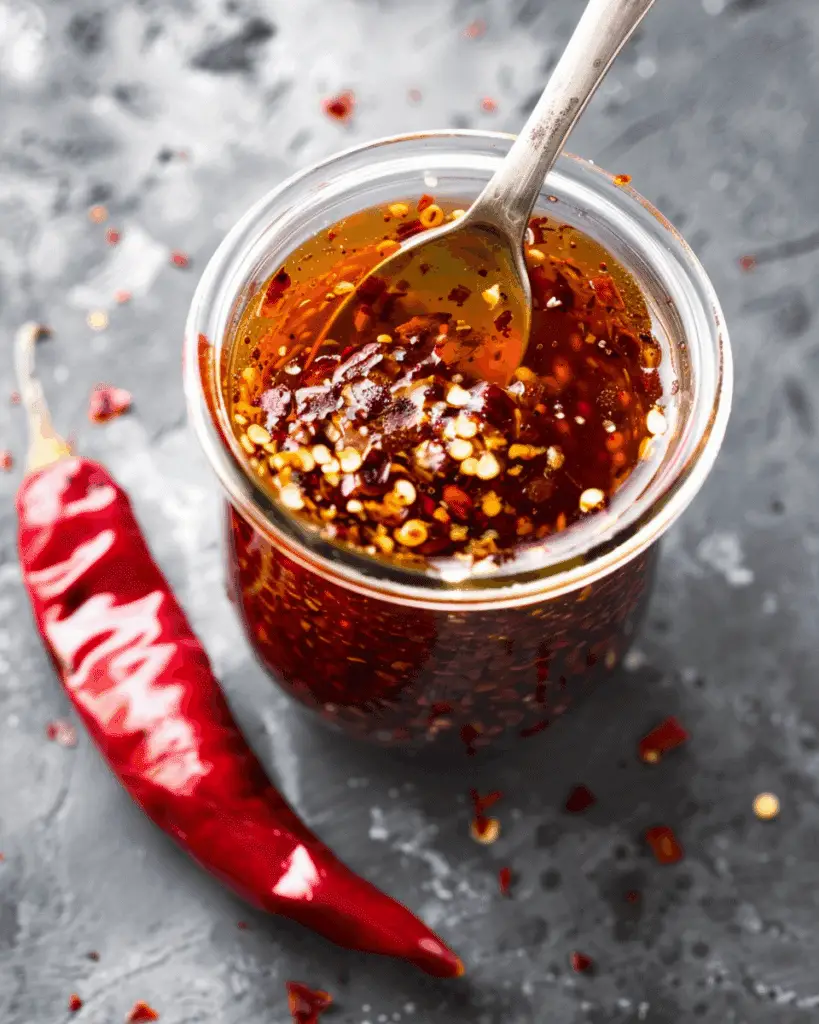
This homemade chili oil is a flavorful, aromatic condiment that adds a punch of heat and depth to just about any dish. Infused with spices, aromatics, and crunchy chili flakes, I find it perfect for drizzling over noodles, dumplings, eggs, or even pizza.
Why You’ll Love This Recipe
I love this chili oil for how easy it is to make with pantry staples. It’s deeply aromatic, thanks to garlic, shallots, and whole spices, and I can customize the heat level just the way I like it. Unlike store-bought versions, I get complete control over the flavor profile, and it stores beautifully for weeks. Whether I want a quick flavor boost or a dipping sauce, this chili oil never fails to impress.
Ingredients
(Here's a tip: Check out the full list of ingredients and measurements in the recipe card below.)
-
Dried chili flakes
-
Neutral oil (like canola, vegetable, or peanut oil)
-
Garlic
-
Shallots
-
Star anise
-
Sichuan peppercorns
-
Cinnamon stick
-
Bay leaves
-
Salt
-
Optional: sesame seeds, ground paprika, or sugar for added flavor
Directions
-
I start by combining chili flakes and salt in a heatproof bowl. If I like, I add sesame seeds or a bit of sugar for extra texture and flavor.
-
In a saucepan, I heat neutral oil over medium heat and add sliced garlic, shallots, and whole spices like star anise, Sichuan peppercorns, and bay leaves.
-
I let everything cook gently, keeping an eye on the garlic so it doesn't burn. Once it turns golden and fragrant, I remove the pan from the heat.
-
I carefully strain the hot oil over the chili flakes, making sure to pour slowly so the heat blooms the spices and releases their aroma.
-
After stirring everything together, I let it cool completely before transferring the chili oil to a clean jar.
Servings and timing
This recipe makes about 1 to 1.5 cups of chili oil, depending on how much oil I use. It takes around 30 minutes from start to finish, including cooling time.
Variations
Sometimes I mix in a bit of smoked paprika for a deeper, slightly smoky note. When I want it sweeter, I add a pinch of sugar to the chili flakes before pouring in the oil. I’ve also tried using different chili types—like Korean gochugaru or crushed Calabrian peppers—for a unique flavor twist. Adding toasted sesame oil at the end gives it a nutty aroma that I really enjoy.
Storage/Reheating
I store my chili oil in an airtight jar in a cool, dark place or in the fridge. It stays fresh for up to a month at room temperature and even longer in the fridge. If the oil solidifies when chilled, I let it come to room temperature or warm it slightly before using. I always use a clean spoon to avoid contamination.
FAQs
How spicy is this chili oil?
The heat depends on the type and amount of chili flakes I use. I can adjust the spice level by using milder flakes or mixing them with hot ones.
Can I reuse the strained aromatics?
Sometimes I do! I save the crispy shallots and garlic as toppings for noodles or rice dishes. I just make sure they’re not overcooked or bitter.
Does it need to be refrigerated?
Not necessarily. I keep it in a cool, dry place if I plan to use it within a few weeks. For longer storage, I prefer refrigerating it.
What kind of oil is best?
I always go for a neutral oil with a high smoke point, like canola, vegetable, or peanut oil. Olive oil isn’t ideal due to its strong flavor and lower smoke point.
Can I make it less oily?
Yes, I just use less oil, but I keep the same ratio of spices and chili flakes to maintain the flavor. The texture may be thicker, but it’s still great.
Conclusion
Chili oil is one of those kitchen staples I didn’t realize I needed until I started making it myself. It brings heat, crunch, and bold flavor to so many dishes, and it’s incredibly easy to customize. Whether I want to spice up my breakfast or enhance my dinner, this chili oil is always within reach.
Print
Chili Oil
- Prep Time: 10 minutes
- Cook Time: 10 minutes
- Total Time: 30 minutes
- Yield: 1 to 1.5 cups
- Category: Condiment
- Method: Stovetop
- Cuisine: Asian
- Diet: Vegan
Description
This homemade chili oil is a spicy, aromatic condiment made with pantry staples like garlic, shallots, and whole spices. It’s perfect for drizzling over noodles, dumplings, or eggs, and can be customized to your desired heat level.
Ingredients
- 1 cup dried chili flakes
- 1.5 cups neutral oil (canola, vegetable, or peanut)
- 6 cloves garlic, sliced
- 2 shallots, sliced
- 2 star anise
- 1 tsp Sichuan peppercorns
- 1 cinnamon stick
- 2 bay leaves
- 1 tsp salt
- Optional: 1 tablespoon sesame seeds
- Optional: 1 teaspoon ground paprika
- Optional: 1 teaspoon sugar
Instructions
- Combine chili flakes and salt in a heatproof bowl. Add sesame seeds or sugar if desired.
- Heat the neutral oil in a saucepan over medium heat. Add sliced garlic, shallots, star anise, Sichuan peppercorns, cinnamon stick, and bay leaves.
- Cook gently until garlic turns golden and aromatic. Remove from heat.
- Strain the hot oil over the chili flakes mixture slowly, allowing the spices to bloom.
- Stir well and let the chili oil cool completely.
- Transfer to a clean jar and store appropriately.
Notes
- Adjust chili flakes to control heat level.
- Use clean utensils to avoid contamination.
- Store in a cool, dark place or refrigerate for longer shelf life.
- Reuse strained garlic and shallots as toppings.
Nutrition
- Serving Size: 1 tablespoon
- Calories: 120
- Sugar: 0g
- Sodium: 70mg
- Fat: 14g
- Saturated Fat: 1g
- Unsaturated Fat: 12g
- Trans Fat: 0g
- Carbohydrates: 1g
- Fiber: 0g
- Protein: 0g
- Cholesterol: 0mg


Leave a Reply