Sue Recipe

  • Recipe Index
  • Chicken
  • Desserts
  • About
  • Contact
menu icon
go to homepage
  • Recipe Index
  • Chicken
  • Desserts
  • About
  • Contact

search icon
Homepage link
  • Recipe Index
  • Chicken
  • Desserts
  • About
  • Contact

×

Steak Queso Rice

July 8, 2025 by Sue Leave a Comment

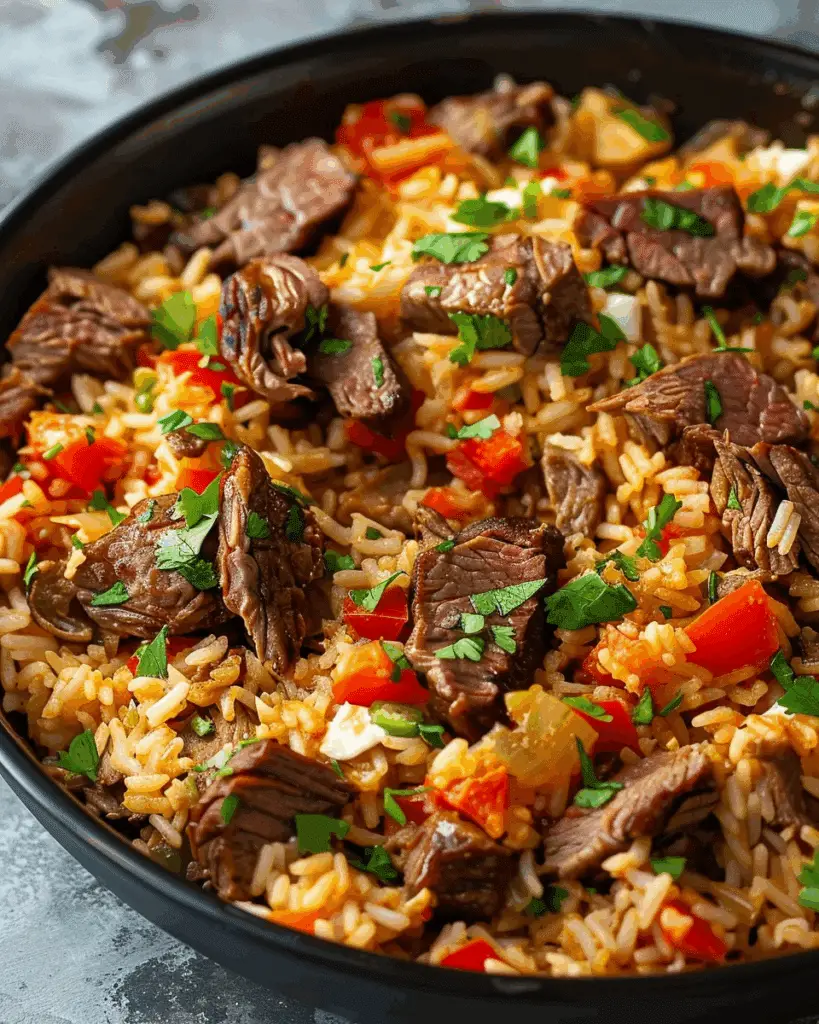
Here’s a flavorful and satisfying Tex-Mex dish that delivers juicy steak, creamy queso, and seasoned rice—all in one skillet. I love how it brings a fiesta to my dinner table with minimal fuss and maximum flavor. Steak Queso Rice
Why You’ll Love This Recipe

I appreciate how this Steak Queso Rice:

  • Brings bold, Tex-Mex flavors with every bite—savory steak, fragrant spices, and creamy cheese

  • Comes together in about an hour, perfect for a filling weeknight dinner

  • Combines protein, carbs, and cheese all in one dish—no extra prep or cleanup

  • Adapts easily: I can change rice types, try different proteins, or adjust the spice for extra kick

Ingredients

(Here's a tip: Check out the full list of ingredients and measurements in the recipe card below.)

  • 2 cups long-grain white or Basmati rice

  • 2½ cups chicken broth (or substitute water with bouillon, if preferred)

  • 1 bouillon cube (optional)

  • 1 can (around 14 oz) crushed or tomato sauce

  • 2 cloves garlic, minced

  • 1 small onion, finely chopped (optional)

  • 1 teaspoon paprika

  • ½ teaspoon cumin (or up to 1 tsp)

  • Salt and pepper, to taste

  • 2 tablespoon olive oil or avocado oil

  • 1 lb sirloin steak (or NY strip), sliced thin

  • 2 tablespoon butter

  • Montreal steak seasoning, to taste

  • White queso sauce (store-bought or homemade)

  • Fresh cilantro, for garnish

  • Flour tortillas, optional (for serving)

Directions

  1. Prepare the rice base: I rinse the rice under cold water until clear. In a large skillet over medium heat, I warm 2 tablespoons of oil. I add garlic and onion, sautéing until fragrant and soft. Then I stir in the rice and toast it for about 2 minutes.

  2. Simmer rice: I pour in the chicken broth and crushed tomatoes or tomato sauce. I stir in the paprika, cumin, salt, and pepper. Once it boils, I reduce the heat, cover the skillet, and let it simmer for about 18–20 minutes, until the liquid is absorbed. Then I remove it from the heat and let it rest, covered, for 5 minutes.

  3. Cook the steak: While the rice is cooking, I season the steak strips with Montreal seasoning. In a separate skillet over medium-high heat, I melt the butter with 1 tablespoon of oil. When hot, I add the steak and sear for 4–5 minutes per side, or until it reaches the desired doneness.

  4. Assemble: I fluff the rice, transfer it to a serving dish, top it with the steak, and drizzle warm white queso on top. I finish it with a sprinkle of chopped cilantro and serve with tortillas if I want.

Servings and timing

  • Servings: 4 generous portions

  • Prep time: 10–15 minutes

  • Cook time: 30–35 minutes

  • Total time: 45–50 minutes

Variations

  • Swap protein: I sometimes use chicken, shrimp, tofu, or grilled veggies instead of steak

  • Rice alternative: Jasmine, long-grain, or brown rice also work well—just adjust cooking time

  • Kick it up: I like to add jalapeños or chili powder for extra heat

  • Vegetarian twist: I skip the steak and use portobello mushrooms or a plant-based alternative

Storage/reheating

  • Store: I keep leftovers in an airtight container in the fridge for up to 3 days

  • Freeze: I freeze portions in containers for up to 1 month and thaw in the fridge before reheating

  • Reheat: I reheat in a skillet or microwave with a splash of broth or water to bring back moisture. I warm the queso separately and drizzle it over after reheating

FAQs

What cheese should I use for the queso?

I like using store-bought white queso because it’s creamy and melts easily, but any mild melting cheese works well.

Can I make this ahead of time?

Yes, I prep the rice and steak separately, then reheat and assemble with queso when I’m ready to serve.

How do I get perfectly cooked rice?

I always rinse my rice well and let it rest covered after cooking. That keeps it fluffy and flavorful.

What if I don't have Montreal seasoning?

I make my own blend with salt, pepper, garlic powder, and paprika if I don’t have any on hand.

Can I make a spicier version?

Absolutely—I mix in chopped jalapeños, chipotle peppers, or hot sauce to give it a bolder kick.

Conclusion

I love how this Steak Queso Rice brings bold flavor and comfort to the table with very little effort. It’s satisfying, adaptable, and perfect for both weeknights and relaxed gatherings. This recipe definitely earns a spot in my regular dinner rotation.

Print

clock clock iconcutlery cutlery iconflag flag iconfolder folder iconinstagram instagram iconpinterest pinterest iconfacebook facebook iconprint print iconsquares squares iconheart heart iconheart solid heart solid icon
Steak Queso Rice

Steak Queso Rice

5 Stars 4 Stars 3 Stars 2 Stars 1 Star No reviews
  • Author: Sue
  • Prep Time: 15 minutes
  • Cook Time: 35 minutes
  • Total Time: 50 minutes
  • Yield: 4 servings
  • Category: Main Course
  • Method: Stovetop
  • Cuisine: Tex-Mex
  • Diet: Gluten Free
Print Recipe
Pin Recipe

Description

This Steak Queso Rice is a one-skillet Tex-Mex delight, combining tender steak, creamy white queso, and seasoned rice for a hearty and flavorful meal.


Ingredients

  • 2 cups long‑grain white or Basmati rice
  • 2½ cups chicken broth (or water with bouillon)
  • 1 bouillon cube (optional)
  • 1 can (14 oz) crushed tomatoes or tomato sauce
  • 2 cloves garlic, minced
  • 1 small onion, finely chopped (optional)
  • 1 tsp paprika
  • ½ tsp cumin (or up to 1 tsp)
  • Salt and pepper, to taste
  • 2 Tbsp olive oil or avocado oil
  • 1 lb sirloin steak (or NY strip), sliced thin
  • 2 Tbsp butter
  • Montreal steak seasoning, to taste
  • White queso sauce (store‑bought or homemade)
  • Fresh cilantro, for garnish
  • Flour tortillas, optional (for serving)

Instructions

  1. Rinse rice under cold water until clear. In a large skillet over medium heat, warm 2 tablespoon oil. Add garlic and onion; sauté until fragrant and soft. Add rice and stir for about 2 minutes to toast.
  2. Pour in chicken broth (plus bouillon if using) and crushed tomatoes or tomato sauce. Stir in paprika, cumin, salt, and pepper. Bring to a boil, then lower heat, cover, and simmer for 18–20 minutes until the rice absorbs the liquid. Remove from heat and let it rest 5 minutes, covered.
  3. While rice simmers, season steak strips with Montreal seasoning. In a separate skillet over medium-high heat, melt butter with 1 tablespoon oil. When hot, add steak and sear 4–5 minutes per side or until desired doneness. Remove from heat.
  4. Fluff the rice, transfer to a serving dish, top with steak, and drizzle with warm white queso. Scatter chopped cilantro over the top. Serve with tortillas if desired.

Notes

  • Rinse rice well to ensure fluffiness.
  • Use plant-based alternatives for a vegetarian or vegan version.
  • Store leftovers in an airtight container and reheat with a splash of broth.
  • Add jalapeños or chili powder for more spice.

Nutrition

  • Serving Size: ¼ of recipe
  • Calories: 620
  • Sugar: 4g
  • Sodium: 920mg
  • Fat: 29g
  • Saturated Fat: 13g
  • Unsaturated Fat: 13g
  • Trans Fat: 0.5g
  • Carbohydrates: 55g
  • Fiber: 3g
  • Protein: 38g
  • Cholesterol: 110mg
Have you made this recipe? I'd love to see it!

Click here to Follow me on Pinterest

Sausage and Veggies Skillet

July 7, 2025 by Sue Leave a Comment

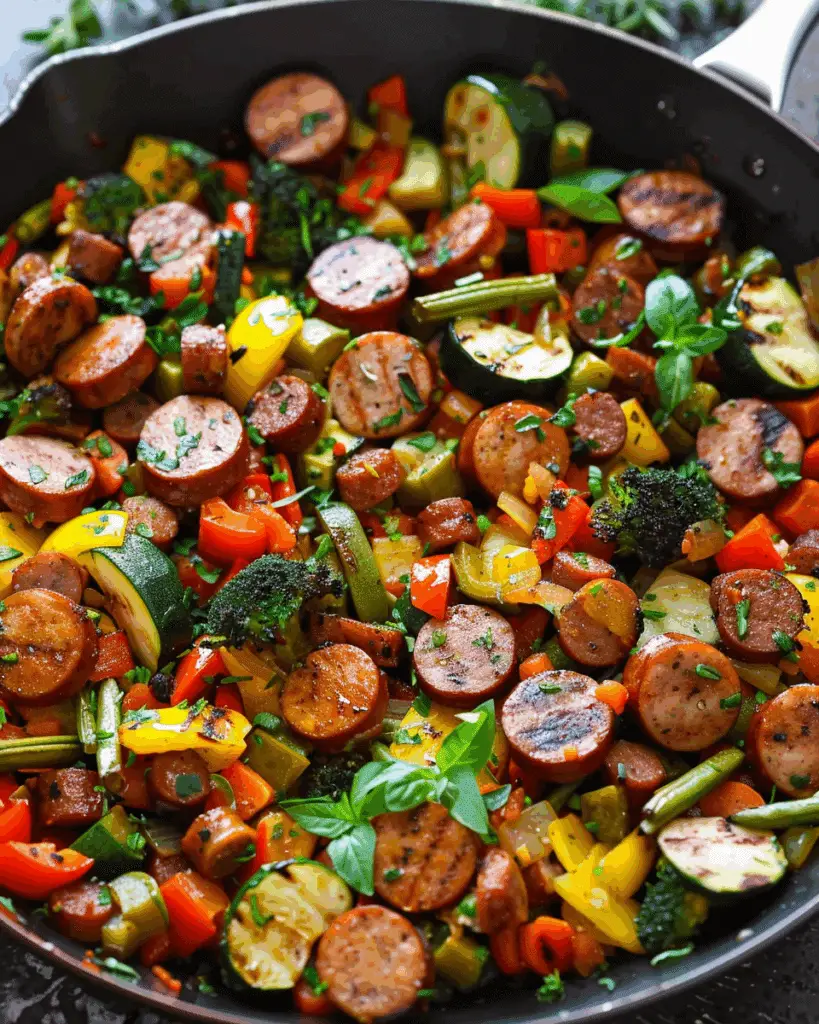
I like how this one-pan skillet recipe brings together flavorful sausage, crisp bell peppers, tender zucchini, and sweet corn. It’s a vibrant, satisfying dinner that’s ready in just 30 minutes, perfect for busy evenings when I want something quick and hearty. Sausage and Veggies Skillet

Why You’ll Love This Recipe

I appreciate how easy this recipe is to make. Everything comes together in one skillet, making cleanup a breeze. It’s packed with wholesome ingredients and naturally gluten-free. I can also customize it easily depending on what veggies I have on hand.

ingredients

(Here’s a tip: Check out the full list of ingredients and measurements in the recipe card below.)

  • 2 cups corn kernels (from 3 ears, precooked)
  • 1 tablespoon olive oil
  • 12 oz pre-cooked sausage, sliced
  • 1 large red bell pepper, diced
  • 1 large zucchini, sliced
  • ½ teaspoon chili powder
  • fresh cilantro, chopped

directions

  1. Cook the sausage
    I heat olive oil in a large skillet over medium heat. Then I add the sausage slices and cook for about 5 minutes on one side, then flip and cook for 3 more minutes. Once browned, I remove them and set them aside.
  2. Sauté the bell pepper
    In the same skillet, I cook the diced bell pepper for about 4 minutes, adding more oil if needed. Once slightly tender, I remove it and place it with the sausage.
  3. Cook the zucchini
    I add zucchini slices to the skillet and cook for around 3 minutes until lightly golden. Then I remove them and set aside with the other veggies.
  4. Combine and season
    I return the sausage, bell pepper, zucchini, and corn kernels to the skillet. I sprinkle in chili powder and stir everything well. I let it heat through over low heat, then remove it from the stove and top with chopped cilantro.

Servings and timing

  • Servings: 4
  • Prep time: 15 minutes
  • Cook time: 15 minutes
  • Total time: 30 minutes

Variations

  • Swap sausage types to suit different flavor preferences.
  • Try other vegetables like mushrooms, green beans, carrots, or broccoli.
  • Mix in cooked rice, pasta, or couscous for a more filling dish.
  • Enhance seasoning with cumin, smoked paprika, or a dash of cayenne for heat.

storage/reheating

  • Store leftovers in an airtight container in the fridge for up to 4 days.
  • Freeze portions for up to 2 months.
  • Reheat in the microwave in 1-minute increments or on the stovetop over medium heat with a splash of oil.

FAQs

What kind of sausage should I use?

I prefer using pre-cooked, well-seasoned sausage. Choose any variety that fits your taste, just make sure it’s fully cooked.

Can I use frozen or canned corn?

Yes, I often use frozen corn—just thaw it before cooking. Canned corn works too, but I make sure to drain it well.

Is this recipe gluten-free?

Yes, all ingredients are naturally gluten-free. I double-check the sausage packaging just to be sure.

How do I add spice to the dish?

I like to add extra chili powder or a bit of cayenne pepper if I want a spicier kick.

Can this be made ahead?

Definitely. I make it ahead and store it in the fridge. It reheats easily and tastes great the next day.

Conclusion

This Sausage and Veggies Skillet is one of my favorite easy meals. It’s fast, colorful, and packed with flavor. Whether I’m cooking a quick weeknight dinner or prepping lunches for the week, this dish always hits the spot.

Print

clock clock iconcutlery cutlery iconflag flag iconfolder folder iconinstagram instagram iconpinterest pinterest iconfacebook facebook iconprint print iconsquares squares iconheart heart iconheart solid heart solid icon
Sausage and Veggies Skillet

Sausage and Veggies Skillet

5 Stars 4 Stars 3 Stars 2 Stars 1 Star No reviews
  • Author: Sue
  • Prep Time: 15 minutes
  • Cook Time: 15 minutes
  • Total Time: 30 minutes
  • Yield: 4 servings
  • Category: Dinner
  • Method: Skillet
  • Cuisine: American
  • Diet: Gluten Free
Print Recipe
Pin Recipe

Description

A quick and colorful one-pan skillet dish with sausage, bell peppers, zucchini, and corn. Perfect for busy evenings, ready in just 30 minutes.


Ingredients

  • 2 cups corn kernels (from 3 ears, precooked)
  • 1 tablespoon olive oil
  • 12 oz pre-cooked sausage, sliced
  • 1 large red bell pepper, diced
  • 1 large zucchini, sliced
  • ½ teaspoon chili powder
  • Fresh cilantro, chopped

Instructions

  1. Heat olive oil in a large skillet over medium heat. Add the sausage slices and cook for about 5 minutes on one side, then flip and cook for 3 more minutes. Remove the sausage and set it aside.
  2. In the same skillet, cook the diced bell pepper for about 4 minutes, adding more oil if needed. Remove and place it with the sausage.
  3. Add zucchini slices to the skillet and cook for around 3 minutes until lightly golden. Remove and set aside with the other veggies.
  4. Return the sausage, bell pepper, zucchini, and corn kernels to the skillet. Sprinkle in chili powder and stir well. Let it heat through over low heat, then remove from the stove and top with chopped cilantro.

Notes

  • Swap sausage types to suit different flavor preferences.
  • Try other vegetables like mushrooms, green beans, carrots, or broccoli.
  • Mix in cooked rice, pasta, or couscous for a more filling dish.
  • Enhance seasoning with cumin, smoked paprika, or a dash of cayenne for heat.
  • Store leftovers in an airtight container in the fridge for up to 4 days.
  • Freeze portions for up to 2 months. Reheat in the microwave or stovetop with a splash of oil.

Nutrition

  • Serving Size: 1 serving
  • Calories: 320
  • Sugar: 5g
  • Sodium: 780mg
  • Fat: 22g
  • Saturated Fat: 5g
  • Unsaturated Fat: 15g
  • Trans Fat: 0g
  • Carbohydrates: 14g
  • Fiber: 3g
  • Protein: 19g
  • Cholesterol: 40mg

Have you made this recipe? I'd love to see it!

Click here to Follow me on Pinterest

Lemon Blueberry Bread

July 7, 2025 by Sue Leave a Comment

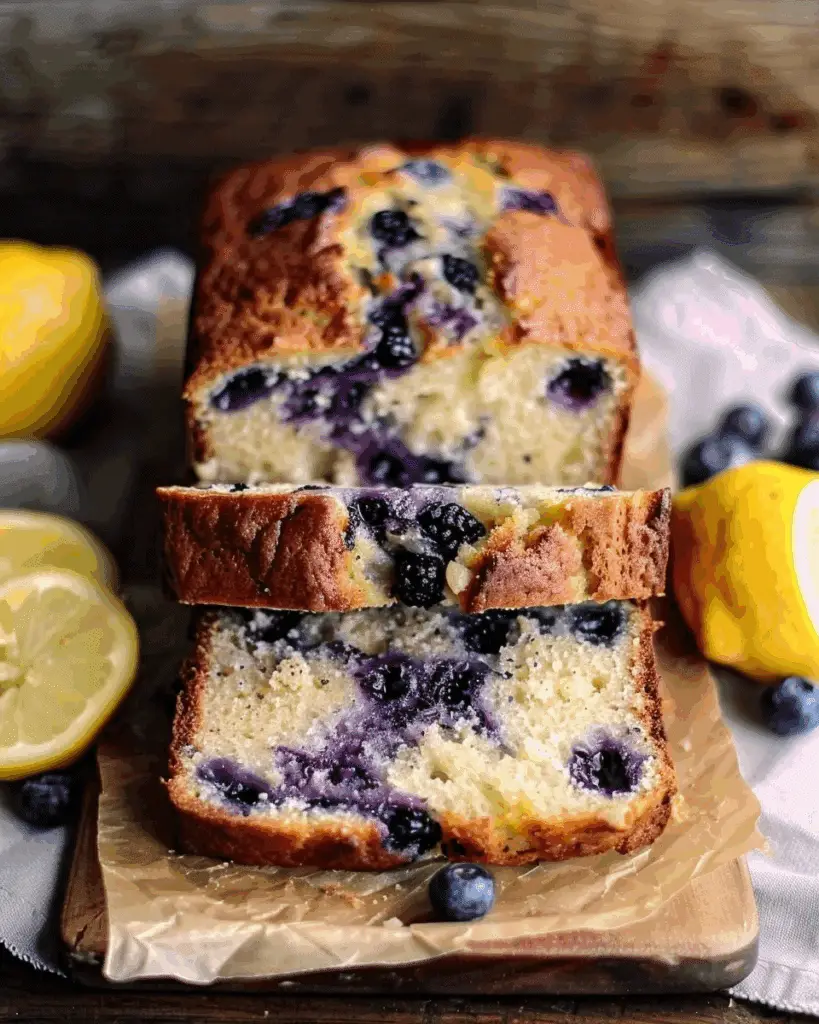
I love how this lemon blueberry bread is soft, moist, and bursting with fresh berries with a bright citrusy zing. It bakes into a delightful 9×5‑inch loaf, perfect for any occasion. Lemon Blueberry Bread

Why You’ll Love This Recipe

I adore this loaf because it combines the sweet juiciness of blueberries with vibrant lemon flavor in a tender, oil-based batter. It’s a simple one-bowl recipe that’s fuss-free yet feels special, especially once it’s topped with a tangy lemon glaze.

Ingredients

(Here's a tip: Check out the full list of ingredients and measurements in the recipe card below.)

  • 1 ½ cups all-purpose flour

  • 1 teaspoon baking powder

  • ⅓ cup granulated sugar

  • ½ teaspoon salt

  • ½ cup milk

  • ⅓ cup vegetable oil

  • 1 large egg

  • 1 teaspoon vanilla extract

  • Zest and juice of 1 lemon

  • 1 ½ cups fresh blueberries, divided

  • For the lemon glaze:

    • ½ cup icing sugar

    • 1–2 tablespoon lemon juice

Directions

  1. Preheat the oven to 350°F and lightly grease a 9×5‑inch loaf pan.

  2. In a bowl, whisk together flour, baking powder, sugar, and salt.

  3. In another bowl, beat milk, oil, egg, vanilla, lemon zest, and lemon juice until smooth.

  4. Fold wet ingredients into dry until just combined—do not overmix. Gently stir in 1 cup blueberries.

  5. Transfer batter to the pan and scatter the remaining ½ cup blueberries on top.

  6. Bake for 55 minutes, or until a toothpick comes out clean. Let it cool for about 10–15 minutes before removing from the pan.

  7. For the glaze, whisk icing sugar with lemon juice until pourable. Drizzle over the cooled loaf and allow it to set before slicing.

Servings and timing

This loaf makes about 10 slices.

  • Prep time: 10 minutes

  • Bake time: 55 minutes

  • Total time: 1 hour, 5 minutes

Variations

  • I sometimes swap half of the blueberries for raspberries or blackberries for a fruity twist.

  • If using frozen blueberries, I toss them in a little flour to prevent sinking.

  • For a richer crumb, I occasionally replace milk with sour cream or Greek yogurt.

storage/reheating

  • I store slices in an airtight container at room temperature for up to 3 days. In the fridge, they keep about a week.

  • To freeze, I wrap the cooled loaf or individual slices tightly and freeze for up to 3 months.

  • When I’m ready to enjoy, I let slices thaw at room temperature or gently warm them in a 300°F oven or toaster oven.

FAQs

Can I use frozen blueberries instead of fresh?

Yes—I often reach for frozen berries. Coating them lightly in flour helps keep them from sinking during baking.

How do I prevent the blueberries from sinking?

Tossing them in a bit of flour before folding into the batter helps suspend them evenly.

Can I replace oil with butter?

I prefer using oil because it keeps the bread ultra-moist. Butter gives a denser texture.

How long does the bread stay fresh?

It stays moist at room temperature for about 3 days, and in the fridge for up to a week.

Should I cover the loaf while baking to prevent browning?

I don’t typically cover it, but if the top browns too quickly, I tent it loosely with foil in the last 10 minutes.

Conclusion

I love this lemon blueberry bread for its bright flavor, tender crumb, and beautiful presentation. It’s easy to whip up and wonderfully versatile—perfect for breakfast, a snack, or a sweet indulgence. The tangy lemon glaze adds that finishing touch that always makes it feel like a treat worth sharing.

Print

clock clock iconcutlery cutlery iconflag flag iconfolder folder iconinstagram instagram iconpinterest pinterest iconfacebook facebook iconprint print iconsquares squares iconheart heart iconheart solid heart solid icon
Lemon Blueberry Bread

Lemon Blueberry Bread

5 Stars 4 Stars 3 Stars 2 Stars 1 Star No reviews
  • Author: Sue
  • Prep Time: 10 minutes
  • Cook Time: 55 minutes
  • Total Time: 1 hour 5 minutes
  • Yield: 1 loaf (10–12 slices)
  • Category: Bread
  • Method: Baking
  • Cuisine: American
  • Diet: Vegetarian
Print Recipe
Pin Recipe

Description

This lemon blueberry bread is soft, moist, and full of fresh berries with a bright citrus zing. It's a quick, one-bowl recipe finished with a simple lemon glaze, making it the perfect summer treat.


Ingredients

  • 1 + ½ cups all-purpose flour (200 g)
  • 1 tsp baking powder
  • ⅓ cup granulated sugar
  • ½ tsp salt
  • ½ cup milk (120 g)
  • ⅓ cup vegetable oil (about 70 g)
  • 1 large egg
  • 1 tsp vanilla extract
  • Zest and juice of 1 lemon
  • 1 + ½ cups fresh blueberries, divided
  • For the lemon glaze:
  • ½ cup icing sugar
  • 1–2 tablespoon lemon juice

Instructions

  1. Preheat the oven to 350 °F (175 °C) and lightly grease a 9×5‑inch loaf pan.
  2. In one bowl, whisk together flour, baking powder, sugar, and salt.
  3. In another bowl, beat milk, oil, egg, vanilla, lemon zest, and lemon juice until smooth.
  4. Fold wet ingredients into dry until just combined—do not overmix. Gently stir in 1 cup of blueberries.
  5. Transfer batter to the pan, then sprinkle remaining ½ cup blueberries on top.
  6. Bake for 55 minutes, or until a toothpick inserted comes out clean. Let cool 10–15 minutes before removing from pan.
  7. For the glaze, whisk icing sugar with lemon juice until pourable, then drizzle over the cooled loaf. Let it set before slicing.

Notes

  • You can substitute half the blueberries with raspberries or blackberries.
  • Toss frozen blueberries in flour to prevent sinking.
  • Use sour cream or Greek yogurt instead of milk for a richer crumb.
  • Store in an airtight container at room temperature for up to 3 days or refrigerate for up to a week.
  • Wrap and freeze for up to 3 months; thaw at room temp or warm in a 300 °F oven.

Nutrition

  • Serving Size: 1 slice
  • Calories: 190
  • Sugar: 12g
  • Sodium: 140mg
  • Fat: 7g
  • Saturated Fat: 1g
  • Unsaturated Fat: 6g
  • Trans Fat: 0g
  • Carbohydrates: 29g
  • Fiber: 1g
  • Protein: 3g
  • Cholesterol: 20mg

Have you made this recipe? I'd love to see it!

Click here to Follow me on Pinterest

Florida Shrimp Pie

July 7, 2025 by Sue Leave a Comment

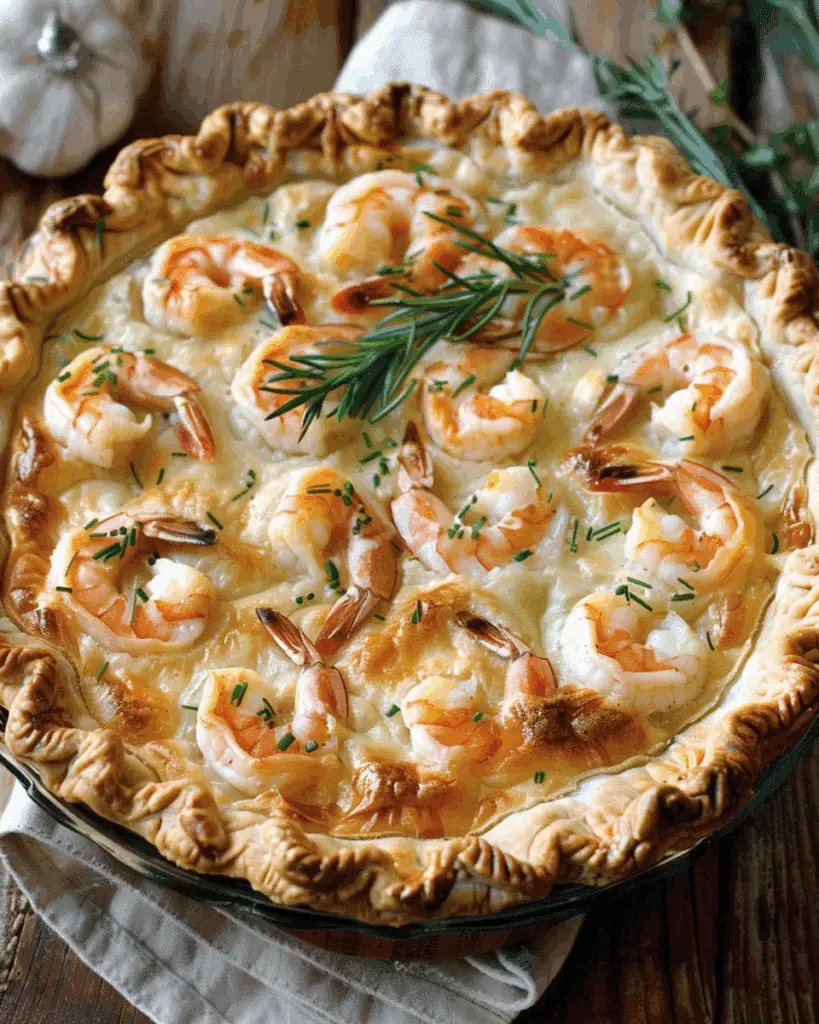
This Florida Shrimp Pie is a creamy, savory delight featuring tender shrimp and melted pepper jack cheese nestled in a flaky pie crust—a crowd-pleasing dish perfect for a light supper or upscale appetizer. Florida Shrimp Pie

Why You’ll Love This Recipe

I love how simple yet elegant this pie feels. With just five main ingredients, I get big flavor and coastal flair. The creamy, tangy filling shines with the sweetness of shrimp and a hint of spice from pepper jack cheese. It’s versatile too—I serve it as a dinner centerpiece or slice it into bite-sized wedges for entertaining.

ingredients

(Here's a tip: Check out the full list of ingredients and measurements in the recipe card below.)

  • 1 frozen deep-dish pie crust (12 oz package)

  • ½ cup chive-and-onion cream cheese spread

  • 4 large eggs

  • 12 oz cooked, peeled, deveined medium shrimp (thawed, drained, and roughly chopped)

  • ½ cup shredded pepper jack cheese

directions

  1. I preheat the oven to 375°F and place a cookie sheet on the middle rack.

  2. I let the pie crust thaw for 10–20 minutes, then prick the bottom and sides with a fork.

  3. I bake the crust on the cookie sheet for 9–11 minutes until lightly golden, then remove and let it cool slightly.

  4. In a medium bowl, I beat the cream cheese until smooth, then add eggs one at a time until the mixture is silky.

  5. I gently fold in the chopped shrimp and shredded pepper jack cheese.

  6. I pour the filling into the par-baked crust and bake for 30–35 minutes, or until the center is set and edges turn golden.

  7. I let the pie rest for 15 minutes before slicing—it helps the filling set and makes cutting neater.

Servings and timing

  • Servings: 6

  • Prep time: 20 minutes

  • Cook time: 35 minutes

  • Rest time: 15 minutes

  • Total time: About 1 hour 10 minutes

Variations

  • I sometimes swap pepper jack for cheddar, Swiss, or Gouda.

  • Instead of shrimp, I use crab, lobster, chicken, or even sautéed vegetables.

  • I add diced bell pepper, green onions, or a pinch of Old Bay seasoning for extra flavor.

  • A gluten-free crust or puff pastry works just as well.

storage/reheating

I store leftovers in an airtight container in the fridge for up to 3 days. When I want to freeze it, I wrap individual slices tightly and keep them frozen for up to 2 months. To reheat, I prefer using a 350°F oven for 10–15 minutes to keep the crust crisp, though the microwave works in a pinch.

FAQs

Can I use fresh instead of frozen shrimp?

Yes—I’ve used fresh shrimp, chopped and briefly cooked. I just make sure they’re cooled and drained well before mixing them in.

Do I need to prebake the crust?

Absolutely. Prebaking prevents a soggy bottom and gives me that crisp, golden texture I want.

Can I make it ahead?

Yes. I often prep the filling the night before and store it in the fridge, then assemble and bake the pie when I’m ready to serve.

What if I don’t like spicy pepper jack?

No problem. I swap it for milder cheeses like cheddar, mozzarella, or Gruyère, depending on what I have on hand.

How do I know when it's done?

The pie is ready when the center is just set and the edges are golden. I check that it no longer jiggles in the middle and feels firm to the touch.

Conclusion

Florida Shrimp Pie is one of my favorite easy-yet-impressive dishes. With a buttery crust, creamy filling, and flavorful shrimp, it always impresses guests. Whether I serve it for casual weeknight dinners or as an appetizer at gatherings, it disappears fast. When I want something that tastes fancy but feels effortless, this pie is my go-to.

Print

clock clock iconcutlery cutlery iconflag flag iconfolder folder iconinstagram instagram iconpinterest pinterest iconfacebook facebook iconprint print iconsquares squares iconheart heart iconheart solid heart solid icon
Florida Shrimp Pie

Florida Shrimp Pie

5 Stars 4 Stars 3 Stars 2 Stars 1 Star No reviews
  • Author: Sue
  • Prep Time: 20 minutes
  • Cook Time: 45 minutes
  • Total Time: 1 hour 15 minutes
  • Yield: 6 servings
  • Category: Main Course
  • Method: Baking
  • Cuisine: American
Print Recipe
Pin Recipe

Description

A creamy and savory Florida Shrimp Pie featuring tender shrimp, melted pepper jack cheese, and a flaky crust. Perfect for a light dinner or as an upscale appetizer with a coastal flair.


Ingredients

  • 1 frozen deep-dish pie crust (12 oz package)
  • ½ cup chive-and-onion cream cheese spread
  • 4 large eggs
  • 12 oz cooked, peeled, deveined medium shrimp (thawed, drained, and roughly chopped)
  • ½ cup shredded pepper jack cheese

Instructions

  1. Preheat the oven to 375 °F and place a cookie sheet on the middle rack.
  2. Let the pie crust thaw for 10–20 minutes, then prick the bottom and sides with a fork.
  3. Bake the crust on the cookie sheet for 9–11 minutes until lightly golden, then remove and let cool slightly.
  4. In a medium bowl, beat the cream cheese until smooth, then add eggs one at a time until the mixture is silky.
  5. Gently fold in the chopped shrimp and shredded pepper jack cheese.
  6. Pour the filling into the par-baked crust and bake for 30–35 minutes, or until the center is set and edges turn golden.
  7. Let the pie rest for 15 minutes before slicing.

Notes

  • Prebaking the crust helps avoid a soggy bottom.
  • Substitute shrimp with crab, lobster, chicken, or vegetables for variation.
  • Can be made ahead by preparing filling in advance.
  • Reheat leftovers in oven for best texture.

Nutrition

  • Serving Size: 1 slice
  • Calories: 320
  • Sugar: 2g
  • Sodium: 570mg
  • Fat: 22g
  • Saturated Fat: 10g
  • Unsaturated Fat: 10g
  • Trans Fat: 0g
  • Carbohydrates: 15g
  • Fiber: 1g
  • Protein: 17g
  • Cholesterol: 210mg

Have you made this recipe? I'd love to see it!

Click here to Follow me on Pinterest

Chocolate Chip Pudding Cookies

July 7, 2025 by Sue Leave a Comment

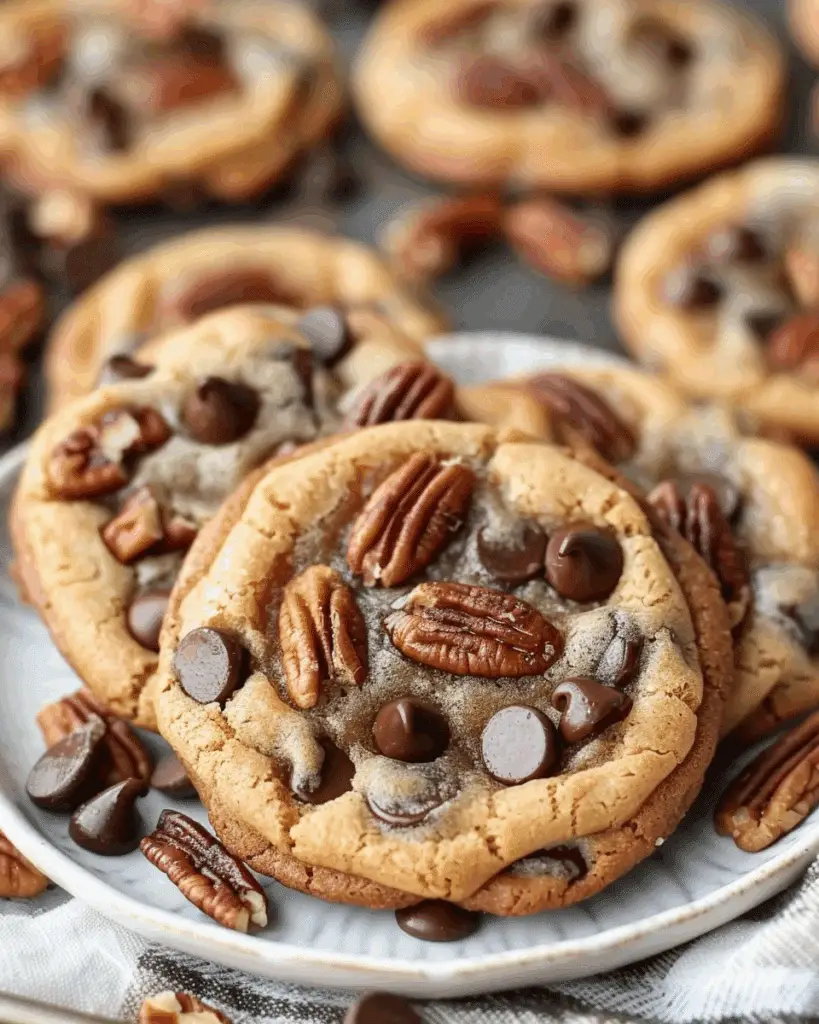
I create these cookies by folding instant vanilla pudding mix into classic chocolate chip cookie dough, and the result is irresistibly light, soft, and chewy. Baked until just set, they stay moist long after they come out of the oven. Chocolate Chip Pudding Cookies

Why You’ll Love This Recipe

I’ll be honest: adding pudding mix is a game-changer. It boosts the buttery flavor and adds a pillowy softness that regular cookies just can’t match. I reach for them on busy weeknights, casual get-togethers, or whenever I want a comforting homemade treat—because they’re easy, reliable, and always a hit.

Ingredients

(Here's a tip: Check out the full list of ingredients and measurements in the recipe card below.)

  • 1 cup unsalted butter, room temperature

  • ½ cup brown sugar

  • ½ cup granulated sugar

  • 2 eggs, room temperature

  • 1 teaspoon vanilla extract

  • 2½ cups all-purpose flour

  • 1 (3.4-ounce) box instant vanilla pudding mix (dry)

  • 1 teaspoon baking powder

  • 1 teaspoon baking soda

  • ½ teaspoon salt

  • 1½ cups semi-sweet chocolate chips

Directions

  1. I cream the butter with brown and granulated sugar on medium speed for 1–2 minutes. Then I beat in the eggs, one at a time, followed by vanilla, until fully incorporated.

  2. In another bowl, I whisk together flour, instant pudding mix, baking powder, baking soda, and salt.

  3. I reduce mixer speed to low and gradually mix the dry ingredients into the wet until just combined—watching out for over-mixing.

  4. I fold in the chocolate chips evenly.

  5. I chill the dough in the fridge for 30 minutes while preheating the oven to 350°F (175°C).

  6. Using a tablespoon or 1″ scoop, I drop dough balls onto a parchment-lined baking sheet, spacing them about 2″ apart. Sometimes I press a few extra chocolate chips on top for a prettier look.

  7. I bake the cookies for 10 minutes—edges should be set while the centers still look soft. Then I transfer them to a wire rack and let them cool for 5 minutes before enjoying.

Servings and Timing

Makes about 34 cookies

  • Preparation: 35 minutes (including chilling)

  • Baking: 10 minutes

Variations

  • I use instant chocolate pudding mix and cocoa powder for double-chocolate cookies.

  • I swap semi-sweet chips for milk, dark, or white chocolate—or add nuts, toffee bits, or shredded coconut.

  • I experiment with flavored extracts like almond, mint, or orange instead of vanilla.

  • For a dairy-free version, I use margarine or coconut oil and egg substitutes like flax or chia “eggs.”

Storage/Reheating

  • Room temperature: I store them in an airtight container for 2–3 days.

  • Freezer (dough): I scoop into balls, freeze flat for an hour, then transfer to a freezer bag—use within 3 months. I bake from frozen, adding a minute or two to baking time.

  • Freezer (baked): I store cooled cookies in an airtight container for up to 3 months. I thaw to room temperature or warm briefly in a low oven.

FAQs

How important is it to chill the dough?

Chilling firms up the butter, helping the cookies hold their shape and develop better flavor. I’ve found that 30 minutes is ideal—less can result in flatter cookies.

Can I use other pudding flavors?

Absolutely! I’ve made them with chocolate pudding for chocolate lovers, and also tried butterscotch and white chocolate pudding with great results.

Will these cookies stay soft after cooling?

Yes—they stay tender for days thanks to the pudding. If they firm up, I give them 5–10 seconds in the microwave for a fresh-baked feel.

Can I freeze the baked cookies?

Yes, I freeze them in airtight containers for up to 3 months and let them thaw before snacking.

What if I don’t have pudding mix?

If pudding mix isn’t available, I try using a powdered custard or similar product. Instant pudding is key—cook-and-serve types don’t produce the same results.

Conclusion

I’ve made these cookies countless times, and they always deliver delightfully soft, chewy perfection. With simple swaps and easy prep, they’re both reliable and versatile. Whether I’m baking for a family gathering or treating myself, they never disappoint. Give them a try—I think they’ll become your new go-to chocolate chip cookie, too!

Print

clock clock iconcutlery cutlery iconflag flag iconfolder folder iconinstagram instagram iconpinterest pinterest iconfacebook facebook iconprint print iconsquares squares iconheart heart iconheart solid heart solid icon
Chocolate Chip Pudding Cookies

Chocolate Chip Pudding Cookies

5 Stars 4 Stars 3 Stars 2 Stars 1 Star No reviews
  • Author: Sue
  • Prep Time: 35 minutes
  • Cook Time: 10 minutes
  • Total Time: 45 minutes
  • Yield: 34 cookies
  • Category: Dessert
  • Method: Baking
  • Cuisine: American
  • Diet: Vegetarian
Print Recipe
Pin Recipe

Description

These chocolate chip pudding cookies are soft, chewy, and moist thanks to the addition of instant vanilla pudding mix, making them a delicious twist on the classic chocolate chip cookie.


Ingredients

  • 1 cup unsalted butter, room temperature
  • ½ cup brown sugar
  • ½ cup granulated sugar
  • 2 eggs, room temperature
  • 1 teaspoon vanilla extract
  • 2½ cups all‑purpose flour
  • 1 (3.4‑ounce) box instant vanilla pudding mix (dry)
  • 1 teaspoon baking powder
  • 1 teaspoon baking soda
  • ½ teaspoon salt
  • 1½ cups semi‑sweet chocolate chips

Instructions

  1. Cream the butter with brown and granulated sugar on medium speed for 1–2 minutes.
  2. Beat in the eggs, one at a time, then add vanilla extract until fully incorporated.
  3. In a separate bowl, whisk together flour, instant pudding mix, baking powder, baking soda, and salt.
  4. Reduce mixer speed to low and gradually mix the dry ingredients into the wet until just combined.
  5. Fold in the chocolate chips evenly.
  6. Chill the dough in the fridge for 30 minutes. Preheat oven to 350 °F (175 °C).
  7. Drop dough balls using a tablespoon or 1″ scoop onto a parchment‑lined baking sheet, spacing 2″ apart. Optionally press a few extra chocolate chips on top.
  8. Bake for 10 minutes until edges are set and centers look soft.
  9. Transfer cookies to a wire rack and cool for 5 minutes before serving.

Notes

  • Chilling the dough helps cookies retain shape and enhances flavor.
  • Try different pudding flavors or mix-ins like nuts or toffee bits for variety.
  • Microwaving for 5–10 seconds can revive cookies after a few days.

Nutrition

  • Serving Size: 1 cookie
  • Calories: 150
  • Sugar: 12g
  • Sodium: 85mg
  • Fat: 8g
  • Saturated Fat: 5g
  • Unsaturated Fat: 2g
  • Trans Fat: 0g
  • Carbohydrates: 18g
  • Fiber: 1g
  • Protein: 2g
  • Cholesterol: 20mg

Have you made this recipe? I'd love to see it!

Click here to Follow me on Pinterest

Flank Steak with Corn, Feta, and Spinach Sauce

July 7, 2025 by Sue Leave a Comment

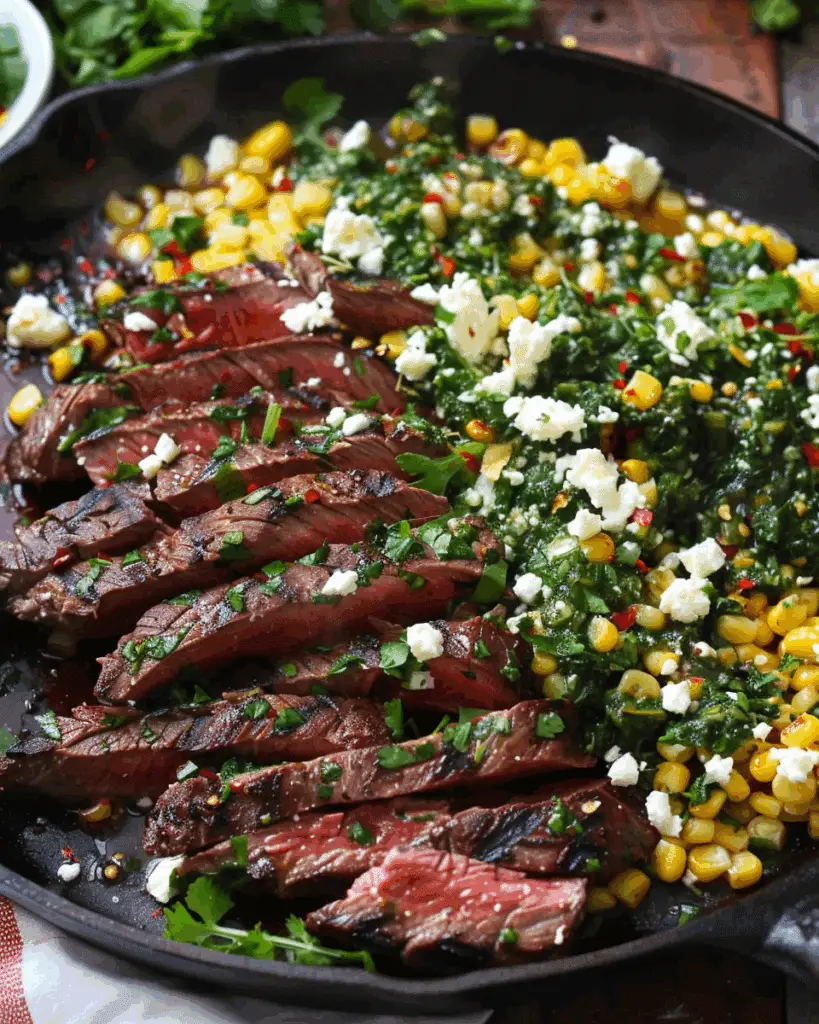
I make a vibrant summer dinner by pairing juicy pan-seared flank steak with sweet corn, tangy feta, and a creamy spinach sauce that’s reminiscent of chimichurri—but milder and herbier. It’s easy, flavorful, and a one-pan wonder! Flank Steak with Corn, Feta, and Spinach Sauce

Why You’ll Love This Recipe

I love how this meal brings together so many favorite summer ingredients—sweet yellow corn, bold feta, and a green, garlicky sauce all atop a tender flank steak. It’s gorgeous, satisfying, and perfect for prepping ahead. This dish has become a staple at my home and always impresses guests.

ingredients

(Here's a tip: Check out the full list of ingredients and measurements in the recipe card below.)

Corn

  • 3 ears corn on the cob (or roughly 2 cups cooked kernels)

Spinach Sauce

  • 5 oz fresh baby spinach

  • 1 large clove garlic

  • 3 tablespoon olive oil

  • 1 tablespoon balsamic vinegar

  • ½ teaspoon cumin

  • 1 teaspoon chili powder

  • ¼ teaspoon salt

Steak & Toppings

  • 1 lb flank steak

  • 1 teaspoon chili powder

  • ½ teaspoon salt

  • Freshly ground black pepper, to taste

  • 3 tablespoon olive oil, divided

  • 4 oz crumbled feta cheese

  • Chopped fresh cilantro or parsley (for garnish)

directions

  1. Boil or grill the corn until tender, then slice off the kernels.

  2. In a food processor, blend spinach, garlic, olive oil, balsamic vinegar, cumin, chili powder, and salt until smooth.

  3. Season the steak with chili powder, salt, pepper, and a tablespoon of olive oil.

  4. Heat a cast-iron skillet over medium heat and sear the steak for about 5 minutes per side, depending on desired doneness.

  5. Remove the steak, let it rest briefly, then slice against the grain.

  6. Reheat the skillet with a bit of olive oil, toss in the sliced steak and corn just until warmed.

  7. Plate the steak and corn, drizzle with spinach sauce, top with crumbled feta and fresh herbs.

Servings and timing

  • Serves: 4

  • Prep time: 30 minutes

  • Cook time: 20 minutes

  • Total time: 50 minutes

Variations

  • Grill the steak instead of pan-searing for a smoky flavor.

  • Use frozen or canned corn if fresh isn't available.

  • Substitute other steak cuts like skirt, hanger, flat iron, or sirloin.

  • Swap cilantro with parsley for a different herbal twist.

storage/reheating

  • Store leftovers in airtight containers in the fridge for up to 4 days.

  • Freeze the spinach sauce separately for best results.

  • Reheat gently in the microwave or on the stovetop with a splash of olive oil.

  • Add the spinach sauce fresh when serving rather than reheating it.

FAQs

What cut of steak works best?

I prefer flank steak for its flavor and quick cooking, but skirt, hanger, and sirloin also work great.

Can I prep this ahead of time?

Yes, I usually prepare the corn and spinach sauce in advance and just cook the steak fresh.

How do I know when the steak is done?

I use a meat thermometer—130°F for medium-rare and 145°F for medium.

What if I don’t have a food processor?

I use a blender or finely chop the ingredients and whisk them together, though the texture is chunkier.

Is the spinach sauce spicy?

It has a mild warmth from the chili powder and cumin, but it’s not too spicy. I sometimes add red pepper flakes for extra heat.

Conclusion

This flank steak dinner captures everything I love about summertime cooking—easy prep, bold flavors, and vibrant colors. With the creamy spinach sauce and fresh toppings, it’s a dish I make again and again. Whether I'm serving friends or keeping dinner simple, it never disappoints.

Print

clock clock iconcutlery cutlery iconflag flag iconfolder folder iconinstagram instagram iconpinterest pinterest iconfacebook facebook iconprint print iconsquares squares iconheart heart iconheart solid heart solid icon
Flank Steak with Corn, Feta, and Spinach Sauce

Flank Steak with Corn, Feta, and Spinach Sauce

5 Stars 4 Stars 3 Stars 2 Stars 1 Star No reviews
  • Author: Sue
  • Prep Time: 30 minutes
  • Cook Time: 20 minutes
  • Total Time: 50 minutes
  • Yield: 4 servings
  • Category: Dinner
  • Method: Pan-Seared
  • Cuisine: American
  • Diet: Gluten Free
Print Recipe
Pin Recipe

Description

Juicy pan-seared flank steak served with sweet corn, tangy feta, and a creamy spinach sauce that’s mildly herby and reminiscent of chimichurri—an easy and flavorful one-pan summer dinner.


Ingredients

  • 3 ears corn on the cob (or roughly 2 cups cooked kernels)
  • 5 oz fresh baby spinach
  • 1 large clove garlic
  • 3 Tbsp olive oil (for sauce)
  • 1 Tbsp balsamic vinegar
  • ½ tsp cumin
  • 1 tsp chili powder (for sauce)
  • ¼ tsp salt (for sauce)
  • 1 lb flank steak
  • 1 tsp chili powder (for steak)
  • ½ tsp salt (for steak)
  • Freshly ground black pepper, to taste
  • 3 Tbsp olive oil, divided (for steak and pan)
  • 4 oz crumbled feta cheese
  • Chopped fresh cilantro or parsley (for garnish)

Instructions

  1. Boil or grill the corn until tender or charred, about 5–10 minutes. Let cool, then slice off the kernels.
  2. In a food processor, blend spinach, garlic, 3 tablespoon olive oil, balsamic vinegar, cumin, 1 teaspoon chili powder, and ¼ teaspoon salt until smooth, about 3–5 minutes.
  3. Rub flank steak with chili powder, salt, pepper, and 1 tablespoon olive oil. Heat a cast-iron skillet over medium heat for 3 minutes, then sear steak for about 5 minutes per side (130°F for medium-rare or 145°F for medium).
  4. Remove steak, let rest, then slice against the grain. Add remaining olive oil to the pan and briefly reheat steak slices with the corn.
  5. Plate the steak and corn, drizzle with spinach sauce, and top with crumbled feta and herbs.

Notes

  • Use frozen or canned corn if fresh isn’t available.
  • Grill steak instead of pan-searing for a smoky flavor.
  • Prepare the sauce and corn up to two days ahead for easier meal prep.
  • Swap parsley for cilantro in the garnish for a different flavor.
  • Use a blender if no food processor is available.

Nutrition

  • Serving Size: 1 serving
  • Calories: 420
  • Sugar: 4g
  • Sodium: 580mg
  • Fat: 28g
  • Saturated Fat: 8g
  • Unsaturated Fat: 18g
  • Trans Fat: 0g
  • Carbohydrates: 14g
  • Fiber: 3g
  • Protein: 30g
  • Cholesterol: 75mg

Have you made this recipe? I'd love to see it!

Click here to Follow me on Pinterest

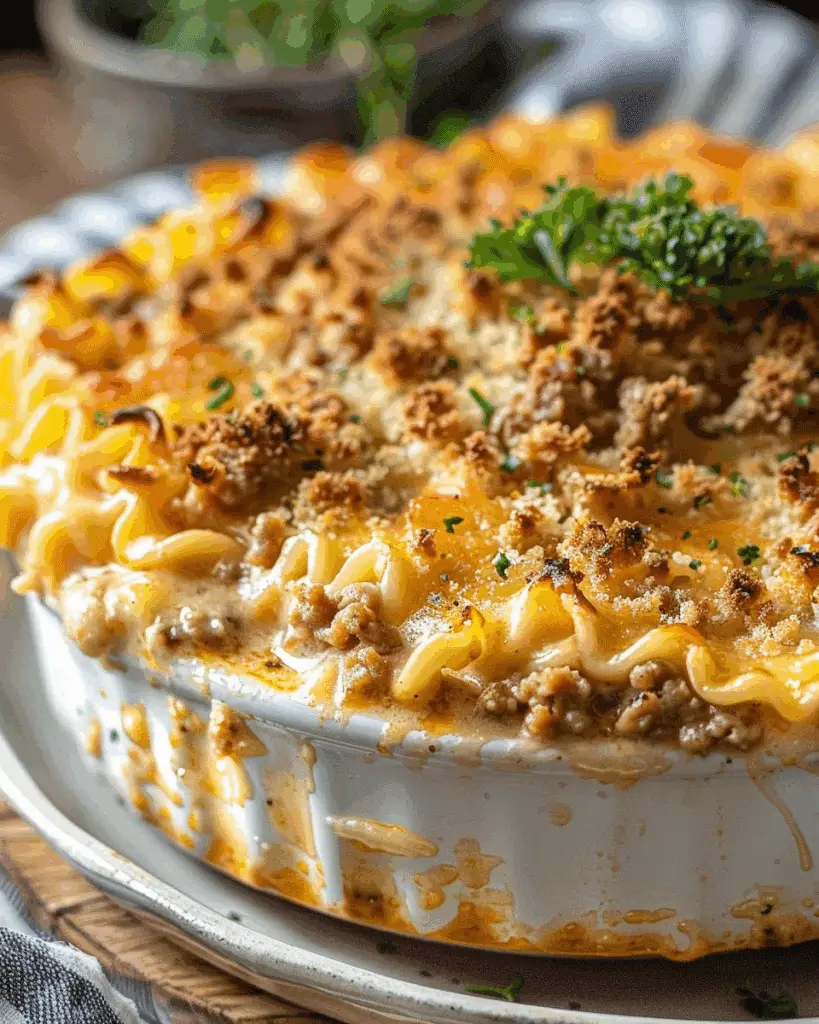
Poor Man Husband Casserole

July 7, 2025 by Sue Leave a Comment

I love how this hearty, budget-friendly casserole combines simple ingredients into a warm and comforting meal. It’s an easy dish to throw together on busy nights and always satisfies! Poor Man Husband Casserole

Why You’ll Love This Recipe

I adore this recipe because it uses pantry staples and affordable cuts of meat, yet delivers rich flavors. It’s a one-dish wonder that gives me minimal cleanup, maximum satisfaction, and makes great leftovers.

ingredients

(Here's a tip: Check out the full list of ingredients and measurements in the recipe card below.)

  • ground beef (lean or regular, depending on preference)

  • onion, diced

  • bell pepper, diced (any color)

  • garlic cloves, minced

  • canned diced tomatoes

  • tomato sauce

  • elbow macaroni or another small pasta

  • beef broth or water

  • shredded cheddar cheese

  • Worcestershire sauce

  • dried oregano

  • dried basil

  • salt and pepper to taste

  • olive oil or cooking oil

directions

  1. Preheat oven to 350°F (175°C).

  2. In a large skillet, heat oil over medium heat. I sauté diced onion and bell pepper until soft, then add garlic and cook until fragrant.

  3. Add ground beef, breaking it apart as it browns evenly. Season with salt, pepper, oregano, basil, and a splash of Worcestershire sauce.

  4. Stir in diced tomatoes, tomato sauce, and beef broth or water. Bring the mixture to a simmer.

  5. Add uncooked elbow macaroni, stirring to combine. Let it simmer just until pasta begins to soften (about 5 minutes).

  6. Transfer the mixture into a greased baking dish. I top it generously with shredded cheddar cheese.

  7. Bake for 20–25 minutes, until casserole is bubbling and cheese is melted and golden.

  8. Let it rest for a few minutes before serving.

Servings and timing

This casserole serves about 6 people.

  • Prep time: 15 minutes

  • Cook time: 30–35 minutes (including baking)

  • Total time: about 50 minutes

Variations

  • I sometimes swap ground beef for ground turkey or chicken to lighten it up.

  • I’ve also added frozen mixed vegetables (peas, carrots, corn) for extra nutrition.

  • For a bit of spice, I mix in chopped jalapeños or red pepper flakes.

  • I enjoy using a Mexican cheese blend in place of cheddar for a twist in flavor.

  • To make it low-carb, I swap the pasta for cauliflower florets or zucchini noodles.

storage/reheating

I store leftovers in an airtight container in the fridge for up to 4 days. To reheat, I microwave individual portions until warm, or I reheat in a 350°F (175°C) oven for about 15 minutes. If the casserole has dried out, I add a splash of broth or water before reheating to restore moisture.

FAQs

How do I make this casserole vegetarian?

I substitute cooked lentils or a plant-based ground meat for the beef, and I use vegetable broth instead of beef broth. The rest stays the same!

Can I freeze Poor Man Husband Casserole?

Yes. I cool it completely, wrap it well or store it in a freezer-safe dish, and freeze for up to 3 months. To reheat, I thaw overnight and bake at 350°F (175°C) for 30–35 minutes until heated through.

Can I use different pasta shapes?

Absolutely. I’ve used penne, rotini, or shells. Just ensure the pasta cooks through during baking; you might need a slightly longer bake time.

Is there a way to make it quicker?

If I’m in a real hurry, I cook the pasta separately and mix it with the meat sauce before baking. That cuts bake time to about 10 minutes—just until cheese is melted.

What kind of cheese works best?

I typically use sharp cheddar for flavor and meltability. However, Monterey Jack, mozzarella, or a cheese blend all work beautifully.

Conclusion

Poor Man Husband Casserole is my go-to comfort meal when I want something satisfying, easy, and cost-effective. It’s versatile, flavorful, and perfect for families or meal prep. I hope it becomes one of your kitchen favorites, just like it has in mine.

Print

clock clock iconcutlery cutlery iconflag flag iconfolder folder iconinstagram instagram iconpinterest pinterest iconfacebook facebook iconprint print iconsquares squares iconheart heart iconheart solid heart solid icon
Poor Man Husband Casserole

Poor Man Husband Casserole

5 Stars 4 Stars 3 Stars 2 Stars 1 Star No reviews
  • Author: Sue
  • Prep Time: 15 minutes
  • Cook Time: 35 minutes
  • Total Time: 50 minutes
  • Yield: 6 servings
  • Category: Main Course
  • Method: Baking
  • Cuisine: American
Print Recipe
Pin Recipe

Description

A hearty and budget-friendly casserole combining ground beef, pasta, and cheese for a comforting one-dish meal perfect for busy nights.


Ingredients

  • 1 lb ground beef (lean or regular)
  • 1 medium onion, diced
  • 1 bell pepper, diced (any color)
  • 3 garlic cloves, minced
  • 1 can (14.5 oz) diced tomatoes
  • 1 can (8 oz) tomato sauce
  • 2 cups elbow macaroni (uncooked)
  • 1 cup beef broth or water
  • 2 cups shredded cheddar cheese
  • 1 tbsp Worcestershire sauce
  • 1 tsp dried oregano
  • 1 tsp dried basil
  • Salt and pepper to taste
  • 1 tbsp olive oil or cooking oil

Instructions

  1. Preheat oven to 350°F (175°C).
  2. In a large skillet, heat oil over medium heat. Sauté diced onion and bell pepper until soft, then add garlic and cook until fragrant.
  3. Add ground beef, breaking it apart as it browns. Season with salt, pepper, oregano, basil, and Worcestershire sauce.
  4. Stir in diced tomatoes, tomato sauce, and beef broth or water. Bring to a simmer.
  5. Add uncooked elbow macaroni, stirring to combine. Simmer until pasta begins to soften (about 5 minutes).
  6. Transfer mixture into a greased baking dish. Top with shredded cheddar cheese.
  7. Bake for 20–25 minutes until casserole is bubbling and cheese is melted and golden.
  8. Let it rest for a few minutes before serving.

Notes

  • Swap beef with ground turkey or chicken for a lighter version.
  • Add frozen mixed vegetables for extra nutrition.
  • Use jalapeños or red pepper flakes for a spicy kick.
  • Try a Mexican cheese blend for flavor variation.
  • Replace pasta with cauliflower or zucchini noodles for a low-carb option.

Nutrition

  • Serving Size: ⅙ of casserole
  • Calories: 420
  • Sugar: 6g
  • Sodium: 780mg
  • Fat: 22g
  • Saturated Fat: 10g
  • Unsaturated Fat: 10g
  • Trans Fat: 0.5g
  • Carbohydrates: 35g
  • Fiber: 3g
  • Protein: 24g
  • Cholesterol: 70mg

Have you made this recipe? I'd love to see it!

Click here to Follow me on Pinterest

Bread in 10 Minutes (No Oven!)

July 7, 2025 by Sue Leave a Comment

This is my go-to recipe for making fresh, fluffy bread in just 10 minutes—no oven, no yeast, and no waiting. It’s a stovetop method that gives me soft, golden bread with minimal effort. Bread in 10 Minutes (No Oven!)

Why I’ll Love This Recipe

I love how quick and simple this recipe is. There’s no need to preheat an oven or wait for the dough to rise. I can mix the ingredients, cook them in a pan, and enjoy fresh bread almost instantly. It’s also easy to adapt with different flavors or ingredients depending on what I have on hand.

Ingredients

(Here's a tip: Check out the full list of ingredients and measurements in the recipe card below.)

  • about 2 cups all-purpose flour

  • 1 teaspoon baking soda (or baking powder)

  • 1 tablespoon oil

  • ½ teaspoon salt

  • 1 cup milk + 1 tablespoon vinegar (or use buttermilk)

  • Optional: 1 teaspoon sugar or honey, herbs, or shredded cheese for added flavor

Directions

  1. Mix the milk and vinegar and let it sit for a minute to curdle slightly.

  2. In a large bowl, combine the flour, baking soda (or powder), salt, and any optional ingredients like sugar or herbs.

  3. Add the oil and the milk mixture, then stir until a rough dough forms.

  4. If the dough is sticky, I add a bit more flour; if it’s too dry, I splash in a little more milk.

  5. Heat a non-stick or cast-iron skillet over medium heat.

  6. Divide the dough into 4–6 equal parts and flatten each into a disc about ½ to 1 cm thick.

  7. Place the discs in the pan, cover with a lid, and cook for 4–5 minutes per side until golden brown and cooked through.

Servings and timing

This recipe makes about 4 to 6 flatbreads. It takes around 5 minutes to prepare and 5 minutes to cook, so the total time is about 10 minutes.

Variations

  • I sometimes use yogurt instead of milk and vinegar for a thicker, tangier dough.

  • Adding chopped fresh herbs, garlic powder, or shredded cheese gives the bread extra flavor.

  • For a vegan version, I use plant-based milk and skip the honey or use maple syrup instead.

Storage/Reheating

I store the cooled bread in an airtight container at room temperature for up to 2 days. To reheat, I warm it in a dry skillet for 30 seconds per side or microwave for about 15 seconds until soft and warm.

FAQs

What if my dough is too sticky or too dry?

I adjust as needed by adding a little extra flour if it’s too sticky or a splash of milk if it’s too dry. It’s a very forgiving dough.

Can I make it gluten-free?

Yes, I use a gluten-free flour blend in the same amount. It may be slightly more delicate, but it still tastes great.

Do I need vinegar?

The vinegar helps activate the baking soda, making the bread rise slightly. If I’m using baking powder, I can skip the vinegar.

Can I cook more than one at a time?

Yes, I often cook 2–3 at once in a large skillet, as long as they fit without crowding the pan.

Will this work at high altitudes?

Yes, I find that it cooks just fine at higher altitudes, though I sometimes lower the heat and cook a little longer if the bread puffs up too quickly.

Conclusion

This 10-minute no-oven bread is my favorite quick solution for fresh, homemade bread. It’s easy, flexible, and always hits the spot whether I want a side for soup, a quick sandwich, or just something warm to snack on.

Print

clock clock iconcutlery cutlery iconflag flag iconfolder folder iconinstagram instagram iconpinterest pinterest iconfacebook facebook iconprint print iconsquares squares iconheart heart iconheart solid heart solid icon
Bread in 10 Minutes (No Oven!)

Bread in 10 Minutes (No Oven!)

5 Stars 4 Stars 3 Stars 2 Stars 1 Star No reviews
  • Author: Sue
  • Prep Time: 5 minutes
  • Cook Time: 5 minutes
  • Total Time: 10 minutes
  • Yield: 4–6 small flatbreads
  • Category: Bread
  • Method: Stovetop
  • Cuisine: Universal
  • Diet: Vegetarian
Print Recipe
Pin Recipe

Description

A quick and easy stovetop bread recipe with no oven, no yeast, and no rise time. Just mix, cook, and enjoy fresh, fluffy bread in 10 minutes.


Ingredients

  • 2 cups all-purpose flour
  • 1 tsp baking soda or baking powder
  • 1 tbsp oil
  • ½ tsp salt
  • 1 cup milk + 1 tablespoon vinegar (or use buttermilk)
  • Optional: 1 teaspoon sugar or honey
  • Optional: herbs or cheese for flavor

Instructions

  1. Mix milk and vinegar in a small bowl and let sit for a minute to resemble buttermilk.
  2. In a mixing bowl, whisk together flour, baking soda (or powder), salt, and optional sugar or herbs.
  3. Add oil and the milk mixture to the dry ingredients; stir to form a rough dough.
  4. If dough is too wet, gently form into balls; if too dry, knead lightly until workable.
  5. Heat a cast-iron or nonstick skillet over medium heat.
  6. Flatten dough balls into ½–1 cm thick patties and place them in the hot pan.
  7. Cover the pan, reduce heat to medium-low, and cook for 5 minutes on each side until golden and cooked through.

Notes

  • Swap milk with yogurt for tangier flavor.
  • Use nut milk and vinegar for a vegan option.
  • Gluten-free flour blends can be substituted 1:1.
  • Store in an airtight container at room temperature for up to 2 days.
  • Reheat in a pan or microwave before serving.

Nutrition

  • Serving Size: 1 flatbread
  • Calories: 180
  • Sugar: 1g
  • Sodium: 250mg
  • Fat: 5g
  • Saturated Fat: 1g
  • Unsaturated Fat: 3.5g
  • Trans Fat: 0g
  • Carbohydrates: 28g
  • Fiber: 1g
  • Protein: 4g
  • Cholesterol: 2mg

Have you made this recipe? I'd love to see it!

Click here to Follow me on Pinterest

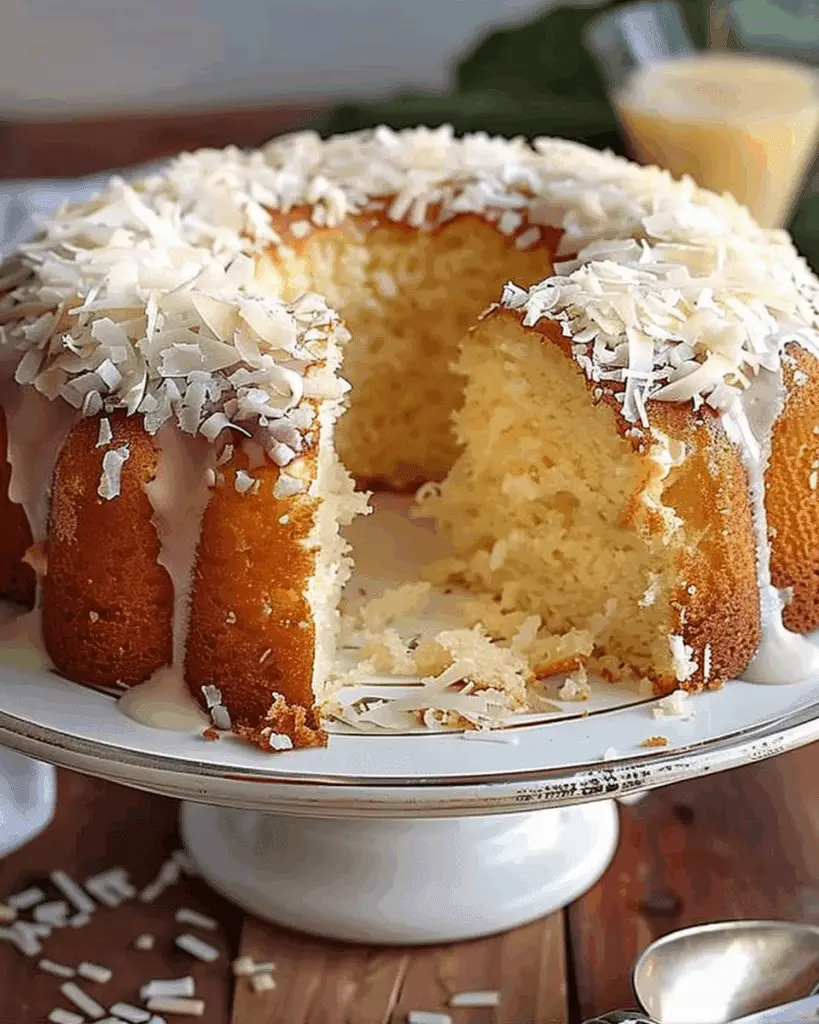
Piña Colada Pound Cake

July 7, 2025 by Sue Leave a Comment

I bring the beachside vibes straight to the kitchen with this Piña Colada Pound Cake—tropical, tender, and soaked in the flavors of coconut and pineapple, all wrapped in a moist, buttery crumb. Piña Colada Pound Cake

Why I’ll Love This Recipe

I love how this cake captures the essence of a piña colada using wholesome ingredients. It’s soft, dense, and bursting with tropical sweetness from crushed pineapple and coconut. Whether I serve it for dessert or enjoy a slice with coffee, it always delivers a sunny, feel-good bite.

ingredients

(Here's a tip: Check out the full list of ingredients and measurements in the recipe card below.)

For the cake:
1 cup unsalted butter, softened
3 cups granulated sugar
5 large eggs
3 cups all‑purpose flour
¼ tsp baking soda
¼ tsp baking powder
¼ tsp kosher salt
¾ cup sour cream
1 cup crushed pineapple, drained
2 tsp coconut extract

For the glaze:
2 Tbsp milk
2 cups powdered sugar
1 tsp coconut extract
1 cup sweetened coconut, toasted

directions

  1. Preheat oven to 325 °F. Grease and flour a 10–12‑cup bundt pan thoroughly.

  2. In a skillet over medium heat, toast coconut for 3–5 minutes until golden and fragrant, stirring frequently. Set aside.

  3. In a large bowl, beat butter until creamy. Add sugar and coconut extract; cream until fluffy.

  4. Beat in eggs one at a time, mixing well after each.

  5. In a separate bowl, whisk flour, baking soda, baking powder, and salt.

  6. Add dry ingredients and sour cream alternately to the butter mixture, beginning and ending with the flour mixture, mixing until just combined. Fold in drained pineapple.

  7. Pour batter into pan and bake for 85–90 minutes or until a toothpick comes out clean.

  8. Let cake cool in pan for 15 minutes. Invert onto a wire rack and cool completely.

  9. Whisk milk, powdered sugar, and coconut extract until smooth. Drizzle over cooled cake, then sprinkle toasted coconut on top.

Servings and timing

I slice this cake into 12 generous pieces. Active prep takes about 15 minutes, followed by a bake time of 1 hour 25 minutes, and cooling time gives a total of around 1 hour 40 minutes.

Variations

Pineapple boost: I like to add extra pineapple for more moisture—just reduce sour cream slightly.
Coconut inside: Stir ¾ cup shredded coconut into the batter for texture.
Tropical twist: Swap coconut extract with pineapple extract for extra fruitiness.
Lighter version: I sometimes use Greek yogurt in place of sour cream for a slightly tangy and lighter option.

storage/reheating

I store this cake covered at room temperature for up to 2 days. For longer storage, I wrap slices individually and freeze for up to 3 months. When ready to enjoy, I thaw and warm individual slices briefly in the microwave (10–15 seconds) or in a 300 °F oven for about 5 minutes.

FAQs

Can I make this cake without coconut?

Yes, I can skip the coconut extract and topping, but the coconut does enhance that tropical piña colada flavor.

Is fresh pineapple okay to use?

Absolutely—I chop it finely and drain well to prevent excess moisture in the batter.

Can I use yogurt instead of sour cream?

Yes, plain Greek yogurt works great and keeps the cake moist with a bit of tang.

Why did my cake stick to the pan?

I make sure to coat the bundt pan thoroughly with nonstick baking spray that contains flour, and I let the cake cool 15 minutes before inverting.

Can I turn this into cupcakes or loaf cakes?

Yes! I adjust the baking time—around 20–25 minutes for cupcakes and 50–60 minutes for loaf pans.

Conclusion

This Piña Colada Pound Cake is all about sunshine in dessert form. With the natural sweetness of pineapple and the creamy hint of coconut, it’s the perfect treat for when I want something tropical, simple, and refreshing.

Print

clock clock iconcutlery cutlery iconflag flag iconfolder folder iconinstagram instagram iconpinterest pinterest iconfacebook facebook iconprint print iconsquares squares iconheart heart iconheart solid heart solid icon
Piña Colada Pound Cake

Piña Colada Pound Cake

5 Stars 4 Stars 3 Stars 2 Stars 1 Star No reviews
  • Author: Sue
  • Prep Time: 15 minutes
  • Cook Time: 1 hour 25 minutes
  • Total Time: 1 hour 40 minutes
  • Yield: 12 servings
  • Category: Dessert
  • Method: Baking
  • Cuisine: American
  • Diet: Vegetarian
Print Recipe
Pin Recipe

Description

A tropical-inspired pound cake that blends the flavors of coconut and pineapple for a moist, buttery dessert reminiscent of a piña colada—without any alcohol.


Ingredients

  • 1 cup unsalted butter, softened
  • 3 cups granulated sugar
  • 5 large eggs
  • 3 cups all-purpose flour
  • ¼ tsp baking soda
  • ¼ tsp baking powder
  • ¼ tsp kosher salt
  • ¾ cup sour cream
  • 1 cup crushed pineapple, drained
  • 2 tsp coconut extract
  • 2 Tbsp milk
  • 2 cups powdered sugar
  • 1 tsp coconut extract (for glaze)
  • 1 cup sweetened coconut, toasted

Instructions

  1. Preheat oven to 325°F. Grease and flour a 10–12‑cup bundt pan thoroughly.
  2. In a skillet over medium heat, toast coconut for 3–5 minutes until golden and fragrant, stirring frequently. Set aside.
  3. In a large bowl, beat butter until creamy. Add sugar and coconut extract; cream until fluffy.
  4. Beat in eggs one at a time, mixing well after each.
  5. In a separate bowl, whisk flour, baking soda, baking powder, and salt.
  6. Add dry ingredients and sour cream alternately to the butter mixture, beginning and ending with the flour mixture, mixing until just combined. Fold in drained pineapple.
  7. Pour batter into prepared pan and bake for 85–90 minutes, or until a toothpick inserted comes out clean.
  8. Let cake cool in pan for 15 minutes, then invert onto a wire rack and cool completely.
  9. Whisk milk, powdered sugar, and coconut extract until smooth. Drizzle over cooled cake, then sprinkle toasted coconut on top.

Notes

  • Ensure pineapple is well-drained to avoid excess moisture in the batter.
  • Use nonstick baking spray with flour for best bundt pan release.
  • For added texture, stir shredded coconut into the batter.
  • Can substitute Greek yogurt for a lighter version.

Nutrition

  • Serving Size: 1 slice
  • Calories: 520
  • Sugar: 48g
  • Sodium: 190mg
  • Fat: 25g
  • Saturated Fat: 17g
  • Unsaturated Fat: 6g
  • Trans Fat: 0g
  • Carbohydrates: 70g
  • Fiber: 1g
  • Protein: 5g
  • Cholesterol: 105mg

Have you made this recipe? I'd love to see it!

Click here to Follow me on Pinterest

Crispy Buttermilk Chicken Fried Steak with Country Gravy

July 7, 2025 by Sue Leave a Comment

I’m excited to share this indulgent Southern-style Chicken Fried Steak that's been soaked in tangy buttermilk, dredged in seasoned flour, and fried to a golden crisp. Topped with rich country gravy, it’s the ultimate comfort dish that combines hearty flavor with satisfying crunch. Crispy Buttermilk Chicken Fried Steak with Country Gravy

Why You’ll Love This Recipe

I love how the buttermilk marinade tenderizes the steak while adding a slight tang. The golden, crispy crust provides an irresistible crunch, and the creamy country gravy ties everything together with its savory goodness. It’s a classic dish that brings warmth, nostalgia, and satisfaction in every bite.

Ingredients

(Here's a tip: Check out the full list of ingredients and measurements in the recipe card below.)

  • Cube steaks (tenderized round or sirloin)

  • Buttermilk

  • Hot sauce

  • All-purpose flour

  • Cornstarch

  • Paprika

  • Garlic powder

  • Onion powder

  • Salt and black pepper

  • Vegetable oil or shortening, for frying

Directions

  1. In a bowl, combine buttermilk and a few dashes of hot sauce. Submerge steak pieces and refrigerate for at least 2 hours, or overnight for maximum tenderness.

  2. In a shallow dish, whisk together flour, cornstarch, paprika, garlic powder, onion powder, salt, and pepper.

  3. Remove steaks from marinade, letting excess drip off. Dredge thoroughly in the flour mixture, pressing to help the coating adhere.

  4. Heat oil or shortening in a heavy skillet to about 325–350 °F (160–175 °C). Carefully lower steaks into the hot fat.

  5. Fry on each side for about 3–4 minutes, or until the crust is deep golden brown and the steak is cooked through.

  6. Transfer steaks to a paper towel–lined plate to drain while you make the gravy.

  7. For the gravy: Pour off most of the fat, leaving about 2–3 tablespoons in the pan. Whisk in remaining flour bits, cook for a minute, then gradually whisk in milk. Bring to a simmer, season with salt and pepper, and cook until thickened.

  8. Spoon gravy generously over steaks and serve immediately.

Servings and timing

This recipe yields 4 servings.

  • Marinade time: at least 2 hours, preferably overnight

  • Prep time: about 15 minutes (excluding marinade)

  • Cook time: approximately 15 minutes

  • Total active time: 30 minutes, not including chill time

Variations

  • Spicy kick: Add cayenne pepper or chopped jalapeños to the buttermilk marinade.

  • Herbed coating: Mix dried herbs like thyme, oregano, or parsley into the flour dredge.

  • Cheese gravy: Stir in a bit of shredded cheddar or pepper jack cheese into the gravy for extra richness.

  • Gluten‑free option: Use a blend of rice flour and cornstarch instead of all-purpose flour.

Storage/reheating

I store leftover steaks in an airtight container in the fridge for up to 3 days. To reheat, I preheat the oven to 350 °F, place the steaks on a wire rack over a baking sheet, and warm for about 10–12 minutes until heated through and crispy again. The gravy can be gently reheated on the stovetop, adding a splash of milk if it thickens too much.

FAQs

What cut of meat works best for chicken fried steak?

I prefer cube steaks, which are usually made from tenderized round or sirloin. They cook quickly and stay tender under the breading.

Can I make this ahead of time?

Yes, I sometimes dredge the steaks and refrigerate them, covered, for an hour before frying. The gravy is best made fresh, but you can reheat it gently before serving.

What kind of oil is best for frying?

I use vegetable oil or shortening because they have a high smoke point and neutral flavor. You can also use canola or peanut oil.

How do I keep the coating from falling off?

After dredging, let the coated steaks rest for a few minutes before frying. The resting period helps the breading adhere better.

Can I freeze leftovers?

Absolutely. I let the steaks cool completely, wrap them tightly in foil or plastic wrap, and freeze for up to 2 months. To reheat, I thaw overnight in the fridge and reheat in the oven as directed above.

Conclusion

I hope this Crispy Buttermilk Chicken Fried Steak with Country Gravy becomes one of your favorite comfort meals. The juicy, tender steak encased in a crunchy crust and slathered with creamy gravy makes for a soul-satisfying dinner. It’s perfect for a cozy family meal or special weekend feast—let me know how yours turns out!

Print

clock clock iconcutlery cutlery iconflag flag iconfolder folder iconinstagram instagram iconpinterest pinterest iconfacebook facebook iconprint print iconsquares squares iconheart heart iconheart solid heart solid icon
Crispy Buttermilk Chicken Fried Steak with Country Gravy

Crispy Buttermilk Chicken Fried Steak with Country Gravy

5 Stars 4 Stars 3 Stars 2 Stars 1 Star No reviews
  • Author: Sue
  • Prep Time: 15 minutes
  • Cook Time: 15 minutes
  • Total Time: 30 minutes plus marinating time
  • Yield: 4 servings
  • Category: Main Course
  • Method: Frying
  • Cuisine: Southern
  • Diet: Halal
Print Recipe
Pin Recipe

Description

Southern-style Chicken Fried Steak soaked in tangy buttermilk, fried until crispy golden, and topped with creamy country gravy for the ultimate comfort food experience.


Ingredients

  • 4 cube steaks (tenderized round or sirloin)
  • 2 cups buttermilk
  • 1-2 teaspoons hot sauce
  • 1 ½ cups all-purpose flour
  • ½ cup cornstarch
  • 1 teaspoon paprika
  • 1 teaspoon garlic powder
  • 1 teaspoon onion powder
  • Salt and black pepper to taste
  • Vegetable oil or shortening, for frying
  • 2-3 tablespoons reserved frying fat (for gravy)
  • 2 cups milk (for gravy)

Instructions

  1. In a bowl, combine buttermilk and hot sauce. Submerge cube steaks in the mixture and refrigerate for at least 2 hours or overnight.
  2. In a shallow dish, whisk together flour, cornstarch, paprika, garlic powder, onion powder, salt, and pepper.
  3. Remove steaks from marinade, letting excess drip off. Dredge in the flour mixture, pressing to adhere the coating.
  4. Heat oil or shortening in a heavy skillet to 325–350°F (160–175°C). Fry steaks for 3–4 minutes per side until golden brown and cooked through.
  5. Transfer to a paper towel–lined plate to drain excess oil.
  6. To make the gravy, pour off most of the fat, leaving about 2–3 tablespoons. Whisk in remaining flour bits and cook for 1 minute.
  7. Gradually whisk in milk, bring to a simmer, season with salt and pepper, and cook until thickened.
  8. Spoon gravy over fried steaks and serve hot.

Notes

  • Marinate longer for more tender and flavorful steaks.
  • Let the dredged steaks rest before frying to help coating stick.
  • Use a wire rack over a baking sheet for reheating to retain crispiness.
  • Add herbs or spices to the dredge for variation.
  • Gravy can be reheated with a splash of milk if too thick.

Nutrition

  • Serving Size: 1 steak with gravy
  • Calories: 650
  • Sugar: 5g
  • Sodium: 780mg
  • Fat: 42g
  • Saturated Fat: 10g
  • Unsaturated Fat: 28g
  • Trans Fat: 1g
  • Carbohydrates: 35g
  • Fiber: 2g
  • Protein: 35g
  • Cholesterol: 110mg

Have you made this recipe? I'd love to see it!

Click here to Follow me on Pinterest

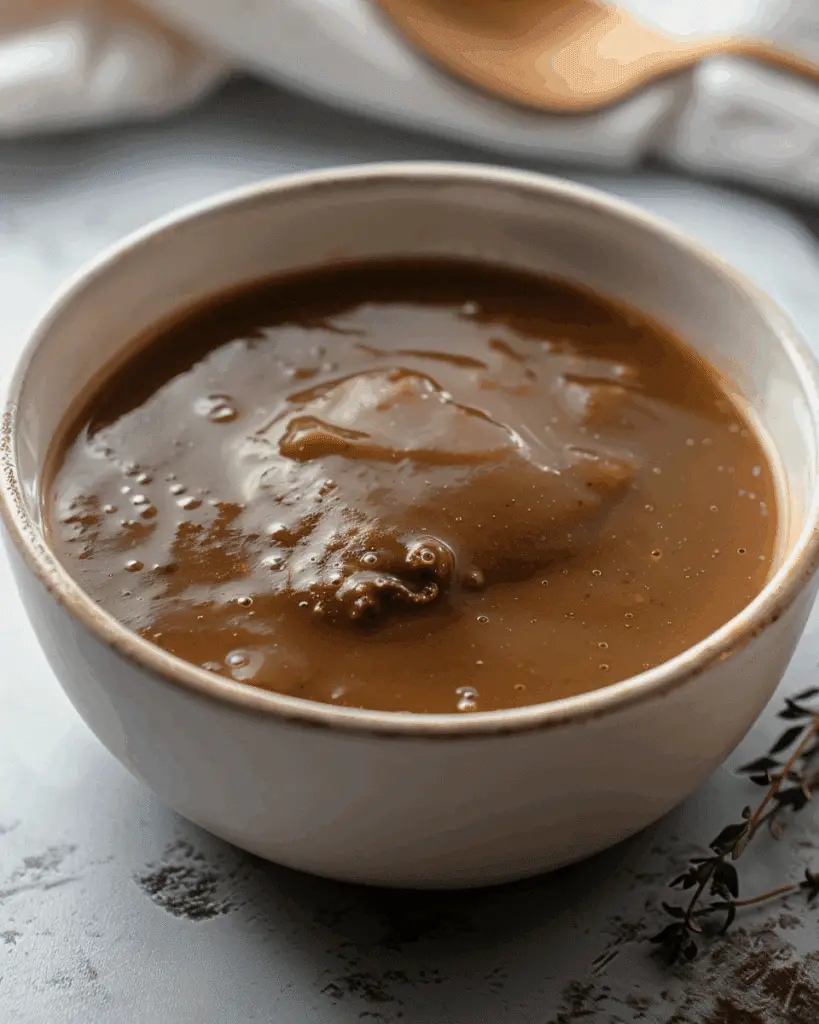
Easy Beef Brown Gravy

July 7, 2025 by Sue Leave a Comment

I crafted a rich and savory beef brown gravy that can be made in just 10–15 minutes with simple pantry ingredients—perfect for drizzling over roast meats, mashed potatoes, or rice. Easy Beef Brown Gravy

Why You’ll Love This Recipe

I love how quick and flexible this gravy is. It delivers deep beefy flavor without needing pan drippings, and I can easily double or halve it depending on how much I need. It’s smooth, comforting, and elevates even simple meals.

ingredients

(Here's a tip: Check out the full list of ingredients and measurements in the recipe card below.)

  • 2 cups beef broth

  • 2 teaspoons garlic powder

  • 1 teaspoon onion powder

  • 1 tablespoon Worcestershire sauce (optional, but I always add it)

  • ¼ cup cold water + 3 tablespoons corn starch (for slurry)

  • Salt and pepper to taste

directions

  1. I bring the beef broth to a gentle boil over medium-high heat in a saucepan.

  2. I stir in garlic powder, onion powder, and Worcestershire sauce.

  3. In a separate bowl, I whisk together the cold water and corn starch until smooth.

  4. I slowly whisk the slurry into the boiling broth, then reduce heat to medium-low and continue stirring until it thickens.

  5. I season with salt and pepper, taste-adjust as needed, and serve hot.

Servings and timing

  • Servings: 4

  • Prep time: 5 minutes

  • Cook time: 10 minutes

  • Total time: 15 minutes

Variations

  • I can use beef drippings or pan juices in place of some or all of the beef broth for a deeper flavor.

  • I sometimes add a swirl of cold butter at the end to create a silky finish.

  • For extra depth, I might stir in a splash of soy sauce or a few drops of browning sauce to darken the color.

storage/reheating

I store leftovers in an airtight container in the fridge for up to 3–4 days. To reheat, I warm it gently on the stovetop, whisking and adding a little broth if needed. It also freezes well (up to 3 months); I thaw it overnight in the fridge before reheating.

FAQs

Can I make this without corn starch?

Yes—I can start by forming a roux with butter and flour, then whisk in the broth. That gives a slightly different texture but works just as well.

What if my gravy is lumpy?

If lumps appear, I whisk vigorously or strain the gravy through a fine mesh sieve. A smooth slurry also helps prevent clumping.

Is Worcestershire sauce necessary?

Not essential, but it enhances the umami depth. If I don’t have it, soy sauce works well as a substitute.

Can I use bouillon instead of broth?

Absolutely. A bouillon cube or paste dissolved in water gives concentrated flavor. I just adjust the salt to taste.

How thick should the gravy be?

It should lightly coat the back of a spoon. If it’s too thick, I whisk in a tablespoon or two of warm broth. If too thin, I add more slurry or reduce it slightly over low heat.

Conclusion

I’m thrilled with how quickly and easily this gravy transforms any meal. Whether I’m serving roast beef, mashed potatoes, or biscuits, this beef brown gravy is my go-to comfort booster. I hope it brings flavorful warmth to your table just like it does at mine.

Print

clock clock iconcutlery cutlery iconflag flag iconfolder folder iconinstagram instagram iconpinterest pinterest iconfacebook facebook iconprint print iconsquares squares iconheart heart iconheart solid heart solid icon
Easy Beef Brown Gravy

Easy Beef Brown Gravy

5 Stars 4 Stars 3 Stars 2 Stars 1 Star No reviews
  • Author: Sue
  • Prep Time: 5 minutes
  • Cook Time: 10 minutes
  • Total Time: 15 minutes
  • Yield: 4 servings
  • Category: Sauce
  • Method: Stovetop
  • Cuisine: American
  • Diet: Low Lactose
Print Recipe
Pin Recipe

Description

A rich and savory beef brown gravy made in just 15 minutes using simple pantry ingredients. Ideal for enhancing roast meats, mashed potatoes, or rice.


Ingredients

  • 2 cups beef broth
  • 2 teaspoons garlic powder
  • 1 teaspoon onion powder
  • 1 tablespoon Worcestershire sauce (optional)
  • ¼ cup cold water
  • 3 tablespoons corn starch
  • Salt and pepper to taste

Instructions

  1. Bring the beef broth to a gentle boil over medium-high heat in a saucepan.
  2. Stir in garlic powder, onion powder, and Worcestershire sauce.
  3. In a separate bowl, whisk together cold water and corn starch until smooth.
  4. Slowly whisk the slurry into the boiling broth, reduce heat to medium-low, and continue stirring until it thickens.
  5. Season with salt and pepper, taste and adjust as needed, then serve hot.

Notes

  • Use beef drippings or pan juices for deeper flavor.
  • Add a swirl of cold butter at the end for a silky finish.
  • Enhance color and flavor with soy sauce or Kitchen Bouquet.
  • Store leftovers in the fridge for 3–4 days or freeze for up to 3 months.
  • Reheat gently on the stovetop, adding broth as needed.

Nutrition

  • Serving Size: ¼ of recipe
  • Calories: 60
  • Sugar: 0g
  • Sodium: 400mg
  • Fat: 0g
  • Saturated Fat: 0g
  • Unsaturated Fat: 0g
  • Trans Fat: 0g
  • Carbohydrates: 14g
  • Fiber: 0g
  • Protein: 1g
  • Cholesterol: 0mg

Have you made this recipe? I'd love to see it!

Click here to Follow me on Pinterest

Lemon Vanilla Black Tea Iced Tea

July 7, 2025 by Sue Leave a Comment

I’ve created a refreshing summer drink that blends homemade lemonade with vanilla‑infused black tea. It’s my new go‑to iced tea—crisp, slightly sweet, and bursting with citrus and vanilla flavors. Lemon Vanilla Black Tea Iced Tea

Why You’ll Love This Recipe

I love how customizable and healthier this drink is compared to store‑bought teas—I control the sweetness and avoid artificial additives. The cold‑brew vanilla black tea gives such a smooth flavor without bitterness, and the homemade lemonade adds the perfect tangy zing. It’s cost‑effective and easy to make ahead, too.

ingredients

(Here's a tip: Check out the full list of ingredients and measurements in the recipe card below.)

Vanilla black tea infusion

  • 400 ml filtered water

  • 2–3 teaspoon vanilla black loose tea

Homemade lemonade

  • 15 g sugar

  • 200 ml water

  • 50 g fresh lemon juice

  • Ice cubes and lemon slices to serve

directions

  1. I place the filtered water and vanilla tea in a jar, stir, then steep overnight in the fridge for a smooth, intense flavor without bitterness.

  2. I dissolve the sugar in warm water, let it cool, add lemon juice, and mix for the lemonade.

  3. In a glass filled with ice, I pour about 150 ml of lemonade (adjust to my taste), add lemon slices if I’m feeling fancy, and top up with the chilled vanilla tea infusion.

Servings and timing

  • Makes about 1–2 cups (enough for one large glass or two smaller servings)

  • Prep: 5 minutes active work, plus 12 hours cold‑brew

  • Ready: Overnight infusion + a few minutes the next day

Variations

  • I sometimes use green tea and strawberry syrup for a fruity version.

  • I swap sugar for honey or stevia when I want a different sweetness.

  • I like to add fresh mint or basil for a cool herbal twist.

  • When I’m short on time, I brew the tea hot and chill it quickly—though it’s less smooth.

storage/reheating

  • I keep leftover vanilla tea infusion in a sealed jar in the fridge for up to one week.

  • When I want another glass, I mix it with freshly made lemonade over ice.

  • This tea is meant to be served cold—no reheating needed.

FAQs

Can I use tea bags instead of loose tea?

Absolutely. I can swap in 2–3 vanilla black tea bags and cold‑brew them the same way.

How long should the tea steep?

I steep it overnight—around 8–12 hours gives the best vanilla flavor without bitterness. If I’m in a hurry, 6 hours also works.

How tart is the lemonade?

I find 50 g lemon juice gives a nice balance. If I want it sweeter, I add more sugar or reduce the lemon juice slightly.

Can I make this with bottled lemonade?

Yes, but I enjoy making it from scratch so I can fresh‑squeeze lemons and control the sweetness.

Does it keep well?

Yes—the tea base stays fresh for up to one week in the fridge, and I just add fresh lemonade when I’m ready for another glass.

Conclusion

I can’t help but smile every time I sip this Lemon Vanilla Black Tea Iced Tea. It’s flavorful, low-effort, and endlessly customizable—perfect for lazy summer afternoons or casual get‑togethers. I’m already excited to test variations with honey, mint, or seasonal berries. I hope you enjoy it as much as I do!

Print

clock clock iconcutlery cutlery iconflag flag iconfolder folder iconinstagram instagram iconpinterest pinterest iconfacebook facebook iconprint print iconsquares squares iconheart heart iconheart solid heart solid icon
Lemon Vanilla Black Tea Iced Tea

Lemon Vanilla Black Tea Iced Tea

5 Stars 4 Stars 3 Stars 2 Stars 1 Star No reviews
  • Author: Sue
  • Prep Time: 5 minutes
  • Cook Time: 0 minutes
  • Total Time: 12 hours 5 minutes
  • Yield: 1–2 servings
  • Category: Beverages
  • Method: Cold Brew
  • Cuisine: Fusion
  • Diet: Vegan
Print Recipe
Pin Recipe

Description

A refreshing summer iced tea combining smooth vanilla-infused black tea with tangy homemade lemonade. This customizable and healthier alternative to store-bought options is perfect for hot days.


Ingredients

  • 400 ml filtered water
  • 2–3 tsp vanilla black loose tea (or 2–3 tea bags)
  • 15 g sugar
  • 200 ml water
  • 50 g fresh lemon juice
  • Ice cubes, for serving
  • Lemon slices, for garnish

Instructions

  1. Combine 400 ml filtered water and 2–3 tsp vanilla black tea in a jar, stir, and refrigerate overnight to cold-brew.
  2. In a separate container, dissolve 15 g sugar in 200 ml warm water. Let cool, then add 50 g fresh lemon juice to make the lemonade.
  3. To serve, fill a glass with ice, pour in about 150 ml of lemonade (adjust to taste), add lemon slices if desired, and top with the chilled vanilla tea infusion.

Notes

  • Cold-brewing tea ensures a smooth flavor without bitterness.
  • Sweetness and lemon levels can be adjusted to taste.
  • Store leftover vanilla tea infusion in the fridge for up to a week.
  • Try adding mint or basil for a refreshing twist.

Nutrition

  • Serving Size: 1 glass
  • Calories: 60
  • Sugar: 15g
  • Sodium: 5mg
  • Fat: 0g
  • Saturated Fat: 0g
  • Unsaturated Fat: 0g
  • Trans Fat: 0g
  • Carbohydrates: 16g
  • Fiber: 0g
  • Protein: 0g
  • Cholesterol: 0mg

Have you made this recipe? I'd love to see it!

Click here to Follow me on Pinterest

Iced Tea (Extra Easy)

July 7, 2025 by Sue Leave a Comment

I’ve always loved a crisp, homemade iced tea that’s refreshing and effortless to make. This iced tea recipe from Natasha’s Kitchen delivers just that—simple, scalable, and perfect whether I want it sweetened or unsweetened. Iced Tea (Extra Easy)

Why I’ll Love This Recipe

I love how easy it is: just boil water, steep tea bags, add sweetener if I want it, and chill. It’s quick—about 15 minutes total—and I can easily double or triple the batch for gatherings without extra fuss.

ingredients

(Here’s a tip: Check out the full list of ingredients and measurements in the recipe card below.)

  • 6 black tea bags

  • 8 cups water (divided)

  • ⅓ cup sugar (optional, adjust to taste)

directions

  1. Bring 4 cups of water to a boil in a saucepan.

  2. Remove from heat, add tea bags, and steep for 10 minutes.

  3. Remove the tea bags and stir in sugar if I want sweet tea.

  4. Pour into a pitcher and add the remaining 4 cups of cold water.

  5. Chill in the refrigerator until cold, then serve over ice.

Servings and timing

This makes about 6 servings and takes roughly 15 minutes of prep (including steeping), plus chilling time in the fridge.

Variations

  • Herb-infused twist: Add a few sprigs of fresh mint or a couple of basil leaves to the steeped tea for a subtle herbal note.

  • Citrus brightness: Add slices of lemon or orange to the pitcher before chilling.

  • Decaf option: Swap regular black tea for decaffeinated black tea bags.

  • Flavored sugar: Replace sugar with honey or simple syrup in equal measure for a different sweetness profile.

storage/reheating

I store leftover iced tea in a covered pitcher in the refrigerator—it keeps well for up to 5 days. If it gets too strong or sweet over time, I dilute it with a bit of cold water before serving.

FAQs

How do I make it caffeine-free?

I use decaffeinated black tea bags instead of regular ones and follow the same steeping process.

Can I make this tea less sweet?

Absolutely—I adjust the sugar amount or skip it entirely and often sweeten just a pitcher or individual glass.

What if I don’t have sugar—can I use honey or syrup?

Yes! I replace sugar with an equal measure of honey or simple syrup, stirring it in while the tea is still warm so it dissolves easily.

How long can I store this iced tea?

In the fridge, I keep it in a sealed pitcher for up to 5 days. I give it a taste before serving—if it tastes too strong, I add a splash of cold water.

Can I brew this hot and drink it warm?

Sure—I sometimes sip it hot like regular tea. Just brew with the full 8 cups of hot water and enjoy immediately.

Conclusion

This extra-easy iced tea has become my go-to—not only because it’s simple and refreshing, but also because I can tweak it to match my mood. Whether I keep it classic or dress it up with mint, citrus, or alternative sweeteners, it’s always satisfying. I hope it becomes a staple in your kitchen too!

Print

clock clock iconcutlery cutlery iconflag flag iconfolder folder iconinstagram instagram iconpinterest pinterest iconfacebook facebook iconprint print iconsquares squares iconheart heart iconheart solid heart solid icon
Iced Tea (Extra Easy)

Iced Tea (Extra Easy)

5 Stars 4 Stars 3 Stars 2 Stars 1 Star No reviews
  • Author: Sue
  • Prep Time: 15 minutes
  • Cook Time: 0 minutes
  • Total Time: 15 minutes (plus chilling time)
  • Yield: 6 servings
  • Category: Drinks
  • Method: Boiling and Steeping
  • Cuisine: American
  • Diet: Vegan
Print Recipe
Pin Recipe

Description

A crisp and refreshing homemade iced tea that's simple to make and easily customizable with sweeteners or flavor variations.


Ingredients

  • 6 black tea bags
  • 8 cups water (divided)
  • ⅓ cup sugar (optional, adjust to taste)

Instructions

  1. Bring 4 cups of water to a boil in a saucepan.
  2. Remove from heat, add tea bags, and steep for 10 minutes.
  3. Remove the tea bags and stir in sugar if desired.
  4. Pour into a pitcher and add the remaining 4 cups of cold water.
  5. Chill in the refrigerator until cold, then serve over ice.

Notes

  • Add fresh mint or basil for a herbal twist.
  • Include lemon or orange slices for citrus brightness.
  • Use decaffeinated tea for a caffeine-free option.
  • Honey or simple syrup can replace sugar for a different sweetness profile.
  • Store in the refrigerator for up to 5 days; dilute if too strong or sweet over time.

Nutrition

  • Serving Size: 1 cup
  • Calories: 27
  • Sugar: 5g
  • Sodium: 5mg
  • Fat: 0g
  • Saturated Fat: 0g
  • Unsaturated Fat: 0g
  • Trans Fat: 0g
  • Carbohydrates: 7g
  • Fiber: 0g
  • Protein: 0g
  • Cholesterol: 0mg

Have you made this recipe? I'd love to see it!

Click here to Follow me on Pinterest

Honeycrisp Apple Broccoli Salad

July 7, 2025 by lina Leave a Comment

This Honeycrisp Apple Broccoli Salad is the perfect combination of crunchy, fresh vegetables and sweet, crisp apples, creating a delightful side dish that pairs well with almost any meal. It’s vibrant, full of textures, and can easily be made in advance, making it a great addition to potlucks, picnics, or family gatherings.

Honeycrisp Apple Broccoli Salad

Why You’ll Love This Recipe

I absolutely love this Honeycrisp Apple Broccoli Salad because it's so easy to make and always a crowd-pleaser. The combination of fresh broccoli, crunchy sunflower seeds, sweet dried cranberries, and the slightly tart Honeycrisp apples offers the perfect balance of flavors. Plus, the dressing made with Greek yogurt and honey gives it a creamy texture without feeling too heavy. It’s the perfect light salad that’s both nutritious and satisfying!

Ingredients

  • 4 cups fresh broccoli florets

  • 1 large Honeycrisp apple, diced

  • ½ cup shredded carrots

  • ⅓ cup dried cranberries

  • ¼ cup sunflower seeds

  • ¼ cup red onion, finely diced

  • ⅓ cup plain Greek yogurt

  • ⅓ cup mayonnaise

  • 1½ tablespoon apple cider vinegar

  • 1 tablespoon honey

  • Salt and pepper, to taste

(Tip: You'll find the full list of ingredients and measurements in the recipe card below.)

Directions

  1. In a large mixing bowl, I combine the broccoli, diced Honeycrisp apple, shredded carrots, dried cranberries, sunflower seeds, and red onion.

  2. In a small bowl, I whisk together the Greek yogurt, mayonnaise, apple cider vinegar, honey, salt, and pepper until the mixture is smooth and creamy.

  3. I pour the dressing over the salad ingredients and toss everything together, making sure it’s evenly coated.

  4. To let the flavors meld, I chill the salad in the refrigerator for at least 20 minutes before serving.

  5. After chilling, I give the salad a final toss and serve it cold.

Servings and Timing

  • Prep Time: 15 minutes

  • Cooking Time: None

  • Total Time: 35 minutes (including chilling)

  • Servings: 6 servings

Storage/Reheating

I recommend storing this Honeycrisp Apple Broccoli Salad in an airtight container in the refrigerator for up to 2 days. The salad can be enjoyed cold, and it’s just as refreshing the next day! However, I wouldn’t recommend reheating it, as the crispness of the apples and broccoli is what makes it so refreshing.

FAQs

Can I use a different type of apple for this salad?

Yes, while Honeycrisp apples are my favorite for this recipe due to their sweetness and crunch, you can use other varieties like Gala or Fuji apples. Just make sure the apples are firm and crisp.

Can I make this salad ahead of time?

Yes! This salad is great to make ahead. I usually prepare it a few hours before serving, or even the night before, and refrigerate it to let the flavors meld together.

Is this salad gluten-free?

Yes, this Honeycrisp Apple Broccoli Salad is naturally gluten-free, making it a great choice for those with dietary restrictions. Just be sure that the mayonnaise and other ingredients are labeled gluten-free if necessary.

How can I make this salad vegan?

To make this salad vegan, you can substitute the Greek yogurt and mayonnaise with plant-based alternatives. There are many delicious vegan mayo and yogurt options available that work wonderfully in this recipe.

Can I add other vegetables or fruits to this salad?

Absolutely! If you want to experiment, you can add other fruits like grapes, pears, or even strawberries. As for veggies, I think chopped celery, bell peppers, or even cauliflower would be tasty additions.

Conclusion

This Honeycrisp Apple Broccoli Salad is a refreshing, light, and flavorful side dish that’s perfect for any occasion. It’s simple to prepare and packed with nutritious ingredients like fresh broccoli, apples, and seeds. The sweet and tangy dressing ties everything together, making it a salad that’s as delightful to eat as it is to look at. Whether you’re serving it at a summer barbecue or packing it for a picnic, this salad is sure to be a hit!

Print

clock clock iconcutlery cutlery iconflag flag iconfolder folder iconinstagram instagram iconpinterest pinterest iconfacebook facebook iconprint print iconsquares squares iconheart heart iconheart solid heart solid icon
Honeycrisp Apple Broccoli Salad

Honeycrisp Apple Broccoli Salad

5 Stars 4 Stars 3 Stars 2 Stars 1 Star No reviews
  • Author: lina
  • Prep Time: 15 minutes
  • Cook Time: None
  • Total Time: 35 minutes (including chilling)
  • Yield: 6 servings
  • Category: Side Dish
  • Method: No-cook
  • Cuisine: American
  • Diet: Gluten Free
Print Recipe
Pin Recipe

Description

This Honeycrisp Apple Broccoli Salad is a fresh and flavorful side dish featuring crisp Honeycrisp apples, crunchy broccoli, and a creamy dressing made with Greek yogurt and honey. Perfect for potlucks, picnics, and family gatherings, this salad combines vibrant textures and balanced flavors that everyone will love.


Ingredients

4 cups fresh broccoli florets

1 large Honeycrisp apple, diced

½ cup shredded carrots

⅓ cup dried cranberries

¼ cup sunflower seeds

¼ cup red onion, finely diced

⅓ cup plain Greek yogurt

⅓ cup mayonnaise

1½ Tbsp apple cider vinegar

1 Tbsp honey

Salt and pepper, to taste


Instructions

In a large mixing bowl, combine the broccoli, diced Honeycrisp apple, shredded carrots, dried cranberries, sunflower seeds, and red onion.

In a separate small bowl, whisk together Greek yogurt, mayonnaise, apple cider vinegar, honey, salt, and pepper until smooth and creamy.

Pour the dressing over the salad ingredients and toss until evenly coated.

Refrigerate the salad for at least 20 minutes to allow the flavors to meld.

Toss the salad again before serving and enjoy!


Notes

This salad can be made ahead of time and stored in the fridge for up to 2 days.

For a vegan version, swap out the Greek yogurt and mayonnaise for plant-based alternatives.

This recipe can be customized by adding fruits like grapes or pears, or vegetables such as celery or bell peppers.

Have you made this recipe? I'd love to see it!

Click here to Follow me on Pinterest

How To Make Homemade Tomato Sauce

July 6, 2025 by Sue Leave a Comment

I love making this homemade tomato sauce—it's vibrant, flavorful, and perfect for everything from pasta dishes to pizzas. With simple ingredients and minimal effort, it transforms basic pantry items into a sauce that tastes restaurant-quality. How To Make Homemade Tomato Sauce

Why You’ll Love This Recipe

I adore this sauce because it's made entirely from scratch using ripe tomatoes, fragrant herbs, and a hint of garlic. It’s easy to customize—whether I want it smooth for a creamy pasta or chunky for dipping. Plus, it’s freezer-friendly and healthier than store-bought versions.

Ingredients

(Here's a tip: Check out the full list of ingredients and measurements in the recipe card below.)

  • 2 lbs ripe tomatoes, cored and roughly chopped

  • 2 tablespoons olive oil

  • 1 medium onion, finely chopped

  • 3 cloves garlic, minced

  • 1 teaspoon salt (adjust to taste)

  • ½ teaspoon black pepper

  • 1 teaspoon sugar (optional, if tomatoes are very acidic)

  • 1 teaspoon dried oregano or 2 tablespoons fresh basil, chopped

  • Pinch of red pepper flakes (optional, for heat)

  • 2 tablespoons tomato paste (for richer flavor and color)

  • ½ cup water or vegetable broth (optional, for thinning)

Directions

  1. Heat the olive oil in a large saucepan over medium heat.

  2. Add the chopped onion and sauté until translucent, about 5 minutes.

  3. Stir in the minced garlic and cook for another minute, until fragrant.

  4. Add the chopped tomatoes, tomato paste, salt, pepper, oregano or basil, red pepper flakes, and sugar if using.

  5. Stir everything well, then bring the mixture to a gentle simmer.

  6. Reduce heat to low, cover partially, and simmer for 30–40 minutes, stirring occasionally, until the sauce thickens.

  7. If the sauce is too thick, stir in water or broth to reach desired consistency.

  8. For a smoother sauce, use an immersion blender to blend directly in the pot or cool slightly and blend in batches in a blender.

  9. Taste and adjust seasoning as needed, adding more salt, pepper, or herbs.

Servings and Timing

  • Yields: About 4 cups (enough for 4–6 servings of pasta)

  • Prep time: 10 minutes

  • Cook time: 30–40 minutes

  • Total time: 40–50 minutes

Variations

  • Chunky Style: Skip blending for a rustic sauce with tomato chunks.

  • Spicy Kick: Increase red pepper flakes or add a chopped jalapeño.

  • Herb-Rich: Stir in fresh chopped basil and parsley at the end.

  • Creamy Twist: Swirl in a little heavy cream or mascarpone for a pink sauce.

  • Umami Boost: Add a splash of soy sauce or a small handful of grated Parmesan during cooking.

Storage/Reheating

  • To store: Let the sauce cool completely, then store it in airtight containers in the fridge for up to 5 days.

  • To freeze: Portion into freezer-safe containers or bags, leaving about an inch of headspace. Freeze for up to 3 months.

  • To reheat: Thaw in the fridge overnight or defrost in the microwave. Reheat gently on stovetop over low heat, stirring so it warms evenly.

FAQs

What type of tomatoes work best?

I find that vine-ripened plum tomatoes or Roma tomatoes offer the best balance of sweetness and rich flavor. But I use whichever ripe tomatoes are available or on sale.

Can I use canned tomatoes instead?

Absolutely. Swap in two 28‑ounce cans of whole or crushed tomatoes—drain excess liquid and adjust simmer time slightly.

Do I need to peel the tomatoes?

I don't bother peeling them unless I want an ultra-smooth sauce. If needed, I blanch tomatoes for 30 seconds, then peel the skins easily.

How can I make the sauce last longer in the fridge?

I add a tablespoon of lemon juice or a teaspoon of white vinegar to boost acidity—it helps preserve freshness.

Can I use this sauce for pizza?

Yes! I cook it slightly less—about 20–25 minutes—and skip blending so it remains thicker and more rustic on pizza.

Conclusion

This homemade tomato sauce recipe is a delicious, versatile staple I always keep on hand. With simple ingredients and easy steps, I can whip it up anytime and tailor it to my tastes. Whether I’m feeding family or batch-prepping for the week, it’s a go-to recipe that never fails to impress.

Print

clock clock iconcutlery cutlery iconflag flag iconfolder folder iconinstagram instagram iconpinterest pinterest iconfacebook facebook iconprint print iconsquares squares iconheart heart iconheart solid heart solid icon
How To Make Homemade Tomato Sauce

How To Make Homemade Tomato Sauce

5 Stars 4 Stars 3 Stars 2 Stars 1 Star No reviews
  • Author: Sue
  • Prep Time: 10 minutes
  • Cook Time: 40 minutes
  • Total Time: 50 minutes
  • Yield: About 4 cups (4–6 servings)
  • Category: Sauce
  • Method: Stovetop
  • Cuisine: Italian
  • Diet: Vegan
Print Recipe
Pin Recipe

Description

A vibrant, flavorful homemade tomato sauce made from ripe tomatoes, herbs, and garlic—perfect for pasta, pizza, or dipping. Easy to customize and freezer-friendly.


Ingredients

  • 2 lbs ripe tomatoes, cored and roughly chopped
  • 2 tablespoons olive oil
  • 1 medium onion, finely chopped
  • 3 cloves garlic, minced
  • 1 teaspoon salt (adjust to taste)
  • ½ teaspoon black pepper
  • 1 teaspoon sugar (optional, if tomatoes are very acidic)
  • 1 teaspoon dried oregano or 2 tablespoons fresh basil, chopped
  • Pinch of red pepper flakes (optional, for heat)
  • 2 tablespoons tomato paste
  • ½ cup water or vegetable broth (optional, for thinning)

Instructions

  1. Heat the olive oil in a large saucepan over medium heat.
  2. Add the chopped onion and sauté until translucent, about 5 minutes.
  3. Stir in the minced garlic and cook for another minute, until fragrant.
  4. Add the chopped tomatoes, tomato paste, salt, pepper, oregano or basil, red pepper flakes, and sugar if using.
  5. Stir everything well, then bring the mixture to a gentle simmer.
  6. Reduce heat to low, cover partially, and simmer for 30–40 minutes, stirring occasionally, until the sauce thickens.
  7. If the sauce is too thick, stir in water or broth to reach desired consistency.
  8. For a smoother sauce, use an immersion blender or cool slightly and blend in batches in a blender.
  9. Taste and adjust seasoning as needed, adding more salt, pepper, or herbs.

Notes

  • Use vine-ripened or Roma tomatoes for the best flavor.
  • Skip blending for a chunky, rustic texture.
  • Freeze in small portions for convenient use later.
  • Add lemon juice or vinegar to increase shelf life in the fridge.
  • Use less cooking time for pizza sauce consistency.

Nutrition

  • Serving Size: ½ cup
  • Calories: 60
  • Sugar: 4g
  • Sodium: 250mg
  • Fat: 3.5g
  • Saturated Fat: 0.5g
  • Unsaturated Fat: 2.8g
  • Trans Fat: 0g
  • Carbohydrates: 7g
  • Fiber: 2g
  • Protein: 1g
  • Cholesterol: 0mg

Have you made this recipe? I'd love to see it!

Click here to Follow me on Pinterest

Homemade Maple Donut Bars – Sweet, Soft & Glazed to Perfection

July 6, 2025 by Sue Leave a Comment

I adore these homemade maple donut bars—they’re like a soft, cake-like donut baked into a convenient bar, topped with a rich maple glaze that perks up any morning or mid-afternoon treat. Homemade Maple Donut Bars – Sweet, Soft & Glazed to Perfection

Why You’ll Love This Recipe

I’m always on the hunt for a breakfast treat that’s easy to make but feels indulgent, and these bars hit the sweet spot. They’re baked, not fried, so I get that lovely tender crumb without the mess. Plus, the maple glaze adds a cozy, warm sweetness that pairs perfectly with coffee or milk.

Ingredients

(Here's a tip: Check out the full list of ingredients and measurements in the recipe card below.)

  • All-purpose flour

  • Granulated sugar

  • Baking powder

  • Salt

  • Milk

  • Eggs

  • Butter, melted

  • Pure maple syrup

  • Vanilla extract

Directions

  1. I preheat the oven and prepare an 8×8-inch baking pan by greasing or lining it with parchment paper.

  2. I whisk together the dry ingredients—flour, sugar, baking powder, and salt—in a large bowl.

  3. In a separate bowl, I combine the wet ingredients: milk, eggs, melted butter, maple syrup, and vanilla extract until everything is smooth.

  4. I fold the wet mixture into the dry ingredients until just combined—overmixing would make the texture dense.

  5. I pour the batter into the prepared pan, smoothing the top with a spatula.

  6. I bake until the top is golden and a toothpick inserted into the center comes out clean.

  7. After allowing the bars to cool slightly, I whisk together extra powdered sugar, maple syrup, milk (or cream), and a pinch of salt to make the glaze.

  8. I spread the glaze over the warm bars, letting it drip slightly over the edges.

  9. Finally, I let everything set before cutting the bars into squares or rectangles.

Servings and Timing

  • Makes: 9 to 12 bars, depending on the size of each piece

  • Prep Time: 15 minutes

  • Bake Time: 20–25 minutes

  • Cooling & Glazing Time: 15 minutes

  • Total Time: About 50–55 minutes

Variations

  • Chocolate Glaze: I stir cocoa powder into the glaze for a chocolatey twist.

  • Nut Crunch: I sprinkle chopped pecans or walnuts on top of the glaze for extra texture.

  • Spiced: I mix in a teaspoon of cinnamon (or pumpkin spice) into the batter for a cozy flavor boost.

  • Maple Butter: I add a swirl of softened maple butter into the batter before baking for a richer taste.

Storage/Reheating

I store the bars in an airtight container at room temperature for up to 3 days. For longer freshness, I refrigerate them for up to 5 days (letting them come to room temperature before eating). To reheat, I microwave a bar for about 10–15 seconds or warm it in a 300 °F oven for 5 minutes to revive that soft, fresh-from-the-oven feel.

FAQs

What kind of maple syrup should I use?

I always go for pure, grade A maple syrup—it has the best flavor. Pancake syrup just doesn’t give the same sweetness or depth.

Can I use a different pan size?

Yes, I’ve used a 9×9-inch pan, which makes for shorter bars. Just watch the baking time—it might need a couple minutes less.

Can I make these gluten-free?

Absolutely. I substitute the flour with a 1:1 gluten-free baking flour blend and they turn out just as soft and tasty.

What if my glaze is too thick or too thin?

If it’s too thick, I add a little more milk or cream. If it’s too thin, I stir in a bit more powdered sugar until it reaches that perfect drizzle consistency.

Can I freeze these bars?

Yes! I flash-freeze individual bars on a baking sheet, then transfer them to a freezer-safe container. They keep well for up to 2 months. I thaw one at room temperature or microwave for about 20 seconds when I want a quick treat.

Conclusion

Making these homemade maple donut bars is one of those moments that brings a little celebration into ordinary days. I love how soft and sweet they are, and the maple glaze melts into every crumb. They stay fresh for days, and the easy variations mean I can keep things fresh in my kitchen. I always feel a sense of pride when I whip these up—simple ingredients, warm baking, and that irresistible flavor.

Print

clock clock iconcutlery cutlery iconflag flag iconfolder folder iconinstagram instagram iconpinterest pinterest iconfacebook facebook iconprint print iconsquares squares iconheart heart iconheart solid heart solid icon
Homemade Maple Donut Bars – Sweet, Soft & Glazed to Perfection

Homemade Maple Donut Bars – Sweet, Soft & Glazed to Perfection

5 Stars 4 Stars 3 Stars 2 Stars 1 Star No reviews
  • Author: Sue
  • Prep Time: 15 minutes
  • Cook Time: 25 minutes
  • Total Time: 55 minutes
  • Yield: 9 to 12 bars
  • Category: Breakfast, Dessert
  • Method: Baking
  • Cuisine: American
  • Diet: Vegetarian
Print Recipe
Pin Recipe

Description

These homemade maple donut bars are soft, cake-like treats baked in bar form and topped with a rich maple glaze. Perfect for breakfast or a cozy afternoon snack, they offer all the indulgence of a donut with none of the frying.


Ingredients

  • 2 cups all-purpose flour
  • ¾ cup granulated sugar
  • 2 tsp baking powder
  • ½ tsp salt
  • ¾ cup milk
  • 2 large eggs
  • ½ cup butter, melted
  • ¼ cup pure maple syrup
  • 1 tsp vanilla extract
  • 1 cup powdered sugar (for glaze)
  • 2 tbsp maple syrup (for glaze)
  • 1-2 tablespoon milk or cream (for glaze)
  • Pinch of salt (for glaze)

Instructions

  1. Preheat the oven to 350°F (175°C) and grease or line an 8×8-inch baking pan with parchment paper.
  2. In a large bowl, whisk together the flour, granulated sugar, baking powder, and salt.
  3. In a separate bowl, combine the milk, eggs, melted butter, maple syrup, and vanilla extract until smooth.
  4. Fold the wet mixture into the dry ingredients until just combined; do not overmix.
  5. Pour the batter into the prepared pan and smooth the top with a spatula.
  6. Bake for 20–25 minutes or until the top is golden and a toothpick inserted in the center comes out clean.
  7. While the bars cool slightly, whisk together powdered sugar, maple syrup, milk or cream, and a pinch of salt to make the glaze.
  8. Spread the glaze over the warm bars, allowing it to drip slightly over the edges.
  9. Let the glaze set before cutting the bars into squares or rectangles.

Notes

  • Use pure grade A maple syrup for the best flavor.
  • Bars can be stored at room temperature for up to 3 days or refrigerated for 5 days.
  • Microwave for 10–15 seconds or warm in a 300°F oven for 5 minutes to refresh.
  • Optional add-ins: cinnamon, pumpkin spice, chopped nuts, or maple butter swirl.
  • To freeze, flash-freeze bars, then transfer to a freezer-safe container for up to 2 months.

Nutrition

  • Serving Size: 1 bar
  • Calories: 220
  • Sugar: 18g
  • Sodium: 140mg
  • Fat: 9g
  • Saturated Fat: 5g
  • Unsaturated Fat: 3g
  • Trans Fat: 0g
  • Carbohydrates: 32g
  • Fiber: 1g
  • Protein: 3g
  • Cholesterol: 40mg

Have you made this recipe? I'd love to see it!

Click here to Follow me on Pinterest

Parmesan Cheese Crisps

July 6, 2025 by Sue Leave a Comment

A simple and elegant snack featuring golden, lacy discs of baked Parmesan cheese—perfect for nibbling solo or adding a satisfying crunch to salads, soups, or charcuterie boards. Parmesan Cheese Crisps

Why You’ll Love This Recipe

I adore how effortless this recipe is—just one main ingredient, minimal prep, and ready in under 10 minutes. Baking transforms the cheese into crisp, savory, golden rounds that feel gourmet yet are wonderfully easy. They elevate anything from salads to creamy soups, and even casseroles. And whenever I have leftover Parmesan, this is my go‑to for reducing waste—nothing goes to waste here!

ingredients

(Here's a tip: Check out the full list of ingredients and measurements in the recipe card below.)
• Freshly grated Parmesan cheese
• Optional: a pinch of freshly ground black pepper or spices like cayenne, smoked paprika, herbs, or za’atar

directions

  1. Preheat oven to 400 °F (200 °C) and line a baking sheet with parchment paper or a silicone mat.

  2. Use a tablespoon to scoop small mounds of Parmesan onto the lined sheet, spacing them about 1–2 inches apart.

  3. Lightly press the tops of the cheese mounds to flatten them slightly.

  4. Bake for 3–8 minutes—oven times vary—until golden and crisp. Keep a close eye to prevent burning.

  5. Let crisps cool completely on the baking sheet to firm up before transferring.

Servings and timing

  • Yield: About 12–16 crisps (2 per serving as a snack or garnish)

  • Prep time: ~5 minutes

  • Cook time: 3–8 minutes, depending on oven and crisp size

Variations

  • Peppery crunch: add a pinch of freshly ground black pepper on each mound before baking

  • Spiced crisps: top with cayenne, smoked paprika, za’atar, everything bagel seasoning, or herbs like thyme or rosemary

  • Cheesy mix: use half Parmesan and half cheddar for thicker, richer crisps

storage/reheating

I store crisps in an airtight container at room temperature for up to 2 weeks. If they lose their crispiness, I re‑crisp them in a low oven (around 300 °F/150 °C) for 3–4 minutes. For freezer storage, I seal them in zip‑top bags for up to 6 months, then reheat the same way.

FAQs

What kind of Parmesan should I use?

I always grate a fresh block of Parmesan—pre‑grated cheese often has additives that affect melting and texture, giving less crisp results.

How can I prevent them from burning?

Ovens vary, so I watch closely around 3–4 minutes. Once the edges turn light golden, I take them out. Over‑baking turns them bitter.

Why are my crisps soggy?

Usually they need more time in the oven to fully crisp out, or maybe the cheese wasn’t aged enough. A longer bake at slightly lower heat helps.

How long do they last?

At room temperature in a sealed container, they stay crisp for about 1–2 weeks. Fridge storage isn’t ideal—it can introduce moisture.

Can I make them ahead of time?

Yes! I often bake a batch and store them. They’re ready whenever I want a snack, garnish, or to top a dish.

Conclusion

These Parmesan cheese crisps are a simple yet flexible snack and garnish with endless possibilities. I love how they add crunch and flair to everything I serve. Give them a try—you’ll find they’re quick to make, deliciously addictive, and wonderfully waste‑conscious.

Print

clock clock iconcutlery cutlery iconflag flag iconfolder folder iconinstagram instagram iconpinterest pinterest iconfacebook facebook iconprint print iconsquares squares iconheart heart iconheart solid heart solid icon
Parmesan Cheese Crisps

Parmesan Cheese Crisps

5 Stars 4 Stars 3 Stars 2 Stars 1 Star No reviews
  • Author: Sue
  • Prep Time: 5 minutes
  • Cook Time: 3–8 minutes
  • Total Time: 10–13 minutes
  • Yield: 12–16 crisps
  • Category: Snack
  • Method: Baking
  • Cuisine: Italian
Print Recipe
Pin Recipe

Description

Golden, lacy Parmesan cheese crisps that are baked to perfection—ideal as a snack or crunchy garnish for salads, soups, or charcuterie boards.


Ingredients

  • 1 cup freshly grated Parmesan cheese
  • Optional: a pinch of freshly ground black pepper
  • Optional: spices like cayenne, herbs, or za’atar

Instructions

  1. Preheat oven to 200 °C (400 °F) and line a baking sheet with parchment paper or a silicone mat.
  2. Use a tablespoon to scoop small mounds of Parmesan onto the lined sheet, spacing them about 1–2 inches apart.
  3. Lightly press the tops of the cheese mounds to flatten them slightly.
  4. Bake for 3–8 minutes until golden and crisp. Watch closely to avoid burning.
  5. Let crisps cool completely on the baking sheet to firm up before transferring.

Notes

  • Use freshly grated Parmesan for best results—pre-grated cheese may contain anti-caking agents that affect crispiness.
  • Watch the oven closely after 3 minutes to prevent burning.
  • Store in an airtight container at room temperature for up to 2 weeks.
  • To re-crisp, bake at 150 °C (300 °F) for 3–4 minutes.

Nutrition

  • Serving Size: 2 crisps
  • Calories: 60
  • Sugar: 0g
  • Sodium: 190mg
  • Fat: 4g
  • Saturated Fat: 2.5g
  • Unsaturated Fat: 1.5g
  • Trans Fat: 0g
  • Carbohydrates: 0g
  • Fiber: 0g
  • Protein: 5g
  • Cholesterol: 10mg

Have you made this recipe? I'd love to see it!

Click here to Follow me on Pinterest

Honey Butter Skillet Corn

July 6, 2025 by Sue Leave a Comment

I love this Honey Butter Skillet Corn for its creamy, sweet, buttery magic that transforms simple frozen corn into a show-stopping side dish in just 15 minutes. Honey Butter Skillet Corn

Why You’ll Love This Recipe

I adore how this recipe uses just a handful of pantry staples—frozen corn, honey, butter, cream cheese, salt, and pepper—and comes together super fast. The honey gives a subtle glaze, the cream cheese adds tangy creaminess, and it pairs beautifully with everything from grilled meats to weeknight dinners.

ingredients

(Here's a tip: Check out the full list of ingredients and measurements in the recipe card below.)

  • 2 tablespoons butter (salted or unsalted)

  • 2 tablespoons honey

  • 1 pound (16 oz / about 4 cups) frozen corn (no need to thaw)

  • 2 ounces cream cheese, cut into small cubes

  • ¼ teaspoon salt

  • ¼ teaspoon black pepper

directions

  1. In a large skillet over medium-high heat, I melt the butter and honey until they bubble and combine.

  2. I add the frozen corn straight into the skillet and cook, stirring occasionally, for about 5–8 minutes until heated through.

  3. I stir in the cream cheese cubes, salt, and pepper. Then I continue cooking for another 2–5 minutes, stirring often, until the cream cheese melts into a creamy sauce.

  4. I taste and adjust seasoning if needed and serve immediately for the best texture.

Servings and timing

  • Servings: 6 side-dish portions

  • Prep time: 5 minutes

  • Cook time: 10 minutes

  • Total time: 15 minutes

Variations

  • Fresh or canned corn: I sometimes use fresh corn (about 5 ears) or canned corn, draining well and reducing honey slightly to balance sweetness.

  • Add veggies: I love adding diced red onion, bell pepper, or jalapeño during cooking for more flavor.

  • Spicy twist: I add a pinch of cayenne or a drizzle of sriracha when I want a bit of heat.

  • Cheesy flair: I occasionally finish with grated Parmesan or swap cream cheese for mascarpone for a richer taste.

storage/reheating

  • To store: I let it cool, then transfer to an airtight container and refrigerate for up to 3–4 days.

  • To reheat: I warm it gently on the stovetop or microwave and add a splash of milk if it gets too thick.

  • Freezing: I avoid freezing it, as the cream cheese can separate when thawed.

FAQs

What if I don’t have cream cheese?

I’ve used mascarpone or even Greek yogurt as a substitute. Mascarpone gives rich creaminess, while yogurt adds tang but might be thinner.

Can I use canned corn instead of frozen?

Absolutely—I drain two 15-oz cans and use them. I reduce honey a bit since canned corn is naturally sweeter.

How spicy can I make this?

I’ve added sriracha or a pinch of cayenne, and it turns out wonderfully spicy. It's a great way to switch things up.

Can I make it ahead of time?

Yes—I prepare it up to 3 days in advance, refrigerate, then reheat gently before serving. I usually add a splash of milk when reheating.

How do I keep leftovers from drying out?

I store it in a tightly sealed container and reheat with a bit of milk or butter to keep it creamy and smooth.

Conclusion

I absolutely love this Honey Butter Skillet Corn—it's the perfect easy side dish that turns everyday corn into something creamy, sweet, and irresistible. I make it often for dinner sides and holiday spreads, and it always disappears fast from the table.

Print

clock clock iconcutlery cutlery iconflag flag iconfolder folder iconinstagram instagram iconpinterest pinterest iconfacebook facebook iconprint print iconsquares squares iconheart heart iconheart solid heart solid icon
Honey Butter Skillet Corn

Honey Butter Skillet Corn

5 Stars 4 Stars 3 Stars 2 Stars 1 Star No reviews
  • Author: Sue
  • Prep Time: 5 minutes
  • Cook Time: 10 minutes
  • Total Time: 15 minutes
  • Yield: 6 side-dish portions
  • Category: Side Dish
  • Method: Skillet
  • Cuisine: American
  • Diet: Vegetarian
Print Recipe
Pin Recipe

Description

Honey Butter Skillet Corn is a quick and creamy side dish that transforms frozen corn into a buttery, sweet, and tangy delight with just a few pantry staples.


Ingredients

  • 2 tablespoons butter (salted or unsalted)
  • 2 tablespoons honey
  • 1 pound (16 oz / about 4 cups) frozen corn (no need to thaw)
  • 2 ounces cream cheese, cut into small cubes
  • ¼ teaspoon salt
  • ¼ teaspoon black pepper

Instructions

  1. In a large skillet over medium-high heat, melt the butter and honey until bubbly and combined.
  2. Add the frozen corn directly into the skillet and cook, stirring occasionally, for about 5–8 minutes until heated through.
  3. Stir in the cream cheese cubes, salt, and pepper. Continue cooking for another 2–5 minutes, stirring often, until the cream cheese melts into a creamy sauce.
  4. Taste and adjust seasoning if needed. Serve immediately for best texture.

Notes

  • You can substitute fresh (about 5 ears) or canned corn (2 drained 15-oz cans).
  • Enhance flavor with diced red onion, bell pepper, or jalapeño.
  • Add a pinch of cayenne or drizzle of sriracha for heat.
  • Mascarpone or Greek yogurt can replace cream cheese if needed.
  • Store leftovers in an airtight container in the fridge for 3–4 days.
  • Reheat gently with a splash of milk to maintain creaminess.

Nutrition

  • Serving Size: 1 portion
  • Calories: 180
  • Sugar: 6g
  • Sodium: 180mg
  • Fat: 11g
  • Saturated Fat: 6g
  • Unsaturated Fat: 4g
  • Trans Fat: 0g
  • Carbohydrates: 20g
  • Fiber: 2g
  • Protein: 3g
  • Cholesterol: 25mg

Have you made this recipe? I'd love to see it!

Click here to Follow me on Pinterest

Keto Breakfast Sandwiches

July 6, 2025 by Sue Leave a Comment

A satisfying low‑carb twist on the classic breakfast sandwich—featuring fluffy “90‑second bread,” cheese, and a fried egg—ready in about 20 minutes. Keto Breakfast Sandwiches

Why You’ll Love This Recipe

I love how this sandwich combines the comforting familiarity of a breakfast sandwich with keto‑friendly ingredients. The quick‑microwave bread is pillowy yet firm, while the cheese and egg come together to form a warm, protein‑packed morning meal that fuels me for hours.

ingredients

(Here's a tip: Check out the full list of ingredients and measurements in the recipe card below.)
For the bread:
• butter
• egg
• coconut flour
• baking powder

For the sandwich filling:
• olive oil spray
• egg
• slice of cheese (I use sharp cheddar)

directions

  1. Make the bread
    I melt the butter in a microwave‑safe bowl, stir in egg, coconut flour, and baking powder, then microwave for 90 seconds. Once slightly cooled, I slice it in half.

  2. Cook the egg & toast the bread
    I heat a nonstick skillet sprayed with olive oil, fry an egg (using a round mold if I want it neat), and toast the bread slices until lightly browned.

  3. Assemble the sandwich
    One bread slice, a slice of cheese, the egg, then the top bread slice. Serve immediately.

Servings and timing

  • Yield: Makes 1 sandwich

  • Prep Time: 10 minutes

  • Cook Time: 10 minutes

  • Total Time: 20 minutes

Variations

  • Cheese swap: Gouda, provolone, or smoked mozzarella all work great.

  • Add-ins: I like folding in fresh spinach or sliced tomatoes—just toast the bread extra to keep it from getting soggy.

  • Different bread: I sometimes use a keto English muffin or make cloud bread instead of the microwaved loaf.

storage/reheating

I wrap leftovers in plastic wrap and refrigerate for 1–2 days. To reheat, I remove the wrap and microwave until warm—it’s best freshly made, but still tasty later.

FAQs

What if I want a thicker sandwich?

I sometimes make two batches of the 90‑second bread and use both pieces instead of slicing one—that gives a much heartier sandwich.

Can I prepare these ahead of time?

Yes—I often make them the night before, wrap tightly, and refrigerate. They reheat well the next morning, although they’re best fresh.

Can I freeze these sandwiches?

Freezing works too, but the texture of the bread and egg isn’t as good as when freshly made. I prefer eating them within a day or two.

Can I use almond flour instead of coconut flour?

Absolutely! I’ve used almond flour successfully, though texture may be slightly different. Toasting the bread well helps firm it up.

Can I add veggies to it?

Yes—I add spinach, sautéed mushrooms, or tomatoes for extra flavor. Just make sure to toast the bread well to avoid sogginess.

Conclusion

I find this keto breakfast sandwich to be a delightful, quick, and filling way to start the morning. Between the soft, warm bread, gooey cheese, and perfect fried egg, it hits all the right notes while staying low carb. Whether I’m preparing a quick solo breakfast or meal‑prepping for the week, this recipe is always a hit.

Print

clock clock iconcutlery cutlery iconflag flag iconfolder folder iconinstagram instagram iconpinterest pinterest iconfacebook facebook iconprint print iconsquares squares iconheart heart iconheart solid heart solid icon
Keto Breakfast Sandwiches

Keto Breakfast Sandwiches

5 Stars 4 Stars 3 Stars 2 Stars 1 Star No reviews
  • Author: Sue
  • Prep Time: 10 minutes
  • Cook Time: 10 minutes
  • Total Time: 20 minutes
  • Yield: 1 sandwich
  • Category: Breakfast
  • Method: Microwave, Stovetop
  • Cuisine: American
Print Recipe
Pin Recipe

Description

A low-carb twist on the classic breakfast sandwich using quick microwave '90-second bread', cheese, and a fried egg—perfect for a satisfying keto-friendly morning meal.


Ingredients

  • 1 tbsp butter
  • 1 egg (for bread)
  • 1 tbsp coconut flour
  • ½ tsp baking powder
  • Olive oil spray
  • 1 egg (for filling)
  • 1 slice of cheese (sharp cheddar recommended)

Instructions

  1. Melt butter in a microwave-safe bowl. Stir in 1 egg, coconut flour, and baking powder. Microwave for 90 seconds. Let cool slightly and slice in half.
  2. Heat a nonstick skillet sprayed with olive oil. Fry the egg (use a round mold if desired) and toast bread slices until lightly browned.
  3. Assemble the sandwich: place one bread slice on a plate, add cheese slice, then the fried egg, and top with the second bread slice. Serve immediately.

Notes

  • Swap cheese with gouda, provolone, or smoked mozzarella.
  • Add spinach or sliced tomatoes, and toast the bread more to avoid sogginess.
  • Use a keto English muffin or cloud bread as an alternative to microwave bread.
  • Wrap and refrigerate leftovers for up to 2 days; reheat in the microwave.

Nutrition

  • Serving Size: 1 sandwich
  • Calories: 310
  • Sugar: 1g
  • Sodium: 350mg
  • Fat: 25g
  • Saturated Fat: 12g
  • Unsaturated Fat: 11g
  • Trans Fat: 0g
  • Carbohydrates: 5g
  • Fiber: 2g
  • Protein: 14g
  • Cholesterol: 230mg

Have you made this recipe? I'd love to see it!

Click here to Follow me on Pinterest

Cheeseburger French Fry Bake

July 6, 2025 by Sue Leave a Comment

A comforting, crowd-pleasing twist on classic cheeseburgers and fries—everything combined in one hearty, easy-to-make bake. Cheeseburger French Fry Bake

Why You’ll Love This Recipe

I absolutely adore this dish because it's complete comfort food in a single pan. The juicy beef soaked in cheesy, creamy sauce, crispy fries on top, and gooey melted cheddar—what's not to love? I often make it for busy weeknights since it cooks quickly and always brings smiles. Plus, it’s easy to customize for picky eaters or casual gatherings.

ingredients

(Here's a tip: Check out the full list of ingredients and measurements in the recipe card below.)

  • 2 pounds lean ground beef

  • ½ medium onion, chopped

  • Salt and pepper to taste

  • Garlic powder to taste

  • 1 (10.75 oz) can condensed golden mushroom soup

  • 1 (10.75 oz) can condensed cheddar cheese soup

  • 1 (16 oz) package frozen French fries

  • 2 cups shredded cheddar cheese

directions

  1. Preheat the oven to 375°F (190°C).

  2. In a skillet over medium-high heat, I brown the ground beef with chopped onion until no pink remains and the onion is tender. Then I drain any excess grease and season with salt, pepper, and garlic powder.

  3. I stir in both cans of condensed soups until the mixture is well blended and heated through.

  4. I transfer the beef mixture to a 9×13-inch baking dish, then layer the frozen fries evenly over the top.

  5. I bake for 25–30 minutes, until the fries are golden and crispy.

  6. I sprinkle the cheddar cheese over the fries, return it to the oven for a few more minutes until the cheese is melted, and it's ready to serve.

Servings and timing

  • Serves: 8

  • Prep time: 20 minutes

  • Cook time: 25–30 minutes

  • Total time: About 50 minutes

Variations

  • I sometimes swap one of the soups for cream of mushroom if I want a milder, creamier taste.

  • For a classic burger flair, I like to add a little ketchup and mustard into the beef mixture before baking.

  • Tater tots can be used instead of French fries for a different texture.

  • A sprinkle of diced pickles or tomatoes on top before serving adds a fresh bite.

storage/reheating

I store leftovers covered in the fridge for up to 4 days. To reheat, I prefer using the oven at 350°F until everything is warmed through and the fries get crispy again. The microwave works too, but the fries will be softer.

FAQs

Can I double or halve this recipe?

I sure can. It’s easy to adjust the portions. I just make sure to use the right-sized baking dish to avoid overflow.

Do the fries go in frozen or thawed?

I always use fries straight from the freezer. They cook perfectly crisp that way.

Can I use homemade fries?

Yes, homemade oven-baked fries work great. I just make sure they’re fully cooked before topping the casserole.

Can I make it ahead of time?

I sometimes prepare the beef and soup mixture in advance and refrigerate it. When ready to bake, I add the fries and pop it in the oven.

Is it possible to freeze this bake?

Yes, I’ve frozen it after baking. I let it cool, portion it out, and store it in airtight containers. To reheat, I thaw it in the fridge and warm it in the oven.

Conclusion

This Cheeseburger French Fry Bake is my go-to when I want something satisfying and low-effort. With cheesy, creamy beef topped with crispy fries, it's a guaranteed crowd-pleaser. It’s also easy to tweak to my liking, making it a reliable favorite for weeknight dinners or weekend indulgence.

Print

clock clock iconcutlery cutlery iconflag flag iconfolder folder iconinstagram instagram iconpinterest pinterest iconfacebook facebook iconprint print iconsquares squares iconheart heart iconheart solid heart solid icon
Cheeseburger French Fry Bake

Cheeseburger French Fry Bake

5 Stars 4 Stars 3 Stars 2 Stars 1 Star No reviews
  • Author: Sue
  • Prep Time: 20 minutes
  • Cook Time: 30 minutes
  • Total Time: 50 minutes
  • Yield: 8 servings
  • Category: Main Dish
  • Method: Baking
  • Cuisine: American
  • Diet: Halal
Print Recipe
Pin Recipe

Description

A comforting and crowd-pleasing casserole that combines the flavors of a classic cheeseburger with crispy French fries, all baked into one hearty dish.


Ingredients

  • 2 pounds lean ground beef
  • ½ medium onion, chopped
  • Salt and pepper to taste
  • Garlic powder to taste
  • 1 (10.75 oz) can condensed golden mushroom soup
  • 1 (10.75 oz) can condensed cheddar cheese soup
  • 1 (16 oz) package frozen French fries
  • 2 cups shredded cheddar cheese

Instructions

  1. Preheat the oven to 375°F (190°C).
  2. In a skillet over medium-high heat, brown the ground beef with chopped onion until no pink remains and the onion is tender. Drain any excess grease and season with salt, pepper, and garlic powder.
  3. Stir in both cans of condensed soups until the mixture is well blended and heated through.
  4. Transfer the beef mixture to a 9×13-inch baking dish, then layer the frozen fries evenly over the top.
  5. Bake for 25–30 minutes, until the fries are golden and crispy.
  6. Sprinkle the cheddar cheese over the fries and return to the oven for a few more minutes until the cheese is melted.
  7. Serve hot and enjoy.

Notes

  • Can substitute cream of mushroom soup for a creamier flavor.
  • Try adding ketchup and mustard to the beef mixture for classic cheeseburger flavor.
  • Tater tots can be used instead of French fries for a texture variation.
  • Add diced pickles or tomatoes on top before serving for a fresh twist.
  • Leftovers can be refrigerated for up to 4 days and reheated in the oven for best texture.

Nutrition

  • Serving Size: ⅛ of bake
  • Calories: 490
  • Sugar: 4g
  • Sodium: 870mg
  • Fat: 32g
  • Saturated Fat: 14g
  • Unsaturated Fat: 14g
  • Trans Fat: 1g
  • Carbohydrates: 25g
  • Fiber: 2g
  • Protein: 28g
  • Cholesterol: 95mg

Have you made this recipe? I'd love to see it!

Click here to Follow me on Pinterest

Strawberry Cheesecake Pound Cake

July 6, 2025 by Sue Leave a Comment

I created this Strawberry Cheesecake Pound Cake by blending dense, buttery pound cake with a creamy cheesecake swirl and fresh strawberry flavor. It yields a moist, rich cake perfect for celebrations or snacking anytime. Strawberry Cheesecake Pound Cake

Why You’ll Love This Recipe

I love how the cream cheese swirl adds extra richness and tang, balancing the sweetness of fresh strawberries. It isn’t overly sugary because the strawberries do the flavor work. The result is a luxurious, tender cake that feels like dessert heaven in every bite.

Ingredients

(Here's a tip: Check out the full list of ingredients and measurements in the recipe card below.)

  • 1 cup unsalted butter, softened

  • 2 cups granulated sugar

  • 8 oz cream cheese, softened

  • 1 teaspoon vanilla extract

  • 1 teaspoon salt

  • 6 large eggs, room temperature

  • 3 cups all‑purpose flour, sifted

  • 2 cups fresh strawberries, muddled (some puree, some chunks)

Directions

  1. Preheat oven to 175 °C (350 °F). Grease and flour a Bundt or tube pan.

  2. In a mixer, cream together butter, sugar, and cream cheese until light and fluffy (about 3 minutes).

  3. Beat in vanilla and salt until combined.

  4. Add eggs one at a time, mixing thoroughly after each.

  5. Gradually add flour, one cup at a time, mixing until just incorporated.

  6. Fold in muddled strawberries gently so I maintain texture.

  7. Pour batter into the prepared pan and lightly sprinkle additional vanilla sugar on top (optional).

  8. Bake for about 1 hour (a toothpick should come out clean).

  9. Cool in pan 5–10 minutes, then invert onto a rack to cool completely before slicing.

Servings and timing

Makes one 12‑slice pound cake.

  • Prep time: 15 minutes

  • Cook time: ~1 hour

  • Cooling time: ~10 minutes in pan, plus complete cooling on rack

Variations

  • Fruit swap: I can switch strawberries for raspberries, blueberries, or mixed berries. Muddled blackberries have worked beautifully in my tests.

  • Zest boost: A bit of lemon or orange zest lifts the flavor—especially with blueberries or raspberries.

  • Mini loaves: Divide into four small loaf pans and bake for ~45 minutes for adorable gift-sized treats.

Storage/reheating

I store slices wrapped in plastic at room temperature for up to 3 days. For longer, I freeze slices in airtight bags up to 2 months. To defrost, I leave them on the counter or warm them briefly in a low oven (150 °C / 300 °F for ~10 minutes) or toaster oven until just soft.

FAQs

Is the flour self‑rising or plain?

I use plain all‑purpose flour and let baking time do the rising.

Can I make this gluten‑free?

Yes—I substitute a 1:1 gluten‑free blend. Texture stays surprisingly similar, just be sure to check doneness early.

Do I have to mash the strawberries?

Not at all! I like some berry chunks, but I can purée completely for uniform pink color and flavor.

How to prevent strawberries from sinking?

Gently folding them in at the end helps. If sinking happens, it’s usually from overmixing or adding too much fruit moisture.

Can I skip the cheesecake swirl?

Definitely. If I’m short on time, I just make a plain cream cheese pound cake and swirl in the berries instead.

Conclusion

I’m always reaching for this cake when I want something a bit special yet easy. The creamy swirl and fresh berry flavor make it feel fancy without fuss. It’s a recipe I return to for birthdays, brunches, or cozy coffee afternoons—always a hit with friends and family.

Print

clock clock iconcutlery cutlery iconflag flag iconfolder folder iconinstagram instagram iconpinterest pinterest iconfacebook facebook iconprint print iconsquares squares iconheart heart iconheart solid heart solid icon
Strawberry Cheesecake Pound Cake

Strawberry Cheesecake Pound Cake

5 Stars 4 Stars 3 Stars 2 Stars 1 Star No reviews
  • Author: Sue
  • Prep Time: 15 minutes
  • Cook Time: 1 hour
  • Total Time: 1 hour 25 minutes
  • Yield: 12 slices
  • Category: Dessert
  • Method: Baking
  • Cuisine: American
  • Diet: Vegetarian
Print Recipe
Pin Recipe

Description

This Strawberry Cheesecake Pound Cake combines buttery pound cake with a creamy cheesecake swirl and the natural sweetness of fresh strawberries. Moist, rich, and full of berry flavor, it’s perfect for celebrations or casual snacking.


Ingredients

  • 1 cup unsalted butter, softened
  • 2 cups granulated sugar
  • 8 oz cream cheese, softened
  • 1 tsp vanilla extract
  • 1 tsp salt
  • 6 large eggs, room temperature
  • 3 cups all-purpose flour, sifted
  • 2 cups fresh strawberries, muddled (some puree, some chunks)

Instructions

  1. Preheat oven to 175 °C (350 °F). Grease and flour a Bundt or tube pan.
  2. Cream together butter, sugar, and cream cheese until light and fluffy (about 3 minutes).
  3. Beat in vanilla and salt until combined.
  4. Add eggs one at a time, mixing thoroughly after each.
  5. Gradually add flour, one cup at a time, mixing until just incorporated.
  6. Gently fold in muddled strawberries to maintain texture.
  7. Pour batter into prepared pan and optionally sprinkle with vanilla sugar.
  8. Bake for about 1 hour, or until a toothpick inserted comes out clean.
  9. Cool in the pan for 5–10 minutes, then invert onto a rack and cool completely before slicing.

Notes

  • You can substitute strawberries with raspberries, blueberries, or blackberries.
  • Adding lemon or orange zest enhances berry flavors.
  • To make mini loaves, divide batter and bake for about 45 minutes.
  • Store slices at room temperature up to 3 days or freeze up to 2 months.
  • Defrost at room temperature or warm briefly in a low oven.

Nutrition

  • Serving Size: 1 slice
  • Calories: 410
  • Sugar: 27g
  • Sodium: 210mg
  • Fat: 22g
  • Saturated Fat: 13g
  • Unsaturated Fat: 7g
  • Trans Fat: 0g
  • Carbohydrates: 47g
  • Fiber: 1g
  • Protein: 6g
  • Cholesterol: 110mg

Have you made this recipe? I'd love to see it!

Click here to Follow me on Pinterest

Mexican Corn Dip

July 6, 2025 by Sue Leave a Comment

A warm, creamy, and irresistible dip that blends fire-roasted flavors with melting cheese and a hint of spice—perfect for any gathering or solo snack night. Mexican Corn Dip

Why I’ll Love This Recipe

I love that this dip combines sweet corn with tangy cheese, a little jalapeño kick, and creamy richness. It’s easy to whip up, bakes to bubbly perfection, and always disappears fast—especially with crunchy tortilla chips or fresh veggies.

Ingredients

(Here's a tip: Check out the full list of ingredients and measurements in the recipe card below.)

  • Cream cheese (typically two 8 oz blocks)

  • 16 oz pepper jack cheese, shredded

  • 1 cup sour cream

  • 3 cans (15 oz each) Mexican-style corn (drained)

  • 1 tablespoon Tajín seasoning

  • Optional: diced cilantro, jalapeño, garlic powder

Directions

  1. Preheat the oven to 350 °F (175 °C).

  2. In a mixing bowl, combine cream cheese, sour cream, drained corn, shredded pepper jack, and Tajín. If I’m adding jalapeño or garlic powder, I mix that in too.

  3. Spread the mixture evenly in a baking dish.

  4. Bake for 15 minutes, then stir well to incorporate melted cheese from the edges.

  5. Bake another 15 minutes, until bubbly and golden.

  6. Garnish with extra Tajín and cilantro before serving hot with chips or veggies.

Servings and timing

This dip serves about 8–10 people as an appetizer. It takes around 10 minutes to prep and 30 minutes to bake—a 40-minute total prep-to-table time.

Variations

  • Smoked version: Instead of baking, I smoke it at 225–235 °F for about 2 hours, stirring halfway through.

  • Spicier: I add chopped jalapeños or chili powder to taste.

  • Cheese swap: I use Monterey Jack, pepper jack, or a spicy cheddar blend.

  • Healthier twist: I substitute Greek yogurt for sour cream.

Storage/reheating

I store leftovers in an airtight container in the fridge for up to 4 days. To reheat, I microwave individual portions until warmed through, or heat in a 350 °F oven for about 10–15 minutes until bubbly.

FAQs

How long does it stay good?

I keep it in the fridge for up to 4 days—after that the texture changes and it's best to toss.

Can I freeze it?

I recommend against freezing; it tends to separate or become watery when thawed.

Can I make it ahead of time?

Absolutely. I assemble it, refrigerate it, and then bake right before serving to keep it fresh and warm.

Can I make it in a slow cooker?

Yes! I set it to low, cook for about 1–2 hours until cheese fully melts, stirring occasionally.

What if I can’t find pepper jack cheese?

I use Monterey Jack or a mix of cheddar and Monterey Jack—just pick whatever cheesy combo melts well.

Conclusion

I love this Mexican Corn Dip for its vibrant flavors and easy prep—it’s cheesy, spicy, and comforting all at once. Whether baked or smoked, it's a crowd-pleaser that I keep coming back to for parties or a simple snack night.

Print

clock clock iconcutlery cutlery iconflag flag iconfolder folder iconinstagram instagram iconpinterest pinterest iconfacebook facebook iconprint print iconsquares squares iconheart heart iconheart solid heart solid icon
Mexican Corn Dip

5 Stars 4 Stars 3 Stars 2 Stars 1 Star No reviews
  • Author: Sue
  • Prep Time: 10 minutes
  • Cook Time: 30 minutes
  • Total Time: 40 minutes
  • Yield: 8–10 servings
  • Category: Appetizer
  • Method: Baking
  • Cuisine: Mexican
  • Diet: Vegetarian
Print Recipe
Pin Recipe

Description

A warm, creamy, and irresistible Mexican Corn Dip that combines sweet corn, pepper jack cheese, sour cream, and Tajín seasoning—perfectly baked until golden and bubbly. Ideal for parties or a cozy night in.


Ingredients

  • 16 oz cream cheese (2 blocks)
  • 16 oz pepper jack cheese, shredded
  • 1 cup sour cream
  • 3 cans (15 oz each) Mexican-style corn, drained
  • 1 Tbsp Tajín seasoning
  • Optional: diced cilantro
  • Optional: diced jalapeño
  • Optional: garlic powder

Instructions

  1. Preheat the oven to 350 °F (175 °C).
  2. In a mixing bowl, combine cream cheese, sour cream, drained corn, shredded pepper jack, and Tajín. Add optional jalapeño or garlic powder if using.
  3. Spread the mixture evenly in a baking dish.
  4. Bake for 15 minutes, then stir well to incorporate melted cheese from the edges.
  5. Bake another 15 minutes, until bubbly and golden.
  6. Garnish with extra Tajín and cilantro. Serve hot with tortilla chips or fresh veggies.

Notes

  • Store leftovers in the fridge for up to 4 days.
  • Reheat in the microwave or in the oven at 350 °F for 10–15 minutes.
  • For a smokier version, cook in a smoker at 225–235 °F for 2 hours, stirring halfway.
  • Substitute Greek yogurt for a healthier twist.
  • Monterey Jack or spicy cheddar blends can replace pepper jack cheese.

Nutrition

  • Serving Size: 1/10 of recipe
  • Calories: 280
  • Sugar: 4g
  • Sodium: 470mg
  • Fat: 22g
  • Saturated Fat: 12g
  • Unsaturated Fat: 8g
  • Trans Fat: 0g
  • Carbohydrates: 13g
  • Fiber: 2g
  • Protein: 8g
  • Cholesterol: 50mg

Have you made this recipe? I'd love to see it!

Click here to Follow me on Pinterest

Best Crockpot Buffalo Chicken Dip

July 6, 2025 by Sue Leave a Comment

I love how this creamy, spicy buffalo chicken dip brings together the flavors of hot wings into one irresistible appetizer. It’s easy to make in the slow cooker and always disappears fast at gatherings. Best Crockpot Buffalo Chicken Dip

Why You’ll Love This Recipe

I’m all about crowd-pleasing and convenience. This dip is loaded with cheese, ranch, hot sauce, and tender chicken—all cooked effortlessly in the crockpot. It’s rich, warm, and perfect with veggies, crackers, or tortilla chips.

ingredients

(Here's a tip: Check out the full list of ingredients and measurements in the recipe card below.)

  • 3 frozen chicken breasts

  • 8 oz cream cheese

  • 1 cup ranch dressing

  • 1 cup hot sauce (like Frank’s RedHot)

  • 1 cup shredded cheddar cheese

directions

  1. In a large pan, boil the frozen chicken breasts in water until cooked through (about 20 minutes).

  2. In the crockpot or a large bowl, mix the cream cheese, ranch dressing, hot sauce, and shredded cheddar.

  3. Shred the cooked chicken and stir it into the mixture.

  4. Cook on low in the crockpot for 30 minutes, or until everything is hot and melty.

Servings and timing

  • Servings: Makes about 10 appetizer portions

  • Prep time: 5 minutes

  • Cook time: 50 minutes (20 minutes to boil the chicken, 30 minutes in the crockpot)

Variations

  • I sometimes increase or decrease the hot sauce depending on how spicy I want it.

  • I’ve swapped the cheddar cheese for mozzarella or Monterey Jack for a creamier texture.

  • Instead of ranch dressing, I like using sour cream with a ranch seasoning mix.

  • When I’m in a hurry, I use canned chicken or rotisserie chicken for a shortcut.

  • For a tangy twist, I occasionally add blue cheese crumbles or dressing.

storage/reheating

  • I store any leftovers in an airtight container in the fridge for up to 3 days.

  • To reheat, I warm it in the microwave or on the stovetop until bubbly and hot.

  • I don’t recommend freezing this dip, as the dairy can separate when thawed.

FAQs

Can I bake this dip instead of using a crockpot?

Yes, I often mix everything together and bake it in a dish at 350°F for about 20 minutes until hot and bubbly.

Can I prep this dip ahead of time?

Absolutely. I prepare the mixture ahead and store it in the fridge, then heat it in the crockpot or oven when I’m ready to serve.

What's the best chicken to use?

I prefer using rotisserie chicken for convenience and flavor, but boiled chicken breasts or even canned chicken work well too.

How spicy is this dip?

It’s moderately spicy. I adjust the amount of hot sauce to control the heat level to my liking.

Can I add blue cheese?

Definitely. I like adding blue cheese crumbles or a bit of blue cheese dressing for a classic buffalo flavor.

Conclusion

This buffalo chicken dip is my go-to for parties, game days, and anytime I want a quick and flavorful appetizer. It’s simple, customizable, and always a hit with my guests. I love how easy it is to throw together and how satisfying every bite is.

Print

clock clock iconcutlery cutlery iconflag flag iconfolder folder iconinstagram instagram iconpinterest pinterest iconfacebook facebook iconprint print iconsquares squares iconheart heart iconheart solid heart solid icon
Best Crockpot Buffalo Chicken Dip

Best Crockpot Buffalo Chicken Dip

5 Stars 4 Stars 3 Stars 2 Stars 1 Star No reviews
  • Author: Sue
  • Prep Time: 5 minutes
  • Cook Time: 50 minutes
  • Total Time: 55 minutes
  • Yield: 10 appetizer portions
  • Category: Appetizer
  • Method: Crockpot
  • Cuisine: American
Print Recipe
Pin Recipe

Description

A creamy, spicy buffalo chicken dip made in the slow cooker with hot sauce, ranch, cheese, and shredded chicken. Perfect for parties and easy to customize.


Ingredients

  • 3 frozen chicken breasts
  • 8 oz cream cheese
  • 1 cup ranch dressing
  • 1 cup hot sauce (like Frank’s RedHot)
  • 1 cup shredded cheddar cheese

Instructions

  1. In a large pan, boil the frozen chicken breasts in water until cooked through (about 20 minutes).
  2. In your crockpot or large bowl, mix cream cheese, ranch dressing, hot sauce, and cheddar.
  3. Shred the cooked chicken and add it to the mixture.
  4. Cook on low in the crockpot for 30 minutes, or until everything is hot and melty.

Notes

  • Use rotisserie chicken or canned chicken for a faster option.
  • Adjust hot sauce for desired spiciness.
  • Substitute cheddar with Monterey Jack or mozzarella for a different flavor.
  • Store leftovers in the fridge for up to 3 days.
  • Do not freeze as the texture changes.

Nutrition

  • Serving Size: 1/10th of recipe
  • Calories: 290
  • Sugar: 2g
  • Sodium: 820mg
  • Fat: 24g
  • Saturated Fat: 10g
  • Unsaturated Fat: 11g
  • Trans Fat: 0g
  • Carbohydrates: 4g
  • Fiber: 0g
  • Protein: 14g
  • Cholesterol: 70mg

Have you made this recipe? I'd love to see it!

Click here to Follow me on Pinterest

Rotel Dip

July 6, 2025 by Sue Leave a Comment

A creamy, cheesy, and mildly spicy crowd-pleaser, this Rotel Dip comes together easily in about 20 minutes with just three main ingredients—Velveeta, Rotel tomatoes, and ground beef. It’s perfect for parties, game days, or a simple snack at home. Rotel Dip

Why You’ll Love This Recipe

I love how straightforward it is—I just brown ground beef, stir in cubed Velveeta cheese and a can of Rotel, and warm until everything melds into a smooth, cheesy dip. The blend of savory meat, creamy cheese, and a gentle kick from the tomatoes always hits the spot. It’s become a go-to for gatherings and family nights.

ingredients

(Here’s a tip: Check out the full list of ingredients and measurements in the recipe card below.)

  • 16 ounces Velveeta, cubed

  • 10-ounce can Rotel (diced tomatoes with green chiles)

  • 1 pound ground beef

directions

  1. I start by browning the ground beef in a skillet over medium heat until it's fully cooked.

  2. While it cooks, I cube the Velveeta into roughly 1-inch pieces for even melting.

  3. Once the beef is done, I add the Velveeta cubes and the entire can of Rotel (undrained) to the skillet.

  4. I stir continuously for about 3–5 minutes, until the cheese is completely melted and the dip is smooth and creamy.

  5. I remove it from heat and serve it warm with tortilla chips, crackers, or veggies.

Servings and timing

  • Servings: Makes about 12 appetizer-size servings

  • Prep time: 5 minutes

  • Cook time: 15 minutes

  • Total time: 20 minutes

Variations

  • Slow cooker version: I sometimes transfer the browned beef, Velveeta, and Rotel to a slow cooker and cook on low for 2–3 hours—your dip stays warm and ready for snacking.

  • Meat swap: I’ve swapped ground beef for spicy sausage to add more flavor and heat.

  • Extra creaminess: Mixing in cream cheese or adding a splash of milk makes the dip even more indulgently creamy.

  • Add-ins: I’ve stirred in a can of beans, extra green chiles, or even a bit of cream of mushroom soup for additional texture and depth.

storage/reheating

I let the dip cool slightly before transferring it to an airtight container. It keeps well in the fridge for 3–4 days. To reheat, I do one of the following:

  • Microwave: Heat in 30-second intervals, stirring in between each round.

  • Stovetop: Warm gently over low heat, stirring occasionally. If it thickens too much, I add a splash of milk to loosen it.

I avoid freezing this dip since it tends to separate and lose its smooth texture when thawed.

FAQs

What is Rotel?

Rotel is a canned mixture of diced tomatoes and green chiles in a mild seasoned juice. It adds flavor and just the right amount of spice to this dip.

Can I use fresh tomatoes instead of canned Rotel?

Yes—you can use fresh diced tomatoes and green chiles if desired, although the texture and consistency may vary slightly.

Do I need to drain the Rotel?

No. I keep the juices from the can in the skillet because they help create the creamy, smooth dip texture.

Can I prepare this ahead of time?

Definitely. I’ll sometimes brown the meat earlier in the day, refrigerate it, and then just reheat with the cheese and Rotel when I’m ready to serve.

How do I keep the dip from becoming too thick?

If it gets too thick while reheating, I simply stir in a little milk or cream to bring it back to a creamy consistency.

Conclusion

This Rotel Dip is a staple in my kitchen because it delivers big, comforting flavor with minimal effort. It’s incredibly versatile—whether adapted for the slow cooker, using different meats, or adding creamy elements, it always turns out delicious. It's perfect as a dip or even as a nacho topping, and it never lasts long once I bring it out!

Print

clock clock iconcutlery cutlery iconflag flag iconfolder folder iconinstagram instagram iconpinterest pinterest iconfacebook facebook iconprint print iconsquares squares iconheart heart iconheart solid heart solid icon
Rotel Dip

Rotel Dip

5 Stars 4 Stars 3 Stars 2 Stars 1 Star No reviews
  • Author: Sue
  • Prep Time: 5 minutes
  • Cook Time: 15 minutes
  • Total Time: 20 minutes
  • Yield: 12 appetizer-size servings
  • Category: Appetizer
  • Method: Stovetop
  • Cuisine: American
  • Diet: Gluten Free
Print Recipe
Pin Recipe

Description

A creamy, cheesy, and spicy Rotel Dip made with Velveeta, Rotel tomatoes, and ground beef. Ready in just 20 minutes, this crowd-pleaser is perfect for parties, game days, or casual snacking.


Ingredients

  • 16 ounces Velveeta, cubed
  • 10-ounce can Rotel (diced tomatoes with green chiles)
  • 1 pound ground beef

Instructions

  1. Brown the ground beef in a skillet until fully cooked.
  2. Cube the Velveeta into 1-inch pieces for even melting.
  3. Add the Velveeta cubes and the can of Rotel (undrained) to the skillet with the beef.
  4. Stir continuously until the cheese is fully melted and the mixture is smooth and creamy, about 3–5 minutes.
  5. Serve hot with tortilla chips, crackers, bagel chips, or raw veggies.

Notes

  • Use spicy sausage instead of beef for extra flavor and heat.
  • Add cream cheese or a splash of milk for more creaminess.
  • Mix in beans, green chiles, or cream of mushroom soup for added texture and depth.
  • Can be made in a slow cooker and kept warm for serving.
  • Store leftovers in an airtight container in the fridge for 3–4 days.
  • Reheat gently in the microwave or stovetop with a splash of milk if needed.
  • Do not freeze as the texture may change.

Nutrition

  • Serving Size: 1/12 of recipe
  • Calories: 210
  • Sugar: 2g
  • Sodium: 650mg
  • Fat: 15g
  • Saturated Fat: 7g
  • Unsaturated Fat: 6g
  • Trans Fat: 0g
  • Carbohydrates: 6g
  • Fiber: 1g
  • Protein: 12g
  • Cholesterol: 45mg

Have you made this recipe? I'd love to see it!

Click here to Follow me on Pinterest

Pecan Upside-Down Cake

July 6, 2025 by Sue Leave a Comment

I fell in love with this rich and buttery pecan upside-down cake that combines gooey caramelized nuts with a tender, moist yellow cake—no fancy decorations, just pure, comforting indulgence. Pecan Upside-Down Cake

Why You’ll Love This Recipe

I love easy shortcut recipes that still feel homemade, and this cake delivers that in spades. It uses a classic yellow cake mix, but elevates it with a sticky pecan topping that looks like it took hours to make. One bite and I’m hit with buttery pecans, brown sugar, and corn syrup caramel—all baked into a soft, moist cake. It's the perfect showstopper for holidays or a cozy evening at home.

ingredients

(Here's a tip: Check out the full list of ingredients and measurements in the recipe card below.)

For the pecan topping

  • ½ cup (1 stick) melted butter

  • ½ cup brown sugar (light or dark)

  • ¼ cup light corn syrup

  • 1 cup chopped pecans

For the cake batter

  • 1 box yellow cake mix

  • ½ cup vegetable oil

  • 3 large eggs

  • ¼ cup sour cream (or plain Greek yogurt)

  • 1 cup water

directions

  1. Preheat oven to 350 °F and grease a 10‑inch bundt pan thoroughly.

  2. In a bowl, combine melted butter, brown sugar, and corn syrup until smooth. Stir in chopped pecans, then spread this mixture evenly in the bottom of the pan.

  3. In a separate bowl, whisk together cake mix, oil, eggs, sour cream, and water until a smooth batter forms.

  4. Gently spoon the batter over the pecan layer to keep the nuts from shifting.

  5. Bake for 40–45 minutes or until a toothpick inserted into the center comes out clean.

  6. Let the cake cool in the pan for 10 minutes. Then carefully run a knife around the edges, set a plate on top and invert the cake. Tap the bottom of the pan to release, then lift it off to reveal the caramel pecan topping.

Servings and timing

  • Servings: 12 slices

  • Prep time: 15 minutes

  • Bake time: 40–45 minutes

  • Cooling: 10 minutes

Variations

  • Swap pecans for chopped walnuts for similar flavor and texture.

  • Replace sour cream with plain Greek yogurt without missing a beat.

  • Try dark brown sugar or dark corn syrup to deepen the caramel flavor.

  • Use a decorative bundt pan if I don’t mind rearranging any nuts that don’t release cleanly.

storage/reheating

I store mine in an airtight container in the fridge—it stays fresh for up to 3 days. To reheat, I let it come to room temperature or gently warm slices in the oven at 325 °F for about 10 minutes. For longer storage, I freeze slices wrapped tightly in plastic; they can last about 3 months when frozen, and I thaw them at room temperature before warming.

FAQs

How soon should I invert the cake after baking?

I wait about 10 minutes—if I flip it too early, it might fall apart, and too late means the topping sticks. This timing helps it release cleanly.

Can I make this cake ahead of time?

Yes! I often bake it the day before. It actually tastes better after sitting overnight, since the flavors develop more.

Do I need to grease the bundt pan well?

Absolutely—I grease every nook to ensure none of the pecan topping sticks. I use butter or non-stick spray to coat thoroughly.

What if some pecans stick to the pan?

I just scoop any leftover nuts from the pan and place them on top of the cake after inverting. No one ever notices!

Can I use a springform or round pan instead?

Yes, I can. A round pan works well and might be easier to invert. I just make sure to grease and line the bottom so it releases nicely.

Conclusion

I love how this recipe gives me that homemade, comforting dessert without the fuss. Rich caramelized pecans, moist cake, and simple steps make it my go-to when I want something sweet and satisfying. Whether it’s a dinner party centerpiece or a cozy treat for myself, it never disappoints. I can’t wait to bake it again soon!

Print

clock clock iconcutlery cutlery iconflag flag iconfolder folder iconinstagram instagram iconpinterest pinterest iconfacebook facebook iconprint print iconsquares squares iconheart heart iconheart solid heart solid icon
Pecan Upside-Down Cake

Pecan Upside-Down Cake

5 Stars 4 Stars 3 Stars 2 Stars 1 Star No reviews
  • Author: Sue
  • Prep Time: 15 minutes
  • Cook Time: 45 minutes
  • Total Time: 1 hour 10 minutes
  • Yield: 12 slices
  • Category: Dessert
  • Method: Baking
  • Cuisine: American
  • Diet: Vegetarian
Print Recipe
Pin Recipe

Description

A rich and buttery pecan upside-down cake that pairs gooey caramelized pecans with a moist yellow cake base—simple yet indulgent, perfect for any occasion.


Ingredients

  • ½ cup (1 stick) melted butter
  • ½ cup brown sugar (light or dark)
  • ¼ cup light corn syrup
  • 1 cup chopped pecans
  • 1 box yellow cake mix
  • ½ cup vegetable oil
  • 3 large eggs
  • ¼ cup sour cream (or plain Greek yogurt)
  • 1 cup water

Instructions

  1. Preheat oven to 350 °F and grease a 10-inch bundt pan thoroughly.
  2. Combine melted butter, brown sugar, and corn syrup until smooth. Stir in chopped pecans and spread the mixture evenly in the bottom of the pan.
  3. In a separate bowl, whisk together cake mix, oil, eggs, sour cream, and water until smooth.
  4. Gently spoon the batter over the pecan layer to keep the nuts from shifting.
  5. Bake for 40–45 minutes or until a toothpick inserted into the center comes out clean.
  6. Let the cake cool in the pan for 10 minutes. Run a knife around the edges, place a plate on top, invert the cake, tap the bottom, and lift the pan off to reveal the pecan topping.

Notes

  • Use dark brown sugar or dark corn syrup for a deeper caramel flavor.
  • Substitute sour cream with plain Greek yogurt.
  • Store in an airtight container in the fridge for up to 3 days or freeze for up to 3 months.
  • If pecans stick to the pan, simply place them back on top after inverting.

Nutrition

  • Serving Size: 1 slice
  • Calories: 420
  • Sugar: 32g
  • Sodium: 350mg
  • Fat: 22g
  • Saturated Fat: 6g
  • Unsaturated Fat: 14g
  • Trans Fat: 0g
  • Carbohydrates: 52g
  • Fiber: 1g
  • Protein: 4g
  • Cholesterol: 55mg

Have you made this recipe? I'd love to see it!

Click here to Follow me on Pinterest

Cinnamon Donut Bread

July 6, 2025 by Sue Leave a Comment

I fell in love with this Cinnamon Donut Bread from Lina’s recipe because it perfectly captures that nostalgic cinnamon‐sugar donut flavor in a moist, marbled loaf. It’s warm, comforting, and satisfying for breakfast or dessert. Cinnamon Donut Bread

Why You’ll Love This Recipe

I adore this recipe because it blends simplicity with indulgence. I only need pantry staples—flour, sugar, eggs, basic leaveners—and the result is a tender, cinnamon‑swirled bread that tastes like freshly fried donuts without the grease or effort. It’s ideal for mornings when I crave something sweet, but want to skip the frying. Plus, I can slice it and share (or not!).

Ingredients

(Here's a tip: Check out the full list of ingredients and measurements in the recipe card below.)

  • All‑purpose flour

  • Granulated sugar

  • Light brown sugar

  • Baking powder

  • Baking soda

  • Salt

  • Ground cinnamon

  • Eggs

  • Milk (or buttermilk)

  • Melted butter (or oil)

  • Vanilla extract

Directions

  1. Preheat the oven to about 350 °F (175 °C) and grease a loaf pan.

  2. In one bowl, whisk together dry ingredients: flour, baking powder, baking soda, salt, and most of the cinnamon.

  3. In another bowl, combine sugar, eggs, milk, melted butter, and vanilla until smooth.

  4. Gradually fold the dry mix into the wet until just combined.

  5. Stir up a cinnamon‑sugar swirl: mix brown sugar and cinnamon. Layer half the batter in the pan, sprinkle swirl, add remaining batter, and finish with more swirl.

  6. Bake for 45–55 minutes or until a toothpick comes out clean.

  7. Let the bread cool in the pan for 10 minutes, then transfer to a rack.

Servings and timing

This loaf yields around 10–12 slices—perfect for sharing at brunch or enjoying throughout the week. Prep takes about 15 minutes, baking around 50 minutes, and cooling 10 minutes—total ~1 hour 15 minutes.

Variations

  • Streusel topping: mix butter, flour, brown sugar, and cinnamon, then sprinkle on top before baking.

  • Glazed version: drizzle a simple vanilla or maple glaze once the loaf cools.

  • Nuts or raisins: swirl in chopped pecans or raisins for extra texture and flavor.

  • Chocolate swirl: replace half the cinnamon swirl with cocoa powder and sugar for a chocolate‑cinnamon twist.

Storage/reheating

I store leftover slices wrapped in plastic or in an airtight container at room temperature for up to 3 days. To reheat, I microwave a slice for about 15 seconds or toast it lightly—it tastes freshly baked that way.

FAQs

1. Can I use buttermilk instead of regular milk?

Yes. I often swap in buttermilk for added tang and tenderness without changing the loaf's texture.

2. Can I make this gluten‑free?

I haven’t tried it yet, but from what I’ve read, a 1:1 gluten‑free flour blend should work. The texture might be slightly denser though.

3. Can I freeze this bread?

Absolutely. I wrap slices or the whole loaf tightly in plastic and foil, freeze up to 3 months, and thaw at room temperature or in the fridge overnight.

4. How do I ensure the cinnamon swirl stays visible?

I gently dot the swirl mixture instead of mixing it fully into the batter—this creates that lovely marbled effect.

5. Why did my loaf crack on top?

I find that’s totally normal—it means the dough rose well. To minimize cracking, I gently smooth the top before baking, but I still expect some charming rustic cracks.

Conclusion

In every bite of this Cinnamon Donut Bread, I taste warmth, nostalgia, and simplicity. It’s become a go‑to treat in my kitchen—easy to make, flexible in flavor, and irresistibly cozy. When I want something sweet that’s fuss‑free and comforting, this loaf never disappoints.

Print

clock clock iconcutlery cutlery iconflag flag iconfolder folder iconinstagram instagram iconpinterest pinterest iconfacebook facebook iconprint print iconsquares squares iconheart heart iconheart solid heart solid icon
Cinnamon Donut Bread

Cinnamon Donut Bread

5 Stars 4 Stars 3 Stars 2 Stars 1 Star No reviews
  • Author: Sue
  • Prep Time: 15 minutes
  • Cook Time: 50 minutes
  • Total Time: 1 hour 15 minutes
  • Yield: 10–12 slices
  • Category: Breakfast, Dessert
  • Method: Baking
  • Cuisine: American
  • Diet: Vegetarian
Print Recipe
Pin Recipe

Description

This Cinnamon Donut Bread combines the nostalgic flavor of cinnamon-sugar donuts with the ease of a quick loaf. Moist, marbled, and perfectly sweet, it’s ideal for breakfast or dessert.


Ingredients

  • 2 cups all-purpose flour
  • ½ cup granulated sugar
  • ½ cup light brown sugar (divided)
  • 1 tsp baking powder
  • ½ tsp baking soda
  • ½ tsp salt
  • 1 ½ tsp ground cinnamon (divided)
  • 2 large eggs
  • 1 cup milk or buttermilk
  • ½ cup melted butter or oil
  • 1 tsp vanilla extract

Instructions

  1. Preheat oven to 350°F (175°C) and grease a loaf pan.
  2. In a large bowl, whisk together flour, baking powder, baking soda, salt, and 1 teaspoon of cinnamon.
  3. In a separate bowl, mix granulated sugar, ¼ cup brown sugar, eggs, milk, melted butter, and vanilla extract until smooth.
  4. Gradually fold the dry mixture into the wet mixture until just combined.
  5. In a small bowl, combine remaining ¼ cup brown sugar and ½ teaspoon cinnamon to make the swirl mixture.
  6. Pour half the batter into the loaf pan, sprinkle half the cinnamon-sugar swirl, add the remaining batter, and top with the rest of the swirl mixture.
  7. Use a knife to gently swirl the mixture into the batter.
  8. Bake for 45–55 minutes, or until a toothpick inserted in the center comes out clean.
  9. Cool in the pan for 10 minutes, then transfer to a wire rack to cool completely.

Notes

  • Use buttermilk for extra tenderness and a slight tang.
  • Let the loaf cool before slicing to help it set.
  • Store in an airtight container for up to 3 days at room temperature.
  • Freeze for up to 3 months—thaw at room temperature or overnight in the fridge.
  • Microwave slices for 15 seconds to revive that fresh-baked warmth.

Nutrition

  • Serving Size: 1 slice
  • Calories: 210
  • Sugar: 15g
  • Sodium: 180mg
  • Fat: 9g
  • Saturated Fat: 5g
  • Unsaturated Fat: 3g
  • Trans Fat: 0g
  • Carbohydrates: 30g
  • Fiber: 1g
  • Protein: 3g
  • Cholesterol: 35mg

Have you made this recipe? I'd love to see it!

Click here to Follow me on Pinterest

Thai Chicken Meatballs in Coconut Curry

July 5, 2025 by Sue Leave a Comment

This dish features tender chicken meatballs simmered in a rich, creamy red coconut curry sauce, delivering a comforting and flavorful meal. Served over rice, it's a perfect balance of creamy and spicy with a crunchy peanut topping. Thai Chicken Meatballs in Coconut Curry

Why I’ll Love This Recipe

I love how versatile and comforting this recipe is. The meatballs are juicy and flavorful, thanks to a mix of ground chicken, coconut milk, and fragrant spices. Simmering them in a coconut curry sauce takes the dish to the next level, with the creamy base perfectly complementing the spicy curry paste. What makes this even better is that I can easily adjust the flavor to suit my taste, adding more fish sauce for saltiness, lime juice for brightness, or brown sugar for sweetness. It's the perfect combination of simplicity and indulgence.

ingredients

(Here's a tip: Check out the full list of ingredients and measurements in the recipe card below.)

  • Thai Chicken Meatballs:
    ⅓ cup panko breadcrumbs
    3 tablespoon coconut milk
    2 tablespoon minced white onion
    2 teaspoon fish sauce (or soy sauce)
    ½ teaspoon kosher salt, coriander, ground ginger, and garlic powder
    ¼ teaspoon black pepper
    1 lb ground chicken

  • Coconut Curry:
    1 ½ cups coconut milk, divided
    3 tablespoon red curry paste
    2 cups low-sodium chicken stock
    ½ chopped red bell pepper
    1 tablespoon fish sauce
    2 teaspoon brown sugar
    1 tablespoon lime juice
    Jasmine or coconut rice, for serving
    ½ cup roasted salted peanuts, for topping
    Optional: cilantro or Thai basil leaves

directions

  1. Mix meatball ingredients: Combine the panko, coconut milk, onion, fish sauce, spices, and ground chicken. Form into 1 ½-inch meatballs. Wetting my hands helps with shaping.

  2. Prepare curry base: Heat ½ cup of coconut milk in a large pan over medium heat until the milk "breaks" and releases some oil (about 5–6 minutes).

  3. Add curry paste: Stir in the red curry paste and cook for 2–3 minutes until it becomes fragrant.

  4. Cook the meatballs: Carefully add the meatballs to the pan, followed by the chicken stock and remaining coconut milk.

  5. Add veggies and seasoning: Stir in the chopped bell pepper, fish sauce, and brown sugar, then bring everything to a simmer.

  6. Simmer: Let the meatballs cook through and the flavors meld together for 10–15 minutes.

  7. Finish and serve: Remove from heat, stir in the lime juice, and adjust seasoning if needed. Serve the curry over rice, topped with roasted peanuts and fresh herbs.

Servings and timing

Makes 4 servings.
Prep time: ~20 minutes
Cook time: ~25 minutes
Total time: ~45 minutes

Variations

  • Gluten-free? Simply swap the panko for gluten-free breadcrumbs and use tamari instead of fish sauce.

  • Swap veggies: You can add or swap vegetables like broccoli, cauliflower, green beans, or sweet potatoes for extra texture and flavor.

  • Low carb? Serve this curry over cauliflower rice or skip the rice entirely for a lighter option.

storage/reheating

I store the leftovers in an airtight container in the refrigerator for up to 4 days. When reheating, I heat it gently on the stove or in the microwave, adding a little water or stock if the sauce has thickened too much.

FAQs

How spicy is this curry?

The level of spice depends on the curry paste I use. If I like it spicier, I can add extra curry paste or a dash of sriracha. If I prefer something milder, I reduce the curry paste or add more coconut milk.

Can I freeze the meatballs or curry?

Yes, I can freeze the cooked meatballs and curry (after cooling) in freezer-safe containers for up to 3 months. Thaw in the fridge overnight before reheating.

What can I substitute for fish sauce?

If I don't have fish sauce or prefer a different flavor, soy sauce or tamari works as a good substitute, though the flavor will be slightly different.

Can I bake or air-fry the meatballs first?

Absolutely! If I want to make the meatballs a little crispy, I can bake them at 400°F for 10–15 minutes until lightly browned, and then simmer them in the curry sauce.

Can I use ground turkey or pork instead of chicken?

Yes, I can use ground turkey or pork for a slightly different texture and flavor. Ground pork will add extra richness to the dish.

Conclusion

This Thai Chicken Meatballs in Coconut Curry is a perfect combination of comforting flavors and textures. The juicy meatballs, creamy curry sauce, and crispy peanuts make it a standout dish that I can enjoy on a cozy weeknight or serve at a dinner party. I know this recipe will quickly become a favorite!

Print

clock clock iconcutlery cutlery iconflag flag iconfolder folder iconinstagram instagram iconpinterest pinterest iconfacebook facebook iconprint print iconsquares squares iconheart heart iconheart solid heart solid icon
Thai Chicken Meatballs in Coconut Curry

Thai Chicken Meatballs in Coconut Curry

5 Stars 4 Stars 3 Stars 2 Stars 1 Star No reviews
  • Author: Sue
  • Prep Time: 20 minutes
  • Cook Time: 25 minutes
  • Total Time: 45 minutes
  • Yield: 4 servings
  • Category: Main Course
  • Method: Simmering
  • Cuisine: Thai
  • Diet: Gluten Free
Print Recipe
Pin Recipe

Description

A comforting twist on Thai curry with tender chicken meatballs simmered in a creamy red coconut curry, served over rice and topped with crunchy peanuts and fresh herbs.


Ingredients

  • ⅓ cup panko breadcrumbs
  • 3 Tbsp coconut milk
  • 2 Tbsp minced white onion
  • 2 tsp fish sauce (or soy sauce)
  • ½ tsp kosher salt, coriander, ground ginger, and garlic powder
  • ¼ tsp black pepper
  • 1 lb ground chicken
  • 1½ cups coconut milk, divided
  • 3 Tbsp red curry paste
  • 2 cups low-sodium chicken stock
  • ½ chopped red bell pepper
  • 1 Tbsp fish sauce
  • 2 tsp brown sugar
  • 1 Tbsp lime juice
  • Jasmine or coconut rice, for serving
  • ½ cup roasted salted peanuts, for topping
  • Optional: cilantro or Thai basil leaves

Instructions

  1. Mix meatball ingredients: Combine breadcrumb, coconut milk, onion, fish sauce, spices, and chicken. Form into 1½-inch meatballs (wet hands help).
  2. Start the curry base: Simmer ½ cup coconut milk in a pan over medium heat until it “breaks” and releases oil (5–6 minutes).
  3. Add curry paste: Stir in red curry paste and cook until aromatic (2–3 minutes).
  4. Add meatballs and liquids: Gently place meatballs, add chicken stock and remaining coconut milk.
  5. Add veggies and seasoning: Stir in bell pepper, fish sauce, brown sugar once simmering.
  6. Simmer: Gently simmer (10–15 minutes) until meatballs are cooked through.
  7. Finish and serve: Remove from heat, stir in lime juice, taste and adjust seasoning, then serve over rice topped with peanuts and herbs.

Notes

  • Gluten-free? Use gluten-free panko and tamari instead of fish sauce.
  • Swap or add veggies: broccoli, cauliflower, squash, sweet potatoes, green beans work beautifully.
  • For low carb, serve over cauliflower rice or skip rice altogether.
  • Leftovers can be stored in an airtight container in the fridge for up to 4 days.
  • Reheat leftovers by warming gently on the stove or in the microwave with a splash of water or stock.
  • For extra texture, bake or air-fry the meatballs before simmering them in the curry.

Nutrition

  • Serving Size: 1 serving
  • Calories: 400
  • Sugar: 7g
  • Sodium: 800mg
  • Fat: 22g
  • Saturated Fat: 9g
  • Unsaturated Fat: 12g
  • Trans Fat: 0g
  • Carbohydrates: 30g
  • Fiber: 3g
  • Protein: 25g
  • Cholesterol: 70mg

Have you made this recipe? I'd love to see it!

Click here to Follow me on Pinterest

Caramel Pecan Chocolate Chip Cookies

July 5, 2025 by Sue Leave a Comment

I bring you chewy, nutty cookies bursting with gooey caramel, rich chocolate chips, and toasted pecans—a delightful twist on the classic chocolate chip cookie! Caramel Pecan Chocolate Chip Cookies

Why I’ll Love This Recipe

I adore the combination of textures and flavors: soft caramel bits, crunchy pecans, and melty chocolate chips. The simple dough comes together quickly, and the caramel pieces add surprise pockets of sticky sweetness throughout each bite .

Ingredients

(Here's a tip: Check out the full list of ingredients and measurements in the recipe card below.)

  • ½ cup (115 g) unsalted butter, softened

  • ½ cup (100 g) granulated sugar

  • ½ cup (100 g) brown sugar

  • 1 large egg

  • 1 teaspoon vanilla extract

  • 1½ cups (190 g) all‑purpose flour

  • ½ teaspoon baking soda

  • ½ cup (90 g) chocolate chips

  • ½ cup (60 g) chopped pecans

  • 6–8 soft caramels, chopped

Directions

  1. Preheat oven to 350 °F (175 °C). Line a baking sheet with parchment paper.

  2. Cream together the butter, granulated sugar, and brown sugar until light and fluffy.

  3. Beat in the egg and vanilla extract until smooth.

  4. Add the flour and baking soda; mix until just combined.

  5. Fold in the chocolate chips, chopped pecans, and caramel pieces.

  6. Scoop dough onto the prepared baking sheet, spacing about 2 inches apart.

  7. Bake for 10–12 minutes, until edges are golden but centers remain soft.

  8. Let cookies cool on the sheet for about 5 minutes before transferring to a wire rack.

Servings and timing

  • Makes: about 18–24 cookies, depending on size

  • Prep time: 10 minutes

  • Bake time: 10–12 minutes

  • Total time: roughly 25 minutes—including cooling

Variations

  • I sometimes swap half the chocolate chips for chopped dark chocolate to deepen the chocolate flavor.

  • Toasting the pecans before adding them brings out a richer nutty aroma—definitely worth it!

  • For a sea-salt twist, I lightly sprinkle flaky salt on top right after baking.

Storage / reheating

  • I store baked cookies in an airtight container at room temperature; they stay soft for up to 3 days.

  • To reheat, I microwave them for about 10–15 seconds—just enough to melt the caramel slightly without burning it.

  • The unbaked dough can be scooped and frozen; I bake them directly from frozen, adding 2–3 extra minutes to the baking time.

FAQs

How can I prevent the caramel from melting out of the cookies?

I chill the dough slightly before baking—this helps the cookie hold its shape and keeps the caramel nestled inside rather than oozing out.

Can I use store-bought caramel sauce instead of caramel pieces?

Yes, but I find that thick caramel sauce can weigh the dough down. Chopped soft caramels are more convenient and give better texture.

What if I don’t have pecans?

I’ve swapped in walnuts plenty of times—totally works. You could also use toasted almonds for a different nutty twist.

Can I make this recipe gluten-free?

I replace the flour with a 1:1 gluten-free baking flour blend, and it works well. The texture may be slightly more crumbly, but still delicious.

Can I reduce the sugar?

I've tried cutting the brown sugar slightly, but it affects the chewiness. For best results, I’d stick to the original amounts.

Conclusion

These caramel pecan chocolate chip cookies are a crowd-pleaser whenever I bake them. They’re straightforward, indulgent, and perfectly balanced. I hope I’ve inspired you to bake a batch—and enjoy every gooey bite!

Print

clock clock iconcutlery cutlery iconflag flag iconfolder folder iconinstagram instagram iconpinterest pinterest iconfacebook facebook iconprint print iconsquares squares iconheart heart iconheart solid heart solid icon
Caramel Pecan Chocolate Chip Cookies

Caramel Pecan Chocolate Chip Cookies

5 Stars 4 Stars 3 Stars 2 Stars 1 Star No reviews
  • Author: Sue
  • Prep Time: 10 minutes
  • Cook Time: 10–12 minutes
  • Total Time: 25 minutes
  • Yield: 18–24 cookies
  • Category: Dessert
  • Method: Baking
  • Cuisine: American
  • Diet: Vegetarian
Print Recipe
Pin Recipe

Description

Chewy, nutty cookies bursting with gooey caramel, rich chocolate chips, and toasted pecans—a delightful twist on the classic chocolate chip cookie.


Ingredients

  • ½ cup (115 g) unsalted butter, softened
  • ½ cup (100 g) granulated sugar
  • ½ cup (100 g) brown sugar
  • 1 large egg
  • 1 teaspoon vanilla extract
  • 1½ cups (190 g) all‑purpose flour
  • ½ teaspoon baking soda
  • ½ cup (90 g) chocolate chips
  • ½ cup (60 g) chopped pecans
  • 6–8 soft caramels, chopped

Instructions

  1. Preheat oven to 350 °F (175 °C). Line a baking sheet with parchment paper.
  2. Cream together the butter, granulated sugar, and brown sugar until light and fluffy.
  3. Beat in the egg and vanilla extract until smooth.
  4. Add the flour and baking soda; mix until just combined.
  5. Fold in the chocolate chips, chopped pecans, and caramel pieces.
  6. Scoop dough onto the prepared baking sheet, spacing about 2 inches apart.
  7. Bake for 10–12 minutes, until edges are golden but centers remain soft.
  8. Let cookies cool on the sheet for about 5 minutes before transferring to a wire rack.

Notes

  • For a deeper chocolate flavor, swap half the chocolate chips for chopped dark chocolate.
  • Toast the pecans before adding them for a richer nutty aroma.
  • For a sea-salt twist, lightly sprinkle flaky salt on top right after baking.
  • Store cookies in an airtight container at room temperature for up to 3 days.
  • Unbaked dough can be frozen and baked directly from frozen, adding 2–3 extra minutes to the baking time.

Nutrition

  • Serving Size: 1 cookie
  • Calories: 180
  • Sugar: 16g
  • Sodium: 50mg
  • Fat: 9g
  • Saturated Fat: 4g
  • Unsaturated Fat: 4g
  • Trans Fat: 0g
  • Carbohydrates: 23g
  • Fiber: 1g
  • Protein: 2g
  • Cholesterol: 20mg

Have you made this recipe? I'd love to see it!

Click here to Follow me on Pinterest

Baked Broccoli Cheese Balls

July 5, 2025 by Sue Leave a Comment

I stumbled across this delightful baked broccoli cheese balls recipe and I just had to share it—it’s cheesy, veggie-packed, and irresistibly crunchy.

Why You’ll Love This Recipe

I love how these snackable bites deliver both health and indulgence. They have a crisp, golden exterior and a gooey, cheesy center filled with broccoli. They’re baked, not fried, so I can feel good about serving them. Whether it’s for movie night, a party appetizer, or a kid-friendly snack, they always disappear fast. Baked Broccoli Cheese Balls

ingredients

(Here's a tip: Check out the full list of ingredients and measurements in the recipe card below.)
• 2 cups broccoli florets, finely chopped
• 1 cup breadcrumbs
• 1½ cups shredded cheddar cheese
• ⅓ cup Parmesan cheese, grated
• 1 large egg (or 2 for firmer texture)
• ½ teaspoon garlic powder (plus optional onion powder)
• Salt and pepper, to taste
• Cooking spray or a drizzle of olive oil

directions

  1. Preheat the oven to 400 °F (200 °C) and line a baking sheet with parchment paper; lightly grease it.

  2. Steam or blanch broccoli for about 2–5 minutes until tender‑crisp, then drain thoroughly and chop finely.

  3. In a large bowl, combine broccoli, breadcrumbs, cheddar, Parmesan, egg(s), garlic powder, (onion powder), salt, and pepper. Mix until it holds together.

  4. Scoop tablespoon-sized portions and roll into balls, placing them on the prepared sheet.

  5. Lightly mist or brush the tops with cooking spray or oil.

  6. Bake for 20–25 minutes, until golden and crisp. Optionally broil for 1–2 minutes to deepen the browning.

  7. Let cool for a few minutes, then serve warm—great with marinara, ranch, or a garlic‑lemon yogurt dip.

Servings and timing

This recipe makes about 24 balls, enough for 4–6 as appetizers or 2–3 hearty snacks. Prep time is around 10–15 minutes, with 20–25 minutes bake time (plus optional broiling). Total in about 30–40 minutes.

Variations

  • Swap cheddar with mozzarella, Gouda, Monterey Jack, or smoky cheeses.

  • Add finely chopped veggies like spinach, zucchini, carrots, or shallots/green onions.

  • Spice them up with red pepper flakes, smoked paprika, or a dash of cayenne.

  • Make gluten‑free by using almond flour or gluten‑free breadcrumbs.

  • For a vegan version, use a flax egg and dairy‑free cheeses.

storage/reheating

I store leftovers in an airtight container in the fridge for up to 3–4 days. For longer storage, I flash‑freeze them, then transfer to a freezer bag for up to 2–3 months. To reheat, I bake at 350 °F (175 °C) for 8–12 minutes or crisp them up in an air fryer. Microwaving works too, though they soften slightly.

FAQs

What if I only have frozen broccoli?

I always thaw and drain it completely before chopping—fresh gives better texture, but frozen works fine.

Can I prepare them ahead of time?

Absolutely. I form the balls up to 2 days ahead and refrigerate, or freeze uncooked balls for baking later.

Can I include other vegetables?

Yes! I’ve tried spinach, zucchini, carrots—it’s easy to customize with finely chopped veggies.

How do I make these vegan?

I substitute a flax egg and dairy‑free cheeses—works surprisingly well.

Which dips work best?

I enjoy them with marinara, ranch, spicy mayo, honey‑mustard, or a garlic‑lemon yogurt dip.

Conclusion

I adore these baked broccoli cheese balls for their balance of taste, texture, and simplicity. They’re a savvy way to sneak veggies into a fun, cheesy bite that everyone loves. With quick prep, flexible variations, and easy storage, they’ve become a staple in my kitchen. Give them a go—you’ll enjoy every satisfying crunch.

Print

clock clock iconcutlery cutlery iconflag flag iconfolder folder iconinstagram instagram iconpinterest pinterest iconfacebook facebook iconprint print iconsquares squares iconheart heart iconheart solid heart solid icon
Baked Broccoli Cheese Balls

5 Stars 4 Stars 3 Stars 2 Stars 1 Star No reviews
  • Author: Sue
  • Prep Time: 10–15 minutes
  • Cook Time: 20–25 minutes
  • Total Time: 30–40 minutes
  • Yield: 24 balls
  • Category: Appetizer, Snack
  • Method: Baked
  • Cuisine: American
  • Diet: Vegetarian
Print Recipe
Pin Recipe

Description

These baked broccoli cheese balls are a delightful, cheesy, and veggie-packed snack that’s crispy on the outside and gooey on the inside. Perfect for any occasion, they’re healthier than fried versions and easy to make.


Ingredients

  • 2 cups broccoli florets, finely chopped
  • 1 cup breadcrumbs
  • 1½ cups shredded cheddar cheese
  • ⅓ cup Parmesan cheese, grated
  • 1 large egg (or 2 for firmer texture)
  • ½ teaspoon garlic powder (plus optional onion powder)
  • Salt and pepper, to taste
  • Cooking spray or a drizzle of olive oil

Instructions

  1. Preheat the oven to 400°F (200°C) and line a baking sheet with parchment paper; lightly grease it.
  2. Steam or blanch broccoli for about 2–5 minutes until tender-crisp, then drain thoroughly and chop finely.
  3. In a large bowl, combine broccoli, breadcrumbs, cheddar, Parmesan, egg(s), garlic powder, (onion powder), salt, and pepper. Mix until it holds together.
  4. Scoop tablespoon-sized portions and roll into balls, placing them on the prepared sheet.
  5. Lightly mist or brush the tops with cooking spray or oil.
  6. Bake for 20–25 minutes, until golden and crisp. Optionally broil for 1–2 minutes to deepen the browning.
  7. Let cool for a few minutes, then serve warm—great with marinara, ranch, or a garlic-lemon yogurt dip.

Notes

  • This recipe makes about 24 balls, enough for 4–6 as appetizers or 2–3 hearty snacks.
  • For a vegan version, use a flax egg and dairy-free cheeses.
  • Make gluten-free by using almond flour or gluten-free breadcrumbs.
  • For additional flavor, experiment with spices like red pepper flakes or smoked paprika.
  • Store leftovers in an airtight container for up to 3–4 days, or freeze for longer storage.

Nutrition

  • Serving Size: 1 ball
  • Calories: 80
  • Sugar: 1g
  • Sodium: 150mg
  • Fat: 5g
  • Saturated Fat: 2g
  • Unsaturated Fat: 3g
  • Trans Fat: 0g
  • Carbohydrates: 7g
  • Fiber: 1g
  • Protein: 3g
  • Cholesterol: 30mg

Have you made this recipe? I'd love to see it!

Click here to Follow me on Pinterest

Swiss Mushroom Melt Delight

July 5, 2025 by Sue Leave a Comment

I created this Swiss Mushroom Melt Delight to combine savory mushrooms, melted Swiss cheese, and a toasted base—resulting in an irresistibly comforting and flavorful treat. Swiss Mushroom Melt Delight

Why You’ll Love This Recipe

I love how this recipe delivers a rich, savory experience with minimal effort. The earthy mushrooms pair wonderfully with gooey Swiss cheese, while a hint of garlic and herbs adds depth. It’s perfect for a cozy snack, light meal, or casual gathering.

Ingredients

(Here's a tip: Check out the full list of ingredients and measurements in the recipe card below.)

  • Cremini or button mushrooms, cleaned and sliced

  • Swiss cheese slices

  • Butter or olive oil for sautéing

  • Garlic, minced

  • Fresh thyme or parsley, chopped

  • Salt and pepper to taste

  • Bread or roll of choice, sliced

Directions

  1. I begin by heating butter or olive oil in a skillet over medium heat.

  2. I add minced garlic and sauté until fragrant, about 30 seconds.

  3. I toss in the sliced mushrooms, sprinkle with salt and pepper, and cook until they're softened and golden—about 5–7 minutes.

  4. I stir in fresh thyme or parsley, then remove the mushrooms from heat.

  5. Meanwhile, I preheat the broiler (or oven to 400 °F/200 °C).

  6. I place bread slices on a baking sheet, top each with sautéed mushrooms, and layer Swiss cheese over the mushrooms.

  7. I broil (or bake) until the cheese is melted and bubbly, roughly 2–4 minutes under broiler or 5–7 minutes in oven.

  8. I serve immediately while hot and melty.

Servings and timing

This recipe makes 4 open-faced melts and takes about 25 minutes total:

  • Prep: 10 minutes

  • Cook: 15 minutes

Variations

  • I swap Swiss cheese for Gruyère or provolone for a different flavor profile.

  • I add caramelized onions or a drizzle of balsamic glaze for sweetness.

  • I toss in cooked spinach or arugula for a fresh, green twist.

  • I use ciabatta, sourdough, or rye bread for different textures and flavors.

Storage/reheating

I store leftovers in an airtight container in the fridge for up to 2 days. To reheat, I place the melts on a baking sheet and warm under broiler or in a 350 °F (175 °C) oven until cheese is bubbly—usually 5–7 minutes. I avoid microwaving, as it can make the bread soggy.

FAQs

What mushrooms work best for this melt?

I find cremini or button mushrooms excellent, but you can absolutely use shiitake or portobello—they offer a deeper, more robust flavor.

Can I prep the mushrooms ahead of time?

Yes, I sauté the mushrooms in advance, cool them, and store in the fridge for up to 2 days. Then I assemble and bake when ready.

Is this melt suitable for vegetarians?

Definitely—it’s vegetarian as-is. To make it vegan, I substitute Swiss cheese with a plant-based meltable cheese and use vegan butter or oil.

How do I make the bread extra crispy?

I lightly toast the bread before assembling or brush it with a bit of olive oil, then bake for 2–3 minutes before topping with mushrooms and cheese.

Can this melt be turned into a full meal?

Yes. I serve it alongside a mixed green salad or light soup, or I top a large piece of bread and enjoy it as a standalone lunch or dinner.

Conclusion

I love how effortlessly the Swiss Mushroom Melt Delight transforms simple ingredients into a satisfying, flavorful dish. Whether I serve it as a cozy snack or an entrée with a fresh salad, it never fails to impress.

Print

clock clock iconcutlery cutlery iconflag flag iconfolder folder iconinstagram instagram iconpinterest pinterest iconfacebook facebook iconprint print iconsquares squares iconheart heart iconheart solid heart solid icon
Swiss Mushroom Melt Delight

Swiss Mushroom Melt Delight

5 Stars 4 Stars 3 Stars 2 Stars 1 Star No reviews
  • Author: Sue
  • Prep Time: 10 minutes
  • Cook Time: 15 minutes
  • Total Time: 25 minutes
  • Yield: 4 open-faced melts
  • Category: Snack, Light Meal
  • Method: Sautéing, Broiling or Baking
  • Cuisine: American
  • Diet: Vegetarian
Print Recipe
Pin Recipe

Description

A comforting and flavorful treat with sautéed mushrooms, melted Swiss cheese, and toasted bread, creating a perfect savory snack or meal.


Ingredients

  • Cremini or button mushrooms, cleaned and sliced
  • Swiss cheese slices
  • Butter or olive oil for sautéing
  • Garlic, minced
  • Fresh thyme or parsley, chopped
  • Salt and pepper to taste
  • Bread or roll of choice, sliced

Instructions

  1. Heat butter or olive oil in a skillet over medium heat.
  2. Add minced garlic and sauté until fragrant, about 30 seconds.
  3. Toss in the sliced mushrooms, sprinkle with salt and pepper, and cook until softened and golden, about 5–7 minutes.
  4. Stir in fresh thyme or parsley, then remove the mushrooms from heat.
  5. Preheat the broiler or oven to 400°F (200°C).
  6. Place bread slices on a baking sheet, top with sautéed mushrooms, and layer Swiss cheese over the mushrooms.
  7. Broil or bake until the cheese is melted and bubbly, 2–4 minutes under the broiler or 5–7 minutes in the oven.
  8. Serve immediately while hot and melty.

Notes

  • For a different flavor, swap Swiss cheese for Gruyère or provolone.
  • Try adding caramelized onions or balsamic glaze for sweetness.
  • Fresh spinach or arugula can be added for a green twist.
  • Use ciabatta, sourdough, or rye bread for varied textures and flavors.
  • Store leftovers in an airtight container in the fridge for up to 2 days.
  • Reheat by placing melts under the broiler or in a 350°F (175°C) oven for 5–7 minutes.

Nutrition

  • Serving Size: 1 melt
  • Calories: 300
  • Sugar: 3g
  • Sodium: 450mg
  • Fat: 18g
  • Saturated Fat: 8g
  • Unsaturated Fat: 9g
  • Trans Fat: 0g
  • Carbohydrates: 25g
  • Fiber: 2g
  • Protein: 12g
  • Cholesterol: 30mg

Have you made this recipe? I'd love to see it!

Click here to Follow me on Pinterest

Spicy Shrimp Sushi Stacks

July 5, 2025 by Sue Leave a Comment

I created this dish to capture all the flavors of sushi in a fun, deconstructed stack—with creamy avocado, tangy vinegar rice, crisp cucumber, and spicy mayo shrimp layered together for a colorful, restaurant-style bite at home. Spicy Shrimp Sushi Stacks

Why You’ll Love This Recipe

I love how easy these stacks are compared to rolling sushi—no bamboo mats or precision slicing. Every bite hits all the flavor notes: the savory shrimp, creamy avocado, fresh cucumber, and slightly sweet-tangy rice. Plus, the presentation always impresses guests—even when I make it on a busy weeknight.

ingredients

(Here's a tip: Check out the full list of ingredients and measurements in the recipe card below.)

  • 1 cup uncooked short-grain sushi rice

  • 2 cups water

  • 2 tablespoon rice vinegar

  • 1 tablespoon sugar

  • 1 teaspoon salt

  • 1 cup cucumber, diced

  • 1 cup avocado, mashed

  • Juice of ½ lime

  • Salt to taste

  • ½ lb cooked shrimp, diced

  • 3 tablespoon mayonnaise

  • 1 tablespoon sriracha (adjust to taste)

  • 4 teaspoon furikake or sesame seeds

directions

  1. Rinse the rice until the water runs clear. Cook with water; once done, fold in vinegar, sugar, and salt while still warm. Let cool slightly.

  2. Mix diced cucumber with mashed avocado, lime juice, and salt.

  3. Toss the shrimp with mayo and sriracha until evenly coated.

  4. Lightly oil a 1-cup measuring cup or ring mold. Press ¼ cup rice into the bottom.

  5. Add a layer of the avocado–cucumber mixture, then the shrimp. Top with more rice if desired.

  6. Flip onto a plate, remove the mold, and sprinkle with furikake or sesame seeds. Repeat to make 3–4 stacks.

Servings and timing

This recipe makes 4 stacks. Prep time is about 10 minutes, cook time is 20 minutes, and total time is 30 minutes.

Variations

  • I like to swap the shrimp for spicy tuna, salmon, or crab salad.

  • Sometimes I add a mango or radish layer for extra brightness.

  • Brown sushi rice is a great alternative for extra nutrition.

  • I drizzle spicy mayo or eel sauce on top when I want a flavor boost.

storage/reheating

I store the components separately: rice and shrimp keep well in airtight containers in the fridge for up to 2 days. For the avocado mixture, I press plastic wrap directly on the surface to prevent browning. When ready to eat, I reassemble and serve chilled or at room temperature.

FAQs

Can I use raw shrimp?

I usually stick with cooked shrimp because it's simple, but I can poach raw shrimp in boiling salted water for 2–3 minutes until they turn pink, then chill and dice them.

Will brown rice work?

Absolutely. Brown sushi rice works well, though it may be a bit firmer. I prefer short-grain brown rice for the best texture.

How do I prevent the avocado from browning?

I mix in lime juice and press plastic wrap directly onto the surface of the mash before storing—it keeps it nice and green.

Can I make this ahead for a party?

Definitely. I prepare all the components in advance and assemble the stacks just before serving for the best taste and texture.

What if I don’t have furikake?

I just sprinkle sesame seeds or chopped nori instead—they give a similar flavor and crunch.

Conclusion

Building these Spicy Shrimp Sushi Stacks is one of my favorite ways to bring sushi vibes home without the fuss. I love how they look and taste—and the layering trick never fails to impress. Whether it’s a casual dinner or a way to wow guests, these stacks hit all the right notes.

Print

clock clock iconcutlery cutlery iconflag flag iconfolder folder iconinstagram instagram iconpinterest pinterest iconfacebook facebook iconprint print iconsquares squares iconheart heart iconheart solid heart solid icon
Spicy Shrimp Sushi Stacks

Spicy Shrimp Sushi Stacks

5 Stars 4 Stars 3 Stars 2 Stars 1 Star No reviews
  • Author: Sue
  • Prep Time: 10 minutes
  • Cook Time: 20 minutes
  • Total Time: 30 minutes
  • Yield: 4 stacks
  • Category: Appetizer, Main Course
  • Method: Stovetop, Assembly
  • Cuisine: Japanese
  • Diet: Low Calorie
Print Recipe
Pin Recipe

Description

A fun, deconstructed sushi dish with layers of creamy avocado, tangy vinegar rice, crisp cucumber, and spicy mayo shrimp.


Ingredients

  • 1 cup uncooked short-grain sushi rice
  • 2 cups water
  • 2 Tbsp rice vinegar
  • 1 Tbsp sugar
  • 1 tsp salt
  • 1 cup cucumber, diced
  • 1 cup avocado, mashed
  • Juice of ½ lime
  • Salt to taste
  • ½ lb cooked shrimp, diced
  • 3 Tbsp mayonnaise
  • 1 Tbsp sriracha (adjust to taste)
  • 4 tsp furikake or sesame seeds

Instructions

  1. Rinse rice until water is clear. Cook with water; once done, fold in vinegar, sugar, and salt while still warm. Let cool slightly.
  2. Mix diced cucumber with mashed avocado, lime juice, and salt.
  3. Toss shrimp with mayo and sriracha until evenly coated.
  4. Lightly oil a 1-cup measuring cup or ring mold. Press ¼ cup rice into the bottom.
  5. Add a layer of avocado–cucumber mixture, then shrimp. Top with more rice if desired.
  6. Flip onto a plate, remove mold, and sprinkle with furikake or sesame seeds. Repeat to make 3–4 stacks.

Notes

  • Swap shrimp for spicy tuna, salmon, or crab salad.
  • Add mango or radish layer.
  • Use brown sushi rice for extra nutrition.
  • Drizzle spicy mayo or eel sauce on top for more flavor.
  • Store components separately for up to 2 days.
  • Press avocado mixture with plastic wrap to prevent browning.

Nutrition

  • Serving Size: 1 stack
  • Calories: 300
  • Sugar: 3g
  • Sodium: 700mg
  • Fat: 16g
  • Saturated Fat: 3g
  • Unsaturated Fat: 12g
  • Trans Fat: 0g
  • Carbohydrates: 30g
  • Fiber: 4g
  • Protein: 15g
  • Cholesterol: 120mg

Have you made this recipe? I'd love to see it!

Click here to Follow me on Pinterest

Mandarin Orange Salad

July 5, 2025 by Sue Leave a Comment

I love the bright, refreshing taste of this Mandarin Orange Salad. It combines sweet citrus, crisp greens, crunchy almonds, and a light citrus-ginger dressing for a perfect balance of flavors and textures. Mandarin Orange Salad

Why You’ll Love This Recipe

I appreciate how this salad is both visually stunning and incredibly easy to make. It’s vibrant enough to serve at a special gathering yet simple enough for a weekday meal. The naturally sweet mandarin oranges pair beautifully with tangy dressing, while toasted almonds add satisfying crunch. I can’t resist how fresh and lively it feels with every bite.

Ingredients

(Herе's a tip: Check out the full list of ingredients and measurements in the recipe card below.)

  • Mixed salad greens (such as romaine, spinach, or spring mix)

  • Canned or fresh mandarin orange segments

  • Sliced red onion or green onion

  • Sliced cucumber or shaved fennel (optional)

  • Toasted slivered or sliced almonds

  • Crumbled feta or goat cheese (optional)

  • Fresh herbs, like mint or basil (optional)

For the citrus-ginger dressing:

  • Mandarin orange juice (fresh or from the can)

  • Rice vinegar or white wine vinegar

  • Olive oil

  • Fresh grated ginger

  • Honey or agave syrup

  • Salt and pepper

Directions

  1. I start by preparing the dressing: whisk together mandarin orange juice, vinegar, olive oil, grated ginger, and honey in a small bowl until emulsified. I season it with salt and pepper to taste.

  2. I rinse and spin dry the salad greens, then gently place them in a large bowl.

  3. I add mandarin segments, sliced onion, optional cucumber or fennel, toasted almonds, and cheese if I’m using it.

  4. I drizzle the dressing over the salad just before serving, then toss gently to coat everything evenly.

  5. I taste and adjust seasoning—sometimes I add a bit more honey or extra vinegar depending on how bold I want the flavor.

Servings and Timing

This salad serves about 4 people as a side dish.

  • Preparation time: 10 minutes

  • Assembly time: 5 minutes

  • Total time: 15 minutes

Variations

  • Add protein: I sometimes include grilled chicken, shrimp, or chickpeas to make it a full meal.

  • Switch up the nuts: Pecans, walnuts, or pistachios work beautifully instead of almonds.

  • Alternate fruits: Try fresh orange segments, grapefruit, or even berries in place of mandarin oranges.

  • Cheese options: I love the tang of feta, but goat cheese or shaved parmesan are delicious too.

Storage/Reheating

I store leftover salad separately from the dressing in an airtight container in the refrigerator for up to 2 days. When I'm ready to enjoy it, I let it sit at room temperature briefly, then toss with fresh dressing. I don't recommend reheating—this salad is best served crisp and cold.

FAQs

How do I keep mandarin oranges from making the greens soggy?

I drain any canned segments well and pat fresh ones dry before adding them. I also wait to dress the salad until right before serving to prevent sogginess.

Can I make this salad ahead of time?

I often prep the greens, fruits, and nuts the day before, keeping them separate in containers. I mix everything and add dressing just before serving to preserve freshness.

What can I use instead of mandarin oranges?

I enjoy substituting tangerines, fresh orange slices, grapefruit, or even berries depending on what I have on hand.

Is there a dairy-free version?

Yes, I simply skip the cheese and optionally add more nuts or seeds (like pumpkin seeds) to boost flavor and crunch.

Can I make a creamier dressing?

Absolutely—I mix a bit of Greek yogurt or mayo into the citrus-ginger dressing for a creamier texture that still tastes bright.

Conclusion

This Mandarin Orange Salad is a go-to in my kitchen whenever I want something quick, fresh, and lively. The interplay of sweet citrus, crisp veggies, and zesty dressing never disappoints. I hope you enjoy making—and eating—it as much as I do!

Print

clock clock iconcutlery cutlery iconflag flag iconfolder folder iconinstagram instagram iconpinterest pinterest iconfacebook facebook iconprint print iconsquares squares iconheart heart iconheart solid heart solid icon
Mandarin Orange Salad

Mandarin Orange Salad

5 Stars 4 Stars 3 Stars 2 Stars 1 Star No reviews
  • Author: Sue
  • Prep Time: 10 minutes
  • Cook Time: 0 minutes
  • Total Time: 15 minutes
  • Yield: 4 servings
  • Category: Salad
  • Method: No-Cook
  • Cuisine: American
  • Diet: Vegetarian
Print Recipe
Pin Recipe

Description

A bright, refreshing Mandarin Orange Salad featuring sweet citrus, crisp greens, crunchy almonds, and a light citrus-ginger dressing that is perfect for any occasion.


Ingredients

  • 4 cups mixed salad greens (romaine, spinach, or spring mix)
  • 1 cup canned or fresh mandarin orange segments
  • ¼ cup sliced red onion or green onion
  • ½ cup sliced cucumber or shaved fennel (optional)
  • ¼ cup toasted slivered or sliced almonds
  • ¼ cup crumbled feta or goat cheese (optional)
  • 2 tbsp fresh herbs like mint or basil (optional)
  • ¼ cup mandarin orange juice (fresh or from the can)
  • 2 tbsp rice vinegar or white wine vinegar
  • 2 tbsp olive oil
  • 1 tsp fresh grated ginger
  • 1 tbsp honey or agave syrup
  • Salt and pepper to taste

Instructions

  1. Whisk together mandarin orange juice, vinegar, olive oil, grated ginger, and honey until emulsified. Season with salt and pepper.
  2. Rinse and dry salad greens and place in a large bowl.
  3. Add mandarin segments, onion, optional cucumber or fennel, toasted almonds, and cheese if using.
  4. Drizzle dressing over the salad just before serving and toss gently to combine.
  5. Taste and adjust seasoning with more honey or vinegar as desired.

Notes

  • Drain and pat dry mandarin oranges to prevent soggy greens.
  • Prepare ingredients ahead and store separately for best freshness.
  • Substitute with tangerines, grapefruit, or berries if desired.
  • Skip cheese and add seeds for a dairy-free version.
  • Add Greek yogurt or mayo to the dressing for a creamier option.

Nutrition

  • Serving Size: 1 serving
  • Calories: 180
  • Sugar: 9g
  • Sodium: 120mg
  • Fat: 12g
  • Saturated Fat: 3g
  • Unsaturated Fat: 8g
  • Trans Fat: 0g
  • Carbohydrates: 15g
  • Fiber: 3g
  • Protein: 4g
  • Cholesterol: 10mg

Have you made this recipe? I'd love to see it!

Click here to Follow me on Pinterest

Cajun Garlic Butter Chicken Penne in Creamy Parmesan Sauce

July 5, 2025 by Sue Leave a Comment

A cozy, flavorful pasta dish where tender, Cajun-seasoned chicken meets silky garlic-butter cream sauce with Parmesan, all enveloping perfectly cooked penne. Cajun Garlic Butter Chicken Penne in Creamy Parmesan Sauce

Why You’ll Love This Recipe

I love how this comes together in about 30 minutes, perfect for weeknights. The Cajun seasoning adds a subtle kick without overwhelming, and the garlic-butter cream sauce feels indulgent yet balanced. Every forkful has juicy chicken, creamy sauce, and satisfying pasta—just the kind of comfort I crave when cooking after a long day.

ingredients

(Here’s a tip: Check out the full list of ingredients and measurements in the recipe card below.)

  • 2 large boneless, skinless chicken breasts, cut into bites

  • 2 teaspoon Cajun seasoning, divided

  • Salt and pepper, to taste

  • 2 tablespoon olive oil

  • 2 tablespoon butter, divided

  • 4 cloves garlic, minced

  • 10 oz penne pasta (about 3 cups uncooked)

  • 2 cups heavy cream

  • 1 cup grated Parmesan cheese

  • ½ cup reserved pasta water (optional, for thinning sauce)

  • Fresh parsley or green onions, for garnish (optional)

directions

  1. Cook penne in salted water until al dente. Reserve ½ cup of the pasta water, then drain.

  2. Toss chicken pieces with 1 teaspoon Cajun seasoning, salt, and pepper. In a large skillet, heat olive oil and 1 tablespoon butter over medium-high heat. Add chicken and cook for 5–6 minutes until browned and fully cooked. Add garlic and sauté for 1 minute. Transfer chicken to a plate.

  3. In the same skillet, melt remaining butter. Stir in heavy cream, Parmesan cheese, and the remaining Cajun seasoning. Let simmer for 3–4 minutes until slightly thickened. Season with salt and pepper.

  4. Add the cooked pasta and chicken back into the skillet. Toss everything together until evenly coated. Add reserved pasta water as needed to loosen the sauce.

  5. Garnish with parsley or green onions if desired and serve hot.

Servings and timing

  • Servings: 4

  • Prep time: 10 minutes

  • Cook time: 20 minutes

  • Total time: 30 minutes

Variations

  • I sometimes use chicken thighs instead of breasts for a juicier texture.

  • Rigatoni or fettuccine can easily replace penne.

  • For extra nutrients and flavor, I like adding spinach, mushrooms, or bell peppers.

  • I adjust the Cajun seasoning for more or less spice depending on who’s eating.

storage/reheating

  • I store leftovers in an airtight container in the fridge for up to 3 days.

  • When reheating, I add a splash of cream or pasta water to bring the sauce back to life.

  • This dish also freezes well in portions for up to 2 months. I thaw it overnight in the fridge before reheating.

FAQs

1. Can I use chicken thighs instead of breasts?

Yes, I’ve tried this and it results in even more tender chicken with a slightly richer flavor.

2. How do I make this dish spicier or milder?

I simply adjust the amount of Cajun seasoning. For more heat, I add a little cayenne or chili flakes too.

3. Will the sauce thicken too much after cooling?

Yes, it does. I just stir in some cream or a little water while reheating to fix that.

4. Can I use a lighter cream or milk?

I’ve tried using half-and-half, and while it’s not as rich, it still works well. A little cream cheese can help boost the texture.

5. Can I add vegetables to this?

Absolutely. I like to toss in some spinach or mushrooms when I want to make it a more complete meal.

Conclusion

This Cajun Garlic Butter Chicken Penne in Creamy Parmesan Sauce is everything I look for in a comforting meal—rich, creamy, slightly spicy, and full of satisfying texture. It’s quick to whip up, easy to customize, and always a crowd-pleaser in my kitchen.

Print

clock clock iconcutlery cutlery iconflag flag iconfolder folder iconinstagram instagram iconpinterest pinterest iconfacebook facebook iconprint print iconsquares squares iconheart heart iconheart solid heart solid icon
Cajun Garlic Butter Chicken Penne in Creamy Parmesan Sauce

Cajun Garlic Butter Chicken Penne in Creamy Parmesan Sauce

5 Stars 4 Stars 3 Stars 2 Stars 1 Star No reviews
  • Author: Sue
  • Prep Time: 10 minutes
  • Cook Time: 20 minutes
  • Total Time: 30 minutes
  • Yield: 4 servings
  • Category: Dinner
  • Method: Stovetop
  • Cuisine: American
  • Diet: Halal
Print Recipe
Pin Recipe

Description

A cozy and flavorful pasta dish featuring Cajun-seasoned chicken, garlic-butter cream sauce, and Parmesan, tossed with tender penne for a satisfying and quick comfort meal.


Ingredients

  • 2 large boneless, skinless chicken breasts, cut into bites
  • 2 tsp Cajun seasoning, divided
  • Salt and pepper, to taste
  • 2 Tbsp olive oil
  • 2 Tbsp butter, divided
  • 4 cloves garlic, minced
  • 10 oz penne pasta (about 3 cups uncooked)
  • 2 cups heavy cream
  • 1 cup grated Parmesan cheese
  • ½ cup reserved pasta water (optional, for thinning sauce)
  • Fresh parsley or green onions, for garnish (optional)

Instructions

  1. Boil penne in salted water until al dente. Reserve ½ cup pasta water, then drain.
  2. Toss chicken with 1 teaspoon Cajun seasoning, salt, and pepper. Heat oil and 1 tablespoon butter in a skillet over medium-high heat. Sear chicken for about 5–6 minutes until browned and cooked. Add garlic and sauté for 1 minute. Remove chicken to a plate.
  3. In the same skillet, melt remaining butter. Pour in cream, stir in Parmesan and remaining Cajun seasoning. Simmer 3–4 minutes until slightly thickened. Season with salt and pepper.
  4. Add pasta and chicken into the sauce, tossing to coat. If sauce is too thick, stir in reserved pasta water. Let simmer 2 minutes for flavors to meld.
  5. Garnish with parsley or green onions if desired, and serve hot.

Notes

  • Use chicken thighs instead of breasts for juicier meat.
  • Try other pasta shapes like rigatoni or fettuccine.
  • Add vegetables like spinach, bell peppers, or mushrooms for extra flavor and texture.
  • Double the Cajun seasoning for a spicier dish or reduce for a milder flavor.
  • Store leftovers in the fridge for up to 3 days or freeze up to 2 months.

Nutrition

  • Serving Size: 1 serving
  • Calories: 670
  • Sugar: 2g
  • Sodium: 560mg
  • Fat: 42g
  • Saturated Fat: 23g
  • Unsaturated Fat: 17g
  • Trans Fat: 0.5g
  • Carbohydrates: 42g
  • Fiber: 2g
  • Protein: 35g
  • Cholesterol: 155mg

Have you made this recipe? I'd love to see it!

Click here to Follow me on Pinterest

Garlic Chili Sauce – Restaurant Style!

July 5, 2025 by Sue Leave a Comment

I’m excited to share my take on a bold, spicy, and flavorful Garlic Chili Sauce that tastes like it was whipped up in a restaurant kitchen. With the perfect balance of garlic punch, heat from chili, and a hint of sweetness, it’s a versatile condiment that elevates so many dishes. Garlic Chili Sauce – Restaurant Style!

Why You’ll Love This Recipe

I love this sauce because it’s incredibly easy to make yet delivers big on flavor. It strikes a beautiful balance between heat, garlic, and sweetness. It enhances grilled meats, roasted vegetables, noodles, or even works wonders stirred into soups and dips. Plus, it keeps well, so I can make a batch ahead and enjoy it all week!

Ingredients

(Here's a tip: Check out the full list of ingredients and measurements in the recipe card below.)

  • garlic, finely minced

  • red chili flakes or fresh red chilies, finely chopped

  • neutral oil (like vegetable or canola)

  • light soy sauce

  • rice vinegar

  • sugar (white or brown)

  • water

  • cornstarch (for thickening)

  • sesame oil

Directions

  1. Infuse the oil: I heat the neutral oil in a saucepan over medium heat. Once warm, I add the garlic and chili flakes (or chopped chilies), stirring gently until the garlic is fragrant but not browned.

  2. Build the sauce: I whisk in soy sauce, rice vinegar, sugar, and a splash of water, bringing the mixture to a simmer so the sugar dissolves completely.

  3. Thicken: I mix cornstarch with a little extra water to create a slurry, then stir it into the saucepan. As it simmers, the sauce thickens and takes on a glossy sheen.

  4. Finish: I remove the sauce from heat and stir in sesame oil for extra depth and aroma.

  5. Cool & store: I let it cool slightly before transferring it to sterilized jars for fridge storage.

Servings and timing

This recipe yields about 1 cup of sauce, enough to serve 4–6 as a condiment. Prep time is around 10 minutes, and cooking takes just another 10, so you’re looking at roughly 20 minutes total.

Variations

  • Extra spicy? I double the amount of chili flakes or use a hotter chili.

  • Less kick? I substitute part of the chili with bell pepper for milder flavor.

  • Smoky twist: I add a pinch of smoked paprika or use chipotle chili flakes.

  • Sweet-savory balance: I swap sugar for honey or maple syrup to change the sweetness profile.

Storage/Reheating

I store this sauce in an airtight jar in the refrigerator, where it stays fresh for about 2–3 weeks. No need to reheat—it's ready straight from the fridge. But if I want it warm, I give it a quick microwave zap or simmer it gently on the stove before serving.

FAQs

What kind of chilies work best?

I find that a mix of red chili flakes gives heat without overpowering, but fresh red chilies make the sauce vibrant. I choose based on my mood—both work beautifully.

Can I make this sauce oil-free?

Yes! I whisk the other ingredients with a little water and simmer until thickened. The flavor will still be tasty, though it lacks the richness oil provides.

Is this sauce gluten-free?

To make it gluten-free, I swap soy sauce for tamari. I always check labels in case of cross-contamination.

Why use cornstarch?

Cornstarch gives the sauce a glossy, slightly thick texture that clings perfectly to foods. If I’m avoiding starch, I skip it—just expect a thinner sauce.

Can I freeze it?

Absolutely. I freeze it in small portions (ice cube trays work well), then thaw as needed. It stays good for a couple of months in the freezer.

Conclusion

I absolutely love this restaurant-style Garlic Chili Sauce for its bold flavors and versatility. It’s perfect for spicing up everything from noodles to grilled proteins, and it’s easy to adjust heat or sweetness to match what I’m in the mood for. With just 20 minutes of hands-on time, I end up with a sauce that feels gourmet yet is simple enough for weeknights. I can’t wait for it to become your go-to fiery condiment!

Print

clock clock iconcutlery cutlery iconflag flag iconfolder folder iconinstagram instagram iconpinterest pinterest iconfacebook facebook iconprint print iconsquares squares iconheart heart iconheart solid heart solid icon
Garlic Chili Sauce – Restaurant Style!

Garlic Chili Sauce – Restaurant Style!

5 Stars 4 Stars 3 Stars 2 Stars 1 Star No reviews
  • Author: Sue
  • Prep Time: 10 minutes
  • Cook Time: 10 minutes
  • Total Time: 20 minutes
  • Yield: 1 cup (serves 4–6 as condiment)
  • Category: Sauce
  • Method: Stovetop
  • Cuisine: Asian
  • Diet: Vegan
Print Recipe
Pin Recipe

Description

A bold, spicy, and flavorful Garlic Chili Sauce that tastes like it's from a restaurant kitchen. Perfectly balanced with garlic, heat, and a touch of sweetness, this versatile condiment enhances everything from noodles to grilled meats.


Ingredients

  • 4-5 cloves garlic, finely minced
  • 2 tbsp red chili flakes or 3 fresh red chilies, finely chopped
  • ¼ cup neutral oil (vegetable or canola)
  • 2 tbsp light soy sauce
  • 1 tbsp rice vinegar
  • 1 tbsp sugar (white or brown)
  • ¼ cup water
  • 1 tsp cornstarch
  • 1 tsp sesame oil

Instructions

  1. Heat neutral oil in a saucepan over medium heat.
  2. Add garlic and chili flakes (or chopped chilies) and stir gently until fragrant but not browned.
  3. Whisk in soy sauce, rice vinegar, sugar, and water, and bring to a simmer until sugar dissolves.
  4. Mix cornstarch with a little extra water to create a slurry, then stir into the saucepan.
  5. Simmer until the sauce thickens and turns glossy.
  6. Remove from heat and stir in sesame oil.
  7. Let cool slightly and transfer to sterilized jars for storage.

Notes

  • Adjust chili quantity for more or less heat.
  • Use smoked paprika for a smoky flavor.
  • Swap sugar with honey or maple syrup for a different sweetness profile.
  • Store in the fridge for 2–3 weeks or freeze in portions.

Nutrition

  • Serving Size: 2 tbsp
  • Calories: 60
  • Sugar: 2g
  • Sodium: 250mg
  • Fat: 5g
  • Saturated Fat: 0.5g
  • Unsaturated Fat: 4g
  • Trans Fat: 0g
  • Carbohydrates: 4g
  • Fiber: 0.5g
  • Protein: 0.5g
  • Cholesterol: 0mg

Have you made this recipe? I'd love to see it!

Click here to Follow me on Pinterest

Cheesecake Deviled Strawberries

July 5, 2025 by Sue Leave a Comment

A delightful twist on classic dessert treats, cheesecake deviled strawberries combine the juicy sweetness of fresh berries with a creamy, no-bake cheesecake filling, topped off with a hint of graham cracker crunch. They’re easy to make, visually charming, and perfect for any occasion. Cheesecake Deviled Strawberries

Why You’ll Love This Recipe

I love that these strawberries feel like a fancy dessert, yet require no baking. The creamy cheesecake filling is light and fluffy, thanks to whipped cream folded in, and complements the natural sweetness of ripe strawberries beautifully. Plus, they’re fun to assemble—like edible art!

Ingredients

(Here's a tip: Check out the full list of ingredients and measurements in the recipe card below.)

  • fresh large strawberries

  • cream cheese, softened

  • powdered (confectioners’) sugar

  • vanilla extract

  • heavy whipping cream

  • graham cracker crumbs

Directions

  1. Wash and thoroughly dry the strawberries. Slice each one in half lengthwise, leaving the stem intact, then trim a small sliver from the rounded base so each half sits flat.

  2. Use a small spoon, melon baller, or paring knife to scoop out a shallow well in each strawberry half.

  3. In a bowl, whip the heavy cream until stiff peaks form. Transfer it to a separate bowl.

  4. Beat the softened cream cheese with powdered sugar and vanilla until creamy and smooth.

  5. Gently fold the whipped cream into the cream cheese mixture until no streaks remain.

  6. Fill a piping bag (or Ziploc bag with a corner snipped off) with the cheesecake mixture. Pipe or spoon the filling into each strawberry well, mounding slightly.

  7. Sprinkle the tops with graham cracker crumbs.

  8. Serve immediately or chill for up to 2 hours before serving.

Servings and timing

  • Servings: Makes about 18–24 filled strawberry halves (serves 6–12, depending on portion size)

  • Prep time: 20–30 minutes

  • Chill time (optional): Up to 2 hours (longer can make berries watery)

Variations

  • Add a teaspoon of lemon or orange zest to the filling for a citrusy zing.

  • Fold in mini chocolate chips or place a drizzle of melted chocolate on top.

  • Swap graham crackers for crushed cookies, toasted coconut, or chopped nuts.

  • Make a "wedding cake" version by adding almond extract to the filling.

Storage/reheating

I keep the filling and berries stored separately: the cheesecake mixture stays fresh in an airtight container in the fridge for up to 3 days. The strawberry halves are best kept unfilled and assembled just before serving. Once filled, they’re at their best within a few hours and should be eaten within 1–2 days; otherwise, the berries can become soggy.

FAQs

1. Can I make these ahead of time?

I usually prepare the filling a day or two ahead and refrigerate it. I slice and hollow strawberries a few hours before serving, then fill just before guests arrive to prevent soggy berries.

2. Can I use frozen strawberries?

I don’t recommend frozen berries—they become too soft and lose juice once thawed. For best results, use fresh, firm, ripe strawberries.

3. How long will leftovers keep?

Filled strawberries are best consumed within 24–48 hours. After that, they release juice and lose texture. The filling alone can last 3 days in the fridge.

4. Can I make this dairy‑free?

You can try using dairy‑free cream cheese and coconut cream whipped to stiff peaks, but texture and flavor will differ from the classic version.

5. My strawberries are small—will this still work?

Small berries can be tricky for hollowing and filling. I recommend medium to large berries so they hold more filling and sit flat on a tray.

Conclusion

These cheesecake deviled strawberries are my go-to for quick yet elegant desserts. They combine fresh fruit, creamy filling, and a delightful crunch—all without turning on the oven. Whether I’m hosting a party or just treating myself, they’re always a hit. Enjoy creating these bite‑sized delights!

Print

clock clock iconcutlery cutlery iconflag flag iconfolder folder iconinstagram instagram iconpinterest pinterest iconfacebook facebook iconprint print iconsquares squares iconheart heart iconheart solid heart solid icon
Cheesecake Deviled Strawberries

Cheesecake Deviled Strawberries

5 Stars 4 Stars 3 Stars 2 Stars 1 Star No reviews
  • Author: Sue
  • Prep Time: 25 minutes
  • Cook Time: 0 minutes
  • Total Time: 25 minutes
  • Yield: 6–12 servings
  • Category: Dessert
  • Method: No-Bake
  • Cuisine: American
  • Diet: Vegetarian
Print Recipe
Pin Recipe

Description

Cheesecake deviled strawberries are a no-bake dessert featuring halved strawberries filled with a fluffy cream cheese and whipped cream mixture, topped with graham cracker crumbs. They're elegant, simple, and delicious.


Ingredients

  • 18–24 fresh large strawberries
  • 8 oz cream cheese, softened
  • ⅓ cup powdered (confectioners’) sugar
  • 1 tsp vanilla extract
  • ½ cup heavy whipping cream
  • 2 tbsp graham cracker crumbs

Instructions

  1. Wash and dry the strawberries. Slice each in half lengthwise, keeping the stem on, and trim a small sliver from the base so they sit flat.
  2. Use a small spoon, melon baller, or knife to create a shallow well in each strawberry half.
  3. Whip the heavy cream until stiff peaks form and set aside.
  4. In a separate bowl, beat cream cheese, powdered sugar, and vanilla until smooth.
  5. Fold the whipped cream into the cream cheese mixture until combined.
  6. Transfer the filling to a piping bag or Ziploc with a snipped corner and pipe into each strawberry well.
  7. Sprinkle graham cracker crumbs over the tops.
  8. Serve immediately or chill for up to 2 hours.

Notes

  • Best served fresh or within a few hours of assembling.
  • Store the filling and berries separately for longer freshness.
  • Can be customized with citrus zest, chocolate, or different toppings.

Nutrition

  • Serving Size: 3–4 strawberry halves
  • Calories: 120
  • Sugar: 10g
  • Sodium: 60mg
  • Fat: 8g
  • Saturated Fat: 5g
  • Unsaturated Fat: 2g
  • Trans Fat: 0g
  • Carbohydrates: 12g
  • Fiber: 1g
  • Protein: 2g
  • Cholesterol: 25mg

Have you made this recipe? I'd love to see it!

Click here to Follow me on Pinterest

Crab and Shrimp Stuffed Salmon

July 5, 2025 by Sue Leave a Comment

A deliciously elegant dinner that's surprisingly simple to prepare, combining tender salmon with a creamy, flavorful seafood stuffing. It’s perfect for both weeknight meals and special occasions. Crab and Shrimp Stuffed Salmon

Why You’ll Love This Recipe

I love how this recipe brings together the rich flavors of crab and shrimp in every bite. The creamy filling contrasts beautifully with the flaky salmon, and the Old Bay seasoning adds that classic seafood touch. Plus, baking everything together means less fuss and cleanup.

ingredients

(Here’s a tip: Check out the full list of ingredients and measurements in the recipe card below.)

  • 4 salmon fillets (skin-on or skinless, about 6 oz each)

  • 1 teaspoon salt

  • ⅛ teaspoon pepper (or to taste)

  • 1 tablespoon olive oil

For the stuffing:

  • ½ cup cooked shrimp, finely chopped

  • ½ cup lump crab meat

  • 2 oz cream cheese, softened

  • 2 tablespoons mayonnaise

  • 1 tablespoon Dijon mustard

  • 1 teaspoon lemon juice

  • 1 garlic clove, minced

  • 1 teaspoon Old Bay seasoning (or Cajun seasoning)

  • ¼ cup shredded mozzarella or Parmesan cheese

  • 1 tablespoon chopped parsley

For the topping (optional):

  • 2 tablespoons melted butter

  • Smoked paprika

  • Extra parsley for garnish

directions

  1. Preheat the oven to 375°F (190°C) and lightly grease a baking dish.

  2. Pat the salmon fillets dry and season both sides with salt and pepper.

  3. Carefully cut a pocket or slit lengthwise into the thickest part of each fillet.

  4. In a bowl, mix chopped shrimp, crab meat, cream cheese, mayonnaise, Dijon mustard, lemon juice, garlic, Old Bay seasoning, shredded cheese, and parsley until well combined.

  5. Spoon the seafood mixture into each salmon pocket, gently pressing to pack it in. If there’s extra filling, I mound it on top of the salmon.

  6. Place the stuffed fillets in the baking dish, drizzle with olive oil or melted butter, and sprinkle with smoked paprika if using.

  7. Bake for about 20 minutes, or until the salmon flakes easily with a fork and the stuffing is hot.

  8. Garnish with parsley and serve with lemon wedges, rice, or roasted vegetables.

Servings and timing

  • Servings: 4

  • Prep time: 15 minutes

  • Cook time: 20 minutes

  • Total time: 35 minutes

Variations

  • I sometimes swap out Old Bay seasoning for Cajun seasoning if I’m in the mood for something spicier.

  • For extra creaminess, I’ll add a tablespoon of sour cream to the stuffing.

  • A sprinkle of breadcrumbs on top before baking gives a nice crunchy texture.

  • To lower fat, I’ve replaced mayo with Greek yogurt—same tangy flavor with fewer calories.

  • I’ve even made a version with crab only, which is just as tasty if I’m out of shrimp.

storage/reheating

I store leftovers in an airtight container in the fridge for up to 2 days. To reheat, I gently warm in a 325°F (165°C) oven for 8–10 minutes, or until heated through. The filling stays creamy, and the salmon stays moist when reheated this way.

FAQs

How can I tell when the salmon is done?

I look for the salmon to flake easily with a fork and for the stuffing to be heated through. An internal temperature of 145°F (63°C) is a reliable indicator.

Can I use frozen shrimp or crab?

Yes—I thaw them fully, pat them dry, and then chop. Excess moisture can make the filling too runny, so drying them well is key.

Can I prepare this ahead of time?

Absolutely. I assemble the stuffed salmon and cover it in the baking dish, then refrigerate for up to 6 hours before baking. I add the olive oil or butter and paprika just before putting it in the oven.

Can I skip the cheese or use a different one?

Yes, I’ve made it without cheese and it still tastes great. You can also try Monterey Jack or Gruyère for different flavor profiles.

What should I serve with this?

I love serving it with lemon-butter rice, roasted asparagus, or a crisp green salad to balance the rich seafood flavors.

Conclusion

I truly enjoy how this Crab and Shrimp Stuffed Salmon feels gourmet without the fuss. With its creamy seafood stuffing, seasoned to perfection, it’s a dish I love making when I want to impress or just treat myself. Enjoy every delicious bite!

Print

clock clock iconcutlery cutlery iconflag flag iconfolder folder iconinstagram instagram iconpinterest pinterest iconfacebook facebook iconprint print iconsquares squares iconheart heart iconheart solid heart solid icon
Crab and Shrimp Stuffed Salmon

Crab and Shrimp Stuffed Salmon

5 Stars 4 Stars 3 Stars 2 Stars 1 Star No reviews
  • Author: Sue
  • Prep Time: 15 minutes
  • Cook Time: 20 minutes
  • Total Time: 35 minutes
  • Yield: 4 servings
  • Category: Main Dish
  • Method: Baking
  • Cuisine: American
Print Recipe
Pin Recipe

Description

A rich and elegant seafood dish featuring salmon fillets stuffed with a creamy, flavorful mixture of crab and shrimp, perfect for special occasions or a luxurious weeknight dinner.


Ingredients

  • 4 salmon fillets (about 6 oz each, skin-on or skinless)
  • 1 teaspoon salt
  • ⅛ teaspoon pepper
  • 1 tablespoon olive oil
  • ½ cup cooked shrimp, finely chopped
  • ½ cup lump crab meat
  • 2 oz cream cheese, softened
  • 2 tablespoons mayonnaise
  • 1 tablespoon Dijon mustard
  • 1 teaspoon lemon juice
  • 1 garlic clove, minced
  • 1 teaspoon Old Bay seasoning (or Cajun seasoning)
  • ¼ cup shredded mozzarella or Parmesan cheese
  • 1 tablespoon chopped parsley
  • 2 tablespoons melted butter (optional)
  • Smoked paprika (optional)
  • Extra parsley for garnish (optional)

Instructions

  1. Preheat the oven to 375°F (190°C) and lightly grease a baking dish.
  2. Pat the salmon fillets dry and season both sides with salt and pepper.
  3. Carefully cut a pocket or slit lengthwise into the thickest part of each fillet.
  4. In a bowl, mix chopped shrimp, crab meat, cream cheese, mayonnaise, Dijon mustard, lemon juice, garlic, Old Bay seasoning, shredded cheese, and parsley until well combined.
  5. Spoon the seafood mixture into each salmon pocket, gently pressing to pack it in. Mound any extra filling on top.
  6. Place the stuffed fillets in the baking dish, drizzle with olive oil or melted butter, and sprinkle with smoked paprika if using.
  7. Bake for about 20 minutes, or until the salmon flakes easily with a fork and the stuffing is hot.
  8. Garnish with parsley and serve with lemon wedges, rice, or roasted vegetables.

Notes

  • Use Greek yogurt instead of mayonnaise for a lower-fat option.
  • Add sour cream to the stuffing for extra creaminess.
  • Sprinkle breadcrumbs on top before baking for a crunchy texture.
  • Thaw and dry frozen shrimp/crab thoroughly to avoid watery stuffing.
  • Assemble ahead and refrigerate up to 6 hours before baking.

Nutrition

  • Serving Size: 1 stuffed salmon fillet
  • Calories: 380
  • Sugar: 1g
  • Sodium: 620mg
  • Fat: 24g
  • Saturated Fat: 8g
  • Unsaturated Fat: 13g
  • Trans Fat: 0g
  • Carbohydrates: 5g
  • Fiber: 0g
  • Protein: 35g
  • Cholesterol: 115mg

Have you made this recipe? I'd love to see it!

Click here to Follow me on Pinterest

Easy Garlic Rosemary Focaccia Muffins

July 5, 2025 by Sue Leave a Comment

These mini focaccia muffins are soft inside with a golden, crispy crust, infused with fragrant garlic and rosemary—perfect as a side dish or snack I love to make for gatherings. Easy Garlic Rosemary Focaccia Muffins

Why You’ll Love This Recipe

I find this recipe super approachable—minimal kneading, simple ingredients, and the dough chills overnight so I can prep ahead without fuss. Plus, they’re portable, flavorful, and always a crowd-pleaser at any meal.

Ingredients

(Here's a tip: Check out the full list of ingredients and measurements in the recipe card below.)

  • active dry yeast

  • honey

  • warm water

  • bread flour (or all-purpose flour)

  • sea salt

  • extra‑virgin olive oil

  • butter

  • finishing salt (e.g., fleur de sel)

Rosemary Garlic Topping

  • extra‑virgin olive oil

  • fresh rosemary, minced

  • garlic cloves, minced

Directions

Day One

  1. In a large bowl, I mix the yeast, honey, and warm water until foamy (5–10 minutes).

  2. I stir in the flour and salt until a rough dough forms.

  3. I drizzle 2 tablespoons of olive oil over the dough, turn to coat, cover, and refrigerate overnight for at least 8 hours.

Day Two

  1. I add another 2 tablespoons of olive oil, gently deflate the dough, and turn it onto an oiled surface. I flatten it into a rectangle.

  2. I cut the dough into 12 pieces and place each in a greased muffin tin.

  3. I cover and let the dough rise for about 2 hours until puffy.

Rosemary Garlic Topping
I heat oil over medium, then remove from heat and add rosemary and garlic, swirling for about 1 minute.

Final Steps
4. I preheat the oven to 450°F (232°C).
5. I poke dimples into each muffin and drizzle the rosemary garlic topping over the dough.
6. I bake for about 20 minutes until golden.
7. I brush the tops with melted butter and sprinkle with finishing salt before serving.

Servings and timing

  • Makes 12 muffins

  • Prep time: 30 minutes (Day One), 30 minutes (Day Two)

  • Rise time: Overnight + 2 hours

  • Bake time: 20 minutes

  • Total time: Approximately 11 hours including resting time

Variations

  • I sometimes swap bread flour with all-purpose for a slightly softer texture.

  • I use maple syrup or sugar instead of honey to make it vegan.

  • I love adding toppings like olives, sun-dried tomatoes, or shredded cheese before baking for extra flavor.

Storage / Reheating

These muffins taste best fresh the same day, but I freeze them without the butter finish when needed.
To reheat, I bake them straight from frozen at 375°F (190°C) for 10 to 20 minutes until warmed through.

FAQs

What kind of flour can I use?

I prefer bread flour for a chewier texture, but all-purpose flour works well too.

Can I use instant yeast instead of active?

Yes, I can use instant yeast—it eliminates the need to bloom the yeast in water and mixes directly with the dry ingredients.

Why does the dough chill overnight?

Chilling overnight develops better flavor and gives the dough a stronger structure while making it easier to handle.

How can I tell when they’re done?

They’re done when the tops are golden and they sound hollow when tapped. I also like brushing them with butter for shine.

Can I prep everything ahead?

Absolutely. I prepare the dough the night before, then shape, top, and bake the next day—perfect when planning ahead.

Conclusion

I love how these focaccia muffins combine ease and bold flavor. They’re simple to make ahead, flexible with toppings, and always a hit whether I’m serving them at a casual meal or a special gathering.

Print

clock clock iconcutlery cutlery iconflag flag iconfolder folder iconinstagram instagram iconpinterest pinterest iconfacebook facebook iconprint print iconsquares squares iconheart heart iconheart solid heart solid icon
Easy Garlic Rosemary Focaccia Muffins

Easy Garlic Rosemary Focaccia Muffins

5 Stars 4 Stars 3 Stars 2 Stars 1 Star No reviews
  • Author: Sue
  • Prep Time: 1 hour
  • Cook Time: 20 minutes
  • Total Time: 11 hours
  • Yield: 12 muffins
  • Category: Bread
  • Method: Baking
  • Cuisine: Italian
  • Diet: Vegetarian
Print Recipe
Pin Recipe

Description

These mini focaccia muffins are soft inside with a golden, crispy crust, infused with fragrant garlic and rosemary—perfect as a side dish or snack for gatherings.


Ingredients

  • 1 packet active dry yeast
  • 1 tbsp honey
  • 1 ¼ cups warm water
  • 3 ¼ cups bread flour (or all-purpose flour)
  • 1 tsp sea salt
  • 4 tbsp extra-virgin olive oil (divided)
  • 2 tbsp melted butter
  • Finishing salt (e.g., fleur de sel)
  • Rosemary Garlic Topping:
  • 2 tbsp extra-virgin olive oil
  • 1 tbsp fresh rosemary, minced
  • 2 garlic cloves, minced

Instructions

  1. In a large bowl, mix the yeast, honey, and warm water until foamy (5–10 min).
  2. Stir in flour and salt until a rough dough forms.
  3. Drizzle 2 tbsp olive oil over the dough, turn to coat, cover, and refrigerate overnight (8+ hrs).
  4. On the next day, add another 2 tbsp olive oil, gently deflate the dough, turn it onto an oiled surface, and flatten into a rectangle.
  5. Cut into 12 pieces and place each in a greased muffin tin.
  6. Cover and let rise for about 2 hours until puffy.
  7. Prepare the topping by heating oil over medium, removing from heat, and swirling in rosemary and garlic for about 1 minute.
  8. Preheat oven to 450 °F (232 °C).
  9. Poke dimples into each muffin and drizzle the rosemary garlic topping over the dough.
  10. Bake for 20 minutes until golden brown.
  11. Brush tops with melted butter and sprinkle with finishing salt before serving.

Notes

  • Use all-purpose flour if bread flour isn't available; texture will be slightly softer.
  • Replace honey with sugar or maple syrup for a vegan-friendly version.
  • Add optional toppings like olives, sun-dried tomatoes, or cheese before baking.
  • Freeze muffins without butter finish if storing; reheat at 375°F for 10–20 min.

Nutrition

  • Serving Size: 1 muffin
  • Calories: 210
  • Sugar: 1g
  • Sodium: 150mg
  • Fat: 9g
  • Saturated Fat: 2g
  • Unsaturated Fat: 6g
  • Trans Fat: 0g
  • Carbohydrates: 28g
  • Fiber: 1g
  • Protein: 4g
  • Cholesterol: 5mg

Have you made this recipe? I'd love to see it!

Click here to Follow me on Pinterest

Sweet Chili Chicken Bowl with Coconut Lime Drizzle

July 5, 2025 by Sue Leave a Comment

I present a vibrant Sweet Chili Chicken Bowl featuring juicy chicken thighs glazed in sweet chili, served over fluffy jasmine rice and topped with a creamy, zesty coconut‑lime drizzle. It’s like takeout—only better and homemade. Sweet Chili Chicken Bowl with Coconut Lime Drizzle

Why You’ll Love This Recipe

I love this bowl because it delivers a bold mix of sweet, spicy, creamy, and tangy flavors in every bite. It feels special yet comes together easily. The contrast between charred chicken and chilled drizzle makes each mouthful exciting. Plus, it's flexible for various diets and holds up well as leftovers.

ingredients

(Here's a tip: Check out the full list of ingredients and measurements in the recipe card below.)

  • 1 ½ lbs boneless, skinless chicken thighs

  • ½ cup sweet chili sauce

  • 1 tbsp soy sauce

  • 2 cloves garlic, minced

  • 1 tsp fresh ginger, grated

  • Juice of 1 lime

  • ½ cup full‑fat coconut milk

  • 1 tsp chili sauce or sriracha (optional, for drizzle)

  • 3 cups cooked jasmine rice

  • ¼ cup fresh cilantro, chopped

  • 2 green onions, chopped

  • Crushed red pepper (optional)

  • Olive oil for cooking

  • Salt to taste

directions

  1. Marinate the chicken
    I whisk sweet chili sauce, soy sauce, garlic, ginger, and lime juice together. Then I add the chicken, toss to coat, and let it marinate for at least 30 minutes.

  2. Make the drizzle
    I mix coconut milk, lime juice, a bit of sweet chili sauce, and salt in a small bowl. For extra heat, I stir in some sriracha. I refrigerate it while the chicken cooks.

  3. Cook the chicken
    I heat oil in a skillet or grill pan over medium‑high. I cook the thighs for 5‑6 minutes per side until caramelized and cooked through. After resting, I slice them.

  4. Assemble the bowls
    I scoop rice into each bowl, top it with sliced chicken, and drizzle generously with the coconut‑lime sauce.

  5. Garnish and serve
    I finish with cilantro, green onions, a pinch of crushed red pepper, and lime wedges.

Servings and timing

This recipe makes 4 servings and takes about 1 hour total—15 minutes to prep, 30 minutes to marinate, and 15 minutes to cook.

Variations

  • Protein swap: I sometimes use chicken breast, shrimp, tofu, or chickpeas.

  • Grain base: Brown rice, quinoa, or cauliflower rice make great alternatives.

  • Sauce twist: A honey‑sriracha or gochujang glaze works well too.

  • Drizzle: I occasionally use Greek yogurt instead of coconut milk for a tangier sauce.

  • Veggies: I love adding shredded carrots, cucumber, bell pepper, or edamame for crunch and color.

storage/reheating

  • I let the chicken cool completely, then store it in an airtight container for up to 4 days in the fridge or freeze it for up to 2 months.

  • I refrigerate cooked rice for up to 4 days and reheat it with a splash of water to bring back moisture.

  • I store the drizzle separately in the fridge for 3 to 4 days and stir it before serving.

I reheat chicken and rice separately—either in the microwave or on the stove—and then spoon the chilled sauce over just before eating for a perfect contrast in temperatures and textures.

FAQs

How long should I marinate the chicken?

I recommend marinating for at least 30 minutes, but longer (like overnight) brings even more flavor.

Can I use chicken breast instead of thighs?

Absolutely—I just make sure not to overcook it so it stays tender and juicy.

Is the coconut lime drizzle spicy?

Not really. It’s creamy and zesty. I add sriracha if I want a bit more heat.

Can I make this vegan?

Yes. I switch the chicken for tofu or chickpeas and make sure all sauces are plant‑based.

Does the recipe freeze well?

I freeze the chicken and rice without a problem. The drizzle is better fresh, but it still works for leftovers.

Conclusion

I adore this Sweet Chili Chicken Bowl because it's bold, satisfying, and easy to make. The sweet-spicy chicken on rice with a cool, creamy coconut-lime drizzle creates a delicious balance of flavors and textures. Whether it's a busy weeknight or a casual dinner with friends, this bowl delivers big without big effort. I know I’ll be making it again and again.

Print

clock clock iconcutlery cutlery iconflag flag iconfolder folder iconinstagram instagram iconpinterest pinterest iconfacebook facebook iconprint print iconsquares squares iconheart heart iconheart solid heart solid icon
Sweet Chili Chicken Bowl with Coconut Lime Drizzle

Sweet Chili Chicken Bowl with Coconut Lime Drizzle

5 Stars 4 Stars 3 Stars 2 Stars 1 Star No reviews
  • Author: Sue
  • Prep Time: 15 minutes
  • Cook Time: 15 minutes
  • Total Time: 1 hour
  • Yield: 4 servings
  • Category: Main Course
  • Method: Stovetop
  • Cuisine: Asian-Inspired
  • Diet: Halal
Print Recipe
Pin Recipe

Description

A vibrant Sweet Chili Chicken Bowl with juicy, marinated chicken thighs served over jasmine rice and topped with a zesty coconut-lime drizzle, delivering a delicious blend of sweet, spicy, creamy, and tangy flavors.


Ingredients

  • 1 ½ lbs boneless, skinless chicken thighs
  • ½ cup sweet chili sauce
  • 1 tbsp soy sauce
  • 2 cloves garlic, minced
  • 1 tsp fresh ginger, grated
  • Juice of 1 lime
  • ½ cup full‑fat coconut milk
  • 1 tsp chili sauce or sriracha (optional, for drizzle)
  • 3 cups cooked jasmine rice
  • ¼ cup fresh cilantro, chopped
  • 2 green onions, chopped
  • Crushed red pepper (optional)
  • Olive oil for cooking
  • Salt to taste

Instructions

  1. Whisk together sweet chili sauce, soy sauce, garlic, ginger, and lime juice. Add chicken, toss to coat, and marinate at least 30 minutes.
  2. In a small bowl, mix coconut milk, lime juice, a spoonful of sweet chili sauce, and a pinch of salt. Add optional sriracha. Chill until serving.
  3. Heat oil in a skillet or grill pan over medium‑high. Cook thighs 5‑6 minutes per side until caramelized and cooked through. Let rest, then slice.
  4. Divide rice into bowls. Add sliced chicken, drizzle generously with coconut‑lime sauce.
  5. Top with cilantro, green onions, crushed red pepper, and lime wedges.

Notes

  • Marinate the chicken longer (overnight) for deeper flavor.
  • Customize with tofu or shrimp and different grains.
  • Drizzle can be made spicier with sriracha or red pepper flakes.
  • Refrigerate sauce separately and stir before using.
  • Chicken and rice are freezer-friendly; drizzle is best fresh.

Nutrition

  • Serving Size: 1 bowl
  • Calories: 580
  • Sugar: 14g
  • Sodium: 760mg
  • Fat: 26g
  • Saturated Fat: 10g
  • Unsaturated Fat: 14g
  • Trans Fat: 0g
  • Carbohydrates: 53g
  • Fiber: 2g
  • Protein: 34g
  • Cholesterol: 145mg

Have you made this recipe? I'd love to see it!

Click here to Follow me on Pinterest

Italian-Style Chicken Grinder Salad

July 5, 2025 by lina Leave a Comment

This Italian-Style Chicken Grinder Salad is a fresh and hearty twist on the classic grinder sandwich, packed with seasoned grilled chicken, crisp vegetables, and tangy Italian dressing. With its vibrant flavors and crunchy textures, it’s a delightful meal that can be served as a salad or loaded into a sandwich roll for a more traditional grinder experience.

Italian-Style Chicken Grinder Salad

Why You’ll Love This Recipe

I absolutely love this Italian-Style Chicken Grinder Salad for how satisfying and versatile it is. The combination of juicy, grilled chicken seasoned with Italian spices pairs perfectly with the crunchy veggies, all drenched in a zesty, herby dressing. It’s a great way to enjoy the flavors of a classic grinder sandwich in a lighter, fresher way. Whether I’m in the mood for a salad or want to serve it in a sandwich, this recipe offers the best of both worlds!

Ingredients

  • 2 chicken breasts, grilled and sliced

  • 1 large cucumber, diced

  • 1 red bell pepper, diced

  • 1 small red onion, thinly sliced

  • 1 cup cherry tomatoes, halved

  • 1 cup shredded iceberg lettuce

  • ½ cup provolone cheese, shredded

  • ¼ cup black olives, sliced

  • ¼ cup banana peppers, sliced

  • ¼ cup Italian dressing

  • 1 teaspoon dried oregano

  • Salt and pepper, to taste

(Tip: You'll find the full list of ingredients and measurements in the recipe card below.)

Directions

  1. Start by grilling the chicken breasts over medium heat for about 5–7 minutes per side or until fully cooked and no longer pink in the center. Once done, let the chicken rest for a few minutes, then slice it thinly.

  2. In a large bowl, combine the cucumber, red bell pepper, red onion, cherry tomatoes, and shredded lettuce.

  3. Add the grilled chicken, shredded provolone cheese, black olives, and banana peppers to the bowl.

  4. Drizzle the Italian dressing over the ingredients and sprinkle with dried oregano, salt, and pepper. Toss everything gently until the salad is well combined and evenly coated.

  5. Serve immediately as a salad or pile it into a sandwich roll for a grinder-style meal.

Servings and Timing

  • Servings: 4

  • Prep Time: 15 minutes

  • Cooking Time: 10 minutes

  • Total Time: 25 minutes

Variations

  • Use different proteins: I can easily swap the grilled chicken for grilled turkey, roast beef, or even a vegetarian protein like grilled tofu or chickpeas.

  • Add more veggies: If I want to increase the veggie content, I could throw in some shredded carrots, spinach, or even artichoke hearts for added flavor and texture.

  • Spicy kick: For a bit of heat, I might add some red pepper flakes or extra banana peppers.

  • Gluten-free: To make it gluten-free, I would serve this salad as is, or wrap it in gluten-free wraps for a sandwich.

  • Cheese variations: If I want a different cheese, mozzarella, parmesan, or even a sharp cheddar would work well in this salad.

Storage/Reheating

If I have leftovers, I recommend storing the salad in an airtight container in the fridge for up to 2 days. Keep the dressing separate if possible to maintain the freshness of the vegetables. If I plan to have it in a sandwich, it’s best to store the salad mixture and bread separately, assembling the sandwich right before serving to keep it from becoming soggy.

FAQs

Can I use store-bought grilled chicken for this recipe?

Yes! If I’m short on time, using store-bought grilled chicken strips or rotisserie chicken is a great shortcut. It will save me some time without compromising too much on flavor.

Can I make this salad ahead of time?

Yes, I can prep the salad ingredients earlier in the day and store them in the fridge. Just wait to add the dressing until I’m ready to serve to keep everything fresh and crunchy.

How can I make this salad spicier?

To add some spice, I could use a spicier Italian dressing, or mix in some sliced jalapeños, red pepper flakes, or hot sauce for an extra kick.

What kind of dressing should I use?

I love using a classic Italian dressing for this salad, but I could also experiment with other dressings, such as balsamic vinaigrette, ranch, or even a lemon-oregano vinaigrette for a lighter option.

Can I make this salad vegetarian?

Yes, I can easily make this salad vegetarian by omitting the chicken and adding more veggies, beans, or even roasted vegetables. For added protein, I could also include chickpeas or tofu.

Conclusion

The Italian-Style Chicken Grinder Salad is a perfect combination of flavors and textures. It’s packed with crispy veggies, juicy grilled chicken, and tangy Italian dressing, making it a filling yet refreshing dish. Whether I serve it as a salad or in a sandwich, it’s a versatile and satisfying meal that will please everyone at the table.

Print

clock clock iconcutlery cutlery iconflag flag iconfolder folder iconinstagram instagram iconpinterest pinterest iconfacebook facebook iconprint print iconsquares squares iconheart heart iconheart solid heart solid icon
Italian-Style Chicken Grinder Salad

Italian-Style Chicken Grinder Salad

5 Stars 4 Stars 3 Stars 2 Stars 1 Star No reviews
  • Author: lina
  • Prep Time: 15 minutes
  • Cook Time: 10 minutes
  • Total Time: 25 minutes
  • Yield: 4 servings
  • Category: Salad
  • Method: Grilling, Mixing
  • Cuisine: Italian-American
  • Diet: Gluten Free
Print Recipe
Pin Recipe

Description

This Italian-Style Chicken Grinder Salad brings all the flavors of a classic grinder sandwich in a lighter, refreshing salad form. Grilled chicken, crunchy veggies, provolone cheese, and tangy Italian dressing combine to create a satisfying meal that can be served as a salad or stuffed into a sandwich roll.


Ingredients

2 chicken breasts, grilled and sliced

1 large cucumber, diced

1 red bell pepper, diced

1 small red onion, thinly sliced

1 cup cherry tomatoes, halved

1 cup shredded iceberg lettuce

½ cup provolone cheese, shredded

¼ cup black olives, sliced

¼ cup banana peppers, sliced

¼ cup Italian dressing

1 tsp dried oregano

Salt and pepper, to taste


Instructions

  • Grill the chicken breasts over medium heat for 5–7 minutes per side or until fully cooked and no longer pink. Let rest, then slice thinly.

  • In a large bowl, combine cucumber, red bell pepper, red onion, cherry tomatoes, and shredded lettuce.

  • Add the grilled chicken, provolone cheese, black olives, and banana peppers.

  • Drizzle with Italian dressing and sprinkle with oregano, salt, and pepper. Toss everything gently until well-coated.

  • Serve immediately as a salad or pile into a sandwich roll for a grinder-style meal.


Notes

Protein options: You can substitute grilled turkey, roast beef, tofu, or chickpeas for a variety of flavors.

Spicy twist: Add red pepper flakes or extra banana peppers for some heat.

Cheese variations: Try mozzarella, parmesan, or cheddar instead of provolone.

Gluten-free: Serve as a salad or use gluten-free wraps for a sandwich option.


Have you made this recipe? I'd love to see it!

Click here to Follow me on Pinterest

Beet, Feta & Cucumber Salad

July 5, 2025 by lina Leave a Comment

This Beet, Feta & Cucumber Salad is a colorful, Mediterranean-inspired dish that’s perfect for brightening up any spring or summer meal. With the earthy sweetness of roasted beets, the crisp crunch of fresh cucumber, and the tangy richness of feta cheese, it's a refreshing salad that satisfies all the senses. Lightly dressed with olive oil, lemon, and a hint of honey, it's an easy and delightful addition to any table.

Beet, Feta & Cucumber Salad

Why You’ll Love This Recipe

I love this salad for its vibrant flavors and beautiful presentation. The roasted beets bring an earthy sweetness that pairs perfectly with the fresh, crisp cucumbers. The crumbled feta adds a creamy, tangy element, while the dill brings a refreshing, herbaceous note. It’s an incredibly easy dish to prepare, yet it feels special enough for any occasion. Plus, it’s a great way to enjoy seasonal produce and get a burst of color on your plate!

Ingredients

  • 3 medium beets, roasted, peeled, and diced

  • 1 large cucumber, diced

  • ½ cup crumbled feta cheese

  • 3 tablespoon fresh dill, chopped

  • 2 tablespoon olive oil

  • 1 tablespoon fresh lemon juice

  • 1 teaspoon honey or agave syrup

  • Salt and pepper, to taste

(Tip: You'll find the full list of ingredients and measurements in the recipe card below.)

Directions

  1. Preheat your oven to 400°F (205°C). Wrap each beet in foil and roast for about 45–60 minutes, or until tender when pierced with a fork. Let them cool, then peel and dice them.

  2. In a large bowl, whisk together olive oil, lemon juice, honey, salt, and pepper.

  3. Add the diced beets, cucumber, crumbled feta, and chopped dill into the bowl.

  4. Toss everything gently to combine, making sure all the ingredients are well-coated with the dressing.

  5. Taste and adjust the seasoning if needed—add more lemon juice or olive oil if desired.

  6. Serve chilled or at room temperature.

Servings and Timing

  • Servings: 4

  • Prep Time: 15 minutes

  • Cooking Time: 60 minutes

  • Total Time: 1 hour 15 minutes

Variations

  • Add nuts or seeds: For some crunch, I love adding roasted walnuts or sunflower seeds to the salad.

  • Use a different cheese: If you’re not a fan of feta, goat cheese or ricotta salata would make a great alternative.

  • Add protein: This salad can easily be made a main dish by topping it with grilled chicken, shrimp, or chickpeas for a vegetarian option.

  • Herb variations: Swap fresh dill for mint or parsley for a slightly different flavor profile.

  • Make it spicy: Add a sprinkle of red pepper flakes or a dash of hot sauce to give it a little kick.

Storage/Reheating

This salad is best served fresh, but it can be stored in an airtight container in the fridge for up to 2 days. If storing, keep the dressing separate and add it just before serving to maintain the crispness of the cucumbers. The beets and feta can get a little soggy if stored together for too long, so separating the components is ideal.

FAQs

Can I use raw beets instead of roasted?

While roasted beets provide a sweeter, more earthy flavor, raw beets are a crunchy, slightly more earthy alternative. If you prefer raw beets, just peel and grate them or slice thinly for a fresh approach.

How do I know when my beets are done roasting?

Beets are done when they are fork-tender. The exact time will depend on their size, but it generally takes between 45 to 60 minutes. If a fork easily slides into the beet, they’re ready.

Can I make this salad ahead of time?

Yes, I love making this salad ahead of time. You can roast the beets and chop the vegetables earlier in the day or even a day before serving. Just wait to add the dressing until you’re ready to serve to keep the cucumbers crisp.

What can I serve this salad with?

This salad pairs beautifully with grilled meats, fish, or as a side dish to a variety of Mediterranean-inspired meals. It also works wonderfully as a light, standalone dish for lunch.

Can I make this salad vegan?

Yes! To make this salad vegan, simply omit the feta cheese or swap it with a dairy-free alternative like vegan feta or cashew cheese. The rest of the ingredients are naturally vegan.

Conclusion

This Beet, Feta & Cucumber Salad is an easy, colorful, and healthy dish that brightens up any meal. The balance of earthy beets, fresh cucumber, tangy feta, and lemony dressing makes it a perfect choice for spring and summer. Whether you enjoy it as a side dish or add some protein for a more filling meal, it’s a salad that never fails to impress!

Print

clock clock iconcutlery cutlery iconflag flag iconfolder folder iconinstagram instagram iconpinterest pinterest iconfacebook facebook iconprint print iconsquares squares iconheart heart iconheart solid heart solid icon
Beet, Feta & Cucumber Salad

Beet, Feta & Cucumber Salad

5 Stars 4 Stars 3 Stars 2 Stars 1 Star No reviews
  • Author: lina
  • Prep Time: 15 minutes
  • Cook Time: 60 minutes
  • Total Time: 1 hour 15 minutes
  • Yield: 4 servings
  • Category: Salad
  • Method: Roasting, Mixing
  • Cuisine: Mediterranean
  • Diet: Vegetarian
Print Recipe
Pin Recipe

Description

This vibrant Beet, Feta & Cucumber Salad is a refreshing, Mediterranean-inspired dish perfect for spring and summer. With the earthy sweetness of roasted beets, crunchy cucumbers, creamy feta, and a tangy honey-lemon dressing, it’s a delightful and easy-to-make salad that brightens any meal.


Ingredients

3 medium beets, roasted, peeled, and diced

1 large cucumber, diced

½ cup crumbled feta cheese

3 Tbsp fresh dill, chopped

2 Tbsp olive oil

1 Tbsp fresh lemon juice

1 tsp honey or agave syrup

Salt and pepper, to taste


Instructions

Preheat your oven to 400°F (205°C). Wrap each beet in foil and roast for 45–60 minutes, or until tender when pierced with a fork. Let them cool, peel, and dice.

In a large bowl, whisk together olive oil, lemon juice, honey, salt, and pepper.

Add the diced beets, cucumber, crumbled feta, and chopped dill into the bowl.

Gently toss to combine, ensuring all ingredients are well-coated with the dressing.

Taste and adjust seasoning with more lemon juice or olive oil if needed.

Serve chilled or at room temperature.


Notes

For a crunchy twist, add roasted walnuts or sunflower seeds.

For a different cheese, swap feta with goat cheese or ricotta salata.

Add protein like grilled chicken, shrimp, or chickpeas to make it a main dish.

To add a little spice, try red pepper flakes or hot sauce.

Have you made this recipe? I'd love to see it!

Click here to Follow me on Pinterest

  • « Previous Page
  • 1
  • …
  • 8
  • 9
  • 10
  • 11
  • 12
  • …
  • 40
  • Next Page »
Modern Sidebar

Hey there! I'm Sue, a mom, a wife, and someone who’s always in the kitchen trying out new recipes or revisiting old ones that remind me of family gatherings and special moments.

Learn more

Popular

  • Crispy Baked Chicken Tenders
    Crispy Baked Chicken Tenders
  • Pumpkin Sugar Cookies
    Pumpkin Sugar Cookies
  • Street Corn Chicken Casserole
    Street Corn Chicken Casserole
  • Better Than Box Mix Chocolate Brownies
    Better Than Box Mix Chocolate Brownies

Footer

↑ back to top

About

  • About
  • Contact
  • Disclosure Policy
  • DMCA
  • Privacy Policy
  • Terms and Conditions

Newsletter

  • Sign Up! for emails and updates

Recipes

  • Appetizers & Snacks
  • Beef
  • Breakfast
  • Chicken
  • Desserts
  • Dinner
  • Drinks
  • Side-Dish
  • Soups

As an Amazon Associate I earn from qualifying purchases.

Copyright © 2025 Sue Recipe