Sue Recipe

  • Recipe Index
  • Chicken
  • Desserts
  • About
  • Contact
menu icon
go to homepage
  • Recipe Index
  • Chicken
  • Desserts
  • About
  • Contact

search icon
Homepage link
  • Recipe Index
  • Chicken
  • Desserts
  • About
  • Contact

×

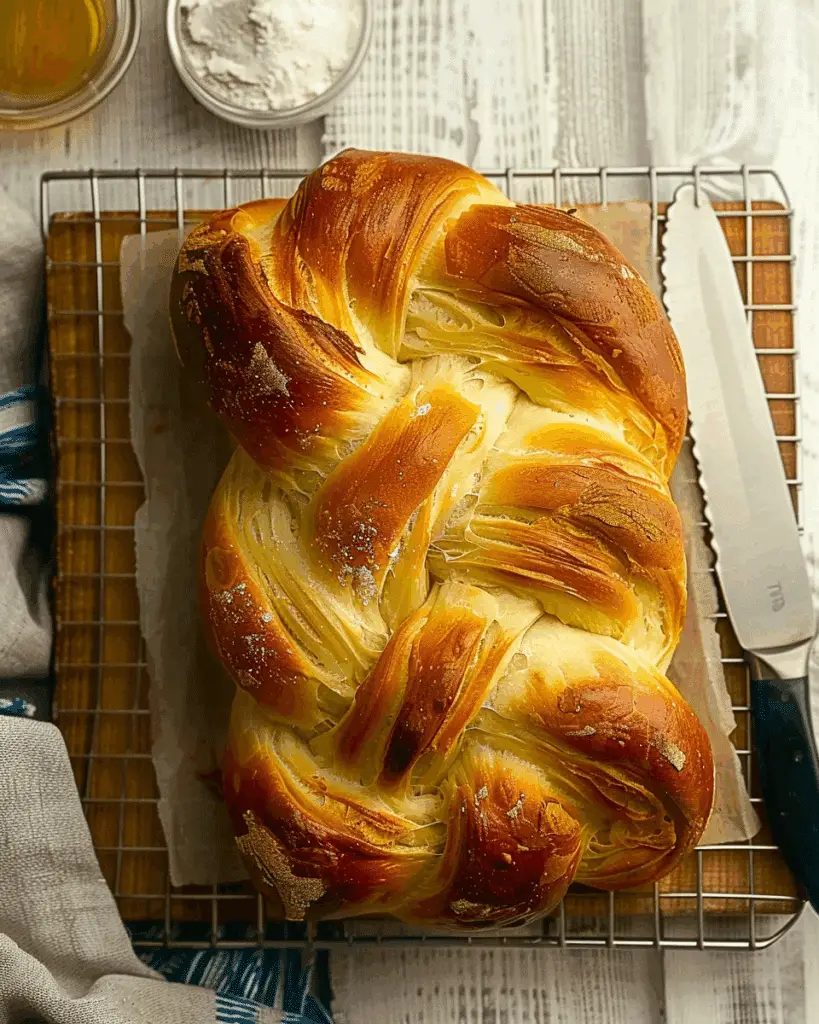
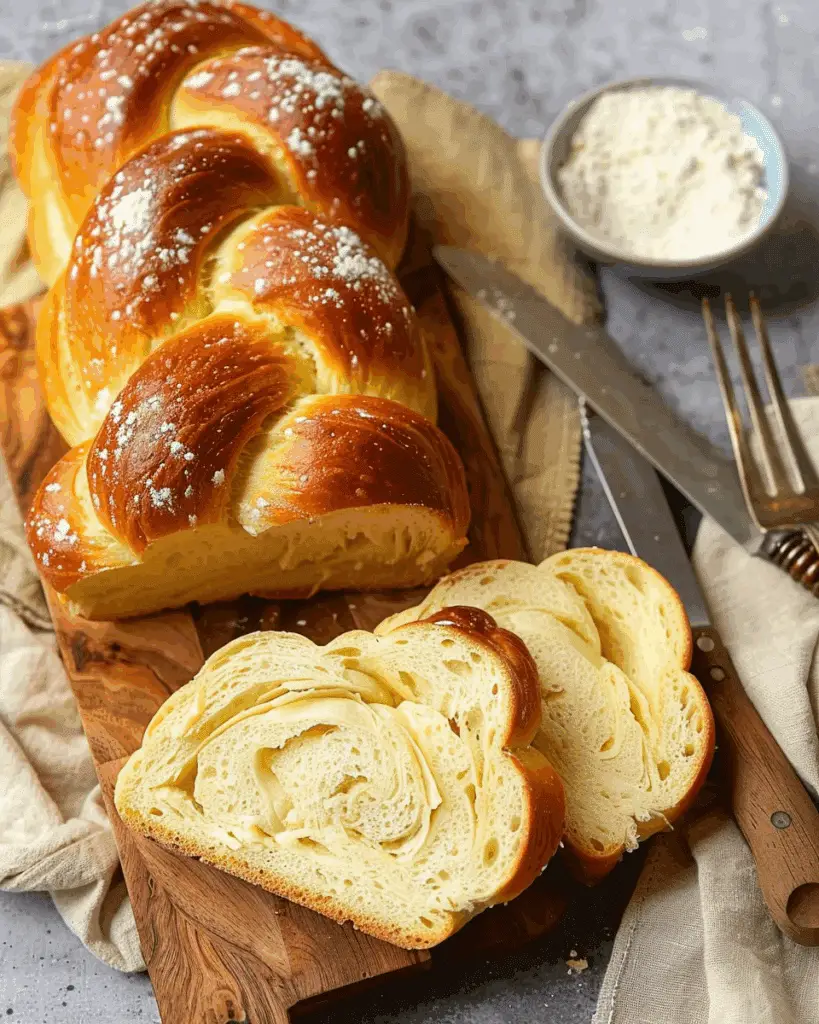
Twisted Herb and Cheese Bread

August 24, 2025 by Sue Leave a Comment

A savory, herb-and-cheese-filled bread with a golden crust and a beautifully twisted braid—this loaf is a showstopper. I love serving it as an appetizer, side dish, or even a snack when I want something comforting and packed with flavor. Twisted Herb and Cheese Bread
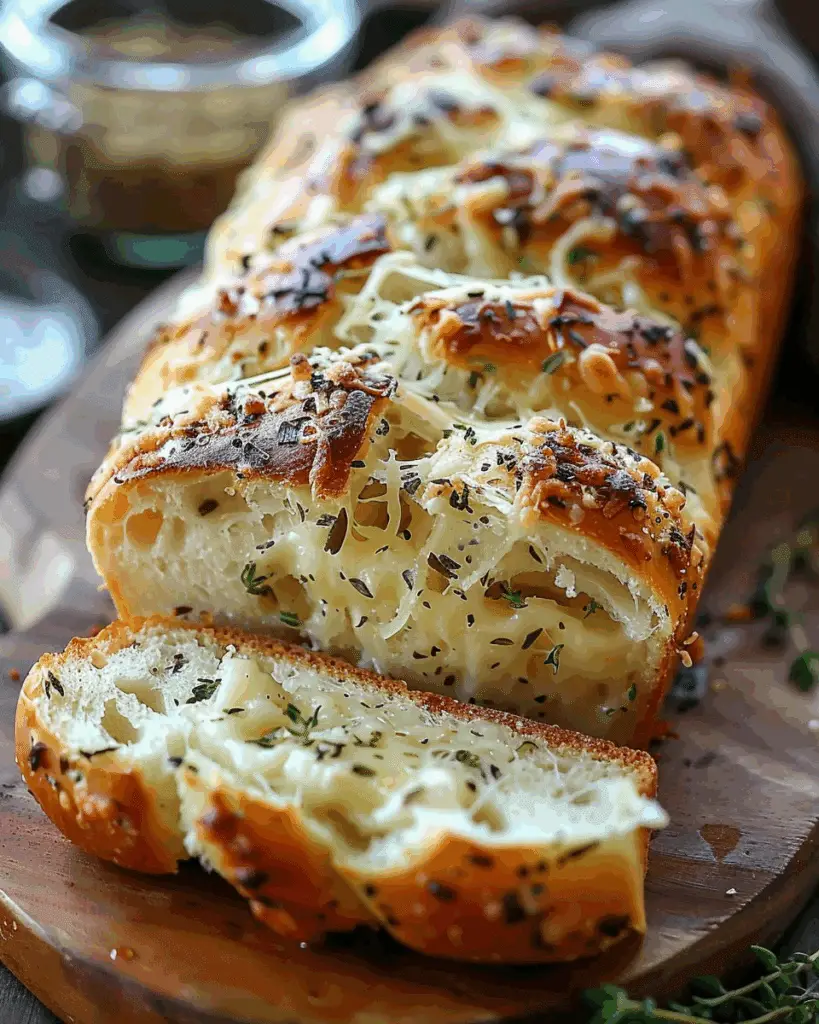
Why You’ll Love This Recipe

I always reach for this twisted herb and cheese bread when I want something both cozy and impressive. The crust bakes up golden and crisp, while the inside stays soft and creamy thanks to a generous filling of cream cheese, mozzarella, and Parmesan. The fresh herbs bring everything to life, and that twist? It’s not just pretty—it makes sure every slice has the perfect balance of bread and cheese. I also appreciate how easy it is to customize with whatever herbs or cheeses I have on hand.

ingredients

(Here's a tip: Check out the full list of ingredients and measurements in the recipe card below.)

  • 3 ½ cups all-purpose flour, plus more for dusting

  • 1 packet active dry yeast (2 ¼ tsp)

  • 1 ½ teaspoon granulated sugar

  • 1 ¼ teaspoon salt

  • 1 ¼ cups warm water (105–115 °F)

  • 2 tablespoon olive oil, plus more for greasing

  • 8 oz cream cheese, softened

  • 1 cup shredded mozzarella cheese

  • ½ cup grated Parmesan cheese

  • ¼ cup chopped fresh Italian parsley

  • 2 tablespoon chopped fresh basil

  • 1 tablespoon chopped fresh oregano

  • 2 cloves garlic, minced

  • ¼ teaspoon garlic powder

  • ¼ teaspoon onion powder

  • ¼ teaspoon red pepper flakes (optional)

  • Salt and black pepper, to taste

  • 1 large egg

  • 1 tablespoon milk or water

  • Everything bagel seasoning (optional, for topping)

  • Additional grated Parmesan cheese (optional, for topping)

  • Dried Italian herbs (optional, for topping)

directions

  1. I start by activating the yeast: I combine warm water, sugar, and yeast, then let it sit for 5–10 minutes until foamy.

  2. In another bowl, I whisk together the flour and salt.

  3. I pour the yeast mixture and olive oil into the dry ingredients and mix until a shaggy dough forms.

  4. On a floured surface, I knead the dough for 6–8 minutes until smooth and elastic—or I use a stand mixer with a dough hook. If it’s sticky, I add more flour a tablespoon at a time.

  5. I grease a bowl with olive oil, place the dough inside, turn it to coat, and cover it. Then I let it rise in a warm spot for 1 to 1.5 hours until doubled in size.

  6. While the dough rises, I prepare the filling by mixing cream cheese, mozzarella, Parmesan, herbs, garlic, and seasonings.

  7. For easier spreading, I sometimes refrigerate the filling for 15–20 minutes.

  8. I preheat the oven to 375 °F and line a baking sheet with parchment paper.

  9. Once the dough has risen, I punch it down and roll it out into a 12×18-inch rectangle on a floured surface.

  10. I spread the filling evenly, leaving a ½-inch border on one long side.

  11. Rolling from the opposite long side, I create a tight log and pinch the seam to seal.

  12. I slice the log in half lengthwise and keep the cut sides facing up.

  13. Then I gently twist the two strands together, keeping the filling visible.

  14. I transfer the twisted loaf onto the baking sheet, shaping it into a circle or leaving it long.

  15. I brush the surface with egg wash (egg beaten with milk or water).

  16. If I want to dress it up, I sprinkle everything bagel seasoning, more Parmesan, or dried herbs on top.

  17. I bake the loaf for 25–30 minutes until golden and bubbly, tenting with foil if it browns too fast.

  18. Once out of the oven, I let it cool a few minutes on the sheet, then move it to a rack to cool completely.

Servings and timing

This recipe yields 1 twisted loaf, perfect for 8–10 slices depending on thickness.

  • Prep Time: 30 minutes

  • Rise Time: 90 minutes

  • Cook Time: 25 minutes

  • Total Time: About 2 hours and 30 minutes

Variations

I like swapping in cheeses like Gruyère, Provolone, or even a bit of goat cheese when I’m feeling adventurous. For the herbs, rosemary or thyme are delicious alternatives. If I want a little heat, I mix in cayenne pepper. Add-ins like sun-dried tomatoes, chopped spinach, or roasted red peppers take the flavor up a notch too. And when I need to prep ahead, I refrigerate the dough and filling separately overnight—super helpful for planning.

storage/reheating

Once the bread is baked and cooled, I store it wrapped in plastic wrap and foil at room temperature for up to 2 days or refrigerate it for 4–5 days. For longer storage, I freeze the loaf tightly wrapped for up to 2 months. When I’m ready to reheat, I let it thaw completely (if frozen), then warm slices in a 300 °F oven for 8–10 minutes or microwave individual pieces for 20–30 seconds.

FAQs

How do I know if my yeast is active?

I always look for foam after mixing the yeast with warm water and sugar. If nothing happens after 10 minutes, I start over with fresh yeast.

Can I use dried herbs instead of fresh?

Yes, I can substitute dried herbs using about one-third the amount of the fresh herb measurement.

What if the dough is too sticky?

If the dough sticks to everything, I sprinkle in extra flour a tablespoon at a time while kneading until it smooths out.

Can I make the bread ahead of time?

Absolutely—I refrigerate the dough and filling separately overnight and assemble the loaf the next day after letting the dough come to room temperature.

Why is my filling leaking out during baking?

To prevent leaks, I make sure the seam is tightly sealed and always use the egg wash to secure the surface.

Conclusion

This twisted herb and cheese bread has become one of my favorite ways to turn simple ingredients into something truly special. It’s flavorful, beautiful to look at, and endlessly adaptable. Whether I’m bringing it to a gathering or enjoying a slice with soup, it always hits the spot.

Print

clock clock iconcutlery cutlery iconflag flag iconfolder folder iconinstagram instagram iconpinterest pinterest iconfacebook facebook iconprint print iconsquares squares iconheart heart iconheart solid heart solid icon
Twisted Herb and Cheese Bread

Twisted Herb and Cheese Bread

5 Stars 4 Stars 3 Stars 2 Stars 1 Star No reviews
  • Author: Sue
  • Prep Time: 30 minutes
  • Cook Time: 25 minutes
  • Total Time: 2 hours 30 minutes (includes rise time)
  • Yield: 1 loaf (8–10 slices)
  • Category: Bread
  • Method: Baking
  • Cuisine: American
  • Diet: Vegetarian
Print Recipe
Pin Recipe

Description

A savory, herb-and-cheese-filled bread with a golden crust and a beautifully twisted braid—perfect as an appetizer, side dish, or comforting snack.


Ingredients

  • 3 ½ cups all-purpose flour, plus more for dusting
  • 1 packet active dry yeast (2 ¼ teaspoons)
  • 1 ½ teaspoons granulated sugar
  • 1 ¼ teaspoons salt
  • 1 ¼ cups warm water (105–115 °F)
  • 2 tablespoons olive oil, plus more for greasing
  • 8 ounces cream cheese, softened
  • 1 cup shredded mozzarella cheese
  • ½ cup grated Parmesan cheese
  • ¼ cup chopped fresh Italian parsley
  • 2 tablespoons chopped fresh basil
  • 1 tablespoon chopped fresh oregano
  • 2 cloves garlic, minced
  • ¼ teaspoon garlic powder
  • ¼ teaspoon onion powder
  • ¼ teaspoon red pepper flakes (optional)
  • Salt and black pepper, to taste
  • 1 large egg
  • 1 tablespoon milk or water
  • Everything bagel seasoning (optional, for topping)
  • Additional grated Parmesan cheese (optional, for topping)
  • Dried Italian herbs (optional, for topping)

Instructions

  1. Activate the yeast by combining warm water, sugar, and yeast in a bowl. Let sit 5–10 minutes until foamy.
  2. In another bowl, whisk together flour and salt.
  3. Pour the yeast mixture and olive oil into the dry ingredients and mix until a shaggy dough forms.
  4. Knead on a floured surface for 6–8 minutes until smooth and elastic, or use a stand mixer with a dough hook. Add flour as needed if sticky.
  5. Grease a bowl with olive oil, place dough inside, turn to coat, and cover. Let rise 1–1.5 hours until doubled.
  6. Meanwhile, mix cream cheese, mozzarella, Parmesan, herbs, garlic, and seasonings to make the filling. Refrigerate 15–20 minutes if needed for easier spreading.
  7. Preheat oven to 375 °F and line a baking sheet with parchment paper.
  8. Punch down risen dough and roll into a 12×18-inch rectangle.
  9. Spread filling evenly over dough, leaving a ½-inch border on one long side.
  10. Roll tightly from the opposite long side, pinch seam to seal.
  11. Slice the log in half lengthwise, keeping cut sides facing up, and twist strands together into a braid.
  12. Transfer twisted loaf to baking sheet, shaping into a circle or leaving long.
  13. Whisk egg with milk or water and brush over the surface. Sprinkle with optional toppings if desired.
  14. Bake 25–30 minutes until golden and bubbly, tenting with foil if browning too quickly.
  15. Cool a few minutes on the sheet, then transfer to a rack to finish cooling before slicing.

Notes

  • Swap cheeses: Gruyère, Provolone, or goat cheese work well.
  • Try other herbs like rosemary or thyme for variation.
  • Add-ins such as sun-dried tomatoes, spinach, or roasted red peppers elevate flavor.
  • Dough and filling can be prepped separately and refrigerated overnight for next-day baking.
  • Store wrapped bread at room temperature up to 2 days, refrigerated 4–5 days, or frozen 2 months. Reheat in oven or microwave.

Nutrition

  • Serving Size: 1 slice (1/10 loaf)
  • Calories: 280
  • Sugar: 2 g
  • Sodium: 360 mg
  • Fat: 14 g
  • Saturated Fat: 7 g
  • Unsaturated Fat: 6 g
  • Trans Fat: 0 g
  • Carbohydrates: 30 g
  • Fiber: 1 g
  • Protein: 9 g
  • Cholesterol: 50 mg
Have you made this recipe? I'd love to see it!

Click here to Follow me on Pinterest

Braided Brioche Bread

August 24, 2025 by Sue Leave a Comment

An indulgent, soft, and buttery French‑style braided brioche bread, perfect for sandwiches, toast, or French toast. This golden, enriched bread has a tender crumb and a rich flavor that makes it ideal for both savory and sweet applications. Whether I slice it for breakfast or use it for an elevated sandwich, it never disappoints. Braided Brioche Bread

Why You’ll Love This Recipe

I love how versatile this braided brioche is—light yet rich, delicate yet structured enough to hold up to spreads, fillings, and toasting. The braiding not only makes it visually stunning but also gives it a beautiful pull-apart texture. It's satisfying to make, especially when I watch it rise and turn golden in the oven. And let’s be honest: nothing beats the smell of freshly baked brioche filling my kitchen.

ingredients

(Here's a tip: Check out the full list of ingredients and measurements in the recipe card below.)

  • 1 Tablespoon active dry yeast

  • ¼ cup granulated sugar

  • 1⅔ cups warm milk (100‑110 °F)

  • 2 large eggs

  • ⅓ cup all‑purpose flour

  • 4¾ cups bread flour

  • 6 Tablespoons unsalted butter (softened)

  • 1 Tablespoon kosher salt

  • Egg wash (1 egg + splash of water)

directions

  1. I start by mixing the flours, salt, and softened butter in the bowl of my stand mixer fitted with a dough hook. I let it mix on low speed for about a minute.

  2. In a measuring cup, I stir together the yeast, sugar, and warm milk, then let it sit until foamy—usually around 15 minutes. After that, I whisk in the eggs.

  3. I pour the yeast‑egg‑milk mixture into the mixer bowl and knead on low speed until the dough starts to come together, scraping the sides as needed. Gradually, I add the remaining bread flour until the dough becomes slightly sticky but firm. Then I knead it on medium for a few more minutes.

  4. Once kneaded, I transfer the dough to a large greased bowl and shape it into a smooth ball by folding the sides inward. I place it smooth side up.

  5. I cover the bowl and let the dough rise in a warm spot until it doubles in size—about 45 to 60 minutes.

  6. On a greased surface, I divide the dough in half. For each half, I divide it again into three equal pieces, rolling each into ropes about 12 to 15 inches long. I braid the ropes and tuck the ends underneath. Then I place the braided dough on a baking sheet or in a loaf pan.

  7. I cover the braided loaves and let them rise again until nearly doubled in size.

  8. Before baking, I brush the tops with egg wash and sprinkle with kosher salt if I want extra flavor.

  9. I preheat my oven to 375 °F and bake the loaves for about 25 minutes, or until they turn golden brown.

  10. For extra richness, I sometimes brush the tops with melted butter as soon as they come out of the oven. Then I transfer them to a wire rack and let them cool completely before slicing.

Servings and timing Braided Brioche Bread

  • Servings: About 20 slices (2 loaves)

  • Prep Time: 30 minutes

  • Cook Time: 25 minutes

  • Total Time: 2 hours 25 minutes

Variations

  • I sometimes mix in mini chocolate chips or dried fruit before shaping the dough for a sweet twist.

  • A dusting of cinnamon sugar on top before baking adds a subtle warmth.

  • Instead of braiding, I occasionally shape the dough into rolls or buns for individual servings.

  • I use loaf pans when I want more structured sandwich slices, and go free-form on a baking sheet for a rustic look.

storage/reheating

I store the baked brioche in an airtight container at room temperature for 3 to 4 days. To reheat, I like to toast slices lightly to bring back that fresh-baked softness. For longer storage, I freeze the cooled loaves or slices in freezer bags for up to 3 months. When I’m ready to use them, I let them thaw at room temperature or warm them gently in the oven.

FAQs

How do I know when the dough is kneaded enough?

I look for a smooth, elastic dough that pulls away from the sides of the bowl and holds its shape. It should be tacky but not overly sticky.

Can I let the dough rise overnight?

Yes, I often refrigerate the shaped dough overnight to develop deeper flavor. I just let it come to room temperature before the final rise and baking.

What’s the best way to shape the ropes evenly?

I weigh each piece of dough to keep things even. Then I roll from the center outward using both hands until each rope is the same length.

Can I use all-purpose flour instead of bread flour?

Yes, but I find that bread flour gives a slightly chewier texture and better structure. All-purpose will work in a pinch, though it may be softer.

What should I serve with brioche?

I love it with butter and jam for breakfast, or I use it for sandwiches. It also makes amazing French toast thanks to its rich texture.

Conclusion

This braided brioche bread is one of my favorite bakes to make from scratch. It’s elegant, deeply flavorful, and surprisingly versatile—from breakfast to dinner and everything in between. Whether I'm slicing it warm out of the oven or toasting it the next day, each bite reminds me why homemade bread is always worth it.

Print

clock clock iconcutlery cutlery iconflag flag iconfolder folder iconinstagram instagram iconpinterest pinterest iconfacebook facebook iconprint print iconsquares squares iconheart heart iconheart solid heart solid icon
Braided Brioche Bread

Braided Brioche Bread

5 Stars 4 Stars 3 Stars 2 Stars 1 Star No reviews
  • Author: Sue
  • Prep Time: 30 minutes
  • Cook Time: 25 minutes
  • Total Time: 2 hours 25 minutes
  • Yield: About 20 slices (2 loaves)
  • Category: Bread
  • Method: Baking
  • Cuisine: French
  • Diet: Vegetarian
Print Recipe
Pin Recipe

Description

An indulgent, soft, and buttery French‑style braided brioche bread, perfect for sandwiches, toast, or French toast.


Ingredients

  • 1 Tablespoon active dry yeast
  • ¼ cup granulated sugar
  • 1⅔ cups warm milk (100‑110 °F)
  • 2 large eggs
  • ⅓ cup all‑purpose flour
  • 4¾ cups bread flour
  • 6 Tablespoons unsalted butter (softened)
  • 1 Tablespoon kosher salt
  • Egg wash (1 egg + splash of water)

Instructions

  1. Mix the flours, salt, and softened butter in the bowl of a stand mixer fitted with a dough hook; start on low speed for about a minute.
  2. In a measuring cup, stir together the yeast, sugar, and warm milk; let sit until foamy (about 15 minutes), then add the eggs and mix well.
  3. Pour the yeast‑egg‑milk mixture into the mixer bowl; knead on low until dough absorbs, scraping as needed. Gradually add remaining bread flour until dough is slightly sticky but firm; knead on medium for a few minutes.
  4. Transfer dough to a large greased bowl; shape into a smooth ball by folding sides inward, smooth side up.
  5. Cover and let rise in a warm place until doubled in size (about 45‑60 minutes).
  6. Grease a surface, divide dough in half. For each half, divide into three equal pieces and roll into 12‑15″ ropes. Braid the three ropes and tuck ends under. Place on a baking sheet (or in loaf pan).
  7. Cover braided loaves and let rise again until nearly doubled.
  8. Brush with egg wash; sprinkle with kosher salt if desired.
  9. Preheat oven to 375 °F and bake for about 25 minutes, until loaves are golden.
  10. Optionally brush tops with melted butter. Transfer to wire rack to cool completely before slicing.

Notes

  • You can refrigerate the shaped dough overnight to develop flavor—let it come to room temperature before rising and baking.
  • You may bake braided loaves in loaf pans instead of on a baking sheet.
  • Store baked bread in an airtight container on the counter for 3–4 days.
  • Freeze brioche in freezer bags for up to 3 months.
  • Great for serving with butter, jam, as sandwiches, or French toast.

Nutrition

  • Serving Size: 1 slice
  • Calories: 171 kcal
  • Sugar: 4 g
  • Sodium: 365 mg
  • Fat: 5 g
  • Saturated Fat: 3 g
  • Unsaturated Fat: 2 g
  • Trans Fat: 0.1 g
  • Carbohydrates: 27 g
  • Fiber: 1 g
  • Protein: 5 g
  • Cholesterol: 29 mg

Have you made this recipe? I'd love to see it!

Click here to Follow me on Pinterest

Sweet and Sour Meatballs

August 23, 2025 by Sue Leave a Comment

I love how these Sweet and Sour Meatballs bring together juicy, tender bites of meat in a perfectly balanced sauce that’s tangy, sweet, and rich. It’s a quick, comforting recipe that fits beautifully into a weeknight dinner or a party spread. Sweet and Sour Meatballs

Why You’ll Love This Recipe

I like this recipe because it’s simple to make and incredibly satisfying. It uses everyday ingredients and takes very little time to prep. I can easily prepare it in advance, freeze leftovers, and even adjust the flavor depending on what I’m in the mood for. It’s also great for serving a crowd or meal prepping for the week.

ingredients

(Here's a tip: Check out the full list of ingredients and measurements in the recipe card below.)

Meatballs

  • 2 pounds of lean ground beef

  • ½ cup finely diced sweet yellow onion

  • ½ cup plain breadcrumbs

  • ½ cup whole milk

  • 2 large eggs, slightly beaten

  • 1½ teaspoons kosher salt

  • ½ teaspoon freshly cracked black pepper

Sweet and Sour Sauce

  • 1 (20-ounce) can of pineapple chunks, juices reserved

  • ¾ cup BBQ sauce

  • ½ cup sweet chili sauce

  • ½ cup light brown sugar, packed

  • 3 tablespoons apple cider vinegar

  • 2 teaspoons soy sauce

  • 2 tablespoons cornstarch

directions

I start by preheating the oven to 375°F and lightly greasing a 9×13-inch baking dish. Then I mix the ground beef, onion, breadcrumbs, milk, eggs, salt, and pepper until everything is fully combined. Using a small scoop or spoon, I form the mixture into meatballs and place them evenly in the dish.

Next, I whisk together the reserved pineapple juice, BBQ sauce, sweet chili sauce, brown sugar, apple cider vinegar, soy sauce, and cornstarch until smooth. I pour this sauce over the meatballs and sprinkle the pineapple chunks on top. I bake everything uncovered for about 45 minutes until the meatballs are cooked through and the sauce is bubbly.

I like to serve this dish warm over a bed of rice.

Servings and timing

  • Prep Time: 15 minutes

  • Cook Time: 45 minutes

  • Total Time: 1 hour

  • Servings: about 38 meatballs

Variations

Sometimes I switch things up by using ground turkey instead of beef when I want something a little lighter. I also like adding chopped bell peppers or shredded carrots into the baking dish for extra color and texture. For a different flavor profile, I’ve even tried using teriyaki sauce in place of the BBQ sauce. And when I’m short on time, pre-cooked meatballs make a great shortcut—just reduce the baking time slightly.

storage/reheating

  • Make-Ahead: I can shape the meatballs and store them (uncooked) in the fridge for up to a day in advance.

  • In the Fridge: Leftovers keep well in an airtight container for up to four days.

  • In the Freezer: Once cooled, I freeze the meatballs and sauce in a sealed container for up to two months.

  • Reheating: I reheat them in the oven at 350°F for about 20 minutes or microwave smaller portions until heated through. I make sure to cover them to retain moisture.

FAQs

Can I use ground turkey instead of ground beef?

Yes, I like using ground turkey when I want a lighter version. It still turns out flavorful and tender.

Can I make the meatballs ahead of time?

Absolutely. I usually mix and shape them a day ahead, then store them in the fridge until I’m ready to bake.

How can I make the sauce less spicy?

I reduce the amount of sweet chili sauce or use a mild version to tone down the heat. It’s easy to adjust depending on my taste.

Can I use fresh pineapple instead of canned?

Yes, fresh pineapple works great. I just make sure to add a bit of extra juice or liquid to replace what would have come from the can.

What’s the best way to serve these meatballs?

I usually serve them over white rice, but they’re also great with noodles or even as a party appetizer with toothpicks.

Conclusion

These Sweet and Sour Meatballs are a delicious mix of convenience and homemade comfort. I love how easy it is to put together a satisfying, flavorful meal with just a handful of ingredients. Whether I’m making dinner for the family or prepping ahead for a busy week, this recipe always hits the spot.

Print

clock clock iconcutlery cutlery iconflag flag iconfolder folder iconinstagram instagram iconpinterest pinterest iconfacebook facebook iconprint print iconsquares squares iconheart heart iconheart solid heart solid icon
Sweet and Sour Meatballs

Sweet and Sour Meatballs

5 Stars 4 Stars 3 Stars 2 Stars 1 Star No reviews
  • Author: Sue
  • Prep Time: 15 minutes
  • Cook Time: 45 minutes
  • Total Time: 1 hour
  • Yield: About 38 meatballs
  • Category: Main Dish
  • Method: Baking
  • Cuisine: American
  • Diet: Halal
Print Recipe
Pin Recipe

Description

Juicy beef meatballs baked in a tangy-sweet sauce made with pineapple, BBQ, and chili sauce. A comforting, versatile dish perfect for weeknight dinners or parties.


Ingredients

  • 2 pounds lean ground beef
  • ½ cup finely diced sweet yellow onion
  • ½ cup plain breadcrumbs
  • ½ cup whole milk
  • 2 large eggs, slightly beaten
  • 1½ teaspoons kosher salt
  • ½ teaspoon freshly cracked black pepper
  • 1 (20-ounce) can pineapple chunks, juices reserved
  • ¾ cup BBQ sauce
  • ½ cup sweet chili sauce
  • ½ cup light brown sugar, packed
  • 3 tablespoons apple cider vinegar
  • 2 teaspoons soy sauce
  • 2 tablespoons cornstarch

Instructions

  1. Preheat oven to 375°F (190°C) and lightly grease a 9×13-inch baking dish.
  2. In a large bowl, mix ground beef, onion, breadcrumbs, milk, eggs, salt, and pepper until well combined.
  3. Form mixture into meatballs using a scoop or spoon and place them evenly in the prepared dish.
  4. In a separate bowl, whisk reserved pineapple juice, BBQ sauce, sweet chili sauce, brown sugar, apple cider vinegar, soy sauce, and cornstarch until smooth.
  5. Pour sauce evenly over the meatballs and sprinkle pineapple chunks on top.
  6. Bake uncovered for about 45 minutes, until meatballs are fully cooked and sauce is bubbly.
  7. Serve warm over rice, noodles, or as an appetizer.

Notes

  • Can be made with ground turkey for a lighter version.
  • Add bell peppers or shredded carrots for extra color and texture.
  • Teriyaki sauce can replace BBQ sauce for a different flavor.
  • Use pre-cooked meatballs as a shortcut (reduce baking time).

Nutrition

  • Serving Size: 3 meatballs with sauce
  • Calories: 280
  • Sugar: 18g
  • Sodium: 580mg
  • Fat: 12g
  • Saturated Fat: 5g
  • Unsaturated Fat: 6g
  • Trans Fat: 0g
  • Carbohydrates: 24g
  • Fiber: 1g
  • Protein: 16g
  • Cholesterol: 70mg

Have you made this recipe? I'd love to see it!

Click here to Follow me on Pinterest

Crispy Fried Chicken

August 23, 2025 by Sue Leave a Comment

I’m excited to share my take on ultra-crispy fried chicken—tender, flavorful, and topped off with a sweet soy glaze. It’s simple, is inspired by both Southern and Asian flavors, and delivers a perfect crunch each time. The key? Cornstarch does wonders for that irresistible crust. Crispy Fried Chicken

Why I’ll Love This Recipe

I adore how the cornstarch creates an incredibly crispy exterior that stays crisp while the inside remains juicy. The setup is straightforward—I organize my stations before cooking—and the little Asian-style glaze brings a sweet and savory balance that elevates the whole dish.

Ingredients

(Here's a tip: Check out the full list of ingredients and measurements in the recipe card below.)

8 boneless, skinless chicken thighs
2 cups all-purpose flour
1 cup cornstarch
1 tablespoon chili powder
1 tablespoon garlic salt
1 tablespoon onion powder
1 tablespoon dried dill
2 teaspoons dried ginger
2 teaspoons dry mustard
1 teaspoon black pepper
1 teaspoon nutmeg
2 cups Greek yogurt
1 tablespoon lemon juice
½ cup water
About 4 to 6 cups vegetable oil (enough to fill a skillet about ¾ full)

For the glaze:
¾ cup soy sauce
¼ cup brown sugar
1 tablespoon cornstarch
4 tablespoons cold water

Directions

Mix the flour, cornstarch, and seasonings in a bowl—set aside
In another bowl, whisk together Greek yogurt, lemon juice, and water until smooth
Pat the chicken thighs dry and let them rest on paper towels
Arrange your breading station: one bowl for dry mix, one for yogurt mixture, and a foil-lined cookie sheet
Coat each chicken piece by fully submerging in yogurt, then pressing into the dry mix—make sure it adheres well. Repeat if desired for extra crisp
Place coated chicken on the cookie sheet and refrigerate to help the coating set for about an hour
Heat the oil in a heavy skillet until almost smoking. Test with a small piece of chicken—if it floats and sizzles, it’s ready
Fry two thighs at a time for about 12 minutes, gently flipping halfway. Ideally, remove at 160°F, as the internal temperature continues to rise to 165°F while resting
Transfer the fried chicken to a cooling rack over a sheet to drain
For the glaze: bring soy sauce and brown sugar to a boil, then reduce to a simmer
Stir cornstarch into cold water, then whisk into the simmering sauce—cook for about 2 minutes until thick
Drizzle over the fried chicken or serve on the side

Servings and timing

This recipe makes about 8 servings (one chicken thigh per person)
Preparation time: ~20 minutes (plus 1 hour chilling time)
Cooking time: ~15 minutes per batch

Variations

Swap chicken thighs for chicken breasts or wings—adjust cooking times accordingly
Try different spices: smoked paprika, cayenne, or herbs like thyme
Make it extra spicy by adding cayenne or red pepper flakes to the dry mix
For a lighter version, bake at 425°F—spray with oil and bake 25–30 minutes, turning halfway for crispness

Storage and reheating

Storage: Refrigerate leftover fried chicken in an airtight container for up to 3–4 days. Keep glaze separate to preserve crispiness
Reheating: Preheat oven to 375°F. Reheat chicken on a rack over a baking sheet for 10–15 minutes until the coating is crisp and the chicken is fully warmed

FAQs

How long should I chill the chicken before frying?

I recommend chilling the coated chicken for around an hour. This helps the coating set and adhere firmly, resulting in that ultra-crispy crust I love.

Can I use a different type of oil for frying?

Yes, I can swap the vegetable oil for other neutral-flavored oils with a high smoke point—like canola or peanut oil—without altering the outcome.

What if my chicken dries out during frying?

If the heat is too high, the coating may crisp too quickly and dry out the chicken. I keep the oil hot but not smoking and monitor internal temp, pulling at about 160°F to let residual heat carry it to 165°F.

Can I make the glaze thicker or thinner?

Absolutely. If I prefer a thinner glaze, I reduce the cornstarch. For a thicker, stickier coating, I add a touch more cornstarch to the slurry before whisking into the glaze.

Is it possible to prepare this in advance?

Yes. I can coat the chicken and refrigerate (covered) for up to a day ahead—then fry fresh when I’m ready. The glaze can also be made a day ahead and reheated gently before serving.

Conclusion

I hope this crispy fried chicken becomes a favorite in your kitchen as it has in mine. The cornstarch delivers that incredible crunch, while the organized prep helps everything flow smoothly. And the sweet soy glaze? It’s a simple yet transformative touch. I can’t wait to make this again and maybe even put a new spin on it next time.

Print

clock clock iconcutlery cutlery iconflag flag iconfolder folder iconinstagram instagram iconpinterest pinterest iconfacebook facebook iconprint print iconsquares squares iconheart heart iconheart solid heart solid icon
Crispy Fried Chicken

Crispy Fried Chicken

5 Stars 4 Stars 3 Stars 2 Stars 1 Star No reviews
  • Author: Sue
  • Prep Time: 20 minutes (plus 1 hour chilling)
  • Cook Time: 15 minutes per batch
  • Total Time: 1 hour 50 minutes
  • Yield: 8 servings
  • Category: Main Course
  • Method: Frying
  • Cuisine: Fusion (Southern & Asian)
  • Diet: Halal
Print Recipe
Pin Recipe

Description

Ultra-crispy fried chicken inspired by Southern and Asian flavors, featuring a cornstarch-based crust and a sweet-soy glaze for a perfectly juicy and crunchy bite.


Ingredients

  • 8 boneless, skinless chicken thighs
  • 2 cups all-purpose flour
  • 1 cup cornstarch
  • 1 tablespoon chili powder
  • 1 tablespoon garlic salt
  • 1 tablespoon onion powder
  • 1 tablespoon dried dill
  • 2 teaspoons dried ginger
  • 2 teaspoons dry mustard
  • 1 teaspoon black pepper
  • 1 teaspoon nutmeg
  • 2 cups Greek yogurt
  • 1 tablespoon lemon juice
  • ½ cup water
  • 4 to 6 cups vegetable oil (enough to fill a skillet about ¾ full)
  • ¾ cup soy sauce
  • ¼ cup brown sugar
  • 1 tablespoon cornstarch (for glaze)
  • 4 tablespoons cold water (for glaze)

Instructions

  1. Mix the flour, cornstarch, and seasonings in a bowl—set aside.
  2. In another bowl, whisk together Greek yogurt, lemon juice, and water until smooth.
  3. Pat the chicken thighs dry and let them rest on paper towels.
  4. Arrange your breading station: one bowl for dry mix, one for yogurt mixture, and a foil-lined cookie sheet.
  5. Coat each chicken piece by fully submerging in yogurt, then pressing into the dry mix—make sure it adheres well. Repeat if desired for extra crisp.
  6. Place coated chicken on the cookie sheet and refrigerate to help the coating set for about an hour.
  7. Heat the oil in a heavy skillet until almost smoking. Test with a small piece of chicken—if it floats and sizzles, it’s ready.
  8. Fry two thighs at a time for about 12 minutes, gently flipping halfway. Remove at 160 °F and let rest to reach 165 °F.
  9. Transfer the fried chicken to a cooling rack over a sheet to drain.
  10. For the glaze: bring soy sauce and brown sugar to a boil, then reduce to a simmer.
  11. Stir cornstarch into cold water, then whisk into the simmering sauce—cook for about 2 minutes until thick.
  12. Drizzle over the fried chicken or serve on the side.

Notes

  • Chilling helps set the coating for maximum crispiness.
  • Use a thermometer to ensure accurate oil and chicken temperatures.
  • Make glaze ahead and reheat gently for convenience.
  • Store glaze and chicken separately to maintain crispiness.
  • Bake instead of fry for a lighter version.

Nutrition

  • Serving Size: 1 chicken thigh with glaze
  • Calories: 420
  • Sugar: 6g
  • Sodium: 870mg
  • Fat: 24g
  • Saturated Fat: 5g
  • Unsaturated Fat: 17g
  • Trans Fat: 0g
  • Carbohydrates: 28g
  • Fiber: 1g
  • Protein: 26g
  • Cholesterol: 90mg

Have you made this recipe? I'd love to see it!

Click here to Follow me on Pinterest

Honeyed Brie-Blackberry Puff Pastry Swirls

August 23, 2025 by Sue Leave a Comment

These Honeyed Brie-Blackberry Puff Pastry Swirls are a beautiful blend of sweet and savory, with flaky puff pastry wrapped around creamy brie and tart blackberry preserves, then finished with a touch of golden honey. Perfect for entertaining or indulging in a cozy snack, these elegant little bites come together easily and deliver maximum flavor with minimal effort. Honeyed Brie-Blackberry Puff Pastry Swirls

Why You’ll Love This Recipe

I love this recipe because it's quick, classy, and just a little indulgent. The combination of warm, melted brie and fruity blackberry jam is irresistible, especially when paired with the light crunch of puff pastry. The drizzle of honey adds a subtle sweetness that ties everything together. Whether I’m hosting guests or just want a treat with my afternoon tea, these swirls are always a hit. Plus, they look far more impressive than the effort required to make them.

ingredients

(Here's a tip: Check out the full list of ingredients and measurements in the recipe card below.)

  • Puff pastry sheet (thawed)

  • Brie cheese (rind removed)

  • Blackberry preserves

  • Honey

  • Egg (for egg wash)

  • Fresh thyme or rosemary (optional, for garnish)

directions

  1. I start by preheating my oven to 400°F (200°C) and lining a baking sheet with parchment paper.

  2. I roll out the puff pastry on a lightly floured surface, keeping it as even as possible.

  3. Then I spread an even layer of blackberry preserves over the entire sheet.

  4. I add thin slices of brie on top of the jam, spacing them so that each bite gets some cheesy goodness.

  5. I roll the sheet tightly from one end to the other to form a log, then slice it into swirls about ½ to 1 inch thick.

  6. I place the swirls cut-side down on the baking sheet and brush them with an egg wash for a golden finish.

  7. They bake for 15-18 minutes, or until golden and puffed.

  8. Once out of the oven, I drizzle them with honey and, if I want a little herbal contrast, I sprinkle some fresh thyme or rosemary on top.

Servings and timing

This recipe yields about 10-12 swirls, depending on how thick I slice them. It takes around 10 minutes to prepare and 15–18 minutes to bake, so I have them ready in under 30 minutes.

Variations

Sometimes I like to swap the blackberry preserves with raspberry or fig jam for a different twist. If I’m craving something more savory, I skip the honey and add a sprinkle of black pepper or even a few crushed nuts like pecans or walnuts before baking. Brie can also be swapped with camembert for a funkier flavor.

storage/reheating

If I have leftovers, I store them in an airtight container in the refrigerator for up to 3 days. To reheat, I pop them in a 350°F (175°C) oven for 5–7 minutes to crisp them up again. I avoid microwaving them, as it tends to make the pastry soggy.

FAQs

Can I use frozen puff pastry straight from the freezer?

No, I always make sure to thaw the puff pastry before using it so it rolls and bakes properly. Cold pastry is fine, but frozen is too stiff.

What can I use instead of blackberry preserves?

I’ve used raspberry, fig, or even apricot jam with great results. Any fruit preserve that pairs well with brie will work.

Can I make these ahead of time?

Yes, I often prepare the swirls and keep them chilled on a baking sheet (covered) in the fridge for a few hours before baking. I bake them just before serving for the best texture.

Do I need to remove the rind from the brie?

I usually remove the rind for a smoother bite, but it’s not strictly necessary. If I don’t mind a little extra texture, I leave it on.

Can I make this into a larger tart instead of swirls?

Absolutely. I’ve spread the ingredients on a puff pastry sheet, folded the edges, and baked it as a flat tart before. It’s just as tasty and even easier to prepare.

Conclusion

These Honeyed Brie-Blackberry Puff Pastry Swirls are a go-to for when I want something easy, elegant, and delicious. Whether it’s for a party appetizer, a weekend brunch, or just a quiet night in, they always impress. With simple ingredients and minimal prep, it’s a recipe I keep coming back to.

Print

clock clock iconcutlery cutlery iconflag flag iconfolder folder iconinstagram instagram iconpinterest pinterest iconfacebook facebook iconprint print iconsquares squares iconheart heart iconheart solid heart solid icon
Honeyed Brie-Blackberry Puff Pastry Swirls

Honeyed Brie-Blackberry Puff Pastry Swirls

5 Stars 4 Stars 3 Stars 2 Stars 1 Star No reviews
  • Author: Sue
  • Prep Time: 10 minutes
  • Cook Time: 15-18 minutes
  • Total Time: 25-28 minutes
  • Yield: 10-12 swirls
  • Category: Appetizer
  • Method: Baking
  • Cuisine: American
  • Diet: Vegetarian
Print Recipe
Pin Recipe

Description

Honeyed Brie-Blackberry Puff Pastry Swirls are elegant, flaky bites filled with creamy brie, tart blackberry preserves, and a touch of honey. Perfect for entertaining or indulging, they offer a delightful balance of sweet and savory flavors.


Ingredients

  • 1 sheet puff pastry, thawed
  • 4 oz brie cheese, rind removed
  • ¼ cup blackberry preserves
  • 2 tbsp honey
  • 1 egg, beaten (for egg wash)
  • Fresh thyme or rosemary (optional, for garnish)

Instructions

  1. Preheat the oven to 400°F (200°C) and line a baking sheet with parchment paper.
  2. Roll out the puff pastry on a lightly floured surface.
  3. Spread an even layer of blackberry preserves over the puff pastry.
  4. Place thin slices of brie evenly across the preserves.
  5. Tightly roll the pastry into a log and slice into ½ to 1-inch thick swirls.
  6. Place swirls cut-side down on the prepared baking sheet.
  7. Brush with beaten egg for a golden finish.
  8. Bake for 15–18 minutes or until puffed and golden.
  9. Drizzle with honey and garnish with thyme or rosemary, if using.

Notes

  • Swap blackberry preserves with raspberry, fig, or apricot jam for variation.
  • Use camembert instead of brie for a stronger flavor.
  • To reheat, bake at 350°F (175°C) for 5–7 minutes.
  • Best served warm, immediately after baking.

Nutrition

  • Serving Size: 1 swirl
  • Calories: 150
  • Sugar: 5g
  • Sodium: 120mg
  • Fat: 10g
  • Saturated Fat: 4g
  • Unsaturated Fat: 5g
  • Trans Fat: 0g
  • Carbohydrates: 12g
  • Fiber: 0g
  • Protein: 3g
  • Cholesterol: 20mg

Have you made this recipe? I'd love to see it!

Click here to Follow me on Pinterest

Crockpot Swedish Meatballs

August 23, 2025 by Sue Leave a Comment

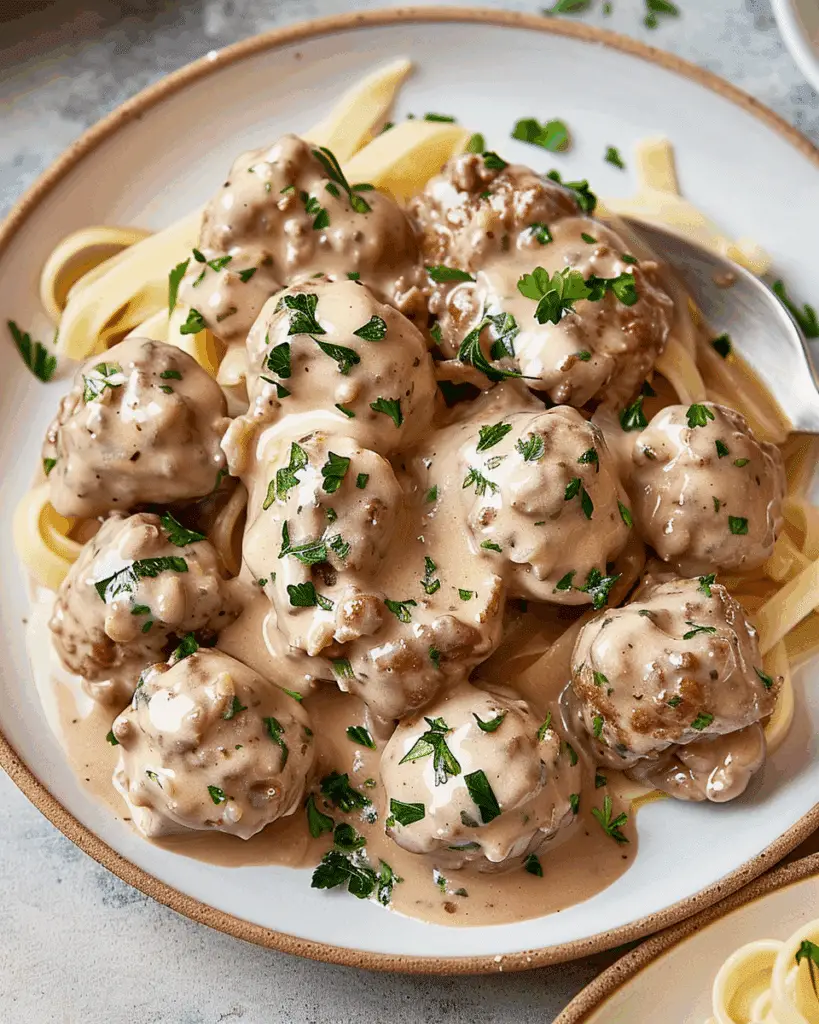
I made these Crockpot Swedish Meatballs and ended up with a rich, creamy dish full of tender, flavorful beef meatballs that slow-cook to perfection. This recipe is pure comfort food and works beautifully over mashed potatoes, noodles, or even rice. Crockpot Swedish Meatballs

Why I’ll Love This Recipe

I love how hands-off this recipe is—after a quick prep, the slow cooker does all the work. The creamy sauce combined with hearty meatballs gives me the kind of cozy, satisfying meal I crave on a cold evening or after a long day. It’s also a hit when I need to feed a group without much effort.

Ingredients

(Here's a tip: Check out the full list of ingredients and measurements in the recipe card below.)

For the Meatballs:

  • 2 pounds lean ground beef

  • ½ cup finely diced sweet yellow onion

  • ½ cup plain panko bread crumbs

  • ½ cup heavy cream

  • 1 large egg

  • 1 tablespoon fresh minced garlic

  • 1 tablespoon Worcestershire sauce

  • 1½ teaspoons kosher salt

  • ½ teaspoon fresh cracked black pepper

  • ¼ teaspoon ground allspice

  • ¼ teaspoon ground nutmeg

  • 1 tablespoon extra virgin olive oil

For the Sauce:

  • 3 tablespoons salted butter

  • 3 tablespoons all-purpose flour

  • 2 cups beef broth

  • 1½ tablespoons Worcestershire sauce

  • 1 teaspoon kosher salt

  • 1 teaspoon fresh cracked pepper

  • 1¼ cups heavy cream

  • 1 cup sour cream

  • 1 tablespoon chopped fresh parsley (optional, for garnish)

Directions

  1. I combined the ground beef, onion, breadcrumbs, heavy cream, egg, garlic, Worcestershire sauce, salt, pepper, allspice, and nutmeg in a large mixing bowl.

  2. I lined a baking sheet with parchment paper and rolled the meat mixture into balls using a 1½ tablespoon scoop.

  3. I seared the meatballs in olive oil over medium-high heat in a large skillet until they browned on all sides, then transferred them to a 6–7 quart slow cooker.

  4. In the same skillet, I melted butter and whisked in the flour, scraping the bottom to pick up all the browned bits. I cooked this for about a minute.

  5. I gradually whisked in the beef broth, Worcestershire sauce, salt, and pepper, and let the sauce simmer for a couple of minutes until slightly thickened.

  6. I poured the sauce over the meatballs in the slow cooker and cooked on high for 3 hours.

  7. After cooking, I removed the meatballs and stirred in the heavy cream and sour cream into the sauce. I covered the crockpot again and let it cook on high for another 30 minutes.

  8. I returned the meatballs to the sauce, sprinkled with parsley, and served hot.

Servings and timing

This recipe makes about 36 meatballs, which comfortably serves 6 to 8 people.

  • Prep time: 25 minutes

  • Cook time: 3 hours 30 minutes

  • Total time: 3 hours 55 minutes

Variations

  • I sometimes use ground turkey or chicken for a leaner version without sacrificing flavor.

  • I like to add a pinch more nutmeg for a warmer spice note.

  • Swapping heavy cream with half-and-half lightens up the sauce a bit.

  • When I want more herb flavor, I add a touch of dried thyme or dill into the meat mixture.

Storage/reheating

I store leftovers in an airtight container in the fridge for up to 3 days. The meatballs and sauce reheat well in the microwave or on the stove over low heat—just stir occasionally so the sauce doesn’t separate.
For longer storage, I freeze the meatballs and sauce in portions. They keep well for up to 2 months. When I reheat from frozen, I let them thaw in the fridge overnight and then warm everything in a saucepan until heated through.

FAQs

Can I make these meatballs ahead of time?

Yes, I often prep the meatballs a day ahead, store them in the fridge, and just toss them in the crockpot when ready to cook.

Do I need to sear the meatballs first?

Searing adds extra flavor, but I’ve skipped this step before and it still turned out great. I just increase the cooking time by 30 minutes if I put them in raw.

Can I make this with ground turkey or chicken instead of beef?

Absolutely. I’ve made this with both ground turkey and chicken—they work beautifully, though the flavor is slightly lighter.

What do I serve with these Swedish meatballs?

I love serving them over egg noodles, mashed potatoes, or even rice. The sauce clings well to starchy sides.

How can I thicken the sauce more?

If I want a thicker sauce, I mix a little cornstarch with water and stir it in during the last 15 minutes of cooking.

Conclusion

This Crockpot Swedish Meatballs recipe is a go-to for me when I want something hearty, creamy, and full of flavor without spending all day in the kitchen. It’s easy to make, reheats beautifully, and feeds a crowd. Whether I’m cooking for the family or hosting dinner guests, this dish always delivers comfort in every bite.

Print

clock clock iconcutlery cutlery iconflag flag iconfolder folder iconinstagram instagram iconpinterest pinterest iconfacebook facebook iconprint print iconsquares squares iconheart heart iconheart solid heart solid icon
Crockpot Swedish Meatballs

Crockpot Swedish Meatballs

5 Stars 4 Stars 3 Stars 2 Stars 1 Star No reviews
  • Author: Sue
  • Prep Time: 25 minutes
  • Cook Time: 3 hours 30 minutes
  • Total Time: 3 hours 55 minutes
  • Yield: 6 to 8 servings (about 36 meatballs)
  • Category: Main Dish
  • Method: Slow Cooker
  • Cuisine: Swedish
  • Diet: Halal
Print Recipe
Pin Recipe

Description

Tender beef meatballs slow-cooked in a rich, creamy sauce. A cozy, comforting dish perfect for serving over mashed potatoes, noodles, or rice.


Ingredients

  • 2 pounds lean ground beef
  • ½ cup finely diced sweet yellow onion
  • ½ cup plain panko bread crumbs
  • ½ cup heavy cream
  • 1 large egg
  • 1 tablespoon fresh minced garlic
  • 1 tablespoon Worcestershire sauce
  • 1½ teaspoons kosher salt
  • ½ teaspoon fresh cracked black pepper
  • ¼ teaspoon ground allspice
  • ¼ teaspoon ground nutmeg
  • 1 tablespoon extra virgin olive oil
  • 3 tablespoons salted butter
  • 3 tablespoons all-purpose flour
  • 2 cups beef broth
  • 1½ tablespoons Worcestershire sauce
  • 1 teaspoon kosher salt
  • 1 teaspoon fresh cracked pepper
  • 1¼ cups heavy cream
  • 1 cup sour cream
  • 1 tablespoon chopped fresh parsley (optional, for garnish)

Instructions

  1. Combine ground beef, onion, breadcrumbs, heavy cream, egg, garlic, Worcestershire sauce, salt, pepper, allspice, and nutmeg in a large mixing bowl.
  2. Line a baking sheet with parchment paper and roll the meat mixture into balls using a 1½ tablespoon scoop.
  3. Sear the meatballs in olive oil over medium-high heat in a large skillet until browned on all sides, then transfer to a 6–7 quart slow cooker.
  4. In the same skillet, melt butter and whisk in flour, scraping the bottom to pick up browned bits. Cook for 1 minute.
  5. Gradually whisk in beef broth, Worcestershire sauce, salt, and pepper. Simmer for 2–3 minutes until slightly thickened.
  6. Pour sauce over meatballs in slow cooker and cook on high for 3 hours.
  7. Remove meatballs and stir in heavy cream and sour cream into the sauce. Cover and cook on high for another 30 minutes.
  8. Return meatballs to the sauce, garnish with parsley, and serve hot.

Notes

  • You can substitute ground turkey or chicken for a lighter version.
  • Use half-and-half instead of heavy cream for a lighter sauce.
  • Add a pinch more nutmeg for extra warmth.
  • Store leftovers in the fridge up to 3 days or freeze for up to 2 months.
  • Searing adds flavor but can be skipped by extending cooking time 30 minutes.

Nutrition

  • Serving Size: ⅙ of recipe (about 6 meatballs with sauce)
  • Calories: 520
  • Sugar: 4g
  • Sodium: 1180mg
  • Fat: 39g
  • Saturated Fat: 19g
  • Unsaturated Fat: 17g
  • Trans Fat: 1g
  • Carbohydrates: 19g
  • Fiber: 1g
  • Protein: 27g
  • Cholesterol: 155mg

Have you made this recipe? I'd love to see it!

Click here to Follow me on Pinterest

High‑Protein Cottage Cheese Veggie Bake

August 23, 2025 by Sue Leave a Comment

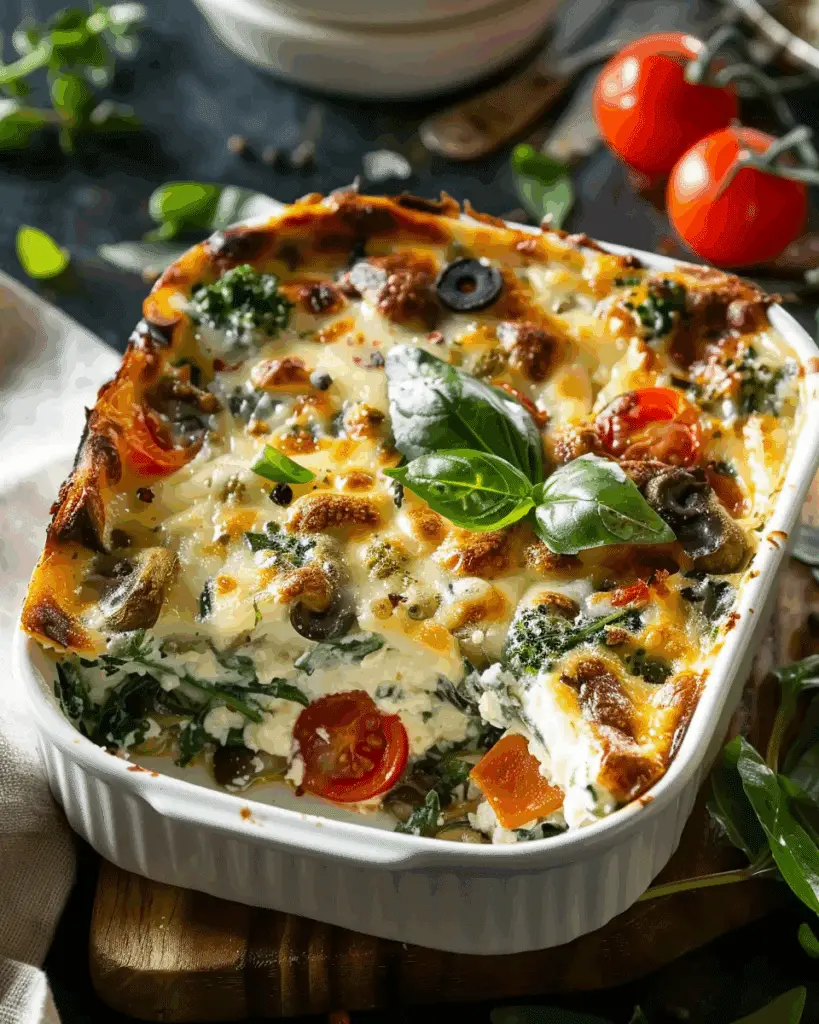
I’m excited to share my version of a high-protein cottage cheese veggie bake—a flavorful, protein-packed dish combining creamy cottage cheese, vibrant vegetables, and a satisfying crunch from oats. This dish comes together in under an hour, making it perfect for busy nights or weekly meal prep. High‑Protein Cottage Cheese Veggie Bake

Why You’ll Love This Recipe

I love how this bake packs in both nutrition and convenience. The cottage cheese provides a rich dose of protein, while vegetables like spinach, bell pepper, and zucchini add freshness and flavor. The oats lend a fun texture and extra fiber—an unexpected but delightful twist that makes this bake stand out. It’s simple to make, super versatile, and perfect for leftovers.

Ingredients

(Here's a tip: Check out the full list of ingredients and measurements in the recipe card below.)

  • 2 cups cottage cheese (low‑fat or full‑fat)

  • 1 cup spinach (fresh or frozen)

  • 1 bell pepper, diced (any color)

  • 1 zucchini, grated

  • 1 cup cherry tomatoes, halved

  • 1 teaspoon garlic powder

  • 1 teaspoon onion powder

  • ½ cup grated cheese (such as cheddar or jack)

  • ½ cup oats

  • Salt and pepper to taste

  • Fresh herbs like basil or parsley for garnish

Directions

  1. I start by preheating the oven to 375°F (190°C).

  2. I mix the cottage cheese, spinach, bell pepper, zucchini, cherry tomatoes, garlic powder, onion powder, grated cheese, oats, salt, and pepper in a large bowl.

  3. I transfer the mixture into a baking dish, smoothing out the top.

  4. I bake it for about 30 minutes, until it’s set and golden on top.

  5. Once baked, I let it cool for a few minutes, then garnish with fresh herbs before serving.

Servings and Timing

  • Servings: 4 to 6 servings

  • Prep Time: 30 minutes

  • Cook Time: 30 minutes

  • Total Time: 1 hour

Variations

I love how customizable this recipe is:

  • I swap in broccoli, kale, or corn depending on the season.

  • I use different cheeses like mozzarella or Parmesan for a new flavor.

  • I sometimes stir in herbs like thyme or rosemary before baking.

  • I add cooked shredded chicken or egg whites to increase the protein content.

  • I occasionally toss in chili flakes or paprika for a spicy kick.

Storage / Reheating

  • I store leftovers in an airtight container in the fridge for up to 3 days.

  • To reheat, I warm individual portions in the microwave or the oven at 350°F until heated through.

  • I sometimes freeze portions for later use—just let the bake cool completely, slice it, and store in freezer-safe containers.

FAQs

1. Can I use frozen spinach instead of fresh?

Yes—I often do. I just make sure to thaw and squeeze out the excess water before adding it to the mix.

2. What if I don’t have oats—can I skip them?

Absolutely. The oats add texture, but the bake holds together just fine without them.

3. Is this dish freezer-friendly?

Yes. I let the bake cool completely, slice it, and freeze individual portions. I reheat them in the microwave or oven.

4. Can I make it ahead of time and bake later?

Definitely. I prepare the mixture, cover the dish, and store it in the fridge overnight. Then I just pop it in the oven when I’m ready.

5. How can I increase the protein even more?

I like to stir in some cooked chicken, turkey, or egg whites. It bulks up the dish and keeps me fuller longer.

Conclusion

This high-protein cottage cheese veggie bake has become one of my favorite go-to meals. It’s quick, filling, packed with nutrition, and flexible enough to suit whatever ingredients I have on hand. Whether I’m serving it fresh out of the oven or reheating leftovers, it always hits the spot.

Print

clock clock iconcutlery cutlery iconflag flag iconfolder folder iconinstagram instagram iconpinterest pinterest iconfacebook facebook iconprint print iconsquares squares iconheart heart iconheart solid heart solid icon
High‑Protein Cottage Cheese Veggie Bake

High‑Protein Cottage Cheese Veggie Bake

5 Stars 4 Stars 3 Stars 2 Stars 1 Star No reviews
  • Author: Sue
  • Prep Time: 30 minutes
  • Cook Time: 30 minutes
  • Total Time: 1 hour
  • Yield: 4–6 servings
  • Category: Main Dish
  • Method: Baking
  • Cuisine: American
  • Diet: Vegetarian
Print Recipe
Pin Recipe

Description

A flavorful and protein-packed Cottage Cheese Veggie Bake featuring creamy cottage cheese, vibrant vegetables, and hearty oats. Perfect for quick weeknight dinners or meal prep.


Ingredients

  • 2 cups cottage cheese (low‑fat or full‑fat)
  • 1 cup spinach (fresh or frozen)
  • 1 bell pepper, diced
  • 1 zucchini, grated
  • 1 cup cherry tomatoes, halved
  • 1 teaspoon garlic powder
  • 1 teaspoon onion powder
  • ½ cup grated cheese (cheddar or jack)
  • ½ cup oats
  • Salt and pepper to taste
  • Fresh herbs like basil or parsley for garnish

Instructions

  1. Preheat the oven to 375 °F (190 °C).
  2. In a large bowl, mix cottage cheese, spinach, bell pepper, zucchini, cherry tomatoes, garlic powder, onion powder, grated cheese, oats, salt, and pepper.
  3. Transfer the mixture to a baking dish and smooth the top.
  4. Bake for about 30 minutes, until set and golden on top.
  5. Let cool for a few minutes, then garnish with fresh herbs before serving.

Notes

  • Swap in broccoli, kale, or corn based on availability or preference.
  • Try different cheeses like mozzarella or Parmesan for variation.
  • Add herbs like thyme or rosemary for extra flavor.
  • Store leftovers in the fridge for up to 3 days.
  • Freezer-friendly: cool completely, portion, and freeze.
  • Reheat in oven or microwave.
  • Great for meal prep or make-ahead baking.

Nutrition

  • Serving Size: 1 slice (⅙ of bake)
  • Calories: 210
  • Sugar: 4g
  • Sodium: 420mg
  • Fat: 10g
  • Saturated Fat: 4g
  • Unsaturated Fat: 5g
  • Trans Fat: 0g
  • Carbohydrates: 15g
  • Fiber: 3g
  • Protein: 18g
  • Cholesterol: 35mg

Have you made this recipe? I'd love to see it!

Click here to Follow me on Pinterest

Pumpkin Cottage Cheese Pancakes

August 23, 2025 by Sue Leave a Comment

I’m absolutely in love with these pancakes—they’re fluffy, flavorful, and packed with protein thanks to cottage cheese. I wanted a cozy fall twist on my favorite cottage cheese pancakes, and the pumpkin flavor totally exceeded my expectations. They’re gluten-free, nut-free, and come together with just a handful of simple ingredients. Pumpkin Cottage Cheese Pancakes

Why You’ll Love This Recipe

I’m obsessed with how easy these are to make. The cottage cheese gives them a rich, moist texture that kids and adults love—my 9-month-old even devoured them, and we all went back for seconds! The fall twist from the pumpkin makes them feel extra special, yet the recipe stays quick and approachable.

ingredients

(Here’s a tip: Check out the full list of ingredients and measurements in the recipe card below.)

I gather these ingredients every time I make it:

  • 4 eggs (I don’t recommend flax eggs here)

  • 1 cup cottage cheese

  • ½ cup pumpkin puree

  • 3 tablespoons pure maple syrup, plus more for serving

  • 1 teaspoon vanilla extract

  • 1 cup gluten-free all-purpose flour (I’ll use regular all-purpose flour if I’m not going GF)

  • ½ tablespoon baking powder

  • ½ teaspoon cinnamon

  • Any desired mix-ins, like chocolate chips or fruit

directions

  1. I whisk together the eggs, cottage cheese, pumpkin puree, maple syrup, and vanilla in a large bowl—sometimes I use a blender if I want it extra smooth.

  2. Then I mix in the flour, baking powder, and cinnamon until just combined.

  3. If I’m feeling fancy, I fold in mix-ins like chocolate chips or berries.

  4. I preheat a skillet over medium-low heat, add a bit of butter or oil, and drop about ¼ cup of batter per pancake—leaving space between them.

  5. I cook each side for about 3–5 minutes until golden, then flip and repeat.

  6. Finally, I serve them hot with extra maple syrup and any little extras I’m loving that day.

Servings and timing

  • Prep time: about 5 minutes

  • Cook time: around 10 minutes

  • Total time: roughly 15 minutes

  • Yield: about 8–10 pancakes

Variations

I like to get creative with mix-ins depending on what I have in the kitchen. Chocolate chips, chopped nuts, blueberries, or even a dash of nutmeg or pumpkin spice make fun additions. Swapping the maple syrup in the batter for mashed banana also works if I want them naturally sweetened.

storage/reheating

I store leftover pancakes in an airtight container in the fridge for up to 5 days, or freeze them for up to 2 months. Reheating is simple: a quick warm-up in the microwave works well, or I use the oven set to low heat. Sometimes I freeze the batter in portions so I can quickly whip up a fresh batch later.

FAQs

How do I keep the batter extra smooth?

I like to blend it all in a blender when I want a silky, lump-free batter.

Can I make them non-gluten-free?

Yes, I just swap in regular all-purpose flour if I’m not avoiding gluten.

What mix-ins work best?

I usually go for chocolate chips, blueberries, or diced apples—whatever I’m in the mood for.

Can I omit the maple syrup from the batter for kids?

Definitely. I skip the syrup in the batter when making these for little ones and just drizzle a bit on top when serving.

How do I avoid burnt outsides and undercooked middles?

I keep the skillet over medium-low heat so they cook through evenly without burning on the outside.

Conclusion

I’m smitten with these Pumpkin Cottage Cheese Pancakes—they’re my go-to fall breakfast. They come together fast, taste cozy and indulgent, yet stay wholesome and protein-rich. Freezer-friendly, kid-approved, and endlessly customizable, they make weekday mornings feel like a treat. I hope you love making them as much as I do!

Print

clock clock iconcutlery cutlery iconflag flag iconfolder folder iconinstagram instagram iconpinterest pinterest iconfacebook facebook iconprint print iconsquares squares iconheart heart iconheart solid heart solid icon
Pumpkin Cottage Cheese Pancakes

5 Stars 4 Stars 3 Stars 2 Stars 1 Star No reviews
  • Author: Sue
  • Prep Time: 5 minutes
  • Cook Time: 10 minutes
  • Total Time: 15 minutes
  • Yield: 8–10 pancakes
  • Category: Breakfast
  • Method: Stovetop
  • Cuisine: American
  • Diet: Gluten Free
Print Recipe
Pin Recipe

Description

These Pumpkin Cottage Cheese Pancakes are fluffy, protein-packed, and have a cozy fall flavor. They’re quick to make, gluten-free, nut-free, and loved by both kids and adults.


Ingredients

  • 4 eggs
  • 1 cup cottage cheese
  • ½ cup pumpkin puree
  • 3 tablespoons pure maple syrup, plus more for serving
  • 1 teaspoon vanilla extract
  • 1 cup gluten-free all-purpose flour
  • ½ tablespoon baking powder
  • ½ teaspoon cinnamon
  • Optional mix-ins: chocolate chips or fruit

Instructions

  1. Whisk together the eggs, cottage cheese, pumpkin puree, maple syrup, and vanilla extract in a large bowl or blend for a smoother texture.
  2. Mix in the flour, baking powder, and cinnamon until just combined.
  3. Fold in any desired mix-ins like chocolate chips or berries.
  4. Preheat a skillet over medium-low heat and lightly grease with butter or oil.
  5. Drop about ¼ cup of batter per pancake onto the skillet, leaving space between them.
  6. Cook for 3–5 minutes per side, or until golden and cooked through.
  7. Serve hot with extra maple syrup and preferred toppings.

Notes

  • Use a blender for an extra smooth batter.
  • Regular all-purpose flour can replace gluten-free flour if needed.
  • Omit maple syrup from batter for babies and sweeten with toppings instead.
  • Keep heat at medium-low to avoid burning and ensure even cooking.
  • Store leftovers in the fridge for up to 5 days or freeze for up to 2 months.

Nutrition

  • Serving Size: 2 pancakes
  • Calories: 180
  • Sugar: 5g
  • Sodium: 200mg
  • Fat: 6g
  • Saturated Fat: 2g
  • Unsaturated Fat: 3g
  • Trans Fat: 0g
  • Carbohydrates: 20g
  • Fiber: 2g
  • Protein: 10g
  • Cholesterol: 120mg

Have you made this recipe? I'd love to see it!

Click here to Follow me on Pinterest

Cotton Candy Cookies

August 21, 2025 by Sue Leave a Comment

These cotton candy cookies are soft, colorful, and full of nostalgic flavor. With pastel hues and that unmistakable cotton candy taste, these cookies are a fun and whimsical treat perfect for parties, holidays, or anytime I want to satisfy a sweet craving with something unique. Cotton Candy Cookies

Why You’ll Love This Recipe

I love how easy and fun these cookies are to make. The texture is perfectly soft with a slight chew, and the flavor brings back all the memories of county fairs and summer carnivals. They’re also a huge hit with kids and adults alike. Plus, I can customize the colors to match any celebration or theme. Whether it’s a baby shower, birthday, or just a Tuesday, these cookies always bring a smile.

Ingredients

(Here's a tip: Check out the full list of ingredients and measurements in the recipe card below.)

  • All-purpose flour

  • Baking soda

  • Salt

  • Unsalted butter (softened)

  • Granulated sugar

  • Brown sugar

  • Eggs

  • Cotton candy flavoring

  • Pink and blue food coloring

  • White chocolate chips or candy melts (optional)

Directions

  1. I start by preheating the oven and lining my baking sheets with parchment paper.

  2. In a medium bowl, I whisk together the flour, baking soda, and salt.

  3. In another large bowl, I cream the butter and sugars together until fluffy.

  4. I add in the eggs one at a time, then stir in the cotton candy flavoring.

  5. Gradually, I mix the dry ingredients into the wet mixture until just combined.

  6. I divide the dough into two bowls and color one half pink and the other blue.

  7. I take small pieces from each color, press them together lightly, and roll them into balls for a swirl effect.

  8. At this point, I like to fold in white chocolate chips for an extra indulgent touch.

  9. I place the cookie dough balls onto the baking sheet and bake until the edges are just set.

  10. After cooling for a few minutes on the sheet, I transfer them to a wire rack to cool completely.

Servings and timing

This recipe makes about 24 cookies. The total prep time is approximately 15 minutes, with a baking time of 10 to 12 minutes per batch. I always let them cool for about 10 minutes afterward before serving.

Variations

If I want an extra pop of flavor, I sometimes mix in a few drops of vanilla or almond extract alongside the cotton candy flavoring. For a crunchier texture, I’ve added sprinkles or sanding sugar on top before baking. I also love using different pastel colors depending on the occasion—lavender and mint green make a beautiful spring version.

Storage/Reheating

I store these cookies in an airtight container at room temperature for up to 5 days. If I want to keep them longer, I freeze the baked cookies for up to 2 months. To reheat, I pop them in the microwave for 10–15 seconds to bring back that just-baked warmth and softness.

FAQs

What does cotton candy flavoring taste like?

Cotton candy flavoring has a sweet, slightly fruity taste that reminds me of spun sugar from the fair. It’s subtle but definitely recognizable and gives the cookies their fun twist.

Can I make the dough ahead of time?

Yes, I often make the dough ahead and keep it chilled in the fridge for up to 2 days. It’s also freezer-friendly if I want to prep even further in advance.

Do I have to use food coloring?

No, I don’t have to, but the pink and blue swirls really bring the cotton candy theme to life. If I skip the coloring, the flavor still shines through.

Can I use margarine instead of butter?

I’ve found that butter gives the best texture and flavor. Margarine can be used in a pinch, but it might make the cookies spread more and change the taste slightly.

What’s the best way to get a strong cotton candy flavor?

I make sure to use a good quality cotton candy flavoring and add just enough to be noticeable without overpowering. I taste the dough to get it just right before baking.

Conclusion

These cotton candy cookies are soft, sweet, and filled with charm. I love how they turn a simple dessert into something playful and memorable. Whether I'm baking for kids or indulging my inner child, this recipe always delivers fun in every bite.

Print

clock clock iconcutlery cutlery iconflag flag iconfolder folder iconinstagram instagram iconpinterest pinterest iconfacebook facebook iconprint print iconsquares squares iconheart heart iconheart solid heart solid icon
Cotton Candy Cookies

Cotton Candy Cookies

5 Stars 4 Stars 3 Stars 2 Stars 1 Star No reviews
  • Author: Sue
  • Prep Time: 15 minutes
  • Cook Time: 12 minutes
  • Total Time: 37 minutes
  • Yield: 24 cookies
  • Category: Dessert
  • Method: Baking
  • Cuisine: American
  • Diet: Vegetarian
Print Recipe
Pin Recipe

Description

Soft, colorful cookies with a nostalgic cotton candy flavor, perfect for parties and special occasions.


Ingredients

  • 2 ½ cups all-purpose flour
  • ½ tsp baking soda
  • ¼ tsp salt
  • 1 cup unsalted butter, softened
  • ¾ cup granulated sugar
  • ¾ cup brown sugar
  • 2 large eggs
  • 1 ½ tsp cotton candy flavoring
  • Pink food coloring
  • Blue food coloring
  • 1 cup white chocolate chips or candy melts (optional)

Instructions

  1. Preheat oven to 350°F (175°C) and line baking sheets with parchment paper.
  2. In a medium bowl, whisk together flour, baking soda, and salt.
  3. In a large bowl, cream together butter, granulated sugar, and brown sugar until light and fluffy.
  4. Add eggs one at a time, beating well after each addition, then mix in cotton candy flavoring.
  5. Gradually mix dry ingredients into the wet ingredients until just combined.
  6. Divide dough into two bowls; add pink food coloring to one and blue to the other, mixing until evenly colored.
  7. Take small pieces of each colored dough, press together lightly, and roll into balls to create a swirl effect.
  8. Optional: Fold in white chocolate chips or candy melts for extra sweetness.
  9. Place cookie dough balls on prepared baking sheets, spacing them about 2 inches apart.
  10. Bake for 10–12 minutes or until edges are set but centers are still soft.
  11. Let cookies cool on the baking sheet for 5 minutes before transferring to a wire rack to cool completely.

Notes

  • Use high-quality cotton candy flavoring for the best taste.
  • Customize colors to match themes or events.
  • For added texture, top with sprinkles before baking.
  • Freeze baked cookies for up to 2 months; reheat briefly before serving.

Nutrition

  • Serving Size: 1 cookie
  • Calories: 180
  • Sugar: 16g
  • Sodium: 75mg
  • Fat: 9g
  • Saturated Fat: 5g
  • Unsaturated Fat: 3g
  • Trans Fat: 0g
  • Carbohydrates: 24g
  • Fiber: 0g
  • Protein: 2g
  • Cholesterol: 25mg

Have you made this recipe? I'd love to see it!

Click here to Follow me on Pinterest

Pizza Casserole

August 21, 2025 by Sue Leave a Comment

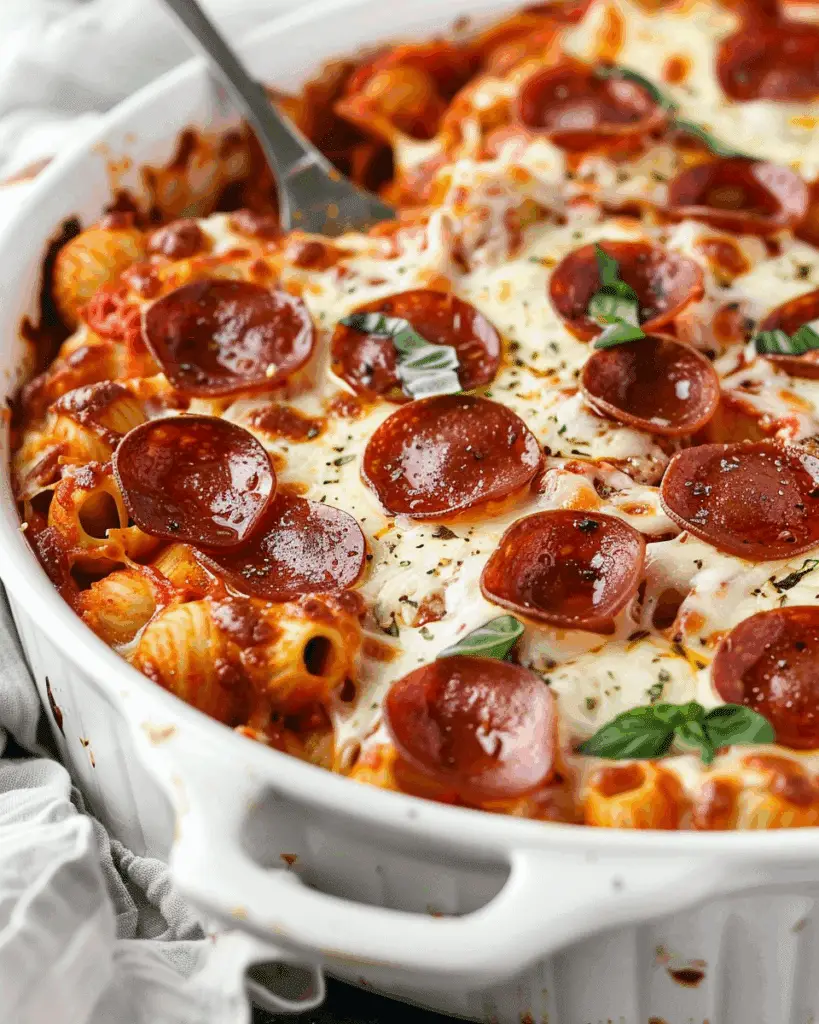
I adore this pizza casserole because it’s a fun, comforting one-dish meal that combines pasta, sauce, and all the beloved pizza flavors—pepperoni, cheese, seasoned beef—into a hearty bake. It’s simple, customizable, and freezer-friendly, making it a true lifesaver on busy nights. Pizza Casserole

Why I’ll Love This Recipe

I love this recipe because:

  • It’s incredibly quick and straightforward, yet yields delicious results

  • It uses common ingredients, so I rarely need to shop specifically for it

  • It’s perfect for families and picky eaters—everyone seems to enjoy it

  • It’s ideal for make-ahead or freezer meals, which fits my busy schedule perfectly

ingredients

(Here’s a tip: Check out the full list of ingredients and measurements in the recipe card below.)
I gather:

  • 1 pound ground beef

  • Salt and pepper, to taste

  • ½ tablespoon olive oil

  • ½ cup onion, chopped

  • 1 teaspoon minced garlic

  • 2 cups shredded mozzarella cheese, divided

  • 16 ounces rotini or penne pasta (uncooked)

  • 24 ounces spaghetti or marinara sauce

  • 1 tablespoon Italian seasoning

  • 1 cup pepperoni slices

  • ½ teaspoon Italian seasoning (for topping)

  • Fresh shredded parmesan (optional garnish)

directions

  1. Preheat the oven to 350°F and spray a 9×13-inch pan with nonstick spray.

  2. Cook the pasta al dente following package instructions. Drain and set aside.

  3. In a large skillet, heat the olive oil and sauté ground beef, onions, garlic, salt, and pepper until the meat is no longer pink. Drain off any excess grease.

  4. Stir the spaghetti or marinara sauce and 1 tablespoon Italian seasoning into the skillet until heated through, then remove from heat.

  5. Mix the cooked pasta and 1 cup of mozzarella cheese with the meat mixture, then spread it evenly in the prepared pan.

  6. Top with the remaining 1 cup of mozzarella, then arrange pepperoni slices on top. Sprinkle with ½ teaspoon Italian seasoning.

  7. Bake uncovered for 25–30 minutes at 350°F.

Servings and timing

  • Serves: 8 people

  • Prep time: about 10 minutes

  • Cook time: about 30 minutes

  • Total time: around 40 minutes

Variations

I experiment with these easy swaps:

  • Use ground turkey or chicken, or a mix of Italian sausage and beef

  • Swap in penne, ziti, bowtie, macaroni, or shells if I don’t have rotini

  • Ditch the meat for a vegetarian or even vegan version—use dairy-free cheese or roasted cauliflower for a keto twist

  • Add fresh or sautéed vegetables like mushrooms, olives, bell peppers, spinach, or broccoli

  • Try different cheeses: provolone, Italian blend, cheddar—or even an alfredo base for a white sauce pizza casserole

storage/reheating

I follow these steps to keep or reheat leftovers perfectly:

  • To store: After baking, I keep leftovers in an airtight container in the fridge for up to 3–4 days

  • To freeze: I freeze the casserole unbaked for up to 3 months, wrapped tightly

  • To reheat: I use the oven or microwave until it's heated through

FAQs

What if I want to make the casserole ahead of time?

I often assemble it and refrigerate it for several hours before baking—or bake it ahead, cool it completely, wrap it, and store it in the fridge (up to 4 days) before reheating.

Can I freeze the baked casserole?

Yes—I freeze the baked, cooled casserole in a tightly wrapped container for up to 2–3 months, then thaw it in the refrigerator before reheating.

Can I adjust the seasoning if I don’t have Italian seasoning?

Absolutely—I mix oregano, basil, and rosemary to approximate Italian seasoning.

Do I need to cook the pasta fully before baking?

I cook it just to al dente, since it continues to cook in the sauce during baking. No need to overcook.

Conclusion

I’m always thrilled when I make this pizza casserole—it’s fast, flexible, and reminiscent of my favorite pizza flavors, but with way less fuss. Whether I’m planning for busy weeknights, feeding a group, or just craving cozy, cheesy comfort, this recipe delivers every time.

Print

clock clock iconcutlery cutlery iconflag flag iconfolder folder iconinstagram instagram iconpinterest pinterest iconfacebook facebook iconprint print iconsquares squares iconheart heart iconheart solid heart solid icon
Pizza Casserole

Pizza Casserole

5 Stars 4 Stars 3 Stars 2 Stars 1 Star No reviews
  • Author: Sue
  • Prep Time: 10 minutes
  • Cook Time: 30 minutes
  • Total Time: 40 minutes
  • Yield: 8 servings
  • Category: Dinner
  • Method: Baking
  • Cuisine: American
  • Diet: Halal
Print Recipe
Pin Recipe

Description

A hearty, comforting one-dish meal that combines pasta, sauce, cheese, and pizza toppings into a baked casserole. Perfect for busy weeknights, it's simple, customizable, and freezer-friendly.


Ingredients

  • 1 pound ground beef
  • Salt and pepper, to taste
  • ½ tablespoon olive oil
  • ½ cup onion, chopped
  • 1 teaspoon minced garlic
  • 2 cups shredded mozzarella cheese, divided
  • 16 ounces rotini or penne pasta (uncooked)
  • 24 ounces spaghetti or marinara sauce
  • 1 tablespoon Italian seasoning
  • 1 cup pepperoni slices
  • ½ teaspoon Italian seasoning (for topping)
  • Fresh shredded parmesan (optional garnish)

Instructions

  1. Preheat the oven to 350 °F and spray a 9×13‑inch pan with nonstick spray.
  2. Cook the pasta al dente following package instructions. Drain and set aside.
  3. In a large skillet, heat olive oil and sauté ground beef, onions, garlic, salt, and pepper until the meat is no longer pink. Drain excess grease.
  4. Stir the spaghetti or marinara sauce and 1 tablespoon Italian seasoning into the skillet until heated through; then remove from heat.
  5. Mix the cooked pasta and 1 cup of mozzarella cheese with the meat mixture, then spread it evenly in the prepared pan.
  6. Top with the remaining 1 cup of mozzarella, then arrange pepperoni slices on top. Sprinkle with ½ teaspoon Italian seasoning.
  7. Bake uncovered for 25–30 minutes at 350 °F until bubbly and the cheese is melted.

Notes

  • Use any pasta shape like penne, ziti, or macaroni if rotini is unavailable.
  • Swap beef for ground turkey, chicken, or Italian sausage.
  • Make it vegetarian or vegan with plant-based cheese and no meat.
  • Add vegetables like mushrooms, olives, or bell peppers for extra nutrition.
  • Store leftovers in the fridge for up to 4 days or freeze unbaked for up to 3 months.

Nutrition

  • Serving Size: 1 serving
  • Calories: 420
  • Sugar: 6g
  • Sodium: 850mg
  • Fat: 20g
  • Saturated Fat: 9g
  • Unsaturated Fat: 9g
  • Trans Fat: 0g
  • Carbohydrates: 38g
  • Fiber: 3g
  • Protein: 23g
  • Cholesterol: 60mg

Have you made this recipe? I'd love to see it!

Click here to Follow me on Pinterest

Rotel Dip

August 21, 2025 by Sue Leave a Comment

This Rotel Dip is a creamy, cheesy, and flavorful crowd-pleaser made with just three ingredients: Velveeta, Rotel tomatoes with green chiles, and ground beef. It’s ready in about 20 minutes and always disappears fast at any gathering. Rotel Dip

Why I’ll Love This Recipe

I love how incredibly easy this dip is to make with just a few ingredients. It’s rich, creamy, and packs the perfect amount of heat. Whether I’m hosting game day or just snacking on the weekend, this dip is a reliable favorite. I also enjoy how versatile it is—I can switch up the meat, spice level, or even toss it in the slow cooker to keep it warm during a party.

Ingredients

(Here’s a tip: Check out the full list of ingredients and measurements in the recipe card below.)

  • 16 ounces Velveeta

  • 1 (10-ounce) can Rotel (diced tomatoes with green chiles)

  • 1 pound ground beef

Directions

  1. I start by browning the ground beef in a skillet over medium heat until it’s fully cooked.

  2. While the meat cooks, I cut the Velveeta into cubes.

  3. Once the beef is done, I add the cubed Velveeta and the entire can of Rotel (including the liquid) to the skillet.

  4. I stir everything together over medium-low heat until the cheese is fully melted and the dip is smooth and creamy.

  5. Once it’s hot and bubbling, I transfer it to a serving bowl or a slow cooker to keep it warm.

Servings and timing

  • Servings: About 12

  • Prep Time: 5 minutes

  • Cook Time: 15 minutes

  • Total Time: 20 minutes

Variations

  • I like swapping the ground beef for spicy sausage to give the dip a little extra kick.

  • Sometimes I mix in a few spoonfuls of cream cheese for added creaminess.

  • If I want it spicier, I choose the hot version of Rotel or add diced jalapeños.

  • For a milder version, I go with mild Rotel and ground turkey.

  • I’ve also made it in the slow cooker by adding all ingredients and heating on low until melted, stirring occasionally.

Storage/Reheating

  • I store leftover dip in an airtight container in the fridge for up to 3–4 days.

  • To reheat, I microwave it in 30-second intervals, stirring in between, until hot and smooth.

  • If it thickens too much, I add a splash of milk to loosen it up.

  • I can also freeze the dip for up to 1–2 months. I thaw it in the fridge overnight before reheating.

FAQs

1. Can I make this dip without meat?

Yes, I sometimes skip the meat entirely and just use Velveeta and Rotel for a quick vegetarian version.

2. Can I use shredded cheese instead of Velveeta?

I’ve tried it, but shredded cheese doesn’t melt as smoothly. Velveeta gives the creamiest texture.

3. How do I keep it warm for a party?

I pour the dip into a small slow cooker and keep it on the “warm” setting. Stirring occasionally helps keep the texture smooth.

4. What should I serve with Rotel Dip?

I like serving it with tortilla chips, but pretzels, crackers, and veggie sticks like celery and carrots work great too.

5. Can I double the recipe for a bigger group?

Absolutely. I just double all the ingredients and cook in a larger skillet or use a slow cooker for easy serving.

Conclusion

Rotel Dip is one of those go-to recipes I keep in my back pocket. It’s quick, comforting, and always gets rave reviews. Whether I serve it at a party or whip it up for a movie night, I know this dip will hit the spot every time.

Print

clock clock iconcutlery cutlery iconflag flag iconfolder folder iconinstagram instagram iconpinterest pinterest iconfacebook facebook iconprint print iconsquares squares iconheart heart iconheart solid heart solid icon
Rotel Dip

Rotel Dip

5 Stars 4 Stars 3 Stars 2 Stars 1 Star No reviews
  • Author: Sue
  • Prep Time: 5 minutes
  • Cook Time: 15 minutes
  • Total Time: 20 minutes
  • Yield: 12 servings
  • Category: Appetizer
  • Method: Stovetop
  • Cuisine: American
  • Diet: Gluten Free
Print Recipe
Pin Recipe

Description

A classic, three-ingredient Rotel Dip made with Velveeta, Rotel tomatoes with green chiles, and ground beef. This quick and creamy dip is perfect for parties, game days, or any casual gathering.


Ingredients

  • 16 ounces Velveeta
  • 1 (10-ounce) can of Rotel (tomatoes with green chiles)
  • 1 pound ground beef

Instructions

  1. Brown the ground beef in a skillet until cooked through.
  2. Cube the Velveeta while the beef cooks.
  3. Stir in the cubed Velveeta and the entire can of Rotel (including juices) with the cooked beef.
  4. Cook and stir regularly until the cheese melts and the dip becomes smooth and creamy.
  5. Serve immediately or transfer to a slow cooker to keep warm.

Notes

  • Swap ground beef for sausage or mix both for extra flavor.
  • Use hot Rotel or add green chiles for extra spice.
  • Add cream cheese or jalapeño Velveeta for a richer dip.
  • Keep warm in a slow cooker and thin with milk if needed.
  • Store leftovers in an airtight container for 3–4 days or freeze up to 2 months.

Nutrition

  • Serving Size: 1/12 of recipe
  • Calories: 220
  • Sugar: 3g
  • Sodium: 720mg
  • Fat: 17g
  • Saturated Fat: 8g
  • Unsaturated Fat: 7g
  • Trans Fat: 0g
  • Carbohydrates: 6g
  • Fiber: 1g
  • Protein: 12g
  • Cholesterol: 50mg

Have you made this recipe? I'd love to see it!

Click here to Follow me on Pinterest

Maple Cookies with Maple Icing

August 21, 2025 by Sue Leave a Comment

These maple cookies with maple icing are soft, chewy, and packed with warm, cozy maple flavor. They’re the perfect treat for fall, but I love baking them year-round whenever I’m craving something sweet and comforting. The rich maple glaze adds just the right amount of sweetness, giving each bite a melt-in-your-mouth finish. Maple Cookies with Maple Icing

Why You’ll Love This Recipe

I love how easy these cookies are to whip up with pantry staples and a bottle of pure maple syrup. They’re perfect for anyone who enjoys soft cookies with a rich, sweet glaze. The maple flavor isn’t overpowering—just warm and comforting. These cookies also make a great homemade gift or a beautiful addition to a cookie tray during the holidays.

Ingredients

(Here's a tip: Check out the full list of ingredients and measurements in the recipe card below.)

flour
baking soda
baking powder
salt
ground cinnamon
unsalted butter
brown sugar
pure maple syrup
egg
vanilla extract

For the maple icing:
powdered sugar
pure maple syrup
milk (or cream, to thin the icing)

Directions

  1. I start by preheating the oven to 350°F (175°C) and lining a baking sheet with parchment paper.

  2. In a bowl, I whisk together the flour, baking soda, baking powder, salt, and cinnamon.

  3. In a separate bowl, I beat the butter and brown sugar until light and fluffy. Then I mix in the maple syrup, egg, and vanilla extract until well combined.

  4. I gradually add the dry ingredients to the wet mixture, mixing until just combined.

  5. I scoop tablespoon-sized balls of dough onto the prepared baking sheet, spacing them a couple of inches apart.

  6. I bake them for 10–12 minutes, or until the edges are lightly golden and the centers are set.

  7. While the cookies cool, I prepare the icing by whisking together powdered sugar, maple syrup, and a splash of milk until smooth.

  8. Once the cookies are completely cool, I drizzle or spread the icing on top and let it set before serving.

Servings and timing

This recipe makes about 24 cookies. Prep time takes around 15 minutes, bake time is 10–12 minutes per batch, and I allow at least 30 minutes for cooling and icing. Altogether, I plan for just under an hour from start to finish.

Variations

  • I sometimes add chopped toasted pecans or walnuts to the dough for extra texture and nuttiness.

  • If I want a stronger maple flavor, I use a touch of maple extract in the cookie dough or icing.

  • For a sandwich cookie variation, I spread the maple icing between two cookies instead of on top.

  • I like using browned butter for a richer, nutty flavor that pairs beautifully with maple.

storage/reheating

I store these cookies in an airtight container at room temperature for up to 4 days. If I want to keep them longer, I refrigerate them for up to a week or freeze them for up to 2 months. When freezing, I layer parchment between cookies to prevent sticking. I let them come to room temperature before serving. If the icing hardens too much, a few seconds in the microwave softens them just right.

FAQs

How do I keep maple cookies soft?

I keep them soft by not overbaking. I remove them from the oven when they’re just set in the center and let them finish setting on the pan. Storing them in an airtight container also helps.

Can I use pancake syrup instead of pure maple syrup?

Technically I could, but I don’t recommend it. Pure maple syrup gives the cookies their deep, rich flavor. Pancake syrup is usually just corn syrup with flavoring and won’t taste the same.

Can I freeze maple cookies?

Yes, I freeze them after icing by placing them in a single layer until solid, then transferring them to a freezer-safe bag or container. They thaw well at room temperature.

What’s the best way to apply the icing?

I either drizzle the icing with a spoon or spread it gently with a butter knife. If I want a neat look, I use a piping bag with a small tip.

Can I make these cookies ahead of time?

Definitely. I sometimes make the dough a day in advance and refrigerate it, or bake the cookies and ice them the next day. The flavor actually deepens after a day, making them even better.

Conclusion

These maple cookies with maple icing are everything I love in a homemade treat—simple, sweet, and satisfying. The cozy maple flavor and soft texture make them an instant favorite every time I bake a batch. Whether I’m making them for a special occasion or just because, they always hit the spot.

Print

clock clock iconcutlery cutlery iconflag flag iconfolder folder iconinstagram instagram iconpinterest pinterest iconfacebook facebook iconprint print iconsquares squares iconheart heart iconheart solid heart solid icon
Maple Cookies with Maple Icing

Maple Cookies with Maple Icing

5 Stars 4 Stars 3 Stars 2 Stars 1 Star No reviews
  • Author: Sue
  • Prep Time: 15 minutes
  • Cook Time: 12 minutes
  • Total Time: 55 minutes
  • Yield: 24 cookies
  • Category: Dessert
  • Method: Baking
  • Cuisine: American
  • Diet: Vegetarian
Print Recipe
Pin Recipe

Description

These soft and chewy maple cookies are infused with warm maple flavor and topped with a rich maple icing, making them a comforting treat perfect for fall or any time of year.


Ingredients

  • 2 ½ cups all-purpose flour
  • ½ tsp baking soda
  • ½ tsp baking powder
  • ½ tsp salt
  • ½ tsp ground cinnamon
  • ¾ cup unsalted butter, softened
  • 1 cup brown sugar
  • ½ cup pure maple syrup
  • 1 large egg
  • 1 tsp vanilla extract
  • For the maple icing:
  • 1 ½ cups powdered sugar
  • 2-3 tablespoon pure maple syrup
  • 1-2 tablespoon milk or cream (to thin the icing)

Instructions

  1. Preheat oven to 350°F (175°C) and line a baking sheet with parchment paper.
  2. In a bowl, whisk together flour, baking soda, baking powder, salt, and cinnamon.
  3. In another bowl, beat butter and brown sugar until light and fluffy.
  4. Mix in maple syrup, egg, and vanilla extract until well combined.
  5. Gradually add dry ingredients to wet ingredients and mix until just combined.
  6. Scoop tablespoon-sized dough balls onto the prepared baking sheet, spacing them apart.
  7. Bake for 10–12 minutes, or until edges are lightly golden and centers are set.
  8. Let cookies cool completely on a wire rack.
  9. Whisk together powdered sugar, maple syrup, and milk/cream to make the icing.
  10. Drizzle or spread icing over cooled cookies and let it set before serving.

Notes

  • Add chopped toasted pecans or walnuts for extra texture.
  • Use a touch of maple extract for a stronger maple flavor.
  • Make sandwich cookies by spreading icing between two cookies.
  • Use browned butter for a nuttier, richer flavor.
  • Store in an airtight container for up to 4 days at room temperature, or freeze for longer storage.

Nutrition

  • Serving Size: 1 cookie
  • Calories: 160
  • Sugar: 12g
  • Sodium: 80mg
  • Fat: 7g
  • Saturated Fat: 4g
  • Unsaturated Fat: 2g
  • Trans Fat: 0g
  • Carbohydrates: 23g
  • Fiber: 0g
  • Protein: 1g
  • Cholesterol: 20mg

Have you made this recipe? I'd love to see it!

Click here to Follow me on Pinterest

Coconut Cloud Cake

August 21, 2025 by Sue Leave a Comment

This Coconut Cloud Cake is a dreamy, fluffy dessert that feels like biting into a sweet, tropical cloud. Light and airy layers are infused with coconut flavor and topped with whipped frosting and shredded coconut for a beautiful and delicate finish. It’s the perfect treat for any celebration or when I just want to indulge in something extra special. Coconut Cloud Cake

Why You’ll Love This Recipe

I love how this cake delivers rich coconut flavor without feeling too heavy. The texture is incredibly soft and pillowy—hence the “cloud” in the name. It’s a showstopper at any gathering but simple enough to make on a weekend. Whether I’m hosting a birthday or just craving a light yet satisfying dessert, this cake hits all the right notes. Plus, the coconut topping adds the perfect chewy contrast to the soft cake.

ingredients

(Here's a tip: Check out the full list of ingredients and measurements in the recipe card below.)

  • Cake flour

  • Baking powder

  • Salt

  • Unsalted butter

  • Granulated sugar

  • Egg whites

  • Coconut milk

  • Vanilla extract

  • Coconut extract

  • Sweetened shredded coconut

  • Heavy cream or whipped topping (for frosting)

directions

  1. I start by preheating the oven to 350°F (175°C) and greasing my cake pans.

  2. In a bowl, I whisk together the cake flour, baking powder, and salt.

  3. In another large bowl, I cream the butter and sugar until light and fluffy.

  4. I add the egg whites one at a time, mixing well after each.

  5. Then I stir in the coconut milk, vanilla extract, and coconut extract.

  6. I gradually add the dry ingredients into the wet, mixing just until combined.

  7. I pour the batter into the prepared pans and bake for 25–30 minutes, or until a toothpick comes out clean.

  8. Once baked, I let the cakes cool completely before frosting.

  9. I whip the heavy cream until soft peaks form (or use a prepared whipped topping) and spread it over the cake layers.

  10. I finish by sprinkling shredded coconut all over the cake for that signature “cloud” look.

Servings and timing

This cake serves about 10–12 people. It takes around 20 minutes to prepare and 25–30 minutes to bake, plus additional cooling time.

Variations

Sometimes I like to add a bit of lemon or lime zest to the batter for a citrus twist. If I want more texture, I fold in some toasted coconut into the frosting. For a more indulgent version, I might layer the cake with coconut pastry cream in between. I’ve also tried using a cream cheese-coconut frosting instead of whipped topping—it’s a richer option but absolutely delicious.

storage/reheating

I store the cake in the refrigerator, covered, for up to 4 days. Because of the whipped topping, I don’t recommend leaving it out at room temperature for too long. I don’t typically reheat this cake, but I do let it sit at room temperature for about 15 minutes before serving to bring back some of the softness.

FAQs

What kind of coconut milk should I use?

I use canned full-fat coconut milk for a richer flavor, but boxed coconut milk can work in a pinch if it’s unsweetened.

Can I make this cake ahead of time?

Yes, I often bake the cake layers a day ahead and store them wrapped tightly. I frost it the day I plan to serve for the best texture.

Is it possible to make this cake gluten-free?

I’ve had success using a 1:1 gluten-free flour blend in place of cake flour. The texture changes slightly, but it’s still delicious.

Can I freeze this cake?

I freeze the unfrosted cake layers by wrapping them well in plastic wrap and foil. I don’t recommend freezing the frosted version because the whipped topping can separate.

Can I use sweetened coconut cream instead of coconut milk?

I avoid using sweetened coconut cream as it can make the cake too dense and overly sweet. Coconut milk offers better balance and texture.

Conclusion

This Coconut Cloud Cake is one of my favorite ways to enjoy coconut in dessert form. It’s light, flavorful, and incredibly satisfying. Whether I’m sharing it with friends or keeping it all to myself (no shame in that!), it always brings joy. It’s simple enough to whip up but elegant enough to impress.

Print

clock clock iconcutlery cutlery iconflag flag iconfolder folder iconinstagram instagram iconpinterest pinterest iconfacebook facebook iconprint print iconsquares squares iconheart heart iconheart solid heart solid icon
Coconut Cloud Cake

Coconut Cloud Cake

5 Stars 4 Stars 3 Stars 2 Stars 1 Star No reviews
  • Author: Sue
  • Prep Time: 20 minutes
  • Cook Time: 30 minutes
  • Total Time: 50 minutes plus cooling
  • Yield: 10–12 servings
  • Category: Dessert
  • Method: Baking
  • Cuisine: American
  • Diet: Vegetarian
Print Recipe
Pin Recipe

Description

This Coconut Cloud Cake is a light and fluffy dessert infused with coconut flavor, topped with whipped frosting and shredded coconut. It's perfect for celebrations or whenever you crave a delicate yet indulgent treat.


Ingredients

  • 2 ½ cups cake flour
  • 2 ½ tsp baking powder
  • ½ tsp salt
  • ¾ cup unsalted butter, softened
  • 1 ¾ cups granulated sugar
  • 5 egg whites
  • 1 cup full-fat canned coconut milk
  • 1 tsp vanilla extract
  • 1 tsp coconut extract
  • 1 ½ cups sweetened shredded coconut
  • 2 cups heavy cream or 1 tub whipped topping

Instructions

  1. Preheat oven to 350°F (175°C) and grease two 9-inch cake pans.
  2. Whisk together cake flour, baking powder, and salt in a bowl.
  3. Cream the butter and sugar in a large bowl until light and fluffy.
  4. Add egg whites one at a time, mixing well after each addition.
  5. Stir in coconut milk, vanilla extract, and coconut extract.
  6. Gradually mix dry ingredients into the wet ingredients until just combined.
  7. Divide batter evenly between prepared pans and bake for 25–30 minutes or until a toothpick inserted comes out clean.
  8. Cool cakes completely on wire racks.
  9. Whip heavy cream until soft peaks form or use prepared whipped topping.
  10. Frost the cake and sprinkle shredded coconut generously on top and sides.

Notes

  • Add lemon or lime zest for a citrus twist.
  • Fold toasted coconut into frosting for extra texture.
  • Use coconut pastry cream for a richer filling.
  • Cream cheese-coconut frosting can be used for more indulgence.
  • Let cake sit at room temperature for 15 minutes before serving.

Nutrition

  • Serving Size: 1 slice
  • Calories: 410
  • Sugar: 28g
  • Sodium: 180mg
  • Fat: 22g
  • Saturated Fat: 15g
  • Unsaturated Fat: 5g
  • Trans Fat: 0g
  • Carbohydrates: 45g
  • Fiber: 2g
  • Protein: 5g
  • Cholesterol: 40mg

Have you made this recipe? I'd love to see it!

Click here to Follow me on Pinterest

Creamy Oyster Mushroom Pasta

August 21, 2025 by Sue Leave a Comment

This creamy oyster mushroom pasta is a comforting, rich, and satisfying dish that comes together quickly, making it perfect for a weeknight dinner or a cozy weekend treat. The earthy flavors of oyster mushrooms blend perfectly with a creamy garlic sauce, coating every strand of pasta in velvety goodness. Creamy Oyster Mushroom Pasta

Why You’ll Love This Recipe

I love how luxurious this dish feels with minimal effort. The oyster mushrooms bring a subtle, meaty texture and umami flavor that elevates the cream sauce without overpowering it. It's vegetarian-friendly, filling, and made with simple pantry ingredients. Plus, it's a one-pan kind of meal—less cleanup, more comfort.

ingredients

(Here's a tip: Check out the full list of ingredients and measurements in the recipe card below.)

  • Pasta (spaghetti, fettuccine, or linguine work great)

  • Oyster mushrooms, cleaned and roughly chopped

  • Garlic, minced

  • Onion, finely chopped

  • Heavy cream

  • Olive oil or butter

  • Parmesan cheese, grated

  • Salt and black pepper

  • Fresh parsley (optional, for garnish)

directions

  1. I start by bringing a large pot of salted water to a boil and cooking the pasta according to the package instructions. I reserve a bit of pasta water before draining.

  2. While the pasta cooks, I heat olive oil (or butter) in a large skillet over medium heat. I add the chopped onion and cook until soft and translucent.

  3. Then I toss in the minced garlic and stir until fragrant—about 30 seconds.

  4. I add the oyster mushrooms and sauté until they’re golden brown and tender, releasing their juices.

  5. I pour in the heavy cream, reduce the heat to low, and let it simmer for a few minutes until slightly thickened. If it’s too thick, I stir in a splash of the reserved pasta water.

  6. I season the sauce with salt and pepper to taste, then add the cooked pasta directly into the skillet.

  7. I toss everything together, making sure the pasta is fully coated in the creamy mushroom sauce.

  8. Finally, I top it with freshly grated Parmesan cheese and chopped parsley before serving.

Servings and timing

This recipe makes about 4 servings. It takes roughly 25–30 minutes from start to finish, including prep and cooking time.

Variations

Sometimes I like to add a splash of white wine before the cream to deepen the flavor. For a little heat, I sprinkle in some crushed red pepper flakes. When I want extra protein, grilled chicken or sautéed shrimp works beautifully. I’ve also swapped out heavy cream for coconut cream to keep it dairy-free—it’s just as creamy and rich.

storage/reheating

I store leftovers in an airtight container in the fridge for up to 3 days. To reheat, I add a splash of water or cream to a skillet and gently warm the pasta over medium-low heat. I avoid microwaving when possible, as it can dry out the sauce.

FAQs

Can I use other types of mushrooms?

Yes, I sometimes mix oyster mushrooms with cremini, shiitake, or even portobello for a more complex mushroom flavor.

Is this dish vegetarian?

It is! I make sure the Parmesan is vegetarian-friendly (some brands use animal rennet, so I check the label).

Can I make it gluten-free?

Absolutely—I just use my favorite gluten-free pasta and double-check that all other ingredients are safe.

What can I use instead of heavy cream?

I’ve had great results with half-and-half, coconut cream, or even blended cashews for a vegan option.

How do I prevent the sauce from getting too thick?

I always reserve a bit of pasta water. Adding a splash of it helps loosen the sauce and makes it silkier.

Conclusion

Creamy oyster mushroom pasta is one of those go-to meals I love to whip up when I want something indulgent but easy. The flavors are earthy, creamy, and comforting, and it’s endlessly customizable. Whether I’m feeding guests or just craving something cozy for myself, this dish never disappoints.

Print

clock clock iconcutlery cutlery iconflag flag iconfolder folder iconinstagram instagram iconpinterest pinterest iconfacebook facebook iconprint print iconsquares squares iconheart heart iconheart solid heart solid icon
Creamy Oyster Mushroom Pasta

Creamy Oyster Mushroom Pasta

5 Stars 4 Stars 3 Stars 2 Stars 1 Star No reviews
  • Author: Sue
  • Prep Time: 10 minutes
  • Cook Time: 15-20 minutes
  • Total Time: 25-30 minutes
  • Yield: 4 servings
  • Category: Main Course
  • Method: Stovetop
  • Cuisine: Italian-Inspired
  • Diet: Vegetarian
Print Recipe
Pin Recipe

Description

This creamy oyster mushroom pasta is a comforting, rich, and satisfying vegetarian dish featuring earthy oyster mushrooms in a velvety garlic cream sauce, perfect for weeknight dinners or cozy weekends.


Ingredients

  • 12 oz pasta (spaghetti, fettuccine, or linguine)
  • 8 oz oyster mushrooms, cleaned and roughly chopped
  • 3 cloves garlic, minced
  • 1 small onion, finely chopped
  • 1 cup heavy cream
  • 2 tbsp olive oil or butter
  • ½ cup Parmesan cheese, grated
  • Salt and black pepper to taste
  • Fresh parsley, chopped (optional, for garnish)

Instructions

  1. Bring a large pot of salted water to a boil. Cook pasta according to package instructions. Reserve ½ cup of pasta water, then drain the pasta.
  2. In a large skillet over medium heat, heat olive oil or butter. Add chopped onion and cook until soft and translucent.
  3. Add minced garlic and cook until fragrant, about 30 seconds.
  4. Add oyster mushrooms and sauté until golden brown and tender.
  5. Pour in heavy cream, reduce heat to low, and simmer for a few minutes until slightly thickened. Add a splash of reserved pasta water if needed.
  6. Season with salt and black pepper to taste.
  7. Add cooked pasta to the skillet and toss to coat in the creamy mushroom sauce.
  8. Top with grated Parmesan cheese and chopped parsley before serving.

Notes

  • Use gluten-free pasta for a gluten-free version.
  • Swap heavy cream with coconut cream or blended cashews for a dairy-free or vegan version.
  • Adding a splash of white wine before the cream enhances flavor depth.
  • Red pepper flakes can be added for heat.
  • Leftovers keep for up to 3 days in the fridge.

Nutrition

  • Serving Size: 1 serving
  • Calories: 480
  • Sugar: 3g
  • Sodium: 320mg
  • Fat: 25g
  • Saturated Fat: 13g
  • Unsaturated Fat: 10g
  • Trans Fat: 0g
  • Carbohydrates: 50g
  • Fiber: 3g
  • Protein: 14g
  • Cholesterol: 55mg

Have you made this recipe? I'd love to see it!

Click here to Follow me on Pinterest

Butterfinger Puppy Chow

August 20, 2025 by Sue Leave a Comment

A no-bake, crunchy, chocolate-peanut buttery snack with bits of Butterfinger candy—perfect for parties or when sweet cravings strike hard. I love how easy it is to whip this up without turning on the oven, and the texture is as fun as the flavor. This recipe takes the classic Muddy Buddies and levels them up with crushed Butterfinger bars. Irresistible, addictive, and ideal for sharing—or not! Butterfinger Puppy Chow

Why You’ll Love This Recipe

I always turn to this Butterfinger Puppy Chow when I need a no-fuss dessert that people can't stop munching. It's ridiculously easy—just a few minutes in the microwave, a quick stir, and a toss in powdered sugar. I like how the crushed Butterfingers melt slightly into the chocolate-peanut butter mix, giving every bite that signature crunchy-candy snap. It’s perfect for parties, game day, holiday treats, or just a sweet treat for myself at home.

Ingredients

(Here's a tip: Check out the full list of ingredients and measurements in the recipe card below.)

  • 7 cups Rice Chex Cereal

  • 1 cup semi sweet chocolate chips

  • ½ cup creamy peanut butter

  • ¼ cup salted butter

  • 1 teaspoon pure vanilla extract

  • 18 fun-size Butterfinger candy bars (15 crushed, 3 roughly chopped for garnish)

  • 1 ¼ cup powdered sugar, sifted

Directions

  1. I start by adding the Rice Chex cereal to an extra-large mixing bowl.

  2. In a microwave-safe bowl, I combine the chocolate chips, peanut butter, and butter, then microwave the mixture on high for 1 minute. I stir it until it’s completely smooth.

  3. I mix in the vanilla extract until everything is fully blended.

  4. I drizzle this warm, velvety chocolate-peanut butter mixture over the cereal, gently folding it so every piece gets coated.

  5. Next, I stir in the crushed Butterfinger candy bars—most of them melt a bit and get beautifully sticky.

  6. I transfer the coated cereal into a 2-gallon Ziploc bag or a large bowl, then add the powdered sugar and shake or stir until all the pieces are covered in that sweet, powdery coating.

  7. I spread it all out on a baking sheet to cool and dry.

  8. Right before serving, I sprinkle the chopped Butterfinger bars on top as a final touch.

Servings and timing

This recipe makes about 14 servings. It takes only 10 minutes to prep and 1 minute to cook, for a total of 11 minutes from start to finish. It’s a no-bake recipe, so I don’t have to wait for anything to cool too long—perfect for last-minute guests or when I want something quick.

Variations

I like switching things up sometimes. Here are a few twists I’ve tried:

  • Swap the semi-sweet chocolate chips for milk chocolate, dark chocolate, or even white chocolate for a different flavor profile.

  • Mix different types of Chex cereals like corn or wheat with rice for a variety of textures.

  • Toss in some fun extras like mini peanut butter cups, Reese’s Pieces, or even chopped Butterfinger balls.

storage/reheating

I store the Butterfinger Puppy Chow in an airtight container at room temperature for up to a week. For a longer shelf life, I pop it in the fridge—it stays crunchy and fresh for up to two weeks. I don’t need to reheat it, but if it hardens too much, letting it sit at room temperature for a few minutes brings it back to its perfect snacking consistency.

FAQs

What’s the best way to crush the Butterfinger bars?

I place them in a sealed plastic bag and use a rolling pin or the bottom of a glass to crush them. I leave a few small chunks for added texture.

Can I make this ahead of time?

Absolutely. I often make it a day or two in advance for parties or road trips. Just store it in an airtight container and wait to garnish with the extra Butterfingers until serving.

Is this recipe gluten-free?

Rice Chex cereal is gluten-free, but I always double-check the Butterfinger ingredients and chocolate chips. Some brands may include gluten, so it depends on the specific products I use.

Can I use natural peanut butter?

I’ve tried it, but I prefer regular creamy peanut butter because it mixes more smoothly with the chocolate and holds everything together better.

How do I prevent the puppy chow from becoming soggy?

I make sure to mix gently but thoroughly so every piece gets coated evenly, and I spread it out well to dry before sealing it up. Avoiding excess moisture is key.

Conclusion

This Butterfinger Puppy Chow is one of my go-to treats when I want something that’s fast, fun, and guaranteed to be a crowd-pleaser. I love how simple it is, but it still delivers that wow-factor with every sweet, crunchy bite. Whether I’m throwing a party or just need something sweet on hand, this no-bake snack never disappoints.

Print

clock clock iconcutlery cutlery iconflag flag iconfolder folder iconinstagram instagram iconpinterest pinterest iconfacebook facebook iconprint print iconsquares squares iconheart heart iconheart solid heart solid icon
Butterfinger Puppy Chow

Butterfinger Puppy Chow

5 Stars 4 Stars 3 Stars 2 Stars 1 Star No reviews
  • Author: Sue
  • Prep Time: 10 minutes
  • Cook Time: 1 minute
  • Total Time: 11 minutes
  • Yield: 14 servings
  • Category: Snack / Dessert
  • Method: No‑bake, microwave
  • Cuisine: American
  • Diet: Low Salt
Print Recipe
Pin Recipe

Description

A no‑bake, crunchy, chocolate‑peanut buttery snack with bits of Butterfinger candy—perfect for parties or sweet cravings.


Ingredients

  • 7 cups Rice Chex Cereal
  • 1 cup semi sweet chocolate chips
  • ½ cup creamy peanut butter
  • ¼ cup salted butter
  • 1 teaspoon pure vanilla extract
  • 18 fun‑size Butterfinger candy bars (15 crushed, 3 roughly chopped for garnish)
  • 1 ¼ cup powdered sugar, sifted

Instructions

  1. Add the cereal to an extra‑large bowl.
  2. In a microwave‑safe bowl, combine the chocolate chips, peanut butter, and butter. Microwave on high for 1 minute, then stir until smooth.
  3. Stir in the vanilla extract until combined.
  4. Drizzle the chocolate‑peanut butter mixture over the cereal; gently stir (fold) to coat evenly.
  5. Stir in the 15 crushed Butterfinger candy bars.
  6. Transfer the coated cereal to a large (2‑gallon) Ziploc bag or bowl, add powdered sugar, and shake or stir until fully coated.
  7. Spread the mixture on a baking sheet to dry.
  8. Just before serving, sprinkle the 3 roughly chopped Butterfinger bars on top as garnish.

Notes

  • Milk chocolate chips, dark chocolate chips, or candy melts can be substituted for the semi‑sweet chips.
  • You can use a mix of rice, corn, and wheat Chex for varied texture.
  • Optional fun mix‑ins: mini peanut butter cups, Reese’s Pieces, Butterfinger balls.

Have you made this recipe? I'd love to see it!

Click here to Follow me on Pinterest

Creamy No-Churn Pumpkin Ice Cream

August 20, 2025 by Sue Leave a Comment

A creamy no-churn pumpkin ice cream that’s rich, smooth, and perfectly spiced—only five simple ingredients, no ice cream maker needed. It’s the kind of dessert I turn to when I want a cozy fall flavor in a frozen treat. Best part? It’s incredibly easy and takes minimal effort. Creamy No-Churn Pumpkin Ice Cream

Why You’ll Love This Recipe

I love how simple and indulgent this pumpkin ice cream is. It brings together the best of autumn flavors with the ease of a no-churn recipe. There’s no need to haul out an ice cream machine or deal with complicated steps. With just five pantry-friendly ingredients, I can whip this up and have it ready to enjoy the next day. The texture turns out ultra-creamy, and the balance of sweetness and spice is just right. Whether I'm hosting or craving something seasonal and sweet, this recipe always hits the spot.

Ingredients

(Here's a tip: Check out the full list of ingredients and measurements in the recipe card below.)

  • 8 oz heavy whipping cream

  • 14 oz sweetened condensed milk

  • ¾ cup pumpkin puree

  • 1 teaspoon pumpkin pie spice

  • ½ teaspoon pure vanilla extract

Directions

  1. I like to start by chilling the condensed milk, heavy cream, and loaf pan in the fridge—this helps everything freeze more smoothly later on.

  2. In a large mixing bowl, I whip the heavy cream until stiff peaks form.

  3. Then I slowly add the sweetened condensed milk while continuing to beat the mixture.

  4. Once combined, I gently fold in the pumpkin puree, pumpkin pie spice, and vanilla extract. I take care not to over-mix so the cream stays fluffy.

  5. I line a 9×5‑inch loaf pan with parchment paper, pour the mixture in, smooth the top, and pop it into the freezer overnight.

Servings and timing

This recipe yields about 6 servings. It takes just 10 minutes to prepare, with no cook time required. I typically freeze it overnight for the best texture, bringing the total time to around 1 day and 10 minutes.

Variations

Sometimes I like to switch things up depending on my mood or what I have on hand. Here are a few twists I’ve tried:

  • Gingersnap swirl: I crush gingersnap cookies and swirl them into the mixture before freezing for an added crunch.

  • Maple touch: A splash of maple syrup brings in a deeper sweetness that pairs perfectly with the pumpkin spice.

  • Dairy-free option: I use coconut cream in place of heavy cream and sweetened condensed coconut milk for a vegan-friendly treat.

  • Extra spice: I occasionally add a pinch of cinnamon or nutmeg for a more robust spiced flavor.

storage/reheating

I keep the ice cream tightly covered in the loaf pan or transfer it to an airtight container. It stores well in the freezer for up to two weeks. When I’m ready to serve, I let it sit at room temperature for about 5–10 minutes to soften slightly for easy scooping. No reheating needed, just thaw and enjoy!

FAQs

How do I keep the texture creamy without churning?

By whipping the cream until stiff peaks form and folding the ingredients gently, I’m able to trap air into the mixture, which mimics the churning process and keeps it light and creamy.

Can I use homemade pumpkin puree?

Yes, I often use homemade pumpkin puree. Just make sure it's thick and not watery—extra moisture can affect the texture.

What’s the best way to serve this ice cream?

I love serving it in a bowl with a sprinkle of crushed graham crackers or even a drizzle of caramel. It also makes a delicious topping for warm pie.

Can I double the recipe?

Absolutely. I double the ingredients and use a larger container or two loaf pans. It freezes just as well and is perfect for sharing.

Is this ice cream overly sweet?

Not at all. The sweetness from the condensed milk balances out beautifully with the pumpkin and spice. If I ever want it less sweet, I reduce the condensed milk slightly and adjust the puree.

Conclusion

This no-churn pumpkin ice cream has become one of my favorite ways to enjoy fall flavors in a frozen dessert. It’s easy, cozy, and crowd-pleasing—exactly the kind of recipe I love to keep in my seasonal rotation. Whether I’m celebrating autumn or just craving something cool and spiced, this treat always delivers.

Print

clock clock iconcutlery cutlery iconflag flag iconfolder folder iconinstagram instagram iconpinterest pinterest iconfacebook facebook iconprint print iconsquares squares iconheart heart iconheart solid heart solid icon
Creamy No-Churn Pumpkin Ice Cream

Creamy No-Churn Pumpkin Ice Cream

5 Stars 4 Stars 3 Stars 2 Stars 1 Star No reviews
  • Author: Sue
  • Prep Time: 10 minutes
  • Cook Time:  
  • Total Time: 1 day 10 minutes
  • Yield: 6 servings
  • Category: Dessert
  • Method: No‑churn ice cream
  • Cuisine: American
  • Diet: Vegetarian
Print Recipe
Pin Recipe

Description

A creamy no‑churn pumpkin ice cream that’s rich, smooth, and perfectly spiced—only five simple ingredients, no ice cream maker needed.


Ingredients

  • 8 oz heavy whipping cream
  • 14 oz sweetened condensed milk
  • ¾ cup pumpkin puree
  • 1 tsp pumpkin pie spice
  • ½ tsp pure vanilla extract

Instructions

  1. Chill the condensed milk, heavy whipping cream, and loaf pan in the fridge for easier freezing.
  2. In a large bowl, whip the heavy cream until stiff peaks form.
  3. Gradually add the sweetened condensed milk while continuing to beat.
  4. Gently stir in the pumpkin puree, pumpkin pie spice, and vanilla extract—careful not to over‑mix.
  5. Line a 9×5‑inch loaf pan with parchment paper, pour in the mixture, smooth, and freeze overnight.

Notes

  • Chill ingredients and loaf pan ahead to help freezing.
  • If using an electric mixer, freeze the beaters and bowl for 30 minutes before starting.
  • Line the loaf pan with parchment paper for easier removal and cleanup.

Have you made this recipe? I'd love to see it!

Click here to Follow me on Pinterest

One-Pot Chicken Parmesan Pasta

August 20, 2025 by Sue Leave a Comment

A creamy, cheesy one‑pot chicken parmesan pasta that’s quick to make and perfect for busy weeknights. With tender chicken, flavorful seasonings, and a rich blend of cheeses, this comforting dish delivers the classic taste of chicken parmesan with the ease of a pasta dinner. One-Pot Chicken Parmesan Pasta

Why You’ll Love This Recipe

I love how this one-pot chicken parmesan pasta brings together convenience and indulgence in just 30 minutes. Everything cooks in one pot—meaning less mess and easy cleanup. The chicken turns out tender and well-seasoned, while the rigatoni soaks up all the flavorful sauce. The cheesy topping is everything I crave on a busy night when I want comfort without spending hours in the kitchen. It’s also a crowd-pleaser, great for family dinners or casual entertaining.

ingredients

(Here's a tip: Check out the full list of ingredients and measurements in the recipe card below.)

  • 2 tablespoons olive oil

  • 3 boneless skinless chicken breasts, diced into bite‑sized pieces

  • 2 teaspoons Italian seasoning

  • ½ teaspoon garlic powder

  • ½ teaspoon onion powder

  • 1 teaspoon garlic salt

  • 1 medium yellow onion, finely minced

  • 1 tablespoon garlic paste

  • 24 oz pasta sauce

  • 24 oz chicken stock

  • 16 oz dried rigatoni pasta

  • 1½ cups mozzarella cheese, shredded

  • ½ cup Parmesan cheese, shredded

  • Salt and pepper, to taste

  • 2 tablespoons fresh parsley, finely chopped (for garnish)

directions

  1. I heat olive oil in a Dutch oven over medium heat. Then I add diced chicken, Italian seasoning, garlic powder, onion powder, and garlic salt. I stir it all together and cook until the chicken is mostly done.

  2. Next, I toss in the minced onion and garlic paste, cooking everything for 5–7 minutes until the onions turn soft and translucent.

  3. I pour in the pasta sauce and chicken stock, then stir in the uncooked rigatoni to make sure it’s all combined.

  4. I cover the pot and let it simmer for about 12–14 minutes until the pasta is al dente.

  5. I stir in half the mozzarella cheese, then sprinkle the remaining mozzarella and Parmesan cheese over the top. I cover the pot again and let the cheeses melt.

  6. Before serving, I garnish with fresh parsley. If I want extra flavor and texture, I broil it for a few minutes for a golden-brown cheese crust.

Servings and timing

This recipe makes 6 servings.
Prep Time: 10 minutes
Cook Time: 20 minutes
Total Time: 30 minutes

Variations

  • I sometimes swap the chicken breasts for chicken thighs for a juicier bite.

  • When I want more heat, I add a pinch of red pepper flakes while cooking the onions.

  • For a veggie boost, I stir in chopped spinach or zucchini just before adding the cheese.

  • If I’m craving extra richness, I mix in a splash of heavy cream with the pasta sauce.

  • I’ve even made a baked version by transferring everything to a baking dish and broiling until bubbly.

storage/reheating

I store any leftovers in an airtight container in the fridge for up to 4 days. When reheating, I add a splash of chicken broth or water to loosen the sauce before microwaving or warming on the stovetop over low heat. The cheesy topping still melts beautifully, and the flavors continue to develop after a day or two.

FAQs

How can I keep the pasta from getting mushy?

I make sure to cook the pasta just until al dente. It continues to soften slightly as it sits in the hot sauce, so taking it off the heat just in time keeps it perfect.

Can I make this recipe ahead of time?

Yes, I often make it ahead and reheat it when I’m ready to serve. It tastes even better the next day, especially with the rich, cheesy flavors soaked into the pasta.

What’s the best pasta shape to use?

I like rigatoni because it holds onto the sauce well, but penne or ziti also work great. Any sturdy short pasta should do the trick.

Can I make this dish gluten-free?

Absolutely. I use gluten-free pasta and double-check that my pasta sauce and chicken stock are certified gluten-free.

Is this recipe freezer-friendly?

I usually don’t freeze it because creamy sauces can separate, but if I need to, I let it cool completely and store it in a freezer-safe container for up to 2 months. I reheat slowly to bring it back to life.

Conclusion

This one-pot chicken parmesan pasta is my go-to when I need something comforting, fast, and family-friendly. It has all the richness of a baked pasta dish without the hassle, and it leaves me with only one pot to wash. Whether I’m feeding a crowd or just want leftovers for lunch, this recipe always delivers.

Print

clock clock iconcutlery cutlery iconflag flag iconfolder folder iconinstagram instagram iconpinterest pinterest iconfacebook facebook iconprint print iconsquares squares iconheart heart iconheart solid heart solid icon
One-Pot Chicken Parmesan Pasta

One-Pot Chicken Parmesan Pasta

5 Stars 4 Stars 3 Stars 2 Stars 1 Star No reviews
  • Author: Sue
  • Prep Time: 10 minutes
  • Cook Time: 20 minutes
  • Total Time: 30 minutes
  • Yield: 6 servings
  • Category: Dinner; Pasta
  • Method: One‑pot, stovetop
  • Cuisine: Italian
  • Diet: Low Fat
Print Recipe
Pin Recipe

Description

A creamy, cheesy one‑pot chicken parmesan pasta that’s quick to make and perfect for busy weeknights.


Ingredients

  • 2 tablespoons olive oil
  • 3 boneless skinless chicken breasts, diced into bite‑sized pieces
  • 2 teaspoons Italian seasoning
  • ½ teaspoon garlic powder
  • ½ teaspoon onion powder
  • 1 teaspoon garlic salt
  • 1 medium yellow onion, finely minced
  • 1 tablespoon garlic paste
  • 24 oz pasta sauce
  • 24 oz chicken stock
  • 16 oz dried rigatoni pasta
  • 1½ cups mozzarella cheese, shredded
  • ½ cup Parmesan cheese, shredded
  • Salt and pepper, to taste
  • 2 tablespoons fresh parsley, finely chopped (for garnish)

Instructions

  1. In a Dutch oven over medium heat, add olive oil, diced chicken, Italian seasoning, garlic powder, onion powder, and garlic salt. Stir to combine and cook until the chicken is mostly cooked through.
  2. Add the onion and garlic paste; stir and cook for 5–7 minutes until onions are soft and translucent.
  3. Pour in the pasta sauce and chicken stock, then add the uncooked rigatoni. Stir to combine.
  4. Cover and simmer for 12–14 minutes or until the pasta is cooked through (al dente is ideal).
  5. Stir in half of the mozzarella cheese. Top with the remaining mozzarella and the Parmesan cheese. Cover and let the cheeses melt.
  6. Garnish with fresh parsley and serve. (Optional: broil briefly for golden‑brown crispy cheese.)

Notes

  • Al dente is the ideal consistency for the pasta—it should be tender but still slightly firm when bitten.
  • For golden‑brown crispy cheese, finish the dish under the broiler for a few minutes.

Have you made this recipe? I'd love to see it!

Click here to Follow me on Pinterest

Egg Roll in a Bowl (One-Pan Stir-Fry)

August 20, 2025 by Sue Leave a Comment

This quick and flavorful one-pan stir-fry gives me all the delicious flavors of a classic egg roll—without the wrapper or deep frying. With savory ground beef, crisp-tender veggies, and a perfectly seasoned sauce, this deconstructed version is packed with Asian-inspired goodness and comes together in just 30 minutes. Egg Roll in a Bowl (One-Pan Stir-Fry)

Why You’ll Love This Recipe

I love how easy this dish is to prepare with minimal cleanup thanks to the one-pan method. It’s hearty, full of flavor, and totally satisfying, all while being low in carbs and naturally gluten-free (with tamari instead of soy sauce). I also appreciate how versatile it is—perfect for busy weeknights, meal prep, or even lunch leftovers. It’s comfort food without the fuss and always a crowd-pleaser at my table.

Ingredients

(Here's a tip: Check out the full list of ingredients and measurements in the recipe card below.)

  • 1½ pounds ground beef

  • 1 large onion, finely diced

  • 1 tablespoon minced garlic

  • 2 tablespoons sesame oil

  • ½ cup finely shredded carrots

  • 16 ounces coleslaw mix

  • ½ teaspoon onion powder

  • ½ teaspoon garlic powder

  • ½ teaspoon red pepper flakes

  • 1½ teaspoons ground ginger

  • ½ to ¾ cup low‑sodium soy sauce

  • 2 tablespoons vegetable oil

  • Green onions (optional, for garnish)

Directions

  1. I cook the ground beef in a large, deep-sided skillet over medium heat until it's no longer pink. I like to keep the pieces a bit larger for texture.

  2. After draining the excess grease, I return the skillet to the heat and stir in the diced onion and minced garlic, cooking until the onion becomes soft and translucent.

  3. I add the sesame oil, shredded carrots, and coleslaw mix. Using tongs, I combine everything and sauté it all for about 5 minutes until the vegetables are tender-crisp.

  4. While that cooks, I whisk together the onion powder, garlic powder, red pepper flakes, ground ginger, soy sauce, and vegetable oil in a small bowl.

  5. I pour the sauce over the beef and veggie mixture, reduce the heat, and let it all cook for about 5 more minutes, stirring occasionally to blend the flavors.

  6. I serve it hot, garnished with green onions if I have them on hand.

Servings and timing

This recipe makes about 6 servings.

  • Prep Time: 10 minutes

  • Cook Time: 20 minutes

  • Total Time: 30 minutes

Variations

I often switch things up depending on what I have in my kitchen. Sometimes I use ground turkey or chicken for a lighter option. I’ve also made a vegetarian version with crumbled tofu or tempeh. If I want extra heat, I add a bit more red pepper flakes or even a dash of sriracha. And for a low-carb twist, I’ve tossed in cauliflower rice at the end—it soaks up the flavors beautifully.

Storage/Reheating

I store leftovers in an airtight container in the fridge for up to 4 days. When it’s time to reheat, I just toss a portion into a skillet over medium heat and stir until warmed through—about 3–5 minutes. It also reheats well in the microwave for about 1–2 minutes, stirring halfway. I avoid freezing it, as the cabbage tends to get mushy when thawed.

FAQs

What type of ground meat works best for this recipe?

I typically use ground beef for its rich flavor, but ground turkey or chicken work great too.

Can I make this dish vegetarian?

Absolutely. I’ve made it vegetarian by using crumbled tofu or a meat substitute. Just adjust the seasonings to taste.

How do I keep the vegetables from getting soggy?

I sauté the veggies just until tender-crisp and avoid overcooking them. Using high heat and stirring frequently helps maintain their crunch.

Is this recipe keto or low-carb friendly?

Yes, it’s naturally low in carbs, especially if I keep the soy sauce minimal and skip any added sugars. I often pair it with cauliflower rice for a keto-friendly meal.

Can I prep this ahead of time?

Definitely. I sometimes pre-chop the veggies and mix the sauce ingredients in advance, storing them in the fridge. Then, when it’s time to cook, everything comes together quickly.

Conclusion

Egg Roll in a Bowl is one of those recipes I find myself turning to again and again. It’s fast, flexible, and packed with flavor—all with minimal cleanup. Whether I’m feeding my family on a busy night or prepping lunches for the week, this dish always delivers.

Print

clock clock iconcutlery cutlery iconflag flag iconfolder folder iconinstagram instagram iconpinterest pinterest iconfacebook facebook iconprint print iconsquares squares iconheart heart iconheart solid heart solid icon
Egg Roll in a Bowl (One-Pan Stir-Fry)

Egg Roll in a Bowl (One-Pan Stir-Fry)

5 Stars 4 Stars 3 Stars 2 Stars 1 Star No reviews
  • Author: Sue
  • Prep Time: 10 minutes
  • Cook Time: 20 minutes
  • Total Time: 30 minutes
  • Yield: 6 servings
  • Category: Dinner
  • Method: Stovetop stir‑fry
  • Cuisine: Asian‑inspired
  • Diet: Low Lactose
Print Recipe
Pin Recipe

Description

A quick and flavorful one‑pan, Asian‑inspired stir‑fry that deconstructs the flavors of an egg roll—savory ground beef and crisp veggies in a seasoned sauce—without the wrapper or frying.


Ingredients

  • 1½ pounds ground beef
  • 1 large onion, finely diced
  • 1 tablespoon minced garlic
  • 2 tablespoons sesame oil
  • ½ cup finely shredded carrots
  • 16 ounces coleslaw mix
  • ½ teaspoon onion powder
  • ½ teaspoon garlic powder
  • ½ teaspoon red pepper flakes
  • 1½ teaspoons ground ginger
  • ½ to ¾ cup low‑sodium soy sauce
  • 2 tablespoons vegetable oil
  • Green onions (optional, for garnish)

Instructions

  1. Cook ground beef in a large, deep‑sided skillet over medium heat until no longer pink; keep the pieces larger for texture.
  2. Drain excess grease, then return skillet to heat. Add diced onion and minced garlic; cook until the onion is soft and translucent.
  3. Add sesame oil, shredded carrots, and coleslaw mix; use tongs to combine, and sauté for about 5 minutes until vegetables are tender‑crisp.
  4. In a small bowl, whisk together onion powder, garlic powder, red pepper flakes, ground ginger, soy sauce, and vegetable oil.
  5. Pour the sauce mixture over the beef and veggies, reduce heat, and cook for about another 5 minutes, stirring occasionally.
  6. Serve hot, garnished with green onions if desired.

Notes

  • Keep the pan a bit cooler when adding garlic to avoid burning it—burnt garlic tastes bitter.
  • Use pre‑shredded carrots and coleslaw mix to save time.
  • Rubbing spices together in your palms or using a mortar and pestle before adding can enhance their flavor.

Nutrition

  • Serving Size: Approximately ⅙th recipe
  • Calories: 421 kcal
  • Sugar: 4 g
  • Sodium: 866 mg
  • Fat: 32 g
  • Saturated Fat: 10 g
  • Unsaturated Fat: 19 g
  • Trans Fat: 1 g
  • Carbohydrates: 10 g
  • Fiber: 3 g
  • Protein: 23 g
  • Cholesterol: 81 mg

Have you made this recipe? I'd love to see it!

Click here to Follow me on Pinterest

Easy Ravioli Sauce

August 20, 2025 by Sue Leave a Comment

I’m excited to share this Easy Ravioli Sauce—it’s rich, creamy, tomatoey, and comes together in only about 30 minutes. It’s perfect for serving over ravioli or any other pasta I have on hand. Easy Ravioli Sauce

Why I’ll Love This Recipe

I love this sauce because it strikes an ideal balance between creamy and tangy. The rosé (or pink) sauce blends savory tomato paste with velvety heavy cream, giving me the best of both worlds. Plus, using diced tomatoes gives it a wonderful texture and pops of flavor. When I made it, my partner couldn’t get enough—every bite disappeared, and I managed to stretch the leftovers over spaghetti later with equal enthusiasm!

ingredients

(Here's a tip: Check out the full list of ingredients and measurements in the recipe card below.)
I used the following ingredients:

  • 2 tablespoons extra virgin olive oil

  • 1 medium onion, finely diced

  • 3 cloves garlic, minced

  • ⅓ cup tomato paste

  • 1 cup low‑sodium chicken stock

  • 1 (15‑ounce) can diced tomatoes

  • 1 tablespoon sugar

  • 1 teaspoon Italian seasoning

  • ¼ teaspoon salt

  • ¼ teaspoon ground black pepper

  • ⅓ cup heavy cream

directions

Here’s how I made it:

  1. In a medium pot, I heat the olive oil over medium‑high heat and cook the onion and garlic until the onion turns soft and translucent—about 4 to 5 minutes.

  2. I add the tomato paste and cook it for about one minute so it starts to caramelize.

  3. Next, I add the chicken stock, diced tomatoes, sugar, Italian seasoning, salt, and black pepper. I bring it to a boil, then reduce the heat and let it simmer for 15–20 minutes.

  4. Finally, I stir in the heavy cream and let it cook a couple more minutes so all the flavors meld together.

  5. I serve it hot over cooked ravioli—and enjoy every last bite!

Servings and timing

  • Servings: This recipe makes enough to serve about 4 people.

  • Prep time: Around 5 minutes.

  • Cook time: Approximately 25 minutes.

  • Total time: Roughly 30 minutes.

Variations

I could easily make this vegetarian by swapping chicken stock with vegetable stock. For extra flavor, I sometimes add a pinch of red pepper flakes or a splash of white wine when adding the stock. If I want it lighter, I’ve tried half-and-half instead of heavy cream. Adding fresh basil at the end brings a lovely herbal note too.

storage/reheating

I like to store leftovers in an airtight container in the fridge for up to 3–4 days. Reheating gently on the stove over low heat, I add a splash of milk or stock to keep it from getting too thick. This sauce also freezes well—if I freeze it, I thaw it overnight in the fridge and reheat slowly on the stovetop.

FAQs

How long can I keep the sauce in the fridge?

I keep it in the fridge for about 3–4 days in a sealed container, then I reheat it gently on low heat, adding a bit of water or milk if it’s too thick.

Can I freeze the sauce?

Yes! I freeze it in a freezer-safe container or heavy-duty zip-top bag, then thaw it in the fridge overnight before reheating.

Can I make it dairy-free?

I can swap the heavy cream for a dairy-free alternative like coconut cream or oat-based cream. The flavor shifts, but it still turns out creamy and tasty.

Is it possible to use fresh tomatoes instead of canned?

Absolutely. I dice fresh tomatoes and cook them down a bit longer than canned ones, and the texture ends up just as nice—maybe with a fresher taste.

Can I add meat to the sauce?

Sure thing. I can brown some ground sausage or chicken first, remove it, then follow the same steps and stir the cooked meat back in at the end for a heartier sauce.

Conclusion

I’m thrilled by how this Easy Ravioli Sauce comes together in just half an hour with mostly pantry staples. The creamy‑tomato flavor hits all the right notes, and it’s so versatile—whether with ravioli, spaghetti, or even as a pizza base in a pinch. I always end up making extra, because it’s even better the next day. I can’t wait to see how you make it your own!

Print

clock clock iconcutlery cutlery iconflag flag iconfolder folder iconinstagram instagram iconpinterest pinterest iconfacebook facebook iconprint print iconsquares squares iconheart heart iconheart solid heart solid icon
Easy Ravioli Sauce

Easy Ravioli Sauce

5 Stars 4 Stars 3 Stars 2 Stars 1 Star No reviews
  • Author: Sue
  • Prep Time: 5 minutes
  • Cook Time: 25 minutes
  • Total Time: 30 minutes
  • Yield: 4 servings
  • Category: Sauce
  • Method: Stovetop
  • Cuisine: Italian
  • Diet: Vegetarian
Print Recipe
Pin Recipe

Description

A rich and creamy tomato-based sauce that comes together in just 30 minutes, perfect for serving over ravioli or any pasta.


Ingredients

  • 2 tablespoons extra virgin olive oil
  • 1 medium onion, finely diced
  • 3 cloves garlic, minced
  • ⅓ cup tomato paste
  • 1 cup low-sodium chicken stock
  • 1 (15-ounce) can diced tomatoes
  • 1 tablespoon sugar
  • 1 teaspoon Italian seasoning
  • ¼ teaspoon salt
  • ¼ teaspoon ground black pepper
  • ⅓ cup heavy cream

Instructions

  1. Heat olive oil in a medium pot over medium-high heat. Add onion and garlic, cooking until onion is soft and translucent, about 4–5 minutes.
  2. Add tomato paste and cook for 1 minute until it begins to caramelize.
  3. Stir in chicken stock, diced tomatoes, sugar, Italian seasoning, salt, and black pepper. Bring to a boil, then reduce heat and simmer for 15–20 minutes.
  4. Stir in heavy cream and cook for 2–3 minutes to blend flavors.
  5. Serve hot over cooked ravioli or pasta.

Notes

  • For a vegetarian version, substitute vegetable stock for chicken stock.
  • Add red pepper flakes or a splash of white wine for extra flavor.
  • Use half-and-half instead of heavy cream for a lighter option.
  • Fresh basil at the end enhances flavor.
  • Store in fridge for 3–4 days or freeze for longer storage.

Nutrition

  • Serving Size: ¼ of recipe
  • Calories: 180
  • Sugar: 6g
  • Sodium: 380mg
  • Fat: 11g
  • Saturated Fat: 4g
  • Unsaturated Fat: 6g
  • Trans Fat: 0g
  • Carbohydrates: 16g
  • Fiber: 3g
  • Protein: 3g
  • Cholesterol: 15mg

Have you made this recipe? I'd love to see it!

Click here to Follow me on Pinterest

Crispy Oven-Baked Zucchini Fries

August 20, 2025 by Sue Leave a Comment

These crispy oven-baked zucchini fries are a healthier twist on traditional fries—golden, cheesy, and irresistibly crunchy thanks to a coating of panko breadcrumbs and Parmesan. They’re baked, not fried, making them a lighter option that’s still big on flavor. I love how kid-friendly and snackable they are, especially when served with a creamy ranch dip. Crispy Oven-Baked Zucchini Fries

Why You’ll Love This Recipe

I find these zucchini fries to be the perfect way to enjoy a veggie-based snack that feels indulgent but doesn’t weigh me down. The panko and Parmesan give them a deliciously crispy crust, while baking keeps things lighter. They’re quick to make, easy to prep ahead, and picky-eater approved—plus, they come out of the oven golden and perfect every time. Whether I’m making them as a side, appetizer, or afternoon snack, they never disappoint.

Ingredients

(Here's a tip: Check out the full list of ingredients and measurements in the recipe card below.)

  • 3 small zucchini

  • 2 large eggs

  • 1 pinch kosher salt

  • Freshly ground black pepper, to taste

  • 2 cups panko‑style breadcrumbs

  • ½ cup finely grated Parmesan

  • Ranch dipping sauce (for serving)

Directions

  1. I start by preheating the oven to 425 °F (218 °C).

  2. Then I slice the zucchinis into 3-inch lengths and cut each piece into ½-inch thick strips.

  3. I line a baking sheet with parchment paper to make cleanup easier.

  4. In a bowl, I beat the eggs with a pinch of kosher salt and black pepper.

  5. In a shallow dish, I mix together the panko breadcrumbs and grated Parmesan.

  6. Working in batches, I dip each zucchini strip in the egg mixture, letting the excess drip off, then coat it in the breadcrumb mixture, pressing gently so the coating sticks.

  7. I arrange the coated zucchini on the prepared baking sheet, spacing them out to ensure they bake evenly.

  8. I bake them for 20–25 minutes, flipping halfway through, until they’re golden and crispy.

  9. Once out of the oven, I serve them right away with a side of ranch dipping sauce.

Servings and timing

This recipe makes about 4 servings, depending on the size of the zucchini.

  • Prep Time: 10–15 minutes

  • Cook Time: 20–25 minutes

  • Total Time: 30–40 minutes

Variations

  • I sometimes add a pinch of garlic powder or Italian seasoning to the breadcrumb mixture for extra flavor.

  • Instead of Parmesan, I occasionally swap in Pecorino Romano for a sharper, saltier bite.

  • When I want to make them gluten-free, I use gluten-free panko breadcrumbs.

  • For a spicy version, I add a little cayenne or smoked paprika to the coating.

Storage/Reheating

If I have leftovers, I store them in an airtight container in the fridge for up to 2 days. To reheat, I place the fries on a baking sheet and warm them in a 375 °F oven for 5–7 minutes to bring back the crispiness. I avoid microwaving, as it makes them soggy.

FAQs

How do I keep the zucchini fries from getting soggy?

I always pat the zucchini dry before coating to remove excess moisture. Giving them space on the baking sheet and not overcrowding is key for getting that crisp texture.

Can I make these ahead of time?

Yes, I can bread the zucchini up to 4 hours in advance and keep them in the fridge until I’m ready to bake.

Do I need to peel the zucchini?

No, I don’t peel them. The skin adds a nice texture and helps the fries hold their shape.

What’s the best dipping sauce for these fries?

I usually serve them with ranch, but I’ve also enjoyed them with marinara, garlic aioli, or spicy mayo.

Can I air fry these instead of baking?

Yes, I’ve made them in the air fryer at 400 °F for about 12–15 minutes, flipping halfway through. They turn out extra crispy that way.

Conclusion

These oven-baked zucchini fries are a go-to for when I want something crispy, cheesy, and satisfying without deep frying. They’re simple to make, adaptable, and always a crowd-pleaser. Whether I’m cooking for kids, guests, or just myself, they hit the spot every single time.

Print

clock clock iconcutlery cutlery iconflag flag iconfolder folder iconinstagram instagram iconpinterest pinterest iconfacebook facebook iconprint print iconsquares squares iconheart heart iconheart solid heart solid icon
Crispy Oven-Baked Zucchini Fries

Crispy Oven-Baked Zucchini Fries

5 Stars 4 Stars 3 Stars 2 Stars 1 Star No reviews
  • Author: Sue
  • Prep Time: 10–15 minutes
  • Cook Time: 20–25 minutes
  • Total Time: 30–40 minutes
  • Yield: Not specified (makes a batch; adjust based on zucchini amount)
  • Category: Appetizer / Snack
  • Method: Baking
  • Cuisine: American
  • Diet: Vegetarian
Print Recipe
Pin Recipe

Description

Crispy oven‑baked zucchini fries coated in panko and Parmesan—ready in about 40 minutes, kid‑friendly, and a healthier alternative to regular fries.


Ingredients

  • 3 small zucchini
  • 2 large eggs
  • 1 pinch kosher salt
  • Freshly ground black pepper, to taste
  • 2 cups panko‑style breadcrumbs
  • ½ cup finely grated Parmesan
  • Ranch dipping sauce (for serving)

Instructions

  1. Preheat the oven to 425 °F (218 °C).
  2. Slice the zucchinis into 3‑inch (7 cm) lengths and cut into ½‑inch (1 cm) thick strips.
  3. Line a baking sheet with parchment paper.
  4. In a bowl, beat the eggs with a pinch of kosher salt and black pepper.
  5. On a plate or shallow container, combine the panko breadcrumbs and grated Parmesan.
  6. Working in batches, dip each zucchini strip first into the egg mixture, letting excess drip off, then coat in the panko‑Parmesan mix, pressing gently so it adheres.
  7. Place coated strips on the prepared baking sheet, leaving space between fries.
  8. Bake for 20–25 minutes, turning halfway through, until golden brown and crispy.
  9. Serve immediately with ranch dipping sauce.

Notes

  • For best results, pat zucchini dry before coating to avoid soggy fries.
  • Don’t overcrowd the baking sheet—give fries room for hot air circulation.
  • For extra crunch, elevate on a wire rack set on the baking sheet.
  • You can bread the zucchini up to 4 hours ahead; store in the fridge.
  • To re‑crisp leftover fries, bake in a 375 °F oven for 5–7 minutes.

Nutrition

  • Serving Size: Whole recipe
  • Calories: 1000‑1200 kcal
  • Fat: 50‑60 g
  • Carbohydrates: 100‑120 g
  • Protein: 40‑50 g

Have you made this recipe? I'd love to see it!

Click here to Follow me on Pinterest

No-Bake Lemonade Pie

August 19, 2025 by Sue Leave a Comment

A light, creamy, and refreshingly tangy no-bake lemonade pie is exactly what I turn to when I want a fuss-free dessert that delivers maximum flavor with minimal effort. With a smooth cream cheese filling blended with zesty lemonade concentrate and nestled in a sweet graham cracker crust, this chilled treat is perfect for warm-weather days or any time I crave something cool and satisfying.

No-Bake Lemonade Pie

Why You’ll Love This Recipe

I love how this no-bake lemonade pie is both nostalgic and vibrant, giving me all the citrusy vibes with none of the oven heat. The texture is luxuriously smooth, and the flavor is perfectly balanced between tart and sweet. It’s a great make-ahead dessert that sets beautifully in the fridge and always impresses guests. Plus, it takes just minutes to prepare before chilling.

ingredients

(Here's a tip: Check out the full list of ingredients and measurements in the recipe card below.)

  • 1½ cups graham cracker crumbs (about 10–12 crackers)

  • ¼ cup packed light or dark brown sugar

  • Pinch of salt

  • 6 tablespoons unsalted butter, melted

  • 1 can (5 oz) evaporated milk

  • 1 package (3.4 oz) instant lemon pudding mix

  • 2 packages (8 oz each) cream cheese, softened

  • ¾ cup thawed lemonade concentrate

directions

  1. I start by mixing the graham cracker crumbs, brown sugar, and a pinch of salt in a bowl.

  2. Then, I stir in the melted butter until the mixture feels like wet sand. I press it into the bottom and sides of a 9-inch pie pan and let it chill in the fridge.

  3. In a large bowl, I whisk together the evaporated milk and lemon pudding mix on low speed for about 2 minutes until it thickens.

  4. Separately, I beat the softened cream cheese until it’s light and fluffy—this usually takes about 3 minutes on medium speed.

  5. I blend in the thawed lemonade concentrate with the cream cheese until smooth.

  6. I then pour the pudding mixture into the cream cheese and beat until everything is fully combined.

  7. I spoon the filling into the prepared crust, cover it, and let it chill for at least 4 hours in the fridge until it's set.

  8. Sometimes I like to garnish it with lemon zest or slices just before serving for an extra pop.

Servings and timingNo-Bake Lemonade Pie

This pie makes 8 generous slices.

  • Prep Time: 15 minutes

  • Chill Time: 4 hours

  • Total Time: 4 hours 15 minutes

Variations

  • I sometimes swap the graham cracker crust with a shortbread crust for extra richness.

  • For a strawberry lemonade twist, I add a few tablespoons of strawberry puree to the filling.

  • I’ve also made this with limeade concentrate for a fun variation—it works beautifully.

  • For a low-sugar version, I use sugar-free pudding mix and light cream cheese.

storage/reheating

I keep this pie covered in the refrigerator where it stays fresh for up to 5 days. It never lasts that long in my house, though. I don’t recommend freezing it, as the texture may suffer once thawed. Since it’s served chilled, there’s no reheating necessary—just slice and enjoy straight from the fridge.

FAQs

How long does it take for the pie to set?

It needs at least 4 hours in the fridge to fully set, but I often make it the night before for best results.

Can I use regular lemonade instead of concentrate?

I don’t recommend it. The concentrate gives the pie its strong lemonade flavor without watering down the filling.

What can I use if I don’t have a mixer?

A sturdy whisk and a little elbow grease can work, especially for the pudding mix. For the cream cheese, I make sure it’s very soft and then mix vigorously.

Can I make this pie gluten-free?

Yes, I just use gluten-free graham crackers for the crust and make sure the pudding mix is gluten-free too.

Can I add whipped cream to the top?

Absolutely—I’ve added whipped cream, lemon zest, or even fresh berries on top for a decorative and flavorful finish.

Conclusion

This no-bake lemonade pie is one of those easy desserts I keep coming back to. It’s bright, creamy, and incredibly satisfying, with just the right amount of tartness. Whether I’m hosting a summer BBQ or just craving a cool treat, this pie always hits the spot.

Print

clock clock iconcutlery cutlery iconflag flag iconfolder folder iconinstagram instagram iconpinterest pinterest iconfacebook facebook iconprint print iconsquares squares iconheart heart iconheart solid heart solid icon
No-Bake Lemonade Pie

No-Bake Lemonade Pie

5 Stars 4 Stars 3 Stars 2 Stars 1 Star No reviews
  • Author: Sue
  • Prep Time: 15 minutes
  • Cook Time: 0 minutes
  • Total Time: 4 hours 15 minutes (including chill time)
  • Yield: 8 servings
  • Category: Dessert
  • Method: No‑Bake, Cold Prep
  • Cuisine: American
  • Diet: Vegetarian
Print Recipe
Pin Recipe

Description

A light, creamy, refreshing no‑bake pie with tangy lemonade flavor and smooth cream cheese filling in a graham cracker crust.


Ingredients

  • 1½ cups graham cracker crumbs (about 10–12 crackers)
  • ¼ cup packed light or dark brown sugar
  • Pinch of salt
  • 6 tablespoons unsalted butter, melted
  • 1 can (5 oz) evaporated milk
  • 1 package (3.4 oz) instant lemon pudding mix
  • 2 packages (8 oz each) cream cheese, softened
  • ¾ cup thawed lemonade concentrate

Instructions

  1. Combine graham cracker crumbs, brown sugar, and salt in a bowl.
  2. Stir in melted butter until mixture resembles wet sand; press into bottom and up the sides of a 9‑inch pie pan. Chill in refrigerator.
  3. In a large bowl, whisk evaporated milk and lemon pudding mix on low speed for about 2 minutes until thickened.
  4. In another bowl, beat softened cream cheese on medium speed until light and fluffy (~3 minutes).
  5. Add lemonade concentrate to the cream cheese and beat until blended.
  6. Pour pudding mixture into the cream cheese mixture and beat until well combined.
  7. Pour filling into the chilled crust. Cover and refrigerate at least 4 hours or until set.
  8. Optional: garnish before serving.

Notes

  • Use fresh or homemade crust for a thicker base if desired.
  • Refrigerate at least 4 hours for best texture, up to overnight.
  • Use softened cream cheese to prevent lumps.
  • Garnish with lemon slices or zest for visual appeal.
  • Store pie covered in refrigerator; great for up to 5 days.

Nutrition

  • Serving Size: 1 slice (⅛ pie)
  • Calories: approx. 350 kcal
  • Sugar: approx. 30 g
  • Sodium: approx. 200 mg
  • Fat: approx. 22 g
  • Saturated Fat: approx. 12 g
  • Unsaturated Fat: approx. 8 g
  • Trans Fat: 0 g
  • Carbohydrates: approx. 28 g
  • Fiber: 0 g
  • Protein: approx. 4 g
  • Cholesterol: approx. 60 mg
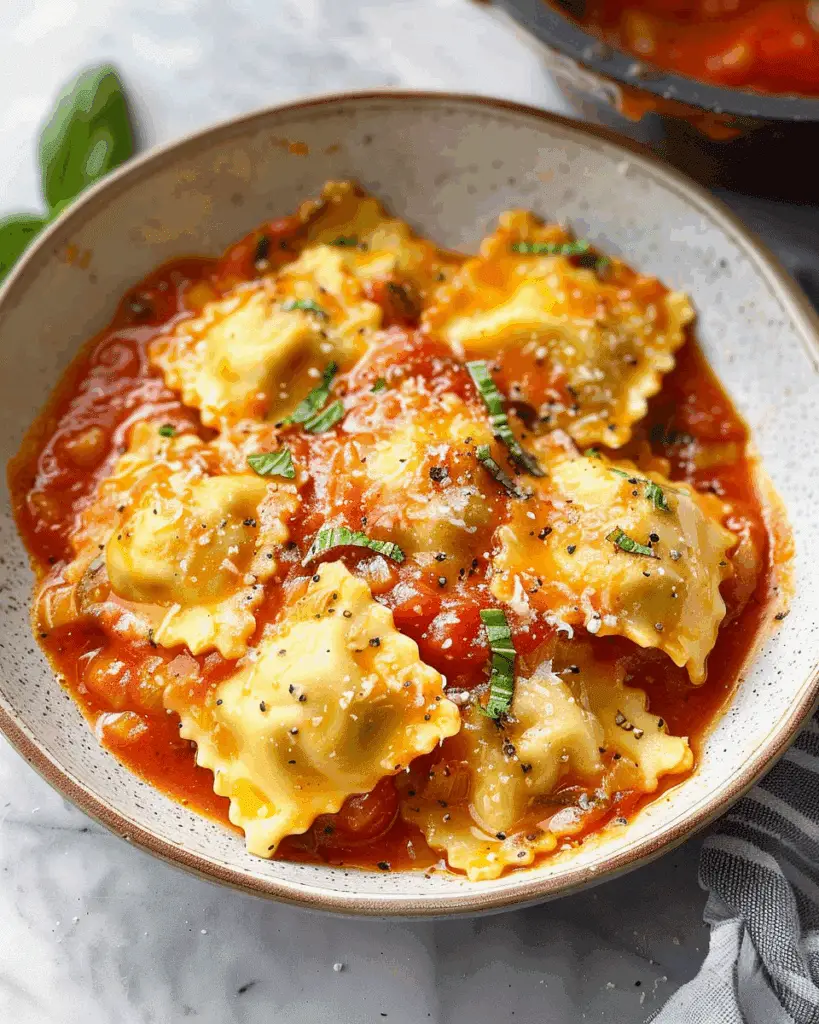
Have you made this recipe? I'd love to see it!

Click here to Follow me on Pinterest

BLT Macaroni Salad

August 19, 2025 by Sue Leave a Comment

A creamy, refreshing macaroni salad inspired by the flavors of a classic BLT. This version brings together juicy tomatoes, crisp greens, and elbow macaroni in a tangy mayo-sour cream dressing. It’s a crowd-pleasing side dish that fits right in at summer cookouts, potlucks, or weekday lunches. BLT Macaroni Salad

Why I Love This Recipe

I love how light yet satisfying this salad is. The pasta soaks up the creamy dressing perfectly, while the tomatoes and greens add freshness and a little crunch. It’s quick to throw together, and the flavors only get better as it chills. I always find it easy to prepare ahead, and it's versatile enough to pair with just about anything.

ingredients

(Here's a tip: Check out the full list of ingredients and measurements in the recipe card below.)

  • 16 oz (about 450 g) elbow macaroni, uncooked

  • ¾ cup mayonnaise

  • ¼ cup sour cream

  • 3 tablespoon rice vinegar

  • 1 teaspoon garlic powder

  • 1 teaspoon salt

  • 1½ teaspoon ground black pepper

  • 1 cup diced, seeded tomato

  • 1 cup roughly chopped baby spinach (or lettuce)

directions

  1. I cook the elbow macaroni according to package directions until al dente, then drain it well.

  2. In a large bowl, I whisk together the mayonnaise, sour cream, rice vinegar, garlic powder, salt, and black pepper.

  3. I add the cooked macaroni to the dressing and toss until evenly coated.

  4. I gently fold in the diced tomato and chopped greens.

  5. I cover and chill the salad in the refrigerator until ready to serve.

Servings and timing

  • Prep time: 15 minutes

  • Cook time: 15 minutes

  • Total time: 30 minutes

  • Yields: Serves 16

Variations

  • I sometimes mix in shredded carrots, chopped cucumber, or corn for added texture.

  • Romaine, arugula, or iceberg all work well in place of spinach depending on what I have on hand.

  • A sprinkle of shredded cheddar or a spoonful of crumbled feta gives it a nice flavor boost.

  • A dash of smoked paprika or cayenne adds a little warmth and depth.

storage/reheating

I store the salad in an airtight container in the fridge for up to 2 days. I like to stir in the greens just before serving so they stay crisp. This salad is meant to be served cold and doesn't need to be reheated.

FAQs

Can I make this ahead of time?

Yes, I often prepare it several hours or even a day in advance. It tastes even better after some time in the fridge.

What type of greens work best?

I usually use baby spinach, but chopped romaine, iceberg, or even arugula all work nicely.

Can I use a different kind of vinegar?

Yes, I’ve tried apple cider vinegar and white wine vinegar, and both give the dressing a great tangy kick.

What if it seems dry after chilling?

I just stir in a little more mayo or sour cream before serving to bring the creaminess back.

Can I add other vegetables?

Absolutely—cucumbers, shredded carrots, bell peppers, or even peas make great additions for extra color and crunch.

Conclusion

This BLT Macaroni Salad is creamy, fresh, and packed with flavor. It’s an easy, reliable side dish that works well for any gathering or simple family meal. I always enjoy how well it holds up in the fridge and how quickly it disappears once served.

Print

clock clock iconcutlery cutlery iconflag flag iconfolder folder iconinstagram instagram iconpinterest pinterest iconfacebook facebook iconprint print iconsquares squares iconheart heart iconheart solid heart solid icon
BLT Macaroni Salad

BLT Macaroni Salad

5 Stars 4 Stars 3 Stars 2 Stars 1 Star No reviews
  • Author: Sue
  • Prep Time: 15 minutes
  • Cook Time: 15 minutes
  • Total Time: 30 minutes
  • Yield: 16 servings
  • Category: Side Dish
  • Method: Mixing
  • Cuisine: American
  • Diet: Vegetarian
Print Recipe
Pin Recipe

Description

A creamy and refreshing macaroni salad inspired by the flavors of a BLT, made with elbow macaroni, juicy tomatoes, crisp greens, and a tangy mayo-sour cream dressing. Perfect for cookouts, potlucks, or easy weekday meals.


Ingredients

  • 16 oz (about 450 g) elbow macaroni, uncooked
  • ¾ cup mayonnaise
  • ¼ cup sour cream
  • 3 Tbsp rice vinegar
  • 1 tsp garlic powder
  • 1 tsp salt
  • 1½ tsp ground black pepper
  • 1 cup diced, seeded tomato
  • 1 cup roughly chopped baby spinach (or lettuce)

Instructions

  1. Cook the elbow macaroni according to package directions until al dente. Drain well.
  2. In a large bowl, whisk together mayonnaise, sour cream, rice vinegar, garlic powder, salt, and black pepper.
  3. Add the cooked macaroni to the dressing and toss until evenly coated.
  4. Gently fold in diced tomato and chopped greens.
  5. Cover and chill in the refrigerator until ready to serve.

Notes

  • Best served cold and within 2 days of preparation.
  • Stir in the greens just before serving to keep them crisp.
  • Mix in extra vegetables like cucumbers, carrots, or corn for more texture.
  • A sprinkle of shredded cheddar or feta can add extra flavor.
  • If the salad seems dry after chilling, stir in a bit more mayo or sour cream.

Nutrition

  • Serving Size: 1 cup
  • Calories: 230
  • Sugar: 2 g
  • Sodium: 280 mg
  • Fat: 12 g
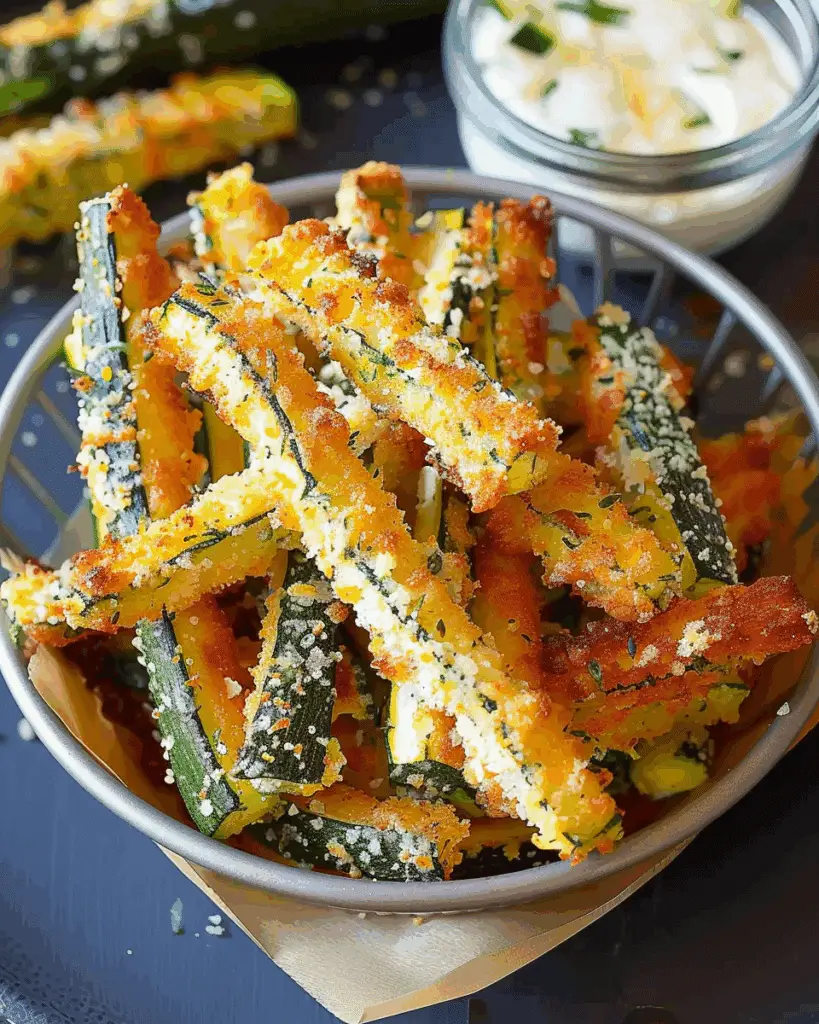
  • Saturated Fat: 3 g
  • Unsaturated Fat: 8 g
  • Trans Fat: 0 g
  • Carbohydrates: 26 g
  • Fiber: 1 g
  • Protein: 5 g
  • Cholesterol: 10 mg

Have you made this recipe? I'd love to see it!

Click here to Follow me on Pinterest

Gooey Caramel Chocolate Bars

August 19, 2025 by Sue Leave a Comment

These gooey caramel chocolate bars are everything I crave in a dessert—rich, chocolatey, and dripping with molten caramel. Starting with a fudgy chocolate cake-mix base, layered with luscious caramel, and finished with a buttery oat crumb topping, these bars are sweet, soft, and satisfyingly chewy. They're perfect for potlucks, parties, or just when I want something irresistibly indulgent. Gooey Caramel Chocolate Bars

Why You’ll Love This Recipe

I love how easy it is to bring this show-stopping dessert together with simple pantry staples and a box of chocolate fudge cake mix. The combination of textures—from the chewy base to the gooey caramel center to the crumbly oat topping—keeps every bite interesting. These bars also store beautifully, making them an ideal make-ahead treat. Whether I’m sharing them at a gathering or saving them for myself, they’re always a hit.

ingredients

(Here's a tip: Check out the full list of ingredients and measurements in the recipe card below.)

  • 1 box chocolate fudge cake mix

  • ½ cup butter or margarine, softened (for crust)

  • 3 eggs

  • 1 cup semisweet chocolate chips

  • 1 bag (14 oz) caramels, unwrapped

  • ¼ cup butter or margarine (for caramel layer)

  • 1 can (14 oz) sweetened condensed milk

  • ½ cup reserved cake mix (for topping)

  • ½ cup quick-cooking oats

  • 3 tablespoon butter or margarine, softened (for topping)

directions

  1. I preheat the oven to 350 °F (or 325 °F if I'm using a dark or non-stick pan).

  2. I reserve ½ cup of the cake mix for the topping.

  3. In a large bowl, I beat the remaining cake mix, ½ cup softened butter, and eggs until a dough forms. Then I stir in the semisweet chocolate chips.

  4. I press this mixture evenly into an ungreased 13×9‑inch baking pan and bake for 14–18 minutes, just until it’s set.

  5. While the crust bakes, I melt the unwrapped caramels, ¼ cup butter, and sweetened condensed milk in a saucepan over medium heat, stirring frequently for about 8 minutes until smooth.

  6. As soon as the crust is out of the oven, I spread the warm caramel mixture evenly over it.

  7. In a small bowl, I mix the reserved cake mix, oats, and 3 tablespoon softened butter with a fork until crumbly, then sprinkle it evenly over the caramel layer.

  8. I return the pan to the oven and bake for another 20 minutes or so, until the topping is golden and set.

  9. Finally, I let the bars cool completely in the pan before cutting, so the gooey caramel layers have time to firm up.

Servings and timing

  • Yield: Approximately 48 bars

  • Prep Time: 25 minutes

  • Cook Time: 40–45 minutes total

  • Total Time: About 1 hour (including cooling)

Variations

  • I sometimes swap out the semisweet chocolate chips for milk or dark chocolate, depending on my mood.

  • For a nutty twist, I mix chopped pecans or walnuts into the topping.

  • If I’m in a salty-sweet kind of vibe, I’ll sprinkle flaky sea salt over the caramel layer before baking.

  • I’ve even tried adding a teaspoon of espresso powder to the cake mix to enhance the chocolate flavor—highly recommended!

storage/reheating

I store these bars covered at room temperature for up to 3 days, or in the fridge for up to a week. If I chill them, cutting becomes much cleaner and easier. For serving, I let refrigerated bars come to room temp or microwave a single bar for 10–15 seconds to bring back the gooey texture.

FAQs

What kind of caramels should I use?

I use standard soft caramel candies like Kraft or Werther’s for easy melting. Just make sure they’re unwrapped.

Can I freeze these bars?

Yes, I freeze them in an airtight container for up to 2 months. I separate the layers with parchment paper and thaw at room temperature.

Can I make these gluten-free?

I haven’t tried it myself, but a gluten-free chocolate cake mix and certified gluten-free oats should work well as a substitute.

Why do I need to let the bars cool before cutting?

Cooling helps the caramel layer set properly, making the bars easier to cut and less messy.

Can I use homemade caramel instead of store-bought?

Absolutely. If I have extra time, I sometimes make my own caramel sauce—just make sure it's thick enough to hold up in the bars.

Conclusion

These gooey caramel chocolate bars are pure indulgence in every layer—from the fudgy base to the silky caramel to the golden oat topping. I love how easy they are to make, and they never fail to impress. Whether I’m baking them for guests or saving a stash for myself, these bars always satisfy my chocolate-caramel cravings.

Print

clock clock iconcutlery cutlery iconflag flag iconfolder folder iconinstagram instagram iconpinterest pinterest iconfacebook facebook iconprint print iconsquares squares iconheart heart iconheart solid heart solid icon
Gooey Caramel Chocolate Bars

Gooey Caramel Chocolate Bars

5 Stars 4 Stars 3 Stars 2 Stars 1 Star No reviews
  • Author: Sue
  • Prep Time: 25 minutes
  • Cook Time: Approximately 20–25 minutes initial bake + ~20 minutes topping bake
  • Total Time: About 1 hour (including cooling)
  • Yield: Approximately 48 bars
  • Category: Dessert, Bar cookie
  • Method: Baking in a sheet pan
  • Cuisine: American
  • Diet: Vegetarian
Print Recipe
Pin Recipe

Description

Decadent chocolate‑cake‑mix base layered with rich caramel and a buttery oat‑crumb topping for irresistibly gooey caramel chocolate bars.


Ingredients

  • 1 box chocolate fudge cake mix
  • ½ cup butter or margarine, softened (for crust)
  • 3 eggs
  • 1 cup semisweet chocolate chips
  • 1 bag (14 oz) caramels, unwrapped
  • ¼ cup butter or margarine (for caramel layer)
  • 1 can (14 oz) sweetened condensed milk
  • ½ cup reserved cake mix (for topping)
  • ½ cup quick‑cooking oats
  • 3 tbsp butter or margarine, softened (for topping)

Instructions

  1. Preheat oven to 350 °F (325 °F for dark or non‑stick pan).
  2. Reserve ½ cup of the cake mix for the topping.
  3. In a large bowl, beat the remaining cake mix, ½ cup softened butter, and eggs until a dough forms. Stir in the semisweet chocolate chips.
  4. Press this mixture evenly into an ungreased 13×9‑inch baking pan. Bake for 14–18 minutes or until set.
  5. While the crust bakes, in a saucepan over medium heat, combine unwrapped caramels, ¼ cup butter, and the sweetened condensed milk. Cook about 8 minutes, stirring frequently, until melted and smooth.
  6. Remove the crust from the oven and immediately spread the warm caramel mixture evenly over it.
  7. In a small bowl, mix the reserved cake mix, oats, and 3 Tbsp softened butter with a fork until crumbly. Sprinkle this topping evenly over the caramel layer.
  8. Return the pan to the oven and bake until the topping is golden and set—generally another ~20 minutes (timing may vary).
  9. Let cool completely in the pan before cutting into bars to allow gooey layers to firm up.

Notes

  • If using a dark or non‑stick pan, reduce oven temperature to 325 °F to prevent over‑browning.
  • Let bars cool fully before cutting—this helps the caramel layer set and prevents mess.
  • Store bars covered at room temperature or in the fridge; chilling them can make cutting cleaner.
  • For extra indulgence, sprinkle flaky sea salt over the caramel layer before adding the topping.

Nutrition

  • Serving Size: 1 bar (if yielding 48)

Have you made this recipe? I'd love to see it!

Click here to Follow me on Pinterest

Creamy Peanut Butter Frosting

August 19, 2025 by Sue Leave a Comment

A creamy, fluffy homemade peanut butter frosting perfect for spreading or piping on cakes and cupcakes. It’s smooth, rich, and has just the right balance of sweet and salty. Whether I’m topping cupcakes, layering a birthday cake, or just looking for a decadent peanut butter fix, this frosting always hits the spot. Creamy Peanut Butter Frosting

Why You’ll Love This Recipe

I love how quick and easy this frosting is to make—just 10 minutes from start to finish. The texture turns out silky and fluffy every time, and it pipes like a dream. The rich peanut butter flavor pairs beautifully with chocolate, vanilla, or banana cakes, and I can easily adjust the sweetness or consistency to suit the occasion. Plus, it’s sturdy enough to hold shape on cupcakes yet smooth enough to spread easily over a sheet cake.

Ingredients

(Here's a tip: Check out the full list of ingredients and measurements in the recipe card below.)

  • 1 cup (226 g) unsalted butter, softened

  • 1 cup (245 g) creamy peanut butter

  • 3 cups (375 g) powdered sugar

  • 1 teaspoon vanilla extract

  • ½ teaspoon salt

  • 2 tablespoons milk

Directions

  1. I combine the softened butter and peanut butter in a large mixing bowl and beat them together until creamy and fully blended.

  2. Next, I gradually add the powdered sugar—about ⅓ cup at a time—with the mixer on low speed, making sure it incorporates smoothly.

  3. Once all the sugar is mixed in, I stir in the vanilla extract and salt.

  4. I pour in the milk, mix until fully combined, then increase the mixer speed to high and beat for about 30 seconds until the frosting becomes light and fluffy.

  5. Finally, I pipe or spread it onto completely cooled cupcakes or cakes.

Servings and timing

This frosting makes enough for 12 generously frosted cupcakes, 24 modestly frosted cupcakes, a 9×13 sheet cake, or a 2-layer 8″ or 9″ round cake.

  • Prep Time: 10 minutes

  • Cook Time: 0 minutes

  • Total Time: 10 minutes

Variations

  • I sometimes add an extra ½–1 cup of powdered sugar for a stiffer consistency, especially if I need defined piping on cupcakes.

  • For a touch of chocolate, I mix in 2 tablespoons of cocoa powder or swirl in some melted chocolate.

  • If I want a sweeter, more dessert-like profile, I use honey-roasted peanut butter (as long as it’s not the oily natural kind).

  • A splash of heavy cream instead of milk makes the frosting extra rich and smooth.

Storage/Reheating

I store any leftover frosting in an airtight container in the fridge for up to 5 days. Before using it again, I let it sit at room temperature for 20–30 minutes and give it a quick re-whip with a hand mixer to bring back the fluffy texture. I don’t recommend freezing it, as the texture can change once thawed.

FAQs

How do I make the frosting thicker?

I add extra powdered sugar, about ½ cup at a time, until I get the desired consistency. This helps make the frosting sturdier for piping.

Can I use natural peanut butter?

I avoid natural peanut butter that separates, since it tends to be too oily and can make the frosting grainy or runny.

Is this frosting stable for layer cakes?

Yes, it’s sturdy enough for layer cakes, especially if I refrigerate the layers a bit before stacking and decorating.

Can I make it ahead of time?

Yes, I often make it a day or two in advance and keep it refrigerated. Just let it come to room temperature and re-whip before using.

What cake flavors go best with peanut butter frosting?

I love pairing this with chocolate cake, banana cake, vanilla cupcakes, or even brownies for a rich and decadent treat.

Conclusion

This creamy peanut butter frosting has become a staple in my dessert recipes. It’s fast, reliable, and irresistibly delicious. Whether I’m piping it on cupcakes or slathering it over a birthday cake, it never disappoints. The smooth, nutty flavor and fluffy texture make it a must-have for any peanut butter lover.

Print

clock clock iconcutlery cutlery iconflag flag iconfolder folder iconinstagram instagram iconpinterest pinterest iconfacebook facebook iconprint print iconsquares squares iconheart heart iconheart solid heart solid icon
Creamy Peanut Butter Frosting

Creamy Peanut Butter Frosting

5 Stars 4 Stars 3 Stars 2 Stars 1 Star No reviews
  • Author: Sue
  • Prep Time: 10 minutes :contentReference[oaicite:4]{index=4}
  • Cook Time: 0 minutes
  • Total Time: 10 minutes :contentReference[oaicite:5]{index=5}
  • Yield: Makes enough for 12 generously frosted cupcakes or 24 modestly frosted cupcakes; also covers a 9×13 cake or 2‑layer 8‑9″ round cake :contentReference[oaicite:6]{index=6}
  • Category: Dessert Frosting
  • Method: Mixing/Beating
  • Cuisine: American
  • Diet: Vegetarian
Print Recipe
Pin Recipe

Description

A creamy, fluffy homemade peanut butter frosting perfect for spreading or piping on cakes and cupcakes.


Ingredients

  • 1 cup (226 g) unsalted butter, softened
  • 1 cup (245 g) creamy peanut butter
  • 3 cups (375 g) powdered sugar
  • 1 teaspoon vanilla extract
  • ½ teaspoon salt
  • 2 tablespoons milk

Instructions

  1. Combine butter and peanut butter in a large bowl and beat until creamy and well‑combined.
  2. Gradually add powdered sugar (about ⅓ cup at a time) with mixer on low until fully incorporated.
  3. Stir in vanilla extract and salt.
  4. Add milk and mix until well‑combined; increase mixer speed to high and beat for about 30 seconds until light and fluffy.
  5. Pipe or spread onto completely cooled cupcakes or cakes.

Notes

  • This recipe covers a 9×13 sheet cake, a 2‑layer 8″ or 9″ round cake, or 12 generously frosted cupcakes (or up to 24 modestly frosted cupcakes) :contentReference[oaicite:1]{index=1}.
  • For a stiffer frosting, add an additional ½–1 cup powdered sugar :contentReference[oaicite:2]{index=2}.
  • Avoid using natural peanut butter that separates—it's too oily and can lead to grainy or runny frosting :contentReference[oaicite:3]{index=3}.

Nutrition

  • Serving Size: 1/12 batch (approx.)
  • Calories: 381 kcal :contentReference[oaicite:7]{index=7}
  • Sugar: 32 g :contentReference[oaicite:8]{index=8}
  • Sodium: 199 mg :contentReference[oaicite:9]{index=9}
  • Fat: 26 g :contentReference[oaicite:10]{index=10}
  • Saturated Fat: 12 g :contentReference[oaicite:11]{index=11}
  • Trans Fat: 1 g :contentReference[oaicite:12]{index=12}
  • Carbohydrates: 34 g :contentReference[oaicite:13]{index=13}
  • Fiber: 1 g :contentReference[oaicite:14]{index=14}
  • Protein: 6 g :contentReference[oaicite:15]{index=15}
  • Cholesterol: 41 mg :contentReference[oaicite:16]{index=16}

Have you made this recipe? I'd love to see it!

Click here to Follow me on Pinterest

Cuban-Style Pollo a la Plancha

August 19, 2025 by Sue Leave a Comment

This Cuban-style Pollo a la Plancha is a citrus-garlic marinated chicken breast that’s pan-griddled until golden brown and juicy. It’s simple, flavorful, and topped with sautéed onions for an added layer of richness. I love serving it with traditional sides like rice, beans, and sweet plantains for a full Cuban experience. Cuban-Style Pollo a la Plancha

Why You’ll Love This Recipe

I like this dish for how quickly it comes together without sacrificing flavor. The mojo marinade brings a punch of citrus and garlic, while the homemade sazon completa gives it that deep, savory Cuban essence. Since the chicken is pounded thin, it cooks fast and stays tender. This is one of those meals I can make any night of the week with minimal effort and maximum payoff.

ingredients

(Here's a tip: Check out the full list of ingredients and measurements in the recipe card below.)

  • 4 boneless, skinless chicken breasts (pounded ¼‑inch thin)

  • ⅓ cup mojo marinade (citrus‑garlic mixture) or store‑bought

  • 2 teaspoons homemade sazon completa (blend of coriander, annatto, garlic powder, onion powder, dried oregano, ground cumin, salt, and pepper)

  • 2‑3 tablespoons neutral oil or unsalted butter

  • Sliced white or yellow onion (optional, for topping)

directions

  1. I start by pounding the chicken breasts between plastic wrap until they're about ¼ inch thick. This ensures even cooking and tenderness.

  2. I place the chicken in a shallow dish and pour the mojo marinade over both sides, seasoning with sazon completa. I let it sit at room temperature for 20 minutes to soak in all that flavor.

  3. In a griddle, grill pan, or large skillet, I heat oil or butter over medium heat.

  4. Working in batches, I remove the chicken from the marinade, shake off the excess, and cook each piece for 2–3 minutes per side until golden brown and cooked through.

  5. I like topping it with sautéed onions right before serving—it adds just the right touch.

Servings and timing

  • Yield: 4 servings

  • Prep time: 15 minutes

  • Cook time: 10 minutes

  • Total time: 45 minutes (includes 20 minutes marinating)

Variations

  • I sometimes swap chicken breasts for boneless thighs for extra juiciness.

  • For a smoky flavor, I like grilling the chicken outdoors instead of using a pan.

  • If I want a spicy kick, I add a pinch of chili powder or crushed red pepper to the marinade.

  • I’ve also tried it with lime juice and orange zest for a more zesty twist on the mojo.

  • Skipping the onions? I add chopped cilantro as a bright finishing touch instead.

storage/reheating

I store any leftover chicken in an airtight container in the fridge for up to 3 days. If I’m planning to keep it longer, I freeze it for up to 3 months. To reheat, I either warm it in a skillet over low heat with a splash of water or microwave it covered to keep it moist. I find it reheats best when sliced thin.

FAQs

What is mojo marinade made of?

I usually make mojo with a blend of sour orange juice (or a mix of orange and lime juice), garlic, olive oil, oregano, and salt. It’s the backbone of this dish’s flavor.

Can I use store-bought mojo?

Yes, I sometimes use store-bought mojo for convenience. Just check the ingredients to make sure it includes citrus and garlic for that authentic taste.

Do I have to marinate the chicken for a full 20 minutes?

I find 20 minutes at room temperature is enough to get that deep flavor without over-marinating or drying the meat. If I have more time, I might refrigerate it for up to 2 hours.

Can I cook this without pounding the chicken?

I’ve tried it, but it doesn’t cook as evenly. Pounding helps the chicken stay juicy and ensures it gets that nice golden crust without drying out.

What sides go best with Pollo a la Plancha?

I love pairing it with white rice, black beans, sweet plantains, or tostones. A fresh avocado salad also rounds out the meal beautifully.

Conclusion

Pollo a la Plancha is one of my go-to Cuban recipes when I want something quick, flavorful, and comforting. The citrusy marinade, savory seasoning, and golden sear make it a standout dish with minimal effort. Whether I’m feeding family or meal-prepping for the week, this chicken never disappoints.

Print

clock clock iconcutlery cutlery iconflag flag iconfolder folder iconinstagram instagram iconpinterest pinterest iconfacebook facebook iconprint print iconsquares squares iconheart heart iconheart solid heart solid icon
Cuban-Style Pollo a la Plancha

Cuban-Style Pollo a la Plancha

5 Stars 4 Stars 3 Stars 2 Stars 1 Star No reviews
  • Author: Sue
  • Prep Time: 15 minutes
  • Cook Time: 10 minutes
  • Total Time: 45 minutes (including 20 minutes marinating)
  • Yield: 4 servings
  • Category: Main Course / Dinner
  • Method: Pan‑fry (griddle or grill pan)
  • Cuisine: Cuban
  • Diet: Halal
Print Recipe
Pin Recipe

Description

A Cuban‑style citrus‑garlic marinated chicken breast that’s griddled to a juicy, golden‑brown perfection and topped with sautéed onions.


Ingredients

  • 4 boneless, skinless chicken breasts (pounded ¼‑inch thin)
  • ⅓ cup mojo marinade (citrus‑garlic mixture) or store‑bought
  • 2 teaspoons homemade sazon completa (blend of coriander, annatto, garlic powder, onion powder, dried oregano, ground cumin, salt, and pepper)
  • 2‑3 tablespoons neutral oil or unsalted butter
  • Sliced white or yellow onion (optional, for topping)

Instructions

  1. Pound the chicken breasts between plastic wrap until they are ¼‑inch thick.
  2. Place the chicken in a shallow dish, pour mojo marinade over both sides, and season with sazon completa. Marinate at room temperature for 20 minutes.
  3. Heat oil (or butter) in a griddle, grill pan, or large skillet over medium heat.
  4. Working in batches, remove chicken from marinade, shake off excess, and cook 2–3 minutes per side until golden brown.
  5. Top with sautéed onions if desired, and serve immediately.

Notes

  • Use a meat mallet or rolling pin to tenderize chicken evenly.
  • Marinating at room temperature for 20 minutes is sufficient for deep flavor without drying.
  • Serving ideas include white rice, black beans, sweet plantains, tostones, or avocado.
  • Store cooked chicken in the refrigerator for up to 3 days or freeze for up to 3 months.

Nutrition

  • Serving Size: 1 chicken breast
  • Calories: 178 kcal
  • Sugar: 8 g
  • Sodium: 780 mg
  • Fat: 3 g
  • Saturated Fat: 1 g
  • Unsaturated Fat: 2 g
  • Trans Fat: 1 g
  • Carbohydrates: 10 g
  • Protein: 26 g
  • Cholesterol: 72 mg

Have you made this recipe? I'd love to see it!

Click here to Follow me on Pinterest

Crispy Parmesan-Crusted Chicken Cutlets

August 19, 2025 by Sue Leave a Comment

This crispy Parmesan-crusted chicken recipe is everything I want in a weeknight dinner: quick, flavorful, and satisfying. Juicy chicken breasts are sliced into thin cutlets, coated in a seasoned Parmesan-Panko crust, pan-fried until golden, and finished in the oven for the perfect crisp. It’s the kind of meal I turn to when I crave comfort food with a touch of elegance—ready in just 30 minutes. Crispy Parmesan-Crusted Chicken Cutlets

Why You’ll Love This Recipe

I love how this recipe delivers maximum flavor with minimal effort. The combination of freshly grated Parmesan and panko breadcrumbs creates an ultra-crispy coating that’s hard to resist. Each bite is packed with savory notes and a satisfying crunch, while the chicken stays juicy and tender inside. It’s a great go-to when I need something impressive but don’t want to spend hours in the kitchen. Plus, it pairs beautifully with pasta, salad, or roasted veggies.

Ingredients

(Here's a tip: Check out the full list of ingredients and measurements in the recipe card below.)

  • 2 large chicken breasts

  • ½ teaspoon garlic powder

  • Salt & pepper to taste

  • ¼ cup flour

  • 2 eggs

  • ⅔ cup panko breadcrumbs

  • ½ cup freshly grated Parmesan cheese

  • ½ heaping teaspoon Italian seasoning

  • 3 tablespoons olive oil, divided

Directions

  1. I start by preheating the oven to 400°F (200°C) and moving the oven rack to the top third.

  2. Then I slice each chicken breast lengthwise into two thinner cutlets, making a total of four. After patting them dry, I season both sides with garlic powder, salt, and pepper.

  3. I set up a breading station: one bowl with flour, another with beaten eggs, and a third with a mix of panko breadcrumbs, Parmesan, and Italian seasoning.

  4. In an oven-proof skillet, I heat 2 tablespoons of olive oil over medium heat.

  5. I dredge each chicken cutlet in flour (shaking off any extra), dip it in the egg, and then coat it in the breadcrumb mixture, pressing gently to help it stick.

  6. I cook two cutlets at a time, frying them for 2–3 minutes per side until they’re golden brown. After transferring the first batch to a plate, I add the remaining tablespoon of oil and cook the rest.

  7. Once all cutlets are browned, I return them to the skillet, then place it in the oven for 5 minutes or until the internal temperature hits 165°F (74°C).

Servings and timing

  • Yield: 4 servings

  • Prep Time: 10 minutes

  • Cook Time: 20 minutes

  • Total Time: 30 minutes

Variations

When I want to change things up, I swap the Parmesan for Pecorino Romano for a sharper flavor. I’ve also added a pinch of cayenne pepper to the breadcrumb mixture for a bit of heat. For a gluten-free version, I use gluten-free panko and flour. Sometimes I add lemon zest to the breading for a fresh twist. And if I’m in the mood for extra herbs, I throw in chopped parsley or thyme.

Storage/Reheating

Leftovers keep well in an airtight container in the fridge for up to 3 days. When I reheat them, I prefer using the oven or an air fryer at 350°F for about 8–10 minutes to maintain the crispiness. Microwaving works in a pinch, but it does soften the crust. I don’t recommend freezing the cooked cutlets since the breading loses its texture.

FAQs

How do I keep the breading from falling off the chicken?

I make sure to pat the chicken dry and shake off excess flour and egg during the coating process. Pressing the breadcrumbs on gently helps everything stick better.

Can I use regular breadcrumbs instead of panko?

Yes, but I find that panko gives a much crispier texture. If I use regular breadcrumbs, I try to toast them a bit first to help them crisp up.

Do I have to finish the chicken in the oven?

I prefer finishing in the oven to ensure even cooking and crispiness. Skipping this step might leave the inside undercooked if the cutlets are thick.

What sides go best with this dish?

I usually serve this with a green salad, garlic mashed potatoes, or pasta tossed in olive oil. Roasted vegetables also make a great match.

Can I prep this in advance?

Yes—I often bread the chicken ahead of time and keep it in the fridge for a few hours before cooking. I don’t recommend breading it the night before, as it can get soggy.

Conclusion

This crispy Parmesan-crusted chicken cutlet recipe has become a regular part of my dinner rotation. It’s easy, versatile, and always hits the spot. Whether I’m cooking for the family or serving guests, it delivers that perfect balance of comfort and crunch. Once I made it the first time, I knew it would be one of those go-to meals I’d keep coming back to.

Print

clock clock iconcutlery cutlery iconflag flag iconfolder folder iconinstagram instagram iconpinterest pinterest iconfacebook facebook iconprint print iconsquares squares iconheart heart iconheart solid heart solid icon
Crispy Parmesan-Crusted Chicken Cutlets

Crispy Parmesan-Crusted Chicken Cutlets

5 Stars 4 Stars 3 Stars 2 Stars 1 Star No reviews
  • Author: Sue
  • Prep Time: 10 minutes
  • Cook Time: 20 minutes
  • Total Time: 30 minutes
  • Yield: 4 servings
  • Category: Main dish / Chicken & Poultry
  • Method: Pan‑fry then oven‑finish
  • Cuisine: Comfort / American
  • Diet: Low Fat
Print Recipe
Pin Recipe

Description

A comfort‑food classic: juicy chicken breasts cut into cutlets, coated in a crispy Parmesan‑Panko crust and finished in the oven—ready in 30 minutes.


Ingredients

  • 2 large chicken breasts
  • ½ teaspoon garlic powder
  • Salt & pepper to taste
  • ¼ cup flour
  • 2 eggs
  • ⅔ cup panko breadcrumbs
  • ½ cup freshly grated Parmesan cheese
  • ½ heaping teaspoon Italian seasoning
  • 3 tablespoons olive oil, divided

Instructions

  1. Preheat the oven to 400 °F (200 °C) and position the rack in the top third.
  2. Cut each chicken breast lengthwise to make 4 thinner cutlets. Pat dry, then season both sides with garlic powder, salt, and pepper.
  3. Set up three bowls: one with flour; one with beaten eggs; one with panko breadcrumbs mixed with Parmesan and Italian seasoning.
  4. Heat 2 tablespoons olive oil in an oven‑proof skillet over medium heat.
  5. Dredge each chicken cutlet in flour (shake off excess), dip in egg, then coat in the breadcrumb mixture (press gently to adhere).
  6. Working in batches, fry two cutlets at a time for about 2–3 minutes per side until golden brown. Use tongs to flip, and transfer browned pieces to a plate. Add remaining tablespoon of oil for the second batch if needed.
  7. Remove skillet from heat, arrange all four cutlets in the pan, then transfer to the oven and bake for 5 minutes, or until the internal temperature reaches 165 °F (74 °C).

Notes

  • Use panko breadcrumbs for extra crispiness; if using Italian‑seasoned panko, omit the added Italian seasoning.
  • Pat chicken dry before dredging and shake off excess at every coating step for best adhesion.
  • Do not overcrowd the skillet—cook in batches to maintain crispiness.
  • Resist moving the chicken while frying; wait until it’s golden before flipping.

Have you made this recipe? I'd love to see it!

Click here to Follow me on Pinterest

Pumpkin Dump Cake

August 18, 2025 by Sue Leave a Comment

Pumpkin dump cake is one of those effortless desserts that feels like a warm hug on a crisp fall day. With just a few pantry staples and minimal prep, I get a comforting, crowd-pleasing dessert that tastes like pumpkin pie with a buttery, cake-like topping. It’s the kind of treat I can whip up quickly for a holiday gathering, a potluck, or just a cozy night in. Pumpkin Dump Cake

Why I Love This Recipe

I love how incredibly simple this pumpkin dump cake is to make—there’s no mixing bowl needed. Everything gets layered right in the baking dish. The combination of creamy pumpkin filling and golden cake crust is magic. It’s also highly versatile, and I can play around with flavors and toppings. Plus, it makes the kitchen smell like fall, and that’s always a win.

Ingredients

(Here's a tip: Check out the full list of ingredients and measurements in the recipe card below.)

  • Pumpkin puree (not pumpkin pie filling)

  • Sweetened condensed milk or evaporated milk

  • Eggs

  • Granulated sugar

  • Pumpkin pie spice (or a mix of cinnamon, nutmeg, and cloves)

  • Yellow cake mix

  • Melted butter

  • Chopped pecans or walnuts (optional)

Directions

  1. I start by preheating my oven to 350°F (175°C) and greasing a 9x13-inch baking dish.

  2. In the dish, I combine the pumpkin puree, sugar, pumpkin pie spice, eggs, and condensed milk. I whisk everything together until smooth.

  3. Next, I evenly sprinkle the dry cake mix over the pumpkin mixture—no need to mix it in.

  4. Then, I drizzle the melted butter over the top, making sure to cover as much of the cake mix as I can.

  5. If I’m adding nuts, I sprinkle them over the top for extra crunch.

  6. I bake it for about 50-60 minutes, or until the top is golden brown and the filling is set.

  7. I let it cool slightly before serving, and it’s especially good with a scoop of vanilla ice cream or a dollop of whipped cream.

Servings and timing

This recipe makes about 12 servings.

Prep Time: 10 minutes
Cook Time: 55 minutes
Total Time: 1 hour 5 minutes

Variations

  • I sometimes swap the yellow cake mix for spice cake mix for an extra burst of fall flavor.

  • A drizzle of caramel sauce over the finished cake gives it a decadent touch.

  • I’ve also tried it with chocolate chips on top for a twist that surprises everyone.

  • For a dairy-free version, I use coconut milk and dairy-free cake mix.

Storage/Reheating

I store leftovers in an airtight container in the refrigerator for up to 4 days. When I’m ready to reheat, I just microwave a slice for 20-30 seconds, or pop it in a warm oven until heated through. It also tastes great cold straight from the fridge.

FAQs

What is a dump cake?

A dump cake is a super simple dessert where I “dump” all the ingredients into a baking dish, usually without mixing, and bake it until golden and bubbly.

Can I use fresh pumpkin instead of canned?

Yes, I can use fresh pumpkin puree as long as it’s smooth and has a similar consistency to canned puree. Just make sure it’s not too watery.

Why is my dump cake runny?

If my dump cake is runny, it likely needs more baking time. I make sure the center is set and not jiggly before taking it out of the oven.

Can I make this ahead of time?

Absolutely. I often make it a day in advance and refrigerate it. The flavors deepen, and it tastes even better the next day.

Do I need to mix the cake mix into the pumpkin?

No, the beauty of this recipe is in the layering. I just sprinkle the cake mix on top and drizzle the butter—no mixing required.

Conclusion

Pumpkin dump cake is the kind of dessert I keep coming back to when I want something quick, easy, and irresistibly delicious. It’s comforting, customizable, and perfect for fall or any time I’m craving those warm pumpkin pie flavors with less fuss.

Print

clock clock iconcutlery cutlery iconflag flag iconfolder folder iconinstagram instagram iconpinterest pinterest iconfacebook facebook iconprint print iconsquares squares iconheart heart iconheart solid heart solid icon
Pumpkin Dump Cake

Pumpkin Dump Cake

5 Stars 4 Stars 3 Stars 2 Stars 1 Star No reviews
  • Author: Sue
  • Prep Time: 10 minutes
  • Cook Time: 55 minutes
  • Total Time: 1 hour 5 minutes
  • Yield: 12 servings
  • Category: Dessert
  • Method: Baking
  • Cuisine: American
  • Diet: Vegetarian
Print Recipe
Pin Recipe

Description

Pumpkin dump cake is a simple, comforting fall dessert that combines creamy pumpkin filling with a buttery cake topping. Perfect for holidays, potlucks, or cozy nights in.


Ingredients

  • 1 can (15 oz) pumpkin puree
  • 1 can (14 oz) sweetened condensed milk or evaporated milk
  • 2 large eggs
  • ¾ cup granulated sugar
  • 1 tbsp pumpkin pie spice (or a mix of cinnamon, nutmeg, and cloves)
  • 1 box yellow cake mix
  • ¾ cup (1 ½ sticks) melted butter
  • ½ cup chopped pecans or walnuts (optional)

Instructions

  1. Preheat the oven to 350°F (175°C) and grease a 9x13-inch baking dish.
  2. In the baking dish, whisk together the pumpkin puree, sugar, pumpkin pie spice, eggs, and condensed milk until smooth.
  3. Evenly sprinkle the dry cake mix over the pumpkin mixture without mixing it in.
  4. Drizzle the melted butter evenly over the cake mix, covering as much as possible.
  5. Sprinkle chopped nuts on top, if using.
  6. Bake for 50–60 minutes, or until the top is golden brown and the filling is set.
  7. Let it cool slightly before serving. Serve with whipped cream or vanilla ice cream if desired.

Notes

  • Swap yellow cake mix with spice cake mix for more fall flavor.
  • Top with caramel sauce or chocolate chips for variation.
  • Use coconut milk and dairy-free cake mix for a dairy-free version.
  • Store leftovers in the fridge for up to 4 days; reheat or enjoy cold.

Nutrition

  • Serving Size: 1 slice
  • Calories: 320
  • Sugar: 28g
  • Sodium: 260mg
  • Fat: 15g
  • Saturated Fat: 8g
  • Unsaturated Fat: 6g
  • Trans Fat: 0g
  • Carbohydrates: 42g
  • Fiber: 2g
  • Protein: 4g
  • Cholesterol: 55mg

Have you made this recipe? I'd love to see it!

Click here to Follow me on Pinterest

Southern-Style Pecan Bread

August 18, 2025 by Sue Leave a Comment

A moist, nutty pecan bread with the warm hint of cinnamon—Southern-style comfort in every slice. This easy, one-bowl recipe comes together in no time and fills my kitchen with the irresistible aroma of toasted pecans and spice. Perfect as a sweet snack, a cozy breakfast treat, or even a simple dessert. Southern-Style Pecan Bread

Why I Love This Recipe

I love how this bread brings together rich, buttery pecans and the warm flavor of cinnamon in a soft, moist texture that feels like a hug from the South. It’s a true comfort bake—simple, fuss-free, and crowd-pleasing. I only need one bowl and a few pantry staples, and I’m rewarded with a loaf that tastes like it came straight from Grandma’s kitchen. Whether I serve it warm with a pat of butter or just as-is, it never disappoints.

Ingredients

(Here's a tip: Check out the full list of ingredients and measurements in the recipe card below.)

  • 2 cups pecans, finely chopped

  • 1½ cups self‑rising flour

  • 1 cup granulated sugar

  • 1 cup brown sugar

  • 1 cup vegetable oil

  • 4 large eggs, beaten

  • 1 teaspoon vanilla extract

  • ¼ teaspoon salt

  • 1 teaspoon ground cinnamon

Directions

  1. I start by preheating my oven to 350 °F (175 °C) and greasing a 9×13‑inch baking dish.

  2. In a large bowl, I mix the granulated sugar, brown sugar, beaten eggs, and vegetable oil until the mixture is smooth.

  3. Then, I stir in the self‑rising flour and salt just until combined.

  4. I add the vanilla extract and cinnamon, then gently fold in the chopped pecans.

  5. I pour the batter into the prepared dish and smooth the top.

  6. I bake it for 30–35 minutes, or until a toothpick inserted in the center comes out with just a few moist crumbs.

  7. I let it cool in the pan for at least 15 minutes before slicing and serving.

Servings and timing

This recipe makes 12 servings.

  • Prep time: 10 minutes

  • Cook time: 30–35 minutes

  • Total time: 45 minutes

Variations

I sometimes swap out the pecans for walnuts when I’m craving something slightly different. For a festive twist, I mix in chocolate chips or dried cranberries. When I want a tropical flavor, I use coconut oil instead of vegetable oil. And if I don’t have self-rising flour on hand, I mix 1½ cups all-purpose flour with 1½ teaspoons baking powder and ½ teaspoon salt.

Storage/Reheating

I keep the bread covered at room temperature for up to 2–3 days. If I want it to last longer, I store it in the fridge for up to a week. For longer storage, I slice and freeze individual pieces—wrapped well—for up to 2 months. When I’m ready to eat, I just thaw and reheat in the microwave or oven until warm.

FAQs

What if I don’t have self-rising flour?

I just use 1½ cups all-purpose flour mixed with 1½ teaspoons baking powder and ½ teaspoon salt—it works beautifully.

Can I make this bread in a loaf pan?

Yes, but I keep in mind that the baking time may need to be increased by 10–15 minutes. I just test with a toothpick for doneness.

How do I keep the top from over-browning?

If I notice it browning too quickly, I loosely tent the top with foil partway through baking.

Can I make this recipe gluten-free?

Absolutely. I use a 1:1 gluten-free flour blend with added leavening (or add baking powder/salt as needed) and keep everything else the same.

Is this bread more of a dessert or breakfast?

I think it’s both! It’s sweet enough to be a dessert but pairs so well with morning coffee that I also enjoy it for breakfast.

Conclusion

This Southern-style pecan bread is one of my go-to comfort bakes. It’s easy, delicious, and endlessly customizable. Whether I’m serving it at brunch, gifting it to friends, or simply enjoying a slice on a quiet afternoon, it always brings a bit of warmth and nostalgia to my day.

Print

clock clock iconcutlery cutlery iconflag flag iconfolder folder iconinstagram instagram iconpinterest pinterest iconfacebook facebook iconprint print iconsquares squares iconheart heart iconheart solid heart solid icon
Southern-Style Pecan Bread

Southern-Style Pecan Bread

5 Stars 4 Stars 3 Stars 2 Stars 1 Star No reviews
  • Author: Sue
  • Prep Time: 10 minutes
  • Cook Time: 30–35 minutes
  • Total Time: 45 minutes
  • Yield: 12 servings
  • Category: Breakfast / Snack / Dessert
  • Method: One‑bowl mixing, baked in a dish
  • Cuisine: Southern
  • Diet: Vegetarian
Print Recipe
Pin Recipe

Description

A moist, nutty pecan bread with the warm hint of cinnamon—Southern-style comfort in every slice.


Ingredients

  • 2 cups pecans, finely chopped
  • 1½ cups self‑rising flour
  • 1 cup granulated sugar
  • 1 cup brown sugar
  • 1 cup vegetable oil
  • 4 large eggs, beaten
  • 1 teaspoon vanilla extract
  • ¼ teaspoon salt
  • 1 teaspoon ground cinnamon

Instructions

  1. Preheat oven to 350 °F (175 °C). Grease a 9×13‑inch baking dish.
  2. In a large bowl, mix granulated sugar, brown sugar, beaten eggs, and vegetable oil until smooth.
  3. Stir in self‑rising flour and salt until just combined.
  4. Add vanilla extract and ground cinnamon; gently fold in chopped pecans.
  5. Pour batter into prepared baking dish and smooth the top.
  6. Bake for 30–35 minutes, or until a toothpick inserted in center comes out with just a few moist crumbs.
  7. Let cool in the pan for at least 15 minutes before slicing and serving.

Notes

  • If you don’t have self‑rising flour, use 1½ cups all‑purpose flour mixed with 1½ teaspoons baking powder and ½ teaspoon salt.
  • Feel free to swap pecans for walnuts or add chocolate chips, dried cranberries, or use coconut oil for different variations.
  • To prevent over-browning while baking, tent the top loosely with foil partway through baking if needed.
  • Store covered at room temperature for 2–3 days, in the fridge up to a week, or freeze slices wrapped for up to 2 months.

Nutrition

  • Serving Size: 1 slice

Have you made this recipe? I'd love to see it!

Click here to Follow me on Pinterest

Flaky Buttermilk Biscuits

August 18, 2025 by Sue Leave a Comment

Buttery, golden, and impossibly flaky—these homemade buttermilk biscuits are everything I want in a classic biscuit. With just a few pantry staples and a simple fold-and-press method, I get tender layers that puff beautifully in the oven. Whether I serve them warm with honey, smothered in gravy, or alongside a hearty dinner, they always impress. Flaky Buttermilk Biscuits

Why You’ll Love This Recipe

I love this biscuit recipe because it delivers on both texture and flavor. The mix of baking powder and baking soda gives a great rise and subtle tang, while the cold butter melts into steam during baking, creating gorgeous, buttery layers. The folding technique gives me that perfect flaky pull-apart interior every time. Plus, they’re ready in just over 30 minutes—quick enough for a weekday but special enough for a weekend brunch.

ingredients

(Here's a tip: Check out the full list of ingredients and measurements in the recipe card below.)

  • 2 cups all‑purpose flour

  • 1 Tablespoon baking powder

  • ½ teaspoon baking soda

  • 1 teaspoon salt

  • ½ cup (8 Tbsp; 113 g) unsalted butter, cubed and very cold

  • 1 cup + 2 Tablespoons (270 ml) cold buttermilk

  • 2 teaspoons honey

directions

  1. I start by preheating the oven to 425 °F (218 °C).

  2. In a large bowl, I whisk together the flour, baking powder, baking soda, and salt.

  3. I add the cold cubed butter and use a pastry cutter (or food processor) to cut it into the flour until it looks like coarse crumbs.

  4. Then I pour in the cold buttermilk and drizzle the honey over the top. I fold it gently with a spatula just until it becomes a shaggy dough. I make sure not to over-mix.

  5. I turn the dough out onto a lightly floured surface and gently pat it into a 1-inch thick rectangle.

  6. I fold the dough in half, then press it again into a 1-inch thick rectangle. I repeat this folding and pressing 4 to 5 times to build up those flaky layers.

  7. Once I’ve formed the final rectangle, I use a biscuit cutter or bench scraper to cut out 8 biscuits (sometimes more if I cut smaller).

  8. I arrange them close together on a parchment-lined baking sheet.

  9. I bake them for about 20 minutes, until they’re golden brown and flaky on top.

  10. Right out of the oven, I sometimes brush them with melted butter and a touch of honey for that glossy, flavorful finish.

Servings and timing

This recipe yields about 8 to 11 biscuits depending on how I cut them.
Prep Time: 15 minutes
Cook Time: 20 minutes
Total Time: 35 minutes

Variations

  • Cheesy Biscuits: I like adding ½ cup of shredded sharp cheddar before folding the dough.

  • Herb Infused: A teaspoon of chopped fresh rosemary or chives gives a savory twist.

  • Spicy Kick: A pinch of cayenne or diced jalapeños adds heat.

  • Sweet Version: I sometimes add a bit more honey and top with coarse sugar for breakfast biscuits.

  • Dairy-Free: I’ve swapped in vegan butter and almond milk with a splash of vinegar for a dairy-free version—it works surprisingly well.

storage/reheating

I store any leftover biscuits in an airtight container at room temperature for up to 2 days, or in the fridge for up to 5. To reheat, I pop them in a 300°F oven for about 8 minutes until warm. For longer storage, I freeze them (baked or unbaked) and reheat directly from frozen—baked ones take about 10 minutes, and unbaked need around 25 minutes.

FAQs

How do I keep my biscuits from turning out tough?

The key is not overworking the dough. I mix just until combined and always fold rather than knead.

Can I make these biscuits ahead of time?

Yes, I sometimes prepare the dough, cut out the biscuits, and freeze them raw. I bake them straight from the freezer when I need them.

Why should the butter be cold?

Cold butter melts during baking and releases steam, which helps create those amazing flaky layers I love.

Can I substitute the buttermilk?

If I don’t have buttermilk, I mix 1 cup of milk with 1 tablespoon of lemon juice or vinegar and let it sit for 5 minutes. It works in a pinch.

How do I get my biscuits to rise tall?

I press the biscuits together on the baking sheet—this encourages upward rise instead of spreading out.

Conclusion

These flaky buttermilk biscuits are my go-to when I want something cozy, simple, and seriously satisfying. With just a handful of ingredients and an easy folding technique, they come out perfect every time—crispy on the outside, buttery and soft on the inside. Once I tried them homemade, I never looked back

Print

clock clock iconcutlery cutlery iconflag flag iconfolder folder iconinstagram instagram iconpinterest pinterest iconfacebook facebook iconprint print iconsquares squares iconheart heart iconheart solid heart solid icon
Flaky Buttermilk Biscuits

Flaky Buttermilk Biscuits

5 Stars 4 Stars 3 Stars 2 Stars 1 Star No reviews
  • Author: Sue
  • Prep Time: 15 min
  • Cook Time: 20 min
  • Total Time: 35 min
  • Yield: 8–11 biscuits
  • Category: Bread / Side
  • Method: Baking
  • Cuisine: American
  • Diet: Vegetarian
Print Recipe
Pin Recipe

Description

Buttery, flaky homemade biscuits with simple pantry ingredients and a fold-and-press technique for perfect layers.


Ingredients

  • 2 cups all‑purpose flour
  • 1 Tablespoon baking powder
  • ½ teaspoon baking soda
  • 1 teaspoon salt
  • ½ cup (8 Tbsp; 113 g) unsalted butter, cubed and very cold
  • 1 cup + 2 Tablespoons (270 ml) cold buttermilk
  • 2 teaspoons honey

Instructions

  1. Preheat oven to 425 °F (218 °C).
  2. In a large bowl, whisk together flour, baking powder, baking soda, and salt.
  3. Add cold cubed butter; cut into flour using a pastry cutter (or pulse in a food processor) until mixture resembles coarse crumbs.
  4. Pour in cold buttermilk and drizzle honey over; fold gently with a spatula just until a shaggy, slightly sticky dough forms—do not over-mix.
  5. Turn the dough onto a lightly floured surface. Pat into a rectangle about 1 inch thick.
  6. Fold the dough in half, press again into a 1 inch rectangle; repeat folding/pressing 4–5 times to build flaky layers.
  7. Pat into final 1‑inch thick rectangle. Use a bench scraper or biscuit cutter to cut into 8 biscuits (or squares).
  8. Place biscuits close together on a parchment‑lined baking sheet.
  9. Bake for 20 minutes or until golden brown on top and flaky.
  10. Optionally brush warm biscuits with melted butter and a bit of honey before serving.

Notes

  • Keep butter and buttermilk very cold—cold fat creates flaky layers by melting into steam during baking :contentReference[oaicite:2]{index=2}.
  • Avoid overworking the dough to prevent tough biscuits—fold rather than knead :contentReference[oaicite:3]{index=3}.
  • Using both baking powder and a bit of baking soda enhances browning, rise, and flavor :contentReference[oaicite:4]{index=4}.
  • Brushing with melted butter (and honey) adds rich flavor and shine :contentReference[oaicite:5]{index=5}.
  • Bake biscuits closely touching to help them rise tall and even :contentReference[oaicite:6]{index=6}.

Nutrition

  • Serving Size: 1 biscuit
  • Calories: Approx. 200 kcal
  • Sugar: ≈ 2 g
  • Sodium: ≈ 300 mg
  • Fat: ≈ 10 g
  • Saturated Fat: ≈ 6 g
  • Unsaturated Fat: ≈ 4 g
  • Trans Fat: 0 g
  • Carbohydrates: ≈ 22 g
  • Fiber: ≈ 1 g
  • Protein: ≈ 3 g
  • Cholesterol: ≈ 25 mg

Have you made this recipe? I'd love to see it!

Click here to Follow me on Pinterest

Crispy Southern Okra Patties

August 18, 2025 by Sue Leave a Comment

Crispy Southern Okra Patties are golden-fried fritters packed with finely chopped okra and onion, held together by a cornmeal-flour batter. Light, crunchy, and full of Southern charm, these make the perfect appetizer or side dish, especially when I’m craving something comforting and savory with a crisp bite. Crispy Southern Okra Patties

Why You’ll Love This Recipe

I love how these patties turn out perfectly crispy on the outside while keeping a tender, flavorful center. The okra adds a unique earthiness, the onions bring sweetness, and the cornmeal gives it that signature Southern crunch. This recipe is also great because it's easy to throw together in about 30 minutes. I enjoy serving them alongside other Southern staples or even as a snack with dipping sauce. Plus, they’re vegetarian-friendly and make a great conversation starter at any gathering.

ingredients

(Here's a tip: Check out the full list of ingredients and measurements in the recipe card below.)

  • 3 cups vegetable oil (for frying)

  • 1 lb okra, finely chopped

  • 1 cup onion, finely chopped

  • 1 teaspoon salt

  • ¼ teaspoon black pepper

  • ½ cup water

  • 1 egg

  • ½ cup all-purpose flour

  • 1 teaspoon baking powder

  • ½ cup cornmeal

directions

  1. I start by heating about 1 inch of vegetable oil in a large skillet to 375°F (190°C).

  2. In a large mixing bowl, I combine the finely chopped okra, chopped onion, salt, pepper, water, and egg.

  3. In a separate bowl, I mix together the flour, baking powder, and cornmeal. Then I stir that into the okra mixture until everything is well combined.

  4. Using a spoon, I carefully drop portions of the batter into the hot oil. I fry each side for about 2 minutes, or until they’re golden brown and crispy.

  5. Once done, I remove the patties with a slotted spoon and let them drain on paper towels to remove excess oil before serving.

Servings and timing

This recipe yields about 6 servings.

  • Prep Time: 20 minutes

  • Cook Time: 10 minutes

  • Total Time: 30 minutes

Variations

I sometimes switch things up by adding a dash of cayenne pepper for some heat or a sprinkle of garlic powder for more depth. Adding extra cornmeal gives them a firmer, crunchier texture if I want more bite. I’ve also tried folding in a handful of shredded cheese or finely chopped bell peppers to give the patties a more colorful and savory twist.

storage/reheating

If I have leftovers, I store them in an airtight container in the fridge. They keep well for up to 3 days. When I reheat them, I prefer using a skillet or toaster oven to bring back their crispiness—microwaving tends to make them a bit soggy.

FAQs

How do I keep okra from being too slimy in the patties?

I always finely hand-chop the okra instead of using a food processor. This keeps the slime to a minimum and helps the texture stay just right.

Can I make these okra patties gluten-free?

Yes, I can substitute the all-purpose flour with a gluten-free flour blend. Just make sure it’s one that works well for frying.

What oil works best for frying these?

I typically use vegetable oil, but peanut oil or canola oil also work well because they can handle high heat and add minimal flavor.

Can I bake these instead of frying?

While I prefer frying for the best crispiness, I can bake them at 400°F (200°C) for about 20 minutes, flipping halfway. They won’t be as crispy but still taste great.

Can I freeze okra patties?

Yes, I let them cool completely, then freeze them in a single layer before transferring them to a freezer bag. I reheat them in the oven or toaster oven straight from frozen for best results.

Conclusion

These Southern Okra Patties are my go-to for a quick and satisfying dish that captures the heart of Southern cooking. They're easy to make, deliciously crispy, and full of home-cooked flavor. Whether I serve them as a snack, appetizer, or side dish, they always disappear fast from the plate.

Print

clock clock iconcutlery cutlery iconflag flag iconfolder folder iconinstagram instagram iconpinterest pinterest iconfacebook facebook iconprint print iconsquares squares iconheart heart iconheart solid heart solid icon
Crispy Southern Okra Patties

Crispy Southern Okra Patties

5 Stars 4 Stars 3 Stars 2 Stars 1 Star No reviews
  • Author: Sue
  • Prep Time: 20 min
  • Cook Time: 10 min
  • Total Time: 30 min
  • Yield: 6 servings
  • Category: Appetizer / Side Dish
  • Method: Pan‑frying
  • Cuisine: Southern United States
  • Diet: Vegetarian
Print Recipe
Pin Recipe

Description

Crispy southern‑style okra patties made with chopped okra, onion, cornmeal‑flour batter, and fried until golden.


Ingredients

  • 3 cups vegetable oil (for frying)
  • 1 lb okra, finely chopped
  • 1 cup onion, finely chopped
  • 1 tsp salt
  • ¼ tsp black pepper
  • ½ cup water
  • 1 egg
  • ½ cup all‑purpose flour
  • 1 tsp baking powder
  • ½ cup cornmeal

Instructions

  1. Heat about 1 inch of vegetable oil in a large skillet to 375 °F (190 °C).
  2. In a large bowl, mix together the chopped okra, onion, salt, pepper, water, and egg.
  3. In a separate bowl, combine the flour, baking powder, and cornmeal; then stir that into the okra mixture until well combined.
  4. Carefully drop spoonfuls of the batter into the hot oil, frying for about 2 minutes per side or until golden brown.
  5. Remove the patties with a slotted spoon and drain them on paper towels before serving.

Notes

  • Use finely chopped okra (hand‑chopping preferred) to reduce slime. Avoid food‑processor chopping :contentReference[oaicite:2]{index=2}.
  • Adjust seasoning—some add garlic powder, cayenne, or additional cornmeal for texture and flavor :contentReference[oaicite:3]{index=3}.
  • Leftovers can be kept in an airtight container and reheated—best reheated in a skillet or toaster oven.

Nutrition

  • Serving Size: 1 patty (approx. ⅙ of batch)
  • Calories: 224
  • Sugar: 3 g
  • Sodium: 467 mg
  • Fat: 12 g
  • Saturated Fat: 2 g
  • Carbohydrates: 25 g
  • Fiber: 4 g
  • Protein: 5 g
  • Cholesterol: 31 mg

Have you made this recipe? I'd love to see it!

Click here to Follow me on Pinterest

Sweet and Spicy Baked Cauliflower

August 18, 2025 by Sue Leave a Comment

This sweet and spicy baked cauliflower is my go-to when I want something bold, healthy, and irresistibly crunchy. The balance of sriracha heat with honey’s mellow sweetness creates a glaze that clings beautifully to the florets. Roasting brings out the cauliflower’s natural nuttiness, while the edges turn crispy and caramelized, giving each bite a satisfying texture. Sweet and Spicy Baked Cauliflower

Why You’ll Love This Recipe

I love how this dish checks all the boxes—healthy, flavorful, and easy to prepare. It’s the kind of side dish or snack I can feel good about eating and sharing. The spice level is adjustable, it’s vegetarian, and with a quick vegan swap, it suits even more diets. Whether I serve it as an appetizer or pair it with a grain bowl, this recipe always steals the show.

Ingredients

(Here's a tip: Check out the full list of ingredients and measurements in the recipe card below.)

  • 1 medium head of cauliflower, cut into florets

  • 2 tablespoons olive oil

  • 2 tablespoons honey

  • 2 tablespoons sriracha sauce

  • 1 tablespoon soy sauce

  • 1 teaspoon garlic powder

  • 1 teaspoon onion powder

  • 1 teaspoon ground cumin

  • Salt and pepper, to taste

  • Fresh cilantro for garnish (optional)

  • Sesame seeds for garnish (optional)

Directions

  1. I start by preheating the oven to 400 °F (200 °C) and lining a baking sheet with parchment paper.

  2. In a large bowl, I toss the cauliflower florets with olive oil, salt, and pepper until they’re evenly coated.

  3. I whisk together the honey, sriracha, soy sauce, garlic powder, onion powder, and cumin in a small bowl until the glaze is smooth.

  4. Then I pour the glaze over the cauliflower and toss everything again to coat it completely.

  5. I spread the florets out in a single layer on the baking sheet, being careful not to overcrowd them.

  6. I bake the cauliflower for 20 to 25 minutes, flipping halfway, until the edges are crispy and the inside is tender.

  7. Once baked, I sometimes sprinkle fresh cilantro and sesame seeds over the top before serving for an extra pop of flavor and texture.

Servings and timing

  • Yield: 4 servings

  • Prep Time: 10 minutes

  • Cook Time: 20–25 minutes

  • Total Time: 30 minutes

Variations

When I want to change things up, I swap the honey for maple syrup or agave to make it vegan. Sometimes I use a different hot sauce for a unique twist—chipotle hot sauce brings a smoky note. For extra crunch, I’ve also tossed in panko breadcrumbs before baking. And if I’m looking for more protein, I serve this with roasted chickpeas or tofu on the side.

Storage/Reheating

I store leftovers in an airtight container in the fridge for up to 3 days. To reheat, I prefer using the oven at 375 °F (190 °C) for about 10 minutes to bring back some crispiness. Microwaving works too, but it softens the texture a bit.

FAQs

What’s the best way to get the cauliflower crispy?

I make sure to not overcrowd the baking sheet and to flip the florets halfway through roasting. This allows the hot air to circulate and crisp up all sides.

Can I make this recipe vegan?

Yes, I just replace the honey with maple syrup or agave nectar. The flavor stays sweet and spicy with a plant-based touch.

Is this dish good for meal prep?

Absolutely. I often make a batch in advance and reheat it in the oven when needed. It pairs well with rice, quinoa, or a salad.

Can I use frozen cauliflower?

I’ve tried it, but fresh cauliflower gives a much better texture. If I must use frozen, I thaw and pat it dry very well before roasting.

How spicy is this recipe?

It has a moderate heat level from the sriracha, but I can easily adjust the spice by adding more or less to suit my taste.

Conclusion

This sweet and spicy baked cauliflower is one of those dishes I keep coming back to. It’s simple, satisfying, and versatile—perfect for weeknight dinners, party snacks, or anytime I’m craving something with bold flavor and a satisfying crunch.

Print

clock clock iconcutlery cutlery iconflag flag iconfolder folder iconinstagram instagram iconpinterest pinterest iconfacebook facebook iconprint print iconsquares squares iconheart heart iconheart solid heart solid icon
Sweet and Spicy Baked Cauliflower

Sweet and Spicy Baked Cauliflower

5 Stars 4 Stars 3 Stars 2 Stars 1 Star No reviews
  • Author: Sue
  • Prep Time: 10 minutes
  • Cook Time: 20–25 minutes
  • Total Time: 30 minutes
  • Yield: 4 servings
  • Category: Side Dish / Appetizer
  • Method: Baking / Roasting
  • Cuisine: Vegetarian, Fusion
  • Diet: Vegetarian
Print Recipe
Pin Recipe

Description

Flavorful baked cauliflower with a perfectly balanced sweet‑and‑spicy glaze, crispy edges, and tender inside.


Ingredients

  • 1 medium head of cauliflower, cut into florets
  • 2 tablespoons olive oil
  • 2 tablespoons honey
  • 2 tablespoons sriracha sauce
  • 1 tablespoon soy sauce
  • 1 teaspoon garlic powder
  • 1 teaspoon onion powder
  • 1 teaspoon ground cumin
  • Salt and pepper, to taste
  • Fresh cilantro for garnish (optional)
  • Sesame seeds for garnish (optional)

Instructions

  1. Preheat the oven to 400 °F (200 °C) and line a baking sheet with parchment paper.
  2. In a large bowl, toss the cauliflower florets with olive oil, salt, and pepper until well coated.
  3. In a small bowl, whisk together honey, sriracha, soy sauce, garlic powder, onion powder, and cumin until smooth.
  4. Pour the sweet‑spicy glaze over the cauliflower, tossing to coat evenly.
  5. Spread the coated florets in a single layer on the baking sheet, ensuring they’re not overcrowded.
  6. Bake for 20–25 minutes, flipping halfway, until the edges are crispy and the cauliflower is tender.
  7. Remove from the oven and, if desired, garnish with fresh cilantro and sesame seeds before serving.

Notes

  • Adjust the spice level by reducing or increasing the sriracha (or substitute a milder hot sauce).
  • For a vegan version, replace honey with maple syrup or agave nectar.
  • For maximum crispiness, avoid overcrowding the baking sheet.
  • Leftovers can be stored in an airtight container in the fridge for up to 3 days and reheated in the oven to retain crunch.

Nutrition

  • Serving Size: 1⁄4 recipe
  • Calories: Approximately 120–150 kcal
  • Sugar: N/A
  • Sodium: N/A
  • Fat: N/A
  • Saturated Fat: N/A
  • Unsaturated Fat: N/A
  • Trans Fat: N/A
  • Carbohydrates: N/A
  • Fiber: N/A
  • Protein: N/A
  • Cholesterol: 0 mg

Have you made this recipe? I'd love to see it!

Click here to Follow me on Pinterest

Cucumber Caprese Salad

August 18, 2025 by Sue Leave a Comment

A refreshing, no-cook Caprese-inspired salad made with crisp cucumber, juicy cherry tomatoes, creamy mozzarella, and a simple balsamic-olive oil herb dressing—perfect for hot summer days. This dish delivers bold flavor and cool crunch in every bite, making it my go-to when the heat is on and the stove is off. Cucumber Caprese Salad

Why You’ll Love This Recipe

I love how this cucumber Caprese salad packs in the freshness without turning on the oven. The blend of juicy tomatoes, cool cucumber, and creamy mozzarella is light yet satisfying. It's fast to prepare, endlessly customizable, and pairs beautifully with grilled meats or stands on its own as a light lunch. Plus, the herb-infused dressing ties everything together with barely any effort.

Ingredients

(Here's a tip: Check out the full list of ingredients and measurements in the recipe card below.)

  • 1 cucumber

  • ¼ – 1½ cups cherry tomatoes

  • 8 oz fresh mozzarella

  • ½ large red onion

  • 2 tablespoon olive oil

  • 1 tablespoon balsamic vinegar

  • 1 tablespoon dried basil

  • 1 tablespoon dried oregano

  • Pinch of salt

  • Pinch of pepper

Directions

  1. I start by whisking together the olive oil, balsamic vinegar, dried basil, oregano, salt, and pepper in a small bowl to make the dressing.

  2. Then I peel the cucumber (optional), scrape the skin lightly with a fork for texture, and dice it into bite-sized pieces.

  3. I quarter the cherry tomatoes and add them to a mixing bowl along with the cucumber.

  4. Next, I thinly slice and dice the red onion and toss it in.

  5. I cut the mozzarella into small chunks—mozzarella pearls work great too—and mix them with the vegetables.

  6. I pour the dressing over everything and gently combine it all.

  7. I like to let the salad rest for about 10 minutes before serving so the flavors meld.

Servings and timing

This salad makes about 4 servings, perfect for a side dish or light lunch.
Prep time: 10 minutes
Cook time: None (no-cook)
Total time: 10 minutes plus 10 minutes optional resting time

Variations

When I feel like switching things up, I toss in diced avocado for extra creaminess or drizzle a bit of balsamic glaze for a sweet finish. If I have pesto on hand, a spoonful mixed into the dressing adds great depth. For more protein, I like to add chickpeas or grilled chicken. The possibilities are endless.

Storage/Reheating

While this salad is best fresh, I store any leftovers in an airtight container in the fridge for up to one day. The vegetables may release water over time, so I give everything a quick stir before serving. I don’t recommend reheating—it’s meant to be enjoyed chilled or at room temperature.

FAQs

How far in advance can I make this salad?

I usually make it no more than a few hours ahead. If I prep it too early, the cucumbers and tomatoes can start to release too much moisture.

Can I use a different cheese instead of mozzarella?

Yes, I sometimes swap in feta or burrata for a twist on flavor and texture.

What kind of cucumber works best?

I prefer English or Persian cucumbers because they’re less watery and don’t have large seeds.

Is fresh basil better than dried?

Fresh basil adds brightness if I have it, but dried basil works just fine and keeps the prep simple.

Can I make this vegan?

Absolutely. I just leave out the mozzarella or replace it with a plant-based alternative.

Conclusion

This cucumber Caprese salad is a staple in my summer kitchen—quick, cool, and bursting with flavor. Whether I serve it at a picnic, as a side to grilled entrees, or as a simple lunch, it never disappoints. I keep it easy, fresh, and always satisfying.

Print

clock clock iconcutlery cutlery iconflag flag iconfolder folder iconinstagram instagram iconpinterest pinterest iconfacebook facebook iconprint print iconsquares squares iconheart heart iconheart solid heart solid icon
Cucumber Caprese Salad

Cucumber Caprese Salad

5 Stars 4 Stars 3 Stars 2 Stars 1 Star No reviews
  • Author: Sue
  • Prep Time: 10 minutes
  • Cook Time: 0 minutes (no-cook)
  • Total Time: 10 minutes plus optional 10 minutes resting
  • Yield: 4 servings
  • Category: Side Dish
  • Method: No-cook, toss-and-serve
  • Cuisine: Italian-inspired
  • Diet: Vegetarian
Print Recipe
Pin Recipe

Description

A refreshing, no-cook Caprese-inspired salad made with crisp cucumber, juicy cherry tomatoes, creamy mozzarella, and a simple balsamic-olive oil herb dressing—perfect for hot summer days.


Ingredients

  • 1 Cucumber
  • ¼ – 1½ cups cherry tomatoes
  • 8 oz fresh mozzarella
  • ½ large red onion
  • 2 tbsp olive oil
  • 1 tbsp balsamic vinegar
  • 1 tbsp dried basil
  • 1 tbsp dried oregano
  • Pinch of salt
  • Pinch of pepper

Instructions

  1. Combine olive oil, balsamic vinegar, dried basil, dried oregano, salt, and pepper in a small bowl; set aside.
  2. Peel (optional) and slice the cucumber—scrape skin with a fork if desired—then dice; place in a medium bowl.
  3. Quarter the cherry tomatoes; add to the bowl.
  4. Thinly slice and dice the red onion; add to the bowl.
  5. Cut the mozzarella into bite-sized pieces (or use pearls); add to the bowl.
  6. Pour the dressing over the vegetables and cheese; mix gently.
  7. Let sit for about 10 minutes before serving.

Notes

  • Prep time is approximately 10 minutes; no cooking required.
  • Salad makes about 4 servings.
  • Best when served soon, though can hold in refrigerator briefly.
  • Optional peeling and skin-scraping of cucumber helps reduce bitterness.
  • Feel free to customize—add avocado, pesto, balsamic glaze, or protein as desired.

Nutrition

  • Serving Size: 1 of 4 servings

Have you made this recipe? I'd love to see it!

Click here to Follow me on Pinterest

Vietnamese Chicken Salad (Gỏi Gà)

August 17, 2025 by Sue Leave a Comment

This crisp, refreshing Vietnamese chicken salad is one of my favorite ways to enjoy a light yet flavorful meal. It brings together tender poached shredded chicken, crunchy cabbage and carrots, and a vibrant mix of herbs, all tied together with a tangy, sweet-sour nuoc mam dressing. Every bite feels like a burst of texture and flavor. Vietnamese Chicken Salad (Gỏi Gà)

Why You’ll Love This Recipe

I love how balanced and bright this salad is. It’s a great way to use up leftover chicken or prepare something fresh without heating up the kitchen too much. The blend of fresh herbs with the savory-sweet dressing makes it irresistibly good. It’s also gluten-free, naturally low in calories, and perfect for warm days or light lunches. Plus, I can make it ahead and let the flavors marinate—if it even lasts that long in the fridge.

Ingredients

(Here's a tip: Check out the full list of ingredients and measurements in the recipe card below.)

  • 2 boneless skinless chicken breasts

  • 4 cups shredded cabbage (Napa cabbage)

  • 1 carrot, shredded

  • ½ red onion, thinly sliced

  • 2 cups mixed fresh herbs (cilantro and mint), chopped

  • 3 tablespoon roasted peanuts, chopped

  • 3 tablespoon fried shallots (optional garnish)

For the Nuoc Mam dressing:

  • 4 tablespoon palm sugar (or brown sugar)

  • ⅓ cup boiling water

  • 1 clove garlic, minced

  • 1–2 red chilies, minced

  • 3½ tablespoon fish sauce

  • ⅓ cup rice vinegar

  • 2 tablespoon lime juice

Directions

  1. I start by poaching the chicken breasts—simmering them gently with a few slices of ginger. Once they’re cooked, I take the pot off the heat, cover it, and let the chicken rest for about 20 minutes. After cooling, I shred them by hand or with forks.

  2. For the dressing, I dissolve the palm sugar in boiling water first. Then I stir in the minced garlic, chilies, fish sauce, rice vinegar, and lime juice. It smells amazing and sets the flavor base for the salad.

  3. In a large mixing bowl, I combine the shredded chicken, cabbage, shredded carrot, red onion, and chopped herbs.

  4. I pour about a third of the dressing over the mixture and toss everything well. I usually taste and add more dressing as needed until it hits that perfect balance.

  5. Finally, I top it all with chopped roasted peanuts and fried shallots (if using), and either serve it right away or chill it briefly to let the flavors meld.

Servings and timing

  • Yield: 4 servings

  • Prep time: 20 minutes

  • Cook time: 25 minutes

  • Total time: 45 minutes

Variations

I sometimes add thinly sliced cucumber or daikon for extra crunch. When I want a more filling dish, I serve it over cold rice vermicelli noodles. For a vegetarian version, I replace the chicken with shredded tofu or jackfruit and use soy sauce instead of fish sauce. And when I want extra richness, I’ll drizzle a tiny bit of sesame oil into the dressing.

Storage/Reheating

I store any leftovers in an airtight container in the fridge for up to 2 days. Since this salad is best enjoyed cold, I don’t reheat it. If I’m storing the components separately, I keep the dressing in a jar and only toss it with the salad just before serving to keep everything fresh and crisp.

FAQs

How do I make the chicken extra tender?

Poaching gently and letting it rest covered in the hot liquid helps the chicken stay juicy and soft. I avoid boiling it too hard—it can dry out the meat.

Can I make this salad ahead of time?

Yes, I often prep the ingredients and dressing a day ahead. I just keep everything separate and toss them together right before serving.

Is there a substitute for fish sauce?

If I want a vegetarian or fish-free option, I use a mix of soy sauce and a little lime juice. It doesn’t taste exactly the same, but still gives a nice umami balance.

What herbs work best in this salad?

I like using fresh mint and cilantro, but Thai basil or even a bit of dill can work well too, depending on what I have on hand.

Can I use leftover rotisserie chicken?

Absolutely! I’ve used shredded rotisserie chicken many times when I’m short on time. It’s a great shortcut and still tastes fantastic with the dressing and veggies.

Conclusion

This Vietnamese chicken salad (Gỏi Gà) is my go-to when I crave something light yet satisfying. It’s full of flavor, texture, and freshness, and it always hits the spot—whether as a quick lunch, a side dish, or a main course. Once I made it the first time, it quickly became part of my regular rotation.

Print

clock clock iconcutlery cutlery iconflag flag iconfolder folder iconinstagram instagram iconpinterest pinterest iconfacebook facebook iconprint print iconsquares squares iconheart heart iconheart solid heart solid icon
Vietnamese Chicken Salad (Gỏi Gà)

Vietnamese Chicken Salad (Gỏi Gà)

5 Stars 4 Stars 3 Stars 2 Stars 1 Star No reviews
  • Author: Sue
  • Prep Time: 20 minutes
  • Cook Time: 25 minutes
  • Total Time: 45 minutes
  • Yield: 4 servings
  • Category: Salad
  • Method: Poach and toss
  • Cuisine: Vietnamese
  • Diet: Halal
Print Recipe
Pin Recipe

Description

A crisp, refreshing Vietnamese chicken salad with poached shredded chicken, crunchy cabbage and carrots, herbs, and a tangy, sweet‑sour fish sauce dressing.


Ingredients

  • 2 boneless skinless chicken breasts
  • 4 cups shredded cabbage (Napa cabbage)
  • 1 carrot, shredded
  • ½ red onion, thinly sliced
  • 2 cups mixed fresh herbs (cilantro and mint), chopped
  • 3 tbsp roasted peanuts, chopped
  • 3 tbsp fried shallots (optional garnish)
  • For the Nuoc Mam dressing:
  • 4 tbsp palm sugar (or brown sugar)
  • ⅓ cup boiling water
  • 1 clove garlic, minced
  • 1–2 red chilies, minced
  • 3½ tbsp fish sauce
  • ⅓ cup rice vinegar
  • 2 tbsp lime juice

Instructions

  1. Poach the chicken breasts: simmer gently with a few slices of ginger, then cover and let rest off the heat for about 20 minutes. Shred when cool.
  2. Make the dressing: dissolve the palm sugar in boiling water, then stir in garlic, chili, fish sauce, vinegar, and lime juice.
  3. In a large bowl, combine shredded chicken, cabbage, carrot, red onion, and herbs.
  4. Pour about one‑third of the dressing over the salad and toss well. Add more dressing as desired to taste.
  5. Garnish with chopped peanuts and fried shallots (if using), and serve immediately or chill briefly.

Notes

  • The poaching method yields tender, juicy chicken that blends well into the salad.
  • Adjust the amount of dressing based on your taste preference—add more for a bolder flavor.
  • This salad can be served over rice vermicelli to make it more filling.
  • Use palm sugar for authentic sweetness, or substitute brown sugar if needed.

Nutrition

  • Serving Size: ¼ of recipe
  • Calories: 202 kcal
  • Sugar: 14 g
  • Sodium: 1390 mg
  • Fat: 5 g
  • Saturated Fat: 1 g
  • Unsaturated Fat: 4 g
  • Trans Fat: 1 g
  • Carbohydrates: 23 g
  • Fiber: 4 g
  • Protein: 17 g
  • Cholesterol: 36 mg

Have you made this recipe? I'd love to see it!

Click here to Follow me on Pinterest

Creamy Summer Corn and Zucchini Chowder

August 17, 2025 by Sue Leave a Comment

A cozy, creamy summer chowder bursting with fresh corn, zucchini, potatoes, and savory aromatics—this dish is comfort in a bowl. It’s a one-pot recipe that celebrates the best of summer produce, delivering rich flavor with minimal effort. Whether I'm making it for lunch, dinner, or just craving something hearty and wholesome, this chowder always hits the spot. Creamy Summer Corn and Zucchini Chowder

Why You’ll Love This Recipe

I love this chowder because it’s both light and filling, making it perfect for warm summer evenings or cooler days when I need something comforting. It’s vegetarian, adaptable for a vegan diet, and uses seasonal veggies I often have on hand. The creamy texture, the sweetness from fresh corn, and the slight bite of zucchini create a flavor profile that feels both rustic and fresh. Plus, it's easy to make in one pot, which means fewer dishes to clean up.

ingredients

(Here's a tip: Check out the full list of ingredients and measurements in the recipe card below.)

  • 1 tablespoon olive oil

  • 1 cup chopped yellow onion (about ½ large onion)

  • 2 celery ribs, chopped (⅓ cup)

  • 1 medium carrot, peeled + chopped (½ cup)

  • 2 garlic cloves, minced

  • ½ teaspoon dried thyme

  • 2 medium (1 lb) russet potatoes, peeled & diced into ½‑inch cubes

  • 4 cups vegetable stock or water

  • 1 bay leaf

  • 4 ears of sweet corn, kernels cut from cob (about 2¾ cups)

  • 1 medium zucchini, diced (about 1½ cups)

  • 1 cup half‑and‑half (or vegan substitute like soy or coconut cream)

  • Kosher salt & fresh-ground black pepper, to taste

  • Chopped fresh parsley, for garnish

  • Optional: pinch of smoked paprika or cayenne pepper

directions

  1. I heat olive oil in a large heavy-bottomed pot or Dutch oven over medium heat.

  2. I add onion, celery, carrot, garlic, and thyme, sautéing until the vegetables soften—this takes about 5 minutes.

  3. Then, I stir in the potatoes, vegetable stock (or water), and the bay leaf. Once it reaches a simmer, I reduce the heat to medium and cook for 8–10 minutes until the potatoes are partially tender.

  4. I add the corn kernels and zucchini next, seasoning with salt and pepper. I let it simmer another 8–12 minutes until everything is perfectly tender.

  5. After removing the bay leaf, I transfer about 2 cups of the chowder to a blender and puree it until smooth. I stir this back into the pot to get that silky texture.

  6. I add the half-and-half or vegan cream and heat it through gently—making sure it doesn’t boil. Then I adjust the seasoning with more salt, pepper, and, if I want, a little smoked paprika or cayenne.

  7. Finally, I ladle it into bowls, sprinkle some fresh parsley on top, and serve it warm.

Servings and timing

  • Yield: 6–8 servings

  • Prep time: 15 minutes

  • Cook time: 40 minutes

  • Total time: 55 minutes

Variations

When I want to mix it up, I swap the russet potatoes for baby gold or red potatoes—I don’t even need to peel them. Sometimes I use cauliflower instead of potatoes for a lighter, low-carb twist. If fresh corn isn’t available, I just use frozen corn straight from the bag—no need to thaw. For a vegan version, I replace the half-and-half with coconut cream or soy-based alternatives.

storage/reheating

Leftovers keep well for up to 5 days in the fridge. I store the chowder in an airtight container and reheat it gently on the stove or in the microwave. If it thickens too much, I just add a splash of water or broth while reheating to bring back the original texture.

FAQs

What can I use instead of half-and-half to make it dairy-free?

I usually go with coconut cream or soy-based cream for a dairy-free option. Both add a nice creaminess without overpowering the flavor.

Can I freeze this chowder?

While it’s best fresh, I’ve frozen it successfully in individual portions. I let it cool completely, pack it into freezer-safe containers, and thaw in the fridge before reheating. Just keep in mind that the texture might change slightly.

Do I need to peel the zucchini?

No, I don’t peel the zucchini. The skin adds color and texture, and it softens nicely as it cooks.

Can I make this chowder thicker?

Yes, I puree a bit more of the soup to make it creamier. A few tablespoons of flour sautéed with the aromatics at the beginning also helps thicken it if needed.

What protein can I add to make it more filling?

Sometimes I add cooked white beans or shredded rotisserie chicken if I want to make it heartier. For a vegetarian protein boost, chickpeas work great too.

Conclusion

This creamy summer corn and zucchini chowder brings comfort and freshness together in one delicious pot. It’s the kind of recipe I come back to again and again—easy, nourishing, and endlessly adaptable. Whether I’m cooking for a crowd or just myself, it never disappoints.

Print

clock clock iconcutlery cutlery iconflag flag iconfolder folder iconinstagram instagram iconpinterest pinterest iconfacebook facebook iconprint print iconsquares squares iconheart heart iconheart solid heart solid icon
Creamy Summer Corn and Zucchini Chowder

Creamy Summer Corn and Zucchini Chowder

5 Stars 4 Stars 3 Stars 2 Stars 1 Star No reviews
  • Author: Sue
  • Prep Time: 15 minutes
  • Cook Time: 40 minutes
  • Total Time: 55 minutes
  • Yield: 6–8 servings
  • Category: Soup
  • Method: One‑Pot
  • Cuisine: American
  • Diet: Vegetarian
Print Recipe
Pin Recipe

Description

A cozy, creamy summer chowder bursting with fresh corn, zucchini, potatoes, and savory aromatics—perfect comfort in a bowl.


Ingredients

  • 1 Tbsp olive oil
  • 1 cup chopped yellow onion (about ½ large onion)
  • 2 celery ribs, chopped (⅓ cup)
  • 1 medium carrot, peeled + chopped (½ cup)
  • 2 garlic cloves, minced
  • ½ tsp dried thyme
  • 2 medium (1 lb) russet potatoes, peeled & diced into ½‑inch cubes
  • 4 cups vegetable stock or water
  • 1 bay leaf
  • 4 ears of sweet corn, kernels cut from cob (about 2¾ cups)
  • 1 medium zucchini, diced (about 1½ cups)
  • 1 cup half‑and‑half (or vegan substitute like soy or coconut cream)
  • Kosher salt & fresh-ground black pepper, to taste
  • Chopped fresh parsley, for garnish
  • Optional: pinch of smoked paprika or cayenne pepper

Instructions

  1. In a large heavy-bottomed pot or Dutch oven, heat olive oil over medium heat.
  2. Add onion, celery, carrot, garlic, and thyme. Sauté until vegetables soften, about 5 minutes.
  3. Add potatoes, vegetable stock or water, and bay leaf. Bring to a simmer, then reduce heat to medium and cook for 8–10 minutes until potatoes are partially tender.
  4. Add corn kernels and zucchini; season with salt and pepper. Simmer another 8–12 minutes until all vegetables are tender.
  5. Discard bay leaf. Transfer about 2 cups of the chowder into a blender or food processor and puree until smooth. Stir the puree back into the pot.
  6. Stir in half‑and‑half (or vegan cream). Heat through gently—do not boil. Adjust seasoning with salt, pepper, and optional paprika or cayenne.
  7. Ladle into bowls, garnish with parsley, and serve hot.

Notes

  • For a vegan version, use plant-based cream like coconut or soy and skip any dairy.
  • Frozen corn can be used if fresh is unavailable—no need to thaw.
  • Substitute russet potatoes with red or baby gold potatoes (no peeling needed). Cauliflower is a great low‑carb alternative.
  • Leftovers last up to 5 days in the refrigerator; reheat gently with a splash of liquid.

Nutrition

  • Serving Size: 1 cup
  • Calories: 160 kcal
  • Sugar: 6 g
  • Sodium: 120 mg
  • Fat: 7 g
  • Saturated Fat: 3 g
  • Unsaturated Fat: 4 g
  • Trans Fat: 0 g
  • Carbohydrates: 22 g
  • Fiber: 3 g
  • Protein: 4 g
  • Cholesterol: 10 mg

Have you made this recipe? I'd love to see it!

Click here to Follow me on Pinterest

Tropical Cheesecake Fruit Salad

August 17, 2025 by Sue Leave a Comment

A creamy, tropical fruit dessert salad combining fresh fruit with a rich cheesecake-style filling. This refreshing no-bake treat brings together bright citrus, sweet berries, and juicy tropical fruits in a dreamy, fluffy cheesecake dressing. It’s a perfect make-ahead option for potlucks, cookouts, and holidays. Tropical Cheesecake Fruit Salad

Why I’ll Love This Recipe

I love how this salad delivers such an indulgent, creamy texture without any baking involved. The cheesecake filling is tangy and sweet, perfectly complementing the fresh fruit. It's the kind of dessert that feels light but is still satisfying. I also appreciate how flexible it is—easy to mix and match with whatever fruit I have on hand. Whether I’m making it ahead or throwing it together last-minute, it never fails to impress.

Ingredients

(Here's a tip: Check out the full list of ingredients and measurements in the recipe card below.)

  • 8 oz cream cheese

  • 3.4 oz instant cheesecake pudding mix, unprepared

  • 1 cup International Delight French Vanilla creamer (liquid)

  • 1 lb strawberries, hulled and sliced

  • 4 mandarin oranges, peeled and sectioned

  • 20 oz can pineapple tidbits, drained

  • 3 kiwi, peeled and cut into half-moons

  • 2 mangoes, cut into bite-size chunks

  • 1 banana, cut into coins

  • Juice of ½ lemon

Directions

  1. I start by whipping the cream cheese in a medium tall bowl with an electric mixer until it's smooth. It can bind in the beaters, but I keep going—it always loosens up.

  2. I add the dry cheesecake pudding mix and beat it in. If it gets too thick, I add just a splash of the measured creamer to loosen the mixture.

  3. With the mixer on low, I slowly add the rest of the creamer a tablespoon at a time. Once fully combined, I whip it until it's light and fluffy.

  4. In a separate large bowl, I mix the strawberries, mandarin oranges, pineapple, kiwi, and mango. Then I gently fold in the cheesecake mixture.

  5. I toss the banana coins with lemon juice in a small bowl, drain off the extra juice, and gently fold the bananas into the salad.

  6. I either chill the salad until I'm ready to serve, or I serve it right away.

Servings and Timing

  • Servings: Approximately 16

  • Prep Time: 5 minutes

  • Cook Time: 20 minutes

  • Total Time: 25 minutes

Variations

I like switching up the fruits depending on the season. Blueberries, grapes, or apples work great in place of mango or kiwi. For a dairy-free version, I swap in plant-based cream cheese and creamer. Sometimes I add shredded coconut or mini marshmallows for a twist, and if I want extra texture, I top it with chopped pecans or granola right before serving.

Storage/Reheating

I store leftovers in an airtight container in the fridge for up to 3 days. The fruit releases juice over time, so I give it a gentle stir before serving again. If I’m making it ahead, I store the fruit and cheesecake mixture separately and combine them just before serving to keep everything fresh and creamy. I don’t recommend freezing this salad—it changes the texture too much.

FAQs

How do I keep the fruit from getting soggy?

I make sure to drain all canned fruit well and keep the banana separate until the last step. If I’m prepping early, I store the fruit and dressing separately.

Can I use other types of pudding mix?

I stick to cheesecake pudding mix for the right flavor and texture, but vanilla pudding can be used in a pinch—it just won't have the tangy cheesecake taste.

What can I use instead of French Vanilla creamer?

If I don’t have the creamer, I mix 1 cup of heavy cream with ¼ cup powdered sugar and 2 teaspoons vanilla extract for a homemade version.

Is this salad good for potlucks?

Absolutely. I find it travels well and is always a hit at gatherings. I just keep it chilled until serving.

Can I make this dessert vegan?

Yes. I use vegan cream cheese, a plant-based creamer, and check that the pudding mix is dairy-free. The flavor still turns out rich and delicious.

Conclusion

This tropical cheesecake fruit salad is a breeze to make and always delivers big on flavor. I love how versatile, creamy, and refreshing it is—just the kind of crowd-pleasing dish I turn to all year long. Whether I’m making it for a family picnic or just treating myself, it’s one of my go-to no-bake desserts.

Print

clock clock iconcutlery cutlery iconflag flag iconfolder folder iconinstagram instagram iconpinterest pinterest iconfacebook facebook iconprint print iconsquares squares iconheart heart iconheart solid heart solid icon
Tropical Cheesecake Fruit Salad

Tropical Cheesecake Fruit Salad

5 Stars 4 Stars 3 Stars 2 Stars 1 Star No reviews
  • Author: Sue
  • Prep Time: 5 minutes
  • Cook Time: 20 minutes
  • Total Time: 25 minutes
  • Yield: Approximately 16 servings
  • Category: Dessert Salad
  • Method: No‑Bake, Mixed
  • Cuisine: American
  • Diet: Vegetarian
Print Recipe
Pin Recipe

Description

A creamy, tropical fruit dessert salad combining fresh fruit with a rich cheesecake‑style filling.


Ingredients

  • 8 oz cream cheese
  • 3.4 oz instant cheesecake pudding mix, unprepared
  • 1 cup International Delight French Vanilla creamer (liquid)
  • 1 lb strawberries, hulled and sliced
  • 4 mandarin oranges, peeled and sectioned
  • 20 oz can pineapple tidbits, drained
  • 3 kiwi, peeled and cut into half‑moons
  • 2 mangoes, cut into bite‑size chunks
  • 1 banana, cut into coins
  • Juice of ½ lemon

Instructions

  1. In a medium tall bowl, use an electric mixer to whip the cream cheese until smooth (it may bind in the beaters, but keep going and it will loosen).
  2. Add the dry cheesecake pudding mix and beat until well combined. If too thick, add a splash of the measured creamer to loosen it.
  3. With the mixer on low, slowly add the remaining creamer a tablespoon at a time until the mixture is smooth and combined; then whip until fluffy.
  4. In a large bowl, combine strawberries, mandarin oranges, pineapple tidbits, kiwi, and mango; gently fold in the cheesecake mixture.
  5. In a small bowl, toss banana coins with lemon juice, drain any excess juice, then gently fold into the salad.
  6. Chill until ready to serve, or serve immediately.

Notes

  • Do not pour all the creamer in at once—adding it slowly prevents clumping. Trust the process!
  • Substitute heavy cream mix: 1 cup heavy cream + ¼ cup powdered sugar + 2 tsp vanilla extract if needed.
  • If using canned fruit, drain it completely to prevent wateriness.
  • To make ahead: refrigerate cheesecake mixture separately, and fruit separately; drain fruit juice just before folding in and serving.

Nutrition

  • Serving Size: 1 serving
  • Calories: 157 cal
  • Sugar: 21 g
  • Sodium: 130 mg
  • Fat: 5 g
  • Saturated Fat: 3 g
  • Carbohydrates: 26 g
  • Fiber: 3 g
  • Protein: 2 g
  • Cholesterol: 14 mg

Have you made this recipe? I'd love to see it!

Click here to Follow me on Pinterest

Ranch Parmesan Ritz Crusted Chicken Tenders

August 17, 2025 by Sue Leave a Comment

Crispy, flavorful chicken tenders coated in a savory Ranch‑Parmesan mayo mixture and crunchy Ritz crackers—these are utterly addictive and perfect whether I'm making a family dinner or prepping a quick, satisfying snack. Every bite delivers that golden crunch followed by rich, tangy seasoning that hits all the right notes. Ranch Parmesan Ritz Crusted Chicken Tenders

Why You’ll Love This Recipe

I love how these chicken tenders manage to be both comforting and crave-worthy. The combo of creamy Ranch-seasoned mayo and salty Parmesan creates an ultra-satisfying flavor base, while the crushed Ritz crackers add a golden, buttery crunch that I just can’t resist. This recipe is also fuss-free and oven-baked, so I get that deep-fried texture without the mess. It’s great for both weeknight dinners and game-day appetizers.

ingredients

(Here's a tip: Check out the full list of ingredients and measurements in the recipe card below.)

  • 1 lb chicken tenders

  • ½ cup mayonnaise

  • ½ cup grated Parmesan cheese

  • 1 packet Ranch seasoning mix

  • ½ teaspoon garlic powder

  • ½ teaspoon onion powder

  • 1 cup crushed Ritz crackers

directions

  1. I preheat my oven to 375 °F (190 °C) and either line a baking sheet with parchment paper or lightly grease it.

  2. In a mixing bowl, I combine the mayonnaise, Parmesan cheese, Ranch seasoning mix, garlic powder, and onion powder until everything is smooth and well blended.

  3. I coat each chicken tender thoroughly in the mayo mixture, making sure it’s completely covered.

  4. Next, I dredge each coated tender in the crushed Ritz crackers, gently pressing the crumbs so they stick well.

  5. I arrange the tenders evenly on the baking sheet, giving each one a little space.

  6. Then, I bake them for 20–25 minutes, or until they’re golden brown and have reached an internal temperature of 165 °F (74 °C).

  7. I let them cool slightly before serving. They’re perfect with my favorite dipping sauce.

Servings and timing

  • Yield: Serves 4

  • Prep Time: 10–15 minutes

  • Cook Time: 20–25 minutes

  • Total Time: 30–40 minutes

Variations

When I want to lighten things up a bit, I swap the mayo for Greek yogurt or sour cream—it still gives me a creamy texture with a little tang. For a gluten-free version, I simply use gluten-free crackers or breadcrumbs. If I’m craving extra crunch, I turn on the broiler during the last minute or two of baking—but I keep a close eye to prevent burning.

I’ve also had success making these ahead of time by prepping and breading the tenders the day before, then storing them in the fridge until I’m ready to bake. And if I want to freeze a batch, I freeze them breaded on a sheet tray, then transfer them to a freezer bag. I bake them straight from the freezer, just adding a few extra minutes.

storage/reheating

When I have leftovers, I store them in an airtight container in the fridge for up to 3 days. To bring back that fresh-from-the-oven crispiness, I reheat them in either the oven or my air fryer. Microwaving works in a pinch, but it does soften the coating, so I prefer oven-style reheating for the best texture.

FAQs

What dipping sauces go best with these chicken tenders?

I love pairing them with ranch, honey mustard, BBQ sauce, or even a spicy sriracha mayo. They’re super versatile, so any favorite dip works.

Can I use chicken breasts instead of tenders?

Absolutely. I just slice the chicken breasts into strips about the size of tenders, and they work perfectly with this recipe.

Are these good for meal prepping?

Yes! I like to bread them in advance and refrigerate or freeze them. When I’m ready, I just bake or air fry straight from the fridge or freezer.

How do I crush Ritz crackers without making a mess?

I place them in a zip-top bag and crush them with a rolling pin or even my hands. It’s fast, easy, and keeps the crumbs contained.

Can I cook these in an air fryer?

Definitely. I preheat the air fryer to 375 °F and cook the tenders for about 12–15 minutes, flipping halfway through, until they’re golden and cooked through.

Conclusion

These Ranch Parmesan Ritz Crusted Chicken Tenders have become a staple in my kitchen because they’re quick to make, incredibly flavorful, and always a hit. Whether I’m feeding a crowd or just craving something crispy and satisfying, this recipe never lets me down.

Print

clock clock iconcutlery cutlery iconflag flag iconfolder folder iconinstagram instagram iconpinterest pinterest iconfacebook facebook iconprint print iconsquares squares iconheart heart iconheart solid heart solid icon
Ranch Parmesan Ritz Crusted Chicken Tenders

Ranch Parmesan Ritz Crusted Chicken Tenders

5 Stars 4 Stars 3 Stars 2 Stars 1 Star No reviews
  • Author: Sue
  • Prep Time: 10–15 minutes
  • Cook Time: 20–25 minutes
  • Total Time: 30–40 minutes
  • Yield: Serves 4
  • Category: Main Course
  • Method: Baking (also works in air fryer)
  • Cuisine: American
  • Diet: Vegetarian
Print Recipe
Pin Recipe

Description

Crispy, flavorful chicken tenders coated in a savory Ranch‑Parmesan mayo mixture and crunchy Ritz crackers—utterly addictive and perfect for a family meal or snack.


Ingredients

  • 1 lb chicken tenders
  • ½ cup mayonnaise
  • ½ cup grated Parmesan cheese
  • 1 packet Ranch seasoning mix
  • ½ tsp garlic powder
  • ½ tsp onion powder
  • 1 cup crushed Ritz crackers

Instructions

  1. Preheat oven to 375 °F (190 °C). Line a baking sheet with parchment paper or lightly grease it.
  2. In a mixing bowl, combine mayonnaise, Parmesan cheese, Ranch seasoning mix, garlic powder, and onion powder until smooth.
  3. Coat each chicken tender in the mayo mixture, ensuring it’s fully covered.
  4. Dredge each coated tender in crushed Ritz crackers, pressing gently so the crumbs adhere.
  5. Arrange the coated tenders on the prepared baking sheet, spacing them out evenly.
  6. Bake for 20–25 minutes, or until golden brown and the internal temperature reaches 165 °F (74 °C).
  7. Let cool slightly before serving. Serve with your favorite dipping sauce.

Notes

  • Substitutions: Greek yogurt or sour cream can replace mayonnaise for a lighter option.
  • Gluten‑free variation: Use gluten‑free crackers or breadcrumbs instead of Ritz.
  • Extra crispiness: Turn on the broiler for the last 1–2 minutes, watching carefully to avoid burning.
  • Make‑ahead: You can bread the tenders up to a day ahead and refrigerate until ready to bake.
  • Freezing: After breading, freeze tenders on a baking sheet; once solid, transfer to a freezer bag. Bake from frozen, adding a few extra minutes.
  • Storage: Refrigerate leftovers in an airtight container for up to 3 days. Reheat in the oven or air fryer to restore crispiness.

Nutrition

  • Serving Size: 1 serving (approx. ¼ recipe)
  • Calories: 320 kcal
  • Sugar: 1 g
  • Sodium: 640 mg
  • Fat: 8 g
  • Carbohydrates: 32 g
  • Fiber: 2 g
  • Protein: 28 g

Have you made this recipe? I'd love to see it!

Click here to Follow me on Pinterest

Crispy Baked Zucchini Bites

August 17, 2025 by Sue Leave a Comment

Crispy, savory zucchini bites flavored with garlic, fresh herbs, Parmesan cheese, and breadcrumbs—baked to golden perfection and perfect for dipping. These little bites pack a punch of flavor and are the ideal solution when I need a light, satisfying appetizer or snack. Crispy Baked Zucchini Bites

Why You’ll Love This Recipe

I love how these zucchini bites turn out golden and crispy on the outside while staying soft and tender inside. They're easy to make, loaded with fresh herbs, and a delicious way to use up summer zucchini. I can serve them with tomato sauce for dipping, or pop them into lunchboxes. Plus, they’re baked—not fried—so they’re a lighter option without sacrificing taste or crunch.

ingredients

(Here's a tip: Check out the full list of ingredients and measurements in the recipe card below.)

  • 1 cup shredded zucchini, well drained

  • 1 clove garlic, grated finely

  • ⅓ cup breadcrumbs

  • ¼ cup grated Parmigiano‑Reggiano cheese

  • 1 large egg

  • 2 tablespoons chopped fresh chives (or 1 tablespoon dried chives)

  • 1 tablespoon chopped fresh parsley (or ½ tablespoon dried parsley)

  • 1 teaspoon chopped fresh basil (or ½ teaspoon dried basil)

  • 1 teaspoon chopped fresh oregano (or ½ teaspoon dried oregano)

  • Pinch of salt and pepper

  • Tomato sauce for dipping

directions

  1. I preheat the oven to 400 °F (about 200 °C) and lightly coat a baking sheet with olive oil or non-stick spray.

  2. I grate the zucchini into a clean kitchen towel, then roll it up and twist tightly to remove as much moisture as possible.

  3. I finely grate the garlic using a box grater.

  4. In a medium bowl, I mix the drained zucchini, grated garlic, egg, breadcrumbs, Parmesan cheese, chives, parsley, basil, oregano, salt, and pepper until well combined.

  5. Using a tablespoon, I scoop the mixture and form it into small balls, then place them on the prepared baking sheet.

  6. I bake them for 15–18 minutes until golden brown.

  7. I serve the bites warm with tomato sauce for dipping.

Servings and timing

This recipe yields about 16 zucchini bites.

  • Prep time: 12 minutes

  • Cook time: 18 minutes

  • Total time: 30 minutes

  • Serving size: 1 bite (26 kcal per bite)

Variations

  • For a gluten-free version, I use gluten-free breadcrumbs or almond meal/flour.

  • To make them vegan, I replace the egg with a flax egg (1 tablespoon ground flaxseed mixed with 3 tablespoons water, left to gel) and use a dairy-free cheese.

  • For extra crispiness, I sometimes cook them in the air fryer instead of the oven.

  • I can also swap out herbs depending on what I have—thyme, dill, or even mint give them a nice twist.

storage/reheating

Once cooled, I store leftovers in an airtight container in the fridge for up to 3 days. To reheat, I pop them in a 400 °F oven for about 10 minutes or warm them in the air fryer until crispy again. If I want to freeze them, I let them cool, freeze them on a baking sheet for an hour, then transfer to a freezer bag for up to 4 months. I reheat from frozen at 400 °F for 10–15 minutes.

FAQs

How do I keep the zucchini bites from getting soggy?

I make sure to squeeze out as much moisture as possible from the grated zucchini using a towel. This step is key to keeping the bites firm and crispy.

Can I make these bites ahead of time?

Yes, I prepare and shape the bites, then refrigerate them uncooked for up to 24 hours. When I’m ready, I bake or air-fry them fresh.

What can I use instead of Parmesan cheese?

I like to substitute it with nutritional yeast or a vegan cheese alternative if I want a dairy-free version.

Can I fry these instead of baking?

Yes, I can lightly fry them in a skillet with a bit of oil over medium heat until golden on all sides.

Are these kid-friendly?

Absolutely! I find that even picky eaters enjoy these bites, especially when served with a favorite dipping sauce like marinara or ranch.

Conclusion

These baked zucchini bites are a go-to snack I can feel good about. They’re packed with flavor, easy to customize, and perfect for sharing—or keeping all to myself. Whether I serve them at a party or enjoy them as a quick lunch with dipping sauce, they never disappoint.

Print

clock clock iconcutlery cutlery iconflag flag iconfolder folder iconinstagram instagram iconpinterest pinterest iconfacebook facebook iconprint print iconsquares squares iconheart heart iconheart solid heart solid icon
Crispy Baked Zucchini Bites

Crispy Baked Zucchini Bites

5 Stars 4 Stars 3 Stars 2 Stars 1 Star No reviews
  • Author: Sue
  • Prep Time: 5 minutes
  • Cook Time: –
  • Total Time: 5 minutes
  • Yield: 2 servings
  • Category: Beverage / Mocktail
  • Method: No‑cook, build in glass
  • Cuisine: American
  • Diet: Vegetarian
Print Recipe
Pin Recipe

Description

A vibrant strawberry‑flavored soda elevated with strawberry syrup and a creamy swirl of vanilla coffee creamer—refreshing, playful, and visually stunning.


Ingredients

  • 16 oz strawberry soda
  • 4 oz vanilla coffee creamer
  • Strawberry syrup (to taste)

Instructions

  1. Chill two serving glasses in the freezer for about 15 minutes for an extra‑cold drink.
  2. Fill both glasses generously with ice.
  3. Drizzle strawberry syrup around the inside of each glass over the ice.
  4. Pour 8 oz of strawberry soda into each glass; watch it fizz and swirl with the syrup.
  5. Gently pour 2 oz of vanilla coffee creamer into each glass, letting it cascade and form beautiful creamy swirls.
  6. Optionally, garnish with fresh strawberry slices, whipped cream, mint sprigs, or a colorful straw.

Notes

  • Serve immediately—don’t prepare ahead, or the soda may go flat or the ice melt and dilute the drink.
  • For a dairy‑free version, use non‑dairy vanilla creamer (almond, soy, or coconut‑based).
  • Feel free to experiment with different creamer flavors (e.g., white chocolate raspberry) or spike it with alcohol for an adult twist.
  • Garnish with whipped cream or cherries for a festive treat.

Nutrition

  • Serving Size: 1 drink
  • Calories: ≈153 kcal
  • Sugar: ≈34 g
  • Sodium: ≈27 mg
  • Fat: –
  • Saturated Fat: –
  • Unsaturated Fat: –
  • Trans Fat: –
  • Carbohydrates: ≈34 g
  • Fiber: –
  • Protein: –
  • Cholesterol: –

Have you made this recipe? I'd love to see it!

Click here to Follow me on Pinterest

Dirty Strawberry Soda

August 17, 2025 by Sue Leave a Comment

A vibrant and playful twist on a classic soda, this Dirty Strawberry Soda blends bubbly strawberry soda with a swirl of vanilla coffee creamer and a drizzle of strawberry syrup. I love how the syrup ribbons through the drink while the creamer adds a dreamy, creamy finish. It’s refreshing, sweet, and absolutely picture-perfect in a glass. Dirty Strawberry Soda

Why You’ll Love This Recipe

I love this drink because it’s fast, easy, and incredibly fun to serve. Whether I’m whipping it up for a summer afternoon, a birthday bash, or just a treat-yourself moment, it never fails to impress. The creamy and fizzy contrast feels indulgent, while the strawberry flavor screams nostalgia with a modern twist. Plus, it looks beautiful with all those swirls and garnishes.

Ingredients

(Here's a tip: Check out the full list of ingredients and measurements in the recipe card below.)

  • 16 oz strawberry soda

  • 4 oz vanilla coffee creamer

  • Strawberry syrup (to taste)

Directions

  1. I start by chilling two serving glasses in the freezer for about 15 minutes to get them nice and frosty.

  2. Then, I fill both glasses generously with ice.

  3. I drizzle strawberry syrup inside each glass over the ice, letting it coat the sides slightly for a lovely effect.

  4. Next, I pour 8 oz of strawberry soda into each glass. I love how it fizzes and mixes with the syrup instantly.

  5. Then I gently pour 2 oz of vanilla coffee creamer into each one, allowing it to cascade and form dreamy creamy swirls.

  6. To finish, I sometimes add a garnish—fresh strawberries, whipped cream, mint, or even a cute straw for flair.

Servings and timing

This recipe makes 2 servings and comes together in just 5 minutes. It’s a no-cook, build-in-glass kind of drink—perfect for when I want something quick and fun.

Variations

When I’m feeling creative, I switch things up by using different flavored creamers like white chocolate raspberry or caramel. For a dairy-free version, I swap in almond or coconut-based vanilla creamers. Garnishes are optional, but I enjoy dressing mine up with whipped cream or maraschino cherries for a nostalgic soda shop feel.

Storage/Reheating

This drink is best made fresh and served immediately. I never prepare it ahead of time because the soda will lose its fizz and the ice can dilute the flavor. Since there’s no heating involved, there’s no reheating required—just mix and enjoy right away.

FAQs

What is a dirty soda?

A dirty soda is a fun twist on traditional soda, usually made by mixing soda with a flavored syrup and creamer or milk. I love how creamy and fizzy it tastes—almost like a soda-float fusion without the ice cream.

Can I make this drink ahead of time?

I wouldn’t recommend it. The soda can go flat and the ice might melt, which waters it down. I always make it fresh right before serving.

Is there a dairy-free option for this recipe?

Yes! I’ve tried it with almond milk creamer and coconut-based creamers, and both work beautifully. Just make sure the creamer you use has that sweet vanilla flavor to balance the strawberry soda.

Can I use a different soda?

Definitely. If I don’t have strawberry soda, I sometimes use cream soda or lemon-lime soda and add a bit more strawberry syrup to boost the flavor.

What’s the best way to garnish this drink?

I like topping it with whipped cream, a sliced strawberry, and a mint sprig. A colorful straw adds a fun finishing touch too, especially for parties.

Conclusion

This Dirty Strawberry Soda is one of my go-to drinks when I want something sweet, creamy, and just a little bit extra. It’s easy to throw together and fun to customize, making it perfect for any occasion where I want to serve up a memorable mocktail.

Print

clock clock iconcutlery cutlery iconflag flag iconfolder folder iconinstagram instagram iconpinterest pinterest iconfacebook facebook iconprint print iconsquares squares iconheart heart iconheart solid heart solid icon
Dirty Strawberry Soda

Dirty Strawberry Soda

5 Stars 4 Stars 3 Stars 2 Stars 1 Star No reviews
  • Author: Sue
  • Prep Time: 5 minutes
  • Cook Time: 0 minutes
  • Total Time: 5 minutes
  • Yield: 2 servings
  • Category: Beverage / Mocktail
  • Method: No-cook, build-in-glass
  • Cuisine: American
  • Diet: Vegetarian
Print Recipe
Pin Recipe

Description

A vibrant and playful twist on a classic soda, this Dirty Strawberry Soda blends bubbly strawberry soda with a swirl of vanilla coffee creamer and a drizzle of strawberry syrup. The syrup ribbons through the drink while the creamer adds a dreamy, creamy finish—refreshing, sweet, and picture-perfect.


Ingredients

  • 16 oz strawberry soda
  • 4 oz vanilla coffee creamer
  • Strawberry syrup (to taste)

Instructions

  1. Chill two serving glasses in the freezer for about 15 minutes to get them nice and frosty.
  2. Fill both glasses generously with ice.
  3. Drizzle strawberry syrup inside each glass over the ice, letting it coat the sides slightly for visual effect.
  4. Pour 8 oz of strawberry soda into each glass and let it fizz and mix with the syrup.
  5. Gently pour 2 oz of vanilla coffee creamer into each glass, allowing it to cascade and form creamy swirls.
  6. Optionally garnish with fresh strawberries, whipped cream, mint, or a colorful straw.

Notes

  • Best served immediately to preserve fizz and texture.
  • Use dairy-free vanilla creamers like almond or coconut for a vegan option.
  • Experiment with different flavored creamers such as white chocolate raspberry or caramel.
  • Garnishes like whipped cream and maraschino cherries give a nostalgic soda shop feel.

Nutrition

  • Serving Size: 1 drink
  • Calories: 153
  • Sugar: 34g
  • Sodium: 27mg
  • Fat: 2g
  • Saturated Fat: 1g
  • Unsaturated Fat: 1g
  • Trans Fat: 0g
  • Carbohydrates: 34g
  • Fiber: 0g
  • Protein: 1g
  • Cholesterol: 5mg

Have you made this recipe? I'd love to see it!

Click here to Follow me on Pinterest

Carrot Zucchini Apple Bread

August 15, 2025 by Sue Leave a Comment

A moist and flavorful quick bread combining shredded carrots, zucchini, and apples for a vibrant, veggie-packed treat. This loaf brings out the best in seasonal produce with a soft crumb, warm spices, and a touch of citrus that ties everything together beautifully. Whether I drizzle it with cream cheese glaze or enjoy it plain, it's always a hit. Carrot Zucchini Apple Bread

Why You’ll Love This Recipe

I love how this bread packs in fruits and veggies without compromising on taste or texture. It’s incredibly moist thanks to the shredded zucchini and carrots, while the apple adds natural sweetness and bite. The warm spices bring comfort, and the optional cream cheese glaze adds a touch of decadence. It’s great for breakfast, a snack, or dessert—and it freezes beautifully.

ingredients

(Here's a tip: Check out the full list of ingredients and measurements in the recipe card below.)

  • 1 cup unsalted butter, melted

  • 2 cups granulated sugar

  • 3 eggs, room temperature

  • ¼ cup fresh orange juice

  • 1 tablespoon vanilla extract

  • 3¼ cups all‑purpose flour

  • ½ teaspoon salt

  • 2½ teaspoon baking powder

  • ¾ teaspoon baking soda

  • 1 teaspoon cinnamon

  • pinch ground cloves

  • pinch ground nutmeg

  • 2 cups shredded carrots

  • 1 cup shredded zucchini

  • 1 cup diced peeled apple

  • ½ cup chopped pecans

directions

  1. I preheat the oven to 350°F (175°C), grease and flour two 8×4‑inch loaf pans, then line them with parchment paper.

  2. I place the shredded zucchini in a clean towel and squeeze out the moisture.

  3. In a medium bowl, I whisk together the flour, salt, baking powder, baking soda, cinnamon, cloves, and nutmeg.

  4. In a separate large bowl, I whisk the melted butter and sugar together, then add the eggs, orange juice, and vanilla until smooth.

  5. I fold in the dry ingredients, then stir in the carrots, zucchini, apple, and pecans until just combined.

  6. I divide the batter between the two pans and bake for 55–60 minutes, until a toothpick inserted in the center comes out clean.

  7. I cool the loaves completely before frosting.

  8. For the glaze, I beat softened cream cheese and butter, then gradually mix in 2 cups powdered sugar. I add 1–3 tablespoon orange juice to get the right drizzle consistency and spread it over the cooled loaves.

Servings and timing

This recipe makes 2 loaves, yielding about 24 slices in total.

  • Prep Time: 10 minutes

  • Cook Time: 55 minutes

  • Total Time: 1 hour 5 minutes

  • Serving Size: 1 slice (1/24 of recipe)

Variations

I like switching up the add-ins depending on what I have on hand. Sometimes I swap the pecans for walnuts or leave the nuts out altogether. If I’m out of zucchini, I just use more carrots—and vice versa. I’ve also added raisins or shredded coconut for extra texture. And the glaze? Totally optional—the bread is flavorful enough without it.

storage/reheating

I store the cooled loaves in an airtight container at room temperature for up to 3 days. For longer storage, I wrap individual slices or whole loaves in plastic wrap and freeze them. When I’m ready to enjoy, I let the bread thaw at room temperature or reheat slices in the microwave for about 15–20 seconds.

FAQs

How do I keep the bread from getting soggy?

I always make sure to squeeze the moisture out of the zucchini before mixing it in. That really helps prevent soggy spots in the bread.

Can I make this recipe gluten-free?

Yes, I’ve tried it with a 1:1 gluten-free flour blend and it worked well. Just be sure to check that your baking powder and other ingredients are certified gluten-free too.

What apples work best in this recipe?

I usually go with a firm, slightly tart apple like Granny Smith or Honeycrisp. They hold their shape well and add a nice balance to the sweetness.

Can I use oil instead of butter?

I’ve swapped the melted butter for an equal amount of vegetable oil and it still came out moist and tasty. The flavor is slightly different but still delicious.

Do I need to peel the zucchini?

No, I leave the peel on. It softens during baking and adds color and nutrition to the bread.

Conclusion

This carrot zucchini apple bread is one of my favorite ways to sneak extra fruits and veggies into a sweet, satisfying treat. It’s easy to make, perfect for freezing, and endlessly customizable. Whether I serve it with glaze or without, it’s always a comforting, wholesome loaf that doesn’t last long on my counter.

Print

clock clock iconcutlery cutlery iconflag flag iconfolder folder iconinstagram instagram iconpinterest pinterest iconfacebook facebook iconprint print iconsquares squares iconheart heart iconheart solid heart solid icon
Carrot Zucchini Apple Bread

Carrot Zucchini Apple Bread

5 Stars 4 Stars 3 Stars 2 Stars 1 Star No reviews
  • Author: Sue
  • Prep Time: 10 minutes
  • Cook Time: 55 minutes
  • Total Time: 1 hour 5 minutes
  • Yield: 2 loaves (about 24 servings)
  • Category: Quick Bread
  • Method: Baking
  • Cuisine: American
  • Diet: Vegetarian
Print Recipe
Pin Recipe

Description

A moist and flavorful quick bread combining shredded carrots, zucchini, and apples for a vibrant, veggie-packed treat.


Ingredients

  • 1 cup unsalted butter, melted
  • 2 cups granulated sugar
  • 3 eggs, room temperature
  • ¼ cup fresh orange juice
  • 1 tbsp vanilla extract
  • 3¼ cups all‑purpose flour
  • ½ tsp salt
  • 2½ tsp baking powder
  • ¾ tsp baking soda
  • 1 tsp cinnamon
  • pinch ground cloves
  • pinch ground nutmeg
  • 2 cups shredded carrots
  • 1 cup shredded zucchini
  • 1 cup diced peeled apple
  • ½ cup chopped pecans

Instructions

  1. Preheat oven to 350 °F (175 °C). Grease and flour two 8×4‑inch loaf pans; line with parchment paper.
  2. Place shredded zucchini in a clean kitchen towel; twist and squeeze out excess moisture. Set aside.
  3. In a medium bowl, whisk together flour, salt, baking powder, baking soda, cinnamon, cloves, and nutmeg.
  4. In a large bowl, whisk melted butter and sugar. Add eggs, orange juice, and vanilla—mix until combined.
  5. Fold the dry ingredients into the wet mixture along with the shredded carrots, squeezed zucchini, diced apple, and chopped pecans.
  6. Divide batter between prepared pans. Bake for 55–60 minutes, or until a toothpick inserted in the center comes out clean and the loaves spring back when gently pressed.
  7. Cool completely before adding frosting.
  8. For the cream cheese glaze: beat softened cream cheese with softened butter. Gradually add 2 cups powdered sugar, mixing until smooth. Add orange juice as needed (1–3 tbsp) to reach desired consistency. Drizzle or spread over cooled loaves.

Notes

  • You can interchange the amounts of carrot and zucchini as long as the total is about 3 cups.
  • If the bread is browning too quickly, tent with foil toward the end of baking.
  • No glaze needed—taste is delicious even without it!

Nutrition

  • Serving Size: 1 slice (1/24 of recipe)
  • Calories: 264 kcal
  • Sugar: 18 g
  • Sodium: 199 mg
  • Fat: 13 g
  • Saturated Fat: 7 g
  • Carbohydrates: 32 g
  • Fiber: 1 g
  • Protein: 4 g
  • Cholesterol: 53 mg

Have you made this recipe? I'd love to see it!

Click here to Follow me on Pinterest

Slow Cooker French Onion Meatloaf

August 15, 2025 by Sue Leave a Comment

This slow cooker French onion meatloaf is a comforting and flavorful dish that combines sweet caramelized onions, juicy ground beef, and melted cheese for a savory twist on a classic favorite. It's rich, hearty, and perfect for a cozy dinner any night of the week. Slow Cooker French Onion Meatloaf

Why You’ll Love This Recipe

I love how this recipe transforms a traditional meatloaf into something extra special. The slow-cooked sweet onions melt into the beef, infusing it with a deep, rich flavor that only gets better with time. A layer of gooey melted Swiss (or Gruyère/provolone) cheese takes the dish over the top, making it feel a little more indulgent without much extra effort. It’s all done in the slow cooker, which means I can set it and forget it while the house fills with the most irresistible aroma.

ingredients

(Here's a tip: Check out the full list of ingredients and measurements in the recipe card below.)

  • 3–4 large sweet onions, sliced

  • 4 tablespoons salted butter

  • 1 tablespoon olive oil

  • 1 teaspoon sea salt

  • 1 teaspoon coarse black pepper

  • 1 teaspoon granulated sugar

  • 1 pound ground beef

  • 1 cup Italian-herb bread crumbs

  • 1 cup milk

  • 1 egg

  • 1 oz. French onion soup mix

  • ½ cup cooking sherry

  • ½ teaspoon Worcestershire sauce

  • 4 oz Swiss, Gruyère, or provolone cheese

  • Fresh thyme sprigs (for garnish)

directions

  1. I slice the onions and layer them on the bottom of a 6-quart slow cooker. Then I sprinkle them with salt, pepper, and sugar, and dot with butter.

  2. In a bowl, I mix the ground beef, bread crumbs, milk, egg, and French onion soup mix, then shape it into a loaf.

  3. I pour the cooking sherry and Worcestershire sauce over the onions, then gently place the meatloaf on top.

  4. I cook it on HIGH for about 3 hours (or LOW for longer) until the internal temperature reaches 160°F.

  5. I top the meatloaf with cheese and cook for an additional 20–30 minutes until it’s perfectly melted and gooey.

  6. I garnish with fresh thyme, slice, and serve with the onions and flavorful pan juices.

Servings and timing

  • Servings: 6

  • Prep Time: 10 minutes

  • Cook Time: 3 hours 20–30 minutes

  • Total Time: 3 hours 30–40 minutes

Variations

When I want to change things up, I sometimes caramelize the onions in a skillet first for deeper flavor—it takes about 15–20 minutes. I also like swapping the Swiss cheese with Gruyère or provolone depending on what I have on hand. For a leaner version, I’ve tried using ground turkey, and it still comes out delicious, though I might reduce the cooking time slightly.

storage/reheating

I store leftovers in an airtight container in the fridge for up to 3 days. To freeze, I wrap individual slices tightly in plastic wrap and place them in a freezer-safe bag. When I’m ready to eat, I reheat in the microwave or a covered baking dish in the oven at 325°F until warmed through.

FAQs

How do I know when the meatloaf is fully cooked?

I always use a meat thermometer to check the internal temperature. Once it reaches 160°F, it’s fully cooked and safe to eat.

Can I use a different type of cheese?

Yes, I often switch between Swiss, Gruyère, or provolone. All of them melt beautifully and add a slightly different twist to the flavor.

Can I prepare this ahead of time?

Absolutely. I assemble everything the night before, keep it covered in the fridge, and start the slow cooker the next day when I’m ready to cook.

Is it possible to cook this in the oven instead?

Yes, I’ve baked it at 350°F for about 60–75 minutes in a loaf pan or on a baking sheet, but I prefer the slow cooker for the extra flavor and tenderness.

What can I serve with this meatloaf?

I like serving it with mashed potatoes, roasted veggies, or a simple green salad. The rich onions and pan juices make great toppings for sides too.

Conclusion

This slow cooker French onion meatloaf is one of those recipes I turn to when I want something hearty, easy, and full of flavor. The combination of sweet onions, tender beef, and melted cheese makes it a hit every time. It’s comfort food at its best—simple, satisfying, and sure to please.

Print

clock clock iconcutlery cutlery iconflag flag iconfolder folder iconinstagram instagram iconpinterest pinterest iconfacebook facebook iconprint print iconsquares squares iconheart heart iconheart solid heart solid icon
Slow Cooker French Onion Meatloaf

Slow Cooker French Onion Meatloaf

5 Stars 4 Stars 3 Stars 2 Stars 1 Star No reviews
  • Author: Sue
  • Prep Time: 10 minutes
  • Cook Time: 3 hours 20–30 minutes
  • Total Time: 3 hours 30–40 minutes
  • Yield: 6 servings
  • Category: Main Course
  • Method: Slow Cooker
  • Cuisine: American
  • Diet: Low Fat
Print Recipe
Pin Recipe

Description

A savory and comforting slow‑cooker meatloaf featuring caramelized sweet onions, flavorful French onion soup mix, and topped with melted Swiss (or Gruyère/provolone) cheese.


Ingredients

  • 3‑4 large sweet onions, sliced
  • 4 tablespoons salted butter
  • 1 tablespoon olive oil
  • 1 teaspoon sea salt
  • 1 teaspoon coarse black pepper
  • 1 teaspoon granulated sugar
  • 1 pound ground beef
  • 1 cup Italian‑herb bread crumbs
  • 1 cup milk
  • 1 egg
  • 1 oz. French onion soup mix
  • ½ cup cooking sherry
  • ½ teaspoon Worcestershire sauce
  • 4 oz Swiss, Gruyère, or provolone cheese
  • Fresh thyme sprigs (for garnish)

Instructions

  1. Slice onions and layer them at the bottom of a 6‑quart slow cooker. Sprinkle with salt, pepper, and sugar, then dot with butter.
  2. In a bowl, combine ground beef, bread crumbs, milk, egg, and onion soup mix. Shape the mixture into a loaf.
  3. Pour cooking sherry and Worcestershire sauce over the onions, then place the meatloaf on top.
  4. Cook on HIGH for about 3 hours (or LOW for longer) until the internal temperature reaches 160 °F.
  5. Top the meatloaf with cheese and cook an additional 20‑30 minutes, until the cheese is melted and gooey.
  6. Garnish with fresh thyme, slice, and serve with onions and pan juices.

Notes

  • Caramelizing onions first in a skillet (15‑20 minutes) deepens flavor.
  • Swiss cheese can be swapped with Gruyère or provolone.
  • Store leftovers in an airtight container in the refrigerator for up to 3 days; freeze for longer storage.
  • Check doneness with an internal meat thermometer (160 °F for beef).

Nutrition

  • Serving Size: 1 slice (approx. ⅙ recipe)
  • Calories: ≈ 327 kcal
  • Sugar: ≈ 2 g
  • Sodium: ≈ 860 mg
  • Fat: ≈ 20 g
  • Saturated Fat: ≈ 10 g
  • Unsaturated Fat: ≈ 8 g
  • Trans Fat: ≈ 1 g
  • Carbohydrates: ≈ 6 g
  • Fiber: ≈ 0.3 g
  • Protein: ≈ 28 g
  • Cholesterol: ≈ 143 mg

Have you made this recipe? I'd love to see it!

Click here to Follow me on Pinterest

  • « Previous Page
  • 1
  • 2
  • 3
  • 4
  • …
  • 39
  • Next Page »
Modern Sidebar

Hey there! I'm Sue, a mom, a wife, and someone who’s always in the kitchen trying out new recipes or revisiting old ones that remind me of family gatherings and special moments.

Learn more

Popular

  • Cheesecake Fruit Salad
    Cheesecake Fruit Salad
  • Creamy Tuscan Ravioli Soup: A Comfort Dish
    Creamy Tuscan Ravioli Soup: A Comfort Dish
  • Garlic Herb Chicken with Mashed Potatoes and Glazed Carrots
    Garlic Herb Chicken with Mashed Potatoes and Glazed Carrots
  • Bobby Flay Salisbury Steak
    Bobby Flay Salisbury Steak

Footer

↑ back to top

About

  • About
  • Contact
  • Disclosure Policy
  • DMCA
  • Privacy Policy
  • Terms and Conditions

Newsletter

  • Sign Up! for emails and updates

Recipes

  • Appetizers & Snacks
  • Beef
  • Breakfast
  • Chicken
  • Desserts
  • Dinner
  • Drinks
  • Side-Dish
  • Soups

As an Amazon Associate I earn from qualifying purchases.

Copyright © 2025 Sue Recipe