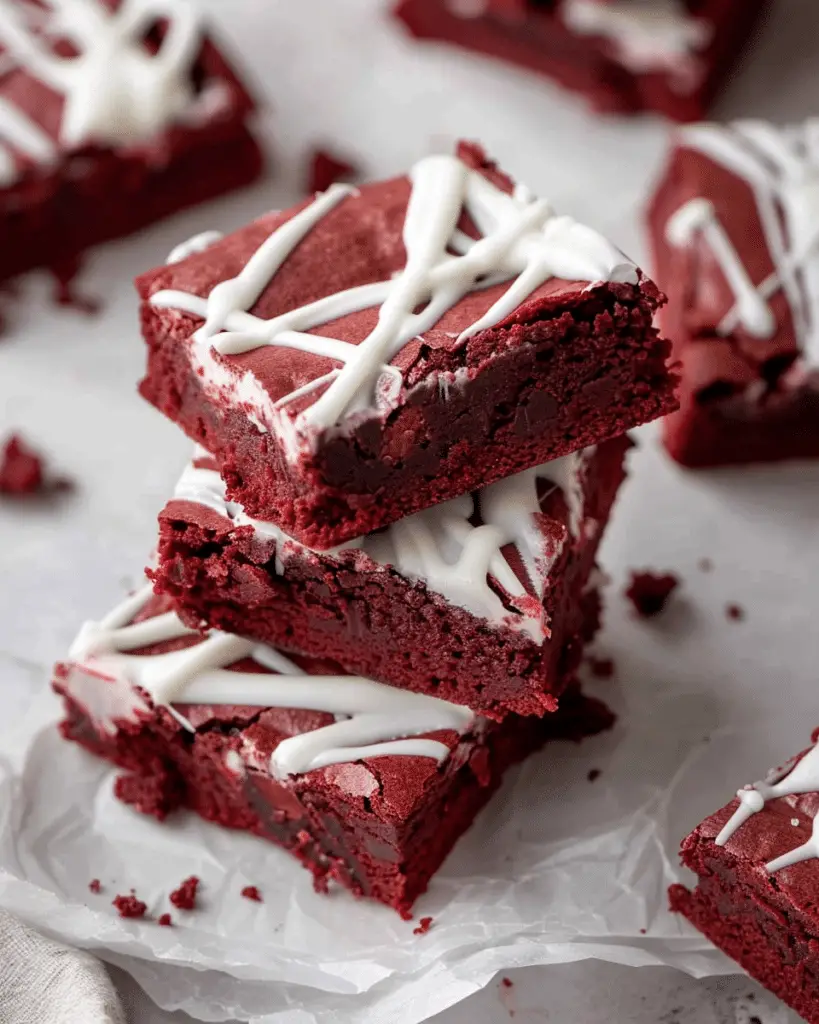
Sue Recipe

  • Recipe Index
  • Chicken
  • Desserts
  • About
  • Contact
menu icon
go to homepage
  • Recipe Index
  • Chicken
  • Desserts
  • About
  • Contact

search icon
Homepage link
  • Recipe Index
  • Chicken
  • Desserts
  • About
  • Contact

×

Garlic Butter Steak Bites and Potatoes

March 21, 2025 by Sue Leave a Comment

Tender, juicy steak bites seared to perfection and tossed with golden, crispy potatoes in a rich garlic butter sauce—this one-pan meal is as satisfying as it is simple. Whether I’m cooking for a weeknight dinner or something hearty on the weekend, these garlic butter steak bites and potatoes never disappoint.

Why You’ll Love This Recipe

I love how quick and easy this recipe is, especially for how much flavor it delivers. It’s a one-pan dish, which makes cleanup a breeze, and it hits that perfect balance between comfort food and satisfying protein. The combination of tender steak with crispy potatoes and savory garlic butter makes this dish feel indulgent without being complicated. It’s also super customizable—perfect for tweaking based on what I have in the fridge.

ingredients

(Here's a tip: Check out the full list of ingredients and measurements in the recipe card below.)

  • 1 ½ pounds sirloin steak, cut into bite-sized cubes – I like using sirloin for its balance of tenderness and flavor
  • 1 ½ pounds baby potatoes, halved or quartered – these roast up quickly and get a crispy golden crust
  • 2 tablespoons olive oil – helps crisp up the potatoes and gives a nice sear to the steak
  • 4 tablespoons unsalted butter – adds richness and makes the garlic butter sauce silky
  • 5 cloves garlic, minced – I use fresh garlic for bold flavor
  • Salt and freshly ground black pepper, to taste – for seasoning both the steak and potatoes
  • 1 tablespoon chopped fresh parsley – I sprinkle this on at the end for color and freshness
  • Optional: ¼ teaspoon red pepper flakes – just a bit adds a subtle kick if I want some heat

directions

  1. I start by boiling the baby potatoes in salted water until they’re just fork-tender, then drain and pat them dry.
  2. In a large skillet over medium-high heat, I add a bit of olive oil and sear the potatoes until they’re golden and crispy. I remove them and set them aside.
  3. I season the steak bites with salt and pepper, then add them to the same skillet. I cook them until browned on all sides but still juicy inside, about 3-4 minutes.
  4. I lower the heat and add butter and garlic to the pan, letting the garlic cook gently for about 30 seconds.
  5. I return the potatoes to the skillet and toss everything together in the garlic butter until well-coated.
  6. I finish with a sprinkle of fresh parsley and, if I’m feeling bold, a pinch of red pepper flakes.

Servings and timing

This recipe serves 4 people.
Prep time: 10 minutes
Cook time: 20 minutes
Total time: 30 minutes

Variations

Sometimes I swap the sirloin with ribeye or New York strip for a richer bite. If I want a lighter version, I use sweet potatoes instead of regular ones. For extra flavor, I toss in some rosemary or thyme while the garlic butter cooks. When I want to add a vegetable, I stir in sautéed green beans or mushrooms toward the end.

storage/reheating

I store leftovers in an airtight container in the fridge for up to 3 days. When reheating, I prefer using a skillet over medium heat to keep the potatoes crispy and the steak tender. Microwaving works too, but I try to do it in short bursts to avoid overcooking the steak.

FAQs

How do I make sure the steak stays tender?

I make sure not to overcook the steak. A quick sear over high heat is all it needs. I also let it rest a few minutes after cooking before serving.

Can I make this ahead of time?

Yes, I sometimes prep the potatoes and cube the steak ahead of time. Then it’s just a matter of quick cooking when I’m ready to eat.

What’s the best cut of steak to use?

I prefer sirloin because it’s lean, affordable, and still tender. But ribeye or New York strip also work beautifully for more marbling.

Can I cook everything in the oven?

I’ve roasted the potatoes first and then added seared steak bites for a similar effect. A sheet pan version is doable, but I still like finishing it on the stovetop for that buttery glaze.

Is this dish gluten-free?

Yes, as long as I make sure all ingredients, especially butter and seasonings, are gluten-free.

Conclusion

Garlic butter steak bites and potatoes are my go-to for a hearty, satisfying meal that doesn’t take a ton of effort. The golden potatoes, rich garlic butter, and perfectly seared steak come together in one irresistible pan. Whether I’m feeding the family or just treating myself, this dish always delivers.

Print

clock clock iconcutlery cutlery iconflag flag iconfolder folder iconinstagram instagram iconpinterest pinterest iconfacebook facebook iconprint print iconsquares squares iconheart heart iconheart solid heart solid icon
Garlic Butter Steak Bites and Potatoes

Garlic Butter Steak Bites and Potatoes

5 Stars 4 Stars 3 Stars 2 Stars 1 Star No reviews
  • Author: Sue
  • Prep Time: 15 minutes
  • Cook Time: 35–40 minutes
  • Total Time: 50–55 minutes
  • Yield: Serves 4
  • Category: Dinner
  • Method: Sheet Pan, Oven-Baked
  • Cuisine: American
Print Recipe
Pin Recipe

Description

Parmesan Crusted Chicken Sheet Pan Dinner brings together juicy, golden-brown chicken breasts, crispy roasted potatoes, and tender green beans, all baked on a single sheet pan for a no-fuss, flavorful meal. This easy one-pan recipe is perfect for busy weeknights, offering comfort food vibes with minimal cleanup.


Ingredients

For the Chicken:

  • 3–4 boneless, skinless chicken breasts
  • 2 tablespoons olive oil
  • ⅓ cup grated Parmesan cheese
  • ⅓ cup breadcrumbs (Panko or regular)
  • 1 tablespoon minced garlic
  • Salt and pepper to taste

For the Potatoes:

  • 2 pounds red potatoes, cut into bite-sized pieces
  • 2 tablespoons olive oil
  • 1–2 cloves garlic, minced
  • 2 tablespoons grated Parmesan cheese
  • Salt and pepper to taste

For the Green Beans:

  • 1 pound fresh green beans, ends trimmed
  • 1 tablespoon olive oil
  • 1 clove garlic, minced
  • 1 tablespoon grated Parmesan cheese (optional)
  • Salt and pepper to taste

Instructions

  1. Preheat oven to 400°F (200°C). Line a large sheet pan with parchment paper or lightly grease it.
  2. Prep the Potatoes: Toss potatoes with olive oil, garlic, Parmesan, salt, and pepper. Spread on one side of the sheet pan.
  3. Coat the Chicken: Mix olive oil, Parmesan, breadcrumbs, garlic, salt, and pepper. Coat each chicken breast and place beside the potatoes.
  4. Bake for 20 minutes.
  5. Season Green Beans: Toss green beans with olive oil, garlic, Parmesan (optional), salt, and pepper.
  6. Add Beans: After 20 minutes, remove the sheet pan and add green beans in a single layer.
  7. Continue Baking: Bake for an additional 15–20 minutes, until chicken reaches 165°F and veggies are tender.
  8. Rest & Serve: Let everything rest for a few minutes before serving.

Notes

  • Swap green beans for broccoli, Brussels sprouts, or asparagus.
  • Use Romano or Asiago instead of Parmesan for a different flavor profile.
  • Add herbs like rosemary, thyme, or Italian seasoning to the breadcrumb coating.
  • Best reheated in the oven at 350°F for 10–15 minutes to maintain the crispy texture.
  • Store leftovers in an airtight container in the fridge for up to 3 days.

Have you made this recipe? I'd love to see it!

Click here to Follow me on Pinterest

Black Pepper Chicken

March 21, 2025 by Sue Leave a Comment

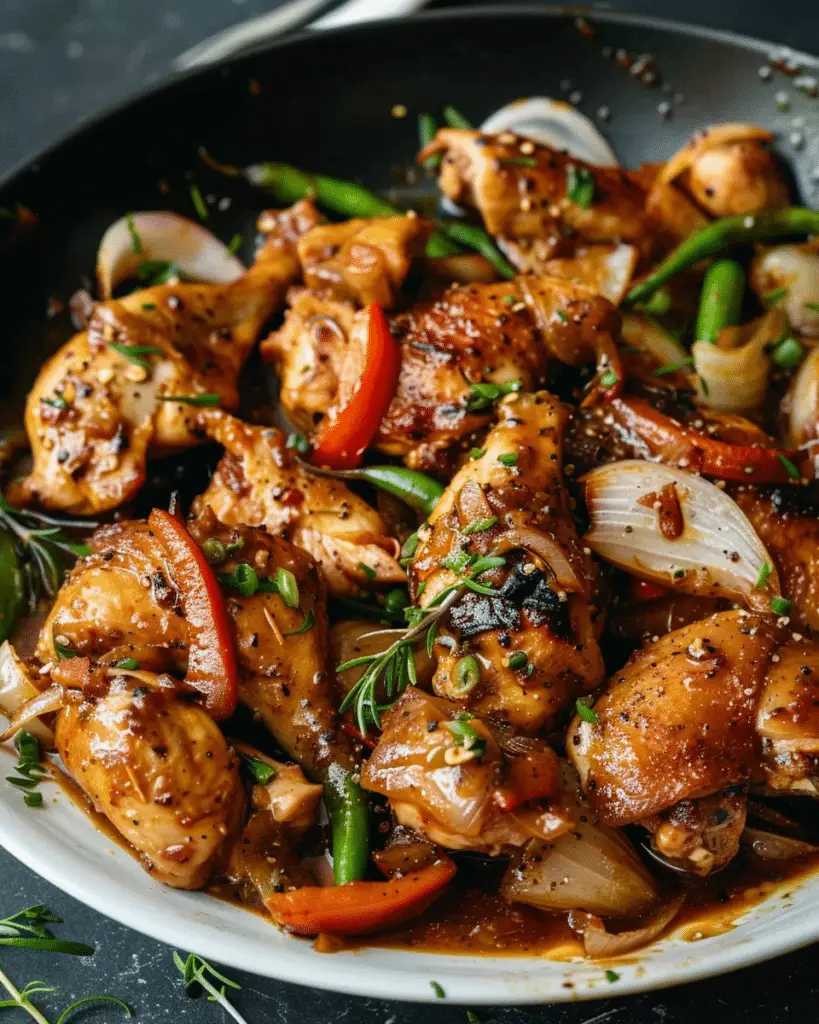
Black Pepper Chicken is a bold and flavorful stir-fry dish that features tender chicken thighs, colorful vegetables, and a punchy pepper sauce. It’s inspired by Chinese takeout but made with fresh ingredients and ready in less than 30 minutes.

Black Pepper Chicken

Why You’ll Love This Recipe

I love how this dish balances savory, spicy, and slightly sweet flavors. The freshly ground black pepper creates a warm heat that builds with every bite, while the vegetables stay crisp and vibrant. It’s perfect when I want something quick, delicious, and satisfying without relying on takeout. I also enjoy how easily I can switch up the ingredients based on what’s in my kitchen.

Ingredients

(Here's a tip: Check out the full list of ingredients and measurements in the recipe card below.)

For the chicken and marinade:

  • 1 lb boneless, skinless chicken thighs, cut into bite-sized pieces
  • 1 tablespoon Shaoxing wine (or dry sherry)
  • ½ teaspoon salt
  • ¼ teaspoon ground white pepper
  • 1 tablespoon cornstarch

For the sauce:

  • 1 tablespoon low sodium soy sauce
  • 1 tablespoon dark soy sauce
  • 1 tablespoon oyster sauce
  • 1 teaspoon sugar
  • 1 teaspoon freshly ground black pepper
  • ¼ cup water

For the stir-fry:

  • 2 tablespoons oil (vegetable or peanut oil)
  • 3 cloves garlic, minced
  • 1 teaspoon ginger, minced
  • ½ medium onion, sliced
  • 1 stalk celery, sliced
  • ½ medium green bell pepper, chopped
  • ½ medium red bell pepper, chopped

Directions

  1. I marinate the chicken by combining it with Shaoxing wine, salt, white pepper, and cornstarch. I let it sit while prepping the rest.
  2. I mix the sauce ingredients in a small bowl: soy sauces, oyster sauce, sugar, black pepper, and water.
  3. I heat oil in a wok over high heat, then sear the chicken until browned and just cooked through. I take it out and set it aside.
  4. I add garlic and ginger to the same wok, followed by onion, celery, and bell peppers. I stir-fry them until just tender.
  5. I return the chicken to the wok, pour in the sauce, and toss everything together until well coated and the sauce thickens slightly.
  6. I serve it hot over freshly steamed rice.

Servings and timing

This recipe makes 3 servings.
Prep time: 15 minutes
Cook time: 10 minutes
Total time: 25 minutes

Variations

I like using chicken breast instead of thighs when I want something lighter.

Sometimes I add mushrooms, snap peas, or broccoli to the mix for extra crunch.

When I’m craving more heat, I toss in some chili flakes or sliced fresh chili.

For a vegetarian option, I’ve used firm tofu in place of the chicken and it works beautifully.

storage/reheating

I store any leftovers in an airtight container in the fridge for up to 3 days. To reheat, I warm it in a skillet over medium heat with a splash of water to refresh the sauce. The microwave also works when I need something fast, though I prefer the texture from stovetop reheating.
FAQs

What type of black pepper works best?

I use freshly ground black pepper—coarse if I want a stronger kick. Pre-ground works in a pinch, but it doesn’t have the same bold aroma or flavor.

Can I use chicken breast instead of thighs?

Yes, I do this often when I want a leaner dish. I just make sure not to overcook it to keep the meat juicy.

What’s a good substitute for Shaoxing wine?

Dry sherry is the closest match. If I don’t have that, I sometimes leave it out or use a splash of rice vinegar for a different kind of tang.

How do I make this gluten-free?

To make it gluten-free, I use tamari instead of soy sauce and make sure the oyster sauce and cornstarch I use are labeled gluten-free.

Can I meal prep this recipe?

Yes, it’s great for meal prep. I store it in portions with rice in the fridge, and it reheats really well for lunches throughout the week.

Conclusion

Black Pepper Chicken is one of my favorite stir-fries when I want something bold, satisfying, and easy to make. The peppery sauce clings to every bite of chicken and vegetable, making each mouthful deeply flavorful. Whether I’m cooking for myself or meal prepping for the week, this dish always hits the spot.

Print

clock clock iconcutlery cutlery iconflag flag iconfolder folder iconinstagram instagram iconpinterest pinterest iconfacebook facebook iconprint print iconsquares squares iconheart heart iconheart solid heart solid icon
Black Pepper Chicken

Black Pepper Chicken

5 Stars 4 Stars 3 Stars 2 Stars 1 Star No reviews
  • Author: Sue
  • Prep Time: 15 minutes
  • Cook Time: 10 minutes
  • Total Time: 25 minutes
  • Yield: 3 servings
  • Category: Main Course
  • Method: Stir-Fry
  • Cuisine: Chinese-Inspired
Print Recipe
Pin Recipe

Description

Black Pepper Chicken is a bold and flavorful Chinese-inspired stir-fry recipe made with juicy chicken thighs, vibrant bell peppers, and a punchy black pepper sauce. Ready in just 25 minutes, this easy homemade takeout dish is perfect for quick weeknight dinners or meal prep.


Ingredients

For the chicken and marinade:

  • 1 lb boneless, skinless chicken thighs, cut into bite-sized pieces
  • 1 tablespoon Shaoxing wine (or dry sherry)
  • ½ teaspoon salt
  • ¼ teaspoon ground white pepper
  • 1 tablespoon cornstarch

For the sauce:

  • 1 tablespoon low sodium soy sauce
  • 1 tablespoon dark soy sauce
  • 1 tablespoon oyster sauce
  • 1 teaspoon sugar
  • 1 teaspoon freshly ground black pepper
  • ¼ cup water

For the stir-fry:

  • 2 tablespoons oil (vegetable or peanut oil)
  • 3 cloves garlic, minced
  • 1 teaspoon ginger, minced
  • ½ medium onion, sliced
  • 1 stalk celery, sliced
  • ½ medium green bell pepper, chopped
  • ½ medium red bell pepper, chopped

Instructions

  1. In a bowl, mix chicken with Shaoxing wine, salt, white pepper, and cornstarch. Let it marinate while you prep the rest.
  2. In a small bowl, combine all sauce ingredients: soy sauces, oyster sauce, sugar, black pepper, and water.
  3. Heat oil in a wok over high heat. Add chicken and sear until browned and just cooked through. Remove and set aside.
  4. Add garlic and ginger to the wok, followed by onion, celery, and bell peppers. Stir-fry until vegetables are slightly tender but still crisp.
  5. Return the chicken to the wok, pour in the sauce, and toss everything until well coated and the sauce thickens.
  6. Serve hot over steamed rice.

Notes

  • Use chicken breast for a leaner option—just be careful not to overcook.
  • Add chili flakes or sliced fresh chili for more heat.
  • Swap in mushrooms, snap peas, or broccoli for added texture and nutrition.
  • Firm tofu makes a great vegetarian substitute.
  • Store leftovers in the fridge for up to 3 days. Reheat on the stovetop with a splash of water for best texture.

Details:

Have you made this recipe? I'd love to see it!

Click here to Follow me on Pinterest

Vanilla French Beignets

March 21, 2025 by Sue Leave a Comment

These Vanilla French Beignets are light, fluffy pillows of fried dough with a delicate hint of vanilla, dusted generously with powdered sugar. Whether I enjoy them for breakfast or as an indulgent afternoon treat, these beignets bring a taste of Paris right into my kitchen.

Why You’ll Love This Recipe

I love how these beignets are crisp on the outside and perfectly soft and airy inside. The subtle vanilla flavor adds a lovely depth, making them more than just fried dough. It’s a recipe that feels fancy but is surprisingly easy to make at home. Plus, it’s a hit whether I’m serving guests or just treating myself.

ingredients

(Here's a tip: Check out the full list of ingredients and measurements in the recipe card below.)

  • All-purpose flour
  • Whole milk
  • Granulated sugar
  • Eggs
  • Unsalted butter
  • Vanilla extract
  • Active dry yeast
  • Salt
  • Powdered sugar, for dusting
  • Oil for frying (vegetable or canola)

directions

  1. I start by warming the milk slightly and dissolving the yeast in it with a pinch of sugar. After letting it sit for about 10 minutes, it becomes foamy.
  2. I whisk together the eggs, melted butter, and vanilla extract, then add this to the yeast mixture.
  3. In a large bowl, I combine flour, sugar, and salt. Then, I gradually stir in the wet ingredients to form a soft dough.
  4. I knead the dough for about 5–7 minutes until it’s smooth, then cover and let it rise in a warm place for about 1.5 hours until it doubles in size.
  5. After it rises, I roll the dough out on a floured surface to about ½ inch thick, then cut it into squares or rectangles.
  6. I heat oil in a deep pan to 350°F (175°C) and fry the dough pieces in batches until golden brown on both sides, about 1–2 minutes per side.
  7. Once fried, I drain them on paper towels and generously dust them with powdered sugar before serving.

Servings and timing

This recipe makes about 18 beignets.
Prep time: 90 minutes (including rising time)
Cook time: 30 minutes
Total time: 120 minutes

Variations

Sometimes I like to add a hint of cinnamon or nutmeg to the dough for a spiced version. If I’m feeling extra indulgent, I’ll fill them with pastry cream or Nutella after frying. A splash of almond extract instead of vanilla also gives them a unique twist.

storage/reheating

Beignets are best enjoyed fresh, but if I have leftovers, I store them in an airtight container at room temperature for up to 1 day. To reheat, I pop them in a 300°F (150°C) oven for about 5–7 minutes. I avoid microwaving them as they can get soggy.

FAQs

How do I know when the oil is ready for frying?

I use a thermometer to check when the oil reaches 350°F. If I don’t have one, I drop in a small piece of dough—it should sizzle and rise to the top quickly.

Can I make the dough ahead of time?

Yes, I sometimes make the dough the night before and refrigerate it after the first rise. I just bring it to room temperature before rolling and frying.

Do I need a deep fryer?

Not at all. I use a heavy-bottomed pot or deep skillet with enough oil for the beignets to float while frying.

Why are my beignets dense?

If the dough didn’t rise properly, it could be due to old yeast or not enough kneading. I always make sure my yeast is fresh and give the dough enough time to proof.

Can I bake these instead of frying?

Traditional beignets are fried, and baking won’t give the same airy texture. I stick to frying for the authentic result.

Conclusion

Making Vanilla French Beignets at home is a deliciously rewarding experience. I get to enjoy a café-style treat without leaving my kitchen, and the aroma alone is worth the effort. Whether it’s a special occasion or a cozy Sunday morning, these beignets always hit the spot.

Print

clock clock iconcutlery cutlery iconflag flag iconfolder folder iconinstagram instagram iconpinterest pinterest iconfacebook facebook iconprint print iconsquares squares iconheart heart iconheart solid heart solid icon
Vanilla French Beignets

Vanilla French Beignets

5 Stars 4 Stars 3 Stars 2 Stars 1 Star No reviews
  • Author: Sue
  • Prep Time: 90 minutes (includes rising time)
  • Cook Time: 30 minutes
  • Total Time: 2 hours
  • Yield: About 18 beignets
  • Category: Breakfast, Dessert, Snack
  • Method: Fried
  • Cuisine: French
  • Diet: Vegetarian
Print Recipe
Pin Recipe

Description

These Vanilla French Beignets are classic pillows of airy fried dough with a touch of vanilla flavor, dusted with powdered sugar for a sweet, Parisian-style treat. Ideal for breakfast, brunch, or dessert, these homemade beignets are light, fluffy, and irresistibly golden — perfect for anyone craving an authentic taste of French cuisine.


Ingredients

  • 3 ½ cups all-purpose flour
  • 1 cup whole milk (warmed)
  • ¼ cup granulated sugar
  • 2 large eggs
  • 4 tablespoons unsalted butter (melted)
  • 1 tablespoon vanilla extract
  • 2 ¼ teaspoons active dry yeast (1 packet)
  • ½ teaspoon salt
  • Powdered sugar, for dusting
  • Vegetable or canola oil, for frying

Instructions

  • Warm the milk and dissolve the yeast with a pinch of sugar. Let it sit for 10 minutes until foamy.
  • In a bowl, whisk eggs, melted butter, and vanilla extract. Add to the yeast mixture.
  • In a large mixing bowl, combine flour, sugar, and salt. Gradually stir in the wet ingredients to form a soft dough.
  • Knead the dough for 5–7 minutes until smooth. Cover and let rise in a warm place for 1.5 hours or until doubled in size.
  • Roll the dough to ½ inch thick on a floured surface. Cut into squares or rectangles.
  • Heat oil to 350°F (175°C) in a deep pan. Fry dough pieces in batches for 1–2 minutes per side until golden brown.
  • Drain on paper towels and dust generously with powdered sugar. Serve warm.

Notes

  • Add a pinch of cinnamon or nutmeg for a spiced variation.
  • For a filled version, inject pastry cream or Nutella after frying.
  • Swap vanilla extract with almond extract for a unique twist.
  • Best enjoyed fresh; reheat leftovers in a 300°F oven for 5–7 minutes.

Have you made this recipe? I'd love to see it!

Click here to Follow me on Pinterest

Garlic Parmesan Chicken

March 21, 2025 by Sue Leave a Comment

Why You’ll Love This Recipe

I love this Garlic Parmesan Chicken for how easy it is to prepare while delivering bold, satisfying flavors. The juicy, tender chicken paired with the rich blend of garlic and Parmesan creates a perfect comfort meal. It works well for weeknight dinners and is elegant enough to serve when I have guests over. Plus, the crispy coating gives it an irresistible texture that keeps everyone coming back for seconds.

Garlic Parmesan Chicken

Ingredients

(Here's a tip: Check out the full list of ingredients and measurements in the recipe card below.)

  • Boneless, skinless chicken breasts or thighs
  • Grated Parmesan cheese
  • Garlic cloves, minced
  • Breadcrumbs (Panko or Italian-style)
  • Olive oil or melted butter
  • Salt
  • Black pepper
  • Italian seasoning (optional)
  • Fresh parsley for garnish (optional)

Directions

  1. I preheat the oven to 400°F (200°C) and line a baking sheet with parchment paper or lightly grease it.
  2. In a bowl, I mix grated Parmesan cheese, breadcrumbs, minced garlic, salt, pepper, and Italian seasoning.
  3. I coat the chicken with olive oil or melted butter to help the crust stick.
  4. I press each chicken piece into the Parmesan mixture, ensuring it’s well coated on all sides.
  5. I place the chicken on the prepared baking sheet and bake for about 25-30 minutes, or until the internal temperature reaches 165°F (74°C) and the crust is golden and crispy.
  6. I let it rest for a few minutes before garnishing with parsley and serving.

Servings and timing

This recipe makes about 4 servings. Prep time: 10 minutes
Cook time: 25-30 minutes
Total time: 35-40 minutes

Variations

  • I sometimes add a bit of smoked paprika for a deeper, smoky flavor.
  • For a spicier version, I mix in some crushed red pepper flakes into the breadcrumb mixture.
  • Swapping out chicken for turkey cutlets also works well.
  • To make it low-carb, I replace breadcrumbs with almond flour.

storage/reheating

I store leftovers in an airtight container in the refrigerator for up to 3 days. To reheat, I use the oven or an air fryer to help keep the coating crispy. Microwaving works too, but it tends to soften the crust a bit.

FAQs

How do I know when the chicken is fully cooked?

I always check with a meat thermometer. The internal temperature should read 165°F (74°C).

Can I use pre-shredded Parmesan cheese?

I prefer freshly grated Parmesan for the best flavor and texture, but pre-shredded works in a pinch.

Is it okay to use chicken thighs instead of breasts?

Yes, I actually like using thighs for juicier, more flavorful results.

Can I make this in an air fryer?

Absolutely. I cook at 375°F (190°C) for about 18-20 minutes, flipping halfway through.

What sides go well with Garlic Parmesan Chicken?

I often serve it with mashed potatoes, roasted vegetables, or a simple side salad.

Conclusion

This Garlic Parmesan Chicken is a go-to favorite in my kitchen. With its crispy, cheesy crust and garlicky goodness, it's a dish that always impresses. It’s easy enough for busy weeknights and delicious enough for special occasions. Once I tried it, it quickly became a staple in my dinner rotation.

Print

clock clock iconcutlery cutlery iconflag flag iconfolder folder iconinstagram instagram iconpinterest pinterest iconfacebook facebook iconprint print iconsquares squares iconheart heart iconheart solid heart solid icon
Garlic Parmesan Chicken

Garlic Parmesan Chicken

5 Stars 4 Stars 3 Stars 2 Stars 1 Star No reviews
  • Author: Sue
  • Prep Time: 10 minutes
  • Cook Time: 25–30 minutes
  • Total Time: 35–40 minutes
  • Yield: 4 servings
  • Category: Dinner
  • Method: Baking
  • Cuisine: American
Print Recipe
Pin Recipe

Description

This Garlic Parmesan Chicken is a crispy, cheesy, and flavorful dish that’s easy to make and sure to impress. Tender chicken breasts or thighs are coated in a savory blend of garlic, Parmesan, and breadcrumbs, then baked to golden perfection. Perfect for weeknight dinners or entertaining guests, this Garlic Parmesan Chicken recipe will become a staple in your meal rotation.


Ingredients

  • Boneless, skinless chicken breasts or thighs
  • 1 cup grated Parmesan cheese
  • 2–3 garlic cloves, minced
  • 1 cup breadcrumbs (Panko or Italian-style)
  • 2–3 tablespoons olive oil or melted butter
  • 1 teaspoon salt
  • ½ teaspoon black pepper
  • 1 teaspoon Italian seasoning (optional)
  • Fresh parsley for garnish (optional)

Instructions

  • Preheat the oven to 400°F (200°C). Line a baking sheet with parchment paper or lightly grease it.
  • In a bowl, mix grated Parmesan cheese, breadcrumbs, minced garlic, salt, pepper, and Italian seasoning.
  • Coat the chicken with olive oil or melted butter.
  • Press each chicken piece into the Parmesan mixture, coating all sides evenly.
  • Place the coated chicken on the prepared baking sheet.
  • Bake for 25–30 minutes, or until the internal temperature reaches 165°F (74°C) and the coating is golden and crispy.
  • Let rest a few minutes, garnish with parsley, and serve.

Notes

  • For a smoky flavor, add smoked paprika to the breadcrumb mix.
  • To make it spicier, include crushed red pepper flakes.
  • Can also be made in an air fryer: 375°F (190°C) for 18–20 minutes, flipping halfway.
  • Store leftovers in the fridge for up to 3 days and reheat in oven or air fryer to retain crispiness.

Have you made this recipe? I'd love to see it!

Click here to Follow me on Pinterest

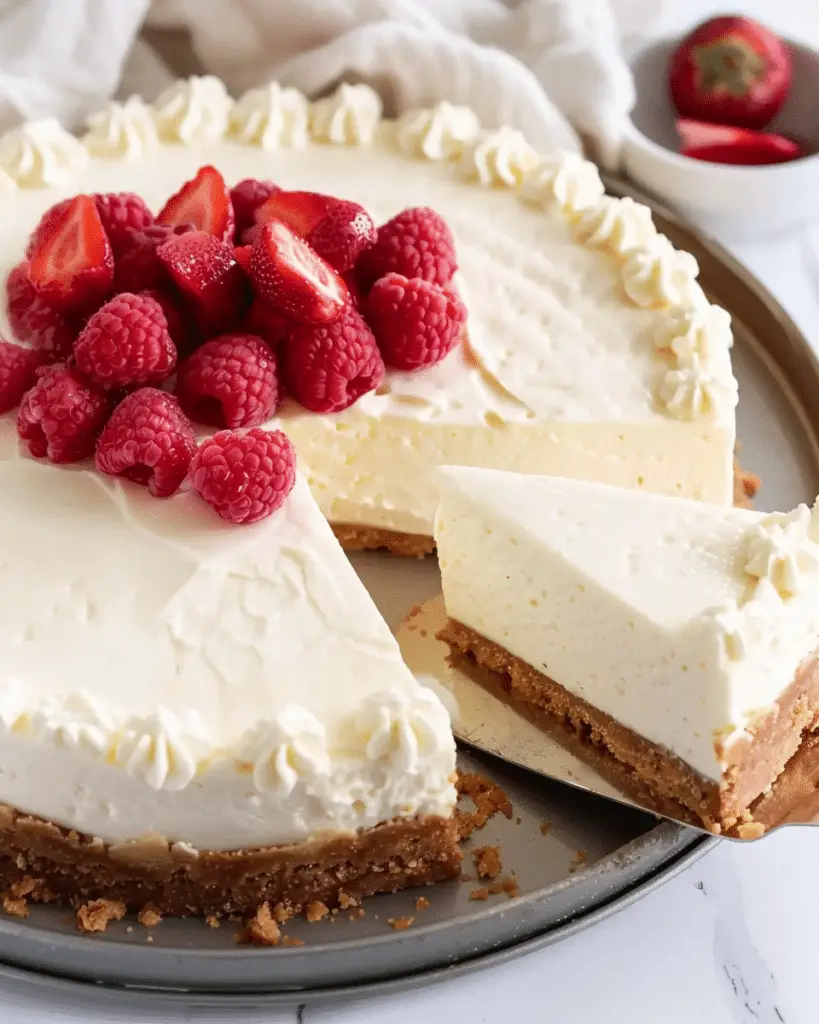
The Best Easy Cheesecake Recipe

March 20, 2025 by Sue Leave a Comment

This easy cheesecake recipe is rich, creamy, and incredibly simple to make. With a smooth and velvety filling sitting on a buttery graham cracker crust, it's a dessert that never fails to impress. Whether it's for a special occasion or just a sweet treat, this homemade cheesecake is always a crowd-pleaser.

The Best Easy Cheesecake Recipe

Why I Love This Recipe

  • It requires minimal ingredients and effort, making it perfect for beginners.
  • The texture is perfectly creamy, with just the right amount of sweetness.
  • No need for a water bath – this cheesecake bakes beautifully without one.
  • It can be customized with various toppings like fresh fruit, caramel, or chocolate.
  • It stores well, so it can be made in advance for events or gatherings.

Ingredients

(Here's a tip: Check out the full list of ingredients and measurements in the recipe card below.)

  • Graham cracker crumbs
  • Granulated sugar
  • Butter, melted
  • Cream cheese, softened
  • Eggs
  • Sour cream
  • Vanilla extract
  • Lemon juice

Directions

  1. Prepare the crust: Preheat the oven to 325°F (163°C). Mix the graham cracker crumbs, sugar, and melted butter. Press into the bottom of a springform pan and bake for 10 minutes. Let cool.
  2. Make the filling: Beat the softened cream cheese until smooth. Add sugar and mix until combined. Mix in eggs one at a time, then stir in sour cream, vanilla extract, and lemon juice.
  3. Bake the cheesecake: Pour the filling over the crust and smooth the top. Bake for about 50-60 minutes, until the center is set but slightly jiggly.
  4. Cool and chill: Turn off the oven and let the cheesecake cool inside with the door slightly open. Once at room temperature, refrigerate for at least 4 hours or overnight.
  5. Serve and enjoy: Run a knife around the edges before removing from the pan. Slice and serve with your favorite toppings.

Servings and Timing

  • Servings: 8-10
  • Prep Time: 15 minutes
  • Cook Time: 60 minutes
  • Chilling Time: 4 hours
  • Total Time: 5 hours 15 minutes

Variations

  • Chocolate Cheesecake: Add melted chocolate to the filling for a rich, chocolatey twist.
  • Berry Swirl Cheesecake: Swirl in raspberry or blueberry sauce before baking for a fruity flavor.
  • Cookie Crust: Substitute graham crackers with crushed Oreos or Biscoff cookies.
  • Lemon Cheesecake: Add extra lemon zest for a tangier flavor.
  • No-Bake Option: Skip the baking and chill the cheesecake overnight for a no-bake version.

Storage/Reheating

  • Refrigeration: Store the cheesecake in the fridge, covered, for up to 5 days.
  • Freezing: Wrap tightly in plastic wrap and foil, then freeze for up to 3 months. Thaw in the fridge overnight before serving.
  • Reheating: Cheesecake is best served chilled, but if needed, let it sit at room temperature for about 20 minutes before serving.

FAQs

How do I prevent my cheesecake from cracking?

Avoid overmixing the batter and bake at a lower temperature. Letting it cool gradually in the oven also helps prevent cracks.

Can I use a different crust?

Yes, graham crackers are traditional, but you can use Oreos, digestive biscuits, or even a nut-based crust.

How do I know when my cheesecake is done baking?

The center should still have a slight jiggle when you gently shake the pan. It will firm up as it cools.

Can I make this cheesecake ahead of time?

Yes, cheesecake is perfect for making ahead since it needs to chill for several hours. Make it a day in advance for the best texture.

What toppings go well with cheesecake?

Fresh berries, caramel sauce, chocolate ganache, whipped cream, or even a dusting of powdered sugar are great choices.

Conclusion

This easy cheesecake recipe is a foolproof way to enjoy a classic dessert with minimal effort. Its creamy texture and buttery crust make it a delightful treat for any occasion. With endless topping and flavor variations, it’s a dessert that never gets boring. Give it a try, and enjoy every delicious bite!

Print

clock clock iconcutlery cutlery iconflag flag iconfolder folder iconinstagram instagram iconpinterest pinterest iconfacebook facebook iconprint print iconsquares squares iconheart heart iconheart solid heart solid icon
The Best Easy Cheesecake Recipe

The Best Easy Cheesecake Recipe

5 Stars 4 Stars 3 Stars 2 Stars 1 Star No reviews
  • Author: Sue
  • Prep Time: 15 minutes
  • Cook Time: 60 minutes
  • Total Time: 5 hours 15 minutes
  • Yield: 8-10 servings
  • Category: Dessert
  • Method: Baking
  • Cuisine: American
  • Diet: Vegetarian
Print Recipe
Pin Recipe

Description

This easy cheesecake recipe is rich, creamy, and incredibly simple to make. With a smooth and velvety filling sitting on a buttery graham cracker crust, it's a dessert that never fails to impress. Whether it's for a special occasion or just a sweet treat, this homemade cheesecake is always a crowd-pleaser.


Ingredients

  • For the crust:
    • Graham cracker crumbs
    • Granulated sugar
    • Butter, melted
  • For the filling:
    • Cream cheese, softened
    • Granulated sugar
    • Eggs
    • Sour cream
    • Vanilla extract
    • Lemon juice

Instructions

  1. Prepare the crust:
    • Preheat the oven to 325°F (163°C).
    • Mix the graham cracker crumbs, sugar, and melted butter.
    • Press into the bottom of a springform pan and bake for 10 minutes. Let cool.
  2. Make the filling:
    • Beat the softened cream cheese until smooth.
    • Add sugar and mix until combined.
    • Mix in eggs one at a time, then stir in sour cream, vanilla extract, and lemon juice.
  3. Bake the cheesecake:
    • Pour the filling over the crust and smooth the top.
    • Bake for about 50-60 minutes, until the center is set but slightly jiggly.
  4. Cool and chill:
    • Turn off the oven and let the cheesecake cool inside with the door slightly open.
    • Once at room temperature, refrigerate for at least 4 hours or overnight.
  5. Serve and enjoy:
    • Run a knife around the edges before removing from the pan.
    • Slice and serve with your favorite toppings.


Notes

  • Storage: Store in the fridge, covered, for up to 5 days.
  • Freezing: Wrap tightly and freeze for up to 3 months. Thaw overnight before serving.
  • No water bath needed: This cheesecake bakes beautifully without one.
  • Prevent cracks: Avoid overmixing and let it cool gradually.

Have you made this recipe? I'd love to see it!

Click here to Follow me on Pinterest

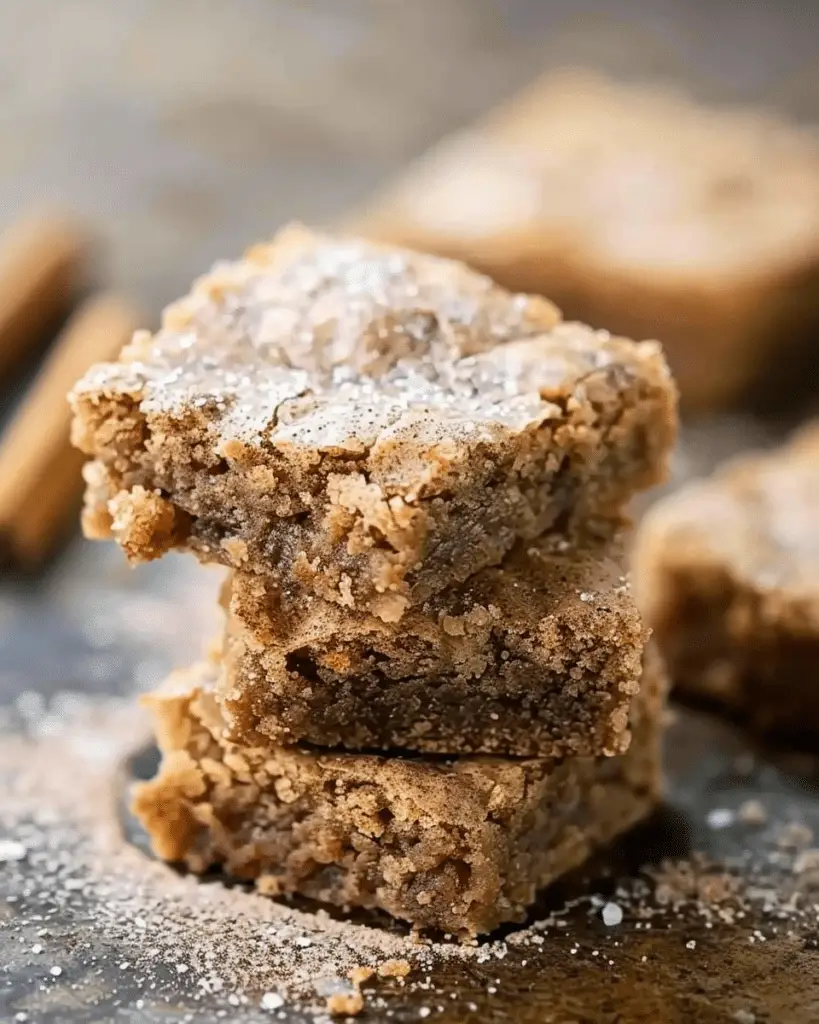
Cinnamon Sugar Blondies

March 20, 2025 by Sue Leave a Comment

Cinnamon Sugar Blondies

Why You’ll Love This Recipe

I love these Cinnamon Sugar Blondies because they are the perfect balance of chewy, buttery, and packed with warm cinnamon flavor. They have a soft and gooey center with a slightly crisp top, thanks to the cinnamon-sugar topping. This easy-to-make dessert is great for any occasion, whether it's a casual snack or a sweet treat for guests. Plus, they require simple pantry ingredients and come together in no time!

Ingredients

(Here's a tip: Check out the full list of ingredients and measurements in the recipe card below.)

  • All-purpose flour
  • Baking powder
  • Salt
  • Unsalted butter, melted
  • Brown sugar
  • Granulated sugar
  • Eggs
  • Vanilla extract
  • Ground cinnamon

Directions

  1. Preheat the oven to 350°F (175°C) and grease a baking pan.
  2. In a mixing bowl, whisk together the flour, baking powder, and salt. Set aside.
  3. In another bowl, mix the melted butter, brown sugar, and granulated sugar until well combined.
  4. Add the eggs and vanilla extract to the wet mixture, stirring until smooth.
  5. Gradually add the dry ingredients to the wet ingredients, mixing until just combined.
  6. Pour the batter into the prepared pan and smooth the top.
  7. In a small bowl, combine cinnamon and sugar, then sprinkle it evenly over the batter.
  8. Bake for 25-30 minutes, or until a toothpick inserted in the center comes out with a few moist crumbs.
  9. Allow the blondies to cool before slicing into squares.

Servings and Timing

  • Servings: 12 blondies
  • Prep time: 10 minutes
  • Cook time: 25-30 minutes
  • Total time: 40 minutes

Variations

  • Nutty Crunch: Add chopped pecans or walnuts for extra texture.
  • Chocolate Twist: Mix in white or dark chocolate chips for added sweetness.
  • Spiced Up: Enhance the flavor with a pinch of nutmeg or cloves.
  • Frosted Option: Drizzle a simple vanilla glaze over the blondies for a bakery-style finish.

Storage/Reheating

Store blondies in an airtight container at room temperature for up to 4 days. For longer storage, keep them in the fridge for up to a week or freeze them for up to 3 months. To reheat, microwave for 10-15 seconds for a warm, fresh-baked taste.

FAQs

How do I know when my blondies are done baking?

I check by inserting a toothpick into the center—if it comes out with a few moist crumbs, they are ready. Overbaking will make them dry.

Can I make these blondies gluten-free?

Yes, substitute all-purpose flour with a gluten-free baking blend to make them gluten-free.

What type of pan should I use?

An 8x8-inch baking pan works well for thick blondies, but a 9x13-inch pan will make them thinner and slightly crispier.

Can I use oil instead of butter?

Butter gives the best flavor, but melted coconut oil or vegetable oil can be used as a substitute.

Do I need to refrigerate these blondies?

No, they can be stored at room temperature, but refrigeration helps them last longer.

Conclusion

These Cinnamon Sugar Blondies are an irresistible treat with their chewy texture and warm cinnamon-sugar topping. They are simple to make, require minimal ingredients, and can be customized to fit any taste preference. Whether served as a dessert or a quick snack, they are sure to be a hit!

Print

clock clock iconcutlery cutlery iconflag flag iconfolder folder iconinstagram instagram iconpinterest pinterest iconfacebook facebook iconprint print iconsquares squares iconheart heart iconheart solid heart solid icon
Cinnamon Sugar Blondies

Cinnamon Sugar Blondies

5 Stars 4 Stars 3 Stars 2 Stars 1 Star No reviews
  • Author: Sue
  • Prep Time: 10 minutes
  • Cook Time: 25-30 minutes
  • Total Time: 40 minutes
  • Yield: 12 blondies
  • Category: Dessert
  • Method: Baking
  • Cuisine: American
  • Diet: Vegetarian
Print Recipe
Pin Recipe

Description

These Cinnamon Sugar Blondies are the ultimate chewy, buttery dessert with a warm cinnamon kick. Their gooey center and crisp cinnamon-sugar topping make them an irresistible treat perfect for any occasion. Plus, they come together quickly using simple pantry staples


Ingredients

  • 1 ½ cups all-purpose flour
  • 1 teaspoon baking powder
  • ½ teaspoon salt
  • ½ cup unsalted butter, melted
  • 1 cup brown sugar
  • ¼ cup granulated sugar
  • 2 eggs
  • 1 teaspoon vanilla extract
  • 1 teaspoon ground cinnamon (for batter)

Cinnamon-Sugar Topping:

  • 2 tablespoons granulated sugar
  • 1 teaspoon ground cinnamon

Instructions

  1. Preheat the oven to 350°F (175°C) and grease an 8x8-inch baking pan.
  2. In a mixing bowl, whisk together the flour, baking powder, and salt. Set aside.
  3. In another bowl, mix the melted butter, brown sugar, and granulated sugar until well combined.
  4. Add the eggs and vanilla extract, stirring until smooth.
  5. Gradually fold in the dry ingredients until just combined.
  6. Pour the batter into the prepared pan and smooth the top.
  7. In a small bowl, mix the cinnamon and sugar for the topping, then sprinkle it evenly over the batter.
  8. Bake for 25-30 minutes, or until a toothpick inserted in the center comes out with a few moist crumbs.
  9. Allow the blondies to cool before slicing into squares.

Notes

  • For extra crunch, add ½ cup of chopped pecans or walnuts.
  • Want a chocolatey twist? Stir in ½ cup of white or dark chocolate chips.
  • Enhance the spice with a pinch of nutmeg or cloves.
  • Drizzle a vanilla glaze over the top for a bakery-style finish.

Have you made this recipe? I'd love to see it!

Click here to Follow me on Pinterest

Mouthwatering Honey Garlic Salmon Bites

March 20, 2025 by Sue Leave a Comment

These honey garlic salmon bites are tender, flavorful, and perfectly caramelized with a sweet and savory glaze. They are easy to make, packed with omega-3s, and pair well with rice, veggies, or a fresh salad. Whether served as an appetizer or a main dish, these bites are a delicious way to enjoy salmon with minimal effort.

Mouthwatering Honey Garlic Salmon Bites

Why I Love This Recipe

I love this recipe because it's quick, easy, and bursting with flavor. The honey garlic glaze creates the perfect balance of sweetness and umami, while the salmon stays juicy and flaky inside. It’s a versatile dish that works for both weeknight dinners and special occasions. Plus, it’s a great way to introduce salmon to those who might not typically enjoy seafood.

Ingredients

(Here's a tip: Check out the full list of ingredients and measurements in the recipe card below.)

  • Salmon fillets, cut into bite-sized cubes
  • Honey
  • Garlic, minced
  • Soy sauce
  • Lemon juice
  • Olive oil
  • Red pepper flakes (optional, for heat)
  • Salt and pepper
  • Green onions and sesame seeds for garnish

Directions

  1. Heat a pan over medium-high heat and add olive oil.
  2. Season the salmon cubes with salt and pepper.
  3. Sear the salmon bites for 2-3 minutes per side until golden brown. Remove from the pan and set aside.
  4. In the same pan, add minced garlic and sauté until fragrant.
  5. Stir in honey, soy sauce, lemon juice, and red pepper flakes. Let it simmer until slightly thickened.
  6. Return the salmon to the pan and toss to coat in the sauce. Cook for another 1-2 minutes.
  7. Garnish with green onions and sesame seeds before serving.

Servings and Timing

  • Servings: 4
  • Prep Time: 10 minutes
  • Cook Time: 10 minutes
  • Total Time: 20 minutes

Variations

  • Spicy Kick: Add sriracha or extra red pepper flakes for more heat.
  • Crispy Texture: Coat the salmon bites lightly in cornstarch before pan-searing for an extra crispy exterior.
  • Teriyaki Twist: Substitute teriyaki sauce for soy sauce for a deeper, slightly sweeter flavor.
  • Grilled Option: Instead of pan-searing, grill the salmon bites on skewers for a smoky flavor.
  • Low-Sodium: Use low-sodium soy sauce or coconut aminos for a healthier alternative.

Storage/Reheating

  • Refrigeration: Store leftovers in an airtight container for up to 3 days.
  • Reheating: Warm in a skillet over low heat or in the microwave in short intervals to avoid drying out the salmon.
  • Freezing: Not recommended as the texture of salmon can change after freezing and thawing.

FAQs

How do I prevent salmon from sticking to the pan?

Make sure the pan is hot and coated with oil before adding the salmon. Also, avoid moving the salmon too soon—it will naturally release when it's ready to flip.

Can I use frozen salmon for this recipe?

Yes, just be sure to thaw it completely and pat it dry before cooking to prevent excess moisture.

What should I serve with honey garlic salmon bites?

They pair well with rice, quinoa, steamed vegetables, or even inside lettuce wraps for a fresh and healthy meal.

Can I bake these instead of pan-searing?

Yes! Bake at 400°F (200°C) for about 10-12 minutes, then broil for an extra minute to caramelize the glaze.

How do I make this recipe gluten-free?

Use tamari or coconut aminos instead of soy sauce to keep it gluten-free.

Conclusion

These honey garlic salmon bites are an easy and delicious way to enjoy salmon with minimal prep. The sweet and savory glaze makes them irresistible, and they come together in just 20 minutes. Whether served as an appetizer, main dish, or meal prep option, this recipe is sure to be a hit.

Print

clock clock iconcutlery cutlery iconflag flag iconfolder folder iconinstagram instagram iconpinterest pinterest iconfacebook facebook iconprint print iconsquares squares iconheart heart iconheart solid heart solid icon
Mouthwatering Honey Garlic Salmon Bites

Mouthwatering Honey Garlic Salmon Bites

5 Stars 4 Stars 3 Stars 2 Stars 1 Star No reviews
  • Author: Sue
  • Prep Time: 10 minutes
  • Cook Time: 10 minutes
  • Total Time: 20 minutes
  • Yield: 4 servings
  • Category: Main Dish
  • Method: Pan-Seared
  • Cuisine: Asian-Inspired
Print Recipe
Pin Recipe

Description

These honey garlic salmon bites are tender, flavorful, and perfectly caramelized with a sweet and savory glaze. They are easy to make, packed with omega-3s, and pair well with rice, veggies, or a fresh salad. Whether served as an appetizer or a main dish, these bites are a delicious way to enjoy salmon with minimal effort.


Ingredients

  • Salmon fillets, cut into bite-sized cubes
  • Honey
  • Garlic, minced
  • Soy sauce
  • Lemon juice
  • Olive oil
  • Red pepper flakes (optional, for heat)
  • Salt and pepper
  • Green onions and sesame seeds for garnish

Instructions

  1. Heat a pan over medium-high heat and add olive oil.
  2. Season the salmon cubes with salt and pepper.
  3. Sear the salmon bites for 2-3 minutes per side until golden brown. Remove from the pan and set aside.
  4. In the same pan, add minced garlic and sauté until fragrant.
  5. Stir in honey, soy sauce, lemon juice, and red pepper flakes. Let it simmer until slightly thickened.
  6. Return the salmon to the pan and toss to coat in the sauce. Cook for another 1-2 minutes.
  7. Garnish with green onions and sesame seeds before serving.

Notes

  • For best results, use fresh, high-quality salmon for optimal flavor and texture.
  • Adjust the amount of honey or soy sauce to suit your taste preferences.
  • If using skin-on salmon, sear it skin-side down first for extra crispiness.
  • A non-stick or well-seasoned cast iron skillet works best to prevent sticking.
  • Serve immediately for the best texture and flavor.

Have you made this recipe? I'd love to see it!

Click here to Follow me on Pinterest

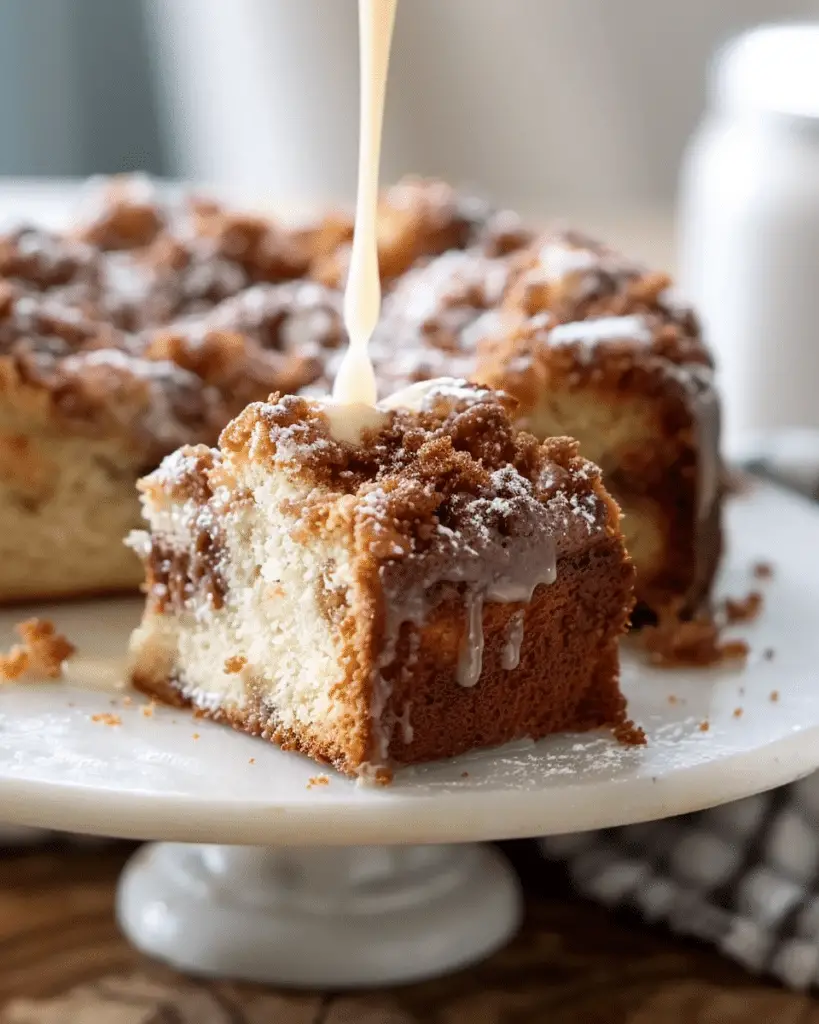
The BEST Coffee Cake

March 20, 2025 by Sue Leave a Comment

The BEST Coffee Cake

Why You’ll Love This Recipe

This coffee cake is soft, buttery, and topped with a deliciously crumbly cinnamon streusel. It’s the perfect treat to pair with a morning cup of coffee or to serve as a delightful dessert. I love how easy it is to make, and the combination of flavors and textures makes every bite irresistible. Whether for breakfast, brunch, or an afternoon snack, this coffee cake always impresses.

Ingredients

(Here's a tip: Check out the full list of ingredients and measurements in the recipe card below.)

  • All-purpose flour
  • Baking powder
  • Baking soda
  • Salt
  • Unsalted butter
  • Granulated sugar
  • Brown sugar
  • Eggs
  • Vanilla extract
  • Sour cream
  • Milk
  • Ground cinnamon
  • Powdered sugar (for optional glaze)

Directions

  1. Preheat the oven to 350°F (175°C) and grease a baking dish.
  2. In a bowl, whisk together the flour, baking powder, baking soda, and salt. Set aside.
  3. In a separate bowl, cream the butter and sugars until light and fluffy.
  4. Add eggs one at a time, mixing well after each addition. Stir in the vanilla extract.
  5. Mix in the sour cream and milk until smooth.
  6. Gradually add the dry ingredients to the wet ingredients, stirring until just combined.
  7. Pour half of the batter into the prepared baking dish.
  8. Mix brown sugar and cinnamon in a small bowl, then sprinkle half over the batter.
  9. Pour the remaining batter on top, then sprinkle with the remaining cinnamon-sugar mixture.
  10. Bake for 35-40 minutes or until a toothpick inserted in the center comes out clean.
  11. Let the cake cool before serving. Drizzle with powdered sugar glaze if desired.

Servings and Timing

  • Servings: 8-10
  • Prep time: 15 minutes
  • Cook time: 35-40 minutes
  • Total time: 50-55 minutes

Variations

  • Add chopped nuts like walnuts or pecans for extra crunch.
  • Mix in chocolate chips for a sweet twist.
  • Use a cream cheese swirl by adding dollops of sweetened cream cheese between the layers.
  • Substitute sour cream with Greek yogurt for a slightly tangy flavor.
  • Try adding a touch of nutmeg for an extra depth of spice.

Storage/Reheating

  • Store at room temperature in an airtight container for up to 3 days.
  • Keep in the refrigerator for up to a week.
  • To reheat, microwave individual slices for 15-20 seconds.
  • Freeze for up to 3 months; thaw overnight in the fridge before serving.

FAQs

How do I make the coffee cake extra moist?

Using sour cream and ensuring the cake isn’t overbaked helps keep it moist and tender.

Can I make this coffee cake ahead of time?

Yes, it stays fresh for a few days, so it’s great for making ahead and storing.

Does coffee cake contain coffee?

No, traditional coffee cake does not contain coffee. It’s meant to be enjoyed with coffee.

Can I use whole wheat flour instead of all-purpose flour?

Yes, but it may make the cake denser. Try using half whole wheat and half all-purpose for a balanced texture.

What’s the best way to serve coffee cake?

I love serving it slightly warm with a cup of coffee or tea. A light dusting of powdered sugar or a drizzle of glaze enhances the flavor.

Conclusion

This coffee cake is the ultimate treat, combining soft cake with a rich cinnamon streusel topping. It’s simple to make, incredibly flavorful, and perfect for any occasion. Whether for breakfast, brunch, or dessert, this coffee cake is sure to become a favorite in any kitchen.

Print

clock clock iconcutlery cutlery iconflag flag iconfolder folder iconinstagram instagram iconpinterest pinterest iconfacebook facebook iconprint print iconsquares squares iconheart heart iconheart solid heart solid icon
The BEST Coffee Cake

The BEST Coffee Cake

5 Stars 4 Stars 3 Stars 2 Stars 1 Star No reviews
  • Author: Sue
  • Prep Time: 15 minutes
  • Cook Time: 35-40 minutes
  • Total Time: 50-55 minutes
  • Yield: 8-10 servings
  • Category: Dessert
  • Method: Baking
  • Cuisine: American
  • Diet: Vegetarian
Print Recipe
Pin Recipe

Description

Indulge in the BEST Coffee Cake, a soft and buttery treat topped with a crumbly cinnamon streusel. Perfect for breakfast, brunch, or dessert, this moist and flavorful cake pairs wonderfully with your morning coffee. Easy to make and irresistibly delicious, this homemade coffee cake will quickly become a family favorite.


Ingredients

  • 2 cups all-purpose flour
  • 1 teaspoon baking powder
  • ½ teaspoon baking soda
  • ¼ teaspoon salt
  • ½ cup unsalted butter, softened
  • ¾ cup granulated sugar
  • ¼ cup brown sugar
  • 2 eggs
  • 1 teaspoon vanilla extract
  • ½ cup sour cream
  • ½ cup milk
  • ½ cup brown sugar (for streusel)
  • 1 tablespoon ground cinnamon
  • Powdered sugar (for optional glaze)

Instructions

  1. Preheat oven to 350°F (175°C) and grease a baking dish.
  2. In a bowl, whisk together flour, baking powder, baking soda, and salt.
  3. In a separate bowl, cream butter and sugars until light and fluffy.
  4. Add eggs one at a time, mixing well after each addition. Stir in vanilla extract.
  5. Mix in sour cream and milk until smooth.
  6. Gradually add dry ingredients to wet ingredients, stirring until just combined.
  7. Pour half of the batter into the prepared baking dish.
  8. Mix brown sugar and cinnamon, then sprinkle half over the batter.
  9. Pour remaining batter on top and sprinkle with the rest of the cinnamon-sugar mixture.
  10. Bake for 35-40 minutes or until a toothpick inserted in the center comes out clean.
  11. Let the cake cool before serving. Drizzle with powdered sugar glaze if desired.

Notes

  • For extra crunch, add chopped walnuts or pecans.
  • Swap sour cream with Greek yogurt for a tangy twist.
  • Mix in chocolate chips for added sweetness.
  • Enhance the spice with a touch of nutmeg.

Have you made this recipe? I'd love to see it!

Click here to Follow me on Pinterest

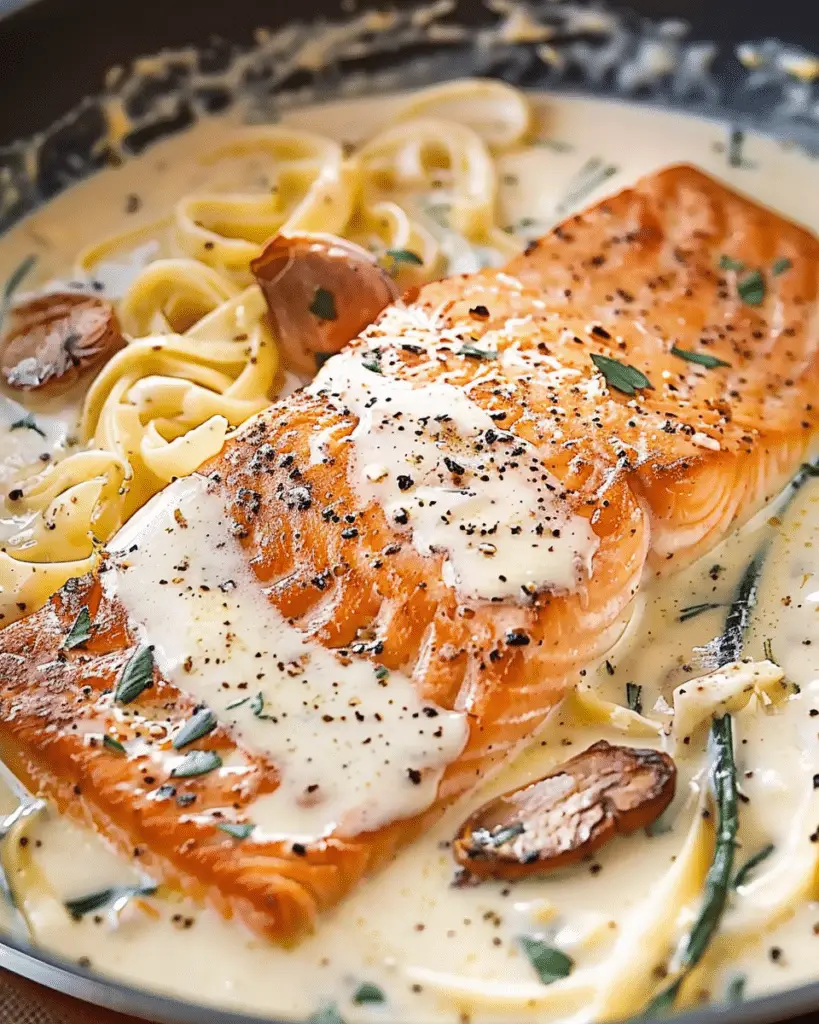
Tuscan Salmon with Parmesan Cream Sauce

March 20, 2025 by Sue Leave a Comment

This Tuscan Salmon with Parmesan Cream Sauce is a rich and flavorful dish featuring perfectly seared salmon fillets smothered in a creamy, garlicky Parmesan sauce with sun-dried tomatoes and spinach. It's an easy yet elegant meal that comes together in under 30 minutes.

Tuscan Salmon with Parmesan Cream Sauce

Why You’ll Love This Recipe

  • The creamy Parmesan sauce enhances the salmon’s natural richness with a luscious, savory depth of flavor.
  • It’s a quick and easy recipe, perfect for a weeknight dinner yet fancy enough for special occasions.
  • The combination of sun-dried tomatoes, spinach, and garlic adds a delicious Tuscan-inspired touch.
  • This dish pairs well with a variety of sides like pasta, rice, or vegetables.
  • It’s a one-pan recipe, which means minimal cleanup and maximum convenience.

Ingredients

(Here's a tip: Check out the full list of ingredients and measurements in the recipe card below.)

  • Salmon fillets
  • Olive oil
  • Butter
  • Garlic, minced
  • Sun-dried tomatoes, chopped
  • Fresh spinach
  • Heavy cream
  • Chicken broth
  • Grated Parmesan cheese
  • Italian seasoning
  • Red pepper flakes (optional, for heat)
  • Salt and pepper
  • Fresh parsley, for garnish

Directions

  1. Heat olive oil in a large skillet over medium-high heat. Season the salmon fillets with salt and pepper, then sear them skin-side down for 4-5 minutes until crispy. Flip and cook for another 3-4 minutes. Remove from the skillet and set aside.
  2. In the same skillet, melt butter and sauté minced garlic until fragrant. Add sun-dried tomatoes and cook for another minute.
  3. Pour in chicken broth and let it simmer for a couple of minutes to deglaze the pan.
  4. Reduce the heat and add heavy cream, Parmesan cheese, Italian seasoning, and red pepper flakes. Stir until the cheese is fully melted and the sauce thickens slightly.
  5. Toss in the fresh spinach and cook until wilted.
  6. Return the salmon fillets to the skillet and spoon the sauce over them. Let everything simmer for 2-3 minutes to allow the flavors to meld.
  7. Garnish with fresh parsley and serve immediately.

Servings and Timing

  • Servings: 4
  • Prep Time: 10 minutes
  • Cook Time: 15 minutes
  • Total Time: 25 minutes

Variations

  • Dairy-Free Option: Use coconut milk instead of heavy cream and nutritional yeast instead of Parmesan.
  • Keto-Friendly: Ensure all ingredients are low-carb and serve with roasted vegetables or zucchini noodles.
  • Spicier Version: Increase the red pepper flakes or add a pinch of cayenne.
  • Herb-Infused: Add fresh basil or thyme for an extra layer of flavor.
  • Protein Swap: Try this sauce with chicken or shrimp instead of salmon.

Storage/Reheating

  • Refrigerate: Store leftovers in an airtight container for up to 3 days.
  • Reheat: Warm on the stovetop over low heat, adding a splash of chicken broth or cream to loosen the sauce.
  • Freezing: While the salmon can be frozen, the cream sauce may separate upon thawing. If freezing, store the salmon separately and make fresh sauce when reheating.

FAQs

How do I know when the salmon is fully cooked?

The salmon should reach an internal temperature of 145°F (63°C) and flake easily with a fork.

Can I use frozen salmon?

Yes, just be sure to thaw it completely and pat it dry before cooking to ensure a nice sear.

What can I serve with Tuscan salmon?

It pairs well with pasta, mashed potatoes, rice, or a side of roasted vegetables.

Can I make this dish ahead of time?

This dish is best served fresh, but you can prepare the sauce in advance and reheat it when ready to serve.

Can I use milk instead of heavy cream?

Milk will make the sauce thinner and less rich. If using milk, add a cornstarch slurry to help thicken it.

Conclusion

Tuscan Salmon with Parmesan Cream Sauce is a restaurant-quality dish made easy at home. With a rich, creamy sauce and a blend of bold flavors, this recipe is perfect for an indulgent meal that comes together quickly. Whether for a special occasion or a cozy dinner, it’s a dish that’s sure to impress.

Print

clock clock iconcutlery cutlery iconflag flag iconfolder folder iconinstagram instagram iconpinterest pinterest iconfacebook facebook iconprint print iconsquares squares iconheart heart iconheart solid heart solid icon
Tuscan Salmon with Parmesan Cream Sauce

Tuscan Salmon with Parmesan Cream Sauce

5 Stars 4 Stars 3 Stars 2 Stars 1 Star No reviews
  • Author: Sue
  • Prep Time: 10 minutes
  • Cook Time: 15 minutes
  • Total Time: 25 minutes
  • Yield: 4 servings
  • Category: Dinner, Main Course
  • Method: Stovetop
  • Cuisine: Italian, Tuscan
  • Diet: Low Calorie
Print Recipe
Pin Recipe

Description

This Tuscan Salmon with Parmesan Cream Sauce is a rich and flavorful dish featuring perfectly seared salmon fillets smothered in a creamy, garlicky Parmesan sauce with sun-dried tomatoes and spinach. Ready in under 30 minutes, it's a quick yet elegant meal perfect for weeknight dinners or special occasions.


Ingredients

  • 4 salmon fillets
  • 2 tbsp olive oil
  • 2 tbsp butter
  • 3 cloves garlic, minced
  • ⅓ cup sun-dried tomatoes, chopped
  • 2 cups fresh spinach
  • 1 cup heavy cream
  • ½ cup chicken broth
  • ½ cup grated Parmesan cheese
  • 1 tsp Italian seasoning
  • ½ tsp red pepper flakes (optional)
  • Salt and pepper, to taste
  • Fresh parsley, for garnish

Instructions

  1. Heat olive oil in a large skillet over medium-high heat. Season the salmon fillets with salt and pepper, then sear them skin-side down for 4-5 minutes until crispy. Flip and cook for another 3-4 minutes. Remove from the skillet and set aside.
  2. In the same skillet, melt butter and sauté minced garlic until fragrant. Add sun-dried tomatoes and cook for another minute.
  3. Pour in chicken broth and let it simmer for a couple of minutes to deglaze the pan.
  4. Reduce the heat and add heavy cream, Parmesan cheese, Italian seasoning, and red pepper flakes. Stir until the cheese is fully melted and the sauce thickens slightly.
  5. Toss in the fresh spinach and cook until wilted.
  6. Return the salmon fillets to the skillet and spoon the sauce over them. Let everything simmer for 2-3 minutes to allow the flavors to meld.
  7. Garnish with fresh parsley and serve immediately.

Notes

  • For a dairy-free version, substitute coconut milk for heavy cream and nutritional yeast for Parmesan.
  • Adjust spice levels by increasing or decreasing red pepper flakes.
  • Serve with pasta, rice, mashed potatoes, or roasted vegetables.

Have you made this recipe? I'd love to see it!

Click here to Follow me on Pinterest

Easy Blueberry Cinnamon Rolls – Perfect for Brunch

March 20, 2025 by Sue Leave a Comment

These Blueberry Cinnamon Rolls are soft, fluffy, and bursting with juicy blueberries and warm cinnamon flavor. They are the perfect breakfast or dessert treat, topped with a luscious glaze that adds the right amount of sweetness. Whether served fresh out of the oven or reheated the next day, they remain irresistibly delicious.

Why I Love This Recipe

  • The combination of blueberries and cinnamon creates a unique, comforting flavor.
  • The dough turns out incredibly soft and pillowy.
  • The glaze enhances the flavor without being too sweet.
  • It’s a great make-ahead recipe for special occasions.
  • It’s easy to customize with different fillings and toppings.

Ingredients

(Here's a tip: Check out the full list of ingredients and measurements in the recipe card below.)

  • All-purpose flour
  • Active dry yeast
  • Milk
  • Granulated sugar
  • Butter
  • Egg
  • Salt
  • Blueberries (fresh or frozen)
  • Brown sugar
  • Ground cinnamon
  • Cornstarch
  • Powdered sugar
  • Vanilla extract
  • Cream or milk (for the glaze)

Directions

  1. Prepare the Dough: Warm the milk and mix it with yeast and a teaspoon of sugar. Let it sit until foamy. Combine flour, sugar, salt, butter, and egg, then knead until a soft dough forms. Let it rise until doubled.
  2. Make the Filling: Mix blueberries with brown sugar, cinnamon, and cornstarch.
  3. Roll and Fill: Roll out the dough into a rectangle, spread the blueberry filling evenly, and roll it up tightly.
  4. Slice and Rise: Cut into even rolls and place them in a greased baking dish. Let them rise again until puffy.
  5. Bake: Bake at 375°F (190°C) for about 25 minutes until golden brown.
  6. Glaze: Mix powdered sugar, vanilla extract, and cream/milk until smooth. Drizzle over warm rolls and serve.

Servings and Timing

  • Servings: Makes about 12 rolls
  • Prep Time: 30 minutes
  • Rise Time: 1 hour
  • Bake Time: 25 minutes
  • Total Time: 1 hour 55 minutes

Variations

  • Lemon Blueberry Rolls: Add lemon zest to the filling and glaze for a citrusy twist.
  • Cream Cheese Glaze: Swap the vanilla glaze for a rich cream cheese frosting.
  • Nutty Crunch: Sprinkle chopped pecans or walnuts over the filling for added texture.
  • Gluten-Free: Use a gluten-free flour blend for the dough.
  • Extra Fruity: Mix in raspberries or blackberries with the blueberries for a berry medley.

Storage/Reheating

  • Storage: Keep leftover rolls in an airtight container at room temperature for up to 2 days or in the refrigerator for up to 5 days.
  • Reheating: Warm in the microwave for 20-30 seconds or in the oven at 300°F (150°C) for 5-7 minutes.
  • Freezing: Freeze unglazed rolls for up to 2 months. Thaw overnight and reheat before adding the glaze.

FAQs

How do I prevent the filling from leaking out?

To prevent leakage, leave a small border when spreading the filling and roll the dough tightly.

Can I use frozen blueberries?

Yes, but thaw them first and drain excess liquid to prevent sogginess.

Can I make these cinnamon rolls ahead of time?

Yes, assemble them the night before and refrigerate overnight. Let them sit at room temperature for 30 minutes before baking.

Why didn’t my dough rise?

Check that the yeast is fresh and that the milk wasn’t too hot or cold. The dough should be placed in a warm environment to rise properly.

Can I use a different glaze?

Absolutely! Try a maple glaze, cream cheese frosting, or even a simple honey drizzle.

Conclusion

These Blueberry Cinnamon Rolls are a delightful twist on the classic cinnamon roll, bringing a fruity burst of flavor in every bite. Whether enjoyed for breakfast, brunch, or dessert, they are a guaranteed crowd-pleaser. Give them a try and enjoy the perfect balance of sweet, spiced, and fluffy goodness!

Print

clock clock iconcutlery cutlery iconflag flag iconfolder folder iconinstagram instagram iconpinterest pinterest iconfacebook facebook iconprint print iconsquares squares iconheart heart iconheart solid heart solid icon
Easy Blueberry Cinnamon Rolls – Perfect for Brunch

Easy Blueberry Cinnamon Rolls – Perfect for Brunch

5 Stars 4 Stars 3 Stars 2 Stars 1 Star No reviews
  • Author: Sue
  • Prep Time: 30 minutes
  • Cook Time: 25 minutes
  • Total Time: 1 hour 55 minutes
  • Yield: 12 rolls
  • Category: Breakfast, Dessert
  • Method: Baking
  • Cuisine: American
  • Diet: Vegetarian
Print Recipe
Pin Recipe

Description

These Blueberry Cinnamon Rolls are soft, fluffy, and bursting with juicy blueberries and warm cinnamon flavor. Topped with a luscious glaze, they make the perfect breakfast or dessert treat. Whether fresh out of the oven or reheated the next day, they remain irresistibly delicious. Try this easy, homemade recipe for a special occasion or weekend brunch!


Ingredients

  • 3 ½ cups all-purpose flour
  • 2 ¼ tsp active dry yeast
  • ¾ cup warm milk
  • ¼ cup granulated sugar
  • ¼ cup melted butter
  • 1 large egg
  • ½ tsp salt
  • 1 cup blueberries (fresh or frozen)
  • ½ cup brown sugar
  • 1 tbsp ground cinnamon
  • 1 tbsp cornstarch
  • 1 cup powdered sugar
  • 1 tsp vanilla extract
  • 2 tbsp cream or milk (for the glaze)

Instructions

  1. Prepare the Dough: Warm the milk and mix it with yeast and a teaspoon of sugar. Let sit until foamy. In a large bowl, combine flour, sugar, salt, melted butter, and egg. Knead until a soft dough forms. Let it rise in a warm place until doubled in size (about 1 hour).
  2. Make the Filling: In a bowl, mix blueberries, brown sugar, cinnamon, and cornstarch.
  3. Roll and Fill: Roll out the dough into a 12x18-inch rectangle. Evenly spread the blueberry filling over the dough, leaving a small border. Roll it up tightly from the long side.
  4. Slice and Rise: Cut into 12 even rolls and place them in a greased baking dish. Cover and let rise until puffy (about 30 minutes).
  5. Bake: Preheat oven to 375°F (190°C). Bake for 25 minutes or until golden brown.
  6. Glaze: Mix powdered sugar, vanilla extract, and cream/milk until smooth. Drizzle over warm rolls before serving.

Notes

  • For best results, use fresh blueberries or drain frozen ones before using.
  • To prevent filling from leaking, roll the dough tightly and leave a border.
  • Store in an airtight container at room temperature for up to 2 days or in the fridge for 5 days.

Have you made this recipe? I'd love to see it!

Click here to Follow me on Pinterest

Easy Fudgy Chewy Brookies – Brownie Cookie Bars

March 20, 2025 by Sue Leave a Comment

These fudgy, chewy brookies are the ultimate combination of brownies and cookies, bringing together the best of both worlds. With a rich, chocolatey brownie layer and a chewy cookie topping, these brookies are irresistible for any dessert lover.

Why I Love This Recipe

I love how these brookies deliver the best textures in every bite: a fudgy, chocolate-loaded brownie base and a soft, chewy cookie top. They are perfect for satisfying both brownie and cookie cravings at once. Plus, they are easy to make and great for sharing at parties, bake sales, or as an indulgent treat.

Ingredients

(Here's a tip: Check out the full list of ingredients and measurements in the recipe card below.)

For the Brownie Layer:

  • Unsalted butter, melted
  • Granulated sugar
  • Brown sugar
  • Eggs
  • Vanilla extract
  • Cocoa powder
  • All-purpose flour
  • Baking powder
  • Salt
  • Chocolate chips

For the Cookie Layer:

  • Unsalted butter, softened
  • Brown sugar
  • Granulated sugar
  • Egg
  • Vanilla extract
  • All-purpose flour
  • Baking soda
  • Salt
  • Chocolate chips

Directions

  1. Preheat the oven to 350°F (175°C). Line a baking pan with parchment paper.
  2. In a bowl, mix melted butter, granulated sugar, and brown sugar for the brownie layer. Add eggs and vanilla extract, then mix until combined.
  3. Sift in cocoa powder, flour, baking powder, and salt. Fold in chocolate chips. Spread the brownie batter evenly in the prepared pan.
  4. In another bowl, cream softened butter with brown sugar and granulated sugar for the cookie layer. Add the egg and vanilla extract, mixing until smooth.
  5. Sift in flour, baking soda, and salt. Stir in chocolate chips.
  6. Drop spoonfuls of cookie dough over the brownie layer and gently spread it out.
  7. Bake for 25-30 minutes, or until the cookie layer is golden and a toothpick inserted comes out with a few moist crumbs.
  8. Let cool completely before slicing into squares.

Servings and Timing

  • Servings: 12-16 bars
  • Prep time: 15 minutes
  • Cook time: 25-30 minutes
  • Total time: 40-45 minutes

Variations

  • Nutty Brookies: Add chopped walnuts or pecans to the brownie layer for an extra crunch.
  • Peanut Butter Brookies: Swirl in some peanut butter into the brownie batter before adding the cookie dough.
  • Double Chocolate: Use dark chocolate chips in the brownie layer and white chocolate chips in the cookie layer.
  • Gluten-Free Version: Substitute all-purpose flour with a gluten-free baking blend.

Storage/Reheating

  • Store brookies in an airtight container at room temperature for up to 3 days.
  • For longer storage, keep them in the fridge for up to a week.
  • To freeze, wrap individual brookie squares in plastic wrap and store them in a freezer-safe bag for up to 3 months.
  • Reheat in the microwave for 10-15 seconds for a warm, gooey texture.

FAQs

How do I know when the brookies are done baking?

I check by inserting a toothpick into the center. It should come out with a few moist crumbs but not raw batter.

Can I use store-bought cookie dough?

Yes, store-bought cookie dough can work in a pinch, but homemade gives the best texture and flavor.

What type of chocolate chips should I use?

I prefer semi-sweet chocolate chips, but dark or milk chocolate chips work just as well.

Can I make these brookies in a muffin tin?

Yes! Simply divide the brownie batter and cookie dough into greased muffin tins and bake for about 15-18 minutes.

How do I get clean slices?

I let the brookies cool completely before cutting and use a sharp knife, wiping it clean between cuts.

Conclusion

These fudgy, chewy brookies are the perfect treat when I can’t decide between brownies and cookies. They have the best of both worlds, making them a crowd-pleaser for any occasion. Whether fresh out of the oven or reheated for a warm dessert, these brookies never disappoint!


Print

clock clock iconcutlery cutlery iconflag flag iconfolder folder iconinstagram instagram iconpinterest pinterest iconfacebook facebook iconprint print iconsquares squares iconheart heart iconheart solid heart solid icon
Easy Fudgy Chewy Brookies – Brownie Cookie Bars

Easy Fudgy Chewy Brookies – Brownie Cookie Bars

5 Stars 4 Stars 3 Stars 2 Stars 1 Star No reviews
  • Author: Sue
  • Prep Time: 15 minutes
  • Cook Time: 25-30 minutes
  • Total Time: 40-45 minutes
  • Yield: 12-16 bars
  • Category: Dessert
  • Method: Baking
  • Cuisine: American
  • Diet: Vegetarian
Print Recipe
Pin Recipe

Description

These fudgy, chewy brookies are the ultimate combination of brownies and cookies, bringing together the best of both worlds. With a rich, chocolatey brownie layer and a chewy cookie topping, these brookies are irresistible for any dessert lover.


Ingredients

For the Brownie Layer:

  • ½ cup unsalted butter, melted
  • ¾ cup granulated sugar
  • ¼ cup brown sugar
  • 2 eggs
  • 1 teaspoon vanilla extract
  • ⅓ cup cocoa powder
  • ¾ cup all-purpose flour
  • ½ teaspoon baking powder
  • ¼ teaspoon salt
  • ½ cup chocolate chips

For the Cookie Layer:

  • ½ cup unsalted butter, softened
  • ½ cup brown sugar
  • ¼ cup granulated sugar
  • 1 egg
  • 1 teaspoon vanilla extract
  • 1 cup all-purpose flour
  • ½ teaspoon baking soda
  • ¼ teaspoon salt
  • ¾ cup chocolate chips

Instructions

  1. Preheat the oven to 350°F (175°C). Line a baking pan with parchment paper.
  2. Prepare the brownie layer: In a bowl, mix melted butter, granulated sugar, and brown sugar. Add eggs and vanilla extract, mixing until combined.
  3. Sift in cocoa powder, flour, baking powder, and salt. Fold in chocolate chips. Spread the brownie batter evenly in the prepared pan.
  4. Prepare the cookie layer: In another bowl, cream softened butter with brown sugar and granulated sugar. Add the egg and vanilla extract, mixing until smooth.
  5. Sift in flour, baking soda, and salt. Stir in chocolate chips.
  6. Drop spoonfuls of cookie dough over the brownie layer and gently spread it out.
  7. Bake for 25-30 minutes, or until the cookie layer is golden and a toothpick inserted comes out with a few moist crumbs.
  8. Let cool completely before slicing into squares.

Notes

  • Let brookies cool completely before cutting for clean slices.
  • Use room-temperature ingredients for a smoother batter.
  • For extra fudginess, slightly underbake the brookies.
  • Pair with a scoop of vanilla ice cream for an extra treat.

Have you made this recipe? I'd love to see it!

Click here to Follow me on Pinterest


Chewy and Moist Red Velvet Brownies

March 20, 2025 by Sue Leave a Comment

Red velvet brownies combine the rich, chocolatey goodness of classic brownies with the slight tang and vibrant color of red velvet. These brownies are irresistibly fudgy, with a crackly top and a deep cocoa flavor that pairs beautifully with a hint of vanilla. Whether for a special occasion or just a sweet craving, these brownies are sure to impress.

Chewy and Moist Red Velvet Brownies

Why I Love This Recipe

These red velvet brownies have the perfect balance of chewiness and fudginess, making every bite a delight. I love how they have a subtle tang from the buttermilk or vinegar, which enhances the chocolate flavor. They are easy to make in just one bowl, and the deep red color adds an elegant touch to any dessert table. Plus, they pair perfectly with cream cheese frosting if I want to take them to the next level.

Ingredients

(Here's a tip: Check out the full list of ingredients and measurements in the recipe card below.)

  • Unsalted butter
  • Granulated sugar
  • Eggs
  • Vanilla extract
  • Red food coloring
  • Unsweetened cocoa powder
  • All-purpose flour
  • Baking powder
  • Salt
  • Buttermilk or white vinegar

Directions

  1. Preheat the oven to 350°F (175°C) and line a baking pan with parchment paper.
  2. Melt the butter in a saucepan or microwave, then mix it with sugar in a large bowl.
  3. Add eggs one at a time, whisking well after each addition. Stir in vanilla extract and red food coloring.
  4. Sift in cocoa powder, flour, baking powder, and salt, then gently fold until just combined.
  5. Stir in buttermilk or vinegar to enhance the red velvet flavor.
  6. Pour the batter into the prepared pan and spread evenly.
  7. Bake for about 25-30 minutes or until a toothpick inserted into the center comes out with a few moist crumbs.
  8. Let the brownies cool completely before slicing.

Servings and Timing

  • Servings: 12 brownies
  • Prep Time: 10 minutes
  • Cook Time: 25-30 minutes
  • Total Time: 40 minutes

Variations

  • Cream Cheese Swirl: Swirl in a cream cheese mixture before baking for a tangy contrast.
  • Chocolate Chips: Fold in some chocolate chips for extra richness.
  • Nutty Crunch: Add chopped pecans or walnuts for a bit of crunch.
  • Gluten-Free: Use a 1:1 gluten-free flour blend.
  • Extra Fudgy: Slightly underbake for an even fudgier texture.

Storage/Reheating

  • Room Temperature: Store in an airtight container for up to 3 days.
  • Refrigerator: Keep in a sealed container for up to a week.
  • Freezer: Freeze individual slices wrapped in plastic wrap for up to 3 months.
  • Reheating: Microwave for 10-15 seconds for a warm, gooey treat.

FAQs

How do I get the perfect fudgy texture?

Using melted butter, the right ratio of eggs, and slightly underbaking will ensure a fudgy texture.

Can I use natural cocoa instead of Dutch-processed?

Yes, but Dutch-processed cocoa gives a smoother, less acidic flavor, which works well for red velvet.

Do I need to use buttermilk or vinegar?

Yes, it helps bring out the signature red velvet tang and react with the baking powder for a better texture.

Can I make these without food coloring?

Absolutely! The red color is optional, but the taste remains just as delicious.

What frosting goes best with red velvet brownies?

A cream cheese frosting pairs beautifully, but a simple dusting of powdered sugar works too.

Conclusion

These fudgy red velvet brownies are a delicious twist on classic brownies with their deep cocoa flavor and slight tang. They are easy to make and perfect for any occasion. Whether plain or topped with cream cheese frosting, they always turn out irresistible. Try them today and enjoy a batch of rich, chewy goodness!

Print

clock clock iconcutlery cutlery iconflag flag iconfolder folder iconinstagram instagram iconpinterest pinterest iconfacebook facebook iconprint print iconsquares squares iconheart heart iconheart solid heart solid icon
Chewy and Moist Red Velvet Brownies

Chewy and Moist Red Velvet Brownies

5 Stars 4 Stars 3 Stars 2 Stars 1 Star No reviews
  • Author: Sue
  • Prep Time: 10 minutes
  • Cook Time: 25-30 minutes
  • Total Time: 40 minutes
  • Yield: 12 brownies
  • Category: Dessert
  • Method: Baking
  • Cuisine: American
  • Diet: Vegetarian
Print Recipe
Pin Recipe

Description

Indulge in the best fudgy red velvet brownies! These rich, chewy brownies have a deep cocoa flavor with a signature red velvet tang. Easy to make in one bowl, they feature a crackly top and a moist, fudgy center. Perfect for any occasion, these brownies pair beautifully with cream cheese frosting. Try them today!


Ingredients

  • ½ cup (1 stick) unsalted butter, melted
  • 1 cup granulated sugar
  • 2 large eggs
  • 1 teaspoon vanilla extract
  • 1 tablespoon red food coloring
  • ¼ cup unsweetened cocoa powder
  • ¾ cup all-purpose flour
  • ½ teaspoon baking powder
  • ¼ teaspoon salt
  • 1 teaspoon buttermilk or white vinegar

Instructions

  1. Preheat the oven to 350°F (175°C). Line an 8x8-inch baking pan with parchment paper.
  2. In a large bowl, mix melted butter and sugar until smooth.
  3. Add eggs one at a time, whisking well after each. Stir in vanilla and red food coloring.
  4. Sift in cocoa powder, flour, baking powder, and salt. Gently fold until just combined.
  5. Stir in buttermilk or vinegar to enhance the red velvet flavor.
  6. Pour batter into the prepared pan and spread evenly.
  7. Bake for 25-30 minutes, or until a toothpick inserted in the center comes out with a few moist crumbs.
  8. Let cool completely before slicing and serving.

Notes

  • Slightly underbake for extra fudgy brownies.
  • Use Dutch-processed cocoa for a smoother flavor.
  • The red food coloring is optional and doesn’t affect taste.

Have you made this recipe? I'd love to see it!

Click here to Follow me on Pinterest

Mexican Street Corn Chicken Bowl – Quick & Delicious

March 19, 2025 by Sue Leave a Comment

Mexican Street Corn Chicken Bowl – Quick & Delicious

This street corn chicken rice bowl is a vibrant and flavorful dish inspired by Mexican street corn. Juicy, seasoned chicken, creamy corn, and zesty toppings come together over a bed of rice for an easy, satisfying meal.

Mexican Street Corn Chicken Bowl – Quick & Delicious

Why I Love This Recipe

  • It’s packed with bold flavors from smoky spices, lime, and creamy cotija cheese.
  • Quick and easy to prepare, making it a great weeknight meal.
  • The balance of protein, carbs, and veggies makes it a well-rounded dish.
  • Customizable with different proteins, toppings, or spice levels.
  • Leftovers store well, making it ideal for meal prep.

Ingredients

(Here's a tip: Check out the full list of ingredients and measurements in the recipe card below.)

  • Chicken breast or thighs
  • Cooked rice
  • Corn (grilled, canned, or frozen)
  • Mayonnaise
  • Sour cream
  • Lime juice
  • Chili powder
  • Garlic powder
  • Paprika
  • Cotija cheese (or feta as a substitute)
  • Fresh cilantro
  • Green onions
  • Butter
  • Salt and pepper

Directions

  1. Cook the Chicken: Season the chicken with chili powder, garlic powder, paprika, salt, and pepper. Cook in a skillet over medium heat until golden brown and cooked through. Let rest before slicing.
  2. Prepare the Corn: In the same skillet, melt butter and add the corn. Sauté until slightly charred. Stir in mayonnaise, sour cream, lime juice, and a sprinkle of chili powder.
  3. Assemble the Bowls: Place a scoop of rice in each bowl. Add sliced chicken and creamy street corn mixture on top.
  4. Garnish: Sprinkle with cotija cheese, fresh cilantro, and green onions. Add extra lime juice for a zesty kick.

Servings and Timing

  • Servings: 4
  • Prep Time: 10 minutes
  • Cook Time: 20 minutes
  • Total Time: 30 minutes

Variations

  • Protein Swap: Try grilled shrimp, steak, or tofu for a different twist.
  • Spice Level: Add cayenne pepper or hot sauce for more heat.
  • Low-Carb Option: Serve over cauliflower rice or a bed of lettuce.
  • Cheese Alternatives: Use feta or Parmesan if cotija isn't available.
  • Extra Toppings: Sliced avocado, black beans, or a drizzle of hot sauce can enhance the flavor.

Storage/Reheating

  • Refrigerate: Store in an airtight container for up to 3 days.
  • Freeze: Freeze the chicken and corn mixture separately for up to 2 months.
  • Reheat: Warm in a skillet over medium heat or microwave in 30-second intervals until heated through.

FAQs

Can I use rotisserie chicken?

Yes! Shredded rotisserie chicken is a great time-saving option.

What type of rice works best?

I prefer jasmine or basmati rice, but brown rice or quinoa are great alternatives.

Can I make this dish ahead of time?

Absolutely! Cook everything in advance and store separately. Assemble just before serving.

Is there a dairy-free option?

Yes! Swap the sour cream and mayonnaise for dairy-free alternatives and skip the cheese.

How can I make it even more flavorful?

Marinate the chicken in lime juice and spices before cooking, and add extra fresh cilantro and lime zest for a punch of flavor.

Conclusion

This street corn chicken rice bowl is a perfect blend of bold flavors and hearty ingredients. Whether I’m making it for a quick dinner or meal prep, it’s always a hit. Try it and enjoy a delicious, easy-to-make meal!

Print

clock clock iconcutlery cutlery iconflag flag iconfolder folder iconinstagram instagram iconpinterest pinterest iconfacebook facebook iconprint print iconsquares squares iconheart heart iconheart solid heart solid icon
Mexican Street Corn Chicken Bowl – Quick & Delicious

Mexican Street Corn Chicken Bowl – Quick & Delicious

5 Stars 4 Stars 3 Stars 2 Stars 1 Star No reviews
  • Author: Sue
  • Prep Time: 10 minutes
  • Cook Time: 20 minutes
  • Total Time: 30 minutes
  • Yield: 4 servings
  • Category: Dinner, Main Course
  • Method: Stovetop
  • Cuisine: Mexican-Inspired
  • Diet: Gluten Free
Print Recipe
Pin Recipe

Description

This Street Corn Chicken Rice Bowl is a flavorful, easy-to-make meal inspired by Mexican street corn. Juicy, seasoned chicken, creamy corn, and zesty toppings come together over a bed of rice for a satisfying and well-balanced dish. Perfect for meal prep or a quick weeknight dinner, this recipe is packed with smoky spices, lime, and cotija cheese for an irresistible combination!


Ingredients

  • 1 lb chicken breast or thighs
  • 2 cups cooked rice (jasmine, basmati, or brown rice)
  • 1 ½ cups corn (grilled, canned, or frozen)
  • 2 tbsp mayonnaise
  • 2 tbsp sour cream
  • 1 tbsp lime juice
  • 1 tsp chili powder
  • ½ tsp garlic powder
  • ½ tsp paprika
  • ½ tsp salt (adjust to taste)
  • ¼ tsp black pepper
  • 1 tbsp butter
  • ¼ cup cotija cheese (or feta as a substitute)
  • 2 tbsp fresh cilantro, chopped
  • 2 green onions, sliced

Instructions

  1. Cook the Chicken: Season chicken with chili powder, garlic powder, paprika, salt, and pepper. Cook in a skillet over medium heat until golden brown and fully cooked. Let rest before slicing.
  2. Prepare the Corn: In the same skillet, melt butter and add the corn. Sauté until slightly charred. Stir in mayonnaise, sour cream, lime juice, and a sprinkle of chili powder.
  3. Assemble the Bowls: Place a scoop of rice in each bowl. Add sliced chicken and the creamy street corn mixture on top.
  4. Garnish: Sprinkle with cotija cheese, fresh cilantro, and green onions. Add extra lime juice for a zesty kick.

Notes

  • Protein Swap: Try grilled shrimp, steak, or tofu for variety.
  • Spice Level: Add cayenne pepper or hot sauce for more heat.
  • Low-Carb Option: Serve over cauliflower rice or a bed of lettuce.
  • Cheese Alternatives: Use feta or Parmesan if cotija isn’t available.
  • Extra Toppings: Add sliced avocado, black beans, or a drizzle of hot sauce for more flavor.

Have you made this recipe? I'd love to see it!

Click here to Follow me on Pinterest


Korean Ground Beef Bowl – Easy 20-Minute Dinner

March 19, 2025 by Sue Leave a Comment

This Korean ground beef bowl is a simple yet flavorful dish that comes together in just 20 minutes. With perfectly seasoned beef, a touch of sweetness, and a hint of spice, it’s the perfect combination of savory and satisfying. Serve it over rice for an easy weeknight meal.

Korean Ground Beef Bowl – Easy 20-Minute Dinner

Why I Love This Recipe

  • It’s incredibly quick and easy, making it perfect for busy weeknights.
  • The sweet and savory flavors blend beautifully with the garlic, soy sauce, and sesame oil.
  • It’s budget-friendly and requires minimal ingredients.
  • The recipe is versatile, allowing for substitutions and variations.
  • It stores well, making it great for meal prep.

Ingredients

(Here's a tip: Check out the full list of ingredients and measurements in the recipe card below.)

  • Ground beef
  • Soy sauce
  • Brown sugar
  • Sesame oil
  • Garlic
  • Ginger
  • Red pepper flakes
  • Green onions
  • Cooked rice
  • Sesame seeds (optional for garnish)

Directions

  1. In a large skillet over medium-high heat, cook the ground beef until browned, breaking it apart as it cooks. Drain any excess fat.
  2. Add garlic and ginger to the beef, stirring until fragrant, about 1 minute.
  3. In a small bowl, mix soy sauce, brown sugar, sesame oil, and red pepper flakes. Pour the sauce over the beef and stir well.
  4. Let the beef simmer for a few minutes to absorb the flavors.
  5. Serve over cooked rice and garnish with green onions and sesame seeds.

Servings and Timing

  • Servings: 4
  • Prep Time: 5 minutes
  • Cook Time: 15 minutes
  • Total Time: 20 minutes

Variations

  • Protein Swap: Use ground turkey, chicken, or even tofu for a lighter option.
  • Low-Carb Option: Serve over cauliflower rice instead of white rice.
  • Extra Veggies: Add bell peppers, shredded carrots, or zucchini for more texture and nutrients.
  • Spicy Kick: Increase red pepper flakes or drizzle with sriracha for extra heat.
  • Gluten-Free: Use tamari or coconut aminos instead of soy sauce.

Storage/Reheating

  • Refrigerate: Store leftovers in an airtight container for up to 4 days.
  • Freeze: Freeze the beef mixture for up to 3 months. Thaw overnight in the fridge before reheating.
  • Reheat: Warm in a skillet over medium heat or microwave in 30-second intervals until heated through.

FAQs

How can I make this dish healthier?

I recommend using lean ground beef or swapping it for ground turkey. Reducing the sugar and serving it over cauliflower rice also makes it healthier.

Can I make this dish ahead of time?

Yes! Cook the beef mixture in advance and store it in the fridge. When ready to eat, simply reheat and serve over fresh rice.

What can I serve with this Korean ground beef bowl?

This dish pairs well with steamed vegetables, kimchi, or a simple side salad.

Can I double the recipe?

Absolutely! Just double the ingredients and cook in a larger skillet to ensure even cooking.

What if I don’t have sesame oil?

You can use olive oil, but sesame oil adds an authentic depth of flavor that’s hard to replicate.

Conclusion

This Korean ground beef bowl is a lifesaver on busy days, offering a delicious, quick, and satisfying meal. Whether I make it for meal prep or a last-minute dinner, it’s always a hit. Try it today and enjoy a homemade take on a Korean classic!

Print

clock clock iconcutlery cutlery iconflag flag iconfolder folder iconinstagram instagram iconpinterest pinterest iconfacebook facebook iconprint print iconsquares squares iconheart heart iconheart solid heart solid icon
Korean Ground Beef Bowl – Easy 20-Minute Dinner

Korean Ground Beef Bowl – Easy 20-Minute Dinner

5 Stars 4 Stars 3 Stars 2 Stars 1 Star No reviews
  • Author: Sue
  • Prep Time: 5 minutes
  • Cook Time: 15 minutes
  • Total Time: 20 minutes
  • Yield: 4 servings
  • Category: Dinner, Main Course
  • Method: Stovetop
  • Cuisine: Korean-Inspired
Print Recipe
Pin Recipe

Description

This Korean Ground Beef Bowl is a quick and easy 20-minute meal packed with savory, slightly sweet flavors. Made with ground beef, garlic, ginger, and a rich soy-based sauce, this dish is served over fluffy rice for the ultimate comfort food. Perfect for busy weeknights, it's budget-friendly, customizable, and absolutely delicious!


Ingredients

  • 1 lb ground beef
  • ¼ cup soy sauce
  • 2 tbsp brown sugar
  • 3 cloves garlic, minced
  • 1 tsp fresh ginger, grated (or ½ tsp ground ginger)
  • 1 tbsp sesame oil
  • ¼ tsp red pepper flakes (adjust to taste)
  • 3 green onions, sliced
  • 2 cups cooked rice
  • 1 tbsp sesame seeds (optional, for garnish)

Instructions

  • Heat a large skillet over medium-high heat and add the ground beef. Cook until browned, breaking it apart with a spoon.
  • Drain excess grease and add garlic and ginger. Stir and cook for about a minute until fragrant.
  • In a small bowl, whisk together soy sauce, brown sugar, sesame oil, and red pepper flakes.
  • Pour the sauce over the beef and stir well, allowing it to simmer for a few minutes.
  • Remove from heat and mix in sliced green onions.
  • Serve the beef over cooked rice and garnish with sesame seeds if desired.

Notes

  • For a leaner option, use ground turkey or chicken.
  • Add vegetables like bell peppers, carrots, or spinach for extra nutrition.
  • Make it spicier by adding more red pepper flakes or a drizzle of sriracha.
  • Low-carb version: Swap white rice for cauliflower rice.

Have you made this recipe? I'd love to see it!

Click here to Follow me on Pinterest

Peach Cobbler Cinnamon Rolls

March 14, 2025 by admin Leave a Comment

These peach cobbler cinnamon rolls bring a delightful twist to a classic favorite. The soft, fluffy rolls are filled with a juicy peach jam and topped with a crumbly, buttery streusel—just like a peach cobbler, but in a cinnamon roll form. Perfect for summer, these rolls are best served warm with a drizzle of cream cheese icing and make a great breakfast or dessert.

Why You’ll Love This Recipe

I love these peach cobbler cinnamon rolls because they capture the essence of a traditional peach cobbler, combining juicy peaches, cinnamon, and brown sugar in a soft, fluffy cinnamon roll. The secret to their softness is a special dough technique called tangzhong, which ensures each roll is melt-in-your-mouth tender. They’re a perfect balance of sweet and fruity with a crunchy streusel topping, making them a showstopper for any occasion.

Ingredients

  • 1 tablespoon all-purpose flour
  • ¼ cup water
  • 3 ½ cups all-purpose flour
  • ½ cup granulated sugar
  • 1 packet instant yeast
  • 1 teaspoon salt
  • 1 large egg
  • ½ cup whole milk
  • ½ cup unsalted butter (softened)
  • 2 teaspoons vanilla extract
  • ½ cup light brown sugar
  • 1 tablespoon ground cinnamon
  • 2 cups fresh peaches (peeled, chopped)
  • ¼ cup sugar
  • 1 tablespoon lemon juice
  • 1 tablespoon cornstarch
  • ½ cup unsalted butter (melted)
  • 1 cup all-purpose flour (for crumb topping)

(Tip: You'll find the full list of ingredients and measurements in the recipe card below.)

Directions

  1. Make the Tangzhong: In a small pot, combine the flour and water. Cook over medium-low heat, whisking constantly, until it thickens into a paste. Set aside.
  2. Prepare the Dough: In a stand mixer, combine flour, sugar, yeast, and salt. Add the egg, milk, tangzhong, and vanilla extract. Mix until a shaggy dough forms. Add butter one tablespoon at a time, kneading until smooth (about 10-11 minutes).
  3. First Rise: Shape the dough into a ball, place it in a greased bowl, and cover with plastic wrap. Let it rise in a warm place for about 1 hour or until doubled.
  4. Make the Peach Filling: In a saucepan, cook the peaches, sugar, and lemon juice over medium heat, mashing frequently. Stir in cornstarch slurry and cook for another minute. Set aside to cool.
  5. Roll and Assemble: Roll out the dough into an 18x15-inch rectangle. Spread a cinnamon sugar mixture over the dough, leaving a border. Add the peach filling, then roll up the dough and slice into 12 rolls.
  6. Second Rise: Place the rolls into a greased baking dish, cover, and let them rise for another hour.
  7. Prepare the Crumb Topping: Combine the flour, sugar, melted butter, and cinnamon. Sprinkle over the rolls before baking.
  8. Bake: Preheat the oven to 350°F (175°C). Bake the rolls for 30-35 minutes, or until golden brown.
  9. Glaze: Drizzle with cream cheese icing and serve warm.

Servings and Timing

This recipe yields 12 rolls. The total preparation time is approximately 3 hours, including rising times.

Variations

  • Use canned peaches: If fresh peaches aren't available, you can substitute canned peaches in syrup. Just drain and chop them before use.
  • Add nuts: You can sprinkle chopped pecans or walnuts over the topping for added crunch.
  • Frost with buttercream: If you want a sweeter topping, try frosting with buttercream instead of cream cheese icing.

Storage/Reheating

Store leftover peach cobbler cinnamon rolls in an airtight container at room temperature for up to 3 days. To reheat, microwave individual rolls for 15-20 seconds or warm them in the oven at 350°F for 5-7 minutes.
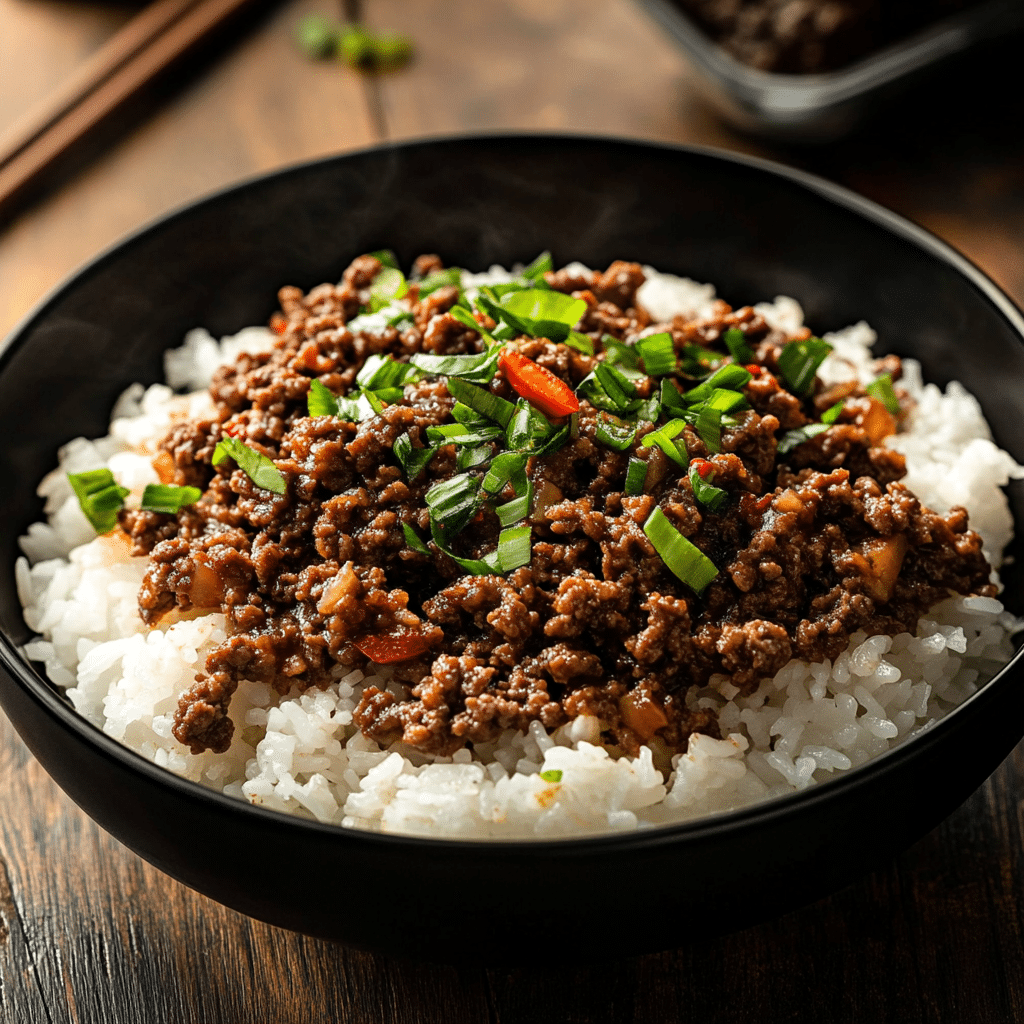
FAQs

Can I make these rolls ahead of time?

Yes, you can prepare the rolls up to the second rise, cover them tightly, and refrigerate overnight. In the morning, let them come to room temperature and rise before baking.

Can I freeze the rolls?

Yes, these rolls can be frozen before baking. After assembling and placing them in the baking dish, cover tightly and freeze. Bake from frozen, adding 5-10 extra minutes to the baking time.

What kind of peaches should I use?

Fresh, ripe peaches work best when they are in season. However, frozen peaches can also be used, especially when fresh ones are not available.

Can I substitute the tangzhong method?

While tangzhong helps make the dough extra soft, you can skip this step and proceed with a traditional cinnamon roll dough recipe if you prefer.

How do I make the cream cheese icing?

Simply beat 4 ounces of cream cheese with ½ cup powdered sugar, ¼ cup butter, and ½ teaspoon vanilla extract until smooth. Add a tablespoon of milk for a thinner consistency, if desired.

Conclusion

Peach cobbler cinnamon rolls are a perfect fusion of two beloved desserts. Whether I’m making them for breakfast or as a treat, I love how the peach filling and crumb topping make them feel indulgent yet comforting. They’re a delightful way to celebrate peach season, and they’ll definitely be a hit with anyone who tries them!

Print
clock clock iconcutlery cutlery iconflag flag iconfolder folder iconinstagram instagram iconpinterest pinterest iconfacebook facebook iconprint print iconsquares squares iconheart heart iconheart solid heart solid icon
Peach Cobbler Cinnamon Rolls

Peach Cobbler Cinnamon Rolls

5 Stars 4 Stars 3 Stars 2 Stars 1 Star No reviews
  • Author: admin
  • Prep Time: 1 hour 30 minutes
  • Cook Time: 30-35 minutes
  • Total Time: 2 hours
  • Yield: 12 cinnamon rolls
  • Category: Dessert
  • Method: Baking
  • Cuisine: American
  • Diet: Vegetarian
Print Recipe
Pin Recipe

Description

These Peach Cobbler Cinnamon Rolls combine the best of both worlds—juicy peaches and warm cinnamon rolls—with a streusel topping that makes them irresistible. Perfect for breakfast or dessert, they bring the flavor of a classic peach cobbler to a soft, fluffy cinnamon roll. Topped with a sweet cream cheese glaze, these rolls are sure to be a crowd-pleaser.


Ingredients

  • 1 tablespoon all-purpose flour
  • ¼ cup water
  • 3 ½ cups all-purpose flour
  • ½ cup granulated sugar
  • 1 packet instant yeast
  • 1 teaspoon salt
  • 1 large egg
  • ½ cup whole milk
  • ½ cup unsalted butter (softened)
  • 2 teaspoons vanilla extract
  • ½ cup light brown sugar
  • 1 tablespoon ground cinnamon
  • 2 cups fresh peaches (peeled, chopped)
  • ¼ cup sugar
  • 1 tablespoon lemon juice
  • 1 tablespoon cornstarch
  • ½ cup unsalted butter (melted)
  • 1 cup all-purpose flour (for crumb topping)

Instructions

  • Make the Tangzhong: In a small pot, combine 1 tablespoon flour and ¼ cup water. Cook over medium-low heat, whisking constantly, until it thickens into a paste. Set aside.

  • Prepare the Dough: In a stand mixer, combine 3 ½ cups flour, ½ cup sugar, yeast, and salt. Add the egg, milk, tangzhong, and vanilla extract. Mix until a shaggy dough forms. Gradually add butter one tablespoon at a time, kneading until smooth (about 10-11 minutes).

  • First Rise: Shape the dough into a ball, place it in a greased bowl, and cover with plastic wrap. Let it rise in a warm place for about 1 hour or until doubled.

  • Make the Peach Filling: In a saucepan, cook the chopped peaches, ¼ cup sugar, and lemon juice over medium heat, mashing frequently. Stir in the cornstarch slurry and cook for another minute. Remove from heat and let it cool.

  • Roll and Assemble: Roll out the dough into an 18x15-inch rectangle. Sprinkle with a cinnamon-sugar mixture, leaving a border. Add the peach filling, then roll the dough up tightly. Slice into 12 rolls.

  • Second Rise: Place the rolls into a greased baking dish, cover, and let them rise for another hour.

  • Prepare the Crumb Topping: Combine 1 cup flour, ½ cup sugar, melted butter, and cinnamon. Sprinkle over the rolls before baking.

  • Bake: Preheat the oven to 350°F (175°C). Bake for 30-35 minutes, or until the rolls are golden brown.

  • Glaze: Drizzle with cream cheese icing and serve warm.


Notes

  • For a richer flavor, you can add more cinnamon to the crumb topping.
  • Make sure to let the rolls rise fully before baking to get the soft, fluffy texture.
  • These rolls can be stored in an airtight container for up to 2 days. Reheat them in the oven or microwave before serving.

Have you made this recipe? I'd love to see it!

Click here to Follow me on Pinterest

  • « Previous Page
  • 1
  • …
  • 37
  • 38
  • 39
Modern Sidebar

Hey there! I'm Sue, a mom, a wife, and someone who’s always in the kitchen trying out new recipes or revisiting old ones that remind me of family gatherings and special moments.

Learn more

Popular

  • Cheesecake Fruit Salad
    Cheesecake Fruit Salad
  • Creamy Tuscan Ravioli Soup: A Comfort Dish
    Creamy Tuscan Ravioli Soup: A Comfort Dish
  • Garlic Herb Chicken with Mashed Potatoes and Glazed Carrots
    Garlic Herb Chicken with Mashed Potatoes and Glazed Carrots
  • Bobby Flay Salisbury Steak
    Bobby Flay Salisbury Steak

Footer

↑ back to top

About

  • About
  • Contact
  • Disclosure Policy
  • DMCA
  • Privacy Policy
  • Terms and Conditions

Newsletter

  • Sign Up! for emails and updates

Recipes

  • Appetizers & Snacks
  • Beef
  • Breakfast
  • Chicken
  • Desserts
  • Dinner
  • Drinks
  • Side-Dish
  • Soups

As an Amazon Associate I earn from qualifying purchases.

Copyright © 2025 Sue Recipe