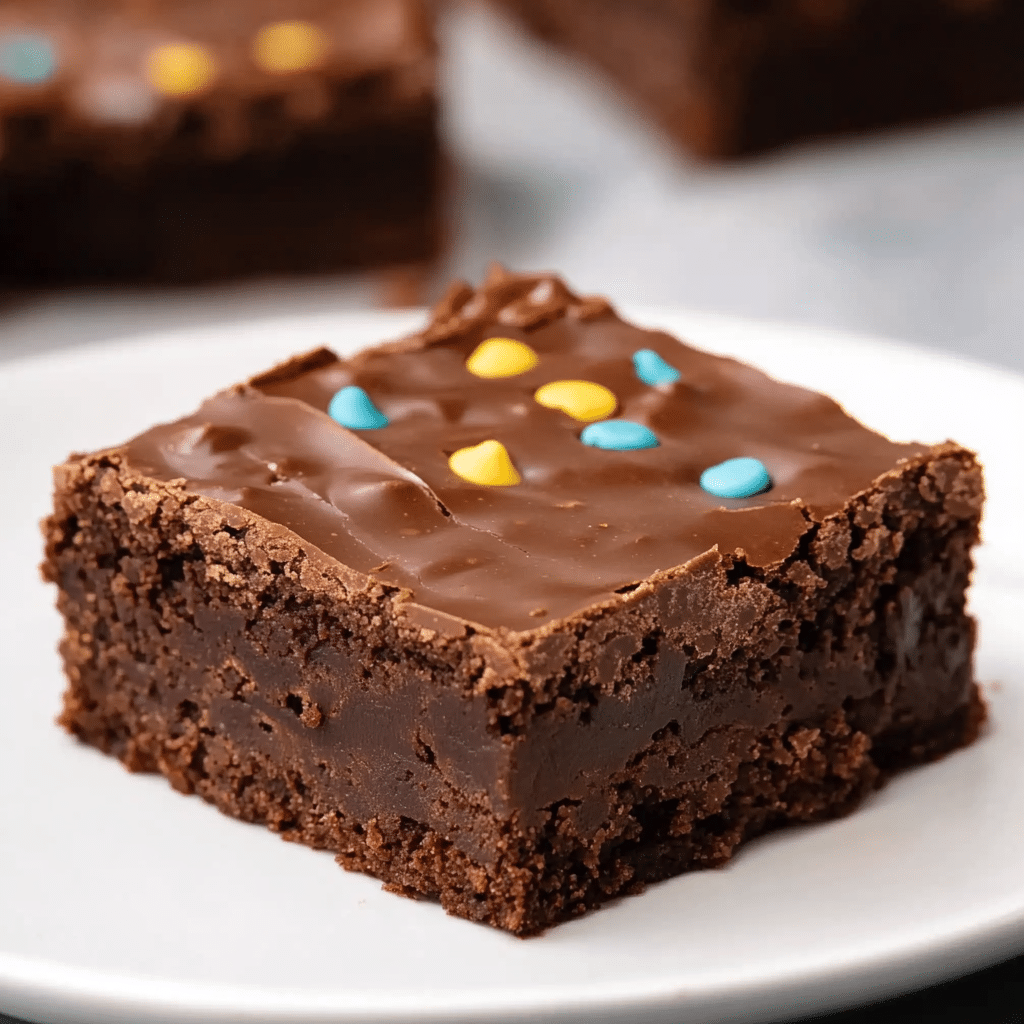
These Lunch Lady Brownies bring me right back to school cafeteria days with their rich, fudgy texture and thick layer of creamy chocolate frosting. They’re soft, moist, and just the right amount of sweet—exactly what I crave when I want a homemade dessert that feels nostalgic and indulgent.

Why You’ll Love This Recipe
I love how easy and reliable this recipe is. With simple ingredients and minimal prep, I can whip up a tray of these brownies that taste like they came straight from a lunch lady’s kitchen. The gooey brownie base and velvety frosting make the perfect combo. Whether I’m baking for a crowd or just want a sweet snack for the week, this recipe always hits the spot.
Ingredients
(Here's a tip: Check out the full list of ingredients and measurements in the recipe card below.)
For the Brownies:
-
Melted butter
-
Unsweetened cocoa powder
-
All-purpose flour
-
Sugar
-
Salt
-
Eggs
-
Vanilla extract
For the Frosting:
-
Melted butter
-
Milk
-
Powdered sugar
-
Unsweetened cocoa powder
-
Vanilla extract
Directions
-
I preheat the oven to 350°F (175°C) and line a 9×13-inch baking pan with parchment paper or lightly grease it.
-
In a bowl, I mix the melted butter and cocoa powder until smooth. Then I stir in the flour, sugar, and salt until the mixture is crumbly.
-
I add the eggs and vanilla extract, mixing just until the batter is fully combined and smooth.
-
I pour the batter into the prepared pan and spread it evenly. I bake it for 20–25 minutes, or until a toothpick inserted in the center comes out with just a few moist crumbs.
-
While the brownies are baking, I prepare the frosting by whisking together the melted butter, milk, powdered sugar, cocoa powder, and vanilla extract. I add more milk if needed to reach a spreadable consistency.
-
Once the brownies come out of the oven, I let them cool for about 15–20 minutes before spreading the frosting over the warm surface.
-
I allow them to cool completely before cutting them into squares and serving.
Servings and timing
This recipe makes about 12 generous servings. It takes around 10 minutes to prep, 25 minutes to bake, and about 2 hours total including cooling and frosting time.
Variations
-
I swap the chocolate frosting with peanut butter or cream cheese frosting for a fun twist.
-
I sometimes add chopped nuts or mini chocolate chips into the batter for extra texture.
-
I top the frosted brownies with sprinkles or sea salt flakes when I want to dress them up a bit.
-
For a mocha flavor, I add a teaspoon of instant coffee to the brownie batter.
Storage/Reheating
I keep these brownies in an airtight container at room temperature for up to 3 days. If I want them to last longer, I store them in the fridge for up to a week. For freezing, I slice and freeze them in a single layer before transferring to a freezer bag. When I want one, I let it thaw at room temperature or warm it for 10–15 seconds in the microwave.
FAQs
How can I make these brownies more cake-like?
I add an extra egg and mix the batter a little longer to introduce more air for a lighter texture.
Can I use salted butter in this recipe?
Yes, I use salted butter if that’s what I have—I just cut the added salt in half to avoid over-seasoning.
Can I halve this recipe?
Definitely. I cut all ingredients in half and bake it in an 8×8-inch pan, checking for doneness after 15–20 minutes.
Do these brownies freeze well?
They freeze beautifully. I slice and freeze them in a single layer, then move them to a sealed bag or container. They stay good for up to 3 months.
How do I tell when the brownies are done baking?
I insert a toothpick into the center—if it comes out with a few moist crumbs but no raw batter, they’re ready to come out of the oven.
Conclusion
These Lunch Lady Brownies are everything I want in a classic chocolate dessert—rich, fudgy, and frosted to perfection. They’re simple to make and always a crowd-pleaser, whether I’m baking for family, friends, or just myself. One bite and I’m reminded why some school lunch memories are worth keeping.

- Author: Sue
- Prep Time: 10 minutes
- Cook Time: 25 minutes
- Total Time: 2 hours (including cooling/frosting)
- Yield: 12 servings
- Category: Dessert
- Method: Baking
- Cuisine: American
- Diet: Vegetarian
Description
This Lunch Lady Brownies recipe brings classic cafeteria-style nostalgia right into your kitchen! These rich, fudgy brownies are topped with a creamy chocolate frosting and are irresistibly soft and moist. With simple pantry ingredients and minimal effort, they’re the perfect old-school dessert for any chocolate lover.
Ingredients
- For the Brownies:
- Melted butter
- Unsweetened cocoa powder
- All-purpose flour
- Sugar
- Salt
- Eggs
- Vanilla extract
- For the Frosting:
- Melted butter
- Milk
- Powdered sugar
- Unsweetened cocoa powder
- Vanilla extract
Instructions
- Preheat oven to 350°F (175°C). Line a 9×13-inch pan with parchment paper or grease it lightly.
- Mix melted butter and cocoa powder in a bowl until smooth.
- Stir in flour, sugar, and salt until crumbly.
- Add eggs and vanilla, mixing just until combined and smooth.
- Pour batter into pan and spread evenly.
- Bake for 20–25 minutes, until a toothpick comes out with moist crumbs.
- While brownies bake, make frosting by whisking together melted butter, milk, powdered sugar, cocoa powder, and vanilla. Adjust consistency with more milk if needed.
- Let brownies cool for 15–20 minutes before spreading frosting over the top.
- Cool completely before cutting and serving.
Notes
- Swap the chocolate frosting with peanut butter or cream cheese for variety.
- Add-ins like chopped nuts or chocolate chips add great texture.
- Top with sprinkles or sea salt for extra flair.
- A teaspoon of instant coffee adds a delicious mocha twist.
- Store at room temp for 3 days, refrigerate for a week, or freeze for up to 3 months.


Leave a Reply