I absolutely adore this Zombie Vein Fudge Recipe because it combines a fun, spooky vibe with a rich, creamy texture that’s irresistible. When I make it, the bright green fudge with bloody red raspberry “veins” always gets everyone talking – it’s like Halloween magic on a plate! This no-bake treat is straightforward to whip up, yet it delivers that perfect creepy-cool effect with every gooey, luscious bite. I love sharing this with friends and family during spooky parties or just when I want to add a bit of eerie excitement to dessert time.
Why You'll Love This Zombie Vein Fudge Recipe
What makes this Zombie Vein Fudge Recipe so special, in my opinion, is the flavor that perfectly balances sweetness with just the right hint of tartness, thanks to the raspberry jam veins that cut through the creamy white chocolate base. I enjoy the rich, buttery texture of the fudge, which melts beautifully in your mouth while the vivid colors make it incredibly eye-catching. It’s the kind of treat that tastes as good as it looks, which always makes me happy in the kitchen.
Another thing I love about this recipe is how easy it is to make. I’m not usually one for complicated desserts, and this fudge feels like such a satisfying win because you simply melt everything, mix, and chill. No need to bake or babysit the stove for long, and in less than half an hour, you’re set—only patience needed while it chills! Honestly, it’s a perfect treat to whip up when you want something special but don’t want to fuss too much.
Plus, the occasions for serving this fudge are endless. Halloween is the obvious celebration, but I’ve also found it’s a fun way to surprise guests at themed parties or even as an unexpected dessert during family dinners. What stands out most for me is how this Zombie Vein Fudge Recipe brings a little theatrical flair with those creepy “veins” that you can actually swirl yourself. It’s so satisfying to watch the jam transform into spooky streaks, making each batch uniquely haunting.
Ingredients You'll Need
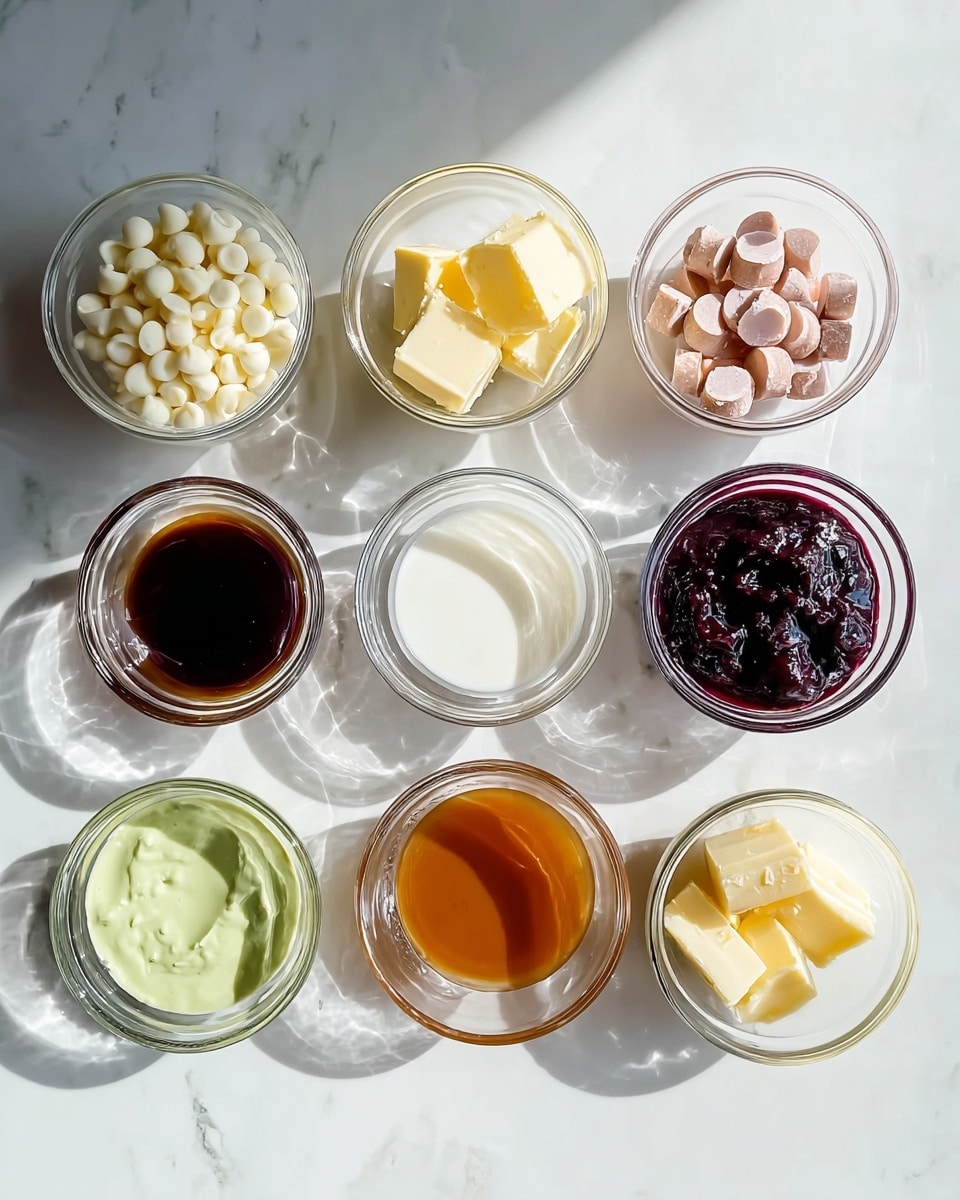
This recipe keeps things simple but brilliantly flavorful by using everyday ingredients that come together into an impressive showstopper. Each ingredient plays its part in creating the perfect taste, texture, and eye-catching color of this fudge.
TIP : You'll find the full list of ingredients and measurements in the recipe card below
- White chocolate chips: This is the creamy base that melts smoothly and adds luxurious sweetness.
- Sweetened condensed milk: It binds everything perfectly while making the fudge luscious and chewy.
- Butter: Adds richness and improves the texture, ensuring a melt-in-your-mouth experience.
- Vanilla extract: A subtle flavor booster that balances the sweetness beautifully.
- Green gel food coloring: This gives the fudge its iconic eerie zombie color without watering down the texture.
- Raspberry jam: Provides the rich red tint and tangy contrast for the “veins,” plus a little fruity zing.
- Red gel food coloring (optional): Used to intensify the blood-red look of the veins for that scary effect.
Directions
Step 1: Line an 8×8-inch baking dish with parchment paper to make sure your fudge comes out easily once set.
Step 2: In a saucepan over low heat, combine the white chocolate chips, sweetened condensed milk, and butter. Stir gently and continuously until everything is fully melted and smooth. This should take about 5 to 7 minutes—don’t rush to avoid burning the chocolate.
Step 3: Remove the mixture from heat and immediately stir in the vanilla extract for that subtle aromatic lift.
Step 4: Add the green gel food coloring, mixing until you achieve a vivid zombie-green hue. Add a little at a time—you can always add more to get the perfect color.
Step 5: Pour the green fudge evenly into your prepared pan and smooth out the surface with a spatula for an even canvas to create your veins.
Step 6: Warm the raspberry jam slightly—just enough to loosen it—and add a few drops of red gel food coloring if you want a bloodier effect.
Step 7: Drizzle the red jam in streaks across the green fudge, then take a knife or skewer and gently swirl the jam to mimic spooky veins snaking through the fudge.
Step 8: Place the pan in the refrigerator and chill for at least 2 hours, or until the fudge is firm enough to cut cleanly.
Step 9: Slice the fudge into 36 squares. For extra gore points, drizzle a bit more raspberry jam on top right before serving to give it that fresh “bloody” look.
Servings and Timing
This Zombie Vein Fudge Recipe yields about 36 squares, which makes it perfect for sharing at parties or enjoying over several days. The prep time is roughly 15 minutes, with melting and mixing taking another 10 minutes or so. The real wait comes from chilling, which requires at least 2 hours to set properly. Altogether, you’re looking at around 2 hours and 25 minutes from start to finish, but most of that time is hands-off chilling.
How to Serve This Zombie Vein Fudge Recipe
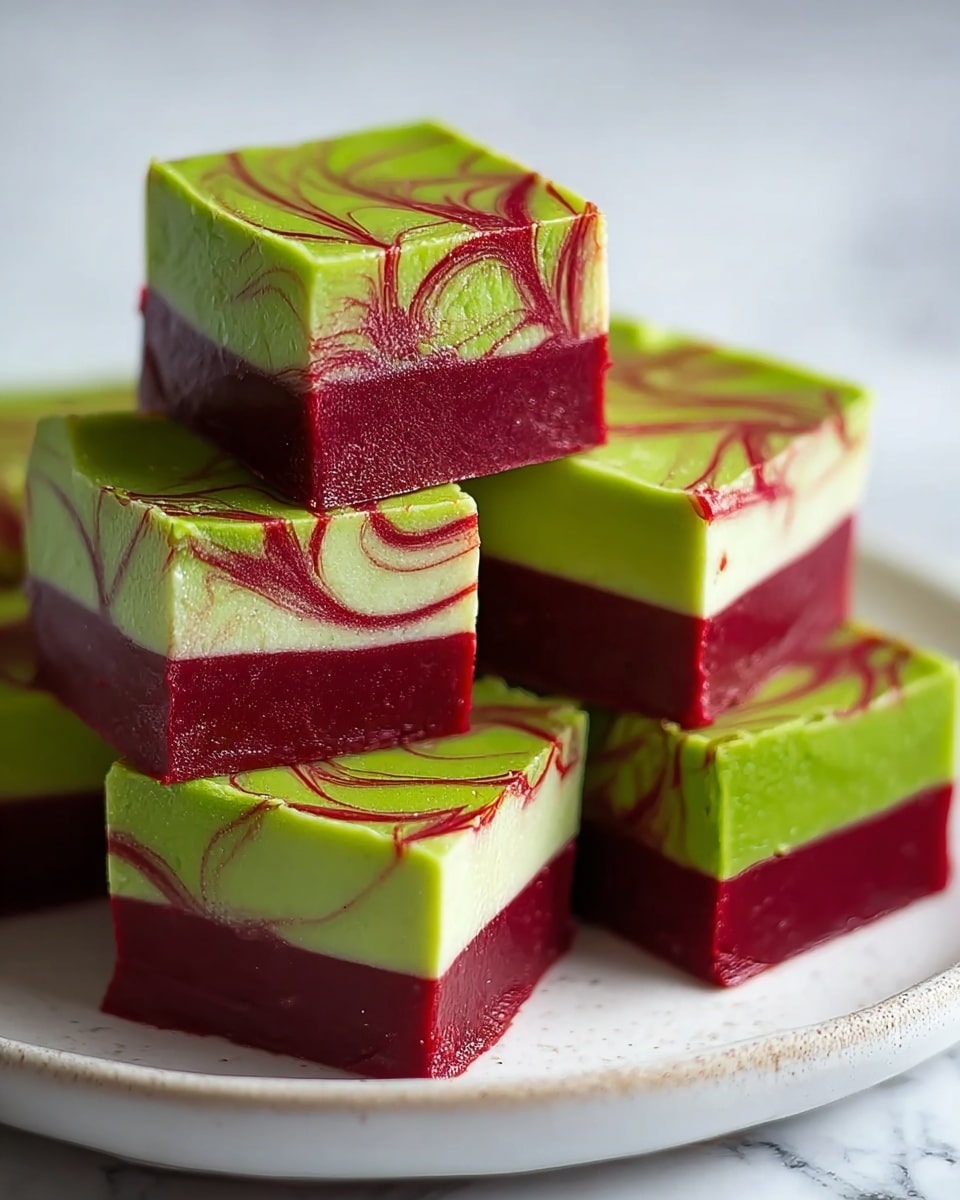
I love serving this fudge chilled and straight from the fridge for the best texture that’s firm yet creamy. The gooey raspberry veins really pop against the cool green, making each square a spooky showpiece. It’s great plated on a dark or themed tray, especially when paired with a Halloween table setting to bring out the colors even more.
For accompaniments, I like to serve this fudge alongside simple vanilla or chocolate-flavored drinks—think an ice-cold glass of milk or a cozy cup of hot cocoa. It also plays well with cocktails that include berry notes, like a raspberry mule or a fruity sangria, which can add a grown-up twist to the presentation. Garnishing with a few fresh raspberries or edible glitter makes it look even more festive and fun.
This is the kind of treat that people enjoy nibbling on at parties or after casual dinners when you want a bit of playful drama in dessert. Because the fudge is rich, I recommend small portions—cut your squares smaller for tasting platters or larger for those who want a truly indulgent experience.
Variations
One of the things I like to experiment with in this Zombie Vein Fudge Recipe is the jam. If raspberry isn’t your favorite, strawberry jam creates a brighter, punchier red vein, while blackberry or cherry preserves can add deeper tones that change the mood entirely. You could even try a little cranberry sauce for tartness mixed with that blood-red color.
If you’re looking for dairy-free or vegan options, I’ve found that swapping white chocolate chips for a vegan white chocolate brand and using a coconut condensed milk alternative works surprisingly well. The texture gets a little different but remains just as creamy and satisfying. For those who want to keep it gluten-free, this recipe is naturally suited since it doesn’t require any flour or wheat-based ingredients.
For an extra fun twist, I sometimes add chopped pistachios or pumpkin seeds right into the fudge before chilling for some crunch and a complementary green tone. Alternatively, you could drizzle a little dark chocolate on top to contrast with the bright colors or even add orange gel coloring as a Halloween accent. The possibilities to personalize this hauntingly delicious fudge are endless!
Storage and Reheating
Storing Leftovers
After your Zombie Vein Fudge is cut, store any leftovers in an airtight container in the refrigerator to maintain freshness and texture. I like to layer the fudge squares between sheets of parchment paper so they don’t stick together. Stored this way, it keeps well for up to one week, which is plenty of time to enjoy the leftovers without them losing any of their vibrancy or taste.
Freezing
If you want to keep your fudge longer, it freezes beautifully. Wrap individual squares tightly in plastic wrap or wax paper, then place them in a freezer-safe container or bag to avoid freezer burn. When properly stored, this fudge can last up to two months in the freezer. When you're ready to indulge, simply thaw it in the refrigerator overnight—this preserves the creamy texture and keeps those signature veins looking fabulous.
Reheating
Since this fudge is best served chilled or at room temperature, reheating is typically unnecessary. However, if you want a softer texture, allow the fudge to sit at room temperature for about 15-20 minutes before serving. Avoid microwaving, as this can cause the white chocolate to separate and affect the smooth, creamy consistency. Gently warming just barely softens the fudge and helps those gooey veins remain delightfully visible.
FAQs
Can I use regular food coloring instead of gel colors for the Zombie Vein Fudge Recipe?
You can, but I highly recommend gel food coloring because it provides the intense, vibrant hues without altering the fudge’s texture or consistency. Regular liquid food coloring might thin your fudge mixture and affect the final set and creaminess.
Is it possible to make this fudge ahead of time for a party?
Absolutely! This fudge holds up really well in the fridge for several days and even freezes well, making it perfect for preparing in advance. Just be sure to keep it covered tightly and slice it just before serving for the freshest presentation.
What’s the best way to create the vein effect with the raspberry jam?
I usually warm the jam slightly to loosen it and then drizzle thin lines across the fudge. Using a toothpick or skewer, I gently swirl the jam into the fudge to create the classic veiny look. It’s fun and super easy to do, and each batch looks unique depending on your swirling style!
Can I substitute other types of jam for the raspberry in this recipe?
Definitely! Strawberry jam works great for a brighter red, while darker jams like blackberry or cherry add a richer tone and slightly different tartness. Just pick your favorite berry jam to match your flavor preference and desired visual effect.
How long does the fudge need to chill before it’s ready to serve?
I recommend chilling the fudge for at least 2 hours to ensure it’s firm enough to cut cleanly and maintain its shape. If you’re in a hurry, a bit longer chilling won’t hurt—it actually helps the flavors meld together wonderfully.
Conclusion
I truly hope you give this Zombie Vein Fudge Recipe a try because it’s one of those festive treats that’s as fun to make as it is to eat. The combination of creamy white chocolate, vibrant green color, and those eerie red raspberry veins always makes me smile. It’s perfect for Halloween or any time you want to surprise people with something a little spooky yet incredibly delicious. I can’t wait to hear how you make it your own and what creative twists you come up with!
Print
Zombie Vein Fudge Recipe
- Prep Time: 10 minutes
- Cook Time: 15 minutes
- Total Time: 25 minutes plus 2 hours chilling
- Yield: 36 squares
- Category: Dessert
- Method: Stovetop
- Cuisine: American
- Diet: Vegetarian
Description
Zombie Vein Fudge is a spooky no-bake Halloween treat featuring creamy white chocolate fudge tinted green with gel food coloring and decorated with vibrant red raspberry jam swirls for a creepy blood vessel effect. This rich and festive dessert is perfect for parties and gatherings, combining smooth sweetness with eye-catching presentation.
Ingredients
Fudge Base
- 3 cups white chocolate chips
- 1 can (14 oz) sweetened condensed milk
- 2 tablespoons butter
- 1 teaspoon vanilla extract
- Green gel food coloring
Vein Decoration
- ½ cup raspberry jam (or strawberry jam for brighter red “veins”)
- Red gel food coloring (optional)
Instructions
- Prepare Pan: Line an 8×8-inch baking dish with parchment paper to prevent sticking and allow easy removal of the fudge once set.
- Melt Base: In a saucepan over low heat, combine the white chocolate chips, sweetened condensed milk, and butter. Stir continuously until the mixture is smooth and fully melted, ensuring the fudge base is creamy and lump-free.
- Add Flavor: Remove from heat and stir in the vanilla extract to enhance the richness and depth of the fudge flavor.
- Color It: Mix in green gel food coloring a little at a time until a vivid zombie green hue is achieved, giving the fudge its spooky Halloween look.
- Spread: Pour the green fudge mixture into the prepared baking dish and smooth the surface evenly with a spatula to create a flat base for the veins.
- Make Veins: Warm the raspberry jam gently to loosen it, then tint with a few drops of red gel food coloring if desired for a more intense color. Drizzle the jam over the fudge in random lines to mimic blood veins.
- Swirl: Use a knife, skewer, or toothpick to lightly swirl the raspberry jam into the fudge, creating a marbled red vein effect that looks creepy and realistic.
- Chill: Refrigerate the fudge for at least 2 hours or until firm to set the texture perfectly for slicing and serving.
- Serve: Remove the set fudge from the pan, slice into 36 squares, and optionally drizzle extra raspberry jam on top for an added gore effect just before serving.
Notes
- For a bloodier look, add a few drops of additional jam after the fudge has chilled.
- Using gel food coloring ensures vibrant colors without thinning the fudge mixture.
- Store leftover fudge refrigerated for up to one week or freeze for up to two months to maintain freshness.





Leave a Reply