Sue Recipe

  • Recipe Index
  • Chicken
  • Desserts
  • About
  • Contact
menu icon
go to homepage
  • Recipe Index
  • Chicken
  • Desserts
  • About
  • Contact

search icon
Homepage link
  • Recipe Index
  • Chicken
  • Desserts
  • About
  • Contact

×

Cheesecake Fruit Salad

August 31, 2025 by Sue Leave a Comment

Cheesecake Fruit Salad is a creamy, dreamy dessert that combines the tangy richness of cheesecake with the sweet juiciness of fresh fruit. It's a refreshing and indulgent treat perfect for picnics, potlucks, or any time I want to impress without spending hours in the kitchen. Cheesecake Fruit Salad
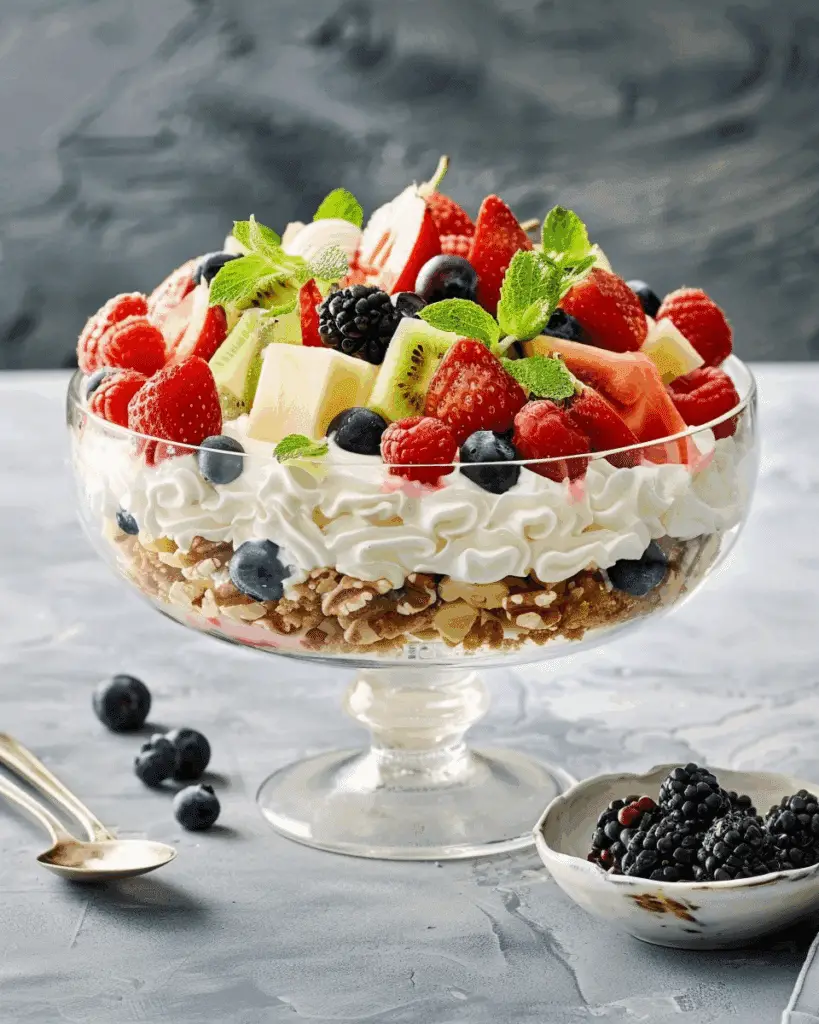
Why You’ll Love This Recipe

I love how this recipe brings together the best of both worlds—classic cheesecake flavor and the vibrant freshness of seasonal fruits. It's quick to whip up, doesn’t require any baking, and is endlessly customizable. Whether I serve it as a dessert or a sweet side dish, it always disappears fast.

Ingredients

(Here's a tip: Check out the full list of ingredients and measurements in the recipe card below.)

  • Cream cheese

  • Instant cheesecake pudding mix

  • Heavy cream or whipped topping

  • Vanilla extract

  • Powdered sugar (optional, for extra sweetness)

  • Assorted fresh fruits (such as strawberries, blueberries, grapes, kiwi, pineapple, and bananas)

Directions

  1. I start by beating the cream cheese in a large mixing bowl until it's smooth and fluffy.

  2. Then I add the instant cheesecake pudding mix and a splash of vanilla extract.

  3. Slowly, I pour in the heavy cream and continue to beat until the mixture thickens and becomes creamy.

  4. If I want it a bit sweeter, I stir in a little powdered sugar.

  5. I gently fold in the fresh fruits, being careful not to crush them.

  6. Once everything is combined, I chill the salad in the fridge for at least an hour before serving to let the flavors blend together.

Servings and timing
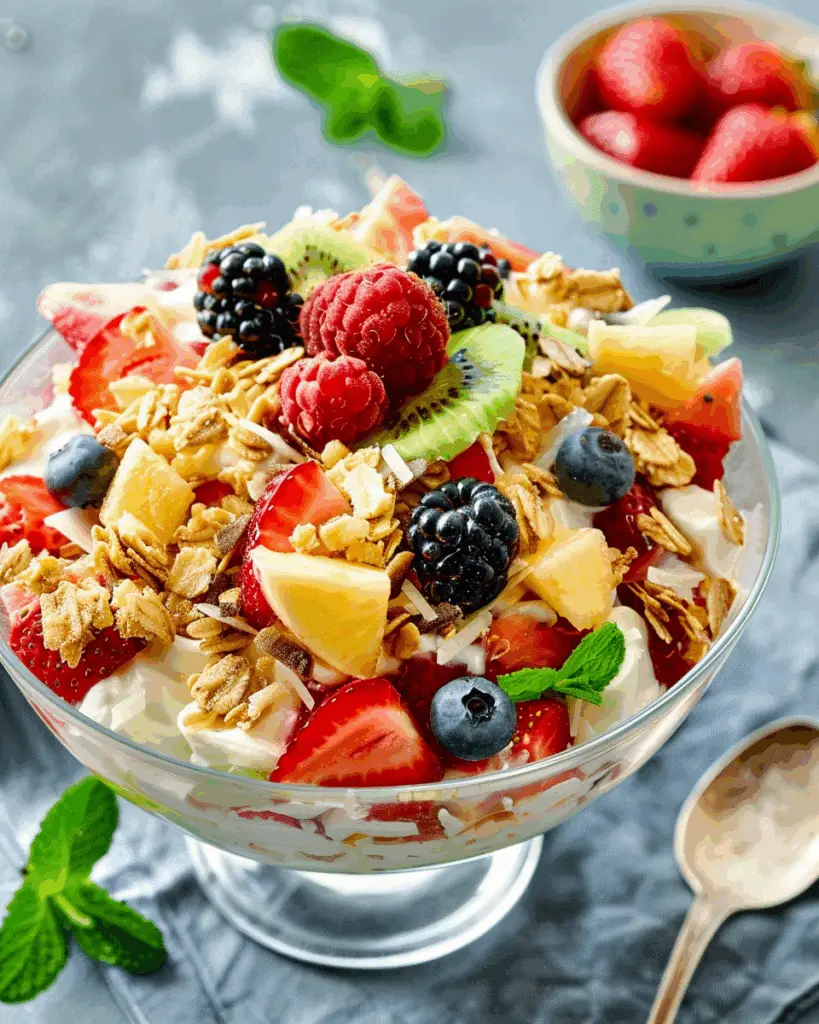
Cheesecake Fruit Salad

This recipe makes about 8 servings and takes roughly 15 minutes to prepare, plus at least 1 hour of chilling time. It's ideal for serving at gatherings or as a sweet weekend treat.

Variations

I often switch up the fruit depending on what’s in season or what I have on hand. Sometimes I add mini marshmallows for extra sweetness and texture. Swapping in flavored yogurt for part of the cream can also give it a tangy twist. For a more tropical vibe, I mix in coconut flakes and chopped mango.

Storage/Reheating

I store any leftovers in an airtight container in the refrigerator for up to 3 days. Since it contains fresh fruit and dairy, I avoid freezing it to maintain the texture. If the salad separates a little after chilling, I just give it a gentle stir before serving. Reheating isn't necessary—this dish is best enjoyed cold.

FAQs

How do I keep the bananas from browning in the salad?

I usually toss banana slices in a bit of lemon juice before adding them to the mix. It helps prevent browning and keeps them looking fresh.

Can I make this ahead of time?

Yes, I like to make it a few hours ahead and let it chill in the fridge. It actually tastes better after the flavors have had time to meld together.

Can I use frozen fruit?

I prefer fresh fruit because frozen fruit can become mushy when thawed and make the salad watery. If I must use frozen, I thaw and drain it thoroughly first.

What type of cream works best?

I’ve had success with both heavy whipping cream and whipped topping. Heavy cream gives it a richer taste, while whipped topping makes it a bit lighter and fluffier.

Is there a dairy-free option?

To make it dairy-free, I use dairy-free cream cheese and whipped topping alternatives. While it changes the flavor slightly, it still tastes delicious.

Conclusion

Cheesecake Fruit Salad is one of those recipes I keep coming back to because it's simple, customizable, and absolutely satisfying. It’s a crowd-pleaser that brings a touch of indulgence to any occasion without being too heavy. I love how easily it comes together and how much everyone enjoys it.

Print

clock clock iconcutlery cutlery iconflag flag iconfolder folder iconinstagram instagram iconpinterest pinterest iconfacebook facebook iconprint print iconsquares squares iconheart heart iconheart solid heart solid icon
Cheesecake Fruit Salad

Cheesecake Fruit Salad

5 Stars 4 Stars 3 Stars 2 Stars 1 Star No reviews
  • Author: Sue
  • Prep Time: 15 minutes
  • Cook Time: 0 minutes
  • Total Time: 1 hour 15 minutes (including chilling time)
  • Yield: 8 servings
  • Category: Dessert
  • Method: No-Bake
  • Cuisine: American
  • Diet: Vegetarian
Print Recipe
Pin Recipe

Description

Cheesecake Fruit Salad is a creamy, no-bake dessert that blends tangy cheesecake flavor with the natural sweetness of assorted fresh fruits. It's quick, easy, and perfect for gatherings or a sweet treat any time.


Ingredients

  • 8 oz cream cheese, softened
  • 1 package (3.4 oz) instant cheesecake pudding mix
  • 1 cup heavy cream or 8 oz whipped topping
  • 1 tsp vanilla extract
  • 2–4 tablespoon powdered sugar (optional)
  • 2 cups strawberries, sliced
  • 1 cup blueberries
  • 1 cup grapes, halved
  • 2 kiwis, peeled and sliced
  • 1 cup pineapple chunks
  • 2 bananas, sliced

Instructions

  1. In a large mixing bowl, beat the cream cheese until smooth and fluffy.
  2. Add the instant cheesecake pudding mix and vanilla extract, and mix well.
  3. Gradually add the heavy cream, beating continuously until the mixture is thick and creamy.
  4. Stir in powdered sugar to taste if desired.
  5. Gently fold in the prepared fruits, being careful not to crush them.
  6. Chill the salad in the refrigerator for at least 1 hour before serving to allow flavors to meld.

Notes

  • Toss banana slices in lemon juice to prevent browning.
  • Customize the fruit based on what's in season.
  • Mini marshmallows or coconut flakes can add extra texture and flavor.
  • For a lighter version, substitute part of the cream with flavored yogurt.
  • Best served chilled and within 3 days of preparation.

Nutrition

  • Serving Size: 1 cup
  • Calories: 280
  • Sugar: 24g
  • Sodium: 180mg
  • Fat: 18g
  • Saturated Fat: 11g
  • Unsaturated Fat: 6g
  • Trans Fat: 0g
  • Carbohydrates: 28g
  • Fiber: 3g
  • Protein: 3g
  • Cholesterol: 45mg

Have you made this recipe? I'd love to see it!

Click here to Follow me on Pinterest

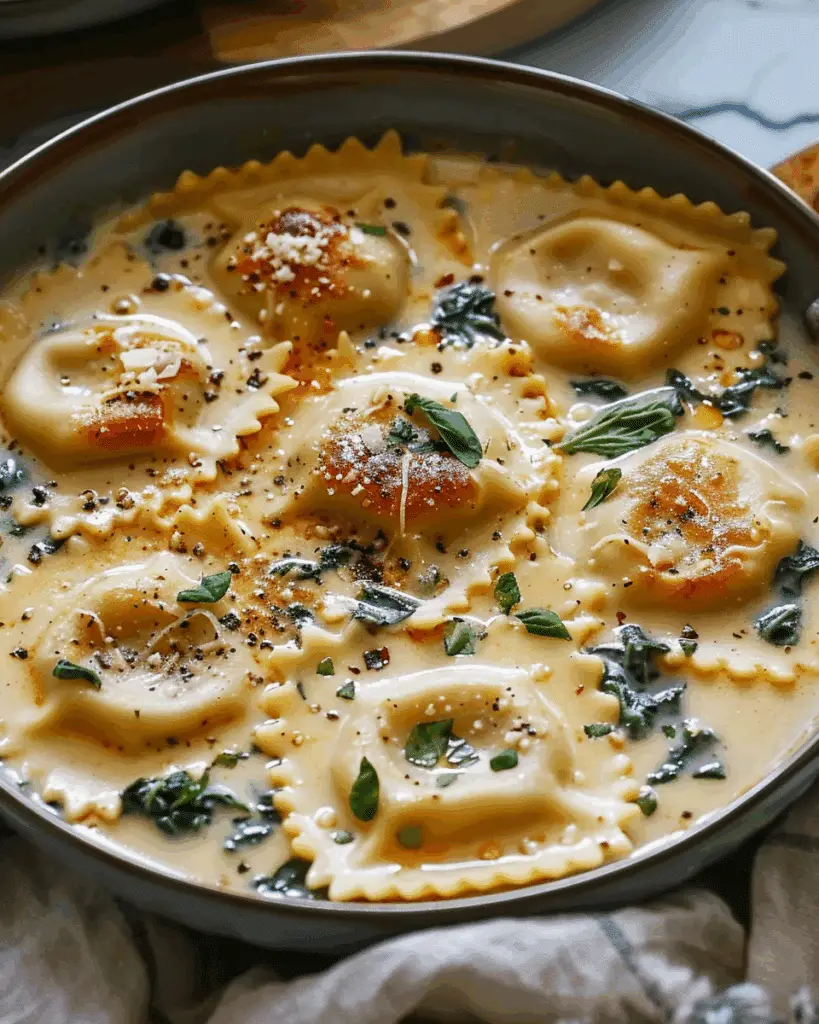
Creamy Tuscan Ravioli Soup: A Comfort Dish

August 31, 2025 by Sue Leave a Comment

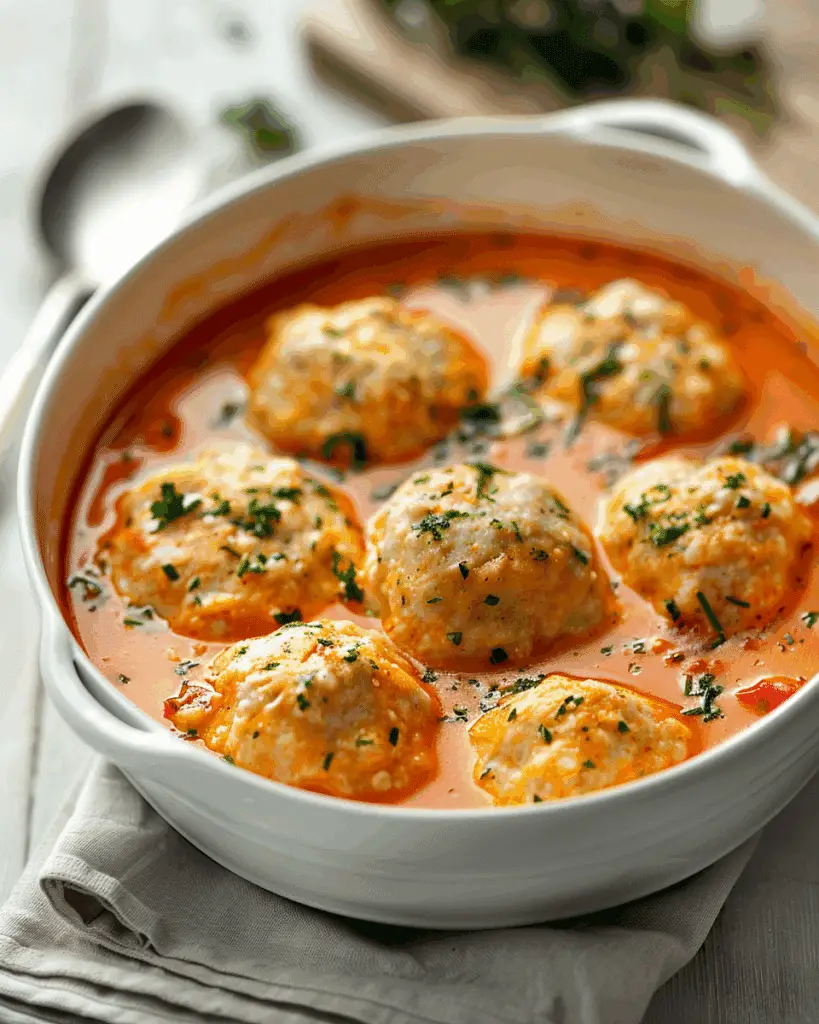
I’m sharing one of my coziest dinner recipes—a one‑pot Creamy Tuscan Ravioli Soup that’s rich, full of flavor, and ready in under an hour. It’s a warm hug in a bowl, perfect for chillier evenings or easy weeknight meals. Creamy Tuscan Ravioli Soup: A Comfort Dish

Why You’ll Love This Recipe

I love that I can whip up a comforting, creamy soup with minimal cleanup—everything cooks together in a single pot. It’s indulgent yet approachable, with cheese-filled ravioli, savory sausage, sun-dried tomatoes, spinach, and a velvety cream base. It appeals to both kids and adults, and I can easily personalize it—for example, turning up the heat with red pepper flakes or making it vegetarian.

ingredients

(Here's a tip: Check out the full list of ingredients and measurements in the recipe card below.)

Here’s what I gather I need:

  • 1 tablespoon olive oil

  • 1 lb Italian sausage (mild or spicy), casing removed

  • 1 small onion, diced

  • 3–4 cloves garlic, minced

  • 1 teaspoon dried Italian seasoning

  • ½ teaspoon paprika (optional)

  • ¼ teaspoon crushed red pepper flakes (optional for heat)

  • 4 cups chicken broth

  • 1 cup heavy cream

  • 1 package (~20 oz) cheese ravioli (fresh or frozen)

  • ½ cup sun-dried tomatoes, drained and chopped

  • 3 cups baby spinach

  • ½ cup grated Parmesan cheese

  • Salt and pepper, to taste

  • Fresh basil or parsley for garnish

directions

  1. Heat olive oil in a Dutch oven or large soup pot over medium heat. Sauté the sausage (breaking it up) until browned, about 5–7 minutes.

  2. Add diced onion and cook 2–3 minutes until softened. Stir in garlic, Italian seasoning, paprika, and red pepper flakes (if using), cooking another minute until fragrant.

  3. Pour in chicken broth and bring to a gentle boil. Lower the heat and stir in heavy cream, simmering uncovered for 5–7 minutes to let flavors meld.

  4. Add the ravioli and sun‑dried tomatoes. Simmer for 5–6 minutes (or per package instructions) until ravioli is tender.

  5. Turn off the heat. Stir in spinach until wilted, then add Parmesan cheese and stir until melted. Season with salt and pepper to taste.

  6. Serve hot, garnished with fresh basil or parsley, and perhaps alongside crusty bread or a side salad.

Servings and timing

  • Prep Time: 10 minutes

  • Cook Time: 25 minutes

  • Total Time: 35 minutes

  • Yields about 4–6 generous servings

Variations

  • Vegetarian version: Use veggie sausage or omit the meat entirely, and add vegetables like mushrooms or zucchini.

  • Spicier version: Use hot Italian sausage and add extra crushed red pepper or hot sauce.

  • Different ravioli: Try mushroom or meat-filled ravioli for a unique twist.

  • Creamier or tomato-forward flavor: Stir in a spoonful of tomato paste, or swap in half‑and‑half instead of heavy cream for lighter richness.

storage/reheating

  • To store: Let the soup cool, then refrigerate in an airtight container for up to 4 days.

  • To freeze: Freeze before adding ravioli or spinach. Thaw overnight before reheating, then freshen with spinach and ravioli.

  • To reheat: Warm gently on the stovetop. Add a splash of broth or cream if it’s too thick or has thickened during storage.

FAQs

Can I use frozen ravioli?

Yes—I often do. I just add it a bit earlier or allow a minute or two more cooking time so it turns tender and not doughy.

Can I make this dairy‑free?

Absolutely—I substitute heavy cream with full‑fat coconut milk or oat‑based cream, and use a vegan Parmesan alternative for that cozy finish.

Will the soup get too thick as it cools?

Yes—it does thicken. I always add a splash of broth or cream when reheating to restore that silky warmth.

Is it gluten‑free?

It can be. I simply use gluten‑free ravioli and make sure the sausage and broth are certified gluten‑free.

What else can I use instead of sausage for protein?

I sometimes swap in shredded rotisserie chicken, ground turkey, or plant‑based crumbles when I’m looking for a lighter option.

Conclusion

I find this Creamy Tuscan Ravioli Soup to be the ultimate cozy, fuss‑free comfort food. It’s rich, flavorful, customizable, and comes together in under an hour with just one pot. Whether I’m feeding family or meal‑prepping ahead, this soup brings warmth and satisfaction that keeps everyone coming back for seconds.

Print

clock clock iconcutlery cutlery iconflag flag iconfolder folder iconinstagram instagram iconpinterest pinterest iconfacebook facebook iconprint print iconsquares squares iconheart heart iconheart solid heart solid icon
Creamy Tuscan Ravioli Soup: A Comfort Dish

Creamy Tuscan Ravioli Soup: A Comfort Dish

5 Stars 4 Stars 3 Stars 2 Stars 1 Star No reviews
  • Author: Sue
  • Prep Time: 10 minutes
  • Cook Time: 25 minutes
  • Total Time: 35 minutes
  • Yield: 4–6 servings
  • Category: Soup
  • Method: Stovetop
  • Cuisine: Italian-American
  • Diet: Halal
Print Recipe
Pin Recipe

Description

A cozy, one-pot Creamy Tuscan Ravioli Soup featuring cheese-filled ravioli, savory Italian sausage, spinach, sun-dried tomatoes, and a rich, creamy broth—perfect for quick, comforting dinners.


Ingredients

  • 1 tablespoon olive oil
  • 1 lb Italian sausage (mild or spicy), casing removed
  • 1 small onion, diced
  • 3–4 cloves garlic, minced
  • 1 teaspoon dried Italian seasoning
  • ½ teaspoon paprika (optional)
  • ¼ teaspoon crushed red pepper flakes (optional)
  • 4 cups chicken broth
  • 1 cup heavy cream
  • 1 package (~20 oz) cheese ravioli (fresh or frozen)
  • ½ cup sun-dried tomatoes, drained and chopped
  • 3 cups baby spinach
  • ½ cup grated Parmesan cheese
  • Salt and pepper, to taste
  • Fresh basil or parsley, for garnish

Instructions

  1. Heat olive oil in a Dutch oven or large soup pot over medium heat. Sauté the sausage (breaking it up) until browned, about 5–7 minutes.
  2. Add diced onion and cook 2–3 minutes until softened. Stir in garlic, Italian seasoning, paprika, and red pepper flakes (if using), cooking another minute until fragrant.
  3. Pour in chicken broth and bring to a gentle boil. Lower the heat and stir in heavy cream, simmering uncovered for 5–7 minutes to let flavors meld.
  4. Add the ravioli and sun‑dried tomatoes. Simmer for 5–6 minutes (or per package instructions) until ravioli is tender.
  5. Turn off the heat. Stir in spinach until wilted, then add Parmesan cheese and stir until melted. Season with salt and pepper to taste.
  6. Serve hot, garnished with fresh basil or parsley, and perhaps alongside crusty bread or a side salad.

Notes

  • Use hot sausage and extra red pepper for a spicier version.
  • Swap in plant-based cream and vegan cheese for a dairy-free version.
  • Use gluten-free ravioli and sausage for a gluten-free meal.
  • Add a splash of broth or cream when reheating as soup thickens on standing.
  • Freeze before adding ravioli and spinach for better texture on reheating.

Nutrition

  • Serving Size: 1.5 cups
  • Calories: 520
  • Sugar: 5g
  • Sodium: 980mg
  • Fat: 36g
  • Saturated Fat: 17g
  • Unsaturated Fat: 16g
  • Trans Fat: 0.5g
  • Carbohydrates: 30g
  • Fiber: 3g
  • Protein: 22g
  • Cholesterol: 95mg

Have you made this recipe? I'd love to see it!

Click here to Follow me on Pinterest

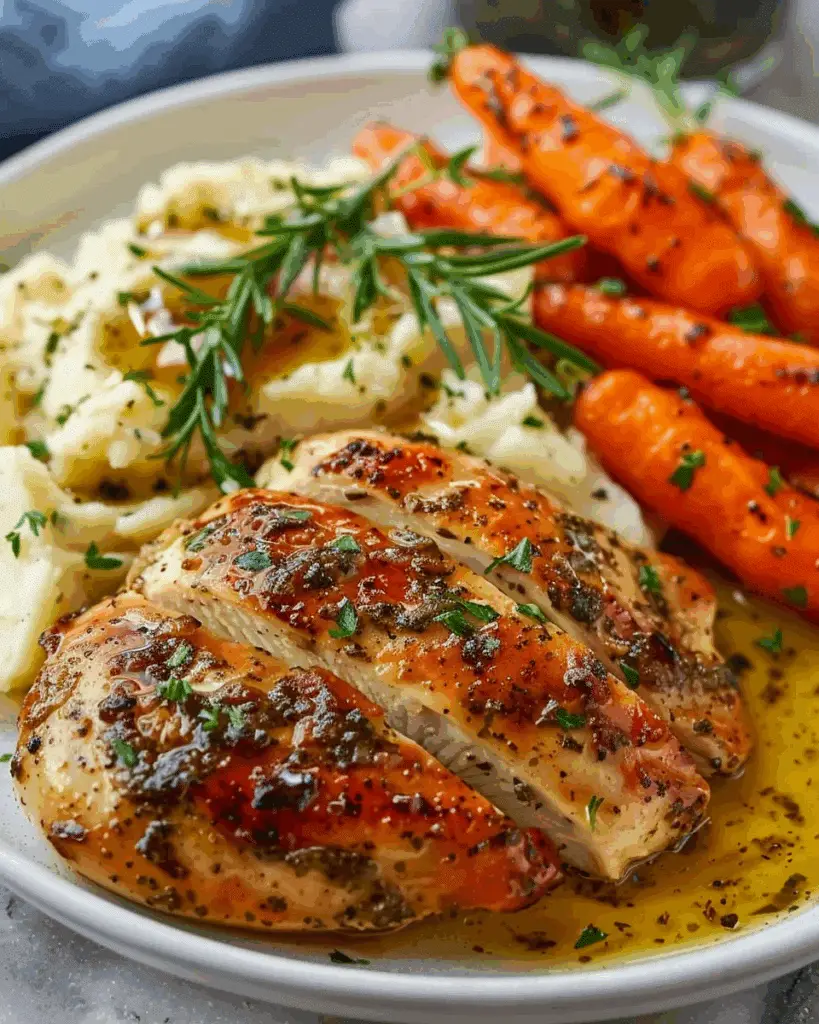
Garlic Herb Chicken with Mashed Potatoes and Glazed Carrots

August 31, 2025 by Sue Leave a Comment

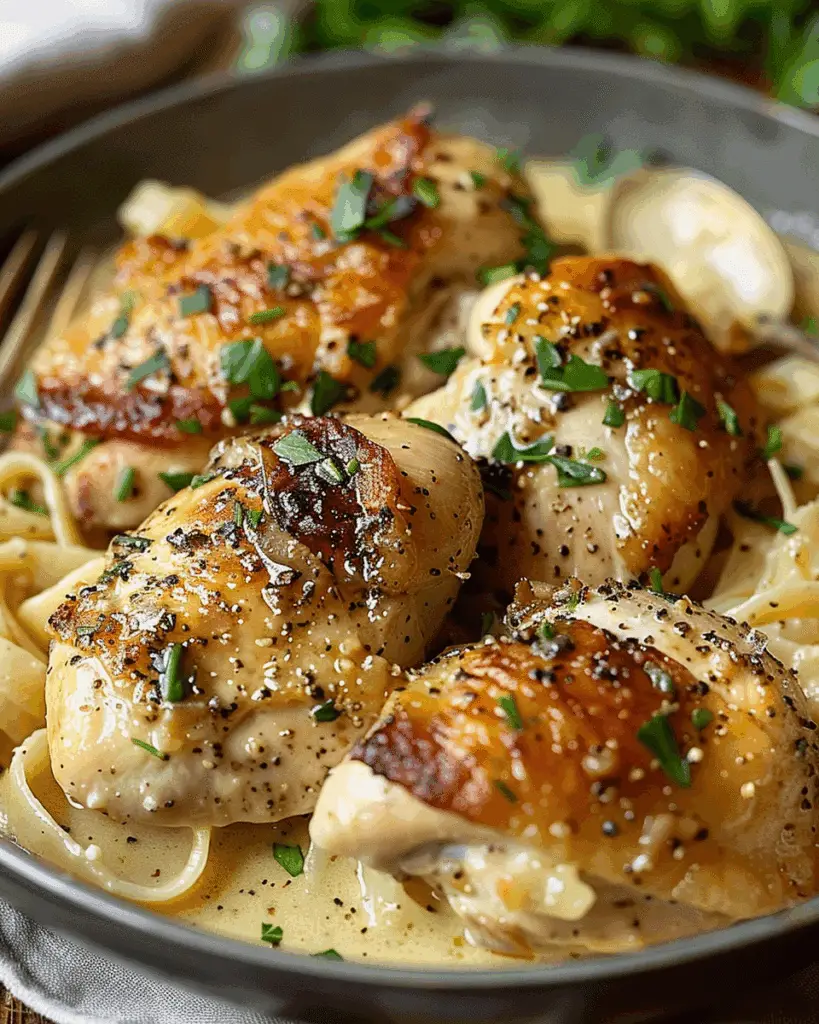
This Garlic Herb Chicken with Mashed Potatoes and Glazed Carrots is a hearty, comforting, and balanced meal that I enjoy making for both family dinners and casual gatherings. The juicy chicken seasoned with garlic and herbs pairs beautifully with creamy mashed potatoes and sweet, buttery glazed carrots. It’s the kind of dish that feels homey yet special enough to serve to guests. Garlic Herb Chicken with Mashed Potatoes and Glazed Carrots

Why You’ll Love This Recipe

I love this recipe because it strikes the perfect balance of flavor, texture, and nutrition. The garlic herb chicken is savory and aromatic, while the mashed potatoes are smooth and creamy, bringing comfort to every bite. The glazed carrots add a touch of sweetness and freshness that lightens the whole plate. It’s also versatile enough to make on a weeknight or for a Sunday dinner, and the components can be prepped ahead to save time.

Ingredients

(Here's a tip: Check out the full list of ingredients and measurements in the recipe card below.)

  • Chicken breasts or thighs

  • Olive oil or butter

  • Fresh garlic, minced

  • Fresh or dried herbs (such as thyme, rosemary, parsley)

  • Salt and pepper

  • Potatoes (Yukon Gold or Russet work best)

  • Milk or cream

  • Butter

  • Carrots

  • Brown sugar or honey

  • Fresh parsley (optional, for garnish)

Directions

  1. I start by seasoning the chicken with garlic, herbs, salt, and pepper.

  2. I heat olive oil or butter in a skillet and sear the chicken until golden brown, then finish cooking it until tender and juicy.

  3. While the chicken cooks, I peel and boil the potatoes until fork-tender, then mash them with butter, milk or cream, and seasoning until smooth and fluffy.

  4. For the glazed carrots, I simmer peeled carrot slices in a bit of butter, brown sugar or honey, and a splash of water until tender and lightly caramelized.

  5. Finally, I plate everything together, adding a sprinkle of parsley for a fresh finish.

Servings and timing

This recipe makes about 4 servings. It typically takes around 40–45 minutes to prepare and cook, making it a great option for both weeknight dinners and weekend meals.

Variations

I sometimes use salmon or turkey cutlets in place of chicken when I want a different protein. For the mashed potatoes, I occasionally add roasted garlic or cream cheese for extra richness. The glazed carrots can also be made with maple syrup instead of brown sugar or honey. Adding other vegetables like green beans or roasted Brussels sprouts creates an even heartier plate.

storage/reheating

I keep leftovers in an airtight container in the refrigerator for up to 3 days. To reheat, I warm the chicken and sides in the oven at 350°F until heated through, or I use the microwave for a quicker option. If the mashed potatoes seem a little dry when reheated, I stir in a splash of milk or cream to bring back their creamy texture.

FAQs

How do I know when the chicken is fully cooked?

I check that the chicken reaches an internal temperature of 165°F and that the juices run clear when cut.

Can I make the mashed potatoes ahead of time?

Yes, I prepare them a day in advance and reheat them with a little extra butter or cream to keep them smooth.

What herbs work best for the chicken?

I like using a mix of rosemary, thyme, and parsley, but oregano or basil can also work well.

Can I make this recipe dairy-free?

Yes, I replace butter with olive oil and use a plant-based milk for the mashed potatoes.

How do I make the carrots less sweet?

I simply reduce the amount of brown sugar or honey and let the natural sweetness of the carrots shine.

Conclusion

This Garlic Herb Chicken with Mashed Potatoes and Glazed Carrots is one of my favorite meals to make when I want something satisfying yet wholesome. The combination of savory chicken, creamy potatoes, and tender glazed carrots always feels comforting and delicious. Whether I’m serving it for a weeknight dinner or a special occasion, it’s a dish that never fails to impress.

Print

clock clock iconcutlery cutlery iconflag flag iconfolder folder iconinstagram instagram iconpinterest pinterest iconfacebook facebook iconprint print iconsquares squares iconheart heart iconheart solid heart solid icon
Garlic Herb Chicken with Mashed Potatoes and Glazed Carrots

Garlic Herb Chicken with Mashed Potatoes and Glazed Carrots

5 Stars 4 Stars 3 Stars 2 Stars 1 Star No reviews
  • Author: Sue
  • Prep Time: 15 minutes
  • Cook Time: 30 minutes
  • Total Time: 45 minutes
  • Yield: 4 servings
  • Category: Dinner
  • Method: Stovetop
  • Cuisine: American
  • Diet: Halal
Print Recipe
Pin Recipe

Description

This Garlic Herb Chicken with Mashed Potatoes and Glazed Carrots is a hearty, comforting, and balanced meal. Juicy, flavorful chicken pairs with creamy mashed potatoes and sweet glazed carrots for a satisfying dinner perfect for family or guests.


Ingredients

  • 4 chicken breasts or thighs
  • 2 tbsp olive oil or butter
  • 3 cloves garlic, minced
  • 1 tsp dried thyme
  • 1 tsp dried rosemary
  • 1 tbsp chopped fresh parsley (plus more for garnish)
  • Salt and pepper to taste
  • 2 lbs potatoes (Yukon Gold or Russet), peeled and chopped
  • ½ cup milk or cream
  • 3 tbsp butter
  • 4 large carrots, peeled and sliced
  • 2 tbsp brown sugar or honey
  • 2 tbsp water

Instructions

  1. Season chicken with garlic, thyme, rosemary, parsley, salt, and pepper.
  2. Heat olive oil or butter in a skillet over medium heat. Sear chicken until golden brown on both sides and cooked through (internal temperature of 165°F).
  3. Meanwhile, boil potatoes in salted water until fork-tender. Drain and mash with butter, milk or cream, salt, and pepper until smooth.
  4. In a separate pan, simmer carrots with butter, brown sugar or honey, and water until tender and glazed.
  5. Plate the chicken with mashed potatoes and glazed carrots. Garnish with fresh parsley if desired.

Notes

  • Use bone-in, skin-on chicken for more flavor if preferred.
  • Swap brown sugar with maple syrup for a different glaze on carrots.
  • Add roasted garlic or cream cheese to mashed potatoes for extra richness.
  • Store leftovers in an airtight container in the fridge for up to 3 days.

Nutrition

  • Serving Size: 1 plate (chicken, potatoes, carrots)
  • Calories: 520
  • Sugar: 8g
  • Sodium: 480mg
  • Fat: 24g

  • Saturated Fat: 9g
  • Unsaturated Fat: 13g
  • Trans Fat: 0g
  • Carbohydrates: 42g
  • Fiber: 5g
  • Protein: 35g
  • Cholesterol: 110mg

Have you made this recipe? I'd love to see it!

Click here to Follow me on Pinterest

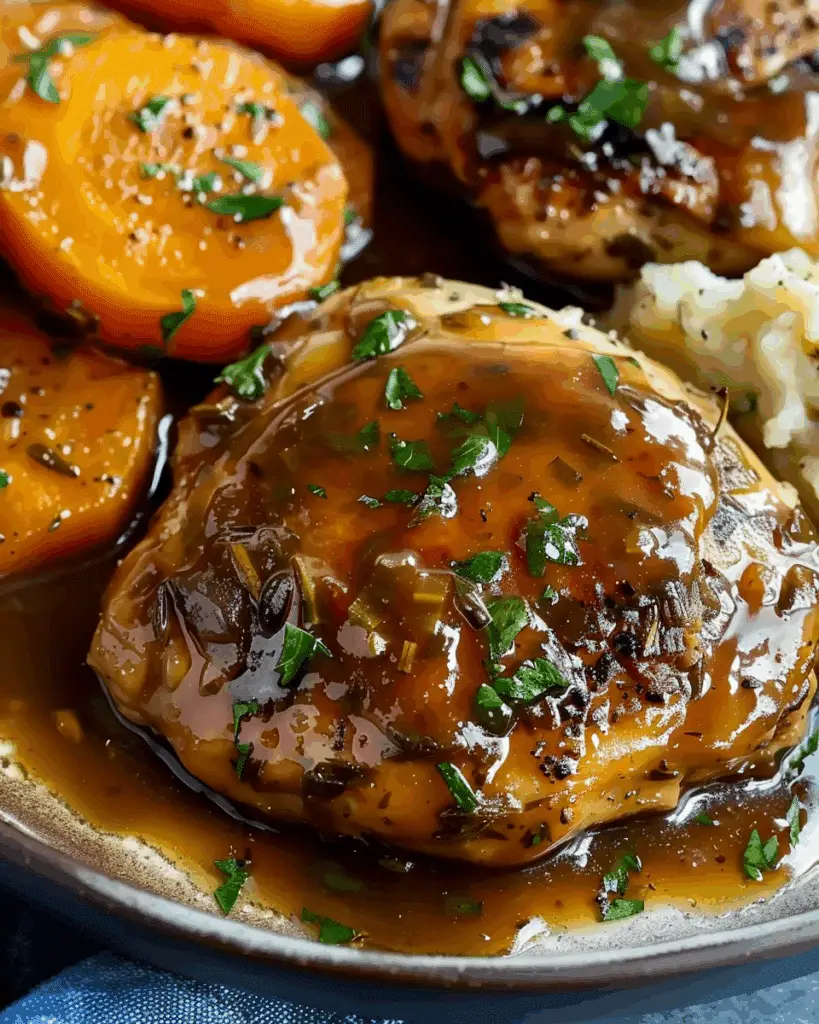
Bobby Flay Salisbury Steak

August 31, 2025 by Sue Leave a Comment

I’m sharing my take on Bobby Flay’s classic Salisbury steak—a cozy, savory dish featuring juicy ground beef patties smothered in a flavorful mushroom-onion gravy. Bobby Flay Salisbury Steak

Why I’ll Love This Recipe

I always find myself drawn to this recipe because the patties are tender and packed with flavor, thanks to the combination of tomato sauce, mustard, and Worcestershire. Then, the mushroom gravy elevates everything with its earthy richness and warmth. It’s comfort food in its best form, yet still feels a bit elevated thanks to Bobby Flay’s touch.

Ingredients

(Here's a tip: Check out the full list of ingredients and measurements in the recipe card below.)

Salisbury Steaks:

  • 4 tablespoons vegetable oil, divided

  • 1 onion, finely diced

  • 2 garlic cloves, minced

  • 1 pound ground beef (80% lean)

  • ⅓ cup panko breadcrumbs

  • 1 large egg

  • ⅓ cup tomato sauce or marinara

  • 1 teaspoon yellow mustard

  • 1 teaspoon Worcestershire sauce

  • 1 teaspoon dried oregano

  • ¼ teaspoon ground black pepper

  • Salt, to taste

Mushroom Gravy:

  • 1 tablespoon vegetable oil

  • 1 onion, sliced

  • 9 oz white button mushrooms, sliced

  • 2½ cups low-sodium beef broth

  • 1 teaspoon onion powder

  • ½ teaspoon garlic powder

  • 1½ teaspoons Worcestershire sauce

  • 3 tablespoons cornstarch mixed with ¼ cup water or beef stock

  • Salt and pepper, as needed

Directions

  1. I heat 2 tablespoons oil in a skillet over medium heat and sauté the diced onion until translucent, about 4 minutes. I add the garlic and cook for another 40–60 seconds, then let it cool slightly.

  2. In a large bowl, I combine the cooked onion and garlic with the ground beef, panko, egg, tomato sauce, mustard, Worcestershire, oregano, pepper, and salt. I mix just until combined and form 4–5 oval patties.

  3. I heat the remaining oil in the skillet and brown the patties for about 1 minute per side, then transfer them to a plate.

  4. In the same skillet, I sauté the sliced onion until browned, about 5 minutes. Then I add the mushrooms and cook until golden.

  5. I return the patties to the skillet, pour in the broth, and add onion powder, garlic powder, Worcestershire, salt, and pepper. I bring everything to a boil, cover, and simmer for 15 minutes.

  6. I stir in the cornstarch slurry and let it simmer for 5 more minutes until the gravy thickens and the patties are fully cooked.

  7. I serve the Salisbury steaks hot, smothered in the rich mushroom gravy—perfect over mashed potatoes or rice.

Servings and timing

  • Servings: 4

  • Prep time: 15 minutes

  • Cook time: 40 minutes

  • Total time: 55 minutes

Variations

  • I sometimes make it gluten-free by using gluten-free breadcrumbs and Worcestershire sauce.

  • For a lighter version, I swap in ground turkey or chicken, adding a touch more seasoning to boost flavor.

  • To make it vegetarian, I’ve used plant-based ground meat and veggie broth, with great results.

  • I occasionally spice it up with crushed red pepper or smoked paprika for a little kick.

  • I’ve also made mini patties for sliders or party appetizers—it works beautifully.

Storage/reheating

I store any leftovers in an airtight container in the fridge for up to 4 days. For longer storage, I freeze them in a sealed container or freezer bag for up to 3 months.
To reheat, I warm the patties gently in a skillet over medium heat with a splash of beef broth to loosen the gravy. The microwave also works, though I prefer the skillet for even heating.

FAQs

How do I keep the patties from falling apart?

I make sure to mix the ingredients just enough and let the patties rest in the fridge for about 20 minutes before cooking. That helps them hold together better when browning and simmering.

Can I use regular breadcrumbs instead of panko?

Yes, I’ve done it many times. Panko makes them a bit lighter, but regular breadcrumbs work just fine.

Can I make the gravy without cornstarch?

Absolutely. I sometimes use a roux instead—just cook equal parts flour and butter together, then slowly whisk in the broth to thicken the gravy.

What should I serve with Salisbury steak?

I usually go with creamy mashed potatoes, roasted vegetables, buttered noodles, or even steamed rice. A fresh salad on the side rounds it out nicely.

Can I make it ahead of time?

Yes. I often prep the patties and gravy the day before, then cook everything fresh when I’m ready. I’ve also frozen uncooked patties for a quick dinner later.

Conclusion

This Salisbury steak recipe brings together bold, comforting flavors in a dish that feels both nostalgic and refined. I love making it when I want something hearty that still comes together with simple ingredients. The rich mushroom gravy alone is enough to keep me coming back to it again and again.

Print

clock clock iconcutlery cutlery iconflag flag iconfolder folder iconinstagram instagram iconpinterest pinterest iconfacebook facebook iconprint print iconsquares squares iconheart heart iconheart solid heart solid icon
Bobby Flay Salisbury Steak

Bobby Flay Salisbury Steak

5 Stars 4 Stars 3 Stars 2 Stars 1 Star No reviews
  • Author: Sue
  • Prep Time: 15 minutes
  • Cook Time: 40 minutes
  • Total Time: 55 minutes
  • Yield: 4 servings
  • Category: Main Course
  • Method: Stovetop
  • Cuisine: American
  • Diet: Low Lactose
Print Recipe
Pin Recipe

Description

A cozy and savory Salisbury steak recipe inspired by Bobby Flay, featuring tender ground beef patties smothered in a rich mushroom-onion gravy. Perfect for a comforting dinner served with mashed potatoes or vegetables.


Ingredients

  • 4 tablespoons vegetable oil, divided
  • 1 onion, finely diced
  • 2 garlic cloves, minced
  • 1 pound (about 500 g) ground beef (80 % lean)
  • ⅓ cup panko breadcrumbs
  • 1 large egg
  • ⅓ cup tomato sauce or marinara
  • 1 teaspoon yellow mustard
  • 1 teaspoon Worcestershire sauce
  • 1 teaspoon dried oregano
  • ¼ teaspoon ground black pepper
  • Salt, to taste
  • 1 tablespoon vegetable oil (for gravy)
  • 1 onion, sliced
  • 9 oz (250 g) white button mushrooms, sliced
  • 2½ cups low‑sodium beef broth
  • 1 teaspoon onion powder
  • ½ teaspoon garlic powder
  • 1½ teaspoons Worcestershire sauce
  • 3 tablespoons cornstarch mixed with ¼ cup water or beef stock
  • Salt and pepper, as needed

Instructions

  1. Heat 2 tablespoons of oil in a skillet over medium heat. Sauté the diced onion until translucent, about 4 minutes. Add minced garlic and cook for another 40–60 seconds. Let cool slightly.
  2. In a bowl, combine the cooked onion-garlic mixture with ground beef, panko breadcrumbs, egg, tomato sauce, mustard, Worcestershire sauce, oregano, pepper, and salt. Mix until just combined. Form into 4–5 oval patties.
  3. Heat the remaining 2 tablespoons oil in the skillet. Brown the patties for about 1 minute per side. Remove and set aside.
  4. In the same skillet, sauté the sliced onion until browned, about 5 minutes. Add mushrooms and cook until golden.
  5. Return the patties to the skillet. Pour in beef broth and add onion powder, garlic powder, Worcestershire sauce, salt, and pepper. Bring to a boil, then cover and simmer for 15 minutes.
  6. Whisk cornstarch with water or beef stock. Stir into the skillet and cook for another 5 minutes, until the gravy thickens and patties are fully cooked (160 °F/71 °C).
  7. Serve hot with mushroom gravy over the steaks. Ideal with mashed potatoes.

Notes

  • Chilling patties for 20–30 minutes before cooking helps them hold shape.
  • Gluten-free breadcrumbs and sauces can be used for dietary needs.
  • For a vegan version, use plant-based meat, flax egg, and vegetable broth.
  • Store leftovers in the fridge for up to 4 days or freeze for up to 3–4 months.
  • To reheat, warm gently in a skillet with a splash of broth.

Nutrition

  • Serving Size: 1 steak with gravy
  • Calories: 420
  • Sugar: 5g
  • Sodium: 650mg
  • Fat: 28g
  • Saturated Fat: 8g
  • Unsaturated Fat: 17g
  • Trans Fat: 0.5g
  • Carbohydrates: 18g
  • Fiber: 2g
  • Protein: 24g
  • Cholesterol: 110mg

Have you made this recipe? I'd love to see it!

Click here to Follow me on Pinterest

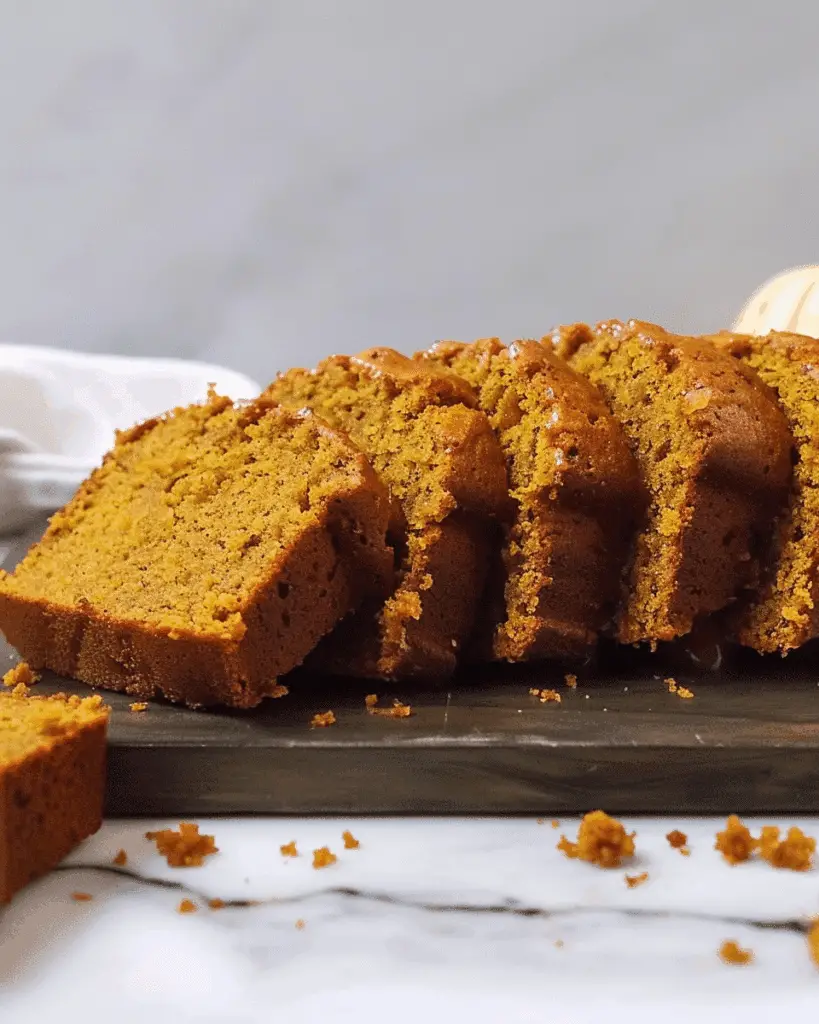
Pumpkin Bread – Rich and Buttery

August 31, 2025 by Sue Leave a Comment

I’m excited to share this moist and rich pumpkin bread recipe that’s incredibly easy to make and bursting with fall spices and butter flavor—it’s a treat I can enjoy any time of the year. Pumpkin Bread – Rich and Buttery

Why You’ll Love This Recipe

I adore how this recipe uses warm spices and butter to create a deliciously moist texture without any frosting needed. It’s straightforward—just two bowls and a special touch of warm milk make it stand out.

Ingredients

(Here's a tip: Check out the full list of ingredients and measurements in the recipe card below.)

  • canned pumpkin (puree, not pumpkin pie filling)

  • whole milk

  • granulated sugar

  • all‑purpose flour

  • ground cinnamon (optional: additional ground cloves, ginger, or nutmeg)

  • unsalted butter

  • baking powder (plus a bit of baking soda according to the recipe details)

  • kosher salt (or table salt)

  • vanilla extract

  • large eggs

directions

  1. Preheat my oven to 350°F (about 175°C).

  2. Prepare the pan: I butter the inside of my loaf or round cake pan, then line it with two pieces of parchment—one lengthwise and one widthwise—to help with easy removal later. I grease the parchment too.

  3. In one bowl, I mix together the dry ingredients: flour, ground cinnamon (and any other spices I choose), baking powder, baking soda, and salt.

  4. In another bowl, I cream together the butter and sugar until fluffy, then beat in the eggs, pumpkin puree, and vanilla extract until well combined.

  5. I gently combine the dry ingredients with the wet mixture until just incorporated.

  6. Here’s the secret: I whisk in warm milk at the end—that’s what gives the bread its exceptional moistness.

  7. I pour the batter into the prepared pan. For a cake pan, I bake about 45–50 minutes; for a loaf pan, I set it on a sheet tray (in case of leaks) and bake about 50–55 minutes, until a toothpick comes out with a few moist crumbs.

  8. I let it cool in the pan for 15 minutes, then carefully run a knife around the edges and invert it onto a plate (or simply lift it out using the parchment). I allow it to cool another 15 minutes before slicing.

Servings and timing

This makes around 8 slices.

  • Prep time: approximately 10 minutes

  • Bake time: 45–55 minutes (depending on pan type)

  • Total time: about 55 minutes—1 hour, including cooling time

Variations

I sometimes add cloves, ground ginger, or nutmeg along with the cinnamon for more fall-spice depth. Melissa also offers a version with streusel topping when I’m in the mood for something a bit more decadent.

storage/reheating

I leave the bread out on the counter the day I bake it, then store it, covered, in the fridge for up to one week. To freeze, once cooled I wrap it in parchment paper and plastic wrap, then place it into a freezer-safe bag—perfect for up to two months. I let it thaw before serving.

FAQs

How should I know when the pumpkin bread is done baking?

I insert a toothpick into the center; when it comes out with just a few moist crumbs, I know it’s ready. It will continue to cook slightly while resting.

Can I use fresh pumpkin instead of canned?

I can—just be sure to drain excess moisture from fresh pumpkin puree to maintain the right batter consistency.

Why does using warm milk matter?

Adding warm milk at the end helps create a wonderfully moist texture—it's the step that makes this bread especially tender and rich.

Can I substitute the spices?

Absolutely—I often stick with just cinnamon, but adding nutmeg, ginger, or cloves brings more warmth. Pumpkin pie spice works too if I want simplicity.

Do I have to line the pan with parchment?

I find it helps release the loaf cleanly. If I skip it, I make sure to grease well and dust with flour—especially useful if I don’t have parchment.

Conclusion

I absolutely love how this pumpkin bread delivers incredible flavor and moistness with minimal fuss. Between the buttery richness, warm spices, and the trick of warm milk, it’s become a go-to treat for me—perfect for cozy mornings or sharing with loved ones. I know you’ll fall in love with it too.

Print

clock clock iconcutlery cutlery iconflag flag iconfolder folder iconinstagram instagram iconpinterest pinterest iconfacebook facebook iconprint print iconsquares squares iconheart heart iconheart solid heart solid icon
Pumpkin Bread – Rich and Buttery

Pumpkin Bread – Rich and Buttery

5 Stars 4 Stars 3 Stars 2 Stars 1 Star No reviews
  • Author: Sue
  • Prep Time: 10 minutes
  • Cook Time: 50 minutes
  • Total Time: 1 hour
  • Yield: 8 slices
  • Category: Dessert
  • Method: Baking
  • Cuisine: American
  • Diet: Vegetarian
Print Recipe
Pin Recipe

Description

A rich, moist, and buttery pumpkin bread infused with warm fall spices and finished with a unique addition of warm milk for extra tenderness.


Ingredients

  • 1 cup canned pumpkin puree (not pumpkin pie filling)
  • ¼ cup whole milk (warmed)
  • 1 cup granulated sugar
  • 1 ½ cups all-purpose flour
  • 1 tsp ground cinnamon (optional: add cloves, ginger, or nutmeg)
  • ½ cup unsalted butter, softened
  • 1 tsp baking powder
  • ¼ tsp baking soda
  • ½ tsp kosher salt (or ¼ tsp table salt)
  • 1 tsp vanilla extract
  • 2 large eggs

Instructions

  1. Preheat oven to 350°F (175°C).
  2. Grease a loaf or round cake pan with butter and line it with parchment paper in two directions. Grease the parchment as well.
  3. In a bowl, whisk together flour, cinnamon, baking powder, baking soda, and salt.
  4. In another bowl, cream the butter and sugar until fluffy, then beat in eggs, pumpkin puree, and vanilla extract.
  5. Mix the dry ingredients into the wet mixture until just combined.
  6. Whisk in the warm milk to the batter for extra moisture.
  7. Pour the batter into the prepared pan. Bake for 45–50 minutes for a cake pan or 50–55 minutes for a loaf pan, until a toothpick comes out with moist crumbs.
  8. Cool in the pan for 15 minutes, then run a knife around the edges and lift or invert onto a plate. Cool another 15 minutes before slicing.

Notes

  • Warm milk is the secret to extra moisture and tenderness.
  • Add spices like cloves, ginger, or nutmeg for a deeper fall flavor.
  • Parchment lining helps with easy removal, but greasing and flouring the pan also works.
  • Freezes well for up to 2 months—wrap tightly before freezing.

Nutrition

  • Serving Size: 1 slice
  • Calories: 260
  • Sugar: 20g
  • Sodium: 180mg
  • Fat: 12g
  • Saturated Fat: 7g
  • Unsaturated Fat: 4g
  • Trans Fat: 0g
  • Carbohydrates: 34g
  • Fiber: 1g
  • Protein: 3g
  • Cholesterol: 60mg

Have you made this recipe? I'd love to see it!

Click here to Follow me on Pinterest

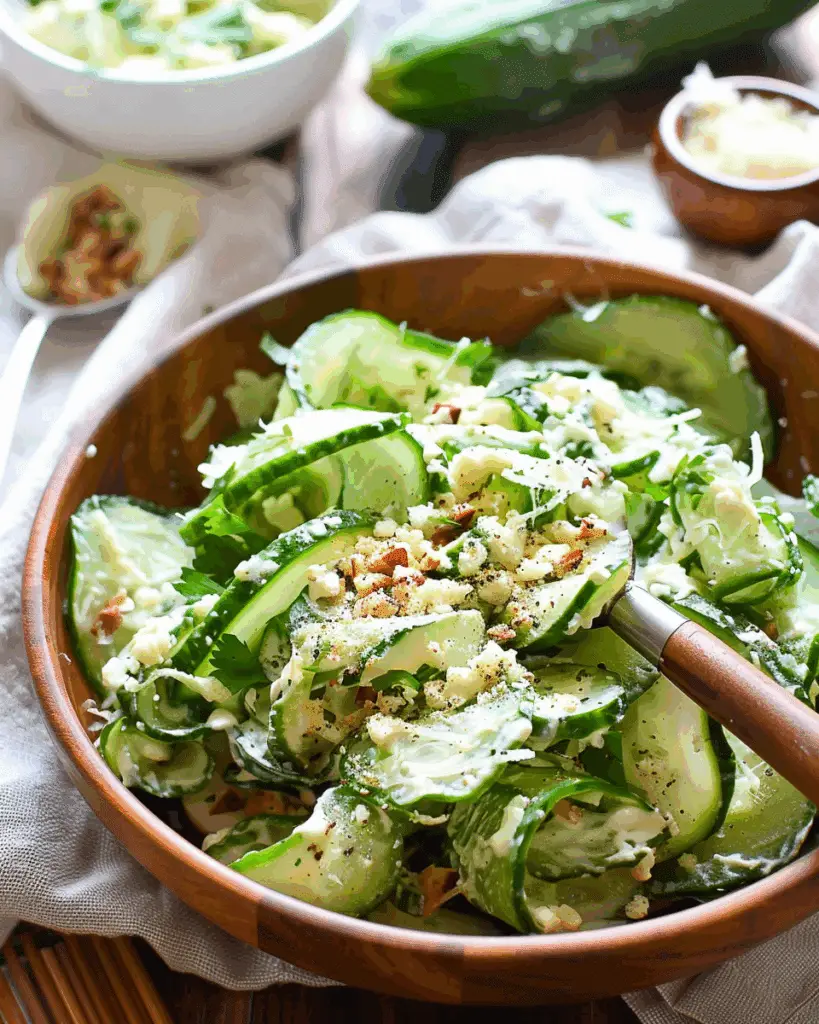
Cucumber Caesar Salad

August 31, 2025 by Sue Leave a Comment

I merged the crisp freshness of cucumber salad with the creamy indulgence of Caesar salad to create this lively side dish. It’s a refreshing, crunchy, and creamy twist on a classic, perfect for warm days or quick gatherings.

Cucumber Caesar Salad

Why I’ll Love This Recipe

I love how it blends two of my go-to salads into one easy dish. The cucumbers stay crisp and juicy, the Caesar dressing adds bold flavor, and the toasted breadcrumbs and Parmesan bring that classic Caesar feel. It’s light, fast, and full of flavor—without being heavy.

ingredients

(Here's a tip: Check out the full list of ingredients and measurements in the recipe card below.)

  • 16 ounces mini seedless cucumbers

  • 1 cup freshly shaved Parmesan cheese

  • ½ tablespoon salted butter

  • ¼ cup panko breadcrumbs

  • ½ cup Caesar dressing (or to taste)

directions

  1. I melt the butter in a small skillet over medium heat, then add the panko and toast it until golden, stirring often.

  2. I slice the cucumbers about ¼ inch thick and toss them into a large bowl.

  3. I add about ½ cup of shaved Parmesan and 2 tablespoons of the toasted breadcrumbs.

  4. I pour in the Caesar dressing—adjusting to taste—and toss until everything’s evenly coated.

  5. I top the salad with more Parmesan and breadcrumbs just before serving for extra crunch and flavor.

Servings and timing

  • Servings: I usually get about 8 side-dish servings.

  • Prep Time: Around 15 minutes total—no cooking besides toasting the breadcrumbs.

storage/reheating

I store leftovers in an airtight container in the refrigerator. Since cucumbers release water, I try to enjoy the salad within 1 day. I also keep extra breadcrumbs aside and sprinkle them fresh when serving leftovers to maintain the crunch.

Variations

I switch it up depending on what I have on hand:

  • I use English or Persian cucumbers if I don’t have minis.

  • I toss in sliced red onions, cherry tomatoes, or olives for more color and bite.

  • For a more filling version, I sometimes add grilled tofu, chickpeas, or cooked quinoa.

  • I use homemade Caesar dressing when I have time, but store-bought works well too.

  • Crushed croutons or Parmesan crisps also make a great crunchy topping instead of panko.

FAQs

1. Can I use regular cucumbers instead of mini ones?

Yes, I just slice them thin and sometimes remove the seeds if they’re large.

2. Is it okay to use pre-grated Parmesan?

While freshly shaved Parmesan gives better texture and flavor, pre-grated works fine in a pinch.

3. Can I make this salad ahead of time?

I prefer to slice the cucumbers and toast the breadcrumbs ahead, but I wait to toss everything together right before serving so it stays fresh.

4. How can I make this vegan?

I swap the Parmesan with a dairy-free alternative and use a vegan Caesar dressing. I also toast the breadcrumbs in olive oil instead of butter.

5. What’s the best way to keep the salad from getting watery?

I keep the cucumbers dry by patting them with a paper towel before mixing, and I always add the dressing just before serving.

Conclusion

This Cucumber Caesar Salad is a bright, crunchy, and creamy twist on the traditional Caesar. I love how simple and satisfying it is—perfect as a side dish, a potluck contribution, or even a quick lunch. It’s one of those salads I come back to again and again when I want something flavorful, fresh, and fast.

Print

clock clock iconcutlery cutlery iconflag flag iconfolder folder iconinstagram instagram iconpinterest pinterest iconfacebook facebook iconprint print iconsquares squares iconheart heart iconheart solid heart solid icon
Cucumber Caesar Salad

Cucumber Caesar Salad

5 Stars 4 Stars 3 Stars 2 Stars 1 Star No reviews
  • Author: Sue
  • Prep Time: 15 minutes
  • Cook Time: 5 minutes
  • Total Time: 20 minutes
  • Yield: 8 servings
  • Category: Salad
  • Method: Tossing
  • Cuisine: Fusion
  • Diet: Vegetarian
Print Recipe
Pin Recipe

Description

A fresh and creamy mash-up of cucumber and Caesar salad, combining crunchy mini cucumbers with rich Parmesan, toasty breadcrumbs, and a savory Caesar dressing—all without any meat.


Ingredients

  • 16 ounces mini seedless cucumbers
  • 1 cup freshly shaved Parmesan cheese
  • ½ tablespoon salted butter
  • ¼ cup panko breadcrumbs
  • ½ cup Caesar dressing (or to taste)

Instructions

  1. Melt the butter in a small skillet over medium heat, add the breadcrumbs, and toast until golden, stirring often.
  2. Slice the cucumbers about ¼‑inch thick and place them in a large bowl.
  3. Add about ½ cup of shaved Parmesan and 2 tablespoons of the toasted breadcrumbs.
  4. Pour in Caesar dressing to taste and toss until everything is evenly coated.
  5. Garnish with extra Parmesan and breadcrumbs before serving.

Notes

  • Best eaten within 1 day for optimal crunch.
  • You can use any type of cucumber if mini seedless aren’t available.
  • Store-bought Caesar dressing works great if you're short on time.
  • Toasted breadcrumbs can be prepared a day in advance.
  • Customize with additions like onions, peppers, or chickpeas.

Nutrition

  • Serving Size: 1 serving
  • Calories: 160
  • Sugar: 2g
  • Sodium: 350mg
  • Fat: 13g
  • Saturated Fat: 5g
  • Unsaturated Fat: 7g
  • Trans Fat: 0g
  • Carbohydrates: 6g
  • Fiber: 1g
  • Protein: 6g
  • Cholesterol: 15mg

Have you made this recipe? I'd love to see it!

Click here to Follow me on Pinterest

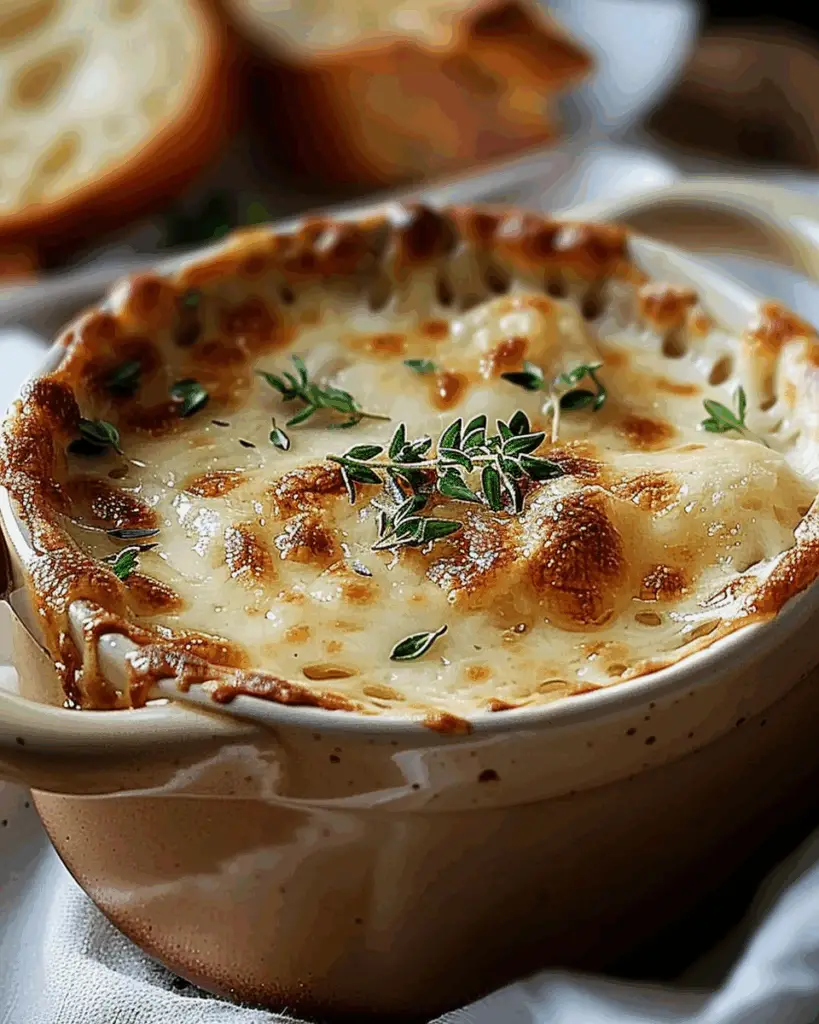
Irresistible FRENCH ONION SOUP GRATINÉE Recipe to Savor

August 31, 2025 by Sue Leave a Comment

This homemade version of the classic French onion soup brings together deeply caramelized onions, rich beef broth, crisp toasted baguette slices, and melty cheese gratinéed to perfection. Every spoonful wraps me in warmth and comfort—it’s the ultimate cozy dish for any time of year. Irresistible FRENCH ONION SOUP GRATINÉE Recipe to Savor

Why You’ll Love This Recipe

I absolutely love how simple and satisfying this soup is. It’s elegant enough for a dinner party but cozy enough for a quiet night in. The sweet depth of the caramelized onions combined with the salty broth and gooey cheese creates an incredible balance of flavors. I enjoy serving this as both a starter and a main course—it always impresses.

Ingredients

(Here’s a tip: Check out the full list of ingredients and measurements in the recipe card below.)

  • 4 medium yellow onions, thinly sliced

  • 4 tablespoons unsalted butter

  • 6 cups (about 1.4 L) beef broth

  • ½ cup dry white wine

  • 1 fresh baguette, sliced into rounds

  • 2 cups (about 200 g) shredded gruyère cheese

directions

  1. I start by thinly slicing the onions so they caramelize evenly.

  2. In a large pot, I melt the butter over medium heat, then add the onions. I stir them frequently for 20 to 25 minutes until they become golden and tender.

  3. I deglaze the pot with the white wine, scraping up any flavorful bits stuck to the bottom.

  4. I pour in the beef broth, bring it to a boil, then lower the heat and let it simmer for 15 to 20 minutes.

  5. While the soup simmers, I toast the baguette slices until golden and crisp.

  6. I ladle the soup into oven-safe bowls, top each with toasted bread slices and a generous layer of shredded gruyère, then place them under the broiler for 3 to 5 minutes until the cheese is bubbly and golden. I serve it hot and melty.

Servings and timing

  • Servings: This recipe makes about 6 portions

  • Prep time: 30 minutes

  • Cook time: About 1 hour

Variations

  • I like swapping gruyère for comté, emmental, or even mozzarella for a milder version.

  • I sometimes use vegetable broth for a vegetarian option or chicken broth for a lighter flavor.

  • I add fresh thyme, rosemary, or sautéed mushrooms when I want more complexity.

storage/reheating

I store leftovers in an airtight container in the fridge for up to 3 days. When reheating, I warm the soup gently on the stove, then re-top with fresh bread and cheese before broiling again to bring back that irresistible gratinéed top.

FAQs

What ingredients are needed for this soup?

I make sure to have sweet yellow onions, unsalted butter, a rich beef broth, dry white wine, a crusty baguette, and melty gruyère cheese.

How long does it take to make this soup?

I plan for about 1 hour and 30 minutes from start to finish—30 minutes for prep, and about 1 hour for cooking, simmering, and broiling.

Can it be made ahead?

Absolutely. I make the soup ahead, store it in the fridge for up to 3 days, and just add the bread and cheese before reheating and broiling right before serving.

What variations can I try?

I experiment with different cheeses, broths, and add-ins like herbs or mushrooms depending on the mood or occasion.

How should leftovers be stored and reheated?

I keep leftovers chilled for up to 3 days, reheat the soup gently, then add new cheese and toast before giving it a quick broil to recreate that perfect melted topping.

Conclusion

This French onion soup gratinée is like a warm hug in a bowl—simple, rich, and deeply comforting. I love how the caramelized onions bring sweetness, the broth adds depth, and the melted cheese ties it all together. Whether I’m cooking for guests or treating myself, this dish always satisfies. I hope it becomes a favorite in your kitchen too.

Print

clock clock iconcutlery cutlery iconflag flag iconfolder folder iconinstagram instagram iconpinterest pinterest iconfacebook facebook iconprint print iconsquares squares iconheart heart iconheart solid heart solid icon
Irresistible FRENCH ONION SOUP GRATINÉE Recipe to Savor

Irresistible FRENCH ONION SOUP GRATINÉE Recipe to Savor

5 Stars 4 Stars 3 Stars 2 Stars 1 Star No reviews
  • Author: Sue
  • Prep Time: 30 minutes
  • Cook Time: 1 hour
  • Total Time: 1 hour 30 minutes
  • Yield: 6 servings
  • Category: Soups
  • Method: Broiled
  • Cuisine: French
  • Diet: Vegetarian
Print Recipe
Pin Recipe

Description

This French onion soup gratinée combines caramelized onions, rich broth, toasted baguette, and melted cheese for a deeply comforting and elegant dish.


Ingredients

  • 4 medium yellow onions, thinly sliced
  • 4 tablespoons unsalted butter
  • 6 cups (about 1.4 L) beef broth
  • ½ cup dry white wine
  • 1 fresh baguette, sliced into rounds
  • 2 cups (about 200 g) shredded gruyère cheese

Instructions

  1. Thinly slice the onions for even caramelization.
  2. In a large pot, melt the butter over medium heat, then add the onions. Stir frequently for 20–25 minutes until golden and tender.
  3. Deglaze the pot with the white wine, scraping up any browned bits.
  4. Add the beef broth, bring to a boil, then simmer for 15–20 minutes.
  5. Toast the baguette slices until golden and crisp.
  6. Ladle the soup into oven-safe bowls, top with toasted baguette and shredded gruyère, then broil for 3–5 minutes until bubbly and golden.
  7. Serve hot and enjoy.

Notes

  • Swap gruyère for comté, emmental, or mozzarella for a milder version.
  • Use vegetable broth for a vegetarian option or chicken broth for a lighter flavor.
  • Add thyme, rosemary, or sautéed mushrooms for added complexity.
  • Soup can be made ahead and gratinéed just before serving.

Nutrition

  • Serving Size: 1 bowl
  • Calories: 340
  • Sugar: 6g
  • Sodium: 900mg
  • Fat: 18g
  • Saturated Fat: 11g
  • Unsaturated Fat: 6g
  • Trans Fat: 0g
  • Carbohydrates: 28g
  • Fiber: 3g
  • Protein: 14g
  • Cholesterol: 50mg

Have you made this recipe? I'd love to see it!

Click here to Follow me on Pinterest

Honey Garlic Chicken Bites Over Creamy Rice

August 30, 2025 by Sue Leave a Comment

This dish brings together tender, golden-seared chicken bites coated in a sticky honey garlic glaze and served over rich, creamy rice. It’s one of those quick-to-make meals that feel indulgent without being complicated, perfect for both weeknight dinners and casual gatherings. Honey Garlic Chicken Bites Over Creamy Rice

Why You’ll Love This Recipe

I love how this recipe balances sweet and savory flavors with the warmth of garlic and the silkiness of the creamy rice. It’s a family-friendly meal that doesn’t take much effort yet always delivers on flavor. The chicken bites cook fast and absorb the sauce beautifully, while the rice adds that luxurious creamy base that makes each bite incredibly satisfying. Plus, it's an easy one-pan dish that saves me cleanup time.

Ingredients

(Here's a tip: Check out the full list of ingredients and measurements in the recipe card below.)

  • Boneless, skinless chicken breasts or thighs, cut into bite-sized pieces

  • Salt and black pepper

  • Cornstarch

  • Olive oil or vegetable oil

  • Butter

  • Garlic, minced

  • Honey

  • Soy sauce

  • Chicken broth

For the creamy rice:

  • Long grain white rice

  • Chicken broth

  • Milk or heavy cream

  • Butter

  • Salt

Directions

  1. I start by seasoning the chicken pieces with salt, pepper, and a light dusting of cornstarch. This helps create a crisp outer coating when they’re pan-fried.

  2. In a hot skillet with a bit of oil, I sear the chicken until golden and cooked through, then set it aside.

  3. Using the same skillet, I add butter and garlic, sautéing just until fragrant. I stir in honey, soy sauce, and a splash of chicken broth to make a sticky, flavorful glaze.

  4. I return the chicken to the skillet and toss it in the sauce until everything’s coated and glossy.

  5. For the creamy rice, I cook the rice in chicken broth until tender, then stir in butter and milk (or cream) for that rich, smooth texture.

  6. I serve the glazed chicken bites over a warm bed of the creamy rice, spooning extra sauce on top.

Servings and timing

This recipe makes approximately 4 servings.

Prep Time: 10 minutes
Cook Time: 25 minutes
Total Time: 35 minutes

Variations

  • I sometimes use chicken thighs for more flavor and tenderness.

  • For a bit of heat, I add red pepper flakes or a squirt of sriracha to the honey garlic sauce.

  • Coconut milk can replace cream in the rice for a subtle tropical twist.

  • If I’m in a rush, I’ll serve it over plain white rice or jasmine rice instead of creamy rice.

  • Adding steamed broccoli or snap peas brings a fresh crunch and makes this a full meal.

storage/reheating

I store leftovers in an airtight container in the fridge for up to 3 days. To reheat, I use the microwave or a skillet over low heat with a splash of broth to loosen the sauce. The rice may thicken in the fridge, so I add a bit of milk or water when reheating to bring back that creamy texture.

FAQs

How do I keep the chicken bites crispy in the sauce?

I lightly coat the chicken in cornstarch and sear it until crisp. To keep it from getting soggy, I add the sauce just before serving and don’t let it simmer too long.

Can I make this recipe ahead of time?

Yes, I often cook the chicken and rice separately, then combine and reheat when I’m ready to serve. I keep the sauce separate and warm it fresh to preserve the texture.

What’s the best substitute for soy sauce?

I use tamari or coconut aminos when I want a gluten-free or lower-sodium option. Both still give that salty-sweet balance.

Can I use leftover rice?

Definitely. I reheat leftover rice with a bit of broth and stir in cream and butter to make it creamy again before serving.

Is this recipe freezer-friendly?

I don’t usually freeze it because the creamy rice can change texture, but the chicken bites freeze well. I reheat them gently on the stove with some added sauce or broth.

Conclusion

Honey Garlic Chicken Bites Over Creamy Rice is one of those meals that’s simple to make but big on comfort. I keep it in rotation because it’s versatile, satisfying, and always hits the spot. Whether I’m cooking for myself or feeding the whole family, this recipe never fails to impress.

Print

clock clock iconcutlery cutlery iconflag flag iconfolder folder iconinstagram instagram iconpinterest pinterest iconfacebook facebook iconprint print iconsquares squares iconheart heart iconheart solid heart solid icon
Honey Garlic Chicken Bites Over Creamy Rice

Honey Garlic Chicken Bites Over Creamy Rice

5 Stars 4 Stars 3 Stars 2 Stars 1 Star No reviews
  • Author: Sue
  • Prep Time: 10 minutes
  • Cook Time: 25 minutes
  • Total Time: 35 minutes
  • Yield: 4 servings
  • Category: Dinner
  • Method: Stovetop
  • Cuisine: Asian-Inspired
  • Diet: Halal
Print Recipe
Pin Recipe

Description

Tender chicken bites glazed with a sweet and savory honey garlic sauce, served over rich and creamy rice for a comforting and flavorful meal.


Ingredients

  • 1.5 lbs boneless, skinless chicken breasts or thighs, cut into bite-sized pieces
  • Salt and black pepper to taste
  • 2 tbsp cornstarch
  • 2 tbsp olive oil or vegetable oil
  • 2 tbsp butter
  • 4 cloves garlic, minced
  • ⅓ cup honey
  • ¼ cup soy sauce
  • ¼ cup chicken broth
  • 1 cup long grain white rice
  • 2 cups chicken broth (for rice)
  • 1 cup milk or heavy cream
  • 2 tbsp butter (for rice)
  • ½ tsp salt (for rice)

Instructions

  1. Season chicken with salt, pepper, and lightly coat with cornstarch.
  2. Heat oil in a skillet and sear chicken until golden brown and cooked through. Remove and set aside.
  3. In the same skillet, add butter and minced garlic; sauté until fragrant.
  4. Add honey, soy sauce, and chicken broth; stir and simmer to form a sticky glaze.
  5. Return chicken to the skillet and toss to coat in the sauce.
  6. In a separate pot, cook rice in chicken broth until tender.
  7. Stir in butter, milk or cream, and salt into the rice to make it creamy.
  8. Serve glazed chicken bites over the creamy rice and spoon extra sauce on top.

Notes

  • Use chicken thighs for extra tenderness and flavor.
  • Add red pepper flakes or sriracha for heat.
  • Coconut milk can substitute for cream in rice.
  • Plain white or jasmine rice works as a quicker alternative.
  • Steamed vegetables like broccoli can make it a full meal.

Nutrition

  • Serving Size: 1 serving
  • Calories: 520
  • Sugar: 18g
  • Sodium: 880mg
  • Fat: 21g
  • Saturated Fat: 9g
  • Unsaturated Fat: 10g
  • Trans Fat: 0g
  • Carbohydrates: 45g
  • Fiber: 1g
  • Protein: 34g
  • Cholesterol: 110mg

Have you made this recipe? I'd love to see it!

Click here to Follow me on Pinterest

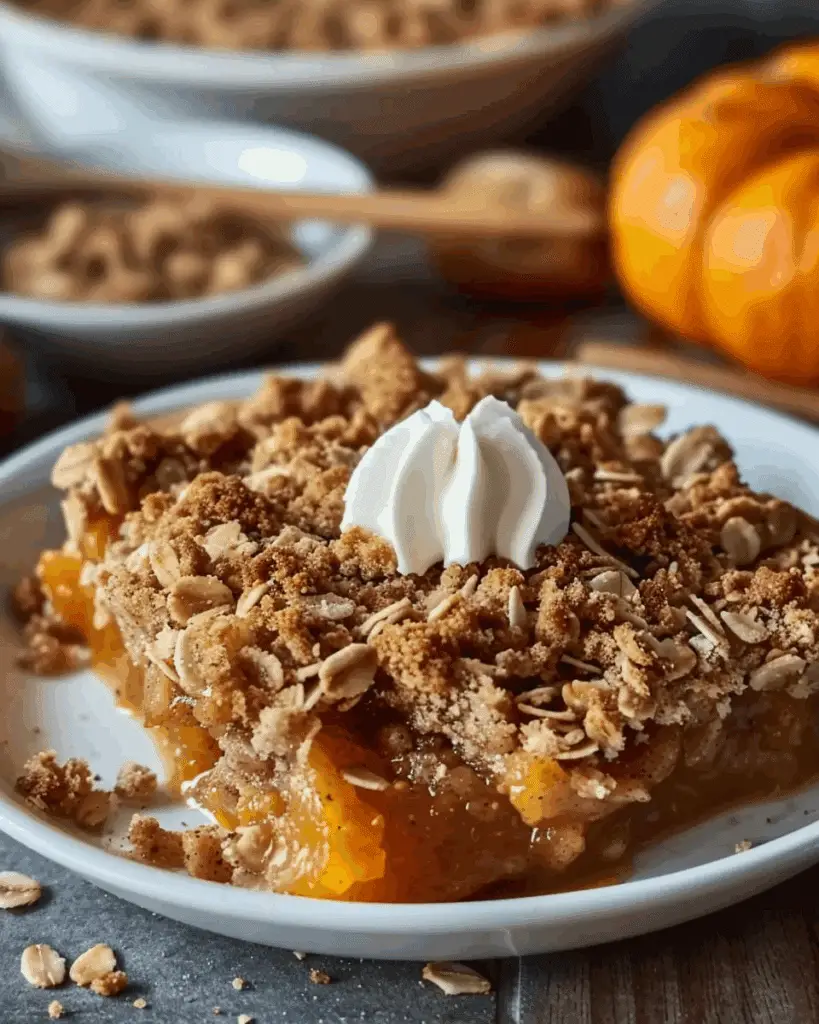
Cinnamon Pumpkin Crisp

August 30, 2025 by Sue Leave a Comment

This Cinnamon Pumpkin Crisp is a cozy and comforting dessert that combines the rich creaminess of pumpkin pie filling with a buttery, crunchy cinnamon oat topping. It’s the kind of fall dessert that fills the kitchen with warm, spiced aromas and makes everyone eager for a second helping. With just a few pantry staples, I can whip this up for a simple treat or even a festive holiday gathering. Cinnamon Pumpkin Crisp

Why You’ll Love This Recipe

I love this recipe because it’s everything I crave during pumpkin season—sweet, warmly spiced, and just the right balance of soft and crunchy. It’s simpler than making a pie, but just as satisfying. Whether I serve it with a scoop of vanilla ice cream or a dollop of whipped cream, it always hits the spot. Plus, it’s easy to tweak depending on what I have on hand.

Ingredients

(Here's a tip: Check out the full list of ingredients and measurements in the recipe card below.)

  • Canned pumpkin puree

  • Brown sugar

  • Granulated sugar

  • Eggs

  • Heavy cream or evaporated milk

  • Ground cinnamon

  • Nutmeg

  • Cloves

  • Salt

  • All-purpose flour

  • Old-fashioned oats

  • Butter (cold and cut into cubes)

  • Chopped pecans (optional for extra crunch)

Directions

  1. I start by preheating the oven to 350°F (175°C) and greasing a baking dish.

  2. In a large bowl, I mix the pumpkin puree with brown sugar, granulated sugar, eggs, heavy cream, cinnamon, nutmeg, cloves, and a pinch of salt until smooth.

  3. I pour the pumpkin mixture into the prepared dish and smooth the top.

  4. For the crisp topping, I combine flour, oats, more brown sugar, cinnamon, and salt. Then I cut in the cold butter until the mixture looks like coarse crumbs.

  5. I sprinkle the topping evenly over the pumpkin layer.

  6. If I’m using pecans, I toss them on top for added texture.

  7. I bake it for about 40–45 minutes until the top is golden and the filling is set.

  8. I let it cool slightly before serving—it’s best warm.

Servings and timing

This recipe serves about 8 people. It takes approximately 15 minutes to prep and 45 minutes to bake, so I usually have it ready in around an hour total.

Variations

  • I sometimes add a splash of vanilla extract to the pumpkin filling for extra depth.

  • For a dairy-free version, I use coconut milk or almond milk instead of cream.

  • Swapping out the pecans for walnuts or leaving them out entirely makes it nut-free.

  • A dash of maple syrup in the filling or topping adds a natural sweetness that I really enjoy.

Storage/Reheating

I store leftovers covered in the refrigerator for up to 4 days. To reheat, I warm individual portions in the microwave for about 30–45 seconds. If I’m reheating a larger portion, I cover it with foil and place it in a 300°F oven for 10–15 minutes until warmed through. It also tastes great cold from the fridge.

FAQs

What’s the difference between pumpkin crisp and pumpkin pie?

Pumpkin crisp has a similar spiced filling to pumpkin pie but skips the crust in favor of a crumbly oat topping, which I find easier and faster to prepare.

Can I use fresh pumpkin instead of canned?

Yes, I can use fresh pumpkin puree—just make sure it’s smooth and not too watery. I usually roast and puree sugar pumpkins for the best flavor.

Can I make this ahead of time?

Absolutely. I often make it the day before and reheat it before serving. It holds up well in the fridge and the flavors deepen overnight.

Do I need to use oats in the topping?

While oats give the crisp its classic texture, I can substitute them with crushed graham crackers or even more flour for a slightly different texture.

Can I freeze pumpkin crisp?

Yes, I freeze fully baked and cooled pumpkin crisp. I wrap it tightly and store it for up to 2 months. To serve, I thaw it in the fridge overnight and reheat it in the oven.

Conclusion

Cinnamon Pumpkin Crisp is one of my favorite ways to celebrate pumpkin season. It’s easy, delicious, and full of fall flavor. I can make it ahead, customize it with what I have on hand, and serve it to a crowd or keep it all to myself. Every bite is the perfect mix of creamy, crunchy, and warmly spiced comfort.

Print

clock clock iconcutlery cutlery iconflag flag iconfolder folder iconinstagram instagram iconpinterest pinterest iconfacebook facebook iconprint print iconsquares squares iconheart heart iconheart solid heart solid icon
Cinnamon Pumpkin Crisp

Cinnamon Pumpkin Crisp

5 Stars 4 Stars 3 Stars 2 Stars 1 Star No reviews
  • Author: Sue
  • Prep Time: 15 minutes
  • Cook Time: 45 minutes
  • Total Time: 1 hour
  • Yield: 8 servings
  • Category: Dessert
  • Method: Baking
  • Cuisine: American
  • Diet: Vegetarian
Print Recipe
Pin Recipe

Description

This Cinnamon Pumpkin Crisp is a warm and cozy dessert that blends a creamy pumpkin pie filling with a buttery cinnamon oat topping. Perfect for fall, it's an easy alternative to pie that’s just as satisfying.


Ingredients

  • 1 (15 oz) can pumpkin puree
  • ½ cup brown sugar (plus more for topping)
  • ¼ cup granulated sugar
  • 2 large eggs
  • ¾ cup heavy cream or evaporated milk
  • 1 ½ tsp ground cinnamon (divided)
  • ¼ tsp ground nutmeg
  • ⅛ tsp ground cloves
  • ¼ tsp salt (plus a pinch for topping)
  • ¾ cup all-purpose flour
  • ¾ cup old-fashioned oats
  • ½ cup cold butter, cubed
  • ⅓ cup chopped pecans (optional)

Instructions

  1. Preheat oven to 350°F (175°C) and grease a baking dish.
  2. In a large bowl, combine pumpkin puree, brown sugar, granulated sugar, eggs, cream, 1 teaspoon cinnamon, nutmeg, cloves, and a pinch of salt until smooth.
  3. Pour the pumpkin mixture into the prepared baking dish and smooth the top.
  4. In another bowl, mix flour, oats, remaining ½ teaspoon cinnamon, additional brown sugar, and ¼ teaspoon salt.
  5. Cut in the cold butter until the topping resembles coarse crumbs.
  6. Sprinkle the topping evenly over the pumpkin layer.
  7. Add chopped pecans on top if using.
  8. Bake for 40–45 minutes until the topping is golden and filling is set.
  9. Let cool slightly before serving. Best enjoyed warm.

Notes

  • Add vanilla extract for more depth in the filling.
  • Use coconut or almond milk for a dairy-free version.
  • Swap pecans with walnuts or omit for nut-free.
  • Add maple syrup to enhance sweetness naturally.
  • Store leftovers in the fridge for up to 4 days.

Nutrition

  • Serving Size: 1 serving
  • Calories: 310
  • Sugar: 22g
  • Sodium: 180mg
  • Fat: 16g
  • Saturated Fat: 9g
  • Unsaturated Fat: 6g
  • Trans Fat: 0g
  • Carbohydrates: 39g
  • Fiber: 3g
  • Protein: 4g
  • Cholesterol: 65mg

Have you made this recipe? I'd love to see it!

Click here to Follow me on Pinterest

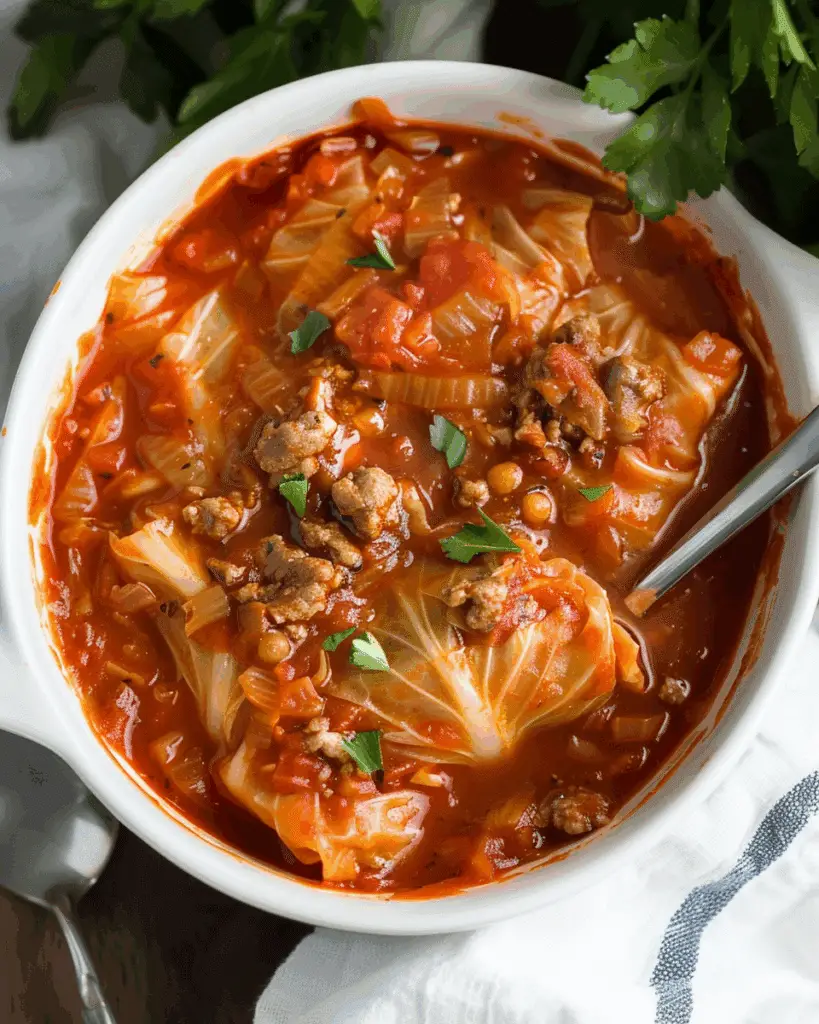
Cabbage Roll Soup

August 30, 2025 by Sue Leave a Comment

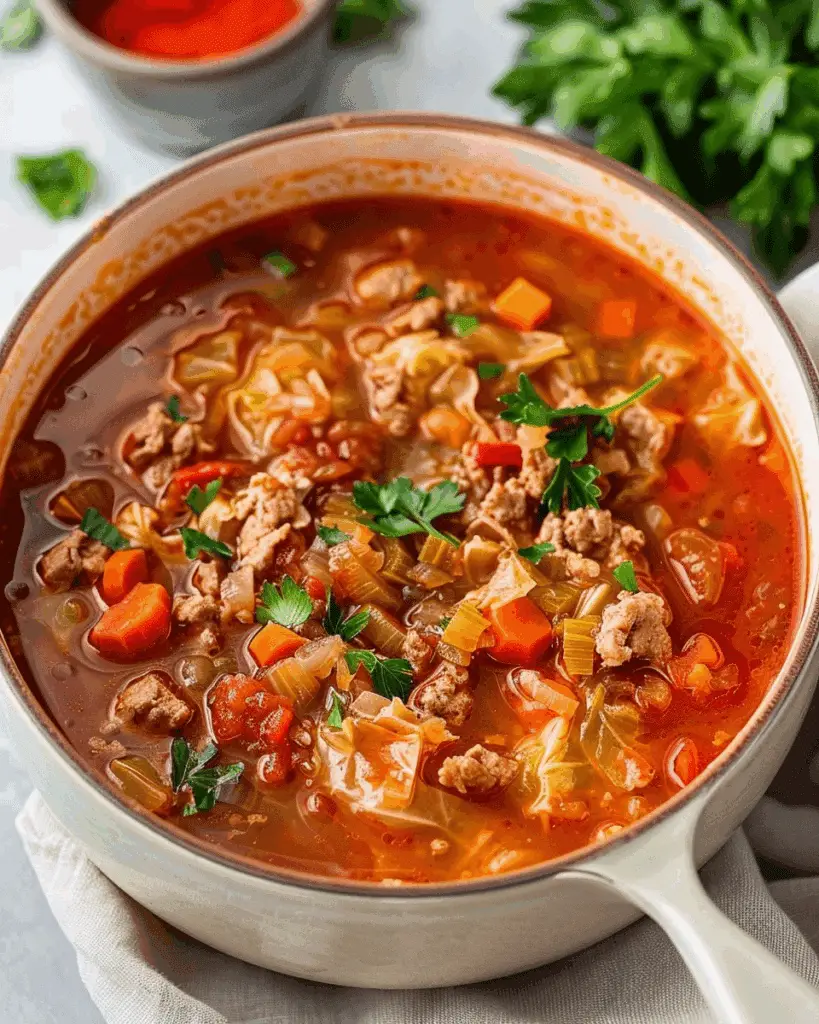
I turn the classic comfort of cabbage rolls into a warm, hearty soup—no rolling required. It’s simple, filling, and perfect for chilly days. Cabbage Roll Soup

Why I’ll Love This Recipe

I love that I can enjoy all the cozy flavors of traditional cabbage rolls without the extra steps. Everything goes into one pot, making cleanup a breeze. It’s versatile, freezer-friendly, and easy to adjust to my taste or dietary needs.

ingredients

(Here's a tip: Check out the full list of ingredients and measurements in the recipe card below.)

  • ground beef

  • chopped green cabbage

  • yellow onion, diced

  • carrots, diced or shredded

  • beef broth

  • tomato sauce

  • white rice

  • garlic, minced

  • olive oil (optional)

  • salt

  • black pepper

directions

I start by heating a bit of olive oil in a large pot and browning the ground beef until it’s fully cooked. If there’s excess grease, I drain it off. Then I add the diced onions and carrots, cooking until they soften, about 5 minutes. I stir in the garlic and chopped cabbage and cook for a few more minutes until the cabbage just starts to wilt.

Next, I pour in the beef broth, tomato sauce, and rice. I season with salt and pepper to taste. I bring the soup to a boil, then reduce the heat and let it simmer uncovered for about 30 minutes, until the rice is tender and everything is well combined. I give it a final taste and adjust seasoning if needed before serving.

Servings and timing

  • Servings: 6

  • Prep time: 10 minutes

  • Cook time: 40 minutes

  • Total time: 50 minutes

Variations

  • I sometimes use ground turkey instead of beef when I want something lighter.

  • I like to swap white rice with brown rice or even cauliflower rice if I’m cutting carbs.

  • For extra depth of flavor, I’ve added a pinch of smoked paprika or a splash of Worcestershire sauce.

  • When I want more tomato flavor, I add a handful of diced tomatoes along with the sauce.

  • I’ve also used low-sodium broth to control the salt level more closely.

storage/reheating

I store leftovers in an airtight container in the fridge for up to 4 days. When I reheat it, I like to add a splash of broth or water because the rice tends to soak up the liquid as it sits.
To freeze, I let the soup cool completely, transfer it to freezer-safe containers, and store it for up to 3 months. If I know I’m freezing, I sometimes leave out the rice and add it fresh after reheating to keep the texture from getting mushy.

FAQs

How can I make this recipe vegetarian?

I swap the ground beef for lentils or a plant-based meat alternative and use vegetable broth instead of beef broth.

Can I use brown rice instead of white?

Yes, I can, but I allow for extra cooking time since brown rice takes longer to soften. I also keep an eye on the liquid level and add more broth if needed.

Is this soup freezer-friendly?

Absolutely. I freeze it in portions, ideally without rice, and then add freshly cooked rice after thawing and reheating for best texture.

How do I prevent the rice from getting mushy?

I cook the rice separately and add it right before serving, especially if I plan to store or freeze the soup. That keeps the grains from breaking down.

What can I serve with this soup?

I like to serve it with crusty bread, garlic toast, or even a green side salad to make it a full meal.

Conclusion

This cabbage roll soup gives me everything I love about stuffed cabbage—rich flavor, hearty ingredients, and satisfying texture—without the hassle. It’s a great way to feed my family with minimal prep and maximum flavor. I keep this one in my regular cold-weather rotation, and it never disappoints.

Print

clock clock iconcutlery cutlery iconflag flag iconfolder folder iconinstagram instagram iconpinterest pinterest iconfacebook facebook iconprint print iconsquares squares iconheart heart iconheart solid heart solid icon
Cabbage Roll Soup

Cabbage Roll Soup

5 Stars 4 Stars 3 Stars 2 Stars 1 Star No reviews
  • Author: Sue
  • Prep Time: 10 minutes
  • Cook Time: 40 minutes
  • Total Time: 50 minutes
  • Yield: 6 servings
  • Category: Soup
  • Method: Stovetop
  • Cuisine: American
  • Diet: Gluten Free
Print Recipe
Pin Recipe

Description

This hearty Cabbage Roll Soup captures all the comforting flavors of traditional cabbage rolls in an easy, one-pot meal. No rolling required—just warm, savory goodness perfect for cold days.


Ingredients

  • 1 lb ground beef
  • 1 medium green cabbage, chopped
  • 1 yellow onion, diced
  • 2 carrots, diced or shredded
  • 6 cups beef broth
  • 2 cups tomato sauce
  • ¾ cup white rice
  • 3 cloves garlic, minced
  • 1 tbsp olive oil (optional)
  • 1 tsp salt, or to taste
  • ½ tsp black pepper, or to taste

Instructions

  1. Heat olive oil in a large pot over medium heat. Add ground beef and cook until browned, breaking it apart as it cooks. Drain excess grease if necessary.
  2. Add diced onions and carrots to the pot. Cook for about 5 minutes until they begin to soften.
  3. Stir in the minced garlic and chopped cabbage. Cook for another 3-5 minutes until the cabbage starts to wilt.
  4. Pour in the beef broth and tomato sauce. Add the rice, salt, and pepper. Stir well to combine.
  5. Bring the mixture to a boil, then reduce heat and simmer uncovered for about 30 minutes, or until the rice is tender and the soup is well combined.
  6. Taste and adjust seasonings as needed. Serve hot.

Notes

  • Use ground turkey for a lighter option.
  • Swap white rice with brown rice or cauliflower rice for lower carbs.
  • Add smoked paprika or Worcestershire sauce for deeper flavor.
  • Low-sodium broth helps control salt content.
  • Store rice separately if freezing to maintain texture.

Nutrition

  • Serving Size: 1 ½ cups
  • Calories: 280
  • Sugar: 6g
  • Sodium: 720mg
  • Fat: 12g
  • Saturated Fat: 4g
  • Unsaturated Fat: 7g
  • Trans Fat: 0g
  • Carbohydrates: 24g
  • Fiber: 4g
  • Protein: 18g
  • Cholesterol: 55mg

Have you made this recipe? I'd love to see it!

Click here to Follow me on Pinterest

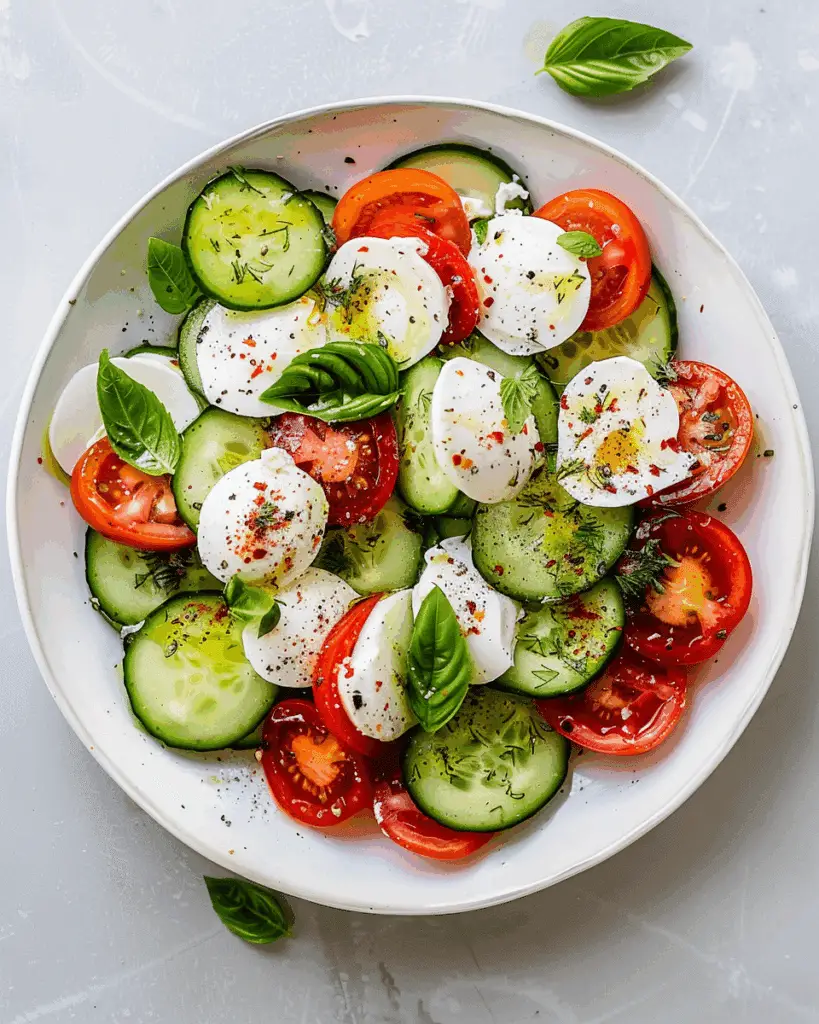
Fresh Cucumber Caprese Salad

August 30, 2025 by Sue Leave a Comment

I rediscovered my love for salads with this Fresh Cucumber Caprese Salad. Refreshing, colorful, and effortlessly assembled—it’s my go-to on hot days when I want something light, flavorful, and fast. Fresh Cucumber Caprese Salad

Why You’ll Love This Recipe

I’ll love sharing why this Caprese salad has won me over:
I can have it ready in just about 10 minutes—no cooking, no turning on the oven. It's crisp and light, with cool cucumbers, sweet tomatoes, and creamy mozzarella. The simple ingredients are pantry staples, and I often prep components ahead so I can toss it together swiftly when guests arrive or dinner time rushes in.

ingredients

(Here's a tip: Check out the full list of ingredients and measurements in the recipe card below.)

For the marinade:

  • 2 tablespoons olive oil

  • 1 tablespoon balsamic vinegar

  • 1 tablespoon dried oregano

  • 1 tablespoon dried basil

  • Pinch of salt

  • Pinch of pepper

For the salad:

  • 1 cucumber (peeled, fork-scored, thinly sliced, then diced)

  • 1½ cups cherry tomatoes (quartered)

  • 8 oz fresh mozzarella

  • ½ large red onion (chopped into small pieces)

  • Optional: fresh basil leaves

directions

  1. I start by whisking together olive oil, balsamic vinegar, oregano, basil, salt, and pepper in a small bowl to make the marinade.

  2. I peel and fork-score the cucumber, slice it thinly, dice it, and place it in a medium bowl.

  3. Next, I quarter the cherry tomatoes and dice the red onion if I’m including it.

  4. I cube or use bite-size pieces of fresh mozzarella and add them to the mix.

  5. I pour the marinade over the vegetables and cheese, toss well, and let it sit for about 10 minutes to meld the flavors before serving.

Servings and timing

  • Servings: 4

  • Preparation time: 10–15 minutes

  • Cooking time: 0 minutes

  • Total time: 10–15 minutes

Variations

I love how flexible this recipe is. Here are some twists I enjoy:

  • Swap fresh mozzarella with mini mozzarella balls (ciliegine) or burrata for extra creaminess—or cubed regular mozzarella if needed.

  • Use red wine vinegar, white balsamic, or a small amount of apple cider vinegar in place of balsamic.

  • Substitute red onion with sweet onion, shallots, or green onions.

  • Try grape tomatoes, sun gold, or chopped regular tomatoes instead of cherry tomatoes.

  • If I have fresh herbs, I’ll use about 3 tablespoons each of fresh basil and oregano, or even add parsley or mint for a different aroma.

  • I’ll choose English or Persian cucumbers when available; otherwise, regular slicing cucumbers work after peeling and seeding.

storage/reheating

This salad is best eaten fresh, but I store leftovers in an airtight container in the fridge for up to 2 days—though the veggies will become a bit watery over time.
To prep ahead, I chop vegetables and store them separately in the fridge, keeping mozzarella whole until serving. The dressing can even be made up to 3 days ahead and shaken before use.

FAQs

How do I prevent the salad from getting too watery?

I salt the cucumber slices and let them drain in a colander for 15–20 minutes. I also pat the mozzarella dry before cutting and wait to add the dressing until just before serving.

Can I use garden cucumbers instead of English or Persian cucumbers?

Yes—just peel them and remove large seeds to keep the texture and flavor balanced.

Is it okay to substitute dried herbs with fresh?

Absolutely. I typically use 3 tablespoons each of fresh basil and oregano instead of dried—and sometimes experiment with parsley or mint too.

What are good substitutes for balsamic vinegar?

I’ll sometimes use red wine vinegar, white balsamic vinegar, or apple cider vinegar (using less of the last since it’s stronger).

Can I make this salad ahead of time?

Definitely. I prep the vegetables and dressing in advance. I combine everything just before serving for the freshest taste.

Conclusion

I’m always amazed how a few fresh, simple ingredients can come together so beautifully in the Fresh Cucumber Caprese Salad. It’s light yet satisfying, refreshingly cool and full of flavor—and I’m confident it’ll become a favorite in my kitchen, especially during warmer months when I want something easy, healthy, and delicious.

Print

clock clock iconcutlery cutlery iconflag flag iconfolder folder iconinstagram instagram iconpinterest pinterest iconfacebook facebook iconprint print iconsquares squares iconheart heart iconheart solid heart solid icon
Fresh Cucumber Caprese Salad

Fresh Cucumber Caprese Salad

5 Stars 4 Stars 3 Stars 2 Stars 1 Star No reviews
  • Author: Sue
  • Prep Time: 10–15 minutes
  • Cook Time: 0 minutes
  • Total Time: 10–15 minutes
  • Yield: 4 servings
  • Category: Salad
  • Method: No-Cook
  • Cuisine: Italian-Inspired
  • Diet: Vegetarian
Print Recipe
Pin Recipe

Description

This Fresh Cucumber Caprese Salad is a refreshing, quick, and colorful dish perfect for warm days. With crisp cucumbers, sweet tomatoes, and creamy mozzarella, it’s light yet satisfying and ready in just 10 minutes.


Ingredients

  • 2 tablespoons olive oil
  • 1 tablespoon balsamic vinegar
  • 1 tablespoon dried oregano
  • 1 tablespoon dried basil
  • Pinch of salt
  • Pinch of pepper
  • 1 cucumber (peeled, fork‑scored, thinly sliced, then diced)
  • 1½ cups cherry tomatoes (quartered)
  • 8 oz fresh mozzarella
  • ½ large red onion (chopped into small pieces)
  • Optional: fresh basil leaves

Instructions

  1. Whisk together olive oil, balsamic vinegar, oregano, basil, salt, and pepper in a small bowl to make the marinade.
  2. Peel and fork‑score the cucumber, slice it thinly, dice it, and place in a medium bowl.
  3. Quarter the cherry tomatoes and dice the red onion.
  4. Cube or use bite‑size pieces of fresh mozzarella and add to the bowl.
  5. Pour the marinade over the vegetables and cheese, toss well, and let it sit for about 10 minutes to meld the flavors before serving.

Notes

  • Use ciliegine or burrata for a creamier texture.
  • Try different vinegars like white balsamic or red wine vinegar.
  • Substitute onions based on preference.
  • Use fresh herbs if available for more aroma.
  • Drain cucumbers and pat mozzarella dry to avoid excess water.

Nutrition

  • Serving Size: 1 serving
  • Calories: 200
  • Sugar: 3g
  • Sodium: 250mg
  • Fat: 15g
  • Saturated Fat: 6g
  • Unsaturated Fat: 8g
  • Trans Fat: 0g
  • Carbohydrates: 7g
  • Fiber: 1g
  • Protein: 10g
  • Cholesterol: 25mg

Have you made this recipe? I'd love to see it!

Click here to Follow me on Pinterest

Zucchini Garlic Bites Recipe: Delicious and Easy

August 30, 2025 by Sue Leave a Comment

I’m excited to share these bite-sized zucchini garlic bites—they’re crisp on the outside, tender on the inside, packed with savory flavor, and incredibly easy to make. Zucchini Garlic Bites Recipe: Delicious and Easy

Why I’ll Love This Recipe

I love this recipe because it uses simple ingredients I usually have on hand, and it comes together quickly. These bites are great as a snack, appetizer, or even a light lunch. They’re also a fun way to use up extra zucchini and sneak in more veggies.

Ingredients

(Here's a tip: Check out the full list of ingredients and measurements in the recipe card below.)

  • 2 medium zucchinis, grated

  • ½ teaspoon salt

  • 1 large egg, beaten

  • ¼ cup grated Parmesan cheese

  • ¼ cup breadcrumbs

  • 2 cloves garlic, minced

  • 1 tablespoon fresh parsley, chopped

  • ¼ teaspoon black pepper

Directions

Step 1: Prepare the Zucchini
I grate the zucchinis and sprinkle them with salt. After letting them sit for 10 minutes, I squeeze out the moisture using a clean kitchen towel or cheesecloth.

Step 2: Mix the Ingredients
In a large bowl, I combine the drained zucchini, egg, Parmesan, breadcrumbs, garlic, parsley, and pepper. I stir everything together until well combined.

Step 3: Form the Bites
I preheat the oven to 400 °F (200 °C) and line a baking sheet with parchment paper. Using a spoon or my hands, I form the mixture into small balls and place them on the sheet.

Step 4: Bake
I bake the bites for 20–25 minutes, or until they’re golden brown and slightly crispy on the outside.

Servings and timing

This recipe makes about 16 zucchini garlic bites, depending on how big I shape them. Prep time takes around 15 minutes, and baking takes 20–25 minutes, so everything is ready in about 35–40 minutes total.

Variations

I like to mix things up depending on what I have in the kitchen:

  • Spicy bites: I add a pinch of red pepper flakes for some heat.

  • Extra cheesy: I stir in shredded mozzarella for a gooey center.

  • Different herbs: I swap parsley for fresh basil or thyme for a new flavor twist.

  • Low-carb: I replace breadcrumbs with almond flour.

Storage/reheating

I store leftover bites in an airtight container in the fridge for up to 3 days. To reheat, I place them in a preheated 350 °F (175 °C) oven for 5–10 minutes to get them crispy again. I can also reheat them in the air fryer for a quicker option.

FAQs

Can I freeze zucchini garlic bites?

Yes, I freeze them on a baking sheet until solid, then transfer to a freezer bag. I reheat straight from frozen in the oven or air fryer.

What can I use instead of Parmesan?

I substitute with other hard cheeses like pecorino or even cheddar if that’s what I have on hand.

Why are my bites falling apart?

I make sure to remove as much moisture as possible from the zucchini before mixing. That really helps the bites hold together.

Can I make them gluten-free?

Yes, I use gluten-free breadcrumbs or almond flour for a gluten-free version.

How do I make them crispier?

I spray or lightly brush them with oil before baking, and make sure they’re spaced out on the baking sheet so they brown evenly.

Conclusion

These zucchini garlic bites are one of my favorite quick snacks to make. They’re flavorful, easy, and a great way to enjoy zucchini in a totally different way. I like making a big batch because they disappear fast—especially when served warm with a dipping sauce on the side.

Print

clock clock iconcutlery cutlery iconflag flag iconfolder folder iconinstagram instagram iconpinterest pinterest iconfacebook facebook iconprint print iconsquares squares iconheart heart iconheart solid heart solid icon
Zucchini Garlic Bites Recipe: Delicious and Easy

Zucchini Garlic Bites Recipe: Delicious and Easy

5 Stars 4 Stars 3 Stars 2 Stars 1 Star No reviews
  • Author: Sue
  • Prep Time: 15 minutes
  • Cook Time: 25 minutes
  • Total Time: 40 minutes
  • Yield: 16 bites
  • Category: Appetizer
  • Method: Baking
  • Cuisine: American
  • Diet: Vegetarian
Print Recipe
Pin Recipe

Description

These Zucchini Garlic Bites are crispy on the outside, tender on the inside, and bursting with flavor. They make a perfect appetizer, snack, or light meal, and are incredibly simple to prepare with everyday ingredients.


Ingredients

  • 2 medium zucchinis, grated
  • ½ teaspoon salt
  • 1 large egg, beaten
  • ¼ cup grated Parmesan cheese
  • ¼ cup breadcrumbs
  • 2 cloves garlic, minced
  • 1 tablespoon fresh parsley, chopped
  • ¼ teaspoon black pepper

Instructions

  1. Grate the zucchinis, sprinkle with salt, and let sit for 10 minutes. Squeeze out excess moisture using a cheesecloth or kitchen towel.
  2. In a large bowl, combine the drained zucchini, beaten egg, Parmesan, breadcrumbs, garlic, parsley, and black pepper. Mix well.
  3. Preheat oven to 400°F (200°C). Line a baking sheet with parchment paper.
  4. Scoop tablespoon-sized portions of the mixture and shape into small balls. Place on the baking sheet.
  5. Bake for 20–25 minutes or until golden brown and crispy. Serve hot.

Notes

  • Add red pepper flakes for a spicy version.
  • Mix in shredded mozzarella for extra cheesiness.
  • Use Italian seasoning for an herby flavor.
  • Store leftovers in an airtight container in the fridge for up to 3 days.
  • Reheat in a 350°F (175°C) oven for 5–10 minutes to restore crispiness.
  • Can be frozen and reheated directly from the freezer.
  • Cheddar or other hard cheeses can substitute for Parmesan.
  • Use almond flour or gluten-free breadcrumbs for a gluten-free option.

Nutrition

  • Serving Size: 4 bites
  • Calories: 120
  • Sugar: 2g
  • Sodium: 260mg
  • Fat: 7g
  • Saturated Fat: 2g
  • Unsaturated Fat: 4g
  • Trans Fat: 0g
  • Carbohydrates: 10g
  • Fiber: 2g
  • Protein: 5g
  • Cholesterol: 35mg

Have you made this recipe? I'd love to see it!

Click here to Follow me on Pinterest

Italian-Style Stuffed Meatloaf with Cheese and Spinach

August 29, 2025 by Sue Leave a Comment

A savory Italian-style meatloaf wrapped around a gooey cheese and spinach filling, topped with marinara and Parmesan—comforting, flavorful, and impressive. Italian-Style Stuffed Meatloaf with Cheese and Spinach

Why You’ll Love This Recipe

I love this stuffed meatloaf because it’s hearty, cheesy, and bursting with Italian flavors. I get the comfort of a classic meatloaf with the surprise of a gooey mozzarella and spinach center. I find it perfect for family dinners or when I want to impress guests without too much extra effort. I also like that it’s customizable—I can swap the filling, adjust the spice, or make it leaner with turkey or chicken.

Ingredients

(Here's a tip: Check out the full list of ingredients and measurements in the recipe card below.)

  • 1 ½ lbs ground beef

  • ½ lb ground Italian sausage

  • 1 small onion, finely chopped

  • 2 cloves garlic, minced

  • 1 cup bread crumbs

  • 2 large eggs

  • ½ cup Parmesan cheese, grated

  • 2 tablespoon Italian seasoning

  • 1 tablespoon chopped parsley

  • ½ cup milk

  • Salt and pepper, to taste

  • Filling: 1 cup shredded mozzarella cheese

  • Filling: 1 cup chopped spinach (optional)

  • Filling: ¼ cup marinara sauce

  • Topping: ½ cup marinara sauce

  • Topping: ¼ cup Parmesan cheese, grated

Directions

  1. Preheat oven to 375 °F (190 °C).

  2. In a large bowl, I combine ground beef, Italian sausage, onion, garlic, bread crumbs, eggs, Parmesan cheese, Italian seasoning, parsley, milk, salt, and pepper; mix until just combined.

  3. On a baking sheet, I form the meat mixture into a rectangular loaf (about 9×12 inches).

  4. I create a well in the center and stuff with mozzarella, spinach (if using), and a spoonful of marinara sauce.

  5. Carefully, I fold the meat around the filling and seal to form a loaf.

  6. I spread remaining marinara on top and sprinkle with Parmesan.

  7. Bake for 45–55 minutes, or until the internal temperature reaches 160 °F (71 °C).

  8. Let the meatloaf rest for 10 minutes before slicing.

  9. Serve warm with extra marinara sauce, if desired.

Servings and timing

This recipe makes about 6–8 servings. It takes me around 15 minutes to prep and 45–55 minutes to bake, for a total time of about 1 hour and 10 minutes.

Variations

I like adding mushrooms, bell peppers, or olives to the filling when I want more veggies. For a leaner version, I swap in ground turkey or chicken and add some olive oil to keep it moist. When I’m craving a bit of heat, I sprinkle in red pepper flakes or a dash of chili powder. For extra cheesiness, I sometimes add provolone or ricotta to the filling along with mozzarella.

storage/reheating

I store leftovers in an airtight container in the fridge for up to 3 days. To reheat, I cover slices with foil and warm them in the oven at 325 °F (165 °C) until heated through. If I want to freeze, I wrap the uncooked loaf tightly in foil and freeze for up to 3 months. I thaw it in the fridge overnight before baking.

FAQs

Can I make this stuffed meatloaf ahead of time?

Yes, I often assemble the loaf a day in advance, cover it, and refrigerate until I’m ready to bake.

Can I use only ground beef instead of adding sausage?

I can use only beef, but I find the sausage adds flavor and richness. If I skip it, I usually increase the seasonings a bit.

How do I keep the meatloaf from falling apart?

I make sure not to overmix the meat and that I add enough bread crumbs and eggs to bind everything together.

Can I bake this in a loaf pan instead of free-form?

Yes, I can press the mixture into a loaf pan, but I like free-forming it on a sheet pan so it cooks evenly and gets a nice crust.

What can I serve with this Italian stuffed meatloaf?

I like pairing it with garlic bread, roasted vegetables, mashed potatoes, or a fresh green salad for a complete meal.

Conclusion

This Italian-style stuffed meatloaf is one of my favorite comfort foods. I love how the cheesy, spinach-filled center makes it feel special, while the marinara and Parmesan topping give it that true Italian touch. It’s simple enough for a weeknight but elegant enough for guests, and with so many ways to customize it, I never get tired of making it.

Print

clock clock iconcutlery cutlery iconflag flag iconfolder folder iconinstagram instagram iconpinterest pinterest iconfacebook facebook iconprint print iconsquares squares iconheart heart iconheart solid heart solid icon
Italian-Style Stuffed Meatloaf with Cheese and Spinach

Italian-Style Stuffed Meatloaf with Cheese and Spinach

5 Stars 4 Stars 3 Stars 2 Stars 1 Star No reviews
  • Author: Sue
  • Prep Time: 15 minutes
  • Cook Time: 45–55 minutes
  • Total Time: 1 hour 10 minutes
  • Yield: 6–8 servings
  • Category: Dinner
  • Method: Baking
  • Cuisine: Italian
  • Diet: Halal
Print Recipe
Pin Recipe

Description

A savory Italian‑style meatloaf wrapped around a gooey cheese and spinach filling, topped with marinara and Parmesan—comforting, flavorful, and impressive.


Ingredients

  • 1 ½ lbs ground beef
  • ½ lb ground Italian sausage
  • 1 small onion, finely chopped
  • 2 cloves garlic, minced
  • 1 cup bread crumbs
  • 2 large eggs
  • ½ cup Parmesan cheese, grated
  • 2 tbsp Italian seasoning
  • 1 tbsp chopped parsley
  • ½ cup milk
  • Salt and pepper, to taste
  • Filling: 1 cup shredded mozzarella cheese
  • Filling: 1 cup chopped spinach (optional)
  • Filling: ¼ cup marinara sauce
  • Topping: ½ cup marinara sauce
  • Topping: ¼ cup Parmesan cheese, grated

Instructions

  1. Preheat oven to 375 °F (190 °C).
  2. In a large bowl, combine ground beef, Italian sausage, onion, garlic, bread crumbs, eggs, Parmesan cheese, Italian seasoning, parsley, milk, salt, and pepper; mix until just combined.
  3. On a baking sheet, form the meat mixture into a rectangular loaf (about 9×12 inches).
  4. Create a well in the center and stuff with mozzarella, spinach (if using), and a spoonful of marinara sauce.
  5. Carefully fold the meat around the filling and seal to form a loaf.
  6. Spread remaining marinara on top and sprinkle with Parmesan.
  7. Bake for 45–55 minutes, or until the internal temperature reaches 160 °F (71 °C).
  8. Let the meatloaf rest for 10 minutes before slicing.
  9. Serve warm with extra marinara sauce, if desired.

Notes

  • Add mushrooms, bell peppers, or olives to the filling for extra flavor.
  • Store leftovers in an airtight container in the fridge for up to 3 days.
  • Freeze the assembled loaf (wrapped in foil) for up to 3 months; thaw in the fridge before baking.
  • Use ground turkey or chicken for a leaner option—add extra fat (e.g., olive oil) to maintain moisture.
  • Add red pepper flakes or chili powder for a spicy kick.

Nutrition

  • Serving Size: 1 slice
  • Calories: 350 kcal
  • Sugar: 4 g
  • Sodium: 500 mg
  • Fat: 22 g
  • Saturated Fat: 9 g
  • Unsaturated Fat: 8 g
  • Trans Fat: 0 g
  • Carbohydrates: 10 g
  • Fiber: 2 g
  • Protein: 30 g
  • Cholesterol: 90 mg

Have you made this recipe? I'd love to see it!

Click here to Follow me on Pinterest

Tater Tot Breakfast Bowls with Sausage Gravy

August 29, 2025 by Sue Leave a Comment

A hearty and comforting breakfast bowl featuring crispy tater tots topped with creamy sausage gravy, eggs, and cheese. This dish brings together all the classic breakfast flavors into one cozy, satisfying meal that’s perfect for a slow weekend morning or a special brunch. Tater Tot Breakfast Bowls with Sausage Gravy

Why You’ll Love This Recipe

I love how this recipe transforms simple ingredients into something that feels indulgent and homemade. The crispy tater tots give every bite a golden crunch, while the creamy sausage gravy adds rich, savory depth. I get to customize the eggs just how I like them, and the melted cheddar ties everything together. It’s one of those meals that feels like a big, warm hug in a bowl.

Ingredients

(Here's a tip: Check out the full list of ingredients and measurements in the recipe card below.)

  • 4 cups frozen tater tots

  • ½ lb ground breakfast sausage (sage or your choice)

  • 2–3 cloves garlic, minced

  • 3 tablespoon all-purpose flour

  • 2 cups cream (half-and-half or whole milk)

  • Pinch of ground nutmeg

  • Salt & freshly ground black pepper, to taste

  • 4 large eggs (fried, scrambled, or as preferred)

  • ½ cup grated cheddar cheese

  • Fresh chives or green onions, for garnish

Directions

  1. I start by cooking the frozen tater tots according to the package instructions—either baked or air-fried until golden and crispy.

  2. While those cook, I heat a skillet over medium-high with a little oil and brown the sausage, breaking it into crumbles for about 5–6 minutes.

  3. I stir in the minced garlic and let it cook for another minute until it smells fragrant.

  4. I reduce the heat to medium-low, then sprinkle in the flour in two batches, stirring well and cooking for about a minute to get rid of the raw taste.

  5. Slowly, I whisk in the cream or milk, stirring constantly to make sure the gravy stays smooth.

  6. I season with salt, pepper, and just a touch of nutmeg. Then I let it simmer, stirring often, until the gravy thickens to a nice pourable consistency—about 8–10 minutes.

  7. While that simmers, I cook the eggs the way I like them—sunny-side-up is my go-to.

  8. I divide the crispy tater tots into four bowls and ladle the warm sausage gravy on top.

  9. Each bowl gets an egg, a sprinkle of cheddar, and a garnish of fresh chives or green onions.

  10. I serve it immediately while everything is hot and gooey.

Servings and timing

This recipe makes 4 generous servings. It takes about 10 minutes to prep and 20 minutes to cook, so I usually have it on the table in around 30 minutes. Perfect for a relaxed breakfast or weekend brunch.

Variations

I like switching things up depending on what I have on hand. To lighten it up, I go with turkey sausage and low-fat milk. Sometimes I toss in sautéed veggies like bell peppers, onions, or spinach for added color and nutrition. When I’m in the mood for heat, I use spicy sausage or add a dash of hot sauce to the gravy. And for gluten-free needs, I just use gluten-free flour and certified gluten-free tater tots.

Storage/Reheating

If I’m making this ahead, I store the gravy and tater tots separately in airtight containers in the fridge. They keep well for up to 2 days. When reheating, I warm the tots in the oven or air fryer to get them crispy again and gently reheat the gravy on the stovetop. I prepare fresh eggs when serving, so everything tastes just right.

FAQs

How can I make this recipe vegetarian?

I swap out the sausage for a plant-based version and use vegetarian-friendly cheese and milk. The result is still rich and comforting.

Can I make the gravy ahead of time?

Yes, I often make the sausage gravy a day ahead. It thickens a bit in the fridge but loosens up nicely when I reheat it on the stovetop with a splash of milk.

What’s the best way to get crispy tater tots?

I prefer air-frying at 400°F or baking them on a wire rack in the oven. It gives them the crispiest texture without needing extra oil.

Can I freeze the leftovers?

I don’t recommend freezing the assembled bowl, but the sausage gravy freezes well. I store it in a freezer-safe container for up to 2 months, then thaw and reheat as needed.

What kind of sausage works best?

I like sage breakfast sausage for the most flavor, but any kind of breakfast sausage—mild or spicy—works beautifully in this recipe.

Conclusion

These Tater Tot Breakfast Bowls with Sausage Gravy are everything I crave in a hearty morning meal: crispy, creamy, cheesy, and completely comforting. I love how easy it is to customize and how satisfying it is to serve for family or guests. Whether I’m feeding a crowd or just treating myself, this bowl always hits the spot.

Print

clock clock iconcutlery cutlery iconflag flag iconfolder folder iconinstagram instagram iconpinterest pinterest iconfacebook facebook iconprint print iconsquares squares iconheart heart iconheart solid heart solid icon
Tater Tot Breakfast Bowls with Sausage Gravy

Tater Tot Breakfast Bowls with Sausage Gravy

5 Stars 4 Stars 3 Stars 2 Stars 1 Star No reviews
  • Author: Sue
  • Prep Time: 10 minutes
  • Cook Time: 20 minutes
  • Total Time: 30 minutes
  • Yield: 4 servings
  • Category: Breakfast, Brunch
  • Method: Bake or air fry, stovetop
  • Cuisine: American, Southern‑style
  • Diet: Vegetarian
Print Recipe
Pin Recipe

Description

A hearty and comforting breakfast bowl featuring crispy tater tots topped with creamy sausage gravy, eggs, and cheese.


Ingredients

  • 4 cups frozen tater tots
  • ½ lb ground breakfast sausage (sage or your choice)
  • 2–3 cloves garlic, minced
  • 3 tbsp all‑purpose flour
  • 2 cups cream (half‑and‑half or whole milk)
  • Pinch of ground nutmeg
  • Salt & freshly ground black pepper, to taste
  • 4 large eggs (fried, scrambled, or as preferred)
  • ½ cup grated cheddar cheese
  • Fresh chives or green onions, for garnish

Instructions

  1. Cook the frozen tater tots according to package instructions—bake or air‑fry until golden and crispy.
  2. Meanwhile, in a skillet over medium‑high heat, add a light drizzle of oil and brown the breakfast sausage, breaking into crumbles, about 5–6 minutes.
  3. Add the minced garlic and cook for an additional minute until fragrant.
  4. Lower heat to medium‑low, sprinkle in the flour in two additions, stirring to combine and cooking for about 1 minute to remove raw flour taste.
  5. Slowly whisk in the cream (or milk), stirring after each addition to achieve a smooth gravy.
  6. Season with salt, pepper, and a pinch of nutmeg. Simmer gently, stirring often, until the gravy thickens to a pourable consistency, about 8–10 minutes.
  7. Prepare eggs to your liking (sunny‑side‑up, scrambled, over‑easy, etc.).
  8. Divide crispy tater tots into four bowls. Spoon sausage gravy over them.
  9. Top each bowl with one egg, sprinkle with cheddar cheese, and garnish with chives or green onions.
  10. Serve immediately while hot and enjoy!

Notes

  • For extra crispy tots, air‑fry at 400 °F or bake directly on the oven rack or on a wire rack for best air circulation.
  • To make gluten‑free: use gluten‑free flour and certified gluten‑free tots.
  • To lighten it up: use turkey sausage or low‑fat milk; consider adding sautéed vegetables like peppers, onions, or spinach.
  • Spice it up with cayenne pepper, hot sauce, or spicy sausage.
  • Make ahead: prepare sausage gravy and tater tots separately; store in the fridge for up to 2 days, then reheat and assemble.

Nutrition

  • Serving Size: 1 bowl
  • Calories: 528 kcal

Have you made this recipe? I'd love to see it!

Click here to Follow me on Pinterest

Cabbage Roll Soup

August 29, 2025 by Sue Leave a Comment

A comforting, tomato-rich soup inspired by classic cabbage rolls, this dish brings together tender cabbage, rice, and seasoned ground beef in a hearty, flavorful broth. It’s everything I love about cabbage rolls—just in a much easier, spoonable form. Perfect for cold evenings, meal prep, or whenever I’m craving something warm and filling. Cabbage Roll Soup

Why I Love This Recipe

I love how this recipe transforms the flavor of traditional cabbage rolls into a one-pot wonder. There’s no rolling, baking, or complicated steps—just rich, savory comfort in every bowl. I also appreciate how adaptable it is. I can make it in a Dutch oven on the stove, or throw it into the crockpot for a more hands-off approach. Plus, the leftovers taste even better the next day, making it a great make-ahead meal.

Ingredients

(Here's a tip: Check out the full list of ingredients and measurements in the recipe card below.)

  • 1 pound lean ground beef

  • 1 medium yellow onion, finely diced

  • 1 cup baby carrots, chopped

  • 1 tablespoon garlic paste

  • 1 tablespoon Worcestershire sauce

  • 1 teaspoon salt

  • ½ teaspoon ground black pepper

  • 1 teaspoon garlic powder

  • 1 teaspoon onion powder

  • 1 teaspoon paprika

  • 1 teaspoon Italian seasoning

  • ½ head cabbage, cored and chopped into 1‑inch pieces (about 5–6 cups)

  • 5 cups beef broth

  • 14‑ounce can petite diced tomatoes

  • 16‑ounce can tomato sauce

  • 2 tablespoons ketchup

  • 2 bay leaves

  • ½ cup uncooked long‑grain white rice

  • Parsley, chopped, for garnish

Directions

  1. I start by cooking the ground beef in a Dutch oven over medium heat until it’s no longer pink. Then I drain off any excess grease.

  2. Next, I add the diced onions, chopped carrots, and garlic paste. I let them cook for 5 to 7 minutes, just until the onions are soft.

  3. I stir in Worcestershire sauce along with salt, black pepper, garlic powder, onion powder, paprika, and Italian seasoning to bring out the deep flavor.

  4. After that, I toss in the chopped cabbage and let it cook for 2 to 3 minutes while stirring frequently.

  5. Then I pour in the beef broth, diced tomatoes, tomato sauce, ketchup, and add the bay leaves and rice. I bring everything to a boil, then reduce the heat, cover it, and let it simmer for 30 minutes without lifting the lid.

  6. After 30 minutes, I check the rice. If it still needs time, I give it another 5 minutes, keeping the pot covered.

  7. Finally, I remove the bay leaves, sprinkle fresh parsley on top, and serve the soup hot.

Servings and timing

  • Prep Time: 20 minutes

  • Cook Time: 1 hour

  • Total Time: 1 hour 20 minutes

  • Yield: 8 servings

  • Serving Size: About 1 bowl per serving (roughly 1½ cups)

Variations

When I want to switch things up, I use ground turkey instead of beef to lighten the dish. If I’m looking for something even leaner, I’ll go for 92% lean ground beef. I’ve also made this using brown rice, though it takes about 20 minutes longer to cook. For a spicier kick, I sometimes add red pepper flakes or a dash of hot sauce. And when I want to make it in the slow cooker, I brown the beef first and let everything simmer for 6 to 7 hours—super convenient.

Storage/Reheating

I store leftovers in an airtight container in the fridge for up to 4 days. It reheats well in the microwave or on the stovetop. If I’m freezing it, I leave about ¾-inch headspace in the container for expansion and freeze it for up to 3 months. I thaw it overnight in the fridge and reheat it gently before serving.

FAQs

How can I make this vegetarian?

I swap the ground beef for lentils or plant-based ground, use vegetable broth instead of beef broth, and it turns out just as hearty and satisfying.

Can I make this ahead of time?

Absolutely. I often make it a day in advance. The flavors deepen overnight, making it even better the next day.

What type of cabbage works best?

I usually use green cabbage, but Napa or Savoy cabbage work well too. I just make sure to chop it into bite-size pieces for easy eating.

Will the rice get mushy in leftovers?

A little, yes. If I’m planning for leftovers, I sometimes cook the rice separately and add it in just before serving to keep the texture firmer.

Is this soup gluten-free?

Yes, as long as I use a gluten-free Worcestershire sauce and double-check all labels, the rest of the ingredients are naturally gluten-free.

Conclusion

This Cabbage Roll Soup gives me everything I love about traditional cabbage rolls in a simpler, cozier format. It’s hearty, budget-friendly, and incredibly satisfying. Whether I make it on the stovetop or let it simmer all day in the slow cooker, it’s a go-to when I need something comforting and nourishing.

Print

clock clock iconcutlery cutlery iconflag flag iconfolder folder iconinstagram instagram iconpinterest pinterest iconfacebook facebook iconprint print iconsquares squares iconheart heart iconheart solid heart solid icon
Cabbage Roll Soup

Cabbage Roll Soup

5 Stars 4 Stars 3 Stars 2 Stars 1 Star No reviews
  • Author: Sue
  • Prep Time: 20 minutes
  • Cook Time: 1 hour
  • Total Time: 1 hour 20 minutes
  • Yield: 8 servings
  • Category: Soup
  • Method: Stovetop (Dutch oven) or Crockpot
  • Cuisine: American
  • Diet: Low Fat
Print Recipe
Pin Recipe

Description

A comforting, tomato-rich soup inspired by cabbage rolls, featuring cabbage, rice, and beef in a flavorful, hearty broth.


Ingredients

  • 1 pound lean ground beef
  • 1 medium yellow onion, finely diced
  • 1 cup baby carrots, chopped
  • 1 tablespoon garlic paste
  • 1 tablespoon Worcestershire sauce
  • 1 teaspoon salt
  • ½ teaspoon ground black pepper
  • 1 teaspoon garlic powder
  • 1 teaspoon onion powder
  • 1 teaspoon paprika
  • 1 teaspoon Italian seasoning
  • ½ head cabbage, cored and chopped into 1‑inch pieces (about 5–6 cups)
  • 5 cups beef broth
  • 14‑ounce can petite diced tomatoes
  • 16‑ounce can tomato sauce
  • 2 tablespoons ketchup
  • 2 bay leaves
  • ½ cup uncooked long‑grain white rice
  • Parsley, chopped, for garnish

Instructions

  1. In a Dutch oven, cook the ground beef over medium heat until no longer pink. Drain excess grease.
  2. Add onions, carrots, and garlic paste to the pot. Cook for about 5–7 minutes, until onions are soft.
  3. Stir in Worcestershire sauce, salt, black pepper, garlic powder, onion powder, paprika, and Italian seasoning.
  4. Add chopped cabbage and cook 2–3 minutes, stirring frequently.
  5. Add beef broth, diced tomatoes, tomato sauce, ketchup, bay leaves, and rice. Stir, bring to a boil, then reduce heat and cover. Let simmer for 30 minutes without uncovering.
  6. After 30 minutes, check the rice. If it's not fully cooked, simmer another 5 minutes, covered.
  7. Remove and discard the bay leaves. Garnish with chopped parsley and serve hot.

Notes

  • To make this in a crockpot: brown the beef first, then transfer everything to the crockpot. Cook for 6–7 hours, adding more broth if needed to ensure the rice cooks properly.
  • You can substitute ground turkey for beef, or use leaner beef (92%) to reduce fat.
  • Swap white rice for brown rice—but increase total cook time by about 20 minutes, as brown rice takes longer to cook.
  • If using dried herbs instead of fresh, use 2–3 times more to achieve the same flavor.
  • You can freeze the soup (leave about ¾‑inch headspace in container for expansion) for up to 3 months. Thaw overnight and reheat before serving.

Nutrition

  • Serving Size: 1 serving (approx.)
  • Calories: 191 kcal
  • Sugar: 8 g
  • Sodium: 1272 mg
  • Fat: 4 g
  • Saturated Fat: 2 g
  • Carbohydrates: 23 g
  • Fiber: 4 g
  • Protein: 17 g
  • Cholesterol: 35 mg

Have you made this recipe? I'd love to see it!

Click here to Follow me on Pinterest

No-Bake Banana Pudding

August 29, 2025 by Sue Leave a Comment

A timeless, no-bake banana pudding layered with soft wafers, fresh banana slices, creamy banana-vanilla pudding, and fluffy whipped topping—this is always the first dessert to disappear at any party I bring it to. It’s easy, creamy, nostalgic, and ideal for making ahead. No-Bake Banana Pudding

Why I Love This Recipe

I love how effortlessly this dessert comes together without needing an oven. It’s perfect for warm-weather gatherings, holidays, or when I just want to treat myself to something sweet but low-fuss. The layered textures—from the crisp wafers that soften into cake-like bites to the rich pudding and airy whipped topping—make every spoonful irresistible. And because I can prepare it the night before, it gives me one less thing to worry about when entertaining.

Ingredients

(Here's a tip: Check out the full list of ingredients and measurements in the recipe card below.)

  • 6 to 7 medium bananas, sliced ¼” thick

  • 1 box Nilla Wafers (or shortbread/Chessman cookies)

  • 2½ cups heavy whipping cream

  • ½ cup powdered sugar

  • ½ teaspoon vanilla extract

  • 8 oz cream cheese, softened

  • 14 oz sweetened condensed milk

  • 3.4 oz instant banana cream pudding mix

  • 3.4 oz instant vanilla or French vanilla pudding mix

  • 2½ cups whole milk

Directions

  1. Make the whipped cream: I beat the heavy whipping cream until soft peaks form, then I add powdered sugar and vanilla, and continue beating until stiff peaks form. I set it aside while working on the pudding.

  2. Prepare the pudding mixture: I beat the softened cream cheese until smooth, then slowly mix in the sweetened condensed milk until it's fully combined. Next, I add both pudding mixes and the whole milk, beating the mixture for 4 to 5 minutes until it thickens. I gently fold in about two-thirds of the whipped cream.

  3. Assemble the dessert: I layer the bottom of a 9×13-inch dish with Nilla Wafers, top that with half of the banana slices, then spread on half the pudding mixture. I repeat with another layer of wafers, the remaining bananas, and the rest of the pudding mixture. Finally, I smooth the remaining whipped cream over the top.

  4. Chill: I cover the dish and refrigerate for at least 4 hours, but overnight is even better for flavor and texture.

  5. Serve: Just before serving, I like to garnish with extra banana slices, mini wafers, or a sprinkle of crushed wafers for a decorative touch.

Servings and Timing

  • Yield: 16 servings

  • Prep Time: 15 minutes

  • Chill Time: At least 4 hours (overnight recommended)

  • Cook Time: 0 minutes

  • Total Time: About 4 hours and 15 minutes

Variations

  • I sometimes use shortbread or Chessman cookies for a different twist.

  • When I’m short on time, I use Cool Whip instead of homemade whipped cream.

  • For extra richness, I’ve tried layering in dulce de leche or peanut butter drizzle between layers.

  • If I want to give it a chocolatey spin, I mix chocolate pudding with the vanilla instead of banana cream.

Storage/Reheating

I keep leftovers tightly covered in the refrigerator for up to 3 days. The bananas may start to brown slightly after a couple of days, so I try to finish it sooner. This dessert isn’t freezer-friendly—the pudding and whipped topping lose their texture after thawing. I don’t reheat it since it’s meant to be enjoyed cold and creamy.

FAQs

How far in advance can I make banana pudding?

I usually make it the night before serving. It needs at least 4 hours to chill, but overnight chilling gives the best results.

Can I use store-bought whipped topping instead of making it from scratch?

Yes, I sometimes substitute Cool Whip for homemade whipped cream when I need to save time. It still tastes great and holds up well.

What kind of bananas work best?

I always use barely ripe bananas with no brown spots. Overripe bananas get mushy and brown too quickly once layered.

Can I freeze banana pudding?

No, I don’t recommend freezing it. The texture of the pudding and bananas doesn’t hold up after thawing.

Can I make this in individual cups?

Absolutely! I like using mason jars or dessert cups to make single-serve versions—perfect for parties or portion control.

Conclusion

This no-bake banana pudding is the kind of dessert I can always count on to be a crowd-pleaser. Whether I’m hosting a cookout, bringing a dish to a potluck, or simply treating my family to something sweet, this creamy, dreamy dessert delivers every time. It’s nostalgic, easy to make, and always gone in minutes.

Print

clock clock iconcutlery cutlery iconflag flag iconfolder folder iconinstagram instagram iconpinterest pinterest iconfacebook facebook iconprint print iconsquares squares iconheart heart iconheart solid heart solid icon
No-Bake Banana Pudding

No-Bake Banana Pudding

5 Stars 4 Stars 3 Stars 2 Stars 1 Star No reviews
  • Author: Sue
  • Prep Time: 15 minutes
  • Cook Time: 0 minutes
  • Total Time: 4 hours (plus chilling)
  • Yield: 16 servings
  • Category: Dessert
  • Method: No‑Bake, Layered
  • Cuisine: American
  • Diet: Vegetarian
Print Recipe
Pin Recipe

Description

A timeless, no‑bake banana pudding layered with wafers, fresh bananas, creamy pudding, and whipped topping—always the first to go at any gathering.


Ingredients

  • 6 to 7 medium bananas, sliced ¼” thick
  • 1 box Nilla Wafers (or shortbread/Chessman cookies)
  • 2½ cups heavy whipping cream
  • ½ cup powdered sugar
  • ½ tsp vanilla extract
  • 8 oz cream cheese, softened
  • 14 oz sweetened condensed milk
  • 3.4 oz instant banana cream pudding mix
  • 3.4 oz instant vanilla or French vanilla pudding mix
  • 2½ cups whole milk

Instructions

  1. Make whipped cream: beat heavy whipping cream until soft peaks form, add powdered sugar and vanilla, beat until stiff peaks. Set aside.
  2. Make pudding mixture: beat cream cheese until smooth, add sweetened condensed milk until combined. Add pudding mixes and milk, beat 4–5 minutes until thick. Fold in two‑thirds of the whipped cream.
  3. Assemble: line 9×13 baking dish with Nilla Wafers, top with half the banana slices, then half the pudding mixture, another wafer layer, remaining bananas, remaining pudding mixture, then top with remaining whipped cream.
  4. Cover and refrigerate at least 4 hours or overnight.
  5. Garnish just before serving with mini wafers, banana slices, or wafer crumbs.

Notes

  • Cool Whip can substitute the homemade whipped cream if desired.
  • Make ahead is recommended—chill for best flavor and consistency.
  • Not suitable for freezing—texture suffers.
  • Use bananas that are barely ripe (no brown spots) to avoid mushiness and browning during chilling.

Nutrition

  • Calories: 379 kcal
  • Sugar: 34 g
  • Sodium: 237 mg
  • Fat: 22 g
  • Saturated Fat: 13 g
  • Carbohydrates: 42 g
  • Fiber: 1 g
  • Protein: 5 g
  • Cholesterol: 79 mg

Have you made this recipe? I'd love to see it!

Click here to Follow me on Pinterest

Creamy Tomato Soup with Cheddar Bay Dumplings

August 29, 2025 by Sue Leave a Comment

A cozy, comforting tomato soup thickened into a velvety base and topped with fluffy, cheesy Cheddar Bay dumplings—this one-pot meal wraps everything I love about comfort food into a single bowl. It’s rich, savory, and packed with classic flavors that never disappoint. Creamy Tomato Soup with Cheddar Bay Dumplings

Why You’ll Love This Recipe

I love how this recipe transforms a simple tomato soup into a hearty, filling dish that doesn’t require anything else on the side. The dumplings—made from Cheddar Bay biscuit mix—cook right on top of the simmering soup, soaking in all those delicious flavors. It’s warm, rich, and perfect for chilly evenings. Best of all, I only need one pot to make it, which means less cleanup after a satisfying meal.

ingredients

(Here's a tip: Check out the full list of ingredients and measurements in the recipe card below.)

  • 2 tablespoons butter

  • 1 sweet white onion, chopped

  • 3 tablespoons all-purpose flour

  • 3 cups chicken broth

  • 43.5 ounces canned diced tomatoes (undrained)

  • 1 teaspoon sugar

  • ¾ teaspoon kosher salt

  • ¼ teaspoon black pepper

  • 11-ounce package Cheddar Bay biscuit mix

  • 2 tablespoons butter (for brushing dumplings)

directions

  1. I start by melting the butter in a large pot over medium heat, then I add the chopped onion and cook until it becomes translucent.

  2. I stir in the flour and keep stirring for about a minute to get rid of that raw flour taste.

  3. I gradually pour in the chicken broth and add the undrained tomatoes, stirring everything together until smooth. I bring it to a boil, then lower the heat to simmer. I season with sugar, salt, and pepper.

  4. If I want a smoother texture, I carefully blend the soup using an immersion blender (or blend in batches), then I return it to the pot and bring it back to a simmer.

  5. I prepare the Cheddar Bay biscuit mix as instructed on the package to make the dumpling dough.

  6. I drop spoonfuls of the dough into the simmering soup, making sure they’re spaced apart so they can expand properly.

  7. I cover the pot and let the dumplings steam for 15–20 minutes, until they’re fluffy and cooked through.

  8. While they cook, I melt 2 tablespoons of butter and mix in the seasoning packet from the biscuit mix. I brush this over the tops of the dumplings.

  9. I serve the soup hot, ladling dumplings and broth into bowls.

Servings and timing

This recipe yields 6 servings.
Prep time: 10 minutes
Cook time: 50 minutes
Total time: 1 hour

Variations

When I’m craving something creamier, I stir in a splash of heavy cream after blending the soup. I also like experimenting with herbs—parsley and basil give it freshness, while smoked paprika adds a deeper warmth. For a vegetarian version, I simply swap the chicken broth for vegetable broth. I can also add greens like spinach or kale to boost the nutrition.

storage/reheating

I find that the soup base stores beautifully in the fridge for up to 4 days. I keep the dumplings separate if possible, as they can get soggy when stored in the soup. When reheating, I gently warm the soup on the stovetop or in the microwave. If I froze the base, I thaw it overnight and add fresh dumplings before serving.

FAQs

How can I make the soup thicker?

I like to blend the soup for a smoother and thicker consistency. Adding a little cream or reducing the broth can also help make it richer.

Can I use fresh tomatoes instead of canned?

Yes, I can substitute fresh tomatoes—about 5 to 6 cups chopped and peeled—but I make sure to simmer them longer to break them down fully.

Do I have to use Cheddar Bay biscuit mix?

It’s my favorite for flavor, but I can use any biscuit or dumpling mix I prefer. I just make sure to season the dough well.

Can I freeze the leftovers?

I freeze the soup base without the dumplings. When I’m ready to eat, I reheat the soup and add freshly cooked dumplings for best texture.

What’s the best way to reheat the dumplings?

I reheat them gently in the soup over low heat or microwave them with a damp paper towel to keep them soft.

Conclusion

This creamy tomato soup with Cheddar Bay dumplings is everything I want in a comforting meal—easy to make, full of flavor, and incredibly satisfying. It’s a warm hug in a bowl, and perfect for cozy nights in.

Print

clock clock iconcutlery cutlery iconflag flag iconfolder folder iconinstagram instagram iconpinterest pinterest iconfacebook facebook iconprint print iconsquares squares iconheart heart iconheart solid heart solid icon
Creamy Tomato Soup with Cheddar Bay Dumplings

Creamy Tomato Soup with Cheddar Bay Dumplings

5 Stars 4 Stars 3 Stars 2 Stars 1 Star No reviews
  • Author: Sue
  • Prep Time: 10 minutes
  • Cook Time: 50 minutes
  • Total Time: 1 hour
  • Yield: 6 servings
  • Category: Soup
  • Method: Stovetop
  • Cuisine: American
  • Diet: Vegetarian
Print Recipe
Pin Recipe

Description

A cozy, comforting tomato soup thickened into a creamy base and topped with soft, cheesy Cheddar Bay dumplings for a satisfying one-pot meal.


Ingredients

  • 2 tablespoons butter
  • 1 sweet white onion, chopped
  • 3 tablespoons all‑purpose flour
  • 3 cups chicken broth
  • 43.5 ounces canned diced tomatoes (undrained)
  • 1 teaspoon sugar
  • ¾ teaspoon kosher salt
  • ¼ teaspoon black pepper
  • 11‑ounce package Cheddar Bay biscuit mix
  • 2 tablespoons butter (for brushing dumplings)

Instructions

  1. In a large pot, melt 2 tablespoon butter over medium heat. Add chopped onion and cook until translucent.
  2. Stir in the flour and cook, stirring constantly, for about 1 minute to eliminate raw flour flavor.
  3. Slowly pour in the chicken broth and add the undrained diced tomatoes; stir until smooth. Bring to a boil, then reduce heat to a simmer. Season with sugar, salt, and black pepper.
  4. If you prefer a smooth soup, carefully puree using an immersion blender (or blend in batches), then return to the pot and bring back to a simmer.
  5. Prepare the Cheddar Bay biscuit mix according to package directions to form the dumpling dough.
  6. Drop spoonfuls of the dumpling dough into the simmering soup, spacing them out so they can expand.
  7. Cover the pot and let the dumplings steam-cook for 15–20 minutes, or until they are fluffy and no longer doughy.
  8. Meanwhile, melt 2 tablespoon butter and stir in the seasoning packet from the biscuit mix. Brush this garlic-butter mixture over the tops of the cooked dumplings.
  9. Ladle soup and dumplings into bowls and serve hot.

Notes

  • For extra richness, stir in a splash of cream after blending the soup.
  • Enhance flavor by adding herbs like parsley, basil, or a pinch of smoked paprika.
  • Do not lift the lid while the dumplings are cooking—steam is crucial for fluffiness.
  • To make it vegetarian, substitute vegetable broth for chicken broth.
  • Leftover soup base (without dumplings) freezes well; reheat and add fresh dumplings when ready to serve.

Nutrition

  • Serving Size: 1 serving
  • Calories: 353 kcal
  • Sugar: 12 g
  • Sodium: 1471 mg
  • Fat: 16 g
  • Saturated Fat: 6 g
  • Unsaturated Fat: —
  • Trans Fat: —
  • Carbohydrates: 46 g
  • Fiber: 3 g
  • Protein: 6 g
  • Cholesterol: 21 mg

Have you made this recipe? I'd love to see it!

Click here to Follow me on Pinterest

Cacio e Pepe Chicken

August 29, 2025 by Sue Leave a Comment

This creamy, savory chicken dish takes its inspiration from the beloved Italian pasta classic, cacio e pepe. I cook tender, golden-seared chicken breasts and smother them in a silky sauce made with Pecorino Romano, freshly cracked black pepper, and heavy cream. It’s a rich yet comforting dinner I can whip up in just about 30 minutes—perfect for a weeknight but elegant enough for guests. Cacio e Pepe Chicken

Why You’ll Love This Recipe

I love how this dish captures the essence of cacio e pepe with minimal ingredients, delivering big flavor in every bite. The combination of sharp cheese and bold pepper creates a deliciously creamy sauce that clings perfectly to juicy chicken breasts. It’s fast, fuss-free, and incredibly satisfying. Whether I’m cooking for myself or sharing with others, it always feels special.

Ingredients

(Here's a tip: Check out the full list of ingredients and measurements in the recipe card below.)

  • 4 boneless, skinless chicken breasts

  • 1 cup grated Pecorino Romano cheese

  • 2 tablespoons freshly cracked black pepper, plus more for serving

  • 1 cup heavy cream

  • 1 tablespoon olive oil

  • 2 tablespoons unsalted butter

  • Salt, to taste

  • Fresh parsley, chopped (for garnish)

Directions

  1. I start by seasoning the chicken breasts on both sides with salt.

  2. I heat olive oil in a large skillet over medium-high heat.

  3. Then I sauté the chicken for about 6–7 minutes per side, until they’re golden and cooked through.

  4. I remove the chicken and keep it warm on a covered plate.

  5. Lowering the heat to medium, I melt the butter in the same skillet.

  6. I pour in the heavy cream and stir it into the melted butter.

  7. Then I add the grated Pecorino Romano and black pepper, stirring until the sauce is smooth and creamy.

  8. I return the chicken to the skillet, letting it simmer in the sauce for 2–3 minutes to soak up all that flavor.

  9. I taste and adjust with extra salt if needed.

  10. Finally, I plate the chicken, spoon over some sauce, and top it with more pepper and parsley before serving warm.

Servings and timing

This recipe yields 4 servings.
Prep time: 10 minutes
Cook time: 20 minutes
Total time: 30 minutes

Variations

  • I sometimes stir in a bit of lemon zest for brightness.

  • When I want a spicy version, I add red pepper flakes to the sauce.

  • If I’m out of Pecorino Romano, Parmesan or Grana Padano work just fine.

  • For a vegetarian twist, I like swapping the chicken with sautéed mushrooms or zucchini.

Storage/Reheating

Leftovers keep well in an airtight container in the fridge for up to 3 days. When I reheat them, I do it gently over low heat, adding a splash of cream to help bring the sauce back to life.

FAQs

How do I know when the chicken is fully cooked?

I look for a golden exterior and check that the internal temperature reaches 165°F (75°C) using a meat thermometer.

Can I use pre-ground black pepper instead of freshly cracked?

I could, but I find freshly cracked pepper makes a noticeable difference in flavor—it gives the dish its signature kick.

Is it okay to use half-and-half instead of heavy cream?

I’ve tried it, but the sauce doesn’t turn out as rich or creamy. I stick with heavy cream when I want the best results.

Can I make this dish ahead of time?

Yes, I can cook the chicken and sauce ahead and refrigerate them separately. I reheat gently and combine just before serving.

What’s a good side dish to serve with this?

I like pairing it with roasted vegetables, mashed potatoes, or even a simple buttered pasta to soak up that creamy sauce.

Conclusion

Cacio e Pepe Chicken is one of those go-to dishes I rely on when I want something quick but luxurious. It’s deeply flavorful, incredibly creamy, and endlessly customizable. Whether I’m cooking for guests or just treating myself to a cozy dinner, it always delivers.

Print

clock clock iconcutlery cutlery iconflag flag iconfolder folder iconinstagram instagram iconpinterest pinterest iconfacebook facebook iconprint print iconsquares squares iconheart heart iconheart solid heart solid icon
Cacio e Pepe Chicken

Cacio e Pepe Chicken

5 Stars 4 Stars 3 Stars 2 Stars 1 Star No reviews
  • Author: Sue
  • Prep Time: 10 minutes
  • Cook Time: 20 minutes
  • Total Time: 30 minutes
  • Yield: 4 servings
  • Category: Dinner
  • Method: Pan‑searing & sauce
  • Cuisine: Italian‑inspired
  • Diet: Low Fat
Print Recipe
Pin Recipe

Description

Tender chicken breasts in a creamy, peppery sauce inspired by the classic Italian cacio e pepe—rich with Pecorino Romano and freshly cracked black pepper, ready in about 30 minutes.


Ingredients

  • 4 boneless, skinless chicken breasts
  • 1 cup grated Pecorino Romano cheese
  • 2 tablespoons freshly cracked black pepper, plus more for serving
  • 1 cup heavy cream
  • 1 tablespoon olive oil
  • 2 tablespoons unsalted butter
  • Salt, to taste
  • Fresh parsley, chopped (for garnish)

Instructions

  1. Season the chicken breasts with salt on both sides.
  2. Heat olive oil in a large skillet over medium-high heat.
  3. Sauté the chicken breasts for about 6–7 minutes per side until golden and fully cooked through.
  4. Transfer the cooked chicken to a plate and cover to keep warm.
  5. Reduce heat to medium and add butter to the same skillet; let it melt.
  6. Add the heavy cream to the butter, stirring to combine.
  7. Stir in the grated Pecorino Romano cheese and freshly cracked black pepper until the sauce is smooth.
  8. Return the chicken to the skillet, coating it in the creamy sauce; simmer for 2–3 minutes to meld flavors.
  9. Taste and adjust seasoning with additional salt if needed.
  10. Plate the chicken, spoon extra sauce over the top, garnish with more black pepper and chopped parsley, and serve warm.

Notes

  • Leftovers keep well in an airtight container in the refrigerator for up to 3 days—reheat gently with a splash of cream if needed.
  • For extra brightness, stir in a bit of lemon zest before serving or add red pepper flakes for a spicy kick.
  • Substitute Parmesan or Grana Padano for Pecorino Romano if needed.
  • You can make a vegetarian version by swapping chicken with sautéed mushrooms or zucchini.

Nutrition

  • Serving Size: 1 chicken breast with sauce
  • Calories: 450 kcal
  • Sugar: n/a
  • Sodium: n/a
  • Fat: 30 g
  • Saturated Fat: n/a
  • Unsaturated Fat: n/a
  • Trans Fat: n/a
  • Carbohydrates: n/a
  • Fiber: n/a
  • Protein: 30 g
  • Cholesterol: n/a

Have you made this recipe? I'd love to see it!

Click here to Follow me on Pinterest

High-Protein Key Lime Pie Yogurt Bark

August 28, 2025 by Sue Leave a Comment

This high-protein key lime pie yogurt bark is a cool, creamy, and refreshing frozen treat packed with flavor and nutrition. I love how it captures the essence of key lime pie with zesty lime, a creamy yogurt base, and a satisfying graham cracker crunch—all without the need for baking. It’s the kind of snack or dessert I can enjoy on a hot day without the guilt or the effort. High-Protein Key Lime Pie Yogurt Bark

Why You’ll Love This Recipe

I make this yogurt bark whenever I want something sweet, tangy, and satisfying that’s also packed with protein. It comes together in minutes, then just needs to freeze. I can also tweak it depending on what I have on hand—whether I want it dairy-free, a little more indulgent, or loaded with extra toppings like berries or chocolate chips. It’s also gluten-free and easy to prep ahead of time for a grab-and-go snack or light dessert.

Ingredients

(Here's a tip: Check out the full list of ingredients and measurements in the recipe card below.)

  • 2½ cups plain Greek yogurt (non‑fat or low‑fat; can substitute dairy‑free)

  • 3½ tablespoon key lime juice

  • 2 tablespoon powdered Swerve (or substitute 1 tablespoon honey or maple syrup)

  • 1 teaspoon vanilla extract

  • 1 tablespoon lime zest

  • ⅓ cup crushed (gluten‑free) graham crackers

  • ¼ cup toasted unsweetened coconut flakes

  • 1 scoop vanilla protein powder (regular or dairy‑free)

Directions

  1. I start by mixing the Greek yogurt, key lime juice, protein powder, sweetener, vanilla extract, and lime zest in a medium bowl until smooth.

  2. Then, I line a baking sheet with parchment paper or a silicone mat and spread the yogurt mixture into a thin, even layer.

  3. I top it with crushed graham crackers, toasted coconut flakes, and a little more lime zest for a pop of color and flavor.

  4. I freeze the whole tray for at least 2–3 hours, or until it’s completely firm.

  5. Once frozen, I lift the bark out and break it into pieces.

  6. I either enjoy it right away or store the rest in an airtight container in the freezer.

Servings and timing

This recipe makes about 6 servings. It takes just 10 minutes to prep, and about 2–3 hours to fully freeze. Since it’s a no-bake recipe, I don’t need any cooking time—just some freezer space and a bit of patience.

Variations

I love how customizable this bark is. Sometimes I swap the coconut flakes for mini chocolate chips or sliced almonds. If I want more natural sweetness, I go for honey or maple syrup instead of powdered Swerve. A swirl of nut butter or a sprinkle of granola on top makes it more decadent, while fresh berries add a juicy bite. It also works great with dairy-free yogurt and protein powder for a vegan-friendly option.

Storage/Reheating

I keep the broken bark pieces in an airtight container in the freezer. To prevent sticking, I separate the layers with parchment paper. It stays fresh for up to two weeks. Since it’s a frozen treat, there’s no need to reheat—I just take a piece or two out of the freezer and enjoy it right away.

FAQs

How long does the yogurt bark need to freeze?

I usually freeze it for 2 to 3 hours until it's completely firm. If I leave it overnight, it becomes even easier to break into clean pieces.

Can I use regular lime juice instead of key lime?

Yes, I can use regular lime juice if that’s what I have—it’s just a little less tangy than key lime, but still delicious.

Is there a way to make this vegan?

Absolutely. I just use a plant-based Greek-style yogurt and a vegan protein powder, and I have a completely dairy-free and vegan bark.

What kind of protein powder works best?

I like using vanilla protein powder because it adds flavor and blends smoothly. Both whey-based and plant-based powders work fine—just make sure it mixes well with yogurt.

Can I make this ahead of time?

Definitely. I often make a batch and keep it in the freezer for up to two weeks. It’s perfect for prepping ahead as a ready-to-go snack or dessert.

Conclusion

This key lime pie yogurt bark is one of my favorite healthy treats—cool, creamy, tangy, and just sweet enough. It’s easy to make, high in protein, and flexible enough to suit different tastes and dietary needs. Whether I want a refreshing snack or a light dessert, this frozen bark hits the spot every time.

Print

clock clock iconcutlery cutlery iconflag flag iconfolder folder iconinstagram instagram iconpinterest pinterest iconfacebook facebook iconprint print iconsquares squares iconheart heart iconheart solid heart solid icon
High-Protein Key Lime Pie Yogurt Bark

High-Protein Key Lime Pie Yogurt Bark

5 Stars 4 Stars 3 Stars 2 Stars 1 Star No reviews
  • Author: Sue
  • Prep Time: 10 minutes (estimate)
  • Cook Time: None (no‑bake)
  • Total Time: 2–3 hours (including freezing)
  • Yield: 6 servings
  • Category: Dessert / Snack
  • Method: No‑bake, freeze
  • Cuisine: American (dessert)
  • Diet: Gluten Free
Print Recipe
Pin Recipe

Description

A refreshing, high‑protein frozen bark inspired by key lime pie—creamy Greek yogurt mixed with protein powder and zesty lime, topped with crunchy graham crumbs and coconut, then frozen into bark pieces.


Ingredients

  • 2½ cups plain Greek yogurt (non‑fat or low‑fat; can substitute dairy‑free)
  • 3½ tbsp key lime juice
  • 2 tbsp powdered Swerve (or substitute 1 tbsp honey or maple syrup)
  • 1 tsp vanilla extract
  • 1 tbsp lime zest
  • ⅓ cup crushed (gluten‑free) graham crackers
  • ¼ cup toasted unsweetened coconut flakes
  • 1 scoop vanilla protein powder (regular or dairy‑free)

Instructions

  1. In a medium bowl, combine Greek yogurt, key lime juice, protein powder, powdered Swerve (or chosen sweetener), vanilla extract, and lime zest. Mix until smooth.
  2. Line a baking sheet with parchment paper or silicone mat. Spread the yogurt mixture into a thin, even layer.
  3. Sprinkle crushed graham crackers, toasted coconut flakes, and additional lime zest evenly over the top.
  4. Freeze for at least 2–3 hours, or until fully set.
  5. Once frozen, remove from freezer, lift the parchment or mat, and break into bark pieces.
  6. Enjoy immediately or store in an airtight container in the freezer (up to 2 weeks), layering pieces with parchment to prevent sticking.

Notes

  • For a less icy texture, use full‑fat Greek yogurt—though light versions still taste great.
  • This recipe is gluten‑free, and can easily be made dairy‑free by choosing appropriate yogurt and protein powder.
  • Customize toppings—try fresh berries, nut butter, dark chocolate chips, granola, or nuts.
  • Store in a single layer or separate layers with parchment paper in the freezer for best texture.

Nutrition

  • Serving Size: 1 piece (approx. ⅙ of bark)

Have you made this recipe? I'd love to see it!

Click here to Follow me on Pinterest

Crispy Beef and Cheese Chimichangas

August 28, 2025 by Sue Leave a Comment

Crispy deep-fried or baked beef and cheese chimichangas offer a fiesta-worthy bite packed with savory meat, gooey cheddar cheese, and a hint of spice—all wrapped in a golden tortilla. Whether I choose to bake them for a lighter crunch or deep-fry for full-on crispiness, these chimichangas bring the fun of Tex-Mex right to my dinner table. Crispy Beef and Cheese Chimichangas

Why You’ll Love This Recipe

I love how versatile and satisfying these beef and cheese chimichangas are. The filling is flavorful without being overly complicated, and the combination of seasoned beef, creamy sour cream, green chilies, and melted cheddar creates a rich, tangy interior. I can serve them for family dinners or casual gatherings, and they’re always a hit. Plus, having the option to bake or deep-fry gives me control over how indulgent I want to be.

ingredients

(Here's a tip: Check out the full list of ingredients and measurements in the recipe card below.)

  • 1 pound ground beef

  • ½ small onion, chopped

  • 1 clove garlic, minced

  • ½ teaspoon taco seasoning mix (or to taste)

  • 1 teaspoon dried oregano

  • ¼ cup sour cream

  • 1 (4-ounce) can chopped green chilies

  • 2 tablespoons distilled white vinegar

  • 1 cup shredded cheddar cheese

  • ¼ cup margarine (for dipping tortillas)

  • 6 (7‑inch) corn tortillas

directions

  1. I start by preheating the oven to 450 °F (230 °C).

  2. In a skillet over medium heat, I brown the ground beef with chopped onion, garlic, taco seasoning, and oregano until the beef is crumbled and cooked through—this takes about 8 minutes. I make sure to drain any excess fat.

  3. I stir in the sour cream, green chilies, and vinegar until everything is well mixed, then take the skillet off the heat and stir in the shredded cheddar cheese.

  4. In a small skillet over low heat, I melt the margarine and dip each tortilla for about 30 seconds so they soften and don’t tear when folded.

  5. I place each tortilla on a baking sheet, add about ⅓ cup of the filling, and fold the sides over the filling, then fold the top and bottom to form a neat package. I make sure to place them seam-side down.

  6. I bake the chimichangas until the tortillas are crisp and golden—about 15 minutes. I serve them warm, straight out of the oven.

Servings and timing

This recipe makes 6 chimichangas, perfect for serving 6 people.

  • Prep time: 15 minutes

  • Cook time: 25 minutes

  • Total time: 40 minutes

  • Serving size: 1 chimichanga

Variations

Sometimes I switch things up by using ground turkey or shredded chicken instead of beef. I’ve also tried Monterey Jack or pepper jack cheese in place of cheddar for a little extra kick. If I want to go vegetarian, I replace the meat with black beans and corn, and it still turns out delicious. For a fun twist, I’ll drizzle queso or salsa verde over the top before serving.

storage/reheating

I store any leftover chimichangas in an airtight container in the refrigerator for up to 3 days. When I want to reheat them, I pop them in the oven at 375 °F for about 10 minutes to bring back that crispiness. If I’m in a hurry, I use the microwave, but I lose some of the crunch. For freezing, I wrap them individually in foil and freeze for up to 2 months—just reheat in the oven straight from the freezer.

FAQs

How can I make these chimichangas spicier?

I add some chopped jalapeños or use a spicier taco seasoning if I want more heat. A dash of hot sauce in the filling also does the trick.

Can I make these ahead of time?

Yes, I prepare and assemble the chimichangas, then store them in the fridge until I’m ready to bake. This works great for meal prepping.

What sides go well with chimichangas?

I usually serve them with Mexican rice, refried beans, or a fresh salad. Guacamole and salsa on the side make a great addition too.

Can I use flour tortillas instead of corn?

Definitely. Flour tortillas are easier to fold and hold up well during baking or frying. I just make sure they’re the same size.

Is it better to bake or deep-fry them?

It depends on what I’m in the mood for. Baking gives a lighter, healthier result, while deep-frying gives that ultimate crunchy texture.

Conclusion

These crispy beef and cheese chimichangas are everything I want in a Tex-Mex comfort food—crispy, cheesy, savory, and incredibly satisfying. They’re easy to make, easy to customize, and always a crowd-pleaser. Whether I bake them for a healthier option or go all-in with deep-frying, they never disappoint.

Print

clock clock iconcutlery cutlery iconflag flag iconfolder folder iconinstagram instagram iconpinterest pinterest iconfacebook facebook iconprint print iconsquares squares iconheart heart iconheart solid heart solid icon
Crispy Beef and Cheese Chimichangas

Crispy Beef and Cheese Chimichangas

5 Stars 4 Stars 3 Stars 2 Stars 1 Star No reviews
  • Author: Sue
  • Prep Time: 15 mins
  • Cook Time: 25 mins (includes baking time)
  • Total Time: 40 mins
  • Yield: 6 chimichangas
  • Category: Main Dish
  • Method: Baked (alternatively can be deep‑fried)
  • Cuisine: Mexican / Tex‑Mex
  • Diet: Halal
Print Recipe
Pin Recipe

Description

Crispy deep‑fried or baked beef and cheese chimichangas with a delightfully golden, cheesy exterior—perfect for a fiesta‑style meal.


Ingredients

  • 1 pound ground beef
  • ½ small onion, chopped
  • 1 clove garlic, minced
  • ½ teaspoon taco seasoning mix (or to taste)
  • 1 teaspoon dried oregano
  • ¼ cup sour cream
  • 1 (4-ounce) can chopped green chilies
  • 2 tablespoons distilled white vinegar
  • 1 cup shredded cheddar cheese
  • ¼ cup margarine (for dipping tortillas)
  • 6 (7‑inch) corn tortillas

Instructions

  1. Preheat oven to 450 °F (230 °C).
  2. In a skillet over medium heat, brown ground beef with onion, garlic, taco seasoning, and oregano until crumbled and cooked, about 8 minutes. Drain excess fat.
  3. Stir in sour cream, green chilies, and vinegar until well mixed, then remove from heat and mix in cheddar cheese.
  4. In a small skillet over low heat, melt margarine. Dip each tortilla into margarine for about 30 seconds until softened.
  5. Place each softened tortilla on a baking sheet, fill with about ⅓ cup of meat‑cheese mixture. Fold sides over the filling and then top and bottom to form an enclosed package; place seam‑side down. Repeat for all tortillas.
  6. Bake in preheated oven until tortilla is crisp and golden, about 15 minutes. Serve warm and enjoy!

Notes

  • This recipe yields 6 chimichangas—one per person if serving individually.
  • For extra crispiness, you can deep‑fry instead of baking—but baking offers a lighter option.
  • Serve with shredded lettuce, tomato, salsa, and sour cream for added flavor and texture.

Nutrition

  • Serving Size: 1 chimichanga
  • Calories: 369 kcal
  • Sugar: 2 g
  • Sodium: 504 mg
  • Fat: 25 g
  • Saturated Fat: 10 g
  • Unsaturated Fat: —
  • Trans Fat: —
  • Carbohydrates: 16 g
  • Fiber: 2 g
  • Protein: 20 g
  • Cholesterol: 70 mg

Have you made this recipe? I'd love to see it!

Click here to Follow me on Pinterest

Southern Hush Puppies

August 28, 2025 by Sue Leave a Comment

Crispy, golden-fried cornmeal balls—soft and tender on the inside—these classic Southern hush puppies are everything I want in a comforting side dish or crowd-pleasing appetizer. With a lightly seasoned batter and a perfectly golden crust, they’re irresistible fresh from the fryer. Southern Hush Puppies

Why I Love This Recipe

I love how this recipe captures that perfect balance between a crunchy outer shell and a pillowy, savory interior. The subtle kick from garlic, onion, and paprika adds so much flavor, while the buttermilk keeps the inside moist and tender. It’s quick to make, doesn’t require fancy tools, and pairs beautifully with fried fish, barbecue, or even just a dipping sauce on its own.

Ingredients

(Here's a tip: Check out the full list of ingredients and measurements in the recipe card below.)

  • ¾ cup flour

  • ¾ cup cornmeal

  • 1 tablespoon sugar

  • 1½ teaspoon baking powder

  • 2 teaspoon salt

  • ½ teaspoon garlic powder

  • ½ teaspoon onion powder

  • ½ teaspoon paprika

  • ¼ teaspoon pepper

  • 1 large egg

  • 1 cup buttermilk

  • 4 tablespoon cold butter, cubed

  • Oil for frying (e.g., vegetable or peanut oil)

Directions

  1. I start by preheating about 2 inches of oil in a large skillet to around 365°F.

  2. In a mixing bowl, I whisk together the flour, cornmeal, sugar, baking powder, salt, garlic powder, onion powder, paprika, and pepper.

  3. I add the egg and buttermilk to the dry mixture and stir gently until just combined. Then, I fold in the cold, cubed butter.

  4. Using a spoon or small scoop, I drop rounded teaspoonfuls of batter into the hot oil and fry for 2–3 minutes, turning as needed, until golden brown.

  5. I remove the hush puppies with a slotted spoon and drain them on a paper towel-lined plate. They’re best served warm, and sometimes I offer tartar sauce on the side.

Servings and timing

This recipe makes approximately 8 servings, which equals about 8 medium-sized hush puppies.

  • Prep Time: 10 minutes

  • Cook Time: 10 minutes

  • Total Time: 20 minutes

Variations

I sometimes like to toss in extras like chopped jalapeños, minced scallions, or shredded cheese for a flavorful twist. For a bit of sweetness, I’ve tried adding a touch more sugar and a sprinkle of honey on top after frying. If I want to make them gluten-free, I substitute the flour with a 1:1 gluten-free flour blend.

Storage/Reheating

I store any leftover hush puppies in an airtight container in the fridge for up to 3 days. To reheat, I prefer using the oven or an air fryer at 350°F for about 5–7 minutes to bring back that crispy texture. I avoid microwaving, as it tends to make them soggy.

FAQs

How do I keep hush puppies from falling apart while frying?

I make sure the batter isn’t too wet and that the oil is hot enough—around 365°F. This helps the outside set quickly and hold its shape.

Can I make the batter ahead of time?

I don’t recommend making it too far in advance. Since the baking powder activates quickly, I mix the batter just before frying for the best texture.

What oil is best for frying hush puppies?

I like using neutral oils with high smoke points, such as vegetable or peanut oil. They fry evenly and don’t add any unwanted flavors.

Why are my hush puppies greasy?

If the oil temperature is too low, they absorb more oil while cooking. I keep the heat between 350–375°F and avoid overcrowding the pan.

Can I freeze hush puppies?

Yes, I let them cool completely, then freeze them in a single layer before transferring to a bag. To reheat, I bake them from frozen at 375°F until hot and crispy.

Conclusion

Southern hush puppies are one of those recipes I return to again and again. They’re simple, satisfying, and full of comforting flavors. Whether I’m making them as a side for a fish fry or just because I’m craving something crunchy and warm, these little cornmeal gems always hit the spot.

Print

clock clock iconcutlery cutlery iconflag flag iconfolder folder iconinstagram instagram iconpinterest pinterest iconfacebook facebook iconprint print iconsquares squares iconheart heart iconheart solid heart solid icon
Southern Hush Puppies

Southern Hush Puppies

5 Stars 4 Stars 3 Stars 2 Stars 1 Star No reviews
  • Author: Sue
  • Prep Time: 10 minutes
  • Cook Time: 10 minutes
  • Total Time: 20 minutes
  • Yield: Approximately 8 servings (~8 hush puppies)
  • Category: Side Dish
  • Method: Deep-fry
  • Cuisine: Southern
  • Diet: Vegetarian
Print Recipe
Pin Recipe

Description

Crispy, golden‑fried cornmeal balls—soft and tender on the inside—perfect as a Southern side or appetizer.


Ingredients

  • ¾ cup flour
  • ¾ cup cornmeal
  • 1 Tbsp sugar
  • 1½ tsp baking powder
  • 2 tsp salt
  • ½ tsp garlic powder
  • ½ tsp onion powder
  • ½ tsp paprika
  • ¼ tsp pepper
  • 1 large egg
  • 1 cup buttermilk
  • 4 Tbsp cold butter, cubed
  • Oil for frying (e.g., vegetable or peanut oil)

Instructions

  1. Preheat about 2 inches of oil in a large skillet to ~365 °F.
  2. In a bowl, whisk together flour, cornmeal, sugar, baking powder, salt, garlic powder, onion powder, paprika, and pepper.
  3. Add the egg and buttermilk; stir until just combined, then fold in the cubed butter.
  4. Drop batter by rounded teaspoonfuls into the hot oil; fry 2–3 minutes until golden brown, turning as needed.
  5. Remove with a slotted spoon to a paper‑towel lined plate; drain and serve warm (optionally with tartar sauce).

Notes

  • Don’t overmix the batter—stir just until combined for light, tender hush puppies.
  • Maintain oil temperature around 350–375 °F to avoid soggy or burnt results.
  • Use two spoons or a spring‑release scoop to form batter balls for better shape retention.
  • Serve immediately for best texture; keep warm in a 200 °F oven if needed.

Nutrition

  • Serving Size: 1 hush puppy (approx.)
  • Calories: 185 kcal
  • Sugar: 3 g
  • Sodium: 672 mg
  • Fat: 8 g
  • Saturated Fat: 5 g
  • Unsaturated Fat: 3 g
  • Trans Fat: —
  • Carbohydrates: 24 g
  • Fiber: 2 g
  • Protein: 4 g
  • Cholesterol: 39 mg

Have you made this recipe? I'd love to see it!

Click here to Follow me on Pinterest

Chicken Pot Pie Pasta

August 28, 2025 by Sue Leave a Comment

A creamy, comforting twist on traditional chicken pot pie, this recipe swaps the flaky crust for tender egg noodles. It delivers all the rich, cozy flavors I love in pot pie—but in a hearty, one-pan pasta dish that’s perfect for weeknights. Chicken Pot Pie Pasta

Why You’ll Love This Recipe

I love how this recipe comes together with minimal effort yet tastes like something I spent hours on. It’s a true comfort meal, packed with juicy shredded chicken, tender noodles, and a velvety cream sauce loaded with veggies. Plus, it’s all made in one pan—fewer dishes, more flavor, and easy cleanup.

Ingredients

(Here's a tip: Check out the full list of ingredients and measurements in the recipe card below.)

  • 12 oz egg noodles

  • 2 tbsp butter

  • 1 large yellow onion, diced

  • 3 cloves garlic, minced

  • 1½ cups frozen mixed vegetables, thawed

  • 1 tsp dried thyme

  • 2 tbsp all‑purpose flour

  • 1 cup chicken broth

  • 1 cup heavy cream

  • 2 cups cooked chicken breast, shredded

  • Salt, to taste

  • Pepper, to taste

  • Optional: 2 tbsp fresh parsley, chopped

Directions

  1. I start by cooking the egg noodles according to the package instructions until they’re al dente, then I drain and set them aside.

  2. In a large skillet over medium heat, I melt the butter and sauté the onion, garlic, and thawed mixed vegetables.

  3. I season the mixture with dried thyme, about ½ tsp salt, and ¼ tsp pepper. I cook it until the onions are soft—this takes around 5 minutes.

  4. Then, I stir in the flour to coat everything evenly.

  5. I pour in the chicken broth and heavy cream, stirring to combine, and bring it to a gentle simmer.

  6. I let the sauce simmer for about 5 minutes, stirring occasionally, until it thickens.

  7. Next, I add the cooked noodles and shredded chicken, stirring everything together until well mixed. I taste and adjust the seasoning if needed.

  8. Just before serving, I sometimes sprinkle fresh parsley on top for a pop of color and freshness.

Servings and timing

This recipe makes 8 hearty servings.

  • Prep Time: 15 minutes

  • Cook Time: 20 minutes

  • Total Time: 35 minutes

Variations

I like to change things up depending on what I have in the fridge. Sometimes I use rotisserie chicken for even quicker prep. I’ve also tried this with turkey, and it works beautifully. For a lighter version, I swap out the heavy cream with half-and-half or whole milk (though the sauce won’t be as thick). And when I want a bit of crunch, I sprinkle crushed buttery crackers on top before serving.

Storage/Reheating

I store leftovers in an airtight container in the fridge for up to 5 days. When reheating, I add a splash of cream, broth, or even milk to loosen the sauce. I reheat it on the stovetop or in the microwave until warm, stirring occasionally.

FAQs

How can I make this dish ahead of time?

I can cook everything and refrigerate it, but I find it’s best enjoyed fresh. If making ahead, I wait to add the noodles until just before serving to keep them from getting too soft.

Can I freeze chicken pot pie pasta?

I don’t recommend freezing it, as the creamy sauce and noodles may separate or get mushy when thawed.

What vegetables work best in this recipe?

I usually stick with frozen mixed vegetables for convenience, but I’ve also used fresh carrots, peas, corn, or even mushrooms when I have them on hand.

Can I use other types of pasta?

Definitely. While I love egg noodles for their soft texture, I’ve made this with rotini, penne, and even shells. Just adjust the cook time as needed.

How do I thicken the sauce if it’s too runny?

I simmer it a bit longer or add a tiny bit more flour to help it thicken. I always make sure to stir well to avoid lumps.

Conclusion

This Chicken Pot Pie Pasta is everything I crave in comfort food—rich, creamy, and satisfying without being fussy. Whether I’m feeding the family or looking for an easy dinner to prep ahead, this recipe always hits the spot.

Print

clock clock iconcutlery cutlery iconflag flag iconfolder folder iconinstagram instagram iconpinterest pinterest iconfacebook facebook iconprint print iconsquares squares iconheart heart iconheart solid heart solid icon
Chicken Pot Pie Pasta

Chicken Pot Pie Pasta

5 Stars 4 Stars 3 Stars 2 Stars 1 Star No reviews
  • Author: Sue
  • Prep Time: 15 minutes
  • Cook Time: 20 minutes
  • Total Time: 35 minutes
  • Yield: 8 servings
  • Category: Main Course / Pasta
  • Method: Stovetop
  • Cuisine: American
  • Diet: Low Fat
Print Recipe
Pin Recipe

Description

A creamy, comforting twist on chicken pot pie using pasta instead of crust.


Ingredients

  • 12 oz egg noodles
  • 2 tbsp butter
  • 1 large yellow onion, diced
  • 3 cloves garlic, minced
  • 1½ cups frozen mixed vegetables, thawed
  • 1 tsp dried thyme
  • 2 tbsp all‑purpose flour
  • 1 cup chicken broth
  • 1 cup heavy cream
  • 2 cups cooked chicken breast, shredded
  • Salt, to taste
  • Pepper, to taste
  • Optional: 2 tbsp fresh parsley, chopped

Instructions

  1. Cook the noodles according to package directions until al dente, then drain and set aside.
  2. Melt butter in a large skillet over medium heat. Add the diced onion, minced garlic, and thawed mixed vegetables.
  3. Season with dried thyme, plus about ½ tsp salt and ¼ tsp pepper. Cook until onions are soft, about 5 minutes.
  4. Stir in the flour to coat the vegetables evenly.
  5. Pour in the chicken broth and heavy cream, bringing the sauce to a simmer.
  6. Continue stirring occasionally until the sauce thickens, roughly 5 minutes.
  7. Add the cooked noodles and shredded chicken to the skillet and stir until well combined. Taste and adjust seasoning with salt and pepper.
  8. Garnish with chopped fresh parsley if desired, then serve warm.

Notes

  • You can make it ahead, but it’s best served fresh for optimal texture.
  • Leftovers keep well in the fridge for up to 5 days; you may need to add a splash of extra liquid when reheating.

Nutrition

  • Serving Size: 1 serving
  • Calories: 390 kcal
  • Sugar: 2.9 g
  • Sodium: 419.5 mg
  • Fat: 17.5 g
  • Saturated Fat: 9.7 g
  • Trans Fat: 0.1 g
  • Carbohydrates: 38.5 g
  • Fiber: 2.7 g
  • Protein: 19.4 g
  • Cholesterol: 114.8 mg

Have you made this recipe? I'd love to see it!

Click here to Follow me on Pinterest

Jamaican Curry Chicken

August 28, 2025 by Sue Leave a Comment

A flavorful and authentic Jamaican curry chicken simmered in a spicy, creamy sauce of coconut milk, scotch bonnet peppers, and aromatic seasonings. This dish brings warmth, comfort, and an explosion of Caribbean flavor to every bite. Jamaican Curry Chicken

Why I Love This Recipe

I love how this Jamaican curry chicken captures the essence of Caribbean cuisine—spicy, savory, creamy, and deeply aromatic. The marinade infuses every bite of chicken with bold, complex flavor, while the coconut milk and scotch bonnet peppers create a sauce that's both rich and fiery. It’s one of those meals that fills my kitchen with incredible smells and always gets rave reviews from anyone who tries it. Whether I serve it with fluffy rice or fried plantains, it always hits the spot.

Ingredients

(Here's a tip: Check out the full list of ingredients and measurements in the recipe card below.)

  • 3–4 chicken drumsticks

  • 2 tablespoon Jamaican curry powder

  • 1 teaspoon sea salt

  • 1–2 teaspoon Flavo Rice or all‑purpose seasoning (optional)

  • 1½ teaspoon black pepper

  • 1 teaspoon garlic powder

  • 1–2 teaspoon onion powder

  • 1 teaspoon dried parsley

  • ½ teaspoon smoked paprika

  • 2 tablespoon browning (optional)

  • 2 tablespoon extra‑virgin olive oil

  • 14 oz full‑fat coconut milk (1 can)

  • 2 peeled and cubed russet potatoes

  • 2 peeled and chopped carrots

  • 1 chopped bell pepper

  • 3–4 minced garlic cloves

  • 1 teaspoon sea salt (for sauce)

  • 1 teaspoon black pepper (for sauce)

  • 2 tablespoon minced fresh ginger

  • 2 chopped green onions

  • 1–2 sprigs fresh thyme

  • 8 tablespoon low‑sodium chicken stock

  • 2–3 scotch bonnet peppers (or habanero to substitute)

  • 1 tablespoon low‑sodium soy sauce

  • 3 tablespoon Jamaican curry powder (additional for sauce)

  • 1 tablespoon Jamaican hot sauce (or preferred brand)

  • 1 teaspoon ground allspice

Directions

  1. I start by combining the cleaned chicken drumsticks with curry powder, sea salt, Flavo Rice seasoning (if using), black pepper, garlic powder, onion powder, parsley, paprika, and browning in a large bowl. I stir well to coat the chicken fully.

  2. Then I place the chicken in an airtight bag and marinate it in the refrigerator for at least 3 hours, preferably overnight. Before cooking, I let it sit at room temperature for 15–20 minutes.

  3. In a large saucepan over medium-high heat, I add olive oil and “burn” the curry powder for 2–3 minutes, letting it darken and release its aroma.

  4. I sauté the garlic, ginger, peppers, onions, and bell pepper until golden and fragrant. Then I stir in allspice, sea salt, and black pepper.

  5. I add the marinated chicken and sear each side for about 3–4 minutes until browned.

  6. Next, I pour in soy sauce, chicken stock, hot sauce, and coconut milk, stirring everything to combine.

  7. I toss in the diced potatoes, carrots, and thyme sprigs. I reduce the heat, cover the pan, and let it simmer for 20 minutes, stirring occasionally, until the chicken is tender and the sauce thickens.

  8. Once it's done, I remove it from the heat and serve it with white rice, plantains, or any of my favorite sides, garnishing with dried parsley or red pepper flakes if I’m feeling fancy.

Servings and Timing

  • Prep Time: 15 minutes (plus at least 3 hours marinating time)

  • Cook Time: Approximately 30–35 minutes

  • Total Time: About 3 hours 45 minutes (including marinating)

  • Yield: Serves 3–4

Variations

Sometimes I like to swap russet potatoes with sweet potatoes for a sweeter flavor and thicker texture. When I’m out of scotch bonnet peppers, I go with habaneros for a similar level of heat. For a different protein, I’ve also made this with boneless chicken thighs, which cook faster but still soak up the flavors just as well. If I want to bulk it up with more veggies, I’ll add green beans or spinach near the end of cooking.

Storage/Reheating

I keep leftovers in an airtight container in the refrigerator for up to 4 days. When I reheat it, I use the stovetop over low heat, adding a splash of chicken stock or water to loosen the sauce. It reheats beautifully and tastes even better the next day as the flavors meld together. For longer storage, I freeze it for up to 2 months and thaw it in the fridge before reheating.

FAQs

What makes Jamaican curry powder different?

Jamaican curry powder typically includes turmeric, allspice, and sometimes fenugreek, giving it a more earthy and bold flavor compared to Indian curry powders. I love how it adds a distinct color and taste to the dish.

Can I make this dish less spicy?

Absolutely. I sometimes use just one scotch bonnet or swap it out for a milder pepper. You can also leave out the hot sauce entirely if heat isn’t your thing.

Do I have to marinate the chicken overnight?

While I get the best flavor when I marinate overnight, even a few hours makes a big difference. If I’m short on time, I try to let it sit for at least 3 hours.

Can I use boneless chicken instead of drumsticks?

Yes, boneless thighs or breasts work well. I just make sure not to overcook them—they cook faster than drumsticks.

What can I serve with Jamaican curry chicken?

I usually pair it with steamed white rice, but I also enjoy it with sautéed vegetables, fried plantains, mashed potatoes, or even orzo for something different.

Conclusion

This Jamaican curry chicken is one of those recipes I come back to again and again. It’s rich, spicy, comforting, and perfect for a cozy night in or impressing friends at dinner. With every bite, I get a little taste of the Caribbean—and it always leaves me wanting more.

Print

clock clock iconcutlery cutlery iconflag flag iconfolder folder iconinstagram instagram iconpinterest pinterest iconfacebook facebook iconprint print iconsquares squares iconheart heart iconheart solid heart solid icon
Jamaican Curry Chicken

Jamaican Curry Chicken

5 Stars 4 Stars 3 Stars 2 Stars 1 Star No reviews
  • Author: Sue
  • Prep Time: 15 minutes (plus at least 3 hours marinating time)
  • Cook Time: Approximately 30–35 minutes
  • Total Time: 3 hours 45 minutes (including marinating)
  • Yield: Serves 3–4
  • Category: Main Dish
  • Method: Marinate, sauté, simmer
  • Cuisine: Jamaican
  • Diet: Gluten Free
Print Recipe
Pin Recipe

Description

A flavorful and authentic Jamaican curry chicken simmered in a spicy, creamy sauce of coconut milk, scotch bonnet peppers, and aromatic seasonings.


Ingredients

  • 3–4 chicken drumsticks
  • 2 tbsp Jamaican curry powder
  • 1 tsp sea salt
  • 1–2 teaspoon Flavo Rice or all‑purpose seasoning (optional)
  • 1½ tsp black pepper
  • 1 tsp garlic powder
  • 1–2 teaspoon onion powder
  • 1 tsp dried parsley
  • ½ tsp smoked paprika
  • 2 tbsp browning (optional)
  • 2 tbsp extra‑virgin olive oil
  • 14 oz full‑fat coconut milk (1 can)
  • 2 peeled and cubed russet potatoes
  • 2 peeled and chopped carrots
  • 1 chopped bell pepper
  • 3–4 minced garlic cloves
  • 1 tsp sea salt ( for sauce)
  • 1 tsp black pepper ( for sauce)
  • 2 tbsp minced fresh ginger
  • 2 chopped green onions
  • 1–2 sprigs fresh thyme
  • 8 tbsp low‑sodium chicken stock
  • 2–3 scotch bonnet peppers (or habanero to substitute)
  • 1 tbsp low‑sodium soy sauce
  • 3 tbsp Jamaican curry powder (additional for sauce)
  • 1 tbsp Jamaican hot sauce (or preferred brand)
  • 1 tsp ground allspice

Instructions

  1. In a large bowl, combine the cleaned chicken drumsticks with 2 tablespoon Jamaican curry powder, 1 teaspoon sea salt, Flavo Rice/all‑purpose seasoning (optional), 1½ teaspoon black pepper, 1 teaspoon garlic powder, 1–2 teaspoon onion powder, 1 teaspoon dried parsley, ½ teaspoon smoked paprika, and 2 tablespoon browning (optional). Stir well to coat the chicken.
  2. Place the coated chicken in an airtight bag and refrigerate to marinate for at least 3 hours, preferably overnight. Before cooking, let the chicken rest at room temperature for 15–20 minutes.
  3. In a large saucepan or skillet over medium‑high heat, add 2 tablespoon olive oil and “burn” the curry by stirring in curry powder until it turns dark brown and becomes aromatic (about 2–3 minutes).
  4. Add the minced garlic, fresh ginger, scotch bonnet (or habanero) peppers, onions, and bell pepper. Sauté until aromatic and golden. Stir in ground allspice, salt, black pepper.
  5. Add the marinated chicken pieces and sear for 3–4 minutes on each side, until browned.
  6. Pour in soy sauce, chicken stock, hot sauce, and coconut milk. Stir to combine.
  7. Add the diced potatoes and carrots. Drop in thyme sprigs. Reduce heat to simmer, cover, and cook for about 20 minutes, stirring occasionally, until the sauce thickens and the chicken is cooked through and tender.
  8. Once done, remove from heat. Serve with sides like white rice, vegetables, fried plantains or plantain chips, and garnish as desired with dried parsley or red pepper flakes.

Notes

  • “Burning” the curry powder in oil deepens flavor and color—a hallmark of authentic Jamaican curry.
  • Scotch bonnet peppers add authentic heat; substitute habaneros if needed.
  • Optionally use sweet potatoes instead of russet potatoes for a slightly sweeter taste and thicker sauce.
  • Serving suggestions: white or brown basmati rice, sautéed vegetables, fried plantains, mashed potatoes, or orzo.

Have you made this recipe? I'd love to see it!

Click here to Follow me on Pinterest

Cheesy Ground Beef and Potato Casserole

August 28, 2025 by Sue Leave a Comment

This cheesy ground beef and potato casserole is everything I crave in a comforting meal—rich, hearty, and incredibly satisfying. It layers tender, thinly sliced potatoes with savory seasoned ground beef, a creamy cheddar cheese soup blend, and finishes with melty shredded cheese on top. Baked to perfection, it’s the kind of dish that brings everyone back for seconds. Cheesy Ground Beef and Potato Casserole

Why I Love This Recipe

I love how this casserole hits all the comfort food notes without being complicated. It’s a full meal in one dish—meaty, cheesy, and carb-loaded in the best way. The sauce makes the potatoes incredibly creamy, and the layered format ensures each bite is packed with flavor. Plus, it reheats beautifully, so I get to enjoy the leftovers just as much the next day.

Ingredients

(Here's a tip: Check out the full list of ingredients and measurements in the recipe card below.)

  • 1 (14 oz) can cheddar cheese soup

  • 1 (12 oz) can evaporated milk or whole milk

  • ½ cup heavy cream

  • 1 lb ground beef

  • 1 cup diced onion

  • 3 cloves garlic, minced

  • 1 teaspoon paprika

  • 1 teaspoon salt

  • ½ teaspoon black pepper

  • 2½ lb Yukon Gold potatoes, thin-sliced (~⅛ in)

  • 1 cup shredded cheddar cheese

  • Fresh parsley, chopped (for garnish)

Directions

  1. I start by preheating the oven to 400°F (204°C).

  2. Then I whisk together the cheddar cheese soup, milk, and heavy cream in a bowl and set it aside.

  3. I wash and dry the potatoes, slicing them into ⅛-inch rounds with a mandoline for uniform thickness.

  4. In a skillet over medium-high heat, I cook the ground beef and diced onion until browned. After that, I stir in the garlic, paprika, salt, and pepper, cooking for another minute before draining the fat.

  5. In a baking dish or oven-safe skillet, I layer one third of the potato slices, followed by one third of the cheese-soup mixture, then one third of the beef mixture.

  6. I repeat the layers two more times—potatoes, sauce, beef—leaving the shredded cheese for later.

  7. I cover the dish and bake it for 1 hour, until the potatoes are fork-tender.

  8. After uncovering, I sprinkle the shredded cheddar over the top and return it to the oven for another 10 minutes, just until the cheese melts and bubbles.

  9. Finally, I let it rest for 10 minutes before garnishing with chopped parsley and serving.

Servings and timing

This recipe makes about 6 servings.

  • Prep Time: 15 minutes

  • Cook Time: 1 hour 10 minutes

  • Total Time: 1 hour 25 minutes

Variations

Sometimes I swap in Russet or red potatoes, depending on what I have. If I want a spicier kick, I’ll mix in some pepper-jack cheese with the cheddar. And when I’m feeling indulgent, I might layer in some  mushrooms for extra texture. The flexibility makes it easy to adjust based on my cravings or pantry supplies.

Storage/Reheating

I store leftovers in an airtight container in the fridge for up to 4 days. When I want to reheat it, I either pop a slice in the microwave or warm the whole dish in the oven at 350°F until hot. It also freezes well—I wrap portions tightly and freeze them for up to 3 months. Just thaw overnight in the fridge before reheating.

FAQs

How do I slice the potatoes evenly?

I use a mandoline slicer—it gives me perfectly thin, uniform slices that cook evenly. A sharp knife works too, but I take my time to keep them consistent.

Can I make this casserole ahead of time?

Absolutely. I assemble the casserole, cover it, and refrigerate it overnight. When I'm ready to bake, I let it sit at room temperature for 20–30 minutes before popping it into the oven.

What can I use instead of cheddar cheese soup?

If I don’t have the canned soup, I make a quick cheese sauce using butter, flour, milk, and shredded cheese. It’s a bit more effort but still delicious.

Can I use ground turkey instead of beef?

Yes, I’ve made it with ground turkey before and it turns out just as tasty. I season it a bit more to enhance the flavor since turkey is milder than beef.

Why are my potatoes still firm after baking?

It’s usually because the slices were too thick or the oven temperature was off. I make sure my slices are around ⅛ inch and bake until they’re fork-tender—sometimes that takes a little longer depending on the potato type.

Conclusion

This cheesy ground beef and potato casserole is my go-to when I need a warm, filling dinner that feeds a crowd or makes great leftovers. It’s simple to prepare, endlessly adaptable, and hits the spot every single time. Whether it’s a cozy weeknight meal or part of a weekend spread, I always know it’s going to be a hit.

Print

clock clock iconcutlery cutlery iconflag flag iconfolder folder iconinstagram instagram iconpinterest pinterest iconfacebook facebook iconprint print iconsquares squares iconheart heart iconheart solid heart solid icon
Cheesy Ground Beef and Potato Casserole

Cheesy Ground Beef and Potato Casserole

5 Stars 4 Stars 3 Stars 2 Stars 1 Star No reviews
  • Author: Sue
  • Prep Time: 15 minutes
  • Cook Time: 1 hour 10 minutes
  • Total Time: 1 hour 25 minutes
  • Yield: 6 servings
  • Category: Entree / Casserole
  • Method: Bake
  • Cuisine: American
  • Diet: Low Lactose
Print Recipe
Pin Recipe

Description

Tender, cheesy, and comforting casserole combining seasoned ground beef, creamy cheese‑soup sauce, and thinly sliced potatoes.


Ingredients

  • 1 (14 oz) can cheddar cheese soup
  • 1 (12 oz) can evaporated milk or whole milk
  • ½ cup heavy cream
  • 1 lb ground beef
  • 1 cup diced onion
  • 3 cloves garlic, minced
  • 1 tsp paprika
  • 1 tsp salt
  • ½ tsp black pepper
  • 2½ lb Yukon Gold potatoes, thin‑sliced (~⅛ in)
  • 1 cup shredded cheddar cheese
  • Fresh parsley, chopped (for garnish)

Instructions

  1. Preheat oven to 400 °F (204 °C).
  2. In a bowl, whisk together cheddar cheese soup, evaporated milk (or whole milk), and heavy cream. Set aside.
  3. Wash and dry potatoes, then slice into ~⅛‑inch slices using a knife or mandoline.
  4. In a skillet over medium‑high heat, cook ground beef and diced onion until browned. Add minced garlic, paprika, salt, and black pepper; cook another minute. Drain excess fat.
  5. Layer one third of the potato slices in an oven‑safe skillet or baking dish, then add one third of the cheese‑soup mixture and one third of the beef mixture.
  6. Repeat the layers two more times (potatoes → sauce → beef), but do not add shredded cheese yet.
  7. Cover the casserole and bake for 1 hour or until potatoes are fork‑tender.
  8. Remove cover, sprinkle shredded cheddar cheese over top, and bake an additional 10 minutes until cheese is melted and bubbly.
  9. Let rest for about 10 minutes; garnish with chopped parsley and serve.

Notes

  • You can substitute Russet or red potatoes if needed.
  • If potatoes are sliced thicker, increase bake time to ensure tenderness.
  • Use a mandoline for uniform slicing.
  • Swapping a mix of cheddar and pepper‑jack cheese adds extra flavor and spice.
  • Leftovers can be refrigerated up to 4 days or frozen for 2–3 months.

Nutrition

  • Serving Size: 1 serving
  • Calories: 530 kcal
  • Sugar: 6 g
  • Sodium: 602 mg
  • Fat: 31 g
  • Saturated Fat: 15 g
  • Unsaturated Fat: 10 g
  • Trans Fat: 1 g
  • Carbohydrates: 40 g
  • Fiber: 5 g
  • Protein: 24 g
  • Cholesterol: 102 mg

Have you made this recipe? I'd love to see it!

Click here to Follow me on Pinterest

Crock Pot Creamy Cajun Chicken Pasta

August 27, 2025 by Sue Leave a Comment

Crock Pot Creamy Cajun Chicken Pasta is a bold, rich, and satisfying dish that brings together tender chicken, a creamy sauce with a kick of Cajun heat, and perfectly cooked pasta—all made effortlessly in the slow cooker. It’s comforting, flavorful, and exactly what I crave when I want something indulgent but easy to throw together. Crock Pot Creamy Cajun Chicken Pasta

Why You’ll Love This Recipe

I love how this dish does all the work for me. I just set it and forget it in the crock pot, and a few hours later, I’ve got a creamy, spicy, cheesy pasta that tastes like it came from a restaurant. The Cajun seasoning gives it a bold flavor, while the cream cheese and heavy cream make the sauce luxuriously rich. It’s a perfect dinner when I want something hearty with minimal prep.

Ingredients

(Here's a tip: Check out the full list of ingredients and measurements in the recipe card below.)

  • Boneless, skinless chicken breasts

  • Cajun seasoning

  • Garlic, minced

  • Onion, diced

  • Bell peppers, sliced

  • Chicken broth

  • Cream cheese

  • Heavy cream

  • Parmesan cheese

  • Penne or fettuccine pasta

  • Salt and pepper

  • Olive oil or butter

Directions

  1. I start by seasoning the chicken breasts generously with Cajun seasoning on both sides.

  2. In a skillet, I sear the chicken in a little olive oil or butter just until golden—this step adds extra flavor but can be skipped if I’m short on time.

  3. I place the chicken, garlic, onion, bell peppers, and chicken broth into the crock pot. I cover and cook on low for 4–5 hours or on high for about 2–3 hours, until the chicken is cooked through and tender.

  4. Once the chicken is done, I remove it and shred or slice it, then return it to the crock pot.

  5. I stir in the cream cheese, heavy cream, and Parmesan until everything is melted and smooth.

  6. Meanwhile, I cook the pasta separately according to package instructions, then drain and add it to the slow cooker. I toss everything together to coat the pasta in the creamy Cajun sauce.

  7. I finish by tasting and adjusting salt, pepper, or extra Cajun seasoning if I want more heat.

Servings and timing

This recipe serves 4 to 6 people, depending on portion size. It takes about 10 minutes to prep, and cooking time is 4–5 hours on low or 2–3 hours on high. I usually get everything going in the morning and it’s ready by dinner.

Variations

I sometimes swap chicken for smoked sausage or shrimp for a different flavor. If I want to lighten it up, I use half-and-half instead of heavy cream and reduce the cream cheese. For a veggie boost, I’ll stir in spinach or mushrooms near the end. And if I’m going low-carb, I skip the pasta and serve it over zucchini noodles or cauliflower rice.

Storage/Reheating

Leftovers keep well in the fridge for up to 4 days. I store them in an airtight container and reheat in the microwave or on the stovetop over low heat with a splash of broth or cream to loosen the sauce. I don’t recommend freezing it since the dairy-based sauce can separate after thawing.

FAQs

Can I use pre-cooked chicken?

Yes, if I have leftover chicken, I just skip the slow cooking part and stir it in along with the cream cheese and cream, letting everything heat through.

What type of pasta works best?

I usually use penne or fettuccine, but any sturdy pasta like rotini or rigatoni holds the creamy sauce well.

Is this dish spicy?

The Cajun seasoning gives it a medium heat. If I want it milder, I reduce the seasoning or choose a low-sodium, mild Cajun blend.

Can I make this dairy-free?

I haven’t tried it, but using a dairy-free cream cheese and coconut cream might work. Just expect a slight flavor difference.

Do I need to cook the pasta separately?

Yes, I always cook the pasta separately. Adding it directly to the crock pot can make it mushy. Mixing it in at the end keeps it perfectly al dente.

Conclusion

Crock Pot Creamy Cajun Chicken Pasta is one of those comforting meals that feels indulgent without being complicated. I love the bold, spicy flavors and the creamy texture, and the slow cooker makes it practically effortless. Whether I’m feeding the family or just want leftovers for a couple of days, this dish always satisfies.

Print

clock clock iconcutlery cutlery iconflag flag iconfolder folder iconinstagram instagram iconpinterest pinterest iconfacebook facebook iconprint print iconsquares squares iconheart heart iconheart solid heart solid icon
Crock Pot Creamy Cajun Chicken Pasta

Crock Pot Creamy Cajun Chicken Pasta

5 Stars 4 Stars 3 Stars 2 Stars 1 Star No reviews
  • Author: Sue
  • Prep Time: 10 minutes
  • Cook Time: 4–5 hours (low) or 2–3 hours (high)
  • Total Time: 4 hours 10 minutes
  • Yield: 4 to 6 servings
  • Category: Dinner
  • Method: Slow Cooker
  • Cuisine: Cajun
  • Diet: Halal
Print Recipe
Pin Recipe

Description

Crock Pot Creamy Cajun Chicken Pasta is a rich, spicy, and indulgent slow cooker meal with tender chicken, creamy Cajun sauce, and pasta, perfect for an easy yet satisfying dinner.


Ingredients

  • 2–3 boneless, skinless chicken breasts
  • 2 tablespoons Cajun seasoning
  • 3 cloves garlic, minced
  • 1 onion, diced
  • 2 bell peppers, sliced (any color)
  • 1 cup chicken broth
  • 8 oz cream cheese, cubed
  • 1 cup heavy cream
  • ½ cup grated Parmesan cheese
  • 12 oz penne or fettuccine pasta
  • Salt and pepper to taste
  • 1 tablespoon olive oil or butter (for searing chicken)

Instructions

  1. Season chicken breasts with Cajun seasoning on both sides.
  2. Optional: Sear chicken in a skillet with olive oil or butter until golden brown.
  3. Place chicken, garlic, onion, bell peppers, and chicken broth into the crock pot. Cover and cook on low for 4–5 hours or high for 2–3 hours until chicken is tender.
  4. Remove the chicken, shred or slice it, and return it to the crock pot.
  5. Stir in cream cheese, heavy cream, and Parmesan cheese until melted and smooth.
  6. Cook pasta separately according to package instructions, drain, and add to the crock pot. Stir to combine with the sauce.
  7. Taste and adjust seasoning with salt, pepper, or additional Cajun seasoning if desired. Serve warm.

Notes

  • Swap chicken with smoked sausage or shrimp for variation.
  • Use half-and-half for a lighter version.
  • Add spinach or mushrooms near the end for extra veggies.
  • Serve over zucchini noodles or cauliflower rice for a low-carb option.
  • Reheat leftovers with a splash of cream or broth to loosen the sauce.

Nutrition

  • Serving Size: 1 serving
  • Calories: 600
  • Sugar: 4g
  • Sodium: 800mg
  • Fat: 35g
  • Saturated Fat: 18g
  • Unsaturated Fat: 14g
  • Trans Fat: 0.5g
  • Carbohydrates: 40g
  • Fiber: 2g
  • Protein: 35g
  • Cholesterol: 130mg

Have you made this recipe? I'd love to see it!

Click here to Follow me on Pinterest

Beef and Pepper Rice Bowl

August 27, 2025 by Sue Leave a Comment

The Beef and Pepper Rice Bowl is a quick, satisfying dish loaded with tender strips of beef, colorful bell peppers, and a savory sauce—all served over a fluffy bed of rice. It’s a stir-fry-inspired meal that hits all the right notes: meaty, saucy, and perfectly balanced with sweet and spicy flavors. Whether I’m short on time or just craving something hearty and comforting, this rice bowl always delivers. Beef and Pepper Rice Bowl

Why I Love This Recipe

I love this recipe for how easy and customizable it is. The beef cooks quickly, the peppers add a nice crunch and burst of color, and the sauce pulls everything together with bold, umami-packed flavor. It’s the kind of meal I can whip up in under 30 minutes with just a few pantry staples and whatever vegetables I have on hand. Plus, it’s great for meal prep—I just make a big batch and portion it out for the week.

Ingredients

(Here's a tip: Check out the full list of ingredients and measurements in the recipe card below.)

  • Thinly sliced beef (flank steak or sirloin works best)

  • Bell peppers (a mix of red, yellow, and green for color)

  • Cooked white or brown rice

  • Soy sauce

  • Oyster sauce

  • Garlic, minced

  • Ginger, grated

  • Brown sugar

  • Cornstarch

  • Water

  • Vegetable oil

  • Green onions (optional, for garnish)

  • Sesame seeds (optional, for garnish)

Directions

  1. I start by cooking the rice according to package instructions and setting it aside.

  2. I slice the beef thinly across the grain and toss it with cornstarch to help it sear nicely.

  3. In a hot skillet or wok, I heat oil and stir-fry the beef until browned and cooked through, then remove it from the pan.

  4. I add more oil if needed, then stir-fry the garlic, ginger, and sliced bell peppers for about 3–4 minutes until they’re slightly tender but still crisp.

  5. In a small bowl, I mix soy sauce, oyster sauce, brown sugar, and a splash of water, then pour it into the pan.

  6. I return the beef to the skillet and toss everything together until coated in the sauce and heated through.

  7. I serve it all over bowls of warm rice, garnished with chopped green onions and sesame seeds if I have them.

Servings and timing

This recipe serves 4 and comes together in about 25–30 minutes total, including prep and cooking time.

Variations

Sometimes I swap the beef for chicken, shrimp, or even tofu if I want a lighter or vegetarian version. I’ve added broccoli, snap peas, or mushrooms for extra veggies. For a spicy kick, I mix in a bit of chili garlic sauce or sliced fresh chili peppers. And when I want to keep things low-carb, I serve the beef and peppers over cauliflower rice.

Storage/Reheating

I store leftovers in airtight containers in the fridge for up to 4 days. To reheat, I use a skillet with a splash of water or soy sauce to keep it moist and flavorful. The microwave works too—about 1–2 minutes on high—but I prefer the stovetop for better texture.

FAQs

What cut of beef works best for this rice bowl?

I usually go with flank steak or sirloin because they’re tender and cook quickly. I always slice them thinly against the grain for the best texture.

Can I make this ahead for meal prep?

Yes, this dish is great for meal prep. I portion it into containers with rice and refrigerate for easy grab-and-go lunches or dinners during the week.

How do I keep the beef tender?

I toss the beef with cornstarch and cook it quickly over high heat. This helps lock in moisture and keeps it from getting tough.

Can I use frozen peppers?

I have used frozen bell pepper strips in a pinch. I just thaw and pat them dry before stir-frying to avoid excess moisture.

Is this dish gluten-free?

To make it gluten-free, I use tamari or a gluten-free soy sauce and check that the oyster sauce is also certified gluten-free.

Conclusion

This Beef and Pepper Rice Bowl is a flavorful, no-fuss meal that satisfies every time. I love how the sauce soaks into the rice, how the peppers stay crisp, and how fast everything comes together. It’s one of those dishes I keep coming back to—easy, filling, and perfect for both busy weeknights and laid-back weekends.

Print

clock clock iconcutlery cutlery iconflag flag iconfolder folder iconinstagram instagram iconpinterest pinterest iconfacebook facebook iconprint print iconsquares squares iconheart heart iconheart solid heart solid icon
Beef and Pepper Rice Bowl

Beef and Pepper Rice Bowl

5 Stars 4 Stars 3 Stars 2 Stars 1 Star No reviews
  • Author: Sue
  • Prep Time: 10 minutes
  • Cook Time: 15 minutes
  • Total Time: 25 minutes
  • Yield: 4 servings
  • Category: Main Dish
  • Method: Stir-Fry
  • Cuisine: Asian-Inspired
  • Diet: Low Lactose
Print Recipe
Pin Recipe

Description

A quick and hearty stir-fry-inspired dish with tender beef, vibrant bell peppers, and a savory-sweet sauce served over rice. Perfect for busy weeknights or meal prep.


Ingredients

  • 1 lb thinly sliced beef (flank steak or sirloin)
  • 2 bell peppers (red and yellow or green), sliced
  • 3 cups cooked white or brown rice
  • 2 tbsp soy sauce
  • 1 tbsp oyster sauce
  • 2 cloves garlic, minced
  • 1 tsp grated ginger
  • 1 tbsp brown sugar
  • 1 tbsp cornstarch
  • 2 tbsp water
  • 2 tbsp vegetable oil
  • 2 green onions, chopped (optional, for garnish)
  • 1 tsp sesame seeds (optional, for garnish)

Instructions

  1. Cook rice according to package instructions and set aside.
  2. Toss thinly sliced beef with cornstarch and set aside.
  3. Heat 1 tablespoon oil in a skillet or wok over high heat. Stir-fry beef until browned and cooked through. Remove from pan.
  4. Add remaining oil if needed and stir-fry garlic, ginger, and bell peppers for 3–4 minutes until just tender.
  5. In a small bowl, mix soy sauce, oyster sauce, brown sugar, and water. Pour into the skillet.
  6. Return beef to the skillet and toss everything to coat evenly in the sauce. Heat through.
  7. Serve over warm rice and garnish with green onions and sesame seeds if using.

Notes

  • Use flank steak or sirloin for best texture—slice thinly against the grain.
  • Customize with other vegetables like broccoli or snap peas.
  • For a gluten-free version, use tamari and gluten-free oyster sauce.
  • Great for meal prep—store in the fridge for up to 4 days.
  • Reheat on the stovetop with a splash of water or soy sauce.

Nutrition

  • Serving Size: 1 bowl
  • Calories: 420
  • Sugar: 6g
  • Sodium: 720mg
  • Fat: 16g
  • Saturated Fat: 4g
  • Unsaturated Fat: 10g
  • Trans Fat: 0g
  • Carbohydrates: 40g
  • Fiber: 3g
  • Protein: 28g
  • Cholesterol: 65mg

Have you made this recipe? I'd love to see it!

Click here to Follow me on Pinterest

Classic Homemade Mayo

August 27, 2025 by Sue Leave a Comment

Making classic homemade mayo is surprisingly easy and incredibly satisfying. With just a few pantry staples and a couple of minutes, I can whip up a creamy, rich, and fresh-tasting mayonnaise that outshines anything I’ve bought in a store. It’s perfect for sandwiches, dips, dressings, and more. Classic Homemade Mayo

Why You’ll Love This Recipe

I love how quick and foolproof this recipe is—no fancy tools needed, just a whisk or blender. The flavor is far superior to store-bought versions, with a clean, slightly tangy profile that I can adjust to my taste. Plus, knowing exactly what goes into my mayo makes it feel healthier and more natural. Whether I need a spread for a BLT or a base for a salad dressing, this homemade mayo never disappoints.

Ingredients

(Here's a tip: Check out the full list of ingredients and measurements in the recipe card below.)

  • Egg yolk

  • Dijon mustard

  • Lemon juice or white vinegar

  • Neutral oil (like canola, grapeseed, or sunflower)

  • Salt

  • Optional: a pinch of sugar for balance

Directions

  1. I start by placing the egg yolk, mustard, and a bit of lemon juice (or vinegar) in a mixing bowl.

  2. While whisking continuously, I begin adding the oil very slowly—just a few drops at first—to emulsify the mixture.

  3. Once it starts to thicken, I gradually stream in the rest of the oil while continuing to whisk vigorously.

  4. When it reaches a creamy consistency, I season with salt and add a bit more lemon juice or vinegar to brighten the flavor.

  5. I taste and adjust seasoning as needed. If I want a hint of sweetness, I’ll mix in a small pinch of sugar.

Servings and timing

This recipe makes about 1 cup of mayo, which serves 8 to 10 as a condiment. It takes around 10 minutes to prepare from start to finish.

Variations

  • Garlic Mayo (Aioli): I like to add a minced garlic clove for a punchy twist.

  • Herb Mayo: Chopped parsley, dill, or tarragon give the mayo a fresh, herby flavor.

  • Spicy Mayo: A spoonful of sriracha or a pinch of cayenne pepper turns it into a zesty spread.

  • Avocado Mayo: I sometimes blend in ripe avocado for a creamier, greener alternative.

  • Vegan Mayo: For an egg-free version, I use aquafaba (chickpea brine) in place of the egg yolk.

storage/reheating

I store my homemade mayo in an airtight container in the refrigerator. It stays fresh for up to one week. I never try to reheat mayo, as it’s best served cold or at room temperature. I also avoid leaving it out for too long to maintain its freshness and safety.

FAQs

How can I fix broken mayo?

If my mayo breaks (separates), I start fresh with a new egg yolk in a clean bowl and slowly whisk the broken mayo into it. It usually comes back together smoothly.

Can I use olive oil instead of neutral oil?

Yes, but I prefer to use light olive oil. Extra virgin olive oil can be too strong and sometimes turns bitter when blended.

Is it safe to eat raw egg yolks?

I use fresh, high-quality eggs and store my mayo properly to minimize risk. For extra safety, I can use pasteurized eggs.

Can I make mayo without a whisk?

Absolutely. I often use a blender, food processor, or immersion blender to make things easier and faster.

Why is my mayo too runny?

It might be due to adding oil too quickly or not whisking enough. I always add the oil slowly and make sure the emulsion forms before pouring in more.

Conclusion

Classic homemade mayo is one of those simple recipes that always delivers. I love the control it gives me over taste and ingredients, and once I started making my own, I never looked back. Whether I’m using it as a spread or as a base for sauces and dressings, this mayo always adds a creamy, delicious touch to any dish.

Print

clock clock iconcutlery cutlery iconflag flag iconfolder folder iconinstagram instagram iconpinterest pinterest iconfacebook facebook iconprint print iconsquares squares iconheart heart iconheart solid heart solid icon
Classic Homemade Mayo

Classic Homemade Mayo

5 Stars 4 Stars 3 Stars 2 Stars 1 Star No reviews
  • Author: Sue
  • Prep Time: 10 minutes
  • Cook Time: 0 minutes
  • Total Time: 10 minutes
  • Yield: 1 cup (serves 8–10)
  • Category: Condiment
  • Method: Whisking
  • Cuisine: American
  • Diet: Low Lactose
Print Recipe
Pin Recipe

Description

This Classic Homemade Mayo is a creamy, rich, and tangy condiment made with simple pantry ingredients. It’s perfect for sandwiches, dips, dressings, and more, offering better flavor and control than store-bought options.


Ingredients

  • 1 large egg yolk
  • 1 teaspoon Dijon mustard
  • 1 tablespoon lemon juice or white vinegar
  • 1 cup neutral oil (canola, grapeseed, or sunflower)
  • ¼ teaspoon salt
  • Optional: pinch of sugar

Instructions

  1. Place the egg yolk, Dijon mustard, and lemon juice or vinegar in a mixing bowl.
  2. Whisk continuously while slowly adding a few drops of oil to begin emulsifying.
  3. Once the mixture starts to thicken, gradually stream in the remaining oil while whisking vigorously.
  4. Continue whisking until the mayo reaches a creamy consistency.
  5. Season with salt and adjust with more lemon juice or vinegar to taste.
  6. Optional: Add a pinch of sugar if a touch of sweetness is desired.

Notes

  • Use pasteurized eggs if concerned about raw egg safety.
  • Store mayo in an airtight container in the fridge for up to one week.
  • Do not reheat mayo; serve cold or at room temperature.
  • To fix broken mayo, whisk a new egg yolk and slowly incorporate the broken mixture.
  • Light olive oil can be used but avoid extra virgin olive oil for its strong flavor.

Nutrition

  • Serving Size: 1 tablespoon
  • Calories: 94
  • Sugar: 0g
  • Sodium: 24mg
  • Fat: 10g
  • Saturated Fat: 1g
  • Unsaturated Fat: 9g
  • Trans Fat: 0g
  • Carbohydrates: 0g
  • Fiber: 0g
  • Protein: 0g
  • Cholesterol: 8mg

Have you made this recipe? I'd love to see it!

Click here to Follow me on Pinterest

No-Knead Spoon Bread

August 27, 2025 by Sue Leave a Comment

No-knead spoon bread is a soft, custardy Southern side dish that falls somewhere between cornbread and soufflé. It's incredibly easy to make and requires no kneading or special equipment—just a mixing bowl and a spoon. With a creamy interior and slightly crisp top, this dish is comforting, simple, and endlessly versatile. No-Knead Spoon Bread

Why You’ll Love This Recipe

I love how effortlessly this dish comes together. There's no kneading, no yeast, and no waiting for dough to rise. It’s the ultimate low-fuss comfort food with deep Southern roots. I find it’s perfect for weeknight dinners or holiday meals alike, and it pairs well with everything from fried chicken to slow-cooked greens. The texture is incredibly satisfying—warm, soft, and rich with a bit of bite from the cornmeal.

Ingredients

(Here's a tip: Check out the full list of ingredients and measurements in the recipe card below.)

  • Cornmeal

  • Milk

  • Butter

  • Eggs

  • Baking powder

  • Salt

  • Sugar (optional, depending on preference)

  • Cheese (optional for a savory variation)

Directions

  1. I start by heating the milk in a saucepan until it’s just about to boil, then I slowly whisk in the cornmeal to make a thick mush.

  2. Once the mixture thickens, I take it off the heat and stir in the butter, letting it melt completely.

  3. After that, I let the mixture cool a bit before adding the eggs, baking powder, salt, and a touch of sugar if I want a slightly sweet version.

  4. I pour the mixture into a greased baking dish and bake it in a preheated oven until the top is golden and puffed.

  5. Once it’s done, I scoop it straight from the dish to serve—hence the name "spoon bread."

Servings and timing

This recipe yields about 6 servings. It takes approximately 10 minutes to prepare and 35–40 minutes to bake, so it's ready in under an hour from start to finish.

Variations

I like to customize my spoon bread depending on the occasion. Sometimes I stir in shredded cheddar or crumbled feta for extra richness. I’ve also added chopped jalapeños or scallions for a savory twist. To make it gluten-free, I simply double-check that the cornmeal is certified gluten-free, and I’m good to go.

storage/reheating

I store any leftovers in an airtight container in the refrigerator for up to 3 days. When reheating, I scoop individual portions into a microwave-safe dish and warm them up for 30–45 seconds. For oven reheating, I cover the dish with foil and bake at 300°F until heated through. The texture stays nicely soft when reheated gently.

FAQs

What is the difference between spoon bread and cornbread?

Spoon bread is much softer and more custard-like than traditional cornbread. While cornbread is firm enough to slice, I need a spoon to serve this version due to its creamy texture.

Can I make spoon bread ahead of time?

Yes, I often make it a few hours in advance and reheat it before serving. Just keep it covered and warm it gently to maintain its texture.

Is spoon bread gluten-free?

It can be! I just make sure to use certified gluten-free cornmeal and check that no other ingredients contain gluten.

Can I freeze spoon bread?

I don’t recommend freezing it, as the texture can become watery or grainy when thawed. It’s best enjoyed fresh or reheated from the fridge within a couple of days.

What do I serve with spoon bread?

I usually serve spoon bread with roasted meats, barbecue, or hearty vegetables like collard greens. It’s also fantastic with chili or stews.

Conclusion

No-knead spoon bread is the ultimate comfort side—simple, creamy, and satisfying. I love how easy it is to make and how customizable it can be for any meal. Whether I’m serving a big family dinner or just want something cozy on the side, this dish always hits the spot.

Print

clock clock iconcutlery cutlery iconflag flag iconfolder folder iconinstagram instagram iconpinterest pinterest iconfacebook facebook iconprint print iconsquares squares iconheart heart iconheart solid heart solid icon
No-Knead Spoon Bread

No-Knead Spoon Bread

5 Stars 4 Stars 3 Stars 2 Stars 1 Star No reviews
  • Author: Sue
  • Prep Time: 10 minutes
  • Cook Time: 40 minutes
  • Total Time: 50 minutes
  • Yield: 6 servings
  • Category: Side Dish
  • Method: Baking
  • Cuisine: Southern
  • Diet: Gluten Free
Print Recipe
Pin Recipe

Description

No-knead spoon bread is a creamy, custardy Southern dish that's easy to prepare and perfect as a comforting side. With a soft interior and a lightly crisp top, it sits between cornbread and soufflé, offering a simple yet satisfying flavor.


Ingredients

  • 1 cup cornmeal
  • 2 cups milk
  • 2 tablespoons butter
  • 2 large eggs
  • 1 tablespoon baking powder
  • ½ teaspoon salt
  • 1 tablespoon sugar (optional)
  • ½ cup shredded cheese (optional)

Instructions

  1. Preheat oven to 375°F (190°C) and grease a baking dish.
  2. Heat milk in a saucepan until just about to boil.
  3. Slowly whisk in cornmeal to make a thick mush.
  4. Remove from heat and stir in butter until melted.
  5. Let mixture cool slightly, then add eggs, baking powder, salt, and sugar if using. Mix well.
  6. Stir in cheese if using.
  7. Pour mixture into the greased baking dish.
  8. Bake for 35–40 minutes, until top is golden and puffed.
  9. Serve warm by scooping with a spoon.

Notes

  • Use certified gluten-free cornmeal for a gluten-free version.
  • Add jalapeños, scallions for variation.
  • Reheat gently to maintain soft texture.
  • Do not freeze—texture may become watery when thawed.

Nutrition

  • Serving Size: 1 serving
  • Calories: 210
  • Sugar: 2g
  • Sodium: 280mg
  • Fat: 10g
  • Saturated Fat: 5g
  • Unsaturated Fat: 4g
  • Trans Fat: 0g
  • Carbohydrates: 23g
  • Fiber: 2g
  • Protein: 6g
  • Cholesterol: 75mg

Have you made this recipe? I'd love to see it!

Click here to Follow me on Pinterest

Short Rib Ragu with Parmesan Mashed Potatoes

August 27, 2025 by Sue Leave a Comment

Rich, savory, and soul-warming, Short Rib Ragu with Parmesan Mashed Potatoes is a hearty meal that feels like a warm hug. Tender beef short ribs are slowly braised until they fall apart in a luxurious tomato and red wine sauce, then served over buttery mashed potatoes enhanced with Parmesan cheese. It’s comfort food elevated to restaurant-quality, perfect for cozy nights or special occasions. Short Rib Ragu with Parmesan Mashed Potatoes

Why I Love This Recipe

I love how this dish brings deep flavors from slow cooking with minimal effort. The short ribs become incredibly tender as they braise in a rich tomato and wine sauce, infusing every bite with savory goodness. Paired with creamy mashed potatoes enriched with Parmesan, it creates a balance of texture and flavor that’s both satisfying and indulgent. Plus, it makes the whole house smell amazing while it cooks.

Ingredients

(Here's a tip: Check out the full list of ingredients and measurements in the recipe card below.)

  • Bone-in beef short ribs

  • Olive oil

  • Yellow onion

  • Carrots

  • Celery

  • Garlic cloves

  • Tomato paste

  • Crushed tomatoes

  • Dry red wine

  • Beef broth

  • Bay leaves

  • Fresh thyme

  • Salt and pepper

For the Parmesan mashed potatoes:

  • Russet or Yukon Gold potatoes

  • Butter

  • Heavy cream or milk

  • Freshly grated Parmesan cheese

  • Salt

Directions

  1. I start by seasoning the short ribs generously with salt and pepper, then sear them in a heavy pot until they’re browned on all sides.

  2. After removing the ribs, I sauté onion, carrots, and celery in the same pot until soft, then add garlic and tomato paste, cooking until fragrant.

  3. I pour in red wine to deglaze the pot, scraping up all those flavorful brown bits.

  4. Then I stir in crushed tomatoes, beef broth, and herbs, returning the short ribs to the pot.

  5. I let everything simmer low and slow, covered, for about 2.5 to 3 hours until the meat is fall-off-the-bone tender.

  6. While the ragu finishes cooking, I boil the potatoes until fork-tender, then mash them with butter, warm cream, salt, and Parmesan until silky.

  7. Finally, I shred the short rib meat, discard the bones, and serve it over a generous mound of Parmesan mashed potatoes, spooning extra sauce on top.

Servings and timing

This recipe serves about 6 people. It takes roughly 3.5 to 4 hours in total:

  • Prep time: 30 minutes

  • Cook time: 3 hours

Variations

I sometimes use boneless short ribs if I can’t find bone-in. For a lighter version, I’ve also tried it with chuck roast, though the richness of short ribs is hard to beat. If I want a lower-carb option, I swap the mashed potatoes with mashed cauliflower. And when I feel like adding extra herbs, I’ll stir in fresh basil or parsley right before serving.

Storage/Reheating

I store leftovers in an airtight container in the fridge for up to 4 days. This ragu actually tastes even better the next day. To reheat, I gently warm it on the stove or in the microwave, adding a splash of broth or water if the sauce has thickened too much. The mashed potatoes reheat well too, especially when stirred with a little extra butter or cream to revive their creaminess.

FAQs

What kind of wine should I use for the ragu?

I prefer a dry red wine like Cabernet Sauvignon or Merlot. It should be something I’d enjoy drinking, since it adds depth to the sauce.

Can I make this in a slow cooker?

Yes, I’ve done it in the slow cooker. After searing the ribs and sautéing the vegetables, I transfer everything to the slow cooker and cook on low for 8 hours.

Can I freeze the short rib ragu?

Absolutely. I freeze the shredded meat and sauce (without the potatoes) in airtight containers for up to 3 months. It’s a great make-ahead option.

Do I need to strain the sauce?

Not necessarily. I like the rustic texture from the vegetables, but if I want a smoother sauce, I’ll blend a portion before adding the meat back in.

What can I serve with this besides mashed potatoes?

I’ve served it over polenta, pappardelle pasta, and even crusty bread. The ragu is versatile and pairs well with anything that soaks up sauce.

Conclusion

Short Rib Ragu with Parmesan Mashed Potatoes is one of those meals I make when I want to impress or simply treat myself to something hearty and comforting. The slow-braised meat and rich sauce, paired with velvety mashed potatoes, make every bite unforgettable. It’s a timeless dish that brings people to the table and keeps them there.

Print

clock clock iconcutlery cutlery iconflag flag iconfolder folder iconinstagram instagram iconpinterest pinterest iconfacebook facebook iconprint print iconsquares squares iconheart heart iconheart solid heart solid icon
Short Rib Ragu with Parmesan Mashed Potatoes

Short Rib Ragu with Parmesan Mashed Potatoes

5 Stars 4 Stars 3 Stars 2 Stars 1 Star No reviews
  • Author: Sue
  • Prep Time: 30 minutes
  • Cook Time: 3 hours
  • Total Time: 3 hours 30 minutes
  • Yield: 6 servings
  • Category: Main Course
  • Method: Braising
  • Cuisine: Italian-American
  • Diet: Halal
Print Recipe
Pin Recipe

Description

Short Rib Ragu with Parmesan Mashed Potatoes is a rich, comforting dish featuring fall-apart tender beef short ribs braised in a tomato-red wine sauce, served over creamy Parmesan mashed potatoes. Perfect for cozy nights or special occasions.


Ingredients

  • 3–4 lbs bone-in beef short ribs
  • 2 tbsp olive oil
  • 1 large yellow onion, chopped
  • 2 carrots, chopped
  • 2 celery stalks, chopped
  • 4 garlic cloves, minced
  • 2 tbsp tomato paste
  • 1 (28 oz) can crushed tomatoes
  • 1 cup dry red wine (e.g., Cabernet Sauvignon or Merlot)
  • 2 cups beef broth
  • 2 bay leaves
  • 4 sprigs fresh thyme
  • Salt and pepper to taste
  • 3 lbs Russet or Yukon Gold potatoes, peeled and cubed
  • 4 tbsp butter
  • ½ cup heavy cream or milk (warmed)
  • ¾ cup freshly grated Parmesan cheese
  • Salt to taste

Instructions

  1. Season the short ribs generously with salt and pepper.
  2. Heat olive oil in a large heavy pot over medium-high heat. Sear short ribs until browned on all sides. Remove and set aside.
  3. In the same pot, sauté onion, carrots, and celery until softened, about 8 minutes.
  4. Add garlic and tomato paste. Cook for 2 minutes until fragrant.
  5. Deglaze the pot with red wine, scraping up brown bits.
  6. Stir in crushed tomatoes, beef broth, bay leaves, and thyme. Return the ribs to the pot.
  7. Cover and simmer on low for 2.5 to 3 hours, or until ribs are fall-apart tender.
  8. Meanwhile, boil potatoes in salted water until fork-tender, about 20 minutes. Drain.
  9. Mash potatoes with butter, warm cream, salt, and Parmesan until smooth and creamy.
  10. Remove short ribs, discard bones and bay leaves, and shred the meat. Return shredded meat to the pot and stir into the sauce.
  11. Serve ragu over a generous portion of Parmesan mashed potatoes. Spoon extra sauce on top.

Notes

  • Boneless short ribs or chuck roast can be used as alternatives.
  • The ragu can be made a day ahead and reheated for deeper flavor.
  • Mashed cauliflower can substitute potatoes for a low-carb option.
  • Leftovers can be frozen (ragu only) for up to 3 months.

Nutrition

  • Serving Size: ⅙ of recipe
  • Calories: 725
  • Sugar: 7g
  • Sodium: 760mg
  • Fat: 41g
  • Saturated Fat: 18g
  • Unsaturated Fat: 20g
  • Trans Fat: 1g
  • Carbohydrates: 38g
  • Fiber: 4g
  • Protein: 48g
  • Cholesterol: 155mg

Have you made this recipe? I'd love to see it!

Click here to Follow me on Pinterest

The Best Cheesy Garlic Chicken Wraps for Quick Meals

August 27, 2025 by Sue Leave a Comment

When I’m craving something comforting, savory, and quick to make, cheesy garlic chicken wraps hit the spot every time. These wraps combine tender chicken, gooey cheese, and bold garlic flavor, all bundled up in a soft tortilla. Whether it’s lunch, dinner, or a meal on the go, this wrap has become one of my favorite go-to recipes when time is tight but taste still matters. The Best Cheesy Garlic Chicken Wraps for Quick Meals

Why You’ll Love This Recipe

I love how simple yet flavorful these wraps are. They come together fast, making them perfect for busy weekdays or lazy weekends. The melted cheese with garlic-seasoned chicken gives every bite a rich, savory punch, and they’re endlessly customizable. I can make a big batch for the family or prep a couple for myself in under 30 minutes. Plus, they’re perfect for kids, work lunches, or even as a satisfying late-night snack.

Ingredients

(Here's a tip: Check out the full list of ingredients and measurements in the recipe card below.)

  • Cooked chicken breast (shredded or chopped)

  • Minced garlic

  • Olive oil or butter

  • Shredded mozzarella cheese

  • Shredded cheddar cheese

  • Flour tortillas

  • Salt and black pepper

  • Optional: chopped parsley or green onions for garnish

Directions

  1. I start by heating olive oil or butter in a skillet over medium heat and sautéing the minced garlic until it’s fragrant, about 1–2 minutes.

  2. I add the shredded chicken to the pan, seasoning it with salt and pepper, and stir to combine. I let it cook for another 3–4 minutes so it absorbs that delicious garlic flavor.

  3. On a clean surface, I lay out the flour tortillas and sprinkle a mix of mozzarella and cheddar cheese in the center of each one.

  4. I spoon the garlic chicken over the cheese, then top it with a little more cheese for extra gooeyness.

  5. I fold the sides of the tortillas in and then roll them up tightly like burritos.

  6. In a clean skillet, I toast the wraps seam-side down over medium heat until golden and crisp on both sides—about 2–3 minutes per side.

  7. Once they’re browned and the cheese is melted, I slice them in half and serve them warm.

Servings and timing

This recipe makes 4 wraps and takes about 25 minutes from start to finish. Prep time is around 10 minutes, and cook time is about 15 minutes. It’s great for a quick lunch or dinner, and easy to double if I’m feeding more people.

Variations

Sometimes I like to switch things up by using rotisserie chicken for convenience or adding sautéed onions and bell peppers for more flavor. I’ve also made these with spicy pepper jack cheese for a bit of a kick, and it turned out amazing. For a low-carb version, I use lettuce wraps instead of tortillas, and if I’m feeling indulgent, I add a drizzle of ranch or garlic aioli before folding the wrap.

Storage/Reheating

I store any leftovers in an airtight container in the fridge for up to 3 days. When reheating, I use a skillet or toaster oven to keep the wrap crispy—about 5–7 minutes over medium heat. I avoid the microwave if I want to maintain that nice crunch, but it works in a pinch for a softer texture.

FAQs

How do I keep the wraps from getting soggy?

I make sure the chicken mixture isn’t too wet and toast the wraps well before storing. This helps keep them from becoming soggy when reheated.

Can I make these wraps ahead of time?

Yes, I often prep the filling ahead and assemble the wraps right before eating or quickly toast them before heading out.

What type of chicken works best?

I usually use shredded cooked chicken breast, but thighs or rotisserie chicken work just as well and add extra flavor.

Can I freeze these wraps?

Yes, I wrap them tightly in foil or plastic wrap and freeze them for up to a month. I just thaw and reheat in a skillet or oven for best results.

What dipping sauces go well with these?

I love pairing them with ranch, garlic aioli, or even marinara sauce for an Italian twist.

Conclusion

These cheesy garlic chicken wraps have become a staple in my kitchen because they’re quick, satisfying, and packed with flavor. Whether I’m rushing through a busy day or just want something delicious without spending hours in the kitchen, these wraps always deliver. I know I’ll be coming back to this recipe again and again.

Print

clock clock iconcutlery cutlery iconflag flag iconfolder folder iconinstagram instagram iconpinterest pinterest iconfacebook facebook iconprint print iconsquares squares iconheart heart iconheart solid heart solid icon
The Best Cheesy Garlic Chicken Wraps for Quick Meals

The Best Cheesy Ground Beef Enchiladas for Dinner

5 Stars 4 Stars 3 Stars 2 Stars 1 Star No reviews
  • Author: Sue
  • Prep Time: 15 minutes
  • Cook Time: 7 minutes
  • Total Time: 22 minutes
  • Yield: 2 servings
  • Category: Lunch
  • Method: Pan‑fry
  • Cuisine: Healthy / Comfort Food
  • Diet: Low Fat
Print Recipe
Pin Recipe

Description

Crispy, cheesy garlic chicken wraps—quick, high‑protein comfort food perfect for lunch or dinner.


Ingredients

  • 2 large tortillas (regular or low‑carb/high‑protein)
  • 7 oz cooked chicken, chopped (about 200 g; rotisserie works great)
  • 2 garlic cloves, minced or grated
  • 2 tablespoons light mayonnaise
  • 1 tablespoon light Greek yogurt or plain yogurt
  • 2 teaspoons hot sauce (like Frank’s)
  • ¼ teaspoon salt
  • 3 oz grated cheese (cheddar blend, about 90 g)
  • 1 green onion, chopped
  • Olive oil spray

Instructions

  1. In a bowl, mix chopped chicken, garlic, mayonnaise, yogurt, hot sauce, and salt.
  2. Lay out the tortilla. On the lower third, sprinkle about 2 tablespoons of cheese, then add about ⅔ cup of the chicken mixture, another tablespoon of cheese, and a sprinkle of green onion.
  3. Fold in the sides of the tortilla and roll it up tightly from the bottom.
  4. Heat a non‑stick pan over medium‑high and spray with olive oil.
  5. Place wraps seam‑side down and cook for 3–4 minutes per side until golden and crispy; cover with a lid to help heat through.
  6. Slice in half and serve hot.

Notes

  • Cover the pan to help melt the cheese and warm the filling faster.
  • You can make the chicken filling ahead and store in the fridge for up to 3 days.
  • Reduce the cheese for a lighter version, though the melty center really adds magic.
  • Air fryer option: cook at 375 °F (190 °C) for about 6–8 minutes.
  • Store cooked wraps in the fridge for up to 2 days; reheat in a skillet or air fryer to retain crispiness.
  • The filling (not wrapped) can be frozen for up to 1 month.
  • Use leftover filling in toasted sandwiches, quesadillas, or baked potatoes.
  • Great served with a big crunchy salad, roasted veggies, pickles, salsa, or chips.

Nutrition

  • Serving Size: 1 wrap
  • Calories: 476 kcal
  • Sugar: 2 g
  • Sodium: 1090 mg
  • Fat: 27 g
  • Saturated Fat: 11 g
  • Unsaturated Fat: —
  • Trans Fat: 0.01 g
  • Carbohydrates: 19 g
  • Fiber: 1 g
  • Protein: 38 g
  • Cholesterol: 120 mg

Have you made this recipe? I'd love to see it!

Click here to Follow me on Pinterest

Pineapple Chicken Tacos

August 26, 2025 by Sue Leave a Comment

These pineapple chicken tacos are a sweet and savory twist on a classic taco night. Juicy chicken is paired with fresh pineapple, seasoned perfectly, and tucked into warm tortillas for a refreshing, tropical-inspired dish. Pineapple Chicken Tacos

Why You’ll Love This Recipe

I like how the sweetness of pineapple balances out the savory flavors of the chicken. The combination of textures—from tender chicken to juicy pineapple and crisp toppings—makes every bite satisfying. I also enjoy that this recipe feels light yet filling, making it great for a weeknight dinner or a fun weekend gathering.

ingredients

(Here's a tip: Check out the full list of ingredients and measurements in the recipe card below.)

  • Boneless, skinless chicken breasts or thighs

  • Pineapple (fresh or canned, diced)

  • Olive oil

  • Lime juice

  • Garlic, minced

  • Chili powder

  • Cumin

  • Paprika

  • Salt and pepper

  • Small flour or corn tortillas

  • Red onion, finely chopped

  • Cilantro, chopped

  • Optional toppings: shredded lettuce, avocado slices, sour cream, or cheese

directions

  1. I marinate the chicken with olive oil, lime juice, garlic, chili powder, cumin, paprika, salt, and pepper for at least 30 minutes.

  2. I cook the chicken in a skillet or grill until fully cooked, then dice it into bite-sized pieces.

  3. I sauté diced pineapple in a pan until lightly caramelized.

  4. I warm the tortillas in a skillet or directly over a flame for extra flavor.

  5. I assemble the tacos by layering chicken, pineapple, onions, and cilantro into the tortillas.

  6. I add any additional toppings I enjoy before serving.

Servings and timing

This recipe makes about 4 servings, with 2 tacos per person. I usually spend around 15 minutes on prep time and 15–20 minutes cooking, so the whole recipe comes together in about 30–35 minutes.

Variations

I sometimes swap chicken for shrimp for a seafood version. If I want it spicier, I add jalapeños or a drizzle of hot sauce. For a creamier touch, I like to top the tacos with a lime crema. Using corn tortillas gives the dish a more traditional flavor, while flour tortillas make them softer and easier to fold.

storage/reheating

I keep leftover chicken and pineapple in an airtight container in the refrigerator for up to 3 days. When reheating, I warm the chicken mixture in a skillet over medium heat so it doesn’t dry out. I always store tortillas separately and heat them fresh before serving.

FAQs

Can I use canned pineapple instead of fresh?

Yes, I use canned pineapple when fresh isn’t available, but I make sure to drain it well so the tacos don’t get watery.

What kind of chicken works best for this recipe?

I usually use boneless chicken thighs because they stay juicier, but chicken breasts also work well.

Can I make this recipe ahead of time?

I often marinate the chicken and prep the toppings ahead of time, then cook everything fresh when I’m ready to eat.

What toppings go well with pineapple chicken tacos?

I like fresh cilantro, red onions, avocado slices, shredded lettuce, or a drizzle of sour cream for balance.

Can I make this recipe vegetarian?

Yes, I replace the chicken with grilled vegetables or even chickpeas for a hearty vegetarian version.

Conclusion

These pineapple chicken tacos are one of my favorite ways to bring a little tropical flavor into taco night. I love how quick they are to make and how customizable they can be with different toppings and variations. They’re perfect for a weeknight dinner or sharing with friends on the weekend.

Print

clock clock iconcutlery cutlery iconflag flag iconfolder folder iconinstagram instagram iconpinterest pinterest iconfacebook facebook iconprint print iconsquares squares iconheart heart iconheart solid heart solid icon
Pineapple Chicken Tacos

Pineapple Chicken Tacos

5 Stars 4 Stars 3 Stars 2 Stars 1 Star No reviews
  • Author: Sue
  • Prep Time: 15 minutes
  • Cook Time: 20 minutes
  • Total Time: 35 minutes
  • Yield: 4 servings (2 tacos per person)
  • Category: Main Dish
  • Method: Skillet or Grilling
  • Cuisine: Mexican-Inspired
  • Diet: Halal
Print Recipe
Pin Recipe

Description

These pineapple chicken tacos blend juicy, seasoned chicken with sweet caramelized pineapple for a tropical twist on taco night. Served in warm tortillas with fresh toppings, they’re flavorful, light, and perfect for any gathering.


Ingredients

  • 1 lb boneless, skinless chicken breasts or thighs
  • 1 cup pineapple (fresh or canned, diced)
  • 2 tbsp olive oil
  • 2 tbsp lime juice
  • 2 cloves garlic, minced
  • 1 tsp chili powder
  • ½ tsp cumin
  • ½ tsp paprika
  • Salt and pepper to taste
  • 8 small flour or corn tortillas
  • ¼ cup red onion, finely chopped
  • 2 tbsp cilantro, chopped
  • Optional toppings: shredded lettuce, avocado slices, sour cream, cheese

Instructions

  1. Marinate the chicken with olive oil, lime juice, garlic, chili powder, cumin, paprika, salt, and pepper for at least 30 minutes.
  2. Cook the chicken in a skillet or on a grill until fully cooked, then dice into bite-sized pieces.
  3. Sauté the diced pineapple in a pan until lightly caramelized.
  4. Warm the tortillas in a skillet or over an open flame for extra flavor.
  5. Assemble the tacos by layering chicken, pineapple, red onion, and cilantro into the tortillas.
  6. Add any optional toppings like lettuce, avocado, sour cream, or cheese before serving.

Notes

  • Drain canned pineapple well to avoid soggy tacos.
  • Chicken thighs stay juicier than breasts but both work well.
  • Store tortillas separately from fillings for best reheating results.
  • Customize with hot sauce, jalapeños, or lime crema for extra flavor.

Nutrition

  • Serving Size: 2 tacos
  • Calories: 370
  • Sugar: 7g
  • Sodium: 420mg
  • Fat: 16g
  • Saturated Fat: 3g
  • Unsaturated Fat: 12g
  • Trans Fat: 0g
  • Carbohydrates: 34g
  • Fiber: 3g
  • Protein: 25g
  • Cholesterol: 75mg

Have you made this recipe? I'd love to see it!

Click here to Follow me on Pinterest

Soft Batch Pumpkin Sugar Cookies

August 26, 2025 by Sue Leave a Comment

These Soft Batch Pumpkin Sugar Cookies are tender, chewy, and perfectly spiced with warm fall flavors. I love baking them when I want something cozy and sweet—each cookie melts in my mouth with that irresistible pumpkin twist on a classic sugar cookie. Soft Batch Pumpkin Sugar Cookies

Why I’ll Love This Recipe

I love how these cookies strike the perfect balance between soft and chewy, with just the right amount of pumpkin flavor. They’re easy to whip up, no chilling required, and they make my kitchen smell like fall. The texture is dreamy—thanks to the pumpkin purée—and they stay soft for days.

ingredients

(Here's a tip: Check out the full list of ingredients and measurements in the recipe card below.)

  • all-purpose flour

  • baking powder

  • baking soda

  • salt

  • ground cinnamon

  • ground nutmeg

  • ground ginger

  • unsalted butter (softened)

  • granulated sugar

  • brown sugar

  • egg yolk

  • pumpkin purée (not pumpkin pie filling)

  • vanilla extract

  • optional: additional sugar for rolling or topping

directions

I begin by preheating the oven to 350°F and lining my baking sheets with parchment paper. In one bowl, I whisk together the dry ingredients—flour, baking powder, baking soda, salt, and the warm spices.

In another large bowl, I cream together the softened butter, granulated sugar, and brown sugar until light and fluffy. Then, I mix in the egg yolk, pumpkin purée, and vanilla extract until fully combined.

Next, I gradually add the dry ingredients to the wet mixture, stirring just until everything is incorporated. I scoop out the dough with a cookie scoop or tablespoon and gently shape it into balls. If I want a little crunch, I roll them in sugar before placing them on the baking sheet.

I bake the cookies for 10–12 minutes until the edges are set but the centers are still soft. Once out of the oven, I let them cool on the baking sheet for a few minutes before transferring them to a wire rack. They come out perfectly soft every time.

Servings and timing

  • Servings: about 24 cookies

  • Prep time: 15 minutes

  • Cook time: 10–12 minutes per batch

  • Total time: 25–30 minutes

Variations

  • I sometimes add white chocolate chips or chopped pecans for extra texture.

  • For a stronger spice flavor, I adjust the cinnamon or add a pinch of cloves.

  • I like to drizzle a simple glaze of powdered sugar and milk over cooled cookies for a little sweetness.

  • I’ve used whole wheat flour for a slightly nuttier flavor—it works well with the pumpkin.

  • For a festive look, I roll the dough in cinnamon sugar before baking.

storage/reheating

I store these cookies in an airtight container at room temperature for up to 5 days. They stay soft and chewy, especially if I include a slice of bread in the container to maintain moisture. For longer storage, I freeze them in a single layer, then transfer to a freezer bag for up to 2 months. I let them thaw at room temperature or microwave for 10–15 seconds for that fresh-baked feel.

FAQs

Can I use pumpkin pie filling instead of pumpkin purée?

I always use pumpkin purée—pumpkin pie filling has added sugar and spices that would throw off the flavor and texture of the cookies.

Why are my cookies spreading too much?

If my dough is too warm or the butter too soft, the cookies can spread too much. I pop the dough in the fridge for 15–20 minutes if it seems too soft before baking.

Can I freeze the cookie dough?

Yes, I scoop the dough into balls and freeze them on a baking sheet. Once solid, I transfer to a freezer bag. I bake them from frozen, just adding a minute or two to the baking time.

How do I keep the cookies soft after baking?

I store them in an airtight container with a slice of bread—it helps maintain moisture and keeps them soft for days.

Can I make these gluten-free?

Yes, I’ve had success using a 1:1 gluten-free baking flour. I make sure it includes xanthan gum or add a bit myself for the best texture.

Conclusion

These Soft Batch Pumpkin Sugar Cookies are a fall favorite that I come back to year after year. They’re cozy, flavorful, and incredibly easy to make. Whether I’m baking for a holiday, a gathering, or just craving something sweet, these cookies always hit the spot.

Print

clock clock iconcutlery cutlery iconflag flag iconfolder folder iconinstagram instagram iconpinterest pinterest iconfacebook facebook iconprint print iconsquares squares iconheart heart iconheart solid heart solid icon
Soft Batch Pumpkin Sugar Cookies

Soft Batch Pumpkin Sugar Cookies

5 Stars 4 Stars 3 Stars 2 Stars 1 Star No reviews
  • Author: Sue
  • Prep Time: 15 minutes
  • Cook Time: 10–12 minutes
  • Total Time: 25–30 minutes
  • Yield: 24 cookies
  • Category: Dessert
  • Method: Baking
  • Cuisine: American
  • Diet: Vegetarian
Print Recipe
Pin Recipe

Description

Soft Batch Pumpkin Sugar Cookies are tender, chewy, and filled with warm fall spices. Made with real pumpkin purée, these cookies are cozy, flavorful, and stay soft for days—perfect for autumn baking.


Ingredients

  • 2 ¼ cups all-purpose flour
  • 1 teaspoon baking powder
  • ½ teaspoon baking soda
  • ½ teaspoon salt
  • 1 teaspoon ground cinnamon
  • ¼ teaspoon ground nutmeg
  • ¼ teaspoon ground ginger
  • ½ cup unsalted butter, softened
  • 1 cup granulated sugar
  • ¼ cup brown sugar
  • 1 large egg yolk
  • ½ cup pumpkin purée (not pumpkin pie filling)
  • 1 teaspoon vanilla extract
  • Optional: additional sugar for rolling or topping

Instructions

  1. Preheat oven to 350°F (175°C) and line baking sheets with parchment paper.
  2. In a medium bowl, whisk together flour, baking powder, baking soda, salt, cinnamon, nutmeg, and ginger.
  3. In a large bowl, cream together softened butter, granulated sugar, and brown sugar until light and fluffy.
  4. Mix in egg yolk, pumpkin purée, and vanilla extract until fully combined.
  5. Gradually add dry ingredients to the wet mixture, stirring just until incorporated.
  6. Scoop dough using a tablespoon or cookie scoop and shape into balls. Optionally, roll in sugar.
  7. Place on prepared baking sheet and bake for 10–12 minutes, until edges are set but centers remain soft.
  8. Cool on baking sheet for 2–3 minutes before transferring to a wire rack to cool completely.

Notes

  • Add white chocolate chips or pecans for extra flavor.
  • Adjust spices or add cloves for a stronger spice kick.
  • Top with a simple glaze or roll in cinnamon sugar for variety.
  • Store in an airtight container with a slice of bread to keep cookies soft.
  • Dough can be frozen and baked later with 1–2 extra minutes added to bake time.

Nutrition

  • Serving Size: 1 cookie
  • Calories: 110
  • Sugar: 9g
  • Sodium: 65mg
  • Fat: 4g
  • Saturated Fat: 2.5g
  • Unsaturated Fat: 1.5g
  • Trans Fat: 0g
  • Carbohydrates: 17g
  • Fiber: 0.5g
  • Protein: 1g
  • Cholesterol: 15mg

Have you made this recipe? I'd love to see it!

Click here to Follow me on Pinterest

Cheddar Bay Biscuit Seafood Pot Pie

August 26, 2025 by Sue Leave a Comment

This Cheddar Bay Biscuit Seafood Pot Pie combines the best of two comforting favorites: rich, creamy seafood filling and golden, cheesy biscuits baked right on top. It’s everything I want in a cozy, indulgent meal—hearty, flavorful, and brimming with tender seafood under a blanket of buttery cheddar biscuits. Cheddar Bay Biscuit Seafood Pot Pie

Why I Love This Recipe

I love this recipe because it feels like a treat but comes together without much fuss. The creamy seafood mixture is full of flavor, and when I top it with those fluffy Cheddar Bay-style biscuits, it turns into a show-stopping dish that’s both homey and luxurious. It’s my go-to when I want something comforting but still a little special.

Ingredients

(Here's a tip: Check out the full list of ingredients and measurements in the recipe card below.)

  • Shrimp, peeled and deveined

  • Crab meat or imitation crab

  • Scallops or firm white fish (optional)

  • Butter

  • Garlic, minced

  • Onion, finely chopped

  • Carrots, diced

  • Celery, diced

  • All-purpose flour

  • Seafood or chicken broth

  • Heavy cream

  • Old Bay seasoning

  • Salt and pepper to taste

  • Frozen peas or corn

  • Cheddar Bay biscuit mix (or biscuit mix + shredded cheddar and garlic powder)

  • Milk and melted butter (for biscuit dough)

  • Fresh parsley (for garnish)

Directions

  1. I start by sautéing the onion, garlic, carrots, and celery in butter until they’re soft and fragrant.

  2. I sprinkle in flour and stir to create a roux, cooking it for a minute before gradually adding seafood broth and cream to make a thick, flavorful sauce.

  3. I stir in the seafood, peas or corn, and season everything with Old Bay, salt, and pepper. I let it simmer just until the seafood is cooked through.

  4. I pour the mixture into a baking dish while I prepare the biscuit topping.

  5. I mix the biscuit dough according to the package (or from scratch), then gently drop spoonfuls over the top of the seafood filling.

  6. I bake it in the oven until the biscuits are golden and cooked through, usually about 20–25 minutes.

  7. I finish with a sprinkle of parsley and serve hot.

Servings and timing

This recipe makes 6 hearty servings. Prep takes about 20 minutes, and bake time is roughly 25–30 minutes, so I typically have it ready in about 50 minutes total.

Variations

I sometimes switch up the seafood depending on what I have—adding lobster chunks or using just shrimp and crab. For a spicier twist, I stir a bit of Cajun seasoning into the filling. I’ve also used homemade biscuit dough with shredded cheddar and garlic powder when I don’t have the boxed mix, and it still turns out amazing.

Storage/Reheating

I store leftovers in an airtight container in the fridge for up to 3 days. When I reheat it, I cover the pot pie with foil and warm it in the oven at 350°F until heated through. The biscuits stay crispier that way compared to microwaving. If I do use the microwave, I add a splash of cream to keep the filling smooth.

FAQs

Can I use frozen seafood?

Yes, I do that often. I just make sure to thaw and pat it dry before adding it to the sauce so the filling doesn’t get watery.

What if I don’t have Cheddar Bay biscuit mix?

I use regular biscuit mix and add shredded cheddar, garlic powder, and a pinch of parsley. It tastes just as good.

Can I make this ahead of time?

Yes, I prepare the filling in advance and store it in the fridge. I add the biscuit topping just before baking so it stays fluffy and fresh.

Can I freeze this pot pie?

I freeze the filling separately and make fresh biscuits when I’m ready to bake. The texture is much better that way.

What vegetables can I add?

I like adding mushrooms, green beans, or even spinach to change it up. As long as I sauté or blanch them first, they blend in beautifully.

Conclusion

Cheddar Bay Biscuit Seafood Pot Pie is pure comfort food magic. The savory seafood filling, the rich and creamy base, and those cheesy, garlicky biscuits baked on top make every bite a warm and satisfying experience. It’s a dish I keep in rotation all year long—especially when I want something that feels both hearty and a little indulgent.

Print

clock clock iconcutlery cutlery iconflag flag iconfolder folder iconinstagram instagram iconpinterest pinterest iconfacebook facebook iconprint print iconsquares squares iconheart heart iconheart solid heart solid icon
Cheddar Bay Biscuit Seafood Pot Pie

Cheddar Bay Biscuit Seafood Pot Pie

5 Stars 4 Stars 3 Stars 2 Stars 1 Star No reviews
  • Author: Sue
  • Prep Time: 20 minutes
  • Cook Time: 25–30 minutes
  • Total Time: 50 minutes
  • Yield: 6 servings
  • Category: Main Dish
  • Method: Baking
  • Cuisine: American
  • Diet: Halal
Print Recipe
Pin Recipe

Description

A comforting seafood pot pie topped with golden Cheddar Bay biscuits. This creamy, flavorful dish combines tender shrimp, crab, and scallops with a rich sauce and cheesy biscuits for the ultimate indulgent meal.


Ingredients

  • 1 lb shrimp, peeled and deveined
  • 1 cup crab meat or imitation crab
  • 1 cup scallops or firm white fish (optional)
  • 4 tbsp butter
  • 3 cloves garlic, minced
  • 1 medium onion, finely chopped
  • 2 carrots, diced
  • 2 celery stalks, diced
  • ¼ cup all-purpose flour
  • 2 cups seafood or chicken broth
  • 1 cup heavy cream
  • 1 tsp Old Bay seasoning
  • Salt and pepper to taste
  • 1 cup frozen peas or corn
  • 1 package Cheddar Bay biscuit mix (or 2 cups biscuit mix + 1 cup shredded cheddar + ½ tsp garlic powder)
  • ⅔ cup milk (for biscuit dough)
  • 2 tbsp melted butter (for biscuit dough)
  • Fresh parsley, chopped (for garnish)

Instructions

  1. Preheat oven to 375°F (190°C).
  2. In a large skillet, sauté onion, garlic, carrots, and celery in butter until softened.
  3. Stir in flour to form a roux, cooking for 1 minute.
  4. Gradually whisk in broth and cream, stirring until thickened.
  5. Add shrimp, crab, scallops (if using), peas or corn, Old Bay seasoning, salt, and pepper. Simmer until seafood is just cooked through.
  6. Transfer the mixture into a greased baking dish.
  7. Prepare the biscuit dough according to package instructions (or from scratch with cheddar and garlic powder).
  8. Drop spoonfuls of biscuit dough evenly over the seafood filling.
  9. Bake 20–25 minutes, until biscuits are golden and cooked through.
  10. Garnish with fresh parsley and serve hot.

Notes

  • Use thawed and patted-dry frozen seafood to avoid watery filling.
  • For a spicier version, add Cajun seasoning to the filling.
  • The filling can be prepared in advance; add biscuit topping just before baking.
  • Leftovers keep for 3 days in the fridge; reheat covered in the oven for best texture.
  • Freeze filling separately and bake with fresh biscuits when ready.

Nutrition

  • Serving Size: 1 serving
  • Calories: 480
  • Sugar: 5g
  • Sodium: 950mg
  • Fat: 28g
  • Saturated Fat: 15g
  • Unsaturated Fat: 10g
  • Trans Fat: 0g
  • Carbohydrates: 35g
  • Fiber: 3g
  • Protein: 25g
  • Cholesterol: 160mg

Have you made this recipe? I'd love to see it!

Click here to Follow me on Pinterest

Extra Fudgy Chocolate Zucchini Brownies with Creamy Frosting

August 26, 2025 by Sue Leave a Comment

These extra fudgy chocolate zucchini brownies are a decadent dessert that sneaks in a healthy twist. I love how the zucchini adds incredible moisture without altering the rich chocolate flavor. Topped with a smooth, creamy frosting, these brownies are indulgent and satisfying—perfect for any time I’m craving a treat that feels special but is easy to make. Extra Fudgy Chocolate Zucchini Brownies with Creamy Frosting

Why You’ll Love This Recipe

I always come back to this recipe because the brownies are unbelievably moist, fudgy, and loaded with chocolate flavor. The zucchini practically melts into the batter, leaving behind nothing but softness. And the creamy frosting? It’s the perfect finishing touch. I like that I don’t need fancy equipment or unusual ingredients, and even people who claim they “don’t like zucchini” end up loving these brownies.

Ingredients

(Here's a tip: Check out the full list of ingredients and measurements in the recipe card below.)

  • All-purpose flour

  • Unsweetened cocoa powder

  • Baking soda

  • Salt

  • Granulated sugar

  • Brown sugar

  • Vegetable oil or melted butter

  • Vanilla extract

  • Eggs

  • Shredded zucchini (with excess moisture gently squeezed out)

  • Semi-sweet chocolate chips

For the creamy frosting:

  • Butter (softened)

  • Powdered sugar

  • Cocoa powder

  • Milk or heavy cream

  • Vanilla extract

Directions

  1. I preheat the oven to 350°F (175°C) and grease a 9x13-inch baking pan.

  2. In a bowl, I whisk together the flour, cocoa powder, baking soda, and salt.

  3. In a separate large bowl, I mix the sugars with oil (or melted butter), vanilla, and eggs until smooth.

  4. I stir the dry ingredients into the wet mixture just until combined.

  5. I gently fold in the shredded zucchini and chocolate chips. The batter will be thick—perfect for that fudgy texture.

  6. I spread the batter evenly into the prepared pan and bake for 30–35 minutes, or until a toothpick comes out with moist crumbs (not wet batter).

  7. While the brownies cool, I prepare the frosting by beating together butter, powdered sugar, cocoa powder, vanilla, and milk until it’s smooth and spreadable.

  8. Once the brownies are completely cool, I frost the top evenly and let it set before slicing.

Servings and timing

This recipe yields about 16 brownies. It takes around 15 minutes to prepare and 30–35 minutes to bake, with additional time for cooling and frosting.

Variations

When I want to change things up, I sometimes use dark chocolate chips or add a handful of walnuts or pecans for a bit of crunch. For a gluten-free version, I swap in a 1:1 gluten-free flour blend. I’ve also made these with coconut oil instead of vegetable oil, which adds a subtle flavor twist I really like.

Storage/Reheating

I keep the brownies in an airtight container at room temperature for up to 3 days, or in the fridge for up to 5 days. If I want to serve them warm, I microwave a slice for about 10–15 seconds—it makes them taste like they just came out of the oven. For longer storage, I freeze individual pieces (without frosting) and frost them after thawing.

FAQs

Can I taste the zucchini in the brownies?

Not at all. The zucchini adds moisture but completely blends into the texture and flavor. I’ve served these to people who had no idea there were vegetables inside.

Should I peel the zucchini before shredding?

I don’t usually peel it. The skin softens while baking and isn’t noticeable in the final product. Plus, it adds a bit of color and nutrients.

Can I use a different frosting?

Yes, I sometimes use a simple ganache or even skip the frosting altogether if I’m short on time. They’re still rich and delicious on their own.

How do I prevent soggy brownies?

I make sure to squeeze out excess moisture from the shredded zucchini before adding it to the batter. This helps keep the texture fudgy, not wet.

Can I double the recipe?

Absolutely. I double the ingredients and bake it in a larger sheet pan, adjusting the baking time slightly and checking for doneness with a toothpick.

Conclusion

These extra fudgy chocolate zucchini brownies with creamy frosting are a favorite in my kitchen for good reason. They’re rich, satisfying, and full of hidden goodness. Whether I’m making them for a gathering or just a quiet night in, they never fail to impress.

Print

clock clock iconcutlery cutlery iconflag flag iconfolder folder iconinstagram instagram iconpinterest pinterest iconfacebook facebook iconprint print iconsquares squares iconheart heart iconheart solid heart solid icon
Extra Fudgy Chocolate Zucchini Brownies with Creamy Frosting

Extra Fudgy Chocolate Zucchini Brownies with Creamy Frosting

5 Stars 4 Stars 3 Stars 2 Stars 1 Star No reviews
  • Author: Sue
  • Prep Time: 15 minutes
  • Cook Time: 30–35 minutes
  • Total Time: 50 minutes
  • Yield: 16 brownies
  • Category: Dessert
  • Method: Baking
  • Cuisine: American
  • Diet: Vegetarian
Print Recipe
Pin Recipe

Description

These extra fudgy chocolate zucchini brownies are rich, moist, and packed with chocolate flavor. The zucchini keeps them soft without being detectable, and the creamy frosting makes them indulgent and satisfying.


Ingredients

  • 1 ½ cups all-purpose flour
  • ½ cup unsweetened cocoa powder
  • 1 teaspoon baking soda
  • ½ teaspoon salt
  • 1 cup granulated sugar
  • ½ cup brown sugar
  • ½ cup vegetable oil or melted butter
  • 2 teaspoons vanilla extract
  • 2 large eggs
  • 2 cups shredded zucchini (excess moisture squeezed out)
  • 1 cup semi-sweet chocolate chips

For the creamy frosting:

  • ½ cup butter, softened
  • 2 cups powdered sugar
  • ¼ cup unsweetened cocoa powder
  • 2–3 tablespoons milk or heavy cream
  • 1 teaspoon vanilla extract

Instructions

  1. Preheat oven to 350°F (175°C) and grease a 9x13-inch baking pan.
  2. In a medium bowl, whisk together flour, cocoa powder, baking soda, and salt.
  3. In a large bowl, beat together granulated sugar, brown sugar, oil (or melted butter), vanilla, and eggs until smooth.
  4. Stir dry ingredients into wet mixture just until combined.
  5. Fold in shredded zucchini and chocolate chips. Batter will be thick.
  6. Spread batter evenly into prepared pan and bake for 30–35 minutes, or until a toothpick inserted comes out with moist crumbs.
  7. Cool brownies completely before frosting.
  8. For frosting: Beat butter, powdered sugar, cocoa powder, vanilla, and milk until smooth and spreadable.
  9. Frost cooled brownies evenly, allow to set, then slice and serve.

Notes

  • Squeeze excess moisture from zucchini to avoid soggy brownies.
  • You can substitute dark chocolate chips or add nuts for variety.
  • For a gluten-free option, use a 1:1 gluten-free flour blend.
  • Store brownies in an airtight container at room temperature for up to 3 days, refrigerated up to 5 days, or freeze (without frosting) for longer storage.

Nutrition

  • Serving Size: 1 brownie
  • Calories: 280
  • Sugar: 26g
  • Sodium: 160mg
  • Fat: 14g
  • Saturated Fat: 6g
  • Unsaturated Fat: 7g
  • Trans Fat: 0g
  • Carbohydrates: 38g
  • Fiber: 2g
  • Protein: 3g
  • Cholesterol: 30mg

Have you made this recipe? I'd love to see it!

Click here to Follow me on Pinterest

Pesto Pasta with Crispy Parmesan Chicken

August 26, 2025 by Sue Leave a Comment

Pesto pasta with crispy Parmesan chicken is a comforting yet elevated dish that combines vibrant basil pesto with golden, crunchy chicken cutlets. The contrast of the creamy, herby pasta and the crisp, cheesy coating on the chicken creates a satisfying and flavorful meal that feels restaurant-worthy but is easy enough for a weeknight dinner. Pesto Pasta with Crispy Parmesan Chicken

Why You’ll Love This Recipe

I love how this recipe brings together classic Italian flavors in such a simple, delicious way. The pesto adds a fresh, nutty kick to the pasta, while the crispy Parmesan chicken offers a savory crunch in every bite. It’s the kind of meal that looks impressive but comes together quickly with just a few pantry staples. Plus, it's perfect for anyone who wants something comforting without being too heavy.

Ingredients

(Here's a tip: Check out the full list of ingredients and measurements in the recipe card below.)

  • Boneless, skinless chicken breasts

  • Salt and pepper

  • Flour (for dredging)

  • Eggs

  • Grated Parmesan cheese

  • Panko breadcrumbs

  • Olive oil or vegetable oil (for frying)

  • Pasta of choice (I like penne, spaghetti, or fettuccine)

  • Basil pesto (store-bought or homemade)

  • Cherry tomatoes (optional, for garnish or added freshness)

  • Fresh basil (optional)

  • Extra Parmesan cheese (for topping)

Directions

  1. I start by pounding the chicken breasts to an even thickness and seasoning them with salt and pepper.

  2. I set up a breading station with three shallow dishes: one with flour, one with beaten eggs, and one with a mix of Parmesan and panko.

  3. I dredge each chicken piece in flour, dip it in egg, then press it into the Parmesan breadcrumb mixture until well coated.

  4. In a large skillet, I heat a thin layer of oil over medium-high heat and fry the chicken until golden and crispy on both sides, about 4–5 minutes per side. I let them rest on a wire rack or paper towel-lined plate.

  5. While the chicken cooks, I boil the pasta in salted water according to package directions, then drain it.

  6. I toss the hot pasta with pesto, stirring until fully coated. If it feels too thick, I add a little pasta water to loosen the sauce.

  7. I slice the crispy chicken and serve it on top of the pesto pasta, garnished with cherry tomatoes, fresh basil, and extra Parmesan if I want to add more flavor and color.

Servings and timing

This recipe makes 4 servings and takes about 35–40 minutes from start to finish, making it ideal for a weeknight dinner or a cozy meal with friends.

Variations

  • I sometimes use breaded chicken tenders or cutlets if I want a quicker cooking time.

  • For a lighter version, I bake the chicken instead of frying it.

  • I’ve tried using sun-dried tomato pesto or arugula pesto for a twist on the flavor.

  • I can swap regular pasta with zucchini noodles or gluten-free pasta when needed.

  • Adding a splash of cream or a dollop of ricotta to the pesto makes the sauce richer and creamier.

Storage/Reheating

I store leftover pasta and chicken separately to keep the chicken from getting soggy. The pasta goes in an airtight container in the fridge for up to 3 days, and the chicken does the same. I reheat the pasta in the microwave or on the stovetop with a splash of water to revive the sauce. The chicken is best reheated in an oven or air fryer to bring back the crispiness.

FAQs

Can I use store-bought pesto?

Yes, I often use store-bought pesto when I’m short on time. It’s convenient and still delicious, especially when paired with the crispy chicken.

What kind of pasta works best?

I usually go with penne, fettuccine, or spaghetti, but honestly, any pasta I have on hand works well with this dish.

Can I make this dish ahead of time?

I prep the chicken ahead by breading it and storing it in the fridge until I’m ready to cook. The pasta and pesto are best made fresh for the best texture and flavor.

What’s the secret to crispy chicken?

Using panko breadcrumbs and grated Parmesan together makes the coating super crisp. Frying in hot oil without overcrowding the pan also helps keep it crunchy.

Is there a baked version of this recipe?

Yes, I bake the breaded chicken at 400°F (200°C) for about 20–25 minutes, flipping halfway through. It doesn’t get quite as crispy as frying, but it’s still very satisfying.

Conclusion

Pesto pasta with crispy Parmesan chicken is one of those meals I turn to when I want something comforting, flavorful, and a little indulgent. The bright, herby pasta and the crunchy, cheesy chicken make every bite satisfying. It’s an easy way to enjoy classic Italian-inspired flavors without spending hours in the kitchen.

Print

clock clock iconcutlery cutlery iconflag flag iconfolder folder iconinstagram instagram iconpinterest pinterest iconfacebook facebook iconprint print iconsquares squares iconheart heart iconheart solid heart solid icon
Pesto Pasta with Crispy Parmesan Chicken

Pesto Pasta with Crispy Parmesan Chicken

5 Stars 4 Stars 3 Stars 2 Stars 1 Star No reviews
  • Author: Sue
  • Prep Time: 15 minutes
  • Cook Time: 20 minutes
  • Total Time: 35 minutes
  • Yield: 4 servings
  • Category: Dinner
  • Method: Stovetop + Frying
  • Cuisine: Italian
  • Diet: Halal
Print Recipe
Pin Recipe

Description

A delicious Italian-inspired dish featuring creamy basil pesto pasta topped with golden, crispy Parmesan-coated chicken cutlets. Perfect for a comforting yet elegant weeknight dinner.


Ingredients

  • 2 boneless, skinless chicken breasts
  • Salt and pepper, to taste
  • ½ cup flour (for dredging)
  • 2 large eggs, beaten
  • 1 cup grated Parmesan cheese
  • 1 cup panko breadcrumbs
  • ¼ cup olive oil or vegetable oil (for frying)
  • 12 oz pasta of choice (penne, spaghetti, or fettuccine)
  • ½ cup basil pesto (store-bought or homemade)
  • 1 cup cherry tomatoes (optional, for garnish)
  • Fresh basil leaves (optional, for garnish)
  • Extra Parmesan cheese (for topping)

Instructions

  1. Pound chicken breasts to an even thickness and season with salt and pepper.
  2. Set up a breading station with three shallow dishes: flour, beaten eggs, and a mixture of Parmesan and panko.
  3. Dredge chicken in flour, dip in egg, and coat in Parmesan-panko mixture.
  4. Heat oil in a large skillet over medium-high heat. Fry chicken for 4–5 minutes per side until golden and crispy. Drain on a paper towel-lined plate or wire rack.
  5. Cook pasta in salted boiling water according to package directions. Drain.
  6. Toss pasta with basil pesto, adding a little reserved pasta water if needed to loosen the sauce.
  7. Slice crispy chicken and serve over pesto pasta. Garnish with cherry tomatoes, fresh basil, and extra Parmesan.

Notes

  • Bake instead of fry for a lighter version (400°F for 20–25 minutes, flipping halfway).
  • Use gluten-free pasta or zucchini noodles for a lighter option.
  • Try sun-dried tomato pesto or arugula pesto for variation.
  • Store pasta and chicken separately to maintain crispiness.
  • Reheat chicken in oven or air fryer for best texture.

Nutrition

  • Serving Size: 1 serving
  • Calories: 620
  • Sugar: 3g
  • Sodium: 780mg
  • Fat: 28g
  • Saturated Fat: 8g
  • Unsaturated Fat: 17g
  • Trans Fat: 0g
  • Carbohydrates: 55g
  • Fiber: 3g
  • Protein: 38g
  • Cholesterol: 135mg

Have you made this recipe? I'd love to see it!

Click here to Follow me on Pinterest

Chicken Alfredo Lasagna Rolls

August 26, 2025 by Sue Leave a Comment

Chicken Alfredo Lasagna Rolls are a creamy, cheesy, and comforting twist on traditional lasagna. Instead of layering, I roll tender lasagna noodles around a rich chicken and ricotta mixture, then smother them in Alfredo sauce and bake until bubbly. It’s the perfect dish when I want something hearty and elegant without the fuss of a full lasagna. Chicken Alfredo Lasagna Rolls

Why You’ll Love This Recipe

I love this recipe because it gives me all the flavors of classic lasagna with a fun presentation that makes serving so much easier. Each roll is perfectly portioned, and I can fill them with as much creamy chicken mixture as I like. I enjoy how comforting the Alfredo sauce is with the tender pasta and juicy chicken. It’s also great for making ahead and reheating when I need a quick meal.

ingredients

(Here's a tip: Check out the full list of ingredients and measurements in the recipe card below.)

  • Lasagna noodles, cooked al dente

  • Shredded cooked chicken

  • Ricotta cheese

  • Shredded mozzarella cheese

  • Grated Parmesan cheese

  • Egg

  • Garlic powder

  • Italian seasoning

  • Alfredo sauce (store-bought or homemade)

  • Fresh parsley, for garnish

directions

  1. I cook the lasagna noodles until al dente, then lay them flat on parchment paper.

  2. I mix the shredded chicken, ricotta, egg, half of the mozzarella, Parmesan, garlic powder, and Italian seasoning in a bowl until smooth.

  3. I spread the chicken mixture evenly over each noodle, then roll them up tightly.

  4. I pour a thin layer of Alfredo sauce into the bottom of a baking dish and place the rolls seam-side down.

  5. I cover the rolls with the remaining Alfredo sauce and sprinkle mozzarella and Parmesan on top.

  6. I bake at 375°F for about 25–30 minutes, until hot and bubbly.

  7. I let them cool slightly, garnish with parsley, and serve warm.

Servings and timing

This recipe makes about 8 rolls, which usually serves 4 people. It takes me around 20 minutes to prepare and about 30 minutes to bake, so I can have it ready in under an hour.

Variations

Sometimes I like adding spinach or sautéed mushrooms to the filling for extra veggies. I’ve also swapped the chicken for leftover turkey, which works beautifully. If I want a lighter option, I use a low-fat Alfredo sauce and part-skim cheeses.

storage/reheating

I store leftovers in an airtight container in the fridge for up to 3 days. When I reheat, I cover the rolls with foil and bake at 350°F until warm. If I’m short on time, I’ll microwave them, but I prefer the oven for the best texture. These rolls also freeze well before baking—I just thaw and bake when ready to serve.

FAQs

Can I make Chicken Alfredo Lasagna Rolls ahead of time?

Yes, I often assemble the rolls a day before, cover them tightly, and refrigerate until ready to bake.

Can I use store-bought rotisserie chicken?

Absolutely, I like using shredded rotisserie chicken when I want to save time.

Can I freeze the rolls?

Yes, I freeze them unbaked in a covered dish. When ready, I thaw overnight in the fridge and bake as directed.

What side dishes go well with these rolls?

I usually serve them with garlic bread, Caesar salad, or roasted vegetables.

Can I use a different sauce?

Yes, I sometimes use a tomato-based marinara sauce for a more traditional lasagna flavor, or even a pesto cream sauce for variety.

Conclusion

Chicken Alfredo Lasagna Rolls are one of my favorite comfort meals because they’re creamy, cheesy, and incredibly satisfying. I love how simple they are to assemble and how elegant they look when served. They’re perfect for family dinners, meal prep, or even a special occasion when I want something hearty and delicious.

Print

clock clock iconcutlery cutlery iconflag flag iconfolder folder iconinstagram instagram iconpinterest pinterest iconfacebook facebook iconprint print iconsquares squares iconheart heart iconheart solid heart solid icon
Chicken Alfredo Lasagna Rolls

Chicken Alfredo Lasagna Rolls

5 Stars 4 Stars 3 Stars 2 Stars 1 Star No reviews
  • Author: Sue
  • Prep Time: 20 minutes
  • Cook Time: 30 minutes
  • Total Time: 50 minutes
  • Yield: 8 rolls (4 servings)
  • Category: Main Course
  • Method: Baking
  • Cuisine: Italian-American
  • Diet: Halal
Print Recipe
Pin Recipe

Description

Chicken Alfredo Lasagna Rolls are a creamy and comforting twist on traditional lasagna. Tender noodles are rolled with a rich chicken and ricotta filling, smothered in Alfredo sauce, and baked until bubbly for an elegant yet hearty dish.


Ingredients

  • 8 lasagna noodles, cooked al dente
  • 2 cups shredded cooked chicken
  • 1 cup ricotta cheese
  • 2 cups shredded mozzarella cheese, divided
  • ½ cup grated Parmesan cheese
  • 1 large egg
  • 1 tsp garlic powder
  • 1 tsp Italian seasoning
  • 3 cups Alfredo sauce (store-bought or homemade)
  • 2 tbsp fresh parsley, chopped (for garnish)

Instructions

  1. Cook lasagna noodles until al dente and lay flat on parchment paper.
  2. In a mixing bowl, combine shredded chicken, ricotta, egg, 1 cup mozzarella, Parmesan, garlic powder, and Italian seasoning.
  3. Spread the chicken mixture evenly over each noodle and roll tightly.
  4. Pour a thin layer of Alfredo sauce in the bottom of a baking dish and place rolls seam-side down.
  5. Cover with remaining Alfredo sauce and sprinkle with the rest of the mozzarella and Parmesan.
  6. Bake at 375°F (190°C) for 25–30 minutes until hot and bubbly.
  7. Let cool slightly, garnish with parsley, and serve warm.

Notes

  • Great for make-ahead: Assemble a day before and refrigerate until ready to bake.
  • Rotisserie chicken works perfectly for convenience.
  • For extra veggies, add spinach or mushrooms to the filling.
  • These rolls freeze well unbaked—thaw overnight before baking.
  • Can be served with garlic bread, salad, or roasted vegetables.

Nutrition

  • Serving Size: 2 rolls
  • Calories: 520
  • Sugar: 4g
  • Sodium: 980mg
  • Fat: 27g
  • Saturated Fat: 14g
  • Unsaturated Fat: 10g
  • Trans Fat: 0g
  • Carbohydrates: 35g
  • Fiber: 2g
  • Protein: 34g
  • Cholesterol: 120mg

Have you made this recipe? I'd love to see it!

Click here to Follow me on Pinterest

Smoky Chicken and Fire-Roasted Corn Soup

August 24, 2025 by Sue Leave a Comment

A savory and smoky one‑pot soup featuring tender shredded chicken, fire‑roasted corn, green chiles, and aromatics, simmered in chicken stock for a satisfying, flavor‑packed meal. This soup is bold, hearty, and full of vibrant flavors that remind me of street-style elote, but with the comforting richness of a homemade chicken soup. Smoky Chicken and Fire-Roasted Corn Soup

Why You’ll Love This Recipe

I love how this soup brings together the smoky sweetness of fire-roasted corn with the warmth of cumin, chili powder, and a kick of jalapeño. It's all made in one pot, which makes cleanup simple, and the layers of flavor develop beautifully as it simmers. Whether I’m in the mood for something cozy or craving something with bold Mexican-inspired flavors, this dish never disappoints.

ingredients

(Here's a tip: Check out the full list of ingredients and measurements in the recipe card below.)

  • 1 tablespoon olive oil

  • 1 small red onion, chopped

  • 1 medium jalapeño, seeded and chopped

  • 3 cloves garlic, minced

  • 2 (12 oz) skinless, boneless chicken breasts

  • 1 (12 oz) package fire‑roasted frozen corn

  • 1 (4 oz) can diced green chiles

  • 1 tablespoon Tajín seasoning

  • 2 teaspoon ground cumin

  • 2 teaspoon chili powder

  • ½ teaspoon table salt

  • ¼ teaspoon finely ground black pepper

  • 4 cups (32 oz) chicken stock

directions

  1. I start by heating the olive oil in a large pot or Dutch oven over medium‑high heat. I add the chopped onion and jalapeño and cook until the onion softens, which takes about 3 to 4 minutes. Then I stir in the garlic and let it cook for another 30 seconds.

  2. Next, I add the chicken breasts, fire‑roasted corn, and diced green chiles. I season everything with Tajín, cumin, chili powder, salt, and pepper.

  3. I pour in the chicken stock and bring the soup to a boil. Once it's bubbling, I reduce the heat to low, cover the pot, and let it simmer for 25 minutes.

  4. After simmering, I remove the chicken breasts and shred them into bite‑sized pieces. Then I return the shredded chicken to the pot, stir everything together, and heat it through.

  5. Finally, I ladle the soup into bowls and serve it hot. Sometimes I garnish with fresh cilantro, a squeeze of lime, or a little shredded cheese—whatever I’m craving that day.

Servings and timing

This recipe yields about 4 generous servings. It takes around 10 minutes to prep and 25 minutes to cook, making the total time about 35 minutes. It’s perfect for a quick weeknight dinner or a comforting weekend lunch.

Variations

  • If I’m out of fire-roasted corn, I’ll grill or char some fresh corn kernels for that smoky depth.

  • When I want it vegetarian, I swap the chicken with canned white beans or diced potatoes and use vegetable stock instead.

  • I sometimes use rotisserie chicken to save time—just add it after the soup simmers and heat through.

  • For extra heat, I leave some jalapeño seeds in or add a dash of hot sauce at the end.

  • I like to top it with crushed tortilla chips or avocado slices for added texture and richness.

storage/reheating

I store leftovers in an airtight container in the fridge for up to 4 days. The flavors deepen over time, which I actually enjoy. To reheat, I warm it gently on the stovetop over medium heat or microwave it in individual bowls until hot. If the soup thickens too much, I stir in a splash of broth or water.

FAQs

How spicy is this soup?

The spice level is moderate with one jalapeño and Tajín, but I can always adjust it by adding more or less chili powder or leaving out the jalapeño altogether.

Can I freeze this soup?

Yes, I freeze it in airtight containers for up to 3 months. I let it cool completely before freezing and thaw it overnight in the fridge before reheating.

What toppings go well with this soup?

I like to add fresh cilantro, lime wedges, avocado, shredded cheese, or crushed tortilla chips for extra flavor and crunch.

Can I make this in a slow cooker?

Yes, I can sauté the aromatics first, then add everything to the slow cooker and cook on low for 6–7 hours or high for 3–4 hours. I shred the chicken at the end and stir it back in.

Is Tajín necessary?

Tajín adds a unique tangy-spicy flavor, but if I don’t have it, I just use extra chili powder and a splash of lime juice to mimic the taste.

Conclusion

This smoky chicken and fire-roasted corn soup is one of my go-to comfort meals. It’s hearty, flavorful, and easy to customize based on what I have on hand. Whether I’m feeding the family or making a batch just for myself, I know I’ll be satisfied with every spoonful.

Print

clock clock iconcutlery cutlery iconflag flag iconfolder folder iconinstagram instagram iconpinterest pinterest iconfacebook facebook iconprint print iconsquares squares iconheart heart iconheart solid heart solid icon
Smoky Chicken and Fire-Roasted Corn Soup

Smoky Chicken and Fire-Roasted Corn Soup

5 Stars 4 Stars 3 Stars 2 Stars 1 Star No reviews
  • Author: Sue
  • Prep Time: 10 minutes
  • Cook Time: 25 minutes
  • Total Time: 35 minutes
  • Yield: About 4 servings
  • Category: Soup / Main Course
  • Method: Simmering
  • Cuisine: Mexican‑inspired
  • Diet: Halal
Print Recipe
Pin Recipe

Description

A savory and smoky one‑pot soup featuring tender shredded chicken, fire‑roasted corn, green chiles, and aromatics, simmered in chicken stock for a satisfying, flavor‑packed meal.


Ingredients

  • 1 tbsp olive oil
  • 1 small red onion, chopped
  • 1 medium jalapeño, seeded and chopped
  • 3 cloves garlic, minced
  • 2 (12 oz) skinless, boneless chicken breasts
  • 1 (12 oz) package fire‑roasted frozen corn
  • 1 (4 oz) can diced green chiles
  • 1 tbsp Tajín seasoning
  • 2 tsp ground cumin
  • 2 tsp chili powder
  • ½ tsp table salt
  • ¼ tsp finely ground black pepper
  • 4 cups (32 oz) chicken stock

Instructions

  1. Heat the olive oil in a large pot or Dutch oven over medium‑high heat. Add the onion and jalapeño and cook until the onion softens, about 3–4 minutes. Stir in the garlic and cook another 30 seconds.
  2. Add the chicken breasts, fire‑roasted corn, and diced green chiles. Season with Tajín, cumin, chili powder, salt, and pepper.
  3. Pour in the chicken stock and bring the mixture to a boil. Reduce heat to low, cover, and let simmer for 25 minutes.
  4. Remove the chicken, shred it into bite‑size pieces, then return it to the pot. Stir to combine and heat through.
  5. Ladle into bowls and serve hot—optionally garnish as desired.

Notes

  • Fire‑roasted corn adds a smoky flavor—if unavailable, grill or char fresh corn kernels.
  • Adjust jalapeño amount for desired heat level.
  • Use vegetable stock and omit chicken for a vegetarian version.

Have you made this recipe? I'd love to see it!

Click here to Follow me on Pinterest

Dill Pickle Cake

August 24, 2025 by Sue Leave a Comment

A unique savory-sweet cake made with dill pickles and pickle juice, balanced with sugar and warm spices for an unexpectedly delicious flavor combination. This isn’t just a quirky dessert—it’s a conversation starter that delivers flavor in every bite. I was skeptical at first too, but one slice turned me into a believer. Dill Pickle Cake

Why You’ll Love This Recipe

I love how this recipe pushes the boundaries of traditional desserts. The tangy dill pickles mellow during baking, blending surprisingly well with cinnamon and nutmeg to create a sweet, spiced cake with just enough zip to keep things interesting. The moist texture, thanks to sour cream and pickle juice, pairs perfectly with a thick layer of cream cheese frosting. If I'm being honest, this cake is a hit at every gathering—not just because it’s different, but because it’s downright delicious.

ingredients

(Here's a tip: Check out the full list of ingredients and measurements in the recipe card below.)

  • 2 cups all-purpose flour

  • 2 teaspoon baking soda

  • 1 teaspoon ground cinnamon

  • ½ teaspoon ground nutmeg

  • ½ teaspoon salt

  • 2 large eggs

  • 1 ¼ cups granulated sugar

  • ½ cup vegetable oil

  • ½ cup sour cream

  • 1 teaspoon vanilla extract

  • 1 cup finely chopped dill pickles

  • ½ cup pickle juice

  • ½ cup chopped walnuts or pecans (optional)

  • Cream cheese frosting (optional, for topping)

directions

  1. I preheat the oven to 350°F (175°C) and grease and flour either a 9x13-inch pan or two 8-inch round pans.

  2. In a medium bowl, I whisk together flour, baking soda, cinnamon, nutmeg, and salt.

  3. In a separate large bowl, I beat the eggs and sugar until light and fluffy, then mix in the oil, sour cream, and vanilla.

  4. I stir in the chopped dill pickles and pickle juice until well combined.

  5. Then I gradually mix in the dry ingredients until just incorporated.

  6. I fold in the nuts if I’m using them.

  7. I pour the batter into the prepared pan(s) and bake for 35 to 40 minutes, or until a toothpick inserted in the center comes out clean.

  8. After letting the cake cool completely, I frost it with cream cheese frosting (if I'm going for the full experience).

Servings and timing

This recipe makes 12 servings.
Prep time: 15 minutes
Cook time: 40 minutes
Total time: 55 minutes

Variations

When I want to play around with this recipe, I switch things up in a few ways:

  • I swap the walnuts for pecans or leave the nuts out altogether for a smoother texture.

  • For a spicier note, I add a pinch of ground ginger or clove.

  • I’ve even used bread-and-butter pickles once for a sweeter twist—it worked surprisingly well.

  • If I want to skip the frosting, I dust the cooled cake with powdered sugar for a lighter finish.

storage/reheating

I store this cake covered in the refrigerator for up to 5 days. The flavors deepen over time, so I actually prefer it the next day.
For reheating, I let a slice sit at room temperature for 15–20 minutes. If I want it slightly warm, a quick 10–15 seconds in the microwave does the trick. Just be mindful if it’s frosted—it might melt.

FAQs

What do pickles taste like in a cake?

Once baked, the pickles add a tangy brightness that’s subtle—not overpowering. I find it balances the sweetness and spices in the best way.

Can I use sweet pickles instead of dill?

Yes, I can swap in sweet pickles, but it’ll change the flavor profile. The cake will still be tasty, just sweeter and without that savory bite dill provides.

Is the frosting necessary?

Not at all. I’ve had this cake both ways. Cream cheese frosting adds richness, but I sometimes skip it for a more understated treat.

Can I make this cake ahead of time?

Absolutely. I often bake it a day in advance and refrigerate it overnight. It actually tastes better the next day as the flavors meld.

Can I freeze dill pickle cake?

Yes, I can freeze it (unfrosted) for up to 2 months. I wrap slices in plastic wrap and store them in a freezer bag. When I’m ready, I thaw it in the fridge or at room temperature.

Conclusion

This dill pickle cake is the definition of “don’t knock it until I try it.” It's an adventurous dessert with a balance of sweet, tangy, and spice that keeps everyone guessing—and coming back for seconds. Whether I serve it frosted or plain, it always sparks curiosity and conversation. If I’m in the mood to surprise and delight, this is the recipe I reach for.

Print

clock clock iconcutlery cutlery iconflag flag iconfolder folder iconinstagram instagram iconpinterest pinterest iconfacebook facebook iconprint print iconsquares squares iconheart heart iconheart solid heart solid icon
Dill Pickle Cake

Dill Pickle Cake

5 Stars 4 Stars 3 Stars 2 Stars 1 Star No reviews
  • Author: Sue
  • Prep Time: 15 minutes
  • Cook Time: 40 minutes
  • Total Time: 55 minutes
  • Yield: 12 servings
  • Category: Dessert
  • Method: Baking
  • Cuisine: American
  • Diet: Vegetarian
Print Recipe
Pin Recipe

Description

A unique savory-sweet cake made with dill pickles and pickle juice, balanced with sugar and warm spices for an unexpectedly delicious flavor combination.


Ingredients

  • 2 cups all-purpose flour
  • 2 tsp baking soda
  • 1 tsp ground cinnamon
  • ½ tsp ground nutmeg
  • ½ tsp salt
  • 2 large eggs
  • 1 ¼ cups granulated sugar
  • ½ cup vegetable oil
  • ½ cup sour cream
  • 1 tsp vanilla extract
  • 1 cup finely chopped dill pickles
  • ½ cup pickle juice
  • ½ cup chopped walnuts or pecans (optional)
  • Cream cheese frosting (optional, for topping)

Instructions

  1. Preheat oven to 350°F (175°C). Grease and flour a 9x13-inch baking pan or two 8-inch round pans.
  2. In a medium bowl, whisk together flour, baking soda, cinnamon, nutmeg, and salt.
  3. In a large bowl, beat eggs and sugar until light and fluffy. Mix in oil, sour cream, and vanilla extract.
  4. Stir in chopped dill pickles and pickle juice.
  5. Gradually add the dry ingredients to the wet mixture, stirring until just combined.
  6. Fold in nuts if using.
  7. Pour batter into prepared pan(s) and bake for 35–40 minutes, or until a toothpick inserted into the center comes out clean.
  8. Let cool completely before frosting with cream cheese frosting, if desired.

Notes

  • The pickle flavor mellows as the cake bakes, leaving a tangy-sweet balance.
  • Cream cheese frosting pairs best, but you can also serve it plain.
  • Chilling overnight enhances the flavors.
  • Great conversation-starter for parties or potlucks!

Nutrition

  • Serving Size: 1 slice
  • Calories: 320
  • Sugar: 28g
  • Sodium: 210mg
  • Fat: 15g
  • Saturated Fat: 3g
  • Unsaturated Fat: 11g
  • Trans Fat: 0g
  • Carbohydrates: 42g
  • Fiber: 2g
  • Protein: 4g
  • Cholesterol: 30mg

Have you made this recipe? I'd love to see it!

Click here to Follow me on Pinterest

Tangy Dill Pickle Meatloaf – A Juicy Twist on a Classic Comfort Favorite

August 24, 2025 by Sue Leave a Comment

This tangy dill pickle meatloaf puts a unique, flavorful twist on a nostalgic comfort food favorite. Juicy, savory ground meat gets an unexpected burst of brightness from chopped dill pickles and pickle juice, making each bite bold and mouthwatering. It’s a simple yet surprising dish that stands out on any dinner table. Tangy Dill Pickle Meatloaf – A Juicy Twist on a Classic Comfort Favorite

Why You’ll Love This Recipe

I love how this meatloaf takes all the cozy, familiar feelings of a traditional recipe and adds something completely new with the dill pickles. The tang from the pickles balances the richness of the meat, while the moisture from the pickle juice keeps it tender and juicy. It’s a crowd-pleaser with just the right amount of zing, and it’s incredibly easy to put together. Whether I’m serving it up on a weeknight or making it ahead for meal prep, it never disappoints.

ingredients

(Here's a tip: Check out the full list of ingredients and measurements in the recipe card below.)

  • Ground beef

  • Chopped dill pickles

  • Pickle juice

  • Eggs

  • Breadcrumbs

  • Onion (finely chopped)

  • Garlic (minced)

  • Ketchup

  • Mustard

  • Worcestershire sauce

  • Salt

  • Black pepper

directions

  1. I preheat the oven to 350°F (175°C) and grease a loaf pan.

  2. In a large mixing bowl, I combine the ground beef, chopped dill pickles, pickle juice, eggs, breadcrumbs, onion, garlic, ketchup, mustard, Worcestershire sauce, salt, and pepper.

  3. I mix everything until just combined, being careful not to overwork the meat.

  4. I shape the mixture into a loaf and place it into the prepared pan.

  5. I top the loaf with a little extra ketchup or a mixture of ketchup and pickle juice for added flavor.

  6. I bake for about 55-65 minutes, or until the internal temperature reaches 160°F (71°C).

  7. I let it rest for 10 minutes before slicing and serving.

Servings and timing

This recipe serves about 6 people and takes roughly 1 hour and 20 minutes from start to finish, including prep and resting time.

Variations

I like to switch things up by using ground turkey or chicken for a lighter version. Sometimes, I mix in shredded cheddar cheese or top the loaf with sliced pickles before baking for an extra tangy kick. For a spicy version, I add chopped jalapeños or a splash of hot sauce to the mix. I’ve also tried using crushed crackers instead of breadcrumbs for a different texture.

storage/reheating

To store leftovers, I wrap the meatloaf tightly or place it in an airtight container and keep it in the refrigerator for up to 4 days. For longer storage, I freeze slices individually and reheat them in the microwave or oven. I like to reheat it covered with foil in a 350°F oven for about 15-20 minutes to keep it moist.

FAQs

What kind of pickles work best for this recipe?

I prefer classic dill pickles for their bold, tangy flavor, but garlic dill or spicy pickles also work well.

Can I make this meatloaf ahead of time?

Yes, I often prepare the mixture the night before and refrigerate it. Then I just bake it when I’m ready.

How do I keep the meatloaf from falling apart?

I make sure to use enough binding ingredients like eggs and breadcrumbs, and I let it rest after baking so it holds its shape when sliced.

Can I use sweet pickles instead of dill?

I wouldn’t recommend it—the sweet flavor can clash with the savory ingredients. Dill pickles give the right balance of tart and savory.

What sides go well with this meatloaf?

I like to serve it with mashed potatoes, roasted vegetables, or a crisp green salad. It also pairs well with mac and cheese for a comfort food feast.

Conclusion

This tangy dill pickle meatloaf is a fresh take on a beloved classic, delivering bold flavor and juicy texture in every slice. I love how easy it is to make and how it always brings something a little unexpected to the table. It’s hearty, satisfying, and just quirky enough to become a new favorite.

Print

clock clock iconcutlery cutlery iconflag flag iconfolder folder iconinstagram instagram iconpinterest pinterest iconfacebook facebook iconprint print iconsquares squares iconheart heart iconheart solid heart solid icon
Tangy Dill Pickle Meatloaf – A Juicy Twist on a Classic Comfort Favorite

Tangy Dill Pickle Meatloaf – A Juicy Twist on a Classic Comfort Favorite

5 Stars 4 Stars 3 Stars 2 Stars 1 Star No reviews
  • Author: Sue
  • Prep Time: 15 minutes
  • Cook Time: 65 minutes
  • Total Time: 1 hour 20 minutes
  • Yield: 6 servings
  • Category: Dinner
  • Method: Baking
  • Cuisine: American
  • Diet: Halal
Print Recipe
Pin Recipe

Description

A juicy, savory meatloaf with a tangy twist from dill pickles and pickle juice. This flavorful comfort food classic is tender, moist, and bursting with bold flavor in every bite.


Ingredients

  • 2 lbs ground beef
  • ½ cup chopped dill pickles
  • ¼ cup pickle juice
  • 2 large eggs
  • 1 cup breadcrumbs
  • 1 medium onion, finely chopped
  • 2 cloves garlic, minced
  • ¼ cup ketchup (plus extra for topping)
  • 2 tbsp mustard
  • 1 tbsp Worcestershire sauce
  • 1 tsp salt
  • ½ tsp black pepper

Instructions

  1. Preheat oven to 350°F (175°C) and grease a loaf pan.
  2. In a large bowl, combine ground beef, chopped dill pickles, pickle juice, eggs, breadcrumbs, onion, garlic, ketchup, mustard, Worcestershire sauce, salt, and pepper.
  3. Mix until just combined, avoiding overmixing.
  4. Shape mixture into a loaf and place in prepared pan.
  5. Spread extra ketchup or a ketchup-pickle juice mix on top.
  6. Bake for 55-65 minutes, or until internal temperature reaches 160°F (71°C).
  7. Let rest for 10 minutes before slicing and serving.

Notes

  • Use ground turkey or chicken for a lighter version.
  • Mix in shredded cheddar cheese or top with sliced pickles for extra tang.
  • Add jalapeños or hot sauce for a spicy kick.
  • Crushed crackers can replace breadcrumbs for a different texture.
  • Store leftovers in the fridge for up to 4 days or freeze for longer storage.

Nutrition

  • Serving Size: 1 slice (⅙ of loaf)
  • Calories: 380
  • Sugar: 4g
  • Sodium: 720mg
  • Fat: 22g
  • Saturated Fat: 8g
  • Unsaturated Fat: 12g
  • Trans Fat: 1g
  • Carbohydrates: 18g
  • Fiber: 1g
  • Protein: 26g
  • Cholesterol: 125mg

Have you made this recipe? I'd love to see it!

Click here to Follow me on Pinterest

Light and Fluffy Waffles

August 24, 2025 by Sue Leave a Comment

Golden on the outside, soft and airy on the inside—these light and fluffy waffles are everything I love in a classic breakfast. Whether I’m sitting down for a slow weekend brunch or freezing a batch for quick weekday mornings, this easy recipe never lets me down. With just a few simple ingredients, I always end up with beautifully crisp-edged waffles and that irresistible soft middle. Light and Fluffy Waffles

Why You’ll Love This Recipe

I like how simple this recipe is—nothing fancy, just pantry basics that come together perfectly. The batter is versatile, allowing for both buttermilk or whole milk depending on what I have on hand. I enjoy how the waffles stay tender inside while getting that rich golden color on the outside. Plus, the make-ahead and freezer-friendly tips make it perfect for busy schedules.

Ingredients

(Here's a tip: Check out the full list of ingredients and measurements in the recipe card below.)

  • 2 cups all purpose flour

  • 2 tablespoons granulated sugar

  • ½ teaspoon salt

  • 2 teaspoons baking powder

  • 1 teaspoon baking soda

  • 1¾ cups buttermilk (or 1½ cups whole milk), warmed to room temperature

  • 2 eggs, room temperature

  • 1 teaspoon vanilla extract

  • 8 tablespoons unsalted butter, melted and cooled

Directions

  1. I start by preheating my waffle iron and, if I plan to keep waffles warm, I set my oven to 225°F and place a wire rack on a baking sheet inside.

  2. In a large mixing bowl, I whisk together flour, sugar, salt, baking powder, and baking soda.

  3. In a separate bowl, I combine the warm milk, eggs, vanilla extract, and melted butter.

  4. I gently mix the wet ingredients into the dry ingredients until just combined—it’s okay if the batter’s a little lumpy. I let it rest for 10 minutes to develop structure and flavor.

  5. Once the waffle iron is hot, I grease it if needed, then pour about ¾ cup of batter onto the surface, spreading it close to the edges.

  6. I cook until the waffle is golden and crispy. If my waffle maker doesn’t have an indicator light, I wait until the steam almost stops.

  7. I serve the waffles hot with butter, maple syrup, berries, or whipped cream. If I’m making a large batch, I keep the finished ones warm in the oven.

Servings and Timing

This recipe makes 5 Belgian-style waffles.

  • Prep Time: 10 minutes

  • Cook Time: 6 minutes per waffle

  • Total Time: About 16 minutes plus 10 minutes resting time

Variations

  • Buttermilk vs. Milk: I go with buttermilk for a tangier flavor and tender crumb. When I only have whole milk, I switch out the baking soda and adjust the baking powder accordingly.

  • Mix-ins: Sometimes I fold mini chocolate chips or blueberries into the batter just before cooking.

  • Whole Wheat Option: I’ve swapped out half the all-purpose flour with whole wheat flour for a heartier texture—it works well.

Storage/Reheating

When I have leftovers, I let the waffles cool completely, then freeze them flat on a tray before storing in a freezer-safe bag. For reheating, I prefer popping them in a 250°F oven for 10–15 minutes to restore crispness. A wide-slot toaster works well too, especially if I’m in a hurry.

FAQs

How do I keep waffles crispy after cooking?

I place cooked waffles on a rack in a 225°F oven to stay warm and crisp while I make the rest.

Can I make the batter ahead of time?

I prefer making the batter fresh, but I’ve stored it in the fridge for a few hours without issues. I give it a quick stir before using.

What if I don’t have buttermilk?

I often make my own by adding a tablespoon of lemon juice or vinegar to 1¾ cups of milk and letting it sit for 5–10 minutes.

Can I double the recipe?

Yes, I’ve doubled it with great results. Just make sure to give the batter a good stir between batches as it can settle.

How do I prevent my waffles from sticking to the iron?

I always grease the waffle iron before the first waffle and reapply lightly if needed. Using melted butter or oil works well.

Conclusion

These light and fluffy waffles have become my go-to for effortless breakfasts and cozy brunches. With crisp edges, a soft center, and tons of ways to customize them, I always keep this recipe in rotation. Whether fresh off the iron or reheated from the freezer, they deliver every time.

Print

clock clock iconcutlery cutlery iconflag flag iconfolder folder iconinstagram instagram iconpinterest pinterest iconfacebook facebook iconprint print iconsquares squares iconheart heart iconheart solid heart solid icon
Light and Fluffy Waffles

Light and Fluffy Waffles

5 Stars 4 Stars 3 Stars 2 Stars 1 Star No reviews
  • Author: Sue
  • Prep Time: 30 minutes
  • Cook Time: 25 minutes
  • Total Time: 2 hours 30 minutes (includes rise time)
  • Yield: 1 loaf (8–10 slices)
  • Category: Bread
  • Method: Baking
  • Cuisine: American
  • Diet: Vegetarian
Print Recipe
Pin Recipe

Description

A savory, herb-and-cheese-filled bread with a golden crust and a beautifully twisted braid—perfect as an appetizer, side dish, or comforting snack.


Ingredients

  • 3 ½ cups all-purpose flour, plus more for dusting
  • 1 packet active dry yeast (2 ¼ teaspoons)
  • 1 ½ teaspoons granulated sugar
  • 1 ¼ teaspoons salt
  • 1 ¼ cups warm water (105–115 °F)
  • 2 tablespoons olive oil, plus more for greasing
  • 8 ounces cream cheese, softened
  • 1 cup shredded mozzarella cheese
  • ½ cup grated Parmesan cheese
  • ¼ cup chopped fresh Italian parsley
  • 2 tablespoons chopped fresh basil
  • 1 tablespoon chopped fresh oregano
  • 2 cloves garlic, minced
  • ¼ teaspoon garlic powder
  • ¼ teaspoon onion powder
  • ¼ teaspoon red pepper flakes (optional)
  • Salt and black pepper, to taste
  • 1 large egg
  • 1 tablespoon milk or water
  • Everything bagel seasoning (optional, for topping)
  • Additional grated Parmesan cheese (optional, for topping)
  • Dried Italian herbs (optional, for topping)

Instructions

  1. Activate the yeast by combining warm water, sugar, and yeast in a bowl. Let sit 5–10 minutes until foamy.
  2. In another bowl, whisk together flour and salt.
  3. Pour the yeast mixture and olive oil into the dry ingredients and mix until a shaggy dough forms.
  4. Knead on a floured surface for 6–8 minutes until smooth and elastic, or use a stand mixer with a dough hook. Add flour as needed if sticky.
  5. Grease a bowl with olive oil, place dough inside, turn to coat, and cover. Let rise 1–1.5 hours until doubled.
  6. Meanwhile, mix cream cheese, mozzarella, Parmesan, herbs, garlic, and seasonings to make the filling. Refrigerate 15–20 minutes if needed for easier spreading.
  7. Preheat oven to 375 °F and line a baking sheet with parchment paper.
  8. Punch down risen dough and roll into a 12×18-inch rectangle.
  9. Spread filling evenly over dough, leaving a ½-inch border on one long side.
  10. Roll tightly from the opposite long side, pinch seam to seal.
  11. Slice the log in half lengthwise, keeping cut sides facing up, and twist strands together into a braid.
  12. Transfer twisted loaf to baking sheet, shaping into a circle or leaving long.
  13. Whisk egg with milk or water and brush over the surface. Sprinkle with optional toppings if desired.
  14. Bake 25–30 minutes until golden and bubbly, tenting with foil if browning too quickly.
  15. Cool a few minutes on the sheet, then transfer to a rack to finish cooling before slicing.

Notes

  • Swap cheeses: Gruyère, Provolone, or goat cheese work well.
  • Try other herbs like rosemary or thyme for variation.
  • Add-ins such as sun-dried tomatoes, spinach, or roasted red peppers elevate flavor.
  • Dough and filling can be prepped separately and refrigerated overnight for next-day baking.
  • Store wrapped bread at room temperature up to 2 days, refrigerated 4–5 days, or frozen 2 months. Reheat in oven or microwave.

Nutrition

  • Serving Size: 1 slice (1/10 loaf)
  • Calories: 280
  • Sugar: 2 g
  • Sodium: 360 mg
  • Fat: 14 g
  • Saturated Fat: 7 g
  • Unsaturated Fat: 6 g
  • Trans Fat: 0 g
  • Carbohydrates: 30 g
  • Fiber: 1 g
  • Protein: 9 g
  • Cholesterol: 50 mg

Have you made this recipe? I'd love to see it!

Click here to Follow me on Pinterest

  • 1
  • 2
  • 3
  • …
  • 39
  • Next Page »
Modern Sidebar

Hey there! I'm Sue, a mom, a wife, and someone who’s always in the kitchen trying out new recipes or revisiting old ones that remind me of family gatherings and special moments.

Learn more

Popular

  • Cheesecake Fruit Salad
    Cheesecake Fruit Salad
  • Creamy Tuscan Ravioli Soup: A Comfort Dish
    Creamy Tuscan Ravioli Soup: A Comfort Dish
  • Garlic Herb Chicken with Mashed Potatoes and Glazed Carrots
    Garlic Herb Chicken with Mashed Potatoes and Glazed Carrots
  • Bobby Flay Salisbury Steak
    Bobby Flay Salisbury Steak

Footer

↑ back to top

About

  • About
  • Contact
  • Disclosure Policy
  • DMCA
  • Privacy Policy
  • Terms and Conditions

Newsletter

  • Sign Up! for emails and updates

Recipes

  • Appetizers & Snacks
  • Beef
  • Breakfast
  • Chicken
  • Desserts
  • Dinner
  • Drinks
  • Side-Dish
  • Soups

As an Amazon Associate I earn from qualifying purchases.

Copyright © 2025 Sue Recipe