Sue Recipe

  • Recipe Index
  • Chicken
  • Desserts
  • About
  • Contact
menu icon
go to homepage
  • Recipe Index
  • Chicken
  • Desserts
  • About
  • Contact

search icon
Homepage link
  • Recipe Index
  • Chicken
  • Desserts
  • About
  • Contact

×

Costco Chocolate Muffins (Copycat Recipe)

May 29, 2025 by Sue Leave a Comment

These homemade Costco-style chocolate muffins are rich, moist, and loaded with deep chocolate flavor. With a tender crumb and melty chocolate chips throughout, they truly rival the iconic bakery originals. I love making these indulgent muffins at home—they're perfect for breakfast, dessert, or an anytime chocolate fix. Costco Chocolate Muffins (Copycat Recipe)

Why You’ll Love This Recipe

I love this recipe because it perfectly captures the decadent, oversized muffins I find at Costco. The texture is soft and moist, thanks to sour cream and a mix of cocoa powder and chocolate chips. It uses simple ingredients I likely already have in my pantry, and the results are always bakery-worthy. Plus, making them at home means I can enjoy these jumbo chocolate muffins fresh and warm.

Ingredients

(Here's a tip: Check out the full list of ingredients and measurements in the recipe card below.)

  • all-purpose flour
  • baking powder
  • baking soda
  • kosher salt
  • unsweetened cocoa powder
  • hot water
  • granulated sugar
  • vegetable oil
  • large eggs
  • pure vanilla extract
  • sour cream
  • semi-sweet chocolate chips

Directions

  1. I preheat my oven to 375°F and line a 6-cup jumbo muffin pan with liners or lightly grease them.
  2. In a small bowl, I whisk together ¼ cup of cocoa powder with the hot water until smooth, then let it cool.
  3. In another bowl, I mix the flour, remaining cocoa powder, baking powder, baking soda, and salt.
  4. In a large bowl, I whisk together the sugar, oil, eggs, and vanilla until smooth.
  5. I add the sour cream and the cooled cocoa mixture to the wet ingredients and stir until combined.
  6. Gradually, I mix in the dry ingredients, being careful not to overmix.
  7. I fold in most of the chocolate chips, reserving some for the tops.
  8. I divide the batter evenly into the muffin cups and sprinkle the remaining chips on top.
  9. I bake them for 25–30 minutes or until a toothpick comes out clean.
  10. I let them cool in the pan for 5 minutes before transferring to a wire rack.

Servings and Timing

  • Servings: 6 jumbo muffins
  • Prep Time: 15 minutes
  • Cook Time: 25–30 minutes
  • Total Time: 40–45 minutes

Variations

  • I sometimes make standard-sized muffins instead of jumbo ones—this yields about 12 muffins and they bake in 18–22 minutes.
  • For a deeper chocolate flavor, I add a teaspoon of espresso powder to the batter.
  • If I want a nutty crunch, I toss in a handful of chopped walnuts or pecans.
  • Swapping in dark chocolate or white chocolate chips gives a fun twist.
  • When I’m out of sour cream, full-fat Greek yogurt works well too.

Storage/Reheating

  • I store these muffins in an airtight container at room temperature for up to 3 days.
  • In the fridge, they last up to a week, and I just warm them before serving.
  • To freeze, I wrap each muffin individually and store them in a freezer-safe bag for up to 3 months.
  • When reheating, I microwave a thawed muffin for 20–30 seconds to bring back the fresh-baked feel.

FAQs

Can I make these with standard muffin tins?

Yes, I often use a 12-cup muffin tin instead. I just reduce the baking time to around 18–22 minutes.

What’s the secret to making them taste like Costco’s?

Using both cocoa powder and real chocolate chips, along with sour cream, gives them that rich, moist texture that tastes just like the ones from the bakery.

Can I freeze these muffins?

Absolutely. I wrap each one in plastic wrap and store them in the freezer for up to 3 months. They reheat beautifully.

Why do I need to bloom the cocoa in hot water?

Blooming enhances the chocolate flavor. Mixing cocoa with hot water releases its richness, giving the muffins a deeper taste.

Do I have to use sour cream?

Sour cream is ideal for moisture and tenderness, but I sometimes use full-fat Greek yogurt when I need a substitute.

Conclusion

These copycat Costco chocolate muffins hit all the right notes—rich, moist, deeply chocolaty, and perfectly oversized. I love how easy they are to make at home and how they satisfy my sweet tooth every time. Whether I serve them for breakfast or dessert, these muffins always disappear fast.

Print

clock clock iconcutlery cutlery iconflag flag iconfolder folder iconinstagram instagram iconpinterest pinterest iconfacebook facebook iconprint print iconsquares squares iconheart heart iconheart solid heart solid icon
Costco Chocolate Muffins (Copycat Recipe)

Costco Chocolate Muffins (Copycat Recipe)

5 Stars 4 Stars 3 Stars 2 Stars 1 Star No reviews
  • Author: Sue
  • Prep Time: 15 minutes
  • Cook Time: 25-30 minutes
  • Total Time: 40-45 minutes
  • Yield: 6 jumbo muffins
  • Category: Breakfast, Dessert
  • Method: Baking
  • Cuisine: American
  • Diet: Vegetarian
Print Recipe
Pin Recipe

Description

These homemade Costco-style chocolate muffins are rich, moist, and packed with deep chocolate flavor, mimicking the indulgent bakery muffins from Costco.


Ingredients

  • 1 ⅔ cups all-purpose flour
  • 2 teaspoons baking powder
  • ½ teaspoon baking soda
  • 1 teaspoon kosher salt
  • ¾ cup unsweetened cocoa powder, divided
  • ½ cup hot water
  • 1 cup granulated sugar
  • ⅓ cup vegetable oil
  • 2 large eggs plus 1 yolk, at room temperature
  • 2 teaspoons pure vanilla extract
  • ¾ cup sour cream, at room temperature
  • 15 ounces semi-sweet chocolate chips, about 2 ½ cups, divided

Instructions

  1. Preheat the oven to 375°F (190°C). Line a 6-cup jumbo muffin tin with liners or grease each cup.
  2. Whisk ¼ cup cocoa powder with hot water in a small bowl until smooth and set aside to cool.
  3. In a medium bowl, whisk flour, remaining cocoa powder, baking powder, baking soda, and salt.
  4. In a large bowl, whisk sugar, vegetable oil, eggs, yolk, and vanilla until smooth.
  5. Stir in sour cream and cooled cocoa mixture until incorporated.
  6. Gradually stir in dry ingredients until just combined, avoiding overmixing.
  7. Fold in 2 cups of chocolate chips, reserving ½ cup for topping.
  8. Divide batter evenly in muffin cups, filling each about ¾ full. Top with reserved chocolate chips.
  9. Bake for 25–30 minutes, or until a toothpick comes out clean.
  10. Cool muffins in the pan for 5 minutes before transferring to a wire rack to cool completely.

Notes

  • Use natural, unsweetened cocoa for best results.
  • Full-fat Greek yogurt can substitute sour cream, with slight flavor changes.
  • Store in an airtight container at room temperature for 3 days or refrigerate for a week.
  • Freeze individually wrapped muffins for up to 3 months.
  • Batter can be prepped and refrigerated up to 24 hours in advance.

Nutrition

  • Serving Size: 1 jumbo muffin
  • Calories: 580
  • Sugar: 40g
  • Sodium: 320mg
  • Fat: 32g
  • Saturated Fat: 15g
  • Unsaturated Fat: 14g
  • Trans Fat: 0g
  • Carbohydrates: 70g
  • Fiber: 5g
  • Protein: 7g
  • Cholesterol: 65mg
Have you made this recipe? I'd love to see it!

Click here to Follow me on Pinterest

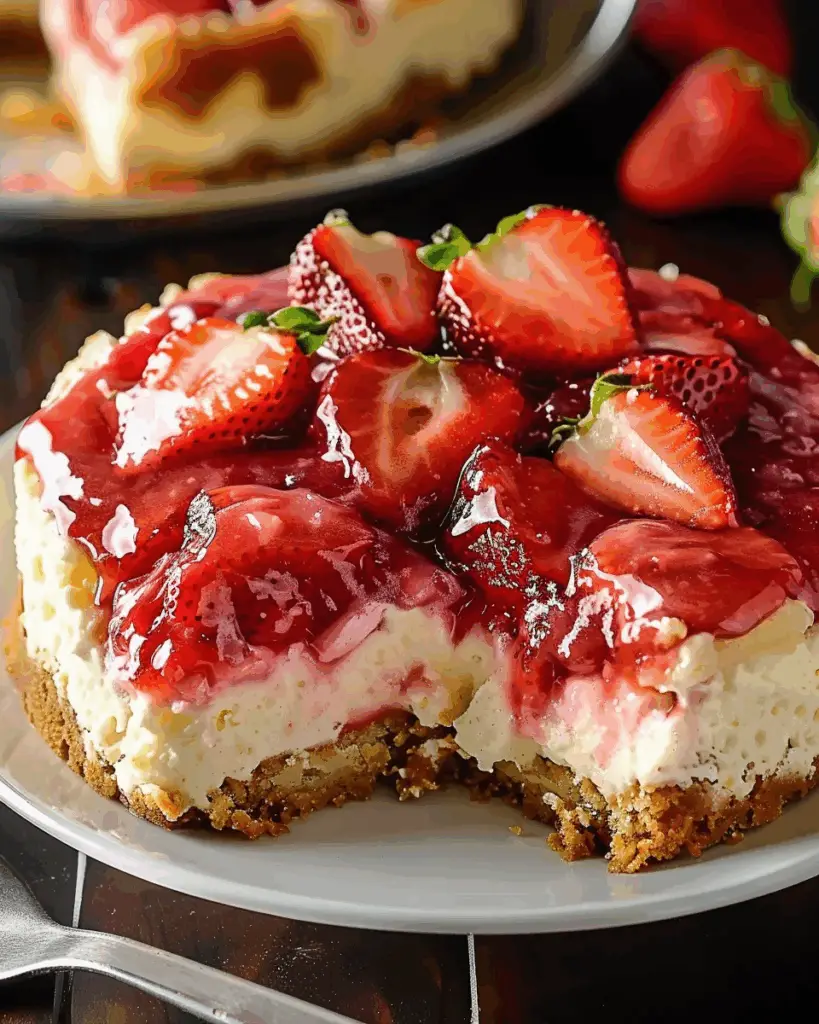
Easy Strawberry Cheesecake Dump Cake Recipe

May 29, 2025 by Sue Leave a Comment

This Strawberry Cheesecake Dump Cake is a delightful fusion of creamy cheesecake, juicy strawberries, and a buttery cake topping. It's the perfect dessert for any occasion, combining rich flavors with a simple preparation method. Easy Strawberry Cheesecake Dump Cake Recipe

Why You’ll Love This Recipe

I love how this recipe brings together the classic flavors of strawberry cheesecake in a fuss-free dump cake format. It's incredibly easy to make, requiring minimal ingredients and effort. Whether I'm hosting a gathering or craving a sweet treat, this dessert never disappoints.

Ingredients

(Here's a tip: Check out the full list of ingredients and measurements in the recipe card below.)

  • 2 cups fresh strawberries, sliced
  • 8 ounces cream cheese, softened
  • 1 box (15.25 ounces) yellow cake mix
  • ½ cup unsalted butter, melted
  • ½ cup granulated sugar
  • 1 cup milk
  • 1 teaspoon vanilla extract

Directions

  1. Preheat the oven to 350°F (175°C). Lightly grease a 9x13-inch baking dish.
  2. Prepare the strawberries by washing and slicing them. If desired, sprinkle a little sugar over them and let sit for 10 minutes to enhance their sweetness.
  3. In a medium bowl, beat the softened cream cheese and granulated sugar until smooth. Add the vanilla extract and mix until well combined.
  4. Spread the sliced strawberries evenly over the bottom of the prepared baking dish.
  5. Dollop the cream cheese mixture over the strawberries, spreading it gently to cover the fruit layer.
  6. Sprinkle the dry cake mix evenly over the cream cheese layer.
  7. Drizzle the melted butter over the top of the cake mix, ensuring most of the surface is moistened.
  8. Bake for 40-45 minutes, or until the top is golden brown and the edges are bubbly.
  9. Allow the cake to cool slightly before serving. Enjoy warm or at room temperature.

Servings and Timing

This recipe yields approximately 12 servings. Preparation time is about 15 minutes, with a baking time of 40-45 minutes, totaling around 1 hour from start to finish.

Variations

  • Fruit Variations: I sometimes swap out the strawberries for other fruits like blueberries, raspberries, or a mix of berries for a different flavor profile.
  • Cake Mix Options: While yellow cake mix is my go-to, white or vanilla cake mix also work well. For a more intense strawberry flavor, strawberry cake mix is a great choice.
  • Add-Ins: Adding a handful of chopped nuts or a sprinkle of cinnamon on top before baking adds an extra layer of flavor and texture.

Storage/Reheating

  • Refrigeration: I store leftovers in an airtight container in the refrigerator for up to 3 days.
  • Freezing: This dump cake freezes well. I wrap individual portions tightly and freeze for up to 3 months. Thaw in the refrigerator overnight before reheating.
  • Reheating: To reheat, I place a portion in the microwave for about 30 seconds or warm it in a 350°F (175°C) oven for 10-15 minutes until heated through.

FAQs

What is a dump cake?

A dump cake is a simple dessert where ingredients are "dumped" into a baking dish without mixing, then baked. It's known for its ease and delicious results.

Can I use frozen strawberries?

Yes, I can use frozen strawberries. I make sure to thaw and drain them well before using to prevent excess moisture in the cake.

Do I need to mix the cake mix before adding it?

No, I sprinkle the dry cake mix directly over the cream cheese layer. The butter drizzled on top will moisten it during baking.

Can I make this dessert ahead of time?

Absolutely. I often prepare it a day in advance and store it in the refrigerator. I reheat it before serving for the best taste.

What can I serve with this dump cake?

I love serving it with a scoop of vanilla ice cream or a dollop of whipped cream for an extra indulgent treat.

Conclusion

This Easy Strawberry Cheesecake Dump Cake is a crowd-pleaser that's as simple to make as it is delicious. With its layers of sweet strawberries, creamy cheesecake, and buttery cake topping, it's a dessert that I find myself returning to time and again. Whether for a special occasion or a casual get-together, it's sure to impress.

Print

clock clock iconcutlery cutlery iconflag flag iconfolder folder iconinstagram instagram iconpinterest pinterest iconfacebook facebook iconprint print iconsquares squares iconheart heart iconheart solid heart solid icon
Easy Strawberry Cheesecake Dump Cake Recipe

Easy Strawberry Cheesecake Dump Cake Recipe

5 Stars 4 Stars 3 Stars 2 Stars 1 Star No reviews
  • Author: Sue
  • Prep Time: 15 minutes
  • Cook Time: 45 minutes
  • Total Time: 1 hour
  • Yield: 12 servings
  • Category: Dessert
  • Method: Baking
  • Cuisine: American
  • Diet: Vegetarian
Print Recipe
Pin Recipe

Description

This Easy Strawberry Cheesecake Dump Cake blends juicy strawberries, creamy cheesecake, and a buttery cake topping in a quick, fuss-free dessert perfect for any occasion.


Ingredients

  • 2 cups fresh strawberries, sliced
  • 8 ounces cream cheese, softened
  • 1 box (15.25 ounces) yellow cake mix
  • ½ cup unsalted butter, melted
  • ½ cup granulated sugar
  • 1 cup milk
  • 1 teaspoon vanilla extract

Instructions

  1. Preheat the oven to 350°F (175°C) and lightly grease a 9x13-inch baking dish.
  2. Wash and slice the strawberries. Optionally, sprinkle with sugar and let sit for 10 minutes.
  3. In a medium bowl, beat the cream cheese and granulated sugar until smooth. Mix in the vanilla extract.
  4. Spread the sliced strawberries evenly in the baking dish.
  5. Dollop and gently spread the cream cheese mixture over the strawberries.
  6. Sprinkle the dry cake mix evenly over the cream cheese layer.
  7. Drizzle the melted butter over the cake mix, covering as much as possible.
  8. Bake for 40-45 minutes, until the top is golden and edges are bubbly.
  9. Let cool slightly before serving. Serve warm or at room temperature.

Notes

  • Use different fruits like blueberries or raspberries for variation.
  • White, vanilla, or strawberry cake mix can be substituted.
  • Add chopped nuts or cinnamon for extra texture and flavor.
  • Store leftovers in the refrigerator for up to 3 days.
  • Freeze individual portions for up to 3 months and thaw before reheating.

Nutrition

  • Serving Size: 1 serving
  • Calories: 310
  • Sugar: 22g
  • Sodium: 280mg
  • Fat: 15g
  • Saturated Fat: 9g
  • Unsaturated Fat: 5g
  • Trans Fat: 0g
  • Carbohydrates: 40g
  • Fiber: 1g
  • Protein: 4g
  • Cholesterol: 40mg

Have you made this recipe? I'd love to see it!

Click here to Follow me on Pinterest

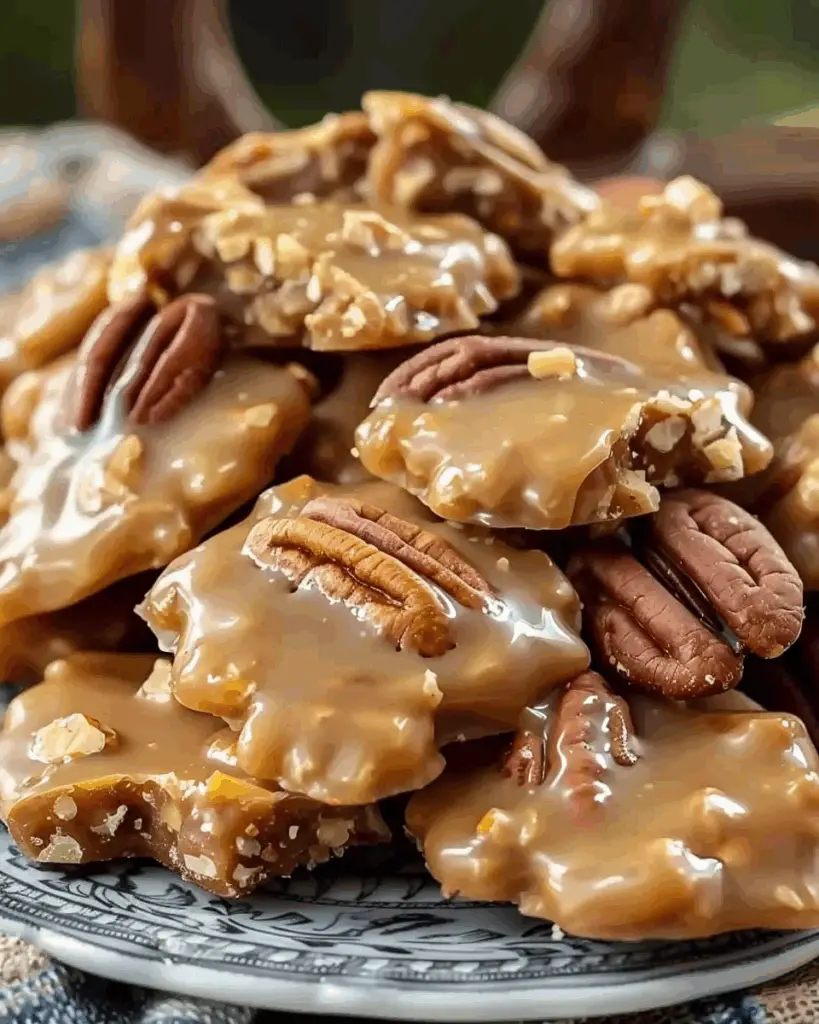
New Orleans Pecan Pralines

May 29, 2025 by Sue Leave a Comment

New Orleans pecan pralines are a rich, sweet Southern candy made from sugar, cream, butter, and pecans. These melt-in-your-mouth confections are a staple of Louisiana cuisine and are often gifted during holidays or enjoyed as a homemade treat year-round. With their creamy texture and nutty crunch, these pralines bring a little bit of Southern charm to every bite. New Orleans Pecan Pralines

Why You’ll Love This Recipe

I love this recipe because it brings together simple pantry ingredients to create a decadent, old-fashioned candy that tastes like it came straight out of a New Orleans confectionery. The balance between the creamy, caramelized sugar base and the toasted pecans is irresistible. Plus, it’s surprisingly easy to make with a little patience and the right technique. I also appreciate that it’s a perfect homemade gift and keeps well when stored properly.

Ingredients

(Here's a tip: Check out the full list of ingredients and measurements in the recipe card below.)

  • Granulated sugar
  • Light brown sugar
  • Heavy cream
  • Unsalted butter
  • Vanilla extract
  • Salt
  • Pecan halves

Directions

  1. I start by preparing a baking sheet lined with parchment paper so it’s ready when the pralines are done cooking.
  2. In a heavy-bottomed saucepan, I combine both sugars and heavy cream over medium heat, stirring constantly until the sugars dissolve.
  3. I add butter and continue cooking, stirring frequently. I use a candy thermometer and cook the mixture until it reaches the soft ball stage, around 238–240°F (114–115°C).
  4. Once it reaches temperature, I remove it from the heat and stir in the vanilla extract, salt, and pecan halves.
  5. I beat the mixture with a wooden spoon for several minutes until it starts to thicken and lose its gloss. This is the critical stage where the candy sets up correctly.
  6. Using a spoon, I quickly drop heaping tablespoons of the mixture onto the prepared baking sheet, forming individual pralines.
  7. I let them cool completely at room temperature until firm and set.

Servings and timing

This recipe makes about 18–24 pralines, depending on size.
Prep time: 10 minutes
Cook time: 20–25 minutes
Cooling time: 30–40 minutes
Total time: About 1 hour and 15 minutes

Variations

  • I sometimes add a splash of bourbon with the vanilla for a deeper flavor.
  • For a spiced version, I stir in a pinch of cinnamon or nutmeg.
  • If I want a creamier praline, I add a bit more cream and reduce the beating time to keep the mixture soft.
  • Toasted pecans enhance the nuttiness, so I occasionally roast them beforehand for a richer taste.

Storage/reheating

I store the pralines in an airtight container at room temperature. They keep well for up to 1 week. For longer storage, I refrigerate them and let them come to room temperature before serving. I never reheat them, as it affects the texture, but if one gets slightly too firm, I’ll warm it in my hands or let it sit out for a few minutes to soften slightly.

FAQs

What’s the best way to prevent grainy pralines?

I make sure to stir continuously and avoid scraping the sides of the pan while cooking to prevent crystallization.

Can I use dark brown sugar instead of light brown sugar?

Yes, I’ve used dark brown sugar before. It adds a deeper molasses flavor, which works beautifully if I want a richer candy.

Do I have to use a candy thermometer?

While not strictly necessary, I find that using a thermometer ensures consistent results, especially for reaching the soft ball stage.

Why did my pralines not set?

If they didn’t reach the right temperature or I didn’t beat them long enough after cooking, they might remain too soft. I always wait until the mixture thickens and dulls slightly before spooning.

Can I freeze pecan pralines?

I don’t recommend freezing them, as the texture can change. But if I must, I wrap each praline in parchment and place them in a sealed container, thawing at room temperature before eating.

Conclusion

These New Orleans pecan pralines are a classic Southern treat that always impress. I love making them for gatherings, holidays, or simply to satisfy my sweet tooth. Their creamy texture and crunchy pecans offer the perfect bite of indulgence, and they’re easier to make than most people think. Give them a try and bring a taste of Louisiana into your kitchen.

Print

clock clock iconcutlery cutlery iconflag flag iconfolder folder iconinstagram instagram iconpinterest pinterest iconfacebook facebook iconprint print iconsquares squares iconheart heart iconheart solid heart solid icon
New Orleans Pecan Pralines

New Orleans Pecan Pralines

5 Stars 4 Stars 3 Stars 2 Stars 1 Star No reviews
  • Author: Sue
  • Prep Time: 10 minutes
  • Cook Time: 25 minutes
  • Total Time: 1 hour 15 minutes
  • Yield: 18–24 pralines
  • Category: Dessert
  • Method: Stovetop
  • Cuisine: Southern
  • Diet: Vegetarian
Print Recipe
Pin Recipe

Description

New Orleans pecan pralines are rich, creamy Southern candies made with sugar, cream, butter, and pecans, offering a melt-in-your-mouth texture and nutty crunch.


Ingredients

  • 1 cup granulated sugar
  • 1 cup light brown sugar
  • ½ cup heavy cream
  • 4 tablespoons unsalted butter
  • 1 teaspoon vanilla extract
  • ¼ teaspoon salt
  • 1 ½ cups pecan halves

Instructions

  1. Line a baking sheet with parchment paper and set aside.
  2. In a heavy-bottomed saucepan, combine granulated sugar, light brown sugar, and heavy cream over medium heat, stirring until sugars dissolve.
  3. Add butter and continue cooking, stirring frequently. Use a candy thermometer and cook until the mixture reaches 238–240°F (soft ball stage).
  4. Remove from heat and stir in vanilla extract, salt, and pecan halves.
  5. Beat the mixture with a wooden spoon until it begins to thicken and lose its gloss.
  6. Quickly drop heaping tablespoons of the mixture onto the prepared baking sheet to form individual pralines.
  7. Allow pralines to cool completely at room temperature until firm and set.

Notes

  • Use a candy thermometer for best results.
  • Do not scrape the sides of the pan to prevent crystallization.
  • Roasting the pecans adds depth to the flavor.
  • Add bourbon or spices for flavor variations.

Nutrition

  • Serving Size: 1 praline
  • Calories: 180
  • Sugar: 21g
  • Sodium: 30mg
  • Fat: 10g
  • Saturated Fat: 4g
  • Unsaturated Fat: 5g
  • Trans Fat: 0g
  • Carbohydrates: 22g
  • Fiber: 1g
  • Protein: 1g
  • Cholesterol: 15mg

Have you made this recipe? I'd love to see it!

Click here to Follow me on Pinterest

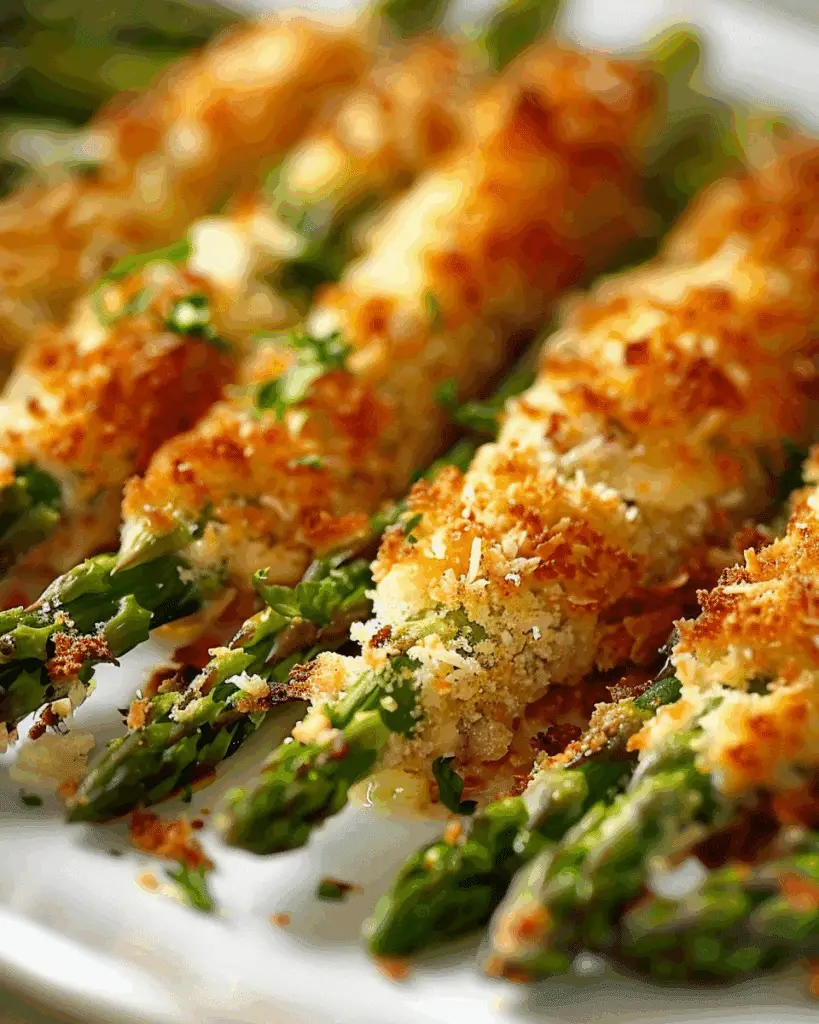
Crispy Parmesan Asparagus Sticks

May 29, 2025 by Sue Leave a Comment

These crispy Parmesan asparagus sticks are my go-to when I want to turn a simple vegetable into a show-stopping side dish or appetizer. Coated in a crunchy Parmesan breadcrumb mixture and baked to golden perfection, they're crispy on the outside, tender on the inside, and packed with savory flavor. Whether I'm serving them as a holiday side, game-day snack, or healthy weeknight treat, they're always a hit with kids and adults alike. Crispy Parmesan Asparagus Sticks

Why I Love This Recipe

  • Crispy & Cheesy: The Parmesan coating adds a rich, savory crunch that pairs perfectly with tender asparagus.
  • Quick & Easy: Ready in under 20 minutes with minimal prep.
  • Healthy & Delicious: A guilt-free way to enjoy my veggies without sacrificing flavor.
  • Versatile: Great as a side dish, appetizer, or even a snack.

Ingredients

(Here's a tip: Check out the full list of ingredients and measurements in the recipe card below.)

  • 1 bunch fresh asparagus (about 1 lb), trimmed
  • ¼ cup grated Parmesan cheese
  • ½ cup panko breadcrumbs (or regular breadcrumbs for a finer texture)
  • ¼ teaspoon garlic powder
  • ¼ teaspoon onion powder
  • Salt and black pepper to taste
  • 1 large egg, beaten
  • 1 tablespoon olive oil (optional, for extra crispiness)

Directions

  1. Preheat and Prep: I preheat my oven to 400°F (200°C) and line a baking sheet with parchment paper or lightly grease it. Then, I trim the woody ends off the asparagus spears by snapping them or cutting them with a knife.
  2. Prepare the Coating Mixture: In a shallow bowl, I mix together the grated Parmesan cheese, panko breadcrumbs, garlic powder, onion powder, salt, and pepper. In another shallow bowl, I beat the egg.
  3. Coat the Asparagus: I dip each asparagus spear into the beaten egg, ensuring it's fully coated. Then, I roll the spear in the Parmesan breadcrumb mixture, pressing gently to adhere the coating evenly. I place the coated asparagus sticks on the prepared baking sheet, leaving a little space between each spear.
  4. Bake Until Crispy: I lightly drizzle the asparagus sticks with olive oil (optional) to help them crisp up in the oven. Then, I bake them for 10–12 minutes, flipping halfway through, until the coating is golden brown and the asparagus is tender but still crisp.

Servings and Timing

  • Servings: 4
  • Prep Time: 10 minutes
  • Cook Time: 10–12 minutes
  • Total Time: 20–22 minutes

Variations

  • Spicy Kick: I sometimes add a pinch of cayenne pepper or red pepper flakes to the breadcrumb mixture for a spicy version.
  • Herb Infusion: Mixing in dried herbs like thyme or oregano adds an aromatic twist.
  • Cheese Swap: For a different flavor, I substitute Parmesan with Asiago or Pecorino Romano.
  • Gluten-Free: Using gluten-free breadcrumbs makes this recipe suitable for those with gluten sensitivities.

Storage/Reheating

  • Storage: I store any leftovers in an airtight container in the refrigerator for up to 2 days.
  • Reheating: To reheat, I place them in a preheated oven at 350°F (175°C) for 5–7 minutes to maintain their crispiness. I avoid microwaving, as it can make them soggy.

FAQs

Can I use frozen asparagus?

I prefer using fresh asparagus for the best texture, but if I use frozen, I make sure to thaw and pat them dry thoroughly to prevent sogginess.

What dipping sauces pair well with these sticks?

I love serving them with ranch dressing, marinara sauce, or lemon aioli for added flavor.

Can I make these ahead of time?

Yes, I prepare and coat the asparagus sticks, then refrigerate them for up to 4 hours before baking.

How do I ensure the coating sticks well?

I make sure to pat the asparagus dry before coating and press the breadcrumb mixture firmly onto each spear.

Can I cook these in an air fryer?

Absolutely! I air fry them at 400°F (200°C) for about 8–10 minutes, flipping halfway through, until they're golden and crispy.

Conclusion

These crispy Parmesan asparagus sticks are a delightful way to enjoy a healthy vegetable with an irresistibly crunchy, cheesy twist. Quick to prepare, budget-friendly, and bursting with flavor, this recipe is ideal for snacks, sides, or party appetizers. Whether I'm new to asparagus or a longtime fan, these sticks make cooking fun and flavorful. I give this recipe a try and enjoy the crispy, cheesy goodness that'll have everyone reaching for seconds.

Print

clock clock iconcutlery cutlery iconflag flag iconfolder folder iconinstagram instagram iconpinterest pinterest iconfacebook facebook iconprint print iconsquares squares iconheart heart iconheart solid heart solid icon
Crispy Parmesan Asparagus Sticks

Crispy Parmesan Asparagus Sticks

5 Stars 4 Stars 3 Stars 2 Stars 1 Star No reviews
  • Author: Sue
  • Prep Time: 10 minutes
  • Cook Time: 12 minutes
  • Total Time: 22 minutes
  • Yield: 4 servings
  • Category: Appetizer
  • Method: Baking
  • Cuisine: American
  • Diet: Vegetarian
Print Recipe
Pin Recipe

Description

Crispy Parmesan Asparagus Sticks are a delicious, healthy side or snack made by coating fresh asparagus in a savory Parmesan breadcrumb mixture and baking them to golden perfection.


Ingredients

  • 1 bunch fresh asparagus (about 1 lb), trimmed
  • ¼ cup grated Parmesan cheese
  • ½ cup panko breadcrumbs (or regular breadcrumbs)
  • ¼ teaspoon garlic powder
  • ¼ teaspoon onion powder
  • Salt and black pepper to taste
  • 1 large egg, beaten
  • 1 tablespoon olive oil (optional)

Instructions

  1. Preheat the oven to 400°F (200°C) and line a baking sheet with parchment paper or lightly grease it.
  2. Trim the woody ends off the asparagus spears.
  3. In a shallow bowl, mix Parmesan cheese, panko breadcrumbs, garlic powder, onion powder, salt, and pepper. In another bowl, beat the egg.
  4. Dip each asparagus spear into the beaten egg, then roll in the breadcrumb mixture to coat evenly.
  5. Place coated asparagus on the baking sheet, spacing them apart. Drizzle with olive oil if desired.
  6. Bake for 10–12 minutes, flipping halfway through, until golden brown and tender-crisp.

Notes

  • Add cayenne or red pepper flakes for a spicy variation.
  • Use dried herbs like thyme or oregano for an aromatic twist.
  • Swap Parmesan with Asiago or Pecorino Romano for a different flavor.
  • Use gluten-free breadcrumbs for a gluten-free version.
  • Store leftovers in the fridge for up to 2 days and reheat in the oven to keep crispiness.

Nutrition

  • Serving Size: ¼ of recipe
  • Calories: 120
  • Sugar: 1g
  • Sodium: 230mg
  • Fat: 6g
  • Saturated Fat: 2g
  • Unsaturated Fat: 3g
  • Trans Fat: 0g
  • Carbohydrates: 10g
  • Fiber: 2g
  • Protein: 6g
  • Cholesterol: 40mg

Have you made this recipe? I'd love to see it!

Click here to Follow me on Pinterest

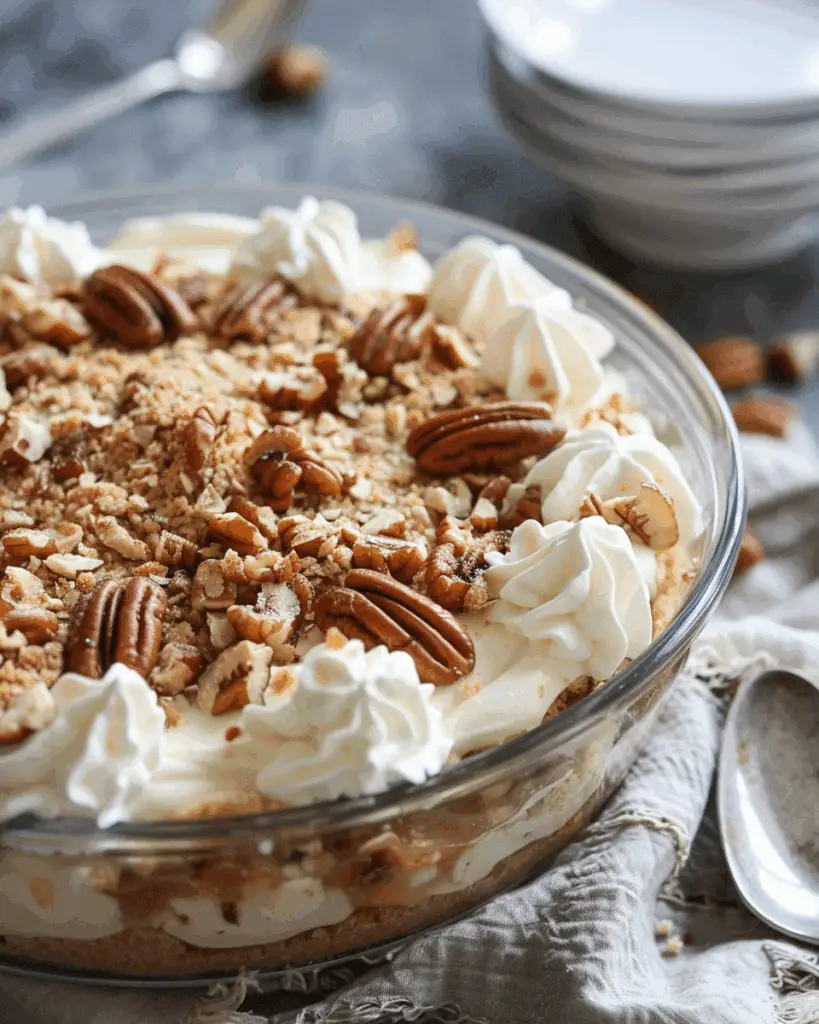
Pecan Pie Dump Cake

May 29, 2025 by Sue Leave a Comment

This Pecan Pie Dump Cake brings together the gooey richness of a classic pecan pie with the buttery crumble of a yellow cake mix. It’s my go-to when I crave a sweet, nutty dessert that feels indulgent but takes minimal effort to prepare. With layers of caramel, syrup, and pecans, each bite is a blend of crunch and melt-in-your-mouth goodness. Pecan Pie Dump Cake

Why You’ll Love This Recipe

I love how simple this recipe is—there’s no need to make pie crust or use a mixer. I just layer everything in a baking dish and let the oven do the work. The caramel and syrup create a luscious filling, while the cake mix bakes into a golden, buttery topping. Whether I serve it warm with ice cream or eat it straight from the pan, it’s always a hit.

Ingredients

(Here's a tip: Check out the full list of ingredients and measurements in the recipe card below.)

  • 1 cup caramel sauce
  • 1 cup maple syrup or corn syrup
  • ½ cup brown sugar
  • 1 teaspoon vanilla extract
  • ½ teaspoon cinnamon
  • 2 cups pecan halves
  • 1 box (15 oz) yellow cake mix
  • 1 cup unsalted butter, melted

Optional add-ins:

  • 1 tablespoon bourbon
  • ½ cup chocolate chips

Directions

  1. I preheat the oven to 350°F (175°C) and grease a 9x13-inch baking dish.
  2. In a large bowl, I mix the caramel sauce, maple or corn syrup, brown sugar, vanilla, and cinnamon until well combined.
  3. I stir in the pecans, making sure they’re fully coated.
  4. I pour the mixture into the baking dish and spread it out evenly.
  5. I sprinkle the dry yellow cake mix evenly over the top.
  6. I drizzle the melted butter over the cake mix, trying to cover as much as possible.
  7. I bake it for 35 to 40 minutes, or until the top is golden and the edges are bubbling.
  8. I let it cool for about 15 minutes before serving.

Servings and Timing

  • Servings: 8 to 10
  • Prep Time: 10 minutes
  • Bake Time: 35 to 40 minutes
  • Cooling Time: 15 minutes
  • Total Time: Around 1 hour

Variations

  • I like to swap the maple syrup for dark corn syrup for a deeper flavor.
  • Sometimes I add a teaspoon of nutmeg or allspice for extra warmth.
  • When I want a lighter dessert, I cut the brown sugar in half.
  • For more crunch, I toss in chopped pecans on top before baking.
  • When I’m in the mood for something extra decadent, I stir in chocolate chips or a splash of bourbon.

Storage/Reheating

I keep leftovers in an airtight container at room temperature for up to 3 days or refrigerate them for up to a week. If I want to save it longer, I freeze individual portions for up to 3 months. When reheating, I microwave a slice for 20 to 30 seconds or warm it in the oven at 350°F for about 10 minutes.

FAQs

What is a dump cake?

A dump cake is a quick and easy dessert where I layer ingredients—typically a sweet filling and dry cake mix—into a dish and bake. No mixing bowls or fancy steps required.

Can I substitute the pecans with another nut?

Yes, I sometimes use walnuts or almonds if I want a change. Each nut brings its own texture and taste.

Do I have to use both caramel and syrup?

I prefer using both for the richest flavor, but if I only have one on hand, I go with it. The cake still turns out great.

How do I make this gluten-free?

I simply swap the regular cake mix with a gluten-free yellow cake mix. The rest of the ingredients are naturally gluten-free.

Can I make this in advance?

Yes, I often make it a day ahead and store it covered at room temperature. When it’s time to serve, I warm it up slightly or serve it as is.

Conclusion

This Pecan Pie Dump Cake is one of the easiest and most satisfying desserts I make. It delivers that classic pecan pie flavor without the hassle, and it’s endlessly adaptable to my tastes. Whether I serve it for a special occasion or just because, it never disappoints.

Print

clock clock iconcutlery cutlery iconflag flag iconfolder folder iconinstagram instagram iconpinterest pinterest iconfacebook facebook iconprint print iconsquares squares iconheart heart iconheart solid heart solid icon
Pecan Pie Dump Cake

Pecan Pie Dump Cake

5 Stars 4 Stars 3 Stars 2 Stars 1 Star No reviews
  • Author: Sue
  • Prep Time: 10 minutes
  • Cook Time: 35-40 minutes
  • Total Time: 1 hour
  • Yield: 8-10 servings
  • Category: Dessert
  • Method: Baking
  • Cuisine: American
  • Diet: Vegetarian
Print Recipe
Pin Recipe

Description

This Pecan Pie Dump Cake is a delicious and easy-to-make dessert combining the gooey richness of pecan pie with the buttery crunch of a cake mix topping. Perfect for holidays and gatherings.


Ingredients

  • 1 cup (240ml) caramel sauce
  • 1 cup (240ml) maple syrup or corn syrup
  • ½ cup (100g) brown sugar
  • 1 tsp vanilla extract
  • ½ tsp cinnamon
  • 2 cups (200g) pecan halves
  • 1 box (15 oz) yellow cake mix
  • 1 cup (230g) unsalted butter, melted
  • Optional: 1 tablespoon bourbon
  • Optional: ½ cup chocolate chips

Instructions

  1. Preheat the oven to 350°F (175°C) and grease a 9x13-inch baking dish.
  2. In a large bowl, combine the caramel sauce, maple syrup or corn syrup, brown sugar, vanilla extract, and cinnamon. Mix well.
  3. Fold in the pecan halves until they are evenly coated.
  4. Pour the pecan mixture into the prepared baking dish, spreading it out evenly.
  5. Evenly sprinkle the dry yellow cake mix over the pecan mixture.
  6. Drizzle the melted butter over the cake mix, ensuring it covers as much of the surface as possible.
  7. Bake for 35-40 minutes, or until the top is golden brown and the edges are bubbling.
  8. Allow the cake to rest for 15 minutes before serving.

Notes

  • Use dark corn syrup for a richer flavor.
  • Add nutmeg or allspice for a spiced variation.
  • Reduce brown sugar to ¼ cup for less sweetness.
  • Top with chopped pecans for added crunch.
  • Add chocolate chips for a twist.

Nutrition

  • Serving Size: 1 slice
  • Calories: 520
  • Sugar: 40g
  • Sodium: 320mg
  • Fat: 32g
  • Saturated Fat: 14g
  • Unsaturated Fat: 16g
  • Trans Fat: 0g
  • Carbohydrates: 56g
  • Fiber: 2g
  • Protein: 4g
  • Cholesterol: 50mg

Have you made this recipe? I'd love to see it!

Click here to Follow me on Pinterest

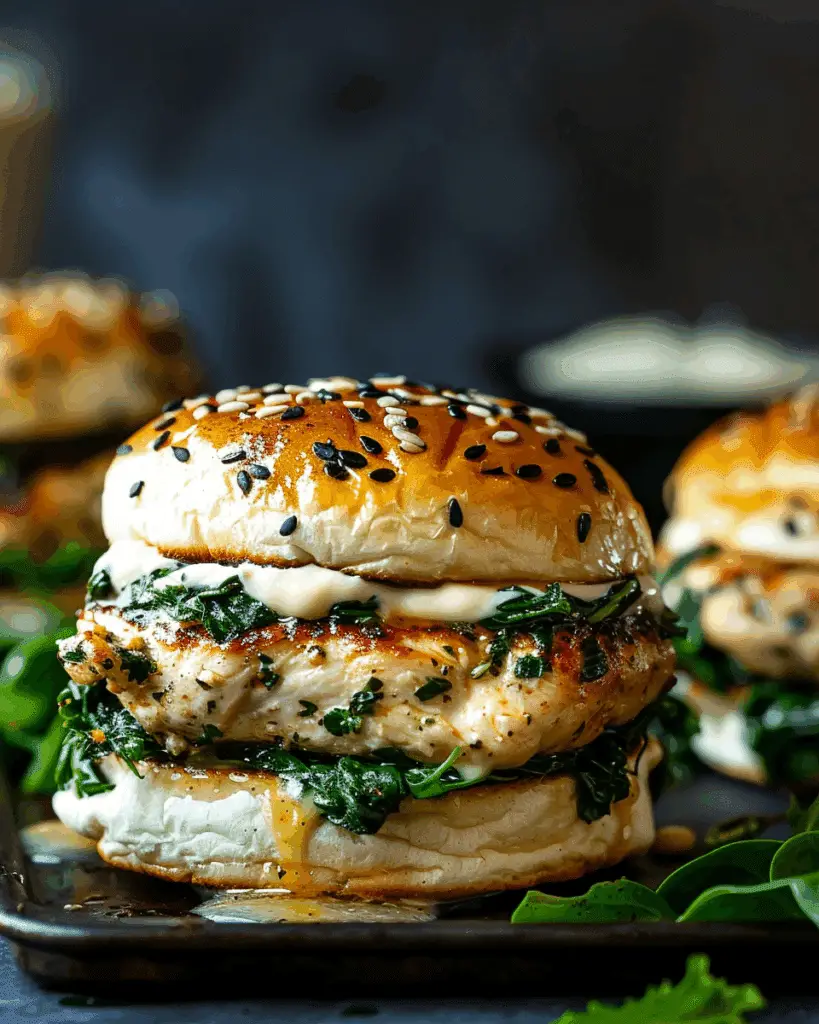
White Cheddar Spinach Chicken Burgers

May 29, 2025 by Sue Leave a Comment

These White Cheddar Spinach Chicken Burgers are a delicious and wholesome twist on the classic burger. I combine lean ground chicken with fresh spinach and sharp white cheddar cheese, creating a juicy patty that's both flavorful and satisfying. Perfect for weeknight dinners or casual gatherings, these burgers are quick to prepare and sure to impress. White Cheddar Spinach Chicken Burgers

Why You’ll Love This Recipe

  • I can prepare them in under 30 minutes, making them ideal for busy evenings.
  • They offer a healthier alternative to traditional beef burgers without compromising on taste.
  • The combination of spinach and white cheddar provides a delightful flavor and texture.
  • They're versatile—perfect for serving with various toppings or in lettuce wraps for a low-carb option.
  • Even picky eaters in my family enjoy them, making them a go-to meal in our household.

Ingredients

(Here's a tip: Check out the full list of ingredients and measurements in the recipe card below.)

  • 1 lb ground chicken
  • 1 cup fresh spinach, finely chopped
  • ½ cup shredded white cheddar cheese
  • ¼ cup breadcrumbs
  • ¼ cup finely chopped onion
  • 2 garlic cloves, minced
  • 1 tablespoon Dijon mustard
  • 1 teaspoon Worcestershire sauce
  • Salt and black pepper, to taste
  • Olive oil, for cooking
  • 4 burger buns
  • Optional toppings: lettuce, tomato slices, or extra cheese

Directions

  1. In a large mixing bowl, I combine ground chicken, spinach, cheddar cheese, breadcrumbs, onion, garlic, Dijon mustard, Worcestershire sauce, salt, and black pepper. I mix gently until evenly combined.
  2. I divide the mixture into 4 portions and shape them into patties.
  3. I heat a skillet over medium heat, drizzle with olive oil, and cook the patties for 5-6 minutes per side, or until they reach an internal temperature of 165°F (75°C).
  4. I transfer the cooked patties to a plate and let them rest for a few minutes.
  5. I place the patties on buns with my favorite toppings. Serve and enjoy!

Servings and Timing

  • Servings: 4
  • Prep Time: 10 minutes
  • Cook Time: 12 minutes
  • Total Time: 22 minutes

Variations

  • For a gluten-free option, I use gluten-free breadcrumbs and buns or opt for lettuce wraps.
  • I sometimes add a pinch of smoked paprika or cayenne pepper for a spicier kick.
  • Swapping white cheddar with pepper jack cheese gives a different flavor profile.
  • I occasionally mix in finely chopped herbs like parsley or basil for added freshness.

Storage/Reheating

  • I store leftover patties in an airtight container in the refrigerator for up to 3 days.
  • To reheat, I warm them in a skillet over medium heat until heated through or microwave them for 1-2 minutes.
  • For longer storage, I freeze the uncooked patties between parchment paper layers in a freezer-safe bag for up to 3 months. I thaw them in the refrigerator before cooking.

FAQs

How do I prevent the chicken patties from falling apart?

I ensure the mixture is well combined and not too wet. The breadcrumbs and cheese help bind the ingredients. If needed, I add a bit more breadcrumbs to achieve the right consistency.

Can I grill these burgers instead of pan-frying?

Yes, I preheat the grill to medium heat and cook the patties for about 5-6 minutes per side, ensuring they reach an internal temperature of 165°F (75°C).

What sides pair well with these burgers?

I often serve them with sweet potato fries, a fresh garden salad, or roasted vegetables for a complete meal.

Can I use frozen spinach instead of fresh?

Yes, I thaw and squeeze out excess moisture from frozen spinach before adding it to the mixture.

Is it necessary to let the patties rest after cooking?

Yes, resting the patties for a few minutes allows the juices to redistribute, resulting in a juicier burger.

Conclusion

These White Cheddar Spinach Chicken Burgers have become a staple in my kitchen. They're easy to make, packed with flavor, and offer a healthier alternative to traditional burgers. Whether I'm cooking for my family or hosting friends, these burgers never fail to impress. Give them a try, and they might become your new favorite too!

Print

clock clock iconcutlery cutlery iconflag flag iconfolder folder iconinstagram instagram iconpinterest pinterest iconfacebook facebook iconprint print iconsquares squares iconheart heart iconheart solid heart solid icon
White Cheddar Spinach Chicken Burgers

White Cheddar Spinach Chicken Burgers

5 Stars 4 Stars 3 Stars 2 Stars 1 Star No reviews
  • Author: Sue
  • Prep Time: 10 minutes
  • Cook Time: 12 minutes
  • Total Time: 22 minutes
  • Yield: 4 servings
  • Category: Main Course
  • Method: Stovetop
  • Cuisine: American
  • Diet: Low Fat
Print Recipe
Pin Recipe

Description

These White Cheddar Spinach Chicken Burgers are a flavorful and healthy alternative to traditional beef burgers, made with ground chicken, fresh spinach, and sharp white cheddar cheese.


Ingredients

  • 1 lb ground chicken
  • 1 cup fresh spinach, finely chopped
  • ½ cup shredded white cheddar cheese
  • ¼ cup breadcrumbs
  • ¼ cup finely chopped onion
  • 2 garlic cloves, minced
  • 1 tbsp Dijon mustard
  • 1 tsp Worcestershire sauce
  • Salt and black pepper, to taste
  • Olive oil, for cooking
  • 4 burger buns
  • Optional toppings: lettuce, tomato slices, or extra cheese

Instructions

  1. In a large mixing bowl, combine ground chicken, spinach, cheddar cheese, breadcrumbs, onion, garlic, Dijon mustard, Worcestershire sauce, salt, and black pepper. Mix gently until evenly combined.
  2. Divide the mixture into 4 portions and shape them into patties.
  3. Heat a skillet over medium heat, drizzle with olive oil, and cook the patties for 5-6 minutes per side, or until they reach an internal temperature of 165°F (75°C).
  4. Transfer the cooked patties to a plate and let them rest for a few minutes.
  5. Place the patties on buns with your favorite toppings. Serve and enjoy!

Notes

  • Use gluten-free breadcrumbs and buns or lettuce wraps for a gluten-free option.
  • Add smoked paprika or cayenne for a spicy twist.
  • Try pepper jack cheese instead of white cheddar for a different flavor.
  • Mix in fresh herbs like parsley or basil for added freshness.
  • Leftover patties can be refrigerated for up to 3 days or frozen uncooked for up to 3 months.

Nutrition

  • Serving Size: 1 burger
  • Calories: 320
  • Sugar: 2g
  • Sodium: 450mg
  • Fat: 17g
  • Saturated Fat: 6g
  • Unsaturated Fat: 10g
  • Trans Fat: 0g
  • Carbohydrates: 18g
  • Fiber: 2g
  • Protein: 25g
  • Cholesterol: 85mg

Have you made this recipe? I'd love to see it!

Click here to Follow me on Pinterest

3-Ingredient Sour Cream Biscuits: The Fluffiest Shortcut to Homemade Comfort

May 29, 2025 by Sue Leave a Comment

Sometimes, the simplest recipes deliver the biggest rewards—and these sour cream biscuits are proof. With just three ingredients and a muffin tin, I can have golden, buttery biscuits on the table in no time. Soft on the inside and beautifully crisp on the edges, these are the kind of biscuits I want to make on repeat. 3-Ingredient Sour Cream Biscuits: The Fluffiest Shortcut to Homemade Comfort

Why I Love This Recipe

  • Only 3 ingredients – No complicated prep or long ingredient lists.
  • No rolling or cutting – I just mix and scoop into a muffin tin.
  • Ready in under 30 minutes – Perfect for quick breakfasts or easy side dishes.
  • Versatile and comforting – I can serve them sweet or savory, plain or with toppings.

Ingredients

(Here's a tip: Check out the full list of ingredients and measurements in the recipe card below.)

  • 1 cup self-rising flour
  • ½ cup butter, softened
  • ½ cup sour cream

Directions

  1. Preheat and Prep the Pan
    I set my oven to 400°F and lightly grease 8 cups of a standard muffin tin. If I like my biscuits on the larger side, I use just 6 cups.
  2. Mix the Wet Ingredients
    In a large bowl, I combine the softened butter and sour cream. I whisk or stir until the mixture is creamy and smooth.
  3. Add the Flour
    I stir in the self-rising flour using a wooden spoon. The dough will be thick and sticky—that’s exactly what I want.
  4. Fill the Muffin Tin
    I spoon the dough evenly into the greased muffin cups. I don't worry about smoothing them out; the rustic texture adds charm.
  5. Bake to Golden Perfection
    I bake in the preheated oven for about 12–15 minutes, or until the tops are golden brown. I keep an eye on them near the end for that perfect bake.
  6. Serve and Enjoy
    I let the biscuits cool slightly, then serve warm with a pat of butter, a drizzle of honey, or my favorite jam.

Servings and Timing

  • Servings: Makes 6–8 biscuits, depending on the size of the muffin cups used.
  • Prep Time: 10 minutes
  • Cook Time: 12–15 minutes
  • Total Time: Approximately 25 minutes

Variations

  • Use cold butter for a flakier texture
    If I prefer flakier, layered biscuits, I try using cold butter instead of softened. I cut it into small pieces and work it into the flour before adding the sour cream. This change gives a slightly different texture—more like traditional layered biscuits.
  • Make them cheesy
    I fold in ½ cup of shredded cheese like sharp cheddar, gouda, or parmesan for an ultra-savory biscuit. Perfect for serving alongside soup or chili.
  • Add herbs or spices
    For a more flavorful biscuit, I mix in a teaspoon of garlic powder, onion powder, dried thyme, rosemary, or chives.
  • Sweeten things up
    When I want a biscuit that leans more toward dessert, I stir in 1 tablespoon of sugar and top with cinnamon butter or fruit preserves.
  • Shape-free simplicity
    Because they bake in a muffin tin, there’s no need to roll, cut, or fuss. This method also helps the biscuits keep a uniform shape with less mess.
  • Try flavored butters
    I serve my biscuits with honey butter, herb butter, or even a whipped cinnamon maple butter for an extra special touch.
  • Mini biscuit bites
    I use a mini muffin pan for bite-sized biscuits—great for brunch tables or as party snacks. I reduce baking time accordingly.
  • Pair with dinner or brunch
    These biscuits are just as good next to scrambled eggs as they are with pot roast or a bowl of stew. They’re endlessly versatile!

Storage/Reheating

  • How to store leftovers
    I let the biscuits cool completely before storing. I keep them in an airtight container or resealable bag at room temperature for up to 2 days. If I prefer them warm, I just reheat before serving.
  • Refrigerator option
    I can refrigerate the biscuits if my kitchen is especially warm or humid. They’ll stay fresh for up to 4–5 days. I reheat in a 300°F oven or microwave in short bursts.
  • Freezing baked biscuits
    These biscuits freeze beautifully. Once cooled, I place them in a single layer on a baking sheet and freeze for 1–2 hours. Then I transfer them to a freezer-safe bag or container. They’ll keep for up to 2 months. To reheat, I bake at 350°F for about 10 minutes or microwave until warm.

FAQs

What if I don’t have self-rising flour?

I can make my own by combining 1 cup of all-purpose flour with 1½ teaspoons of baking powder and ¼ teaspoon of salt.

Can I use margarine instead of butter?

While I can use margarine, I find that real butter provides the best flavor and texture for these biscuits.

Can I use low-fat sour cream?

I can, but I prefer full-fat sour cream for the best flavor and texture. Low-fat versions may result in slightly less tender biscuits.

How can I make these biscuits ahead of time?

I can prepare the dough ahead and refrigerate it for up to a day. When ready to bake, I let the dough come to room temperature, then proceed with baking.

Can I add mix-ins like sausage or bacon?

Absolutely! I love folding in cooked and crumbled sausage or bacon for a hearty variation.

Conclusion

These 3-ingredient sour cream biscuits are my go-to when I want something warm, buttery, and comforting without spending hours in the kitchen. Whether I’m pairing them with a cozy stew or enjoying them with jam for breakfast, they always hit the spot. I hope I enjoy making—and eating—them as much as I do.

Print

clock clock iconcutlery cutlery iconflag flag iconfolder folder iconinstagram instagram iconpinterest pinterest iconfacebook facebook iconprint print iconsquares squares iconheart heart iconheart solid heart solid icon
3-Ingredient Sour Cream Biscuits: The Fluffiest Shortcut to Homemade Comfort

3-Ingredient Sour Cream Biscuits: The Fluffiest Shortcut to Homemade Comfort

5 Stars 4 Stars 3 Stars 2 Stars 1 Star No reviews
  • Author: Sue
  • Prep Time: 10 minutes
  • Cook Time: 15 minutes
  • Total Time: 25 minutes
  • Yield: 6–8 biscuits
  • Category: Breads
  • Method: Baking
  • Cuisine: American
  • Diet: Vegetarian
Print Recipe
Pin Recipe

Description

These 3-ingredient sour cream biscuits are incredibly simple, quick to prepare, and yield soft, buttery biscuits with a golden top and crisp edges. Perfect for any meal, from breakfast to dinner.


Ingredients

  • 1 cup self-rising flour
  • ½ cup butter, softened
  • ½ cup sour cream

Instructions

  1. Preheat the oven to 400°F and lightly grease 6 to 8 cups of a standard muffin tin.
  2. In a large bowl, mix the softened butter and sour cream until smooth and creamy.
  3. Add the self-rising flour and stir until a thick, sticky dough forms.
  4. Spoon the dough evenly into the prepared muffin cups without smoothing the tops.
  5. Bake for 12–15 minutes or until the tops are golden brown.
  6. Let the biscuits cool slightly and serve warm with your preferred toppings.

Notes

  • Use cold butter for a flakier biscuit texture.
  • Fold in cheese or herbs for savory variations.
  • Add a tablespoon of sugar for a sweeter biscuit.
  • Store leftovers in an airtight container for up to 2 days at room temperature.
  • Freeze baked biscuits for up to 2 months for easy reheating.

Nutrition

  • Serving Size: 1 biscuit
  • Calories: 170
  • Sugar: 0g
  • Sodium: 220mg
  • Fat: 12g
  • Saturated Fat: 7g
  • Unsaturated Fat: 4g
  • Trans Fat: 0g
  • Carbohydrates: 13g
  • Fiber: 0g
  • Protein: 2g
  • Cholesterol: 30mg

Have you made this recipe? I'd love to see it!

Click here to Follow me on Pinterest

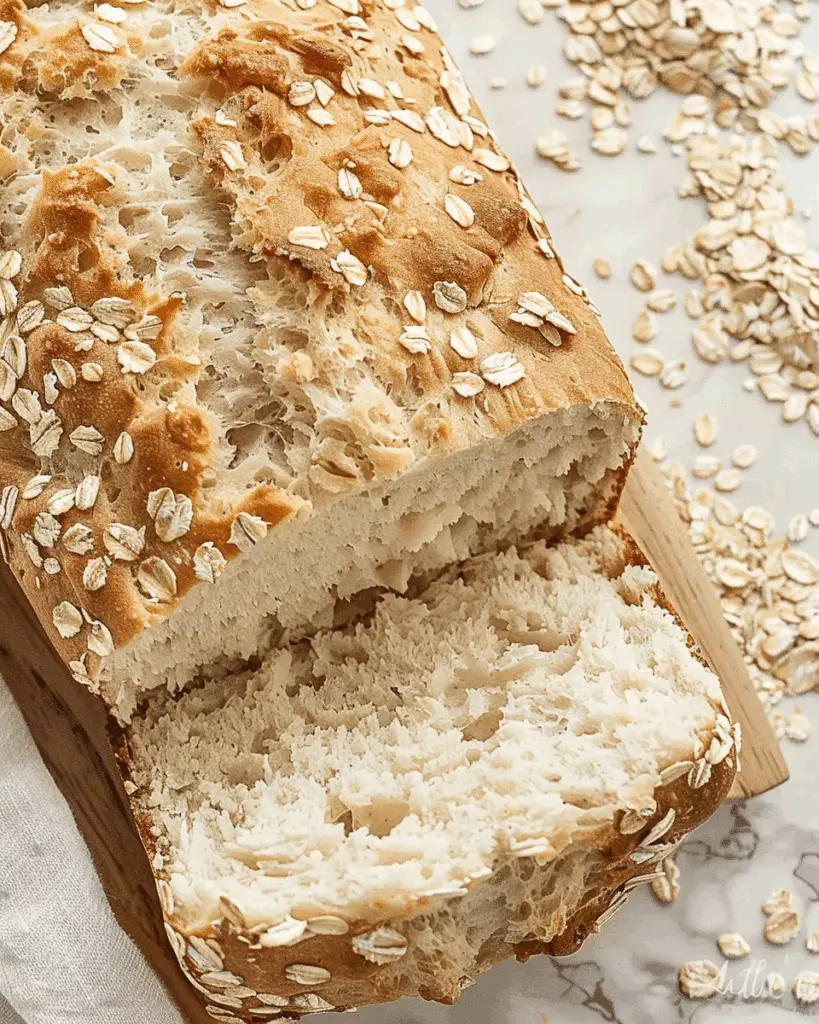
Honey Oat Bread

May 29, 2025 by Sue Leave a Comment

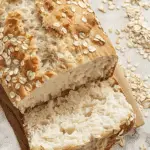
This honey oat bread is a simple and wholesome recipe, perfect for anyone who loves homemade baking. It’s slightly sweet from natural honey and has a soft, tender texture with a golden crust. Whether I’m enjoying it for breakfast, as a sandwich base, or simply toasted with butter, this bread never disappoints. Honey Oat Bread

Why I’ll Love This Recipe

I love how easy and forgiving this recipe is. It uses pantry staples and doesn’t require any fancy equipment—though a stand mixer helps. The natural sweetness from the honey, combined with the hearty oats, makes each slice comforting and satisfying. Plus, it smells amazing while baking.

Ingredients

(Here's a tip: Check out the full list of ingredients and measurements in the recipe card below.)

  • All-purpose flour
  • Old-fashioned rolled oats
  • Active dry yeast
  • Fine sea salt
  • Butter
  • Whole milk
  • Warm water
  • Raw natural honey
  • For the top: 2 tablespoons honey, 2 tablespoons oats

Directions

  1. I start by combining the dry ingredients in a large bowl or the bowl of a stand mixer.
  2. In a small saucepan, I gently heat the milk and butter until the butter is melted—being careful not to boil it. Then I stir in the honey and warm water.
  3. I pour the warm liquid into the dry ingredients and mix. Using a dough hook on the stand mixer, I knead for 6–8 minutes. If I’m kneading by hand, I do so until the dough is smooth and elastic.
  4. I cover the dough and let it rise in a warm place until it doubles in size.
  5. Once risen, I shape the dough into a loaf and place it in a greased bread pan.
  6. I cover it again and let it rise until it reaches the top edge of the pan.
  7. Meanwhile, I preheat the oven to 350°F (180°C).
  8. I brush the top of the loaf with honey and sprinkle with oats.
  9. I bake the bread for 35 to 40 minutes, until it’s golden and sounds hollow when tapped.
  10. I cool it on a wire rack before slicing.

Servings and timing

This recipe yields one standard loaf, which gives about 10 to 12 slices.
Preparation time: 20 minutes
Rising time: 1.5 to 2 hours
Baking time: 35 to 40 minutes
Total time: around 2.5 hours

Variations

Sometimes I like to mix things up by adding chopped nuts or dried fruits into the dough. For extra texture and nutrition, I replace part of the all-purpose flour with whole wheat flour. A sprinkle of cinnamon or a handful of seeds also brings in a lovely twist.

Storage/reheating

I store the bread in an airtight container or a sealed plastic bag at room temperature for up to 3 days. To keep it longer, I slice and freeze it. When I’m ready to eat, I toast the frozen slices or warm them in the oven at 350°F for a few minutes.

FAQs

Can I substitute whole wheat flour for all-purpose flour?

Yes, but the bread may be denser. I usually replace half the flour with whole wheat to keep a good texture.

Can I use plant-based milk instead of whole milk?

Absolutely. I’ve tried almond, soy, and oat milk—they all work well and offer a subtle flavor change.

Do I need to use raw honey?

Raw honey adds more depth of flavor, but regular honey works just fine if that’s what I have on hand.

Can I make this bread without a stand mixer?

Yes, I can knead it by hand. It takes a bit more effort, but the results are just as tasty.

Can I add seeds or nuts?

Definitely. I love adding sunflower seeds, flaxseeds, or chopped walnuts—up to ½ cup works well without affecting the dough structure.

Conclusion

This honey oat bread is one of my go-to recipes for its flavor, texture, and ease. It’s nourishing, slightly sweet, and incredibly versatile. Whether I eat it fresh out of the oven or toasted with butter, it always hits the spot. I find myself coming back to it time and again for good reason.

Print

clock clock iconcutlery cutlery iconflag flag iconfolder folder iconinstagram instagram iconpinterest pinterest iconfacebook facebook iconprint print iconsquares squares iconheart heart iconheart solid heart solid icon
Honey Oat Bread

Honey Oat Bread

5 Stars 4 Stars 3 Stars 2 Stars 1 Star No reviews
  • Author: Sue
  • Prep Time: 20 minutes
  • Cook Time: 40 minutes
  • Total Time: 2 hours
  • Yield: 1 loaf (10 to 12 slices)
  • Category: Bread
  • Method: Baking
  • Cuisine: Homemade
  • Diet: Vegetarian
Print Recipe
Pin Recipe

Description

This oat and honey bread is soft with a golden crust, lightly sweetened with natural honey. Ideal for breakfasts or snacks, it's a healthy and delicious alternative to store-bought breads.


Ingredients

  • 3 ½ cups all-purpose flour
  • 1 cup old-fashioned rolled oats
  • 2 ¼ teaspoons active dry yeast
  • 1 ½ teaspoons fine sea salt
  • 3 tablespoons butter
  • 1 cup whole milk
  • ¼ cup warm water
  • ¼ cup raw natural honey
  • 2 tablespoons honey (for topping)
  • 2 tablespoons rolled oats (for topping)

Instructions

  1. In a large bowl or stand mixer bowl, combine the flour, oats, yeast, and salt.
  2. In a small saucepan, heat the milk and butter over medium-low until the butter melts. Add the honey and warm water, then mix well.
  3. Add the liquid mixture to the dry ingredients. Knead for 6–8 minutes until the dough is smooth and elastic.
  4. Cover the dough and let it rise in a warm place until doubled in size.
  5. Shape the dough into a loaf and place it in a greased loaf pan.
  6. Cover again and let rise until the dough reaches the top of the pan.
  7. Preheat the oven to 350°F (180°C).
  8. Brush the top of the bread with 2 tablespoon honey and sprinkle with 2 tablespoon oats.
  9. Bake for 35–40 minutes until golden brown and the loaf sounds hollow when tapped.
  10. Let cool on a wire rack before slicing.

Notes

  • Replace up to half the flour with whole wheat flour for a more rustic texture.
  • Add nuts or seeds for extra crunch and flavor.
  • Can be frozen in slices and reheated in a toaster.
  • Use plant-based milk for a lactose-free version.

Nutrition

  • Serving Size: 1 slice
  • Calories: 180
  • Sugar: 5g
  • Sodium: 200mg
  • Fat: 4g
  • Saturated Fat: 2g
  • Unsaturated Fat: 2g
  • Trans Fat: 0g
  • Carbohydrates: 30g
  • Fiber: 2g
  • Protein: 5g
  • Cholesterol: 10mg

Have you made this recipe? I'd love to see it!

Click here to Follow me on Pinterest

Green Pizza with Pesto, Feta, Artichokes, and Broccoli

May 29, 2025 by Sue Leave a Comment

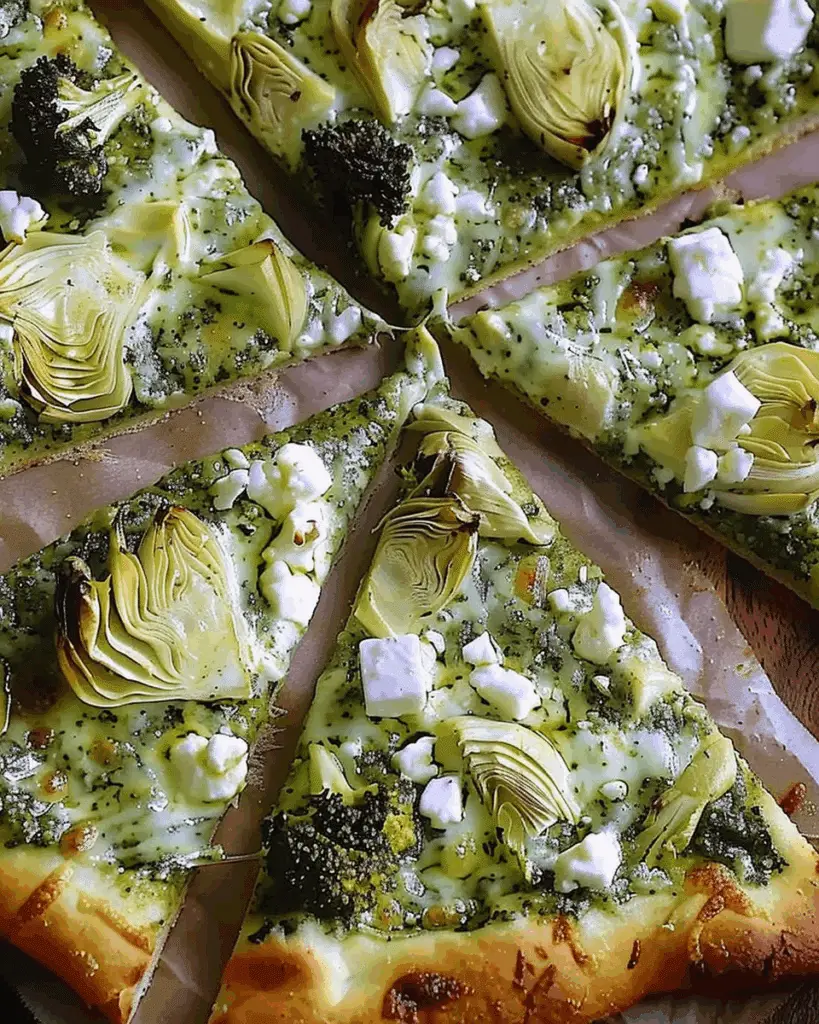
This vibrant Green Pizza is a delightful twist on the classic, featuring a homemade basil-spinach pesto, tender broccoli florets, tangy artichoke hearts, creamy feta, and gooey mozzarella. It's a fresh, flavorful, and satisfying meal that's perfect for any night of the week.

Green Pizza with Pesto, Feta, Artichokes, and Broccoli

Why I Love This Recipe

I adore this Green Pizza because it's a delicious way to enjoy a variety of vegetables in one dish. The combination of the rich pesto, the slight crunch of the broccoli, the briny artichokes, and the creamy cheeses creates a harmonious blend of flavors and textures. It's not only tasty but also visually appealing, making it a hit at gatherings or a special treat for myself.

Ingredients

(Here's a tip: Check out the full list of ingredients and measurements in the recipe card below.)

  • ¼ cup chopped walnuts
  • 2 cloves garlic
  • 1 cup basil leaves, lightly packed
  • 1 cup spinach leaves, lightly packed
  • ½ cup shredded Parmesan cheese
  • ½ cup extra virgin olive oil
  • Kosher salt and pepper, to taste
  • Nonstick spray or olive oil
  • 2 heads broccoli
  • 1 pound pizza dough
  • 1 (14-ounce) can quartered artichoke hearts, drained
  • 8 ounces shredded mozzarella (about 2 cups)
  • 1 cup crumbled feta

Directions

  1. Preheat the oven to 425°F (220°C). If the pizza dough has been refrigerated, let it sit at room temperature to warm up slightly.
  2. Prepare the pesto: Toast the chopped walnuts in a small skillet over medium heat until lightly browned, stirring often. Let them cool. In a food processor, combine the toasted walnuts, garlic, basil, and spinach; process until minced. Add the Parmesan cheese, olive oil, salt, and pepper; process until smooth. Set aside.
  3. Prepare the broccoli: Cut the broccoli into small florets and place them in a microwave-safe dish with a lid. Add a couple of tablespoons of water, cover, and microwave until just tender (about 3-4 minutes). Drain and set aside to cool.
  4. Assemble the pizza: Lightly coat a baking sheet with nonstick spray or olive oil. Place the pizza dough on the pan and press it to the edges. If the dough resists, let it rest for a few minutes before pressing again. Spread a thin layer of the prepared pesto over the dough (you'll have some pesto left over). Sprinkle ¾ of the mozzarella over the pesto. Evenly distribute the broccoli and artichoke hearts over the cheese. Top with the remaining mozzarella and then sprinkle with feta.
  5. Bake the pizza for 25 to 35 minutes, or until the crust is browned and the cheese is lightly golden. Let it cool slightly before slicing and serving.

Servings and Timing

  • Servings: 8 slices
  • Prep Time: 30 minutes
  • Cook Time: 25 minutes
  • Total Time: 55 minutes

Variations

  • Nut-Free Pesto: Substitute the walnuts with sunflower seeds or simply omit them for a nut-free version.
  • Different Greens: Replace spinach with arugula or kale for a different flavor profile.
  • Cheese Options: Try goat cheese or ricotta instead of feta for a creamier texture.
  • Add Protein: For a non-vegetarian option, add cooked chicken or shrimp on top before baking.

Storage/Reheating

  • Storage: Store leftover pizza slices in an airtight container in the refrigerator for up to 3 days.
  • Reheating: Reheat slices in a preheated 350°F (175°C) oven for about 10 minutes, or until warmed through. Alternatively, reheat in a skillet over medium heat until the crust is crispy and the cheese is melted.

FAQs

How can I make this pizza vegan?

To make this pizza vegan, substitute the Parmesan and mozzarella with plant-based cheese alternatives and ensure the pesto is made without dairy.

Can I use store-bought pesto?

Yes, if you're short on time, a good-quality store-bought pesto can be used in place of homemade. However, making your own allows you to control the ingredients and flavor.

What type of pizza dough works best?

A traditional pizza dough works well for this recipe. You can use store-bought dough or make your own at home, depending on your preference.

Can I prepare this pizza ahead of time?

You can prepare the pesto and chop the vegetables ahead of time. Assemble the pizza just before baking to ensure the crust doesn't become soggy.

Is it possible to freeze this pizza?

It's best to freeze the pizza before baking. Assemble the pizza on a baking sheet, freeze until solid, then wrap tightly and store in the freezer. Bake from frozen, adding a few extra minutes to the cooking time.

Conclusion

This Green Pizza with Pesto, Feta, Artichokes, and Broccoli is a delightful and flavorful dish that's sure to please both vegetarians and meat-eaters alike. The combination of fresh vegetables, creamy cheeses, and aromatic pesto creates a satisfying meal that's perfect for any occasion. Give it a try and enjoy a slice of green goodness!

Print

clock clock iconcutlery cutlery iconflag flag iconfolder folder iconinstagram instagram iconpinterest pinterest iconfacebook facebook iconprint print iconsquares squares iconheart heart iconheart solid heart solid icon
Green Pizza with Pesto, Feta, Artichokes, and Broccoli

Green Pizza with Pesto, Feta, Artichokes, and Broccoli

5 Stars 4 Stars 3 Stars 2 Stars 1 Star No reviews
  • Author: Sue
  • Prep Time: 30 minutes
  • Cook Time: 25 minutes
  • Total Time: 55 minutes
  • Yield: 8 slices
  • Category: Main Dish
  • Method: Baking
  • Cuisine: Italian-Inspired
  • Diet: Vegetarian
Print Recipe
Pin Recipe

Description

This vibrant Green Pizza is a delightful twist on the classic, featuring a homemade basil-spinach pesto, tender broccoli florets, tangy artichoke hearts, creamy feta, and gooey mozzarella.


Ingredients

  • ¼ cup chopped walnuts
  • 2 cloves garlic
  • 1 cup basil leaves, lightly packed
  • 1 cup spinach leaves, lightly packed
  • ½ cup shredded Parmesan cheese
  • ½ cup extra virgin olive oil
  • Kosher salt and pepper, to taste
  • Nonstick spray or olive oil
  • 2 heads broccoli
  • 1 pound pizza dough
  • 1 (14-ounce) can quartered artichoke hearts, drained
  • 8 ounces shredded mozzarella (about 2 cups)
  • 1 cup crumbled feta

Instructions

  1. Preheat the oven to 425°F (220°C). If the pizza dough has been refrigerated, let it sit at room temperature to warm up slightly.
  2. Toast the chopped walnuts in a small skillet over medium heat until lightly browned, stirring often. Let them cool. In a food processor, combine the toasted walnuts, garlic, basil, and spinach; process until minced. Add the Parmesan cheese, olive oil, salt, and pepper; process until smooth. Set aside.
  3. Cut the broccoli into small florets and place them in a microwave-safe dish with a lid. Add a couple of tablespoons of water, cover, and microwave until just tender (about 3-4 minutes). Drain and set aside to cool.
  4. Lightly coat a baking sheet with nonstick spray or olive oil. Place the pizza dough on the pan and press it to the edges. If the dough resists, let it rest for a few minutes before pressing again.
  5. Spread a thin layer of the prepared pesto over the dough. Sprinkle ¾ of the mozzarella over the pesto. Evenly distribute the broccoli and artichoke hearts over the cheese. Top with the remaining mozzarella and then sprinkle with feta.
  6. Bake the pizza for 25 to 35 minutes, or until the crust is browned and the cheese is lightly golden. Let it cool slightly before slicing and serving.

Notes

  • Use sunflower seeds or omit nuts for a nut-free pesto.
  • Arugula or kale can substitute spinach for a different flavor.
  • Use goat cheese or ricotta instead of feta for a creamier texture.
  • Add cooked chicken or shrimp for a protein boost.
  • Store leftovers in the fridge up to 3 days and reheat in oven or skillet.

Nutrition

  • Serving Size: 1 slice
  • Calories: 320
  • Sugar: 2g
  • Sodium: 580mg
  • Fat: 21g
  • Saturated Fat: 7g
  • Unsaturated Fat: 12g
  • Trans Fat: 0g
  • Carbohydrates: 24g
  • Fiber: 3g
  • Protein: 12g
  • Cholesterol: 25mg

Have you made this recipe? I'd love to see it!

Click here to Follow me on Pinterest

Air Fryer Honey Butter Garlic Chicken Tenders

May 28, 2025 by Sue Leave a Comment

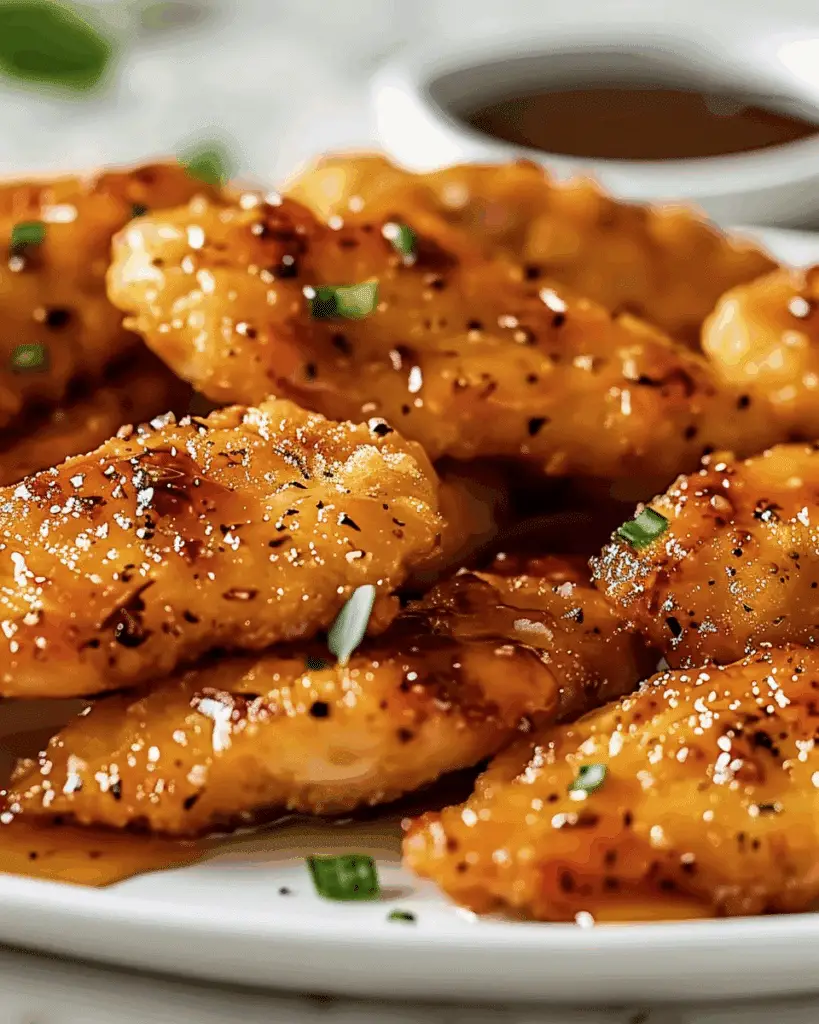
These Air Fryer Honey Butter Garlic Chicken Tenders are the perfect mix of sweet, savory, and crispy. I love how quick they are to make, and the air fryer gives them that golden crunch without the need for deep frying. The combination of honey, butter, and garlic creates a rich glaze that coats the tenders beautifully. Air Fryer Honey Butter Garlic Chicken Tenders

Why You’ll Love This Recipe

I find this recipe to be a real game-changer for weeknight dinners or lazy weekends. It’s fast, fuss-free, and doesn’t require a ton of ingredients. The air fryer makes cleanup a breeze, and the flavor combo of honey, butter, and garlic feels indulgent while still being simple. Whether I’m feeding family or just craving something satisfying, these chicken tenders always hit the spot.

ingredients

(Here's a tip: Check out the full list of ingredients and measurements in the recipe card below.)

  • Chicken tenders
  • All-purpose flour
  • Garlic powder
  • Onion powder
  • Paprika
  • Salt
  • Black pepper
  • Eggs
  • Panko breadcrumbs
  • Butter
  • Honey
  • Minced garlic
  • Fresh parsley (optional for garnish)

directions

  1. I start by seasoning the flour with garlic powder, onion powder, paprika, salt, and pepper.
  2. I set up a dredging station with the seasoned flour, beaten eggs, and panko breadcrumbs.
  3. Each chicken tender gets coated in flour, dipped in egg, and then pressed into the panko for an extra crispy crust.
  4. I preheat the air fryer to 400°F (200°C), then place the tenders in a single layer, spraying them lightly with cooking oil.
  5. I cook them for 10–12 minutes, flipping halfway through, until they’re golden brown and cooked through.
  6. While the chicken is cooking, I melt the butter in a small saucepan, then add the honey and minced garlic, letting it simmer for a minute or two.
  7. Once the tenders are done, I toss them in the honey butter garlic sauce until fully coated.
  8. I garnish with chopped parsley before serving, just to add a fresh touch.

Servings and timing

This recipe makes about 4 servings. It takes roughly 10 minutes to prep and 12 minutes to cook, so I can have it ready in around 25 minutes from start to finish.

Variations

I sometimes switch things up by adding a little heat—just a dash of hot sauce or red pepper flakes to the honey butter mix does the trick. For a more savory version, I skip the honey and go for a garlic parmesan coating instead. And if I don’t have tenders, I just slice chicken breasts into strips.

storage/reheating

I store any leftovers in an airtight container in the fridge for up to 3 days. To reheat, I pop them back in the air fryer at 350°F for about 4–5 minutes so they stay crispy. Microwaving works too, but the coating won’t be as crunchy.

FAQs

How do I know when the chicken tenders are done?

I always make sure the internal temperature hits 165°F (75°C) with a meat thermometer. They should be golden and firm to the touch.

Can I use frozen chicken tenders?

Yes, I just thaw them completely before breading and air frying to ensure even cooking.

What can I use instead of panko breadcrumbs?

I sometimes use regular breadcrumbs, crushed cornflakes, or even crushed crackers when I’m out of panko. The texture changes a bit, but it still works.

Is it possible to bake these instead of using an air fryer?

Absolutely. I bake them at 425°F (220°C) for about 20 minutes, flipping halfway through. They won’t be quite as crispy, but they’re still delicious.

Can I make the sauce ahead of time?

Yes, I make the honey butter garlic sauce ahead and store it in the fridge. I just warm it up before tossing it with the cooked tenders.

Conclusion

These Air Fryer Honey Butter Garlic Chicken Tenders are one of my favorite ways to enjoy crispy, flavorful chicken without deep frying. The sweet-savory glaze and golden coating make each bite irresistible, and the quick cook time means I can whip them up whenever the craving hits. Whether I’m serving them as a main dish or a party snack, they always disappear fast.

Print

clock clock iconcutlery cutlery iconflag flag iconfolder folder iconinstagram instagram iconpinterest pinterest iconfacebook facebook iconprint print iconsquares squares iconheart heart iconheart solid heart solid icon
Air Fryer Honey Butter Garlic Chicken Tenders

Air Fryer Honey Butter Garlic Chicken Tenders

5 Stars 4 Stars 3 Stars 2 Stars 1 Star No reviews
  • Author: Sue
  • Prep Time: 10 minutes
  • Cook Time: 12 minutes
  • Total Time: 22 minutes
  • Yield: 4 servings
  • Category: Main Course
  • Method: Air Fryer
  • Cuisine: American
  • Diet: Low Fat
Print Recipe
Pin Recipe

Description

These Air Fryer Honey Butter Garlic Chicken Tenders are crispy, sweet, and savory with a rich garlic-honey-butter glaze. Quick to prepare and healthier than traditional fried versions, they’re perfect for weeknight dinners or party snacks.


Ingredients

  • 1 lb chicken tenders
  • ½ cup all-purpose flour
  • 1 tsp garlic powder
  • 1 tsp onion powder
  • 1 tsp paprika
  • ½ tsp salt
  • ½ tsp black pepper
  • 2 eggs, beaten
  • 1 cup panko breadcrumbs
  • 3 tbsp butter
  • ¼ cup honey
  • 2 cloves garlic, minced
  • 1 tbsp fresh parsley, chopped (optional for garnish)

Instructions

  1. Preheat the air fryer to 400°F (200°C).
  2. In a shallow bowl, mix flour with garlic powder, onion powder, paprika, salt, and pepper.
  3. Set up a dredging station with seasoned flour, beaten eggs, and panko breadcrumbs.
  4. Coat each chicken tender in flour, then egg, and finally panko breadcrumbs.
  5. Place tenders in a single layer in the air fryer basket and spray lightly with cooking oil.
  6. Cook for 10–12 minutes, flipping halfway through, until golden brown and cooked through.
  7. In a saucepan, melt butter over medium heat. Add honey and minced garlic, simmer for 1–2 minutes.
  8. Toss cooked tenders in the honey butter garlic sauce until fully coated.
  9. Garnish with chopped parsley before serving.

Notes

  • Add hot sauce or red pepper flakes to the glaze for a spicy kick.
  • Use chicken breast strips if tenders aren’t available.
  • Store leftovers in an airtight container in the fridge for up to 3 days.
  • Reheat in the air fryer at 350°F for 4–5 minutes for best texture.

Nutrition

  • Serving Size: ¼ of recipe
  • Calories: 350
  • Sugar: 12g
  • Sodium: 480mg
  • Fat: 15g
  • Saturated Fat: 6g
  • Unsaturated Fat: 7g
  • Trans Fat: 0g
  • Carbohydrates: 28g
  • Fiber: 1g
  • Protein: 26g
  • Cholesterol: 115mg

Have you made this recipe? I'd love to see it!

Click here to Follow me on Pinterest

Iced Caramel Latte

May 28, 2025 by Sue Leave a Comment

This iced caramel latte is a refreshing, creamy drink that combines chilled espresso, milk, and sweet caramel syrup over ice. Topped with whipped cream and a drizzle of caramel, it’s a cool and satisfying treat I like to enjoy any time of day. Iced Caramel Latte

Why You’ll Love This Recipe

I love this recipe because it's incredibly easy to make in just a few minutes, and it tastes just like a coffeehouse favorite. I can customize it to my taste, make it as sweet or creamy as I want, and avoid the need for any fancy equipment. It's perfect when I want something cold, delicious, and energizing.

Ingredients

(Here's a tip: Check out the full list of ingredients and measurements in the recipe card below.)

  • ice cubes
  • espresso, chilled
  • whole milk
  • salted caramel syrup
  • whipped topping (for garnish)
  • caramel dessert sauce (for garnish)

Directions

  1. I start by filling a 16-ounce glass with ice cubes.
  2. I pour the chilled espresso over the ice.
  3. In a jar with a lid, I add the whole milk and salted caramel syrup, then shake it for 15 to 30 seconds until it’s nice and frothy.
  4. I pour the milk mixture over the espresso and ice.
  5. Finally, I top it with whipped cream and drizzle some caramel dessert sauce on top.

Servings and Timing

  • Servings: 1
  • Prep Time: 3 minutes
  • Total Time: 3 minutes

Variations

  • Dairy-Free: I like using almond, oat, or soy milk as a substitute for whole milk.
  • Sweeter: I sometimes add an extra tablespoon of caramel syrup for more sweetness.
  • Milder: If I want a smoother taste, I use a less concentrated espresso.
  • Vanilla Touch: Adding a drop of vanilla extract to the milk and caramel mixture gives it a nice twist.
  • Extra Creamy: A splash of half-and-half makes it even richer.

Storage/Reheating

This drink is best when I make and drink it fresh. If I need to prepare it ahead, I keep the espresso and milk mixture in separate containers in the fridge for up to a day. When I’m ready to enjoy it, I pour everything over fresh ice and top it off. Since it’s an iced drink, I don’t reheat it.

FAQs

Can I use decaf espresso?

Yes, I often make it with decaf when I want the flavor without the caffeine kick.

Can I use non-dairy milk?

Absolutely. I’ve tried oat, almond, and soy milk—all work great in this recipe.

How do I make it less sweet?

I reduce the caramel syrup or skip the caramel drizzle on top when I want a less sweet version.

Do I need a frother?

Nope, I just shake the milk and syrup in a jar with a lid. It gets nice and frothy without any gadgets.

Can I double the recipe?

Yes, I just double the ingredients and use a larger glass or make two servings.

Conclusion

This iced caramel latte is my go-to when I want something quick, cold, and indulgent. It’s creamy, sweet, and hits all the right notes. Whether I’m making it to start my day or as an afternoon treat, this drink always delivers.

Print

clock clock iconcutlery cutlery iconflag flag iconfolder folder iconinstagram instagram iconpinterest pinterest iconfacebook facebook iconprint print iconsquares squares iconheart heart iconheart solid heart solid icon
Iced Caramel Latte

Iced Caramel Latte

5 Stars 4 Stars 3 Stars 2 Stars 1 Star No reviews
  • Author: Sue
  • Prep Time: 3 minutes
  • Cook Time: 0 minutes
  • Total Time: 3 minutes
  • Yield: 1 serving
  • Category: Beverage
  • Method: No-Cook
  • Cuisine: American
  • Diet: Vegetarian
Print Recipe
Pin Recipe

Description

This iced caramel latte is a cool, creamy coffee drink combining chilled espresso, milk, and caramel syrup over ice, topped with whipped cream and a caramel drizzle for a sweet and energizing treat.


Ingredients

  • 1 cup ice cubes
  • ½ cup espresso, chilled
  • ¾ cup whole milk
  • 2 tbsp salted caramel syrup
  • Whipped topping, for garnish
  • Caramel dessert sauce, for garnish

Instructions

  1. Fill a 16-ounce glass with ice cubes.
  2. Pour the chilled espresso over the ice.
  3. In a jar with a lid, combine whole milk and salted caramel syrup. Shake for 15 to 30 seconds until frothy.
  4. Pour the milk mixture over the espresso and ice.
  5. Top with whipped cream and drizzle with caramel dessert sauce.

Notes

  • Use non-dairy milk like almond, oat, or soy for a dairy-free version.
  • Add more caramel syrup for a sweeter drink.
  • Use a less concentrated espresso for a milder flavor.
  • Add a drop of vanilla extract for a flavor twist.
  • Use half-and-half instead of milk for extra creaminess.

Nutrition

  • Serving Size: 1 drink (approx. 16 oz)
  • Calories: 180
  • Sugar: 22g
  • Sodium: 85mg
  • Fat: 6g
  • Saturated Fat: 4g
  • Unsaturated Fat: 1.5g
  • Trans Fat: 0g
  • Carbohydrates: 26g
  • Fiber: 0g
  • Protein: 4g
  • Cholesterol: 20mg

Have you made this recipe? I'd love to see it!

Click here to Follow me on Pinterest

Chili Mac

May 28, 2025 by Sue Leave a Comment

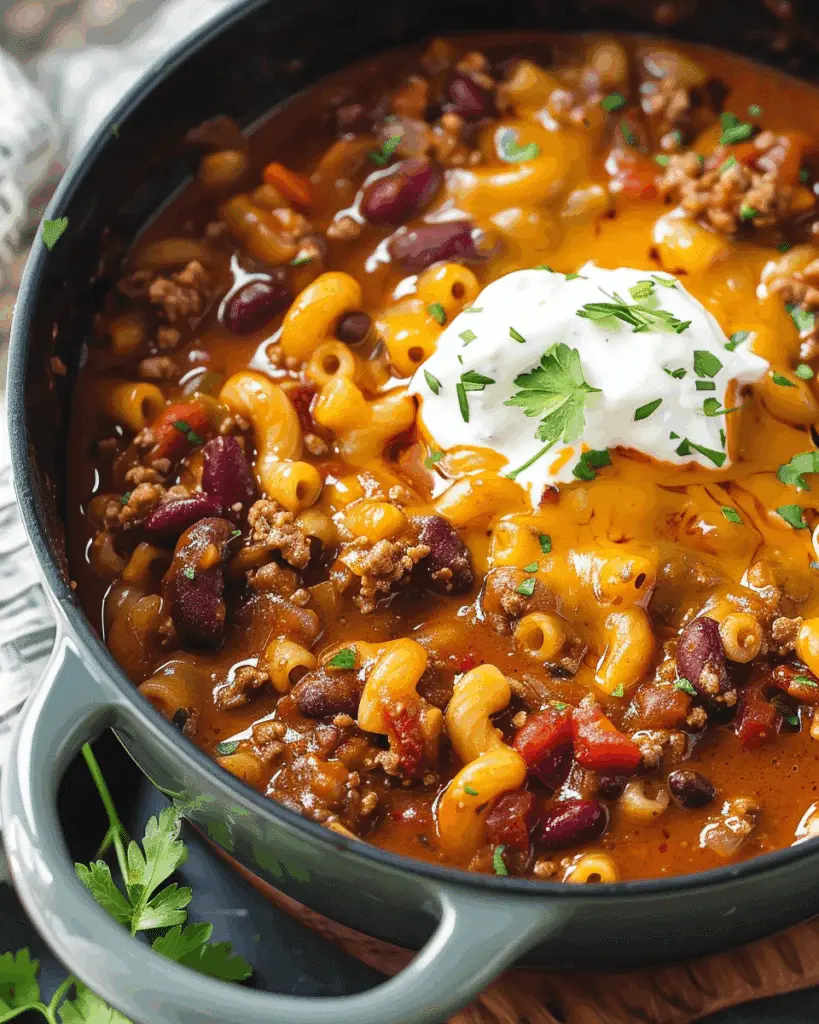
This Chili Mac recipe is a comforting fusion of hearty homemade chili and creamy macaroni and cheese. It's the perfect dish for family dinners, potlucks, or game day gatherings. Chili Mac

Why You’ll Love This Recipe

I love how this dish brings together the bold flavors of chili with the creamy texture of mac and cheese. It's a one-pot meal that's both satisfying and easy to prepare. Plus, it's versatile enough to customize to my taste preferences.

Ingredients

(Here's a tip: Check out the full list of ingredients and measurements in the recipe card below.)

For the Chili:

  • 1 lb. ground beef (80% lean)
  • 1 small onion, diced
  • ½ cup bell pepper, diced
  • 3 cloves garlic, minced
  • 1.25 oz. packet chili seasoning mix
  • 1 tablespoon tomato paste
  • 8 oz. tomato sauce
  • 14.5 oz. can diced tomatoes, undrained
  • ½ cup chicken broth (or beef broth)
  • 15 oz. can kidney beans, drained

For the Mac and Cheese:

  • 2 cups elbow macaroni, uncooked
  • 2 tablespoons butter
  • 2 tablespoons flour
  • ½ cup heavy cream
  • 1 cup milk
  • ½ teaspoon mustard powder
  • ¼ teaspoon onion powder
  • ¼ teaspoon each: salt and pepper
  • ½ teaspoon hot sauce
  • 1½ cups cheddar cheese, shredded

For Baking:

  • 1½ cups cheddar cheese, shredded
  • Fresh parsley, for garnish

Directions

  1. Prepare the Chili:
    • In a large pot, cook and crumble the ground beef over medium-high heat for 2 minutes. Add the diced onions and cook for 5 more minutes until the beef is browned and the onions are softened. Drain excess grease.
    • Add the diced bell peppers and minced garlic; cook until the peppers are softened, about 4 minutes.
    • Stir in the chili seasoning mix and tomato paste; cook for 1 minute.
    • Add the tomato sauce, undrained diced tomatoes, and chicken broth. Stir to combine. Bring to a boil, then reduce the heat to a gentle simmer. Partially cover and let it simmer while preparing the macaroni and cheese. Add the drained kidney beans during the last 10 minutes of simmering.
  2. Prepare the Mac and Cheese:
    • Preheat the oven to 400°F (200°C).
    • Bring a large pot of salted water to a boil. Add the elbow macaroni and cook according to package instructions until just al dente. Drain and set aside.
    • In a separate large pot or Dutch oven, melt the butter over medium heat. Whisk in the flour and cook, stirring continuously, for 2 minutes.
    • Gradually add the heavy cream and milk, stirring continuously. Bring to a boil, then reduce to a simmer.
    • Stir in the mustard powder, onion powder, salt, pepper, and hot sauce.
    • Reduce the heat to low and gradually add the shredded cheddar cheese, stirring until the cheese is melted and the sauce is smooth.
    • Add the cooked and drained macaroni to the cheese sauce; stir to combine.
  3. Combine and Bake:
    • Add the prepared chili to the macaroni and cheese mixture; stir to combine thoroughly.
    • Transfer the mixture to a baking dish if not using an oven-safe pot. Top with the additional 1½ cups of shredded cheddar cheese.
    • Bake in the preheated oven for 5 minutes, or until the cheese is melted.
    • Garnish with fresh parsley before serving.

Servings and Timing

This recipe yields approximately 18 cups of Chili Mac, serving about 8 to 10 people. Preparation time is around 15 minutes, with a cook time of 45 minutes, totaling about 1 hour.

Variations

  • Cheese Options: I sometimes mix in Monterey Jack cheese with the cheddar for a different flavor profile.
  • Beans: If I prefer, I can substitute black beans for kidney beans or omit them entirely.
  • Spice Level: Adjust the amount of hot sauce to control the spiciness. I find that the hot sauce enhances the flavor without making it overly spicy.
  • Make-Ahead: I can prepare the chili 1–2 days in advance and store it in the refrigerator. When ready to serve, I reheat the chili, prepare the macaroni and cheese, combine them, and bake as directed.

Storage/Reheating

  • Refrigeration: Store leftovers in an airtight container in the refrigerator for up to 3 days.
  • Freezing: Leftovers can be frozen. I ensure the macaroni is cooked just until al dente to prevent it from becoming mushy upon reheating.
  • Reheating: Reheat on the stovetop over medium heat, stirring occasionally, until heated through. If the mixture is too thick, I add a splash of milk to loosen it.

FAQs

How can I make this dish vegetarian?

To make a vegetarian version, I replace the ground beef with plant-based meat alternatives or additional beans, such as black beans or lentils. I also use vegetable broth instead of chicken broth.

Can I use different types of pasta?

Yes, I can substitute elbow macaroni with other short pasta shapes like penne, rotini, or shells. I ensure to cook the pasta until just al dente to maintain the desired texture.

Is it possible to make this recipe gluten-free?

To make it gluten-free, I use gluten-free pasta and substitute the all-purpose flour with a gluten-free flour blend when making the cheese sauce. I also check that all other ingredients, like the chili seasoning mix, are gluten-free.

Can I prepare this dish ahead of time?

Yes, I can prepare the chili and macaroni and cheese separately, combine them, and store the mixture in the refrigerator for up to 2 days. When ready to serve, I top it with cheese and bake as directed.

What are some good side dishes to serve with Chili Mac?

I often serve Chili Mac with a side of cornbread, a simple green salad, or steamed vegetables to complement the rich and hearty flavors of the dish.

Conclusion

Chili Mac is a delightful combination of two comfort food classics. I enjoy how the robust flavors of the chili meld with the creamy macaroni and cheese, creating a satisfying and hearty meal. Whether I'm preparing it for a family dinner or a gathering with friends, this dish is always a crowd-pleaser.

Print

clock clock iconcutlery cutlery iconflag flag iconfolder folder iconinstagram instagram iconpinterest pinterest iconfacebook facebook iconprint print iconsquares squares iconheart heart iconheart solid heart solid icon
Chili Mac

Chili Mac

5 Stars 4 Stars 3 Stars 2 Stars 1 Star No reviews
  • Author: Sue
  • Prep Time: 15 minutes
  • Cook Time: 45 minutes
  • Total Time: 1 hour
  • Yield: 8 to 10 servings
  • Category: Main Course
  • Method: Baking
  • Cuisine: American
  • Diet: Halal
Print Recipe
Pin Recipe

Description

Chili Mac is a hearty one-pot dish that combines the bold flavors of chili with the creamy comfort of macaroni and cheese, perfect for family meals or gatherings.


Ingredients

  • 1 lb. ground beef (80% lean)
  • 1 small onion, diced
  • ½ cup bell pepper, diced
  • 3 cloves garlic, minced
  • 1.25 oz. packet chili seasoning mix
  • 1 tablespoon tomato paste
  • 8 oz. tomato sauce
  • 14.5 oz. can diced tomatoes, undrained
  • ½ cup chicken broth (or beef broth)
  • 15 oz. can kidney beans, drained
  • 2 cups elbow macaroni, uncooked
  • 2 tablespoons butter
  • 2 tablespoons flour
  • ½ cup heavy cream
  • 1 cup milk
  • ½ teaspoon mustard powder
  • ¼ teaspoon onion powder
  • ¼ teaspoon salt
  • ¼ teaspoon pepper
  • ½ teaspoon hot sauce
  • 3 cups cheddar cheese, shredded (1½ cups for sauce, 1½ cups for topping)
  • Fresh parsley, for garnish

Instructions

  1. In a large pot, cook and crumble the ground beef over medium-high heat for 2 minutes. Add diced onions and cook for 5 more minutes until browned and softened. Drain excess grease.
  2. Add diced bell peppers and garlic; cook for 4 minutes until softened.
  3. Stir in chili seasoning mix and tomato paste; cook for 1 minute.
  4. Add tomato sauce, diced tomatoes, and broth. Stir and bring to a boil. Reduce to a simmer, partially cover, and let simmer. Add kidney beans during the last 10 minutes.
  5. Preheat oven to 400°F (200°C). Boil salted water and cook macaroni until just al dente. Drain and set aside.
  6. In another pot, melt butter over medium heat. Whisk in flour and cook for 2 minutes.
  7. Gradually add heavy cream and milk, stirring until it simmers. Stir in mustard powder, onion powder, salt, pepper, and hot sauce.
  8. Reduce heat to low, add 1½ cups cheddar cheese, and stir until melted. Add macaroni and mix.
  9. Add chili to macaroni and cheese mixture and stir to combine thoroughly.
  10. Transfer to a baking dish, top with remaining 1½ cups cheddar cheese, and bake for 5 minutes until melted. Garnish with parsley before serving.

Notes

  • Mix in Monterey Jack cheese for variation.
  • Substitute or omit beans as preferred.
  • Adjust hot sauce for spiciness.
  • Prepare chili in advance and refrigerate.
  • Store leftovers for 3 days or freeze for longer storage.
  • Reheat with a splash of milk if needed.

Nutrition

  • Serving Size: 1.8 cups
  • Calories: 460
  • Sugar: 6g
  • Sodium: 820mg
  • Fat: 23g
  • Saturated Fat: 11g
  • Unsaturated Fat: 10g
  • Trans Fat: 0.5g
  • Carbohydrates: 37g
  • Fiber: 5g
  • Protein: 27g
  • Cholesterol: 75mg

Have you made this recipe? I'd love to see it!

Click here to Follow me on Pinterest

Cowboy Pasta Salad

May 28, 2025 by Sue Leave a Comment

Cowboy Pasta Salad is a hearty, flavor-packed dish that blends tender pasta, seasoned ground beef, black beans, corn, and crisp vegetables, all tossed in a bold, tangy lime and taco dressing. It’s a satisfying and colorful meal perfect for barbecues, potlucks, or weekday dinners. Cowboy Pasta Salad

Why You’ll Love This Recipe

I love how this Cowboy Pasta Salad transforms a basic pasta dish into a crowd-pleasing favorite. The savory ground beef pairs beautifully with the bright flavors of the vegetables and the kick from the taco seasoning. It’s not only filling but also great for making ahead, which makes my life easier when entertaining or prepping lunches for the week.

ingredients

(Here's a tip: Check out the full list of ingredients and measurements in the recipe card below.)

  • 16 ounces lean ground beef (90/10)
  • 1 small yellow onion, minced
  • ½ teaspoon sea salt
  • ½ teaspoon ground black pepper
  • 16 ounces dry rotini pasta
  • 1 tablespoon olive oil
  • ½ cup olive oil (for dressing)
  • Juice of 2 limes
  • 3 tablespoons taco seasoning
  • 12 ounces frozen corn, thawed or 1 can (drained)
  • 1 can black beans, rinsed and drained
  • 1 cup sharp cheddar cheese, grated or cubed
  • 1 cup cherry tomatoes, halved
  • 1 red bell pepper, diced
  • 1 green bell pepper, diced
  • 1 jalapeño, diced
  • 2 green onions, sliced
  • Fresh cilantro or parsley, chopped (optional for garnish)

directions

  1. I start by cooking the ground beef and minced onion in a large skillet over medium heat until browned and fully cooked. Then I season it with salt and pepper and let it cool.
  2. While the beef cooks, I boil the rotini pasta according to package directions until al dente. After draining, I toss it with 1 tablespoon of olive oil to prevent sticking and set it aside to cool.
  3. In a large bowl, I whisk together ½ cup olive oil, lime juice, and taco seasoning to make the dressing.
  4. I add the cooled pasta, beef mixture, corn, black beans, cheese, tomatoes, bell peppers, jalapeño, and green onions to the bowl with the dressing.
  5. I toss everything together until well mixed and coated with the dressing.
  6. I refrigerate it for at least 30 minutes before serving to let the flavors come together.
  7. Before serving, I sprinkle chopped cilantro or parsley over the top if I have it on hand.

Servings and timing

  • Servings: 8
  • Prep time: 15 minutes
  • Cook time: 10 minutes
  • Chill time: 30 minutes
  • Total time: 55 minutes

Variations

  • I sometimes swap the ground beef for ground turkey, shredded chicken, or a meatless crumble.
  • Different pasta shapes like penne or bowtie work just as well and make it fun.
  • When I want extra crunch, I add diced cucumber or shredded lettuce.
  • For a spicier twist, I use pepper jack cheese instead of cheddar.
  • A dash of hot sauce or more jalapeño gives the salad an extra kick if I’m craving heat.

storage/reheating

  • I store leftovers in an airtight container in the fridge for up to 4 days.
  • I don’t freeze this salad since the texture of the veggies and pasta doesn’t hold up well.
  • Making this salad a day ahead helps the flavors blend even more. I always give it a good stir before serving.

FAQs

Can I make this salad vegetarian?

Yes, I just skip the ground beef and add more beans or a plant-based protein. It’s just as hearty and flavorful.

What pasta works best?

I prefer rotini because it holds the dressing well, but penne, bowtie, or even macaroni are great choices.

Should I serve it cold or warm?

I always serve it cold or at room temperature. It’s more refreshing that way and perfect for gatherings.

Can I make it ahead of time?

Absolutely. I usually make it the night before. It tastes even better the next day after chilling.

What if I don’t have taco seasoning?

I mix my own using chili powder, cumin, garlic powder, onion powder, and a touch of cayenne. It’s quick and easy.

Conclusion

Cowboy Pasta Salad is one of my go-to recipes when I need something simple, flavorful, and filling. It’s got everything I want in a pasta salad—protein, fresh veggies, bold taste, and make-ahead convenience. Whether I’m prepping lunches or feeding a crowd, this dish always hits the spot.

Print

clock clock iconcutlery cutlery iconflag flag iconfolder folder iconinstagram instagram iconpinterest pinterest iconfacebook facebook iconprint print iconsquares squares iconheart heart iconheart solid heart solid icon
Cowboy Pasta Salad

Cowboy Pasta Salad

5 Stars 4 Stars 3 Stars 2 Stars 1 Star No reviews
  • Author: Sue
  • Prep Time: 15 minutes
  • Cook Time: 10 minutes
  • Total Time: 55 minutes
  • Yield: 8 servings
  • Category: Salad
  • Method: Mixing
  • Cuisine: American
  • Diet: Halal
Print Recipe
Pin Recipe

Description

Cowboy Pasta Salad is a hearty, flavor-packed dish that combines pasta, seasoned ground beef, black beans, corn, and vibrant vegetables tossed in a tangy lime and taco dressing, perfect for gatherings or weekday meals.


Ingredients

  • 16 ounces lean ground beef (90/10)
  • 1 small yellow onion, minced
  • ½ teaspoon sea salt
  • ½ teaspoon ground black pepper
  • 16 ounces dry rotini pasta
  • 1 tablespoon olive oil
  • ½ cup olive oil (for dressing)
  • Juice of 2 limes
  • 3 tablespoons taco seasoning
  • 12 ounces frozen corn, thawed or 1 can (drained)
  • 1 can black beans, rinsed and drained
  • 1 cup sharp cheddar cheese, grated or cubed
  • 1 cup cherry tomatoes, halved
  • 1 red bell pepper, diced
  • 1 green bell pepper, diced
  • 1 jalapeño, diced
  • 2 green onions, sliced
  • Fresh cilantro or parsley, chopped (optional for garnish)

Instructions

  1. Cook the ground beef and minced onion in a large skillet over medium heat until browned and fully cooked. Season with salt and pepper and let it cool.
  2. Boil the rotini pasta according to package directions until al dente. Drain and toss with 1 tablespoon of olive oil to prevent sticking. Set aside to cool.
  3. In a large bowl, whisk together ½ cup olive oil, lime juice, and taco seasoning to make the dressing.
  4. Add the cooled pasta, beef mixture, corn, black beans, cheese, tomatoes, bell peppers, jalapeño, and green onions to the bowl with the dressing.
  5. Toss everything together until well mixed and coated with the dressing.
  6. Refrigerate for at least 30 minutes before serving to allow the flavors to meld.
  7. Before serving, sprinkle chopped cilantro or parsley on top if desired.

Notes

  • Swap ground beef with turkey, chicken, or plant-based crumbles for variation.
  • Use different pasta shapes like penne or bowtie for a fun twist.
  • Add cucumbers or lettuce for extra crunch.
  • Use pepper jack cheese for added spice.
  • Store in an airtight container for up to 4 days; do not freeze.

Nutrition

  • Serving Size: 1 cup
  • Calories: 420
  • Sugar: 3g
  • Sodium: 480mg
  • Fat: 24g
  • Saturated Fat: 6g
  • Unsaturated Fat: 16g
  • Trans Fat: 0g
  • Carbohydrates: 35g
  • Fiber: 5g
  • Protein: 18g
  • Cholesterol: 45mg

Have you made this recipe? I'd love to see it!

Click here to Follow me on Pinterest

Best Fudgy Chocolate Brownie Cookies

May 28, 2025 by Sue Leave a Comment

These fudgy chocolate brownie cookies combine the rich, gooey center of a brownie with the crisp edges of a cookie. Made in one bowl with simple pantry staples, they deliver a deep chocolate flavor and a satisfying texture that makes them irresistible. Best Fudgy Chocolate Brownie Cookies

Why You’ll Love This Recipe

I love how these cookies bring together the best of both worlds: the chewy, fudgy interior of a brownie and the slightly crisp exterior of a cookie. They're quick to make, requiring no chilling time, and the one-bowl method means less cleanup. The addition of chocolate chips adds bursts of melted chocolate in every bite, making them a perfect treat for any chocolate lover.

Ingredients

(Here's a tip: Check out the full list of ingredients and measurements in the recipe card below.)

  • ½ cup unsweetened cocoa powder
  • 1 cup white granulated sugar
  • ½ cup melted butter
  • 3 tablespoons vegetable oil
  • 1 egg
  • 2 teaspoons pure vanilla extract
  • 1⅓ cups all-purpose flour
  • ½ teaspoon baking powder
  • ½ teaspoon salt
  • ⅓ cup semi-sweet chocolate chips (add more if desired)

Directions

  1. Preheat the oven to 350°F (175°C) and line two baking trays with parchment paper.
  2. In a medium-sized bowl, mix together the cocoa powder, sugar, melted butter, and vegetable oil until well combined.
  3. Beat in the egg and vanilla extract until fully incorporated.
  4. Add the flour, baking powder, and salt. Stir the dry ingredients together lightly before mixing them into the wet ingredients until a dough forms. Be careful not to overmix.
  5. Fold in the chocolate chips.
  6. Scoop equal-sized balls of dough onto the prepared baking trays, spacing them about 2 inches apart. Press down slightly to flatten.
  7. Bake for 10–12 minutes, or until the edges are set and the centers look slightly underbaked.
  8. Allow the cookies to cool on the baking trays for a few minutes before transferring them to a wire rack to cool completely.

Servings and Timing

  • Servings: 16 cookies
  • Prep Time: 10 minutes
  • Cook Time: 12 minutes
  • Total Time: 22 minutes

Variations

  • Double Chocolate: I like to add an extra ¼ cup of chocolate chips for a more intense chocolate experience.
  • Nutty Delight: Chopped walnuts or pecans can be folded into the dough for added crunch.
  • Spicy Kick: A pinch of cayenne pepper or cinnamon adds a subtle warmth that complements the chocolate.
  • Mint Chocolate: Replace the vanilla extract with peppermint extract for a refreshing twist.

Storage/Reheating

  • Storage: I store these cookies in an airtight container at room temperature for up to 5 days.
  • Freezing: They freeze well. I place them in a single layer in a freezer-safe bag or container for up to 3 months.
  • Reheating: To enjoy warm cookies, I microwave them for about 10–15 seconds until just warmed through.

FAQs

What makes these cookies fudgy?

The combination of melted butter, cocoa powder, and the right ratio of flour to fat gives these cookies their fudgy texture. I also make sure not to overbake them to maintain that gooey center.

Can I use Dutch-processed cocoa powder?

Yes, I can use Dutch-processed cocoa powder, but it may result in a slightly different flavor and color. I prefer unsweetened natural cocoa powder for a more traditional taste.

How do I know when the cookies are done?

I look for set edges and a slightly underbaked center. They will continue to cook slightly as they cool on the baking tray.

Can I make the dough ahead of time?

Yes, I can prepare the dough ahead and refrigerate it for up to 24 hours. However, I let it come to room temperature before baking to ensure even spreading.

Why did my cookies turn out cakey instead of fudgy?

Overmixing the dough or overbaking can lead to cakier cookies. I mix just until the ingredients are combined and keep an eye on the baking time to maintain that fudgy texture.

Conclusion

These fudgy chocolate brownie cookies are a delightful treat that combines the best aspects of brownies and cookies. With their rich chocolate flavor, gooey centers, and crisp edges, they're sure to become a favorite in your baking repertoire. I enjoy making them for gatherings, gifting, or simply satisfying my chocolate cravings.

Print

clock clock iconcutlery cutlery iconflag flag iconfolder folder iconinstagram instagram iconpinterest pinterest iconfacebook facebook iconprint print iconsquares squares iconheart heart iconheart solid heart solid icon
Best Fudgy Chocolate Brownie Cookies

Best Fudgy Chocolate Brownie Cookies

5 Stars 4 Stars 3 Stars 2 Stars 1 Star No reviews
  • Author: Sue
  • Prep Time: 10 minutes
  • Cook Time: 12 minutes
  • Total Time: 22 minutes
  • Yield: 16 cookies
  • Category: Dessert
  • Method: Baking
  • Cuisine: American
  • Diet: Vegetarian
Print Recipe
Pin Recipe

Description

These fudgy chocolate brownie cookies combine the rich, gooey center of a brownie with the crisp edges of a cookie, offering deep chocolate flavor and satisfying texture in every bite.


Ingredients

  • ½ cup unsweetened cocoa powder
  • 1 cup white granulated sugar
  • ½ cup melted butter
  • 3 tablespoons vegetable oil
  • 1 egg
  • 2 teaspoons pure vanilla extract
  • 1⅓ cups all-purpose flour
  • ½ teaspoon baking powder
  • ½ teaspoon salt
  • ⅓ cup semi-sweet chocolate chips (add more if desired)

Instructions

  1. Preheat the oven to 350°F (175°C) and line two baking trays with parchment paper.
  2. In a medium-sized bowl, mix together the cocoa powder, sugar, melted butter, and vegetable oil until well combined.
  3. Beat in the egg and vanilla extract until fully incorporated.
  4. Add the flour, baking powder, and salt. Stir the dry ingredients together lightly before mixing them into the wet ingredients until a dough forms. Do not overmix.
  5. Fold in the chocolate chips.
  6. Scoop equal-sized balls of dough onto the prepared baking trays, spacing them about 2 inches apart. Press down slightly to flatten.
  7. Bake for 10–12 minutes, or until the edges are set and the centers look slightly underbaked.
  8. Allow the cookies to cool on the baking trays for a few minutes before transferring them to a wire rack to cool completely.

Notes

  • Do not overmix the dough to maintain fudgy texture.
  • Store in an airtight container for up to 5 days.
  • Freeze for up to 3 months in a freezer-safe bag or container.
  • Microwave for 10–15 seconds to enjoy warm cookies.

Nutrition

  • Serving Size: 1 cookie
  • Calories: 150
  • Sugar: 12g
  • Sodium: 85mg
  • Fat: 8g
  • Saturated Fat: 4g
  • Unsaturated Fat: 3g
  • Trans Fat: 0g
  • Carbohydrates: 20g
  • Fiber: 1g
  • Protein: 1g
  • Cholesterol: 15mg

Have you made this recipe? I'd love to see it!

Click here to Follow me on Pinterest

Big Mac Salad

May 28, 2025 by Sue Leave a Comment

This Big Mac Salad is a deconstructed version of the classic fast-food burger, packed into a low-carb, protein-rich bowl. I get all the familiar flavors—seasoned beef, crisp lettuce, tangy pickles, creamy dressing—without the bun. Big Mac Salad

Why I Love This Recipe

I love how this recipe gives me the taste of a Big Mac in a healthier, fresher way. It’s incredibly easy to put together, making it perfect for busy weeknights. Plus, I can adjust the ingredients to fit what I have in the fridge or suit my cravings.

Ingredients

(Here's a tip: Check out the full list of ingredients and measurements in the recipe card below.)

  • 6 cups chopped iceberg lettuce
  • 1½ pounds extra lean ground beef, browned and drained
  • 1½ cups shredded Colby Jack cheese
  • 1 cup diced Roma tomatoes
  • 1 cup sliced red onion
  • ½ cup diced dill pickles
  • Thousand Island dressing

Directions

  1. I start by browning the ground beef in a skillet over medium-high heat. Once it’s fully cooked, I drain the excess fat and set it aside.
  2. In a large bowl, I add the chopped iceberg lettuce as the base.
  3. I layer the cooked ground beef over the lettuce.
  4. Then I add shredded cheese, tomatoes, red onion, and pickles on top.
  5. I drizzle Thousand Island dressing generously across the salad.
  6. I give everything a good toss until it’s evenly mixed.
  7. Serve right away while the beef is still warm.

Servings and Timing

This recipe makes about 8 servings. It takes just 20 minutes from start to finish, which includes both the prep and cook time. It’s quick, convenient, and filling.

Variations

  • Swap Colby Jack with cheddar or pepper jack for a different flavor.
  • Use ground turkey or chicken for a leaner version.
  • Try romaine or mixed greens if I want a change from iceberg.
  • I sometimes add sesame seeds or croutons for extra crunch.
  • A few jalapeños give it a spicy kick if I’m in the mood.

Storage/Reheating

I keep leftover ingredients in separate containers so the lettuce doesn’t get soggy. The cooked beef can go in an airtight container in the fridge for up to 3 days. When I’m ready to eat, I reheat the beef and reassemble the salad with fresh toppings and dressing.

FAQs

How can I make this salad keto-friendly?

I choose a low-sugar or homemade version of Thousand Island dressing and make sure all ingredients are keto-approved.

Can I prepare this salad ahead of time?

Yes, I like to prep the ingredients and store them separately. When it’s time to eat, I just assemble and serve.

What can I use instead of Thousand Island dressing?

I sometimes mix mayo and ketchup with a splash of vinegar for a quick homemade version, or use ranch if I want a different flavor.

Can I make this vegetarian?

Absolutely. I use plant-based ground meat or seasoned lentils and make sure the cheese and dressing are vegetarian-friendly.

How do I add more veggies?

I toss in shredded carrots, cucumbers, or bell peppers when I want to bulk up the salad or add more crunch.

Conclusion

This Big Mac Salad is my go-to when I want something quick, flavorful, and a little nostalgic. It hits all the right notes—savory, tangy, crunchy—and keeps me full without feeling heavy. It’s an easy, crowd-pleasing option that fits right into my weekly meal plan.

Print

clock clock iconcutlery cutlery iconflag flag iconfolder folder iconinstagram instagram iconpinterest pinterest iconfacebook facebook iconprint print iconsquares squares iconheart heart iconheart solid heart solid icon
Big Mac Salad

Big Mac Salad

5 Stars 4 Stars 3 Stars 2 Stars 1 Star No reviews
  • Author: Sue
  • Prep Time: 10 minutes
  • Cook Time: 10 minutes
  • Total Time: 20 minutes
  • Yield: 8 servings
  • Category: Salad
  • Method: Stovetop
  • Cuisine: American
Print Recipe
Pin Recipe

Description

This Big Mac Salad is a low-carb, deconstructed version of the classic fast-food burger, featuring seasoned ground beef, crisp lettuce, pickles, onions, tomatoes, and shredded cheese, all topped with creamy Thousand Island dressing.


Ingredients

  • 6 cups chopped iceberg lettuce
  • 1½ pounds extra lean ground beef, browned and drained
  • 1½ cups shredded Colby Jack cheese
  • 1 cup diced Roma tomatoes
  • 1 cup sliced red onion
  • ½ cup diced dill pickles
  • Thousand Island salad dressing, to taste

Instructions

  1. In a large skillet over medium-high heat, brown the ground beef until fully cooked. Drain any excess fat and set aside.
  2. In an extra-large serving bowl, add the chopped iceberg lettuce.
  3. Layer the cooked ground beef over the lettuce.
  4. Sprinkle the shredded Colby Jack cheese, diced Roma tomatoes, sliced red onion, and diced dill pickles over the beef.
  5. Drizzle Thousand Island dressing over the top of the salad.
  6. Toss everything together until well combined.
  7. Serve immediately and enjoy!

Notes

  • Use a keto-friendly or homemade low-sugar dressing to make it keto-compliant.
  • Prepare ingredients ahead and store separately for easy assembly later.
  • Swap in plant-based meat for a vegetarian version.
  • Add more veggies like cucumbers or bell peppers for extra crunch and nutrition.

Nutrition

  • Serving Size: 1 serving
  • Calories: 350
  • Sugar: 4g
  • Sodium: 600mg
  • Fat: 26g
  • Saturated Fat: 11g
  • Unsaturated Fat: 12g
  • Trans Fat: 1g
  • Carbohydrates: 7g
  • Fiber: 2g
  • Protein: 23g
  • Cholesterol: 80mg

Have you made this recipe? I'd love to see it!

Click here to Follow me on Pinterest

No-Bake Oreo Pie

May 28, 2025 by Sue Leave a Comment

This no-bake Oreo pie is a delightful dessert that combines a crunchy Oreo crust with a creamy, cookies-and-cream cheesecake filling. It's a perfect treat for any occasion, requiring no oven and minimal effort. No-Bake Oreo Pie

Why You’ll Love This Recipe

I love how this recipe brings together the rich flavors of Oreos and cream cheese into a luscious, no-bake dessert. It's incredibly easy to prepare, making it ideal for both novice and experienced bakers. The combination of textures—from the crunchy crust to the smooth filling—makes every bite satisfying.

Ingredients

(Here's a tip: Check out the full list of ingredients and measurements in the recipe card below.)

  • 25 Oreo cookies (including filling)
  • 5 tablespoons unsalted butter, melted
  • 8 ounces cream cheese, softened
  • ¾ cup powdered sugar
  • 2 cups whipped topping, thawed
  • 10 Oreo cookies, chopped

Directions

  1. Prepare the crust: I crush 25 Oreo cookies (with filling) into fine crumbs using a food processor. Then, I mix in the melted butter until well combined.
  2. Form the crust: I press the mixture firmly into the bottom and up the sides of a 9-inch pie plate. To ensure a firm crust, I refrigerate it while preparing the filling.
  3. Make the filling: In a mixing bowl, I beat the softened cream cheese until smooth. I add the powdered sugar and continue beating until well incorporated.
  4. Add whipped topping: I fold in the whipped topping gently until the mixture is smooth and creamy.
  5. Incorporate chopped Oreos: I stir in the chopped Oreo cookies, distributing them evenly throughout the filling.
  6. Assemble the pie: I pour the filling into the prepared crust, smoothing the top with a spatula.
  7. Chill: I refrigerate the pie for at least 1 hour and 20 minutes, or until set.

Servings and Timing

  • Servings: 8
  • Prep Time: 20 minutes
  • Chill Time: 1 hour 20 minutes
  • Total Time: 1 hour 40 minutes

Variations

  • Minty Twist: I sometimes use mint-flavored Oreo cookies for a refreshing variation.
  • Peanut Butter Delight: Adding a layer of peanut butter between the crust and filling gives a delightful twist.
  • Chocolate Lovers: Drizzling melted chocolate over the top enhances the richness.

Storage/Reheating

I store any leftover pie in the refrigerator, covered with plastic wrap or in an airtight container, for up to 3 days. Since it's a no-bake dessert, reheating isn't necessary.

FAQs

Can I use a store-bought Oreo crust?

Yes, I can use a pre-made Oreo crust to save time. However, making it from scratch gives a fresher taste.

Can I make this pie ahead of time?

Absolutely. I often prepare it a day in advance and let it chill overnight for the best texture.

Can I freeze the Oreo pie?

Yes, I can freeze the pie for up to a month. I wrap it tightly in plastic wrap and aluminum foil. Before serving, I thaw it in the refrigerator.

What can I use instead of whipped topping?

If I prefer, I can use homemade whipped cream. I whip 1 cup of heavy cream with 2 tablespoons of powdered sugar until stiff peaks form.

Can I use reduced-fat cream cheese?

Yes, I can use reduced-fat cream cheese, but the filling might be slightly less rich and creamy.

Conclusion

This no-bake Oreo pie is a crowd-pleaser that's simple to make and delicious to eat. Whether I'm serving it at a party or enjoying a slice at home, it's always a hit. The combination of crunchy crust and creamy filling makes it a dessert I'll return to time and again.

Print

clock clock iconcutlery cutlery iconflag flag iconfolder folder iconinstagram instagram iconpinterest pinterest iconfacebook facebook iconprint print iconsquares squares iconheart heart iconheart solid heart solid icon
No-Bake Oreo Pie

No-Bake Oreo Pie

5 Stars 4 Stars 3 Stars 2 Stars 1 Star No reviews
  • Author: Sue
  • Prep Time: 20 minutes
  • Cook Time: 0 minutes
  • Total Time: 1 hour 40 minutes
  • Yield: 8 servings
  • Category: Dessert
  • Method: No-Bake
  • Cuisine: American
  • Diet: Vegetarian
Print Recipe
Pin Recipe

Description

This no-bake Oreo pie features a crunchy Oreo crust and a creamy cookies-and-cream cheesecake filling. It's an easy, crowd-pleasing dessert perfect for any occasion.


Ingredients

  • 25 Oreo cookies (including filling)
  • 5 tablespoons unsalted butter, melted
  • 8 ounces cream cheese, softened
  • ¾ cup powdered sugar
  • 2 cups whipped topping, thawed
  • 10 Oreo cookies, chopped

Instructions

  1. Crush 25 Oreo cookies (with filling) into fine crumbs using a food processor.
  2. Mix in the melted butter until well combined.
  3. Press the mixture firmly into the bottom and up the sides of a 9-inch pie plate. Refrigerate to set the crust.
  4. In a bowl, beat the softened cream cheese until smooth.
  5. Add powdered sugar and beat until fully incorporated.
  6. Gently fold in the whipped topping until smooth and creamy.
  7. Stir in the chopped Oreo cookies.
  8. Pour the filling into the prepared crust and smooth the top.
  9. Refrigerate the pie for at least 1 hour and 20 minutes or until set.

Notes

  • Store leftovers in the fridge for up to 3 days.
  • Can be frozen for up to 1 month and thawed in the fridge before serving.
  • Use a store-bought Oreo crust for convenience.
  • Homemade whipped cream can substitute whipped topping.
  • Reduced-fat cream cheese may result in a less rich filling.

Nutrition

  • Serving Size: 1 slice
  • Calories: 420
  • Sugar: 27g
  • Sodium: 310mg
  • Fat: 26g
  • Saturated Fat: 13g
  • Unsaturated Fat: 10g
  • Trans Fat: 0g
  • Carbohydrates: 42g
  • Fiber: 1g
  • Protein: 4g
  • Cholesterol: 35mg

Have you made this recipe? I'd love to see it!

Click here to Follow me on Pinterest

KFC Copycat Coleslaw

May 28, 2025 by Sue Leave a Comment

This KFC Copycat Coleslaw recipe brings the iconic taste of the famous fast-food side dish right into my kitchen. With its creamy, tangy dressing and finely chopped cabbage, it's a refreshing addition to any meal. KFC Copycat Coleslaw

Why I Love This Recipe

I appreciate how this coleslaw captures the authentic flavor of KFC's version. The balance of sweetness and tanginess in the dressing complements the crispness of the cabbage and carrots. It's a versatile side that pairs well with various dishes, from fried chicken to grilled meats.

Ingredients

(Here's a tip: Check out the full list of ingredients and measurements in the recipe card below.)

  • 8 cups finely chopped green cabbage (about 1 medium head)
  • ¼ cup shredded carrot (about 1 medium carrot)
  • 2 tablespoons minced onion
  • ½ cup mayonnaise
  • ¼ cup buttermilk
  • ¼ cup whole milk
  • ⅓ cup granulated sugar
  • 2 ½ tablespoons lemon juice
  • 1 ½ tablespoons white vinegar
  • ½ teaspoon salt
  • ⅛ teaspoon ground black pepper

Directions

  1. In a large mixing bowl, I whisk together the mayonnaise, buttermilk, milk, sugar, lemon juice, vinegar, salt, and pepper until smooth.
  2. I add the finely chopped cabbage, shredded carrot, and minced onion to the bowl.
  3. I toss everything together until the vegetables are well coated with the dressing.
  4. I cover the bowl and refrigerate the coleslaw for at least 4 hours, preferably overnight, to allow the flavors to meld.
  5. Before serving, I give the coleslaw a good stir to redistribute the dressing.

Servings and Timing

This recipe yields approximately 10 servings, with each serving being about ½ cup. The preparation time is around 15 minutes, and I recommend chilling the coleslaw for at least 4 hours before serving to achieve the best flavor.

Variations

  • Vegan Version: I substitute the mayonnaise with a vegan alternative and use plant-based milk and buttermilk substitutes.
  • Spicy Kick: I add a pinch of cayenne pepper or a dash of hot sauce to the dressing for some heat.
  • Herb Infusion: I mix in some finely chopped fresh herbs like parsley or dill for added freshness.

Storage and Reheating

I store the coleslaw in an airtight container in the refrigerator for up to 3 days. I don't recommend freezing it, as the texture of the cabbage can become mushy upon thawing. Since it's a cold dish, reheating isn't necessary.

FAQs

What type of cabbage works best for this coleslaw?

I find that green cabbage provides the classic texture and flavor reminiscent of KFC's coleslaw. It's crisp and holds up well in the dressing.

Can I use pre-shredded cabbage and carrots?

Yes, I often use pre-shredded coleslaw mix for convenience. I ensure it's finely chopped to mimic the texture of KFC's coleslaw.

How can I make a buttermilk substitute?

When I don't have buttermilk on hand, I mix ¼ cup of milk with ½ tablespoon of lemon juice or white vinegar and let it sit for 5 minutes before using.

Is it necessary to refrigerate the coleslaw before serving?

Absolutely. I always refrigerate the coleslaw for at least 4 hours to allow the flavors to meld and the cabbage to soften slightly, enhancing the overall taste.

Can I make this coleslaw ahead of time?

Yes, I often prepare it a day in advance. In fact, I find that the flavor improves after sitting overnight in the refrigerator.

Conclusion

Creating this KFC Copycat Coleslaw at home is a simple and rewarding experience. I enjoy how it brings a familiar taste to my meals, and it's always a hit at gatherings. Whether I'm serving it alongside fried chicken or as part of a picnic spread, this coleslaw adds a delightful crunch and flavor that everyone appreciates.

Print

clock clock iconcutlery cutlery iconflag flag iconfolder folder iconinstagram instagram iconpinterest pinterest iconfacebook facebook iconprint print iconsquares squares iconheart heart iconheart solid heart solid icon
KFC Copycat Coleslaw

KFC Copycat Coleslaw

5 Stars 4 Stars 3 Stars 2 Stars 1 Star No reviews
  • Author: Sue
  • Prep Time: 15 minutes
  • Cook Time: 0 minutes
  • Total Time: 4 hours 15 minutes
  • Yield: 10 servings
  • Category: Side Dish
  • Method: No-Cook
  • Cuisine: American
  • Diet: Vegetarian
Print Recipe
Pin Recipe

Description

This KFC Copycat Coleslaw recipe recreates the iconic fast-food side with a creamy, tangy dressing and finely chopped cabbage, making it a refreshing complement to many meals.


Ingredients

  • 8 cups finely chopped green cabbage (about 1 medium head)
  • ¼ cup shredded carrot (about 1 medium carrot)
  • 2 tablespoons minced onion
  • ½ cup mayonnaise
  • ¼ cup buttermilk
  • ¼ cup whole milk
  • ⅓ cup granulated sugar
  • 2 ½ tablespoons lemon juice
  • 1 ½ tablespoons white vinegar
  • ½ teaspoon salt
  • ⅛ teaspoon ground black pepper

Instructions

  1. In a large mixing bowl, whisk together the mayonnaise, buttermilk, milk, sugar, lemon juice, vinegar, salt, and pepper until smooth.
  2. Add the finely chopped cabbage, shredded carrot, and minced onion to the bowl.
  3. Toss everything together until the vegetables are well coated with the dressing.
  4. Cover the bowl and refrigerate the coleslaw for at least 4 hours, preferably overnight, to allow the flavors to meld.
  5. Before serving, stir the coleslaw well to redistribute the dressing.

Notes

  • For a vegan version, use plant-based mayonnaise and milk substitutes.
  • Add a pinch of cayenne or a dash of hot sauce for a spicy kick.
  • Include fresh herbs like parsley or dill for extra flavor.
  • Best served chilled after refrigerating overnight.
  • Do not freeze, as the texture may degrade.

Nutrition

  • Serving Size: ½ cup
  • Calories: 150
  • Sugar: 9g
  • Sodium: 170mg
  • Fat: 10g
  • Saturated Fat: 1.5g
  • Unsaturated Fat: 7.5g
  • Trans Fat: 0g
  • Carbohydrates: 13g
  • Fiber: 1g
  • Protein: 1g
  • Cholesterol: 5mg

Have you made this recipe? I'd love to see it!

Click here to Follow me on Pinterest

Chicken Taco Casserole

May 28, 2025 by Sue Leave a Comment

This Chicken Taco Casserole is a delightful fusion of creamy, cheesy, and crunchy layers that bring together the best of Mexican flavors in a comforting bake. With shredded chicken, black beans, and a zesty taco seasoning blend, it's a dish that satisfies every craving. Chicken Taco Casserole

Why I Love This Recipe

I love how this casserole combines the hearty goodness of chicken tacos with the ease of a one-dish meal. The layers of crushed tortilla chips, creamy chicken mixture, and melted cheese create a texture and flavor that's both comforting and exciting. It's perfect for busy weeknights or when I want to impress guests without spending hours in the kitchen.

Ingredients

(Here's a tip: Check out the full list of ingredients and measurements in the recipe card below.)

  • Shredded cooked chicken
  • Cream of chicken soup
  • Sour cream
  • Diced tomatoes with green chilies (like Rotel)
  • Black beans
  • Taco seasoning
  • Crushed tortilla chips
  • Shredded cheddar cheese
  • Optional toppings: sliced jalapeños, chopped tomatoes, fresh cilantro

Directions

  1. Preheat the oven to 350°F (175°C).
  2. In a large bowl, I combine the shredded chicken, cream of chicken soup, sour cream, diced tomatoes with green chilies, black beans, and taco seasoning. I mix until everything is well incorporated.
  3. I lightly grease a 9x13-inch baking dish and spread half of the crushed tortilla chips evenly on the bottom.
  4. I pour the chicken mixture over the chips and spread it out evenly.
  5. I sprinkle the remaining crushed tortilla chips over the top, followed by the shredded cheddar cheese.
  6. I bake the casserole in the preheated oven for 30 minutes, or until the cheese is melted and bubbly.
  7. Once baked, I let it cool for a few minutes before adding optional toppings like sliced jalapeños, chopped tomatoes, and fresh cilantro.

Servings and Timing

This recipe yields 8 servings. The preparation time is about 5 minutes, and the cooking time is approximately 30 minutes, making the total time around 35 minutes.

Variations

  • Spicy Kick: I add chopped jalapeños or a dash of hot sauce to the chicken mixture for extra heat.
  • Vegetarian Version: I substitute the chicken with more beans or a meat substitute like tofu crumbles.
  • Different Cheeses: I experiment with Monterey Jack or a Mexican cheese blend for a different flavor profile.
  • Add Veggies: I mix in corn, bell peppers, or onions for added texture and nutrition.

Storage/Reheating

  • Storage: I store leftovers in an airtight container in the refrigerator for up to 3 days.
  • Freezing: I freeze the casserole in a freezer-safe container for up to 2 months. I make sure to cool it completely before freezing.
  • Reheating: I reheat individual portions in the microwave for 2-3 minutes or until heated through. For larger portions, I cover the casserole with foil and bake at 350°F (175°C) for about 20 minutes.

FAQs

What can I use instead of cream of chicken soup?

I often use cream of mushroom or cream of celery soup as alternatives. For a homemade version, I make a roux with butter, flour, and chicken broth, then add milk to create a creamy base.

Can I make this casserole ahead of time?

Absolutely! I assemble the casserole, cover it tightly, and refrigerate it for up to 24 hours before baking. I may need to add a few extra minutes to the baking time if it's coming straight from the fridge.

How can I make this dish gluten-free?

I use gluten-free tortilla chips and ensure that the cream of chicken soup and taco seasoning are labeled gluten-free. Many brands offer gluten-free options.

What sides go well with this casserole?

I like to serve it with a simple green salad, Mexican rice, or a side of guacamole and chips to complement the flavors.

Can I use rotisserie chicken?

Yes, using rotisserie chicken is a great time-saver. I shred the meat and use it as directed in the recipe.

Conclusion

This Chicken Taco Casserole is a versatile and satisfying dish that brings the flavors of a taco night into a convenient casserole form. Whether I'm feeding a crowd or looking for leftovers to enjoy throughout the week, this recipe never disappoints. It's a staple in my kitchen for its ease, flavor, and the smiles it brings to the dinner table.

Print

clock clock iconcutlery cutlery iconflag flag iconfolder folder iconinstagram instagram iconpinterest pinterest iconfacebook facebook iconprint print iconsquares squares iconheart heart iconheart solid heart solid icon
Chicken Taco Casserole

Chicken Taco Casserole

5 Stars 4 Stars 3 Stars 2 Stars 1 Star No reviews
  • Author: Sue
  • Prep Time: 5 minutes
  • Cook Time: 30 minutes
  • Total Time: 35 minutes
  • Yield: 8 servings
  • Category: Main Course
  • Method: Baking
  • Cuisine: Mexican-Inspired
  • Diet: Gluten Free
Print Recipe
Pin Recipe

Description

A comforting and flavorful Chicken Taco Casserole that combines creamy, cheesy, and crunchy layers with Mexican-inspired ingredients like shredded chicken, taco seasoning, and black beans.


Ingredients

  • 3 cups shredded cooked chicken
  • 1 can (10.5 oz) cream of chicken soup
  • ½ cup sour cream
  • 1 can (10 oz) diced tomatoes with green chilies (like Rotel)
  • 1 can (15 oz) black beans, drained and rinsed
  • 1 packet (1 oz) taco seasoning
  • 3 cups crushed tortilla chips
  • 2 cups shredded cheddar cheese
  • Optional toppings: sliced jalapeños, chopped tomatoes, fresh cilantro

Instructions

  1. Preheat the oven to 350°F (175°C).
  2. In a large bowl, combine the shredded chicken, cream of chicken soup, sour cream, diced tomatoes with green chilies, black beans, and taco seasoning. Mix well.
  3. Lightly grease a 9x13-inch baking dish and spread half of the crushed tortilla chips on the bottom.
  4. Pour the chicken mixture over the chips and spread it evenly.
  5. Sprinkle the remaining crushed tortilla chips over the top, followed by the shredded cheddar cheese.
  6. Bake in the preheated oven for 30 minutes, or until the cheese is melted and bubbly.
  7. Let the casserole cool for a few minutes before adding optional toppings like sliced jalapeños, chopped tomatoes, and fresh cilantro.

Notes

  • Use rotisserie chicken for convenience and added flavor.
  • Make ahead and refrigerate up to 24 hours before baking.
  • Substitute with cream of mushroom or celery soup if desired.
  • For a gluten-free version, use certified gluten-free chips and soup.

Nutrition

  • Serving Size: 1 serving
  • Calories: 420
  • Sugar: 3g
  • Sodium: 880mg
  • Fat: 24g
  • Saturated Fat: 10g
  • Unsaturated Fat: 11g
  • Trans Fat: 0g
  • Carbohydrates: 28g
  • Fiber: 5g
  • Protein: 24g
  • Cholesterol: 70mg

Have you made this recipe? I'd love to see it!

Click here to Follow me on Pinterest

Lemon Brownies

May 28, 2025 by Sue Leave a Comment

These lemon brownies are a zesty, refreshing twist on the classic chocolate version. I get a perfectly fudgy, soft texture with bold lemon flavor in every bite. Topped with a tangy glaze, they’re a sweet citrus dream that's perfect for any time of year. Lemon Brownies

Why You’ll Love This Recipe

I love how easy these lemon brownies are to whip up with just a handful of ingredients. The bright lemon zest and juice give them a fresh, natural flavor that stands out. The texture is soft and chewy, not cakey, and the glaze adds the perfect touch of sweetness and tang. Whether I’m making them for a family gathering or just to satisfy a lemon craving, they never disappoint.

Ingredients

(Here's a tip: Check out the full list of ingredients and measurements in the recipe card below.)

For the brownies:

  • yellow cake mix
  • lemon instant pudding mix
  • fresh lemon juice
  • eggs
  • lemon zest

For the glaze:

  • powdered sugar
  • lemon juice (adjust to desired consistency)
  • lemon zest (optional for garnish)

Directions

  1. I preheat the oven to 350°F (175°C) and line an 8-inch square baking dish with parchment paper, then spray it lightly with non-stick cooking spray.
  2. In a medium bowl, I combine the dry cake mix, lemon pudding mix, lemon juice, eggs, and lemon zest using a hand mixer until smooth and well combined.
  3. I pour the batter into the prepared pan, spreading it out evenly.
  4. I bake the brownies for 22–24 minutes, until a toothpick inserted into the center comes out with moist crumbs.
  5. After removing them from the oven, I let them cool in the pan for 10 minutes, then lift them out using the parchment paper and cool them completely on a wire rack.
  6. For the glaze, I whisk together powdered sugar and lemon juice until smooth and drizzle it over the cooled brownies.
  7. I sometimes finish with extra lemon zest on top before slicing and serving.

Servings and Timing

  • Servings: 9
  • Prep Time: 12 minutes
  • Cook Time: 24 minutes
  • Total Time: 36 minutes

Variations

  • I like to switch it up by using lime or orange juice and zest for a different citrus profile.
  • Sometimes I fold in white chocolate chips for added sweetness.
  • For a twist in the glaze, I add a splash of vanilla or swap lemon juice for orange juice.

Storage/Reheating

I store the brownies in an airtight container at room temperature for up to 3 days. If I need them to last longer, I keep them in the fridge for up to a week. For freezing, I wrap each brownie in plastic and store them in a freezer-safe bag or container for up to 3 months. I thaw them at room temperature before enjoying. If I want them slightly warm, a quick 10-second zap in the microwave does the trick.

FAQs

How do I know when the brownies are done baking?

I check them by inserting a toothpick in the center. If it comes out clean or with a few moist crumbs, they’re ready.

Can I use a different pan size?

Yes, but if I use a larger pan, the brownies will be thinner and may bake faster. I keep a close eye and adjust the baking time as needed.

Can I make these brownies gluten-free?

Yes, I just substitute a gluten-free yellow cake mix and ensure all other ingredients are gluten-free.

Is lemon pudding mix essential?

It helps with the moist texture and strong lemon flavor. If I don’t have it, the flavor and texture might change, but the brownies will still be good.

Can I double the recipe?

Definitely. I double everything and bake it in a 9x13-inch pan, checking for doneness around the 30-minute mark.

Conclusion

These lemon brownies are one of my favorite citrus desserts. They’re quick to prepare, full of lemony flavor, and always a hit whether I’m serving them at a party or enjoying one with coffee. I love how they balance sweet and tart, with that rich, chewy brownie texture I crave.

Print

clock clock iconcutlery cutlery iconflag flag iconfolder folder iconinstagram instagram iconpinterest pinterest iconfacebook facebook iconprint print iconsquares squares iconheart heart iconheart solid heart solid icon
Lemon Brownies

Lemon Brownies

5 Stars 4 Stars 3 Stars 2 Stars 1 Star No reviews
  • Author: Sue
  • Prep Time: 12 minutes
  • Cook Time: 24 minutes
  • Total Time: 36 minutes
  • Yield: 9 servings
  • Category: Dessert
  • Method: Baking
  • Cuisine: American
  • Diet: Vegetarian
Print Recipe
Pin Recipe

Description

These lemon brownies offer a moist, fudgy texture bursting with zesty lemon flavor and are topped with a tangy glaze, making them a refreshing and sweet citrus treat.


Ingredients

  • 15.25 ounces yellow cake mix
  • 3.4 ounces lemon instant pudding mix
  • ⅓ cup fresh lemon juice
  • 3 large eggs
  • 1 teaspoon lemon zest
  • 1 cup powdered sugar
  • 1 tablespoon lemon juice (more if needed)
  • Lemon zest, for garnish (optional)

Instructions

  1. Preheat the oven to 350°F (175°C).
  2. Line an 8-inch square baking pan with parchment paper and lightly spray with non-stick cooking spray.
  3. In a medium-sized mixing bowl, combine the dry cake mix, dry pudding mix, lemon juice, eggs, and lemon zest using an electric hand mixer until well blended.
  4. Pour the batter into the prepared baking pan and spread evenly with a spatula.
  5. Bake for 22-24 minutes, or until a toothpick inserted in the center comes out clean or with only moist crumbs.
  6. Remove from the oven and let cool in the pan for 10 minutes.
  7. Using the parchment paper, lift the brownies out of the pan and allow them to cool completely on a wire rack.
  8. While the brownies are cooling, prepare the glaze by whisking together the powdered sugar and lemon juice until smooth.
  9. Once the brownies are completely cooled, drizzle the glaze over the top and sprinkle with additional lemon zest if desired.
  10. Cut into squares and serve.

Notes

  • Ensure the brownies are completely cool before glazing for best results.
  • Adjust the lemon juice in the glaze to reach your desired consistency.
  • Store in an airtight container to maintain freshness.
  • For a stronger lemon flavor, increase the amount of lemon zest.

Nutrition

  • Serving Size: 1 brownie
  • Calories: 220
  • Sugar: 22g
  • Sodium: 210mg
  • Fat: 6g
  • Saturated Fat: 1.5g
  • Unsaturated Fat: 3.5g
  • Trans Fat: 0g
  • Carbohydrates: 38g
  • Fiber: 0g
  • Protein: 2g
  • Cholesterol: 45mg

Have you made this recipe? I'd love to see it!

Click here to Follow me on Pinterest

Honey Butter Chicken

May 28, 2025 by Sue Leave a Comment

This Honey Butter Chicken recipe delivers a perfect balance of sweet and savory flavors, featuring tender chicken pieces coated in a rich, sticky honey butter sauce. It's a quick and satisfying meal that's sure to become a family favorite. Honey Butter Chicken

Why You’ll Love This Recipe

I love how this dish combines the sweetness of honey with the richness of butter, creating a mouthwatering glaze that clings to every piece of chicken. It's quick to prepare, making it ideal for busy weeknights, and the ingredients are simple and likely already in my pantry.

Ingredients

(Here's a tip: Check out the full list of ingredients and measurements in the recipe card below.)

  • Chicken: I use boneless, skinless chicken thighs for their juiciness, but chicken breasts work well too.
  • All-purpose flour: For coating the chicken and giving it a light, crispy texture.
  • Olive oil: I prefer extra virgin olive oil, but avocado, canola, or vegetable oil are great alternatives.
  • Kosher salt: Enhances the overall flavor; sea salt or flaky salt can be used as substitutes.
  • Black pepper: Adds a subtle heat and depth to the dish.

For the honey butter sauce:

  • Unsalted butter: I always opt for real butter to achieve the best flavor.
  • Honey: Provides the sweet component of the sauce.
  • Fresh garlic: I mince it finely for a robust, aromatic flavor.
  • Light soy sauce: Adds a savory umami depth that balances the sweetness.

Directions

  1. I start by cutting the chicken into bite-sized pieces and patting them dry.
  2. In a bowl, I mix the flour, kosher salt, and black pepper.
  3. I toss the chicken pieces in the flour mixture until they're well coated.
  4. In a large skillet, I heat the olive oil over medium-high heat.
  5. I add the coated chicken pieces to the skillet, cooking them until they're golden brown and cooked through, about 5-7 minutes per side.
  6. While the chicken cooks, I prepare the sauce by melting the butter in a saucepan over medium heat.
  7. I add the honey, minced garlic, and soy sauce to the melted butter, stirring until the sauce is smooth and slightly thickened.
  8. Once the chicken is cooked, I pour the honey butter sauce over the chicken in the skillet, tossing to coat each piece evenly.
  9. I let it simmer for a couple of minutes to allow the flavors to meld.
  10. I serve the honey butter chicken hot, garnished with chopped parsley if desired.

Servings and Timing

This recipe yields approximately 4 servings. The preparation time is about 10 minutes, and the cooking time is around 20 minutes, making the total time to prepare this dish approximately 30 minutes.

Variations

  • Spicy Kick: I add a pinch of red pepper flakes or a dash of hot sauce to the honey butter sauce for some heat.
  • Citrus Twist: A squeeze of fresh lemon or orange juice in the sauce adds a bright, tangy flavor.
  • Herb Infusion: I sometimes incorporate fresh herbs like thyme or rosemary into the sauce for an aromatic touch.
  • Nutty Flavor: A sprinkle of toasted sesame seeds on top adds a delightful crunch and nutty taste.

Storage/Reheating

I store any leftovers in an airtight container in the refrigerator for up to 3 days. To reheat, I place the chicken in a skillet over medium heat until warmed through, or I microwave it in 30-second intervals, stirring in between, until hot.

FAQs

How can I make this dish gluten-free?

I substitute the all-purpose flour with a gluten-free flour blend to make this recipe gluten-free.

Can I use chicken breasts instead of thighs?

Yes, chicken breasts can be used. I ensure they are cut into uniform pieces to cook evenly and avoid overcooking to keep them tender.

What sides pair well with honey butter chicken?

I often serve this dish with steamed rice, mashed potatoes, or a fresh green salad to complement the rich flavors.

Can I prepare the sauce ahead of time?

Yes, the honey butter sauce can be made in advance and stored in the refrigerator. I reheat it gently before tossing it with the cooked chicken.

Is this recipe suitable for meal prep?

Absolutely. I cook the chicken and store it separately from the sauce. When ready to eat, I reheat both and combine them for a fresh-tasting meal.

Conclusion

Honey Butter Chicken is a delightful dish that combines simple ingredients to create a flavorful and satisfying meal. Its quick preparation and versatile nature make it a go-to recipe in my kitchen. Whether I'm cooking for family or entertaining guests, this dish never fails to impress.

Print

clock clock iconcutlery cutlery iconflag flag iconfolder folder iconinstagram instagram iconpinterest pinterest iconfacebook facebook iconprint print iconsquares squares iconheart heart iconheart solid heart solid icon
Honey Butter Chicken

Honey Butter Chicken

5 Stars 4 Stars 3 Stars 2 Stars 1 Star No reviews
  • Author: Sue
  • Prep Time: 10 minutes
  • Cook Time: 20 minutes
  • Total Time: 30 minutes
  • Yield: 4 servings
  • Category: Main Course
  • Method: Stovetop
  • Cuisine: American
  • Diet: Halal
Print Recipe
Pin Recipe

Description

Honey Butter Chicken is a quick and flavorful dish featuring juicy chicken pieces coated in a rich, sweet-savory honey butter sauce. Perfect for a fast weeknight dinner.


Ingredients

  • 1.5 lbs boneless, skinless chicken thighs or breasts, cut into bite-sized pieces
  • ½ cup all-purpose flour
  • 2 tbsp olive oil
  • 1 tsp kosher salt
  • ½ tsp black pepper
  • 4 tbsp unsalted butter
  • ¼ cup honey
  • 3 cloves garlic, minced
  • 2 tbsp light soy sauce

Instructions

  1. Cut the chicken into bite-sized pieces and pat them dry.
  2. In a bowl, mix the flour, kosher salt, and black pepper.
  3. Toss the chicken pieces in the flour mixture until well coated.
  4. Heat the olive oil in a large skillet over medium-high heat.
  5. Add the coated chicken and cook until golden brown and cooked through, about 5-7 minutes per side.
  6. While the chicken cooks, melt the butter in a saucepan over medium heat.
  7. Add honey, minced garlic, and soy sauce to the melted butter, stirring until smooth and slightly thickened.
  8. Pour the honey butter sauce over the cooked chicken in the skillet and toss to coat evenly.
  9. Let it simmer for a couple of minutes to allow flavors to meld.
  10. Serve hot, garnished with chopped parsley if desired.

Notes

  • Substitute chicken thighs with breasts for a leaner option.
  • Use gluten-free flour to make the dish gluten-free.
  • Add red pepper flakes for a spicy version.
  • Store leftovers in an airtight container in the fridge for up to 3 days.
  • Reheat gently on the stove or in the microwave.

Nutrition

  • Serving Size: 1 serving
  • Calories: 420
  • Sugar: 14g
  • Sodium: 720mg
  • Fat: 22g
  • Saturated Fat: 8g
  • Unsaturated Fat: 12g
  • Trans Fat: 0g
  • Carbohydrates: 25g
  • Fiber: 1g
  • Protein: 30g
  • Cholesterol: 100mg

Have you made this recipe? I'd love to see it!

Click here to Follow me on Pinterest

Greek Chicken Bowls

May 28, 2025 by Sue Leave a Comment

These Greek Chicken Bowls are a fresh and flavorful way to bring Mediterranean inspiration to my meals. With juicy marinated chicken, crisp veggies, and creamy tzatziki, each bite is both satisfying and nourishing. It’s a balanced and vibrant dish I love to return to, especially when I need something simple but full of flavor. Greek Chicken Bowls

Why You’ll Love This Recipe

I love how easy this recipe is to prepare and how flexible it is to suit different tastes. The marinated chicken is tender and packed with flavor, while the fresh veggies and creamy tzatziki add a refreshing balance. It’s perfect for meal prep, and I find it keeps me full and energized throughout the day. Whether I’m making it for dinner or prepping lunches for the week, it always hits the spot.

Ingredients

(Here's a tip: Check out the full list of ingredients and measurements in the recipe card below.)

For the chicken marinade:

  • 4 small chicken breasts (about 1¼ pounds)
  • ¼ cup olive oil
  • 1 tablespoon lemon zest
  • 2 tablespoons lemon juice
  • 2 tablespoons honey
  • 1 teaspoon garlic powder
  • 1½ teaspoons dried oregano
  • 1½ teaspoons dried basil
  • 1 teaspoon salt
  • ¼ teaspoon black pepper
  • ½ teaspoon red pepper flakes

For the bowls:

  • Cooked rice or quinoa
  • Grape or cherry tomatoes
  • Cucumber
  • Red onion
  • Feta cheese
  • Homemade tzatziki sauce

Directions

  1. I whisk together all the marinade ingredients in a small bowl.
  2. I pound the chicken to about ½ inch thick, then place it in a shallow dish or ziplock bag with the marinade.
  3. I let it marinate for at least 30 minutes or up to a few hours in the refrigerator.
  4. While the chicken is marinating, I prepare the tzatziki sauce and chop the vegetables.
  5. To cook the chicken:
    • Air fryer: I preheat it to 380°F and cook the chicken for 7 minutes on one side, then flip and cook for another 3–4 minutes until the internal temperature reaches 165°F.
    • Skillet: I heat a bit of oil over medium-low heat and cook the chicken for about 7–8 minutes per side, or until cooked through.
  6. I let the chicken rest for 5 minutes, then slice it into strips.
  7. To assemble, I layer rice or quinoa in a bowl, add the veggies, top with sliced chicken and tzatziki.
  8. I finish with a drizzle of olive oil and a squeeze of lemon juice if I want extra brightness.

Servings and Timing

  • Servings: 4
  • Prep time: 20 minutes
  • Cook time: 20 minutes
  • Marinate time: 1 hour
  • Total time: 1 hour 40 minutes

Variations

  • To keep it low carb, I use cauliflower rice instead of grains.
  • For a dairy-free version, I skip the feta and use plant-based yogurt in the tzatziki.
  • Sometimes I add kalamata olives or avocado for extra richness and flavor.
  • I also like swapping the chicken with grilled tofu or chickpeas for a vegetarian version.

Storage/Reheating

I store each component separately in airtight containers in the fridge. The cooked chicken and rice or quinoa last for up to 3 days. When it’s time to eat, I reheat the chicken and grains, then assemble my bowl with the cold vegetables and tzatziki. It’s super convenient and keeps the textures fresh.

FAQs

What can I use instead of chicken?

I like to swap the chicken for grilled tofu, roasted chickpeas, or even shrimp when I want something different.

Can I make this ahead of time?

Absolutely. I prep all the components in advance and keep them refrigerated. Then I just assemble the bowl when I’m ready to eat.

How can I make the tzatziki sauce dairy-free?

I use a dairy-free yogurt alternative like coconut or almond yogurt to make a vegan-friendly tzatziki sauce.

What type of rice works best?

I usually go with jasmine or basmati rice, but brown rice or quinoa also work well if I want more fiber.

Can I freeze the marinated chicken?

Yes, I often freeze the raw marinated chicken in a ziplock bag. Then I just thaw it overnight in the fridge before cooking.

Conclusion

These Greek Chicken Bowls are one of my favorite go-to meals when I want something fresh, hearty, and packed with flavor. They’re easy to make, perfect for meal prep, and endlessly customizable. Whether I’m feeding a crowd or just prepping for myself, this recipe never fails to deliver.

Print

clock clock iconcutlery cutlery iconflag flag iconfolder folder iconinstagram instagram iconpinterest pinterest iconfacebook facebook iconprint print iconsquares squares iconheart heart iconheart solid heart solid icon
Greek Chicken Bowls

Greek Chicken Bowls

5 Stars 4 Stars 3 Stars 2 Stars 1 Star No reviews
  • Author: Sue
  • Prep Time: 20 minutes
  • Cook Time: 20 minutes
  • Total Time: 1 hour 40 minutes
  • Yield: 4 servings
  • Category: Main Course
  • Method: Air Fryer or Skillet
  • Cuisine: Greek
  • Diet: Low Fat
Print Recipe
Pin Recipe

Description

These Greek Chicken Bowls are a vibrant Mediterranean-inspired meal featuring marinated chicken, fresh vegetables, creamy tzatziki, and grains. Perfect for meal prep or quick dinners.


Ingredients

  • 4 small chicken breasts (about 1¼ pounds)
  • ¼ cup olive oil
  • 1 tablespoon lemon zest
  • 2 tablespoons lemon juice
  • 2 tablespoons honey
  • 1 teaspoon garlic powder
  • 1½ teaspoons dried oregano
  • 1½ teaspoons dried basil
  • 1 teaspoon salt
  • ¼ teaspoon black pepper
  • ½ teaspoon red pepper flakes
  • Cooked rice or quinoa
  • Grape or cherry tomatoes
  • Cucumber
  • Red onion
  • Feta cheese
  • Homemade tzatziki sauce

Instructions

  1. Whisk together all the marinade ingredients.
  2. Pound the chicken to about ½ inch thick and place it in a shallow bowl or ziplock bag with the marinade.
  3. Marinate for at least 30 minutes, or up to a few hours.
  4. While the chicken marinates, prepare the tzatziki sauce and chop the vegetables.
  5. Cook the chicken using an air fryer or skillet until internal temperature reaches 165°F (74°C).
  6. Let the chicken rest for 5 minutes, then slice.
  7. Assemble the bowls with rice or quinoa, vegetables, sliced chicken, and tzatziki sauce.
  8. Drizzle with olive oil and lemon juice, if desired.

Notes

  • Store individual components separately in the fridge for up to 3 days.
  • Use cauliflower rice for a low-carb option.
  • Substitute chicken with tofu or chickpeas for a vegetarian version.
  • Use plant-based yogurt for a dairy-free tzatziki.
  • Marinated chicken can be frozen for later use.

Nutrition

  • Serving Size: 1 bowl
  • Calories: 450
  • Sugar: 6g
  • Sodium: 620mg
  • Fat: 18g
  • Saturated Fat: 5g
  • Unsaturated Fat: 12g
  • Trans Fat: 0g
  • Carbohydrates: 35g
  • Fiber: 4g
  • Protein: 35g
  • Cholesterol: 95mg

Have you made this recipe? I'd love to see it!

Click here to Follow me on Pinterest

Hot Fudge Pie

May 27, 2025 by Sue Leave a Comment

Hot Fudge Pie is a rich, gooey dessert that combines the deep flavors of chocolate fudge with a buttery, flaky pie crust. It's a perfect treat for any occasion, whether it's a casual family dinner or a festive gathering. Hot Fudge Pie

Why You’ll Love This Recipe

I love how this pie brings together the best of both worlds: the dense, fudgy texture of brownies and the crisp, buttery crust of a classic pie. It's simple to make, yet delivers a decadent experience that's sure to impress. The addition of semi-sweet chocolate chips adds an extra layer of indulgence, making each bite a chocolate lover's dream.

Ingredients

(Here's a tip: Check out the full list of ingredients and measurements in the recipe card below.)

For the Crust:

  • 1 ½ cups all-purpose flour
  • ¼ cup granulated sugar
  • ½ cup unsalted butter, cold and cut into small pieces
  • ¼ cup ice water (more if needed)

For the Fudge Filling:

  • ½ cup unsalted butter
  • 1 cup granulated sugar
  • ½ cup unsweetened cocoa powder
  • ¼ teaspoon salt
  • 2 large eggs
  • 1 teaspoon vanilla extract
  • ½ cup all-purpose flour
  • ½ cup semi-sweet chocolate chips (optional, for extra gooeyness)

Directions

  1. Prepare the Crust:
    • In a large bowl, combine the flour and sugar.
    • Add the cold butter pieces and use a pastry cutter or your fingers to blend until the mixture resembles coarse crumbs.
    • Gradually add the ice water, one tablespoon at a time, until the dough comes together. Be careful not to overmix.
    • Form the dough into a disk, wrap in plastic wrap, and refrigerate for at least 30 minutes.
  2. Preheat the Oven:
    • Preheat your oven to 350°F (175°C).
  3. Roll Out the Dough:
    • On a lightly floured surface, roll out the chilled dough to fit a 9-inch pie dish.
    • Gently transfer the dough to the pie dish, pressing it into the bottom and sides. Trim any excess dough.
  4. Bake the Crust:
    • Line the crust with parchment paper and fill with pie weights or dried beans.
    • Bake for 15 minutes, then remove the parchment and weights. Bake for an additional 5 minutes. Set aside to cool.
  5. Prepare the Fudge Filling:
    • In a medium saucepan, melt the butter over low heat.
    • Stir in the sugar, cocoa powder, and salt until well combined.
    • Remove from heat and whisk in the eggs, one at a time, until smooth. Stir in the vanilla extract.
    • Fold in the flour until just combined. If using, mix in the chocolate chips.
  6. Assemble and Bake:
    • Pour the fudge filling into the pre-baked crust and smooth the top.
    • Bake for 25-30 minutes, or until the center is set but still slightly gooey.
  7. Cool and Serve:
    • Allow the pie to cool completely before slicing.
    • Serve warm with a scoop of vanilla ice cream or a dollop of whipped cream for an extra touch of decadence.

Servings and Timing

  • Servings: 8
  • Prep Time: 30 minutes
  • Cook Time: 30 minutes
  • Total Time: 1 hour

Variations

  • Nutty Delight: I like to add ½ cup of chopped walnuts or pecans to the filling for a crunchy texture.
  • Mint Chocolate: A teaspoon of peppermint extract gives the pie a refreshing twist.
  • Espresso Infusion: Incorporating a tablespoon of instant espresso powder enhances the chocolate flavor.

Storage/Reheating

  • Refrigeration: I store leftover Hot Fudge Pie in the refrigerator, covered with plastic wrap or aluminum foil. It keeps well for up to 5 days.
  • Freezing: For longer storage, I wrap the pie tightly in plastic wrap and aluminum foil, then freeze it. It can be frozen for up to 3 months. To serve, I thaw it overnight in the refrigerator and reheat slices in the microwave or oven.

FAQs

How do I know when the pie is done baking?

I check if the edges are set and the center is slightly gooey. It will continue to set as it cools.

Can I use a store-bought pie crust?

Yes, I often use a store-bought crust to save time. Just follow the package instructions for pre-baking.

What can I serve with Hot Fudge Pie?

I love serving it with vanilla ice cream, whipped cream, or a drizzle of chocolate or caramel sauce.

Can I make this pie ahead of time?

Absolutely. I prepare the pie a day in advance and store it in the refrigerator. I reheat slices before serving.

Is it possible to make this pie gluten-free?

Yes, I substitute the all-purpose flour with a gluten-free flour blend to make it gluten-free.

Conclusion

Hot Fudge Pie is a decadent dessert that's simple to make yet delivers an indulgent experience. Its rich, fudgy filling and buttery crust make it a favorite for any occasion. Whether served warm with ice cream or enjoyed on its own, it's a treat that never disappoints.

Print

clock clock iconcutlery cutlery iconflag flag iconfolder folder iconinstagram instagram iconpinterest pinterest iconfacebook facebook iconprint print iconsquares squares iconheart heart iconheart solid heart solid icon
Hot Fudge Pie

Hot Fudge Pie

5 Stars 4 Stars 3 Stars 2 Stars 1 Star No reviews
  • Author: Sue
  • Prep Time: 30 minutes
  • Cook Time: 30 minutes
  • Total Time: 1 hour
  • Yield: 8 servings
  • Category: Dessert
  • Method: Baking
  • Cuisine: American
  • Diet: Vegetarian
Print Recipe
Pin Recipe

Description

Hot Fudge Pie is a rich, gooey dessert that blends the dense texture of brownies with a buttery pie crust, making it a chocolate lover’s delight.


Ingredients

  • 1 ½ cups all-purpose flour (for crust)
  • ¼ cup granulated sugar (for crust)
  • ½ cup unsalted butter, cold and cut into small pieces (for crust)
  • ¼ cup ice water (more if needed, for crust)
  • ½ cup unsalted butter (for filling)
  • 1 cup granulated sugar (for filling)
  • ½ cup unsweetened cocoa powder
  • ¼ teaspoon salt
  • 2 large eggs
  • 1 teaspoon vanilla extract
  • ½ cup all-purpose flour (for filling)
  • ½ cup semi-sweet chocolate chips (optional)

Instructions

  1. In a large bowl, combine flour and sugar for the crust. Cut in butter until the mixture resembles coarse crumbs. Gradually add ice water until dough forms. Shape into a disk, wrap, and chill for 30 minutes.
  2. Preheat oven to 350°F (175°C).
  3. Roll dough on a floured surface and fit into a 9-inch pie dish. Trim edges.
  4. Line crust with parchment paper and fill with weights. Bake for 15 minutes, remove weights and bake 5 more minutes. Let cool.
  5. In a saucepan, melt butter. Stir in sugar, cocoa powder, and salt. Remove from heat. Whisk in eggs one at a time, then add vanilla.
  6. Stir in flour until just combined. Fold in chocolate chips if using.
  7. Pour filling into cooled crust and smooth top. Bake for 25-30 minutes until set but still gooey in center.
  8. Cool completely before slicing. Serve warm with ice cream or whipped cream.

Notes

  • Add nuts like walnuts or pecans for crunch.
  • Use peppermint extract for a minty variation.
  • Espresso powder enhances chocolate flavor.
  • Store in fridge up to 5 days or freeze up to 3 months.

Nutrition

  • Serving Size: 1 slice
  • Calories: 420
  • Sugar: 30g
  • Sodium: 120mg
  • Fat: 24g
  • Saturated Fat: 14g
  • Unsaturated Fat: 8g
  • Trans Fat: 0g
  • Carbohydrates: 50g
  • Fiber: 3g
  • Protein: 4g
  • Cholesterol: 75mg

Have you made this recipe? I'd love to see it!

Click here to Follow me on Pinterest

Ritz S’mores Cookies

May 27, 2025 by Sue Leave a Comment

I love how these Ritz S’mores Cookies bring together the nostalgic flavors of classic campfire s’mores with a delightful salty twist. By sandwiching marshmallow creme between buttery Ritz crackers and dipping them in rich chocolate, I create a no-bake treat that's both quick and indulgent. They're perfect for any occasion, from summer gatherings to holiday dessert spreads. Ritz S’mores Cookies

Why I Love This Recipe

I’m always on the lookout for simple yet satisfying desserts, and these cookies hit the mark every time. The combination of sweet marshmallow, salty crackers, and smooth chocolate creates a harmonious balance that’s hard to resist. Plus, the no-bake aspect means I can whip them up without heating the kitchen, making them ideal for warm days or when I’m short on time. Their versatility also allows me to customize them with various toppings to suit different festivities or personal preferences.

Ingredients

(Here's a tip: Check out the full list of ingredients and measurements in the recipe card below.)

  • Ritz crackers
  • Marshmallow creme or fluff
  • Chocolate almond bark or melting wafers
  • Optional toppings:
    • Crushed graham crackers
    • Mini marshmallow bits
    • Mini chocolate chips
    • Sprinkles or jimmies

Directions

  1. I start by melting the chocolate almond bark according to the package instructions until it's smooth.
  2. Next, I line a baking sheet with parchment or wax paper and lay out half of the Ritz crackers.
  3. Using a greased spoon, I place 1 to 2 teaspoons of marshmallow creme onto the center of each cracker.
  4. I then top each with another Ritz cracker, gently pressing to create a sandwich.
  5. Using tongs or a fork, I dip each sandwich into the melted chocolate, allowing any excess to drip off before placing them back on the lined baking sheet.
  6. While the chocolate is still wet, I sprinkle my choice of toppings over each cookie.
  7. Finally, I let the cookies sit until the chocolate hardens completely before serving.

Servings and Timing

This recipe yields approximately 24 cookies. The preparation time is about 15 minutes, and I allow additional time for the chocolate to set, which can vary depending on room temperature but generally takes around 30 minutes.

Variations

I enjoy experimenting with different flavors and textures. Sometimes, I add a drop of peppermint or almond extract to the melted chocolate for a unique twist. For a festive touch, I use colored sprinkles corresponding to the holiday or event. If I’m in the mood for something nutty, a thin layer of peanut butter inside the sandwich adds a delightful depth.

Storage and Reheating

After the chocolate has set, I store the cookies in an airtight container at room temperature for up to 5 days. To prevent them from sticking together, I place parchment or wax paper between layers. Since these are no-bake cookies, reheating isn't necessary, but if I prefer a softer texture, a few seconds in the microwave does the trick.

FAQs

Can I use regular marshmallows instead of marshmallow creme?

Yes, I can use regular marshmallows by cutting them in half and slightly melting them to make them tacky enough to stick between the crackers.

What type of chocolate works best for dipping?

I prefer using chocolate almond bark or melting wafers because they melt smoothly and set firmly, but high-quality chocolate chips with a bit of shortening can also work.

How can I make these cookies festive for holidays?

I customize them with colored sprinkles, themed jimmies, or by adding flavored extracts to the chocolate to match the holiday spirit.

Are there any nut-free alternatives for added flavor?

Absolutely, I can use sunflower seed butter or cookie butter as a nut-free alternative to peanut butter for added flavor.

Can I freeze these cookies for later?

Yes, I can freeze them by placing them in a single layer on a baking sheet to harden, then transferring them to a freezer-safe container with parchment paper between layers. They can be stored for up to a month.

Conclusion

These Ritz S’mores Cookies have become a staple in my dessert repertoire due to their simplicity, versatility, and irresistible flavor combination. Whether I’m preparing a quick treat for unexpected guests or adding a unique item to a festive dessert table, these cookies never disappoint. Their no-bake nature and customizable toppings make them a go-to recipe that I can adapt to any occasion.

Print

clock clock iconcutlery cutlery iconflag flag iconfolder folder iconinstagram instagram iconpinterest pinterest iconfacebook facebook iconprint print iconsquares squares iconheart heart iconheart solid heart solid icon
Ritz S’mores Cookies

Ritz S’mores Cookies

5 Stars 4 Stars 3 Stars 2 Stars 1 Star No reviews
  • Author: Sue
  • Prep Time: 15 minutes
  • Cook Time: 0 minutes
  • Total Time: 45 minutes
  • Yield: 24 cookies
  • Category: Dessert
  • Method: No-Bake
  • Cuisine: American
  • Diet: Vegetarian
Print Recipe
Pin Recipe

Description

These no-bake Ritz S’mores Cookies combine sweet marshmallow creme and salty Ritz crackers, all dipped in rich chocolate for a quick, indulgent treat perfect for any occasion.


Ingredients

  • 48 Ritz crackers
  • 1 cup marshmallow creme or fluff
  • 12 oz chocolate almond bark or melting wafers
  • Optional toppings:
  • 2 tbsp crushed graham crackers
  • 2 tbsp mini marshmallow bits
  • 2 tbsp mini chocolate chips
  • 2 tbsp sprinkles or jimmies

Instructions

  1. Melt the chocolate almond bark according to the package instructions until smooth.
  2. Line a baking sheet with parchment or wax paper and lay out half of the Ritz crackers.
  3. Using a greased spoon, place 1 to 2 teaspoons of marshmallow creme onto the center of each cracker.
  4. Top each with another Ritz cracker, gently pressing to create a sandwich.
  5. Using tongs or a fork, dip each sandwich into the melted chocolate, allowing any excess to drip off before placing them back on the lined baking sheet.
  6. While the chocolate is still wet, sprinkle your choice of toppings over each cookie.
  7. Let the cookies sit until the chocolate hardens completely before serving.

Notes

  • Use greased utensils to handle marshmallow creme more easily.
  • Store cookies in an airtight container with parchment between layers.
  • For a festive touch, use themed sprinkles or flavored chocolate.
  • Microwave briefly for a softer texture before serving.

Nutrition

  • Serving Size: 1 cookie
  • Calories: 130
  • Sugar: 9g
  • Sodium: 90mg
  • Fat: 7g
  • Saturated Fat: 3.5g
  • Unsaturated Fat: 3g
  • Trans Fat: 0g
  • Carbohydrates: 16g
  • Fiber: 0.5g
  • Protein: 1g
  • Cholesterol: 0mg

Have you made this recipe? I'd love to see it!

Click here to Follow me on Pinterest

Honeycrisp Apple and Feta Salad

May 27, 2025 by Sue Leave a Comment

A refreshing blend of crisp Honeycrisp apples, tangy feta cheese, and crunchy nuts, this salad is a delightful combination of sweet, savory, and tangy flavors. It's perfect as a light lunch or a vibrant side dish for any meal. Honeycrisp Apple and Feta Salad

Why You’ll Love This Recipe

I find this salad incredibly easy to prepare, yet it feels fresh and exciting every time I make it. The Honeycrisp apples add a delightful crunch and a touch of sweetness, while the feta brings in a creamy, slightly salty contrast. I often add walnuts for a nutty crunch, and the dried cranberries bring in a touch of tartness and sweetness that balances everything perfectly. The homemade dressing is simple but adds just the right zing with the apple cider vinegar and honey, creating a well-rounded flavor profile. It’s a salad that works great as a standalone lunch or as a side dish to just about any main course.

Ingredients

(Here's a tip: Check out the full list of ingredients and measurements in the recipe card below.)

  • 2 Honeycrisp apples, thinly sliced
  • 4 cups mixed salad greens (arugula, spinach, or mixed greens)
  • ½ cup crumbled feta cheese
  • ¼ cup walnuts, chopped (optional)
  • ¼ cup dried cranberries
  • 2 tablespoons extra virgin olive oil
  • 1 tablespoon apple cider vinegar
  • 1 teaspoon honey
  • Salt and pepper to taste

Directions

  1. In a large bowl, I combine the mixed salad greens, sliced apples, feta cheese, walnuts (if using), and dried cranberries.
  2. In a small bowl, I whisk together the olive oil, apple cider vinegar, honey, salt, and pepper until the dressing is well combined.
  3. I drizzle the dressing over the salad and toss gently to combine.
  4. I serve immediately and enjoy!

Servings and Timing

  • Prep Time: 10 minutes
  • Cooking Time: 0 minutes
  • Total Time: 10 minutes
  • Servings: 4 servings

Variations

  • Add protein: For a heartier meal, I sometimes add grilled chicken or shrimp to make this salad more filling.
  • Cheese alternatives: If I don’t have feta on hand, goat cheese or blue cheese works wonderfully as a substitute.
  • Nuts and seeds: I love experimenting with different nuts. I could use almonds, pecans, or even pumpkin seeds for a twist.

Storage/Reheating

This salad is best enjoyed fresh, but if I have leftovers, I typically store the salad components separately to keep everything fresh. I store the salad greens, apples, and any extras like walnuts or cranberries in an airtight container in the fridge. The dressing can be kept in a separate jar. When I’m ready to eat, I simply toss everything together and add the dressing.

FAQs

Can I use a different type of apple for this salad?

Yes, I’ve made this with Granny Smith apples before, and they add a nice tartness. I can try other apple varieties, but Honeycrisp apples give a perfect balance of sweetness and crunch.

Can I make the salad ahead of time?

I don’t recommend assembling the salad ahead of time, as the apples might brown and the greens can wilt. However, I can prepare the ingredients separately and combine them just before serving.

How can I make the dressing thicker?

If I want a thicker dressing, I can add a teaspoon of Dijon mustard or Greek yogurt to the mix. This will help emulsify the dressing and create a creamier texture.

Can I substitute the olive oil with another oil?

Yes, I can use other oils like avocado oil or even a light vegetable oil, though olive oil gives the best flavor in this salad.

How long will the salad last in the fridge?

The salad is best eaten fresh, but if I store the components separately, they should last for 2-3 days. However, the dressing will last up to a week in the fridge.

Conclusion

This Honeycrisp Apple and Feta Salad is a light, vibrant, and flavorful dish that comes together in just 10 minutes. Whether I’m enjoying it as a quick lunch or serving it as a side dish for dinner, it’s always a hit. The combination of fresh apples, creamy feta, and crunchy walnuts, paired with a simple yet tangy dressing, makes for a truly satisfying and refreshing salad.

Print

clock clock iconcutlery cutlery iconflag flag iconfolder folder iconinstagram instagram iconpinterest pinterest iconfacebook facebook iconprint print iconsquares squares iconheart heart iconheart solid heart solid icon
Honeycrisp Apple and Feta Salad

Honeycrisp Apple and Feta Salad

5 Stars 4 Stars 3 Stars 2 Stars 1 Star No reviews
  • Author: Sue
  • Prep Time: 10 minutes
  • Cook Time: 0 minutes
  • Total Time: 10 minutes
  • Yield: 4 servings
  • Category: Salad
  • Method: No-Cook
  • Cuisine: American
  • Diet: Vegetarian
Print Recipe
Pin Recipe

Description

A refreshing and vibrant salad featuring crisp Honeycrisp apples, tangy feta cheese, crunchy walnuts, and sweet dried cranberries, all tossed in a zesty apple cider vinaigrette.


Ingredients

  • 2 Honeycrisp apples, thinly sliced
  • 4 cups mixed salad greens (arugula, spinach, or mixed greens)
  • ½ cup crumbled feta cheese
  • ¼ cup walnuts, chopped (optional)
  • ¼ cup dried cranberries
  • 2 tablespoons extra virgin olive oil
  • 1 tablespoon apple cider vinegar
  • 1 teaspoon honey
  • Salt and pepper to taste

Instructions

  1. In a large bowl, combine the mixed salad greens, sliced apples, feta cheese, walnuts (if using), and dried cranberries.
  2. In a small bowl, whisk together the olive oil, apple cider vinegar, honey, salt, and pepper until well combined.
  3. Drizzle the dressing over the salad and toss gently to combine.
  4. Serve immediately and enjoy.

Notes

  • For added protein, consider adding grilled chicken or shrimp.
  • Substitute feta with goat cheese or blue cheese for a different flavor.
  • Try other nuts like almonds, pecans, or pumpkin seeds.
  • Store salad components separately to keep fresh if not serving immediately.

Nutrition

  • Serving Size: 1 serving
  • Calories: 220
  • Sugar: 12g
  • Sodium: 320mg
  • Fat: 14g
  • Saturated Fat: 4g
  • Unsaturated Fat: 9g
  • Trans Fat: 0g
  • Carbohydrates: 20g
  • Fiber: 3g
  • Protein: 4g
  • Cholesterol: 15mg

Have you made this recipe? I'd love to see it!

Click here to Follow me on Pinterest

Orange Creamsicle Cake

May 27, 2025 by Sue Leave a Comment

I love how this Orange Creamsicle Cake captures the nostalgic flavors of the classic frozen treat, blending vibrant citrus with creamy vanilla. The moist vanilla cake, infused with orange JELLO and topped with a fluffy mandarin orange frosting, makes it a delightful dessert for any summer gathering. Orange Creamsicle Cake

Why You’ll Love This Recipe

  • Simple and Convenient: I appreciate how this recipe uses a boxed cake mix, making it quick and easy to prepare without compromising on flavor.
  • Vibrant and Flavorful: The combination of orange zest, orange JELLO, and mandarin oranges creates a refreshing and tangy taste that I find irresistible.
  • Moist and Creamy: The poke cake method ensures each bite is moist, and the whipped topping adds a light, creamy finish that I enjoy.
  • Visually Appealing: I love the bright orange swirls and specks of mandarin in the frosting, making the cake as beautiful as it is delicious.
  • Perfect for Gatherings: This cake is always a hit at potlucks and summer parties, and I find it pairs wonderfully with grilled dishes and fresh salads.

Ingredients

(Here's a tip: Check out the full list of ingredients and measurements in the recipe card below.)

For the Cake:

  • 15.25 ounces vanilla cake mix
  • 3 eggs, room temperature
  • 1 cup milk or vanilla almondmilk
  • ½ cup vegetable oil
  • 1 tablespoon orange zest
  • 3.4 ounces orange JELLO
  • 1¼ cups boiling water
  • ⅓ cup fresh squeezed orange juice

For the Frosting:

  • 15 ounces can of mandarin oranges (do not drain)
  • 3.5 ounces vanilla instant pudding mix
  • 8 ounces Cool Whip

Directions

  1. I start by preheating the oven according to the cake mix instructions and greasing a 9x13 inch baking pan.
  2. In a large bowl, I combine the cake mix, eggs, milk, vegetable oil, and orange zest, mixing until smooth.
  3. I pour the batter into the prepared pan and bake as directed on the cake mix package.
  4. Once baked, I let the cake cool for about 10 minutes, then use a skewer to poke holes all over the top.
  5. In a separate bowl, I dissolve the orange JELLO in boiling water, then stir in the fresh orange juice.
  6. I carefully pour the JELLO mixture over the cake, ensuring it seeps into the holes, and refrigerate the cake for at least 3 hours.
  7. For the frosting, I beat the mandarin oranges with the pudding mix until combined, then gently fold in the Cool Whip.
  8. I spread the frosting over the chilled cake and refrigerate for at least 30 minutes before serving.

Servings and Timing

  • Servings: 24
  • Prep Time: 10 minutes
  • Cook Time: 28 minutes
  • Chill Time: 3.5 hours
  • Total Time: Approximately 4 hours and 10 minutes

Variations

  • Citrus Twist: Sometimes, I substitute lemon or lime JELLO for a different citrus flavor.
  • Cream Cheese Frosting: For a richer taste, I use cream cheese frosting with added orange zest.
  • Cupcake Version: I pour the batter into cupcake liners for individual servings, adjusting the baking time accordingly.
  • Fresh Fruit Topping: I like to top the cake with fresh orange slices or berries for added freshness.
  • Nutty Addition: Occasionally, I add chopped nuts like pecans or walnuts to the batter for extra texture.

Storage/Reheating

I store any leftover cake in an airtight container in the refrigerator for up to 3 days. Since it's a chilled dessert, I don't reheat it; instead, I serve it cold, straight from the fridge.

FAQs

How can I make this cake more homemade?

I sometimes replace the boxed mix with a homemade vanilla cake recipe and use freshly squeezed orange juice for a more authentic taste.

Can I use a different type of milk?

Yes, I've used almond milk, soy milk, and regular dairy milk, all with great results.

Is it possible to make this cake ahead of time?

Absolutely. I often prepare it a day in advance and keep it refrigerated until serving.

Can I freeze this cake?

I don't recommend freezing it, as the texture of the frosting may change upon thawing.

What can I use instead of Cool Whip?

I sometimes use homemade whipped cream stabilized with a bit of gelatin or cream cheese as an alternative.

Conclusion

This Orange Creamsicle Cake is a delightful blend of citrus and cream that I find perfect for warm-weather occasions. Its vibrant flavor, moist texture, and creamy frosting make it a crowd-pleaser every time. Whether I'm hosting a summer barbecue or simply craving a nostalgic treat, this cake never disappoints.

Print

clock clock iconcutlery cutlery iconflag flag iconfolder folder iconinstagram instagram iconpinterest pinterest iconfacebook facebook iconprint print iconsquares squares iconheart heart iconheart solid heart solid icon
Orange Creamsicle Cake

Orange Creamsicle Cake

5 Stars 4 Stars 3 Stars 2 Stars 1 Star No reviews
  • Author: Sue
  • Prep Time: 10 minutes
  • Cook Time: 28 minutes
  • Total Time: 4 hours 10 minutes
  • Yield: 24 servings
  • Category: Dessert
  • Method: Baking
  • Cuisine: American
  • Diet: Vegetarian
Print Recipe
Pin Recipe

Description

This Orange Creamsicle Cake blends vibrant citrus and creamy vanilla, mimicking the nostalgic frozen treat. Made with a vanilla cake base soaked in orange JELLO and topped with a mandarin orange whipped frosting, it's a refreshing summer dessert perfect for gatherings.


Ingredients

  • 15.25 ounces vanilla cake mix
  • 3 eggs, room temperature
  • 1 cup milk or vanilla almondmilk
  • ½ cup vegetable oil
  • 1 tablespoon orange zest
  • 3.4 ounces orange JELLO
  • 1¼ cups boiling water
  • ⅓ cup fresh squeezed orange juice
  • 15 ounces can of mandarin oranges (do not drain)
  • 3.5 ounces vanilla instant pudding mix
  • 8 ounces Cool Whip

Instructions

  1. Preheat the oven according to the cake mix instructions and grease a 9x13 inch baking pan.
  2. In a large bowl, mix together cake mix, eggs, milk, vegetable oil, and orange zest until smooth.
  3. Pour the batter into the prepared pan and bake as directed on the cake mix package.
  4. Allow the cake to cool for about 10 minutes, then poke holes all over the top with a skewer.
  5. In a separate bowl, dissolve orange JELLO in boiling water and stir in orange juice.
  6. Carefully pour the JELLO mixture over the cake and refrigerate for at least 3 hours.
  7. For the frosting, beat mandarin oranges with vanilla pudding mix until combined.
  8. Gently fold in Cool Whip and spread over the chilled cake.
  9. Refrigerate for at least 30 minutes before serving.

Notes

  • You can substitute lemon or lime JELLO for a different citrus flavor.
  • Use cream cheese frosting for a richer variation.
  • Turn this into cupcakes by using liners and adjusting the bake time.
  • Top with fresh fruit for added color and freshness.
  • Store in the fridge in an airtight container for up to 3 days.

Nutrition

  • Serving Size: 1 slice
  • Calories: 210
  • Sugar: 22g
  • Sodium: 190mg
  • Fat: 9g
  • Saturated Fat: 2g
  • Unsaturated Fat: 6g
  • Trans Fat: 0g
  • Carbohydrates: 30g
  • Fiber: 0g
  • Protein: 2g
  • Cholesterol: 25mg

Have you made this recipe? I'd love to see it!

Click here to Follow me on Pinterest

Cottage Cheese Peanut Butter Smoothie

May 27, 2025 by Sue Leave a Comment

This Cottage Cheese Peanut Butter Smoothie is a rich, creamy, and protein-packed drink that I like to whip up for a quick breakfast or post-workout snack. It's made with simple ingredients and delivers a surprisingly indulgent flavor with a thick, milkshake-like texture—all without any refined sugar. Cottage Cheese Peanut Butter Smoothie

Why You’ll Love This Recipe

I love how this smoothie combines the nutty goodness of peanut butter with the creamy texture of cottage cheese. It’s not only high in protein but also incredibly filling and satisfying. There’s no need for protein powder or refined sugar because the natural ingredients do all the heavy lifting. Whether I’m in a rush or just craving something cold and creamy, this smoothie always hits the spot.

ingredients

(Here's a tip: Check out the full list of ingredients and measurements in the recipe card below.)

  • Cottage cheese
  • Peanut butter
  • Frozen banana
  • Milk (any kind – I use almond milk for a dairy-free option)
  • Vanilla extract (optional)
  • Ice cubes (optional, for a thicker texture)

directions

  1. I start by adding the cottage cheese, peanut butter, frozen banana, and milk to a blender.
  2. If I want it a little sweeter or more dessert-like, I add a splash of vanilla extract.
  3. I blend everything until smooth and creamy.
  4. For extra thickness, I toss in a few ice cubes and blend again.
  5. I pour it into a tall glass and enjoy it right away.

Servings and timing

This recipe makes 1 large smoothie or 2 small servings. It takes about 5 minutes from start to finish, which is perfect for my busy mornings or a quick afternoon recharge.

Variations

  • I sometimes swap the peanut butter for almond or cashew butter for a different flavor.
  • To make it chocolatey, I blend in a teaspoon of cocoa powder or a handful of chocolate chips.
  • For a touch of sweetness, I add a pitted date or a drizzle of honey.
  • I occasionally throw in a handful of oats to make it more filling.
  • To make it dairy-free, I use a dairy-free cottage cheese alternative or substitute with silken tofu.

storage/reheating

I prefer to drink this smoothie fresh, but if I make extra, I store it in an airtight jar in the fridge for up to 24 hours. Before drinking, I give it a good shake or stir. This smoothie doesn’t need reheating—just chill and enjoy.

FAQs

What does cottage cheese do in a smoothie?

Cottage cheese adds a creamy texture and packs in extra protein without altering the flavor much. I find it makes the smoothie feel richer and more satisfying.

Can I make this smoothie ahead of time?

Yes, I sometimes make it the night before and store it in the fridge. Just know it may separate slightly, so I always give it a stir before drinking.

Is this smoothie good for weight loss?

It can be. Since it’s high in protein and healthy fats, it keeps me full longer and curbs my snack cravings.

Can I use fresh bananas instead of frozen?

I can, but I notice the texture becomes thinner. Frozen bananas give that nice thick and frosty consistency I love.

What kind of cottage cheese should I use?

I go for full-fat or low-fat cottage cheese depending on how creamy I want it. Small curd or whipped works best for a smooth blend.

Conclusion

This Cottage Cheese Peanut Butter Smoothie is one of my favorite ways to fuel my day. It’s creamy, satisfying, and loaded with wholesome ingredients. Whether I need a quick breakfast or a post-workout boost, this smoothie never disappoints.

Print

clock clock iconcutlery cutlery iconflag flag iconfolder folder iconinstagram instagram iconpinterest pinterest iconfacebook facebook iconprint print iconsquares squares iconheart heart iconheart solid heart solid icon
Cottage Cheese Peanut Butter Smoothie

Cottage Cheese Peanut Butter Smoothie

5 Stars 4 Stars 3 Stars 2 Stars 1 Star No reviews
  • Author: Sue
  • Prep Time: 5 minutes
  • Cook Time: 0 minutes
  • Total Time: 5 minutes
  • Yield: 1 large smoothie or 2 small servings
  • Category: Beverage
  • Method: Blending
  • Cuisine: American
  • Diet: Vegetarian
Print Recipe
Pin Recipe

Description

This Cottage Cheese Peanut Butter Smoothie is a creamy, protein-rich drink perfect for a quick breakfast or post-workout snack, made with wholesome ingredients and no refined sugar.


Ingredients

  • ½ cup cottage cheese
  • 2 tablespoons peanut butter
  • 1 frozen banana
  • ½ cup milk (any kind, e.g., almond milk)
  • ½ teaspoon vanilla extract (optional)
  • ½ cup ice cubes (optional, for a thicker texture)

Instructions

  1. Add cottage cheese, peanut butter, frozen banana, and milk to a blender.
  2. Add vanilla extract if desired for extra flavor.
  3. Blend until smooth and creamy.
  4. Add ice cubes for extra thickness and blend again.
  5. Pour into a tall glass and enjoy immediately.

Notes

  • Use almond or other plant-based milk for a dairy-free version.
  • Add cocoa powder or chocolate chips for a chocolate twist.
  • Sweeten naturally with a date or honey if desired.
  • Include oats to make the smoothie more filling.
  • Store leftovers in the fridge for up to 24 hours and stir before drinking.

Nutrition

  • Serving Size: 1 smoothie
  • Calories: 320
  • Sugar: 10g
  • Sodium: 280mg
  • Fat: 18g
  • Saturated Fat: 4g
  • Unsaturated Fat: 12g
  • Trans Fat: 0g
  • Carbohydrates: 22g
  • Fiber: 4g
  • Protein: 18g
  • Cholesterol: 15mg

Have you made this recipe? I'd love to see it!

Click here to Follow me on Pinterest

Pistachio Fluff Salad (Watergate Salad)

May 27, 2025 by Sue Leave a Comment

Pistachio Fluff Salad, also known as Watergate Salad, is a delightful no-bake dessert that combines the creamy texture of whipped topping with the nutty flavor of pistachio pudding. This vintage recipe has been a staple at family gatherings and potlucks for decades, offering a sweet and refreshing treat that's incredibly easy to prepare. Pistachio Fluff Salad (Watergate Salad)

Why I Love This Recipe

I appreciate this recipe for its simplicity and the nostalgic memories it brings. With just a handful of ingredients, I can create a dessert that's both visually appealing and delicious. It's perfect for those times when I need a quick dish to share, and it always garners compliments from friends and family.

Ingredients

(Here's a tip: Check out the full list of ingredients and measurements in the recipe card below.)

  • 1 package (3.4 oz) instant pistachio pudding mix
  • 1 can (20 oz) crushed pineapple, undrained
  • 1 cup miniature marshmallows
  • ½ cup chopped nuts (such as pecans or pistachios)
  • 1 container (8 oz) whipped topping, thawed

Directions

  1. In a large bowl, I combine the pistachio pudding mix with the entire can of crushed pineapple, including the juice. I stir until the mixture is well blended.
  2. I add the miniature marshmallows and chopped nuts, mixing them in evenly.
  3. Next, I fold in the whipped topping gently until the mixture is smooth and all ingredients are well incorporated.
  4. I cover the bowl and refrigerate the salad for at least 2 hours before serving, allowing the flavors to meld and the texture to set.

Servings and Timing

This recipe yields approximately 8 servings. The preparation time is about 10 minutes, with an additional 2 hours of chilling time to achieve the best consistency and flavor.

Variations

I sometimes like to customize this salad by adding different ingredients:

  • Fruits: Incorporating mandarin oranges or fruit cocktail can add a burst of flavor and color.
  • Nuts: Swapping pecans for walnuts or omitting nuts altogether caters to different preferences and dietary needs.
  • Maraschino Cherries: Garnishing with cherries not only enhances the presentation but also adds a sweet touch.

Storage and Reheating

I store any leftovers in an airtight container in the refrigerator, where they keep well for up to 3 days. Since this is a chilled dessert, reheating isn't necessary. I always give it a gentle stir before serving again to refresh its texture.

FAQs

What is the origin of Pistachio Fluff Salad?

Pistachio Fluff Salad, also known as Watergate Salad, originated in the United States during the 1970s. It's believed to have been named after the Watergate scandal, although the exact origin of the name is unclear.

Can I make this salad ahead of time?

Absolutely. I often prepare it the day before an event, allowing it to chill overnight. This not only saves time but also enhances the flavors.

Is it necessary to use instant pistachio pudding mix?

Yes, instant pistachio pudding mix is essential for this recipe. It provides the distinctive flavor and green color characteristic of Pistachio Fluff Salad.

Can I use fresh pineapple instead of canned?

While fresh pineapple can be used, I prefer canned crushed pineapple with its juice, as it blends more smoothly with the pudding mix and contributes to the desired consistency.

Is this dessert suitable for those with nut allergies?

If serving to individuals with nut allergies, I omit the chopped nuts or replace them with a nut-free alternative to ensure everyone's safety.

Conclusion

Pistachio Fluff Salad is a timeless dessert that combines ease of preparation with delightful flavors and textures. Whether I'm bringing it to a potluck or enjoying it at home, it's always a hit. The creamy, nutty, and fruity elements come together to create a dish that's both comforting and indulgent.

Print

clock clock iconcutlery cutlery iconflag flag iconfolder folder iconinstagram instagram iconpinterest pinterest iconfacebook facebook iconprint print iconsquares squares iconheart heart iconheart solid heart solid icon
Pistachio Fluff Salad (Watergate Salad)

Pistachio Fluff Salad (Watergate Salad)

5 Stars 4 Stars 3 Stars 2 Stars 1 Star No reviews
  • Author: Sue
  • Prep Time: 10 minutes
  • Cook Time: 0 minutes
  • Total Time: 2 hours 10 minutes
  • Yield: 8 servings
  • Category: Dessert
  • Method: No-Bake
  • Cuisine: American
  • Diet: Vegetarian
Print Recipe
Pin Recipe

Description

Pistachio Fluff Salad, also known as Watergate Salad, is a classic no-bake dessert featuring pistachio pudding, crushed pineapple, whipped topping, marshmallows, and nuts. It's an easy and refreshing treat perfect for gatherings.


Ingredients

  • 1 package (3.4 oz) instant pistachio pudding mix
  • 1 can (20 oz) crushed pineapple, undrained
  • 1 cup miniature marshmallows
  • ½ cup chopped nuts (such as pecans or pistachios)
  • 1 container (8 oz) whipped topping, thawed

Instructions

  1. In a large bowl, combine the pistachio pudding mix with the entire can of crushed pineapple including juice. Stir until well blended.
  2. Add the miniature marshmallows and chopped nuts, mixing evenly.
  3. Fold in the whipped topping gently until the mixture is smooth and well combined.
  4. Cover and refrigerate for at least 2 hours before serving.

Notes

  • For added flavor and color, mix in mandarin oranges or fruit cocktail.
  • Substitute or omit nuts based on dietary needs.
  • Top with maraschino cherries for enhanced presentation.
  • Stir before serving if made in advance.

Nutrition

  • Serving Size: 1 cup
  • Calories: 210
  • Sugar: 20g
  • Sodium: 170mg
  • Fat: 10g
  • Saturated Fat: 6g
  • Unsaturated Fat: 3g
  • Trans Fat: 0g
  • Carbohydrates: 28g
  • Fiber: 1g
  • Protein: 2g
  • Cholesterol: 5mg

Have you made this recipe? I'd love to see it!

Click here to Follow me on Pinterest

Watermelon Lemonade

May 27, 2025 by Sue Leave a Comment

This Watermelon Lemonade is a cool and fruity drink that combines the sweet juiciness of ripe watermelon with the fresh tang of lemon and lime. It’s the perfect refreshment for warm weather or any time I want something naturally delicious and hydrating. Watermelon Lemonade

Why You’ll Love This Recipe

I love how this drink comes together in minutes with simple ingredients and no fancy tools. The blend of watermelon with citrus makes each sip crisp, light, and energizing. It’s great for summer picnics, backyard barbecues, or just keeping in the fridge for a flavorful alternative to plain water. Plus, I can adjust the sweetness exactly how I like it.

Ingredients

(Here's a tip: Check out the full list of ingredients and measurements in the recipe card below.)

  • Seedless watermelon, cut into 1-2 inch cubes
  • Granulated sugar
  • Fresh lemon juice (from about 4 large lemons)
  • Fresh lime juice (from 1 large lime)
  • Agave nectar or honey (optional, for extra sweetness)
  • Cold water
  • Ice (for serving)
  • Optional garnishes: fresh mint leaves, watermelon slices, lemon and/or lime slices

Directions

  1. I place the cubed watermelon, sugar, and water in a blender and blend until everything is smooth.
  2. I strain the juice through a fine mesh sieve into a large pitcher to get rid of any pulp, but sometimes I leave a little in for texture.
  3. I stir in the fresh lemon juice, lime juice, and a bit of agave or honey if I want it sweeter.
  4. I pour it over ice and garnish with mint and fruit slices when I’m serving guests or just want to make it extra refreshing.

Servings and Timing

This recipe makes about 6 to 8 servings. It only takes around 10 minutes to prepare from start to finish, making it an ideal last-minute refresher.

Variations

  • Sparkling Twist: I like to swap some of the water with sparkling water to give it a bubbly lift.
  • Berry Boost: Sometimes I blend in a handful of strawberries or raspberries for a slightly richer flavor.
  • Herbal Freshness: A few fresh basil or mint leaves blended in add a gentle, refreshing herbal note.
  • Frozen Slush: I freeze the watermelon cubes first and blend them with the other ingredients to create a frozen lemonade slush.

Storage/Reheating

I keep leftovers in a covered pitcher in the fridge for up to 3 days. Before drinking again, I give it a good stir, since the juice can separate over time. This drink is always served cold, so no reheating is needed or recommended.

FAQs

Can I make this ahead of time?

Yes, I often make it a few hours early and store it in the refrigerator until I’m ready to serve. It actually tastes better once it’s fully chilled.

What type of watermelon should I use?

I prefer seedless watermelon because it’s easier to blend and strain. The ripest watermelon gives the best flavor, so I look for one with a yellow belly spot and a deep sound when I tap it.

Can I skip straining the juice?

Yes, if I don't mind a more rustic texture, I sometimes skip straining. For a silky-smooth drink, straining is best.

Is there a way to make it less sweet?

Absolutely. I simply reduce the amount of sugar or skip the optional sweeteners altogether. Ripe watermelon usually has enough natural sweetness on its own.

Can I freeze leftovers?

Yes, I freeze leftover lemonade in ice cube trays and use the cubes later in water or to chill another batch without watering it down.

Conclusion

Watermelon Lemonade is one of the easiest, most refreshing drinks I make, especially during summer. I love how customizable it is, and how it only takes a few ingredients to create something so flavorful and satisfying. Whether I’m sipping it solo or serving it to friends, this drink never disappoints.

Print

clock clock iconcutlery cutlery iconflag flag iconfolder folder iconinstagram instagram iconpinterest pinterest iconfacebook facebook iconprint print iconsquares squares iconheart heart iconheart solid heart solid icon
Watermelon Lemonade

Watermelon Lemonade

5 Stars 4 Stars 3 Stars 2 Stars 1 Star No reviews
  • Author: Sue
  • Prep Time: 10 minutes
  • Cook Time: 0 minutes
  • Total Time: 10 minutes
  • Yield: 6 to 8 servings
  • Category: Beverage
  • Method: Blending
  • Cuisine: American
  • Diet: Vegan
Print Recipe
Pin Recipe

Description

This Watermelon Lemonade is a refreshing summer beverage combining sweet watermelon with zesty lemon and lime. It's light, hydrating, and easy to customize for sweetness or extra flavors.


Ingredients

  • 4 cups seedless watermelon, cut into 1-2 inch cubes
  • 2 tablespoons granulated sugar (adjust to taste)
  • ½ cup fresh lemon juice (from about 4 large lemons)
  • 2 tablespoons fresh lime juice (from 1 large lime)
  • 1-2 tablespoons agave nectar or honey (optional, for extra sweetness)
  • 2 cups cold water
  • Ice (for serving)
  • Optional garnishes: fresh mint leaves, watermelon slices, lemon and/or lime slices

Instructions

  1. Place the cubed watermelon, sugar, and cold water in a blender and blend until smooth.
  2. Strain the juice through a fine mesh sieve into a large pitcher to remove pulp (optional).
  3. Stir in the lemon juice, lime juice, and agave nectar or honey if desired.
  4. Serve over ice and garnish with mint leaves and fruit slices if desired.

Notes

  • For a bubbly version, substitute part of the water with sparkling water.
  • Add strawberries or raspberries for a berry twist.
  • Blend in fresh basil or mint for a herbal touch.
  • Use frozen watermelon cubes to make a slushy version.
  • Store in the fridge for up to 3 days and stir before serving.

Nutrition

  • Serving Size: 1 cup
  • Calories: 60
  • Sugar: 13g
  • Sodium: 5mg
  • Fat: 0g
  • Saturated Fat: 0g
  • Unsaturated Fat: 0g
  • Trans Fat: 0g
  • Carbohydrates: 15g
  • Fiber: 1g
  • Protein: 1g
  • Cholesterol: 0mg

Have you made this recipe? I'd love to see it!

Click here to Follow me on Pinterest

Cowboy Pasta Salad

May 27, 2025 by Sue Leave a Comment

Cowboy Pasta Salad is a hearty, flavor-packed dish that combines seasoned ground beef, black beans, sweet corn, and fresh vegetables, all tossed with a zesty lime-taco dressing. It's the perfect addition to any potluck, BBQ, or weeknight dinner. Cowboy Pasta Salad

Why You’ll Love This Recipe

I love how this salad brings together bold flavors and satisfying textures. The combination of seasoned beef, crunchy vegetables, and a tangy dressing makes every bite exciting. It's also incredibly versatile and can be customized to suit any taste.

Ingredients

(Here's a tip: Check out the full list of ingredients and measurements in the recipe card below.)

  • 16 ounces lean ground beef (90/10 preferred)
  • 1 small yellow onion, minced
  • ½ teaspoon fine sea salt, or to taste
  • ½ teaspoon freshly ground black pepper, or to taste
  • 16 ounces dry pasta (rotini or similar)
  • 1 tablespoon extra virgin olive oil

For the Dressing:

  • ½ cup extra virgin olive oil
  • Juice of 2 limes
  • 3 tablespoons taco seasoning (or one 1-ounce packet)

Additional Ingredients:

  • 12 ounces frozen corn, thawed (or one 15-ounce can, drained)
  • 15-ounce can black beans, thoroughly rinsed and drained
  • 1 cup sharp cheddar cheese (4 ounces), grated or cubed
  • 2 cups cherry tomatoes, halved
  • 1 red bell pepper, diced
  • 1 green bell pepper, diced
  • 1 jalapeño, diced
  • 2 green onions, sliced

Optional Garnish:

  • Fresh cilantro, chopped
  • Fresh parsley, chopped

Directions

  1. In a large skillet over medium heat, I cook the ground beef and minced onion until the beef is browned. After draining the grease, I season it with salt and pepper to taste and set it aside to cool.
  2. I cook the pasta according to the package instructions. Once cooked, I toss it with 1 tablespoon of olive oil and set it aside to cool.
  3. In a large serving bowl, I whisk together ½ cup of olive oil, the juice of 2 limes, and 3 tablespoons of taco seasoning to create the dressing.
  4. To the bowl, I add the cooled pasta, cooked ground beef, corn, black beans, cheddar cheese, cherry tomatoes, red and green bell peppers, jalapeño, and green onions.
  5. I toss everything together until well combined. Then, I cover the bowl and refrigerate the salad for at least 30 minutes before serving.

Servings and Timing

This recipe yields approximately 8 servings. Preparation takes about 15 minutes, cooking time is around 10 minutes, and I recommend chilling the salad for at least 30 minutes before serving. In total, it takes approximately 55 minutes to prepare.

Variations

  • I sometimes substitute ground turkey or grilled chicken for the ground beef.
  • For a vegetarian version, I omit the meat and add extra beans or grilled vegetables.
  • Adding diced avocado, crushed tortilla chips, or a dollop of sour cream can enhance the flavor.
  • To increase the heat, I include more jalapeño or a dash of hot sauce.

Storage/Reheating

I store any leftovers in an airtight container in the refrigerator for up to 4 days. Before serving, I give the salad a good toss. I don't recommend freezing this salad, as the fresh vegetables and dressing don't freeze and thaw well.

FAQs

Can I make this salad ahead of time?

Yes, I often prepare this salad up to a day in advance. The flavors meld beautifully when given time to sit.

What type of pasta works best?

I prefer using short pasta shapes like rotini, penne, or bowtie, as they hold onto the dressing and mix-ins effectively.

Can I serve this salad warm?

While I enjoy it chilled, this salad can also be served warm or at room temperature, depending on my preference.

How can I make this salad spicier?

To add more heat, I include extra diced jalapeños or a splash of hot sauce in the dressing.

Is it possible to make this salad vegetarian?

Absolutely. I omit the ground beef and add more beans or grilled vegetables to keep it hearty and satisfying.

Conclusion

Cowboy Pasta Salad is a delightful fusion of bold flavors and hearty ingredients. Whether I'm hosting a summer BBQ or looking for a satisfying weeknight meal, this salad never disappoints. Its versatility and ease of preparation make it a staple in my recipe collection.

Print

clock clock iconcutlery cutlery iconflag flag iconfolder folder iconinstagram instagram iconpinterest pinterest iconfacebook facebook iconprint print iconsquares squares iconheart heart iconheart solid heart solid icon
Cowboy Pasta Salad

Cowboy Pasta Salad

5 Stars 4 Stars 3 Stars 2 Stars 1 Star No reviews
  • Author: Sue
  • Prep Time: 15 minutes
  • Cook Time: 10 minutes
  • Total Time: 55 minutes
  • Yield: 8 servings
  • Category: Salad
  • Method: Stovetop
  • Cuisine: American
  • Diet: Halal
Print Recipe
Pin Recipe

Description

Cowboy Pasta Salad is a hearty and flavorful dish featuring seasoned ground beef, black beans, corn, fresh vegetables, and pasta tossed in a zesty lime-taco dressing—perfect for potlucks, BBQs, or casual dinners.


Ingredients

  • 16 ounces lean ground beef (90/10 preferred)
  • 1 small yellow onion, minced
  • ½ teaspoon fine sea salt
  • ½ teaspoon freshly ground black pepper
  • 16 ounces dry pasta (rotini or similar)
  • 1 tablespoon extra virgin olive oil
  • ½ cup extra virgin olive oil (for dressing)
  • Juice of 2 limes
  • 3 tablespoons taco seasoning (or one 1-ounce packet)
  • 12 ounces frozen corn, thawed or one 15-ounce can, drained
  • 15-ounce can black beans, rinsed and drained
  • 1 cup sharp cheddar cheese (4 ounces), grated or cubed
  • 2 cups cherry tomatoes, halved
  • 1 red bell pepper, diced
  • 1 green bell pepper, diced
  • 1 jalapeño, diced
  • 2 green onions, sliced
  • Fresh cilantro, chopped (optional garnish)
  • Fresh parsley, chopped (optional garnish)

Instructions

  1. Cook the ground beef and minced onion in a large skillet over medium heat until browned. Drain the grease, season with salt and pepper, and set aside to cool.
  2. Cook the pasta according to package instructions. Drain, toss with 1 tablespoon olive oil, and let cool.
  3. In a large serving bowl, whisk together ½ cup olive oil, lime juice, and taco seasoning to make the dressing.
  4. Add the cooled pasta, cooked beef, corn, black beans, cheddar cheese, cherry tomatoes, red and green bell peppers, jalapeño, and green onions to the bowl.
  5. Toss everything together until well combined. Cover and refrigerate for at least 30 minutes before serving.

Notes

  • Substitute ground turkey or grilled chicken for a lighter version.
  • Make it vegetarian by omitting meat and adding extra beans or vegetables.
  • Enhance flavor with avocado, tortilla chips, or sour cream.
  • Add hot sauce or extra jalapeño for more spice.

Nutrition

  • Serving Size: 1 serving
  • Calories: 480
  • Sugar: 4g
  • Sodium: 580mg
  • Fat: 26g
  • Saturated Fat: 7g
  • Unsaturated Fat: 17g
  • Trans Fat: 0g
  • Carbohydrates: 43g
  • Fiber: 6g
  • Protein: 21g
  • Cholesterol: 50mg

Have you made this recipe? I'd love to see it!

Click here to Follow me on Pinterest

Better Than Anything Toffee Recipe

May 27, 2025 by Sue Leave a Comment

This Better Than Anything Toffee recipe delivers a delightful combination of rich, buttery toffee layered with crunchy pecans and smooth milk chocolate. It's a simple yet indulgent treat that's perfect for gifting or satisfying a sweet tooth. Better Than Anything Toffee Recipe

Why You’ll Love This Recipe

I find this toffee recipe incredibly easy to remember and prepare, thanks to its straightforward ingredient list. The harmonious blend of sweet and salty flavors, coupled with a satisfying crunch, makes it a crowd-pleaser. Whether I'm making it for holiday gifts or a personal treat, it never fails to impress.

Ingredients

(Here's a tip: Check out the full list of ingredients and measurements in the recipe card below.)

  • 1 cup coarsely chopped pecans
  • 1 cup (2 sticks) unsalted butter
  • 1 cup granulated sugar
  • ½ teaspoon kosher salt
  • 1 teaspoon vanilla extract
  • 1 cup milk chocolate chips

Directions

  1. I start by spraying a 9-inch square baking dish with cooking spray and lining it with parchment paper.
  2. Then, I spread the chopped pecans in a single layer over the parchment.
  3. In a heavy-bottomed 3-quart saucepan, I combine the butter, sugar, and salt.
  4. I bring the mixture to a boil over medium-low heat, stirring frequently to dissolve the sugar.
  5. Once boiling, I continue to stir occasionally until the candy reaches 290°F to 300°F on a candy thermometer, known as the "hard crack" stage.
  6. I remove the saucepan from heat and stir in the vanilla extract.
  7. Carefully, I pour the hot mixture over the chopped pecans in the prepared dish.
  8. I let the candy sit undisturbed for a few minutes before sprinkling the chocolate chips on top.
  9. I cover the dish with foil and let it sit for 5 minutes to allow the chocolate to soften.
  10. After removing the foil, I gently spread the melted chocolate into an even layer.
  11. I place the dish in the refrigerator and let the toffee cool completely, which takes at least 2 hours.
  12. Once set, I lift the parchment out of the dish and place the toffee on a cutting board.
  13. Using a knife, I break the toffee into smaller pieces.
  14. I store the toffee in an airtight container in a cool place.

Servings and Timing

This recipe yields approximately 24 pieces of toffee. The preparation time is about 20 minutes, and I allow at least 2 hours for the toffee to cool and set completely.

Variations

I enjoy customizing this toffee by substituting the pecans with other nuts like almonds or walnuts. For a different flavor profile, I sometimes use semisweet or dark chocolate chips instead of milk chocolate. Adding a sprinkle of sea salt on top before the chocolate sets can also enhance the flavor.

Storage/Reheating

I store the toffee in an airtight container at room temperature for up to 2 weeks. To maintain its crisp texture, I keep it in a cool, dry place away from heat and humidity. If the environment is particularly warm, I refrigerate the toffee to prevent melting.

FAQs

What if I don't have a candy thermometer?

While a candy thermometer ensures accuracy, I can test the toffee's readiness by dropping a small amount into cold water. If it hardens immediately and breaks easily, it's at the "hard crack" stage.

Can I use salted butter instead of unsalted?

Yes, but I reduce or omit the added kosher salt to prevent the toffee from becoming too salty.

How do I prevent the toffee from separating?

I make sure to stir the mixture consistently and evenly during cooking and avoid sudden temperature changes to maintain a smooth texture.

Can I double the recipe?

Absolutely. I use a larger baking dish and ensure even spreading to maintain consistent thickness.

Is it necessary to refrigerate the toffee?

Refrigeration helps the toffee set faster, but if I have time, I let it cool at room temperature. However, in warmer climates, refrigeration prevents the chocolate from melting.

Conclusion

This Better Than Anything Toffee recipe is a delightful treat that's both easy to make and incredibly satisfying. Its rich, buttery flavor combined with crunchy nuts and smooth chocolate makes it a favorite in my household. Whether I'm preparing it for a special occasion or simply indulging myself, this toffee never disappoints.

Print

clock clock iconcutlery cutlery iconflag flag iconfolder folder iconinstagram instagram iconpinterest pinterest iconfacebook facebook iconprint print iconsquares squares iconheart heart iconheart solid heart solid icon
Better Than Anything Toffee Recipe

Better Than Anything Toffee Recipe

5 Stars 4 Stars 3 Stars 2 Stars 1 Star No reviews
  • Author: Sue
  • Prep Time: 20 minutes
  • Cook Time: 20 minutes
  • Total Time: 2 hours 40 minutes
  • Yield: 24 pieces
  • Category: Dessert
  • Method: Stovetop
  • Cuisine: American
  • Diet: Vegetarian
Print Recipe
Pin Recipe

Description

This Better Than Anything Toffee is a rich, buttery treat topped with crunchy pecans and smooth milk chocolate—perfect for gifts or indulgent snacking.


Ingredients

  • 1 cup coarsely chopped pecans
  • 1 cup (2 sticks) unsalted butter
  • 1 cup granulated sugar
  • ½ teaspoon kosher salt
  • 1 teaspoon vanilla extract
  • 1 cup milk chocolate chips

Instructions

  1. Spray a 9-inch square baking dish with cooking spray and line with parchment paper.
  2. Spread chopped pecans in a single layer over the parchment.
  3. In a heavy-bottomed 3-quart saucepan, combine butter, sugar, and salt.
  4. Bring to a boil over medium-low heat, stirring frequently until sugar dissolves.
  5. Continue boiling and stirring occasionally until the mixture reaches 290°F to 300°F (hard crack stage).
  6. Remove from heat and stir in vanilla extract.
  7. Carefully pour the hot toffee mixture over the pecans in the baking dish.
  8. Let it sit undisturbed for a few minutes, then sprinkle chocolate chips on top.
  9. Cover with foil and let sit for 5 minutes to soften chocolate.
  10. Remove foil and spread melted chocolate evenly.
  11. Refrigerate for at least 2 hours until fully set.
  12. Lift parchment out, place toffee on a cutting board, and break into pieces with a knife.
  13. Store in an airtight container in a cool place.

Notes

  • Substitute pecans with almonds or walnuts for variation.
  • Try dark or semisweet chocolate chips for a different taste.
  • Sprinkle sea salt on chocolate before it sets for enhanced flavor.
  • Use a candy thermometer for accuracy, or test toffee in cold water.
  • Refrigerate in warm climates to prevent melting.

Nutrition

  • Serving Size: 1 piece
  • Calories: 170
  • Sugar: 14g
  • Sodium: 80mg
  • Fat: 12g
  • Saturated Fat: 7g
  • Unsaturated Fat: 4g
  • Trans Fat: 0g
  • Carbohydrates: 16g
  • Fiber: 1g
  • Protein: 1g
  • Cholesterol: 20mg

Have you made this recipe? I'd love to see it!

Click here to Follow me on Pinterest

Easy Cashew Chicken

May 27, 2025 by Sue Leave a Comment

This Easy Cashew Chicken recipe is a quick and flavorful dish that brings the taste of takeout right to my kitchen. With tender chicken, crunchy cashews, and a savory sauce, it's a meal that's both satisfying and simple to prepare. Easy Cashew Chicken

Why I Love This Recipe

I enjoy this recipe because it's incredibly easy to make and packed with flavor. The combination of hoisin sauce and chili garlic sauce creates a rich, savory taste that pairs perfectly with the roasted cashews. Plus, it takes less than 30 minutes to prepare, making it ideal for busy weeknights.

Ingredients

(Here's a tip: Check out the full list of ingredients and measurements in the recipe card below.)

  • 3 tablespoons hoisin sauce
  • ½ teaspoon chili garlic sauce
  • 3 tablespoons chicken broth or water
  • 1½ pounds boneless, skinless chicken thighs, cut into 1-inch pieces
  • Salt and pepper
  • 1 tablespoon cornstarch
  • 1½ tablespoons vegetable oil
  • 1 small onion, cut into 1-inch pieces
  • 4 garlic cloves, minced
  • 2 tablespoons rice vinegar
  • 6 green onions, diced
  • ¾ cup unsalted roasted cashews
  • Cooked white rice, for serving

Directions

  1. I start by whisking together the hoisin sauce, chili garlic sauce, and chicken broth in a small bowl and set it aside.
  2. Then, I season the chicken with salt and pepper, sprinkle it with cornstarch, and toss to coat.
  3. In a large non-stick pan or wok, I heat the oil over medium-high heat and sauté the chicken until it's golden brown and cooked through, about 8 to 10 minutes.
  4. I add the onion and cook for another 3 to 5 minutes until it's soft and translucent.
  5. Next, I add the garlic and cook for about a minute.
  6. I stir in the rice vinegar and cook for another minute.
  7. I reduce the heat to medium-low, add the hoisin mixture, and cook for a few more minutes to warm through.
  8. Finally, I stir in the cashews and green onions, adjust the seasoning if needed, and serve the dish over cooked white rice.

Servings and Timing

This recipe yields 4 servings and takes approximately 30 minutes to prepare and cook.

Variations

To switch things up, I sometimes add vegetables like bell peppers or broccoli for extra color and nutrition. If I want a spicier kick, I increase the amount of chili garlic sauce. For a different protein, shrimp or tofu can be used in place of chicken.

Storage and Reheating

I store any leftovers in an airtight container in the refrigerator for up to 3 days. To reheat, I warm the dish in a skillet over medium heat until heated through, adding a splash of water if the sauce has thickened too much. Alternatively, I microwave it in 30-second intervals, stirring in between, until hot.

FAQs

How can I make this dish gluten-free?

To make this recipe gluten-free, I use gluten-free hoisin sauce and ensure that the chili garlic sauce and chicken broth are also gluten-free. I also serve it over gluten-free rice or noodles.

Can I use chicken breasts instead of thighs?

Yes, I can use boneless, skinless chicken breasts instead of thighs. They may be slightly less tender, but they still work well in this recipe.

What can I substitute for hoisin sauce?

If I don't have hoisin sauce, I mix together soy sauce, peanut butter, honey, and a dash of vinegar as a substitute.

Here's the article based on the Easy Cashew Chicken recipe:

Easy Cashew Chicken

This Easy Cashew Chicken recipe is one of my go-to meals when I want something savory, satisfying, and fast. With juicy chicken, crunchy cashews, and a rich, flavorful sauce, it brings all the joy of takeout right into my own kitchen—without the wait or the extra cost.

Why I Love This Recipe

I like this recipe because it’s both simple and packed with flavor. The hoisin and chili garlic sauces create a bold and tangy base, while the roasted cashews add a perfect crunch. It’s ideal for busy nights when I need a fast meal that still feels special.

ingredients

(Here's a tip: Check out the full list of ingredients and measurements in the recipe card below.)

  • 3 tablespoons hoisin sauce
  • ½ teaspoon chili garlic sauce
  • 3 tablespoons chicken broth or water
  • 1½ pounds boneless, skinless chicken thighs, cut into 1-inch pieces
  • Salt and pepper
  • 1 tablespoon cornstarch
  • 1½ tablespoons vegetable oil
  • 1 small onion, cut into 1-inch pieces
  • 4 garlic cloves, minced
  • 2 tablespoons rice vinegar
  • 6 green onions, diced
  • ¾ cup unsalted roasted cashews
  • Cooked white rice, for serving

directions

  1. I whisk together hoisin sauce, chili garlic sauce, and chicken broth in a bowl and set it aside.
  2. Then I season the chicken with salt and pepper, sprinkle it with cornstarch, and toss until coated.
  3. I heat vegetable oil in a large skillet or wok over medium-high heat, then cook the chicken until browned and fully cooked—about 8 to 10 minutes.
  4. I add the chopped onion and cook for another 3 to 5 minutes until tender.
  5. I stir in the minced garlic and cook for 1 more minute.
  6. Next, I pour in the rice vinegar and stir, letting it cook for another minute.
  7. I reduce the heat to medium-low, add the sauce mixture, and stir to coat the chicken thoroughly.
  8. Lastly, I add the cashews and green onions, stir everything together, and serve it hot over white rice.

Servings and timing

This recipe serves 4 and takes about 30 minutes total—15 minutes for prep and another 15 for cooking.

Variations

When I want to switch it up, I like to add sliced bell peppers, broccoli, or snap peas for extra texture and color. Sometimes I substitute tofu or shrimp for the chicken when I’m in the mood for something different. And if I’m craving more heat, I’ll double the chili garlic sauce.

storage/reheating

I store leftovers in an airtight container in the fridge for up to 3 days. When it’s time to reheat, I use a skillet over medium heat or microwave it in 30-second bursts until warmed through. If the sauce thickens too much, I just add a splash of water.

FAQs

Can I use chicken breast instead of thighs?

Yes, I can. While thighs are juicier, chicken breast also works well if I prefer a leaner option.

How do I make it spicier?

I just increase the amount of chili garlic sauce or add a dash of sriracha for more heat.

Can I make this dish ahead of time?

Absolutely. I often prep the chicken and sauce a day in advance and cook it fresh when I’m ready to eat.

Is this recipe freezer-friendly?

Yes, I freeze the cooked chicken and sauce (without the rice) for up to 2 months. When reheating, I thaw it overnight and warm it in a skillet.

What can I serve with it besides rice?

Sometimes I serve it with noodles, quinoa, or even lettuce wraps for a lighter option.

Conclusion

This Easy Cashew Chicken is a fast, flavorful dish that I love making when I’m craving comfort food without the fuss. It’s flexible, quick, and so satisfying—perfect for my weekly dinner rotation.

Print

clock clock iconcutlery cutlery iconflag flag iconfolder folder iconinstagram instagram iconpinterest pinterest iconfacebook facebook iconprint print iconsquares squares iconheart heart iconheart solid heart solid icon
Easy Cashew Chicken

Easy Cashew Chicken

5 Stars 4 Stars 3 Stars 2 Stars 1 Star No reviews
  • Author: Sue
  • Prep Time: 15 minutes
  • Cook Time: 15 minutes
  • Total Time: 30 minutes
  • Yield: 4 servings
  • Category: Main Dish
  • Method: Stir-Fry
  • Cuisine: Asian
  • Diet: Halal
Print Recipe
Pin Recipe

Description

Easy Cashew Chicken is a quick, flavorful meal featuring tender chicken, crunchy roasted cashews, and a savory hoisin-based sauce. Perfect for busy weeknights, it's ready in just 30 minutes and delivers takeout-style flavor at home.


Ingredients

  • 3 tablespoons hoisin sauce
  • ½ teaspoon chili garlic sauce
  • 3 tablespoons chicken broth or water
  • 1½ pounds boneless, skinless chicken thighs, cut into 1-inch pieces
  • Salt and pepper, to taste
  • 1 tablespoon cornstarch
  • 1½ tablespoons vegetable oil
  • 1 small onion, cut into 1-inch pieces
  • 4 garlic cloves, minced
  • 2 tablespoons rice vinegar
  • 6 green onions, diced
  • ¾ cup unsalted roasted cashews
  • Cooked white rice, for serving

Instructions

  1. Whisk together the hoisin sauce, chili garlic sauce, and chicken broth in a small bowl and set aside.
  2. Season the chicken with salt and pepper, then toss with cornstarch to coat evenly.
  3. Heat vegetable oil in a large skillet or wok over medium-high heat. Add chicken and cook until golden brown and cooked through, about 8 to 10 minutes.
  4. Add onion and cook for another 3 to 5 minutes until soft and translucent.
  5. Stir in garlic and cook for about 1 minute.
  6. Add rice vinegar and cook for 1 more minute.
  7. Reduce heat to medium-low, pour in the hoisin mixture, and cook for a few minutes until warmed through.
  8. Stir in cashews and green onions, adjust seasoning if needed, and serve hot over cooked white rice.

Notes

  • Add bell peppers or broccoli for extra vegetables and color.
  • Increase chili garlic sauce for more heat.
  • Substitute tofu or shrimp for a different protein.
  • Store leftovers in the fridge for up to 3 days and reheat with a splash of water if needed.
  • Use gluten-free hoisin and sauces for a gluten-free version.

Nutrition

  • Serving Size: 1 serving
  • Calories: 450
  • Sugar: 6g
  • Sodium: 620mg
  • Fat: 24g
  • Saturated Fat: 4g
  • Unsaturated Fat: 18g
  • Trans Fat: 0g
  • Carbohydrates: 25g
  • Fiber: 2g
  • Protein: 34g
  • Cholesterol: 115mg

Have you made this recipe? I'd love to see it!

Click here to Follow me on Pinterest

Pesto Caprese Pasta Salad

May 27, 2025 by Sue Leave a Comment

Pesto Caprese Pasta Salad is a vibrant and refreshing dish that combines the bold flavors of basil pesto, fresh mozzarella, sweet cherry tomatoes, and tender pasta. Inspired by the classic Caprese salad, this pasta version is tossed in a rich, aromatic pesto sauce that ties everything together beautifully. It’s a versatile dish perfect for potlucks, picnics, or as a light lunch or dinner. Simple, flavorful, and packed with fresh ingredients, this salad is a guaranteed crowd-pleaser. Pesto Caprese Pasta Salad

Why You’ll Love This Recipe

I find this salad to be a perfect blend of freshness and flavor. The combination of juicy cherry tomatoes, creamy mozzarella, and aromatic basil pesto creates a delightful taste experience. It's quick to prepare, making it ideal for busy days or spontaneous gatherings. Plus, it's versatile enough to serve as a main dish or a side, and it tastes even better the next day as the flavors meld together.

Ingredients

(Here's a tip: Check out the full list of ingredients and measurements in the recipe card below.)

For the Salad:

  • 12 oz short pasta (penne, fusilli, or farfalle)
  • 1 ½ cups cherry tomatoes, halved
  • 8 oz fresh mozzarella balls (bocconcini) or diced mozzarella
  • ¼ cup fresh basil leaves, torn

For the Pesto Dressing:

  • 1 cup fresh basil leaves
  • ⅓ cup grated Parmesan cheese
  • ⅓ cup extra virgin olive oil
  • 2 tablespoons pine nuts (or walnuts for a budget-friendly option)
  • 1 clove garlic
  • ½ teaspoon salt
  • ¼ teaspoon black pepper
  • Juice of ½ a lemon (optional, for brightness)

Directions

  1. Cook the Pasta: I bring a large pot of salted water to a boil and cook the pasta according to package instructions until al dente. After draining, I rinse it under cold water to stop the cooking process and set it aside to cool.
  2. Prepare the Pesto Dressing: In a food processor or blender, I combine the basil, Parmesan, olive oil, pine nuts, garlic, salt, and pepper. I blend until smooth, scraping down the sides as needed. If the pesto is too thick, I add a tablespoon or two of water or extra olive oil. For extra brightness, I sometimes add lemon juice.
  3. Assemble the Salad: In a large mixing bowl, I toss the cooled pasta with the pesto dressing, ensuring every piece is coated evenly. Then, I gently fold in the halved cherry tomatoes and fresh mozzarella balls.
  4. Garnish and Serve: I sprinkle torn basil leaves over the salad for freshness and presentation. For the best flavor, I let the salad sit for 15 minutes before serving to allow the flavors to meld. It can be served chilled or at room temperature.

Servings and Timing

  • Servings: 6 servings
  • Preparation Time: 15 minutes
  • Cooking Time: 10 minutes
  • Total Time: 25 minutes

Variations

  • Add Protein: I sometimes add grilled chicken, shrimp, or chickpeas to make it more filling.
  • Vegetable Boost: Roasted zucchini, bell peppers, or artichoke hearts can add extra flavor and nutrition.
  • Cheese Swap: For a different taste, I use burrata or feta instead of mozzarella.
  • Nut-Free Pesto: If I need a nut-free version, I substitute sunflower seeds or skip the nuts altogether.
  • Gluten-Free: I use gluten-free pasta to accommodate dietary needs.

Storage/Reheating

I store any leftovers in an airtight container in the refrigerator for up to 4 days. If the salad becomes a bit dry, I drizzle a little extra olive oil or a spoonful of pesto before serving. I prefer to serve it cold or at room temperature, so I don't usually reheat it.

FAQs

How can I make this salad ahead of time?

I prepare the pesto and chop the tomatoes in advance, storing them separately in the fridge. I cook the pasta just before serving and assemble the salad fresh for the best texture.

Can I use store-bought pesto?

Yes, I often use store-bought pesto when I'm short on time. It still provides great flavor, though homemade pesto offers a fresher taste.

What type of pasta works best?

I prefer short pasta shapes like penne, fusilli, or farfalle because they hold the pesto well and are easy to eat in a salad.

Is this salad suitable for vegetarians?

Absolutely! This salad is vegetarian-friendly. Just ensure the Parmesan cheese used in the pesto is vegetarian, as some contain animal rennet.

Can I freeze this pasta salad?

I don't recommend freezing this salad, as the texture of the pasta and mozzarella can become unpleasant after thawing.

Conclusion

Pesto Caprese Pasta Salad is a delightful dish that brings together the classic flavors of Italian cuisine in a refreshing and satisfying way. I love how easy it is to prepare and how versatile it can be to suit different tastes and dietary needs. Whether I'm hosting a summer BBQ, attending a potluck, or simply craving a light meal, this salad is always a hit.

Print

clock clock iconcutlery cutlery iconflag flag iconfolder folder iconinstagram instagram iconpinterest pinterest iconfacebook facebook iconprint print iconsquares squares iconheart heart iconheart solid heart solid icon
Pesto Caprese Pasta Salad

Pesto Caprese Pasta Salad

5 Stars 4 Stars 3 Stars 2 Stars 1 Star No reviews
  • Author: Sue
  • Prep Time: 15 minutes
  • Cook Time: 10 minutes
  • Total Time: 25 minutes
  • Yield: 6 servings
  • Category: Salad
  • Method: No-Cook (post-boiling)
  • Cuisine: Italian
  • Diet: Vegetarian
Print Recipe
Pin Recipe

Description

Pesto Caprese Pasta Salad is a refreshing and flavorful dish combining pasta, cherry tomatoes, mozzarella, and basil pesto. Ideal for potlucks, picnics, or light meals, it offers a vibrant taste of Italian cuisine.


Ingredients

  • 12 oz short pasta (penne, fusilli, or farfalle)
  • 1 ½ cups cherry tomatoes, halved
  • 8 oz fresh mozzarella balls (bocconcini) or diced mozzarella
  • ¼ cup fresh basil leaves, torn
  • 1 cup fresh basil leaves (for pesto)
  • ⅓ cup grated Parmesan cheese
  • ⅓ cup extra virgin olive oil
  • 2 tablespoons pine nuts or walnuts
  • 1 clove garlic
  • ½ teaspoon salt
  • ¼ teaspoon black pepper
  • Juice of ½ a lemon (optional)

Instructions

  1. Bring a large pot of salted water to a boil and cook the pasta until al dente. Drain and rinse under cold water. Set aside to cool.
  2. In a food processor or blender, combine basil, Parmesan, olive oil, pine nuts, garlic, salt, and pepper. Blend until smooth. Add lemon juice for brightness if desired.
  3. In a large bowl, toss the cooled pasta with pesto dressing until evenly coated.
  4. Gently fold in halved cherry tomatoes and mozzarella balls.
  5. Sprinkle torn basil leaves on top. Let sit for 15 minutes before serving. Serve chilled or at room temperature.

Notes

  • Use gluten-free pasta for a gluten-free version.
  • Store leftovers in an airtight container for up to 4 days.
  • Add grilled chicken or chickpeas for extra protein.
  • Drizzle extra olive oil or pesto if salad becomes dry.
  • Use store-bought pesto for convenience.

Nutrition

  • Serving Size: 1 serving
  • Calories: 380
  • Sugar: 3g
  • Sodium: 320mg
  • Fat: 22g
  • Saturated Fat: 6g
  • Unsaturated Fat: 14g
  • Trans Fat: 0g
  • Carbohydrates: 32g
  • Fiber: 2g
  • Protein: 13g
  • Cholesterol: 25mg

Have you made this recipe? I'd love to see it!

Click here to Follow me on Pinterest

Cinnamon Roll Breakfast Smoothie

May 27, 2025 by Sue Leave a Comment

This Cinnamon Roll Breakfast Smoothie brings together the cozy flavors of a classic cinnamon roll in a nutritious, drinkable form. With wholesome ingredients like rolled oats, Greek yogurt, and a hint of cinnamon, it's a delightful way to start the day. Cinnamon Roll Breakfast Smoothie

Why I Love This Recipe

I appreciate how this smoothie captures the essence of a cinnamon roll without the need for baking. It's quick to prepare, taking only about 5 minutes, and provides a satisfying, protein-rich breakfast that keeps me energized throughout the morning. The combination of oats and Greek yogurt offers a creamy texture, while the cinnamon and banana add a natural sweetness that makes this smoothie feel indulgent yet healthy.

Ingredients

(Here's a tip: Check out the full list of ingredients and measurements in the recipe card below.)

  • ½ cup rolled oats
  • ¾ cup plain Greek yogurt
  • 1 tablespoon light brown sugar
  • 1 cup almond milk
  • 1 teaspoon ground cinnamon
  • ½ teaspoon vanilla extract
  • 1 frozen banana
  • Optional: 2 tablespoons pecans or walnuts

Directions

  1. In a blender, combine the rolled oats, Greek yogurt, brown sugar, almond milk, ground cinnamon, vanilla extract, and frozen banana.
  2. Blend until the mixture is smooth and creamy.
  3. Pour into a glass, sprinkle with additional cinnamon if desired, and enjoy immediately.

Servings and Timing

This recipe yields approximately 2 servings. Preparation time is about 5 minutes, making it an excellent choice for busy mornings when I need a quick yet satisfying breakfast.

Variations

  • Protein Boost: I sometimes add a scoop of vanilla protein powder to increase the protein content.
  • Sweetener Alternatives: Instead of brown sugar, I might use coconut sugar, maple syrup, or even a couple of Medjool dates for natural sweetness.
  • Milk Options: Depending on what's available, I swap almond milk with oat milk, soy milk, or regular dairy milk.
  • Nutty Addition: Adding a spoonful of peanut butter or almond butter gives the smoothie a richer flavor and added healthy fats.
  • Vegan Version: To make it vegan, I replace the Greek yogurt with a plant-based yogurt alternative.

Storage/Reheating

This smoothie is best enjoyed fresh. However, if I have leftovers, I store them in an airtight container in the refrigerator for up to 24 hours. Before drinking, I give it a good stir or shake, as separation may occur. I don't recommend reheating, as it's meant to be consumed cold.

FAQs

What type of oats should I use?

I prefer using rolled oats for their texture and nutritional benefits. Quick oats can also be used, but I avoid steel-cut oats as they don't blend as smoothly.

Can I make this smoothie ahead of time?

Yes, I often prepare the ingredients the night before and store them in the blender jar in the refrigerator. In the morning, I just blend and go.

Is it possible to make this smoothie without banana?

Absolutely. If I'm out of bananas or prefer not to use them, I substitute with half an avocado for creaminess and add a bit of honey or maple syrup for sweetness.

How can I make this smoothie more filling?

To make it more substantial, I add a tablespoon of chia seeds or flaxseeds, which provide additional fiber and omega-3 fatty acids.

Can I use flavored yogurt instead of plain?

Yes, using vanilla-flavored Greek yogurt adds extra sweetness and enhances the cinnamon roll flavor profile.

Conclusion

This Cinnamon Roll Breakfast Smoothie is a delightful fusion of comfort and nutrition. It's quick to make, customizable, and satisfies my sweet tooth while keeping me full and energized. Whether I'm rushing out the door or enjoying a leisurely morning, this smoothie is a go-to choice that never disappoints.

Print

clock clock iconcutlery cutlery iconflag flag iconfolder folder iconinstagram instagram iconpinterest pinterest iconfacebook facebook iconprint print iconsquares squares iconheart heart iconheart solid heart solid icon
Cinnamon Roll Breakfast Smoothie

Cinnamon Roll Breakfast Smoothie

5 Stars 4 Stars 3 Stars 2 Stars 1 Star No reviews
  • Author: Sue
  • Prep Time: 5 minutes
  • Cook Time: 0 minutes
  • Total Time: 5 minutes
  • Yield: 2 servings
  • Category: Breakfast
  • Method: Blending
  • Cuisine: American
  • Diet: Vegetarian
Print Recipe
Pin Recipe

Description

This Cinnamon Roll Breakfast Smoothie blends the cozy flavors of a cinnamon roll into a creamy, nutritious drink made with oats, Greek yogurt, banana, and cinnamon. Perfect for a quick, energizing breakfast.


Ingredients

  • ½ cup rolled oats
  • ¾ cup plain Greek yogurt
  • 1 tablespoon light brown sugar
  • 1 cup almond milk
  • 1 teaspoon ground cinnamon
  • ½ teaspoon vanilla extract
  • 1 frozen banana
  • Optional: 2 tablespoons pecans or walnuts

Instructions

  1. In a blender, combine the rolled oats, Greek yogurt, brown sugar, almond milk, ground cinnamon, vanilla extract, and frozen banana.
  2. Blend until the mixture is smooth and creamy.
  3. Pour into a glass, sprinkle with additional cinnamon if desired, and enjoy immediately.

Notes

  • Use rolled oats for best texture; avoid steel-cut oats.
  • To make it vegan, use plant-based yogurt.
  • Add chia seeds or flaxseeds for extra fiber and omega-3s.
  • Use vanilla yogurt for extra sweetness.
  • Store leftovers in the fridge up to 24 hours and stir before drinking.

Nutrition

  • Serving Size: 1 glass
  • Calories: 250
  • Sugar: 12g
  • Sodium: 100mg
  • Fat: 6g
  • Saturated Fat: 2g
  • Unsaturated Fat: 3g
  • Trans Fat: 0g
  • Carbohydrates: 38g
  • Fiber: 5g
  • Protein: 10g
  • Cholesterol: 5mg

Have you made this recipe? I'd love to see it!

Click here to Follow me on Pinterest

Chicken Wild Rice Casserole

May 26, 2025 by Sue Leave a Comment

This Chicken Wild Rice Casserole is a hearty, comforting dish that's perfect for busy weeknights or cozy weekends. It's packed with tender chicken, earthy wild rice, a creamy base, and a touch of cheese—all baked to golden perfection. Chicken Wild Rice Casserole

Why You’ll Love This Recipe

I love how easy this recipe is to put together with minimal prep. It’s a true one-dish wonder that delivers incredible flavor and satisfying texture. The mix of creamy sauce, juicy chicken, and nutty wild rice creates a balance that keeps me coming back for seconds. Whether I’m feeding the whole family or meal prepping for the week, this casserole always hits the spot.

Ingredients

(Here's a tip: Check out the full list of ingredients and measurements in the recipe card below.)

  • Cooked wild rice blend
  • Cooked chicken breast, cubed or shredded
  • Cream of mushroom soup (or homemade alternative)
  • Chicken broth
  • Shredded cheddar cheese
  • Diced onion
  • Minced garlic
  • Butter or olive oil
  • Salt and pepper to taste
  • Fresh chopped green onions (for garnish)

Directions

  1. Preheat the oven to 350°F (175°C) and lightly grease a large casserole dish.
  2. In a skillet, I sauté onion and garlic in butter or olive oil until translucent.
  3. In a large bowl, I mix together the cooked wild rice, chicken, cream of mushroom soup, chicken broth, sautéed onion and garlic, and half of the shredded cheese. I season it with salt and pepper.
  4. I pour the mixture into the prepared casserole dish and spread it out evenly.
  5. I sprinkle the remaining cheese on top and cover the dish with foil.
  6. I bake it for 30 minutes, then uncover and bake an additional 10–15 minutes, or until the top is golden and bubbly.
  7. I remove it from the oven and let it rest for 5 minutes before garnishing with green onions and serving.

Servings and timing

This recipe serves about 6 people.
Prep time: 15 minutes
Cook time: 40–45 minutes
Total time: 1 hour

Variations

  • I sometimes swap the cream of mushroom soup for cream of chicken for a lighter flavor.
  • To make it vegetarian, I replace the chicken with mushrooms and use vegetable broth.
  • I love tossing in frozen peas or chopped spinach for extra veggies.
  • For a little crunch, I top it with crispy fried onions or crushed buttery crackers before baking.

Storage/Reheating

I store leftovers in an airtight container in the refrigerator for up to 4 days.
To reheat, I microwave individual portions for 1–2 minutes or reheat the whole dish in a 350°F oven for about 20 minutes, covered with foil.
It also freezes well—just make sure it's fully cooled before wrapping tightly and freezing for up to 2 months.

FAQs

How do I cook wild rice for this casserole?

I cook wild rice according to package instructions, usually simmering in water or broth for about 40–45 minutes until tender.

Can I use rotisserie chicken?

Absolutely, I often use rotisserie chicken to save time and add extra flavor.

What can I substitute for cream of mushroom soup?

I make a homemade version with a roux, milk, and sautéed mushrooms, or I use cream of chicken if that’s what I have on hand.

Is this casserole gluten-free?

If I use a gluten-free soup and ensure my ingredients are certified gluten-free, yes, this casserole can be made gluten-free.

Can I make this casserole ahead of time?

Yes, I assemble it up to a day ahead and store it in the fridge, then bake it when I’m ready to serve.

Conclusion

This Chicken Wild Rice Casserole is a flavorful, satisfying dish that brings comfort and convenience together in one pan. It’s the kind of recipe I rely on when I want something hearty, homey, and easy to make. Whether I’m feeding a crowd or freezing leftovers, it always delivers.

Print

clock clock iconcutlery cutlery iconflag flag iconfolder folder iconinstagram instagram iconpinterest pinterest iconfacebook facebook iconprint print iconsquares squares iconheart heart iconheart solid heart solid icon
Chicken Wild Rice Casserole

Chicken Wild Rice Casserole

5 Stars 4 Stars 3 Stars 2 Stars 1 Star No reviews
  • Author: Sue
  • Prep Time: 20 minutes
  • Cook Time: 35 minutes
  • Total Time: 55 minutes
  • Yield: 6–8 servings
  • Category: Main Course
  • Method: Baking
  • Cuisine: American
  • Diet: Halal
Print Recipe
Pin Recipe

Description

This Chicken Wild Rice Casserole is a hearty, comforting dish made with tender chicken, nutty wild rice, vegetables, and a creamy sauce. It's perfect for cozy dinners, meal prepping, or using up holiday leftovers.


Ingredients

  • 2 cups cooked chicken, shredded or cubed
  • 2 cups cooked wild rice
  • 1 can (10.5 oz) cream of mushroom soup or homemade equivalent
  • ½ cup sour cream
  • 1 cup celery, chopped
  • 1 medium onion, chopped
  • 1 cup carrots, diced
  • 2 cloves garlic, minced
  • ½ cup chicken broth
  • 2 tablespoons butter or olive oil
  • Salt and pepper to taste
  • Optional: ¼ cup slivered almonds
  • Optional: ½ cup shredded cheese
  • Optional: fresh herbs for garnish

Instructions

  1. Preheat oven to 350°F (175°C).
  2. In a large skillet, sauté onion, garlic, celery, and carrots in butter or olive oil until softened, about 5–7 minutes.
  3. Add cooked wild rice and chicken to the skillet.
  4. Stir in cream of mushroom soup, sour cream, and chicken broth. Mix until well combined.
  5. Season with salt and pepper to taste.
  6. Transfer the mixture to a greased 9x13-inch baking dish.
  7. Top with slivered almonds or shredded cheese, if using.
  8. Bake uncovered for 30–35 minutes, until bubbly and golden on top.
  9. Let cool slightly before serving.

Notes

  • Can be made with leftover turkey instead of chicken.
  • Use extra veggies like mushrooms or zucchini for a vegetarian version.
  • Use dairy-free alternatives for a dairy-free version.
  • Top with crushed crackers or fried onions for extra crunch.
  • Store leftovers in the fridge up to 4 days; reheat with a splash of broth if dry.

Nutrition

  • Serving Size: 1 serving
  • Calories: 430
  • Sugar: 4g
  • Sodium: 720mg
  • Fat: 21g
  • Saturated Fat: 8g
  • Unsaturated Fat: 11g
  • Trans Fat: 0g
  • Carbohydrates: 35g
  • Fiber: 3g
  • Protein: 25g
  • Cholesterol: 75mg

Have you made this recipe? I'd love to see it!

Click here to Follow me on Pinterest

French Onion Soup Rice

May 26, 2025 by Sue Leave a Comment

French Onion Soup Rice is a delightful fusion of the classic French onion soup and comforting rice. This recipe combines the rich, caramelized flavors of onions with the satisfying texture of rice, creating a dish that's perfect for any meal. It's an excellent choice for a cozy family dinner or an elegant side dish for special occasions. French Onion Soup Rice

Why You’ll Love This Recipe

I find this dish to be a comforting and flavorful side that brings the essence of French onion soup into a hearty rice dish. The caramelized onions add a depth of flavor, while the melted Gruyère cheese provides a creamy finish. It's a versatile recipe that pairs well with various main courses or can stand alone as a satisfying vegetarian option.

Ingredients

(Here's a tip: Check out the full list of ingredients and measurements in the recipe card below.)

  • 2 cups long-grain white rice
  • 3 large yellow onions, thinly sliced
  • 4 cups beef broth
  • 1 cup water
  • ½ cup dry white wine (optional)
  • 4 tablespoons unsalted butter
  • 2 tablespoons olive oil
  • 2 cloves garlic, minced
  • 1 teaspoon sugar
  • 1 teaspoon dried thyme
  • 1 bay leaf
  • Salt and pepper to taste
  • 1 ½ cups shredded Gruyère cheese
  • ¼ cup fresh parsley, chopped (for garnish)

Directions

  1. Caramelize the Onions: In a large skillet, I heat the olive oil and 2 tablespoons of butter over medium heat. I add the thinly sliced onions and sugar, stirring to coat the onions evenly. I cook the onions for about 30 minutes, stirring occasionally, until they are deep golden brown and caramelized. If the onions start to brown too quickly, I reduce the heat. I then add the minced garlic and cook for an additional 2 minutes.
  2. Prepare the Rice: While the onions are caramelizing, I rinse the rice under cold water until the water runs clear. This step removes excess starch and helps achieve fluffy rice. I then set the rinsed rice aside.
  3. Deglaze the Skillet: Once the onions are caramelized, I add the dry white wine to the skillet, if using. I scrape the bottom of the skillet with a wooden spoon to release any browned bits and allow the wine to simmer for about 2 minutes until it has mostly evaporated.
  4. Cook the Rice: I add the beef broth, water, dried thyme, bay leaf, and caramelized onions to a large pot. I bring the mixture to a boil over medium-high heat. I stir in the rinsed rice, then reduce the heat to low and cover the pot. I simmer the rice for 18-20 minutes or until the rice is tender and has absorbed most of the liquid. I then remove the pot from the heat and let it sit, covered, for an additional 5 minutes.
  5. Finish the Dish: I remove the bay leaf from the pot and fluff the rice with a fork. I stir in the remaining 2 tablespoons of butter until melted and combined. I fold in 1 cup of shredded Gruyère cheese until it melts and blends into the rice. I season with salt and pepper to taste.
  6. Serve: I garnish the dish with the remaining ½ cup of shredded Gruyère cheese and chopped fresh parsley before serving.

Servings and Timing

  • Servings: 6
  • Prep Time: 15 minutes
  • Cook Time: 45 minutes
  • Total Time: 1 hour

Variations

  • Vegetarian Option: I substitute the beef broth with vegetable broth to make a vegetarian version.
  • Cheese Variations: If Gruyère cheese isn't available, I use Swiss or mozzarella cheese as alternatives.
  • Protein Addition: For a more substantial meal, I add cooked chicken or beef to the rice.
  • Herb Enhancements: I sometimes add fresh thyme or rosemary for additional flavor.

Storage/Reheating

I store any leftovers in an airtight container in the refrigerator for up to 3 days. To reheat, I add a splash of water or broth to the rice and warm it in the microwave or on the stovetop until heated through.

FAQs

What type of rice works best for this recipe?

I find that long-grain white rice works best as it absorbs the flavors well and maintains a good texture. I avoid using instant rice as it can become mushy.

Can I make this dish ahead of time?

Yes, I often prepare the dish ahead of time and reheat it when needed. I store it in the refrigerator and reheat with a bit of added broth to maintain moisture.

Is it necessary to use wine in the recipe?

No, the wine is optional. I sometimes omit it and still achieve a flavorful dish. If I want to add a bit of acidity, I might use a splash of vinegar as a substitute.

Can I freeze the leftovers?

Yes, I freeze the cooled rice in an airtight container for up to 3 months. I thaw it in the refrigerator overnight and reheat as needed.

What can I serve with French Onion Soup Rice?

I often serve it alongside roasted meats, grilled vegetables, or a fresh green salad. It also pairs well with crusty bread for a complete meal.

Conclusion

French Onion Soup Rice is a comforting and flavorful dish that brings the essence of a classic soup into a hearty rice meal. With its rich caramelized onions and melted cheese, it's a versatile recipe that complements various main courses or stands alone as a satisfying dish. I enjoy making this recipe for family dinners and special occasions alike.

Print

clock clock iconcutlery cutlery iconflag flag iconfolder folder iconinstagram instagram iconpinterest pinterest iconfacebook facebook iconprint print iconsquares squares iconheart heart iconheart solid heart solid icon
French Onion Soup Rice

French Onion Soup Rice

5 Stars 4 Stars 3 Stars 2 Stars 1 Star No reviews
  • Author: Sue
  • Prep Time: 15 minutes
  • Cook Time: 45 minutes
  • Total Time: 1 hour
  • Yield: 6 servings
  • Category: Side Dish
  • Method: Stovetop
  • Cuisine: French-American
  • Diet: Vegetarian
Print Recipe
Pin Recipe

Description

French Onion Soup Rice is a hearty and comforting dish that blends the rich flavors of French onion soup with fluffy rice, caramelized onions, and melted Gruyère cheese. Perfect as a side or a standalone vegetarian meal.


Ingredients

  • 2 cups long-grain white rice
  • 3 large yellow onions, thinly sliced
  • 4 cups beef broth
  • 1 cup water
  • ½ cup dry white wine (optional)
  • 4 tablespoons unsalted butter
  • 2 tablespoons olive oil
  • 2 cloves garlic, minced
  • 1 teaspoon sugar
  • 1 teaspoon dried thyme
  • 1 bay leaf
  • Salt and pepper to taste
  • 1 ½ cups shredded Gruyère cheese
  • ¼ cup fresh parsley, chopped (for garnish)

Instructions

  1. Heat olive oil and 2 tablespoons of butter in a large skillet over medium heat. Add onions and sugar, stir to coat, and cook for about 30 minutes until caramelized, stirring occasionally. Add garlic and cook for 2 more minutes.
  2. Rinse rice under cold water until clear and set aside.
  3. Add white wine to the skillet, scrape the bottom to deglaze, and simmer for 2 minutes until the wine reduces.
  4. In a large pot, combine beef broth, water, thyme, bay leaf, and caramelized onions. Bring to a boil, stir in rice, then cover and simmer on low for 18-20 minutes. Let sit covered for 5 more minutes off heat.
  5. Remove bay leaf, fluff rice with a fork, stir in remaining 2 tablespoons of butter and 1 cup of Gruyère cheese until melted. Season with salt and pepper.
  6. Garnish with remaining ½ cup of Gruyère cheese and chopped parsley before serving.

Notes

  • Use vegetable broth for a vegetarian version.
  • Gruyère can be substituted with Swiss or mozzarella cheese.
  • Add cooked meat for a heartier dish.
  • Store leftovers in the fridge for up to 3 days or freeze for up to 3 months.
  • Reheat with a splash of broth to maintain moisture.

Nutrition

  • Serving Size: 1 cup
  • Calories: 320
  • Sugar: 4g
  • Sodium: 480mg
  • Fat: 14g
  • Saturated Fat: 8g
  • Unsaturated Fat: 5g
  • Trans Fat: 0g
  • Carbohydrates: 38g
  • Fiber: 2g
  • Protein: 9g
  • Cholesterol: 35mg

Have you made this recipe? I'd love to see it!

Click here to Follow me on Pinterest

Blondie Oreo Buttermilk Pound Cake

May 26, 2025 by Sue Leave a Comment

This Blondie Oreo Buttermilk Pound Cake is a rich, buttery dessert that combines the chewy texture of blondies with the dense, moist crumb of a classic pound cake. The crushed Oreo cookies baked into the batter add a delightful crunch and chocolatey surprise in every bite, while the buttermilk brings a gentle tang that perfectly balances the sweetness. It's a twist on traditional pound cake that feels indulgent but is easy to make. Blondie Oreo Buttermilk Pound Cake

Why You’ll Love This Recipe

I love how this cake brings together the best parts of a blondie and a pound cake—soft, tender, and filled with golden cookie flavor. The Oreos add just enough contrast to make every bite exciting, and the buttermilk ensures the crumb stays ultra-moist without being too heavy. It’s perfect for both casual snacking and special occasions, and I find that it pairs beautifully with a scoop of vanilla ice cream or a drizzle of caramel sauce.

ingredients

(Here's a tip: Check out the full list of ingredients and measurements in the recipe card below.)

  • All-purpose flour
  • Baking powder
  • Salt
  • Unsalted butter
  • Granulated sugar
  • Brown sugar
  • Eggs
  • Vanilla extract
  • Buttermilk
  • Chopped white chocolate or white chocolate chips
  • Golden Oreo cookies, roughly chopped

directions

  1. I start by preheating the oven to 325°F (165°C) and greasing a loaf or bundt pan thoroughly.
  2. In a medium bowl, I whisk together the flour, baking powder, and salt.
  3. In a large bowl, I cream the butter with both sugars until the mixture is fluffy and light in color.
  4. I add the eggs one at a time, beating well after each, and then mix in the vanilla extract.
  5. I alternate adding the dry ingredients and the buttermilk to the creamed mixture, beginning and ending with the flour.
  6. I gently fold in the chopped white chocolate and crushed Oreo cookies.
  7. I pour the batter into the prepared pan and smooth the top.
  8. I bake the cake for 60 to 70 minutes, or until a toothpick inserted in the center comes out clean.
  9. I let the cake cool in the pan for 15 minutes before turning it out onto a wire rack to cool completely.

Servings and timing

This cake makes about 10–12 servings. The total prep time is around 15 minutes, with a baking time of 60 to 70 minutes and a cooling time of about 1 hour.

Variations

I sometimes switch things up by using chocolate Oreo cookies instead of Golden ones for a darker twist. I’ve also added a swirl of peanut butter or Nutella to the batter before baking for extra richness. If I want a citrusy touch, I add a bit of orange zest to the batter, which pairs beautifully with the white chocolate and Oreos.

storage/reheating

I store leftovers in an airtight container at room temperature for up to 3 days. If I want to keep it longer, I wrap the cake tightly and refrigerate it for up to a week. It also freezes well—just slice and wrap each piece individually. To reheat, I microwave a slice for about 15–20 seconds to bring back the soft texture.

FAQs

How do I know when the pound cake is fully baked?

I check by inserting a toothpick into the center; if it comes out clean or with just a few crumbs, it's ready.

Can I use regular Oreos instead of Golden?

Yes, I’ve used both types and each gives a different flavor. Golden Oreos give a more buttery taste, while regular Oreos add a richer chocolate element.

What can I use instead of buttermilk?

If I’m out of buttermilk, I mix 1 cup of milk with 1 tablespoon of lemon juice or vinegar and let it sit for 5–10 minutes before using.

Can I make this in a bundt pan?

Yes, I often use a bundt pan for a more decorative shape. Just make sure to grease it well so the cake releases cleanly.

Is it okay to add nuts?

Absolutely. I sometimes fold in chopped pecans or walnuts for extra crunch and nutty flavor.

Conclusion

This Blondie Oreo Buttermilk Pound Cake is a crowd-pleasing dessert that delivers comfort and indulgence in every bite. I love how easy it is to make, and the mix of textures from the soft crumb, chunks of white chocolate, and crunchy Oreos never gets old. Whether served on its own or dressed up with toppings, it's a recipe I come back to again and again.

Print

clock clock iconcutlery cutlery iconflag flag iconfolder folder iconinstagram instagram iconpinterest pinterest iconfacebook facebook iconprint print iconsquares squares iconheart heart iconheart solid heart solid icon
Blondie Oreo Buttermilk Pound Cake

Blondie Oreo Buttermilk Pound Cake

5 Stars 4 Stars 3 Stars 2 Stars 1 Star No reviews
  • Author: Sue
  • Prep Time: 15 minutes
  • Cook Time: 60–70 minutes
  • Total Time: 1 hour 25 minutes
  • Yield: 10–12 servings
  • Category: Dessert
  • Method: Baking
  • Cuisine: American
  • Diet: Vegetarian
Print Recipe
Pin Recipe

Description

This Blondie Oreo Buttermilk Pound Cake is a rich, moist dessert blending the chewy texture of blondies with a classic pound cake, featuring white chocolate and Golden Oreo chunks for added crunch and flavor.


Ingredients

  • 2 cups all-purpose flour
  • 1 tsp baking powder
  • ½ tsp salt
  • 1 cup unsalted butter, softened
  • ¾ cup granulated sugar
  • ½ cup brown sugar
  • 3 large eggs
  • 2 tsp vanilla extract
  • ½ cup buttermilk
  • 1 cup chopped white chocolate or white chocolate chips
  • 1 ½ cups Golden Oreo cookies, roughly chopped

Instructions

  1. Preheat the oven to 325°F (165°C) and grease a loaf or bundt pan thoroughly.
  2. In a medium bowl, whisk together the flour, baking powder, and salt.
  3. In a large bowl, cream the butter with granulated and brown sugars until light and fluffy.
  4. Add the eggs one at a time, beating well after each addition. Mix in the vanilla extract.
  5. Alternately add the dry ingredients and buttermilk to the creamed mixture, beginning and ending with the flour mixture.
  6. Gently fold in the chopped white chocolate and crushed Oreo cookies.
  7. Pour the batter into the prepared pan and smooth the top.
  8. Bake for 60 to 70 minutes, or until a toothpick inserted in the center comes out clean.
  9. Let the cake cool in the pan for 15 minutes before transferring to a wire rack to cool completely.

Notes

  • You can substitute Golden Oreos with regular Oreos for a chocolatey twist.
  • Adding orange zest or a swirl of Nutella can enhance the flavor profile.
  • Store in an airtight container at room temperature for up to 3 days, or refrigerate for up to a week.
  • Freezes well; slice and wrap individually for easy storage.

Nutrition

  • Serving Size: 1 slice
  • Calories: 380
  • Sugar: 28g
  • Sodium: 210mg
  • Fat: 20g
  • Saturated Fat: 12g
  • Unsaturated Fat: 6g
  • Trans Fat: 0.5g
  • Carbohydrates: 45g
  • Fiber: 1g
  • Protein: 4g
  • Cholesterol: 70mg

Have you made this recipe? I'd love to see it!

Click here to Follow me on Pinterest

Cauliflower Au Gratin Recipe

May 26, 2025 by Sue Leave a Comment

Cauliflower Au Gratin is a comforting French-inspired dish that transforms humble cauliflower into a rich, cheesy, and golden-baked masterpiece. I combine tender florets with a creamy béchamel sauce, top it with breadcrumbs and cheese, and bake until bubbly and crisp. It's a perfect side for holidays or cozy dinners. Cauliflower Au Gratin Recipe

Why I Love This Recipe

I love this recipe because it’s both elegant and approachable. The creamy Gruyère-Parmesan sauce adds depth, while the breadcrumb topping gives it a satisfying crunch. It’s a great way to make vegetables feel indulgent, and it pairs beautifully with roasted meats or stands alone as a vegetarian main.

Ingredients

(Here's a tip: Check out the full list of ingredients and measurements in the recipe card below.)

  • 1 large head of cauliflower, cut into florets
  • 3 tablespoons unsalted butter
  • 3 tablespoons all-purpose flour
  • 2 cups whole milk
  • 1 cup grated Gruyère cheese
  • ½ cup grated Parmesan cheese
  • ¼ cup breadcrumbs
  • 2 cloves garlic, minced
  • ½ teaspoon salt
  • ¼ teaspoon black pepper
  • ¼ teaspoon ground nutmeg
  • 1 tablespoon chopped fresh parsley (optional)

Directions

  1. I preheat the oven to 375°F (190°C) and grease a 2-quart baking dish.
  2. I bring a large pot of salted water to a boil, add the cauliflower florets, and cook them for 5–7 minutes until just tender. Then I drain them well and transfer them to the prepared baking dish.
  3. In a medium saucepan over medium heat, I melt the butter, add the minced garlic, and cook for 1 minute until fragrant. I stir in the flour to form a roux, cooking for about 2 minutes until golden and bubbling.
  4. I gradually whisk in the milk, ensuring there are no lumps, and continue to cook, whisking constantly, until the sauce thickens, about 5 minutes. I remove it from heat and stir in the Gruyère cheese, ¼ cup of the Parmesan cheese, salt, pepper, and nutmeg until the cheese is melted and the sauce is smooth.
  5. I pour the cheese sauce evenly over the cauliflower florets in the baking dish. Then I sprinkle the breadcrumbs and the remaining ¼ cup of Parmesan cheese over the top.
  6. I bake it in the preheated oven for 25–30 minutes, or until the top is golden brown and the sauce is bubbling around the edges. I garnish with chopped fresh parsley before serving, if desired.

Servings and Timing

This recipe serves 6 people. It takes about 20 minutes to prepare and 30 minutes to bake, totaling approximately 50 minutes from start to finish.

Variations

  • Cheese Swap: I sometimes use sharp cheddar or Fontina instead of Gruyère for a different flavor profile.
  • Add Protein: For a heartier dish, I add cooked bacon bits, diced ham, or shredded chicken.
  • Vegetable Mix: I like to mix in broccoli or roasted mushrooms for added variety.
  • Spice It Up: A pinch of cayenne pepper or mustard powder adds a subtle kick.

Storage/Reheating

To store leftovers, I let the dish cool completely, then cover it tightly and refrigerate for up to 3 days. To reheat, I place it in a 350°F (175°C) oven until warmed through, about 15–20 minutes. I avoid freezing, as the sauce can separate and become grainy upon thawing.

FAQs

What’s the best cheese to use for Cauliflower Au Gratin?

I prefer Gruyère for its nutty flavor and excellent melting properties. However, sharp cheddar, Fontina, or a mix of cheeses also work well.

Can I make this dish ahead of time?

Yes, I often assemble the dish up to the baking step, cover it, and refrigerate for up to 24 hours. When ready to serve, I bake it as directed, adding a few extra minutes if needed.

How do I prevent the sauce from becoming lumpy?

I make sure to whisk the flour and butter mixture thoroughly before gradually adding the milk, continuing to whisk constantly until the sauce is smooth and thickened.

Is it possible to make this recipe gluten-free?

Absolutely. I substitute the all-purpose flour with a gluten-free flour blend and use gluten-free breadcrumbs for the topping.

Can I use frozen cauliflower?

Yes, I thaw and drain frozen cauliflower thoroughly before using it. I might need to adjust the cooking time slightly, as frozen cauliflower is often softer than fresh.

Conclusion

Cauliflower Au Gratin is a delightful way to elevate a simple vegetable into a dish that's both comforting and sophisticated. The creamy, cheesy sauce combined with the tender cauliflower and crispy topping creates a harmonious blend of textures and flavors. Whether I'm serving it at a holiday gathering or a weeknight dinner, it's always a crowd-pleaser that brings warmth and satisfaction to the table.

Print

clock clock iconcutlery cutlery iconflag flag iconfolder folder iconinstagram instagram iconpinterest pinterest iconfacebook facebook iconprint print iconsquares squares iconheart heart iconheart solid heart solid icon
Cauliflower Au Gratin Recipe

Cauliflower Au Gratin Recipe

5 Stars 4 Stars 3 Stars 2 Stars 1 Star No reviews
  • Author: Sue
  • Prep Time: 20 minutes
  • Cook Time: 30 minutes
  • Total Time: 50 minutes
  • Yield: 6 servings
  • Category: Side Dish
  • Method: Baking
  • Cuisine: French
  • Diet: Vegetarian
Print Recipe
Pin Recipe

Description

Cauliflower Au Gratin is a French-inspired baked dish featuring tender cauliflower florets smothered in a creamy, cheesy béchamel sauce, topped with breadcrumbs and cheese, then baked until golden and bubbly.


Ingredients

  • 1 large head of cauliflower, cut into florets
  • 3 tablespoons unsalted butter
  • 3 tablespoons all-purpose flour
  • 2 cups whole milk
  • 1 cup grated Gruyère cheese
  • ½ cup grated Parmesan cheese
  • ¼ cup breadcrumbs
  • 2 cloves garlic, minced
  • ½ teaspoon salt
  • ¼ teaspoon black pepper
  • ¼ teaspoon ground nutmeg
  • 1 tablespoon chopped fresh parsley (optional)

Instructions

  1. Preheat oven to 375°F (190°C) and grease a 2-quart baking dish.
  2. Bring a large pot of salted water to a boil, add cauliflower florets, and cook for 5–7 minutes until just tender. Drain well and transfer to prepared baking dish.
  3. In a medium saucepan over medium heat, melt butter, add minced garlic, and cook for 1 minute. Stir in flour to form a roux and cook for 2 minutes until golden.
  4. Gradually whisk in milk, cooking and whisking constantly until thickened, about 5 minutes. Remove from heat and stir in Gruyère, ¼ cup Parmesan, salt, pepper, and nutmeg until melted and smooth.
  5. Pour cheese sauce over cauliflower in the baking dish. Sprinkle with breadcrumbs and remaining ¼ cup Parmesan.
  6. Bake for 25–30 minutes or until top is golden and sauce is bubbling. Garnish with parsley if desired before serving.

Notes

  • Use sharp cheddar or Fontina for a cheese variation.
  • Add bacon bits, ham, or chicken for extra protein.
  • Mix in broccoli or mushrooms for more veggies.
  • Add cayenne or mustard powder for spice.
  • Make ahead and refrigerate before baking.
  • Substitute with gluten-free flour and breadcrumbs for a gluten-free version.

Nutrition

  • Serving Size: 1 serving
  • Calories: 230
  • Sugar: 4g
  • Sodium: 380mg
  • Fat: 16g
  • Saturated Fat: 9g
  • Unsaturated Fat: 6g
  • Trans Fat: 0g
  • Carbohydrates: 12g
  • Fiber: 3g
  • Protein: 10g
  • Cholesterol: 40mg

Have you made this recipe? I'd love to see it!

Click here to Follow me on Pinterest

Black Poison Swirl Candy Apples

May 26, 2025 by Sue Leave a Comment

These Black Poison Swirl Candy Apples are a spooky and stunning treat perfect for Halloween or any dark-themed celebration. With their glossy black candy coating and eerie swirls, they’re not only delicious but also serve as a dramatic centerpiece. I love how the sweet, tart crunch of the apple pairs with the hard candy shell. It’s an easy recipe with a hauntingly beautiful payoff. Black Poison Swirl Candy Apples

Why You’ll Love This Recipe

I love how this recipe combines simplicity with visual impact. These candy apples are surprisingly easy to make, yet they always draw attention on the dessert table. The glossy black candy coating with white swirls gives off serious wicked witch vibes—ideal for Halloween or gothic-themed parties. Plus, I can customize the colors or add flavor extracts for a twist. They're also fun to make with kids (just be cautious with the hot sugar).

ingredients

(Here's a tip: Check out the full list of ingredients and measurements in the recipe card below.)

  • Apples (preferably Granny Smith or Honeycrisp)
  • Granulated sugar
  • Light corn syrup
  • Water
  • Black gel food coloring
  • White gel food coloring (optional for swirls)
  • Candy thermometer
  • Lollipop or wooden sticks

directions

  1. I start by washing and drying the apples thoroughly, then I remove the stems and insert sturdy sticks into the center of each apple.
  2. In a heavy saucepan, I combine the sugar, corn syrup, and water. I stir gently until everything dissolves, then I stop stirring and let the mixture come to a boil.
  3. I use a candy thermometer and allow the mixture to reach 300°F (hard crack stage).
  4. Once it hits the right temperature, I remove it from heat and immediately stir in the black food coloring. If I want a swirl effect, I add a few drops of white gel coloring and gently swirl with a skewer.
  5. I quickly dip each apple into the candy mixture, turning to coat evenly, then place them on a parchment-lined baking sheet to cool and harden.

Servings and timing

This recipe makes about 6 candy apples.
Prep time: 15 minutes
Cook time: 20 minutes
Cooling time: 15 minutes
Total time: Around 50 minutes

Variations

I sometimes change things up by using red or purple food coloring for a different spooky vibe. I also like adding flavored extracts like cinnamon or black cherry to the sugar mix for a surprise twist. Using gold or silver edible glitter makes them even more magical. For an extra crunch, I occasionally roll the freshly dipped apples in crushed cookies or candy before the coating sets.

storage/reheating

I store these candy apples at room temperature in a cool, dry place for up to 3 days. I avoid refrigerating them because the moisture can make the candy coating sticky. There’s no need to reheat them since the candy shell is meant to stay hard. If I want to make them ahead, I wrap each apple in cellophane once they’ve cooled completely.

FAQs

How do I get the candy to stick to the apples?

I make sure the apples are completely dry and wax-free. I sometimes scrub them with hot water and a bit of vinegar to remove any waxy coating.

Can I use liquid food coloring instead of gel?

I prefer gel food coloring because it gives a more intense color without watering down the candy mixture.

Why is my candy coating bubbling or too thick?

If I overcook the sugar or stir it too much, it can crystallize or become thick. I make sure to let it boil undisturbed and remove it at exactly 300°F.

Can I make these in advance?

Yes, I usually make them a day ahead. I let them cool completely, then store them in a dry place wrapped in parchment or plastic wrap.

What type of apples works best?

I like to use tart apples like Granny Smith because they balance the sweetness of the candy shell. Honeycrisp and Fuji also work well for a sweeter bite.

Conclusion

Black Poison Swirl Candy Apples are the perfect eerie indulgence for Halloween or any darkly festive gathering. I love how dramatic and eye-catching they are, and they’re always a hit with kids and adults alike. With just a handful of ingredients and a little care, I can whip up a batch that looks like it came straight out of a witch’s kitchen.

Print

clock clock iconcutlery cutlery iconflag flag iconfolder folder iconinstagram instagram iconpinterest pinterest iconfacebook facebook iconprint print iconsquares squares iconheart heart iconheart solid heart solid icon
Black Poison Swirl Candy Apples

Black Poison Swirl Candy Apples

5 Stars 4 Stars 3 Stars 2 Stars 1 Star No reviews
  • Author: Sue
  • Prep Time: 15 minutes
  • Cook Time: 20 minutes
  • Total Time: 50 minutes
  • Yield: 6 candy apples
  • Category: Dessert
  • Method: Candy Making
  • Cuisine: American
  • Diet: Vegetarian
Print Recipe
Pin Recipe

Description

Black Poison Swirl Candy Apples are spooky and stunning treats with a glossy black candy coating and eerie white swirls, perfect for Halloween or dark-themed celebrations.


Ingredients

  • 6 Apples (preferably Granny Smith or Honeycrisp)
  • 2 cups Granulated sugar
  • ½ cup Light corn syrup
  • ¾ cup Water
  • Black gel food coloring
  • White gel food coloring (optional for swirls)
  • 6 Lollipop or wooden sticks

Instructions

  1. Wash and dry the apples thoroughly. Remove stems and insert sturdy sticks into the center of each apple.
  2. In a heavy saucepan, combine sugar, corn syrup, and water. Stir gently until dissolved, then bring to a boil without stirring further.
  3. Attach a candy thermometer and heat the mixture until it reaches 300°F (hard crack stage).
  4. Remove from heat and stir in black food coloring. For swirl effect, add a few drops of white gel coloring and gently swirl with a skewer.
  5. Quickly dip each apple into the candy mixture, turning to coat evenly, and place on a parchment-lined baking sheet to cool and harden.

Notes

  • Use gel food coloring for vibrant colors without altering the candy consistency.
  • Be cautious when working with hot sugar syrup.
  • Store at room temperature to prevent the candy coating from becoming sticky.

Nutrition

  • Serving Size: 1 apple
  • Calories: 280
  • Sugar: 45g
  • Sodium: 20mg
  • Fat: 0g
  • Saturated Fat: 0g
  • Unsaturated Fat: 0g
  • Trans Fat: 0g
  • Carbohydrates: 70g
  • Fiber: 2g
  • Protein: 0g
  • Cholesterol: 0mg

Have you made this recipe? I'd love to see it!

Click here to Follow me on Pinterest

Strawberry Banana Pudding Cookies with Cheesecake Dip

May 26, 2025 by Sue Leave a Comment

I’ve found a fun and fruity spin on banana pudding that turns heads and wins hearts—Strawberry Banana Pudding Cookies with a luscious Cheesecake Dip. These soft, golden cookies are packed with banana flavor, dotted with juicy strawberries, and paired with a creamy dip that takes them over the top. Strawberry Banana Pudding Cookies with Cheesecake Dip

Why You’ll Love This Recipe

  • I don’t need to chill the dough, so baking is quick and easy.
  • The flavors of banana pudding and fresh strawberries bring back comforting memories.
  • These cookies pair beautifully with a cheesecake dip, making them feel extra special.
  • They're always a hit at parties or family gatherings—gone in minutes.
  • I like that they’re portable and make for a unique, stand-out dessert.

Ingredients

(Here's a tip: Check out the full list of ingredients and measurements in the recipe card below.)

For the Cookies:

  • ½ cup unsalted butter, softened
  • ½ cup granulated sugar
  • ¼ cup brown sugar
  • 1 large egg
  • 1 teaspoon vanilla extract
  • 1 box (3.4 oz) instant banana pudding mix
  • 1 cup all-purpose flour
  • ½ teaspoon baking powder
  • ¼ teaspoon salt
  • ½ cup diced fresh strawberries
  • ½ cup diced ripe banana
  • Optional: ½ cup white chocolate chips or chopped nuts

For the Cheesecake Dip:

  • 8 oz cream cheese, softened
  • ¼ cup powdered sugar
  • 1 teaspoon vanilla extract
  • 2 tablespoons milk (adjust for consistency)

Directions

  1. I preheat the oven to 350°F (175°C) and line my baking sheet with parchment paper.
  2. In a large bowl, I cream together the softened butter, granulated sugar, and brown sugar until smooth and fluffy.
  3. I add in the egg and vanilla extract and mix until combined.
  4. I stir in the banana pudding mix until fully blended.
  5. In a separate bowl, I whisk the flour, baking powder, and salt, then gradually mix it into the wet ingredients.
  6. I gently fold in the diced strawberries and bananas. If I’m using white chocolate chips or nuts, I add them here too.
  7. Using a tablespoon or cookie scoop, I drop the dough onto my prepared baking sheet, spacing them apart.
  8. I bake for 10–12 minutes, until the edges are lightly golden, then let them cool on the sheet for 5 minutes before transferring to a wire rack.
  9. For the cheesecake dip, I beat the cream cheese until smooth, add powdered sugar and vanilla, and then mix in milk until it reaches the desired creamy texture.

Servings and Timing

  • Servings: about 24 cookies
  • Prep Time: 15 minutes
  • Bake Time: 10–12 minutes
  • Total Time: around 30 minutes

Variations

  • I like using dark or milk chocolate chips for a richer flavor instead of white chocolate.
  • Chopped pecans or walnuts add a great crunch.
  • A bit of shredded coconut brings a tropical vibe.
  • To make them gluten-free, I use a 1:1 gluten-free flour blend.
  • I’ve made these vegan by using plant-based butter, a flax egg, and dairy-free pudding mix.

Storage/Reheating

  • I keep these cookies in an airtight container at room temperature for up to 3 days.
  • For longer storage, I refrigerate them for up to a week or freeze for up to 3 months.
  • To reheat, I pop one in the microwave for 10–15 seconds to bring back that fresh-from-the-oven softness.
  • I store the cheesecake dip in a separate airtight container in the fridge and stir it before serving.

FAQs

How ripe should the bananas be?

I like using ripe bananas with brown speckles for maximum sweetness and flavor in the cookies.

Can I use frozen strawberries?

Yes, I can use frozen strawberries, but I make sure to thaw and drain them well to avoid excess moisture in the dough.

Can I skip the cheesecake dip?

Absolutely. The cookies are tasty on their own, but the dip adds a rich, creamy touch that I find really enhances them.

Can I make the dough in advance?

Yes, I often prepare the dough and refrigerate it for up to a day. It makes baking even easier and the flavor deepens a bit.

What’s the best way to serve these at a party?

I stack the cookies neatly and keep the dip in a small bowl with a spoon. Guests love dipping them or even spreading the dip on top.

Conclusion

Strawberry Banana Pudding Cookies with Cheesecake Dip are a flavorful treat I keep coming back to. They’re easy, memorable, and perfect for when I want to bring something sweet but a little unexpected. Whether for a special gathering or a quiet afternoon treat, they always bring smiles.

Print

clock clock iconcutlery cutlery iconflag flag iconfolder folder iconinstagram instagram iconpinterest pinterest iconfacebook facebook iconprint print iconsquares squares iconheart heart iconheart solid heart solid icon
Strawberry Banana Pudding Cookies with Cheesecake Dip

Strawberry Banana Pudding Cookies with Cheesecake Dip

5 Stars 4 Stars 3 Stars 2 Stars 1 Star No reviews
  • Author: Sue
  • Prep Time: 15 minutes
  • Cook Time: 10-12 minutes
  • Total Time: 25-27 minutes
  • Yield: 24 cookies
  • Category: Dessert
  • Method: Baking
  • Cuisine: American
  • Diet: Vegetarian
Print Recipe
Pin Recipe

Description

These Strawberry Banana Pudding Cookies with Cheesecake Dip are soft, fruity, and nostalgic treats that blend classic banana pudding flavors with fresh strawberries and a creamy cheesecake dip. Perfect for parties or indulgent snacking.


Ingredients

  • ½ cup unsalted butter, softened
  • ½ cup granulated sugar
  • ¼ cup brown sugar
  • 1 large egg
  • 1 teaspoon vanilla extract
  • 1 box (3.4 oz) instant banana pudding mix
  • 1 cup all-purpose flour
  • ½ teaspoon baking powder
  • ¼ teaspoon salt
  • ½ cup diced fresh strawberries
  • ½ cup diced ripe banana
  • Optional: ½ cup white chocolate chips or chopped nuts
  • 8 oz cream cheese, softened
  • ¼ cup powdered sugar
  • 1 teaspoon vanilla extract
  • 2 tablespoons milk (adjust for desired consistency)

Instructions

  1. Preheat oven to 350°F (175°C) and line a baking sheet with parchment paper.
  2. In a large bowl, beat butter, granulated sugar, and brown sugar until light and fluffy.
  3. Mix in the egg and vanilla extract until well combined.
  4. Stir in the banana pudding mix until fully integrated.
  5. In a separate bowl, whisk together flour, baking powder, and salt. Gradually mix into the wet ingredients.
  6. Gently fold in diced strawberries, banana, and optional white chocolate chips or nuts.
  7. Drop dough by tablespoonfuls onto the baking sheet, spacing them about 2 inches apart.
  8. Bake for 10-12 minutes or until edges are lightly golden.
  9. Cool on the baking sheet for 5 minutes, then transfer to a wire rack.
  10. For the dip, beat softened cream cheese until smooth. Mix in powdered sugar and vanilla. Gradually add milk to desired consistency.

Notes

  • Use ripe bananas for better flavor and sweetness.
  • If using frozen strawberries, thaw and drain to avoid excess moisture.
  • Chill dough if preparing ahead; refrigerate up to 24 hours.
  • Cookies store well in airtight containers at room temperature for 3 days or refrigerated for up to a week.
  • Freeze baked cookies for up to 3 months.

Nutrition

  • Serving Size: 1 cookie with dip
  • Calories: 140
  • Sugar: 9g
  • Sodium: 85mg
  • Fat: 7g
  • Saturated Fat: 4g
  • Unsaturated Fat: 2g
  • Trans Fat: 0g
  • Carbohydrates: 18g
  • Fiber: 0.5g
  • Protein: 2g
  • Cholesterol: 20mg

Have you made this recipe? I'd love to see it!

Click here to Follow me on Pinterest

Baked Mac ’n’ Cheese Stuffed Meatball Bombs with BBQ Drizzle

May 26, 2025 by Sue Leave a Comment

These Baked Mac ’n’ Cheese Stuffed Meatball Bombs are a flavor-packed twist on two classic comfort foods. Tender meatballs are loaded with creamy mac and cheese, baked to golden perfection, and topped with a sweet and smoky BBQ drizzle that pulls it all together. It’s a hearty and delicious dish that always gets rave reviews. Baked Mac ’n’ Cheese Stuffed Meatball Bombs with BBQ Drizzle

Why You’ll Love This Recipe

I love how this recipe combines two beloved favorites—meatballs and mac ’n’ cheese—into one irresistible bite. The contrast of the savory meatball shell with the gooey, cheesy center is pure magic. It’s perfect for parties, game days, or any time I want a satisfying and unexpected crowd-pleaser. Plus, the BBQ drizzle adds the perfect tangy kick.

Ingredients

(Here's a tip: Check out the full list of ingredients and measurements in the recipe card below.)

ground beef
seasoned breadcrumbs
egg
grated Parmesan cheese
salt
black pepper
garlic powder
onion powder
paprika
prepared mac and cheese (cooled and firmed slightly)
BBQ sauce
fresh parsley (optional, for garnish)
shredded mozzarella or cheddar (optional, for extra cheesiness)

Directions

  1. I start by preheating the oven to 375°F (190°C) and lining a baking sheet with parchment paper.
  2. In a large bowl, I mix the ground beef, breadcrumbs, egg, Parmesan, and seasonings until just combined—being careful not to overmix.
  3. I take a small amount of the meat mixture and flatten it into a disk in my palm.
  4. I spoon a small scoop of mac and cheese into the center, then gently wrap the meat around it to form a sealed meatball.
  5. I place the meatballs on the baking sheet and repeat with the remaining mixture.
  6. I bake them for 20–25 minutes, until cooked through and browned on the outside.
  7. While they’re baking, I warm the BBQ sauce.
  8. Once out of the oven, I drizzle the BBQ sauce over the meatballs and sprinkle with fresh parsley or extra cheese if I like.
  9. I serve them hot while the centers are still melty and delicious.

Servings and timing

This recipe makes about 12 large stuffed meatballs, serving 4 to 6 people.
Prep time: 20 minutes
Cook time: 25 minutes
Total time: 45 minutes

Variations

I sometimes switch the beef for ground turkey  for a different flavor profile. Adding jalapeños to the mac and cheese gives it a spicy kick. For a smokier touch, I like using smoked gouda in the mac. If I want a crunchier exterior, I roll the meatballs in crushed crackers before baking.

Storage/Reheating

To store leftovers, I let them cool completely and then refrigerate in an airtight container for up to 3 days. For reheating, I bake them at 350°F until warmed through, about 10–12 minutes. I can also microwave them for a quick fix, though the oven keeps them crispier. They freeze well too—I just thaw and reheat as needed.

FAQs

How do I keep the mac and cheese from leaking out?

I make sure the mac and cheese is chilled before stuffing—it helps it stay firm. Sealing the meatball completely around the filling is also key.

Can I make these ahead of time?

Yes, I often prepare the meatballs a day ahead and refrigerate them uncooked. When I’m ready, I just bake and drizzle.

What type of BBQ sauce works best?

I usually go for a thick, smoky-sweet sauce, but spicy or tangy varieties also work depending on the mood I’m going for.

Can I use boxed mac and cheese?

Absolutely. While homemade is great, I’ve used boxed mac for ease and it still tastes amazing.

What sides go well with this dish?

I like to serve them with coleslaw, a fresh green salad, or roasted vegetables to balance out the richness.

Conclusion

These Baked Mac ’n’ Cheese Stuffed Meatball Bombs with BBQ Drizzle are everything I crave in comfort food—hearty, cheesy, and packed with bold flavor. Whether I’m serving them at a party or making a fun family dinner, they’re always a hit and never last long.

Print

clock clock iconcutlery cutlery iconflag flag iconfolder folder iconinstagram instagram iconpinterest pinterest iconfacebook facebook iconprint print iconsquares squares iconheart heart iconheart solid heart solid icon
Baked Mac ’n’ Cheese Stuffed Meatball Bombs with BBQ Drizzle

Baked Mac ’n’ Cheese Stuffed Meatball Bombs with BBQ Drizzle

5 Stars 4 Stars 3 Stars 2 Stars 1 Star No reviews
  • Author: Sue
  • Prep Time: 20 minutes
  • Cook Time: 25 minutes
  • Total Time: 45 minutes
  • Yield: 12 meatballs (serves 4-6)
  • Category: Appetizer, Main Dish
  • Method: Baking
  • Cuisine: American
  • Diet: Halal
Print Recipe
Pin Recipe

Description

Baked Mac ’n’ Cheese Stuffed Meatball Bombs with BBQ Drizzle combine two classic comfort foods into one irresistible bite. Juicy meatballs are filled with creamy mac and cheese, baked to golden perfection, and finished with a tangy BBQ drizzle.


Ingredients

  • 1 lb ground beef
  • ½ cup seasoned breadcrumbs
  • 1 egg
  • ¼ cup grated Parmesan cheese
  • ½ tsp salt
  • ½ tsp black pepper
  • ½ tsp garlic powder
  • ½ tsp onion powder
  • ½ tsp paprika
  • 1 ½ cups prepared mac and cheese (cooled and slightly firm)
  • ⅓ cup BBQ sauce
  • 1 tbsp fresh parsley (optional, for garnish)
  • ½ cup shredded mozzarella or cheddar (optional, for extra cheesiness)

Instructions

  1. Preheat the oven to 375°F (190°C) and line a baking sheet with parchment paper.
  2. In a large bowl, combine ground beef, breadcrumbs, egg, Parmesan, salt, pepper, garlic powder, onion powder, and paprika. Mix until just combined.
  3. Take a small portion of the meat mixture and flatten it into a disk in your palm.
  4. Place a small scoop of mac and cheese in the center, then wrap the meat around it to seal and form a meatball.
  5. Place the meatballs on the prepared baking sheet and repeat with the remaining ingredients.
  6. Bake for 20–25 minutes, until meatballs are browned and cooked through.
  7. While baking, warm the BBQ sauce in a small saucepan.
  8. Once baked, drizzle BBQ sauce over the meatballs and garnish with parsley or extra cheese if desired.
  9. Serve hot while the centers are still melty.

Notes

  • Ensure the mac and cheese is well chilled before stuffing to prevent leaking.
  • For added flavor, try using smoked cheeses or adding jalapeños to the mac and cheese.
  • Can be made ahead and refrigerated before baking.
  • Store leftovers in an airtight container in the fridge for up to 3 days.
  • They can be frozen and reheated in the oven for best results.

Nutrition

  • Serving Size: 2 meatballs
  • Calories: 320
  • Sugar: 5g
  • Sodium: 580mg
  • Fat: 20g
  • Saturated Fat: 9g
  • Unsaturated Fat: 9g
  • Trans Fat: 0.5g
  • Carbohydrates: 18g
  • Fiber: 1g
  • Protein: 17g
  • Cholesterol: 65mg

Have you made this recipe? I'd love to see it!

Click here to Follow me on Pinterest

  • « Previous Page
  • 1
  • …
  • 19
  • 20
  • 21
  • 22
  • 23
  • …
  • 40
  • Next Page »
Modern Sidebar

Hey there! I'm Sue, a mom, a wife, and someone who’s always in the kitchen trying out new recipes or revisiting old ones that remind me of family gatherings and special moments.

Learn more

Popular

  • Slow Cooker Hot Honey Chicken Sandwiches
    Slow Cooker Hot Honey Chicken Sandwiches
  • Crockpot French Onion Meatloaf with Melted Swiss Cheese
    Crockpot French Onion Meatloaf with Melted Swiss Cheese
  • Cheddar & Havarti Chicken Bowtie Pasta with Roasted Broccoli & Carrots
    Cheddar & Havarti Chicken Bowtie Pasta with Roasted Broccoli & Carrots
  • Honey Butter Sweet Alabama Pecan Bread
    Honey Butter Sweet Alabama Pecan Bread

Footer

↑ back to top

About

  • About
  • Contact
  • Disclosure Policy
  • DMCA
  • Privacy Policy
  • Terms and Conditions

Newsletter

  • Sign Up! for emails and updates

Recipes

  • Appetizers & Snacks
  • Beef
  • Breakfast
  • Chicken
  • Desserts
  • Dinner
  • Drinks
  • Side-Dish
  • Soups

As an Amazon Associate I earn from qualifying purchases.

Copyright © 2025 Sue Recipe