Sue Recipe

  • Recipe Index
  • Chicken
  • Desserts
  • About
  • Contact
menu icon
go to homepage
  • Recipe Index
  • Chicken
  • Desserts
  • About
  • Contact

search icon
Homepage link
  • Recipe Index
  • Chicken
  • Desserts
  • About
  • Contact

×

Crispy Salmon and Rice Bowl

April 23, 2025 by Sue Leave a Comment

This Crispy Salmon and Rice Bowl combines golden, pan-seared salmon with fluffy rice and vibrant vegetables, all brought together with a splash of soy sauce and a squeeze of lemon. It's a quick, satisfying meal that delivers restaurant-quality flavor in the comfort of my own kitchen. Crispy Salmon and Rice Bowl

Why You’ll Love This Recipe

I love this recipe because it's incredibly versatile—perfect for a weeknight dinner or a casual gathering with friends. It's budget-friendly, using ingredients I likely already have on hand, and it's quick and easy to prepare, even for beginners. Plus, it's customizable to suit different tastes and dietary preferences, making it a crowd-pleaser for both kids and adults.

Ingredients

(Here's a tip: Check out the full list of ingredients and measurements in the recipe card below.)

  • Salmon fillets (with skin on)
  • Cooked rice (white, brown, or jasmine)
  • Vegetables (such as steamed broccoli, shredded carrots, or edamame)
  • Soy sauce
  • Olive oil
  • Lemon
  • Garlic

Directions

  1. Preheat Your Pan: Heat a large skillet over medium-high heat until hot.
  2. Prepare the Salmon: Pat the salmon fillets dry with a paper towel. Season with salt, pepper, and a drizzle of olive oil.
  3. Sear the Salmon: Place the fillets skin-side down in the hot pan. Cook for about 4-5 minutes without moving them to allow the skin to crisp. Flip and cook for another 3-4 minutes until cooked through.
  4. Cook the Rice: While the salmon is cooking, heat the cooked rice in a microwave or separate pan. Add a splash of soy sauce and stir to coat.
  5. Assemble the Bowl: Place the rice in a bowl, top with the cooked salmon, and arrange the vegetables around the salmon. Squeeze fresh lemon juice over everything.
  6. Serve and Enjoy: Serve warm and enjoy!

Servings and Timing

  • Servings: 2
  • Prep Time: 10 minutes
  • Cook Time: 15 minutes
  • Total Time: 25 minutes

Variations

  • Spicy Kick: Add a drizzle of sriracha or sprinkle red pepper flakes over the finished bowl.
  • Herb Infusion: Incorporate fresh herbs like cilantro or parsley for added freshness.
  • Grain Swap: Use quinoa or cauliflower rice instead of traditional rice for a low-carb option.
  • Vegetable Medley: Include a mix of roasted or sautéed vegetables like bell peppers, zucchini, or mushrooms.

Storage/Reheating

  • Storage: Store leftovers in an airtight container in the refrigerator for up to 2 days.
  • Reheating: Reheat in the microwave until warmed through. To maintain the salmon's crispiness, reheat in a skillet over medium heat.

FAQs

Can I use frozen salmon?

Yes, just make sure to thaw it completely and pat it dry before cooking to achieve a crispy skin.

What type of rice works best?

Any cooked rice will work, but jasmine or basmati rice adds a nice fragrance and texture to the bowl.

Can I make this dish ahead of time?

You can prepare the components ahead of time and assemble the bowl just before serving.

How can I make this dish gluten-free?

Use tamari or a gluten-free soy sauce alternative to make this dish gluten-free.

What other proteins can I use?

You can substitute the salmon with grilled chicken, tofu, or shrimp based on your preference.

Conclusion

This Crispy Salmon and Rice Bowl is a delightful combination of flavors and textures that's both satisfying and easy to prepare. Whether I'm cooking for myself or entertaining guests, it's a go-to recipe that never disappoints.

Print

clock clock iconcutlery cutlery iconflag flag iconfolder folder iconinstagram instagram iconpinterest pinterest iconfacebook facebook iconprint print iconsquares squares iconheart heart iconheart solid heart solid icon
Crispy Salmon and Rice Bowl

Crispy Salmon and Rice Bowl

5 Stars 4 Stars 3 Stars 2 Stars 1 Star No reviews
  • Author: Sue
  • Prep Time: 10 minutes
  • Cook Time: 15 minutes
  • Total Time: 25 minutes
  • Yield: 2 servings
  • Category: Main Course
  • Method: Pan-Seared
  • Cuisine: Asian-Inspired
  • Diet: Gluten Free
Print Recipe
Pin Recipe

Description

This Crispy Salmon and Rice Bowl is a quick, flavorful dinner idea featuring golden pan-seared salmon, fluffy rice, and vibrant veggies. A splash of soy sauce and a squeeze of lemon take this easy, healthy meal to the next level. Perfect for busy weeknights or a fuss-free lunch, this customizable bowl is a must-try for salmon lovers.


Ingredients

  • Salmon fillets (with skin on)
  • Cooked rice (white, brown, or jasmine)
  • Mixed vegetables (e.g., steamed broccoli, shredded carrots, edamame)
  • Soy sauce
  • Olive oil
  • Lemon
  • Garlic
  • Salt and pepper (to taste)

Instructions

  1. Heat the Skillet: Warm a large skillet over medium-high heat until hot.
  2. Season the Salmon: Pat salmon fillets dry. Rub with olive oil, and season with salt and pepper.
  3. Sear the Salmon: Place salmon skin-side down in the skillet. Cook for 4–5 minutes without moving, then flip and cook another 3–4 minutes until done.
  4. Warm the Rice: Reheat rice in the microwave or a pan. Stir in soy sauce to coat.
  5. Assemble Bowls: Divide rice into bowls, top with salmon, and arrange vegetables around.
  6. Add Fresh Flavor: Squeeze lemon juice over the top and serve warm.

Notes

  • For a spicy twist, add sriracha or red pepper flakes.
  • Swap rice for quinoa or cauliflower rice for a low-carb option.
  • Add fresh herbs like cilantro or parsley for brightness.
  • Use tamari for a gluten-free version.
  • Leftovers keep for 2 days in the fridge; reheat in a pan to keep salmon crispy.

Have you made this recipe? I'd love to see it!

Click here to Follow me on Pinterest

Pecan Pie Brownies

April 23, 2025 by Sue Leave a Comment

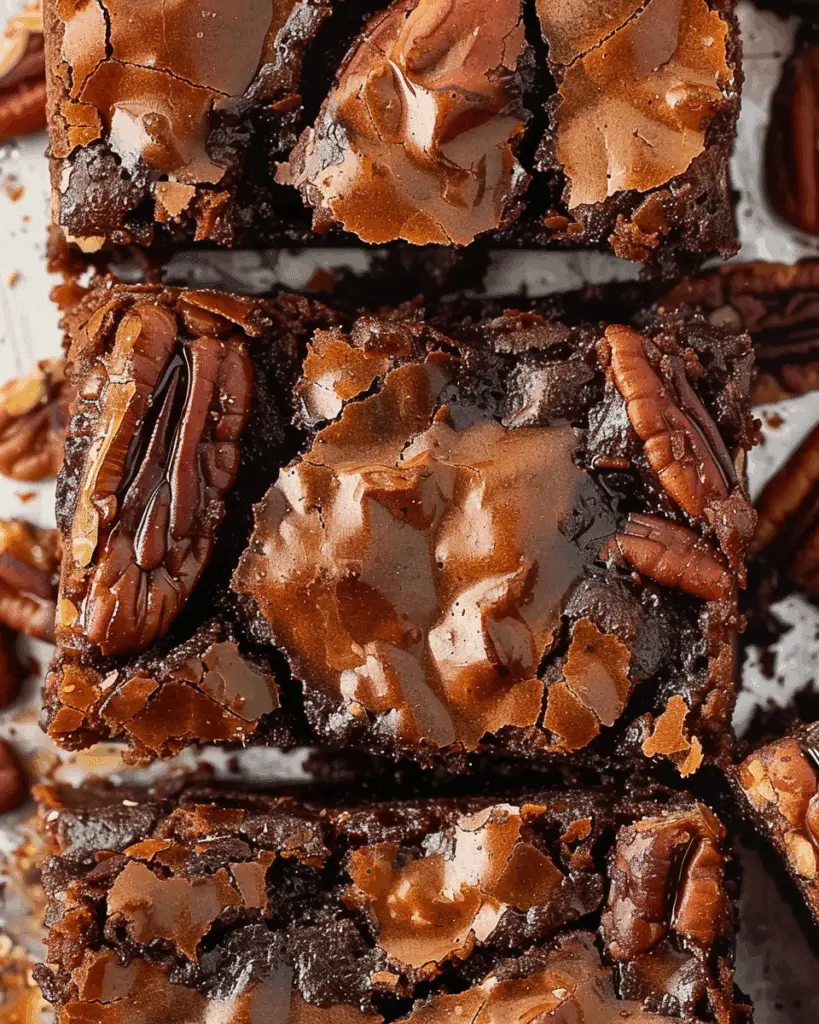
Pecan Pie Brownies are the ultimate dessert fusion—rich, fudgy brownies meet the gooey, nutty topping of classic pecan pie. This indulgent treat combines two beloved favorites into one irresistible bite, making it perfect for holidays or any time I crave something special.​ Pecan Pie Brownies

Why I Love This Recipe

I adore this recipe because it delivers the best of both worlds: the deep, chocolatey goodness of brownies and the sweet, crunchy delight of pecan pie. It's a crowd-pleaser that's surprisingly easy to make, especially when I use a boxed brownie mix. The pecan topping adds a delightful texture and flavor that elevates the brownies to a whole new level.​

Ingredients

(Here's a tip: Check out the full list of ingredients and measurements in the recipe card below.)

  • 1 box brownie mix (plus ingredients listed on the package to prepare the brownies)

  • 1 cup granulated sugar

  • 1 cup light corn syrup

  • 4 large eggs

  • ½ cup unsalted butter

  • 1 teaspoon vanilla extract

  • 2 cups pecans (roughly chopped)​

Directions

  1. Preheat the oven according to the brownie mix instructions.

  2. Prepare the brownie batter as directed on the package and pour it into a greased 9×13-inch baking dish.

  3. Bake the brownies for about 20 minutes, until they're partially cooked but not fully set.

  4. While the brownies are baking, combine the sugar, corn syrup, eggs, butter, and vanilla extract in a medium saucepan over medium heat.

  5. Whisk continuously for 10–15 minutes until the mixture thickens to a jelly-like consistency and turns a medium honey color.

  6. Remove the mixture from heat and stir in the chopped pecans.

  7. Pour the pecan mixture evenly over the partially baked brownies.

  8. Return the pan to the oven and bake for an additional 25 minutes, until the pecan topping is set and bubbling.

  9. Allow the brownies to cool completely before cutting into squares and serving.​

Servings and Timing

  • Servings: 12–16 brownies

  • Preparation Time: 15 minutes

  • Cooking Time: 45 minutes

  • Total Time: 1 hour​

Variations

  • Homemade Brownies: Instead of a boxed mix, I sometimes make brownies from scratch for a more personalized touch.

  • Nut Options: While pecans are traditional, I've tried using walnuts or almonds for a different flavor profile.

  • Add Chocolate Chips: For extra decadence, I sprinkle chocolate chips over the brownie batter before adding the pecan topping.​

Storage and Reheating

  • Storage: I store the cooled brownies in an airtight container at room temperature for up to 3 days or refrigerate them for up to a week.

  • Freezing: These brownies freeze well. I wrap them individually and store them in a freezer-safe bag for up to 3 months.

  • Reheating: To enjoy warm, I microwave a brownie for about 15–20 seconds.​

FAQs

How do I know when the brownies are done?

The brownies are done when the pecan topping is set and bubbling, and a toothpick inserted into the center comes out with a few moist crumbs.​

Can I make this recipe gluten-free?

Yes, by using a gluten-free brownie mix and ensuring all other ingredients are gluten-free, I can make this recipe suitable for a gluten-free diet.​

What can I use instead of corn syrup?

If I prefer not to use corn syrup, I substitute it with maple syrup or honey, keeping in mind that it may slightly alter the flavor and texture.​

Can I prepare these brownies in advance?

Absolutely. I often make them a day ahead, as the flavors meld beautifully overnight.​

How do I prevent the pecan topping from sinking into the brownies?

Partially baking the brownie layer before adding the pecan topping helps keep the layers distinct and prevents sinking.​

Conclusion

Pecan Pie Brownies are a delightful twist on two classic desserts, combining the rich flavors of chocolate and pecan pie into one irresistible treat. Whether for a holiday gathering or a special indulgence, these brownies are sure to impress and satisfy any sweet tooth.​

Print

clock clock iconcutlery cutlery iconflag flag iconfolder folder iconinstagram instagram iconpinterest pinterest iconfacebook facebook iconprint print iconsquares squares iconheart heart iconheart solid heart solid icon
Pecan Pie Brownies

Pecan Pie Brownies

5 Stars 4 Stars 3 Stars 2 Stars 1 Star No reviews
  • Author: Sue
  • Prep Time: 15 minutes
  • Cook Time: 45 minutes
  • Total Time: 1 hour
  • Yield: 12–16 brownies
  • Category: Dessert
  • Method: Baking
  • Cuisine: American
  • Diet: Vegetarian
Print Recipe
Pin Recipe

Description

These Pecan Pie Brownies combine the rich, fudgy texture of classic brownies with the gooey, nutty sweetness of pecan pie. Perfect for holidays or anytime you're craving a decadent dessert, this easy recipe is a crowd-pleasing twist on two beloved treats.


Ingredients

  • 1 box brownie mix (plus ingredients listed on the package to prepare the brownies)
  • 1 cup granulated sugar
  • 1 cup light corn syrup
  • 4 large eggs
  • ½ cup unsalted butter
  • 1 teaspoon vanilla extract
  • 2 cups pecans, roughly chopped

Instructions

  1. Preheat the oven as directed on the brownie mix package.
  2. Prepare brownie batter and pour into a greased 9×13-inch baking dish.
  3. Bake for 20 minutes until partially set.
  4. In a saucepan over medium heat, combine sugar, corn syrup, eggs, butter, and vanilla. Whisk for 10–15 minutes until thick and honey-colored.
  5. Stir in chopped pecans.
  6. Pour pecan mixture over partially baked brownies.
  7. Return to oven and bake an additional 25 minutes until topping is set and bubbling.
  8. Cool completely before cutting and serving.

Notes

  • Use homemade brownie batter for a from-scratch option.
  • Swap pecans for walnuts or almonds to change up the flavor.
  • Sprinkle chocolate chips over the brownie base for extra richness.
  • Store in an airtight container at room temperature for 3 days, or refrigerate for up to a week.
  • Freeze individually wrapped brownies for up to 3 months.

Have you made this recipe? I'd love to see it!

Click here to Follow me on Pinterest

Delicious Mediterranean Steak Bowls: A Quick and Healthy Recipe

April 23, 2025 by Sue Leave a Comment

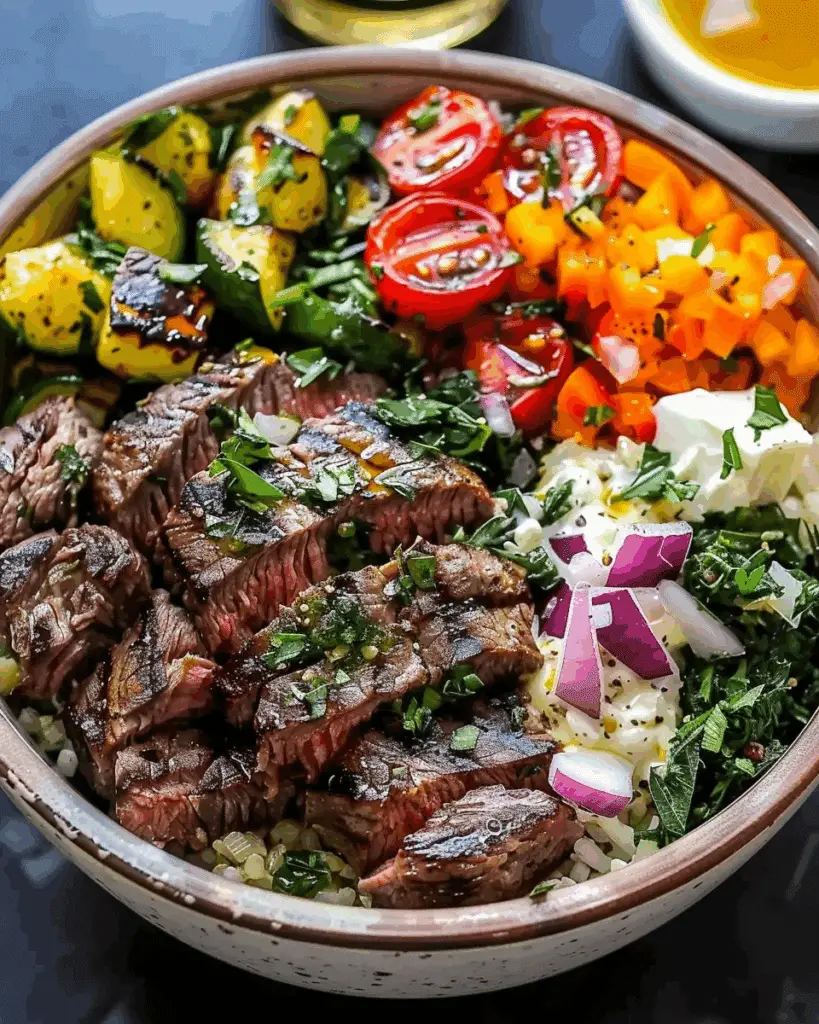
These Mediterranean Steak Bowls are a vibrant, flavorful, and wholesome meal that combines juicy grilled steak with fresh vegetables and a zesty yogurt dressing. Perfect for a quick weeknight dinner or meal prep, this dish brings the essence of the Mediterranean to your table. Delicious Mediterranean Steak Bowls: A Quick and Healthy Recipe

Why You’ll Love This Recipe

I love how these steak bowls are both satisfying and nourishing. The combination of tender steak, crisp vegetables, and creamy yogurt dressing creates a harmonious blend of textures and flavors. It's a versatile recipe that fits well into a healthy lifestyle without compromising on taste.

Ingredients

(Here's a tip: Check out the full list of ingredients and measurements in the recipe card below.)

  • 1 lb steak (such as flank or sirloin)
  • Salt and pepper, to taste
  • 2 cups cherry tomatoes, halved
  • 1 cucumber, diced
  • ½ red onion, thinly sliced
  • ½ cup yellow bell pepper, diced
  • ¼ cup fresh parsley, chopped
  • ½ cup plain Greek yogurt
  • 2 tablespoon olive oil
  • 1 tablespoon lemon juice
  • 1 garlic clove, minced
  • ¼ teaspoon paprika
  • ¼ teaspoon cumin
  • Almonds or nuts of choice, for garnish (optional)

Directions

  1. Cook the Steak: Season the steak with salt and pepper. Heat a skillet or grill over medium-high heat and cook the steak for about 4-5 minutes on each side, or until it reaches your desired level of doneness. Let it rest for 5 minutes before slicing.
  2. Prepare the Vegetables: While the steak rests, combine the cherry tomatoes, cucumber, red onion, yellow bell pepper, and parsley in a large bowl.
  3. Make the Yogurt Dressing: In a small bowl, whisk together the Greek yogurt, olive oil, lemon juice, minced garlic, paprika, and cumin until smooth.
  4. Assemble the Bowls: Divide the vegetable mixture among four bowls. Top each with sliced steak and a generous dollop of the yogurt dressing. Sprinkle with almonds or your choice of nuts for added crunch, if desired.

Servings and Timing

This recipe serves 4 people. The total preparation and cooking time is approximately 30 minutes, making it an excellent choice for a quick and healthy meal.

Variations

  • Protein Alternatives: Swap the steak for grilled chicken, lamb, or even chickpeas for a vegetarian option.
  • Grain Base: Serve the ingredients over a bed of quinoa, couscous, or brown rice to add more substance.
  • Dressing Twist: Add a touch of tahini or feta cheese to the yogurt dressing for a different flavor profile.
  • Spice It Up: Incorporate a pinch of chili flakes or harissa for some heat.

Storage/Reheating

Store any leftovers in an airtight container in the refrigerator for up to 3 days. Keep the yogurt dressing separate to maintain freshness. To reheat, warm the steak gently in a skillet over low heat or in the microwave for about 1 minute. Add the fresh vegetables and dressing after reheating to preserve their texture and flavor.

FAQs

How can I ensure the steak remains tender?

Letting the steak rest after cooking allows the juices to redistribute, resulting in a more tender and flavorful bite.

Can I prepare the components ahead of time?

Absolutely. You can cook the steak and chop the vegetables in advance. Store them separately in the refrigerator and assemble the bowls when ready to eat.

Is there a dairy-free alternative to the yogurt dressing?

Yes, you can use a dairy-free yogurt made from almond, coconut, or soy milk as a substitute for Greek yogurt.

What other toppings can I add to these bowls?

Consider adding olives, feta cheese, or roasted chickpeas for extra flavor and texture.

Can I use dried herbs instead of fresh parsley?

While fresh parsley offers a brighter flavor, dried parsley can be used in a pinch. Use about one-third the amount of dried parsley as you would fresh.

Conclusion

These Mediterranean Steak Bowls are a delightful fusion of flavors and textures that make for a satisfying and healthy meal. Whether you're looking for a quick dinner option or a meal prep solution, this recipe is versatile and easy to customize to your taste preferences. Enjoy the taste of the Mediterranean in every bite!

Print

clock clock iconcutlery cutlery iconflag flag iconfolder folder iconinstagram instagram iconpinterest pinterest iconfacebook facebook iconprint print iconsquares squares iconheart heart iconheart solid heart solid icon
Delicious Mediterranean Steak Bowls: A Quick and Healthy Recipe

Delicious Mediterranean Steak Bowls: A Quick and Healthy Recipe

5 Stars 4 Stars 3 Stars 2 Stars 1 Star No reviews
  • Author: Sue
  • Prep Time: 15 minutes
  • Cook Time: 15 minutes
  • Total Time: 30 minutes
  • Yield: 4 servings
  • Category: Dinner, Main Course
  • Method: Grilled or Pan-Seared
  • Cuisine: Mediterranean
Print Recipe
Pin Recipe

Description

Enjoy these Delicious Mediterranean Steak Bowls, a healthy and quick dinner recipe packed with grilled steak, crisp vegetables, and a creamy yogurt dressing. This vibrant Mediterranean meal is perfect for busy weeknights or meal prep and is easy to customize for your diet.


Ingredients

  • 1 lb steak (flank or sirloin)
  • Salt and pepper, to taste
  • 2 cups cherry tomatoes, halved
  • 1 cucumber, diced
  • ½ red onion, thinly sliced
  • ½ cup yellow bell pepper, diced
  • ¼ cup fresh parsley, chopped
  • ½ cup plain Greek yogurt
  • 2 tbsp olive oil
  • 1 tbsp lemon juice
  • 1 garlic clove, minced
  • ¼ tsp paprika
  • ¼ tsp cumin
  • Almonds or nuts of choice (optional, for garnish)

Instructions

  • Season steak with salt and pepper. Grill or sear over medium-high heat for 4–5 minutes per side. Rest 5 minutes, then slice.
  • In a large bowl, mix tomatoes, cucumber, onion, bell pepper, and parsley.
  • In a small bowl, whisk yogurt, olive oil, lemon juice, garlic, paprika, and cumin.
  • Assemble bowls: Add veggies to bowls, top with sliced steak, spoon yogurt dressing, and garnish with nuts if using.

Notes

  • Resting steak keeps it juicy and tender.
  • Swap steak with chicken, lamb, or chickpeas for variation.
  • Serve over grains like quinoa or couscous for added volume.
  • Store components separately for freshest leftovers.
  • Use dairy-free yogurt for a dairy-free option.

Have you made this recipe? I'd love to see it!

Click here to Follow me on Pinterest

Sourdough Discard Raspberry Cream Cheese Danishes

April 23, 2025 by Sue Leave a Comment

These Sourdough Discard Raspberry Cream Cheese Danishes are a delightful way to transform leftover sourdough discard into a flaky, buttery pastry filled with tangy cream cheese and sweet raspberry jam. I love how they combine the richness of a classic Danish with the subtle tang of sourdough, making them perfect for breakfast, brunch, or an indulgent afternoon treat.

Sourdough Discard Raspberry Cream Cheese Danishes

Why You’ll Love This Recipe

I find this recipe to be a fantastic way to repurpose sourdough discard, reducing waste while creating something truly delicious. The combination of creamy cheese and tart raspberry jam nestled in a tender, flaky pastry is simply irresistible. Plus, the process is straightforward, making it accessible for both novice and experienced bakers.

Ingredients

(Here's a tip: Check out the full list of ingredients and measurements in the recipe card below.)

  • All-purpose flour
  • Unsalted butter
  • Granulated sugar
  • Salt
  • Sourdough discard
  • Cold water
  • Cream cheese
  • Powdered sugar
  • Vanilla extract
  • Raspberry jam
  • Egg (for egg wash)

Directions

  1. In a large bowl, I combine the flour, sugar, and salt. I cut in the cold butter until the mixture resembles coarse crumbs.
  2. I add the sourdough discard and cold water, mixing until a dough forms. I wrap it in plastic and chill for at least an hour.
  3. On a floured surface, I roll out the dough into a rectangle, fold it into thirds, and repeat this process twice more, chilling between folds to create layers.
  4. For the filling, I beat together the cream cheese, powdered sugar, and vanilla extract until smooth.
  5. I roll out the dough and cut it into squares, placing a dollop of cream cheese filling and a spoonful of raspberry jam in the center of each.
  6. I fold the corners of each square towards the center, pressing gently to seal.
  7. I place the danishes on a baking sheet, brush with egg wash, and bake at 375°F (190°C) for 20-25 minutes until golden brown.
  8. I let them cool slightly before serving.

Servings and Timing

This recipe yields approximately 8 danishes. Preparation time is about 30 minutes, with an additional 1 hour for chilling the dough. Baking time is 20-25 minutes, so I can have these delightful pastries ready in under 2 hours.

Variations

I sometimes swap the raspberry jam for other fruit preserves like apricot or blueberry for a different flavor profile. Adding a drizzle of lemon glaze on top after baking adds a zesty touch. For a nutty twist, I sprinkle chopped almonds over the filling before baking.

Storage/Reheating

I store leftover danishes in an airtight container at room temperature for up to 2 days or refrigerate them for up to 5 days. To reheat, I place them in a preheated 350°F (175°C) oven for about 5-10 minutes until warmed through.

FAQs

How do I make the dough flakier?

To achieve a flakier dough, I ensure the butter is very cold and handle the dough as little as possible to prevent the butter from melting before baking.

Can I use active sourdough starter instead of discard?

Yes, I can use active starter, but it may affect the texture slightly, making the dough more elastic. I adjust the hydration accordingly.

What if I don't have raspberry jam?

If I don't have raspberry jam, I use any other fruit preserves or even fresh fruit compote as a substitute.

Can I freeze the danishes?

Absolutely, I freeze the baked danishes in a single layer, then transfer them to a freezer bag. They keep well for up to a month. I reheat them in the oven before serving.

Is it necessary to chill the dough?

Chilling the dough is crucial as it relaxes the gluten and keeps the butter cold, resulting in a tender, flaky pastry.

Conclusion

These Sourdough Discard Raspberry Cream Cheese Danishes are a delightful treat that makes excellent use of sourdough discard. I enjoy the process of creating them and the delicious results that follow. Whether for a special occasion or a simple indulgence, these danishes are sure to impress.

Print

clock clock iconcutlery cutlery iconflag flag iconfolder folder iconinstagram instagram iconpinterest pinterest iconfacebook facebook iconprint print iconsquares squares iconheart heart iconheart solid heart solid icon
Sourdough Discard Raspberry Cream Cheese Danishes

Sourdough Discard Raspberry Cream Cheese Danishes

5 Stars 4 Stars 3 Stars 2 Stars 1 Star No reviews
  • Author: Sue
  • Prep Time: 30 minutes
  • Chill Time: 1 hour
  • Cook Time: 25 minutes
  • Total Time: 1 hour 55 minutes
  • Yield: 8 danishes
  • Category: Breakfast, Brunch, Dessert
  • Method: Baking
  • Cuisine: American, European-inspired
  • Diet: Vegetarian
Print Recipe
Pin Recipe

Description

These Sourdough Discard Raspberry Cream Cheese Danishes are the perfect way to elevate your leftover sourdough starter. With a tender, flaky pastry base, rich cream cheese filling, and a swirl of sweet raspberry jam, they’re an irresistible homemade treat ideal for breakfast, brunch, or a cozy afternoon snack.


Ingredients

  • 2 cups all-purpose flour
  • 1 cup unsalted butter (cold, cubed)
  • 2 tbsp granulated sugar
  • ½ tsp salt
  • ½ cup sourdough discard
  • ¼ cup cold water
  • 8 oz cream cheese (softened)
  • ⅓ cup powdered sugar
  • 1 tsp vanilla extract
  • ⅓ cup raspberry jam
  • 1 egg (beaten, for egg wash)

Instructions

  1. In a large bowl, combine flour, sugar, and salt. Cut in cold butter until mixture resembles coarse crumbs.
  2. Add sourdough discard and cold water. Mix until dough forms. Wrap in plastic wrap and chill for 1 hour.
  3. On a floured surface, roll out dough into a rectangle. Fold into thirds. Repeat rolling and folding process two more times, chilling in between.
  4. Beat cream cheese, powdered sugar, and vanilla extract until smooth to make filling.
  5. Roll dough and cut into 8 squares. Place a dollop of filling and a spoonful of raspberry jam in the center of each.
  6. Fold corners of each square to the center and gently press to seal.
  7. Transfer to baking sheet, brush with egg wash, and bake at 375°F (190°C) for 20–25 minutes or until golden brown.
  8. Let cool slightly before serving.

Notes

  • For flakier pastry, keep butter and dough very cold and avoid overhandling.
  • Swap raspberry jam with apricot, blueberry, or any favorite fruit preserve.
  • Optional: Drizzle with lemon glaze or top with chopped almonds before baking.
  • Danishes can be frozen after baking and reheated in the oven.

Have you made this recipe? I'd love to see it!

Click here to Follow me on Pinterest

Leftover Mashed Potato Cheese Puffs

April 23, 2025 by Sue Leave a Comment

Why You’ll Love This Recipe

I love finding ways to give new life to leftovers, and these mashed potato cheese puffs are one of my favorite kitchen hacks. They’re crispy on the outside, creamy on the inside, and loaded with cheesy goodness. Whether I'm entertaining or just need a quick snack or side, these little puffs always deliver. They're easy to make, kid-friendly, and work perfectly for brunch, lunch, or a cozy dinner side. Leftover Mashed Potato Cheese Puffs

Ingredients

(Here's a tip: Check out the full list of ingredients and measurements in the recipe card below.)

  • Leftover mashed potatoes
  • Shredded cheddar cheese
  • Grated Parmesan cheese
  • Eggs
  • All-purpose flour
  • Chopped chives or green onions
  • Salt
  • Pepper
  • Baking powder
  • Optional: garlic powder, onion powder, or paprika for extra flavor

Directions

  1. I start by preheating my oven to 400°F (200°C) and lightly greasing a muffin tin.
  2. In a large bowl, I mix the mashed potatoes with shredded cheddar, Parmesan, eggs, flour, chives, baking powder, and seasonings until everything is well combined.
  3. I spoon the mixture into the muffin cups, filling each about ¾ full.
  4. I bake them for 20-25 minutes, or until the tops are golden and puffed.
  5. After baking, I let them cool in the pan for a few minutes before gently removing and serving.

Servings and timing

This recipe makes about 12 puffs and takes around 10 minutes to prep and 25 minutes to cook. Total time is roughly 35 minutes.

Variations

I like switching up the cheeses—mozzarella, Gruyère, or pepper jack all work well. Sometimes I add cooked bacon bits or finely chopped ham for a meaty twist. If I want a bit more kick, I mix in some diced jalapeños or a pinch of cayenne pepper.

storage/reheating

I store leftovers in an airtight container in the fridge for up to 3 days. To reheat, I pop them in the oven or toaster oven at 350°F until warmed through and crispy again, usually about 10 minutes. They can also be frozen and reheated straight from the freezer for 15-20 minutes at the same temperature.

FAQs

Can I use instant mashed potatoes for this recipe?

Yes, I can use instant mashed potatoes as long as they’re thick and not too watery. Let them cool before mixing with the other ingredients.

Can I make these ahead of time?

Absolutely. I often prepare the mixture a day ahead and keep it covered in the fridge. Then I just bake them fresh when I need them.

Can I make them gluten-free?

Yes, I substitute the all-purpose flour with a gluten-free flour blend. It works just as well.

Do I need to use a muffin tin?

A muffin tin helps keep the shape and ensures even cooking, but I’ve also scooped them onto a baking sheet for more rustic rounds.

What can I serve these with?

I love serving them with sour cream, ketchup, or a spicy aioli. They pair great with soups, salads, or as a brunch side.

Conclusion

These leftover mashed potato cheese puffs are a tasty, easy way to reduce waste and make something delicious. I find myself making extra mashed potatoes just to ensure I have leftovers. Whether I serve them as a snack, side, or party bite, they always disappear fast.

Print

clock clock iconcutlery cutlery iconflag flag iconfolder folder iconinstagram instagram iconpinterest pinterest iconfacebook facebook iconprint print iconsquares squares iconheart heart iconheart solid heart solid icon
Leftover Mashed Potato Cheese Puffs

Leftover Mashed Potato Cheese Puffs

5 Stars 4 Stars 3 Stars 2 Stars 1 Star No reviews
  • Author: Sue
  • Prep Time: 10 minutes
  • Cook Time: 25 minutes
  • Total Time: 35 minutes
  • Yield: 12 cheese puffs
  • Category: Appetizer, Snack, Side Dish
  • Method: Baking
  • Cuisine: American
Print Recipe
Pin Recipe

Description

Give your leftovers new life with these crispy, cheesy Leftover Mashed Potato Cheese Puffs. Perfect as a snack, side dish, or brunch favorite, they're easy to make, loaded with flavor, and kid-approved.


Ingredients

2 cups leftover mashed potatoes

1 cup shredded cheddar cheese

¼ cup grated Parmesan cheese

2 large eggs

⅓ cup all-purpose flour

2 tablespoons chopped chives or green onions

1 teaspoon baking powder

½ teaspoon salt

¼ teaspoon pepper

Optional: ½ teaspoon garlic powder, onion powder, or paprika for extra flavor


Instructions

  1. Preheat oven to 400°F (200°C) and lightly grease a muffin tin.
  2. In a large bowl, mix together mashed potatoes, cheddar, Parmesan, eggs, flour, chives, baking powder, salt, pepper, and any optional spices.
  3. Spoon mixture into muffin cups, filling each about ¾ full.
  4. Bake for 20–25 minutes, until tops are golden and puffed.
  5. Cool in the pan for a few minutes before removing and serving.

Notes

  • Try different cheeses like Gruyère, mozzarella, or pepper jack.
  • Add jalapeños for variety.
  • Can be made ahead and stored in the fridge or freezer.
  • Reheat in oven or toaster oven at 350°F until crisp and heated through.

Have you made this recipe? I'd love to see it!

Click here to Follow me on Pinterest

Loaded Potato & Meatloaf Casserole

April 23, 2025 by Sue Leave a Comment

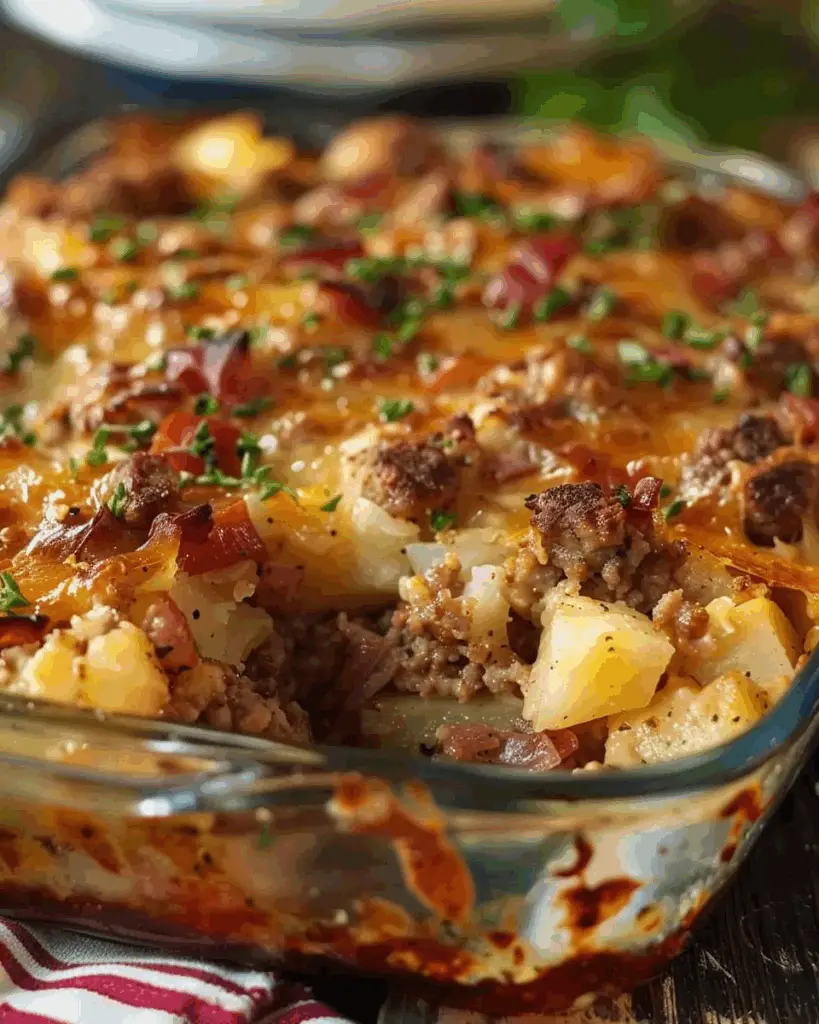
This Loaded Potato & Meatloaf Casserole is the ultimate comfort food dish that layers juicy meatloaf with creamy mashed potatoes, melted cheese, and fresh green onions. It’s a hearty, satisfying meal that brings together the best of two classic dinners in one irresistible bake. Loaded Potato & Meatloaf Casserole

Why You’ll Love This Recipe

I love how this casserole merges the richness of a savory meatloaf with the comfort of loaded mashed potatoes. It’s warm, cheesy, and full of flavor with every bite. The green onions add a pop of freshness that balances out the richness, and it’s easy to put together on a weeknight or for a cozy weekend meal.

ingredients

(Here's a tip: Check out the full list of ingredients and measurements in the recipe card below.)

  • Lean ground beef
  • Instant mashed potatoes
  • Milk
  • Butter
  • Shredded cheddar cheese
  • Eggs
  • Ritz crackers (crushed)
  • BBQ sauce
  • Green onions
  • Onion powder
  • Garlic powder
  • Salt and pepper

directions

  1. I cook the ground beef in a skillet until browned, then drain the fat.
  2. I mix the beef with crushed crackers, eggs, BBQ sauce, onion powder, garlic powder, salt, and pepper.
  3. I spread the meat mixture into a greased 9x13 baking dish and bake it for about 30 minutes at 400°F.
  4. While the meat layer bakes, I prepare the mashed potatoes using butter and milk, then stir in shredded cheddar cheese.
  5. Once the meatloaf layer is cooked through, I spread the cheesy mashed potatoes evenly over the top.
  6. I sprinkle additional shredded cheddar over the potatoes and return the dish to the oven until the cheese is melted and bubbly.
  7. I top the casserole with freshly chopped green onions just before serving.

Servings and timing

This recipe makes about 6 servings.
Prep time: 20 minutes
Cook time: 45 minutes
Total time: 1 hour 5 minutes

Variations

I sometimes switch the ground beef for ground turkey or chicken if I want something a little lighter. For extra flavor, I’ve added sautéed mushrooms or chopped spinach into the meat mixture. If I’m in the mood for a little heat, I mix a touch of hot sauce into the mashed potatoes or sprinkle in some crushed red pepper flakes.

storage/reheating

I store leftovers in an airtight container in the fridge for up to 4 days. When I’m ready to reheat, I warm individual portions in the microwave for about 2 minutes or reheat the entire dish in a 350°F oven for 15–20 minutes, covered with foil to keep it moist.

FAQs

How do I make this casserole ahead of time?

I assemble the casserole completely, cover it, and refrigerate it. When I’m ready to serve, I bake it until hot and the cheese is melted.

Can I freeze this casserole?

Yes, I freeze it before the final bake. I thaw it in the fridge overnight and then bake until heated through.

Can I use homemade mashed potatoes?

Absolutely. I often make mashed potatoes from scratch when I have the time, and they work perfectly in this dish.

What other cheeses can I use?

I’ve used mozzarella, Monterey Jack, and even Colby. Any melty cheese that I enjoy works well in this recipe.

Is this recipe gluten-free?

It can be! I replace the Ritz crackers with gluten-free breadcrumbs and use a gluten-free BBQ sauce to make it gluten-free.

Conclusion

This Loaded Potato & Meatloaf Casserole is everything I crave in a comfort food dish—savory, creamy, and topped with melted cheese and green onions. It’s simple enough for a weeknight dinner but delicious enough to serve to guests. I love how easy it is to make ahead, and the leftovers never disappoint.

Print

clock clock iconcutlery cutlery iconflag flag iconfolder folder iconinstagram instagram iconpinterest pinterest iconfacebook facebook iconprint print iconsquares squares iconheart heart iconheart solid heart solid icon
Loaded Potato & Meatloaf Casserole

Loaded Potato & Meatloaf Casserole

5 Stars 4 Stars 3 Stars 2 Stars 1 Star No reviews
  • Author: Sue
  • Prep Time: 20 minutes
  • Cook Time: 45 minutes
  • Total Time: 1 hour 5 minutes
  • Yield: 6 servings
  • Category: Dinner, Casserole
  • Method: Baked
  • Cuisine: American
Print Recipe
Pin Recipe

Description

This Loaded Potato & Meatloaf Casserole is the ultimate comfort food mashup—juicy, savory meatloaf topped with creamy, cheesy mashed potatoes and a sprinkle of green onions. Easy to prepare and even better as leftovers, this hearty casserole is the perfect weeknight dinner that the whole family will love.


Ingredients

  • Lean ground beef
  • Instant mashed potatoes
  • Milk
  • Butter
  • Shredded cheddar cheese
  • Eggs
  • Ritz crackers (crushed)
  • BBQ sauce
  • Green onions
  • Onion powder
  • Garlic powder
  • Salt
  • Pepper

Instructions

  1. Preheat oven to 400°F.
  2. In a skillet, brown ground beef and drain excess fat.
  3. In a mixing bowl, combine cooked beef, crushed crackers, eggs, BBQ sauce, onion powder, garlic powder, salt, and pepper.
  4. Press meat mixture into a greased 9x13 baking dish and bake for 30 minutes.
  5. While baking, prepare instant mashed potatoes with butter and milk. Stir in shredded cheddar cheese.
  6. Spread cheesy mashed potatoes over baked meatloaf layer.
  7. Top with additional shredded cheddar and bake until cheese is melted and bubbly (about 10–15 minutes).
  8. Garnish with chopped green onions before serving.

Notes

  • Swap ground beef with turkey or chicken for a lighter version.
  • Add chopped mushrooms or spinach to the meat mixture for extra veggies.
  • Stir hot sauce or crushed red pepper flakes into the potatoes for a spicy twist.
  • Leftovers reheat well and are even better the next day.

Have you made this recipe? I'd love to see it!

Click here to Follow me on Pinterest

Easy Strawberry Cool Whip Pie

April 23, 2025 by Sue Leave a Comment

This Easy Strawberry Cool Whip Pie is a delightful no-bake dessert that combines the sweetness of strawberries with the creaminess of Cool Whip, all nestled in a graham cracker crust. Perfect for warm days or when I need a quick and satisfying treat, this pie is both simple to make and irresistibly delicious. Easy Strawberry Cool Whip Pie

Why I Love This Recipe

I adore this recipe because it's incredibly easy to prepare, requiring minimal ingredients and no oven time. The combination of strawberry gelatin and fresh strawberries gives it a vibrant flavor, while the Cool Whip adds a light, airy texture. It's a go-to dessert for gatherings, potlucks, or just a sweet indulgence at home.

Ingredients

(Here's a tip: Check out the full list of ingredients and measurements in the recipe card below.)

  • 1 premade graham cracker pie crust (9-inch)
  • 1 package (3 oz) strawberry-flavored gelatin
  • ⅔ cup boiling water
  • ½ cup cold water
  • Ice cubes
  • 1 tub (8 oz) Cool Whip, thawed
  • 2 cups fresh strawberries, divided

Directions

  1. Slice 1 cup of strawberries and set aside for topping. Chop the remaining strawberries.
  2. In a large bowl, dissolve the strawberry gelatin in boiling water, stirring for 2 minutes.
  3. Add enough ice to the cold water to make 1 cup. Stir into the gelatin mixture until slightly thickened. Remove any unmelted ice.
  4. Whisk in the Cool Whip until well blended.
  5. Stir in the chopped strawberries.
  6. Refrigerate the mixture for 20 to 30 minutes until it thickens and mounds when spooned.
  7. Spoon the filling into the graham cracker crust.
  8. Refrigerate for at least 6 hours or until firm.
  9. Top with the reserved sliced strawberries before serving.

Servings and Timing

  • Servings: 8
  • Prep Time: 15 minutes
  • Chill Time: 6 hours 30 minutes
  • Total Time: 6 hours 45 minutes

Variations

  • Flavor Twist: Swap strawberry gelatin for raspberry or cherry for a different berry flavor.
  • Crust Options: Use a chocolate cookie crust or a homemade graham cracker crust for variety.
  • Fruit Mix: Add blueberries or raspberries along with strawberries for a mixed berry pie.
  • Light Version: Use sugar-free gelatin and light Cool Whip for a lower-calorie dessert.

Storage/Reheating

Store the pie in the refrigerator, covered, for up to 3 days. Freezing is not recommended as it may alter the texture upon thawing.

FAQs

Can I use frozen strawberries?

I recommend using fresh strawberries for the best texture and flavor. Frozen strawberries may release excess moisture, affecting the pie's consistency.

Can I make this pie ahead of time?

Absolutely! This pie is perfect for making a day in advance. Just keep it refrigerated until ready to serve.

Is it possible to use homemade whipped cream instead of Cool Whip?

Yes, you can substitute homemade whipped cream. However, ensure it's whipped to stiff peaks to maintain the pie's structure.

What can I use if I don't have a premade crust?

You can make a simple graham cracker crust by combining crushed graham crackers with melted butter and pressing the mixture into a pie dish. Bake it at 350°F (175°C) for 10 minutes and let it cool before filling.

How do I know when the pie is set?

The pie is set when the filling is firm to the touch and holds its shape when sliced. This usually takes about 6 hours in the refrigerator.

Conclusion

This Easy Strawberry Cool Whip Pie is a delightful, no-fuss dessert that's sure to please any crowd. With its creamy texture and fresh strawberry flavor, it's a refreshing treat that's perfect for any occasion. Give it a try, and it might just become one of your favorite go-to desserts!

Print

clock clock iconcutlery cutlery iconflag flag iconfolder folder iconinstagram instagram iconpinterest pinterest iconfacebook facebook iconprint print iconsquares squares iconheart heart iconheart solid heart solid icon
Easy Strawberry Cool Whip Pie

Easy Strawberry Cool Whip Pie

5 Stars 4 Stars 3 Stars 2 Stars 1 Star No reviews
  • Author: Sue
  • Prep Time: 15 minutes
  • Cook Time: 6 hours 30 minutes
  • Total Time: 6 hours 45 minutes
  • Yield: 8 servings
  • Category: Dessert
  • Method: No-Bake
  • Cuisine: American
  • Diet: Vegetarian
Print Recipe
Pin Recipe

Description

This Easy Strawberry Cool Whip Pie is the ultimate no-bake dessert for summer! Made with fresh strawberries, fluffy Cool Whip, and strawberry gelatin in a graham cracker crust, it's a quick, refreshing, and crowd-pleasing treat. Whether you're prepping for a picnic or need a last-minute dessert, this pie is fruity, creamy, and unbelievably easy to whip up.


Ingredients

  • 1 premade graham cracker pie crust (9-inch)
  • 1 package (3 oz) strawberry-flavored gelatin
  • ⅔ cup boiling water
  • ½ cup cold water
  • Ice cubes
  • 1 tub (8 oz) Cool Whip, thawed
  • 2 cups fresh strawberries, divided

Instructions

  1. Slice 1 cup of strawberries and reserve for topping. Chop the rest.
  2. In a large bowl, dissolve gelatin in boiling water for 2 minutes.
  3. Add enough ice to cold water to make 1 cup and stir into gelatin until slightly thickened. Remove any unmelted ice.
  4. Whisk in Cool Whip until fully combined.
  5. Fold in chopped strawberries.
  6. Chill mixture 20–30 minutes, until it mounds when spooned.
  7. Spoon filling into pie crust and refrigerate for at least 6 hours.
  8. Top with reserved sliced strawberries before serving.

Notes

  • Use fresh strawberries for best results; frozen may cause a watery texture.
  • Homemade whipped cream can be used in place of Cool Whip—just whip to stiff peaks.
  • For a different twist, try raspberry or cherry gelatin.
  • Store in the fridge up to 3 days; freezing not recommended.

Have you made this recipe? I'd love to see it!

Click here to Follow me on Pinterest

Zucchini Spice Cake

April 23, 2025 by Sue Leave a Comment

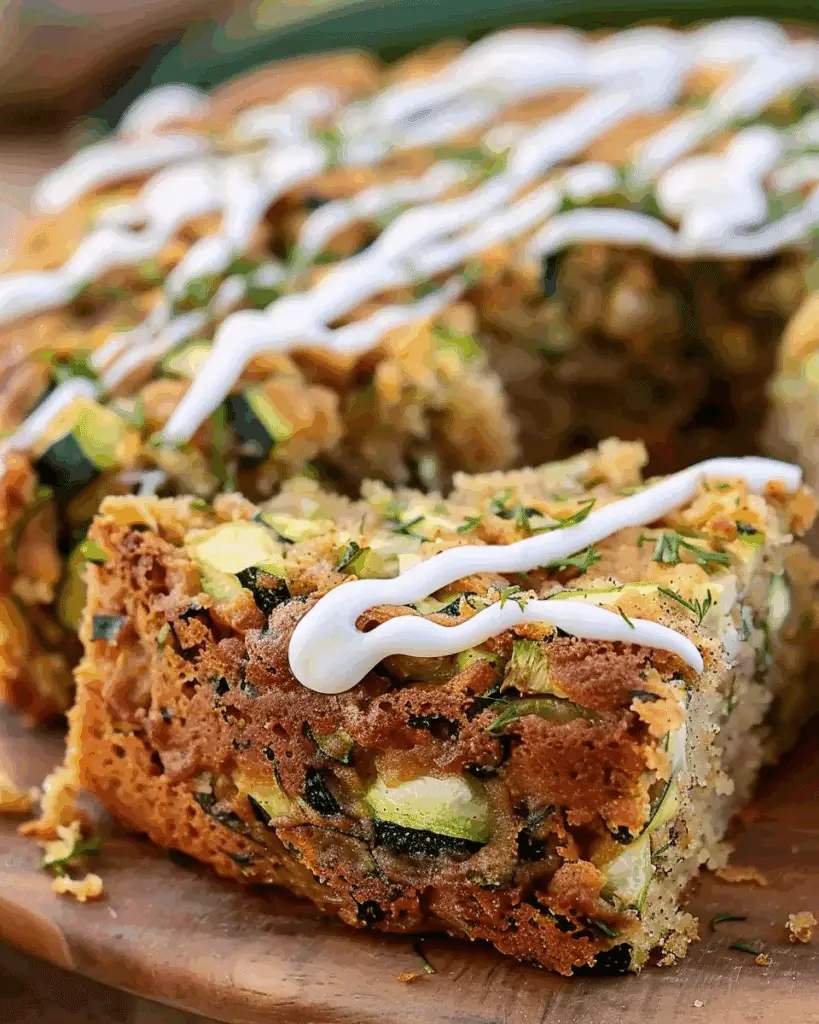
This Zucchini Spice Cake is a moist, tender, and warmly spiced dessert that brings comfort with every bite. Perfect for fall but delicious year-round, it’s a great way to use up extra zucchini and sneak some veggies into a sweet treat. Zucchini Spice Cake

Why You’ll Love This Recipe

I love how incredibly moist and flavorful this cake is, thanks to the zucchini and warm spices like cinnamon and nutmeg. It’s easy to whip up in one bowl, making cleanup a breeze. Plus, it’s topped with a dreamy cream cheese frosting that takes it to the next level. Whether I’m baking it for a casual get-together or just because, it never disappoints.

Ingredients

(Here's a tip: Check out the full list of ingredients and measurements in the recipe card below.)

  • All-purpose flour

  • Baking powder

  • Baking soda

  • Ground cinnamon

  • Ground nutmeg

  • Salt

  • Vegetable oil

  • Granulated sugar

  • Brown sugar

  • Large eggs

  • Vanilla extract

  • Finely shredded zucchini

  • Chopped walnuts or pecans (optional)

For the cream cheese frosting:

  • Cream cheese

  • Unsalted butter

  • Powdered sugar

  • Vanilla extract

Directions

I start by preheating the oven and greasing a 9x13-inch baking pan. Then I whisk together the dry ingredients in one bowl and mix the wet ingredients in another. After combining the two, I fold in the zucchini and optional nuts. The batter gets poured into the pan and baked until a toothpick comes out clean. While it cools, I whip up a luscious cream cheese frosting and spread it generously over the cooled cake.

Servings and timing

This cake serves about 16 people. It takes roughly 15 minutes to prepare and 40 to 45 minutes to bake.

Variations

I sometimes like to add a handful of mini chocolate chips or swap out the nuts for raisins for a little twist. For a lighter version, I’ve also tried reducing the sugar slightly and it still turns out delicious. Making it into cupcakes is a fun option too—just adjust the baking time.

Storage/reheating

I keep this cake in an airtight container in the refrigerator for up to 5 days. If I want to reheat a slice, a quick 10–15 seconds in the microwave brings back that fresh-out-of-the-oven warmth. It also freezes well—just wrap individual pieces tightly and freeze for up to 2 months.

FAQs

Can I use frozen zucchini?

Yes, I’ve used frozen shredded zucchini before. I make sure to thaw and drain it well to avoid excess moisture in the batter.

Do I need to peel the zucchini?

No need. I leave the peel on for extra nutrients and a pop of color. It’s barely noticeable in the final cake.

Can I make this cake gluten-free?

Absolutely. I substitute with a 1:1 gluten-free baking flour and it works great.

Is the cream cheese frosting necessary?

While I love the tangy sweetness it adds, the cake is delicious on its own or with a dusting of powdered sugar.

Can I use a different pan size?

Yes, I’ve made it in two 8-inch round pans for a layer cake or in a bundt pan—just adjust the baking time accordingly.

Conclusion

This Zucchini Spice Cake is one of those dependable recipes I find myself turning to again and again. It's simple, satisfying, and hits all the right cozy notes. Whether I’m serving it for dessert, snacking with coffee, or gifting it to a friend, it always brings smiles.

Print

clock clock iconcutlery cutlery iconflag flag iconfolder folder iconinstagram instagram iconpinterest pinterest iconfacebook facebook iconprint print iconsquares squares iconheart heart iconheart solid heart solid icon
Zucchini Spice Cake

Zucchini Spice Cake

5 Stars 4 Stars 3 Stars 2 Stars 1 Star No reviews
  • Author: Sue
  • Prep Time: 15 minutes
  • Cook Time: 40–45 minutes
  • Total Time: 1 hour
  • Yield: 16 servings
  • Category: Dessert
  • Method: Baking
  • Cuisine: American
  • Diet: Vegetarian
Print Recipe
Pin Recipe

Description

This moist and tender Zucchini Spice Cake is packed with warm spices like cinnamon and nutmeg, and made irresistibly soft with shredded zucchini. Topped with creamy, tangy cream cheese frosting, it’s a cozy dessert perfect for fall—or any time of year. An easy, one-bowl cake that’s sure to become a family favorite!


Ingredients

  • Cake:
  • 2 cups all-purpose flour
  • 2 tsp baking powder
  • ½ tsp baking soda
  • 1 ½ tsp ground cinnamon
  • ¼ tsp ground nutmeg
  • ½ tsp salt
  • 1 cup vegetable oil
  • 1 cup granulated sugar
  • ½ cup brown sugar
  • 3 large eggs
  • 2 tsp vanilla extract
  • 2 cups finely shredded zucchini
  • ½ cup chopped walnuts or pecans (optional)
  • Cream Cheese Frosting:
  • 8 oz cream cheese, softened
  • ½ cup unsalted butter, softened
  • 2–3 cups powdered sugar
  • 1 tsp vanilla extract

Instructions

  1. Preheat oven to 350°F (175°C). Grease a 9x13-inch baking pan.
  2. In a large bowl, whisk together flour, baking powder, baking soda, cinnamon, nutmeg, and salt.
  3. In another bowl, beat together oil, granulated sugar, brown sugar, eggs, and vanilla until smooth.
  4. Gradually add dry ingredients to wet, mixing until just combined.
  5. Fold in shredded zucchini and nuts if using.
  6. Pour batter into prepared pan and smooth top.
  7. Bake for 40–45 minutes, or until a toothpick inserted in the center comes out clean.
  8. Let cake cool completely.
  9. To make frosting, beat cream cheese and butter until fluffy. Add powdered sugar gradually, then vanilla, and mix until smooth.
  10. Spread frosting over cooled cake before serving

Notes

  • ou can use frozen zucchini—just thaw and drain well.
  • No need to peel the zucchini.
  • This cake can be made gluten-free with a 1:1 gluten-free flour blend.
  • For a lighter version, reduce the sugar slightly.
  • Cake freezes well for up to 2 months when wrapped tightly.
  • Try adding mini chocolate chips or swapping nuts for raisins.

Have you made this recipe? I'd love to see it!

Click here to Follow me on Pinterest

Bruschetta Pasta Salad

April 23, 2025 by Sue Leave a Comment

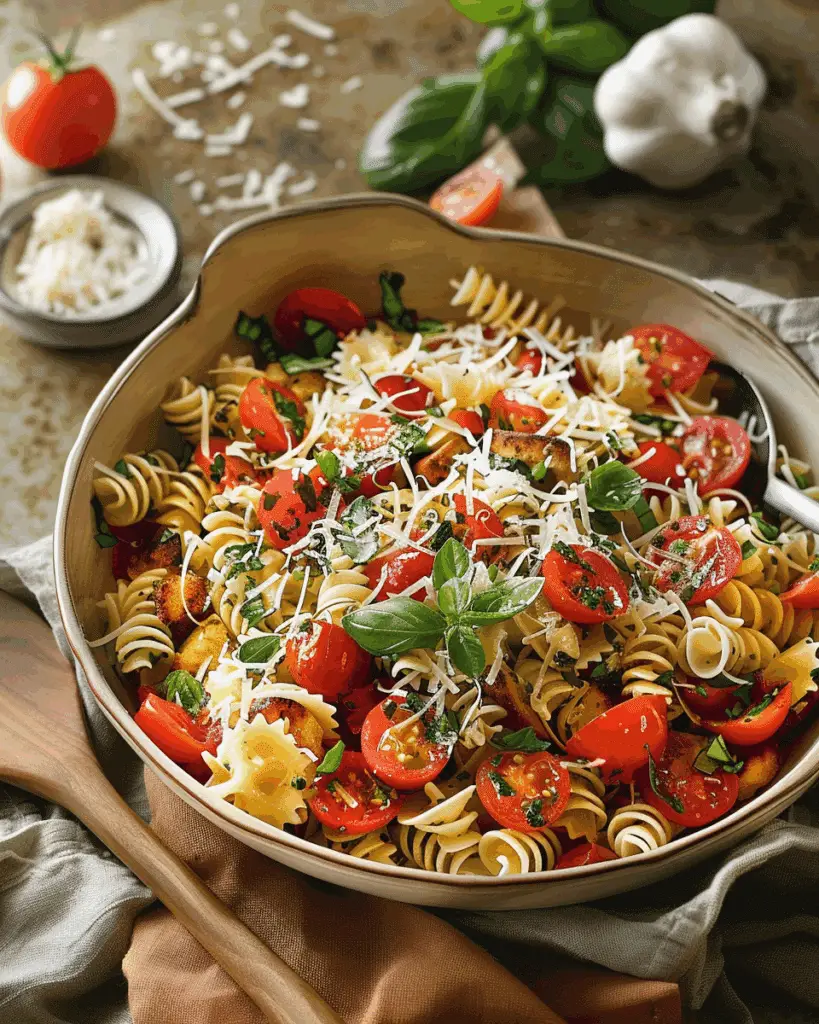
This Bruschetta Pasta Salad is a refreshing and flavorful dish that combines the classic taste of bruschetta with the heartiness of pasta. It's perfect for a light lunch, a side dish, or a potluck contribution. Bruschetta Pasta Salad

Why You’ll Love This Recipe

I love how this salad brings together the fresh flavors of ripe tomatoes, fragrant basil, and garlic, all tossed with al dente pasta. The homemade sourdough breadcrumbs add a delightful crunch, making every bite satisfying. It's a versatile dish that's easy to prepare and sure to impress.

Ingredients

(Here's a tip: Check out the full list of ingredients and measurements in the recipe card below.)

  • Pasta: I use a short pasta like fusilli or penne for the best texture.
  • Cherry tomatoes: Halved for a juicy burst of flavor.
  • Fresh basil: Chopped finely to infuse the salad with its aromatic essence.
  • Garlic: Minced to add a subtle kick.
  • Olive oil: For drizzling and enhancing the flavors.
  • Balsamic vinegar: Adds a tangy depth.
  • Sourdough breadcrumbs: Toasted for that perfect crunch.
  • Salt and pepper: To taste.

Directions

  1. Cook the pasta according to package instructions until al dente. Drain and let it cool.
  2. In a large bowl, combine the halved cherry tomatoes, chopped basil, and minced garlic.
  3. Drizzle olive oil and balsamic vinegar over the tomato mixture. Season with salt and pepper, then toss gently.
  4. Add the cooled pasta to the bowl and mix until well combined.
  5. Just before serving, sprinkle the toasted sourdough breadcrumbs on top for added texture.

Servings and Timing

This recipe yields approximately 4 servings. Preparation time is about 15 minutes, with an additional 10 minutes for cooking the pasta, totaling around 25 minutes from start to finish.

Variations

  • Add protein: I sometimes include grilled chicken or chickpeas to make it more filling.
  • Cheese lovers: A sprinkle of mozzarella or feta can add a creamy element.
  • Gluten-free: Use gluten-free pasta and breadcrumbs to accommodate dietary needs.
  • Herb variations: Try adding oregano or parsley for a different flavor profile.

Storage/Reheating

I store any leftovers in an airtight container in the refrigerator for up to 3 days. While this salad is best enjoyed cold, if I prefer it warm, I gently reheat it in a skillet over low heat, adding a

...little olive oil to refresh the flavors. However, I usually skip reheating to preserve the freshness of the tomatoes and basil.

FAQs

What kind of pasta works best for this salad?

I find that short pasta shapes like fusilli, penne, or farfalle work best because they hold the tomato and herb mixture well and provide a great bite.

Can I make this salad in advance?

Yes, I often prepare it a few hours ahead. I just wait to add the breadcrumbs until right before serving to keep them crisp.

Is this dish vegan?

It is naturally vegan as long as I stick to plant-based pasta and avoid adding cheese. The simple ingredients make it easy to adapt.

How can I make this gluten-free?

I use gluten-free pasta and swap the sourdough breadcrumbs with gluten-free breadcrumbs or crushed gluten-free crackers.

Can I use dried herbs instead of fresh?

I prefer fresh basil for the vibrant flavor, but in a pinch, I use about a third of the amount of dried basil. It’s not quite the same, but still delicious.

Conclusion

This Bruschetta Pasta Salad is one of those recipes I keep coming back to, especially during warmer months. It’s quick, bursting with flavor, and flexible enough to fit different diets or occasions. Whether I’m prepping a picnic basket or just need a fuss-free meal, this dish never disappoints.

Print

clock clock iconcutlery cutlery iconflag flag iconfolder folder iconinstagram instagram iconpinterest pinterest iconfacebook facebook iconprint print iconsquares squares iconheart heart iconheart solid heart solid icon
Bruschetta Pasta Salad

Bruschetta Pasta Salad

5 Stars 4 Stars 3 Stars 2 Stars 1 Star No reviews
  • Author: Sue
  • Prep Time: 15 minutes
  • Cook Time: 10 minutes
  • Total Time: 25 minutes
  • Yield: 4 servings
  • Category: Side Dish, Salad
  • Method: Tossing, Boiling
  • Cuisine: Italian-Inspired
  • Diet: Vegan
Print Recipe
Pin Recipe

Description

This Bruschetta Pasta Salad is a vibrant and easy-to-make dish that combines the fresh flavors of traditional bruschetta with hearty pasta. Perfect for summer gatherings, light lunches, or potluck sides, this bruschetta pasta salad recipe delivers bold, zesty flavor with minimal effort.


Ingredients

  • 8 oz short pasta (fusilli, penne, or farfalle)
  • 2 cups cherry tomatoes, halved
  • ¼ cup fresh basil, finely chopped
  • 2 cloves garlic, minced
  • 2 tbsp olive oil
  • 1 tbsp balsamic vinegar
  • ½ cup sourdough breadcrumbs, toasted
  • Salt, to taste
  • Pepper, to taste

Instructions

  1. Cook the pasta according to package directions until al dente. Drain and cool.
  2. In a large bowl, combine cherry tomatoes, chopped basil, and garlic.
  3. Drizzle with olive oil and balsamic vinegar. Season with salt and pepper. Toss gently.
  4. Add the cooled pasta and mix until well combined.
  5. Sprinkle with toasted sourdough breadcrumbs just before serving.

Notes

  • For added protein, include grilled chicken or chickpeas.
  • For a creamy twist, add mozzarella or crumbled feta.
  • Use gluten-free pasta and breadcrumbs to make this dish gluten-free.
  • Fresh basil is best, but dried can be used in a pinch (use ⅓ the amount).
  • Make ahead friendly—just add breadcrumbs last minute for crunch.

Have you made this recipe? I'd love to see it!

Click here to Follow me on Pinterest

Gooey Salted Caramel Chocolate Chip Cookie Bars

April 23, 2025 by Sue Leave a Comment

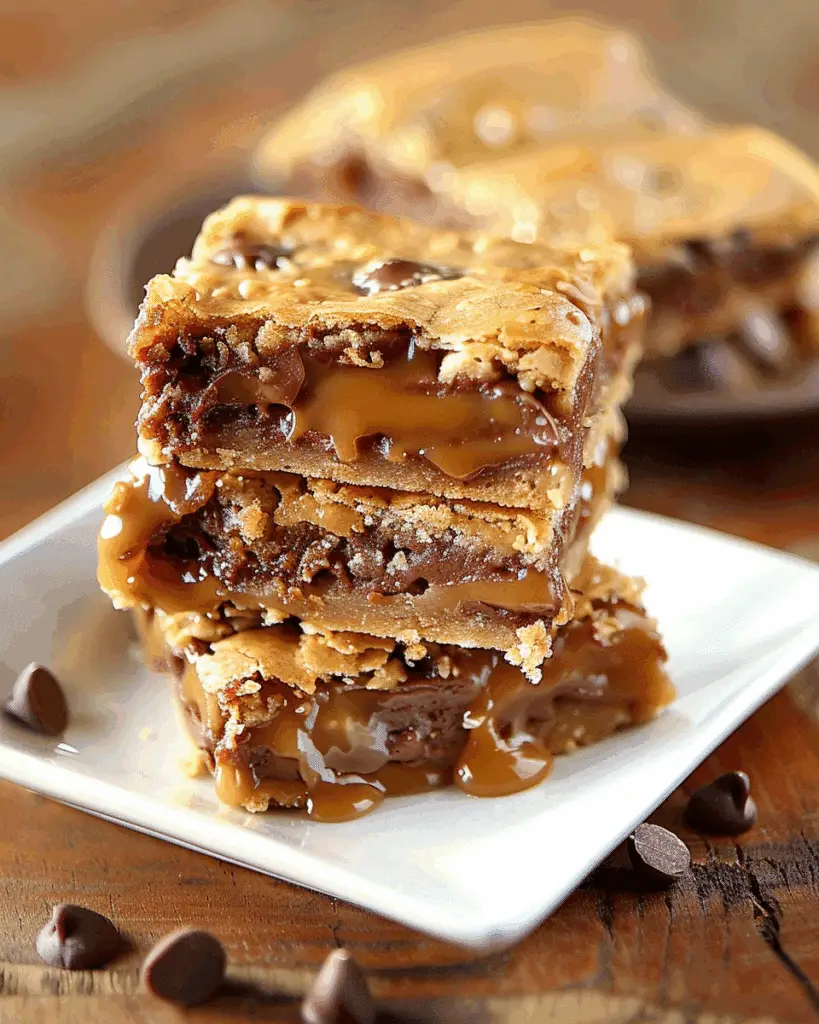
I can't get enough of these Gooey Salted Caramel Chocolate Chip Cookie Bars. They combine the rich flavors of buttery cookie dough, velvety caramel, and melty chocolate chips, all topped with a sprinkle of flaked sea salt. Each bite offers a delightful balance of sweet and salty, making them an irresistible treat for any dessert lover. Gooey Salted Caramel Chocolate Chip Cookie Bars

Why I Love This Recipe

I adore this recipe because it's the perfect blend of textures and flavors. The chewy cookie base pairs wonderfully with the gooey caramel center, while the chocolate chips add a touch of richness. The flaked sea salt on top enhances the sweetness and adds a satisfying crunch. These bars are always a hit at gatherings, and I find myself making them time and time again.

Ingredients

(Here's a tip: Check out the full list of ingredients and measurements in the recipe card below.)

  • 1 cup (2 sticks) salted butter, at room temperature
  • 1 cup packed light brown sugar
  • ½ cup granulated white sugar
  • 2 large eggs
  • 1 teaspoon vanilla extract
  • 1 teaspoon Kosher salt
  • 1 teaspoon baking soda
  • 2½ cups all-purpose flour
  • 2 cups semi-sweet chocolate chips
  • One 14-ounce can sweetened condensed milk
  • 10 ounces soft caramels (unwrapped) — about 40 caramels
  • 1 teaspoon flaked sea salt

Directions

  1. Preheat the oven to 350°F (175°C). Line a 9x13-inch baking pan with foil and coat it liberally with cooking spray.
  2. In a large bowl, I use an electric mixer to combine the butter and both sugars on medium speed for 2 minutes until fluffy.
  3. I add the eggs, vanilla, salt, and baking soda, continuing to mix until smooth, scraping the sides of the bowl as necessary.
  4. Turning the speed to low, I add the flour until combined, then stir in the chocolate chips.
  5. I press three-quarters of the dough into the prepared pan.
  6. In a medium saucepan, I combine the condensed milk and caramels, cooking over medium-low heat and stirring frequently until the caramels are melted.
  7. I pour three-quarters of the caramel mixture on top of the dough in the pan and drop the remaining dough evenly in teaspoon-size amounts on top of the caramel.
  8. I bake for 25 to 30 minutes, until the center is just set.
  9. Once baked, I let the bars cool completely before cutting them into squares.

Servings and Timing

This recipe yields 30 bars. The preparation time is about 30 minutes, and the baking time is approximately 25 minutes, totaling around 55 minutes from start to finish.

Variations

I enjoy experimenting with this recipe by making a few variations:

  • Nutty Delight: I add chopped pecans or walnuts to the dough for an extra crunch.
  • Different Chips: Sometimes, I use white chocolate or dark chocolate chips instead of semi-sweet for a different flavor profile.
  • Caramel Swirl: I swirl some of the caramel mixture into the top layer of dough before baking for a marbled effect.
  • Gluten-Free: I substitute the all-purpose flour with a gluten-free flour blend to accommodate dietary restrictions.
  • Extra Salt: For a more pronounced salty-sweet contrast, I sprinkle additional flaked sea salt on top after baking.

Storage/Reheating

To store these bars, I place them in an airtight container at room temperature for up to 3 days. If I need to keep them longer, I refrigerate them for up to a week or freeze them for up to 3 months. When ready to enjoy, I let them come to room temperature or warm them slightly in the microwave for that gooey texture.

FAQs

How do I prevent the caramel from hardening too much?

I make sure not to overcook the caramel mixture. Cooking it just until the caramels melt and combine with the condensed milk keeps it soft and gooey.

Can I use homemade caramel instead of store-bought caramels?

Absolutely! I sometimes make my own caramel sauce and use it in place of the melted caramels for a more personalized touch.

What’s the best way to cut these bars cleanly?

I let the bars cool completely before cutting. Using a sharp knife and wiping it clean between cuts helps achieve neat squares.

Can I make these bars ahead of time?

Yes, I often prepare them a day in advance. They store well and the flavors meld beautifully overnight.

Is it necessary to use flaked sea salt on top?

While not mandatory, I find that flaked sea salt enhances the flavor by balancing the sweetness and adding a pleasant crunch.

Conclusion

These Gooey Salted Caramel Chocolate Chip Cookie Bars are a delightful treat that I love to make and share. Their rich, chewy texture combined with the sweet and salty flavors makes them a favorite in my household. Whether for a special occasion or just because, these bars never fail to impress.

Print

clock clock iconcutlery cutlery iconflag flag iconfolder folder iconinstagram instagram iconpinterest pinterest iconfacebook facebook iconprint print iconsquares squares iconheart heart iconheart solid heart solid icon
Gooey Salted Caramel Chocolate Chip Cookie Bars

Gooey Salted Caramel Chocolate Chip Cookie Bars

5 Stars 4 Stars 3 Stars 2 Stars 1 Star No reviews
  • Author: Sue
  • Prep Time: 30 minutes
  • Cook Time: 25 minutes
  • Total Time: 55 minutes
  • Yield: 30 bars
  • Category: Dessert
  • Method: Baking
  • Cuisine: American
  • Diet: Vegetarian
Print Recipe
Pin Recipe

Description

These Gooey Salted Caramel Chocolate Chip Cookie Bars are the ultimate indulgent dessert. Buttery cookie dough, rich caramel, melty chocolate chips, and a sprinkle of flaked sea salt create a perfectly balanced sweet and salty treat. Easy to make and guaranteed to impress, these bars are perfect for any occasion.


Ingredients

  • 1 cup (2 sticks) salted butter, at room temperature
  • 1 cup packed light brown sugar
  • ½ cup granulated white sugar
  • 2 large eggs
  • 1 teaspoon vanilla extract
  • 1 teaspoon Kosher salt
  • 1 teaspoon baking soda
  • 2½ cups all-purpose flour
  • 2 cups semi-sweet chocolate chips
  • One 14-ounce can sweetened condensed milk
  • 10 ounces soft caramels (unwrapped), about 40
  • 1 teaspoon flaked sea salt

Instructions

  1. Preheat oven to 350°F (175°C). Line a 9x13-inch pan with foil and spray with cooking spray.
  2. In a large bowl, beat butter and both sugars until light and fluffy (about 2 minutes).
  3. Add eggs, vanilla, salt, and baking soda. Mix until smooth.
  4. Stir in flour, then fold in chocolate chips.
  5. Press ¾ of the dough into the bottom of the prepared pan.
  6. In a saucepan over medium-low heat, melt caramels with condensed milk, stirring frequently.
  7. Pour ¾ of the caramel over the dough. Drop remaining dough in small spoonfuls over the top.
  8. Bake for 25–30 minutes, until the center is just set.
  9. Let cool completely before cutting into bars.

Notes

  • For an extra gooey texture, avoid overbaking.
  • Store bars at room temperature for 3 days, in the fridge for 1 week, or freeze for up to 3 months.
  • Optional variations: add nuts, use different chocolate chips, or swirl in caramel before baking.
  • Sprinkle more flaked sea salt after baking for a stronger contrast.

Have you made this recipe? I'd love to see it!

Click here to Follow me on Pinterest

Fudgy Chewy Brookies (Brownie Cookies)

April 22, 2025 by Sue Leave a Comment

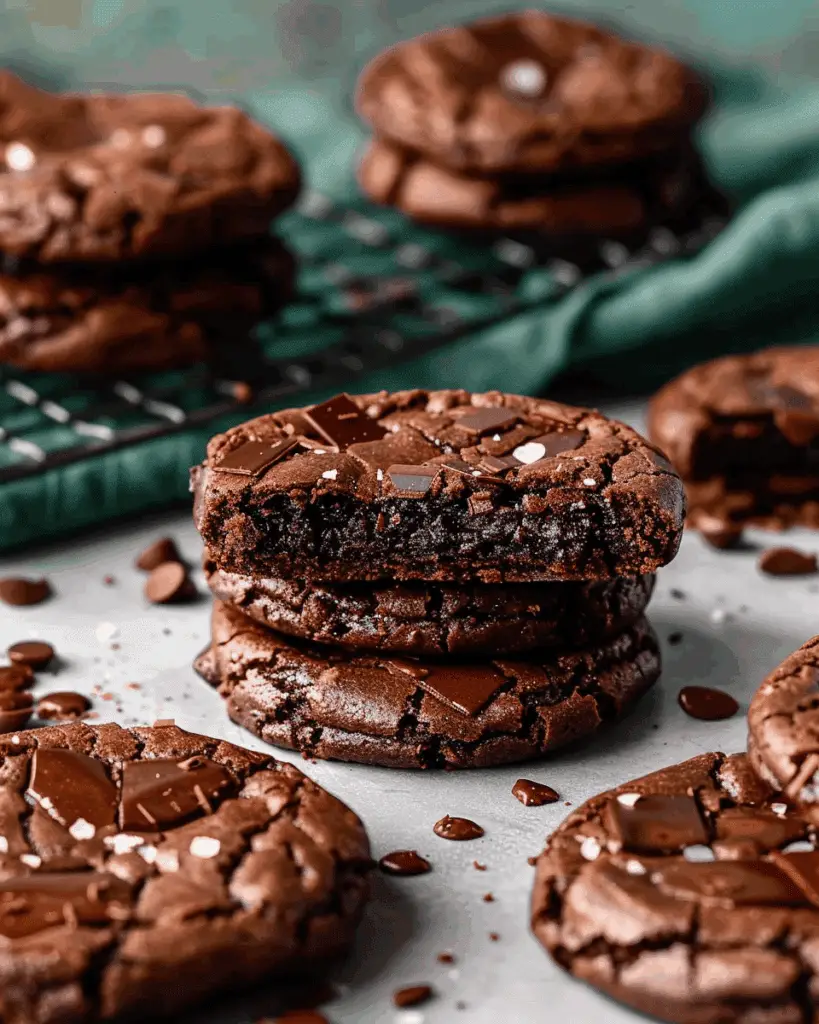
These fudgy chewy brookies are the perfect fusion of rich, gooey brownies and soft, chewy cookies. With a crisp edge and a melt-in-your-mouth center, they offer the best of both worlds in every bite. Whether I'm craving a brownie or a cookie, these brookies always hit the spot. Fudgy Chewy Brookies (Brownie Cookies)

Why I Love This Recipe

I adore this recipe because it combines two of my favorite treats into one delightful dessert. The deep chocolate flavor satisfies my sweet tooth, while the chewy texture keeps me coming back for more. Plus, the recipe is straightforward and doesn't require any fancy equipment, making it accessible for bakers of all levels.

Ingredients

(Here's a tip: Check out the full list of ingredients and measurements in the recipe card below.)

  • Dark chocolate
  • Butter (salted or unsalted)
  • Eggs
  • Demerara sugar
  • Caster sugar
  • Plain flour
  • Cocoa powder
  • Chocolate chips (optional)
  • Sea salt (optional, for sprinkling)

Directions

  1. Melt the chocolate and butter: I start by melting the butter and dark chocolate together in a small saucepan over low heat, stirring continuously until smooth. Alternatively, I sometimes use the microwave for convenience.
  2. Whisk eggs and sugar: In a separate bowl, I whisk the eggs and sugars until the mixture becomes very pale and fluffy.
  3. Prepare dry mix: I whisk the cocoa powder and flour together in another bowl to ensure even distribution without lumps. If the cocoa powder is especially lumpy, I sift it instead.
  4. Combine mixtures: Slowly, I pour the melted chocolate mixture into the egg mixture, stirring gently to prevent the eggs from scrambling.
  5. Add dry ingredients: I fold in the flour-cocoa mix and chocolate chips (if using) until the batter is thick and slightly gooey.
  6. Prep for baking: I preheat the oven and line a baking tray with parchment paper. Then, I drop tablespoons of batter onto the tray, spaced well apart. Using a cookie scoop helps ensure the cookies are the same size.
  7. Bake: I bake the brookies in the preheated oven for 12-14 minutes. They should be soft but set, with slightly firmer edges.
  8. Cool and serve: After baking, I allow the brookies to cool slightly on the baking tray. Sometimes, I sprinkle them with sea salt while they're still warm for an extra flavor boost.

Servings and Timing

This recipe yields approximately 12 brookies. The preparation time is about 15 minutes, and the baking time is 12-14 minutes, making the total time around 30 minutes from start to finish.

Variations

  • Add nuts: I sometimes fold in chopped walnuts or pecans for added crunch and flavor.
  • Use different chocolate: Switching out dark chocolate for milk or white chocolate gives the brookies a different taste profile.
  • Add flavorings: A teaspoon of vanilla extract or a pinch of cinnamon can add a new dimension to the flavor.

Storage and Reheating

  • Storage: I store the cooled brookies in an airtight container at room temperature for up to 5 days.
  • Freezing: For longer storage, I freeze them in a sealed container for up to 3 months.
  • Reheating: To enjoy them warm, I microwave a brookie for a few seconds until just heated through.

FAQs

What makes these brookies chewy and fudgy?

The combination of melted dark chocolate, the right balance of sugars, and careful baking time ensures a chewy and fudgy texture.

Can I make the dough ahead of time?

Yes, I often prepare the dough in advance and refrigerate it for up to 24 hours. This can even enhance the flavor.

Do I have to use both demerara and caster sugar?

Using both sugars adds depth to the flavor and texture, but if I only have one type on hand, I use it exclusively.

Can I make these brookies gluten-free?

Yes, substituting the plain flour with a gluten-free flour blend works well. I ensure it's a 1:1 substitute for best results.

How do I know when the brookies are done baking?

I look for set edges and a slightly soft center. They continue to set as they cool on the baking tray.

Conclusion

These fudgy chewy brookies are a delightful treat that combines the best aspects of brownies and cookies. They're easy to make, customizable, and always a crowd-pleaser. Whether I'm baking for a special occasion or just to satisfy a chocolate craving, this recipe never disappoints.

Print

clock clock iconcutlery cutlery iconflag flag iconfolder folder iconinstagram instagram iconpinterest pinterest iconfacebook facebook iconprint print iconsquares squares iconheart heart iconheart solid heart solid icon
Fudgy Chewy Brookies (Brownie Cookies)

Fudgy Chewy Brookies (Brownie Cookies)

5 Stars 4 Stars 3 Stars 2 Stars 1 Star No reviews
  • Author: Sue
  • Prep Time: 15 minutes
  • Cook Time: 12–14 minutes
  • Total Time: ~30 minutes
  • Yield: 12 brookies
  • Category: Dessert
  • Method: Baking
  • Cuisine: American
  • Diet: Vegetarian
Print Recipe
Pin Recipe

Description

These fudgy chewy brookies combine the best of brownies and cookies in one irresistible dessert. With gooey centers, crisp edges, and rich chocolate flavor, these brownie cookies are the ultimate treat for any chocolate lover. Perfect for bake sales, parties, or anytime you're craving something sweet and indulgent.


Ingredients

  • 200g dark chocolate
  • 100g butter (salted or unsalted)
  • 2 large eggs
  • 100g demerara sugar
  • 50g caster sugar
  • 70g plain flour
  • 30g cocoa powder
  • 100g chocolate chips (optional)
  • Sea salt (optional, for sprinkling)

Instructions

  1. Melt chocolate and butter in a saucepan over low heat or microwave until smooth. Set aside to cool slightly.
  2. Whisk eggs and sugars in a large bowl until pale, thick, and fluffy.
  3. Combine flour and cocoa powder in a separate bowl, sifting if needed to remove lumps.
  4. Add melted chocolate mixture to the egg mixture, stirring gently to combine.
  5. Fold in the dry ingredients and chocolate chips (if using) until a thick, gooey batter forms.
  6. Scoop batter onto a parchment-lined baking tray, leaving space between each.
  7. Bake at 350°F (175°C) for 12–14 minutes until the edges are set but the centers remain soft.
  8. Cool slightly on the tray before transferring to a wire rack. Sprinkle with sea salt if desired.

Notes

  • Chill the dough for 30 minutes before baking for thicker brookies.
  • Swap dark chocolate for milk or white chocolate for a different flavor.
  • Add chopped nuts or a splash of vanilla extract for variation.
  • Store in an airtight container for up to 5 days or freeze for up to 3 months.

Have you made this recipe? I'd love to see it!

Click here to Follow me on Pinterest

Swedish Meatballs

April 22, 2025 by Sue Leave a Comment

Swedish Meatballs, or köttbullar, are a comforting and savory dish featuring tender beef meatballs simmered in a creamy, flavorful gravy. I love making this classic recipe for cozy dinners at home—it’s satisfying, rich, and always a crowd-pleaser. I usually serve them with mashed potatoes or egg noodles, and sometimes a spoonful of lingonberry jam for that authentic Swedish touch.

Swedish Meatballs

Why I Love This Recipe

What I enjoy most about this recipe is how simple ingredients come together to create something so hearty and delicious. The meatballs are soft and juicy, seasoned with warm spices like allspice and nutmeg that give them a uniquely cozy flavor. The silky gravy coats every bite, making it an irresistible meal that always feels a bit special, even on an ordinary night.

Ingredients

(Here's a tip: Check out the full list of ingredients and measurements in the recipe card below.)

For the Meatballs:

  • Ground beef
  • Panko breadcrumbs
  • Milk
  • Egg
  • Onion, finely chopped
  • Garlic, minced
  • Fresh parsley, chopped
  • Ground allspice
  • Ground nutmeg
  • Salt
  • Black pepper
  • Olive oil

For the Gravy:

  • Butter
  • All-purpose flour
  • Beef broth
  • Heavy cream
  • Worcestershire sauce
  • Dijon mustard
  • Salt
  • Black pepper

Directions

  1. I start by mixing the breadcrumbs and milk in a large bowl and let them soak for a few minutes until soft.
  2. Then I add ground beef, egg, onion, garlic, parsley, allspice, nutmeg, salt, and pepper to the bowl and mix gently until everything is just combined.
  3. I shape the mixture into small meatballs, about 1 to 1.5 inches in size.
  4. In a large skillet, I heat olive oil over medium heat and cook the meatballs in batches until browned on all sides and fully cooked through. I transfer them to a plate and set them aside.
  5. Using the same skillet, I melt the butter, stir in the flour, and cook it for a minute or two to form a golden roux.
  6. I slowly whisk in the beef broth, followed by the heavy cream, Worcestershire sauce, and Dijon mustard. I stir and let the gravy simmer until thick and creamy.
  7. I return the meatballs to the skillet and let them simmer in the gravy for a few more minutes to soak up all the flavors.
  8. I serve them hot with mashed potatoes, egg noodles, or rice, topped with a sprinkle of fresh parsley.

Servings and Timing

This recipe serves about 6 people.
Prep time: 10 minutes
Cook time: 20 minutes
Total time: 30 minutes

Variations

  • Dairy-Free: I substitute the milk and cream with oat milk and coconut cream for a dairy-free version.
  • Baked Meatballs: When I want to avoid frying, I bake the meatballs at 400°F for 15–20 minutes until cooked through.
  • Extra Herbs: I like to add dill or thyme for a fresh twist on the traditional flavor.
  • Gluten-Free: I swap the breadcrumbs for gluten-free ones and use a gluten-free flour blend for the gravy.
  • Add Veggies: Sometimes I stir in sautéed mushrooms or baby spinach for more texture and nutrition.

Storage and Reheating

  • Refrigeration: I store leftovers in an airtight container in the fridge for up to 3 days.
  • Freezing: I freeze the cooked meatballs and gravy separately for up to 3 months. I let them thaw in the fridge overnight before reheating.
  • Reheating: I warm them gently in a skillet over low heat, adding a splash of broth or cream if the gravy has thickened too much.

FAQs

What makes Swedish meatballs different?

The warm spices like allspice and nutmeg give Swedish meatballs their signature flavor. They’re smaller than typical meatballs and always served with a creamy, rich gravy instead of tomato-based sauce.

Can I bake the meatballs instead of frying?

Yes, I often bake them at 400°F for 15–20 minutes on a lined baking sheet. It’s an easy way to cut down on cleanup and still get delicious results.

What can I use if I don’t have heavy cream?

When I’m out of heavy cream, I use whole milk with a small spoonful of butter to keep the gravy creamy. It’s not quite as rich, but it still works great.

How do I keep the meatballs from falling apart?

Soaking the breadcrumbs in milk helps bind everything together, and I make sure not to overmix the meat. Gently forming the balls and letting them rest before cooking also helps.

What’s the best way to serve Swedish meatballs?

My favorite way to serve them is over mashed potatoes or egg noodles, with a side of lingonberry jam or a fresh green salad. The sweet and savory combo really works well.

Conclusion

Swedish Meatballs are the ultimate comfort food—rich, flavorful, and incredibly satisfying. I love how easy they are to make and how versatile they can be for any occasion, whether I’m cooking for family or prepping something cozy for myself. This recipe is a timeless favorite that never disappoints.

Print

clock clock iconcutlery cutlery iconflag flag iconfolder folder iconinstagram instagram iconpinterest pinterest iconfacebook facebook iconprint print iconsquares squares iconheart heart iconheart solid heart solid icon
Swedish Meatballs

Swedish Meatballs

5 Stars 4 Stars 3 Stars 2 Stars 1 Star No reviews
  • Author: Sue
  • Prep Time: 10 minutes
  • Cook Time: 20 minutes
  • Total Time: 30 minutes
  • Yield: 6 servings
  • Category: Dinner
  • Method: Stovetop
  • Cuisine: Swedish
Print Recipe
Pin Recipe

Description

Classic Swedish Meatballs are tender, spiced beef meatballs simmered in a rich and creamy gravy—perfect comfort food! This easy Swedish Meatball recipe brings cozy Scandinavian flavors to your table, ideal for family dinners or meal prep. Serve with mashed potatoes or noodles and a spoonful of lingonberry jam for authentic flair.


Ingredients

  • For the Meatballs:
  • Ground beef
  • Panko breadcrumbs
  • Milk
  • Egg
  • Onion, finely chopped
  • Garlic, minced
  • Fresh parsley, chopped
  • Ground allspice
  • Ground nutmeg
  • Salt
  • Black pepper
  • Olive oil
  • For the Gravy:
  • Butter
  • All-purpose flour
  • Beef broth
  • Heavy cream
  • Worcestershire sauce
  • Dijon mustard
  • Salt
  • Black pepper

Instructions

  1. Mix breadcrumbs and milk in a bowl; let soak for a few minutes.
  2. Add beef, egg, onion, garlic, parsley, allspice, nutmeg, salt, and pepper. Mix gently.
  3. Shape into 1 to 1.5-inch meatballs.
  4. Heat olive oil in a skillet and brown meatballs in batches until fully cooked. Set aside.
  5. In the same skillet, melt butter and stir in flour to make a roux.
  6. Gradually whisk in beef broth, cream, Worcestershire, and Dijon mustard. Simmer until thickened.
  7. Return meatballs to the skillet and simmer a few minutes more.
  8. Serve hot over mashed potatoes, egg noodles, or rice. Garnish with parsley.

Notes

  • Bake meatballs at 400°F for 15–20 minutes for a lighter version.
  • For dairy-free, sub oat milk and coconut cream.
  • Add sautéed mushrooms or spinach for extra texture.
  • Use gluten-free breadcrumbs and flour for a gluten-free dish.
  • Store in fridge 3 days or freeze for up to 3 months. Reheat gently on stovetop with added broth or cream if needed.

Have you made this recipe? I'd love to see it!

Click here to Follow me on Pinterest

Homemade Nilla Wafers

April 22, 2025 by Sue Leave a Comment

These homemade Nilla wafers are delightfully crisp, buttery, and infused with real vanilla flavor. I find them perfect for snacking, layering into banana pudding, or even using as a base for mini cheesecakes. They bring back the nostalgic taste of childhood but with a fresher, homemade touch.

Homemade Nilla Wafers

Why I Love This Recipe

I love how simple and satisfying these cookies are to make. With just a few pantry staples, I can whip up a batch of these golden wafers in under an hour. The aroma of vanilla and butter wafting through my kitchen is irresistible. Plus, I appreciate knowing exactly what's in my treats—no preservatives or artificial flavors here.

Ingredients

(Here's a tip: Check out the full list of ingredients and measurements in the recipe card below.)

  • All-purpose flour
  • Baking powder
  • Salt
  • Unsalted butter
  • Granulated sugar
  • Egg
  • Vanilla extract
  • Milk

Directions

  1. I start by preheating my oven to 350°F (175°C) and lining a baking sheet with parchment paper.
  2. In a bowl, I whisk together the flour, baking powder, and salt.
  3. In another bowl, I cream the butter and sugar until light and fluffy.
  4. I beat in the egg and vanilla extract until well combined.
  5. Gradually, I add the dry ingredients to the wet mixture, alternating with the milk, and mix until a smooth dough forms.
  6. Using a teaspoon, I drop small amounts of dough onto the prepared baking sheet, spacing them about 2 inches apart.
  7. I bake the cookies for 12-15 minutes, or until the edges are golden brown.
  8. After removing them from the oven, I let the cookies cool on the baking sheet for a few minutes before transferring them to a wire rack to cool completely.

Servings and Timing

This recipe yields approximately 24 cookies. The preparation time is about 15 minutes, and the baking time is 12-15 minutes per batch, totaling around 30 minutes from start to finish.

Variations

  • Gluten-Free: I substitute the all-purpose flour with a gluten-free flour blend to make these cookies gluten-free.
  • Dairy-Free: I use plant-based butter and milk alternatives to create a dairy-free version.
  • Flavor Twist: Sometimes, I add a pinch of cinnamon or a few drops of almond extract for a different flavor profile.

Storage/Reheating

I store the cooled cookies in an airtight container at room temperature for up to 5 days. To keep them crisp, I ensure the container is sealed tightly. If they lose their crunch, I reheat them in a 300°F (150°C) oven for 5 minutes to revive their texture.

FAQs

How do I make these cookies crispier?

To achieve a crisper texture, I bake the cookies a bit longer until the edges are a deeper golden brown. I also make sure to cool them completely on a wire rack to prevent moisture buildup.

Can I freeze the dough?

Yes, I often freeze the dough after shaping it into balls. I place them on a baking sheet to freeze individually, then transfer them to a freezer bag. When ready to bake, I add a couple of extra minutes to the baking time.

What can I use these wafers for besides snacking?

These wafers are versatile. I use them in banana pudding, crush them for pie crusts, or layer them in trifles. They're also great as a base for mini cheesecakes.

Can I double the recipe?

Absolutely. I double the ingredients to make a larger batch, especially when preparing desserts for gatherings or gifting.

Why did my cookies spread too much?

If my cookies spread excessively, it might be due to over-creaming the butter and sugar or using butter that's too soft. I ensure the butter is just softened and mix until combined to prevent over-aeration.

Conclusion

Making homemade Nilla wafers is a rewarding experience. I enjoy the process of baking them and the delicious results. They're a delightful treat that brings comfort and joy, whether enjoyed on their own or as part of a dessert.

Print

clock clock iconcutlery cutlery iconflag flag iconfolder folder iconinstagram instagram iconpinterest pinterest iconfacebook facebook iconprint print iconsquares squares iconheart heart iconheart solid heart solid icon
Homemade Nilla Wafers

Homemade Nilla Wafers

5 Stars 4 Stars 3 Stars 2 Stars 1 Star No reviews
  • Author: Sue
  • Prep Time: 15 minutes
  • Cook Time: 12–15 minutes
  • Total Time: 30 minutes
  • Yield: Approx. 24 cookies
  • Category: Dessert, Snack
  • Method: Baking
  • Cuisine: American
  • Diet: Vegetarian
Print Recipe
Pin Recipe

Description

These homemade Nilla wafers are buttery, crisp, and packed with real vanilla flavor—perfect for snacking, banana pudding, or dessert crusts. With simple ingredients and no preservatives, they’re an easy and nostalgic treat made fresh from your kitchen. A must-try for fans of classic vanilla cookies!


Ingredients

  • All-purpose flour
  • Baking powder
  • Salt
  • Unsalted butter
  • Granulated sugar
  • Egg
  • Vanilla extract
  • Milk

Instructions

  1. Preheat oven to 350°F (175°C) and line a baking sheet with parchment paper.
  2. Whisk together flour, baking powder, and salt.
  3. In a separate bowl, cream butter and sugar until light and fluffy.
  4. Beat in egg and vanilla extract until well combined.
  5. Gradually add the dry ingredients, alternating with milk, and mix into a smooth dough.
  6. Drop teaspoonfuls of dough onto the baking sheet, spaced 2 inches apart.
  7. Bake for 12–15 minutes, or until edges are golden brown.
  8. Cool on the baking sheet for a few minutes, then transfer to a wire rack to cool completely.

Notes

  • For extra crispness, bake until edges are deeply golden.
  • Store in an airtight container for up to 5 days.
  • Refresh softness by reheating in a 300°F oven for 5 minutes.
  • Freeze raw dough for easy future baking—add 2–3 extra minutes to bake time.

Have you made this recipe? I'd love to see it!

Click here to Follow me on Pinterest

Homemade Rhubarb Butter: A Sweet and Tangy Springtime Spread

April 22, 2025 by Sue Leave a Comment

This homemade rhubarb butter is a smooth, tangy-sweet spread made from fresh rhubarb, apple, honey, and warm spices. It’s the perfect way to capture the flavors of spring in a jar and enjoy them all year long. I love how easy it is to make with just a handful of ingredients. Homemade Rhubarb Butter: A Sweet and Tangy Springtime Spread

Why I Love This Recipe

I love this recipe because it's both simple and flavorful. The natural tartness of rhubarb is mellowed by the apple and honey, while the vanilla and cinnamon bring a cozy warmth that makes this butter feel indulgent. It’s a great way to use up rhubarb from the garden or market, and I enjoy spreading it on toast, pancakes, or even stirring it into yogurt.

Ingredients

(Here's a tip: Check out the full list of ingredients and measurements in the recipe card below.)

  • 4 stalks of rhubarb (about 4 cups), chopped
  • 1 apple, cored and cut into chunks
  • ½ cup honey
  • 2 teaspoons vanilla extract
  • ¼ to ½ teaspoon ground cinnamon

Directions

  1. I start by blending the chopped rhubarb and apple in a food processor or blender until smooth.
  2. Then I transfer the mixture to a saucepan and stir in the honey, vanilla, and cinnamon.
  3. I bring it to a boil over medium heat, stirring often, then reduce to a simmer.
  4. I continue to simmer the mixture for 15–20 minutes, stirring occasionally, until it thickens and darkens in color.
  5. Once it reaches a spreadable consistency, I remove it from heat and let it cool slightly.
  6. I pour the cooled butter into a clean jar and store it in the refrigerator once fully cooled.

Servings and Timing

  • Prep Time: 10 minutes
  • Cook Time: 20 minutes
  • Total Time: 30 minutes
  • Yield: About 1½ cups

Variations

  • Citrus Zest: I sometimes add a bit of lemon or orange zest to brighten the flavor.
  • Berry Blend: Mixing in strawberries or raspberries gives a beautiful color and extra sweetness.
  • Maple Sweetener: Swapping honey with maple syrup adds a rich, earthy flavor.
  • Ginger Spice: A pinch of ground ginger gives a nice zing and pairs well with the tartness.
  • Herbal Note: A sprig of rosemary or thyme added during cooking adds a savory twist.

Storage/Reheating

  • I store the rhubarb butter in a sealed glass jar in the fridge for up to two weeks.
  • For longer storage, I freeze it in small containers for up to 6 months.
  • If I want to serve it warm, I gently reheat it on the stove over low heat, stirring often to prevent burning.

FAQs

How do I know the rhubarb butter is ready?

It’s done when it thickens to a smooth, spreadable consistency and coats the back of a spoon.

Can I use frozen rhubarb?

Yes, I can use frozen rhubarb. I make sure to thaw and drain it before blending.

Do I need to peel the apple?

I usually don’t. The skin blends in well and adds nutrients, but peeling is fine for a smoother result.

Can I use sugar instead of honey?

Yes, I can substitute honey with granulated sugar or even maple syrup, though the flavor will change slightly.

What can I serve rhubarb butter with?

I love it on toast, English muffins, pancakes, stirred into yogurt, or as a glaze for baked goods.

Conclusion

This rhubarb butter is one of my favorite springtime recipes. It’s easy to make, full of vibrant flavor, and super versatile. Whether I’m enjoying it on breakfast toast or gifting a jar to a friend, it always brings a bit of seasonal joy into the kitchen.

Print

clock clock iconcutlery cutlery iconflag flag iconfolder folder iconinstagram instagram iconpinterest pinterest iconfacebook facebook iconprint print iconsquares squares iconheart heart iconheart solid heart solid icon
Homemade Rhubarb Butter: A Sweet and Tangy Springtime Spread

Homemade Rhubarb Butter: A Sweet and Tangy Springtime Spread

5 Stars 4 Stars 3 Stars 2 Stars 1 Star No reviews
  • Author: Sue
  • Prep Time: 10 minutes
  • Cook Time: 20 minutes
  • Total Time: 30 minutes
  • Yield: About 1½ cups
  • Category: Condiments, Spreads
  • Method: Stovetop
  • Cuisine: American
  • Diet: Gluten Free
Print Recipe
Pin Recipe

Description

This homemade rhubarb butter recipe is a sweet and tangy springtime spread made with rhubarb, apple, and honey. Easy to prepare in just 30 minutes, it's the perfect way to preserve the flavors of spring. Enjoy it on toast, pancakes, or stirred into yogurt!


Ingredients

  • 4 stalks of rhubarb (about 4 cups), chopped
  • 1 apple, cored and cut into chunks
  • ½ cup honey
  • 2 teaspoons vanilla extract
  • ¼ to ½ teaspoon ground cinnamon

Instructions

  1. Blend chopped rhubarb and apple in a food processor or blender until smooth.
  2. Transfer to a saucepan and stir in honey, vanilla extract, and cinnamon.
  3. Bring to a boil over medium heat, stirring often.
  4. Reduce to a simmer and cook for 15–20 minutes until thickened.
  5. Remove from heat and let cool slightly.
  6. Pour into a clean jar and refrigerate once fully cooled.

Notes

  • For a citrusy twist, add lemon or orange zest.
  • Blend with strawberries or raspberries for added color and sweetness.
  • Maple syrup can replace honey for an earthy note.
  • A pinch of ground ginger or a sprig of rosemary can enhance flavor complexity.
  • Store in the fridge for up to 2 weeks or freeze for up to 6 months.

Have you made this recipe? I'd love to see it!

Click here to Follow me on Pinterest

Carrot Apple Salad

April 22, 2025 by Sue Leave a Comment

Carrot Apple Salad is a vibrant and refreshing dish that combines the crispness of apples with the crunch of carrots, all brought together with a creamy dressing. It's a delightful blend of sweet and savory flavors, making it a perfect addition to any meal or a standalone snack. Carrot Apple Salad

Why You’ll Love This Recipe

I find this salad to be incredibly versatile and satisfying. The combination of tart Granny Smith apples and sweet red apples provides a balanced flavor profile, while the carrots add a satisfying crunch. The creamy dressing, enhanced with vanilla yogurt and mayo, ties everything together beautifully. Plus, the addition of dried cranberries and mandarin segments introduces a delightful sweetness and texture contrast.

Ingredients

(Here's a tip: Check out the full list of ingredients and measurements in the recipe card below.)

  • 1 red delicious apple
  • 1 Granny Smith apple
  • 2 tablespoons lemon juice
  • 2 cups matchstick carrots (you can usually buy precut bags at the grocery store)
  • ¼ cup yellow onion, finely diced
  • ⅓ cup dried sweetened cranberries
  • ½ cup vanilla yogurt
  • ¼ cup mayo
  • 1 tablespoon sugar
  • ¼ teaspoon salt
  • ¼ teaspoon pepper
  • 1 cup canned mandarin segments, drained

Directions

  1. I start by cutting both apples into matchstick-style pieces and placing them in a bowl.
  2. I pour the lemon juice over the apple pieces and toss well to coat all of them. This step helps prevent browning.
  3. I set the bowl aside to let the apples soak up the lemon juice for 5 minutes.
  4. In a large mixing bowl, I combine the matchstick carrots, diced onion, and dried cranberries.
  5. After the apples have soaked, I add them to the mixing bowl.
  6. I then add the vanilla yogurt and mayo to the bowl.
  7. I sprinkle in the sugar, salt, and pepper.
  8. I stir all the ingredients together until well combined.
  9. Finally, I add the mandarin segments and gently stir them into the salad.
  10. I cover the bowl and refrigerate the salad for at least three hours before serving.

Servings and Timing

This recipe yields approximately 8 servings. The preparation time is about 20 minutes, and I recommend chilling the salad for at least 3 hours before serving, bringing the total time to around 3 hours and 20 minutes.

Variations

  • Fruit Substitutions: I sometimes swap out the mandarin segments for pineapple tidbits or add raisins instead of cranberries for a different flavor profile.
  • Nutty Addition: For added crunch, I like to include chopped walnuts or pecans.
  • Sweetness Adjustment: If I prefer a natural sweetener, I replace the sugar with honey.

Storage/Reheating

I store any leftover salad in an airtight container in the refrigerator and consume it within 2-4 days. Since this is a cold salad, reheating isn't necessary.

FAQs

How can I prevent the apples from browning?

I find that tossing the apple slices in lemon juice immediately after cutting them effectively prevents browning.

Can I prepare this salad in advance?

Yes, I often prepare it a day ahead. In fact, chilling it for several hours enhances the flavors.

What can I use instead of vanilla yogurt?

If I don't have vanilla yogurt on hand, I use plain yogurt and add a bit of honey or vanilla extract to achieve a similar taste.

Is there a vegan alternative for the dressing?

For a vegan version, I substitute the yogurt and mayo with plant-based alternatives like coconut yogurt and vegan mayo.

Can I add protein to this salad?

Absolutely! I sometimes add grilled chicken or chickpeas to make it a more substantial meal.

Conclusion

Carrot Apple Salad is a delightful blend of flavors and textures that I enjoy preparing for various occasions. Its versatility allows me to tweak the ingredients based on what's available, and it's always a hit with family and friends. Whether as a side dish or a light meal, this salad is a refreshing choice that I keep coming back to.

Print

clock clock iconcutlery cutlery iconflag flag iconfolder folder iconinstagram instagram iconpinterest pinterest iconfacebook facebook iconprint print iconsquares squares iconheart heart iconheart solid heart solid icon
Carrot Apple Salad

Carrot Apple Salad

5 Stars 4 Stars 3 Stars 2 Stars 1 Star No reviews
  • Author: Sue
  • Prep Time: 20 minutes
  • Cook Time: 0 minutes
  • Total Time: 3 hours 20 minutes (includes chilling)
  • Yield: 8 servings
  • Category: Salad
  • Method: No-cook
  • Cuisine: American
  • Diet: Vegetarian
Print Recipe
Pin Recipe

Description

This vibrant Carrot Apple Salad blends the crisp sweetness of apples with the crunch of carrots, tossed in a creamy yogurt-mayo dressing. Dried cranberries and mandarin oranges add a pop of flavor and color, making it a refreshing and healthy side dish or snack for any occasion.


Ingredients

  • 1 red delicious apple
  • 1 Granny Smith apple
  • 2 tablespoons lemon juice
  • 2 cups matchstick carrots
  • ¼ cup yellow onion, finely diced
  • ⅓ cup dried sweetened cranberries
  • ½ cup vanilla yogurt
  • ¼ cup mayo
  • 1 tablespoon sugar
  • ¼ teaspoon salt
  • ¼ teaspoon pepper
  • 1 cup canned mandarin segments, drained

Instructions

  1. Cut both apples into matchstick pieces.
  2. Toss apples with lemon juice and let sit for 5 minutes.
  3. In a large bowl, combine carrots, onion, and cranberries.
  4. Add apples to the bowl.
  5. Mix in yogurt and mayo.
  6. Add sugar, salt, and pepper. Stir until well combined.
  7. Gently fold in mandarin segments.
  8. Cover and refrigerate for at least 3 hours before serving.

Notes

  • Chill thoroughly for best flavor.
  • For extra crunch, add chopped walnuts or pecans.
  • Pineapple tidbits or raisins can replace mandarins or cranberries.
  • Use honey in place of sugar for a natural sweetener.
  • To make it vegan, use plant-based yogurt and mayo.

Have you made this recipe? I'd love to see it!

Click here to Follow me on Pinterest

Creamy Layered John Wayne Casserole

April 22, 2025 by Sue Leave a Comment

The Creamy Layered John Wayne Casserole is a deliciously rich and satisfying dish that combines Tex-Mex flavors with a comforting, hearty base. With seasoned ground beef, creamy cheese, and fresh vegetables layered over a biscuit crust, this casserole is perfect for any family dinner or casual gathering. Creamy Layered John Wayne Casserole

Why I Love This Recipe

I love this recipe because it brings together everything I enjoy in one dish—flavorful meat, creamy layers, fresh veggies, and a golden biscuit base. It’s easy to assemble, full of texture, and always a crowd-pleaser. Plus, it's versatile enough to adapt based on what I have in the fridge.

Ingredients

(Here's a tip: Check out the full list of ingredients and measurements in the recipe card below.)

  • 1 (16.3-ounce) can refrigerated biscuits
  • 2 pounds ground beef
  • 1 (1-ounce) packet taco seasoning
  • ¾ cup water
  • 1 medium onion, halved and sliced
  • 1 medium red bell pepper, halved and sliced
  • ½ cup sour cream
  • ½ cup mayonnaise
  • 8 ounces shredded Cheddar cheese, divided
  • 2 medium tomatoes, sliced
  • 1 (4-ounce) jar sliced jalapeño peppers, drained (optional)

Directions

  1. I preheat the oven to 350°F (175°C) and lightly grease a 9x13-inch baking dish.
  2. I press the biscuit dough into the bottom of the dish and slightly up the sides, then bake it for 15 to 20 minutes until lightly golden.
  3. While the crust bakes, I cook the ground beef in a skillet over medium-high heat until browned and crumbly. After draining the fat, I stir in taco seasoning and water, letting it simmer for 5 minutes.
  4. I remove the meat from the skillet and use the same pan to sauté the onions and bell pepper until they're slightly tender.
  5. In a bowl, I mix together the sour cream, mayonnaise, and half of the Cheddar cheese.
  6. On the baked crust, I layer the taco meat, tomato slices, sautéed vegetables, jalapeños if using, and the sour cream mixture. I top it all with the remaining cheese.
  7. I bake it uncovered for 30 to 40 minutes, until the cheese is melted and the edges are lightly browned.

Servings and Timing

  • Servings: 12
  • Prep Time: 20 minutes
  • Cook Time: 35 minutes
  • Total Time: 55 minutes

Variations

  • I like to swap the ground beef with ground turkey for a lighter version.
  • For a vegetarian take, I use black beans and corn instead of meat.
  • I sometimes add green chilies or hot sauce for extra spice.
  • Swapping Cheddar for Pepper Jack gives the dish a bolder flavor.
  • I also enjoy topping it with crushed tortilla chips for a crunchy finish.

Storage/Reheating

  • I store leftovers in an airtight container in the fridge for up to 4 days.
  • For longer storage, I freeze portions in sealed containers for up to 3 months.
  • To reheat, I use the microwave for individual servings or pop it in a 350°F oven until warmed through.

FAQs

Can I make this casserole ahead of time?

Yes, I often prep it the night before and keep it in the fridge. I just let it come to room temperature before baking.

What if I don’t have taco seasoning?

I mix my own with chili powder, cumin, garlic powder, onion powder, paprika, and a pinch of salt.

Is it possible to make this casserole without the biscuit crust?

Definitely. I sometimes use a layer of crushed tortilla chips or even cooked rice instead.

Can I add beans to this casserole?

Absolutely. I’ve added black beans or pinto beans in the meat layer for extra protein and fiber.

How do I make this less spicy?

I skip the jalapeños and use mild taco seasoning, and sometimes substitute plain diced tomatoes for any spicy versions.

Conclusion

The Creamy Layered John Wayne Casserole is a comforting, flavorful dish that's perfect for busy weeknights or feeding a hungry crowd. I love how easy it is to customize and how satisfying each bite is. Once I made it the first time, it quickly became a go-to in my kitchen. Give it a try and see why it’s such a favorite!

Print

clock clock iconcutlery cutlery iconflag flag iconfolder folder iconinstagram instagram iconpinterest pinterest iconfacebook facebook iconprint print iconsquares squares iconheart heart iconheart solid heart solid icon
Creamy Layered John Wayne Casserole

Creamy Layered John Wayne Casserole

5 Stars 4 Stars 3 Stars 2 Stars 1 Star No reviews
  • Author: Sue
  • Prep Time: 20 minutes
  • Cook Time: 35 minutes
  • Total Time: 55 minutes
  • Yield: 12 servings
  • Category: Dinner, Casserole
  • Method: Baking
Print Recipe
Pin Recipe

Description

This Creamy Layered John Wayne Casserole is the ultimate comfort food, loaded with seasoned ground beef, creamy cheese sauce, and fresh vegetables, all baked over a golden biscuit crust. Perfect for family dinners or casual gatherings, this hearty Tex-Mex inspired casserole is easy to make and packed with bold, satisfying flavors.


Ingredients

  • 1 (16.3-ounce) can refrigerated biscuits
  • 2 pounds ground beef
  • 1 (1-ounce) packet taco seasoning
  • ¾ cup water
  • 1 medium onion, halved and sliced
  • 1 medium red bell pepper, halved and sliced
  • ½ cup sour cream
  • ½ cup mayonnaise
  • 8 ounces shredded Cheddar cheese, divided
  • 2 medium tomatoes, sliced
  • 1 (4-ounce) jar sliced jalapeño peppers, drained (optional)

Instructions

  1. Preheat oven to 350°F (175°C) and lightly grease a 9x13-inch baking dish.
  2. Press biscuit dough into the bottom and slightly up the sides of the dish. Bake for 15–20 minutes or until golden.
  3. In a skillet, brown ground beef over medium-high heat. Drain fat, stir in taco seasoning and water, and simmer for 5 minutes.
  4. In the same skillet, sauté onions and bell pepper until slightly tender.
  5. In a bowl, mix sour cream, mayonnaise, and half the Cheddar cheese.
  6. Layer in the baking dish: taco meat, tomato slices, sautéed veggies, jalapeños (if using), then the sour cream mixture. Top with remaining cheese.
  7. Bake uncovered for 30–40 minutes, until cheese is melted and edges are golden brown.

Notes

  • Swap ground beef for ground turkey or plant-based alternatives.
  • Add black beans or corn for a heartier texture.
  • Top with crushed tortilla chips for crunch.
  • Can be prepped ahead and stored in the fridge overnight.
  • To reduce spice, omit jalapeños and use mild seasoning.

Have you made this recipe? I'd love to see it!

Click here to Follow me on Pinterest

Spinach, Mushroom & Ricotta Stuffed Zucchini Boats

April 22, 2025 by Sue Leave a Comment

These Spinach, Mushroom & Ricotta Stuffed Zucchini Boats are a delicious and wholesome way to enjoy zucchini. Loaded with a savory mix of sautéed vegetables and creamy ricotta cheese, they’re satisfying enough for a light dinner or an impressive side dish. Whether I’m looking for something low-carb or just trying to get more greens in my meal, this recipe never disappoints. Spinach, Mushroom & Ricotta Stuffed Zucchini Boats

Why You’ll Love This Recipe

I love how this dish is both comforting and light. The zucchini boats serve as the perfect base for the creamy, cheesy filling that’s packed with earthy mushrooms, fresh spinach, garlic, and herbs. It’s a great way to use up extra zucchini and transform it into something that looks and tastes gourmet. Plus, it’s vegetarian-friendly and easy to make ahead, which makes meal planning a breeze.

ingredients

(Here's a tip: Check out the full list of ingredients and measurements in the recipe card below.)

  • Zucchini
  • Ricotta cheese
  • Baby spinach
  • Mushrooms (like cremini or button)
  • Garlic
  • Onion
  • Olive oil
  • Grated Parmesan cheese
  • Mozzarella cheese
  • Salt
  • Black pepper
  • Italian seasoning
  • Fresh parsley (optional for garnish)

directions

  1. I start by preheating the oven to 375°F (190°C) and prepping my zucchini by slicing them in half lengthwise and scooping out the center to form boats.
  2. I heat olive oil in a pan and sauté chopped onion and garlic until they’re fragrant.
  3. Then I add chopped mushrooms and cook until they release their moisture and start to brown.
  4. I stir in fresh spinach and cook just until wilted, then remove the pan from heat.
  5. In a bowl, I mix ricotta cheese with grated Parmesan, the cooked veggie mixture, Italian seasoning, salt, and pepper.
  6. I spoon this mixture into each zucchini half and place them in a baking dish.
  7. I top each boat with shredded mozzarella and bake for about 25–30 minutes, or until the zucchini is tender and the cheese is golden and bubbly.
  8. Before serving, I like to sprinkle fresh parsley on top for a pop of color.

Servings and timing

This recipe makes about 4 servings. Each serving includes 2 zucchini halves. It takes roughly 15 minutes to prep and 30 minutes to bake, so I can have it on the table in under 45 minutes.

Variations

I sometimes swap out the ricotta for cottage cheese if I want something a little lighter. For added protein, I’ve also mixed in some cooked ground turkey or sausage to the filling. If I want to keep it vegan, I go for a tofu ricotta and skip the cheese topping or use plant-based alternatives. Adding sun-dried tomatoes or pine nuts also gives it a nice twist.

storage/reheating

I store leftovers in an airtight container in the fridge for up to 3 days. To reheat, I place them in the oven at 350°F (175°C) for about 10–15 minutes or until warmed through. The microwave works too, but I prefer the oven to keep the texture from getting soggy.

FAQs

Can I make these zucchini boats ahead of time?

Yes, I often prep the filling and hollow out the zucchini the night before. I just assemble and bake them when I’m ready to eat.

Can I freeze stuffed zucchini boats?

I don’t recommend freezing them once cooked, as zucchini tends to become watery. But I can freeze the filling separately and use it when needed.

What can I use instead of ricotta?

Cottage cheese, goat cheese, or a plant-based cheese spread can work well. It depends on the flavor and texture I’m going for.

How do I keep the zucchini from getting mushy?

I make sure not to overbake them. Just bake until the zucchini is tender but still holds its shape—about 25–30 minutes usually does the trick.

Can I grill these instead of baking?

Yes, I’ve grilled them before! I use indirect heat and cover them until the cheese melts and the zucchini is fork-tender.

Conclusion

These Spinach, Mushroom & Ricotta Stuffed Zucchini Boats are a go-to when I want something nourishing, full of flavor, and simple to put together. Whether I’m making them for myself or serving guests, they always get a warm welcome at the table. It’s a smart way to eat more veggies without sacrificing taste.

Print

clock clock iconcutlery cutlery iconflag flag iconfolder folder iconinstagram instagram iconpinterest pinterest iconfacebook facebook iconprint print iconsquares squares iconheart heart iconheart solid heart solid icon
Spinach, Mushroom & Ricotta Stuffed Zucchini Boats

Spinach, Mushroom & Ricotta Stuffed Zucchini Boats

5 Stars 4 Stars 3 Stars 2 Stars 1 Star No reviews
  • Author: Sue
  • Prep Time: 15 minutes
  • Cook Time: 30 minutes
  • Total Time: 45 minutes
  • Yield: 4 servings (2 boats per person)
  • Category: Main Course, Side Dish
  • Method: Baking
  • Cuisine: American, Italian-Inspired
  • Diet: Vegetarian
Print Recipe
Pin Recipe

Description

These Spinach, Mushroom & Ricotta Stuffed Zucchini Boats are a delicious low-carb, vegetarian dish perfect for a light dinner or hearty side. Packed with sautéed mushrooms, fresh spinach, creamy ricotta, and melty mozzarella, they’re nutritious, flavorful, and easy to prepare. Ideal for meal prep, special occasions, or everyday clean eating!


Ingredients

  • 4 medium zucchini, halved lengthwise and centers scooped out
  • 1 cup ricotta cheese
  • 2 cups fresh baby spinach
  • 1 ½ cups mushrooms (cremini or button), chopped
  • 2 cloves garlic, minced
  • 1 small onion, chopped
  • 1 tbsp olive oil
  • ¼ cup grated Parmesan cheese
  • ¾ cup shredded mozzarella cheese
  • ½ tsp salt
  • ½ tsp black pepper
  • 1 tsp Italian seasoning
  • Fresh parsley, chopped (optional, for garnish)

Instructions

  1. Preheat oven to 375°F (190°C). Prepare zucchini by slicing in half lengthwise and scooping out the centers to create boats.
  2. In a skillet, heat olive oil over medium heat. Sauté onion and garlic until fragrant.
  3. Add chopped mushrooms and cook until browned and moisture evaporates.
  4. Stir in spinach and cook until wilted. Remove from heat.
  5. In a bowl, mix ricotta, Parmesan, cooked veggies, Italian seasoning, salt, and pepper.
  6. Fill each zucchini half with the ricotta mixture and place in a baking dish.
  7. Top with shredded mozzarella and bake for 25–30 minutes, until cheese is golden and zucchini is tender.
  8. Garnish with parsley before serving.

Notes

  • For added protein, stir in cooked ground turkey or sausage.
  • Substitute ricotta with cottage cheese or vegan alternatives for dietary needs.
  • Add-ins like sun-dried tomatoes or pine nuts can enhance flavor and texture.
  • Avoid overbaking to keep zucchini from becoming mushy.

Have you made this recipe? I'd love to see it!

Click here to Follow me on Pinterest

Juicy Korean-Style BBQ Meatballs with Spicy Mayo Sauce

April 22, 2025 by Sue Leave a Comment

These Juicy Korean-Style BBQ Meatballs with Spicy Mayo Sauce are a flavor-packed twist on a classic comfort food. Each meatball is glazed with a sweet, tangy, and umami-rich Korean BBQ sauce, then paired with a creamy, spicy mayo that adds just the right amount of heat. Whether served over rice, as a party appetizer, or tucked into lettuce wraps, these meatballs always hit the spot. Juicy Korean-Style BBQ Meatballs with Spicy Mayo Sauce

Why You’ll Love This Recipe

I love how these meatballs bring together bold Korean flavors and easy preparation. The meatballs are juicy on the inside and sticky on the outside, thanks to the glaze. I also really enjoy how the spicy mayo balances the sweetness of the BBQ sauce, adding an unexpected but welcome kick. This recipe is also versatile—it works great for weeknight dinners, meal prep, or even as a party snack.

Ingredients

(Here's a tip: Check out the full list of ingredients and measurements in the recipe card below.)

For the meatballs:

  • Ground beef
  • Garlic, minced
  • Green onions, finely chopped
  • Ginger, grated
  • Soy sauce
  • Sesame oil
  • Panko breadcrumbs
  • Egg
  • Salt and pepper

For the Korean BBQ sauce:

  • Soy sauce
  • Brown sugar
  • Rice vinegar
  • Gochujang (Korean chili paste)
  • Garlic, minced
  • Sesame oil

For the spicy mayo sauce:

  • Mayonnaise
  • Sriracha or gochujang
  • Lime juice (optional)

Garnish:

  • Sesame seeds
  • Chopped green onions

Directions

  1. I preheat the oven to 400°F (200°C) and line a baking sheet with parchment paper.
  2. In a large bowl, I combine the ground meat, garlic, green onions, ginger, soy sauce, sesame oil, panko, egg, salt, and pepper. I mix just until combined, then form into 1-inch meatballs.
  3. I place the meatballs on the prepared baking sheet and bake for 15-18 minutes, or until fully cooked through.
  4. While the meatballs bake, I prepare the Korean BBQ sauce by combining all sauce ingredients in a saucepan. I bring it to a simmer over medium heat, stirring occasionally until thickened.
  5. Once the meatballs are done, I toss them in the warm sauce to coat evenly.
  6. I mix the spicy mayo ingredients together in a small bowl until smooth.
  7. I drizzle or serve the spicy mayo alongside the meatballs and garnish with sesame seeds and green onions.

Servings and timing

This recipe makes about 20-24 meatballs and serves 4-6 people, depending on portion size. The total time to make this recipe is about 35 minutes, including prep and baking.

Variations

  • I sometimes swap out the beef for ground chicken or turkey for a lighter option.
  • For a vegetarian version, I use plant-based meat substitutes and adjust the seasonings.
  • I love wrapping the meatballs in lettuce leaves for a low-carb serving style.
  • If I want extra heat, I add chopped chili or more gochujang to the BBQ sauce.
  • Sometimes I skip the spicy mayo and serve the meatballs over kimchi fried rice for a full meal.

Storage/Reheating

I store leftover meatballs in an airtight container in the refrigerator for up to 4 days. For longer storage, I freeze them (without the mayo) for up to 2 months. When I’m ready to reheat, I microwave them for a few minutes or warm them in a skillet over medium heat. I always add a splash of water or extra sauce to keep them moist.

FAQs

How spicy are these meatballs?

The meatballs themselves aren’t too spicy, but the BBQ sauce and spicy mayo add heat. I adjust the gochujang and Sriracha based on how spicy I want them.

Can I make these meatballs ahead of time?

Yes, I often make the meatballs a day in advance and store them in the fridge. I reheat them and toss with the sauce just before serving.

What can I serve with these meatballs?

I usually serve them over steamed rice, in lettuce wraps, or with noodles. They also work great as a party appetizer with toothpicks.

Can I use store-bought Korean BBQ sauce?

Absolutely. If I’m short on time, I use a good-quality store-bought Korean BBQ sauce and just heat it up before tossing with the meatballs.

How do I keep the meatballs from drying out?

I make sure not to overcook them and always include moisture-boosting ingredients like egg and sesame oil in the mixture. Tossing them in the sauce right after baking also helps lock in juiciness.

Conclusion

These Juicy Korean-Style BBQ Meatballs with Spicy Mayo Sauce are one of my favorite go-to dishes when I’m craving bold, comforting flavors. They’re easy to make, super satisfying, and always a crowd-pleaser. Whether I’m serving them for dinner or sharing them with guests, they never disappoint.

Print

clock clock iconcutlery cutlery iconflag flag iconfolder folder iconinstagram instagram iconpinterest pinterest iconfacebook facebook iconprint print iconsquares squares iconheart heart iconheart solid heart solid icon
Juicy Korean-Style BBQ Meatballs with Spicy Mayo Sauce

Juicy Korean-Style BBQ Meatballs with Spicy Mayo Sauce

5 Stars 4 Stars 3 Stars 2 Stars 1 Star No reviews
  • Author: Sue
  • Prep Time: 15 minutes
  • Cook Time: 18 minutes
  • Total Time: 33 minutes
  • Yield: 20–24 meatballs (serves 4–6)
  • Category: Appetizer, Main Course
  • Method: Baked
  • Cuisine: Korean-Inspired, Asian Fusion
Print Recipe
Pin Recipe

Description

These Juicy Korean-Style BBQ Meatballs with Spicy Mayo Sauce are packed with bold Korean flavors, combining sweet, savory BBQ glaze with creamy, spicy mayo. Perfect as a party appetizer, weeknight dinner, or meal prep, these meatballs are tender, flavorful, and easy to make.


Ingredients

  • For the Meatballs:
  • 1 lb ground beef
  • 2 cloves garlic, minced
  • 2 green onions, finely chopped
  • 1 tsp fresh ginger, grated
  • 1 tbsp soy sauce
  • 1 tsp sesame oil
  • ½ cup panko breadcrumbs
  • 1 egg
  • Salt and pepper to taste
  • For the Korean BBQ Sauce:
  • 3 tbsp soy sauce
  • 2 tbsp brown sugar
  • 1 tbsp rice vinegar
  • 1 tbsp gochujang (Korean chili paste)
  • 1 clove garlic, minced
  • 1 tsp sesame oil
  • For the Spicy Mayo:
  • ½ cup mayonnaise
  • 1 tbsp Sriracha or gochujang
  • 1 tsp lime juice (optional)
  • Garnish:
  • Sesame seeds
  • Chopped green onions

Instructions

  1. Preheat oven to 400°F (200°C) and line a baking sheet with parchment paper.
  2. In a large bowl, mix ground meat, garlic, green onions, ginger, soy sauce, sesame oil, panko, egg, salt, and pepper until just combined.
  3. Form into 1-inch meatballs and place on the baking sheet.
  4. Bake for 15–18 minutes, until fully cooked.
  5. While baking, combine all BBQ sauce ingredients in a saucepan. Simmer on medium heat until thickened.
  6. Toss cooked meatballs in the warm BBQ sauce until evenly coated.
  7. Mix all spicy mayo ingredients in a small bowl until smooth.
  8. Serve meatballs drizzled with spicy mayo and garnish with sesame seeds and green onions.

Notes

  • Substitute beef with ground chicken or turkey for a lighter version.
  • Make vegetarian with plant-based meat alternatives.
  • Serve in lettuce wraps for a low-carb option.
  • Store leftovers in the fridge for up to 4 days or freeze for 2 months.
  • Adjust spice level by adding more or less gochujang or Sriracha.

Have you made this recipe? I'd love to see it!

Click here to Follow me on Pinterest

No-Bake Coconut Pecan Praline Cookies

April 22, 2025 by Sue Leave a Comment

These No-Bake Coconut Pecan Praline Cookies are a chewy, sweet treat packed with toasted pecans and shredded coconut, all held together with a buttery praline-style caramel. I love how quick and easy they are to make—no oven required. No-Bake Coconut Pecan Praline Cookies

Why I Love This Recipe

I love this recipe because it's so simple but delivers such rich flavor. The combination of coconut and pecans gives the perfect texture—crunchy, chewy, and gooey all at once. I also appreciate how convenient it is when I don’t want to bake but still want something homemade and indulgent. They're especially great in warmer months when I want to avoid turning on the oven.

Ingredients

(Here's a tip: Check out the full list of ingredients and measurements in the recipe card below.)

  • 2 cups chopped pecans
  • 2 cups sweetened shredded coconut
  • 1½ cups granulated sugar
  • 1 cup brown sugar
  • ½ cup evaporated milk
  • ½ cup light corn syrup
  • ½ cup (1 stick) unsalted butter
  • 1 teaspoon vanilla extract
  • ½ teaspoon salt

Directions

  1. In a large saucepan over medium-high heat, I combine the granulated sugar, brown sugar, evaporated milk, corn syrup, and butter. I stir until everything melts and blends together.
  2. I bring the mixture to a boil and let it cook for about 3 minutes, stirring constantly.
  3. I remove the pan from the heat and stir in the vanilla and salt.
  4. Then I add in the chopped pecans and shredded coconut, stirring well until everything is coated and combined.
  5. I use a spoon or small scoop to drop the mixture onto parchment or wax paper-lined baking sheets.
  6. I let the cookies set at room temperature until firm. If I want to speed things up, I pop them in the fridge or freezer.

Servings and Timing

  • Yield: About 24 cookies
  • Prep Time: 15 minutes
  • Cook Time: 5 minutes
  • Setting Time: 1–2 hours at room temperature or 30 minutes in the fridge
  • Total Time: Around 1.5 to 2 hours

Variations

  • Nut-Free: I swap the pecans for toasted oats, sunflower seeds, or even crispy rice cereal.
  • Darker Flavor: I use dark brown sugar for a richer molasses taste.
  • Vegan Version: I substitute coconut milk for evaporated milk and use plant-based butter.
  • Chocolate-Topped: After they set, I drizzle melted chocolate over the tops for an extra treat.

Storage/Reheating

I store these cookies in an airtight container at room temperature for up to 5 days. If I want them to last longer, I freeze them in a single layer, then transfer to a zip-top bag or airtight container. When I’m ready to eat, I just let them thaw at room temp for 10–15 minutes—no reheating needed.

FAQs

How long does it take for the cookies to set?

At room temperature, they usually set in about 1 to 2 hours. If I’m in a hurry, I chill them in the fridge or freezer to speed it up.

Can I use unsweetened coconut?

Yes, I can use unsweetened coconut if I want to reduce the sweetness. I just make sure to check if the texture still holds well since the sweetened kind adds moisture too.

What if my cookies don’t harden?

That usually means the sugar mixture didn’t boil long enough. I make sure to boil it for at least 3 minutes to reach the right consistency.

Can I use different nuts?

Definitely. I’ve tried walnuts, almonds, and even macadamia nuts. They all bring a slightly different flavor, but still work great.

Can I make these ahead for a party?

Absolutely. I often make them the day before and store them in a container. They hold up well and taste just as fresh the next day.

Conclusion

These No-Bake Coconut Pecan Praline Cookies are a no-fuss dessert that always hits the spot. I can whip them up quickly, customize them easily, and serve them at any occasion. Whether I'm craving something sweet in the middle of the week or need a party treat in a pinch, these are always a reliable go-to.

Print

clock clock iconcutlery cutlery iconflag flag iconfolder folder iconinstagram instagram iconpinterest pinterest iconfacebook facebook iconprint print iconsquares squares iconheart heart iconheart solid heart solid icon
No-Bake Coconut Pecan Praline Cookies

No-Bake Coconut Pecan Praline Cookies

5 Stars 4 Stars 3 Stars 2 Stars 1 Star No reviews
  • Author: Sue
  • Prep Time: 15 minutes
  • Cook Time: 5 minutes
  • Total Time: 1 hour 30 minutes to 2 hours (including setting time)
  • Yield: About 24 cookies
  • Category: Dessert
  • Method: No-Bake
  • Cuisine: American
  • Diet: Vegetarian
Print Recipe
Pin Recipe

Description

These No-Bake Coconut Pecan Praline Cookies are the ultimate easy treat—sweet, chewy, and loaded with toasted pecans and shredded coconut, all held together by a rich praline caramel. Perfect for summer days or quick holiday treats, these cookies require zero baking and deliver maximum flavor with minimal effort.


Ingredients

  • 2 cups chopped pecans
  • 2 cups sweetened shredded coconut
  • 1½ cups granulated sugar
  • 1 cup brown sugar
  • ½ cup evaporated milk
  • ½ cup light corn syrup
  • ½ cup (1 stick) unsalted butter
  • 1 teaspoon vanilla extract
  • ½ teaspoon salt

Instructions

  1. In a large saucepan over medium-high heat, combine granulated sugar, brown sugar, evaporated milk, corn syrup, and butter. Stir until smooth and melted.
  2. Bring the mixture to a boil and cook for about 3 minutes, stirring constantly.
  3. Remove from heat and stir in vanilla extract and salt.
  4. Add chopped pecans and shredded coconut; stir until fully combined.
  5. Drop spoonfuls of the mixture onto parchment or wax paper-lined baking sheets.
  6. Let cookies set at room temperature for 1–2 hours, or chill in the fridge for 30 minutes for quicker results.

Notes

  • Use dark brown sugar for a deeper, molasses-rich flavor.
  • For a vegan version, substitute coconut milk for evaporated milk and use dairy-free butter.
  • Drizzle with melted chocolate once set for a fancy finish.
  • Swap pecans with other nuts or even crispy rice cereal for a fun twist.

Have you made this recipe? I'd love to see it!

Click here to Follow me on Pinterest

Mississippi Mud Cake

April 22, 2025 by Sue Leave a Comment

Mississippi Mud Cake is a rich, indulgent dessert that combines a moist chocolate cake base with gooey marshmallows and a luscious chocolate-pecan frosting. This classic Southern treat is perfect for special occasions, holidays, potlucks, or whenever I crave a decadent chocolate fix. Mississippi Mud Cake

Why You’ll Love This Recipe

I love this Mississippi Mud Cake for its irresistible combination of textures and flavors. The moist chocolate cake pairs perfectly with the melted marshmallows and the thick, fudgy frosting studded with pecans. It's an easy-to-make dessert that never fails to impress, making it a go-to recipe for gatherings and celebrations.

Ingredients

(Here's a tip: Check out the full list of ingredients and measurements in the recipe card below.)

For the Cake:

  • 1 cup (2 sticks) unsalted butter
  • ½ cup unsweetened cocoa powder
  • 2 cups granulated sugar
  • 4 large eggs
  • 1 ½ cups all-purpose flour
  • ¼ teaspoon salt
  • 1 teaspoon vanilla extract
  • 1 ½ cups chopped pecans (optional)
  • 4 cups mini marshmallows

For the Frosting:

  • ½ cup unsalted butter
  • ⅓ cup unsweetened cocoa powder
  • ½ cup milk
  • 1 teaspoon vanilla extract
  • 1 (16-ounce) package powdered sugar, sifted

Directions

  1. Preheat the oven to 350°F (175°C). Grease a 9x13-inch baking pan.
  2. In a medium saucepan, melt the butter over low heat. Stir in the cocoa powder until smooth. Remove from heat.
  3. In a large mixing bowl, combine the sugar and eggs. Mix well.
  4. Add the cocoa mixture to the sugar and eggs, stirring until combined.
  5. Gradually add the flour and salt, mixing until just combined.
  6. Stir in the vanilla extract and chopped pecans, if using.
  7. Pour the batter into the prepared pan and bake for 35 minutes, or until a toothpick inserted into the center comes out clean.
  8. Remove the cake from the oven and immediately sprinkle the mini marshmallows evenly over the top. Let them sit for a few minutes to soften.
  9. While the marshmallows are softening, prepare the frosting. In a medium saucepan, melt the butter over medium heat. Stir in the cocoa powder and milk, bringing the mixture to a gentle boil. Remove from heat and stir in the vanilla extract.
  10. Gradually add the sifted powdered sugar to the cocoa mixture, stirring until smooth.
  11. Pour the warm frosting over the marshmallows, spreading it evenly with a spatula.
  12. Allow the cake to cool completely before serving.

Servings and Timing

  • Servings: 15
  • Prep Time: 15 minutes
  • Cook Time: 35 minutes
  • Total Time: 50 minutes

Variations

  • Nut-Free: Omit the pecans for a nut-free version.
  • Different Nuts: Substitute pecans with walnuts or almonds for a different flavor.
  • Extra Chocolatey: Add chocolate chips to the batter for an extra chocolate boost.
  • Frosting Flavor: Add a teaspoon of instant coffee to the frosting for a mocha twist.

Storage/Reheating

  • Storage: Store the cake covered at room temperature for up to 3 days. For longer storage, refrigerate for up to a week.
  • Freezing: Freeze individual slices wrapped tightly in plastic wrap and aluminum foil for up to 3 months. Thaw at room temperature before serving.
  • Reheating: Warm individual slices in the microwave for 10-15 seconds to restore gooeyness.

FAQs

How can I make this cake ahead of time?

I can bake the cake a day in advance and store it covered at room temperature. Add the marshmallows and frosting the day I plan to serve it for the best texture.

Can I use marshmallow creme instead of mini marshmallows?

Yes, I can spread marshmallow creme over the warm cake instead of using mini marshmallows. It will create a similar gooey layer.

What type of cocoa powder is best for this recipe?

I prefer using unsweetened natural cocoa powder for a rich chocolate flavor. Dutch-processed cocoa can also be used but may result in a slightly different taste and texture.

Can I make this cake gluten-free?

Yes, I can substitute the all-purpose flour with a gluten-free flour blend designed for baking. Ensure all other ingredients are gluten-free as well.

How do I prevent the frosting from becoming too thick?

If the frosting is too thick, I add a little more milk, one tablespoon at a time, until it reaches the desired consistency.

Conclusion

Mississippi Mud Cake is a decadent dessert that combines rich chocolate cake, gooey marshmallows, and a luscious chocolate-pecan frosting. It's easy to make and perfect for any occasion. I love how this cake brings smiles to everyone's faces with its indulgent flavors and textures. Give it a try, and it might become one of your favorite go-to desserts too!

Print

clock clock iconcutlery cutlery iconflag flag iconfolder folder iconinstagram instagram iconpinterest pinterest iconfacebook facebook iconprint print iconsquares squares iconheart heart iconheart solid heart solid icon
Mississippi Mud Cake

Mississippi Mud Cake

5 Stars 4 Stars 3 Stars 2 Stars 1 Star No reviews
  • Author: Sue
  • Prep Time: 15 minutes
  • Cook Time: 35 minutes
  • Total Time: 50 minutes
  • Yield: 15 servings
  • Category: Dessert
  • Method: Baking
  • Cuisine: Southern, American
Print Recipe
Pin Recipe

Description

This Mississippi Mud Cake recipe is a rich, gooey Southern classic featuring moist chocolate cake, a melted marshmallow layer, and a fudgy chocolate-pecan frosting. Perfect for parties, potlucks, and chocolate lovers alike, it’s a decadent dessert that’s easy to make and impossible to resist.


Ingredients

  • For the Cake:
  • 1 cup (2 sticks) unsalted butter
  • ½ cup unsweetened cocoa powder
  • 2 cups granulated sugar
  • 4 large eggs
  • 1 ½ cups all-purpose flour
  • ¼ teaspoon salt
  • 1 teaspoon vanilla extract
  • 1 ½ cups chopped pecans (optional)
  • 4 cups mini marshmallows
  • For the Frosting:
  • ½ cup unsalted butter
  • ⅓ cup unsweetened cocoa powder
  • ½ cup milk
  • 1 teaspoon vanilla extract
  • 1 (16-ounce) package powdered sugar, sifted

Instructions

  1. Preheat oven to 350°F (175°C) and grease a 9x13-inch baking pan.
  2. Melt butter in a saucepan over low heat, stir in cocoa until smooth.
  3. In a bowl, beat sugar and eggs. Add cocoa mixture and mix well.
  4. Stir in flour, salt, vanilla, and pecans (if using).
  5. Pour batter into pan and bake for 35 minutes.
  6. Immediately top hot cake with marshmallows; let soften.
  7. For frosting, melt butter in a saucepan. Add cocoa and milk, bring to a boil.
  8. Remove from heat; stir in vanilla and sifted powdered sugar until smooth.
  9. Pour frosting over marshmallows and spread evenly.
  10. Cool completely before slicing and serving.

Notes

  • Omit pecans for a nut-free version.
  • Swap pecans for walnuts or almonds if preferred.
  • Add chocolate chips to the batter for extra richness.
  • A spoonful of instant coffee enhances the chocolate flavor in frosting.
  • If frosting thickens too much, thin with a little extra milk.

Have you made this recipe? I'd love to see it!

Click here to Follow me on Pinterest

Creamy Crack Chicken Gnocchi

April 22, 2025 by Sue Leave a Comment

Creamy Crack Chicken Gnocchi is a rich and comforting dish that features tender chicken, fluffy gnocchi, and a cheesy ranch-style cream sauce. It's hearty, satisfying, and perfect for an easy weeknight meal or something special without a lot of work. Creamy Crack Chicken Gnocchi

Why You’ll Love This Recipe

I love how this recipe delivers so much flavor with just one pan. The creamy sauce, seasoned with herbs and ranch-inspired spices, coats every piece of gnocchi and chicken perfectly. It’s quick to make, requires minimal cleanup, and brings all the cozy vibes of comfort food.

Ingredients

(Here's a tip: Check out the full list of ingredients and measurements in the recipe card below.)

  • 2 small uncooked chicken breasts, approx 360g (12.7oz)

  • 3.5 cups (840ml) of chicken stock (low sodium)

  • 1 shallot, finely diced

  • 2 cloves of garlic, minced

  • ½ cup (120ml) of 2% milk

  • ½ tablespoon lemon juice

  • 175g of light cream cheese (or Laughing Cow light)

  • ½ tablespoon of cornstarch

  • 1 teaspoon of dried parsley

  • 1 teaspoon of dried chives

  • 1 teaspoon of onion powder

  • ½ teaspoon of dried dill

  • ½ teaspoon of garlic powder

  • 500g (17.5oz) of potato gnocchi (dry in a vacuum pack)

  • 60g (2.2oz) of cheddar, grated (do not use pre-grated)

  • Olive oil spray

  • Salt and black pepper

  • Fresh chopped parsley (or chopped spring onions or chives) for garnish

Directions

  1. Add chicken to a saucepan fully submerged in 2 cups (480ml) of the stock. Bring to a boil, then simmer for approximately 10-12 minutes until cooked. Drain, remove from pan, allow chicken to cool slightly, then slice into pieces and set aside. (If preferred, I can use the stock I poached the chicken in for the sauce, ensuring it equals 360ml.)

  2. While the chicken is poaching, spray a non-stick frying pan over medium-high heat with olive oil spray.

  3. In the same frying pan, spray a little more olive oil spray and add the shallot. Fry until lightly golden and softened.

  4. Add the minced garlic cloves and fry for 30 seconds to infuse the flavor.

  5. Add the remaining stock (1.5 cups/360ml), milk, lemon juice, dried herbs, dried seasoning, and light cream cheese. Whisk until it is all melted into the stock with no visible lumps. Mix the cornstarch with a couple of tablespoons of water and add this into the sauce, stirring as I do.

  6. Add the poached chicken and uncooked gnocchi. Bring to a boil, then let it bubble on medium heat for 5 minutes until the gnocchi is cooked and the sauce is creamy and thick. (If the sauce is not thickening, the heat may be too low.) Once the gnocchi is cooked and the sauce is thickened, taste and adjust seasoning with salt and black pepper if needed.

  7. Transfer to an ovenproof dish and top with the grated cheddar. Place under the grill (broil) for a couple of minutes until the cheddar is melted and very lightly golden.

  8. Garnish with some chopped fresh parsley (or spring onions or chives).

  9. Serve and enjoy!

Servings and Timing

  • Servings: 4

  • Prep Time: 15 minutes

  • Cook Time: 20 minutes

  • Total Time: 35 minutes

Variations

  • Add Veggies: I like to stir in spinach, kale, or peas during the last few minutes of cooking for added nutrition and color.

  • Spicy Option: A pinch of red pepper flakes or a splash of hot sauce gives the dish a nice kick.

  • Cheese Swap: I sometimes mix it up with gouda or mozzarella for a different flavor.

  • Herb Boost: Fresh herbs like thyme or basil give a brighter finish.

  • Vegetarian Version: I skip the chicken and use mushrooms or chickpeas for a protein-packed meatless version.

Storage/Reheating

  • Storage: I keep leftovers in an airtight container in the fridge for up to 3 days.

  • Reheating: I reheat gently on the stove or microwave in short bursts, stirring often. A splash of milk or broth helps revive the sauce if it thickens too much.

FAQs

Can I make this dish ahead of time?

Yes, I often prepare it earlier in the day and reheat just before serving. It holds up well and the flavors deepen over time.

What can I use instead of gnocchi?

If I don’t have gnocchi, I use cooked pasta like penne or rigatoni. The texture is different, but it still tastes great.

Is this recipe freezer-friendly?

It can be frozen, but the texture of the gnocchi may change. If I do freeze it, I let it cool completely first and use an airtight container.

Can I use leftover cooked chicken?

Absolutely. Leftover roasted or grilled chicken works perfectly. I just add it when the gnocchi goes into the sauce.

Is this dish suitable for kids?

Yes, most kids love it thanks to the creamy, cheesy sauce and soft gnocchi. I just skip the spicy add-ins for little ones.

Conclusion

Creamy Crack Chicken Gnocchi is a fuss-free dish that tastes like I’ve spent hours in the kitchen. The combination of juicy chicken, fluffy gnocchi, and that ranch-seasoned cheese sauce is simply irresistible. Whether I’m cooking for family or treating myself to a cozy night in, this recipe always hits the spot.

Print

clock clock iconcutlery cutlery iconflag flag iconfolder folder iconinstagram instagram iconpinterest pinterest iconfacebook facebook iconprint print iconsquares squares iconheart heart iconheart solid heart solid icon
Creamy Crack Chicken Gnocchi

Creamy Crack Chicken Gnocchi

5 Stars 4 Stars 3 Stars 2 Stars 1 Star No reviews
  • Author: Sue
  • Prep Time: 15 minutes
  • Cook Time: 20 minutes
  • Total Time: 35 minutes
  • Yield: 4 servings
  • Category: Dinner
  • Method: Stovetop + Broil
  • Cuisine: American
Print Recipe
Pin Recipe

Description

This Creamy Crack Chicken Gnocchi is the ultimate comfort food with tender chicken, soft gnocchi, and a rich ranch-style cream sauce. Made in one pan and ready in 35 minutes, it's perfect for cozy weeknights or quick family dinners.


Ingredients

  • 2 small uncooked chicken breasts (approx 360g)
  • 3.5 cups (840ml) low sodium chicken stock
  • 1 shallot, finely diced
  • 2 garlic cloves, minced
  • ½ cup (120ml) 2% milk
  • ½ tbsp lemon juice
  • 175g light cream cheese (or Laughing Cow light)
  • ½ tbsp cornstarch
  • 1 tsp dried parsley
  • 1 tsp dried chives
  • 1 tsp onion powder
  • ½ tsp dried dill
  • ½ tsp garlic powder
  • 500g potato gnocchi (dry, vacuum-packed)
  • 60g grated cheddar (not pre-grated)
  • Olive oil spray
  • Salt and black pepper, to taste
  • Fresh parsley, spring onions, or chives (for garnish)

Instructions

  1. Poach the chicken in 2 cups of stock for 10–12 minutes. Let cool, slice, and set aside.
  2. Spray a non-stick pan with olive oil and sauté shallots until softened.
  3. Add garlic and cook for 30 seconds.
  4. Add remaining stock, milk, lemon juice, herbs, and cream cheese. Whisk until smooth.
  5. Mix cornstarch with water and add to the sauce.
  6. Add chicken and uncooked gnocchi. Cook for 5 minutes until thickened.
  7. Transfer to an oven-safe dish, top with cheese, and broil until melted and lightly golden.
  8. Garnish and serve.

Notes

  • Add spinach, peas, or kale for extra veggies.
  • Use leftover cooked chicken to save time.
  • Reheat with a splash of milk or broth to maintain creamy texture.
  • Cheese swaps like gouda or mozzarella work well.
  • Optional: Add chili flakes or hot sauce for heat.

Have you made this recipe? I'd love to see it!

Click here to Follow me on Pinterest

Creamy Steak Pasta

April 22, 2025 by Sue Leave a Comment

Creamy Steak Pasta is a luxurious yet approachable dish that combines tender, seared steak with a rich, garlicky Parmesan cream sauce, all tossed with perfectly cooked pasta. It's the kind of meal that feels indulgent but is simple enough to prepare on a weeknight. Creamy Steak Pasta

Why You’ll Love This Recipe

I love how this recipe brings together the hearty satisfaction of a well-cooked steak with the comforting creaminess of pasta. The balance of flavors—from the savory steak to the rich sauce—makes it a standout dish that's both impressive and easy to make.

Ingredients

(Here's a tip: Check out the full list of ingredients and measurements in the recipe card below.)

  • 2 strip steaks
  • Steak seasoning
  • 2 tablespoons olive oil
  • 2 tablespoons butter
  • 2 tablespoons minced garlic
  • 1 tablespoon flour
  • 1 cup chicken broth
  • 1 cup heavy cream
  • 1 cup Parmesan cheese
  • 1 teaspoon red pepper flakes
  • ½ teaspoon each of oregano and thyme
  • ⅓ cup chopped sun-dried tomatoes
  • 16 oz pasta (I used Rigatoni)

Directions

  1. I start by seasoning the strip steaks with my preferred steak seasoning.
  2. In a large skillet over medium-high heat, I heat the olive oil and butter until hot.
  3. I add the steaks to the skillet and cook for about 5 minutes on each side, or until they reach my desired level of doneness. Then, I remove them from the skillet and set them aside.
  4. While the steaks are resting, I cook the pasta according to the package instructions, then drain and set aside.
  5. In the same skillet, I add the minced garlic and cook for about 1 minute.
  6. I sprinkle in the flour, stirring constantly to create a roux, and cook for another minute.
  7. I slowly pour in the chicken broth, stirring to combine, and let it simmer for a couple of minutes.
  8. I add the heavy cream, Parmesan cheese, red pepper flakes, oregano, thyme, and sun-dried tomatoes, stirring until the cheese is melted and the sauce is smooth.
  9. I add the cooked pasta to the sauce, tossing to coat evenly.
  10. I slice the rested steaks into thin strips and place them on top of the pasta.
  11. I serve the dish hot, garnished with additional Parmesan cheese if desired.

Servings and Timing

This recipe yields approximately 6 servings. The total preparation and cooking time is about 35 minutes, making it a great option for a satisfying weeknight dinner.

Variations

  • For a spicier kick, I sometimes add extra red pepper flakes.
  • To incorporate more vegetables, I like to add sautéed mushrooms or spinach to the sauce.
  • If I'm in the mood for a different protein, grilled chicken or shrimp work well as substitutes for the steak.
  • For a lighter version, I use half-and-half instead of heavy cream.

Storage/Reheating

I store any leftovers in an airtight container in the refrigerator for up to 3 days. To reheat, I gently warm the pasta in a skillet over low heat, adding a splash of milk or cream to loosen the sauce if necessary. I prefer not to freeze this dish, as the cream sauce can separate upon thawing.

FAQs

What type of steak is best for this pasta?

I find that strip steaks work well due to their balance of flavor and tenderness. However, ribeye or sirloin are also excellent choices.

Can I make the sauce ahead of time?

Yes, I often prepare the sauce in advance and store it in the refrigerator for up to 2 days. I reheat it gently on the stove before tossing it with freshly cooked pasta and steak.

Is there a dairy-free alternative for the cream sauce?

For a dairy-free version, I use coconut cream or a plant-based cream substitute and nutritional yeast in place of Parmesan cheese.

What pasta shapes work best with this dish?

I prefer using short pasta shapes like Rigatoni or Penne, as they hold the sauce well. However, long noodles like Fettuccine or Linguine also pair nicely.

How can I make this dish gluten-free?

To make this recipe gluten-free, I use gluten-free pasta and substitute the flour in the sauce with a gluten-free alternative like cornstarch or a gluten-free flour blend.

Conclusion

Creamy Steak Pasta is a delightful fusion of rich flavors and comforting textures. Whether I'm cooking for a special occasion or simply indulging in a hearty meal, this dish never fails to impress. I hope you enjoy making and savoring it as much as I do.

Print

clock clock iconcutlery cutlery iconflag flag iconfolder folder iconinstagram instagram iconpinterest pinterest iconfacebook facebook iconprint print iconsquares squares iconheart heart iconheart solid heart solid icon
Creamy Steak Pasta

Creamy Steak Pasta

5 Stars 4 Stars 3 Stars 2 Stars 1 Star No reviews
  • Author: Sue
  • Prep Time: 10 minutes
  • Cook Time: 25 minutes
  • Total Time: 35 minutes
  • Yield: 6 servings
  • Category: Dinner
  • Method: Stovetop
  • Cuisine: American, Italian-Inspired
Print Recipe
Pin Recipe

Description

Creamy Steak Pasta is a decadent yet simple dish that features juicy, pan-seared steak in a garlicky Parmesan cream sauce, tossed with hearty pasta like Rigatoni. Perfect for an indulgent weeknight dinner or a special occasion, this recipe delivers bold flavor and rich, satisfying comfort in every bite.


Ingredients

  • 2 strip steaks
  • Steak seasoning (to taste)
  • 2 tablespoons olive oil
  • 2 tablespoons butter
  • 2 tablespoons minced garlic
  • 1 tablespoon flour
  • 1 cup chicken broth
  • 1 cup heavy cream
  • 1 cup Parmesan cheese
  • 1 teaspoon red pepper flakes
  • ½ teaspoon oregano
  • ½ teaspoon thyme
  • ⅓ cup chopped sun-dried tomatoes
  • 16 oz Rigatoni pasta (or your preferred shape)

Instructions

  1. Season the strip steaks with steak seasoning.
  2. Heat olive oil and butter in a large skillet over medium-high heat.
  3. Sear the steaks for 5 minutes per side or until desired doneness. Remove and let rest.
  4. Cook pasta according to package directions. Drain and set aside.
  5. In the same skillet, sauté garlic for 1 minute.
  6. Stir in flour to create a roux and cook for another minute.
  7. Gradually add chicken broth, simmering for 2 minutes.
  8. Stir in heavy cream, Parmesan, red pepper flakes, oregano, thyme, and sun-dried tomatoes. Cook until smooth.
  9. Toss cooked pasta into the sauce until well coated.
  10. Slice rested steak and place over pasta.
  11. Serve hot with extra Parmesan if desired.

Notes

  • For extra spice, increase red pepper flakes.
  • Add veggies like spinach or mushrooms for variety.
  • Grilled chicken or shrimp are tasty protein alternatives.
  • Half-and-half can replace heavy cream for a lighter sauce.
  • Reheat gently with a splash of milk or cream. Best consumed within 3 days.

Have you made this recipe? I'd love to see it!

Click here to Follow me on Pinterest

Crispy Potato Salad

April 21, 2025 by Sue Leave a Comment

This Crispy Potato Salad takes the classic comfort of a traditional potato salad and gives it a bold twist with golden, oven-roasted potatoes. Each bite delivers a satisfying crunch wrapped in a creamy, herby dressing that’s fresh and tangy. It's a side dish that instantly upgrades any meal. Crispy Potato Salad

Why You’ll Love This Recipe

  • I love the contrast between the crispy potatoes and the smooth, flavorful dressing.
  • It’s a great make-ahead option—I can roast the potatoes in advance and mix everything right before serving.
  • This dish brings something new to the table at cookouts, picnics, or weeknight dinners.
  • I don’t have to peel the potatoes, which saves time and keeps the texture interesting.
  • The ingredients are simple, but the results taste gourmet.

Ingredients

(Here's a tip: Check out the full list of ingredients and measurements in the recipe card below.)

  • Yukon gold potatoes
  • Olive oil
  • Garlic powder
  • Salt
  • Black pepper
  • Sour cream
  • Mayonnaise
  • Scallions
  • Fresh dill
  • Fresh parsley
  • Dijon mustard
  • Lemon juice

Directions

  1. I add cubed Yukon gold potatoes to a large pot of cold salted water and bring it to a boil. Then I simmer them until fork-tender, around 12 to 16 minutes. I drain them well.
  2. I preheat the oven to 400°F and line a baking sheet with foil. I toss the drained potatoes with olive oil, garlic powder, salt, and pepper. I spread them out and roast until crispy and golden brown, about 30 minutes.
  3. While the potatoes roast, I mix sour cream, mayonnaise, Dijon mustard, lemon juice, and chopped herbs in a large bowl. I reserve a few scallions and herbs for garnish.
  4. Once the potatoes are crispy, I let them cool slightly, then toss them in the dressing just before serving. I garnish with the reserved scallions, dill, and parsley.

Servings and timing

  • Servings: 6
  • Prep Time: 15 minutes
  • Cook Time: 30 minutes
  • Total Time: 45 minutes

Variations

  • I swap sour cream for Greek yogurt for a lighter option with extra tang.
  • I chop in a few hard-boiled eggs for a protein boost.
  • Sometimes I add chopped dill pickles or relish for a briny bite.
  • If I want a smokier flavor, I add a sprinkle of smoked paprika.

Storage/Reheating

  • I keep leftovers in the fridge in an airtight container for up to 3 days.
  • Since this is a chilled salad, I don’t usually reheat it, but if I want to warm it up, I use a low oven for a few minutes to maintain some of the crispiness.
  • I always wait to mix the potatoes with the dressing until right before serving if I’m making it ahead.

FAQs

Can I use red potatoes instead of Yukon gold?

Yes, I can. Red potatoes hold their shape well and also roast beautifully.

How do I keep the potatoes from getting soggy?

I make sure they’re completely dry after boiling and I don’t overcrowd the pan when roasting.

Can I make this potato salad dairy-free?

I can substitute dairy-free sour cream and mayo to make it suitable for a dairy-free diet.

What’s the best way to re-crisp leftover potatoes?

If I haven’t mixed them with dressing yet, I reheat them in a 400°F oven for about 10 minutes to bring back the crisp.

Can I serve this salad warm?

Absolutely. I actually like serving it warm right after roasting the potatoes—it makes the flavors really pop.

Conclusion

This Crispy Potato Salad is everything I love in a side dish—bold, fresh, and easy to throw together. It’s the kind of recipe that disappears fast at the dinner table, whether it’s a backyard BBQ or a quiet weeknight meal. I keep it in my rotation for when I want something comforting with just the right amount of crunch.

Print

clock clock iconcutlery cutlery iconflag flag iconfolder folder iconinstagram instagram iconpinterest pinterest iconfacebook facebook iconprint print iconsquares squares iconheart heart iconheart solid heart solid icon
Crispy Potato Salad

Crispy Potato Salad

5 Stars 4 Stars 3 Stars 2 Stars 1 Star No reviews
  • Author: Sue
  • Prep Time: 15 minutes
  • Cook Time: 30 minutes
  • Total Time: 45 minutes
  • Yield: 6 servings
  • Category: Side Dish
  • Method: Roasting, Mixing
  • Cuisine: American
Print Recipe
Pin Recipe

Description

This Crispy Potato Salad takes traditional potato salad to a whole new level with golden roasted Yukon gold potatoes, tossed in a creamy herb dressing. Packed with flavor, crunch, and freshness, this roasted potato salad is the perfect side dish for BBQs, cookouts, and weeknight dinners. Easy to prepare and make-ahead friendly, it's a modern twist on a classic that will impress every time.


Ingredients

  • Yukon gold potatoes
  • Olive oil
  • Garlic powder
  • Salt
  • Black pepper
  • Sour cream
  • Mayonnaise
  • Dijon mustard
  • Lemon juice
  • Scallions
  • Fresh dill
  • Fresh parsley

Instructions

  1. Add cubed Yukon gold potatoes to a pot of cold salted water. Bring to a boil and simmer until fork-tender, 12–16 minutes. Drain well.
  2. Preheat oven to 400°F. Toss drained potatoes with olive oil, garlic powder, salt, and pepper. Spread on a foil-lined baking sheet. Roast for 30 minutes or until crispy and golden.
  3. In a large bowl, mix sour cream, mayonnaise, Dijon mustard, lemon juice, chopped scallions, dill, and parsley. Reserve some herbs and scallions for garnish.
  4. Let the roasted potatoes cool slightly, then gently toss with dressing. Garnish and serve.

Notes

  • Use Greek yogurt in place of sour cream for a lighter version.
  • Add hard-boiled eggs, chopped pickles for extra flavor.
  • Only toss potatoes with dressing just before serving to keep them crisp.
  • Red potatoes are a great substitute for Yukon gold.

Have you made this recipe? I'd love to see it!

Click here to Follow me on Pinterest

Marinated Cucumber, Onion, and Tomato Salad

April 21, 2025 by Sue Leave a Comment

This marinated cucumber, onion, and tomato salad is a cool, tangy, and colorful side dish that I love making when the weather warms up. It's a classic combo that soaks up a punchy marinade, perfect for picnics, potlucks, or as a refreshing pairing to grilled mains. Marinated Cucumber, Onion, and Tomato Salad

Why I Love This Recipe

I love how this salad comes together in minutes with fresh, everyday ingredients. It’s crisp, juicy, and full of that delicious tangy flavor from the marinade. Since it gets better the longer it sits, I like making it ahead of time for easy prep and even better taste. It’s also super versatile and goes with just about anything.

Ingredients

(Here's a tip: Check out the full list of ingredients and measurements in the recipe card below.)

  • 3 medium cucumbers, peeled and sliced into ¼-inch rounds
  • 3 medium tomatoes, cut into wedges
  • 1 medium onion, thinly sliced into rings
  • 1 cup water
  • ½ cup distilled white vinegar
  • ¼ cup vegetable oil
  • ¼ cup sugar
  • 1 teaspoon salt
  • 1 teaspoon freshly ground black pepper

Directions

  1. In a large bowl, I whisk together the water, vinegar, oil, sugar, salt, and pepper until the sugar dissolves.
  2. I add the cucumbers, tomatoes, and onion slices to the bowl.
  3. I gently toss everything together so the vegetables are fully coated in the marinade.
  4. I cover the bowl and let it chill in the fridge for at least 2 hours, though I like it best when it marinates overnight.
  5. Before serving, I give it a quick stir to make sure everything is still well coated.

Servings and Timing

  • Servings: 6
  • Prep time: 15 minutes
  • Marinate time: At least 2 hours
  • Total time: About 2 hours 15 minutes

Variations

  • I sometimes toss in fresh herbs like dill, basil, or parsley to add a burst of freshness.
  • If I’m out of white vinegar, I use apple cider vinegar or red wine vinegar for a slightly different flavor.
  • To make it less sweet, I reduce the sugar or swap it for honey.
  • A pinch of crushed red pepper flakes gives it a gentle heat if I’m craving a little kick.

Storage/Reheating

I keep leftovers in an airtight container in the refrigerator for up to 3 days. The vegetables continue to absorb the marinade, so the flavor deepens, though they do soften a bit. I don’t reheat this salad—it's meant to be served cold and crisp.

FAQs

How long does this salad last in the fridge?

I usually keep it for up to 3 days in the fridge. After that, the veggies lose too much crunch for my taste.

Do I have to peel the cucumbers?

Not at all. I peel them when I want a softer texture, but I also leave the peel on sometimes for a firmer bite and more color.

Can I use a different type of onion?

Yes, I’ve used red onions and sweet onions. Red onions give a sharper bite, while sweet ones mellow out the salad.

Can I make this ahead of time?

Definitely. In fact, I prefer making it the day before serving so the flavors have more time to come together.

What can I serve this with?

I usually serve it with grilled chicken, burgers, or sandwiches. It’s also great next to barbecue dishes or spicy food as a cooling side.

Conclusion

This marinated cucumber, onion, and tomato salad is one of those simple recipes I keep coming back to. It’s quick, refreshing, and always a hit at the table. Whether I’m prepping for a backyard meal or just need a flavorful side in a hurry, this one never disappoints.

Print

clock clock iconcutlery cutlery iconflag flag iconfolder folder iconinstagram instagram iconpinterest pinterest iconfacebook facebook iconprint print iconsquares squares iconheart heart iconheart solid heart solid icon
Marinated Cucumber, Onion, and Tomato Salad

Marinated Cucumber, Onion, and Tomato Salad

5 Stars 4 Stars 3 Stars 2 Stars 1 Star No reviews
  • Author: Sue
  • Prep Time: 15 minutes
  • Cook Time: 0 minutes
  • Total Time: 2 hours 15 minutes (including marinating)
  • Yield: 6 servings
  • Category: Salad
  • Method: Marinating (No-Cook)
  • Cuisine: American
  • Diet: Gluten Free
Print Recipe
Pin Recipe

Description

This marinated cucumber, onion, and tomato salad is a tangy, refreshing summer side dish made with crisp cucumbers, juicy tomatoes, and zesty onions. Perfect for BBQs, potlucks, and picnics, this easy make-ahead salad bursts with flavor thanks to its simple vinegar-based marinade. A quick, healthy, and colorful addition to any warm-weather menu.


Ingredients

  • 3 medium cucumbers, peeled and sliced into ¼-inch rounds
  • 3 medium tomatoes, cut into wedges
  • 1 medium onion, thinly sliced into rings
  • 1 cup water
  • ½ cup distilled white vinegar
  • ¼ cup vegetable oil
  • ¼ cup sugar
  • 1 teaspoon salt
  • 1 teaspoon freshly ground black pepper

Instructions

  1. In a large bowl, whisk together the water, vinegar, oil, sugar, salt, and pepper until the sugar fully dissolves.
  2. Add cucumbers, tomatoes, and onion slices to the bowl.
  3. Gently toss to coat all the vegetables evenly in the marinade.
  4. Cover and refrigerate for at least 2 hours, preferably overnight for best flavor.
  5. Stir before serving to redistribute the marinade.

Notes

  • Add fresh herbs like dill or parsley for extra brightness.
  • Swap white vinegar with apple cider for variation.
  • Adjust sweetness by reducing sugar or using honey.
  • For a touch of heat, sprinkle in crushed red pepper flakes.
  • Salad is best served chilled and gets more flavorful the longer it marinates.

Have you made this recipe? I'd love to see it!

Click here to Follow me on Pinterest

Meaty Texas Trash Dip

April 21, 2025 by Sue Leave a Comment

This Meaty Texas Trash Dip is a warm, cheesy, and indulgent appetizer that layers creamy, spicy, and savory flavors into every bite. It's the kind of dip I like to serve when I want to impress without too much effort. Perfect for parties, game day, or casual snacking, it never sticks around for long once it hits the table. Meaty Texas Trash Dip

Why You’ll Love This Recipe

I love how simple this dip is to pull together, yet it delivers huge flavor. The creamy blend of cheeses mixed with refried beans and seasoned ground beef creates the ultimate comfort food. It’s filling enough to be a meal, but made to share. Whether I’m feeding a crowd or just indulging myself, this dip always hits the spot. I also enjoy how customizable it is depending on what I have in the pantry or fridge.

Ingredients

(Here's a tip: Check out the full list of ingredients and measurements in the recipe card below.)

  • 1 pound ground beef
  • 1 medium onion, diced
  • 2 cloves garlic, minced
  • 1 (8 oz) package of cream cheese, softened
  • 1 cup sour cream
  • 1 (10 oz) can diced tomatoes with green chilies, drained
  • 1 (15 oz) can refried beans
  • 2 teaspoons chili powder
  • 1 teaspoon cumin
  • ½ teaspoon salt
  • ½ teaspoon black pepper
  • 2 cups cheddar cheese, shredded
  • ½ cup green onions, chopped for garnish
  • Tortilla chips, for serving

Directions

  1. I preheat the oven to 350°F and lightly grease a 9×13-inch baking dish.
  2. In a skillet over medium heat, I brown the ground beef with the diced onion and minced garlic. Once cooked, I drain the excess fat.
  3. I reduce the heat and stir in the cream cheese and sour cream until it’s fully melted and smooth.
  4. Then, I mix in the diced tomatoes with green chilies, refried beans, chili powder, cumin, salt, and black pepper until everything is well combined.
  5. I spread the mixture evenly in the baking dish, top it with shredded cheddar cheese, and bake for 20–25 minutes until hot and bubbly.
  6. Just before serving, I sprinkle chopped green onions on top and serve it hot with tortilla chips.

Servings and Timing

  • Servings: 8–10
  • Prep Time: 10 minutes
  • Cook Time: 45 minutes
  • Total Time: 55 minutes

Variations

  • To make it spicier, I like to stir in chopped jalapeños or use a spicier variety of tomatoes with chilies.
  • For a vegetarian version, I skip the ground beef and double up on refried beans or use a plant-based ground meat.
  • I sometimes swap the cheddar cheese for Monterey Jack or Pepper Jack if I want a creamier or zestier flavor.
  • I can also layer in corn or black beans for extra texture and taste.

Storage/Reheating

  • I store leftovers in an airtight container in the fridge for up to 4 days.
  • To reheat, I use the microwave for quick single portions or warm it in the oven at 350°F until heated through.
  • If it thickens up too much, I stir in a splash of milk or cream to bring it back to life.

FAQs

Can I make this dip in advance?

Yes, I prepare everything ahead of time, store it covered in the fridge, and bake it just before serving. It’s perfect for prepping the night before.

Can I use another type of meat?

Definitely. I’ve made it with ground turkey and even ground chicken. The seasoning keeps it flavorful regardless of the meat used.

Is it okay to use store-bought taco seasoning instead of individual spices?

Yes, if I’m in a rush, I use a tablespoon of taco seasoning in place of the chili powder, cumin, salt, and pepper.

What should I serve this dip with?

I usually go for tortilla chips, but it also tastes great with pita chips, crackers, or even as a topping for baked potatoes or nachos.

Can I freeze leftovers?

I don’t usually recommend freezing because of the dairy, which can separate when thawed. It’s best enjoyed fresh or within a few days from the fridge.

Conclusion

Meaty Texas Trash Dip is one of those no-fail recipes that I turn to again and again. It’s rich, satisfying, and always gets people coming back for seconds. Whether I’m serving it at a party or just digging in during a quiet night at home, it delivers comfort in every scoop.

Print

clock clock iconcutlery cutlery iconflag flag iconfolder folder iconinstagram instagram iconpinterest pinterest iconfacebook facebook iconprint print iconsquares squares iconheart heart iconheart solid heart solid icon
Meaty Texas Trash Dip

Meaty Texas Trash Dip

5 Stars 4 Stars 3 Stars 2 Stars 1 Star No reviews
  • Author: Sue
  • Prep Time: 10 minutes
  • Cook Time: 45 minutes
  • Total Time: 55 minutes
  • Yield: 8–10 servings
  • Category: Appetizer
  • Method: Baking
  • Cuisine: Tex-Mex
Print Recipe
Pin Recipe

Description

This Meaty Texas Trash Dip is the ultimate game day or party appetizer, loaded with creamy refried beans, spicy ground beef, and melty cheddar cheese. Quick to prep and baked until bubbly, this Tex-Mex layered dip is perfect for feeding a crowd. Serve it hot with tortilla chips for a bold, cheesy indulgence that’s always a hit.


Ingredients

  • 1 pound ground beef
  • 1 medium onion, diced
  • 2 cloves garlic, minced
  • 1 (8 oz) package cream cheese, softened
  • 1 cup sour cream
  • 1 (10 oz) can diced tomatoes with green chilies, drained
  • 1 (15 oz) can refried beans
  • 2 teaspoons chili powder
  • 1 teaspoon cumin
  • ½ teaspoon salt
  • ½ teaspoon black pepper
  • 2 cups cheddar cheese, shredded
  • ½ cup green onions, chopped (for garnish)
  • Tortilla chips, for serving

Instructions

  1. Preheat oven to 350°F and lightly grease a 9×13-inch baking dish.
  2. In a skillet over medium heat, brown ground beef with diced onion and garlic; drain excess fat.
  3. Reduce heat, then stir in cream cheese and sour cream until melted and smooth.
  4. Mix in diced tomatoes with green chilies, refried beans, chili powder, cumin, salt, and pepper.
  5. Spread the mixture evenly into the prepared dish and top with shredded cheddar cheese.
  6. Bake for 20–25 minutes until hot and bubbly.
  7. Garnish with chopped green onions and serve hot with tortilla chips.

Notes

  • Spice it up with jalapeños or hot diced tomatoes.
  • Substitute ground turkey or chicken if preferred.
  • Swap cheddar with Monterey Jack or Pepper Jack for different flavors.
  • Add corn or black beans for extra texture.
  • Store leftovers in an airtight container in the fridge for up to 4 days. Reheat in the oven or microwave.

Have you made this recipe? I'd love to see it!

Click here to Follow me on Pinterest

Greek Chicken Gyros with Cucumber Tzatziki

April 21, 2025 by Sue Leave a Comment

Greek Chicken Gyros with Cucumber Tzatziki is a beloved Mediterranean dish that combines juicy, marinated chicken with a refreshing cucumber-yogurt sauce, all wrapped in warm pita bread. This recipe brings together the vibrant flavors of Greece in a satisfying and wholesome meal. Greek Chicken Gyros with Cucumber Tzatziki

Why I Love This Recipe

I love this recipe because it's a harmonious blend of flavors and textures. The tender, flavorful chicken pairs perfectly with the cool, creamy tzatziki sauce. It's a versatile dish that's great for casual family dinners or entertaining guests. Plus, it's customizable to suit different tastes and dietary preferences.

Ingredients

(Here's a tip: Check out the full list of ingredients and measurements in the recipe card below.)

For the Chicken Marinade:

  • Chicken thighs or breasts
  • Greek yogurt
  • Fresh lemon juice
  • Extra virgin olive oil
  • Apple cider vinegar
  • Garlic cloves, minced
  • Dried oregano
  • Salt and pepper

For the Tzatziki Sauce:

  • Greek yogurt
  • Cucumber, grated and squeezed to remove excess water
  • Garlic cloves, minced
  • Fresh dill, chopped
  • Lemon juice
  • Extra virgin olive oil
  • Salt and pepper

For the Greek Salad:

  • Tomatoes, diced
  • Cucumber, peeled and diced
  • Red onion, diced
  • Fresh parsley, chopped
  • Extra virgin olive oil
  • Salt and pepper
  • Feta cheese (optional)

To Serve:

  • Pita bread or flatbread
  • Additional toppings like lettuce, olives, or more feta cheese (optional)

Directions

  1. Marinate the Chicken: In a bowl, combine Greek yogurt, lemon juice, olive oil, apple cider vinegar, minced garlic, dried oregano, salt, and pepper. Add the chicken pieces and coat them thoroughly with the marinade. Cover and refrigerate for at least 2 hours, preferably overnight.
  2. Prepare the Tzatziki Sauce: In a separate bowl, mix Greek yogurt, grated cucumber (ensure it's well-drained), minced garlic, chopped fresh dill, lemon juice, olive oil, salt, and pepper. Stir until well combined. Refrigerate until ready to use.
  3. Make the Greek Salad: Combine diced tomatoes, cucumber, red onion, and chopped parsley in a bowl. Drizzle with olive oil, season with salt and pepper, and toss gently. Add feta cheese if desired.
  4. Cook the Chicken: Preheat a grill or skillet over medium-high heat. Remove the chicken from the marinade and cook for about 5-7 minutes on each side, or until fully cooked and nicely charred. Let it rest for a few minutes before slicing.
  5. Assemble the Gyros: Warm the pita bread. Place sliced chicken in the center, top with Greek salad and a generous dollop of tzatziki sauce. Add any additional toppings I like. Fold the pita over the fillings and serve immediately.

Servings and Timing

  • Servings: 4-6
  • Prep Time: 20 minutes
  • Marinating Time: At least 2 hours (preferably overnight)
  • Cook Time: 15 minutes
  • Total Time: Approximately 2 hours and 35 minutes

Variations

  • Protein Alternatives: Substitute chicken with lamb, beef, or grilled vegetables for a vegetarian option.
  • Bread Choices: Use naan or whole wheat wraps instead of traditional pita.
  • Additional Toppings: Add pickled onions, olives, or spicy sauces for extra flavor.

Storage/Reheating

  • Storage: Store leftover chicken, tzatziki sauce, and salad separately in airtight containers in the refrigerator. They will keep well for up to 3 days.
  • Reheating: Reheat the chicken in a skillet over medium heat until warmed through. Assemble the gyros just before serving to maintain freshness.

FAQs

What type of chicken is best for gyros?

I prefer using boneless, skinless chicken thighs for their juiciness and flavor, but chicken breasts work well too if I prefer leaner meat.

Can I make the tzatziki sauce ahead of time?

Yes, I often prepare the tzatziki sauce a day in advance. It allows the flavors to meld beautifully.

Is it necessary to marinate the chicken overnight?

While marinating overnight yields the most flavorful results, marinating for at least 2 hours will still infuse the chicken with great taste.

Can I grill the chicken instead of using a skillet?

Absolutely! Grilling adds a delightful smoky flavor to the chicken, enhancing the overall taste of the gyros.

What can I serve with chicken gyros?

I like to serve them with a side of roasted potatoes, a simple Greek salad, or even some hummus and pita chips for a complete meal.

Conclusion

Greek Chicken Gyros with Cucumber Tzatziki is a delightful dish that brings the essence of Mediterranean cuisine to the table. With its flavorful marinated chicken, refreshing tzatziki sauce, and crisp salad, it's a meal that's both satisfying and versatile. Whether I’m making it for a family dinner or a casual get-together, it always hits the spot.

Print

clock clock iconcutlery cutlery iconflag flag iconfolder folder iconinstagram instagram iconpinterest pinterest iconfacebook facebook iconprint print iconsquares squares iconheart heart iconheart solid heart solid icon
Greek Chicken Gyros with Cucumber Tzatziki

Greek Chicken Gyros with Cucumber Tzatziki

5 Stars 4 Stars 3 Stars 2 Stars 1 Star No reviews
  • Author: Sue
  • Prep Time: 20 minutes
  • Cook Time: 15 minutes
  • Total Time: 2 hours 35 minutes (includes marinating)
  • Yield: 4–6 servings
  • Category: Dinner, Main Course
  • Method: Grilling, Skillet
  • Cuisine: Greek, Mediterranean
  • Diet: Gluten Free
Print Recipe
Pin Recipe

Description

This Greek Chicken Gyros with Cucumber Tzatziki recipe is a flavorful and easy Mediterranean meal featuring juicy marinated chicken, creamy tzatziki sauce, and fresh veggies wrapped in warm pita. Made with apple cider vinegar for a balanced tang, it's perfect for weeknight dinners or weekend gatherings.


Ingredients

  • For the Chicken Marinade:
  • Chicken thighs or breasts
  • Greek yogurt
  • Fresh lemon juice
  • Extra virgin olive oil
  • Apple cider vinegar
  • Garlic cloves, minced
  • Dried oregano
  • Salt and pepper
  • For the Tzatziki Sauce:
  • Greek yogurt
  • Cucumber, grated and squeezed
  • Garlic cloves, minced
  • Fresh dill, chopped
  • Lemon juice
  • Extra virgin olive oil
  • Salt and pepper
  • For the Greek Salad:
  • Tomatoes, diced
  • Cucumber, peeled and diced
  • Red onion, diced
  • Fresh parsley, chopped
  • Extra virgin olive oil
  • Salt and pepper
  • Feta cheese (optional)
  • To Serve:
  • Pita bread or flatbread
  • Optional toppings: lettuce, olives, extra feta

Instructions

  1. Marinate Chicken: Mix all marinade ingredients in a bowl. Add chicken and coat thoroughly. Cover and refrigerate for at least 2 hours or overnight.
  2. Make Tzatziki: In another bowl, combine Greek yogurt, drained cucumber, garlic, dill, lemon juice, olive oil, salt, and pepper. Mix well and chill.
  3. Prepare Salad: Toss tomatoes, cucumber, onion, and parsley with olive oil, salt, and pepper. Add feta if desired.
  4. Cook Chicken: Grill or sear chicken over medium-high heat until cooked and lightly charred, about 5–7 minutes per side. Let rest before slicing.
  5. Assemble Gyros: Warm pita, layer with chicken, salad, and tzatziki. Add extra toppings if desired. Fold and serve.

Notes

  • Chicken: Thighs offer more flavor, but breasts are leaner.
  • Tzatziki Tip: Make it ahead to let the flavors meld.
  • Serving Suggestion: Pair with hummus, olives, or roasted potatoes.

Have you made this recipe? I'd love to see it!

Click here to Follow me on Pinterest

Italian Lemon Cream Cake

April 21, 2025 by Sue Leave a Comment

This Italian Lemon Cream Cake is a light, refreshing dessert layered with tangy lemon flavor and silky cream. It’s the kind of cake I turn to when I want something that feels both indulgent and bright. With soft, lemon-infused cake layers and a smooth, citrusy cream filling, this recipe always brings a little sunshine to the table. Italian Lemon Cream Cake

Why I Love This Recipe

I love how this cake perfectly balances rich creaminess with the zesty pop of fresh lemon. It feels elegant but isn’t complicated to make. Every bite has that melt-in-your-mouth texture, and the flavor is so fresh and vibrant. It’s one of those desserts I can serve at a dinner party or enjoy with a coffee on a quiet afternoon. Plus, the scent of lemons while baking? Absolutely irresistible.

Ingredients

(Here's a tip: Check out the full list of ingredients and measurements in the recipe card below.)

For the Cake Layers

  • all-purpose flour
  • baking powder
  • baking soda
  • granulated sugar
  • unsalted butter
  • eggs
  • whole milk or buttermilk
  • fresh lemon zest
  • fresh lemon juice
  • pinch of salt

For the Lemon Cream Filling

  • cream cheese
  • powdered sugar
  • fresh lemon juice
  • heavy whipping cream

For the Frosting and Garnish

  • whipped cream
  • fresh lemon zest or thin lemon slices
  • powdered sugar (optional)

Directions

  1. Make the Cake Layers
    I start by preheating the oven to 350°F (175°C) and greasing two 9-inch round cake pans. I whisk the flour, baking powder, baking soda, and salt together in one bowl. In another bowl, I cream the butter and sugar until light and fluffy, then beat in the eggs one at a time. I mix in the lemon zest and juice before alternating the dry ingredients and milk into the butter mixture. Once combined, I divide the batter between the pans and bake for about 25-30 minutes, until a toothpick comes out clean. After 10 minutes of cooling in the pan, I transfer the cakes to a rack to cool completely.
  2. Prepare the Lemon Cream Filling
    While the cake cools, I beat cream cheese until smooth, then add powdered sugar and lemon juice. Separately, I whip the cream to stiff peaks and gently fold it into the lemon-cheese mixture to make it light and fluffy.
  3. Assemble the Cake
    I place one cake layer on a serving plate and spread the lemon cream filling generously over it. Then I top it with the second layer and coat the whole cake with more filling or whipped cream if I want it extra decadent.
  4. Decorate
    I finish by garnishing with lemon zest, a few delicate lemon slices, or a dusting of powdered sugar. Chilling it for a couple of hours really helps the flavors blend beautifully.

Servings and Timing

  • Servings: 12
  • Prep Time: 30 minutes
  • Cook Time: 25–30 minutes
  • Chill Time: 2 hours
  • Total Time: about 3 hours

Variations

  • Limoncello Cake: I sometimes replace some of the milk with limoncello for a grown-up version with more punch.
  • Berry Twist: I like adding a layer of raspberries or blueberries between the cake and filling.
  • Gluten-Free: Swapping in a 1:1 gluten-free flour blend works well for me.
  • Extra Creamy: Doubling the filling gives a taller, creamier cake if I want to impress guests.

Storage/Reheating

  • Refrigerator: I store leftovers in an airtight container in the fridge for up to 3 days.
  • Freezer: I wrap slices in plastic wrap and freeze them for up to 1 month.
  • Serving: I prefer serving this cake chilled or at room temperature. I don’t reheat it, since the cream filling is best cold.

FAQs

Can I use bottled lemon juice instead of fresh?

I can, but I find fresh lemon juice gives a much better flavor and aroma to the cake and filling.

How do I stop the cake from sticking to the pans?

I always grease and flour the pans well and sometimes line the bottom with parchment paper just to be safe.

What can I substitute for cream cheese?

Mascarpone works nicely if I want a milder, more delicate flavor in the filling.

Can I make this cake in advance?

Yes, I often bake the cake layers a day ahead and assemble everything the next day. It actually tastes better after chilling overnight.

Do I have to use whipped cream on top?

No, but I like the lightness it adds. I’ve also topped it with lemon glaze or left it plain for a more rustic feel.

Conclusion

This Italian Lemon Cream Cake is one of those desserts that looks as good as it tastes. It’s refreshing, elegant, and just the right amount of indulgent. Whether I’m baking it for a celebration or a simple gathering, it always leaves people smiling—and asking for seconds.

Print

clock clock iconcutlery cutlery iconflag flag iconfolder folder iconinstagram instagram iconpinterest pinterest iconfacebook facebook iconprint print iconsquares squares iconheart heart iconheart solid heart solid icon
Italian Lemon Cream Cake

Italian Lemon Cream Cake

5 Stars 4 Stars 3 Stars 2 Stars 1 Star No reviews
  • Author: Sue
  • Prep Time: 30 minutes
  • Chill Time:: 2 hours
  • Cook Time: 25–30 minutes
  • Total Time: ~3 hours
  • Yield: 12 servings
  • Category: Dessert
  • Method: Baking
  • Cuisine: Italian-Inspired
  • Diet: Vegetarian
Print Recipe
Pin Recipe

Description

This Italian Lemon Cream Cake is the ultimate blend of zesty lemon flavor and velvety cream, perfect for spring gatherings, Easter, or any occasion that calls for a light yet indulgent dessert. With layers of moist lemon-infused cake and a fluffy lemon cream filling, it’s a refreshing twist on classic Italian desserts. Keywords: Italian Lemon Cream Cake, lemon dessert, spring cake recipe, lemon cream cake recipe.


Ingredients

  • For the Cake Layers:
  • All-purpose flour
  • Baking powder
  • Baking soda
  • Pinch of salt
  • Granulated sugar
  • Unsalted butter
  • Eggs
  • Whole milk or buttermilk
  • Fresh lemon zest
  • Fresh lemon juice
  • For the Lemon Cream Filling:
  • Cream cheese
  • Powdered sugar
  • Fresh lemon juice
  • Heavy whipping cream
  • For Frosting and Garnish:
  • Whipped cream
  • Fresh lemon zest or thin lemon slices
  • Powdered sugar (optional)

Instructions

  1. Preheat & Prep Pans: Preheat oven to 350°F (175°C). Grease and flour two 9-inch round cake pans.
  2. Mix Dry Ingredients: In a bowl, whisk flour, baking powder, baking soda, and salt.
  3. Cream Butter & Sugar: In another bowl, beat butter and sugar until fluffy. Add eggs one at a time, then stir in lemon zest and juice.
  4. Combine & Bake: Alternate adding dry ingredients and milk into the butter mixture. Divide into pans and bake 25–30 minutes. Cool completely.
  5. Make Filling: Beat cream cheese, then add powdered sugar and lemon juice. Whip cream separately and fold into lemon mixture.
  6. Assemble Cake: Spread filling over one cake layer. Top with second layer and frost with remaining filling or whipped cream.
  7. Decorate & Chill: Garnish with lemon zest/slices or powdered sugar. Chill for at least 2 hours before serving.

Notes

  • For a grown-up twist, substitute part of the milk with limoncello.
  • Add berries between layers for a fruity variation.
  • Use gluten-free flour 1:1 for a gluten-free version.
  • Store chilled for best flavor. Cake can be made a day ahead.

Have you made this recipe? I'd love to see it!

Click here to Follow me on Pinterest

Cheesecake Stuffed Chocolate Chip Cookies

April 21, 2025 by Sue Leave a Comment

Cheesecake Stuffed Chocolate Chip Cookies are the perfect mashup of two classic desserts. I get a soft, chewy chocolate chip cookie with a rich and creamy cheesecake surprise tucked inside. It’s the kind of treat that makes people pause mid-bite and say, “Whoa.” Cheesecake Stuffed Chocolate Chip Cookies

Why I Love This Recipe

I love how these cookies combine the best of both worlds. There’s the familiar, comforting flavor of a homemade chocolate chip cookie, but then I hit the smooth, tangy cheesecake center, and it takes things to the next level. They’re great for parties, bake sales, or just when I want to indulge in something extra special. Every bite is rich, gooey, and satisfying.

ingredients

(Here's a tip: Check out the full list of ingredients and measurements in the recipe card below.)

For the cheesecake filling:

  • 12 ounces cream cheese, cubed
  • ¾ cup powdered sugar

For the cookie dough:

  • 1 cup butter, room temperature
  • 1 cup light brown sugar
  • ¼ cup granulated sugar
  • 1 egg, plus 1 egg yolk
  • 2 teaspoons vanilla extract
  • 1 teaspoon baking soda
  • 1 teaspoon kosher salt
  • 2 ½ cups all-purpose flour
  • 2 cups semi-sweet chocolate chips

directions

  1. I preheat the oven to 375°F and line a baking sheet with parchment paper.
  2. In a mixing bowl, I beat the cream cheese and powdered sugar together until smooth. Then I chill the mixture while I prepare the cookie dough.
  3. In a separate large bowl, I cream the butter, brown sugar, and granulated sugar until fluffy.
  4. I mix in the egg, egg yolk, and vanilla extract until well blended.
  5. I add the baking soda, salt, and flour gradually, mixing until just combined, then stir in the chocolate chips.
  6. I scoop out a portion of dough, flatten it into a disk, and place a spoonful of cheesecake filling in the center.
  7. I fold the dough around the filling and roll it into a sealed ball.
  8. I place the dough balls on the prepared baking sheet about 2 inches apart.
  9. I bake for about 9 minutes until the edges are golden and the centers are set.
  10. I let them cool on the baking sheet for a few minutes before moving to a wire rack.

Servings and timing

This recipe makes about 24 cookies. It takes around 15 minutes to prep and 9 minutes to bake each batch. Altogether, I usually spend around 25-30 minutes from start to finish, depending on how many batches I bake.

Variations

  • I use dark chocolate chips for a deeper, richer flavor.
  • I sometimes fold in chopped pecans or walnuts for a nutty crunch.
  • For a fruity twist, I like adding a few dried cherries or cranberries to the dough.
  • Around the holidays, I might swap in white chocolate chips and crushed peppermint.

storage/reheating

I store the cookies in an airtight container in the fridge for up to five days. When I want that warm, fresh-baked feel, I pop one in the microwave for 10 seconds. They also freeze really well—just freeze them in a single layer first, then transfer to a freezer bag.

FAQs

How do I keep the filling from leaking?

I make sure the dough fully wraps around the cheesecake filling. I pinch it closed at the seams and sometimes chill the stuffed dough balls for 10-15 minutes before baking to help hold their shape.

Can I freeze them before baking?

Yes. I freeze the unbaked dough balls on a tray first, then move them to a bag or container. When I bake from frozen, I just add 1-2 extra minutes to the baking time.

What if I don’t have a cookie scoop?

No problem. I use a tablespoon and eyeball a heaping scoop to get the right size. It works just as well.

Can I use low-fat cream cheese?

I’ve tried it, but the filling tends to be softer and a bit runny. I stick with full-fat cream cheese for the best texture and taste.

How do I know when they’re done baking?

I look for golden edges and slightly underbaked centers. They’ll finish setting up as they cool on the pan.

Conclusion

These Cheesecake Stuffed Chocolate Chip Cookies are an indulgent, show-stopping treat that always gets rave reviews. I love how they look like a regular cookie until I take a bite and discover the creamy center. If I’m looking to wow friends or just treat myself, this is the recipe I reach for every time.

Print

clock clock iconcutlery cutlery iconflag flag iconfolder folder iconinstagram instagram iconpinterest pinterest iconfacebook facebook iconprint print iconsquares squares iconheart heart iconheart solid heart solid icon
Cheesecake Stuffed Chocolate Chip Cookies

Cheesecake Stuffed Chocolate Chip Cookies

5 Stars 4 Stars 3 Stars 2 Stars 1 Star No reviews
  • Author: Sue
  • Prep Time: 15 minutes
  • Cook Time: 9 minutes per batch
  • Total Time: 25–30 minutes
  • Yield: About 24 cookies
  • Category: Dessert
  • Method: Baking
  • Cuisine: American
  • Diet: Vegetarian
Print Recipe
Pin Recipe

Description

Cheesecake Stuffed Chocolate Chip Cookies are the ultimate dessert mashup! These soft, chewy cookies are filled with a rich and creamy cheesecake center, delivering indulgent flavor in every bite. Ideal for parties, bake sales, or anytime you want to impress with a surprise inside. Keywords: cheesecake stuffed cookies, chocolate chip cheesecake cookies, stuffed cookie recipe.


Ingredients

  • For the cheesecake filling:
  • 12 ounces cream cheese, cubed
  • ¾ cup powdered sugar
  • For the cookie dough:
  • 1 cup butter, room temperature
  • 1 cup light brown sugar
  • ¼ cup granulated sugar
  • 1 egg
  • 1 egg yolk
  • 2 teaspoons vanilla extract
  • 1 teaspoon baking soda
  • 1 teaspoon kosher salt
  • 2 ½ cups all-purpose flour
  • 2 cups semi-sweet chocolate chips

Instructions

  1. Preheat oven to 375°F and line baking sheet with parchment paper.
  2. Beat cream cheese and powdered sugar until smooth, then chill the mixture.
  3. Cream together butter, brown sugar, and granulated sugar until fluffy.
  4. Mix in egg, egg yolk, and vanilla extract.
  5. Gradually add baking soda, salt, and flour; stir in chocolate chips.
  6. Flatten a scoop of dough, add cheesecake filling, and wrap dough around it.
  7. Roll into a sealed ball and place on baking sheet.
  8. Repeat and space cookies about 2 inches apart.
  9. Bake for 9 minutes until edges are golden.
  10. Cool on baking sheet before transferring to a wire rack.

Notes

  • Chill stuffed dough balls before baking to prevent leaking.
  • Freeze unbaked cookies for later and bake straight from frozen with extra baking time.
  • Use full-fat cream cheese for the best consistency.
  • Warm in the microwave for 10 seconds to reheat.

Have you made this recipe? I'd love to see it!

Click here to Follow me on Pinterest

Jalapeño Popper Deviled Eggs

April 21, 2025 by Sue Leave a Comment

Jalapeño Popper Deviled Eggs are a spicy, creamy twist on the classic deviled egg. I take smooth, seasoned yolks and mix them with jalapeños, cheese, and just the right amount of tangy flavor to create an appetizer that's bold, crave-worthy, and sure to stand out on any snack table. Jalapeño Popper Deviled Eggs

Why I Love This Recipe

I love how this recipe transforms a simple deviled egg into something with a little attitude. The heat from the jalapeños pairs perfectly with the creamy yolk mixture, while the cheese adds richness and a touch of sharpness. They’re easy to make, look great on a platter, and always get people asking for the recipe.

Ingredients

(Here's a tip: Check out the full list of ingredients and measurements in the recipe card below.)

  • 12 large eggs, hard-boiled and peeled
  • 2 jalapeños: one finely diced, one thinly sliced for garnish
  • ½ teaspoon minced garlic
  • ⅓ cup mayonnaise
  • 2 teaspoons Dijon mustard
  • 1 teaspoon smoked paprika
  • ¼ cup shredded cheese (cheddar, pepper jack, or Colby Jack)
  • Salt and black pepper to taste

Directions

  1. I cut the eggs in half lengthwise and gently remove the yolks into a bowl. The whites go onto a serving tray.
  2. I mash the yolks until smooth, then stir in the mayonnaise, mustard, garlic, paprika, shredded cheese, and diced jalapeño. I mix until everything is fully combined and creamy.
  3. I either spoon or pipe the yolk mixture back into each egg white half.
  4. I top each one with a slice of jalapeño for a little flair and extra heat.
  5. I refrigerate the finished eggs until it’s time to serve.

Servings and Timing

  • Servings: 24 deviled egg halves
  • Prep Time: 20 minutes
  • Cook Time: 10 minutes
  • Total Time: 30 minutes

Variations

  • Cream cheese addition: I sometimes mix in a bit of softened cream cheese for extra richness.
  • Herb topping: A sprinkle of fresh chopped chives or parsley on top adds color and a fresh bite.
  • Pickled twist: I use pickled jalapeños for a tangier flavor.
  • Different cheeses: Swapping in gouda or feta changes up the flavor nicely.

Storage and Reheating

I keep these deviled eggs in an airtight container in the fridge for up to 2 days. They're best served cold, so I don’t reheat them. If the filling settles or separates slightly, I give it a quick stir before serving.

FAQs

Can I make these ahead of time?

Absolutely. I often prep the filling and eggs separately the day before, then assemble them fresh right before serving.

How do I make them less spicy?

I remove the seeds and membranes from the jalapeños or use a smaller amount to dial down the heat.

What cheese works best?

Cheddar, Colby Jack, and pepper jack are my favorites, but I’ve also had success with gouda or even feta for a tangier flavor.

How do I get a smooth filling?

I mash the yolks well and mix thoroughly. If I want it ultra-smooth, I run the yolks through a fine sieve or use a food processor.

Can I freeze deviled eggs?

I don’t recommend freezing them. The texture changes too much, especially the egg whites, which can become rubbery once thawed.

Conclusion

Jalapeño Popper Deviled Eggs are a flavorful, spicy upgrade to a traditional appetizer. They’re simple to make, pack a punch of flavor, and are always a hit whether I’m making them for a party or keeping a few on hand for quick bites at home. Every time I serve them, they disappear fast.

Print

clock clock iconcutlery cutlery iconflag flag iconfolder folder iconinstagram instagram iconpinterest pinterest iconfacebook facebook iconprint print iconsquares squares iconheart heart iconheart solid heart solid icon
Jalapeño Popper Deviled Eggs

Jalapeño Popper Deviled Eggs

5 Stars 4 Stars 3 Stars 2 Stars 1 Star No reviews
  • Author: Sue
  • Prep Time: 20 minutes
  • Cook Time: 10 minutes
  • Total Time: 30 minutes
  • Yield: 24 deviled egg halves
  • Category: Appetizer
  • Method: Boiling, Mixing
  • Cuisine: American
  • Diet: Vegetarian
Print Recipe
Pin Recipe

Description

These Jalapeño Popper Deviled Eggs are a spicy, creamy twist on the classic appetizer. Made with hard-boiled eggs, jalapeños, cheese, and smoked paprika, they’re bold, delicious, and perfect for parties or holiday platters. This easy deviled egg recipe brings heat, flavor, and flair to your snack table. Keywords: jalapeño popper deviled eggs, spicy deviled eggs, easy deviled eggs recipe.


Ingredients

  • 12 large eggs, hard-boiled and peeled
  • 2 jalapeños: one finely diced, one thinly sliced for garnish
  • ½ teaspoon minced garlic
  • ⅓ cup mayonnaise
  • 2 teaspoons Dijon mustard
  • 1 teaspoon smoked paprika
  • ¼ cup shredded cheese (cheddar, pepper jack, or Colby Jack)
  • Salt and black pepper to taste

Instructions

  1. Cut the eggs in half lengthwise and gently remove the yolks into a bowl. Place egg whites on a serving tray.
  2. Mash yolks until smooth, then stir in mayonnaise, mustard, garlic, paprika, shredded cheese, and diced jalapeño. Mix until creamy.
  3. Spoon or pipe the mixture back into each egg white half.
  4. Garnish each with a jalapeño slice for heat and presentation.
  5. Refrigerate until ready to serve.

Notes

  • For a creamier texture, add softened cream cheese to the filling.
  • Fresh chopped herbs like chives or parsley can add color and a fresh bite.
  • Pickled jalapeños provide a tangier option.
  • Use your favorite cheese — gouda, cheddar, pepper jack, or even feta for variety.
  • Best served cold; do not freeze.

Have you made this recipe? I'd love to see it!

Click here to Follow me on Pinterest

Navajo Cornbread

April 21, 2025 by Sue Leave a Comment

Navajo Cornbread is a savory, rich, and slightly spicy cornbread that goes beyond the basics. It’s packed with layers of flavor from creamed corn, jalapeños, green onions, and melty cheese. The result is a moist, golden cornbread that works perfectly as a side or even as the star of the plate. Navajo Cornbread

Why I Love This Recipe

I love this recipe because it's bold and comforting all at once. The sweet corn flavor blends beautifully with the mild heat of jalapeños and the creamy richness of sour cream and cheese. It’s one of those dishes that feels rustic and homemade, yet still brings something unexpected to the table. Whether I’m making it for a potluck or a weeknight dinner, it always gets rave reviews.

Ingredients

(Here's a tip: Check out the full list of ingredients and measurements in the recipe card below.)

  • plain yellow cornmeal
  • all-purpose flour
  • baking powder
  • salt
  • eggs
  • canned creamed corn
  • sour cream
  • milk or buttermilk
  • vegetable oil
  • jalapeño pepper, finely diced
  • green onions, chopped
  • shredded Colby Jack cheese

Directions

  1. I start by preheating the oven to 350°F and greasing a baking dish or cast iron skillet.
  2. In a large bowl, I whisk together the cornmeal, flour, baking powder, and salt.
  3. In a separate bowl, I mix the eggs, creamed corn, sour cream, milk, and oil until smooth.
  4. I combine the wet and dry ingredients, then fold in the jalapeños, green onions, and shredded cheese.
  5. I pour the batter into the prepared dish and bake for 55 to 70 minutes, until golden and set in the center.
  6. Once baked, I let it cool slightly before slicing and serving.

Servings and Timing

This recipe makes about 12 to 16 servings. It takes roughly 15 minutes to prep and about 55 to 70 minutes to bake, depending on the pan and oven used.

Variations

  • I sometimes swap out Colby Jack for cheddar or pepper jack for more kick.
  • For extra heat, I keep some of the jalapeño seeds in the mix.
  • For a milder take, I leave out the jalapeños and add chopped bell peppers instead.

Storage/Reheating

I store leftovers in an airtight container in the fridge for up to 5 days. To reheat, I warm slices in the microwave for 30 seconds or in the oven at 350°F for about 10 minutes. It also freezes well—I just wrap individual portions and reheat from frozen when I need a quick side.

FAQs

What do I serve with Navajo Cornbread?

I usually pair it with chili, soups, stews, or even a big salad. It’s also great with butter or a drizzle of honey.

Can I make it less spicy?

Yes, I remove the jalapeño seeds or skip the pepper entirely for a milder version.

Can I use a different cheese?

Absolutely. Cheddar, Monterey Jack, or a Mexican blend all work great.

How do I keep it from drying out?

I always make sure not to overbake it and store it tightly wrapped. The sour cream and creamed corn help keep it moist.

Can I make it ahead of time?

Yes, I often bake it a day ahead and reheat it in the oven before serving. It tastes just as good the next day.

Conclusion

Navajo Cornbread is one of those recipes I keep coming back to—it’s warm, filling, and full of character. Whether I’m feeding a crowd or just want something comforting, this dish always hits the spot. I love how easy it is to tweak to suit whatever I have on hand, and the flavor never disappoints.

Print

clock clock iconcutlery cutlery iconflag flag iconfolder folder iconinstagram instagram iconpinterest pinterest iconfacebook facebook iconprint print iconsquares squares iconheart heart iconheart solid heart solid icon
Navajo Cornbread

Navajo Cornbread

5 Stars 4 Stars 3 Stars 2 Stars 1 Star No reviews
  • Author: Sue
  • Prep Time: 15 minutes
  • Cook Time: 55–70 minutes
  • Total Time: 70–85 minutes
  • Yield: 12–16 servings
  • Category: Bread, Side Dish
  • Method: Baking
  • Cuisine: Southwestern, Native American-inspired
Print Recipe
Pin Recipe

Description

This moist and cheesy Navajo Cornbread recipe combines creamed corn, jalapeños, green onions, and Colby Jack cheese for a savory Southwestern twist on classic cornbread. Perfect as a side with chili or soup, or served on its own, this easy cornbread is a crowd-pleaser with bold flavor and a soft texture.


Ingredients

  • 1 ½ cups plain yellow cornmeal
  • ½ cup all-purpose flour
  • 1 tablespoon baking powder
  • 2 teaspoons salt
  • 2 eggs
  • 1 (14-ounce) can creamed corn
  • ½ cup sour cream
  • 1 cup milk (or buttermilk)
  • ⅓ cup vegetable oil
  • 1 jalapeño pepper, seeded and finely diced
  • 1 bunch green onions, chopped (about 1 cup)
  • 8 ounces Colby Jack cheese, shredded

Instructions

  1. Preheat oven to 350°F (175°C). Grease a 13x9-inch baking dish or 12-inch cast iron skillet.
  2. In a large bowl, mix cornmeal, flour, baking powder, and salt.
  3. In a separate bowl, whisk eggs, creamed corn, sour cream, milk, and oil.
  4. Combine wet and dry ingredients until just mixed.
  5. Fold in jalapeños, green onions, and shredded cheese.
  6. Pour batter into prepared dish and smooth the top.
  7. Bake for 55–70 minutes, or until golden and a toothpick comes out clean.
  8. Let cool for 15 minutes before slicing and serving.

Notes

  • For extra heat, leave jalapeño seeds in.
  • Swap Colby Jack for cheddar or Mexican blend for a flavor variation.
  • Add cooked ground beef or sausage to make it a main dish.
  • Store in fridge up to 5 days, or freeze for 3 months.

Have you made this recipe? I'd love to see it!

Click here to Follow me on Pinterest

Banana Bread Cinnamon Rolls

April 21, 2025 by Sue Leave a Comment

Banana Bread Cinnamon Rolls are a soft, gooey, and flavorful treat that merges the comforting essence of banana bread with the sweet swirl of a classic cinnamon roll. Perfect for cozy mornings or indulgent brunches, these rolls are topped with creamy frosting for the ultimate finish.

Banana Bread Cinnamon Rolls

Why You’ll Love This Recipe

I love how these rolls combine the richness of banana bread with the spiced sweetness of cinnamon rolls. The bananas add natural moisture and flavor, making every bite tender and satisfying. The warm, fluffy texture with a swirl of cinnamon sugar and a generous smear of cream cheese frosting makes this recipe something I find myself making again and again—whether for breakfast, brunch, or a sweet snack.

Ingredients

(Here's a tip: Check out the full list of ingredients and measurements in the recipe card below.)

For the Dough:

  • all-purpose flour
  • brown sugar
  • rapid-rise yeast
  • ground cinnamon
  • salt
  • milk
  • unsalted butter
  • mashed ripe bananas

For the Cinnamon Sugar Filling:

  • unsalted butter (softened)
  • brown sugar
  • ground cinnamon
  • pinch of salt

For the Cream Cheese Frosting:

  • unsalted butter (softened)
  • cream cheese
  • powdered sugar
  • cinnamon
  • milk
  • vanilla extract
  • pinch of salt

Directions

  1. I start by mixing flour, brown sugar, yeast, cinnamon, and salt in a large bowl.
  2. In another bowl, I warm the milk and butter together until the butter is almost melted. I let this cool slightly before using.
  3. I add the milk mixture and mashed bananas into the dry ingredients and mix until combined.
  4. I gradually add more flour until the dough starts to pull away from the sides. Then I knead it on a floured surface for about 10 minutes until smooth.
  5. I place the dough in a greased bowl, cover it, and let it rise in a warm area until doubled in size—about 1 hour.
  6. While the dough rises, I prepare the filling by combining brown sugar, cinnamon, and salt.
  7. Once risen, I roll out the dough into a large rectangle, spread it with softened butter, and sprinkle the cinnamon sugar evenly over it.
  8. I roll it up tightly from the long end and slice it into 12 even rolls.
  9. I place the rolls in a greased or parchment-lined baking dish and let them rise again until puffy—about another hour.
  10. I preheat the oven to 350°F (175°C) and bake the rolls for 25–30 minutes until golden.
  11. While they bake, I prepare the frosting by beating together butter, cream cheese, powdered sugar, cinnamon, milk, vanilla, and salt until smooth and fluffy.
  12. Once the rolls are slightly cooled, I spread the frosting on top and serve warm.

Servings and Timing

  • Servings: 12 rolls
  • Prep time: 25 minutes
  • Rise time: 2 hours
  • Cook time: 30 minutes
  • Total time: About 2 hours 55 minutes

Variations

  • Add chopped walnuts or pecans into the filling for crunch.
  • Sprinkle mini chocolate chips before rolling up for a chocolate-banana twist.
  • Add a touch of nutmeg or cardamom to the filling for extra spice depth.
  • Use maple syrup in the frosting instead of vanilla for a cozy flavor change.
  • Make them dairy-free with plant-based butter, milk, and cream cheese alternatives.

Storage/Reheating

I store leftovers in an airtight container at room temperature for up to 2 days, or refrigerate for up to 5 days. To reheat, I microwave each roll for about 20–30 seconds or warm them in a 350°F oven for 10 minutes. If I’ve made extra, I freeze the unfrosted rolls and just thaw and frost them before serving.

FAQs

Can I use frozen bananas?

Yes, I let them thaw completely and drain any excess liquid before mashing. They work great in this dough.

What can I do if my dough isn’t rising?

I make sure my milk isn’t too hot (it should be warm to the touch) and that my yeast isn’t expired. Letting it rise in a warm, draft-free space also helps.

Do I have to use cream cheese in the frosting?

Not at all—I’ve swapped it with plain buttercream or even a vanilla glaze when I wanted something lighter.

Can I make these ahead of time?

Yes, I prepare them the night before, cover the pan, and refrigerate. In the morning, I let them come to room temp and rise again before baking.

How ripe should the bananas be?

I always use bananas with brown spots—they’re sweeter and mash more easily, giving the dough its signature moistness and flavor.

Conclusion

These Banana Bread Cinnamon Rolls are a warm, cozy fusion of two favorite baked goods. Whether I’m treating guests or just craving something sweet and homey, this recipe never fails to impress. It’s easy to make, full of comforting flavor, and totally irresistible.

Print

clock clock iconcutlery cutlery iconflag flag iconfolder folder iconinstagram instagram iconpinterest pinterest iconfacebook facebook iconprint print iconsquares squares iconheart heart iconheart solid heart solid icon
Banana Bread Cinnamon Rolls

Banana Bread Cinnamon Rolls

5 Stars 4 Stars 3 Stars 2 Stars 1 Star No reviews
  • Author: Sue
  • Prep Time: 20 minutes
  • Rising Time: 2 hours
  • Cook Time: 30 minutes
  • Total Time: 2 hours 50 minutes
  • Yield: 12 rolls
  • Category: Breakfast, Brunch, Dessert
  • Method: Baking
  • Cuisine: American
  • Diet: Vegetarian
Print Recipe
Pin Recipe

Description

These Banana Bread Cinnamon Rolls are the ultimate comfort treat—combining the moist, rich flavor of banana bread with the gooey, spiced swirl of classic cinnamon rolls. With a sweet cinnamon-sugar filling and luscious cream cheese frosting, this indulgent fusion is perfect for breakfast, brunch, or dessert. Made with overripe bananas for extra moisture and natural sweetness, these rolls are irresistibly soft and fluffy.


Ingredients

  • For the Dough:
  • 4 cups all-purpose flour
  • ⅓ cup packed light brown sugar
  • 2 ¼ teaspoons rapid-rise yeast
  • 1 ½ teaspoons ground cinnamon
  • 1 teaspoon salt
  • 1 cup milk
  • 6 tablespoons unsalted butter
  • ⅔ cup mashed overripe banana
  • For the Cinnamon Sugar Filling:
  • ¼ cup unsalted butter, at room temperature
  • ½ cup packed light brown sugar
  • 1 tablespoon ground cinnamon
  • Pinch of salt
  • For the Cream Cheese Frosting:
  • ⅓ cup unsalted butter, at room temperature
  • 2 ounces cream cheese, at room temperature
  • 2 cups powdered sugar
  • 2 teaspoons ground cinnamon
  • 1 tablespoon milk
  • 1 teaspoon vanilla extract
  • Pinch of salt

Instructions

  1. Mix 2 cups flour, brown sugar, yeast, cinnamon, and salt in a large bowl.
  2. Warm milk and butter in the microwave until melted; let cool slightly.
  3. Add milk mixture and mashed banana to dry ingredients; beat until combined.
  4. Add 1 cup flour, beat again. Gradually add remaining flour until dough forms.
  5. Knead dough on floured surface for 10 minutes until smooth.
  6. Place dough in greased bowl, cover, and let rise 1 hour until doubled.
  7. Mix brown sugar, cinnamon, and salt for filling.
  8. Roll dough into 18x12-inch rectangle.
  9. Spread softened butter, sprinkle with cinnamon sugar.
  10. Roll tightly, slice into 12 rolls.
  11. Place in lined 9x13-inch pan, cover, rise 1 hour.
  12. Bake at 350°F for 30 minutes until golden.
  13. Beat frosting ingredients until fluffy.
  14. Spread frosting on warm rolls. Serve and enjoy!

Notes

  • Overripe bananas with brown spots give the best flavor.
  • To prep ahead, refrigerate shaped rolls overnight and bake the next morning.
  • Swap in vegan or gluten-free ingredients if needed.
  • Store frosted rolls in the fridge for up to 5 days, or freeze unfrosted for 2 months.

Have you made this recipe? I'd love to see it!

Click here to Follow me on Pinterest

Coconut Pound Cake

April 21, 2025 by Sue Leave a Comment

This Coconut Pound Cake is a rich, buttery dessert infused with tropical coconut flavor, topped with a sweet coconut glaze and toasted coconut. The sweetened shredded coconut in the cake adds a lovely texture that I really like. If I love coconut treats, I will love this Coconut Pound Cake. Coconut Pound Cake

Why I’ll Love This Recipe

I love this Coconut Pound Cake because it's rich, buttery, and full of coconut flavor. The sweetened shredded coconut in the cake adds a lovely texture that I really like. The coconut glaze and toasted coconut topping make it even more delicious. If I love coconut treats, I will love this Coconut Pound Cake.

Ingredients

(Here's a tip: Check out the full list of ingredients and measurements in the recipe card below.)

  • 2 ¾ cups all-purpose flour
  • ½ teaspoon baking powder
  • ½ teaspoon baking soda
  • ½ teaspoon kosher salt
  • 1 cup (2 sticks) unsalted butter, softened
  • 1 ½ cups granulated sugar
  • 4 large eggs, room temperature
  • 1 teaspoon vanilla extract
  • 1 teaspoon coconut extract
  • 1 cup canned full-fat coconut milk, shaken well
  • 1 cup sweetened shredded coconut

For the Coconut Glaze:

  • 1 cup confectioners' sugar
  • 3-4 tablespoons canned full-fat coconut milk, shaken well
  • ¼ teaspoon coconut extract
  • Toasted shredded coconut, for garnish

Directions

  1. Preheat the oven to 350°F (175°C). Spray a 10-inch Bundt pan with baking spray.
  2. In a medium bowl, whisk together the flour, baking powder, baking soda, and kosher salt until well combined. Set aside.
  3. In the bowl of a stand mixer fitted with the paddle attachment, cream the softened butter and granulated sugar on medium-high speed for about 3–4 minutes, or until light and fluffy.
  4. Add the eggs, one at a time, beating well after each addition. Scrape down the sides of the bowl as needed.
  5. Add the vanilla extract and coconut extract. Mix until combined.
  6. On low speed, alternate adding the flour mixture and the coconut milk, beginning and ending with the flour mixture. Start by adding one-third of the flour mixture, then half of the coconut milk, another third of the flour, the remaining coconut milk, and finally the last third of the flour mixture. Mix until just combined; do not overmix.
  7. Gently fold in the shredded coconut until evenly distributed.
  8. Pour the batter into the prepared pan and smooth the top with a spatula. Tap the pan lightly on the counter to remove any air bubbles.
  9. Bake for 50-55 minutes, or until a toothpick inserted into the center comes out with a few crumbs, but no wet batter.
  10. Let the cake cool in the pan for 10–15 minutes, then carefully turn it out onto a wire rack to cool completely.

To make the glaze:

  1. In a medium bowl, whisk together the confectioners' sugar, coconut milk, and coconut extract until smooth.
  2. Once the cake is completely cooled, drizzle the glaze over the top.
  3. Sprinkle toasted shredded coconut on top for garnish.

Servings and Timing

  • Servings: 12 slices
  • Prep Time: 15 minutes
  • Cook Time: 50-55 minutes
  • Total Time: 1 hour 5 minutes

Variations

  • Lemon Coconut Pound Cake: Add 1 tablespoon of lemon zest to the batter for a citrusy twist.
  • Chocolate Coconut Pound Cake: Fold in ½ cup of mini chocolate chips into the batter before baking.
  • Nutty Coconut Pound Cake: Add ½ cup of chopped pecans or walnuts to the batter for added crunch.

Storage/Reheating

To store the Coconut Pound Cake, wrap it tightly in plastic wrap or place it in an airtight container. It will last up to 3 days at room temperature. If I keep it in the refrigerator, it can last up to 5 days but could dry out faster. For longer storage, freeze the pound cake.

To freeze, let the cake cool completely, then wrap it tightly in plastic wrap and place it in a freezer-safe bag or aluminum foil for extra protection. It's best to freeze the cake without the glaze, as it can become soggy. Store the wrapped cake in the freezer for up to 3 months. When ready to serve, thaw the cake at room temperature and add the glaze afterward. Don't forget about the toasted coconut to top off the cake!

FAQs

How can I ensure my pound cake is moist?

To ensure the pound cake is moist, I make sure to use full-fat coconut milk and not overmix the batter. Also, I don't overbake the cake; I check for doneness with a toothpick.

Can I use unsweetened shredded coconut?

Yes, I can use unsweetened shredded coconut, but I might want to add a little extra sugar to the batter to compensate for the lack of sweetness.

What can I use instead of coconut milk?

If I don't have coconut milk, I can substitute with heavy cream or whole milk, but the cake will miss out on the coconut flavor.

How do I toast shredded coconut?

To toast shredded coconut, I spread it in an even layer on a baking sheet and bake at 350°F (175°C) for 5-10 minutes, stirring occasionally, until golden brown.

Can I make this cake ahead of time?

Yes, I can make this cake ahead of time. I can bake the cake, let it cool completely, and store it in an airtight container at room temperature for up to 3 days. I can also freeze the unglazed cake for up to 3 months.

Conclusion

This Coconut Pound Cake is a delightful dessert that's rich, buttery, and full of coconut flavor. The sweetened shredded coconut in the cake adds a lovely texture that I really like. The coconut glaze and toasted coconut topping make it even more delicious. If I love coconut treats, I will love this Coconut Pound Cake.

Print

clock clock iconcutlery cutlery iconflag flag iconfolder folder iconinstagram instagram iconpinterest pinterest iconfacebook facebook iconprint print iconsquares squares iconheart heart iconheart solid heart solid icon
Coconut Pound Cake

Coconut Pound Cake

5 Stars 4 Stars 3 Stars 2 Stars 1 Star No reviews
  • Author: Sue
  • Prep Time: 15 minutes
  • Cook Time: 50–55 minutes
  • Total Time: 1 hour 5 minutes
  • Yield: 12 slices
  • Category: Dessert
  • Method: Baking
  • Cuisine: American
  • Diet: Vegetarian
Print Recipe
Pin Recipe

Description

This Coconut Pound Cake is a rich, buttery dessert infused with tropical coconut flavor, perfect for coconut lovers. Topped with a smooth coconut glaze and toasted shredded coconut, it’s moist, tender, and full of texture—ideal for special occasions or everyday indulgence.


Ingredients

  • For the Cake:
  • 2 ¾ cups all-purpose flour
  • ½ teaspoon baking powder
  • ½ teaspoon baking soda
  • ½ teaspoon kosher salt
  • 1 cup (2 sticks) unsalted butter, softened
  • 1 ½ cups granulated sugar
  • 4 large eggs, room temperature
  • 1 teaspoon vanilla extract
  • 1 teaspoon coconut extract
  • 1 cup canned full-fat coconut milk, shaken well
  • 1 cup sweetened shredded coconut
  • For the Coconut Glaze:
  • 1 cup confectioners' sugar
  • 3–4 tablespoons canned full-fat coconut milk, shaken well
  • ¼ teaspoon coconut extract
  • Toasted shredded coconut, for garnish

Instructions

  1. Preheat oven to 350°F (175°C). Grease a 10-inch Bundt pan with baking spray.
  2. In a medium bowl, whisk together flour, baking powder, baking soda, and salt.
  3. In a stand mixer, cream butter and sugar on medium-high for 3–4 minutes until light and fluffy.
  4. Add eggs one at a time, mixing well and scraping the bowl as needed.
  5. Add vanilla and coconut extracts; mix until combined.
  6. Alternate adding flour mixture and coconut milk, starting and ending with flour. Mix until just combined.
  7. Fold in shredded coconut.
  8. Pour batter into prepared pan; smooth top and tap to release air bubbles.
  9. Bake 50–55 minutes or until a toothpick comes out with a few crumbs.
  10. Cool in pan for 10–15 minutes, then turn onto a wire rack to cool completely.
  11. To Make the Glaze:
  12. Whisk together confectioners’ sugar, coconut milk, and extract until smooth.
  13. Drizzle glaze over cooled cake.
  14. Sprinkle with toasted coconut.

Notes

  • Do not overmix the batter to keep the cake tender.
  • Full-fat coconut milk ensures a moist, flavorful crumb.
  • For a deeper coconut flavor, toast the coconut used inside the batter too.
  • Store unglazed cake in the freezer and glaze after thawing for best results.

Have you made this recipe? I'd love to see it!

Click here to Follow me on Pinterest

Banana Oatmeal Cookies

April 21, 2025 by Sue Leave a Comment

Soft, chewy, and naturally sweet, Banana Oatmeal Cookies are a wholesome treat I always love baking, especially when I have ripe bananas on hand. With the comforting flavor of bananas and the hearty texture of oats, these cookies are great for breakfast, snacking, or a light dessert.

Banana Oatmeal Cookies

Why You’ll Love This Recipe

I love how easy these cookies are to make with just a few pantry staples. They’re sweet without needing a ton of sugar, and the oats add a satisfying chew. These cookies are naturally gluten-free (if I use certified GF oats) and can be made vegan-friendly, which makes them great for sharing with different eaters. Plus, I can whip them up in under 30 minutes from start to finish.

ingredients

(Here's a tip: Check out the full list of ingredients and measurements in the recipe card below.)

  • Ripe bananas

  • Rolled oats

  • Peanut butter or almond butter (optional for richness)

  • Maple syrup or honey

  • Vanilla extract

  • Ground cinnamon

  • Baking powder

  • Salt

  • Chocolate chips, raisins, or chopped nuts (optional for extra texture and flavor)

directions

  1. I preheat the oven to 350°F (175°C) and line a baking sheet with parchment paper.

  2. In a large bowl, I mash the ripe bananas until smooth.

  3. I stir in the nut butter (if using), maple syrup or honey, and vanilla extract.

  4. Then, I mix in the oats, cinnamon, baking powder, and salt until well combined.

  5. If I’m adding chocolate chips, raisins, or nuts, I fold them in at this stage.

  6. Using a spoon or cookie scoop, I drop portions of dough onto the prepared baking sheet.

  7. I flatten each cookie slightly with the back of the spoon.

  8. I bake for about 12–15 minutes, or until the cookies are lightly golden and set.

  9. I let them cool on the baking sheet for a few minutes before transferring to a wire rack.

Servings and timing

This recipe makes about 12–16 cookies, depending on the size I scoop. It takes approximately 10 minutes to prepare and 12–15 minutes to bake, so I have a fresh batch ready in under 30 minutes.

Variations

I like to switch things up with different mix-ins. Sometimes I add a tablespoon of cocoa powder for a chocolaty twist, or I mix in shredded coconut for added texture. Chopped dried fruit like cranberries or apricots works great too. For a vegan version, I use maple syrup and skip the honey.

storage/reheating

I store these cookies in an airtight container at room temperature for up to 3 days. For longer storage, I keep them in the fridge for up to a week or freeze them for up to 3 months. To reheat, I pop a cookie in the microwave for about 10 seconds to bring back that just-baked warmth.

FAQs

How ripe should the bananas be?

The riper, the better. I use bananas with plenty of brown spots for maximum sweetness and moisture.

Can I make these cookies without nut butter?

Yes, I can skip the nut butter or replace it with seed butter like sunflower seed butter for a nut-free version.

Are these cookies gluten-free?

As long as I use certified gluten-free oats, the cookies are naturally gluten-free.

Can I add protein powder?

Yes, I sometimes add a scoop of protein powder. I just reduce the oats slightly to keep the dough from getting too dry.

Do these cookies spread while baking?

Not much. That’s why I flatten them a bit before baking to get the shape I like.

Conclusion

Banana Oatmeal Cookies are one of those simple, satisfying treats I can feel good about. They’re quick to whip up, adaptable to what I have on hand, and always hit the spot when I’m craving something sweet but wholesome. Whether for breakfast on-the-go or a cozy afternoon snack, these cookies always deliver.

Print

clock clock iconcutlery cutlery iconflag flag iconfolder folder iconinstagram instagram iconpinterest pinterest iconfacebook facebook iconprint print iconsquares squares iconheart heart iconheart solid heart solid icon
Banana Oatmeal Cookies

Banana Oatmeal Cookies

5 Stars 4 Stars 3 Stars 2 Stars 1 Star No reviews
  • Author: Sue
  • Prep Time: 10 minutes
  • Cook Time: 12–15 minutes
  • Total Time: 25 minutes
  • Yield: 12–16 cookies
  • Category: Dessert, Snack
  • Method: Baking
  • Cuisine: American
  • Diet: Gluten Free
Print Recipe
Pin Recipe

Description

Soft, chewy, and naturally sweet, these Banana Oatmeal Cookies are a quick and healthy treat perfect for breakfast, snacking, or dessert. Made with ripe bananas, rolled oats, and optional mix-ins like chocolate chips or nuts, they’re easy to make, naturally gluten-free, and vegan-friendly. This wholesome cookie recipe is ideal for using up overripe bananas and creating a guilt-free indulgence everyone will love.


Ingredients

  • 2 ripe bananas (mashed)
  • 1 ½ cups rolled oats (certified gluten-free if needed)
  • 2 tablespoons peanut butter or almond butter (optional)
  • 2 tablespoons maple syrup or honey
  • 1 teaspoon vanilla extract
  • ½ teaspoon ground cinnamon
  • ½ teaspoon baking powder
  • ¼ teaspoon salt
  • ¼ cup chocolate chips, raisins, or chopped nuts (optional)

Instructions

  1. Preheat oven to 350°F (175°C) and line a baking sheet with parchment paper.
  2. Mash the bananas in a large mixing bowl until smooth.
  3. Add nut butter (if using), maple syrup or honey, and vanilla extract. Stir to combine.
  4. Mix in oats, cinnamon, baking powder, and salt.
  5. Fold in optional mix-ins like chocolate chips, raisins, or nuts.
  6. Scoop dough onto baking sheet and flatten slightly.
  7. Bake for 12–15 minutes, until cookies are golden and set.
  8. Cool on the baking sheet for a few minutes, then transfer to a wire rack.

Notes

  • Use very ripe bananas for best sweetness and moisture.
  • Swap in seed butter for a nut-free option.
  • To make vegan, use maple syrup instead of honey.
  • Add 1 tablespoon cocoa powder for a chocolate variation.
  • Store in an airtight container at room temp (3 days), fridge (1 week), or freezer (3 months).

Have you made this recipe? I'd love to see it!

Click here to Follow me on Pinterest

Quick and Delicious French Toast Muffin Recipe

April 21, 2025 by Sue Leave a Comment

Why You’ll Love This Recipe

I love how these French Toast Muffins come together so quickly and easily. They combine the classic flavors of French toast with the convenience and portability of muffins. Perfect for busy mornings or lazy weekend brunches, these are soft on the inside, slightly crisp on the outside, and full of cinnamon-sugar goodness. I find that they also make a great make-ahead breakfast or a fun treat for kids. Quick and Delicious French Toast Muffin Recipe

ingredients

(Here's a tip: Check out the full list of ingredients and measurements in the recipe card below.)

  • Bread (preferably day-old, cubed)
  • Eggs
  • Milk
  • Maple syrup
  • Granulated sugar
  • Ground cinnamon
  • Vanilla extract
  • Salt
  • Butter (melted)

directions

  1. I start by preheating the oven to 350°F (175°C) and greasing a muffin tin.
  2. In a large mixing bowl, I whisk together the eggs, milk, maple syrup, vanilla extract, cinnamon, sugar, and a pinch of salt.
  3. Then, I fold in the bread cubes until they are fully coated in the mixture.
  4. I spoon the mixture evenly into the muffin tin cups, pressing down slightly to compact them.
  5. I bake the muffins for 25-30 minutes or until the tops are golden and set.
  6. After letting them cool for a few minutes, I drizzle melted butter and an extra sprinkle of cinnamon sugar on top before serving.

Servings and timing

This recipe makes about 12 muffins. It takes approximately 10 minutes to prep and 25-30 minutes to bake, so in under 40 minutes, I have a batch of warm, delicious muffins ready to enjoy.

Variations

Sometimes I like to add fresh berries or diced apples for a fruity twist. Swapping the maple syrup for honey or using a different type of bread like brioche or challah also changes things up nicely. For a more indulgent treat, I mix in chocolate chips or top the muffins with a simple glaze instead of cinnamon sugar.

storage/reheating

I store these muffins in an airtight container at room temperature for up to 2 days, or in the fridge for up to 5 days. When I want to reheat them, I pop them in the microwave for about 20 seconds or warm them in the oven at 300°F (150°C) for 5-10 minutes to bring back the fresh-baked feel.

FAQs

How do I keep the muffins from getting soggy?

I make sure to use day-old bread and don’t let it soak too long in the egg mixture. Pressing the bread slightly into the muffin tin also helps them bake more evenly.

Can I freeze French Toast Muffins?

Yes, I freeze them after baking. Once cooled, I wrap each muffin in plastic wrap and place them in a freezer bag. They reheat beautifully in the oven or microwave.

Can I make these muffins dairy-free?

Absolutely. I use plant-based milk and dairy-free butter substitutes. They still turn out delicious.

What’s the best type of bread to use?

I like using sturdy bread like brioche, challah, or even sourdough. Softer sandwich bread works too, but it may result in a softer texture.

Can I prepare them the night before?

Yes, I assemble the muffins and keep the tray in the fridge overnight. In the morning, I bake them fresh for a hassle-free breakfast.

Conclusion

These French Toast Muffins are one of my go-to breakfast solutions when I want something comforting, quick, and versatile. With endless options to customize and a short prep time, I find myself coming back to this recipe again and again. Whether for a family brunch or an on-the-go snack, they never disappoint.

Print

clock clock iconcutlery cutlery iconflag flag iconfolder folder iconinstagram instagram iconpinterest pinterest iconfacebook facebook iconprint print iconsquares squares iconheart heart iconheart solid heart solid icon
Quick and Delicious French Toast Muffin Recipe

Quick and Delicious French Toast Muffin Recipe

5 Stars 4 Stars 3 Stars 2 Stars 1 Star No reviews
  • Author: Sue
  • Prep Time: 10 minutes
  • Cook Time: 25–30 minutes
  • Total Time: 35–40 minutes
  • Yield: 12 muffins
  • Category: Breakfast, Brunch, Snack
  • Method: Baked
  • Cuisine: American
Print Recipe
Pin Recipe

Description

These Quick and Delicious French Toast Muffins are the perfect breakfast or brunch treat! Made with day-old bread, warm cinnamon, maple syrup, and a buttery finish, they're soft on the inside and crisp on the outside. Whether you need a portable breakfast for busy mornings or a make-ahead treat for guests, these muffins are easy to customize and sure to please. Great for kids, freezer-friendly, and ready in under 40 minutes!


Ingredients

  • Day-old bread, cubed (brioche, challah, or sourdough preferred)
  • 4 large eggs
  • 1 cup milk (dairy or plant-based)
  • ¼ cup maple syrup
  • ¼ cup granulated sugar
  • 1 tsp ground cinnamon
  • 1 tsp vanilla extract
  • ¼ tsp salt
  • 2 tbsp butter, melted (plus more for drizzling)

Instructions

  1. Preheat oven to 350°F (175°C). Grease a 12-cup muffin tin.
  2. In a large bowl, whisk together eggs, milk, maple syrup, vanilla, cinnamon, sugar, and salt.
  3. Fold in the cubed bread until fully coated.
  4. Spoon the mixture into muffin cups, pressing down gently.
  5. Bake for 25–30 minutes, or until golden and set.
  6. Let cool slightly. Drizzle with melted butter and a sprinkle of cinnamon sugar before serving

Notes

  • For extra flavor, fold in berries, diced apples, or chocolate chips.
  • Can be prepped the night before and baked fresh in the morning.
  • Store in an airtight container for 2 days at room temperature or 5 days in the fridge.
  • Reheat in the microwave (20 seconds) or oven (300°F for 5–10 minutes).
  • Freeze individually wrapped muffins for longer storage.

Have you made this recipe? I'd love to see it!

Click here to Follow me on Pinterest

Crispy Balsamic-Thyme Potato Torte

April 20, 2025 by Sue Leave a Comment

This Crispy Balsamic-Thyme Potato Torte is a savory and elegant side dish that layers thinly sliced potatoes with aromatic thyme and a splash of balsamic vinegar. Baked until golden and crisp on the edges, this torte is as stunning in presentation as it is in flavor. I love serving it at dinner parties or holiday meals when I want something both rustic and refined. Crispy Balsamic-Thyme Potato Torte

Why You’ll Love This Recipe

I find this potato torte irresistibly satisfying thanks to its crisp layers, subtle herbal notes from fresh thyme, and the tangy-sweet finish from balsamic vinegar. It’s a comforting dish that feels fancy but uses simple pantry staples. Whether I serve it with roasted meats or as the centerpiece of a vegetarian meal, it always gets rave reviews.

Ingredients

(Here's a tip: Check out the full list of ingredients and measurements in the recipe card below.)

  • Yukon gold potatoes, thinly sliced
  • Fresh thyme leaves
  • Balsamic vinegar
  • Olive oil or melted butter
  • Salt
  • Freshly ground black pepper

Directions

  1. I start by preheating the oven to 400°F (200°C) and greasing a round cake or tart pan.
  2. I thinly slice the potatoes using a mandoline or sharp knife for even layers.
  3. In a large bowl, I toss the potato slices with olive oil or melted butter, balsamic vinegar, thyme, salt, and pepper.
  4. I layer the potatoes in the pan, overlapping slightly, and pressing down occasionally to keep it compact.
  5. Once all the potatoes are layered, I cover the pan with foil and bake for 30 minutes.
  6. I then remove the foil and continue baking for another 20-30 minutes, or until the top is golden brown and crisp.
  7. Before serving, I let it cool for a few minutes, then invert it onto a plate or serve directly from the pan.

Servings and timing

This recipe serves about 6 people and takes approximately 1 hour and 15 minutes in total — including prep and baking time.

Variations

  • I sometimes swap out the balsamic for apple cider vinegar for a milder tang.
  • For added richness, I mix in grated parmesan or Gruyère between the layers.
  • A touch of garlic powder or minced garlic can deepen the flavor.
  • To make it dairy-free, I use olive oil instead of butter.

storage/reheating

I store leftovers in an airtight container in the fridge for up to 3 days. To reheat, I place slices on a baking sheet and warm them in the oven at 350°F until heated through and re-crisped. I avoid microwaving it if I want to keep the texture crispy.
FAQs

How do I keep the potato layers from falling apart?

I press down on the layers as I build them and once during baking to help the torte hold its shape. Letting it cool slightly before slicing also helps it stay intact.

Can I make this potato torte ahead of time?

Yes, I often make it a day in advance and reheat it in the oven before serving. It actually tastes even better the next day.
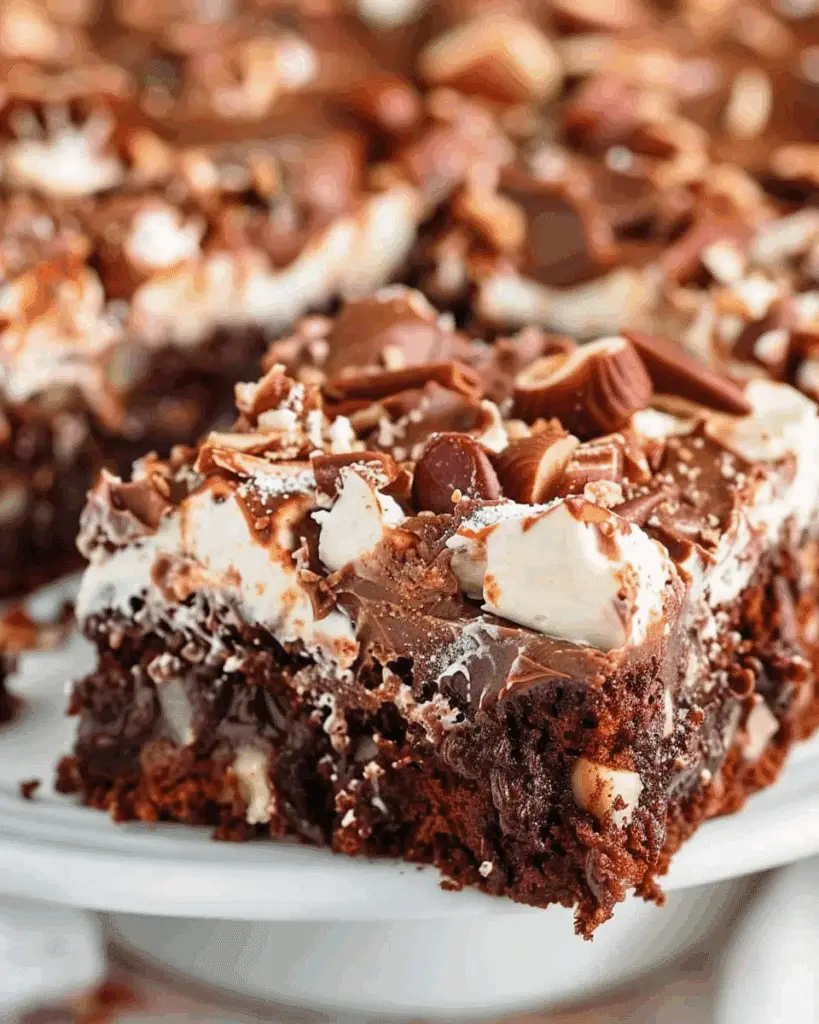
What kind of potatoes work best?

I like using Yukon gold potatoes because they have the right balance of waxy and starchy texture, which gives a creamy interior and crisp exterior.

Is this recipe gluten-free?

Yes, as long as I use gluten-free balsamic vinegar, the entire dish is naturally gluten-free.

Can I use dried thyme instead of fresh?

I can, but I use about one-third the amount since dried herbs are more concentrated. I find fresh thyme gives the best flavor and aroma though.

Conclusion

This Crispy Balsamic-Thyme Potato Torte is a dish I keep coming back to for its simplicity, flavor, and impressive appearance. It’s a lovely addition to any meal and easy enough to make on a weeknight. Whether I’m entertaining guests or just treating myself, this recipe never disappoints.

Print

clock clock iconcutlery cutlery iconflag flag iconfolder folder iconinstagram instagram iconpinterest pinterest iconfacebook facebook iconprint print iconsquares squares iconheart heart iconheart solid heart solid icon
Crispy Balsamic-Thyme Potato Torte

Crispy Balsamic-Thyme Potato Torte

5 Stars 4 Stars 3 Stars 2 Stars 1 Star No reviews
  • Author: Sue
  • Prep Time: 15 minutes
  • Cook Time: 60 minutes
  • Total Time: 1 hour 15 minutes
  • Yield: 6 servings
  • Category: Side Dish
  • Method: Baking
  • Cuisine: American, French-inspired
  • Diet: Gluten Free
Print Recipe
Pin Recipe

Description

This Crispy Balsamic-Thyme Potato Torte is a savory and elegant side dish made with thinly sliced Yukon gold potatoes, fresh thyme, and balsamic vinegar. Oven-baked until golden and crispy, it’s a rustic yet refined recipe that’s perfect for dinner parties or holiday meals.


Ingredients

  • Yukon gold potatoes, thinly sliced
  • Fresh thyme leaves
  • Balsamic vinegar
  • Olive oil or melted butter
  • Salt
  • Freshly ground black pepper

Instructions

  1. Preheat oven to 400°F (200°C). Grease a round cake or tart pan.
  2. Slice potatoes thinly using a mandoline or sharp knife.
  3. In a large bowl, toss potato slices with olive oil or butter, balsamic vinegar, thyme, salt, and pepper.
  4. Layer the potatoes in the prepared pan, overlapping slightly. Press down occasionally to compact.
  5. Cover with foil and bake for 30 minutes.
  6. Remove foil and bake another 20–30 minutes until golden and crisp.
  7. Let cool slightly before inverting onto a plate or serving directly from the pan.

Notes

  • Substitute balsamic with apple cider vinegar for a gentler flavor.
  • Add parmesan or Gruyère between layers for richness.
  • Garlic powder or minced garlic can deepen the flavor.
  • Use olive oil to make it dairy-free.
  • Best reheated in the oven to retain crispiness.

Have you made this recipe? I'd love to see it!

Click here to Follow me on Pinterest

Best Macaroni Salad

April 20, 2025 by Sue Leave a Comment

This Best Macaroni Salad is a creamy and satisfying dish that blends pasta with fresh, crunchy vegetables and a flavorful dressing. I like how quick it is to throw together, making it a go-to for potlucks, barbecues, or an easy family side. The combination of mayonnaise, sour cream, and a vegetable soup mix gives this salad its standout taste. Best Macaroni Salad

Why You’ll Love This Recipe

I love this recipe because it's incredibly simple yet full of flavor. The texture from the crisp veggies and the creaminess of the dressing create a perfect balance. It’s one of those dishes that tastes even better after sitting for a few hours in the fridge, which makes it ideal for make-ahead meals or parties.

Ingredients

(Here's a tip: Check out the full list of ingredients and measurements in the recipe card below.)

  • elbow macaroni (or other pasta)
  • Knorr vegetable soup/dip mix
  • mayonnaise
  • sour cream
  • red bell pepper, finely chopped
  • green bell pepper, finely chopped
  • frozen peas, thawed
  • celery, finely chopped
  • green onions, sliced

Directions

  1. I cook the pasta according to the package instructions, then rinse with cold water and drain it well.
  2. In a large bowl, I combine the Knorr vegetable soup/dip mix with mayonnaise and sour cream until it's smooth.
  3. Then I stir in the chopped red and green bell peppers, peas, celery, and green onions.
  4. I fold the cooked macaroni into the dressing mixture until everything is well coated.
  5. A little black pepper on top finishes it off for me.

Servings and Timing

  • Servings: 8 to 10
  • Prep time: 10 minutes
  • Cook time: 10 minutes
  • Total time: 20 minutes

Variations

I sometimes switch it up by adding:

  • diced turkey for protein
  • chopped hard-boiled eggs
  • shredded cheddar cheese

It’s easy to tailor this salad based on what I have in the fridge.

Storage and Reheating

I store any leftover salad in an airtight container in the fridge for up to 3 days. Before serving again, I give it a good stir. If it seems a little dry, I add a spoonful of mayonnaise or sour cream to refresh the texture. I always serve it cold—no reheating needed.

FAQs

How far ahead can I make this salad?

I like to make it a few hours ahead so the flavors can blend. It stays good in the fridge for up to three days.

Can I use a different type of pasta?

Yes, I often swap elbow macaroni for rotini, shells, or penne depending on what I have available.

What if I can’t find Knorr vegetable soup mix?

If I’m out, I use a mix of dried onion flakes, garlic powder, and a few chopped fresh vegetables to create a similar flavor.

Is it okay to add meat?

Absolutely. I’ve added diced turkey, or grilled chicken before and it turns this into a full meal.

Can I freeze macaroni salad?

I don’t recommend freezing it since the texture of the pasta and dressing can change. It’s best enjoyed fresh from the fridge.

Conclusion

This Best Macaroni Salad has become a staple in my kitchen for a reason—it’s easy, flavorful, and always gets compliments. Whether I’m making it for a casual dinner or a party spread, it’s a dish that brings comfort and satisfaction every time.

Print

clock clock iconcutlery cutlery iconflag flag iconfolder folder iconinstagram instagram iconpinterest pinterest iconfacebook facebook iconprint print iconsquares squares iconheart heart iconheart solid heart solid icon
Best Macaroni Salad

Best Macaroni Salad

5 Stars 4 Stars 3 Stars 2 Stars 1 Star No reviews
  • Author: Sue
  • Prep Time: 10 minutes
  • Cook Time: 10 minutes
  • Total Time: 20 minutes
  • Yield: 8 to 10 servings
  • Category: Salad, Side Dish
  • Method: No-cook, quick prep
  • Cuisine: American
Print Recipe
Pin Recipe

Description

This creamy and satisfying Best Macaroni Salad blends elbow macaroni with fresh vegetables and a flavorful dressing made with mayonnaise, sour cream, and Knorr vegetable soup mix. Perfect for potlucks, barbecues, or as a quick family side dish, it’s a go-to recipe that can be easily customized to suit your taste.


Ingredients

  • Elbow macaroni (or other pasta)
  • Knorr vegetable soup/dip mix
  • Mayonnaise
  • Sour cream
  • Red bell pepper, finely chopped
  • Green bell pepper, finely chopped
  • Frozen peas, thawed
  • Celery, finely chopped
  • Green onions, sliced

Instructions

Cook the pasta according to the package instructions, then rinse with cold water and drain well.

In a large bowl, combine the Knorr vegetable soup/dip mix with mayonnaise and sour cream until smooth.

Stir in the chopped red and green bell peppers, peas, celery, and green onions.

Fold the cooked macaroni into the dressing mixture, ensuring everything is well-coated.

Finish with a sprinkle of black pepper on top.


Notes

  • You can switch up the pasta type (rotini, shells, penne) based on what you have available.
  • Add-ins like chopped hard-boiled eggs, shredded cheddar cheese can customize the flavor.
  • This salad is perfect for making ahead and can be stored in an airtight container in the fridge for up to 3 days.

Have you made this recipe? I'd love to see it!

Click here to Follow me on Pinterest

Fiery Chicken Ramen with Creamy Garlic Sauce

April 20, 2025 by Sue Leave a Comment

This Fiery Chicken Ramen with Creamy Garlic Sauce is my go-to when I want something indulgent, spicy, and soul-satisfying. The combination of tender chicken, fiery chili heat, and a luxuriously creamy garlic sauce wrapped around springy ramen noodles is hard to beat. It's perfect for cozy nights or when I'm craving something bold and flavorful. Fiery Chicken Ramen with Creamy Garlic Sauce

Why You’ll Love This Recipe

I love how this dish balances creamy and spicy in such a comforting way. The garlic sauce adds a smooth, velvety finish that takes ordinary ramen to the next level. It’s also super customizable—great for tossing in extra veggies or adjusting the spice level to my taste. Whether I’m cooking for myself or impressing guests, this recipe always delivers.

ingredients

(Here's a tip: Check out the full list of ingredients and measurements in the recipe card below.)

  • Ramen noodles (instant or fresh work fine)
  • Chicken breast or thigh, sliced
  • Garlic, minced
  • Heavy cream or coconut milk for a dairy-free option
  • Chicken broth
  • Chili paste or Sriracha
  • Soy sauce
  • Sesame oil
  • Green onions, chopped
  • Olive oil or vegetable oil
  • Salt and pepper

directions

  1. I start by heating oil in a skillet and sautéing the garlic until fragrant.
  2. Then I add the sliced chicken, season with salt and pepper, and cook until browned and fully cooked.
  3. In the same pan, I pour in the chicken broth, heavy cream, chili paste, soy sauce, and a dash of sesame oil.
  4. I let the sauce simmer on low heat until it thickens slightly and becomes creamy.
  5. Meanwhile, I cook the ramen noodles separately according to the package instructions, then drain them.
  6. I toss the cooked noodles into the creamy sauce, mixing well to coat them evenly.
  7. Finally, I serve it hot, topped with green onions and an extra swirl of chili sauce if I want more heat.

Servings and timing

This recipe makes 2 generous servings and takes about 25–30 minutes from start to finish.

Variations

Sometimes I add sautéed mushrooms, bok choy, or bell peppers to make it more veggie-packed. Swapping chicken for shrimp also works beautifully. For a vegan version, I replace the chicken with tofu and use coconut milk instead of cream. If I want it even spicier, I stir in some crushed red pepper or add chili oil on top before serving.

storage/reheating

I store any leftovers in an airtight container in the fridge for up to 3 days. To reheat, I warm it gently on the stovetop or in the microwave, adding a splash of broth or cream to loosen up the sauce if it’s thickened too much.

FAQs

Can I use rotisserie chicken instead of cooking fresh?

Yes, I’ve used rotisserie chicken when I’m short on time. I just shred it and warm it up in the sauce before adding the noodles.

How do I make it less spicy?

I reduce the amount of chili paste or use a mild version. I can also balance the heat by adding more cream or coconut milk.

Can I make this gluten-free?

Definitely. I use gluten-free ramen or rice noodles, and make sure the soy sauce is a gluten-free variety like tamari.

Is there a dairy-free alternative to heavy cream?

Yes, I often use full-fat coconut milk for a rich, dairy-free option that still gives a creamy texture.

Can I freeze this ramen?

I wouldn’t recommend freezing it, as the noodles and cream sauce don’t hold up well. It's best enjoyed fresh or refrigerated for a couple of days.

Conclusion

Fiery Chicken Ramen with Creamy Garlic Sauce is everything I want in a bowl: bold, comforting, and packed with flavor. It’s easy to whip up, endlessly adaptable, and guaranteed to warm me up from the inside out. Whether I need a quick dinner or something extra cozy, this dish hits the spot every time.

Print

clock clock iconcutlery cutlery iconflag flag iconfolder folder iconinstagram instagram iconpinterest pinterest iconfacebook facebook iconprint print iconsquares squares iconheart heart iconheart solid heart solid icon
Fiery Chicken Ramen with Creamy Garlic Sauce

Fiery Chicken Ramen with Creamy Garlic Sauce

5 Stars 4 Stars 3 Stars 2 Stars 1 Star No reviews
  • Author: Sue
  • Prep Time: 10 minutes
  • Cook Time: 20 minutes
  • Total Time: 30 minutes
  • Category: Dinner, Noodles
  • Method: Stovetop
  • Cuisine: Asian-Inspired, Fusion
Print Recipe
Pin Recipe

Description

This Fiery Chicken Ramen with Creamy Garlic Sauce is a bold and comforting noodle dish that combines tender chicken, spicy chili heat, and a rich garlic cream sauce. Perfect for weeknight dinners or cozy nights in, this indulgent ramen recipe is easy to make, customizable, and absolutely packed with flavor. A must-try for fans of spicy creamy ramen!


Ingredients

  • Ramen noodles (instant or fresh)
  • Chicken breast or thigh, sliced
  • Garlic, minced
  • Heavy cream or full-fat coconut milk (for dairy-free option)
  • Chicken broth
  • Chili paste or Sriracha
  • Soy sauce
  • Sesame oil
  • Green onions, chopped
  • Olive oil oar vegetable oil
  • Salt and pepper

Instructions

  1. Heat oil in a skillet over medium heat and sauté minced garlic until fragrant.
  2. Add sliced chicken, season with salt and pepper, and cook until browned and fully cooked through.
  3. Stir in chicken broth, cream (or coconut milk), chili paste, soy sauce, and sesame oil. Let it simmer until the sauce thickens slightly.
  4. Meanwhile, cook ramen noodles according to package instructions. Drain.
  5. Add cooked noodles to the sauce, tossing to coat well.
  6. Serve hot, topped with chopped green onions and extra chili sauce if desired.

Notes

  • Use rotisserie chicken for a faster version.
  • Add mushrooms, bok choy, or bell peppers for extra veggies.
  • Make it spicier with chili oil or red pepper flakes.
  • For a vegan version: swap chicken for tofu and use coconut milk.
  • Store leftovers in the fridge up to 3 days; reheat with a splash of broth or cream.

Have you made this recipe? I'd love to see it!

Click here to Follow me on Pinterest

Spaghetti & Spinach with Sun-Dried Tomato Cream Sauce

April 20, 2025 by Sue Leave a Comment

This Spaghetti & Spinach with Sun-Dried Tomato Cream Sauce is a simple yet decadent pasta dish that's bursting with flavor. With the rich, tangy notes of sun-dried tomatoes blended into a creamy sauce, this meal balances comfort and freshness. Tender spinach and perfectly cooked spaghetti make this a satisfying, wholesome dinner that's easy enough for weeknights but special enough for guests. Spaghetti & Spinach with Sun-Dried Tomato Cream Sauce

Why You’ll Love This Recipe

I love how effortlessly this dish comes together while delivering such bold, layered flavors. The sun-dried tomato cream sauce is rich and savory, yet not too heavy, and it clings beautifully to the spaghetti. The spinach adds a pop of green and a nutritious twist, making this meal feel balanced and hearty. Plus, it's a one-pan wonder when it comes to the sauce—perfect for anyone craving something gourmet without the fuss.

ingredients

(Here's a tip: Check out the full list of ingredients and measurements in the recipe card below.)

  • Spaghetti
  • Olive oil
  • Garlic
  • Sun-dried tomatoes (in oil)
  • Heavy cream
  • Parmesan cheese
  • Fresh spinach
  • Salt
  • Black pepper
  • Crushed red pepper flakes (optional)

directions

  1. I start by boiling a large pot of salted water and cooking the spaghetti until it's al dente. Then I drain it, reserving a little pasta water to loosen the sauce later if needed.
  2. In a large skillet, I heat olive oil over medium heat and sauté minced garlic until fragrant, about 1 minute. I add the chopped sun-dried tomatoes and cook them for another 1-2 minutes to release their flavor.
  3. I pour in the heavy cream, stirring well, and bring it to a gentle simmer. Then I stir in freshly grated Parmesan cheese until the sauce thickens slightly.
  4. Next, I add the spinach, letting it wilt in the creamy sauce. I season everything with salt, black pepper, and a pinch of crushed red pepper flakes if I want some heat.
  5. I toss the cooked spaghetti into the skillet, mixing well so the sauce coats every strand. If it feels too thick, I add a splash of reserved pasta water to smooth it out.
  6. I serve it hot with extra Parmesan on top if I'm feeling fancy.

Servings and timing

This recipe serves 4 people and takes about 25–30 minutes total to prepare—15 minutes of prep and 10–15 minutes of cooking time. It's perfect for a quick and cozy weeknight dinner.

Variations

  • I sometimes swap the spinach for kale or arugula for a different flavor and texture.
  • If I’m craving protein, grilled chicken or shrimp are great additions.
  • For a vegan version, I use plant-based cream and vegan Parmesan alternatives.
  • I like adding mushrooms for an earthy depth.
  • To make it spicier, I double up on the red pepper flakes or stir in some chili oil.

storage/reheating

I store leftovers in an airtight container in the refrigerator for up to 3 days. When reheating, I prefer doing it on the stovetop over low heat, adding a splash of cream or water to bring back the sauce’s silky texture. Microwaving works too—just make sure to stir halfway through and add a bit of moisture to keep it creamy.

FAQs

Can I use milk instead of heavy cream?

Yes, but the sauce will be thinner and less rich. I recommend using whole milk and maybe adding a bit of butter for extra creaminess.

What type of sun-dried tomatoes works best?

I like using sun-dried tomatoes packed in oil because they’re more flavorful and blend smoothly into the sauce.

Can I make this gluten-free?

Absolutely. I just use gluten-free spaghetti and check that all other ingredients are certified gluten-free.

Is this dish good for meal prep?

Yes, I find it reheats well, especially if I store the sauce and pasta separately.

Can I freeze the sauce?

I don’t recommend freezing the full dish with pasta, but the cream sauce alone can be frozen for up to a month. Just thaw and stir it well while reheating.

Conclusion

This Spaghetti & Spinach with Sun-Dried Tomato Cream Sauce is everything I want in a quick dinner—rich, vibrant, and incredibly satisfying. It’s easy to make, easy to tweak, and always hits the spot. Whether I’m cooking for myself or sharing with friends, this pasta dish is a go-to favorite that never disappoints.

Print

clock clock iconcutlery cutlery iconflag flag iconfolder folder iconinstagram instagram iconpinterest pinterest iconfacebook facebook iconprint print iconsquares squares iconheart heart iconheart solid heart solid icon
Spaghetti & Spinach with Sun-Dried Tomato Cream Sauce

Spaghetti & Spinach with Sun-Dried Tomato Cream Sauce

5 Stars 4 Stars 3 Stars 2 Stars 1 Star No reviews
  • Author: Sue
  • Prep Time: 15 minutes
  • Cook Time: 10–15 minutes
  • Total Time: 25–30 minutes
  • Yield: 4 servings
  • Category: Dinner, Main Course
  • Method: Stovetop
  • Cuisine: Italian-inspired, American
Print Recipe
Pin Recipe

Description

This Spaghetti & Spinach with Sun-Dried Tomato Cream Sauce is a quick and flavorful pasta dish that blends sun-dried tomatoes, fresh spinach, and a creamy Parmesan sauce for a rich, satisfying weeknight meal. Ideal for busy nights, this vegetarian recipe is both comforting and gourmet.


Ingredients

  • Spaghetti
  • Olive oil
  • Garlic (minced)
  • Sun-dried tomatoes (in oil, chopped)
  • Heavy cream
  • Parmesan cheese (freshly grated)
  • Fresh spinach
  • Salt
  • Black pepper
  • Crushed red pepper flakes (optional)

Instructions

  1. Bring a large pot of salted water to a boil and cook spaghetti until al dente. Reserve a bit of pasta water, then drain.
  2. In a large skillet, heat olive oil over medium heat. Sauté garlic until fragrant (about 1 minute).
  3. Add sun-dried tomatoes and cook for 1–2 minutes.
  4. Pour in heavy cream and bring to a simmer. Stir in Parmesan until the sauce thickens.
  5. Add spinach and let it wilt. Season with salt, pepper, and red pepper flakes if using.
  6. Toss in cooked spaghetti. Mix until evenly coated. Add reserved pasta water if needed to loosen the sauce.
  7. Serve hot with extra Parmesan on top if desired.

Notes

  • Swap spinach with kale or arugula for variety.
  • Add grilled chicken, shrimp, or mushrooms for extra protein and flavor.
  • Use vegan cream and cheese alternatives for a plant-based version.
  • Adjust spice by adding chili oil or more red pepper flakes.
  • Store leftovers in the fridge for up to 3 days; reheat with added moisture.
  • Sauce can be frozen separately for up to 1 month.

Have you made this recipe? I'd love to see it!

Click here to Follow me on Pinterest

Cucumbers in Spicy Peanut Sauce

April 20, 2025 by Sue Leave a Comment

This refreshing yet bold dish combines the crisp crunch of fresh cucumbers with the rich, creamy heat of a spicy peanut sauce. It’s a perfect side dish, light lunch, or even a quick snack that satisfies cravings for something both cooling and fiery. With just a few ingredients and minimal prep time, I can whip this up anytime I need something flavorful and fuss-free. Cucumbers in Spicy Peanut Sauce

Why You’ll Love This Recipe

I love how this recipe balances textures and flavors—it’s creamy, spicy, tangy, and crisp all at once. It takes almost no time to put together, making it a lifesaver when I need a last-minute side dish or a simple lunch. It’s also easy to customize, whether I want it milder, crunchier, or with an added boost of protein like tofu or chicken. And it’s vegan-friendly, so it fits into a wide range of diets.

ingredients

(Here's a tip: Check out the full list of ingredients and measurements in the recipe card below.)

  • Cucumbers, thinly sliced or cut into spears
  • Peanut butter (smooth or chunky, depending on my texture preference)
  • Soy sauce
  • Rice vinegar
  • Garlic, minced
  • Chili oil or sriracha (for heat)
  • Sugar or maple syrup (to balance the flavors)
  • Sesame seeds and chopped peanuts (optional for garnish)
  • Fresh herbs like cilantro or green onions (optional)

directions

  1. I start by slicing the cucumbers and placing them in a colander with a little salt to draw out excess water. I let them sit for 10–15 minutes, then pat them dry with paper towels.
  2. In a bowl, I whisk together the peanut butter, soy sauce, rice vinegar, garlic, chili oil, and a touch of sugar until smooth. If it's too thick, I add a splash of water to reach a drizzling consistency.
  3. I toss the cucumbers in the spicy peanut sauce until well coated.
  4. To serve, I transfer the cucumbers to a platter and sprinkle with sesame seeds, chopped peanuts, and fresh herbs if I’m using them.
  5. I let it chill for a few minutes in the fridge before serving, which helps the flavors meld.

Servings and timing

This recipe serves about 2–4 people depending on whether it’s a side or snack. It takes around 10 minutes to prepare, plus an optional 10–15 minutes for draining the cucumbers. No cooking required.

Variations

  • I sometimes add thinly sliced carrots or radishes for extra crunch.
  • For a protein boost, I mix in cubed tofu or shredded chicken.
  • If I want it less spicy, I reduce the chili oil or use a mild chili sauce.
  • A splash of lime juice gives it an extra zing when I’m craving something tangy.
  • I’ve also swapped peanut butter for almond butter and it turned out great.

storage/reheating

I store leftovers in an airtight container in the fridge for up to 2 days. The cucumbers can get a bit soft over time, but the flavor stays strong. This dish is meant to be enjoyed cold, so there’s no need for reheating. I give it a quick stir before serving again.

FAQs

Can I make this dish ahead of time?

Yes, I can prep the sauce and cucumbers separately and combine them just before serving. This keeps the cucumbers crisp.

What type of cucumber works best?

I usually go with Persian or English cucumbers because they’re seedless and have a nice crunch, but any type will work.

Is there a way to make this peanut-free?

Absolutely—I swap the peanut butter for sunflower seed butter or tahini when I need a nut-free version.

How do I adjust the spice level?

I simply use less chili oil or choose a milder hot sauce if I want less heat. For more kick, I add red pepper flakes or extra sriracha.

Can I serve this as a main dish?

I sometimes turn it into a light main by adding rice noodles or chilled soba noodles, along with tofu or shredded chicken.

Conclusion

Cucumbers in Spicy Peanut Sauce is one of those recipes I keep coming back to. It’s quick, satisfying, and full of bold flavor, with the perfect mix of creamy, spicy, and refreshing. Whether I’m serving it up as a snack, a salad, or part of a larger spread, it never fails to impress with its punchy simplicity.

Print

clock clock iconcutlery cutlery iconflag flag iconfolder folder iconinstagram instagram iconpinterest pinterest iconfacebook facebook iconprint print iconsquares squares iconheart heart iconheart solid heart solid icon
Cucumbers in Spicy Peanut Sauce

Cucumbers in Spicy Peanut Sauce

5 Stars 4 Stars 3 Stars 2 Stars 1 Star No reviews
  • Author: Sue
  • Prep Time: 10 minutes
  • Cook Time: 0 minutes
  • Total Time: 10–25 minutes (including optional draining time)
  • Yield: Serves 2–4
  • Category: Side Dish, Salad, Snack
  • Method: No-Cook
  • Cuisine: Asian-Inspired
Print Recipe
Pin Recipe

Description

“Cucumbers in Spicy Peanut Sauce” is a quick, bold, and refreshing vegan dish made with crunchy cucumbers and a creamy, spicy peanut dressing. Perfect as a side, snack, or light lunch, this recipe brings together flavor and texture with minimal prep time. Ideal for those seeking easy Asian-inspired cucumber recipes with heat and zing.


Ingredients

  • Cucumbers, thinly sliced or cut into spears
  • Peanut butter (smooth or chunky)
  • Soy sauce
  • Rice vinegar
  • Garlic, minced
  • Chili oil or sriracha
  • Sugar or maple syrup
  • Water (to adjust sauce consistency)
  • Sesame seeds (optional garnish)
  • Chopped peanuts (optional garnish)
  • Fresh herbs like cilantro or green onions (optional)

Instructions

  1. Slice cucumbers and place in a colander with a pinch of salt. Let them sit for 10–15 minutes, then pat dry.
  2. In a bowl, whisk peanut butter, soy sauce, rice vinegar, garlic, chili oil or sriracha, and sugar until smooth. Add water as needed to thin.
  3. Toss cucumbers in the spicy peanut sauce until evenly coated.
  4. Transfer to a platter and garnish with sesame seeds, chopped peanuts, and herbs if using.
  5. Chill briefly before serving to meld the flavors.

Notes

  • se Persian or English cucumbers for the best crunch.
  • Add sliced carrots or radishes for extra texture.
  • Customize spice level by adjusting chili oil or sriracha.
  • Peanut butter can be swapped with almond butter, sunflower seed butter, or tahini.
  • For a light main, add noodles and protein like tofu or shredded chicken.

Have you made this recipe? I'd love to see it!

Click here to Follow me on Pinterest

Homemade Strawberry Italian Cream Pound Cake

April 20, 2025 by Sue Leave a Comment

This Homemade Strawberry Italian Cream Pound Cake is rich, buttery, and incredibly moist, with the perfect balance of sweet strawberries and a slight tang from cream cheese. Every bite melts in my mouth, making it a beautiful dessert to serve for gatherings, holidays, or simply when I want something special and indulgent. Homemade Strawberry Italian Cream Pound Cake

Why You’ll Love This Recipe

I love how this cake combines the classic Southern charm of pound cake with a fruity twist. The strawberries bring in a fresh, juicy element that pairs so well with the dense, velvety texture of the cream cheese pound cake. It’s simple to make yet tastes like it came straight from a bakery. The flavor deepens overnight, making it even better the next day. It’s a go-to dessert when I want to impress without too much fuss.

ingredients

(Here's a tip: Check out the full list of ingredients and measurements in the recipe card below.)

  • All-purpose flour

  • Baking powder

  • Salt

  • Unsalted butter, room temperature

  • Cream cheese, room temperature

  • Granulated sugar

  • Eggs

  • Vanilla extract

  • Fresh strawberries, chopped

  • Powdered sugar (optional, for dusting)

directions

  1. I preheat my oven to 325°F (163°C) and grease a bundt pan thoroughly.

  2. In a bowl, I whisk together the flour, baking powder, and salt.

  3. In a separate mixing bowl, I cream the butter and cream cheese until smooth and fluffy.

  4. I gradually add in the sugar and beat until the mixture is light and airy.

  5. One at a time, I add the eggs, mixing well after each addition.

  6. I stir in the vanilla extract.

  7. Slowly, I mix in the dry ingredients, being careful not to overmix.

  8. I gently fold in the chopped strawberries.

  9. I pour the batter into the prepared bundt pan and smooth the top.

  10. I bake the cake for about 1 hour and 15 minutes, or until a toothpick inserted in the center comes out clean.

  11. After baking, I let it cool in the pan for about 15 minutes, then carefully turn it out onto a wire rack to cool completely.

  12. Once cooled, I dust the top with powdered sugar if desired.

Servings and timing

This recipe serves about 12–14 people. It takes approximately 20 minutes to prepare and 1 hour and 15 minutes to bake, with additional time for cooling.

Variations

  • I sometimes use a mix of strawberries and blueberries for a berry twist.

  • Swapping vanilla extract with almond extract gives it a deeper, nutty flavor.

  • For extra richness, I fold in white chocolate chips before baking.

  • I’ve also tried topping it with a strawberry glaze made from powdered sugar and mashed strawberries—absolutely delicious.

storage/reheating

I store the cake tightly wrapped at room temperature for up to 3 days. If I need it to last longer, I refrigerate it for up to a week. For even longer storage, I slice it and freeze the pieces individually. When I want a piece, I let it thaw at room temperature or microwave it in 10-second bursts until warmed through.

FAQs

How do I keep the strawberries from sinking to the bottom?

I toss the chopped strawberries in a bit of flour before folding them into the batter. That helps suspend them evenly throughout the cake.

Can I use frozen strawberries instead of fresh?

Yes, I can, but I make sure to thaw and drain them thoroughly to avoid adding extra moisture to the batter.

What kind of cream cheese should I use?

I always use full-fat cream cheese for the best texture and flavor. Avoid the whipped or reduced-fat versions.

Can I make this in a loaf pan?

Yes, but I divide the batter into two loaf pans and adjust the baking time accordingly. I check for doneness around the 55-minute mark.

Why is my pound cake dry?

Dryness usually happens from overbaking. I always check my cake at the minimum time and use a toothpick test to avoid overcooking.

Conclusion

This Homemade Strawberry Italian Cream Pound Cake is everything I want in a dessert—rich, fruity, and full of comforting flavor. It’s easy enough to whip up anytime but fancy enough to wow my guests. Whether I serve it at brunch, take it to a potluck, or just enjoy a slice with tea, it never disappoints.

Print

clock clock iconcutlery cutlery iconflag flag iconfolder folder iconinstagram instagram iconpinterest pinterest iconfacebook facebook iconprint print iconsquares squares iconheart heart iconheart solid heart solid icon
Homemade Strawberry Italian Cream Pound Cake

Homemade Strawberry Italian Cream Pound Cake

5 Stars 4 Stars 3 Stars 2 Stars 1 Star No reviews
  • Author: Sue
  • Prep Time: 20 minutes
  • Cook Time: 1 hour 15 minutes
  • Total Time: : 1 hour 35 minutes
  • Yield: 12–14 servings
  • Category: Dessert
  • Method: Baking
  • Cuisine: Southern, American
  • Diet: Vegetarian
Print Recipe
Pin Recipe

Description

This Homemade Strawberry Italian Cream Pound Cake is a rich and buttery dessert infused with fresh strawberries and cream cheese for an ultra-moist texture. Perfect for spring and summer gatherings, this easy strawberry pound cake recipe is bursting with flavor and Southern charm. Serve it dusted with powdered sugar or with a drizzle of strawberry glaze for a show-stopping treat!


Ingredients

  • 3 cups all-purpose flour
  • 1 tsp baking powder
  • ½ tsp salt
  • 1 cup (2 sticks) unsalted butter, room temperature
  • 8 oz cream cheese, room temperature
  • 2 ½ cups granulated sugar
  • 6 large eggs
  • 2 tsp vanilla extract
  • 1 ½ cups fresh strawberries, chopped
  • Powdered sugar (optional, for dusting)

Instructions

  1. Preheat oven to 325°F (163°C). Grease and flour a bundt pan.
  2. In a medium bowl, whisk together flour, baking powder, and salt.
  3. In a large mixing bowl, cream the butter and cream cheese until smooth.
  4. Gradually beat in the sugar until light and fluffy.
  5. Add eggs one at a time, mixing well after each addition.
  6. Stir in vanilla extract.
  7. Gradually add dry ingredients, mixing just until combined.
  8. Toss chopped strawberries with a tablespoon of flour, then gently fold into the batter.
  9. Pour batter into prepared bundt pan and smooth the top.
  10. Bake for 1 hour and 15 minutes or until a toothpick inserted into the center comes out clean.
  11. Cool in pan for 15 minutes, then turn out onto a wire rack to cool completely.
  12. Dust with powdered sugar if desired before serving.

Notes

  • Tossing the strawberries in flour prevents them from sinking to the bottom.
  • For extra flavor, substitute almond extract for vanilla.
  • Can be topped with a simple strawberry glaze for added sweetness.
  • Store at room temperature for 3 days, in the fridge for 7 days, or freeze slices for up to 3 months.

Have you made this recipe? I'd love to see it!

Click here to Follow me on Pinterest

  • « Previous Page
  • 1
  • …
  • 29
  • 30
  • 31
  • 32
  • 33
  • …
  • 39
  • Next Page »
Modern Sidebar

Hey there! I'm Sue, a mom, a wife, and someone who’s always in the kitchen trying out new recipes or revisiting old ones that remind me of family gatherings and special moments.

Learn more

Popular

  • Cracker Barrel Meatloaf Copycat Recipe
    Cracker Barrel Meatloaf Copycat Recipe
  • Hillbilly Pie (Poor Man’s Pie)
    Hillbilly Pie (Poor Man’s Pie)
  • Perfect Chocolate Cupcakes
    Perfect Chocolate Cupcakes
  • Slow Cooker Salisbury Steaks
    Slow Cooker Salisbury Steaks

Footer

↑ back to top

About

  • About
  • Contact
  • Disclosure Policy
  • DMCA
  • Privacy Policy
  • Terms and Conditions

Newsletter

  • Sign Up! for emails and updates

Recipes

  • Appetizers & Snacks
  • Beef
  • Breakfast
  • Chicken
  • Desserts
  • Dinner
  • Drinks
  • Side-Dish
  • Soups

As an Amazon Associate I earn from qualifying purchases.

Copyright © 2025 Sue Recipe