Sue Recipe

  • Recipe Index
  • Chicken
  • Desserts
  • About
  • Contact
menu icon
go to homepage
  • Recipe Index
  • Chicken
  • Desserts
  • About
  • Contact

search icon
Homepage link
  • Recipe Index
  • Chicken
  • Desserts
  • About
  • Contact

×

Lemon Sweet Rolls

March 27, 2025 by Sue Leave a Comment

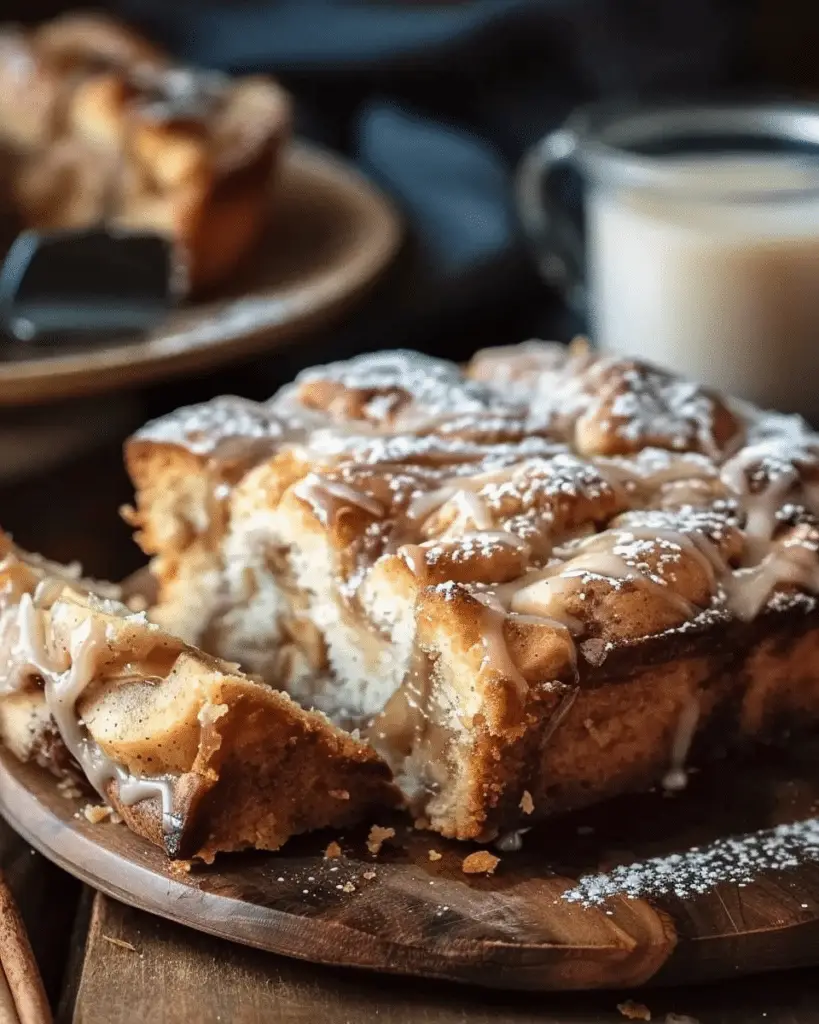
These Lemon Sweet Rolls are soft, fluffy, and bursting with bright citrus flavor. Topped with a tangy lemon glaze, they’re the perfect treat to welcome the morning or to enjoy as a light dessert. They bring a refreshing twist to the classic cinnamon roll, swapping out warm spices for a zesty, vibrant lemon filling that’s both sweet and tart.

Lemon Sweet Rolls

Why You’ll Love This Recipe

I love how these lemon sweet rolls brighten up any day. The dough is pillowy and tender, and the filling has that fresh-squeezed lemon flavor that pairs beautifully with just the right amount of sugar. The glaze on top adds an extra pop of lemon and sweetness that ties it all together. Whether it’s for brunch, a holiday, or just a weekend treat, these rolls never disappoint.

Ingredients

(Here's a tip: Check out the full list of ingredients and measurements in the recipe card below.)

  • All-purpose flour

  • Active dry yeast

  • Whole milk

  • Granulated sugar

  • Unsalted butter

  • Eggs

  • Salt

  • Lemons (juice and zest)

  • Powdered sugar

  • Cream cheese (optional for glaze)

Directions

  1. I start by warming the milk slightly and adding the yeast and a bit of sugar to activate it. I let it sit until it’s foamy.

  2. In a large bowl, I combine the activated yeast with the eggs, melted butter, more sugar, salt, and flour. I mix until a dough forms and knead until it’s smooth and elastic.

  3. I let the dough rise in a warm place until it doubles in size, which usually takes about an hour.

  4. While the dough rises, I prepare the filling by mixing lemon zest with sugar and softened butter.

  5. Once the dough has risen, I roll it out into a rectangle, spread the lemon filling evenly, and roll it up tightly from the long side.

  6. I slice the roll into even pieces and place them in a greased baking dish. After another short rise, I bake the rolls until golden.

  7. While they bake, I whisk together lemon juice, powdered sugar, and optionally cream cheese to make the glaze.

  8. Once the rolls are out of the oven, I drizzle the glaze generously over the top while they’re still warm.

Servings and timing

This recipe yields about 12 rolls.
Prep time: 2 hours (including rise time)
Cook time: 20–25 minutes
Total time: Approximately 2 hours and 30 minutes

Variations

  • I sometimes add a bit of vanilla extract or almond extract to the dough for extra depth.

  • If I want an extra tangy flavor, I include cream cheese in the glaze.

  • I’ve also tried adding blueberries to the filling for a lemon-blueberry twist.

  • For a more subtle flavor, I reduce the lemon zest and swap in a bit of orange zest instead.

storage/reheating

To store, I keep the rolls in an airtight container at room temperature for up to 2 days or refrigerate for up to 5 days.
For reheating, I microwave individual rolls for 15–20 seconds or warm them in a low oven (around 300°F) for 5–10 minutes.
If they’re glazed with cream cheese, I refrigerate them to keep the glaze fresh.

FAQs

How do I know when the dough has risen enough?

I press it gently with a fingertip; if the indentation remains, it’s ready to move on.

Can I make these lemon sweet rolls ahead of time?

Yes, I prepare them up to the point of baking, then cover and refrigerate overnight. In the morning, I let them come to room temperature before baking.

Can I use instant yeast instead of active dry?

Absolutely. I just skip the proofing step and mix it directly with the flour and other dry ingredients.

What if I don’t have fresh lemons?

Bottled lemon juice works in a pinch, but I recommend fresh lemons for the best flavor, especially for the zest.

Can I freeze the rolls?

Yes, I freeze them after baking and cooling. When ready to eat, I thaw and reheat before glazing.

Conclusion

Lemon Sweet Rolls are a delightful citrusy treat that’s as beautiful as it is delicious. I love how they combine the comfort of a soft roll with the brightness of lemon, making them perfect for spring mornings or anytime I crave something sweet and refreshing. Once I tried them, they quickly became a go-to favorite in my baking rotation.

Print

clock clock iconcutlery cutlery iconflag flag iconfolder folder iconinstagram instagram iconpinterest pinterest iconfacebook facebook iconprint print iconsquares squares iconheart heart iconheart solid heart solid icon
Lemon Sweet Rolls

Lemon Sweet Rolls

5 Stars 4 Stars 3 Stars 2 Stars 1 Star No reviews
  • Author: Sue
  • Prep Time: 2 hours (includes rise time)
  • Cook Time: 20–25 minutes
  • Total Time: ~2 hours 30 minutes
  • Yield: 12 rolls
  • Category: Breakfast, Brunch, Dessert
  • Method: Baking
  • Cuisine: American
  • Diet: Vegetarian
Print Recipe
Pin Recipe

Description

These Lemon Sweet Rolls are soft, fluffy, and filled with sweet-tart lemon zest and sugar, then topped with a tangy lemon glaze. A bright and citrusy twist on traditional cinnamon rolls, they're perfect for spring brunches, holidays, or anytime you crave a zesty, comforting treat. Easy to make and full of flavor, they’ll quickly become a household favorite.


Ingredients

  • 4 cups all-purpose flour
  • 2¼ tsp active dry yeast
  • 1 cup whole milk (warmed)
  • ½ cup granulated sugar (divided)
  • 6 tbsp unsalted butter (melted)
  • 2 large eggs
  • ½ tsp salt
  • Zest of 2 lemons
  • ¼ cup fresh lemon juice
  • ¾ cup powdered sugar
  • 2 tbsp cream cheese (optional, for glaze)

Instructions

  1. Warm the milk and mix with yeast and 1 tablespoon sugar. Let sit until foamy (5–10 mins).
  2. In a large bowl, mix eggs, melted butter, remaining sugar, salt, and foamy yeast. Add flour gradually until a soft dough forms.
  3. Knead dough for 8–10 minutes until smooth and elastic. Cover and let rise in a warm place for about 1 hour, or until doubled in size.
  4. Meanwhile, make the filling: Mix softened butter with lemon zest and a bit of sugar until combined.
  5. Roll dough into a rectangle, spread lemon filling evenly, and roll tightly into a log. Slice into 12 even rolls.
  6. Place rolls into a greased baking dish. Cover and let rise again for 30–45 minutes.
  7. Bake at 350°F (175°C) for 20–25 minutes or until golden brown.
  8. While baking, make the glaze: Whisk powdered sugar, lemon juice, and cream cheese (if using) until smooth.
  9. Drizzle glaze over warm rolls and serve.

Notes

  • Use fresh lemons for best flavor.
  • Cream cheese in the glaze adds richness and tang.
  • Rolls can be assembled the night before and baked in the morning.
  • Add blueberries or swap in orange zest for variations.
  • If using instant yeast, skip proofing and mix with dry ingredients.

Have you made this recipe? I'd love to see it!

Click here to Follow me on Pinterest

Butter Pecan Cookies

March 27, 2025 by Sue Leave a Comment

These butter pecan cookies are rich, nutty, and full of warm, buttery flavor. I make them with toasted pecans and browned butter for that classic Southern-inspired depth, and every bite melts in my mouth with just the right amount of chew. They're perfect for holiday baking or anytime I want a cozy, comforting treat.

Butter Pecan Cookies

Why You’ll Love This Recipe

I love how these cookies combine simple ingredients to create something really special. The browned butter adds a deep, caramel-like note, and the toasted pecans give them a nutty crunch that balances perfectly with the soft cookie base. They’re easy to make, freeze beautifully, and always disappear fast when I bring them to gatherings. If I’m in the mood for a cookie that feels both nostalgic and indulgent, these hit the mark.

Ingredients

(Here's a tip: Check out the full list of ingredients and measurements in the recipe card below.)

  • Unsalted butter

  • Brown sugar

  • Granulated sugar

  • Eggs

  • Vanilla extract

  • All-purpose flour

  • Baking soda

  • Salt

  • Pecans (toasted and chopped)

Directions

  1. I start by browning the butter in a saucepan over medium heat until it smells nutty and turns golden brown. I let it cool slightly before using.

  2. In a large mixing bowl, I combine the browned butter, brown sugar, and granulated sugar, and mix until smooth.

  3. I beat in the eggs one at a time, followed by the vanilla extract.

  4. In a separate bowl, I whisk together the flour, baking soda, and salt, then slowly mix the dry ingredients into the wet mixture until combined.

  5. I stir in the toasted chopped pecans.

  6. I chill the dough for at least 30 minutes to prevent spreading.

  7. Once chilled, I scoop the dough into balls and place them on a parchment-lined baking sheet.

  8. I bake the cookies at 350°F (175°C) for 10–12 minutes, until the edges are golden but the centers are still soft.

  9. I let them cool on the baking sheet for a few minutes before transferring to a wire rack.

Servings and timing

This recipe makes about 24 cookies and takes around 1 hour total—15 minutes for prep, 30 minutes to chill the dough, and 10–12 minutes to bake.

Variations

Sometimes I add a sprinkle of flaky sea salt on top before baking for a sweet-and-salty finish. If I want extra decadence, I mix in a handful of white or dark chocolate chips. For a holiday twist, I add a pinch of cinnamon or nutmeg to the dough.

storage/reheating

I store the baked cookies in an airtight container at room temperature for up to 5 days. They also freeze well—I freeze both the baked cookies and the unbaked dough balls for up to 3 months. To enjoy from frozen, I let them thaw at room temperature or pop them in a 300°F oven for a few minutes to warm them up.

FAQs

Why brown the butter?

Browning the butter brings out a rich, nutty flavor that adds incredible depth to the cookies. I always let it cool before mixing it with the sugar so the dough doesn’t get too loose.

Can I use regular butter instead of browned butter?

Yes, but I find the browned butter gives the cookies a much more complex flavor. If I’m short on time, softened unsalted butter still works well.

Do I have to toast the pecans?

Toasting the pecans really enhances their flavor and makes a big difference. I usually toast them in a dry skillet for a few minutes until they’re fragrant.

Can I chill the dough overnight?

Absolutely. I often make the dough ahead and chill it overnight. The flavor develops even more that way, and the cookies hold their shape better during baking.

Can I make these gluten-free?

Yes, I’ve had success using a 1:1 gluten-free flour blend. The texture may be slightly different, but the flavor still shines through.

Conclusion

These butter pecan cookies are everything I want in a homemade dessert—soft, flavorful, and loaded with nutty goodness. Whether I’m baking them for the holidays or just treating myself, they always bring that warm, cozy feeling with every bite.

Print

clock clock iconcutlery cutlery iconflag flag iconfolder folder iconinstagram instagram iconpinterest pinterest iconfacebook facebook iconprint print iconsquares squares iconheart heart iconheart solid heart solid icon
Butter Pecan Cookies

Butter Pecan Cookies

5 Stars 4 Stars 3 Stars 2 Stars 1 Star No reviews
  • Author: Sue
  • Prep Time: 15 minutes
  • Cook Time: 12 minutes
  • Total Time: 1 hour
  • Yield: 24 cookies
  • Category: Dessert, Cookies
  • Method: Baking
  • Cuisine: American, Southern-Inspired
  • Diet: Vegetarian
Print Recipe
Pin Recipe

Description

These Butter Pecan Cookies are soft, chewy, and bursting with buttery, nutty flavor. Made with browned butter and toasted pecans, they offer a rich Southern-style taste in every bite. Perfect for holiday cookie trays or cozy year-round baking, this easy cookie recipe freezes well and always satisfies a sweet tooth.


Ingredients

  • 1 cup (2 sticks) unsalted butter
  • 1 cup brown sugar, packed
  • ½ cup granulated sugar
  • 2 large eggs
  • 2 tsp vanilla extract
  • 2½ cups all-purpose flour
  • 1 tsp baking soda
  • ½ tsp salt
  • 1½ cups pecans, toasted and chopped

Instructions

  1. In a saucepan, brown the butter over medium heat until golden and fragrant. Cool slightly.
  2. In a mixing bowl, combine browned butter, brown sugar, and granulated sugar. Mix until smooth.
  3. Beat in eggs one at a time, then add vanilla extract.
  4. In a separate bowl, whisk together flour, baking soda, and salt. Gradually mix dry ingredients into wet mixture.
  5. Stir in toasted chopped pecans.
  6. Chill dough for at least 30 minutes.
  7. Preheat oven to 350°F (175°C). Line baking sheet with parchment paper.
  8. Scoop dough into balls and place on baking sheet, spaced apart.
  9. Bake for 10–12 minutes, until edges are golden and centers are soft.
  10. Cool on the baking sheet for a few minutes before transferring to a wire rack.

Notes

  • Browning the butter adds rich, caramel-like flavor.
  • Chill the dough to keep cookies thick and chewy.
  • Add white or dark chocolate chips for extra indulgence.
  • A pinch of cinnamon or nutmeg gives a warm holiday twist.
  • Sprinkle with flaky sea salt before baking for a sweet-salty finish.
  • Freeze dough balls or baked cookies for up to 3 months.

Have you made this recipe? I'd love to see it!

Click here to Follow me on Pinterest

Orange Creamsicle Cake

March 27, 2025 by Sue Leave a Comment

This Orange Creamsicle Cake is a light, fluffy dessert bursting with bright citrus flavor and creamy vanilla frosting—just like the nostalgic popsicle I grew up loving. It’s made with a few simple ingredients, but the result is a beautifully layered treat that feels special and tastes like summer in every bite.

Orange Creamsicle Cake

Why You’ll Love This Recipe

I love how this cake captures the classic orange creamsicle flavor with minimal effort. The orange cake base is soft, moist, and full of sunshiney citrus goodness, while the creamy vanilla frosting balances it out with smooth sweetness. Whether I’m baking it for a celebration or just because, this cake brings a fun, retro twist to any dessert table. It’s also easy to decorate and even easier to devour.

ingredients

(Here's a tip: Check out the full list of ingredients and measurements in the recipe card below.)

  • Orange cake mix (or vanilla cake mix with added orange zest and extract)

  • Eggs

  • Vegetable oil

  • Orange juice

  • Orange zest

  • Vanilla pudding mix (instant)

  • Milk

  • Whipped topping (like Cool Whip)

  • Cream cheese (optional, for richer frosting)

  • Orange gelatin (for added orange flavor and color, optional)

  • Powdered sugar (if making homemade frosting)

  • Vanilla extract

directions

  1. I begin by preparing the cake mix according to the package directions, but I substitute orange juice for part of the water to boost the flavor, and I mix in orange zest.

  2. I pour the batter into a greased 9x13 inch pan or two round cake pans, then bake as directed until a toothpick comes out clean.

  3. While the cake cools, I mix together vanilla pudding mix with cold milk until thick, then fold in whipped topping (and cream cheese if I want extra richness).

  4. Once the cake is completely cool, I spread the frosting evenly over the top. For a layered cake, I frost between the layers and the sides too.

  5. I sometimes add a sprinkle of orange zest or a few candied orange slices on top for decoration.

Servings and timing

This cake serves about 12–16 slices, depending on how generous I’m feeling. It takes about 10 minutes to prep, 25–30 minutes to bake, and another 15 minutes to cool and frost—so it’s ready in around an hour.

Variations

I like to customize this cake in a few fun ways:

  • I swirl orange gelatin into the cake batter for a marbled creamsicle look.

  • I make it a poke cake by poking holes in the baked cake and pouring in prepared orange gelatin before frosting.

  • For a fancier look, I bake it as a layered c

    ake with piped frosting and garnish.

  • I sometimes use orange-flavored extract in the frosting for an extra citrus boost.

storage/reheating

I store the cake covered in the refrigerator for up to 4 days. It actually tastes even better the next day as the flavors meld. I don’t usually reheat it, but I let it sit at room temperature for about 10–15 minutes before serving to let the frosting soften.

FAQs

Can I use fresh oranges instead of orange juice from a bottle?

Yes, I like using fresh orange juice and zest whenever I can for the brightest flavor.

Can I make this cake ahead of time?

Definitely. I often bake the cake a day ahead and frost it right before serving or even earlier. It holds up beautifully.

What if I don’t have pudding mix?

I can make a simple whipped cream and cream cheese frosting with powdered sugar and vanilla—it’s still delicious.

Can I use homemade cake batter?

Of course. A homemade orange or vanilla cake batter works great if I prefer not to use a boxed mix.

Does this cake need to be refrigerated?

Yes, since the frosting includes whipped topping or cream cheese, I always keep it chilled.

Conclusion

This Orange Creamsicle Cake brings sunshine to the table no matter the season. I love how it combines nostalgic flavors with an easy-to-make recipe that’s perfect for birthdays, barbecues, or just a sweet treat at home. One bite and I’m reminded of those creamy popsicles I used to enjoy as a kid—only now, I get to enjoy them in cake form.

Print

clock clock iconcutlery cutlery iconflag flag iconfolder folder iconinstagram instagram iconpinterest pinterest iconfacebook facebook iconprint print iconsquares squares iconheart heart iconheart solid heart solid icon
Orange Creamsicle Cake

Orange Creamsicle Cake

5 Stars 4 Stars 3 Stars 2 Stars 1 Star No reviews
  • Author: Sue
  • Prep Time: 10 minutes
  • Cook Time: 25–30 minutes
  • Total Time: 1 hour (including cooling and frosting)
  • Yield: 12–16 servings
  • Category: Dessert, Cake
  • Method: Baked
  • Cuisine: American
  • Diet: Vegetarian
Print Recipe
Pin Recipe

Description

This Orange Creamsicle Cake recipe is a dreamy citrus dessert with the nostalgic flavor of the classic orange creamsicle popsicle. A soft, moist orange cake base pairs perfectly with creamy vanilla frosting made from pudding and whipped topping. It’s an easy, crowd-pleasing dessert perfect for birthdays, summer parties, or anytime you crave a refreshing treat.


Ingredients

  • 1 box orange cake mix (or vanilla cake mix + 1 tbsp orange zest + ½ tsp orange extract)
  • 3 eggs (or as directed on cake mix)
  • ½ cup vegetable oil
  • 1 cup orange juice (can substitute half for water if needed)
  • 1 tbsp orange zest
  • 1 package (3.4 oz) instant vanilla pudding mix
  • 1 cup cold milk
  • 8 oz whipped topping (e.g., Cool Whip)
  • 4 oz cream cheese, softened (optional, for richer frosting)
  • 1 tbsp powdered sugar (optional, for homemade frosting)
  • ½ tsp vanilla extract
  • 1 small box orange gelatin (optional for marbling or poke cake)
  • Orange zest or candied orange slices for garnish (optional)

Instructions

  1. Preheat oven to 350°F (175°C). Grease a 9x13 inch baking pan or two 8-inch round pans.
  2. In a large bowl, prepare the cake mix according to package instructions, replacing part of the water with orange juice and adding orange zest. Mix well.
  3. Pour into prepared pan(s) and bake for 25–30 minutes or until a toothpick inserted comes out clean. Let cool completely.
  4. In another bowl, whisk vanilla pudding mix with cold milk until thickened (about 2 minutes).
  5. Fold in whipped topping and softened cream cheese (if using) until smooth and fluffy.
  6. Spread frosting over cooled cake. For a layer cake, frost between layers and around the sides.
  7. Garnish with orange zest or candied orange slices if desired. Chill before serving.

Notes

  • For a fun twist, poke holes in the cake and pour in prepared orange gelatin for a creamsicle poke cake.
  • For homemade frosting, skip the pudding and mix cream cheese, powdered sugar, whipped cream, and vanilla.
  • This cake tastes even better after chilling overnight.
  • Add orange extract to the frosting for extra orange punch.

Have you made this recipe? I'd love to see it!

Click here to Follow me on Pinterest

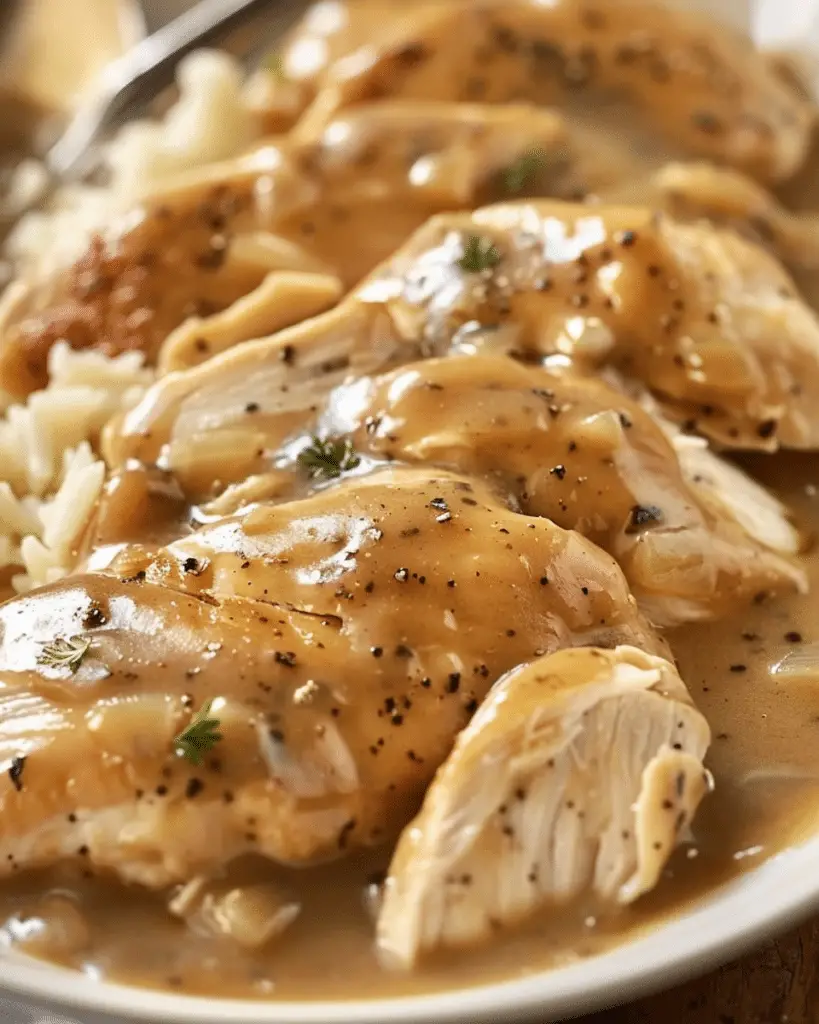
Smothered Chicken and Rice

March 27, 2025 by Sue Leave a Comment

Smothered chicken and rice is the kind of dish that feels like a warm hug on a plate. Tender chicken is seared and simmered in a savory, creamy gravy, then served over fluffy rice that soaks up all that rich, comforting flavor. It’s a soulful, Southern-style meal I love making when I want something hearty, filling, and full of down-home goodness.

Smothered Chicken and Rice

Why You’ll Love This Recipe

I love how this recipe brings together simple ingredients to create something so deeply satisfying. The chicken turns out juicy and flavorful, and the gravy is rich and packed with seasonings. It’s all cooked in one skillet, which means fewer dishes, and it’s just the kind of meal that makes the house smell amazing while it’s cooking. Whether I’m feeding the family or making dinner for myself, this one always hits the spot.

Ingredients

(Here's a tip: Check out the full list of ingredients and measurements in the recipe card below.)

  • Bone-in, skin-on chicken thighs or drumsticks (I like thighs for their juiciness)

  • Seasonings: salt, pepper, garlic powder, onion powder, paprika

  • All-purpose flour (for dredging and thickening the gravy)

  • Butter or oil (for searing the chicken)

  • Onion, diced

  • Garlic, minced

  • Chicken broth

  • Heavy cream or milk (for a creamier gravy)

  • Cooked white rice

Directions

  1. I season the chicken generously with salt, pepper, garlic powder, onion powder, and paprika.

  2. Then I lightly dredge the chicken in flour to help get that golden crust and thicken the gravy later.

  3. In a large skillet or Dutch oven, I melt some butter or heat oil over medium heat and sear the chicken until golden brown on both sides. I remove it and set it aside.

  4. In the same pan, I sauté the onions until soft, then add garlic and cook for a minute more.

  5. I sprinkle in a bit more flour, stir, and let it cook for a minute to make a roux. Then I slowly pour in chicken broth, whisking constantly until smooth.

  6. I stir in a splash of cream or milk for richness, bring the sauce to a simmer, and return the chicken to the pan.

  7. I cover and simmer everything for 30–40 minutes, until the chicken is tender and the gravy is thick and flavorful.

  8. I serve it hot over rice, spooning that savory gravy all over.

Servings and timing

This recipe serves 4 and takes about 10 minutes to prep, 15 minutes to sear and build the gravy, and around 30–40 minutes to simmer. Total time is approximately 1 hour.

Variations

Sometimes I add mushrooms or bell peppers to the gravy for extra depth. I’ve also made this with boneless chicken breasts, but I adjust the cooking time so they don’t dry out. For a Cajun twist, I use Creole seasoning instead of the standard spice mix. I’ve even used brown rice or mashed potatoes instead of white rice—just depends on what I have on hand.

Storage/Reheating

Leftovers go into an airtight container and stay fresh in the fridge for up to 4 days. I reheat in the microwave or on the stovetop over low heat, adding a splash of broth or milk if the gravy thickens too much. It also freezes well—just let it cool, store in freezer-safe containers, and thaw in the fridge before reheating.

FAQs

Can I use boneless chicken?

Yes, I’ve used boneless chicken thighs and breasts. They cook a little faster, so I keep an eye on them and reduce the simmering time to avoid overcooking.

What kind of rice works best?

I like long grain white rice for this, but jasmine or basmati also work great. Brown rice adds a nuttier flavor, but it takes longer to cook.

How do I make the gravy thicker?

If the gravy isn’t thick enough, I whisk a little flour into cold water, then stir it into the simmering sauce and let it cook until thickened.

Can I make this ahead?

Definitely. I often make it a day in advance—the flavors deepen overnight. I just reheat gently and cook fresh rice when I’m ready to serve.

Is this dish spicy?

Not unless I add spice. It’s mild by default, but if I’m craving heat, I’ll throw in a dash of cayenne or hot sauce while the gravy simmers.

Conclusion

Smothered chicken and rice is the ultimate comfort food, and I always come back to it when I want a meal that feels like home. It’s rich, creamy, and made with simple ingredients that bring big flavor. Whether it’s a weeknight dinner or a Sunday favorite, this dish never disappoints.

Print

clock clock iconcutlery cutlery iconflag flag iconfolder folder iconinstagram instagram iconpinterest pinterest iconfacebook facebook iconprint print iconsquares squares iconheart heart iconheart solid heart solid icon
Smothered Chicken and Rice

Smothered Chicken and Rice

5 Stars 4 Stars 3 Stars 2 Stars 1 Star No reviews
  • Author: Sue
  • Prep Time: 10 minutes
  • Cook Time: 45 minutes
  • Total Time: 1 hour
  • Yield: 4 servings
  • Category: Dinner
  • Method: Skillet / One-Pot
  • Cuisine: Southern / American
Print Recipe
Pin Recipe

Description

This rich and creamy smothered chicken and rice recipe brings Southern comfort to your table with juicy seared chicken simmered in savory gravy, all served over fluffy white rice. It’s a one-skillet meal full of soulful flavor—perfect for cozy weeknights or Sunday supper.


Ingredients

  • 4 bone-in, skin-on chicken thighs or drumsticks
  • 1 tsp salt
  • ½ tsp black pepper
  • 1 tsp garlic powder
  • 1 tsp onion powder
  • ½ tsp paprika
  • ½ cup all-purpose flour (for dredging + thickening)
  • 2 tbsp butter or oil
  • 1 small onion, diced
  • 2 cloves garlic, minced
  • 2 cups chicken broth
  • ½ cup heavy cream or milk
  • 3 cups cooked white rice

Instructions

  1. Season chicken with salt, pepper, garlic powder, onion powder, and paprika.
  2. Lightly dredge chicken in flour and set aside.
  3. In a large skillet or Dutch oven, heat butter or oil over medium heat. Sear chicken until golden on both sides. Remove and set aside.
  4. In the same pan, sauté diced onions until soft. Add garlic and cook 1 minute more.
  5. Sprinkle in remaining flour, stir well, and cook 1 minute to form a roux.
  6. Slowly whisk in chicken broth until smooth. Stir in heavy cream or milk.
  7. Bring to a simmer, then return chicken to the pan. Cover and simmer for 30–40 minutes, until chicken is cooked through and tender.
  8. Serve hot over cooked white rice, spooning gravy on top.

Notes

  • Add mushrooms or bell peppers for more texture.
  • Boneless chicken cooks faster—adjust simmer time accordingly.
  • For a Cajun twist, use Creole seasoning instead of standard spices.
  • Pairs well with brown rice or mashed potatoes, too.
  • To thicken gravy, mix a little flour with cold water and stir into the simmering sauce.

Have you made this recipe? I'd love to see it!

Click here to Follow me on Pinterest

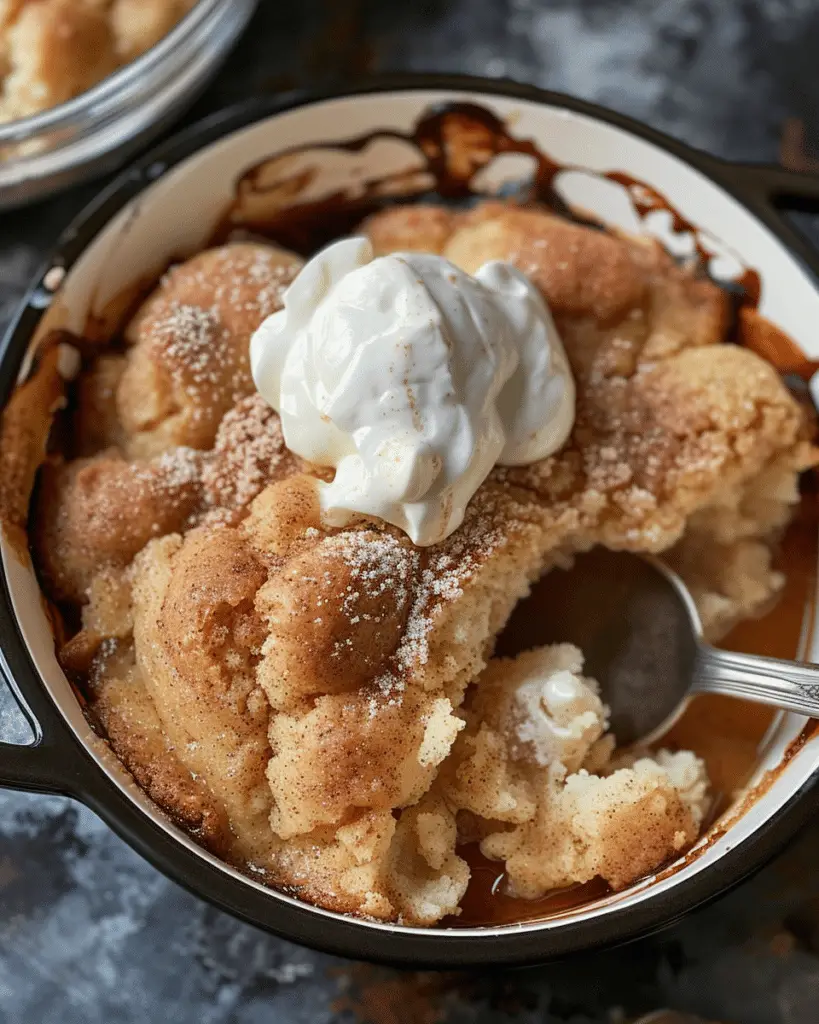
Snickerdoodle Cobbler

March 27, 2025 by Sue Leave a Comment

Snickerdoodle Cobbler is a magical dessert that combines the buttery, cinnamon-sugar goodness of snickerdoodle cookies with the warm, gooey texture of a cobbler. It creates its own caramel-like sauce as it bakes, making every bite rich, cozy, and irresistible. I love serving it warm with a scoop of vanilla ice cream for the ultimate comfort treat.

Snickerdoodle Cobbler

Why You’ll Love This Recipe

I can never get enough of the soft, cinnamon-spiced flavor of snickerdoodles, and this cobbler takes it to the next level. It's easy to prepare with simple pantry staples, and the bubbling sauce that forms under the cakey topping is absolutely decadent. Whether I’m hosting guests or just treating myself, this dessert never fails to impress.

ingredients

(Here's a tip: Check out the full list of ingredients and measurements in the recipe card below.)

  • All-purpose flour
  • Granulated sugar
  • Brown sugar
  • Baking powder
  • Salt
  • Milk
  • Butter
  • Vanilla extract
  • Ground cinnamon
  • Boiling water

directions

  1. I preheat the oven to 350°F (175°C).
  2. In a mixing bowl, I combine flour, granulated sugar, baking powder, salt, and milk to make the batter.
  3. I melt the butter in a baking dish in the oven, then pour the batter over the melted butter without stirring.
  4. In another bowl, I mix brown sugar and cinnamon, then sprinkle this mixture evenly over the batter.
  5. I gently pour boiling water over the top—again, without stirring.
  6. I bake for 40 to 45 minutes until the top is golden and the cobbler is set.
  7. I let it cool for a few minutes before serving. It’s especially delicious with vanilla ice cream.

Servings and timing

This recipe serves about 6 to 8 people. Prep takes around 10 minutes, and baking time is 40 to 45 minutes.

Variations

  • I sometimes add chopped pecans or walnuts on top for extra texture.
  • A pinch of nutmeg in the cinnamon sugar mix gives it a little twist.
  • I swap out the milk for almond milk or oat milk for a dairy-free version.
  • For a more indulgent take, I drizzle caramel sauce over the finished cobbler.

storage/reheating

I store leftover cobbler covered in the fridge for up to 4 days. When reheating, I warm individual portions in the microwave for about 30 seconds to 1 minute. If reheating the whole dish, I cover it with foil and warm it in a 300°F oven for 10 to 15 minutes.

FAQs

What makes this a "cobbler" instead of a cake?

The unique layering and the boiling water poured over the top create a saucy bottom layer and a fluffy, cake-like topping—a signature of cobbler-style desserts.

Can I make this ahead of time?

Yes, I can prep the dry ingredients in advance. I recommend baking it fresh for the best texture, but leftovers still taste great the next day.

Can I use a cake mix?

Some variations use yellow cake mix for convenience. I prefer the from-scratch version for a more authentic snickerdoodle flavor.

Is this recipe kid-friendly?

Absolutely. Kids love the warm cinnamon-sugar taste, and it’s a fun dessert to make together.

Can I double the recipe?

Yes, I double it and bake it in a 9x13-inch pan. I just keep an eye on the baking time, which may need a few extra minutes.

Conclusion

Snickerdoodle Cobbler is a nostalgic and cozy dessert that always hits the spot. With its gooey cinnamon sauce and fluffy topping, it brings comfort and joy in every spoonful. It’s easy, versatile, and a definite crowd-pleaser for any occasion.

Print

clock clock iconcutlery cutlery iconflag flag iconfolder folder iconinstagram instagram iconpinterest pinterest iconfacebook facebook iconprint print iconsquares squares iconheart heart iconheart solid heart solid icon
Snickerdoodle Cobbler

5 Stars 4 Stars 3 Stars 2 Stars 1 Star No reviews
  • Author: Sue
  • Prep Time: 10 minutes
  • Cook Time: 40–45 minutes
  • Total Time: 50–55 minutes
  • Yield: 6–8 servings
  • Category: Dessert
  • Method: Baking
  • Cuisine: American
  • Diet: Vegetarian
Print Recipe
Pin Recipe

Description

This Snickerdoodle Cobbler is the ultimate cozy dessert—featuring a buttery cinnamon-sugar topping and a rich, gooey caramel-like sauce that forms as it bakes. It’s an easy, magical twist on the classic cookie turned into a warm, comforting cobbler. Serve it with vanilla ice cream for a nostalgic, crowd-pleasing treat perfect for any occasion.


Ingredients

  • 1 cup all-purpose flour
  • ¾ cup granulated sugar
  • 2 tsp baking powder
  • ¼ tsp salt
  • ½ cup milk
  • ½ cup (1 stick) unsalted butter, melted
  • 1 tsp vanilla extract
  • ½ cup brown sugar
  • 1 tsp ground cinnamon
  • 1 ¼ cups boiling water

Instructions

  1. Preheat oven to 350°F (175°C).
  2. In a mixing bowl, whisk together flour, granulated sugar, baking powder, salt, and milk until just combined.
  3. Melt butter in a 9x9-inch baking dish in the preheating oven.
  4. Pour batter over the melted butter in the dish—do not stir.
  5. In a small bowl, combine brown sugar and cinnamon. Sprinkle evenly over the batter.
  6. Carefully pour boiling water over the top—do not stir.
  7. Bake for 40–45 minutes, or until golden brown and set on top.
  8. Let cool slightly before serving. Serve warm with a scoop of vanilla ice cream.

Notes

  • Add chopped pecans or walnuts on top for crunch.
  • Swap milk with almond or oat milk for a dairy-free version.
  • Add a pinch of nutmeg for extra depth.
  • Drizzle caramel sauce over the finished cobbler for an indulgent twist.
  • To double the recipe, bake in a 9x13-inch dish and extend bake time slightly.

Have you made this recipe? I'd love to see it!

Click here to Follow me on Pinterest

Crockpot Chicken and Gravy

March 27, 2025 by Sue Leave a Comment

Crockpot Chicken and Gravy is a comforting, hearty dish that combines tender, slow-cooked chicken with a rich, savory gravy. It's an effortless meal that brings warmth and satisfaction to the table, perfect for busy days when I crave a home-cooked dinner without the fuss.

Crockpot Chicken and Gravy

Why I Love This Recipe

I find this recipe appealing for several reasons:

  • Simplicity: With minimal ingredients and preparation, I can set it in the morning and return to a ready-to-serve meal in the evening.

  • Flavorful Comfort: The combination of tender chicken and creamy gravy provides a classic comfort food experience that I always enjoy.

  • Versatility: I can serve it over rice, mashed potatoes, or noodles, making it adaptable to what I have on hand.

Ingredients

(Here's a tip: Check out the full list of ingredients and measurements in the recipe card below.)

  • Boneless, skinless chicken breasts

  • Chicken gravy mix packets

  • Cream of chicken soup

  • Water or chicken broth

  • Garlic powder

  • Black pepper

  • Sour cream (optional)

Directions

  1. Prepare the Slow Cooker: I place the chicken breasts in the bottom of my slow cooker and season them with garlic powder and black pepper.

  2. Mix the Gravy: In a bowl, I whisk together the chicken gravy mix packets, cream of chicken soup, and water or chicken broth until smooth.

  3. Combine: I pour the gravy mixture over the seasoned chicken, ensuring the chicken is well-covered.

  4. Cook: I cover and cook on low for 6-8 hours, or until the chicken is tender and easily shredded.

  5. Shred and Serve: Once cooked, I shred the chicken directly in the slow cooker using two forks, mix it well with the gravy, and serve over my choice of rice, mashed potatoes, or noodles. For added creaminess, I sometimes stir in sour cream before serving.

Servings and Timing

This recipe yields approximately 4 servings. The preparation time is about 10 minutes, and the cooking time ranges from 6 to 8 hours on low, making it ideal for a set-it-and-forget-it meal.

Variations

I enjoy experimenting with this recipe by:

  • Adding Vegetables: Incorporating frozen peas, carrots, or green beans during the last hour of cooking adds nutrition and color.

  • Using Different Proteins: Substituting chicken thighs for breasts offers a richer flavor and remains just as tender.

  • Spicing It Up: Adding a pinch of paprika or cayenne pepper introduces a subtle heat that enhances the overall flavor.

Storage and Reheating

To store leftovers, I place them in an airtight container and refrigerate for up to 3 days. For longer storage, I freeze portions for up to 3 months. When ready to eat, I reheat the chicken and gravy gently on the stove over medium heat, adding a splash of water or broth if the gravy has thickened too much.

FAQs

Can I use frozen chicken breasts?

Yes, I can use frozen chicken breasts. However, I ensure they are separated and not in a solid block to allow for even cooking. I also check that the internal temperature reaches 165°F to ensure safety.

Is it possible to cook this on high?

Yes, I can cook the dish on high for 3-4 hours, but I prefer the low setting for 6-8 hours as it results in more tender chicken.

Can I make this dish gluten-free?

To make this recipe gluten-free, I use gluten-free gravy mix and a gluten-free cream of chicken soup. I always check the labels to ensure all ingredients meet gluten-free standards.

What can I serve with Crockpot Chicken and Gravy?

I typically serve this dish over mashed potatoes, rice, or egg noodles. A side of steamed vegetables or a fresh salad complements the meal well.

How can I thicken the gravy if it's too thin?

If the gravy is thinner than I prefer, I mix a tablespoon of cornstarch with two tablespoons of cold water to create a slurry, then stir it into the gravy and cook on high for an additional 15-20 minutes until it thickens.

Conclusion

Crockpot Chicken and Gravy is a delightful, easy-to-make meal that brings comfort and satisfaction to my table. Its simplicity, combined with rich flavors and versatility, makes it a go-to recipe in my collection. Whether I'm serving it for a family dinner or preparing meals ahead of time, this dish never fails to please.

Print

clock clock iconcutlery cutlery iconflag flag iconfolder folder iconinstagram instagram iconpinterest pinterest iconfacebook facebook iconprint print iconsquares squares iconheart heart iconheart solid heart solid icon
Crockpot Chicken and Gravy

Crockpot Chicken and Gravy

5 Stars 4 Stars 3 Stars 2 Stars 1 Star No reviews
  • Author: Sue
  • Prep Time: 10 minutes
  • Cook Time: 6–8 hours (low) or 3–4 hours (high)
  • Total Time: 6 hours 10 minutes to 8 hours 10 minutes
  • Yield: 4 servings
  • Category: Main Course
  • Method: Slow Cooker
  • Cuisine: American
  • Diet: Gluten Free
Print Recipe
Pin Recipe

Description

Crockpot Chicken and Gravy is a cozy, slow-cooked meal made with tender chicken breasts simmered in a creamy, savory gravy. Perfect for busy weeknights or comforting weekend dinners, this no-fuss recipe delivers classic homestyle flavor with minimal prep. Serve it over mashed potatoes, rice, or noodles for the ultimate comfort food experience.


Ingredients

  • 2–3 boneless, skinless chicken breasts
  • 2 packets chicken gravy mix
  • 1 (10.5 oz) can cream of chicken soup
  • 1 ½ cups water or chicken broth
  • ½ tsp garlic powder
  • ¼ tsp black pepper
  • ½ cup sour cream (optional, stirred in at the end)

Instructions

  1. Add Chicken: Place chicken breasts in the bottom of the crockpot. Season with garlic powder and black pepper.
  2. Prepare Gravy: In a separate bowl, whisk together chicken gravy mix, cream of chicken soup, and water or broth until smooth.
  3. Pour & Cook: Pour the gravy mixture over the chicken. Cover and cook on low for 6–8 hours (or high for 3–4 hours) until the chicken is tender.
  4. Shred Chicken: Shred the chicken directly in the crockpot using two forks and stir to combine with the gravy.
  5. Finish & Serve: For extra creaminess, stir in sour cream before serving. Serve over rice, mashed potatoes, or egg noodles.

Notes

  • You can use frozen chicken breasts, just ensure they’re separated.
  • Add frozen vegetables during the last hour for a one-pot meal.
  • Substitute chicken thighs for richer flavor.
  • Add paprika or cayenne for a slight kick.
  • To thicken gravy, use a cornstarch slurry (1 tablespoon cornstarch + 2 tablespoon cold water).

Have you made this recipe? I'd love to see it!

Click here to Follow me on Pinterest

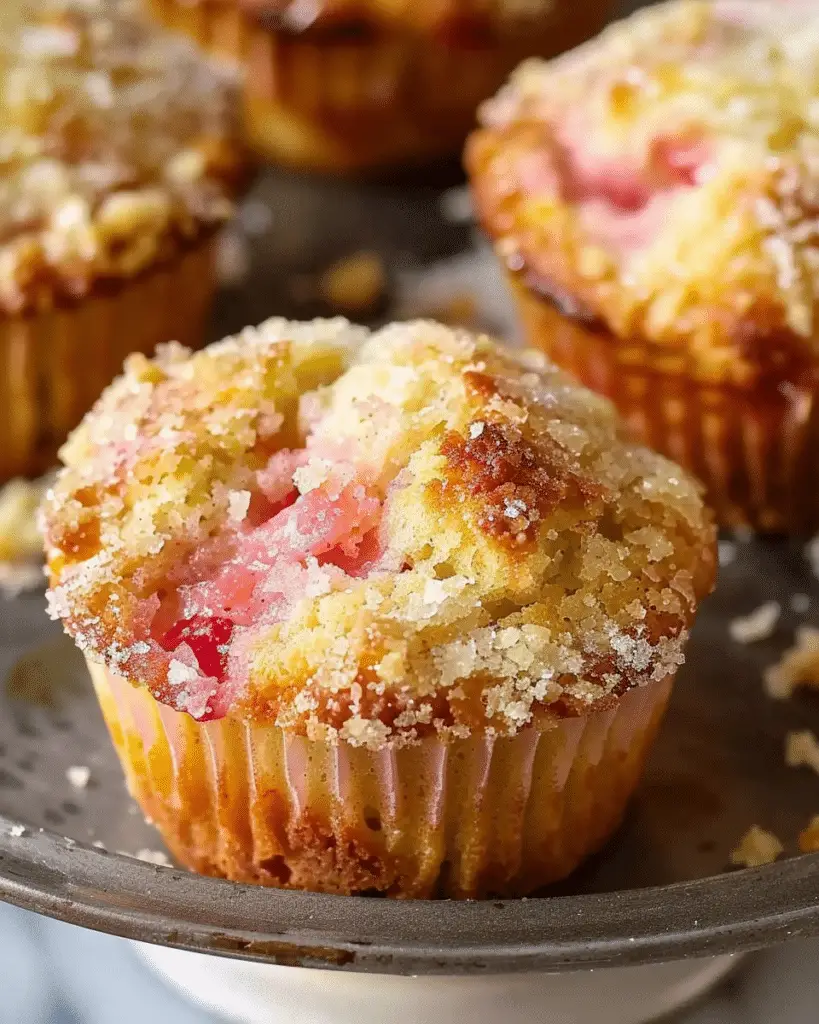
Rhubarb Muffins

March 27, 2025 by Sue Leave a Comment

Rhubarb Muffins are a perfect way to welcome spring or use up extra stalks from the garden. These muffins are soft, moist, and just sweet enough to balance the tartness of the rhubarb. I love how the rhubarb adds bursts of flavor and a slight tang to every bite. They’re ideal for breakfast, brunch, or a midday snack.

Rhubarb Muffins

Why You’ll Love This Recipe

I love this recipe because it’s easy to make and gives me bakery-style muffins with very little effort. The balance of sweet and tart makes them interesting and addictive. They rise beautifully, store well, and fill my kitchen with a cozy aroma as they bake. Plus, I don’t need any fancy equipment—just a bowl, a spoon, and a muffin tin.

Ingredients

(Here's a tip: Check out the full list of ingredients and measurements in the recipe card below.)

  • Rhubarb (fresh or frozen, chopped)

  • All-purpose flour

  • Granulated sugar

  • Baking powder

  • Baking soda

  • Salt

  • Egg

  • Buttermilk or milk with a splash of vinegar

  • Vegetable oil or melted butter

  • Vanilla extract

  • Optional: cinnamon or nutmeg for extra flavor

Directions

  1. I preheat the oven to 375°F (190°C) and line a muffin tin with paper liners or lightly grease it.

  2. In one bowl, I whisk together flour, baking powder, baking soda, salt, and any spices I’m using.

  3. In another bowl, I mix the egg, sugar, oil (or butter), vanilla, and buttermilk.

  4. I combine the wet and dry ingredients gently, making sure not to overmix—just until the flour disappears.

  5. I fold in the chopped rhubarb.

  6. I divide the batter evenly among the muffin cups, filling each about ¾ full.

  7. I bake the muffins for 18–22 minutes, until a toothpick inserted in the center comes out clean.

  8. I let them cool in the pan for a few minutes before transferring them to a wire rack.

Servings and timing

This recipe makes about 12 standard-sized muffins. I usually spend 10–15 minutes prepping and 20 minutes baking, so they’re ready in around 35 minutes total.

Variations

  • I sometimes sprinkle coarse sugar or a cinnamon streusel topping before baking for a sweet crunch.

  • For a nutty twist, I add chopped walnuts or pecans to the batter.

  • If I want extra warmth, I stir in a little cinnamon or cardamom.

  • I’ve made mini muffins using the same batter—perfect for grab-and-go snacks.

storage/reheating

I store cooled muffins in an airtight container at room temperature for up to 3 days or in the fridge for 5 days. To reheat, I warm them in the microwave for 15 seconds or toast them lightly in the oven. I also freeze them individually and thaw as needed—just 20 seconds in the microwave brings them back to life.

FAQs

Can I use frozen rhubarb?

Yes, I use frozen rhubarb often—no need to thaw it first, but I do toss it in a little flour so it doesn’t sink to the bottom.

Why are my muffins dense?

Overmixing can make them heavy. I mix just until the batter is combined to keep the texture light and fluffy.

Can I make these muffins dairy-free?

Yes, I’ve used almond milk or oat milk with a splash of vinegar instead of buttermilk, and oil instead of butter.

How do I keep the muffins moist?

Using oil or buttermilk helps keep them moist. I also make sure not to overbake—checking them around the 18-minute mark works best for me.

What can I serve with rhubarb muffins?

I usually enjoy them with coffee or tea, and they pair beautifully with a dollop of whipped cream or a smear of cream cheese.

Conclusion

Rhubarb Muffins are one of my favorite seasonal bakes. They’re quick, satisfying, and packed with bright, tangy flavor. Whether I’m making them for a weekend breakfast or stashing them for busy mornings, they always hit the spot. Once I’ve made a batch, I keep finding excuses to bake them again.

Print

clock clock iconcutlery cutlery iconflag flag iconfolder folder iconinstagram instagram iconpinterest pinterest iconfacebook facebook iconprint print iconsquares squares iconheart heart iconheart solid heart solid icon
Rhubarb Muffins

Rhubarb Muffins

5 Stars 4 Stars 3 Stars 2 Stars 1 Star No reviews
  • Author: Sue
  • Prep Time: 15 minutes
  • Cook Time: 20 minutes
  • Total Time: 35 minutes
  • Yield: 12 muffins
  • Category: Breakfast, Snack, Brunch
  • Method: Baking
  • Cuisine: American
  • Diet: Vegetarian
Print Recipe
Pin Recipe

Description

Rhubarb Muffins are soft, fluffy, and lightly sweetened with just the right amount of tart rhubarb in every bite. These easy muffins are a springtime favorite, perfect for breakfast, brunch, or snacking. Made with simple ingredients and ready in under 40 minutes, they’re a go-to recipe for using fresh or frozen rhubarb.


Ingredients

  • 1 ½ cups chopped rhubarb (fresh or frozen)
  • 2 cups all-purpose flour
  • ¾ cup granulated sugar
  • 2 tsp baking powder
  • ½ tsp baking soda
  • ¼ tsp salt
  • 1 large egg
  • 1 cup buttermilk (or milk + 1 tbsp vinegar)
  • ⅓ cup vegetable oil or melted butter
  • 1 tsp vanilla extract
  • Optional: ½ teaspoon cinnamon or nutmeg for flavor

Instructions

  1. Preheat oven to 375°F (190°C). Line or grease a 12-cup muffin tin.
  2. In a large bowl, whisk together flour, baking powder, baking soda, salt, and spices (if using).
  3. In a separate bowl, whisk egg, sugar, buttermilk, oil, and vanilla until smooth.
  4. Add wet ingredients to the dry and stir gently until just combined—do not overmix.
  5. Fold in chopped rhubarb.
  6. Divide batter evenly among muffin cups (about ¾ full).
  7. Bake for 18–22 minutes, or until a toothpick comes out clean.
  8. Let muffins cool in pan for 5 minutes, then transfer to a wire rack.

Notes

  • Toss frozen rhubarb with a bit of flour to prevent sinking.
  • Don’t overmix the batter to keep muffins light and airy.
  • Sprinkle tops with coarse sugar or streusel for extra texture.
  • Store in an airtight container or freeze for later enjoyment.

Have you made this recipe? I'd love to see it!

Click here to Follow me on Pinterest

Pizza Grilled Cheese

March 26, 2025 by Sue Leave a Comment

This Pizza Grilled Cheese is a mouthwatering mash-up of two comfort food classics: the gooey, crispy magic of grilled cheese and the cheesy, saucy flavors of a classic slice of pizza. It’s quick to make, incredibly satisfying, and perfect for lunch, dinner, or even a late-night snack. Every bite is filled with melted mozzarella, zesty pizza sauce, and crispy golden bread—basically, everything I crave when I want something fast and comforting.

Pizza Grilled Cheese

Why You’ll Love This Recipe

I love how this recipe takes less than 15 minutes from start to finish, with no fancy ingredients or techniques required. It's ideal for when I’m short on time but still want something warm and indulgent. I can customize it with my favorite pizza toppings like pepperoni or olives, and it’s always a hit with kids and adults alike. Plus, it’s a great way to use up leftover pizza ingredients or deli meat.

Ingredients

(Here's a tip: Check out the full list of ingredients and measurements in the recipe card below.)

  • Bread slices (white, sourdough, or your favorite)

  • Mozzarella cheese, shredded or sliced

  • Pepperoni slices (optional)

  • Pizza sauce

  • Butter or mayonnaise (for spreading on the outside of the bread)

  • Optional add-ins: sliced olives, cooked sausage, mushrooms, fresh basil, or red pepper flakes

Directions

  1. I start by heating a nonstick skillet or griddle over medium heat.

  2. I butter one side of each slice of bread (or use mayo for extra crispiness).

  3. I place one slice, butter side down, onto the skillet and spread a spoonful of pizza sauce on the top.

  4. I layer mozzarella cheese, optional pepperoni, and any other toppings I’m craving.

  5. I top it with the second slice of bread, butter side up.

  6. I grill until the bottom is golden brown, then carefully flip and cook the other side until the cheese is melted and both sides are crispy.

  7. Once done, I remove it from the skillet and let it sit for a minute before slicing.

Servings and timing

This recipe makes 1 sandwich, perfect for one serving, but I easily double or triple it to serve more. It takes about 10 minutes total—5 minutes for prep and 5 minutes for cooking.

Variations

I like to mix things up by swapping mozzarella for a cheese blend like provolone and cheddar. Sometimes I use pesto instead of pizza sauce for a fun twist. If I want a vegetarian option, I load it up with spinach, bell peppers, and mushrooms.

Storage/Reheating

If I have leftovers, I wrap the sandwich in foil and store it in the fridge for up to 2 days. To reheat, I place it in a skillet over low heat until it’s warmed through and crispy again. I avoid microwaving because it can make the bread soggy.

FAQs

How do I keep the bread from burning before the cheese melts?

I keep the heat at medium to medium-low and cover the skillet briefly with a lid to help the cheese melt evenly while the bread toasts.

Can I use a toaster oven instead of a skillet?

Yes, I sometimes make this in a toaster oven or even a panini press—it turns out just as crispy and delicious.

What’s the best bread to use?

I like thick-cut white bread or sourdough for the best texture, but any sturdy bread will do the trick.

Can I make this recipe dairy-free?

Absolutely. I use dairy-free cheese and vegan butter when I need a dairy-free version, and it still melts beautifully.

What dipping sauces go well with Pizza Grilled Cheese?

I love dipping mine in extra pizza sauce, ranch dressing, or even a spicy marinara if I’m feeling bold.

Conclusion

This Pizza Grilled Cheese hits the spot every time I’m in the mood for something cheesy, crispy, and totally satisfying. It’s easy to make, endlessly customizable, and brings together two of my favorite foods into one epic sandwich. Whether I’m feeding myself or a hungry crowd, it’s always a guaranteed winner.

Print

clock clock iconcutlery cutlery iconflag flag iconfolder folder iconinstagram instagram iconpinterest pinterest iconfacebook facebook iconprint print iconsquares squares iconheart heart iconheart solid heart solid icon
Pizza Grilled Cheese

Pizza Grilled Cheese

5 Stars 4 Stars 3 Stars 2 Stars 1 Star No reviews
  • Author: Sue
  • Prep Time: 5 minutes
  • Cook Time: 5 minutes
  • Total Time: 10 minutes
  • Yield: 1 sandwich
  • Category: Sandwiches
  • Method: Grilled
  • Cuisine: American, Italian-Inspired
  • Diet: Vegetarian
Print Recipe
Pin Recipe

Description

This Pizza Grilled Cheese recipe is the ultimate comfort food mash-up, blending crispy grilled cheese with gooey mozzarella, zesty pizza sauce, and optional pepperoni. Quick, customizable, and perfect for lunch, dinner, or a snack—this sandwich brings pizza flavor in every bite. A fast and easy 15-minute meal that’s kid-friendly and adult-approved.


Ingredients

  • 2 slices of bread (white, sourdough, or preferred variety)
  • ½ cup mozzarella cheese, shredded or sliced
  • 4–5 slices of pepperoni (optional)
  • 2 tbsp pizza sauce
  • 1 tbsp butter or mayonnaise (for spreading on bread)
  • Optional: sliced olives, cooked sausage, mushrooms, fresh basil, red pepper flakes

Instructions

  1. Heat a nonstick skillet or griddle over medium heat.
  2. Spread butter or mayonnaise on one side of each slice of bread.
  3. Place one slice, buttered side down, on the skillet. Spread pizza sauce on top.
  4. Layer with mozzarella cheese, pepperoni, and other optional toppings.
  5. Top with the second slice of bread, buttered side up.
  6. Grill until golden brown on the bottom, then flip and cook until both sides are crispy and cheese is melted.
  7. Let cool for a minute before slicing and serving.

Notes

  • For extra flavor, use a cheese blend or add Italian herbs to the pizza sauce.
  • Pesto is a great alternative to pizza sauce for a fun twist.
  • To make dairy-free, use vegan cheese and butter.
  • A panini press or toaster oven works well for cooking, too.
  • Serve with dipping sauces like ranch, extra pizza sauce, or marinara.

Have you made this recipe? I'd love to see it!

Click here to Follow me on Pinterest

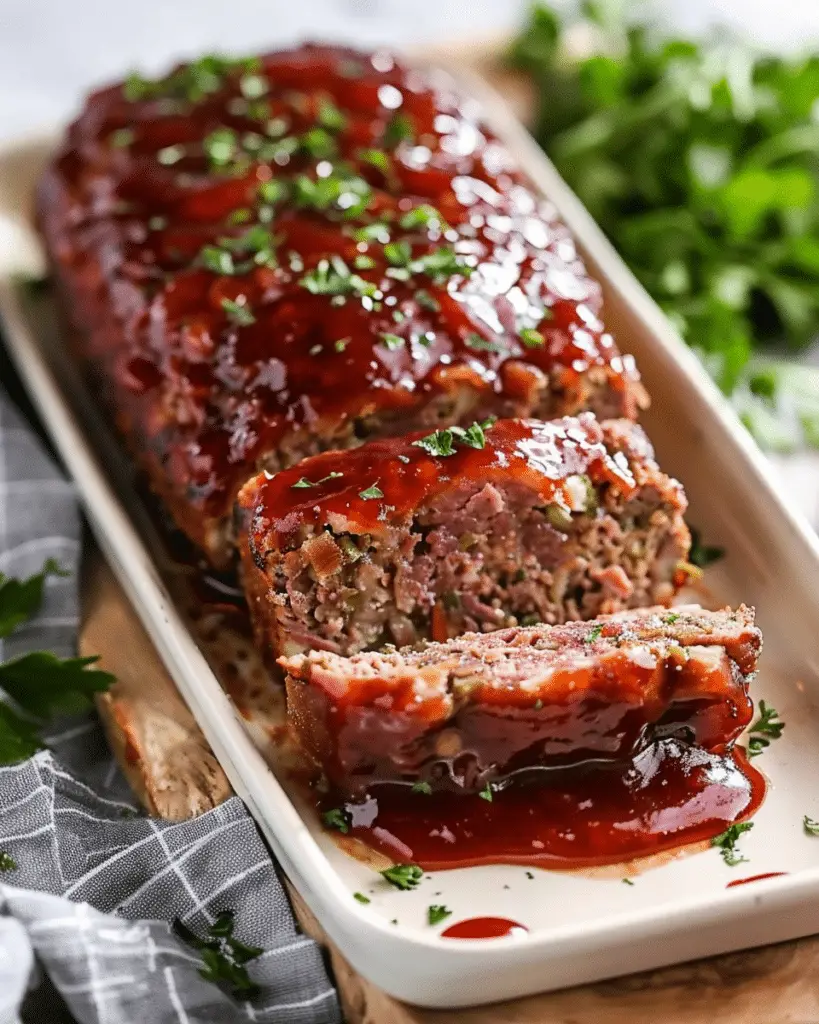
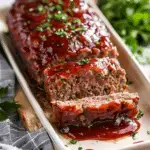
The Best Meatloaf (Made with Stove Top Stuffing)

March 26, 2025 by Sue Leave a Comment

This easy and flavorful meatloaf recipe uses Stove Top stuffing to create a moist, savory, and perfectly seasoned dish that’s ready in no time. It’s my go-to comfort food when I need something hearty, homey, and satisfying. The stuffing mix does all the heavy lifting when it comes to flavor and texture, making this recipe nearly foolproof.

The Best Meatloaf (Made with Stove Top Stuffing)

Why You’ll Love This Recipe

I love how this meatloaf simplifies dinner without sacrificing taste. By using Stove Top stuffing, I don’t need to measure out breadcrumbs or a long list of seasonings—it’s all built right in. This recipe comes together quickly, it’s budget-friendly, and it’s always a hit with family and friends. Plus, the leftovers are just as good the next day.

Ingredients

(Here's a tip: Check out the full list of ingredients and measurements in the recipe card below.)

  • Ground beef (I use 80/20 for flavor and moisture)

  • Stove Top stuffing mix (any flavor works, but I like savory herb or chicken)

  • Eggs

  • Water or milk

  • Ketchup (for mixing in and topping)

  • Optional: Worcestershire sauce, onion powder, garlic powder, black pepper

Directions

  1. I start by preheating the oven to 350°F (175°C) and lightly greasing a loaf pan.

  2. In a large bowl, I combine the ground beef, Stove Top stuffing (right from the box), eggs, and water or milk. I sometimes toss in a splash of Worcestershire sauce and a pinch of seasoning for extra flavor.

  3. I mix everything by hand until it’s just combined—overmixing can make the meatloaf tough.

  4. Then I shape the mixture into a loaf and place it in the prepared pan.

  5. I spread a layer of ketchup on top, which adds sweetness and helps create that classic meatloaf crust.

  6. I bake it uncovered for about 45–55 minutes, until the internal temperature reaches 160°F (71°C).

  7. Once done, I let it rest for 10 minutes before slicing so the juices stay in.

Servings and timing

This recipe serves 6 people and takes about 10 minutes to prep and 50 minutes to bake, with a 10-minute resting period. Total time is roughly 1 hour and 10 minutes.

Variations

I like to switch it up with different stuffing flavors—savory herb adds depth, but cornbread gives it a sweet Southern twist. For a cheesy version, I mix in shredded cheddar. Sometimes I add sautéed onions or diced bell peppers for a bit of texture and color. If I’m short on ketchup, barbecue sauce works great as a topping too.

Storage/Reheating

To store, I place leftover slices in an airtight container and refrigerate for up to 4 days. For longer storage, I wrap slices in foil and freeze for up to 3 months. To reheat, I microwave individual portions for about 1–2 minutes or warm them in the oven at 300°F (150°C) until heated through.

FAQs

How do I know when the meatloaf is done?

I always check with a meat thermometer—it should reach an internal temperature of 160°F (71°C) in the center.

Can I use ground turkey instead of beef?

Yes, I’ve swapped in ground turkey and it works well. Just be sure to check the doneness since turkey should reach 165°F (74°C).

Do I have to use Stove Top stuffing?

No, but I love how convenient and flavorful it makes the meatloaf. If I don’t have it, I sometimes use seasoned breadcrumbs with Italian seasoning and some chopped onions.

Why is my meatloaf falling apart?

It usually needs more binder. I make sure to use enough eggs and stuffing mix to hold everything together. Letting it rest before slicing also helps it firm up.

Can I make this meatloaf ahead of time?

Absolutely. I often prep the loaf earlier in the day, refrigerate it covered, and bake it when I’m ready for dinner. Just add a few extra minutes to the bake time if it’s coming straight from the fridge.

Conclusion

This Stove Top stuffing meatloaf is one of those cozy, satisfying meals I turn to again and again. It’s easy to make, packed with flavor, and the perfect way to bring everyone to the table. Whether I’m feeding my family on a weeknight or prepping ahead for a weekend dinner, this recipe never lets me down.

Print

clock clock iconcutlery cutlery iconflag flag iconfolder folder iconinstagram instagram iconpinterest pinterest iconfacebook facebook iconprint print iconsquares squares iconheart heart iconheart solid heart solid icon
The Best Meatloaf (Made with Stove Top Stuffing)

The Best Meatloaf (Made with Stove Top Stuffing)

5 Stars 4 Stars 3 Stars 2 Stars 1 Star No reviews
  • Author: Sue
  • Prep Time: 10 minutes
  • Cook Time: 50 minutes
  • Total Time: 1 hour
  • Yield: 6 servings
  • Category: Dinner
  • Method: Baking
  • Cuisine: American
Print Recipe
Pin Recipe

Description

This easy and flavorful Stove Top stuffing meatloaf is a comforting, budget-friendly dinner that’s ready in just over an hour. With minimal prep and maximum flavor, this moist and perfectly seasoned meatloaf is a family favorite, ideal for busy weeknights or cozy weekends.


Ingredients

  • 1 lb ground beef (80/20 for best flavor and moisture)
  • 1 box Stove Top stuffing mix (savory herb or chicken flavor)
  • 2 large eggs
  • 1 cup water or milk
  • ⅓ cup ketchup (plus more for topping)
  • Optional: 1 tablespoon Worcestershire sauce
  • Optional: ½ teaspoon onion powder
  • Optional: ½ teaspoon garlic powder
  • Optional: ¼ teaspoon black pepper

Instructions

  1. Preheat oven to 350°F (175°C). Lightly grease a loaf pan.
  2. In a large bowl, combine ground beef, Stove Top stuffing mix, eggs, and water or milk. Add Worcestershire sauce and seasonings if using.
  3. Mix by hand until just combined—do not overmix.
  4. Shape the mixture into a loaf and place in the prepared pan.
  5. Spread ketchup over the top of the loaf.
  6. Bake uncovered for 45–55 minutes, or until internal temperature reaches 160°F (71°C).
  7. Let rest for 10 minutes before slicing and serving.

Notes

  • Try different stuffing flavors like cornbread for variety.
  • Add shredded cheddar, sautéed onions, or bell peppers for extra flavor and texture.
  • BBQ sauce can be used instead of ketchup on top.
  • Leftovers reheat well and make great sandwiches the next day.

Have you made this recipe? I'd love to see it!

Click here to Follow me on Pinterest

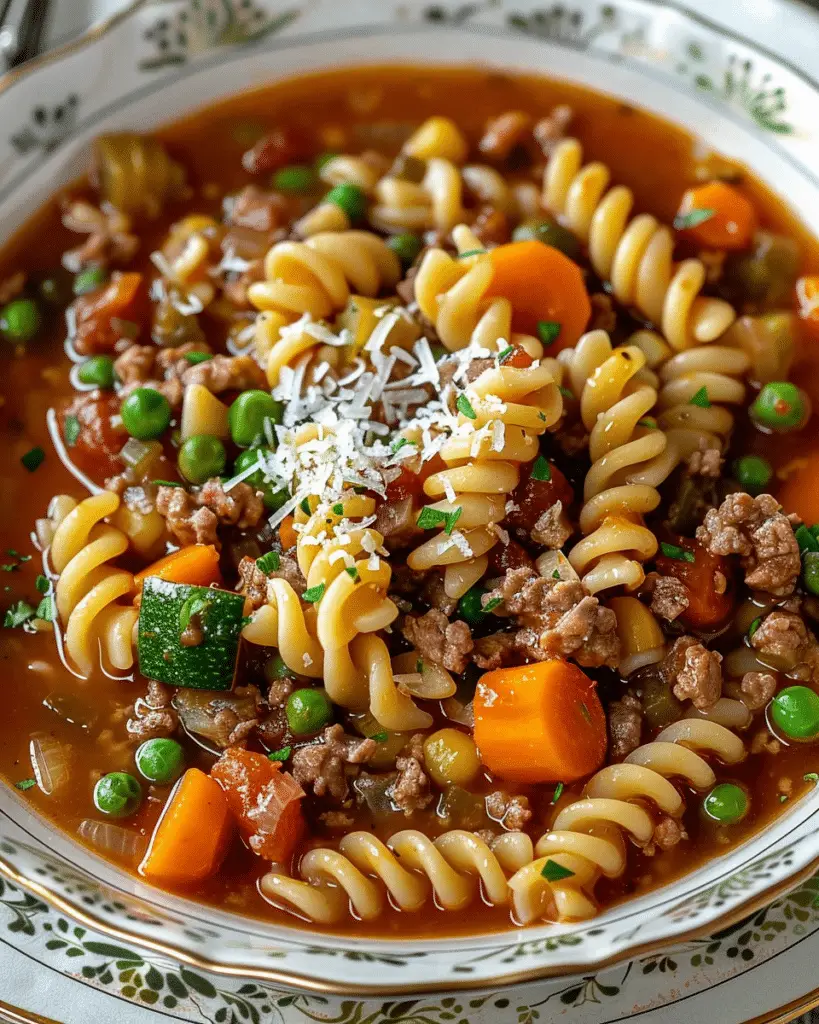
Slow Cooker Beef Vegetable Pasta Soup

March 26, 2025 by Sue Leave a Comment

This Slow Cooker Beef Vegetable Pasta Soup is hearty, comforting, and incredibly easy to make. With tender chunks of beef, a medley of colorful vegetables, and perfectly cooked pasta, it’s the ultimate one-pot meal. The slow cooker does all the heavy lifting, making this a no-fuss recipe that I can enjoy with minimal prep.

Slow Cooker Beef Vegetable Pasta Soup

Why You’ll Love This Recipe

I love how this soup brings together wholesome ingredients into a flavorful and satisfying meal. The beef becomes melt-in-your-mouth tender, the vegetables stay vibrant and nutritious, and the pasta adds a cozy touch. It's perfect for a chilly evening or a busy weekday when I want something nourishing and effortless. Plus, it's a fantastic way to use up any vegetables I have on hand.

ingredients

(Here's a tip: Check out the full list of ingredients and measurements in the recipe card below.)

  • Beef stew meat
  • Onion
  • Carrots
  • Celery
  • Potatoes
  • Green beans
  • Diced tomatoes (canned)
  • Beef broth
  • Garlic
  • Italian seasoning
  • Salt and pepper
  • Pasta (small shapes like ditalini or elbow)
  • Olive oil (optional, for browning the beef)

directions

  1. If I have time, I like to brown the beef in a skillet with a little olive oil for extra flavor. This step is optional.
  2. I add the beef, chopped onion, carrots, celery, potatoes, green beans, diced tomatoes, garlic, Italian seasoning, salt, and pepper into the slow cooker.
  3. I pour in the beef broth until everything is well-covered.
  4. I cover and cook on low for 7-8 hours or on high for 4-5 hours, until the beef and vegetables are tender.
  5. About 30 minutes before serving, I stir in the pasta and let it cook until tender.
  6. I give it a final taste, adjust the seasoning if needed, and serve hot.

Servings and timing

This recipe makes about 6 to 8 servings. It takes approximately 10 minutes to prep, with a cook time of 7 to 8 hours on low (or 4 to 5 hours on high). The pasta cooks in the final 30 minutes.

Variations

  • I sometimes swap beef for ground beef or shredded chicken if that's what I have.
  • For a vegetarian version, I skip the beef and use vegetable broth.
  • I throw in whatever vegetables I have on hand—zucchini, corn, or spinach work well.
  • For extra spice, I add a pinch of red pepper flakes or a dash of hot sauce.

storage/reheating

I let the soup cool completely before storing. I keep it in an airtight container in the refrigerator for up to 4 days. For longer storage, I freeze it (without the pasta) for up to 3 months. When reheating, I thaw it overnight in the fridge if frozen, then warm it on the stovetop or in the microwave. I add freshly cooked pasta before serving if needed.

FAQs

Can I cook the pasta separately?

Yes, I sometimes cook the pasta separately to avoid it getting too soft, especially if I plan to have leftovers.

Can I use frozen vegetables?

Absolutely. I use frozen veggies to save time. I just add them in during the last hour of cooking.

What type of beef is best?

I use beef stew meat or chuck roast cut into chunks. These cuts get super tender when slow cooked.

Can I make this in an Instant Pot?

Yes, I can make it in an Instant Pot. I use the sauté function to brown the beef, then cook everything (except the pasta) on high pressure for about 30 minutes. I add the pasta afterward and use the sauté function to cook it until tender.

Is this soup gluten-free?

It can be if I use gluten-free pasta and make sure all other ingredients are certified gluten-free.

Conclusion

This Slow Cooker Beef Vegetable Pasta Soup is my go-to for a warm, hearty, and nourishing meal. It’s simple to make, full of flavor, and perfect for leftovers. Whether I’m cooking for the family or meal prepping for the week, it always hits the spot.

Print

clock clock iconcutlery cutlery iconflag flag iconfolder folder iconinstagram instagram iconpinterest pinterest iconfacebook facebook iconprint print iconsquares squares iconheart heart iconheart solid heart solid icon
Slow Cooker Beef Vegetable Pasta Soup

Slow Cooker Beef Vegetable Pasta Soup

5 Stars 4 Stars 3 Stars 2 Stars 1 Star No reviews
  • Author: Sue
  • Prep Time: 10 minutes
  • Cook Time: 7–8 hours (low) or 4–5 hours (high)
  • Total Time: 7 hours 10 minutes – 8 hours 10 minutes
  • Yield: 6–8 servings
  • Category: Soup
  • Method: Slow Cooker
  • Cuisine: American
  • Diet: Gluten Free
Print Recipe
Pin Recipe

Description

Warm up with this hearty and comforting Slow Cooker Beef Vegetable Pasta Soup, made with tender beef, vibrant vegetables, and cozy pasta. Perfect for a chilly night or easy weeknight dinner, this one-pot recipe is flavorful, nourishing, and effortless to prepare. Ideal for meal prep or leftovers, it's a family favorite packed with wholesome ingredients.


Ingredients

  • 1.5–2 lbs beef stew meat or chuck roast, cut into chunks
  • 1 onion, chopped
  • 2 carrots, sliced
  • 2 celery stalks, sliced
  • 2 potatoes, diced
  • 1 cup green beans, trimmed and cut
  • 1 (14.5 oz) can diced tomatoes
  • 4 cups beef broth
  • 2–3 garlic cloves, minced
  • 1 tsp Italian seasoning
  • Salt and pepper, to taste
  • 1 cup small pasta (ditalini or elbow)
  • 1 tbsp olive oil (optional, for browning the beef)

Instructions

  1. (Optional) Heat olive oil in a skillet over medium heat. Brown the beef for extra flavor.
  2. Add beef, onion, carrots, celery, potatoes, green beans, tomatoes, garlic, Italian seasoning, salt, and pepper to the slow cooker.
  3. Pour in beef broth to cover ingredients.

  4. Cover and cook on low for 7–8 hours or high for 4–5 hours, until beef and veggies are tender.
  5. About 30 minutes before serving, stir in pasta and let it cook until tender.
  6. Taste and adjust seasoning if needed. Serve hot.

Notes

  • For a vegetarian version, omit the beef and use vegetable broth.
  • Use any veggies you have on hand like corn, zucchini, or spinach.
  • Add red pepper flakes or hot sauce for a spicy kick.
  • Cook pasta separately if planning to store leftovers to avoid soggy noodles.
  • Freeze soup without pasta for up to 3 months.

Have you made this recipe? I'd love to see it!

Click here to Follow me on Pinterest

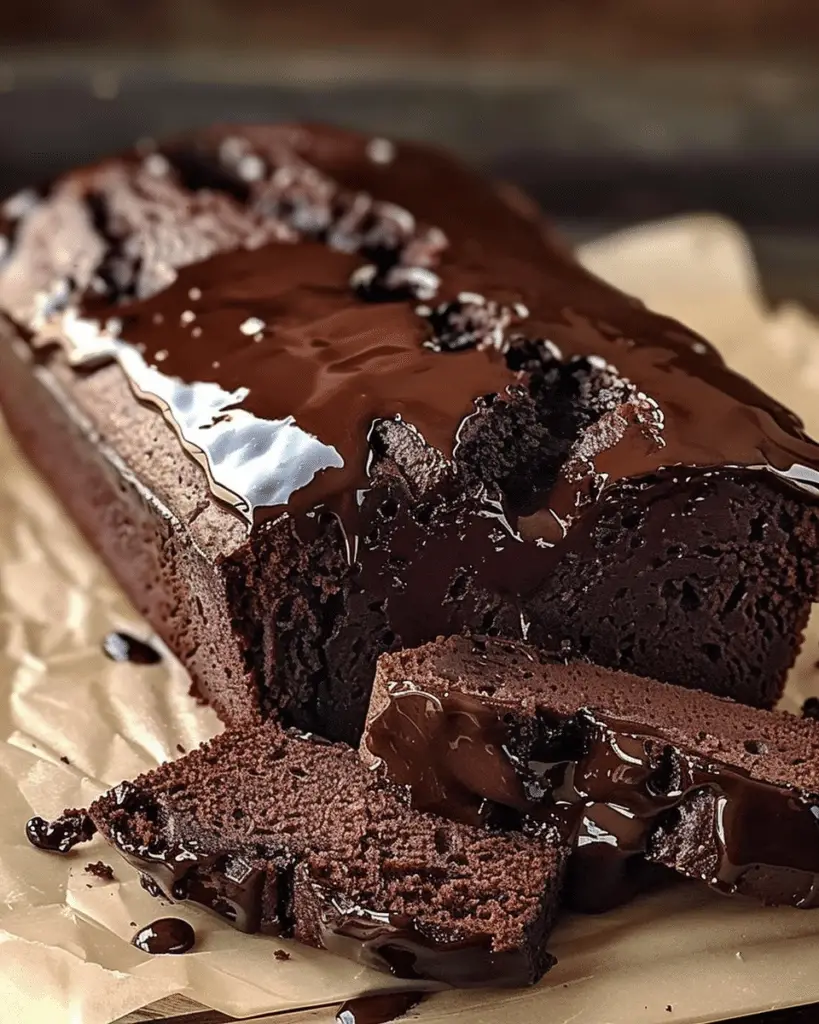
Hot Fudge Brownie Bread

March 26, 2025 by Sue Leave a Comment

Hot Fudge Brownie Bread combines the rich, fudgy goodness of brownies with the comforting form of a loaf, creating a dessert that's both indulgent and easy to serve. This moist, chocolatey treat is perfect for any occasion, whether it's a casual family gathering or a special celebration.

Hot Fudge Brownie Bread

Why I Love This Recipe

I appreciate this recipe for several reasons:

  • Simplicity: With just a few ingredients, I can create a decadent dessert without spending hours in the kitchen.

  • Versatility: It's perfect on its own or paired with ice cream, whipped cream, or fresh berries.

  • Texture: The bread has a moist, fudgy interior with a slightly crisp exterior, offering a delightful contrast in every bite.

Ingredients

(Here's a tip: Check out the full list of ingredients and measurements in the recipe card below.)

  • Brownie mix

  • Hot fudge sauce

  • Eggs

  • Vegetable oil

Directions

  1. Preheat the Oven: I start by preheating my oven to 350°F (175°C) and greasing a 9x5-inch loaf pan to prevent sticking.

  2. Prepare the Batter: In a large mixing bowl, I combine the brownie mix, hot fudge sauce, eggs, and vegetable oil. I stir until the mixture is smooth and well combined.

  3. Bake: I pour the batter into the prepared loaf pan and bake for 55-65 minutes, or until a toothpick inserted into the center comes out clean.

  4. Cool and Serve: After allowing the bread to cool in the pan for about 10 minutes, I transfer it to a wire rack to cool completely before slicing and serving.

Servings and Timing

This recipe yields approximately 8-10 servings. The preparation time is about 10 minutes, with a baking time of 55-65 minutes. In total, I can have this delicious dessert ready in around 1 hour and 15 minutes.

Variations

I enjoy experimenting with this recipe by:

  • Adding Nuts: Folding in ½ cup of chopped walnuts or pecans for added texture and flavor.

  • Extra Chocolate: Mixing in ½ cup of chocolate chips to the batter for an even more intense chocolate experience.

  • Flavor Twists: Adding a teaspoon of espresso powder to enhance the chocolate flavor or swirling in peanut butter before baking for a delightful twist.

Storage and Reheating

To keep the Hot Fudge Brownie Bread fresh:

  • Room Temperature: I store it in an airtight container for up to 3 days.

  • Refrigerator: It stays fresh for up to a week when refrigerated.

  • Freezing: For longer storage, I wrap individual slices and freeze them for up to 3 months. When I'm ready to enjoy a slice, I warm it in the microwave for about 15 seconds to restore its gooey texture.

FAQs

Can I use a homemade brownie mix instead of a boxed mix?

Yes, I can use a homemade brownie mix. I ensure it has similar proportions to a standard boxed mix to achieve the desired consistency.

What can I substitute for vegetable oil in this recipe?

I can substitute an equal amount of melted butter or canola oil for vegetable oil. For a healthier option, I might use unsweetened applesauce, though this may slightly alter the texture.

How do I know when the brownie bread is fully baked?

I insert a toothpick into the center of the loaf. If it comes out clean or with a few moist crumbs, the bread is done. If there's wet batter on the toothpick, I bake it for a few more minutes and check again.

Can I add other mix-ins to the batter?

Absolutely! I can add ingredients like chocolate chips, nuts, or even swirl in caramel or peanut butter to customize the flavor to my liking.

Is it necessary to use hot fudge sauce, or can I use regular chocolate syrup?

Hot fudge sauce is thicker and richer than regular chocolate syrup, contributing to the bread's moistness and fudgy texture. I recommend using hot fudge sauce for the best results.

Conclusion

Hot Fudge Brownie Bread is a delightful fusion of brownies and quick bread, offering a rich and indulgent treat that's simple to make. Whether I serve it plain or with accompaniments like ice cream or whipped cream, it's sure to satisfy any chocolate craving. With options to customize and easy storage solutions, this recipe is a versatile addition to my baking repertoire.

Print

clock clock iconcutlery cutlery iconflag flag iconfolder folder iconinstagram instagram iconpinterest pinterest iconfacebook facebook iconprint print iconsquares squares iconheart heart iconheart solid heart solid icon
Hot Fudge Brownie Bread

Hot Fudge Brownie Bread

5 Stars 4 Stars 3 Stars 2 Stars 1 Star No reviews
  • Author: Sue
  • Prep Time: 10 minutes
  • Cook Time: 55–65 minutes
  • Total Time: ~1 hour 15 minutes
  • Yield: 8–10 servings
  • Category: Dessert
  • Method: Baking
  • Cuisine: American
  • Diet: Vegetarian
Print Recipe
Pin Recipe

Description

Hot Fudge Brownie Bread is a rich, chocolatey dessert that combines the gooey goodness of brownies with the convenience of a loaf. Moist, fudgy, and easy to slice, this decadent treat is perfect for chocolate lovers looking for a quick and easy dessert recipe. Serve it solo or elevate it with a scoop of ice cream or drizzle of extra fudge for an unforgettable indulgence.


Ingredients

  • 1 box brownie mix
  • 1 cup hot fudge sauce
  • 2 large eggs
  • ⅓ cup vegetable oil
  • Optional Add-ins:
  • ½ cup chopped nuts (walnuts or pecans)
  • ½ cup chocolate chips
  • 1 tsp espresso powder
  • 2 tbsp peanut butter (swirled in)

Instructions

  1. Preheat the oven to 350°F (175°C). Grease a 9x5-inch loaf pan.
  2. Mix Batter: In a large bowl, combine the brownie mix, hot fudge sauce, eggs, and vegetable oil. Stir until smooth.
  3. Pour & Bake: Pour the batter into the prepared pan. Bake for 55–65 minutes, or until a toothpick inserted into the center comes out clean or with moist crumbs.
  4. Cool: Let the bread cool in the pan for 10 minutes. Then transfer to a wire rack to cool completely.
  5. Slice & Serve: Once cool, slice and enjoy on its own or with your favorite toppings.

Notes

  • Substitute melted butter or canola oil for vegetable oil if preferred.
  • Store at room temperature for 3 days, refrigerate for up to 1 week, or freeze slices for up to 3 months.
  • Reheat slices in the microwave for about 15 seconds to restore the gooey texture.
  • Homemade brownie mix can be used if it mimics the boxed mix ratio.

Have you made this recipe? I'd love to see it!

Click here to Follow me on Pinterest

Churro Cheesecake Donut Cookies

March 26, 2025 by Sue Leave a Comment

Churro Cheesecake Donut Cookies are the ultimate dessert mash-up—sweet, creamy, and coated in cinnamon sugar. These cookies bring together the classic flavors of a churro and the indulgent richness of cheesecake, all in a soft, donut-shaped cookie. Every bite melts in my mouth with a perfect balance of crunch, creaminess, and spice.

Churro Cheesecake Donut Cookies

Why You’ll Love This Recipe

I love this recipe because it blends three beloved treats into one irresistible bite. The cookie base is soft and fluffy like a donut, with the warm, sugary coating of a churro. Add in the tangy cheesecake filling and I’ve got a decadent, bakery-worthy dessert at home. It’s easy to make, looks impressive, and tastes even better than it sounds. Perfect for sharing—if I can stop myself from eating them all first.

Ingredients

(Here's a tip: Check out the full list of ingredients and measurements in the recipe card below.)

  • Cream cheese

  • Granulated sugar

  • Vanilla extract

  • Crescent roll dough or sugar cookie dough (depending on version)

  • Ground cinnamon

  • Butter (melted)

Directions

  1. I start by preheating the oven to 350°F (175°C) and lining a baking sheet with parchment paper.

  2. I make the cheesecake filling by mixing softened cream cheese, sugar, and vanilla until smooth.

  3. I roll out the dough and cut it into donut shapes using a large and small round cutter.

  4. I place a spoonful of cheesecake filling in the center of half the rounds and top with the remaining halves, sealing the edges gently.

  5. I bake the cookies for 12–15 minutes or until golden brown.

  6. Once out of the oven, I brush each cookie with melted butter and toss them in a cinnamon-sugar mix while still warm.

Servings and timing

This recipe makes about 12 cookies. I usually spend 15 minutes prepping and 12–15 minutes baking, so everything’s done in about 30 minutes.

Variations

  • I sometimes swap in puff pastry or biscuit dough for a flakier texture.

  • For a flavor twist, I mix a bit of lemon zest or caramel into the cheesecake filling.

  • When I want extra crunch, I add crushed graham crackers to the cinnamon sugar coating.

  • I’ve also made mini versions for party platters—they disappear fast!

storage/reheating

I keep leftover cookies in an airtight container in the fridge for up to 4 days. To reheat, I pop one in the microwave for 10–15 seconds to warm it up without drying it out. If I want to revive the crispy coating, a quick 3–5 minute reheat in a toaster oven works wonders.

FAQs

How do I keep the filling from leaking out during baking?

I make sure to press and seal the edges of the dough well, and I don’t overfill them—just a teaspoon or so of filling works best.

Can I use homemade cookie dough instead of crescent rolls?

Yes, I’ve made these with sugar cookie dough and they turn out great. Just make sure the dough is chilled so it’s easier to handle and shape.

Can I freeze churro cheesecake donut cookies?

I can freeze them before baking by assembling the cookies and freezing on a tray until solid, then storing them in a freezer bag. I bake straight from frozen, adding a couple of extra minutes to the time.

What’s the best way to get a crunchy cinnamon sugar coating?

I coat the cookies while they’re still warm so the butter helps the sugar stick. For extra crunch, I double-coat—once right after baking and once more when cool.

Do I have to use cream cheese?

Cream cheese gives the best flavor and texture, but I’ve also tried mascarpone and it works nicely for a slightly milder taste.

Conclusion

Churro Cheesecake Donut Cookies are my go-to treat when I want something truly special without spending hours in the kitchen. They’re fun to make, even more fun to eat, and always a hit whether I’m serving them at a gathering or keeping them all to myself. Once I’ve made them, they quickly become a repeat favorite.

Print

clock clock iconcutlery cutlery iconflag flag iconfolder folder iconinstagram instagram iconpinterest pinterest iconfacebook facebook iconprint print iconsquares squares iconheart heart iconheart solid heart solid icon
Churro Cheesecake Donut Cookies

Churro Cheesecake Donut Cookies

5 Stars 4 Stars 3 Stars 2 Stars 1 Star No reviews
  • Author: Sue
  • Prep Time: 15 minutes
  • Cook Time: 15 minutes
  • Total Time: 30 minutes
  • Yield: 12 cookies
  • Category: Dessert
  • Method: Baking
  • Cuisine: American
  • Diet: Vegetarian
Print Recipe
Pin Recipe

Description

Churro Cheesecake Donut Cookies are a mouthwatering dessert that combines the sweet crunch of churros, the creamy richness of cheesecake, and the soft, airy texture of donuts. Coated in cinnamon sugar and filled with tangy vanilla cream cheese, these indulgent cookies are an easy, crowd-pleasing treat you'll want to make again and again.


Ingredients

  • 8 oz cream cheese, softened
  • ⅓ cup granulated sugar
  • 1 tsp vanilla extract
  • 1 tube crescent roll dough (or sugar cookie dough)
  • ½ cup granulated sugar (for coating)
  • 1 tbsp ground cinnamon
  • ¼ cup butter, melted

Instructions

  1. Preheat oven to 350°F (175°C). Line a baking sheet with parchment paper.
  2. In a bowl, mix cream cheese, sugar, and vanilla until smooth.
  3. Roll out the dough and cut into donut shapes using large and small round cutters.
  4. Place a teaspoon of cheesecake filling onto half the dough rounds.
  5. Cover with the remaining dough rounds and gently seal the edges.
  6. Bake for 12–15 minutes, or until golden brown.
  7. While warm, brush cookies with melted butter and toss in cinnamon sugar.

Notes

  • Don’t overfill the cookies to avoid leakage.
  • Seal the edges well using your fingers or a fork.
  • Use chilled dough for easier handling.
  • Optional: add lemon zest or caramel to the filling for a flavor twist.
  • Reheat in a toaster oven for a crispier coating.

Have you made this recipe? I'd love to see it!

Click here to Follow me on Pinterest

Hoisin Beef Noodles Recipe

March 26, 2025 by Sue Leave a Comment

These Hoisin Beef Noodles are packed with rich, savory flavor, tender slices of beef, and perfectly chewy noodles tossed in a glossy hoisin-based sauce. It’s a quick and satisfying stir-fry dish that comes together in under 30 minutes, making it perfect for busy weeknights when I want something comforting yet easy to whip up.

Hoisin Beef Noodles Recipe

Why You’ll Love This Recipe

I love how this recipe delivers bold, takeout-style flavors without needing a long list of complicated ingredients. The hoisin sauce gives the dish a sweet and tangy base, while garlic, soy sauce, and a touch of sesame oil round out the flavor beautifully. It’s incredibly versatile too—I can use whatever noodles I have on hand, and swap in veggies I like or need to use up. It’s a fast, hearty, and flavorful dinner that hits all the right notes.

ingredients

(Here's a tip: Check out the full list of ingredients and measurements in the recipe card below.)

  • Beef sirloin or flank steak, thinly sliced

  • Hoisin sauce

  • Soy sauce

  • Garlic, minced

  • Ginger, grated

  • Sesame oil

  • Cornstarch

  • Vegetable oil

  • Rice vinegar (optional, for brightness)

  • Cooked noodles (like udon, rice noodles, or lo mein)

  • Green onions, chopped

  • Red pepper flakes or chili paste (optional, for heat)

  • Stir-fry vegetables (e.g. bell peppers, carrots, bok choy)

directions

  1. I start by marinating the thinly sliced beef in a mix of soy sauce, hoisin sauce, cornstarch, and a little sesame oil. I let it sit for at least 10 minutes to soak up flavor and tenderize.

  2. While the beef marinates, I prep the noodles and chop the veggies.

  3. In a hot skillet or wok, I heat some oil and stir-fry the beef until browned and just cooked through, then set it aside.

  4. In the same pan, I sauté garlic, ginger, and my choice of vegetables until tender but still crisp.

  5. I add the beef back in along with cooked noodles and pour in a sauce mixture of hoisin, soy sauce, and a splash of rice vinegar.

  6. I toss everything together to coat well, and finish with green onions and a drizzle of sesame oil.

Servings and timing

This recipe serves about 4 people and takes around 25–30 minutes from start to finish. It’s perfect for a quick weeknight dinner or a cozy meal prep option.

Variations

I like to mix things up based on what I have in the fridge:

  • I swap beef with chicken, shrimp, or tofu for a different protein.

  • For low-carb, I use zucchini noodles or shirataki noodles.

  • I add crushed peanuts or toasted sesame seeds for extra crunch.

  • I play with heat by adding chili oil or sriracha to the sauce.

storage/reheating

I store leftovers in an airtight container in the fridge for up to 3 days. To reheat, I usually warm it in a skillet over medium heat with a splash of water to loosen the sauce. Microwave works too—just make sure to stir halfway through to heat evenly.

FAQs

What kind of noodles work best for this recipe?

I like using udon or lo mein noodles, but rice noodles or even spaghetti in a pinch also work well.

Can I make this dish ahead of time?

Yes, I often prep the beef and chop veggies ahead. I cook it fresh for the best texture, but leftovers reheat nicely.

Is hoisin sauce very sweet?

Hoisin sauce has a sweet and tangy flavor, but it balances out with savory ingredients like soy sauce and garlic.

Can I make this recipe gluten-free?

Absolutely. I use gluten-free tamari instead of soy sauce and make sure to use gluten-free noodles and hoisin sauce.

What vegetables go best with hoisin beef noodles?

I like using bell peppers, carrots, and bok choy, but snow peas, broccoli, or mushrooms are also great options.

Conclusion

Hoisin Beef Noodles are one of my favorite go-to meals when I want something quick, flavorful, and flexible. It’s a dish that brings the comfort of takeout straight to my kitchen, and it always satisfies. Whether I’m cooking for myself or sharing with friends, this recipe never disappoints.

Print

clock clock iconcutlery cutlery iconflag flag iconfolder folder iconinstagram instagram iconpinterest pinterest iconfacebook facebook iconprint print iconsquares squares iconheart heart iconheart solid heart solid icon
Hoisin Beef Noodles Recipe

Hoisin Beef Noodles Recipe

5 Stars 4 Stars 3 Stars 2 Stars 1 Star No reviews
  • Author: Sue
  • Prep Time: 10 minutes
  • Cook Time: 15–20 minutes
  • Total Time: 25–30 minutes
  • Yield: 4 servings
  • Category: Dinner, Main Course
  • Method: Stir-Fry
  • Cuisine: Asian-Inspired, Chinese
Print Recipe
Pin Recipe

Description

This easy Hoisin Beef Noodles recipe is a quick, flavorful stir-fry packed with tender beef, savory hoisin sauce, chewy noodles, and crisp veggies. Perfect for busy weeknights, it comes together in under 30 minutes and delivers bold, takeout-style flavor at home. Customize it with your favorite noodles and vegetables for a satisfying, family-friendly meal.
Keywords: hoisin beef noodles, easy beef stir fry, hoisin noodle recipe, quick beef dinner, stir fry noodles with beef


Ingredients

  • 1 lb beef sirloin or flank steak, thinly sliced
  • ¼ cup hoisin sauce (plus extra for sauce)
  • 2 tbsp soy sauce (plus extra for sauce)
  • 2 cloves garlic, minced
  • 1 tsp fresh ginger, grated
  • 1 tsp sesame oil (plus extra for finishing)
  • 1 tbsp cornstarch
  • 2 tbsp vegetable oil
  • 1 tbsp rice vinegar (optional)
  • 12 oz cooked noodles (udon, lo mein, or rice noodles)
  • 2 green onions, chopped
  • ¼ tsp red pepper flakes or chili paste (optional)
  • 2 cups mixed stir-fry vegetables (bell peppers, carrots, bok choy)

Instructions

  1. In a bowl, combine sliced beef with 1 tablespoon soy sauce, 1 tablespoon hoisin sauce, sesame oil, and cornstarch. Let marinate for 10 minutes.
  2. Cook noodles according to package instructions and set aside.
  3. Heat 1 tablespoon oil in a large skillet or wok over medium-high heat. Add marinated beef and cook until browned and cooked through. Remove and set aside.
  4. Add remaining oil to the skillet. Sauté garlic and ginger for 30 seconds, then add chopped vegetables and stir-fry until crisp-tender.
  5. Return beef to the pan. Add noodles and a sauce made from remaining hoisin, soy sauce, and rice vinegar.
  6. Toss to coat everything evenly. Finish with green onions and a drizzle of sesame oil. Serve hot.

Notes

  • For a gluten-free version, use tamari and gluten-free hoisin sauce and noodles.
  • Add heat with chili oil, sriracha, or red pepper flakes.
  • Swap beef for chicken, tofu, or shrimp.
  • Garnish with crushed peanuts or sesame seeds for texture.
  • Leftovers reheat well with a splash of water in a skillet or microwave.

Have you made this recipe? I'd love to see it!

Click here to Follow me on Pinterest

Southern Style Baked Chicken Ricotta Meatballs with a Creamy Spinach Alfredo Sauce

March 26, 2025 by Sue Leave a Comment

These Southern style baked chicken ricotta meatballs are juicy, tender, and full of comforting flavors. I bake them to golden perfection and smother them in a rich, creamy spinach Alfredo sauce that’s perfect over pasta, rice, or even on its own. The addition of ricotta keeps the meatballs soft and moist, while the Southern-inspired seasoning gives them that down-home depth of flavor.

Southern Style Baked Chicken Ricotta Meatballs with a Creamy Spinach Alfredo Sauce

Why You’ll Love This Recipe

I love how this recipe brings together the richness of Southern comfort food with a creamy Italian twist. The chicken meatballs are light but packed with flavor, and the ricotta adds a melt-in-your-mouth texture. Baked instead of fried, they’re healthier but still incredibly satisfying. The spinach Alfredo sauce adds a creamy, garlicky finish that makes everything feel indulgent. Whether I'm cooking for family or meal-prepping for the week, this dish always hits the spot.

Ingredients

(Here's a tip: Check out the full list of ingredients and measurements in the recipe card below.)

  • Ground chicken

  • Ricotta cheese

  • Egg

  • Breadcrumbs

  • Parmesan cheese

  • Garlic (minced)

  • Onion powder

  • Paprika

  • Salt and pepper

  • Olive oil (for brushing)

  • Butter

  • Heavy cream

  • Fresh spinach

  • Nutmeg (optional, for the sauce)

  • Additional Parmesan cheese (for the Alfredo)

Directions

  1. Preheat the oven to 400°F (200°C). Line a baking sheet with parchment paper.

  2. In a bowl, I combine the ground chicken, ricotta cheese, egg, breadcrumbs, Parmesan, garlic, onion powder, paprika, salt, and pepper. I mix everything gently until well combined.

  3. Using damp hands, I form the mixture into evenly sized meatballs and place them on the prepared baking sheet.

  4. I brush the tops with a bit of olive oil to help them brown, then bake for 20–25 minutes, or until cooked through and golden on top.

  5. While the meatballs are baking, I prepare the Alfredo sauce. In a skillet, I melt butter over medium heat, then stir in minced garlic and let it cook for a minute.

  6. I add heavy cream and bring it to a gentle simmer. Then I stir in chopped spinach, grated Parmesan, and a pinch of nutmeg. I cook until the spinach wilts and the sauce thickens.

  7. Once the meatballs are done, I spoon the sauce over them or toss them directly into the skillet to coat.

Servings and timing

This recipe serves about 4 people and takes approximately 40 minutes from start to finish—15 minutes for prep and 25 minutes for baking and sauce.

Variations

I sometimes swap ground chicken for ground turkey if that's what I have on hand. For a spicier version, I add a pinch of cayenne to the meatball mix. If I want to lighten the sauce, I use half-and-half instead of heavy cream. For a low-carb option, I serve the meatballs and sauce over zucchini noodles or steamed cauliflower rice.

storage/reheating

I store any leftover meatballs and sauce in an airtight container in the fridge for up to 4 days. For longer storage, I freeze the meatballs (without sauce) for up to 2 months. When reheating, I gently warm the meatballs in a skillet with a bit of cream or milk to loosen the sauce, or I microwave them in 30-second intervals until hot.

FAQs

Can I use store-bought Alfredo sauce instead of making it from scratch?

Yes, I sometimes use a quality store-bought Alfredo when I’m short on time. I still like to add fresh spinach and a little garlic to bring it to life.

What can I serve these meatballs with?

I usually serve them over fettuccine, mashed potatoes, or even grits for a true Southern twist. They’re also great on their own with a side salad.

How do I keep chicken meatballs from drying out?

Adding ricotta and not overmixing the meatball mixture helps keep them moist and tender. Baking them at a moderate temperature also prevents drying out.

Can I make these meatballs ahead of time?

Yes, I often prepare the meatballs a day in advance and refrigerate them before baking. They also freeze well, either raw or cooked.

Is there a dairy-free version of the Alfredo sauce?

I’ve tried using full-fat coconut milk or a cashew cream base as a substitute for heavy cream and Parmesan. It gives a similar creamy texture, though the flavor will be slightly different.

Conclusion

These Southern style baked chicken ricotta meatballs in creamy spinach Alfredo sauce are a cozy, flavorful meal that I keep coming back to. They strike a perfect balance between hearty and elegant, with comforting textures and rich flavor in every bite. Whether for a weeknight dinner or a casual gathering, they always impress.

Print

clock clock iconcutlery cutlery iconflag flag iconfolder folder iconinstagram instagram iconpinterest pinterest iconfacebook facebook iconprint print iconsquares squares iconheart heart iconheart solid heart solid icon
Southern Style Baked Chicken Ricotta Meatballs with a Creamy Spinach Alfredo Sauce

Southern Style Baked Chicken Ricotta Meatballs with a Creamy Spinach Alfredo Sauce

5 Stars 4 Stars 3 Stars 2 Stars 1 Star No reviews
  • Author: Sue
  • Prep Time: 15 minutes
  • Cook Time: 25 minutes
  • Total Time: 40 minutes
  • Yield: 4 servings
  • Category: Dinner, Main Course
  • Method: Baking, Stovetop
  • Cuisine: Southern, Italian-Inspired
Print Recipe
Pin Recipe

Description

Southern Style Baked Chicken Ricotta Meatballs in Creamy Spinach Alfredo Sauce are tender, juicy, and full of rich Southern flavor. Baked, not fried, these easy chicken meatballs are paired with a velvety homemade Alfredo sauce made with fresh spinach and Parmesan. Perfect for a comforting dinner over pasta, mashed potatoes, or low-carb options like zucchini noodles.


Ingredients

  • 1 lb ground chicken
  • ½ cup ricotta cheese
  • 1 large egg
  • ½ cup breadcrumbs
  • ¼ cup grated Parmesan cheese
  • 2 cloves garlic, minced
  • 1 tsp onion powder
  • ½ tsp paprika
  • Salt and pepper, to taste
  • Olive oil, for brushing
  • For the Spinach Alfredo Sauce:
  • 2 tbsp butter
  • 2 cloves garlic, minced
  • 1 cup heavy cream
  • 2 cups fresh spinach, chopped
  • ½ cup grated Parmesan cheese
  • Pinch of nutmeg (optional)

Instructions

  1. Preheat oven to 400°F (200°C). Line a baking sheet with parchment paper.
  2. In a mixing bowl, combine ground chicken, ricotta, egg, breadcrumbs, Parmesan, garlic, onion powder, paprika, salt, and pepper. Mix until just combined.
  3. Form into evenly sized meatballs using damp hands. Place on baking sheet and brush tops with olive oil.
  4. Bake for 20–25 minutes, or until golden and fully cooked.
  5. Meanwhile, melt butter in a skillet over medium heat. Add garlic and cook for 1 minute.
  6. Stir in heavy cream and bring to a simmer. Add spinach, Parmesan, and nutmeg. Simmer until sauce thickens and spinach wilts.
  7. Toss cooked meatballs in the Alfredo sauce or spoon the sauce over them to serve.

Notes

  • Swap ground chicken with ground turkey for variation.
  • Add cayenne for a spicy kick.
  • Lighten up the sauce with half-and-half.
  • For low-carb, serve with zucchini noodles or cauliflower rice.
  • Store leftovers in fridge for up to 4 days or freeze meatballs (without sauce) for up to 2 months.
  • Reheat gently with a splash of cream or milk.

Have you made this recipe? I'd love to see it!

Click here to Follow me on Pinterest

Garlic Parmesan Chicken and Potatoes (One-Pan Dinner)

March 26, 2025 by Sue Leave a Comment

This Garlic Parmesan Chicken and Potatoes recipe is a flavorful, hearty one-pan dinner that brings together juicy chicken breasts, tender potatoes, and a rich garlic-parmesan seasoning. Everything roasts in the same pan, making cleanup a breeze while locking in layers of savory goodness.

Garlic Parmesan Chicken and Potatoes (One-Pan Dinner)

Why You’ll Love This Recipe

I love how this dish simplifies dinnertime. The whole meal comes together on a single sheet pan, which means less cleanup and more time to relax. The chicken turns out juicy and flavorful, and the potatoes soak up all the garlic-parmesan goodness. It’s a comforting, satisfying meal that’s easy enough for weeknights but tasty enough to serve to guests.

Ingredients

(Here's a tip: Check out the full list of ingredients and measurements in the recipe card below.)

  • Chicken breasts (or thighs, if preferred)
  • Baby potatoes or Yukon Gold, quartered
  • Olive oil
  • Fresh garlic, minced
  • Grated Parmesan cheese
  • Italian seasoning
  • Paprika
  • Salt
  • Black pepper
  • Fresh parsley (optional, for garnish)

Directions

  1. I preheat the oven to 400°F (200°C) and lightly grease a large baking sheet or line it with parchment paper.
  2. In a bowl, I mix together olive oil, minced garlic, Parmesan cheese, Italian seasoning, paprika, salt, and pepper.
  3. I toss the potatoes in half of this mixture and spread them on one side of the pan.
  4. Then I coat the chicken in the remaining garlic-parmesan mixture and place it on the other side of the pan.
  5. I bake everything for about 35–40 minutes, flipping the chicken halfway through, until the chicken is cooked through and the potatoes are tender and golden.
  6. I like to sprinkle fresh parsley on top before serving for a fresh touch.

Servings and timing

This recipe makes about 4 servings and takes approximately 10 minutes to prep and 40 minutes to cook, totaling 50 minutes from start to finish.

Variations

  • I sometimes swap chicken breasts for boneless thighs when I want extra juiciness.
  • For a spicier kick, I add a pinch of crushed red pepper flakes to the seasoning mix.
  • I like to add vegetables like green beans or broccoli to the pan for a complete one-pan meal.
  • I occasionally mix in a little lemon zest with the Parmesan for a bright flavor boost.

Storage/Reheating

I store leftovers in an airtight container in the fridge for up to 3 days.
To reheat, I prefer using the oven at 350°F until warmed through, about 15 minutes. The microwave works too, but I cover the dish with a damp paper towel to keep the chicken from drying out.
If freezing, I separate the chicken and potatoes and store them in airtight containers for up to 2 months. I thaw in the fridge overnight before reheating.

FAQs

How do I know when the chicken is fully cooked?

I use a meat thermometer to make sure the internal temperature reaches 165°F (75°C). The juices should also run clear when the chicken is cut.

Can I use bone-in chicken pieces?

Yes, I’ve made it with bone-in chicken thighs and it turns out great. Just add an extra 10–15 minutes to the baking time and check for doneness.

What kind of potatoes work best?

I like using baby potatoes or Yukon Golds because they roast well and get a nice golden crust. Red potatoes work too.

Can I prepare this ahead of time?

Yes, I sometimes prep everything a few hours ahead, cover the pan with foil, and keep it in the fridge until I’m ready to bake it.

How do I keep the chicken from drying out?

I make sure not to overbake and I sometimes cover the chicken loosely with foil during the last 10 minutes if it looks like it's drying out.

Conclusion

Garlic Parmesan Chicken and Potatoes is one of those go-to dinners I always come back to. It’s flavorful, simple, and everything cooks together for a no-fuss cleanup. Whether I’m cooking for my family or having friends over, this one-pan meal never disappoints.

Print

clock clock iconcutlery cutlery iconflag flag iconfolder folder iconinstagram instagram iconpinterest pinterest iconfacebook facebook iconprint print iconsquares squares iconheart heart iconheart solid heart solid icon
Garlic Parmesan Chicken and Potatoes (One-Pan Dinner)

Garlic Parmesan Chicken and Potatoes (One-Pan Dinner)

5 Stars 4 Stars 3 Stars 2 Stars 1 Star No reviews
  • Author: Sue
  • Prep Time: 10 minutes
  • Cook Time: 40 minutes
  • Total Time: 50 minutes
  • Yield: 4 servings
  • Category: Dinner
  • Method: Roasting, One-Pan
  • Cuisine: American
  • Diet: Gluten Free
Print Recipe
Pin Recipe

Description

This Garlic Parmesan Chicken and Potatoes recipe is an easy one-pan dinner packed with bold garlic and parmesan flavor. Juicy chicken breasts and golden roasted potatoes come together in a single sheet pan for a satisfying, mess-free meal perfect for busy weeknights or casual entertaining.


Ingredients

  • 2–3 chicken breasts (or boneless chicken thighs)
  • 1.5 lbs baby potatoes or Yukon Gold potatoes, quartered
  • 3 tbsp olive oil
  • 4 cloves garlic, minced
  • ½ cup grated Parmesan cheese
  • 1 tsp Italian seasoning
  • ½ tsp paprika
  • 1 tsp salt
  • ½ tsp black pepper
  • Fresh parsley (optional, for garnish)

Instructions

  1. Preheat oven to 400°F (200°C) and grease or line a large baking sheet.
  2. In a bowl, mix olive oil, minced garlic, Parmesan cheese, Italian seasoning, paprika, salt, and pepper.
  3. Toss potatoes in half the mixture and spread on one side of the pan.
  4. Coat chicken with remaining seasoning and place on the other side of the pan.
  5. Bake for 35–40 minutes, flipping chicken halfway through, until chicken is cooked through and potatoes are golden.
  6. Garnish with chopped fresh parsley and serve.

Notes

  • Use bone-in chicken thighs for extra flavor—just increase cook time by 10–15 minutes.
  • Add green beans or broccoli to the pan for a complete meal.
  • Sprinkle with lemon zest for a fresh flavor twist.
  • To reheat, use the oven at 350°F or microwave with a damp paper towel.

Have you made this recipe? I'd love to see it!

Click here to Follow me on Pinterest

Dollywood Cinnamon Bread with Icing

March 26, 2025 by Sue Leave a Comment

This Dollywood Cinnamon Bread with Icing is a warm, pull-apart treat that’s soft, buttery, and layered with a cinnamon-sugar swirl in every bite. It’s inspired by the famous version served at The Grist Mill in Dollywood and brings all the cozy, sweet comfort of a theme park favorite right into my kitchen. Finished with a simple vanilla icing drizzle, this bread is perfect for breakfast, dessert, or a holiday brunch centerpiece.

Dollywood Cinnamon Bread with Icing

Why You’ll Love This Recipe

I love this recipe because it brings back nostalgic flavors with every bite. The dough is fluffy and tender, and the layers of cinnamon sugar melt into a gooey swirl that’s completely irresistible. The best part? It’s incredibly easy to make at home, and it fills my whole kitchen with the most comforting, bakery-style aroma. Whether I’m baking it for a cozy Sunday morning or serving it for guests, it always impresses.

ingredients

(Here's a tip: Check out the full list of ingredients and measurements in the recipe card below.)

  • All-purpose flour
  • Granulated sugar
  • Salt
  • Active dry yeast
  • Warm water
  • Whole milk
  • Unsalted butter
  • Eggs
  • Ground cinnamon
  • Brown sugar
  • Powdered sugar
  • Vanilla extract
  • Heavy cream or milk (for the icing)

directions

  1. I start by activating the yeast in warm water until it becomes foamy.
  2. In a large bowl, I mix the flour, sugar, and salt, then add in the yeast mixture, warm milk, melted butter, and eggs.
  3. I knead the dough until it becomes smooth and elastic, then let it rise until doubled in size.
  4. Once risen, I roll the dough into a rectangle and generously coat it with melted butter.
  5. I mix brown sugar and cinnamon and sprinkle it all over the dough.
  6. Then, I cut slits into the dough and twist it to get that classic pull-apart effect.
  7. I transfer the dough to a greased loaf pan and let it rise again for about 30 minutes.
  8. I bake it until golden brown and cooked through, then let it cool slightly.
  9. For the icing, I whisk powdered sugar, vanilla, and cream until smooth and drizzle it over the warm bread before serving.

Servings and timing

This recipe makes 1 loaf, which serves about 8 slices.
Prep time: 20 minutes
Rise time: 1 hour 30 minutes
Bake time: 30 minutes
Total time: about 2 hours 20 minutes

Variations

I sometimes add chopped pecans or walnuts for a bit of crunch. For a fruity twist, I’ve also tried sprinkling raisins or finely chopped apples into the cinnamon layer. Swapping the vanilla icing with a cream cheese glaze is another delicious variation I like to use when I want it to feel more like a dessert.

storage/reheating

I store leftover cinnamon bread in an airtight container at room temperature for up to 2 days, or in the fridge for up to 5 days. To reheat, I pop a slice in the microwave for 10–15 seconds or warm the whole loaf in a 300°F oven for about 10 minutes. I always add a bit more icing after reheating to keep it tasting fresh.

FAQs

What makes Dollywood cinnamon bread different from regular cinnamon bread?

It’s the pull-apart style and the generous amount of buttery cinnamon sugar that makes it extra special. The twisted shape lets the cinnamon mix soak into every bite, and the icing adds just the right touch of sweetness.

Can I make the dough ahead of time?

Yes, I’ve made the dough the night before and kept it in the fridge. I just let it come to room temperature and rise before baking.

Do I have to make it in a loaf pan?

While the loaf pan gives it that signature look, I’ve also baked it in a round cake pan or even shaped smaller individual portions for a more snackable version.

Can I freeze the bread?

Absolutely. I wrap the fully baked and cooled bread tightly in plastic wrap and foil, then freeze it for up to 2 months. When I’m ready to serve, I thaw and warm it, then drizzle fresh icing on top.

What kind of icing works best?

I usually go with a simple vanilla icing made with powdered sugar, vanilla extract, and milk or cream. For a thicker, richer option, I sometimes use a cream cheese frosting.

Conclusion

This Dollywood Cinnamon Bread with Icing brings the magic of a beloved theme park treat into my own kitchen. It’s warm, sweet, and perfectly spiced, and the soft, pull-apart texture makes it as fun to eat as it is satisfying. Whether I’m baking it for a special occasion or just because, it always hits the spot.

Print

clock clock iconcutlery cutlery iconflag flag iconfolder folder iconinstagram instagram iconpinterest pinterest iconfacebook facebook iconprint print iconsquares squares iconheart heart iconheart solid heart solid icon
Dollywood Cinnamon Bread with Icing

Dollywood Cinnamon Bread with Icing

5 Stars 4 Stars 3 Stars 2 Stars 1 Star No reviews
  • Author: Sue
  • Prep Time: 20 minutes
  • Cook Time: 30 minutes
  • Total Time: 2 hours 20 minutes
  • Yield: 1 loaf (about 8 slices)
  • Category: Bread, Breakfast, Brunch, Dessert
  • Method: Baking
  • Cuisine: American
  • Diet: Vegetarian
Print Recipe
Pin Recipe

Description

This Dollywood Cinnamon Bread with Icing is a soft, buttery, pull-apart loaf packed with gooey cinnamon-sugar swirls and finished with a sweet vanilla drizzle. Inspired by the iconic treat from The Grist Mill at Dollywood, this homemade version captures all the nostalgic, bakery-style flavor in every bite. Perfect for breakfast, dessert, or brunch!


Ingredients

  • All-purpose flour

  • Granulated sugar

  • Salt

  • Active dry yeast

  • Warm water

  • Whole milk

  • Unsalted butter

  • Eggs

  • Ground cinnamon

  • Brown sugar

  • Powdered sugar

  • Vanilla extract

  • Heavy cream or milk (for icing)


Instructions

  1. Activate the yeast in warm water until foamy.

  2. In a large bowl, combine flour, sugar, and salt. Mix in yeast mixture, warm milk, melted butter, and eggs.

  3. Knead until dough is smooth and elastic. Let rise until doubled in size.

  4. Roll dough into a rectangle and brush with melted butter.

  5. Sprinkle a mix of brown sugar and cinnamon evenly over the dough.

  6. Slice and twist dough to create a pull-apart shape.

  7. Place in greased loaf pan; let rise for 30 minutes.

  8. Bake until golden brown. Cool slightly.

  9. Whisk powdered sugar, vanilla, and cream for icing; drizzle over warm bread before serving.


Notes

  • Add chopped nuts or raisins for variation.
  • Swap vanilla icing for cream cheese glaze for a richer taste.
  • Dough can be made ahead and chilled overnight.
  • Store in airtight container at room temp for 2 days or refrigerate for up to 5.

Have you made this recipe? I'd love to see it!

Click here to Follow me on Pinterest

Oreo Stuffed Cinnamon Rolls

March 26, 2025 by Sue Leave a Comment

Oreo Stuffed Cinnamon Rolls are a decadent twist on the classic breakfast treat, combining the gooey, comforting layers of cinnamon rolls with the rich, chocolaty crunch of Oreo cookies. These rolls are perfect for satisfying a sweet tooth and turning a regular morning into something a little more special.

Oreo Stuffed Cinnamon Rolls

Why You’ll Love This Recipe

I love how this recipe turns a familiar favorite into a surprise-filled delight. The Oreo cookies add a fun texture and chocolate flavor that perfectly contrasts the soft, cinnamon-spiced dough. It’s an easy way to upgrade store-bought cinnamon rolls or elevate a homemade dough. These are great for brunch, dessert, or an indulgent snack—and they’re always a hit with kids and adults alike.

Ingredients

(Here's a tip: Check out the full list of ingredients and measurements in the recipe card below.)

  • Store-bought or homemade cinnamon roll dough
  • Crushed Oreo cookies (I use about 1 to 2 cookies per roll)
  • Ground cinnamon (if not already included in the dough)
  • Brown sugar (optional, if you want extra gooeyness)
  • Icing or glaze (usually included with store-bought rolls)

Directions

  1. Preheat the oven to 350°F (175°C) and grease a baking dish.
  2. If using store-bought rolls, unroll each one gently to expose the inner surface.
  3. Sprinkle crushed Oreos generously across the dough, pressing them slightly into the surface.
  4. Roll each cinnamon roll back up tightly, making sure the Oreos stay tucked inside.
  5. Place them into the prepared dish, spacing them slightly apart.
  6. Bake for 18–22 minutes, or until the rolls are golden and cooked through.
  7. Drizzle the icing over the warm rolls and top with extra Oreo crumbs if desired.

Servings and timing

This recipe typically makes 8 cinnamon rolls and takes about 10 minutes to prep and 20 minutes to bake, so I can have them ready in about 30 minutes total.

Variations

  • I sometimes mix crushed Oreos directly into the icing for an extra burst of cookie flavor.
  • For a cookies-and-cream vibe, I add a layer of cream cheese frosting instead of the glaze.
  • If I’m making them from scratch, I like to add mini chocolate chips or even Nutella along with the crushed Oreos.
  • I’ve also tried using flavored Oreos (like peanut butter or mint) for a fun twist.

Storage/Reheating

I store leftover rolls in an airtight container at room temperature for up to 2 days or refrigerate them for up to 5 days. To reheat, I microwave one roll for about 15–20 seconds, or warm them in a 300°F oven for about 5–7 minutes to revive that soft texture.

FAQs

How do I keep the Oreos from getting soggy?

I press the crushed Oreos into the dough so they hold their texture better during baking. Using less moist fillings also helps.

Can I make these ahead of time?

Yes, I prepare them the night before, cover, and refrigerate them. In the morning, I bake them straight from the fridge—just add a couple extra minutes to the baking time.

Do I have to use store-bought dough?

Not at all. I love using homemade cinnamon roll dough when I have time—it gives a fluffier, richer result.

Can I use double-stuffed Oreos?

Absolutely. I’ve used double-stuffed for extra filling, but they do make the rolls slightly gooier inside.

Can I freeze these?

Yes, I freeze them after baking and cooling. When I want one, I reheat it in the microwave or oven for a quick treat.

Conclusion

Oreo Stuffed Cinnamon Rolls are an easy, irresistible treat that brings together two of my favorite indulgences. Whether I make them for breakfast, brunch, or dessert, they never last long once they’re out of the oven. With just a few ingredients and minimal prep, they’re a sweet upgrade I’ll keep coming back to.

Print

clock clock iconcutlery cutlery iconflag flag iconfolder folder iconinstagram instagram iconpinterest pinterest iconfacebook facebook iconprint print iconsquares squares iconheart heart iconheart solid heart solid icon
Oreo Stuffed Cinnamon Rolls

Oreo Stuffed Cinnamon Rolls

5 Stars 4 Stars 3 Stars 2 Stars 1 Star No reviews
  • Author: Sue
  • Prep Time: 10 minutes
  • Cook Time: 20 minutes
  • Total Time: 30 minutes
  • Yield: 8 rolls
  • Category: Breakfast, Brunch, Dessert
  • Method: Baking
  • Cuisine: American
  • Diet: Vegetarian
Print Recipe
Pin Recipe

Description

Oreo Stuffed Cinnamon Rolls are a deliciously indulgent twist on a classic breakfast treat, filled with crushed Oreo cookies and topped with icing for the perfect blend of gooey cinnamon sweetness and chocolaty crunch. These rolls are easy to make and perfect for brunch, dessert, or a fun weekend snack.


Ingredients

  • Store-bought or homemade cinnamon roll dough

  • Crushed Oreo cookies (1 to 2 cookies per roll)

  • Ground cinnamon (if not included in dough)

  • Brown sugar (optional)

  • Icing or glaze (usually included with store-bought rolls)


Instructions

  1. Preheat oven to 350°F (175°C) and grease a baking dish.

  2. Unroll each cinnamon roll to expose the dough.

  3. Sprinkle crushed Oreos evenly over the dough and press in lightly.

  4. Roll the dough back up tightly.

  5. Arrange rolls in the greased dish, spaced slightly apart.

  6. Bake for 18–22 minutes until golden and cooked through.

  7. Drizzle icing over warm rolls and top with extra Oreo crumbs if desired.


Notes

  • Add mini chocolate chips or Nutella for extra richness.
  • Mix crushed Oreos into the icing for more cookie flavor.
  • Try flavored Oreos for variety (e.g., mint, peanut butter).
  • Store leftovers at room temp (2 days) or fridge (5 days).
  • Reheat in microwave (15–20 sec) or oven (300°F for 5–7 min).

Have you made this recipe? I'd love to see it!

Click here to Follow me on Pinterest

Warm & Gooey Apple Pie Coffee Cake: A Cozy Cinnamon-Kissed Delight

March 26, 2025 by Sue Leave a Comment

This warm and gooey apple pie coffee cake brings the best of two comforting classics into one irresistible treat. With a soft, tender crumb and a swirl of cinnamon-sugar apples tucked inside, it tastes just like a slice of homemade apple pie—only easier to whip up and perfect with my morning coffee or as an after-dinner sweet.

Warm & Gooey Apple Pie Coffee Cake: A Cozy Cinnamon-Kissed Delight

Why You’ll Love This Recipe

I love this recipe because it’s the kind of bake that instantly fills the house with the smell of cinnamon and apples—cozy, nostalgic, and welcoming. It’s perfect for casual brunches, holiday mornings, or those times I just want to treat myself to something extra special. The gooey apple filling and buttery crumb topping bring rich flavors and textures in every bite. Plus, it’s simple to make with pantry staples.

Ingredients

(Here's a tip: Check out the full list of ingredients and measurements in the recipe card below.)

  • All-purpose flour
  • Baking powder
  • Baking soda
  • Salt
  • Unsalted butter
  • Granulated sugar
  • Eggs
  • Sour cream
  • Vanilla extract
  • Apples (peeled and diced)
  • Brown sugar
  • Ground cinnamon
  • Nutmeg
  • Optional: powdered sugar for glaze

Directions

  1. I start by preheating the oven to 350°F (175°C) and greasing a 9x13-inch baking dish.
  2. In one bowl, I whisk together the dry ingredients: flour, baking powder, baking soda, and salt.
  3. In another bowl, I cream the butter and sugar until light and fluffy, then beat in the eggs one at a time.
  4. I stir in the sour cream and vanilla extract to add moisture and flavor.
  5. Gradually, I mix in the dry ingredients just until combined.
  6. For the apple layer, I toss the diced apples with brown sugar, cinnamon, and a pinch of nutmeg.
  7. I pour half the batter into the prepared pan, spread the apple mixture over it, then top with the remaining batter.
  8. I bake for about 40–45 minutes or until a toothpick inserted in the center comes out clean.
  9. Once it cools a bit, I like to drizzle a simple glaze made with powdered sugar and a little milk on top.

Servings and timing

This recipe makes about 12 generous servings. Prep time is around 20 minutes, and bake time is 40–45 minutes. I usually let it cool for at least 15 minutes before serving.

Variations

  • I sometimes use a mix of tart Granny Smith and sweet Honeycrisp apples for more depth of flavor.
  • Adding chopped pecans or walnuts to the topping brings a nice crunch.
  • A pinch of cardamom gives the spice blend a more complex, aromatic twist.
  • I’ve also swapped the glaze for a dollop of whipped cream or a scoop of vanilla ice cream when serving warm.

Storage/Reheating

I store leftovers covered at room temperature for up to 2 days, or in the fridge for up to 5 days. To reheat, I warm slices in the microwave for about 20–30 seconds. If I want that fresh-baked feel, I pop them in a 300°F oven for 10 minutes.

FAQs

How do I keep the apples from making the cake soggy?

I toss them with a little flour or cornstarch before layering to help absorb excess moisture.

Can I make this coffee cake ahead of time?

Yes, I often bake it the night before and cover it once cool. It’s even better the next day as the flavors develop.

What kind of apples work best?

I like using firm, tart apples like Granny Smith, but any baking apple holds up well.

Can I freeze this cake?

Absolutely. I wrap individual slices tightly and freeze for up to 2 months. I reheat in the microwave or oven straight from frozen.

Can I make this gluten-free?

Yes, I substitute a good-quality 1:1 gluten-free baking flour, and it turns out great.

Conclusion

This warm and gooey apple pie coffee cake is my go-to when I want something comforting, sweet, and homey. It’s simple to make but tastes like I put in a lot more effort, and it always brings a smile—whether I’m serving it for guests or enjoying a quiet morning to myself.


Print

clock clock iconcutlery cutlery iconflag flag iconfolder folder iconinstagram instagram iconpinterest pinterest iconfacebook facebook iconprint print iconsquares squares iconheart heart iconheart solid heart solid icon
Warm & Gooey Apple Pie Coffee Cake: A Cozy Cinnamon-Kissed Delight

Warm & Gooey Apple Pie Coffee Cake: A Cozy Cinnamon-Kissed Delight

5 Stars 4 Stars 3 Stars 2 Stars 1 Star No reviews
  • Author: Sue
  • Prep Time: 20 minutes
  • Cook Time: 45 minutes
  • Total Time: 1 hour 5 minutes
  • Yield: 12 servings
  • Category: Dessert, Breakfast, Brunch
  • Method: Baking
  • Cuisine: American
  • Diet: Vegetarian
Print Recipe
Pin Recipe

Description

This warm and gooey apple pie coffee cake combines the cozy flavors of cinnamon-sugar apples and tender cake for the ultimate comfort treat. Perfect for breakfast, brunch, or dessert, it's easy to make and impossible to resist—just like a slice of apple pie with your coffee.


Ingredients

  • 2 cups all-purpose flour

  • 1 teaspoon baking powder

  • ½ teaspoon baking soda

  • ½ teaspoon salt

  • ½ cup unsalted butter (softened)

  • 1 cup granulated sugar

  • 2 large eggs

  • 1 cup sour cream

  • 1 teaspoon vanilla extract

  • 2 medium apples (peeled and diced)

  • ⅓ cup brown sugar

  • 1½ teaspoon ground cinnamon

  • ¼ teaspoon nutmeg

  • Optional: powdered sugar (for glaze)

  • Optional: 1–2 teaspoon milk (for glaze)


Instructions

  1. Preheat oven to 350°F (175°C). Grease a 9x13-inch baking dish.

  2. In a medium bowl, whisk together flour, baking powder, baking soda, and salt.

  3. In a large bowl, cream together butter and sugar until light and fluffy.

  4. Beat in eggs one at a time, then mix in sour cream and vanilla.

  5. Gradually stir in the dry ingredients until just combined.

  6. In a separate bowl, toss diced apples with brown sugar, cinnamon, and nutmeg.

  7. Spread half of the batter into the prepared dish. Add apple mixture evenly over the batter. Top with remaining batter.

  8. Bake for 40–45 minutes or until a toothpick inserted in the center comes out clean.

  9. Cool slightly. If desired, mix powdered sugar and milk for a glaze and drizzle over the cake before serving.


Notes

  • For best flavor, use a mix of tart and sweet apples (like Granny Smith + Honeycrisp).
  • Add chopped nuts for crunch or a pinch of cardamom for extra spice.
  • This coffee cake stores well and is freezer-friendly.
  • Letting it rest overnight enhances the flavor even more.

Have you made this recipe? I'd love to see it!

Click here to Follow me on Pinterest


Monster Cookie Bars

March 26, 2025 by Sue Leave a Comment

Monster Cookie Bars are a delicious mash-up of all the best cookie ingredients—peanut butter, oats, chocolate chips, and colorful M&M's—all baked into one thick, chewy, and irresistibly sweet bar. These are perfect for parties, lunchboxes, or just a cozy night in when I want a quick, satisfying treat.

Monster Cookie Bars

Why You’ll Love This Recipe

  • I can make everything in one bowl—less mess, more ease.

  • The recipe doesn’t require flour, which is great for gluten-free needs.

  • I like how customizable it is, from switching out mix-ins to adjusting the sweetness.

  • These bars are thick, chewy, and packed with texture.

  • They store well and freeze beautifully for make-ahead dessert planning.

Ingredients

(Here's a tip: Check out the full list of ingredients and measurements in the recipe card below.)

  • unsalted butter, room temperature
  • creamy peanut butter
  • packed light brown sugar
  • granulated sugar
  • large eggs
  • vanilla extract
  • old-fashioned oats
  • baking soda
  • salt
  • semi-sweet chocolate chips
  • M&M's

Directions

  1. Preheat the oven to 350°F (175°C). I line a 9x13-inch baking pan with parchment paper or lightly grease it.

  2. In a large bowl, I cream together the butter, peanut butter, brown sugar, and granulated sugar until smooth and fluffy.

  3. I beat in the eggs one at a time, then add the vanilla extract and mix until everything’s combined.

  4. I stir in the oats, baking soda, and salt. The dough gets thick, so I mix carefully to keep the texture just right.

  5. I fold in the chocolate chips and most of the M&M’s, saving a handful to press on top later.

  6. I spread the dough evenly into the prepared pan and gently press the remaining M&M's on top.

  7. Bake for 25–30 minutes, or until the edges are golden and the center is set. I let the bars cool completely before cutting.

Servings and Timing

  • Servings: About 24 bars

  • Prep Time: 10 minutes

  • Bake Time: 25–30 minutes

  • Total Time: 40 minutes

Variations

  • Swap the M&M’s with seasonal colors for holidays.

  • Add chopped nuts for a crunchy twist.

  • Try butterscotch or white chocolate chips in place of semi-sweet.

  • Use almond butter or sunflower seed butter for a nut-free option.

  • Mix in coconut flakes or mini marshmallows for something extra fun.

Storage/Reheating

  • Room Temperature: I store them in an airtight container for up to 4 days.

  • Refrigerator: They last up to a week chilled—just bring them to room temp before serving if I want them softer.

  • Freezer: I wrap individual bars in plastic and store in a freezer-safe bag or container for up to 3 months. Thaw at room temp or microwave for 10–15 seconds for a warm bite.

FAQs

How do I make the bars extra chewy?

I take them out of the oven when the edges are golden but the center still looks slightly soft. As they cool, they firm up but stay super chewy.

Can I use quick oats instead of old-fashioned?

Yes, but I prefer old-fashioned oats for that heartier texture. Quick oats make the bars a bit softer and less chewy.

What can I use instead of peanut butter?

I’ve tried almond butter and cashew butter with great results. Just make sure it’s not too runny or oily.

How do I know when they’re done baking?

When the top turns golden and a toothpick in the center comes out with just a few moist crumbs, they’re ready. I avoid overbaking to keep them soft.

Can I double the recipe?

Absolutely. I use a larger baking pan (like a sheet pan) and adjust the baking time, checking around the 30-minute mark.

Conclusion

Monster Cookie Bars are everything I love in a dessert—easy, colorful, chewy, and packed with flavor. Whether I’m baking for a crowd or just craving a homemade treat, these bars always deliver. With endless mix-in options and freezer-friendly storage, they’re one of my go-to sweet recipes.

Print

clock clock iconcutlery cutlery iconflag flag iconfolder folder iconinstagram instagram iconpinterest pinterest iconfacebook facebook iconprint print iconsquares squares iconheart heart iconheart solid heart solid icon
Monster Cookie Bars

Monster Cookie Bars

5 Stars 4 Stars 3 Stars 2 Stars 1 Star No reviews
  • Author: Sue
  • Prep Time: 10 minutes
  • Cook Time: 25–30 minutes
  • Total Time: 40 minutes
  • Yield: 24 bars
  • Category: Dessert
  • Method: Baking
  • Cuisine: American
  • Diet: Gluten Free
Print Recipe
Pin Recipe

Description

These Monster Cookie Bars are thick, chewy, and loaded with peanut butter, oats, chocolate chips, and M&M's—everything you love in one colorful, gluten-free dessert. Perfect for parties, meal prep, or a sweet snack, these easy one-bowl bars are freezer-friendly and totally customizable.


Ingredients

  1. ½ cup unsalted butter, room temperature
  2. 1 cup creamy peanut butter
  3. 1 cup packed light brown sugar
  4. ½ cup granulated sugar
  5. 2 large eggs
  6. 1 tsp vanilla extract
  7. 3 cups old-fashioned oats
  8. 1 tsp baking soda
  9. ½ tsp salt
  10. 1 cup semi-sweet chocolate chips
  11. 1 cup M&M's (plus extra for topping)

Instructions

  • Preheat oven to 350°F (175°C). Line a 9x13-inch baking pan with parchment paper or lightly grease.

  • In a large bowl, cream together butter, peanut butter, brown sugar, and granulated sugar until smooth and fluffy.

  • Beat in the eggs one at a time. Add vanilla and mix well.

  • Stir in oats, baking soda, and salt until combined.

  • Fold in chocolate chips and most of the M&M’s, reserving some for topping.

  • Spread the dough evenly into the prepared pan. Press remaining M&M’s on top.

  • Bake for 25–30 minutes, until edges are golden and center is set.

  • Let cool completely before slicing into bars.


Notes

  • Use old-fashioned oats for the best chewy texture.
  • Don’t overbake—pull them when the center still looks slightly soft.
  • Swap peanut butter with almond or sunflower seed butter for dietary needs.
  • Add-ins like nuts, coconut flakes, or white chocolate chips add a fun twist.
  • Store airtight at room temp, in the fridge, or freeze individually for later.

Have you made this recipe? I'd love to see it!

Click here to Follow me on Pinterest

Lemon Icebox Pie

March 25, 2025 by Sue Leave a Comment

Lemon Icebox Pie is a creamy, tangy dessert that I love to whip up when I want something refreshing and easy. With a buttery graham cracker crust and a smooth lemon filling, it’s the perfect chilled treat for warm days or anytime I’m craving a no-fuss dessert. It sets beautifully in the fridge, so I can make it ahead and keep it ready for whenever the craving strikes.

Lemon Icebox Pie

Why You’ll Love This Recipe

I love this pie because it’s incredibly simple to make, yet tastes like something I spent hours on. It has the ideal balance of sweet and tart, with a silky texture that melts in my mouth. The best part? No baking is required (except for the quick crust, if I choose to bake it). I can make it the night before a gathering or for a last-minute dessert that everyone will rave about.

Ingredients

(Here's a tip: Check out the full list of ingredients and measurements in the recipe card below.)

  • Graham cracker crumbs

  • Granulated sugar

  • Unsalted butter (melted)

  • Sweetened condensed milk

  • Fresh lemon juice

  • Lemon zest

  • Egg yolks (optional, depending on the version I’m making)

  • Whipped cream (for topping)

Directions

  1. I start by mixing the graham cracker crumbs, sugar, and melted butter, then press the mixture firmly into a pie dish to form the crust. I bake it for about 8–10 minutes at 350°F or chill it if I’m going no-bake.

  2. In a bowl, I whisk together the sweetened condensed milk, lemon juice, lemon zest, and egg yolks if using.

  3. I pour the filling into the crust and chill the pie in the refrigerator for at least 4 hours, or until fully set.

  4. Before serving, I top it with freshly whipped cream and a little extra lemon zest for garnish.

Servings and timing

This recipe serves 8 slices and takes about 15 minutes to prepare. If I bake the crust, I add an extra 10 minutes. The pie needs at least 4 hours to chill and set, but I usually let it sit overnight for the best texture.

Variations

Sometimes I use crushed vanilla wafers or shortbread cookies for the crust instead of graham crackers. When I want extra tartness, I add more lemon juice, and if I’m in the mood for a creamy twist, I fold in some cream cheese to the filling. For a lighter version, I’ve even made it without eggs and with a whipped topping folded into the filling.

storage/reheating

I store leftovers covered in the refrigerator for up to 4 days. It’s best enjoyed cold, so I don’t reheat it, but I always give it a few minutes out of the fridge before slicing to make it easier to serve.

FAQs

Can I make this pie ahead of time?

Yes, I often make it the night before. It actually tastes better once it's had time to set and chill properly.

Do I have to bake the crust?

Not necessarily. I prefer baking it for a firmer texture, but I’ve also made it no-bake by simply chilling it until firm.

Can I use bottled lemon juice?

Fresh lemon juice gives the best flavor, but in a pinch, I’ve used bottled juice with decent results.

Is this pie freezer-friendly?

Definitely. I wrap it tightly and freeze it for up to a month. I let it thaw in the fridge overnight before serving.

Can I use eggless filling?

Yes, I skip the egg yolks entirely for an eggless version—it still sets well thanks to the lemon juice reacting with the condensed milk.

Conclusion

Lemon Icebox Pie is one of my favorite make-ahead desserts. It’s light, zesty, and just the right amount of sweet. Whether I’m serving it at a summer cookout or just enjoying a quiet slice on a weeknight, it always hits the spot.

Print

clock clock iconcutlery cutlery iconflag flag iconfolder folder iconinstagram instagram iconpinterest pinterest iconfacebook facebook iconprint print iconsquares squares iconheart heart iconheart solid heart solid icon
Lemon Icebox Pie

5 Stars 4 Stars 3 Stars 2 Stars 1 Star No reviews
  • Author: Sue
  • Prep Time: 15 minutes
  • Cook Time: 10 minutes (optional for crust)
  • Total Time: 4 hours 25 minutes (including chill time)
  • Yield: 8 slices
  • Category: Dessert
  • Method: No-Bake
  • Cuisine: American
  • Diet: Vegetarian
Print Recipe
Pin Recipe

Description

This Lemon Icebox Pie is a no-bake, creamy dessert with a perfect balance of sweet and tart. Made with fresh lemon juice, sweetened condensed milk, and a buttery graham cracker crust, it’s a refreshing and easy make-ahead treat for any occasion.


Ingredients

  • Graham cracker crumbs
  • Granulated sugar
  • Unsalted butter, melted
  • Sweetened condensed milk
  • Fresh lemon juice
  • Lemon zest
  • Egg yolks (optional)
  • Whipped cream (for topping)

Instructions

  1. Mix graham cracker crumbs, sugar, and melted butter. Press into a pie dish.
  2. Bake at 350°F for 8–10 minutes, or chill if making no-bake version.
  3. In a bowl, whisk together sweetened condensed milk, lemon juice, lemon zest, and egg yolks (if using).
  4. Pour filling into the crust.
  5. Chill in the fridge for at least 4 hours or until set.
  6. Top with whipped cream and a little lemon zest before serving.

Notes

  • Use crushed vanilla wafers or shortbread for a different crust.
  • Add more lemon juice for extra tang.
  • Cream cheese can be added for a richer filling.
  • For a lighter or egg-free version, omit yolks and fold in whipped topping.
  • Best served cold—no reheating required.

Have you made this recipe? I'd love to see it!

Click here to Follow me on Pinterest

Bang Bang Chicken

March 25, 2025 by Sue Leave a Comment

Bang Bang Chicken features panko-crusted chicken tenderloins deep-fried to a crispy golden brown and drizzled with a homemade bang bang sauce. This dish offers a delightful combination of crispy texture and tangy flavor, making it a standout addition to any meal.

Bang Bang Chicken

Why I Love This Recipe

I appreciate this recipe for its perfect balance of sweetness and spice, complemented by the satisfying crunch of the panko-coated chicken. The homemade bang bang sauce elevates the dish, providing a unique flavor that keeps me coming back for more. Plus, it's versatile enough to be served as an appetizer or a main course.

Ingredients

(Here's a tip: Check out the full list of ingredients and measurements in the recipe card below.)

  • Chicken tenderloins

  • Buttermilk

  • All-purpose flour

  • Cornstarch

  • Egg

  • Sriracha

  • Garlic powder

  • Kosher salt

  • Black pepper

  • Cayenne pepper (optional)

  • Panko breadcrumbs

  • Canola oil (for frying)

  • Mayonnaise

  • Thai sweet chili sauce

  • Honey

  • Parsley (for garnish)

Directions

  1. Prepare the Bang Bang Sauce: In a small bowl, I combine mayonnaise, Thai sweet chili sauce, Sriracha, and honey. I mix well and set it aside.

  2. Marinate the Chicken: In a medium mixing bowl, I whisk together buttermilk, flour, cornstarch, egg, Sriracha, garlic powder, salt, pepper, and cayenne pepper. I add the chicken tenders to this mixture, ensuring they are well-coated.

  3. Coat with Panko: I place panko breadcrumbs on a shallow plate. Taking one piece at a time, I remove the chicken from the batter, gently shake off any excess, and dredge it in the panko, pressing slightly to adhere. I set the coated chicken on a clean plate and repeat with the remaining pieces.

  4. Fry the Chicken: In a large skillet, I add about an inch of canola oil and heat it over medium-high heat until it reaches 365°F. Working in batches to avoid overcrowding, I add the chicken and cook until browned, about 2-3 minutes per side, or until the internal temperature reaches 165°F. I transfer the cooked chicken to a paper towel-lined plate to drain.

  5. Serve: I place the fried chicken on a serving plate, drizzle with the bang bang sauce, and garnish with chopped parsley. I serve it warm and enjoy the crispy, flavorful delight.

Servings and Timing

This recipe yields approximately 4 servings. The preparation time is about 20 minutes, and the cooking time is approximately 6 minutes, making the total time around 26 minutes.

Variations

  • Air Fryer Method: If I prefer a healthier option, I use the air fryer. After coating the chicken, I spray each piece with cooking spray and place them in the air fryer basket without overcrowding. I air fry at 400°F for 10 minutes, flipping halfway through, then drizzle with bang bang sauce before serving.

  • Baking Method: For baking, I preheat the oven to 425°F. I place the coated chicken tenders on a parchment-lined baking sheet, spray them with cooking spray, and bake for 12-15 minutes, flipping halfway through, until the internal temperature reaches 165°F. They may not be as crispy as frying, but they remain delicious.

Storage/Reheating

To store leftovers, I let the chicken cool completely, wrap it in aluminum foil, and place it in an airtight container. It can be refrigerated for up to 5 days or frozen for up to 6 months. When ready to eat, I reheat the chicken in the oven at 350°F until warmed through, ensuring it retains its crispiness.

FAQs

How can I make the bang bang sauce spicier?

I increase the amount of Sriracha in the sauce to add more heat, adjusting to my taste preferences.

Can I use chicken breasts instead of tenderloins?

Yes, I cut boneless, skinless chicken breasts into strips to substitute for tenderloins.

What can I serve alongside Bang Bang Chicken?

I often serve it with steamed rice, a fresh salad, or roasted vegetables to complement the flavors.

Is there a substitute for buttermilk in the marinade?

If I don't have buttermilk, I make a substitute by adding a tablespoon of lemon juice or vinegar to a cup of milk and letting it sit for 5-10 minutes.

How do I ensure the chicken stays crispy?

To maintain crispiness, I avoid overcrowding the frying pan, ensure the oil is at the correct temperature, and serve the chicken immediately after frying.

Conclusion

Bang Bang Chicken is a delightful dish that combines crispy fried chicken with a flavorful, spicy-sweet sauce. Its versatility and ease of preparation make it a favorite in my kitchen, perfect for both casual dinners and special occasions. I encourage you to try this recipe and savor the deliciousness it brings to the table.

Print

clock clock iconcutlery cutlery iconflag flag iconfolder folder iconinstagram instagram iconpinterest pinterest iconfacebook facebook iconprint print iconsquares squares iconheart heart iconheart solid heart solid icon
Bang Bang Chicken

Bang Bang Chicken

5 Stars 4 Stars 3 Stars 2 Stars 1 Star No reviews
  • Author: Sue
  • Prep Time: 20 minutes
  • Cook Time: 6 minutes
  • Total Time: 26 minutes
  • Yield: 4 servings
  • Category: Main Course, Appetizer
  • Method: Frying (with air fryer and baking options)
  • Cuisine: American-Asian Fusion
Print Recipe
Pin Recipe

Description

Bang Bang Chicken is a crispy, golden-fried chicken tenderloin dish topped with a creamy, spicy-sweet bang bang sauce. This crowd-pleasing recipe combines panko-crusted crunch with a bold flavor kick from Thai sweet chili sauce, Sriracha, and honey. Perfect as an appetizer or main course, this easy Bang Bang Chicken recipe will become your new favorite for weeknight dinners or entertaining.


Ingredients

  • Chicken tenderloins
  • Buttermilk
  • All-purpose flour
  • Cornstarch
  • Egg
  • Sriracha
  • Garlic powder
  • Kosher salt
  • Black pepper
  • Cayenne pepper (optional)
  • Panko breadcrumbs
  • Canola oil (for frying)
  • Mayonnaise
  • Thai sweet chili sauce
  • Honey
  • Parsley (for garnish)

Instructions

  1. Make Sauce: Mix mayonnaise, Thai sweet chili sauce, Sriracha, and honey. Set aside.

  2. Marinate Chicken: In a bowl, whisk buttermilk, flour, cornstarch, egg, Sriracha, garlic powder, salt, pepper, and cayenne. Add chicken to coat.

  3. Coat in Panko: Dredge chicken in panko breadcrumbs and press gently to adhere.

  4. Fry: Heat oil to 365°F. Fry chicken in batches for 2–3 minutes per side or until golden brown and cooked through (165°F internal temp).

  5. Serve: Drizzle with bang bang sauce, garnish with parsley, and serve warm.


Notes

  • Make it spicier: Add more Sriracha to the sauce.
  • Healthier option: Use an air fryer or bake the chicken for less oil.
  • Storage: Store leftovers in an airtight container in the fridge for up to 5 days or freeze up to 6 months. Reheat in oven for crispiness.
  • Buttermilk substitute: Mix 1 cup milk with 1 tablespoon lemon juice or vinegar; let sit 5–10 minutes.
  • Serving ideas: Pair with rice, salad, or roasted veggies.

Have you made this recipe? I'd love to see it!

Click here to Follow me on Pinterest

Crispy Spicy Salmon Bites

March 25, 2025 by Sue Leave a Comment

These Crispy Spicy Salmon Bites are a flavorful, satisfying way to enjoy salmon with a twist. Perfectly seasoned, pan-seared to crispy perfection, and served with a delicious spicy mayo sauce, these bites make a great appetizer, snack, or even a light dinner when paired with rice or salad.

Crispy Spicy Salmon Bites

Why You’ll Love This Recipe

I love how quick and easy these salmon bites are to make—done in under 20 minutes. The spice blend brings a bold, zesty flavor that complements the natural richness of the salmon. Cooking them in bite-size pieces ensures each one gets beautifully crisp on the outside while staying tender and juicy inside. Plus, they’re versatile enough to enjoy in a rice bowl, salad, or taco.

ingredients

(Here's a tip: Check out the full list of ingredients and measurements in the recipe card below.)

  • Skinless salmon fillets
  • Olive oil
  • Paprika
  • Garlic powder
  • Onion powder
  • Salt
  • Black pepper
  • Cayenne pepper (optional for extra heat)
  • Cornstarch (for extra crispiness)
  • Spicy mayo (optional dipping sauce: typically mayo + sriracha or hot sauce)

directions

  1. I start by cutting the salmon into bite-sized cubes.
  2. Then, I toss the pieces in olive oil and season them with paprika, garlic powder, onion powder, salt, pepper, and a bit of cayenne for heat.
  3. For that crisp texture, I coat the salmon pieces lightly in cornstarch.
  4. I heat some oil in a skillet over medium-high heat and pan-fry the salmon bites until they're golden and crispy on the outside—about 2-3 minutes per side.
  5. Once done, I remove them from the skillet and let them drain briefly on a paper towel.
  6. I like serving them with a drizzle or a side of spicy mayo for dipping.

Servings and timing

This recipe makes about 2 to 3 servings, perfect for a light meal or appetizer. It takes around 15 minutes total—10 minutes for prep and just 5 minutes to cook.

Variations

  • I sometimes swap the spicy seasoning with lemon pepper for a zestier flavor.
  • For a gluten-free version, I use arrowroot powder instead of cornstarch.
  • These bites are great tossed in teriyaki sauce for an Asian-inspired variation.
  • I like adding a squeeze of fresh lime or lemon before serving to brighten the flavors.
  • I’ve also air-fried them instead of pan-frying for a lower-oil option.

storage/reheating

I store any leftovers in an airtight container in the fridge for up to 2 days. When reheating, I use a skillet or air fryer to bring back the crispiness—microwaving makes them a bit soggy. I avoid freezing, as the texture doesn’t hold up well after thawing.

FAQs

How do I know when the salmon bites are fully cooked?

I cook them until they're opaque and flake easily with a fork. They usually take about 2–3 minutes per side in a hot skillet.

Can I use frozen salmon?

Yes, but I always thaw it completely and pat it dry to avoid excess moisture that prevents crisping.

What can I serve with spicy salmon bites?

I often serve them with rice, avocado, cucumber slices, or inside lettuce wraps or tacos.

Can I make these bites less spicy?

Definitely. I just skip the cayenne and use a milder dipping sauce if I want a less spicy version.

Is there a way to make them even crispier?

For extra crunch, I press the cornstarch into the salmon a bit more firmly and let them rest for a few minutes before frying. That gives a better crust when they hit the hot oil.

Conclusion

These Crispy Spicy Salmon Bites are one of my go-to quick meals or appetizers when I’m craving something bold and satisfying. Whether I’m pairing them with a spicy mayo or tossing them into a rice bowl, they never disappoint. Give them a try the next time I want a flavor-packed salmon dish with a bit of a kick.


Print

clock clock iconcutlery cutlery iconflag flag iconfolder folder iconinstagram instagram iconpinterest pinterest iconfacebook facebook iconprint print iconsquares squares iconheart heart iconheart solid heart solid icon
Crispy Spicy Salmon Bites

Crispy Spicy Salmon Bites

5 Stars 4 Stars 3 Stars 2 Stars 1 Star No reviews
  • Author: Sue
  • Prep Time: 10 minutes
  • Cook Time: 5 minutes
  • Total Time: 15 minutes
  • Yield: 2–3 servings
  • Category: Appetizer, Main Course
  • Method: Pan-Frying (or Air Frying)
  • Cuisine: American, Fusion
  • Diet: Gluten Free
Print Recipe
Pin Recipe

Description

These Crispy Spicy Salmon Bites are the perfect quick and flavorful appetizer or light meal. Made with bite-sized salmon pieces, bold spices, and pan-fried to crispy perfection, this easy salmon recipe comes together in under 20 minutes and pairs beautifully with spicy mayo, rice bowls, salads, or tacos. Ideal for weeknight dinners or entertaining!


Ingredients

  1. Skinless salmon fillets, cut into bite-sized cubes
  2. Olive oil
  3. Paprika
  4. Garlic powder
  5. Onion powder
  6. Salt
  7. Black pepper
  8. Cayenne pepper (optional, for heat)
  9. Cornstarch (for crispiness)
  10. Spicy mayo (optional: mayo + sriracha or hot sauce)

Instructions

  • Cut the salmon into bite-sized cubes.
  • Toss salmon with olive oil, paprika, garlic powder, onion powder, salt, black pepper, and cayenne if using.
  • Lightly coat salmon pieces in cornstarch.
  • Heat oil in a skillet over medium-high heat.
  • Pan-fry salmon bites for 2–3 minutes per side, until golden and crispy.
  • Remove and drain on paper towels.
  • Serve with spicy mayo or your favorite dipping sauce.

Notes

  • For extra crunch, press the cornstarch into the salmon firmly and let rest before frying.
  • Make it gluten-free by using arrowroot powder instead of cornstarch.
  • Air-fry for a healthier version.
  • Add a squeeze of lemon or lime before serving to brighten flavors.
  • Store leftovers in the fridge for up to 2 days; reheat in a skillet or air fryer.

Have you made this recipe? I'd love to see it!

Click here to Follow me on Pinterest

Air Fryer Pepperoni Roll

March 25, 2025 by Sue Leave a Comment

A crispy, golden roll filled with melty cheese and spicy pepperoni, this air fryer pepperoni roll is one of my favorite go-to snacks or quick meals. It’s fast, satisfying, and brings all the flavors of a classic pizza into a hand-held treat that’s perfect for game day, lunchboxes, or even a late-night craving.

Air Fryer Pepperoni Roll

Why You’ll Love This Recipe

I love how quick and easy this pepperoni roll is to make, especially in the air fryer. It gives the dough a beautiful golden crust while keeping the inside warm and cheesy. The pepperoni adds a savory, spicy kick that pairs so well with melted mozzarella. Plus, it's easy to customize and makes a great on-the-go snack or party food.

ingredients

(Here's a tip: Check out the full list of ingredients and measurements in the recipe card below.)

  • Refrigerated pizza dough (or homemade, if I have time)
  • Sliced pepperoni
  • Shredded mozzarella cheese
  • Italian seasoning
  • Olive oil or melted butter (for brushing)
  • Optional: marinara sauce for dipping

directions

  1. I start by preheating my air fryer to 375°F.
  2. Then I roll out the pizza dough on a floured surface and cut it into rectangles, about 3x5 inches each.
  3. I layer a few slices of pepperoni and a generous sprinkle of mozzarella cheese on one half of each rectangle.
  4. I fold the dough over and pinch the edges to seal it tightly.
  5. After brushing the tops with olive oil or melted butter and sprinkling a little Italian seasoning, I place the rolls in the air fryer basket, making sure they’re not touching.
  6. I air fry them for about 8–10 minutes, or until they’re golden brown and cooked through.
  7. I let them cool slightly before serving with warm marinara sauce on the side.

Servings and timing

This recipe makes about 6 rolls, depending on how large I cut the dough. Each batch cooks in 8–10 minutes in the air fryer at 375°F. Prep time takes around 10–15 minutes.

Variations

Sometimes I like to mix things up by adding different fillings. Sautéed mushrooms, bell peppers, or cooked sausage all work really well. I’ve also tried using cheddar or provolone instead of mozzarella for a different cheese pull. For a spicy version, I throw in a few jalapeño slices or a dash of red pepper flakes.

storage/reheating

I store any leftovers in an airtight container in the fridge for up to 3 days. To reheat, I pop them back in the air fryer at 350°F for 3–4 minutes so they stay crispy. The microwave works too, but the crust won’t be as crisp.

FAQs

How do I keep the rolls from bursting open in the air fryer?

I make sure to seal the edges really well and avoid overstuffing them. Pressing the edges with a fork helps create a tighter seal.

Can I use crescent roll dough instead of pizza dough?

Yes, I’ve used crescent roll dough for a flakier texture. It cooks a little faster, so I keep an eye on it after 6–7 minutes.

Are these freezer-friendly?

Absolutely. I freeze uncooked rolls on a tray first, then transfer them to a freezer bag. I cook them straight from frozen, adding 2–3 minutes to the air fryer time.

What dipping sauces go well with these?

Besides marinara, I like ranch dressing, garlic butter, or even a spicy sriracha mayo for an extra kick.

Can I make these ahead of time?

Yes, I assemble the rolls and keep them in the fridge for a few hours before air frying. They come out just as fresh.

Conclusion

This air fryer pepperoni roll recipe is a fun, easy twist on classic pizza that I never get tired of. It’s quick to prepare, endlessly customizable, and always a hit with friends and family. Whether I serve it as a snack, appetizer, or lunch, it always disappears fast.

Print

clock clock iconcutlery cutlery iconflag flag iconfolder folder iconinstagram instagram iconpinterest pinterest iconfacebook facebook iconprint print iconsquares squares iconheart heart iconheart solid heart solid icon
Air Fryer Pepperoni Roll

Air Fryer Pepperoni Roll

5 Stars 4 Stars 3 Stars 2 Stars 1 Star No reviews
  • Author: Sue
  • Prep Time: 15 minutes
  • Cook Time: 10 minutes
  • Total Time: 25 minutes
  • Yield: About 6 rolls
  • Category: Appetizer, Snack
  • Method: Air Fryer
  • Cuisine: American, Italian-Inspired
Print Recipe
Pin Recipe

Description

This easy Air Fryer Pepperoni Roll recipe is a crispy, cheesy, and savory snack that brings all the flavors of pizza into a handheld roll. Perfect for game day, party appetizers, lunchboxes, or quick weeknight meals, these air fryer rolls are made with pizza dough, pepperoni, and mozzarella, then cooked to golden perfection in just minutes.


Ingredients

  • Refrigerated pizza dough (or homemade)
  • Sliced pepperoni
  • Shredded mozzarella cheese
  • Italian seasoning
  • Olive oil or melted butter (for brushing)
  • Optional: marinara sauce for dipping

Instructions

  1. Preheat the air fryer to 375°F (190°C).
  2. Roll out the pizza dough on a floured surface and cut into 3x5 inch rectangles.
  3. Add sliced pepperoni and mozzarella on one half of each rectangle.
  4. Fold over and pinch edges to seal tightly.
  5. Brush tops with olive oil or butter and sprinkle Italian seasoning.
  6. Place rolls in the air fryer basket, ensuring they don’t touch.
  7. Air fry for 8–10 minutes until golden brown and cooked through.
  8. Let cool slightly before serving with marinara sauce.

Notes

  • Avoid overfilling the rolls to prevent bursting.
  • Press edges with a fork to help seal better.
  • Customize with other fillings like mushrooms, sausage, or jalapeños.
  • Use cheddar or provolone for a cheese variation.
  • To reheat, use the air fryer for a crispier result.

Have you made this recipe? I'd love to see it!

Click here to Follow me on Pinterest

Olive Oil Dip with Warm Bread

March 25, 2025 by Sue Leave a Comment

This Olive Oil Dip with Warm Bread is the kind of appetizer that sets the tone for a cozy meal or a casual gathering. Made with high-quality olive oil and a flavorful blend of herbs, garlic, and optional balsamic vinegar, it pairs beautifully with fresh, crusty bread that's warm from the oven. It’s simple, elegant, and always a crowd-pleaser.

Olive Oil Dip with Warm Bread

Why You’ll Love This Recipe

I love this recipe for how quick and effortless it is while still feeling indulgent. The dip takes just minutes to pull together, but it delivers big on flavor. It’s perfect for entertaining, a relaxing weekend snack, or even a pre-dinner nibble when I don’t want to fuss with complicated appetizers. Plus, I can easily tweak the herbs and spices to suit whatever mood I’m in.

ingredients

(Here's a tip: Check out the full list of ingredients and measurements in the recipe card below.)

  • Extra virgin olive oil
  • Fresh garlic, minced
  • Italian seasoning or dried herbs (like oregano, basil, thyme)
  • Crushed red pepper flakes (optional, for heat)
  • Sea salt
  • Freshly ground black pepper
  • Balsamic vinegar (optional, for tang)
  • Grated Parmesan cheese (optional, for richness)
  • Warm, crusty bread (such as a baguette, ciabatta, or sourdough)

directions

  1. I pour the olive oil into a shallow bowl or small plate—just enough to cover the bottom generously.
  2. I mix in the minced garlic, dried herbs, a pinch of red pepper flakes, salt, and black pepper.
  3. If I’m feeling like adding extra depth, I drizzle in a bit of balsamic vinegar and sprinkle some grated Parmesan on top.
  4. I give everything a gentle stir to combine and let it sit for a few minutes so the flavors can infuse.
  5. Meanwhile, I warm the bread in the oven until it’s crisp on the outside and soft inside.
  6. I serve the dip with the warm bread on the side, tearing off pieces to soak up every last drop of oil and herbs.

Servings and timing

This recipe serves about 4–6 people as an appetizer.
Prep time: 5 minutes
Cook time (warming bread): 10 minutes
Total time: 15 minutes

Variations

I often switch things up depending on what I have on hand. Sometimes I add chopped sun-dried tomatoes or kalamata olives for a Mediterranean twist. If I want a touch of sweetness, I drizzle in a little honey with the balsamic. Fresh herbs like parsley or rosemary give the dip a garden-fresh flavor, and a squeeze of lemon juice can brighten everything up. For a more luxurious dip, I’ve even stirred in truffle oil or a dab of pesto.

storage/reheating

Leftover dip (if I somehow don’t finish it!) can be stored in an airtight container in the fridge for up to 3 days. I make sure to give it a stir before serving again, as the oil and seasonings can settle. Bread is best fresh, but I sometimes reheat it in the oven at 350°F (175°C) for 5–7 minutes to revive the crust.

FAQs

Can I make the olive oil dip ahead of time?

Yes, I often mix the dip a few hours ahead and let it sit at room temperature to let the flavors meld. Just be sure to stir it before serving.

What kind of olive oil should I use?

I always go for a high-quality extra virgin olive oil with a fruity or peppery flavor—it really makes a difference in a simple recipe like this.

Is the balsamic vinegar necessary?

Not at all. I like the tang it adds, but the dip is just as delicious without it. It’s totally optional.

Can I use fresh herbs instead of dried?

Absolutely. I chop up fresh herbs like basil, oregano, or parsley when I have them, especially in the summer. I just use a little more than I would of dried herbs.

What’s the best bread to serve with this dip?

I prefer a crusty artisan loaf—something like sourdough, French baguette, or ciabatta. I warm it up so it’s soft inside and crisp outside.

Conclusion

This Olive Oil Dip with Warm Bread is a go-to for when I want something easy, delicious, and endlessly customizable. It’s the kind of appetizer that always gets people gathered around the table, dipping and talking. With just a few pantry ingredients and a good loaf of bread, I can whip this up anytime and make it feel like a special moment.

Print

clock clock iconcutlery cutlery iconflag flag iconfolder folder iconinstagram instagram iconpinterest pinterest iconfacebook facebook iconprint print iconsquares squares iconheart heart iconheart solid heart solid icon
Olive Oil Dip with Warm Bread

Olive Oil Dip with Warm Bread

5 Stars 4 Stars 3 Stars 2 Stars 1 Star No reviews
  • Author: Sue
  • Prep Time: 5 minutes
  • Cook Time: 10 minutes (to warm bread)
  • Total Time: 15 minutes
  • Yield: 4–6 servings (as appetizer)
  • Category: Appetizer
  • Method: No-cook (dip); Oven (bread warming)
  • Cuisine: Italian-inspired, Mediterranean
  • Diet: Vegetarian
Print Recipe
Pin Recipe

Description

This Olive Oil Dip with Warm Bread is the ultimate easy appetizer—made with extra virgin olive oil, garlic, herbs, and optional balsamic vinegar or Parmesan. It's flavorful, fast, and perfect for dipping crusty bread. Ideal for gatherings, cozy nights, or as a simple snack, this crowd-pleaser is endlessly customizable and always delicious.


Ingredients

  • Extra virgin olive oil
  • Fresh garlic, minced
  • Italian seasoning or dried herbs (oregano, basil, thyme)
  • Crushed red pepper flakes (optional)
  • Sea salt
  • Freshly ground black pepper
  • Balsamic vinegar (optional)
  • Grated Parmesan cheese (optional)
  • Warm, crusty bread (e.g., baguette, ciabatta, or sourdough)

Instructions

  1. Pour olive oil into a shallow bowl or small plate.
  2. Mix in minced garlic, dried herbs, red pepper flakes, salt, and pepper.
  3. Optional: Add balsamic vinegar and grated Parmesan.
  4. Stir gently and let sit for a few minutes to allow flavors to meld.
  5. Warm bread in the oven until crisp on the outside, soft inside.
  6. Serve dip with warm bread and enjoy!

Notes

  • Add chopped sun-dried tomatoes, olives, or pesto for extra flavor.
  • Swap dried herbs for fresh ones like basil, oregano, or parsley.
  • Truffle oil, honey, or lemon juice can elevate the dip.
  • Store leftover dip in an airtight container in the fridge for up to 3 days. Stir before serving.

Have you made this recipe? I'd love to see it!

Click here to Follow me on Pinterest

One-Pot Creamy Beef and Garlic Butter Pasta

March 23, 2025 by Sue Leave a Comment

One-Pot Creamy Beef and Garlic Butter Pasta is a rich, savory, and satisfying meal that’s perfect for busy weeknights. Made with tender ground beef, aromatic garlic butter, and a creamy sauce that clings to every bite of pasta, this dish is as comforting as it is easy to make. Everything comes together in one pot, which means less cleanup and more flavor in every spoonful.

One-Pot Creamy Beef and Garlic Butter Pasta

Why I Love This Recipe

I love how this dish delivers big, comforting flavors with minimal effort. The garlic butter gives it a deep, savory richness, while the ground beef adds heartiness that makes it a complete meal. The creamy sauce brings everything together, and since it all cooks in one pot, cleanup is a breeze. Whether I’m feeding the family or just want a cozy dinner for myself, this recipe always comes through.

Ingredients

(Here's a tip: Check out the full list of ingredients and measurements in the recipe card below.)

  • Ground beef

  • Pasta (penne, rotini, or your favorite shape)

  • Butter

  • Garlic, minced

  • Onion, chopped

  • Beef broth

  • Heavy cream

  • Parmesan cheese

  • Salt and pepper

  • Italian seasoning

  • Fresh parsley (for garnish, optional)

Directions

  1. In a large pot or deep skillet, melt butter over medium heat. Add the garlic and onion, and sauté until fragrant and translucent.

  2. Add the ground beef and cook until browned, breaking it up as it cooks. Season with salt, pepper, and Italian seasoning.

  3. Pour in the beef broth and bring to a simmer.

  4. Stir in the uncooked pasta. Cover and cook for about 10–12 minutes, stirring occasionally, until the pasta is tender and the liquid has mostly absorbed.

  5. Reduce heat to low. Stir in the heavy cream and Parmesan cheese until everything is creamy and well combined.

  6. Let it simmer for another 2–3 minutes to thicken slightly.

  7. Taste and adjust seasoning if needed.

  8. Garnish with chopped parsley and serve hot.

Servings and Timing

  • Servings: 4–6

  • Prep Time: 10 minutes

  • Cook Time: 20 minutes

  • Total Time: 30 minutes

Variations

  • Spicy Kick: Add red pepper flakes or a dash of hot sauce.

  • Veggie Boost: Stir in spinach, mushrooms, or bell peppers during cooking.

  • Cheesy Twist: Add mozzarella or cream cheese for extra richness.

  • Swap the Meat: I sometimes use ground turkey or Italian sausage instead of beef.

  • Gluten-Free Option: Use gluten-free pasta and ensure the broth and seasonings are gluten-free.

Storage/Reheating

  • Refrigerator: Store leftovers in an airtight container for up to 4 days.

  • Freezer: Freeze in individual portions for up to 2 months.

  • Reheating: Reheat in a skillet with a splash of broth or cream, or microwave in 1-minute intervals, stirring in between.

FAQs

Can I use pre-cooked pasta?

It’s best to cook the pasta in the pot with the sauce so it absorbs the flavors and helps thicken the dish.

What pasta shape works best?

I like using short pasta like penne, rotini, or shells—they hold the sauce well and cook evenly in one pot.

Can I use milk instead of cream?

Yes, but the sauce will be thinner. For a richer result, stick with heavy cream or half-and-half.

Is this dish freezer-friendly?

Yes, it freezes well. I let it cool completely, then portion and freeze. Thaw in the fridge before reheating.

How do I prevent the pasta from sticking or overcooking?

Stir occasionally while the pasta simmers, and don’t overcook—once it’s tender, move on to the next step.

Conclusion

One-Pot Creamy Beef and Garlic Butter Pasta is the kind of dinner I keep in rotation because it’s fast, flavorful, and always satisfying. It’s loaded with creamy, garlicky goodness and hearty beef, all wrapped up in tender pasta. Whether I’m cooking for the family or meal prepping for the week, this is a one-pot wonder that never fails. Give it a try and taste the magic of minimal dishes and maximum comfort.

Print

clock clock iconcutlery cutlery iconflag flag iconfolder folder iconinstagram instagram iconpinterest pinterest iconfacebook facebook iconprint print iconsquares squares iconheart heart iconheart solid heart solid icon
One-Pot Creamy Beef and Garlic Butter Pasta

One-Pot Creamy Beef and Garlic Butter Pasta

5 Stars 4 Stars 3 Stars 2 Stars 1 Star No reviews
  • Author: Sue
  • Prep Time: 10 minutes
  • Cook Time: 20 minutes
  • Total Time: 30 minutes
  • Yield: 4–6 servings
  • Category: Dinner
  • Method: One-Pot
  • Cuisine: American
Print Recipe
Pin Recipe

Description

This One-Pot Creamy Beef and Garlic Butter Pasta is the ultimate easy comfort food dinner. Made with tender ground beef, garlic butter, and a rich, creamy sauce, it’s a simple one-pot pasta recipe perfect for busy weeknights. Minimal cleanup, maximum flavor!


Ingredients

  • 1 lb (450g) ground beef

  • 12 oz (340g) pasta (penne, rotini, or your favorite shape)

  • 2 tablespoons butter

  • 4 cloves garlic, minced

  • 1 small onion, chopped

  • 3 cups beef broth

  • 1 cup heavy cream

  • ¾ cup grated Parmesan cheese

  • 1 teaspoon salt (or to taste)

  • ½ teaspoon black pepper

  • 1 teaspoon Italian seasoning

  • Fresh parsley, chopped (optional, for garnish)


Instructions

  1. In a large pot or deep skillet, melt butter over medium heat. Add the garlic and onion; sauté until translucent and fragrant.

  2. Add ground beef. Cook until browned, breaking it up with a spoon. Season with salt, pepper, and Italian seasoning.

  3. Pour in the beef broth. Bring to a simmer.

  4. Add uncooked pasta. Stir, cover, and cook for 10–12 minutes, stirring occasionally until pasta is tender and most liquid is absorbed.

  5. Reduce heat to low. Stir in heavy cream and Parmesan cheese. Mix until creamy and well combined.

  6. Let simmer for 2–3 minutes to thicken. Adjust seasoning to taste.

  7. Garnish with chopped parsley if desired. Serve hot.


Notes

  • Add red pepper flakes for heat.

  • Stir in spinach, mushrooms, or bell peppers for a veggie boost.

  • Use ground turkey or sausage as a variation.

  • For extra cheesy richness, stir in mozzarella or cream cheese.

Have you made this recipe? I'd love to see it!

Click here to Follow me on Pinterest

Honey Glazed Salmon

March 23, 2025 by Sue Leave a Comment

This Honey Glazed Salmon recipe is a quick and flavorful way to enjoy a restaurant-quality meal right at home. The salmon is pan-seared to perfection and finished with a sticky, sweet, and savory honey glaze that’s hard to resist. It’s ideal for a weeknight dinner but elegant enough for special occasions.

Honey Glazed Salmon

Why You’ll Love This Recipe

I love how this recipe brings out the natural richness of salmon with just a few ingredients. The honey glaze gives the fish a beautiful caramelized finish while balancing out the bold flavor of the salmon. It takes less than 30 minutes from start to finish, making it a perfect go-to for busy days. Plus, it pairs well with just about anything—from rice to roasted veggies or a crisp green salad.
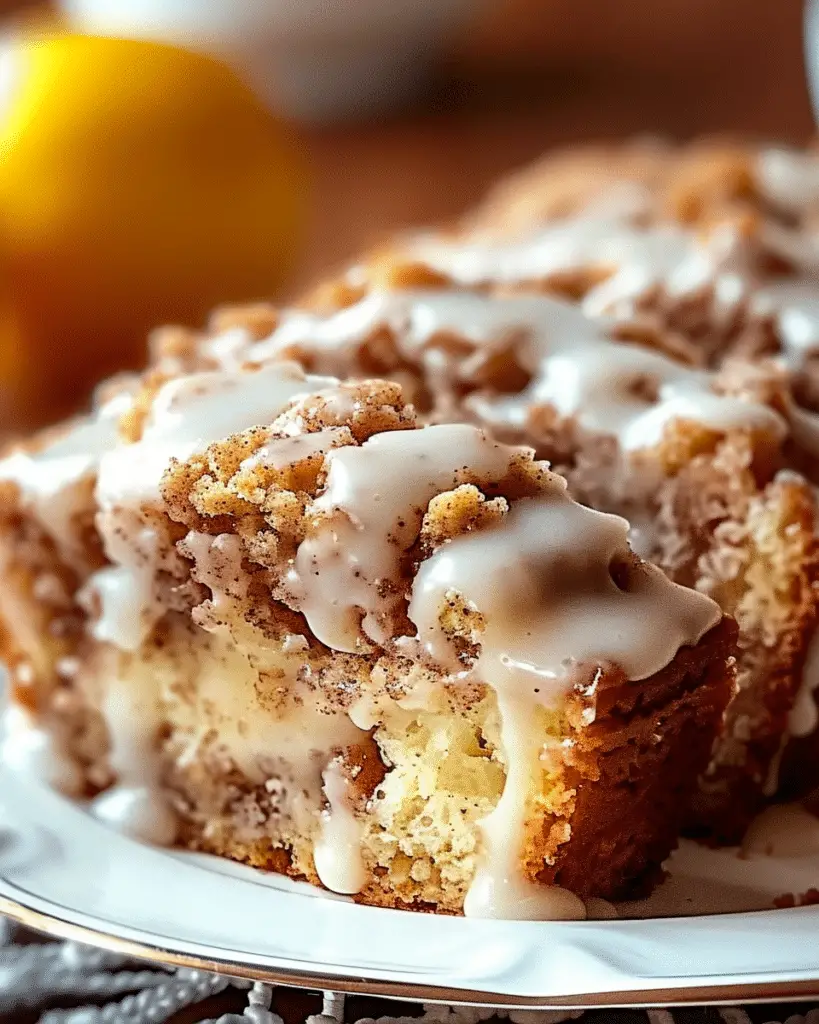
ingredients

(Here's a tip: Check out the full list of ingredients and measurements in the recipe card below.)

  • Salmon fillets, skin-on or skinless

  • Honey

  • Soy sauce

  • Garlic, minced

  • Olive oil or butter

  • Lemon juice

  • Salt

  • Black pepper

  • Optional garnish: sesame seeds or chopped parsley

directions

  1. I start by patting the salmon dry with paper towels and seasoning both sides with salt and pepper.

  2. In a small bowl, I mix together honey, soy sauce, garlic, and lemon juice.

  3. I heat oil or butter in a nonstick skillet over medium-high heat.

  4. I place the salmon fillets in the pan, skin-side down if they have skin, and sear for about 4-5 minutes until nicely browned.

  5. I flip the fillets and cook the other side for 2-3 more minutes.

  6. I reduce the heat to medium-low and pour in the honey glaze mixture.

  7. I spoon the sauce over the salmon continuously for another 2-3 minutes until it thickens slightly and coats the fish in a glossy glaze.

  8. Once the salmon is cooked through and the glaze is sticky, I remove it from the heat and let it rest for a minute before serving.

Servings and timing

This recipe makes 4 servings and takes about 20-25 minutes total—10 minutes for prep and 10-15 minutes for cooking.

Variations

Sometimes I swap out the soy sauce for tamari or coconut aminos to make it gluten-free. If I want a little heat, I add a pinch of red pepper flakes or a dash of sriracha to the glaze. I’ve also tried using maple syrup instead of honey for a deeper, earthier sweetness, and it works beautifully. For an extra citrusy kick, I zest the lemon before juicing it and stir that into the glaze.

storage/reheating

To store leftovers, I place the salmon in an airtight container in the fridge for up to 3 days. When I reheat it, I prefer using the oven or a skillet on low heat to keep the glaze from burning and the salmon from drying out. Microwaving is fine too, but I cover it with a damp paper towel to help retain moisture.

FAQs

How do I know when the salmon is cooked?

I check for doneness by gently pressing the salmon with a fork; it should flake easily and be opaque in the center. An internal temperature of 145°F is also a good indicator.

Can I bake the salmon instead of pan-searing it?

Yes, I often bake it at 400°F for 12-15 minutes, then add the glaze during the last few minutes or broil it briefly to caramelize the top.

What sides go well with honey glazed salmon?

I like serving it with steamed rice, quinoa, roasted broccoli, asparagus, or a fresh cucumber salad. The sweet glaze pairs well with both starchy and green sides.

Can I use frozen salmon?

Yes, I just make sure to thaw it completely and pat it dry before cooking to avoid excess moisture interfering with the glaze.

Is this recipe healthy?

I consider it a healthy option—it’s high in protein, rich in omega-3s, and lower in added sugars compared to many restaurant-style versions.

Conclusion

Honey Glazed Salmon is one of those recipes I keep coming back to—it’s quick, easy, and packed with flavor. Whether I’m cooking for myself or entertaining guests, it always feels like a special treat without much effort. Give it a try and see how effortlessly delicious it can be.

Print

clock clock iconcutlery cutlery iconflag flag iconfolder folder iconinstagram instagram iconpinterest pinterest iconfacebook facebook iconprint print iconsquares squares iconheart heart iconheart solid heart solid icon
Honey Glazed Salmon

Honey Glazed Salmon

5 Stars 4 Stars 3 Stars 2 Stars 1 Star No reviews
  • Author: Sue
  • Prep Time: 10 minutes
  • Cook Time: 10-15 minutes
  • Total Time: 20-25 minutes
  • Yield: 4 servings
  • Category: Main Course
  • Method: Pan-Searing
  • Cuisine: American, Asian-Inspired
  • Diet: Gluten Free
Print Recipe
Pin Recipe

Description

This Honey Glazed Salmon recipe is a quick and flavorful way to enjoy a restaurant-quality meal at home. With a sticky, sweet, and savory honey glaze, the salmon is pan-seared to caramelized perfection. Ready in under 30 minutes, it’s perfect for busy weeknights or elegant dinners alike.


Ingredients

  • 4 salmon fillets (skin-on or skinless)
  • ¼ cup honey
  • 2 tbsp soy sauce (or tamari for gluten-free)
  • 2 cloves garlic, minced
  • 1 tbsp olive oil or butter
  • 1 tbsp lemon juice
  • Salt, to taste
  • Black pepper, to taste
  • Optional garnish: sesame seeds or chopped parsley

Instructions

  1. Pat salmon fillets dry and season both sides with salt and pepper.
  2. In a small bowl, mix together honey, soy sauce, garlic, and lemon juice.
  3. Heat olive oil or butter in a nonstick skillet over medium-high heat.
  4. Place salmon in the pan (skin-side down if applicable) and sear for 4-5 minutes until browned.
  5. Flip and cook for another 2-3 minutes.
  6. Reduce heat to medium-low and pour in the honey glaze.
  7. Spoon glaze over the salmon continuously for 2-3 minutes until thick and glossy.
  8. Remove from heat, let rest briefly, and serve with your favorite sides.

Notes

  • Add red pepper flakes or sriracha for a spicy kick.
  • Substitute maple syrup for honey for a different sweetness profile.
  • Zest the lemon before juicing to enhance citrus flavor.
  • Works well baked at 400°F for 12-15 minutes; broil at the end for glaze caramelization.

Have you made this recipe? I'd love to see it!

Click here to Follow me on Pinterest

Cowboy Meatloaf and Potato Casserole

March 23, 2025 by Sue Leave a Comment

Cowboy Meatloaf and Potato Casserole is the ultimate comfort food—all the hearty flavor of a classic meatloaf, layered with creamy mashed potatoes and topped with melty cheese and barbecue sauce. It’s a warm, filling, and satisfying meal that I like to make when I need something easy, family-friendly, and loaded with bold, down-home flavor.

Cowboy Meatloaf and Potato Casserole

Why I Love This Recipe

This casserole takes two favorites—meatloaf and mashed potatoes—and turns them into one dish that’s simple to make and packed with flavor. I love how the barbecue sauce gives it a smoky, tangy finish, and the cheesy topping brings everything together. It’s a great recipe when I want something cozy without a lot of cleanup, and it’s always a hit at the table.

Ingredients

(Here's a tip: Check out the full list of ingredients and measurements in the recipe card below.)

  • 1 ½ pounds ground beef

  • 1 large egg

  • ½ cup breadcrumbs

  • ½ cup finely chopped onion

  • 2 cloves garlic, minced

  • 1 tablespoon Worcestershire sauce

  • ½ cup barbecue sauce, divided

  • 1 teaspoon salt

  • ½ teaspoon black pepper

  • 2 ½ cups mashed potatoes

  • 1 cup shredded cheddar cheese

  • 2 tablespoons chopped green onions (optional)

Directions

  1. Preheat the oven to 375°F (190°C) and lightly grease a baking dish.

  2. In a mixing bowl, combine ground beef, egg, breadcrumbs, onion, garlic, Worcestershire sauce, half of the barbecue sauce, salt, and pepper.

  3. Press the meat mixture evenly into the bottom of the prepared dish to form a meatloaf base.

  4. Spread the mashed potatoes evenly on top of the meat layer.

  5. Drizzle the remaining barbecue sauce over the potatoes.

  6. Sprinkle shredded cheddar cheese over the top.

  7. Bake for 30–35 minutes, until the cheese is bubbly and the meat is cooked through.

  8. Let it rest for a few minutes before slicing. Top with chopped green onions if desired.

Servings and Timing

  • Servings: 6

  • Prep Time: 15 minutes

  • Cook Time: 35 minutes

  • Total Time: 50 minutes

Variations

  • Spicy Twist: I mix in diced jalapeños or use a spicy barbecue sauce for some kick.

  • Veggie Addition: Chopped bell peppers, carrots, or mushrooms can be added to the meat mixture.

  • Cheese Swap: Try using pepper jack or smoked gouda for a different cheesy topping.

  • Lighter Version: I use ground turkey and light cheese for a leaner take.

Storage/Reheating

  • Refrigerator: Store leftovers in an airtight container for up to 4 days.

  • Freezer: Freeze in a freezer-safe container or tightly wrapped casserole dish for up to 2 months.

  • Reheating: Reheat in the microwave for individual servings, or in the oven at 350°F until warmed through. Cover with foil to keep the cheese from over-browning.

FAQs

Can I use instant mashed potatoes?

Yes, I can use instant mashed potatoes for convenience. Just prepare them according to the package before layering.

What type of ground meat works best?

I usually go with 80/20 ground beef for the best balance of flavor and moisture, but ground turkey or chicken also works well.

Can I make it ahead of time?

Absolutely. I assemble it, cover it, and store it in the fridge up to a day ahead. I just bake it when I’m ready to serve.

How do I know when it’s done baking?

The cheese should be melted and bubbly, and the internal temperature of the meat layer should reach 160°F (71°C).

What sides go well with this dish?

I like to serve it with a crisp green salad, steamed vegetables, or some cornbread for a full, satisfying meal.

Conclusion

Cowboy Meatloaf and Potato Casserole is everything I want in a comforting dinner—savory, cheesy, and simple to make. It brings together classic flavors in a crowd-pleasing, all-in-one dish. Whether it’s a busy weeknight or a cozy weekend dinner, this casserole is always a reliable favorite that gets everyone coming back for seconds.

Print

clock clock iconcutlery cutlery iconflag flag iconfolder folder iconinstagram instagram iconpinterest pinterest iconfacebook facebook iconprint print iconsquares squares iconheart heart iconheart solid heart solid icon
Cowboy Meatloaf and Potato Casserole

Cowboy Meatloaf and Potato Casserole

5 Stars 4 Stars 3 Stars 2 Stars 1 Star No reviews
  • Author: Sue
  • Prep Time: 15 minutes
  • Cook Time: 35 minutes
  • Total Time: 50 minutes
  • Yield: 6 servings
Print Recipe
Pin Recipe

Description

Cowboy Meatloaf and Potato Casserole is a hearty, all-in-one comfort meal that layers juicy ground beef meatloaf with creamy mashed potatoes and melty cheddar cheese, all topped with smoky barbecue sauce. It’s perfect for feeding the family on busy weeknights or serving up at casual gatherings. Easy to make ahead and even easier to love!


Ingredients

  • 1 lb (450g) ground beef
  • 1 large egg
  • ½ cup breadcrumbs
  • 1 small onion, finely chopped
  • 2 cloves garlic, minced
  • 1 tbsp Worcestershire sauce
  • ½ cup barbecue sauce, divided
  • 3 cups prepared mashed potatoes
  • 1 ½ cups shredded cheddar cheese
  • ½ tsp salt
  • ¼ tsp black pepper
  • 2 tbsp chopped green onions (optional, for garnish)

Instructions

  1. Preheat oven to 375°F (190°C) and grease a baking dish.
  2. In a large bowl, combine ground beef, egg, breadcrumbs, onion, garlic, Worcestershire sauce, ¼ cup barbecue sauce, salt, and pepper.
  3. Press meat mixture into the bottom of the dish to form the meatloaf base.
  4. Spread prepared mashed potatoes evenly on top of the meat.
  5. Drizzle remaining ¼ cup barbecue sauce over the mashed potatoes.
  6. Sprinkle cheddar cheese over the top.
  7. Bake 30–35 minutes, until the cheese is bubbly and the meat is fully cooked (internal temp of 160°F / 71°C).
  8. Let rest before slicing. Garnish with chopped green onions if desired.

Notes

  • Use instant mashed potatoes for convenience.
  • Add jalapeños or hot sauce for a spicy version.
  • Substitute mashed cauliflower for a low-carb option.
  • Can be prepped ahead and stored before baking.

Have you made this recipe? I'd love to see it!

Click here to Follow me on Pinterest

Strawberry Sweet Tea

March 23, 2025 by Sue Leave a Comment

Strawberry Sweet Tea is a refreshing twist on classic Southern sweet tea, infused with the fruity brightness of fresh strawberries. It’s light, naturally sweet, and perfect for sipping on a warm day or serving at picnics, barbecues, or just lounging on the porch. I love how the strawberry syrup blends beautifully with the brewed tea to create a drink that’s both vibrant and satisfying.

Strawberry Sweet Tea

Why I Love This Recipe

I love how this strawberry sweet tea combines the boldness of black tea with the sweet, slightly tangy flavor of strawberries. It’s incredibly easy to make and tastes way better than anything store-bought. I can control the sweetness, use fresh or frozen strawberries, and it always looks beautiful in a pitcher. It’s my go-to when I want to impress guests with something that feels a little special but doesn’t take much effort.

Ingredients

(Here's a tip: Check out the full list of ingredients and measurements in the recipe card below.)

  • Fresh strawberries (hulled and chopped)

  • Granulated sugar

  • Water (divided)

  • Black tea bags (like Lipton or your favorite brand)

  • Baking soda (just a pinch, optional for reducing bitterness)

  • Ice cubes

  • Lemon slices or mint (optional, for garnish)

Directions

  1. In a saucepan, combine strawberries, sugar, and 1 cup of water. Bring to a simmer and cook for 10-12 minutes until the strawberries are soft and the mixture thickens slightly.

  2. Strain the strawberry syrup through a fine mesh sieve to remove solids. Let it cool.

  3. In a separate pot, bring 4 cups of water to a boil. Remove from heat and add tea bags. Let steep for 5–7 minutes. Remove the tea bags and stir in a pinch of baking soda if using.

  4. In a large pitcher, combine the brewed tea and strawberry syrup. Add 2–3 more cups of cold water to dilute to your preferred strength.

  5. Chill the tea in the fridge for at least 1 hour.

  6. Serve over ice and garnish with lemon slices or mint if desired.

Servings and Timing

  • Servings: 6–8

  • Prep Time: 10 minutes

  • Cook Time: 15 minutes

  • Chill Time: 1 hour

  • Total Time: 1 hour 25 minutes

Variations

  • Sugar-Free: I use a sugar substitute like stevia or monk fruit to make it low-calorie.

  • Herbal Twist: Try using a fruit-flavored herbal tea instead of black tea.

  • Citrus Boost: Stir in a bit of fresh lemon or orange juice for a citrusy kick.

  • Bubbly Option: Top it off with sparkling water right before serving for a fizzy version.

Storage/Reheating

  • Refrigerator: Store in a sealed pitcher in the fridge for up to 4 days.

  • Freezing: I freeze leftover tea into ice cubes to chill future batches without diluting the flavor.

  • Reheating: I don’t usually reheat this drink, but I can warm the strawberry syrup slightly if making it ahead.

FAQs

Can I use frozen strawberries?

Yes, frozen strawberries work just as well. I simmer them straight from frozen to make the syrup.

Why add baking soda to tea?

A small pinch of baking soda smooths out any bitterness in the tea and gives it a cleaner flavor.

Can I make it ahead of time?

Absolutely. I make it the day before and let the flavors meld in the fridge overnight.

What kind of tea is best for this recipe?

Classic black tea works best, but green tea or white tea can also be used for a lighter taste.

How do I make it less sweet?

I simply reduce the sugar in the strawberry syrup or add more water to the final mix to dilute the sweetness.

Conclusion

Strawberry Sweet Tea is a simple yet delightful drink that always feels like summer in a glass. It’s fruity, smooth, and just the right amount of sweet. I love serving it at gatherings or just keeping a pitcher ready for when I need a little refreshment. Try it once, and it might just become your new favorite iced tea.

Print

clock clock iconcutlery cutlery iconflag flag iconfolder folder iconinstagram instagram iconpinterest pinterest iconfacebook facebook iconprint print iconsquares squares iconheart heart iconheart solid heart solid icon
Strawberry Sweet Tea

Strawberry Sweet Tea

5 Stars 4 Stars 3 Stars 2 Stars 1 Star No reviews
  • Author: Sue
  • Prep Time: 10 minutes
  • Cook Time: 15 minutes
  • Total Time: 1 hour 25 minutes
  • Yield: 6–8 servings
  • Category: Drinks
  • Method: Stovetop + Steeping
  • Cuisine: Southern American
  • Diet: Vegetarian
Print Recipe
Pin Recipe

Description

Strawberry Sweet Tea is a refreshing twist on classic Southern sweet tea, infused with fruity homemade strawberry syrup. This vibrant, lightly sweetened iced tea is perfect for summer sipping, picnics, and porch lounging. Easy to make with fresh or frozen strawberries, it’s the ultimate warm-weather drink.


Ingredients

  • 2 cups fresh strawberries, hulled and chopped (or use frozen)

  • 1 cup granulated sugar (adjust to taste)

  • 7–8 cups water, divided (1 cup for syrup + 4 cups for steeping tea + 2–3 cups to dilute)

  • 4–6 black tea bags (such as Lipton or your favorite brand)

  • 1 pinch baking soda (optional, helps reduce bitterness in tea)

  • Ice cubes, for serving

  • Lemon slices or fresh mint (optional, for garnish)


Instructions

  1. In a saucepan, combine strawberries, sugar, and 1 cup of water. Simmer for 10–12 minutes until strawberries are soft and the mixture thickens slightly.

  2. Strain strawberry syrup through a fine mesh sieve and let it cool.

  3. In a separate pot, boil 4 cups of water. Remove from heat, add tea bags, and steep for 5–7 minutes. Discard tea bags and stir in a pinch of baking soda (optional).

  4. In a large pitcher, mix the brewed tea with the strawberry syrup. Add 2–3 cups of cold water to reach your desired strength.

  5. Chill in the refrigerator for at least 1 hour.

  6. Serve over ice with optional lemon or mint garnish.


Notes

  • Frozen strawberries can be used in place of fresh.

  • Baking soda softens any bitterness from the black tea.

  • Adjust sweetness by reducing sugar or diluting with more water.

  • Store leftovers in the fridge for up to 4 days.

  • Freeze leftover tea into cubes to avoid dilution when serving.

Have you made this recipe? I'd love to see it!

Click here to Follow me on Pinterest


Berry Cottage Cheese Clafoutis

March 23, 2025 by Sue Leave a Comment

Berry Cottage Cheese Clafoutis is a rustic, French-inspired baked dessert that’s both light and comforting. It features a creamy, custard-like base made with cottage cheese and eggs, filled with sweet-tart berries that burst with flavor as they bake. I love how simple it is to make—just blend, pour, and bake—yet the result feels like something you’d find in a charming countryside café.

Berry Cottage Cheese Clafoutis

Why I Love This Recipe

I love how this clafoutis strikes the perfect balance between creamy and fruity. The cottage cheese adds a boost of protein and makes the custard filling feel rich without being heavy. It’s a great way to use up fresh or frozen berries, and it works just as well for breakfast, brunch, or dessert. I also appreciate that it’s not overly sweet, so I can enjoy a slice any time of day.

Ingredients

(Here's a tip: Check out the full list of ingredients and measurements in the recipe card below.)

  • Cottage cheese

  • Eggs

  • Milk

  • All-purpose flour

  • Sugar

  • Vanilla extract

  • Salt

  • Mixed berries (fresh or frozen)

  • Powdered sugar (for dusting, optional)

Directions

  1. Preheat the oven to 350°F (175°C) and lightly grease a baking dish or pie pan.

  2. In a blender or mixing bowl, combine cottage cheese, eggs, milk, flour, sugar, vanilla, and salt. Blend or whisk until smooth.

  3. Pour the batter into the prepared dish.

  4. Scatter the berries evenly over the top. They will sink slightly as the clafoutis bakes.

  5. Bake for 35–40 minutes, or until the center is set and the edges are golden.

  6. Let cool slightly before dusting with powdered sugar, if desired. Serve warm or chilled.

Servings and Timing

  • Servings: 6

  • Prep Time: 10 minutes

  • Cook Time: 40 minutes

  • Total Time: 50 minutes

Variations

  • Berry Blend: I like using blueberries, raspberries, strawberries, or blackberries—or a combination of all.

  • Citrus Note: Add a bit of lemon zest to brighten the flavor.

  • Gluten-Free: Use almond flour or a gluten-free all-purpose blend.

  • Dairy-Free: Swap cottage cheese for a dairy-free alternative and use plant-based milk.

  • Sweet Upgrade: Add a drizzle of honey or maple syrup before serving.

Storage/Reheating

  • Refrigerator: Store covered in the fridge for up to 4 days.

  • Freezer: Freeze individual slices wrapped in plastic and foil for up to 2 months.

  • Reheating: I reheat slices in the microwave for 20–30 seconds or warm in the oven at 300°F until heated through.

FAQs

Can I use frozen berries?

Yes, frozen berries work well. I don’t need to thaw them—just add straight to the batter.

Will the cottage cheese texture show in the final dish?

When blended well, the cottage cheese melts into the custard and leaves a smooth texture.

Can I make this ahead of time?

Yes, I like to make it the night before and store it in the fridge. It tastes great cold or slightly warmed.

Is this more like a cake or a custard?

It’s more like a baked custard or flan—soft, slightly firm, and gently sweet.

Can I make it sweeter?

Definitely. I just increase the sugar slightly or serve it with sweet toppings like jam or whipped cream.

Conclusion

Berry Cottage Cheese Clafoutis is a delightful and easy-to-make treat that brings together creamy texture and juicy berries in one beautiful dish. It’s simple, wholesome, and versatile enough for any time of day. I love how it feels indulgent yet nourishing, and it never lasts long once it’s out of the oven. Give it a try—I think it’ll become a new favorite.

Print

clock clock iconcutlery cutlery iconflag flag iconfolder folder iconinstagram instagram iconpinterest pinterest iconfacebook facebook iconprint print iconsquares squares iconheart heart iconheart solid heart solid icon
Berry Cottage Cheese Clafoutis

Berry Cottage Cheese Clafoutis

5 Stars 4 Stars 3 Stars 2 Stars 1 Star No reviews
  • Author: Sue
  • Prep Time: 10 minutes
  • Cook Time: 40 minutes
  • Total Time: 50 minutes
  • Yield: 6 servings
  • Category: Breakfast, Brunch, Dessert
  • Method: Baking
  • Cuisine: French-inspired
  • Diet: Vegetarian
Print Recipe
Pin Recipe

Description

Berry Cottage Cheese Clafoutis is a light, rustic French-inspired dessert that combines creamy cottage cheese custard with juicy, sweet-tart berries. It bakes into a golden, gently sweet dish that’s perfect for breakfast, brunch, or dessert. Simple to prepare with wholesome ingredients, this clafoutis is high in protein and flavor while being delightfully unfussy.


Ingredients

  • 1 cup cottage cheese – Adds creaminess and a boost of protein to the custard base. Blends smooth when mixed well.
  • 3 large eggs – Help set the custard and provide structure and richness.
  • ½ cup milk – Thins the custard batter and contributes to the silky texture.
  • ¼ cup all-purpose flour – Gives the clafoutis light body and helps bind the ingredients together.
  • ¼ cup sugar – Adds gentle sweetness without overpowering the natural flavor of the berries.
  • 1 tsp vanilla extract – Enhances the custard's flavor with warm, aromatic notes.
  • ¼ tsp salt – Balances and brings out the sweetness of the dish.
  • 1 ½ cups mixed berries (fresh or frozen) – The star ingredient, offering a sweet-tart contrast and juicy texture.
  • Powdered sugar (optional, for dusting) – Adds a touch of elegance and extra sweetness when serving.

Instructions

  1. Preheat oven to 350°F (175°C) and grease a pie pan or baking dish.
  2. In a blender or bowl, blend cottage cheese, eggs, milk, flour, sugar, vanilla, and salt until smooth.
  3. Pour batter into the prepared dish.
  4. Evenly distribute berries over the batter.
  5. Bake for 35–40 minutes, until the center is set and edges are golden.
  6. Cool slightly. Dust with powdered sugar before serving, if desired. Serve warm or chilled.

Notes

  • Use a mix of berries like blueberries, raspberries, or blackberries.
  • Frozen berries can be added directly—no thawing needed.
  • Blending the cottage cheese ensures a smooth texture.
  • Add lemon zest for extra brightness.

Have you made this recipe? I'd love to see it!

Click here to Follow me on Pinterest

Greek Tortellini Pasta Salad

March 23, 2025 by Sue Leave a Comment

Greek tortellini pasta salad is a fresh and flavorful twist on traditional pasta salad. It combines cheesy tortellini with classic Greek ingredients like tomatoes, cucumbers, olives, red onions, and a zesty homemade dressing. It’s colorful, satisfying, and perfect for picnics, potlucks, or a light dinner that still feels indulgent.

Greek Tortellini Pasta Salad

Why I Love This Recipe

I love how easy this salad is to throw together, yet it tastes like something straight from a Mediterranean café. The cheese-filled tortellini makes it hearty enough to serve as a main dish, while the crisp veggies and tangy dressing keep it light and refreshing. I can prep it ahead of time, and the flavors only get better as it chills. It’s my go-to for a crowd-pleasing summer side or an easy meal prep lunch.

Ingredients

(Here's a tip: Check out the full list of ingredients and measurements in the recipe card below.)

  • Cheese tortellini

  • Cherry tomatoes

  • Cucumber

  • Red onion

  • Kalamata olives

  • Feta cheese

  • Fresh parsley

  • Olive oil

  • Red wine vinegar

  • Lemon juice

  • Garlic

  • Dried oregano

  • Salt and pepper

Directions

  1. Cook the cheese tortellini according to package instructions. Drain and rinse with cold water to cool it down quickly.

  2. While the tortellini cools, chop the cherry tomatoes, cucumber, red onion, and parsley.

  3. In a small bowl or jar, whisk together olive oil, red wine vinegar, lemon juice, minced garlic, oregano, salt, and pepper to create the dressing.

  4. In a large bowl, combine the tortellini, vegetables, olives, and feta cheese.

  5. Pour the dressing over the salad and toss gently to coat everything evenly.

  6. Refrigerate for at least 30 minutes before serving to let the flavors meld.

Servings and Timing

  • Servings: 6

  • Prep Time: 15 minutes

  • Cook Time: 10 minutes

  • Chill Time: 30 minutes (optional but recommended)

  • Total Time: 55 minutes

Variations

  • Protein Boost: I sometimes add grilled chicken or chickpeas to make it more filling.

  • Vegan Version: Use vegan tortellini and skip the feta or substitute with a plant-based option.

  • Different Dressings: Try a creamy tzatziki-style dressing or even a balsamic vinaigrette for a twist.

  • More Veggies: I love throwing in spinach, artichoke hearts, or bell peppers when I have them on hand.

  • Spicy Kick: Add a pinch of crushed red pepper flakes or a few sliced pepperoncini for heat.

Storage/Reheating

  • Refrigerator: Store in an airtight container for up to 3-4 days.

  • Make-Ahead Tip: I like to keep the dressing separate until just before serving if I’m making it ahead.

  • Reheating: This salad is meant to be served cold or at room temperature, so no reheating is necessary.

FAQs

Can I make this salad ahead of time?

Yes, in fact I prefer to! It tastes even better after the flavors have had time to meld in the fridge for a few hours.

Do I have to use cheese tortellini?

No, but I like how the cheesy filling pairs with the Greek ingredients. Spinach or meat tortellini also work well.

What if I don’t have red wine vinegar?

I’ve used white wine vinegar or even apple cider vinegar in a pinch, and it still tastes great.

Is this salad served hot or cold?

I always serve it cold or at room temperature—perfect for warm weather or easy entertaining.

Can I freeze Greek tortellini salad?

I don’t recommend freezing it, as the tortellini and vegetables won’t hold up well after thawing.

Conclusion

Greek tortellini pasta salad is one of those recipes I find myself making over and over. It’s quick, flavorful, and endlessly adaptable. With bold Mediterranean flavors and hearty pasta, it satisfies every time. Whether for a summer picnic or a simple weeknight dinner, it’s a dish that always disappears fast from the table.

Print

clock clock iconcutlery cutlery iconflag flag iconfolder folder iconinstagram instagram iconpinterest pinterest iconfacebook facebook iconprint print iconsquares squares iconheart heart iconheart solid heart solid icon
Greek Tortellini Pasta Salad

Greek Tortellini Pasta Salad

5 Stars 4 Stars 3 Stars 2 Stars 1 Star No reviews
  • Author: Sue
  • Prep Time: 15 minutes
  • Cook Time: 10 minutes
  • Total Time: 55 minutes
  • Yield: 6 servings
  • Category: Salad, Main Dish
  • Method: No-Cook (after boiling pasta)
  • Cuisine: Mediterranean
  • Diet: Vegetarian
Print Recipe
Pin Recipe

Description

Greek Tortellini Pasta Salad is a vibrant Mediterranean-inspired dish made with cheese-filled tortellini, crisp vegetables, briny olives, and creamy feta tossed in a tangy homemade vinaigrette. It's perfect for summer gatherings, light dinners, or meal prep lunches—fresh, flavorful, and satisfying with every bite.


Ingredients

  • 1 (20 oz) package cheese tortellini
  • 1 cup cherry tomatoes, halved
  • 1 cucumber, diced
  • ½ red onion, thinly sliced
  • ½ cup Kalamata olives, sliced
  • ½ cup crumbled feta cheese
  • 2 tbsp chopped fresh parsley
  • ¼ cup olive oil
  • 2 tbsp red wine vinegar
  • 1 tbsp lemon juice
  • 1 clove garlic, minced
  • 1 tsp dried oregano
  • Salt and pepper, to taste

Instructions

  1. Cook cheese tortellini according to package directions. Drain and rinse under cold water.
  2. Chop tomatoes, cucumber, red onion, and parsley.
  3. In a small bowl, whisk olive oil, vinegar, lemon juice, garlic, oregano, salt, and pepper.
  4. In a large bowl, combine tortellini, chopped vegetables, olives, and feta.
  5. Pour dressing over salad and toss gently to combine.
  6. Chill for at least 30 minutes before serving for best flavor.

Notes

  • For added protein, mix in grilled chicken or chickpeas.
  • Vegan? Use plant-based tortellini and feta.
  • Customize with extras like bell peppers, spinach, or artichoke hearts.
  • Best served cold or at room temperature.

Have you made this recipe? I'd love to see it!

Click here to Follow me on Pinterest

Samoa Cheesecake

March 23, 2025 by Sue Leave a Comment

Samoa Cheesecake is a decadent dessert that brings together the best of two worlds: the creamy richness of cheesecake and the irresistible flavors of the beloved Samoa cookie. With a buttery graham cracker crust, smooth caramel cheesecake filling, toasted coconut topping, gooey caramel drizzle, and a touch of chocolate, every slice is pure indulgence.

Samoa Cheesecake

Why I Love This Recipe

I love how this Samoa Cheesecake captures all the layers of flavor I expect from the classic cookie but in a luscious, creamy cheesecake form. The balance of textures—from the crunchy crust to the smooth filling and chewy toasted coconut—is incredibly satisfying. I also enjoy how it feels like a gourmet dessert, yet it’s surprisingly straightforward to make.

Ingredients

(Here's a tip: Check out the full list of ingredients and measurements in the recipe card below.)

  • Graham cracker crumbs

  • Unsalted butter

  • Cream cheese

  • Granulated sugar

  • Eggs

  • Sour cream

  • Vanilla extract

  • Caramel sauce (store-bought or homemade)

  • Sweetened shredded coconut

  • Semi-sweet or dark chocolate

  • Heavy cream (optional for chocolate drizzle)

Directions

  1. Preheat the oven to 325°F (163°C). Line the bottom of a springform pan with parchment paper and wrap the bottom with foil to prevent leaks.

  2. Mix graham cracker crumbs with melted butter and press firmly into the bottom of the pan to form the crust. Bake for 8-10 minutes, then let cool.

  3. Beat cream cheese and sugar until smooth and fluffy. Add eggs one at a time, mixing well after each. Stir in sour cream and vanilla extract.

  4. Pour half of the cheesecake batter into the crust, drizzle caramel sauce, then add the remaining batter.

  5. Bake for 50-60 minutes until the center is just set. Let it cool at room temperature, then chill in the fridge for at least 4 hours or overnight.

  6. Toast the shredded coconut in a dry skillet until golden.

  7. Once the cheesecake is chilled, top it with toasted coconut, drizzle with caramel sauce, and melt chocolate to drizzle over the top.

  8. Chill for 15 more minutes before slicing.

Servings and Timing

  • Servings: 12-14 slices

  • Prep Time: 25 minutes

  • Cook Time: 55 minutes

  • Chill Time: 4 hours or overnight

  • Total Time: About 5 hours (including chilling)

Variations

  • Oreo Crust: Swap the graham cracker crust for an Oreo cookie base for a chocolatey twist.

  • Mini Cheesecakes: Use a muffin tin for personal-sized versions.

  • No-Bake Option: Try a no-bake cheesecake base if I want to skip the oven.

  • Coconut-Free: Leave off the coconut for a caramel chocolate cheesecake version.

  • Extra Chocolate: Add a chocolate ganache layer under the topping for a richer bite.

Storage/Reheating

  • Refrigerator: Store covered in the fridge for up to 5 days.

  • Freezer: Freeze slices individually wrapped in plastic and foil for up to 3 months. Thaw in the fridge overnight.

  • Reheating: I like to eat it chilled, but I can microwave a slice for 10 seconds for a softer texture.

FAQs

Can I use store-bought caramel sauce?

Yes, store-bought caramel works perfectly, but I sometimes make my own for a deeper flavor.

How do I prevent cracks in the cheesecake?

Baking in a water bath and letting it cool gradually helps avoid cracks.

Do I need to toast the coconut?

I highly recommend it—it adds a nutty flavor and crispy texture that really elevates the topping.

Can I make this ahead of time?

Absolutely! I usually make it a day in advance so it has time to set and develop flavor.

What kind of chocolate should I use for drizzling?

I like using semi-sweet or dark chocolate, but milk chocolate works too if I want it sweeter.

Conclusion

Samoa Cheesecake is the ultimate dessert for anyone who loves caramel, coconut, and chocolate. It brings the essence of a Girl Scout favorite into a creamy, satisfying cheesecake that's perfect for celebrations or just because. I find it easy to make and even easier to enjoy—one slice is never enough!

Print

clock clock iconcutlery cutlery iconflag flag iconfolder folder iconinstagram instagram iconpinterest pinterest iconfacebook facebook iconprint print iconsquares squares iconheart heart iconheart solid heart solid icon
Samoa Cheesecake

Samoa Cheesecake

5 Stars 4 Stars 3 Stars 2 Stars 1 Star No reviews
  • Author: Sue
  • Prep Time: 25 minutes
  • Cook Time: 55 minutes
  • Total Time: 5 hours
  • Yield: 12-14 slices
  • Category: Dessert
  • Method: Baking
  • Cuisine: American
  • Diet: Vegetarian
Print Recipe
Pin Recipe

Description

Samoa Cheesecake is the ultimate dessert mashup of creamy cheesecake and the beloved Samoa cookie. With a buttery graham cracker crust, smooth caramel-infused filling, toasted coconut topping, rich caramel drizzle, and a chocolatey finish, this indulgent treat is perfect for celebrations or satisfying a serious sweet tooth. It's rich, layered, and irresistibly delicious.


Ingredients

  • 1 ½ cups graham cracker crumbs
  • ½ cup unsalted butter, melted
  • 4 (8 oz) packages cream cheese, softened
  • 1 cup granulated sugar
  • 3 large eggs
  • 1 cup sour cream
  • 2 tsp vanilla extract
  • ½ cup caramel sauce (store-bought or homemade)
  • 1 ½ cups sweetened shredded coconut
  • ½ cup semi-sweet or dark chocolate, melted
  • 2 tbsp heavy cream (optional, for chocolate drizzle)

Instructions

  1. Preheat oven to 325°F (163°C). Line the bottom of a springform pan with parchment paper and wrap the outside with foil.
  2. Mix graham cracker crumbs with melted butter. Press into the pan to form the crust. Bake for 8-10 minutes and cool.
  3. Beat cream cheese and sugar until smooth. Add eggs one at a time, then mix in sour cream and vanilla.
  4. Pour half the batter into the crust, drizzle with caramel, and top with remaining batter.
  5. Bake for 50-60 minutes until center is set. Cool at room temperature, then chill for at least 4 hours.
  6. Toast coconut in a dry skillet until golden.
  7. Top chilled cheesecake with toasted coconut, caramel drizzle, and melted chocolate.
  8. Chill again for 15 minutes before slicing and serving.

Notes

  • Use store-bought or homemade caramel sauce.
  • Toasting the coconut brings out its flavor and adds crunch.
  • For a clean slice, wipe your knife between cuts.
  • Make ahead and chill overnight for best flavor and texture.

Have you made this recipe? I'd love to see it!

Click here to Follow me on Pinterest

Banana Pudding

March 23, 2025 by Sue Leave a Comment

Banana pudding is a classic Southern dessert made with layers of vanilla pudding, sliced bananas, and cookies—usually vanilla wafers. It’s creamy, sweet, comforting, and nostalgic. Whether served at a family gathering or just as a weeknight treat, it’s one of those desserts I always come back to for its simple charm and rich flavor.

Banana Pudding

Why I Love This Recipe

I love banana pudding for its creamy texture and the perfect mix of flavors. The ripe bananas add natural sweetness, the pudding is silky smooth, and the cookies soften just enough to give that cake-like bite. It’s easy to assemble, doesn't require baking (unless I want to make it extra fancy), and tastes even better after chilling overnight. Plus, I can make it ahead of time, which is always a win in my kitchen.

Ingredients

(Here's a tip: Check out the full list of ingredients and measurements in the recipe card below.)

  • Ripe bananas
  • Instant vanilla pudding mix
  • Cold milk
  • Sweetened condensed milk
  • Whipped topping or whipped cream
  • Vanilla wafers (or butter cookies)
  • Cream cheese (optional for extra richness)
  • Vanilla extract

Directions

  1. In a large bowl, whisk together the pudding mix and cold milk until smooth and thickened.
  2. In another bowl, mix sweetened condensed milk, softened cream cheese (if using), and vanilla extract until smooth and creamy.
  3. Fold the cream cheese mixture into the pudding, then gently fold in the whipped topping.
  4. In a serving dish, start layering: begin with cookies, then sliced bananas, then the pudding mixture.
  5. Repeat the layers until all ingredients are used, finishing with pudding on top.
  6. Cover and refrigerate for at least 4 hours, preferably overnight, to let the flavors meld and the cookies soften.

Servings and Timing

  • Servings: 8 to 10
  • Prep Time: 20 minutes
  • Chill Time: 4 hours (or overnight)
  • Total Time: 4 hours 20 minutes

Variations

  • Homemade Pudding: I sometimes swap the instant pudding for homemade vanilla custard for a more traditional feel.
  • Baked Version: Add meringue on top and bake until golden if I want that old-school Southern touch.
  • Different Cookies: Swap vanilla wafers with graham crackers or shortbread for a twist.
  • Chocolate Banana Pudding: Add layers of chocolate pudding or drizzle with chocolate syrup for extra indulgence.
  • Individual Servings: Layer everything in mason jars or cups for a cute party-ready dessert.

Storage/Reheating

  • Refrigerator: Store tightly covered in the fridge for up to 4 days. The bananas may darken, but the flavor stays delicious.
  • Freezing: I don’t recommend freezing, as the pudding and bananas can become watery and mushy.
  • Reheating: This dessert is best served cold, so no reheating is needed.

FAQs

Can I use homemade pudding instead of instant?

Yes, homemade pudding gives a richer, more authentic flavor. I just make sure it’s fully cooled before layering.

How do I keep the bananas from turning brown?

I use ripe but firm bananas and layer them quickly. A light spritz of lemon juice can also help prevent browning.

Can I make banana pudding ahead of time?

Absolutely, and I think it actually tastes better the next day once everything has set and the cookies soften.

What’s the best cookie to use?

Classic vanilla wafers are traditional, but I’ve also tried butter cookies and shortbread for a buttery flavor.

Can I make it dairy-free?

Yes, with dairy-free pudding mix, almond or oat milk, and coconut whipped topping, I can make a tasty dairy-free version.

Conclusion

Banana pudding is a timeless dessert that’s easy to love and even easier to make. With just a few ingredients and a little chill time, I get a sweet, creamy, layered treat that feels like home in every bite. Whether made for a potluck, picnic, or just to satisfy a craving, this recipe never disappoints.

Print

clock clock iconcutlery cutlery iconflag flag iconfolder folder iconinstagram instagram iconpinterest pinterest iconfacebook facebook iconprint print iconsquares squares iconheart heart iconheart solid heart solid icon
Banana Pudding

Banana Pudding

5 Stars 4 Stars 3 Stars 2 Stars 1 Star No reviews
  • Author: Sue
  • Prep Time: 20 minutes
  • Cook Time: None (No-Bake)
  • Total Time: 4 hours 20 minutes
  • Yield: 8 to 10 servings
  • Category: Dessert
  • Method: No-Bake
  • Cuisine: Southern American
  • Diet: Vegetarian
Print Recipe
Pin Recipe

Description

Banana pudding is a classic no-bake Southern dessert that features creamy vanilla pudding, layers of ripe bananas, and soft vanilla wafers. It's the ultimate comfort dessert—simple to prepare, incredibly delicious, and even better after a night in the fridge. Perfect for potlucks, picnics, or family gatherings!


Ingredients

  • 4 ripe bananas, sliced
  • 1 (5.1 oz) box instant vanilla pudding mix
  • 2 cups cold milk
  • 1 (14 oz) can sweetened condensed milk
  • 1 (8 oz) container whipped topping or 2 cups whipped cream
  • 1 box vanilla wafers (or butter cookies)
  • 4 oz cream cheese, softened (optional)
  • 1 tsp vanilla extract

Instructions

    • Whisk pudding mix and cold milk in a bowl until thickened.

    • In a separate bowl, blend sweetened condensed milk, cream cheese (if using), and vanilla until smooth.

    • Fold the cream cheese mixture into the pudding.

    • Gently fold in whipped topping.

    • In a large dish, layer wafers, banana slices, and pudding mixture.

    • Repeat layers, ending with pudding on top.

    • Cover and refrigerate for 4 hours or overnight.


Notes

  • Use firm, ripe bananas for best texture.

  • A spritz of lemon juice helps prevent browning.

  • Store leftovers in the fridge for up to 4 days.

Have you made this recipe? I'd love to see it!

Click here to Follow me on Pinterest

Refreshing Strawberry Cream Frappuccino

March 23, 2025 by Sue Leave a Comment

This Strawberry Cream Frappuccino is a sweet, creamy, and fruity blended drink that's perfect for cooling off on warm days. With a base of fresh strawberries, milk, and ice, and a creamy vanilla twist, it’s a deliciously satisfying treat that tastes like summer in a cup. I love how refreshing and indulgent it feels—like a dessert and drink in one.

Refreshing Strawberry Cream Frappuccino

Why I Love This Recipe

I like that this frappuccino feels luxurious without being too heavy. The combination of strawberries and cream gives it a nostalgic, milkshake-like vibe but lighter and smoother. It's easy to make at home with just a few simple ingredients, and I can customize it with dairy or non-dairy options. Whether I'm craving something sweet in the afternoon or looking to impress guests with a homemade café-style drink, this recipe always hits the spot.

Ingredients

(Here's a tip: Check out the full list of ingredients and measurements in the recipe card below.)

  • Fresh or frozen strawberries
  • Whole milk (or any milk of choice)
  • Ice cubes
  • Vanilla syrup or extract
  • Whipped cream (for topping)
  • Sugar or sweetener (optional, depending on strawberry sweetness)

Directions

  1. Add strawberries, milk, ice, and vanilla syrup into a blender.
  2. Blend until smooth and creamy. Adjust sweetness to taste if needed.
  3. Pour into a tall glass.
  4. Top with a generous swirl of whipped cream.
  5. Serve immediately with a straw and enjoy.

Servings and Timing

  • Servings: 2 glasses
  • Prep Time: 5 minutes
  • Cook Time: 0 minutes
  • Total Time: 5 minutes

Variations

  • Vegan Version: Use almond, oat, or coconut milk and a plant-based whipped topping.
  • Chocolate Drizzle: Add chocolate syrup on top or blend a bit in for a chocolate-strawberry combo.
  • More Creamy: Add a scoop of vanilla ice cream for extra richness.
  • Berry Mix: Try mixing in raspberries or blueberries with the strawberries.

Storage/Reheating

This drink is best enjoyed immediately after blending. However, if I need to make it slightly ahead of time:

  • Refrigerator: Store in a covered container for up to 2 hours. Blend again briefly if it separates.
  • Freezing: I freeze leftovers in ice cube trays and re-blend them later for a quick refresher.

FAQs

Can I use frozen strawberries?

Yes, frozen strawberries work great and actually help make the frappuccino colder and thicker.

Is there a substitute for vanilla syrup?

I can use a teaspoon of vanilla extract and a bit of sugar or honey as a replacement.

Can I make this dairy-free?

Definitely. I just swap out the milk and whipped cream for dairy-free alternatives.

How can I make it thicker?

Using frozen strawberries or adding a few extra ice cubes will give it a thicker consistency.

Can I prepare it ahead of time?

It’s best fresh, but I can store it in the fridge for a short time and give it a quick blend before serving.

Conclusion

This Refreshing Strawberry Cream Frappuccino is the perfect homemade treat when I want something cold, sweet, and fruity. It's simple, quick, and endlessly customizable. Whether I'm sipping it poolside or serving it at brunch, it always adds a bright, creamy touch to my day. Give it a blend and taste the summer magic in every sip.

Print

clock clock iconcutlery cutlery iconflag flag iconfolder folder iconinstagram instagram iconpinterest pinterest iconfacebook facebook iconprint print iconsquares squares iconheart heart iconheart solid heart solid icon
Refreshing Strawberry Cream Frappuccino

Refreshing Strawberry Cream Frappuccino

5 Stars 4 Stars 3 Stars 2 Stars 1 Star No reviews
  • Author: Sue
  • Prep Time: 5 minutes
  • Cook Time: 0 minutes
  • Total Time: 5 minutes
  • Yield: 2 servings
  • Category: Drinks
  • Method: Blended
  • Cuisine: American
  • Diet: Vegetarian
Print Recipe
Pin Recipe

Description

Cool down with this Refreshing Strawberry Cream Frappuccino, a sweet, creamy, and fruity blended drink made with strawberries, milk, and vanilla. This homemade frappuccino is perfect for warm days and easily customizable with dairy-free options. It's like sipping summer in a cup!


Ingredients


  • Fresh or frozen strawberries


  • Whole milk (or any milk of choice)


  • Ice cubes


  • Vanilla syrup or vanilla extract


  • Whipped cream (for topping)


  • Sugar or sweetener (optional, to taste)


Instructions

  • Add strawberries, milk, ice, and vanilla syrup (or extract) to a blender.

  • Blend until smooth and creamy.

  • Taste and adjust sweetness if needed.

  • Pour into a tall glass.

  • Top with whipped cream.

  • Serve immediately and enjoy!


Notes

  • Frozen strawberries make the drink thicker and colder.

  • For a vegan version, use plant-based milk and dairy-free whipped cream.

  • Store in the fridge for up to 2 hours or freeze leftovers in ice cube trays to re-blend later

Have you made this recipe? I'd love to see it!

Click here to Follow me on Pinterest

Vanilla Bean Crème Brûlée Cheesecake Cupcakes

March 23, 2025 by Sue Leave a Comment

these vanilla bean crème brûlée cheesecake cupcakes are a heavenly fusion of two decadent desserts—classic crème brûlée and rich, creamy cheesecake. Each cupcake features a smooth vanilla bean cheesecake filling nestled in a buttery graham cracker crust, topped with a caramelized sugar layer that cracks just like the traditional French dessert.

Vanilla Bean Crème Brûlée Cheesecake Cupcakes

Why I Love This Recipe

I love how these cupcakes combine elegance and comfort in every bite. The creamy vanilla bean flavor feels luxurious, and that crisp sugar top adds a satisfying contrast in texture. They’re baked in individual portions, making them perfect for entertaining or a sweet little treat I can enjoy anytime. Plus, the brûléed topping is always a showstopper.

Ingredients

(Here's a tip: Check out the full list of ingredients and measurements in the recipe card below.)

  • Graham cracker crumbs
  • Melted butter
  • Granulated sugar
  • Cream cheese, softened
  • Sour cream
  • Eggs
  • Vanilla bean or vanilla bean paste
  • Heavy cream
  • Brown sugar or granulated sugar (for brûlée topping)

Directions

  1. Preheat the oven to 325°F (160°C) and line a muffin tin with paper liners.
  2. Combine graham cracker crumbs with melted butter and a bit of sugar, then press the mixture into the bottoms of each liner to form a crust.
  3. Beat the cream cheese until smooth, then add sugar, sour cream, eggs, and vanilla bean paste. Mix until everything is creamy and well blended.
  4. Spoon the cheesecake filling over the crusts and smooth the tops.
  5. Bake for about 18-22 minutes, or until the centers are just set. Let them cool completely, then chill in the fridge for at least 2 hours.
  6. Just before serving, sprinkle a thin layer of sugar on top of each cupcake and use a kitchen torch to caramelize it until golden and crisp.
  7. Let the sugar cool and harden before serving.

Servings and Timing

  • Servings: 12 cheesecake cupcakes
  • Prep Time: 20 minutes
  • Cook Time: 20 minutes
  • Chill Time: 2 hours
  • Total Time: About 2 hours and 40 minutes

Variations

  • Fruit Topping: Add a layer of raspberry or strawberry compote under the brûlée topping.
  • Chocolate Crust: Use chocolate cookie crumbs instead of graham crackers for a richer base.
  • Espresso Infusion: Add a teaspoon of espresso powder to the filling for a mocha twist.
  • Mini Version: Make them in a mini muffin tin for bite-sized party treats.
  • Classic Cheesecake Style: Skip the brûlée topping and serve with whipped cream or fruit instead.

Storage/Reheating

  • Refrigerator: Store in an airtight container in the fridge for up to 5 days.
  • Freezer: Freeze without the brûlée topping for up to 1 month. Thaw overnight in the fridge.
  • Reheating: Not necessary—these are best enjoyed chilled or at room temperature. Torch the sugar topping just before serving.

FAQs

Can I use vanilla extract instead of vanilla bean paste?

Yes, but the vanilla bean paste gives a stronger, more fragrant vanilla flavor with those lovely little flecks.

What if I don’t have a kitchen torch?

I can broil the sugar-topped cupcakes in the oven for 1-2 minutes, watching very closely to avoid burning.

How do I prevent cracks in the cheesecake?

Avoid overmixing the batter and don’t overbake. Letting them cool gradually also helps.

Can I make these ahead of time?

Absolutely. I often make the cupcakes a day ahead and brûlée them right before serving.

Is there a low-sugar version of this recipe?

I can reduce the sugar slightly in the filling and use a sugar substitute like monk fruit for the crust and brûlée topping.

Conclusion

Vanilla bean crème brûlée cheesecake cupcakes are elegant, indulgent, and surprisingly easy to make. I love serving these at dinner parties, holidays, or whenever I’m craving something creamy and a little fancy. With that golden sugar crunch on top and the luscious cheesecake beneath, they never fail to impress.

Print

clock clock iconcutlery cutlery iconflag flag iconfolder folder iconinstagram instagram iconpinterest pinterest iconfacebook facebook iconprint print iconsquares squares iconheart heart iconheart solid heart solid icon
Vanilla Bean Crème Brûlée Cheesecake Cupcakes

Vanilla Bean Crème Brûlée Cheesecake Cupcakes

5 Stars 4 Stars 3 Stars 2 Stars 1 Star No reviews
  • Author: Sue
  • Prep Time: 20 minutes
  • Cook Time: 20 minutes
  • Total Time: 2 hours 40 minutes
  • Yield: 12 cheesecake cupcakes
  • Category: Dessert
  • Method: Baking
  • Cuisine: American
  • Diet: Vegetarian
Print Recipe
Pin Recipe

Description

These vanilla bean crème brûlée cheesecake cupcakes are a luxurious fusion of two classic desserts. Each bite offers a rich, creamy vanilla bean cheesecake nestled in a graham cracker crust and finished with a crackly caramelized sugar topping. Perfect for dinner parties, holidays, or whenever you want an elegant individual treat.


Ingredients

  • Graham cracker crumbs
  • Melted butter
  • Granulated sugar
  • Cream cheese, softened
  • Sour cream
  • Eggs
  • Vanilla bean or vanilla bean paste
  • Heavy cream
  • Brown sugar or granulated sugar (for brûlée topping)

Instructions

  1. Preheat oven to 325°F (160°C). Line a muffin tin with paper liners.
  2. Mix graham cracker crumbs with melted butter and sugar. Press into liners to form crusts.
  3. Beat cream cheese until smooth. Add sugar, sour cream, eggs, and vanilla bean paste. Mix until creamy.
  4. Fill liners with cheesecake mixture and smooth tops.
  5. Bake 18-22 minutes, until centers are just set. Cool completely and chill at least 2 hours.
  6. Before serving, sprinkle sugar on each cupcake and torch until golden and crisp.
  7. Let the sugar cool and harden before serving.

Notes

  • Use vanilla bean paste for maximum flavor and visual appeal.
  • Torch the topping just before serving for best texture.
  • Chill thoroughly for a creamy, set texture.

Have you made this recipe? I'd love to see it!

Click here to Follow me on Pinterest

Coffee Cake Cookies

March 22, 2025 by Sue Leave a Comment

Soft, chewy, and packed with cinnamon-sugar goodness, these coffee cake cookies are a cozy treat with all the charm of a classic coffee cake in every bite. They’re finished with a buttery streusel topping and a drizzle of vanilla glaze, making them the perfect companion for a cup of coffee or a sweet midday pick-me-up.

Coffee Cake Cookies

Why You’ll Love This Recipe

I love how these cookies combine the warmth of cinnamon with the rich texture of a soft cookie. The crumbly streusel topping adds that irresistible bakery-style finish, and the drizzle of icing ties it all together with just the right touch of sweetness. They’re fun to make, beautiful to serve, and even better to eat.

ingredients

(Here's a tip: Check out the full list of ingredients and measurements in the recipe card below.)

For the streusel topping:

  • All-purpose flour – gives structure to the crumb topping
  • Brown sugar – adds a deep, molasses-like sweetness
  • Ground cinnamon – adds warm spice
  • Salt – enhances the flavor balance
  • Unsalted butter, softened – binds the topping together and creates crumbles

For the cookie dough:

  • All-purpose flour – the main structure for the dough
  • Cake flour – helps create a softer, tender texture
  • Cornstarch – keeps the cookies soft and helps prevent spreading
  • Ground cinnamon – adds a cozy, spiced flavor
  • Baking soda and baking powder – leavening agents that give the cookies a slight lift
  • Salt – balances the sweetness
  • Unsalted butter, cold and cubed – keeps the dough firm and helps the cookies hold their shape
  • Brown sugar – gives the dough moisture and a rich sweetness
  • Granulated sugar – adds sweetness and helps with the crisp edges
  • Vanilla extract – adds flavor depth
  • Large egg and egg yolk – provide moisture and structure

For the glaze:

  • Unsalted butter, melted – adds richness
  • Heavy cream or milk – adjusts the thickness of the glaze
  • Powdered sugar – sweetens and creates the smooth finish
  • Vanilla extract – for a sweet, aromatic note
  • Pinch of salt – enhances the flavor

directions

  1. I begin by making the streusel topping. In a small bowl, I mix the flour, brown sugar, cinnamon, and salt, then work in the softened butter until crumbly. I chill it in the fridge to help it firm up.
  2. For the cookie dough, I whisk the dry ingredients together in one bowl—both flours, cornstarch, cinnamon, baking soda, baking powder, and salt.
  3. In a separate bowl, I cream the cold butter with both sugars until well combined. I then mix in the egg, egg yolk, and vanilla until smooth.
  4. I gradually add the dry ingredients to the butter mixture and stir just until a dough forms.
  5. I preheat the oven to 400°F (200°C), scoop out dough balls, and gently press a thumbprint or indent into each one.
  6. I fill the indent with about a tablespoon of the chilled streusel and bake the cookies for 9–11 minutes until the edges are set and the tops are lightly golden.
  7. While the cookies cool, I prepare the glaze by whisking melted butter, cream, powdered sugar, vanilla, and a pinch of salt until smooth. Once the cookies are cool, I drizzle the glaze over the tops.

Servings and timing

This recipe makes about 8 large cookies.
Prep time: 15 minutes
Cook time: 10 minutes
Total time: 25 minutes

Variations

When I want to add a twist, I sometimes stir chopped pecans or walnuts into the streusel. A dash of nutmeg or cardamom in the dough brings out more depth in the spice. For something fruity, I like adding a small spoonful of jam in the center before adding the crumb topping—raspberry or apricot work beautifully.

storage/reheating

I store the cookies in an airtight container at room temperature for up to 3 days. If I want to enjoy them warm again, I reheat them in the oven at 350°F for about 5 minutes, or in the microwave for 10–15 seconds for a softer texture.

FAQs

How do I keep the cookies soft?

I use a combination of cake flour and cornstarch to maintain a tender texture and avoid overbaking them so they stay moist in the center.

Can I make the dough in advance?

Yes, I often chill the dough for up to 24 hours before baking. It not only saves time but also enhances the flavor.

What if I don’t have cake flour?

I make a substitute by removing 2 tablespoons from 1 cup of all-purpose flour and replacing them with 2 tablespoons of cornstarch. I sift it together before using.

Can these cookies be frozen?

Yes, they freeze well. After baking and cooling, I place them in a single layer to freeze, then transfer to a container or freezer bag. I let them thaw at room temperature before serving.

Is cornstarch necessary?

Cornstarch keeps the cookies soft and helps with their shape. If I don’t have it, I use arrowroot powder or potato starch in equal amounts as a substitute.

Conclusion

These coffee cake cookies bring all the nostalgic, comforting flavors of a classic coffee cake into a portable, bite-sized form. With their soft centers, cinnamon crumble tops, and sweet drizzle, they’re perfect for any time I want a little indulgence without the need for a fork.

Print

clock clock iconcutlery cutlery iconflag flag iconfolder folder iconinstagram instagram iconpinterest pinterest iconfacebook facebook iconprint print iconsquares squares iconheart heart iconheart solid heart solid icon
Coffee Cake Cookies

Coffee Cake Cookies

5 Stars 4 Stars 3 Stars 2 Stars 1 Star No reviews
  • Author: Sue
  • Prep Time: 15 minutes
  • Cook Time: 10 minutes
  • Total Time: 25 minutes
  • Yield: 8 large cookies
  • Category: Dessert
  • Method: Baking
  • Cuisine: American
  • Diet: Vegetarian
Print Recipe
Pin Recipe

Description

These Coffee Cake Cookies are soft, chewy, and loaded with warm cinnamon flavor, buttery streusel topping, and a sweet vanilla glaze—bringing all the nostalgic charm of coffee cake into a handheld treat. Perfect with your morning coffee or as an anytime indulgence, these cookies are as easy to make as they are to love.


Ingredients

For the streusel topping:

  • ½ cup all-purpose flour
  • ¼ cup brown sugar
  • ½ teaspoon ground cinnamon
  • Pinch of salt
  • 3 tablespoons unsalted butter, softened

For the cookie dough:

  • 1 cup all-purpose flour
  • ¾ cup cake flour
  • 2 teaspoons cornstarch
  • 1 teaspoon ground cinnamon
  • ½ teaspoon baking soda
  • ½ teaspoon baking powder
  • ½ teaspoon salt
  • ½ cup unsalted butter, cold and cubed
  • ½ cup brown sugar
  • ¼ cup granulated sugar
  • 1 large egg
  • 1 egg yolk
  • 2 teaspoons vanilla extract

For the glaze:

  • 2 tablespoons unsalted butter, melted
  • 1½ tablespoons heavy cream or milk
  • ½ cup powdered sugar
  • ½ teaspoon vanilla extract
  • Pinch of salt

Instructions

  • Make the streusel: In a small bowl, combine flour, brown sugar, cinnamon, and salt. Work in the softened butter until crumbly. Chill.
  • Prepare dry ingredients: In a separate bowl, whisk together all-purpose flour, cake flour, cornstarch, cinnamon, baking soda, baking powder, and salt.
  • Cream butter and sugar: In a large bowl, cream the cold, cubed butter with both sugars until well combined. Add egg, egg yolk, and vanilla extract; mix until smooth.
  • Form the dough: Gradually add the dry ingredients to the wet mixture, mixing until a dough forms.
  • Shape and fill: Preheat oven to 400°F (200°C). Scoop dough into balls and press a shallow indent into the center of each. Fill each indent with about 1 tablespoon of chilled streusel.
  • Bake: Bake for 9–11 minutes or until edges are set and tops are lightly golden. Cool on baking sheet.
  • Glaze: Mix melted butter, cream, powdered sugar, vanilla, and salt until smooth. Drizzle over cooled cookies.

Notes

  • Add chopped pecans or walnuts to the streusel for crunch.
  • Try a spoonful of raspberry or apricot jam under the streusel for a fruity twist.
  • Add a dash of nutmeg or cardamom to enhance the spice profile.
  • Let the dough chill overnight for deeper flavor.

Have you made this recipe? I'd love to see it!

Click here to Follow me on Pinterest

Strawberry Cream Puffs

March 22, 2025 by Sue Leave a Comment

Strawberry cream puffs are delightful pastries that combine light, airy choux pastry shells with a luscious strawberry-infused cream filling. These elegant treats are perfect for special occasions or whenever I crave a sophisticated dessert.

Strawberry Cream Puffs ​

Why You'll Love This Recipe

  • Delicate Pastry: The choux pastry shells bake up crisp on the outside and hollow on the inside, providing a perfect vessel for the creamy filling.​

  • Fresh and Fruity: Incorporating fresh strawberries into the cream adds a natural sweetness and vibrant flavor that elevates the dessert.​

  • Versatile Presentation: Whether dusted with powdered sugar, drizzled with chocolate, or adorned with extra strawberry slices, these cream puffs are as beautiful as they are delicious.​

Ingredients

(Here's a tip: Check out the full list of ingredients and measurements in the recipe card below.)

  • For the Pastry Shells:

    • 400g puff pastry​
    • 1 egg, beaten (for egg wash)​
  • For the Filling:

    • 100g fresh strawberries, sliced​
    • 100ml whipping cream​
    • 2 tablespoons icing sugar (adjust to taste)​
    • 8 teaspoons strawberry jam​
    • 1 tablespoon white cocoa syrup (optional)​
  • For Garnish:

    • Icing sugar, for dusting​
    • Melted chocolate, for drizzling​

Directions

  1. Prepare the Pastry: Preheat the oven to 200°C (392°F). Roll out the puff pastry to your desired thickness. Using a heart-shaped cutter or knife, cut out heart shapes from the pastry. Alternatively, cut the pastry into rectangles.​

  2. Egg Wash and Bake: Place the pastry shapes on a baking sheet lined with parchment paper. Brush the tops with the beaten egg to achieve a golden finish. Bake in the preheated oven until puffed and golden brown, approximately 15-20 minutes.​

  3. Prepare the Filling: While the pastries are baking, whip the cream with icing sugar until soft peaks form. If using white cocoa syrup, fold it into the whipped cream. Gently fold in the sliced strawberries.​

  4. Assemble the Cream Puffs: Once the pastry hearts have cooled, slice them open horizontally. Spread a teaspoon of strawberry jam on the bottom half of each pastry. Pipe or spoon the strawberry cream mixture over the jam. Place the top half of the pastry over the filling.​

  5. Garnish: Dust the assembled cream puffs with icing sugar and drizzle with melted chocolate if desired.​

Servings and Timing

  • Servings: Approximately 8 cream puffs​

  • Preparation Time: 20 minutes​

  • Baking Time: 15-20 minutes​

Variations

  • Flavor Infusions: Add a splash of vanilla extract or a hint of lemon zest to the whipped cream for an extra layer of flavor.​

  • Different Fruits: Substitute strawberries with other berries like raspberries or blueberries, or even a mix of seasonal fruits.​

  • Pastry Options: While puff pastry offers a flaky texture, traditional choux pastry can be used for a classic cream puff experience.​

Storage/Reheating

  • Storage: Store any leftover cream puffs in an airtight container in the refrigerator for up to 2 days.​

  • Note: Filled cream puffs are best enjoyed the same day to maintain their crispiness.​

FAQs

How can I prevent the pastry from becoming soggy after filling?

To keep the pastry crisp, assemble the cream puffs just before serving. If they need to be prepared in advance, consider adding a thin layer of melted chocolate inside the pastry to create a moisture barrier.​

Can I use frozen puff pastry?

Yes, frozen puff pastry works well. Ensure it's fully thawed before rolling and cutting.​

What if I don't have a heart-shaped cutter?

You can use any shape cutter or simply cut the pastry into squares or rectangles.​

Is the white cocoa syrup necessary?

The white cocoa syrup adds a subtle flavor but is optional. The cream puffs will still be delicious without it.​

Can I make the components ahead of time?

You can bake the pastry shells and prepare the filling in advance. Store them separately and assemble just before serving to maintain the best texture.​

Conclusion

Strawberry cream puffs are a delightful fusion of flaky pastry and creamy, fruity filling. Their elegant appearance and delectable taste make them a standout dessert for any occasion. Enjoy crafting and savoring these sweet treats!

Print

clock clock iconcutlery cutlery iconflag flag iconfolder folder iconinstagram instagram iconpinterest pinterest iconfacebook facebook iconprint print iconsquares squares iconheart heart iconheart solid heart solid icon
Strawberry Cream Puffs

Strawberry Cream Puffs

5 Stars 4 Stars 3 Stars 2 Stars 1 Star No reviews
  • Author: Sue
  • Prep Time: 20 minutes
  • Cook Time: 15–20 minutes
  • Total Time: 35–40 minutes
  • Yield: 8 cream puffs
  • Category: Dessert
  • Method: Baked
  • Cuisine: French-inspired
  • Diet: Vegetarian
Print Recipe
Pin Recipe

Description

Strawberry Cream Puffs are elegant, bite-sized desserts that blend flaky puff pastry shells with a luscious strawberry-infused whipped cream filling. These gorgeous, fruit-forward treats are perfect for Valentine’s Day, tea parties, or anytime you want an easy yet impressive dessert.


Ingredients

For the Pastry Shells:

  • 400g puff pastry
  • 1 egg, beaten (for egg wash)

For the Filling:

  • 100g fresh strawberries, sliced
  • 100ml whipping cream
  • 2 tablespoons icing sugar (adjust to taste)
  • 8 teaspoons strawberry jam
  • 1 tablespoon white cocoa syrup (optional)

For Garnish:

  • Icing sugar, for dusting
  • Melted chocolate, for drizzling (optional)

Instructions

  1. Preheat Oven: Preheat oven to 200°C (392°F).
  2. Cut Pastry: Roll out puff pastry and cut into heart shapes or rectangles.
  3. Egg Wash: Place on a parchment-lined baking sheet. Brush with beaten egg.
  4. Bake: Bake for 15–20 minutes, until puffed and golden brown. Let cool completely.
  5. Make Filling: Whip cream with icing sugar until soft peaks form. Fold in cocoa syrup (if using), then gently fold in sliced strawberries.
  6. Assemble: Slice cooled pastries in half. Spread 1 teaspoon of strawberry jam on the bottom half. Pipe or spoon in the strawberry cream. Top with the other pastry half.
  7. Garnish: Dust with icing sugar and drizzle with melted chocolate if desired.

Notes

  • For extra flavor, add a splash of vanilla extract or lemon zest to the whipped cream.
  • Substitute strawberries with raspberries, blueberries, or mixed berries.
  • Use choux pastry for a classic twist.
  • Best served fresh, but can be stored in the fridge for up to 2 days.

Have you made this recipe? I'd love to see it!

Click here to Follow me on Pinterest

Garlic Butter Shrimp Pasta

March 22, 2025 by Sue Leave a Comment

Garlic Butter Shrimp Pasta is a rich and savory dish where juicy shrimp are sautéed in garlic butter and tossed with perfectly cooked pasta. It’s simple, full of flavor, and comes together in just one skillet—making it a favorite for busy nights and special dinners alike.

Why You’ll Love This Recipe

I love how this dish comes together with just a handful of ingredients and still tastes like something from a fancy restaurant. The buttery garlic sauce clings to every strand of pasta, and the shrimp are perfectly tender and flavorful. It’s a one-pan meal that feels indulgent but is surprisingly quick and easy to make. Whether I’m cooking for guests or just myself, it never disappoints.

Ingredients

(Here's a tip: Check out the full list of ingredients and measurements in the recipe card below.)

  • 8 oz (225 g) spaghetti or linguine
  • 1 lb (450 g) shrimp, peeled and deveined
  • 3 tablespoons butter
  • 4 cloves garlic, minced
  • ¼ teaspoon red pepper flakes (optional)
  • ½ teaspoon smoked paprika
  • Salt and freshly ground black pepper, to taste
  • Juice of ½ lemon
  • ¼ cup grated Parmesan cheese
  • 2 tablespoons chopped fresh parsley
  • ¼ cup reserved pasta water (if needed)

Directions

  1. I start by cooking the pasta in salted boiling water until al dente. I save a bit of the pasta water before draining.
  2. While the pasta cooks, I melt butter in a large skillet over medium heat, then sauté the garlic until fragrant.
  3. I add the shrimp, season them with smoked paprika, red pepper flakes, salt, and pepper, and cook for 2–3 minutes per side until pink and opaque.
  4. I squeeze in lemon juice and stir to coat the shrimp evenly.
  5. I add the cooked pasta to the skillet and toss everything together, adding a bit of pasta water if the sauce needs thinning.
  6. I finish with Parmesan and fresh parsley, then serve hot.

Servings and timing

This recipe serves 3 to 4 people.
Prep time: 10 minutes
Cook time: 15 minutes
Total time: 25 minutes

Variations

When I want to make it creamy, I add a splash of heavy cream or a dollop of cream cheese just before mixing in the pasta. Sometimes I swap the shrimp for scallops or add baby spinach or sun-dried tomatoes for extra depth. I also occasionally use angel hair pasta for a more delicate texture.

storage/reheating

I keep leftovers in an airtight container in the fridge for up to 2 days. To reheat, I use a skillet with a splash of water or butter to loosen the sauce. I try to avoid the microwave for this one because the shrimp can overcook and turn rubbery.

FAQs

Can I use frozen shrimp?

Yes, I often use frozen shrimp. I just make sure they’re fully thawed and patted dry before cooking to avoid excess water in the pan.

What kind of pasta works best?

I like spaghetti or linguine, but fettuccine or even penne works too. I choose what I have on hand or what I’m in the mood for.

Can I add vegetables to this dish?

Absolutely. I sometimes stir in spinach, cherry tomatoes, or even steamed broccoli for a more rounded meal.

How do I avoid overcooking the shrimp?

I watch closely and cook them just until they turn pink and curl slightly—usually 2–3 minutes per side is enough.

Is this recipe spicy?

It’s mildly spicy if I add red pepper flakes, but I can easily leave them out if I want a milder flavor.

Conclusion

Garlic Butter Shrimp Pasta is one of those dishes I turn to when I want something quick yet comforting. It’s packed with flavor, easy to make, and always feels like a treat. Whether it’s a casual weeknight dinner or something a little special, this recipe is always a winner in my kitchen.

Print

clock clock iconcutlery cutlery iconflag flag iconfolder folder iconinstagram instagram iconpinterest pinterest iconfacebook facebook iconprint print iconsquares squares iconheart heart iconheart solid heart solid icon
Garlic Butter Shrimp Pasta

Garlic Butter Shrimp Pasta

5 Stars 4 Stars 3 Stars 2 Stars 1 Star No reviews
  • Author: Sue
  • Prep Time: 10 minutes
  • Cook Time: 15 minutes
  • Total Time: 25 minutes
  • Yield: 3–4 servings
  • Category: Main Course
  • Method: Sauté
  • Cuisine: American, Italian-Inspired
Print Recipe
Pin Recipe

Description

Garlic Butter Shrimp Pasta is a rich, savory one-pan dinner made with juicy shrimp, garlic-infused butter, and perfectly cooked pasta. Ready in just 25 minutes, this easy shrimp pasta recipe is packed with flavor and perfect for both weeknight meals and special occasions.


Ingredients

  • 8 oz (225 g) spaghetti or linguine
  • 1 lb (450 g) shrimp, peeled and deveined
  • 3 tablespoons butter
  • 4 cloves garlic, minced
  • ¼ teaspoon red pepper flakes (optional)
  • ½ teaspoon smoked paprika
  • Salt and freshly ground black pepper, to taste
  • Juice of ½ lemon
  • ¼ cup grated Parmesan cheese
  • 2 tablespoons chopped fresh parsley
  • ¼ cup reserved pasta water (if needed)

Instructions

  1. Cook pasta in salted boiling water until al dente. Reserve ¼ cup of pasta water, then drain.
  2. In a large skillet, melt butter over medium heat. Add garlic and cook until fragrant, about 1 minute.
  3. Add shrimp to the skillet. Season with paprika, red pepper flakes (if using), salt, and pepper. Cook for 2–3 minutes per side, or until shrimp are pink and opaque.
  4. Squeeze in lemon juice and stir to coat shrimp.
  5. Add cooked pasta to the skillet and toss everything together. If needed, add reserved pasta water to loosen the sauce.
  6. Stir in Parmesan and sprinkle with fresh parsley. Serve hot.

Notes

  • Use frozen shrimp if needed—just thaw and pat dry before cooking.
  • For a creamy version, add a splash of heavy cream or a spoonful of cream cheese before tossing with the pasta.
  • Swap shrimp for scallops, or add vegetables like baby spinach, cherry tomatoes, or steamed broccoli.
  • Avoid overcooking shrimp; they only need a few minutes per side.

Have you made this recipe? I'd love to see it!

Click here to Follow me on Pinterest

Brownie Cookies

March 22, 2025 by Sue Leave a Comment

Print

clock clock iconcutlery cutlery iconflag flag iconfolder folder iconinstagram instagram iconpinterest pinterest iconfacebook facebook iconprint print iconsquares squares iconheart heart iconheart solid heart solid icon
Brownie Cookies

Brownie Cookies

5 Stars 4 Stars 3 Stars 2 Stars 1 Star No reviews
  • Author: Sue
  • Prep Time: 15 minutes
  • Cook Time: 10–12 minutes
  • Total Time: 30 minutes
  • Yield: About 20 cookies
  • Category: Dessert, Cookies, Snacks
  • Method: Baked
  • Cuisine: American
  • Diet: Vegetarian
Print Recipe
Pin Recipe

Description

These Brownie Cookies combine the rich, fudgy decadence of brownies with the chewy, crisp-edged texture of cookies. With crackly tops and gooey centers, they’re a dream come true for any chocolate lover. Quick and easy to make, these bakery-style chocolate treats are perfect for bake sales, holidays, or late-night cravings.


Ingredients

  • ½ cup unsweetened cocoa powder
  • 6 oz semi-sweet or dark chocolate (bars or chips)
  • ½ cup unsalted butter
  • ½ cup granulated sugar
  • ½ cup brown sugar
  • 2 large eggs
  • 1 teaspoon vanilla extract
  • ¾ cup all-purpose flour
  • ½ teaspoon baking powder
  • ¼ teaspoon salt
  • ½ cup chocolate chips or chunks (optional but recommended)

Instructions

  • Melt butter and chocolate together in a double boiler or microwave. Stir until smooth and set aside to cool slightly.
  • In a separate bowl, whisk together granulated sugar, brown sugar, and eggs for 2–3 minutes until pale and thick. Add vanilla extract.
  • Stir in the melted chocolate mixture.
  • Add cocoa powder, flour, baking powder, and salt. Mix until just combined to form a thick, glossy batter.
  • Fold in optional chocolate chips or chunks.
  • Let the batter sit for 10 minutes to firm up slightly.
  • Scoop dough onto a parchment-lined baking sheet, spacing evenly.
  • Bake at 350°F (175°C) for 10–12 minutes, until tops are crackly but centers are still soft.
  • Let cookies rest on the baking sheet for 5 minutes before transferring to a wire rack.

Notes

  • For a gourmet touch, top each cookie with a pinch of flaky sea salt before baking.
  • Add chopped nuts like walnuts or pecans for extra texture.
  • These make great ice cream sandwich cookies when paired with vanilla or coffee ice cream.
  • Be sure to let the batter rest so cookies don't spread too much during baking.

Have you made this recipe? I'd love to see it!

Click here to Follow me on Pinterest

Brownie Cookies are the best of both worlds—rich like a brownie, yet chewy like a cookie. I get intense chocolate flavor with crackly tops and gooey centers that make them an irresistible treat for any chocolate lover.

Why You’ll Love This Recipe

I love how these cookies combine everything I enjoy about brownies into a portable, shareable form. They’re fudgy in the middle with slightly crisp edges and a glossy, crinkled surface that screams “bakery-quality.” Plus, I don’t need any fancy equipment—just a couple of bowls and about 30 minutes from start to finish.

ingredients

(Here's a tip: Check out the full list of ingredients and measurements in the recipe card below.)

  • Unsweetened cocoa powder
  • Semi-sweet or dark chocolate (bars or chips)
  • Unsalted butter
  • Granulated sugar
  • Brown sugar
  • Eggs
  • Vanilla extract
  • All-purpose flour
  • Baking powder
  • Salt
  • Chocolate chips or chunks (optional, but I always add them)

directions

  1. I start by melting butter and chocolate together until smooth, either in a double boiler or microwave. I let this cool slightly while I prep the rest.
  2. In a bowl, I whisk together the sugars and eggs for about 2–3 minutes until thick and pale. Then I add the vanilla and pour in the melted chocolate mixture.
  3. I stir in the cocoa powder, flour, baking powder, and salt until just combined. The batter is thick and glossy, like brownie batter.
  4. If I’m using extra chocolate chips or chunks, I fold them in now.
  5. I let the batter sit for 10 minutes to thicken slightly—it helps the cookies hold their shape.
  6. Using a cookie scoop, I place mounds of dough onto a lined baking sheet, leaving space between them.
  7. I bake at 350°F (175°C) for 10–12 minutes, until the tops are shiny and crackled but the centers are still soft.
  8. After baking, I let them rest on the baking sheet for 5 minutes before transferring them to a wire rack.

Servings and timing

This recipe makes about 20 cookies.
Prep time: 15 minutes
Cook time: 10–12 minutes
Total time: 30 minutes

Variations

Sometimes I like to add chopped walnuts or pecans for a crunchy twist. A sprinkle of sea salt on top before baking also adds a gourmet touch. If I’m in the mood for something rich, I sandwich a scoop of vanilla ice cream between two cookies for an epic dessert.

storage/reheating

I store these cookies in an airtight container at room temperature for up to 4 days. For longer storage, I freeze them for up to 2 months. To reheat, I pop one in the microwave for 10–15 seconds to bring back that gooey center.

FAQs

Why do my brownie cookies come out flat?

It’s usually because the batter was too warm or too thin. I let the batter rest before baking to help the cookies keep their shape.

Can I use chocolate chips instead of chocolate bars?

Yes, but I prefer chopped bars for a smoother melt. Chips work in a pinch and still give great flavor.

Do I need to chill the dough?

Not necessarily, but a short 10-minute rest helps the batter firm up for better texture and appearance.

Can I double the recipe?

Definitely. I’ve doubled this recipe many times, just making sure to bake in separate batches for even cooking.

How do I get that shiny, crackly top?

Whipping the eggs and sugars well and melting the chocolate properly is key. I don’t skip those steps if I want that signature brownie look.

Conclusion

These Brownie Cookies are my go-to when I’m craving something intensely chocolatey and satisfying. They’re quick to whip up and always a crowd-pleaser, with the perfect balance of chewy, gooey, and crisp textures. Whether it’s for a bake sale, holiday tray, or late-night craving, they never disappoint.

Creamy Chicken Pasta

March 22, 2025 by Sue Leave a Comment

Why You'll Love This Recipe

I love making this Creamy Chicken Pasta because it’s incredibly rich, comforting, and easy to customize. The sauce is velvety smooth, the chicken turns out tender every time, and it’s the kind of meal that makes everyone around the table happy. Plus, I make it without any alcohol, so it’s a great option for family dinners or anyone avoiding wine in cooking.

Ingredients

(Here's a tip: Check out the full list of ingredients and measurements in the recipe card below.)

  • Boneless, skinless chicken breasts
  • Italian seasoning
  • All-purpose flour (for dredging and thickening)
  • Olive oil
  • Butter
  • Minced garlic
  • Chicken broth (used instead of wine)
  • Half and half (or a mix of light cream and milk)
  • Parmesan cheese (grated)
  • Romano cheese (grated)
  • Pasta (shells or any kind I have on hand)
  • Salt and pepper
  • Fresh parsley or lemon juice for garnish (optional)

Directions

  1. I slice the chicken breasts in half to make thinner cutlets, then season them with Italian seasoning and dredge lightly in flour.
  2. In a large skillet, I heat olive oil over medium-high heat and sear the chicken until golden and cooked through. Once done, I set it aside.
  3. In the same skillet, I melt the butter and sauté the minced garlic until fragrant.
  4. I sprinkle in flour to form a roux and cook it for a minute.
  5. Gradually, I whisk in chicken broth (instead of wine), then the half and half. I season with a bit of salt and pepper.
  6. While the sauce simmers, I boil the pasta until just al dente and then drain it.
  7. I stir the Parmesan and Romano cheese into the sauce until melted, then return the sliced chicken and cooked pasta to the skillet, tossing to coat.
  8. If needed, I add a splash of pasta water to loosen the sauce. I finish with fresh parsley or lemon juice before serving.

Servings and timing

This recipe serves about 4 people.
Prep time: 15 minutes
Cook time: 35 minutes
Total time: 50 minutes

Variations

  • Sometimes I add baby spinach, sun-dried tomatoes, or mushrooms for more flavor and texture.
  • For a spicy kick, I include red pepper flakes.
  • I swap out the pasta shape depending on what I have—penne, bowtie, or linguine all work well.
  • To lighten it up, I use milk instead of half and half, though the sauce won’t be as rich.

storage/reheating

I store leftovers in the fridge in an airtight container for up to 3 days. When reheating, I use the stovetop and stir in a little chicken broth or milk to bring back the creamy texture. The microwave works too, though I stir halfway through for even heating.

FAQs

What can I use instead of white wine in the sauce?

I always use chicken broth as a substitute. It adds savory flavor without alcohol.

Can I make this with rotisserie chicken?

Yes, I’ve done that when I’m short on time. I skip the searing step and add the shredded rotisserie chicken right before combining it with the pasta and sauce.

Can I make this dish ahead of time?

I can cook everything ahead and store it in the fridge, but I usually wait to combine the pasta and sauce until just before serving to keep it from getting too thick.

What kind of pasta works best for this recipe?

I like pasta shells, but penne, rigatoni, or fettuccine also hold the creamy sauce really well.

How can I make it gluten-free?

I use a gluten-free flour for the dredging and sauce, and pair it with my favorite gluten-free pasta.

Conclusion

This Creamy Chicken Pasta is one of my favorite easy dinner recipes. It’s rich, flavorful, and doesn’t require any alcohol, making it perfect for everyone at the table. I love how versatile it is, and it always turns out creamy and satisfying. Whether I’m feeding family or enjoying leftovers for lunch, this dish never disappoints.-

Print

clock clock iconcutlery cutlery iconflag flag iconfolder folder iconinstagram instagram iconpinterest pinterest iconfacebook facebook iconprint print iconsquares squares iconheart heart iconheart solid heart solid icon
Creamy Chicken Pasta

Creamy Chicken Pasta

5 Stars 4 Stars 3 Stars 2 Stars 1 Star No reviews
  • Author: Sue
  • Prep Time: 15 minutes
  • Cook Time: 35 minutes
  • Total Time: 50 minutes
  • Yield: 4 servings
  • Category: Dinner
  • Method: Stovetop
  • Cuisine: American
Print Recipe
Pin Recipe

Description

This Creamy Chicken Pasta is rich, comforting, and made without wine—perfect for family dinners. Tender chicken is coated in Italian seasoning, pan-seared to perfection, and tossed in a velvety garlic cream sauce with Parmesan and Romano cheese. It’s an easy weeknight dinner that’s full of flavor, customizable with add-ins like spinach or sun-dried tomatoes, and completely alcohol-free.


Ingredients

  • Boneless, skinless chicken breasts
  • 1 teaspoon Italian seasoning
  • ¼ cup all-purpose flour (for dredging and thickening)
  • 2 tablespoons olive oil
  • 2 tablespoons butter
  • 3–4 garlic cloves, minced
  • 1 cup chicken broth (used instead of wine)
  • 1 cup half and half (or a mix of light cream and milk)
  • ½ cup grated Parmesan cheese
  • ¼ cup grated Romano cheese
  • 8 oz pasta shells (or any preferred pasta)
  • Salt and pepper to taste
  • Optional: chopped fresh parsley or lemon juice for garnish
  • Optional add-ins: baby spinach, mushrooms, sun-dried tomatoes, red pepper flakes

Instructions

  1. Slice chicken breasts in half to create thin cutlets. Season with Italian seasoning and dredge lightly in flour.
  2. Heat olive oil in a large skillet over medium-high heat. Sear chicken until golden and cooked through. Remove and set aside.
  3. In the same skillet, melt butter and sauté garlic until fragrant.
  4. Sprinkle in flour and stir to create a roux. Cook for about 1 minute.
  5. Gradually whisk in chicken broth, then half and half. Season with salt and pepper. Simmer gently.
  6. Meanwhile, cook pasta until al dente. Drain and reserve some pasta water.
  7. Stir Parmesan and Romano cheese into the sauce until melted. Return sliced chicken and cooked pasta to the skillet. Toss to coat.
  8. If needed, thin the sauce with a splash of reserved pasta water. Finish with fresh parsley or lemon juice, if desired.

Notes

  • For a lighter version, substitute milk for half and half.
  • Add red pepper flakes for a spicy twist.
  • Use gluten-free flour and pasta to make this dish gluten-free.
  • Rotisserie chicken can be used to save time—just skip the searing step.
  • Best to combine pasta and sauce just before serving to keep the texture creamy.

Have you made this recipe? I'd love to see it!

Click here to Follow me on Pinterest

Parmesan Crusted Chicken Sheet Pan Dinner

March 21, 2025 by Sue Leave a Comment

This Parmesan Crusted Chicken Sheet Pan Dinner brings together juicy, golden-crusted chicken breasts, crispy roasted potatoes, and tender green beans—all baked on one pan for a fuss-free, flavorful meal. It’s the perfect combination of hearty comfort food and easy weeknight cooking.

Why You’ll Love This Recipe

This recipe is a go-to when I want something delicious without spending too much time in the kitchen. I like how everything cooks on one sheet, which means fewer dishes and more time to relax. The Parmesan crust gives the chicken a savory, crispy bite that pairs perfectly with the roasted potatoes and garlicky green beans. It’s a full meal with balanced flavor and texture—no need for anything extra.

Ingredients

(Here's a tip: Check out the full list of ingredients and measurements in the recipe card below.)

  • 3–4 boneless, skinless chicken breasts
  • 2 tablespoons olive oil
  • ⅓ cup grated Parmesan cheese
  • ⅓ cup breadcrumbs (Panko or regular)
  • 1 tablespoon minced garlic
  • Salt and pepper to taste

For the potatoes:

  • 2 pounds red potatoes, cut into bite-sized pieces
  • 2 tablespoons olive oil
  • 1–2 cloves garlic, minced
  • 2 tablespoons grated Parmesan cheese
  • Salt and pepper to taste

For the green beans:

  • 1 pound fresh green beans, ends trimmed
  • 1 tablespoon olive oil
  • 1 clove garlic, minced
  • 1 tablespoon grated Parmesan cheese (optional)
  • Salt and pepper to taste

Directions

  1. Preheat the oven to 400°F (200°C). Line a large sheet pan with parchment paper or lightly grease it.
  2. In a bowl, toss the potatoes with olive oil, garlic, Parmesan, salt, and pepper. Spread them on one side of the sheet pan.
  3. In another bowl, mix olive oil, Parmesan, breadcrumbs, garlic, salt, and pepper. Coat each chicken breast in the mixture and place them next to the potatoes.
  4. Bake for 20 minutes.
  5. While that bakes, toss the green beans with olive oil, garlic, Parmesan (if using), salt, and pepper.
  6. After 20 minutes, take the pan out of the oven and add the green beans in a single layer.
  7. Return the pan to the oven and bake another 15–20 minutes, until the chicken is cooked through (165°F internal temperature) and the veggies are tender.
  8. Let everything rest a few minutes before serving.

Servings and Timing

  • Servings: 4
  • Prep Time: 15 minutes
  • Cook Time: 35–40 minutes

Variations

  • Swap green beans with broccoli, asparagus, or Brussels sprouts depending on what I have on hand.
  • Try different cheeses like Asiago or Romano for a twist on the flavor.
  • Add dried herbs like rosemary, thyme, or Italian seasoning to the breadcrumb coating for extra aroma.

Storage/Reheating

I keep leftovers in an airtight container in the fridge for up to 3 days. To reheat, the oven works best—about 10–15 minutes at 350°F keeps the chicken crispy. The microwave is faster, but it softens the crust a bit.

FAQs

How do I keep the chicken from drying out?

I make sure the chicken is coated well with the olive oil mixture and always check the internal temperature to avoid overcooking.

Can I use chicken thighs instead?

Yes, boneless, skinless thighs work well. They might take a little longer to cook, so I keep a meat thermometer handy.

Do I need to boil the potatoes first?

Nope, just cutting them small enough helps them roast perfectly in the oven.

Can I prep this ahead?

Yes, I often season the chicken and veggies earlier in the day and keep them in the fridge. When it's dinner time, I just spread everything on the pan and bake.

What else can I serve with this?

This is already a full meal, but I like adding a simple salad or a slice of bread on the side if I’m feeling fancy.

Conclusion

This sheet pan dinner checks all the boxes: easy, satisfying, and loaded with flavor. It’s become one of my favorite ways to get dinner on the table fast, without skimping on taste or texture.

Print

clock clock iconcutlery cutlery iconflag flag iconfolder folder iconinstagram instagram iconpinterest pinterest iconfacebook facebook iconprint print iconsquares squares iconheart heart iconheart solid heart solid icon
Parmesan Crusted Chicken Sheet Pan Dinner

Parmesan Crusted Chicken Sheet Pan Dinner

5 Stars 4 Stars 3 Stars 2 Stars 1 Star No reviews
  • Author: Sue
  • Prep Time: 15 minutes
  • Cook Time: 35–40 minutes
  • Total Time: 50–55 minutes
  • Yield: Serves 4
  • Category: Dinner
  • Method: Sheet Pan, Oven-Baked
  • Cuisine: American
Print Recipe
Pin Recipe

Description

armesan Crusted Chicken Sheet Pan Dinner brings together juicy, golden-brown chicken breasts, crispy roasted potatoes, and tender green beans, all baked on a single sheet pan for a no-fuss, flavorful meal. This easy one-pan recipe is perfect for busy weeknights, offering comfort food vibes with minimal cleanup.


Ingredients

For the Chicken:

  • 3–4 boneless, skinless chicken breasts
  • 2 tablespoons olive oil
  • ⅓ cup grated Parmesan cheese
  • ⅓ cup breadcrumbs (Panko or regular)
  • 1 tablespoon minced garlic
  • Salt and pepper to taste

For the Potatoes:

  • 2 pounds red potatoes, cut into bite-sized pieces
  • 2 tablespoons olive oil
  • 1–2 cloves garlic, minced
  • 2 tablespoons grated Parmesan cheese
  • Salt and pepper to taste

For the Green Beans:

  • 1 pound fresh green beans, ends trimmed
  • 1 tablespoon olive oil
  • 1 clove garlic, minced
  • 1 tablespoon grated Parmesan cheese (optional)
  • Salt and pepper to taste

Instructions

  1. Preheat oven to 400°F (200°C). Line a large sheet pan with parchment paper or lightly grease it.
  2. Prep the Potatoes: Toss potatoes with olive oil, garlic, Parmesan, salt, and pepper. Spread on one side of the sheet pan.
  3. Coat the Chicken: Mix olive oil, Parmesan, breadcrumbs, garlic, salt, and pepper. Coat each chicken breast and place beside the potatoes.
  4. Bake for 20 minutes.
  5. Season Green Beans: Toss green beans with olive oil, garlic, Parmesan (optional), salt, and pepper.
  6. Add Beans: After 20 minutes, remove the sheet pan and add green beans in a single layer.
  7. Continue Baking: Bake for an additional 15–20 minutes, until chicken reaches 165°F and veggies are tender.
  8. Rest & Serve: Let everything rest for a few minutes before serving.

Notes

  • Swap green beans for broccoli, Brussels sprouts, or asparagus.
  • Use Romano or Asiago instead of Parmesan for a different flavor profile.
  • Add herbs like rosemary, thyme, or Italian seasoning to the breadcrumb coating.
  • Best reheated in the oven at 350°F for 10–15 minutes to maintain the crispy texture.
  • Store leftovers in an airtight container in the fridge for up to 3 days.

Have you made this recipe? I'd love to see it!

Click here to Follow me on Pinterest

  • « Previous Page
  • 1
  • …
  • 36
  • 37
  • 38
  • 39
  • Next Page »
Modern Sidebar

Hey there! I'm Sue, a mom, a wife, and someone who’s always in the kitchen trying out new recipes or revisiting old ones that remind me of family gatherings and special moments.

Learn more

Popular

  • Cheesecake Fruit Salad
    Cheesecake Fruit Salad
  • Creamy Tuscan Ravioli Soup: A Comfort Dish
    Creamy Tuscan Ravioli Soup: A Comfort Dish
  • Garlic Herb Chicken with Mashed Potatoes and Glazed Carrots
    Garlic Herb Chicken with Mashed Potatoes and Glazed Carrots
  • Bobby Flay Salisbury Steak
    Bobby Flay Salisbury Steak

Footer

↑ back to top

About

  • About
  • Contact
  • Disclosure Policy
  • DMCA
  • Privacy Policy
  • Terms and Conditions

Newsletter

  • Sign Up! for emails and updates

Recipes

  • Appetizers & Snacks
  • Beef
  • Breakfast
  • Chicken
  • Desserts
  • Dinner
  • Drinks
  • Side-Dish
  • Soups

As an Amazon Associate I earn from qualifying purchases.

Copyright © 2025 Sue Recipe