Sue Recipe

  • Recipe Index
  • Chicken
  • Desserts
  • About
  • Contact
menu icon
go to homepage
  • Recipe Index
  • Chicken
  • Desserts
  • About
  • Contact

search icon
Homepage link
  • Recipe Index
  • Chicken
  • Desserts
  • About
  • Contact

×

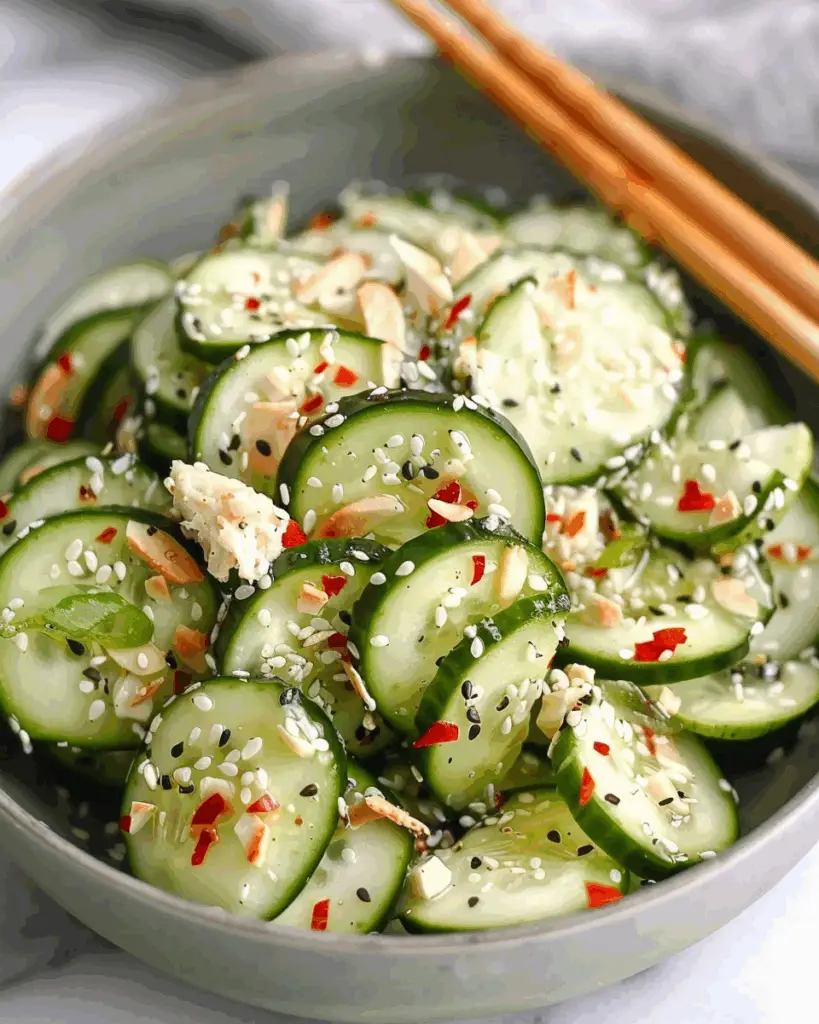
Marinated Cucumber Salad with Creamy Dill Sauce

July 13, 2025 by Sue Leave a Comment

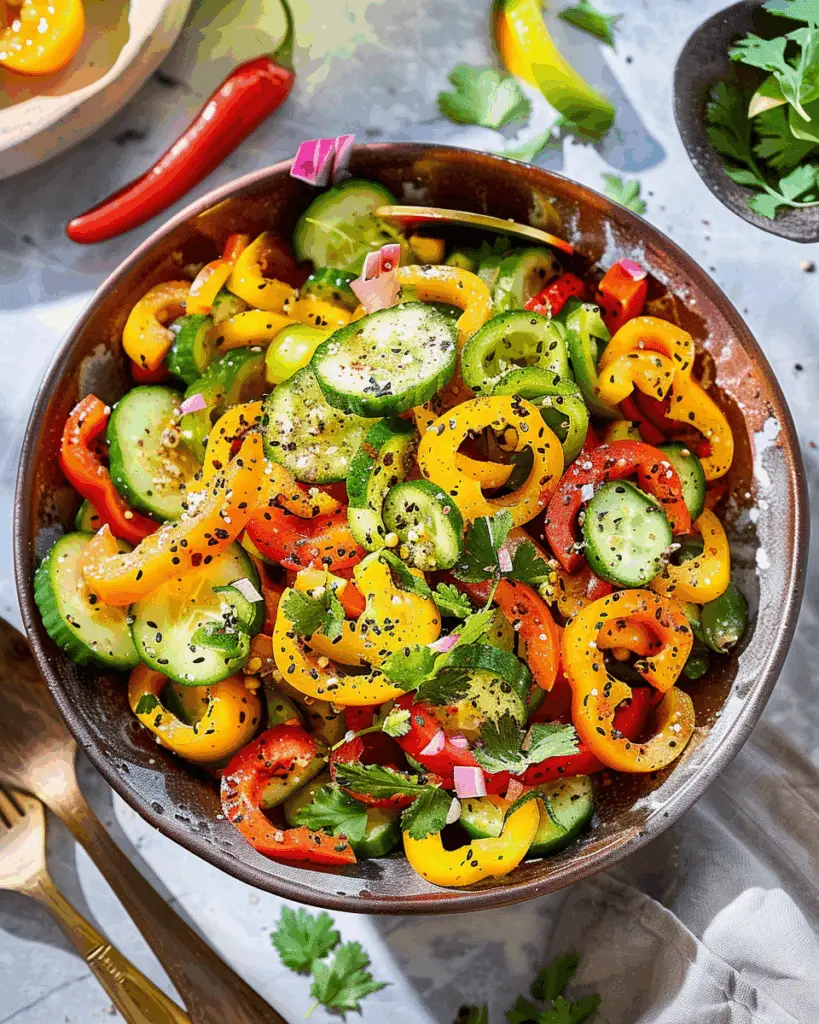
I love how this salad combines crisp, thinly sliced cucumbers and red onion with a tangy, creamy dill dressing. It’s refreshing, easy to prepare, and perfect as a light side dish for warm-weather meals. Marinated Cucumber Salad with Creamy Dill Sauce
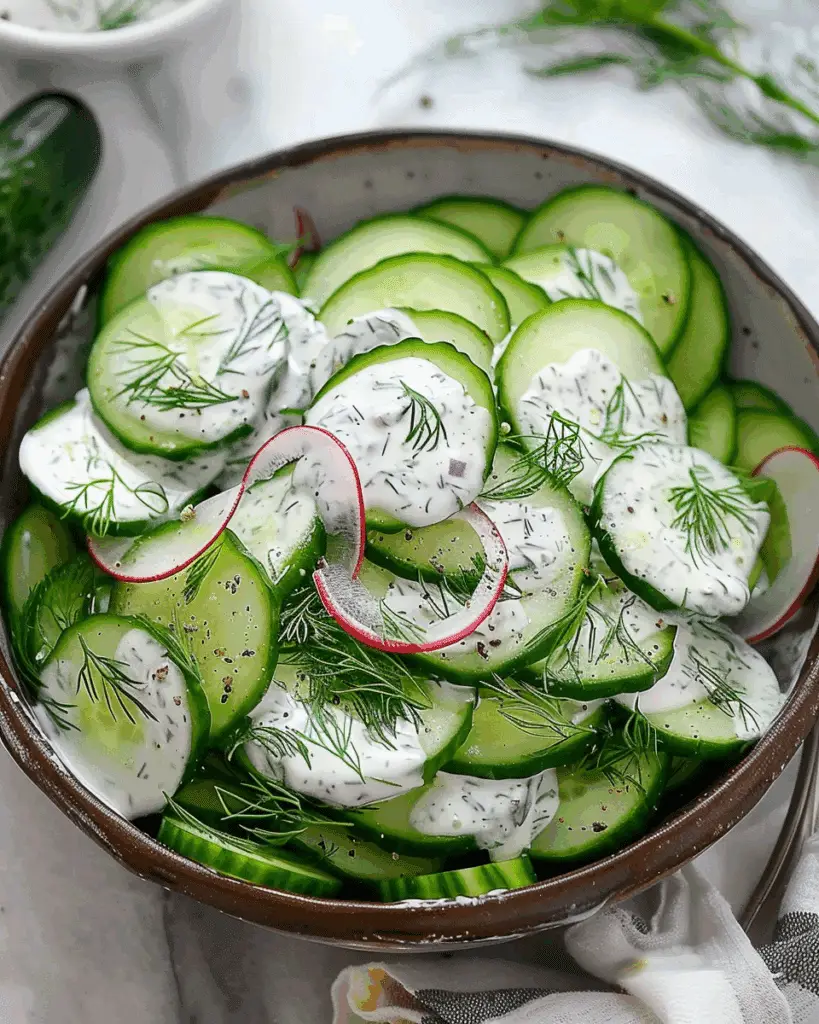
Why You’ll Love This Recipe

I appreciate this recipe because it brings together bright, fresh flavors with minimal effort. The creamy Greek yogurt dressing balances the vinegar’s tang, and marinating the cucumbers allows the flavors to meld beautifully. It’s one of my go-to dishes for barbecues, potlucks, or whenever I want something light yet satisfying.

ingredients

(Here's a tip: Check out the full list of ingredients and measurements in the recipe card below.)

  • 1–2 large English cucumbers

  • 2 tablespoons extra‑virgin olive oil

  • 3 tablespoons apple cider vinegar

  • 1 tablespoon Greek yogurt (or mayonnaise)

  • 1 clove garlic, finely minced

  • 1 tablespoon fresh dill, minced (plus more for garnish)

  • 2 tablespoons red onion, thinly sliced

  • Salt and freshly ground black pepper, to taste

directions

  1. I start by peeling (optional) and thinly slicing the cucumbers. Then I toss them together with the thinly sliced red onion in a shallow bowl.

  2. In a separate jar or small bowl, I mix together olive oil, apple cider vinegar, Greek yogurt (or mayonnaise), garlic, dill, salt, and pepper. I shake or whisk it well until the dressing is smooth and emulsified.

  3. I pour the dressing over the cucumbers and onions and toss everything gently to coat.

  4. Then I cover the bowl and let it marinate for 2 to 3 hours at room temperature, or longer in the fridge. Before serving, I allow it to come to room temperature and sprinkle a bit more fresh dill on top.

Servings and timing

This recipe makes about 4 servings.

  • Prep time: 15 minutes

  • Marinating time: 2 to 3 hours

Variations

  • I sometimes use mayonnaise instead of Greek yogurt when I want a creamier texture.

  • For a quicker version, I swap fresh dill with dried dill or even fresh chives.

  • When I’m feeling adventurous, I add cherry tomatoes or sliced radishes for extra crunch and color.

  • To give it a different twist, I occasionally mix in a pinch of red pepper flakes or a drizzle of honey for a sweet-spicy balance.

storage/reheating

I store the leftover cucumber salad in an airtight container in the fridge. It keeps well for up to 3 days. While I don’t reheat it—since it’s meant to be served cold—I usually let it sit at room temperature for 10–15 minutes before serving so the flavors come back to life.

FAQs

How long should I marinate the cucumbers?

I find that 2 to 3 hours is ideal, but letting them sit overnight in the fridge makes the flavors even more intense.

Can I use regular cucumbers instead of English cucumbers?

Yes, I can. I just peel them and remove the seeds if they're too watery. English cucumbers are less bitter and more tender, but either works well.

Can I make this salad ahead of time?

Definitely. I often slice the cucumbers and onions and prepare the dressing in advance. I just mix everything together a couple of hours before serving.

What can I use instead of Greek yogurt?

If I don’t have Greek yogurt, I use mayonnaise or even sour cream. Sometimes I add a splash of lemon juice for extra brightness.

Will the cucumbers lose their crunch?

They stay pretty crisp for a day or two, especially if I use fresh cucumbers and don’t over-marinate. After that, they soften but still taste great.

Conclusion

This marinated cucumber salad is one of my favorite go-to dishes when I need something refreshing and quick. It’s light, flavorful, and has just the right balance of tang and creaminess. Whether I’m pairing it with grilled meats or serving it alongside a sandwich, it’s always a hit and couldn’t be easier to prepare.
Print

clock clock iconcutlery cutlery iconflag flag iconfolder folder iconinstagram instagram iconpinterest pinterest iconfacebook facebook iconprint print iconsquares squares iconheart heart iconheart solid heart solid icon
Marinated Cucumber Salad with Creamy Dill Sauce

Marinated Cucumber Salad with Creamy Dill Sauce

5 Stars 4 Stars 3 Stars 2 Stars 1 Star No reviews
  • Author: Sue
  • Prep Time: 15 minutes
  • Cook Time: 0 minutes
  • Total Time: 2 hours 15 minutes
  • Yield: 4 servings
  • Category: Salad
  • Method: No-cook
  • Cuisine: American
  • Diet: Vegetarian
Print Recipe
Pin Recipe

Description

A refreshing cucumber salad featuring crisp cucumbers and red onions marinated in a creamy, tangy dill dressing. Perfect as a light side dish for warm weather meals.


Ingredients

  • 1–2 large English cucumbers
  • 2 Tbsp extra‑virgin olive oil
  • 3 Tbsp apple cider vinegar
  • 1 Tbsp Greek yogurt (or mayonnaise)
  • 1 clove garlic, finely minced
  • 1 Tbsp fresh dill, minced (plus more for garnish)
  • 2 Tbsp red onion, thinly sliced
  • Salt and freshly ground black pepper, to taste

Instructions

  1. Peel (optional) and thinly slice the cucumber, then toss with the sliced red onion in a shallow bowl.
  2. In a jar, mix the olive oil, apple cider vinegar, Greek yogurt (or mayo), garlic, dill, salt, and pepper. Shake vigorously to emulsify.
  3. Pour the dressing over the cucumbers and onions.
  4. Cover and marinate for 2–3 hours at room temperature—or longer in the fridge.
  5. Before serving, let it warm to room temperature and garnish with extra dill.

Notes

  • Use mayonnaise instead of Greek yogurt for a richer flavor.
  • Substitute dill with chives if needed.
  • For added crunch and an Asian twist, add chopped peanuts and chili oil.
  • Add cherry tomatoes or bell pepper for a heartier version.
  • Best enjoyed within 2–3 days when stored in the fridge.

Nutrition

  • Serving Size: 1 serving
  • Calories: 85
  • Sugar: 3g
  • Sodium: 120mg
  • Fat: 7g
  • Saturated Fat: 1g
  • Unsaturated Fat: 6g
  • Trans Fat: 0g
  • Carbohydrates: 5g
  • Fiber: 1g
  • Protein: 1g
  • Cholesterol: 0mg

Have you made this recipe? I'd love to see it!

Click here to Follow me on Pinterest

Cinnamon Sweet Potato Breakfast Cookies

July 13, 2025 by Sue Leave a Comment

These Cinnamon Sweet Potato Breakfast Cookies are soft, chewy, and lightly spiced with a comforting cinnamon flavor. They’re packed with wholesome ingredients like oats and mashed sweet potatoes, making them a perfect on-the-go breakfast or healthy snack. Cinnamon Sweet Potato Breakfast Cookies

Why You’ll Love This Recipe

I love how these cookies bring together the natural sweetness of sweet potatoes with the warmth of cinnamon. They’re simple to make, nutritious, and satisfying enough to keep me energized through the morning. Plus, they're naturally gluten-free and easy to make vegan-friendly. I often make a batch ahead of time to have a quick breakfast ready all week.

Ingredients

(Here's a tip: Check out the full list of ingredients and measurements in the recipe card below.)

sweet potato, cooked and mashed
rolled oats
almond flour
ground cinnamon
baking powder
salt
egg (or flax egg for vegan option)
maple syrup
vanilla extract
optional add-ins: raisins, chopped nuts, chocolate chips

Directions

  1. I start by preheating the oven to 350°F (175°C) and lining a baking sheet with parchment paper.

  2. In a large bowl, I combine the mashed sweet potato, egg, maple syrup, and vanilla extract until smooth.

  3. Then, I stir in the oats, almond flour, cinnamon, baking powder, and salt until everything is well mixed.

  4. If I’m using any add-ins like raisins or chocolate chips, I fold those in last.

  5. I scoop the dough into cookie-sized portions and place them on the prepared baking sheet, flattening them slightly with the back of a spoon.

  6. I bake the cookies for 15–18 minutes, until they’re set and golden on the bottom.

  7. After removing them from the oven, I let them cool on a wire rack before enjoying.

Servings and timing

This recipe makes about 12 cookies.
Prep time: 10 minutes
Cook time: 15–18 minutes
Total time: around 30 minutes

Variations

I sometimes swap out the almond flour for oat flour if that’s what I have on hand. For extra protein, I add a spoonful of nut butter to the mix. Chopped dates, cranberries, or coconut flakes also make tasty additions. And when I want an indulgent touch, I add dark chocolate chips.

storage/reheating

I store these cookies in an airtight container at room temperature for up to 3 days, or in the refrigerator for up to a week. For longer storage, I freeze them in a zip-top bag and reheat in the microwave for about 15–20 seconds when I want one.

FAQs

Can I use canned sweet potato instead of fresh?

Yes, I use canned sweet potato purée when I’m short on time. I just make sure it’s plain and not sweetened.

Are these cookies gluten-free?

They are, as long as I use certified gluten-free oats. The almond flour is naturally gluten-free too.

Can I make these cookies vegan?

Absolutely. I replace the egg with a flax egg (1 tablespoon ground flaxseed + 3 tablespoons water) and it works great.

Do these cookies spread when baking?

They don’t spread much, so I always flatten them a bit before baking to shape them the way I want.

Can I eat these for breakfast every day?

Yes, I do! They’re made with wholesome ingredients, so I feel good about having them as a grab-and-go breakfast or snack.

Conclusion

Cinnamon Sweet Potato Breakfast Cookies are a delicious and practical way to start the day. They’re easy to make, loaded with nourishing ingredients, and customizable to suit my taste. Whether I need a quick morning bite or a healthy treat to keep me going, these cookies always hit the spot.

Print

clock clock iconcutlery cutlery iconflag flag iconfolder folder iconinstagram instagram iconpinterest pinterest iconfacebook facebook iconprint print iconsquares squares iconheart heart iconheart solid heart solid icon
Cinnamon Sweet Potato Breakfast Cookies

Cinnamon Sweet Potato Breakfast Cookies

5 Stars 4 Stars 3 Stars 2 Stars 1 Star No reviews
  • Author: Sue
  • Prep Time: 10 minutes
  • Cook Time: 18 minutes
  • Total Time: 30 minutes
  • Yield: 12 cookies
  • Category: Breakfast
  • Method: Baking
  • Cuisine: American
  • Diet: Gluten Free
Print Recipe
Pin Recipe

Description

These Cinnamon Sweet Potato Breakfast Cookies are soft, chewy, and lightly spiced with cinnamon. Made with wholesome ingredients like oats and mashed sweet potatoes, they’re a perfect healthy snack or grab-and-go breakfast.


Ingredients

  • 1 cup sweet potato, cooked and mashed
  • 1 cup rolled oats
  • ½ cup almond flour
  • 1 tsp ground cinnamon
  • 1 tsp baking powder
  • ¼ tsp salt
  • 1 egg or 1 flax egg (1 tbsp ground flaxseed + 3 tbsp water)
  • ¼ cup maple syrup
  • 1 tsp vanilla extract
  • Optional: ¼ cup raisins, chopped nuts, or chocolate chips

Instructions

  1. Preheat the oven to 350°F (175°C) and line a baking sheet with parchment paper.
  2. In a large bowl, mix mashed sweet potato, egg (or flax egg), maple syrup, and vanilla extract until smooth.
  3. Stir in oats, almond flour, cinnamon, baking powder, and salt until well combined.
  4. Fold in any optional add-ins like raisins, nuts, or chocolate chips.
  5. Scoop the dough into cookie-sized portions and place on the baking sheet, flattening slightly with a spoon.
  6. Bake for 15–18 minutes until set and golden on the bottom.
  7. Cool on a wire rack before serving.

Notes

  • Use canned sweet potato puree for convenience, but ensure it's unsweetened.
  • Flatten the cookies before baking, as they do not spread much.
  • Store in an airtight container at room temperature for up to 3 days or refrigerate for up to a week.
  • Freeze for longer storage and reheat in the microwave for 15–20 seconds.

Nutrition

  • Serving Size: 1 cookie
  • Calories: 110
  • Sugar: 4g
  • Sodium: 75mg
  • Fat: 5g
  • Saturated Fat: 0.5g
  • Unsaturated Fat: 4g
  • Trans Fat: 0g
  • Carbohydrates: 15g
  • Fiber: 2g
  • Protein: 2g
  • Cholesterol: 10mg

Have you made this recipe? I'd love to see it!

Click here to Follow me on Pinterest

Air Fryer Pizza Bombs

July 13, 2025 by Sue Leave a Comment

These Air Fryer Pizza Bombs are the ultimate snack or quick meal—gooey cheese and pepperoni wrapped in golden biscuit dough, cooked to perfection in the air fryer. They're fun to make, delicious to eat, and totally customizable depending on what I have on hand. Air Fryer Pizza Bombs

Why You’ll Love This Recipe

I love how fast and easy these pizza bombs are to prepare. Whether I need a quick appetizer for guests or a tasty after-school snack, they always come through. Since I use refrigerated biscuit dough, there’s no need to deal with making a crust from scratch. The air fryer ensures a crisp outside while keeping the inside gooey and cheesy. Plus, I can play around with the fillings based on what I’m craving.

ingredients

(Here's a tip: Check out the full list of ingredients and measurements in the recipe card below.)

  • Refrigerated biscuit dough (like Pillsbury Grands)

  • Mozzarella cheese, cut into cubes

  • Pepperoni slices

  • Pizza sauce (optional for dipping)

  • Olive oil or melted butter

  • Garlic powder

  • Italian seasoning

  • Grated Parmesan cheese

directions

  1. I preheat the air fryer to 350°F (175°C).

  2. I separate the biscuit dough and flatten each piece slightly.

  3. I place a cube of mozzarella and a couple of pepperoni slices in the center of each round.

  4. I fold the edges over the filling, pinch them to seal, and shape into a ball.

  5. I brush each pizza bomb with olive oil or melted butter.

  6. I sprinkle garlic powder, Italian seasoning, and Parmesan cheese over the tops.

  7. I place them in the air fryer basket, making sure they don’t touch.

  8. I air fry for 8–10 minutes or until golden brown and cooked through.

  9. I serve them warm, with pizza sauce on the side for dipping.

Servings and timing

This recipe makes about 8 pizza bombs, depending on the biscuit dough brand I use. It takes around 15 minutes from start to finish, with just 5 minutes of prep and 8–10 minutes in the air fryer.

Variations

I love switching up the fillings. Sometimes I use cooked sausage, mushrooms, or chopped veggies for a different flavor. If I’m feeling spicy, I’ll add a dash of crushed red pepper inside. For a white pizza twist, I skip the marinara and go with ricotta, garlic, and spinach.

storage/reheating

I store any leftovers in an airtight container in the fridge for up to 3 days. When I’m ready to reheat, I pop them back into the air fryer at 350°F for 3–4 minutes until warmed through. They stay crisp and delicious.

FAQs

What kind of dough works best for pizza bombs?

I find refrigerated biscuit dough works perfectly because it’s soft, easy to wrap, and cooks up golden in the air fryer. Crescent roll dough is also a good alternative.

Can I make these ahead of time?

Yes, I sometimes assemble them a few hours ahead and keep them covered in the fridge until I’m ready to air fry. I wait to brush them with oil and seasonings until right before cooking.

What dipping sauces go well with these?

Marinara is a classic, but I also like ranch, garlic butter, or even a spicy sriracha mayo for something different.

How do I keep the cheese from leaking out?

I make sure to seal the dough well by pinching all edges firmly and placing the seam side down in the air fryer. Overfilling can also cause leaks, so I keep it balanced.

Can I freeze pizza bombs?

Yes, I freeze them after cooking. Once cooled, I wrap them individually and store in a freezer bag. To reheat, I put them straight into the air fryer at 350°F for 6–8 minutes.

Conclusion

These Air Fryer Pizza Bombs are a game-changer for quick, satisfying snacks. They’re crispy on the outside, melty on the inside, and totally customizable. Whether I’m feeding a crowd or just want something fun and cheesy, I always turn to this easy air fryer favorite.

Print

clock clock iconcutlery cutlery iconflag flag iconfolder folder iconinstagram instagram iconpinterest pinterest iconfacebook facebook iconprint print iconsquares squares iconheart heart iconheart solid heart solid icon
Air Fryer Pizza Bombs

Air Fryer Pizza Bombs

5 Stars 4 Stars 3 Stars 2 Stars 1 Star No reviews
  • Author: Sue
  • Prep Time: 5 minutes
  • Cook Time: 10 minutes
  • Total Time: 15 minutes
  • Yield: 8 pizza bombs
  • Category: Snack
  • Method: Air Fryer
  • Cuisine: American
  • Diet: Halal
Print Recipe
Pin Recipe

Description

These Air Fryer Pizza Bombs are gooey cheese and pepperoni wrapped in golden biscuit dough and air fried to perfection. Perfect as a snack, appetizer, or quick meal, and easily customizable with your favorite fillings.


Ingredients

  • 1 can refrigerated biscuit dough (like Pillsbury Grands)
  • 8 cubes mozzarella cheese
  • 16 slices pepperoni
  • Pizza sauce, for dipping (optional)
  • 2 tbsp olive oil or melted butter
  • 1 tsp garlic powder
  • 1 tsp Italian seasoning
  • 2 tbsp grated Parmesan cheese

Instructions

  1. Preheat air fryer to 350°F (175°C).
  2. Separate the biscuit dough and slightly flatten each piece.
  3. Place a cube of mozzarella and 2 slices of pepperoni in the center of each dough round.
  4. Fold edges over the filling, pinch to seal, and shape into a ball.
  5. Brush each ball with olive oil or melted butter.
  6. Sprinkle garlic powder, Italian seasoning, and Parmesan cheese on top.
  7. Place in the air fryer basket without touching each other.
  8. Air fry for 8–10 minutes or until golden brown and cooked through.
  9. Serve warm with pizza sauce on the side for dipping.

Notes

  • Don't overfill the dough to prevent leaking.
  • Try different fillings like sausage, mushrooms, or veggies.
  • Store leftovers in an airtight container and reheat in the air fryer for 3–4 minutes.
  • Assemble ahead and refrigerate until ready to cook.
  • Freeze cooked pizza bombs and reheat straight from frozen in the air fryer.

Nutrition

  • Serving Size: 1 pizza bomb
  • Calories: 180
  • Sugar: 1g
  • Sodium: 390mg
  • Fat: 11g
  • Saturated Fat: 5g
  • Unsaturated Fat: 5g
  • Trans Fat: 0g
  • Carbohydrates: 14g
  • Fiber: 1g
  • Protein: 6g
  • Cholesterol: 20mg

Have you made this recipe? I'd love to see it!

Click here to Follow me on Pinterest

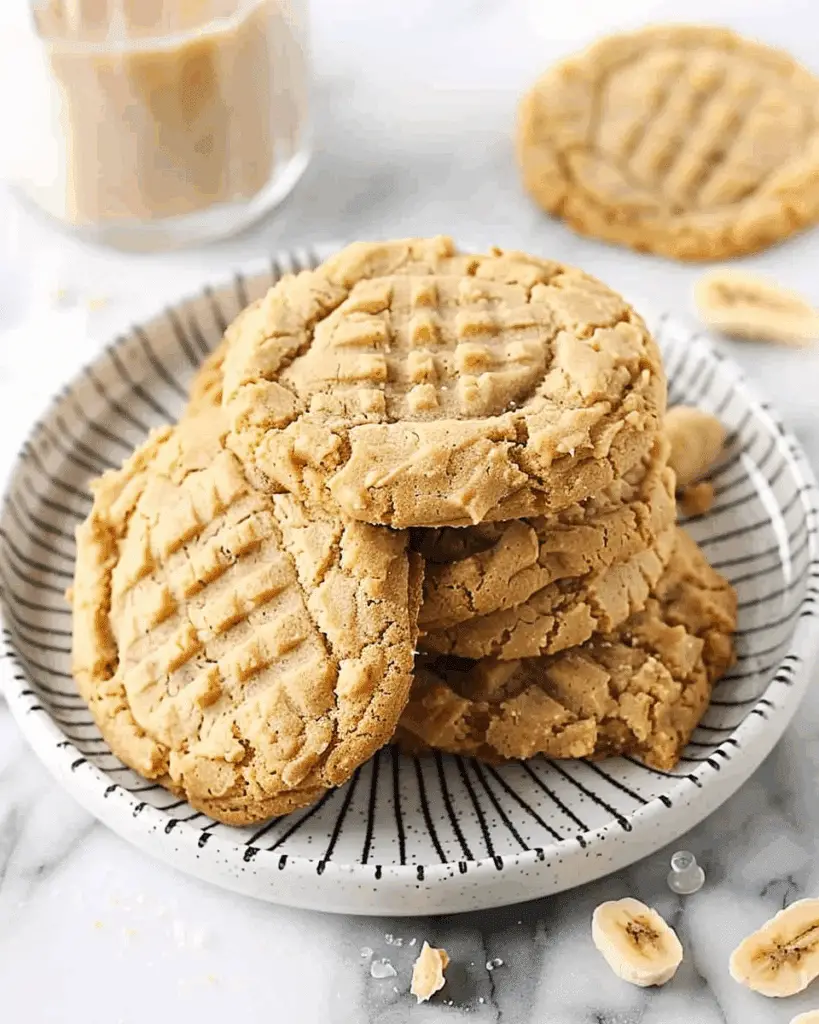
Peanut Butter Banana Cookies

July 13, 2025 by Sue Leave a Comment

These peanut butter banana cookies are soft, chewy, and packed with rich peanut butter flavor and the natural sweetness of ripe bananas. I love how quick and simple they are to make, using basic pantry ingredients for a wholesome, comforting treat. Whether for a midday snack or a sweet bite after dinner, these cookies always hit the spot. Peanut Butter Banana Cookies

Why You’ll Love This Recipe

I enjoy how this recipe brings together the classic combination of peanut butter and banana in cookie form. The cookies are naturally sweet, with no need for a ton of added sugar thanks to the ripe bananas. They’re also wonderfully soft in texture, a little chewy, and not overly dense. It’s a great way to use up overripe bananas, and I can make these in under 30 minutes with minimal cleanup. They’re also perfect for kids and make a great lunchbox treat.

Ingredients

(Here's a tip: Check out the full list of ingredients and measurements in the recipe card below.)

  • Ripe bananas

  • Peanut butter (creamy or chunky, depending on preference)

  • Brown sugar

  • All-purpose flour

  • Baking soda

  • Salt

  • Vanilla extract

  • Optional: chocolate chips or chopped nuts for added texture

Directions

  1. I start by preheating my oven to 350°F (175°C) and lining a baking sheet with parchment paper.

  2. In a large bowl, I mash the ripe bananas until smooth.

  3. I add peanut butter, brown sugar, and vanilla extract to the mashed bananas and mix until everything is well combined.

  4. In a separate bowl, I whisk together the flour, baking soda, and salt.

  5. I gradually stir the dry ingredients into the banana mixture until a dough forms.

  6. If I’m using chocolate chips or nuts, I fold them in at this point.

  7. I scoop tablespoon-sized portions of dough onto the prepared baking sheet, leaving space between each one.

  8. I bake the cookies for about 10–12 minutes, until the edges are golden brown and the centers are set.

  9. Once baked, I let them cool on the pan for a few minutes before transferring them to a wire rack to cool completely.

Servings and timing

This recipe yields about 18 to 20 cookies. The total time needed is approximately 25 minutes, including 10 minutes for prep and 12–15 minutes for baking.

Variations

I sometimes switch things up by adding mini chocolate chips for a bit of indulgence or chopped walnuts for a little crunch. If I want to keep them gluten-free, I substitute the all-purpose flour with a gluten-free flour blend. For an extra flavor boost, a sprinkle of cinnamon in the dough adds a cozy touch.

Storage/Reheating

I store the cookies in an airtight container at room temperature for up to 4 days. If I want to keep them longer, I freeze them in a zip-top bag for up to 2 months. To reheat, I pop a cookie in the microwave for about 10–15 seconds to bring back its soft texture.

FAQs

How ripe should the bananas be for this recipe?

The bananas should be very ripe, with lots of brown spots on the peel. The riper they are, the sweeter and more flavorful the cookies will be.

Can I use natural peanut butter?

Yes, but I make sure it's well-stirred so there's no separation. Natural peanut butter tends to be oilier and may change the texture slightly, but it still works well.

Are these cookies suitable for people with gluten allergies?

If I use a certified gluten-free flour blend instead of all-purpose flour, these cookies can be made gluten-free.

Can I make these cookies vegan?

Yes, this recipe is naturally vegan if the chocolate chips I use are dairy-free. There are no eggs or dairy products in the basic recipe.

How do I keep the cookies from spreading too much?

To avoid too much spreading, I chill the dough for 20–30 minutes before baking or make sure I’m not using overly soft or warm peanut butter.

Conclusion

Peanut butter banana cookies are a comforting, quick, and satisfying treat that I can whip up anytime I have ripe bananas on hand. The combination of nutty richness and natural sweetness makes them a go-to snack in my kitchen. Whether I stick to the classic version or mix in some extras, they always come out soft, flavorful, and delicious.

Print

clock clock iconcutlery cutlery iconflag flag iconfolder folder iconinstagram instagram iconpinterest pinterest iconfacebook facebook iconprint print iconsquares squares iconheart heart iconheart solid heart solid icon
Peanut Butter Banana Cookies

Peanut Butter Banana Cookies

5 Stars 4 Stars 3 Stars 2 Stars 1 Star No reviews
  • Author: Sue
  • Prep Time: 10 minutes
  • Cook Time: 12–15 minutes
  • Total Time: 25 minutes
  • Yield: 18–20 cookies
  • Category: Dessert
  • Method: Baking
  • Cuisine: American
  • Diet: Vegan
Print Recipe
Pin Recipe

Description

Soft, chewy peanut butter banana cookies that are naturally sweetened with ripe bananas and quick to make using pantry staples.


Ingredients

  • 2 ripe bananas, mashed
  • 1 cup peanut butter (creamy or chunky)
  • ½ cup brown sugar
  • 1 cup all-purpose flour
  • ½ tsp baking soda
  • ¼ tsp salt
  • 1 tsp vanilla extract
  • Optional: ½ cup chocolate chips or chopped nuts

Instructions

  1. Preheat oven to 350°F (175°C) and line a baking sheet with parchment paper.
  2. Mash the ripe bananas in a large bowl until smooth.
  3. Add peanut butter, brown sugar, and vanilla extract to the mashed bananas and mix well.
  4. In a separate bowl, whisk together flour, baking soda, and salt.
  5. Gradually stir the dry ingredients into the banana mixture until a dough forms.
  6. Fold in chocolate chips or nuts if using.
  7. Scoop tablespoon-sized portions of dough onto the baking sheet, spacing them apart.
  8. Bake for 10–12 minutes, until edges are golden and centers are set.
  9. Cool on the pan for a few minutes, then transfer to a wire rack to cool completely.

Notes

  • Use very ripe bananas for best flavor and sweetness.
  • Chill the dough for 20–30 minutes to reduce spreading.
  • Store in an airtight container for up to 4 days or freeze for up to 2 months.
  • Use gluten-free flour for a gluten-free version.
  • Ensure chocolate chips are dairy-free for a vegan version.

Nutrition

  • Serving Size: 1 cookie
  • Calories: 120
  • Sugar: 6g
  • Sodium: 80mg
  • Fat: 7g
  • Saturated Fat: 1g
  • Unsaturated Fat: 5g
  • Trans Fat: 0g
  • Carbohydrates: 12g
  • Fiber: 1g
  • Protein: 3g
  • Cholesterol: 0mg

Have you made this recipe? I'd love to see it!

Click here to Follow me on Pinterest

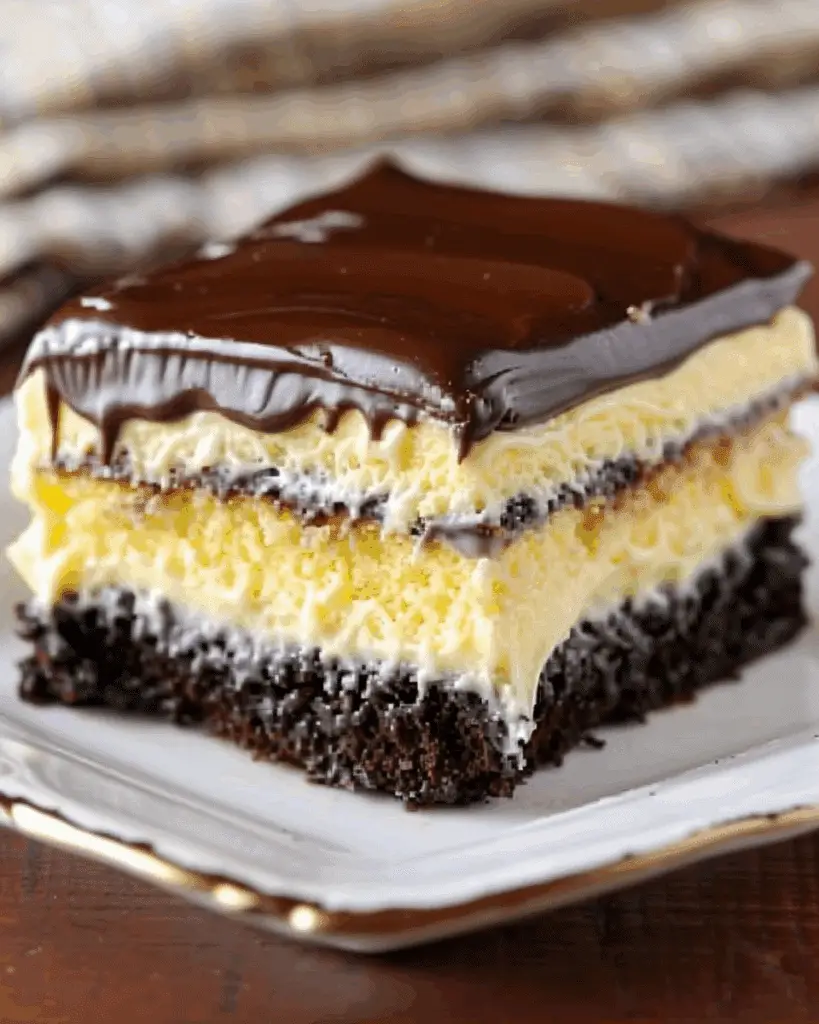
Boston Cream Poke Cake Recipe

July 13, 2025 by Sue Leave a Comment

This Boston Cream Poke Cake is a delicious twist on the classic dessert, combining soft yellow cake, creamy vanilla pudding, and a rich chocolate ganache topping. It’s a simple, semi-homemade recipe that delivers big on flavor and nostalgia. Every bite has that irresistible cream-filled chocolatey taste that makes Boston cream pie so beloved—only this version is much easier to make. Boston Cream Poke Cake Recipe

Why You’ll Love This Recipe

I love how incredibly simple it is to make with just a few store-bought ingredients. The cake is ultra moist because the pudding soaks right into the holes, creating a luscious texture. It’s perfect for entertaining or potlucks since it can be made ahead of time and travels well. The chocolate ganache topping adds that perfect touch of decadence without being too fussy.

ingredients

(Here's a tip: Check out the full list of ingredients and measurements in the recipe card below.)

  • Yellow cake mix (plus ingredients needed to make it: eggs, oil, water)

  • Instant vanilla pudding mix

  • Cold milk

  • Heavy cream

  • Semi-sweet chocolate chips

  • Butter

directions

  1. I start by baking the yellow cake according to the box instructions in a 9x13-inch baking dish. Once baked, I let it cool for about 10 minutes.

  2. Using the handle of a wooden spoon, I poke holes all over the warm cake, spacing them about 1 inch apart.

  3. In a mixing bowl, I whisk together the instant vanilla pudding mix with cold milk until it starts to thicken, then immediately pour it over the cake, making sure it seeps into the holes.

  4. I gently smooth the pudding across the top of the cake with a spatula and then refrigerate it for at least 1 hour to set.

  5. For the ganache, I heat the heavy cream in a small saucepan until just about to boil, then pour it over the chocolate chips and butter in a bowl. I let it sit for a minute, then stir until smooth and glossy.

  6. Once the cake is chilled, I pour the ganache over the top and spread it evenly. I refrigerate again until the ganache is set, at least another hour.

Servings and timing

This Boston Cream Poke Cake serves 12 people. It takes about 15 minutes of prep time, 30 minutes of baking, and at least 2 hours of chilling, making it perfect to prepare ahead of time for a stress-free dessert.

Variations

  • I sometimes use French vanilla or cheesecake-flavored pudding for a slight twist.

  • For a richer flavor, I’ve also swapped yellow cake for butter golden cake mix.

  • If I want to keep it completely homemade, I bake a scratch-made sponge cake instead of using a mix.

  • I’ve even added a layer of sliced bananas under the pudding for a banana cream version—it’s a fun take!

storage/reheating

I store any leftovers covered in the refrigerator for up to 4 days. The cake actually gets better as it sits, since the flavors continue to meld. I don’t recommend freezing it because the pudding and ganache can change texture. I serve it cold or let it sit at room temperature for 10–15 minutes before serving—no need to reheat.

FAQs

What kind of cake mix works best for Boston Cream Poke Cake?

I always go with a classic yellow cake mix, but butter golden or even vanilla cake mix works well too.

Can I use cook-and-serve pudding instead of instant?

I recommend sticking with instant pudding because it sets quickly and fills the cake holes perfectly.

How far in advance can I make this cake?

I usually make it a day ahead. It holds up beautifully in the fridge overnight and tastes even better the next day.

Do I need to cover the cake while it's chilling?

Yes, I loosely cover it with plastic wrap or foil to prevent it from absorbing fridge odors and to keep the texture moist.

Can I use milk chocolate instead of semi-sweet for the ganache?

Absolutely! I’ve used milk chocolate when I want a sweeter topping, but I find semi-sweet gives a nice balance.

Conclusion

This Boston Cream Poke Cake is the perfect mix of easy and indulgent. I love how it captures the flavor of a bakery-style dessert with hardly any effort. Whether I’m making it for a party, a birthday, or just because I’m craving something creamy and chocolatey, it’s always a hit. It’s a must-try for any dessert lover who wants something comforting and crowd-pleasing without spending hours in the kitchen.

Print

clock clock iconcutlery cutlery iconflag flag iconfolder folder iconinstagram instagram iconpinterest pinterest iconfacebook facebook iconprint print iconsquares squares iconheart heart iconheart solid heart solid icon
Boston Cream Poke Cake Recipe

Boston Cream Poke Cake Recipe

5 Stars 4 Stars 3 Stars 2 Stars 1 Star No reviews
  • Author: Sue
  • Prep Time: 15 minutes
  • Cook Time: 30 minutes
  • Total Time: 2 hours 45 minutes
  • Yield: 12 servings
  • Category: Dessert
  • Method: Baking
  • Cuisine: American
  • Diet: Vegetarian
Print Recipe
Pin Recipe

Description

This Boston Cream Poke Cake is a simplified take on the classic Boston cream pie, featuring moist yellow cake, creamy vanilla pudding filling, and a rich chocolate ganache topping.


Ingredients

  • 1 box yellow cake mix (plus ingredients listed on the box: eggs, oil, water)
  • 1 (5.1 oz) box instant vanilla pudding mix
  • 3 cups cold milk
  • 1 cup heavy cream
  • 1 cup semi-sweet chocolate chips
  • 2 tablespoons butter

Instructions

  1. Preheat oven and prepare yellow cake according to box instructions in a 9x13-inch baking dish. Bake and let cool for 10 minutes.
  2. Use the handle of a wooden spoon to poke holes all over the warm cake, spaced about 1 inch apart.
  3. Whisk instant vanilla pudding mix with cold milk until it thickens slightly. Immediately pour over the cake, making sure it fills the holes.
  4. Gently smooth the pudding across the top and refrigerate for at least 1 hour to set.
  5. To make ganache, heat heavy cream in a saucepan until just about to boil. Pour over chocolate chips and butter in a bowl. Let sit 1 minute, then stir until smooth and glossy.
  6. Pour ganache over chilled cake and spread evenly. Refrigerate for another hour or until ganache is set.

Notes

  • Use French vanilla or cheesecake pudding for a flavor variation.
  • Butter golden cake mix can replace yellow cake mix for a richer flavor.
  • Sliced bananas can be added under the pudding for a banana cream version.
  • Store leftovers covered in the fridge for up to 4 days.
  • Do not freeze; pudding and ganache texture may change.

Nutrition

  • Serving Size: 1 slice
  • Calories: 350
  • Sugar: 26g
  • Sodium: 320mg
  • Fat: 18g
  • Saturated Fat: 10g
  • Unsaturated Fat: 6g
  • Trans Fat: 0g
  • Carbohydrates: 42g
  • Fiber: 1g
  • Protein: 4g
  • Cholesterol: 45mg

Have you made this recipe? I'd love to see it!

Click here to Follow me on Pinterest

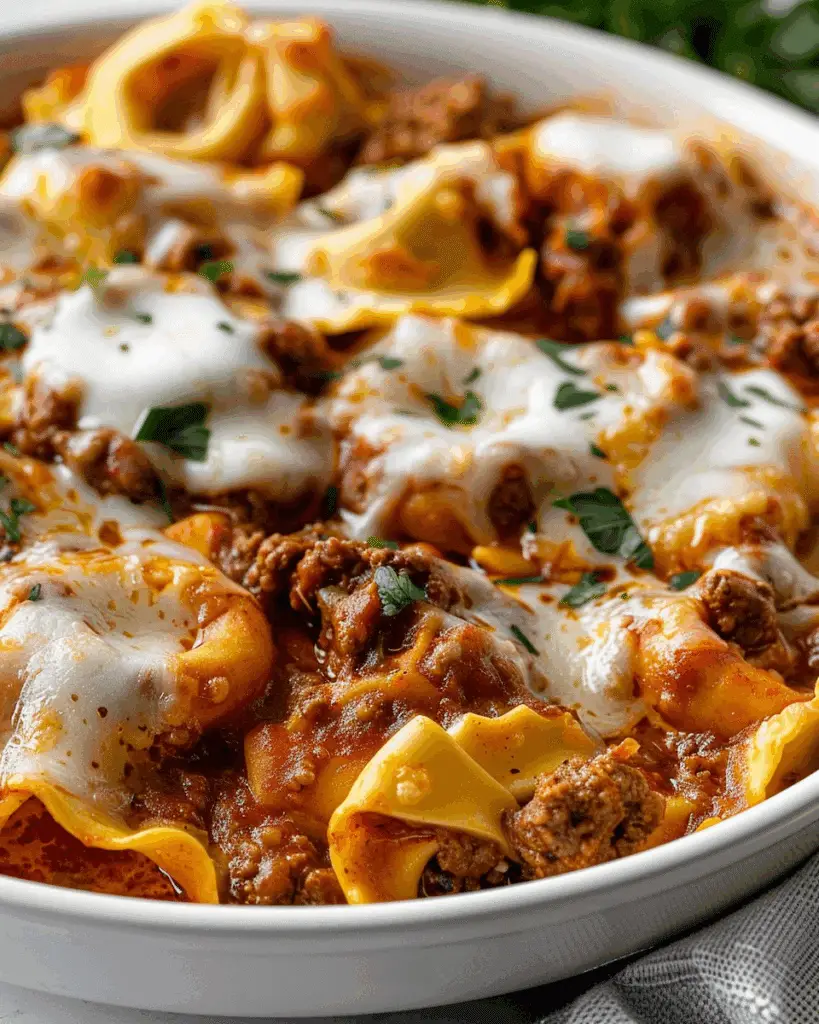
Cheesy Beef Enchilada Tortellini

July 13, 2025 by Sue Leave a Comment

I love how this dish blends the bold flavors of enchiladas with creamy cheese tortellini for a quick one‑pot dinner that’s hearty, comforting, and ready in under 30 minutes. Cheesy Beef Enchilada Tortellini

Why You’ll Love This Recipe

I’m always drawn to recipes that come together fast without sacrificing flavor, and this one fits the bill. The savory ground beef seasoned with classic Tex‑Mex spices melds beautifully with cheesy tortellini in a rich enchilada sauce. It’s comforting, hearty, and my family requests it on repeat—it even works great as a twist on Taco Tuesday.

Ingredients

(Here's a tip: Check out the full list of ingredients and measurements in the recipe card below.)

  • 1 lb ground beef

  • 1 small onion, finely chopped

  • 1 tablespoon minced garlic

  • ½ teaspoon salt & pepper

  • 1 teaspoon chili powder

  • 1 teaspoon cumin

  • (Optional) ¼ teaspoon cayenne or extra chili powder for heat

  • 1 (10–15 oz) can mild enchilada sauce

  • 1 cup salsa or Rotel (diced tomatoes & chiles)

  • 9–19 oz cheese tortellini (refrigerated, frozen, or dried as preferred)

  • 1 cup shredded cheese (Mexican blend, Monterey Jack, or cheddar)

  • Sour cream, cilantro, green onions for garnish

Directions

  1. I brown the ground beef in a large skillet over medium‑high heat, stirring to crumble.

  2. I add the onion and garlic and cook until translucent, about 3–4 minutes. If needed, I drain the excess fat.

  3. I season the beef with salt, pepper, chili powder, cumin, and cayenne if I want extra heat.

  4. I pour in the enchilada sauce and salsa or Rotel, then bring it all to a simmer.

  5. I stir in the tortellini—if using frozen or dry, I add a splash of water and let it simmer until the pasta is tender, about 5–7 minutes.

  6. I stir in shredded cheese and cover the skillet until the cheese is melted. Sometimes I broil it for 2–3 minutes for a golden top.

  7. I finish by garnishing with sour cream, chopped cilantro, and green onions before serving.

Servings and timing

This dish makes about 4 to 6 servings. It takes around 5 minutes to prep and about 20 to 25 minutes to cook, making it a quick and satisfying weeknight dinner in under 30 minutes.

Variations

  • Spicy twist: I add jalapeños or use a hot enchilada sauce to kick up the heat.

  • Veggie boost: I like tossing in corn, black beans, or diced bell peppers for extra flavor and nutrients.

  • Protein swap: Ground turkey or shredded chicken works great instead of beef.

  • Cheese options: I sometimes use Pepper Jack for a spicy kick or mozzarella for extra creaminess.

Storage/Reheating

I store leftovers in an airtight container in the refrigerator for up to 4 days. To reheat, I warm it on the stovetop over low heat or microwave it with a splash of water or broth to keep the sauce creamy. If I want to freeze it, I let it cool completely first and store it in freezer-safe containers for up to 2 months.

FAQs

1. Can I use dry tortellini instead of fresh or frozen?

Yes, I can. I just make sure to add a bit more liquid and simmer longer so the pasta cooks fully.

2. Is this recipe spicy?

Not by default. I use mild enchilada sauce to keep it family-friendly, but I can easily add cayenne, hot sauce, or spicy salsa if I want to turn up the heat.

3. Can I cook the tortellini in the skillet instead of boiling it separately?

Absolutely. I usually cook everything in one pot for convenience. I just add a splash of water or broth and let the tortellini simmer right in the sauce until it’s tender.

4. How do I freeze or make this dish ahead?

I often make the beef and sauce base ahead and refrigerate or freeze it. When I’m ready to eat, I reheat it, stir in tortellini, and finish with cheese and toppings.

5. Can I add more vegetables to this dish?

Yes, I like adding bell peppers, corn, or spinach to bulk it up and add color and texture.

Conclusion

This Cheesy Beef Enchilada Tortellini is a go-to for me when I need something fast, filling, and full of flavor. It hits the spot every time with its melty cheese, bold spices, and tender pasta. Whether I make it as-is or put my own spin on it, it’s always a hit at the dinner table.

Print

clock clock iconcutlery cutlery iconflag flag iconfolder folder iconinstagram instagram iconpinterest pinterest iconfacebook facebook iconprint print iconsquares squares iconheart heart iconheart solid heart solid icon
Cheesy Beef Enchilada Tortellini

Cheesy Beef Enchilada Tortellini

5 Stars 4 Stars 3 Stars 2 Stars 1 Star No reviews
  • Author: Sue
  • Prep Time: 5 minutes
  • Cook Time: 20–25 minutes
  • Total Time: 30 minutes
  • Yield: 4–6 servings
  • Category: Main Course
  • Method: Skillet
  • Cuisine: Tex-Mex
  • Diet: Halal
Print Recipe
Pin Recipe

Description

A quick and hearty one-pot dinner combining cheesy tortellini with seasoned ground beef and enchilada sauce, ready in under 30 minutes.


Ingredients

  • 1 lb ground beef
  • 1 small onion, finely chopped
  • 1 Tbsp minced garlic
  • ½ tsp salt & pepper
  • 1 tsp chili powder
  • 1 tsp cumin
  • ¼ tsp cayenne or extra chili powder (optional)
  • 1 (10–15 oz) can mild enchilada sauce
  • 1 cup salsa or Rotel (diced tomatoes & chiles)
  • 9–19 oz cheese tortellini (refrigerated, frozen, or dried)
  • 1 cup shredded cheese (Mexican blend, Monterey Jack, or cheddar)
  • Sour cream, cilantro, green onions for garnish

Instructions

  1. Brown the ground beef in a large skillet over medium-high heat, stirring to crumble. Add the onion and garlic; cook until translucent, about 3–4 minutes. Drain excess fat if needed.
  2. Season with salt, pepper, chili powder, cumin, and optional cayenne. Stir to combine.
  3. Pour in the enchilada sauce and salsa/Rotel; bring to a simmer.
  4. If using frozen or dried tortellini, either cook separately according to package directions or add directly to the skillet with a splash of water or broth and simmer until tender (≈5 minutes).
  5. Once the tortellini is al dente and the sauce has thickened, stir in shredded cheese and cover until melted, or broil for 2–3 minutes.
  6. Remove from heat, top with sour cream, cilantro, and green onions. Serve warm.

Notes

  • Use mild enchilada sauce for a less spicy dish.
  • Refrigerated tortellini cook faster and absorb flavor well.
  • Add beans, corn, or bell peppers for extra nutrition.
  • Leftovers store well for up to 5 days in the fridge.

Nutrition

  • Serving Size: 1 serving
  • Calories: 480
  • Sugar: 6g
  • Sodium: 970mg
  • Fat: 24g
  • Saturated Fat: 10g
  • Unsaturated Fat: 12g
  • Trans Fat: 0.5g
  • Carbohydrates: 38g
  • Fiber: 4g
  • Protein: 28g
  • Cholesterol: 75mg

Have you made this recipe? I'd love to see it!

Click here to Follow me on Pinterest

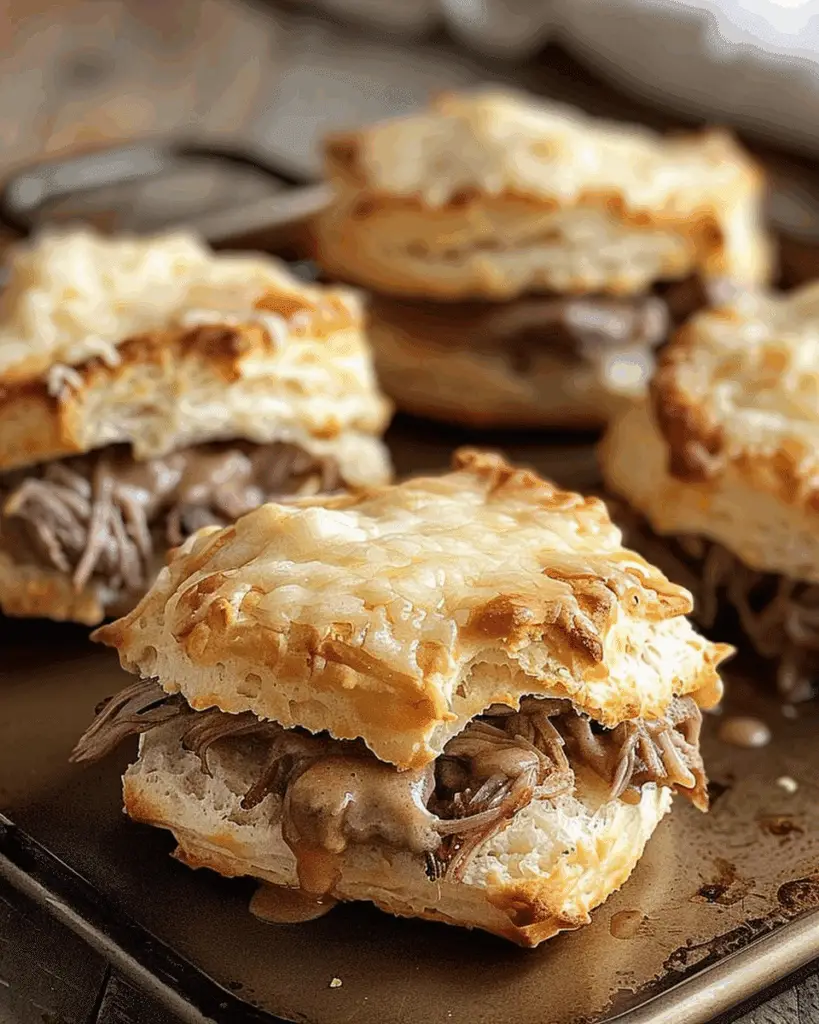
Baked French Dip Biscuits: A Savory Delight

July 13, 2025 by Sue Leave a Comment

I adore these Baked French Dip Biscuits—they’re mini, handheld pockets filled with tender roast beef and gooey provolone, all wrapped in buttery biscuit dough. With a side of warm beef broth for dipping, they’re savory perfection in every bite.

Baked French Dip Biscuits: A Savory Delight

Why You’ll Love This Recipe

I love how easy and satisfying these biscuits are. They capture the comforting flavors of a classic French dip sandwich in a convenient, fun-to-eat form. Whether I’m feeding a crowd or treating myself to a cozy meal, they disappear fast—which is always a good sign.

ingredients

(Here's a tip: Check out the full list of ingredients and measurements in the recipe card below.)

  • 1 can (16.3 oz) refrigerated biscuit dough

  • 8 slices deli roast beef

  • 8 slices provolone cheese

  • ¼ cup butter, melted

  • 1 tablespoon Worcestershire sauce

  • 1 teaspoon garlic powder

  • 1 teaspoon onion powder

  • ½ teaspoon dried thyme

  • ½ teaspoon dried rosemary

  • ½ teaspoon salt

  • ½ teaspoon black pepper

  • 1 cup beef broth

directions

  1. Preheat the oven to 350°F (175°C).

  2. Separate and slightly flatten the 8 biscuits.

  3. Place a slice of roast beef and provolone on each biscuit.

  4. Fold the dough over the filling and pinch to seal into balls.

  5. Arrange seam-side down in a greased baking dish.

  6. Combine melted butter with Worcestershire sauce, garlic powder, onion powder, thyme, rosemary, salt, and pepper.

  7. Brush this flavorful mixture over the biscuits.

  8. Bake for 20–25 minutes until golden brown.

  9. Warm the beef broth and serve it in a small bowl for dipping.

Servings and timing

This recipe makes 8 servings. Prep time is about 10 minutes, and baking takes around 20–25 minutes, so everything is ready in roughly 35 minutes.

Variations

  • I sometimes add a slice of jalapeño or a splash of hot sauce for a spicy version.

  • Switching up the cheese—cheddar, Swiss, or pepper jack—gives the biscuits a whole new flavor profile.

  • For a vegetarian option, I replace the roast beef with sautéed mushrooms and caramelized onions.

  • These can be assembled in advance and baked later, which is perfect for entertaining.

storage/reheating

I keep leftovers in an airtight container in the fridge for up to 3 days. When reheating, I prefer using the oven at 350°F for 8–10 minutes to keep them crispy. For a quick option, the microwave works too—just 30 to 45 seconds per biscuit. The beef broth can be gently reheated on the stove or in the microwave.

FAQs

What can I use instead of canned biscuit dough?

I like using homemade or frozen biscuit dough if I have extra time. Just shape it into rounds before stuffing.

Can I freeze these biscuits?

Yes, I freeze them before baking. When I’m ready to serve, I bake them straight from the freezer, adding a few extra minutes to the cook time.

Is there a gluten-free version?

Sure—I use gluten-free biscuit dough and make sure all other ingredients, like the Worcestershire sauce and beef broth, are also gluten-free.

Can I make these ahead of time for guests?

Absolutely. I prepare and assemble them, cover, and refrigerate for up to a day in advance. Then I bake them fresh when it’s time to serve.

How do I reheat them without drying them out?

I reheat them in the oven at 350°F for about 10 minutes to bring back that golden crisp. The microwave works, but the biscuits tend to get soft.

Conclusion

These Baked French Dip Biscuits are one of my favorite go-to comfort foods. They're easy to make, packed with flavor, and ideal for feeding a group or just treating myself to something special. The warm dip ties it all together, making each bite a cozy, satisfying experience.

Print

clock clock iconcutlery cutlery iconflag flag iconfolder folder iconinstagram instagram iconpinterest pinterest iconfacebook facebook iconprint print iconsquares squares iconheart heart iconheart solid heart solid icon
Baked French Dip Biscuits: A Savory Delight

Baked French Dip Biscuits: A Savory Delight

5 Stars 4 Stars 3 Stars 2 Stars 1 Star No reviews
  • Author: Sue
  • Prep Time: 10 minutes
  • Cook Time: 25 minutes
  • Total Time: 35 minutes
  • Yield: 8 servings
  • Category: Appetizer
  • Method: Baking
  • Cuisine: American
  • Diet: Halal
Print Recipe
Pin Recipe

Description

Mini handheld biscuits filled with tender roast beef and gooey provolone cheese, wrapped in buttery dough and served with a side of warm beef broth for dipping.


Ingredients

  • 1 can (16.3 oz) refrigerated biscuit dough
  • 8 slices deli roast beef
  • 8 slices provolone cheese
  • ¼ cup butter, melted
  • 1 tbsp Worcestershire sauce
  • 1 tsp garlic powder
  • 1 tsp onion powder
  • ½ tsp dried thyme
  • ½ tsp dried rosemary
  • ½ tsp salt
  • ½ tsp black pepper
  • 1 cup beef broth

Instructions

  1. Preheat the oven to 350°F (175°C).
  2. Separate and slightly flatten the 8 biscuits.
  3. Place a slice of roast beef and provolone on each biscuit.
  4. Fold the dough over the filling and pinch to seal into balls.
  5. Arrange seam-side down in a greased baking dish.
  6. Combine melted butter with Worcestershire sauce, garlic powder, onion powder, thyme, rosemary, salt, and pepper.
  7. Brush this flavorful mixture over the biscuits.
  8. Bake for 20–25 minutes until golden brown.
  9. Warm the beef broth and serve it in a small bowl for dipping.

Notes

  • Can substitute biscuit dough with homemade or frozen dough.
  • Use different cheeses like Swiss, cheddar, or pepper jack for variety.
  • Vegetarian option: use sautéed mushrooms and onions instead of roast beef.
  • Prep ahead and refrigerate unbaked biscuits up to 24 hours in advance.
  • Reheat in oven to maintain crispness; microwave softens the texture.

Nutrition

  • Serving Size: 1 biscuit
  • Calories: 310
  • Sugar: 2g
  • Sodium: 750mg
  • Fat: 18g
  • Saturated Fat: 9g
  • Unsaturated Fat: 7g
  • Trans Fat: 0g
  • Carbohydrates: 24g
  • Fiber: 1g
  • Protein: 14g
  • Cholesterol: 45mg

Have you made this recipe? I'd love to see it!

Click here to Follow me on Pinterest

Garlic Mushrooms Cauliflower Skillet

July 12, 2025 by Sue Leave a Comment

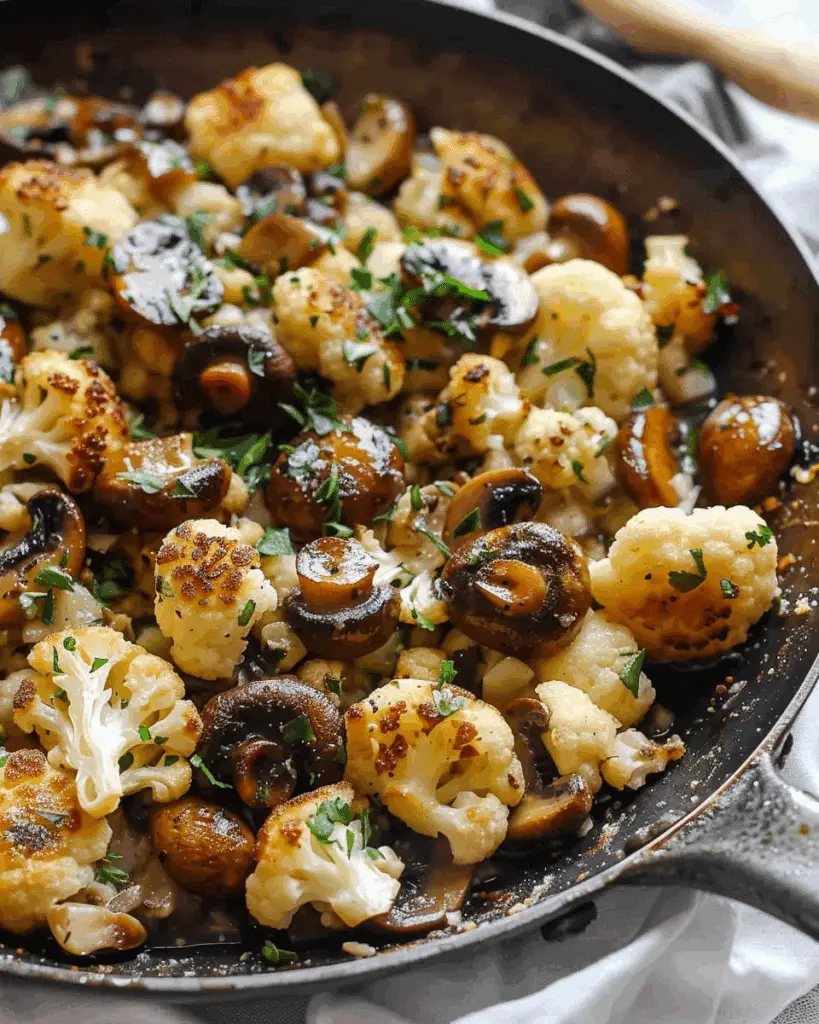
I love how this garlic butter skillet brings together earthy mushrooms and tender cauliflower in a buttery garlic sauce—ready in about 25 minutes and packed with flavor. Garlic Mushrooms Cauliflower Skillet

Why You’ll Love This Recipe

I find this dish irresistibly satisfying because:

  • It doubles as a hearty vegetarian main or a delicious side.

  • Everything cooks in a single pan—minimal cleanup.

  • The mushrooms caramelize so well they almost taste meaty.

  • It’s naturally low-carb and gluten-free.

  • The flavors are bold, buttery, and garlicky—everything I want in comfort food.

Ingredients

(Here's a tip: Check out the full list of ingredients and measurements in the recipe card below.)

  • 4 tablespoons unsalted butter (or ghee)

  • 1 tablespoon olive oil

  • ½ onion, chopped

  • ½ head cauliflower, cut into florets

  • 1 pound mushrooms, cleaned

  • 2 tablespoons low-sodium vegetable stock

  • 1 teaspoon fresh thyme leaves, chopped

  • 2 tablespoons fresh parsley, chopped

  • 4 cloves garlic, minced

  • ½ teaspoon salt and pepper, or to taste

Directions

  1. I melt the butter with olive oil in a large skillet over medium-high heat.

  2. I sauté the chopped onion for about 3 minutes until softened.

  3. I add the mushrooms and cook them for 4–5 minutes per side until they’re browned and have released their moisture.

  4. Then I stir in the cauliflower florets and let them cook for about 8–10 minutes until golden and slightly crispy on the edges.

  5. I pour in the vegetable stock and let it simmer for 2 minutes to reduce.

  6. I add the thyme, half of the parsley, and the minced garlic, cooking for about 30 seconds until fragrant.

  7. I season with salt and pepper to taste, sprinkle with the remaining parsley, and serve immediately.

Servings and timing

This recipe serves 4 people.
Prep time: 5 minutes
Cook time: 20 minutes
Total time: 25 minutes

Variations

  • Vegan option: I replace the butter with more olive oil or a plant-based margarine.

  • Add protein: I like to toss in some cooked chickpeas or white beans for a heartier dish.

  • Boost flavor: A squeeze of lemon juice or a sprinkle of Parmesan at the end adds a tasty twist.

  • Spicy kick: I sometimes add a pinch of red pepper flakes for a little heat.

  • Different herbs: I switch parsley and thyme with rosemary or basil for variety.

Storage/Reheating

I store leftovers in an airtight container in the refrigerator for up to 3 days.
To reheat, I warm the skillet on the stove with a splash of water or broth until heated through.
I avoid microwaving too long to keep the veggies from getting soggy.

FAQs

Can I use frozen cauliflower instead of fresh?

Yes, I’ve used frozen cauliflower before. I make sure to thaw and pat it dry before adding it to the skillet so it doesn’t steam too much.

What kind of mushrooms work best?

I usually go with cremini or white button mushrooms, but shiitake or portobello also work great if I want a deeper flavor.

Can I make this dish ahead of time?

Yes, I often prep the veggies earlier in the day and store them in the fridge. Then I just sauté everything when I’m ready to cook.

Is this dish keto-friendly?

Absolutely. Since it’s low in carbs and high in fats from butter and olive oil, it fits perfectly into a keto meal plan.

What can I serve this with?

I like to pair it with grilled chicken, quinoa, or serve it over mashed potatoes or rice for a complete meal.

Conclusion

This garlic mushrooms cauliflower skillet is my go-to when I want something fast, flavorful, and comforting without a lot of fuss. It’s full of texture, savory flavors, and comes together in one pan—perfect for busy weeknights or a cozy side dish.

Print

clock clock iconcutlery cutlery iconflag flag iconfolder folder iconinstagram instagram iconpinterest pinterest iconfacebook facebook iconprint print iconsquares squares iconheart heart iconheart solid heart solid icon
Garlic Mushrooms Cauliflower Skillet

Garlic Mushrooms Cauliflower Skillet

5 Stars 4 Stars 3 Stars 2 Stars 1 Star No reviews
  • Author: Sue
  • Prep Time: 5 minutes
  • Cook Time: 20 minutes
  • Total Time: 25 minutes
  • Yield: 4 servings
  • Category: Main Course
  • Method: Skillet
  • Cuisine: American
  • Diet: Vegetarian
Print Recipe
Pin Recipe

Description

A savory and satisfying vegetarian skillet dish featuring caramelized mushrooms and crispy cauliflower in a rich garlic butter sauce, ready in just 25 minutes.


Ingredients

  • 4 tablespoons unsalted butter (or ghee)
  • 1 tablespoon olive oil
  • ½ onion, chopped
  • ½ head cauliflower, cut into florets
  • 1 pound (500 g) mushrooms, cleaned
  • 2 tablespoons low‑sodium vegetable stock
  • 1 teaspoon fresh thyme leaves, chopped
  • 2 tablespoons fresh parsley, chopped
  • 4 cloves garlic, minced
  • ½ teaspoon salt and pepper, or to taste

Instructions

  1. In a large skillet over medium‑high heat, melt butter with olive oil. Sauté chopped onion until softened, about 3 minutes.
  2. Add mushrooms and cook 4–5 minutes per side, letting them brown and release moisture.
  3. Stir in cauliflower florets and cook until golden and crispy at the edges, about 8–10 minutes.
  4. Pour in vegetable stock and simmer for 2 minutes to reduce.
  5. Add thyme, half the parsley, and garlic; cook another 30 seconds until fragrant.
  6. Season with salt and pepper, sprinkle with remaining parsley, and serve immediately.

Notes

  • Use vegan butter or extra olive oil for a vegan option.
  • Add cooked barley or chickpeas for more substance.
  • Sprinkle with Parmesan or a squeeze of lemon for extra flavor.
  • Store leftovers in an airtight container in the fridge for up to 3 days.
  • Reheat in a skillet with a splash of water to loosen the sauce.

Nutrition

  • Serving Size: 1 serving
  • Calories: 180
  • Sugar: 3g
  • Sodium: 320mg
  • Fat: 14g
  • Saturated Fat: 7g
  • Unsaturated Fat: 6g
  • Trans Fat: 0g
  • Carbohydrates: 10g
  • Fiber: 3g
  • Protein: 4g
  • Cholesterol: 25mg

Have you made this recipe? I'd love to see it!

Click here to Follow me on Pinterest

Caramel Apple Cheesecake Bars

July 12, 2025 by Sue Leave a Comment

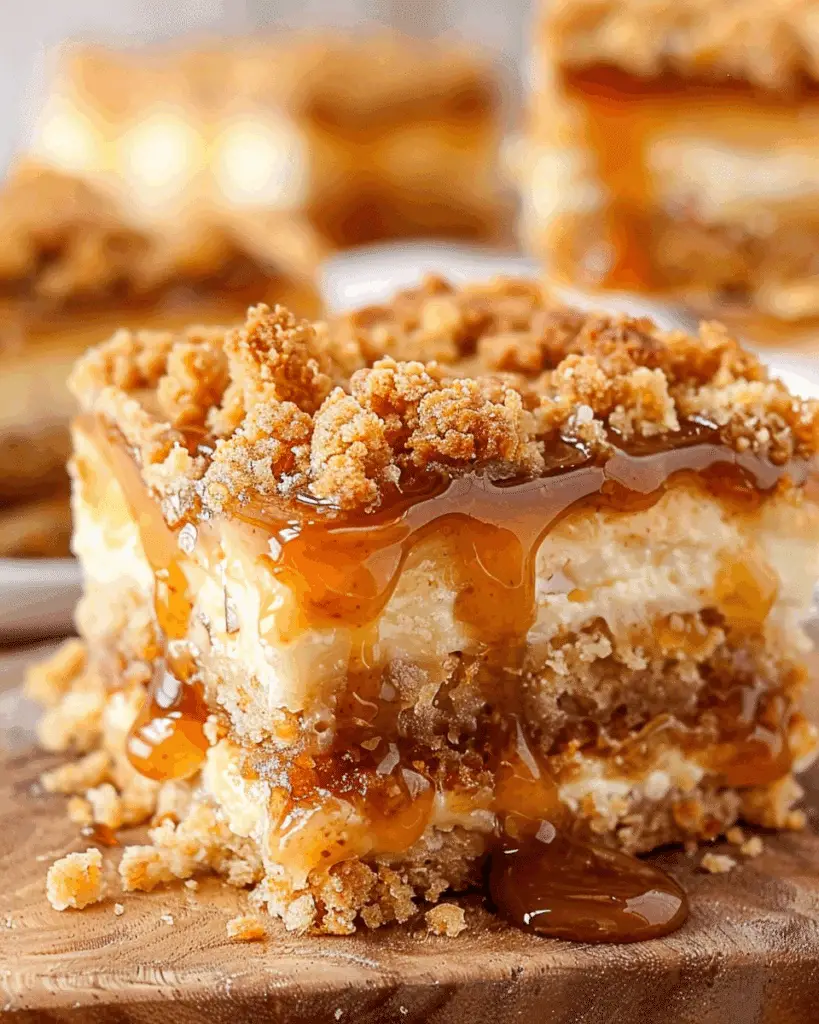
A decadent treat that combines the creaminess of cheesecake, the comforting warmth of baked apples, and the irresistible sweetness of caramel—all layered over a buttery graham cracker crust with a delicious crumb topping. These bars are everything I crave in a fall dessert and more.

Caramel Apple Cheesecake Bars

Why You’ll Love This Recipe

I love how these bars bring together all the best parts of a classic cheesecake and a homemade apple pie in one easy-to-make dessert. The layers add texture and depth: crisp crust, smooth cheesecake, tart-sweet apples, and a crumbly topping with a final drizzle of caramel. They’re ideal for holidays, potlucks, or just a cozy night in.

ingredients

(Here's a tip: Check out the full list of ingredients and measurements in the recipe card below.)

Graham Cracker Crust

  • graham crackers

  • granulated sugar

  • salted butter, melted

Apple Layer

  • apples (Granny Smith or similar), peeled, cored, and chopped

  • fresh lemon juice

  • granulated sugar

  • brown sugar

  • apple pie spice (or a mix of cinnamon and nutmeg)

  • salt

Cheesecake Layer

  • cream cheese, room temperature

  • powdered sugar

  • sour cream, room temperature

  • vanilla extract

  • large eggs

Crumb Topping

  • all-purpose flour

  • granulated sugar

  • brown sugar

  • old-fashioned oats

  • baking powder

  • apple pie spice

  • salt

  • unsalted butter, melted

Optional

  • caramel sauce for drizzling

directions

  1. Preheat the oven to 350°F and line a 9x13-inch pan with parchment paper or spray with nonstick spray.

  2. Crush the graham crackers into fine crumbs. Mix with sugar and melted butter. Press the mixture firmly into the prepared pan and freeze while preparing the other layers.

  3. In a bowl, toss the chopped apples with lemon juice, both sugars, apple pie spice, and salt. Set aside.

  4. In a large mixing bowl, beat the cream cheese and powdered sugar until smooth. Add sour cream and vanilla, then beat in eggs until just combined.

  5. In a separate bowl, stir together the flour, sugars, oats, baking powder, apple pie spice, and salt. Add the melted butter and stir until crumbly.

  6. Pour the cheesecake mixture over the prepared crust. Gently spoon the apple mixture on top of the cheesecake layer. Sprinkle the crumb topping evenly over the apples.

  7. Bake for 35–45 minutes, or until the edges are set and the center has a slight jiggle.

  8. Let the bars cool completely, then refrigerate for at least 6 hours or overnight. Slice into bars and drizzle with caramel sauce before serving.

Servings and timing

This recipe yields about 16 bars. Prep time takes approximately 30 minutes, baking time is 35 to 45 minutes, and chilling time is at least 6 hours. I find it best to chill overnight for clean slices and set layers.

Variations

  • I swap in honeycrisp or Fuji apples when I want a sweeter flavor.

  • Cinnamon graham crackers make a great twist on the crust.

  • A dash of sea salt in the caramel topping adds a salted caramel flavor.

  • For a tangier filling, I use Greek yogurt instead of sour cream.

  • Sometimes I add chopped pecans or walnuts to the crumb topping for extra crunch.

storage/reheating

I keep leftovers in an airtight container in the refrigerator for up to 4 days. To preserve the topping’s texture, I always drizzle the caramel sauce just before serving. I don’t recommend freezing the bars because the cheesecake and crumb topping tend to lose their texture after thawing.

FAQs

What kind of apples work best for this recipe?

I like using Granny Smith apples because they hold their shape and offer a nice tartness that balances the sweet cheesecake and caramel.

Can I use store-bought caramel sauce?

Yes, I often use a high-quality store-bought caramel sauce to save time, but homemade works just as well if I have it on hand.

How do I get clean cuts when slicing the bars?

I always chill the bars overnight and use a sharp knife wiped clean between cuts to get clean, neat squares.

Can I make this recipe in advance?

Yes, I usually prepare it the day before I need it. Chilling overnight improves the flavor and texture.

Do I need to peel the apples?

Yes, I recommend peeling the apples to keep the texture smooth and soft. The peel can become chewy after baking.

Conclusion

These Caramel Apple Cheesecake Bars bring comfort and indulgence together in one beautiful dessert. I love how the creamy, spiced, and crunchy layers create a memorable bite every time. Whether it’s for a special gathering or just a seasonal treat, this recipe always hits the mark.

Print

clock clock iconcutlery cutlery iconflag flag iconfolder folder iconinstagram instagram iconpinterest pinterest iconfacebook facebook iconprint print iconsquares squares iconheart heart iconheart solid heart solid icon
Caramel Apple Cheesecake Bars

Caramel Apple Cheesecake Bars

5 Stars 4 Stars 3 Stars 2 Stars 1 Star No reviews
  • Author: Sue
  • Prep Time: 30 minutes
  • Cook Time: 35–45 minutes
  • Total Time: 7 hours (including chill time)
  • Yield: 16 bars
  • Category: Dessert
  • Method: Baking
  • Cuisine: American
  • Diet: Vegetarian
Print Recipe
Pin Recipe

Description

A rich, multi-layered dessert that features a buttery graham cracker crust, creamy cheesecake, spiced apple filling, and a crumbly oat topping, finished with a luscious caramel drizzle—perfect for fall gatherings.


Ingredients

  • 12 graham crackers, crushed
  • ¼ cup granulated sugar (for crust)
  • ½ cup salted butter, melted (for crust)
  • 3 medium Granny Smith apples, peeled, cored, and chopped
  • 1 tbsp fresh lemon juice
  • 2 tbsp granulated sugar (for apple layer)
  • 2 tbsp brown sugar (for apple layer)
  • 1 tsp apple pie spice (or substitute)
  • ¼ tsp salt (for apple layer)
  • 16 oz cream cheese, full-fat, room temperature
  • ¾ cup powdered sugar
  • ¼ cup sour cream, full-fat, room temperature
  • 1 tsp vanilla extract
  • 2 large eggs, room temperature
  • ¾ cup all-purpose flour
  • ¼ cup granulated sugar (for crumb)
  • ¼ cup brown sugar (for crumb)
  • ½ cup old fashioned oats
  • ½ tsp baking powder
  • ½ tsp apple pie spice (or substitute)
  • ¼ tsp salt (for crumb)
  • 6 tbsp unsalted butter, melted
  • Caramel sauce for drizzling (optional)

Instructions

  1. Preheat oven to 350°F (175°C) and line a 9×13 inch pan with parchment paper or spray with nonstick spray.
  2. For the crust: Crush graham crackers, mix with sugar and melted butter, press firmly into the prepared pan, and freeze while you prepare the next layers.
  3. For the apple layer: Toss chopped apples with lemon juice, sugars, spice, and salt. Set aside.
  4. For the cheesecake layer: Beat cream cheese and powdered sugar until smooth. Add sour cream and vanilla extract. Beat in eggs one at a time until just combined.
  5. For the crumb topping: Mix flour, sugars, oats, baking powder, spice, and salt. Stir in melted butter until crumbly.
  6. Assemble: Spread cheesecake mixture over the crust. Gently layer apple mixture on top. Sprinkle with crumb topping.
  7. Bake for 35–45 minutes, until edges are set and center slightly jiggles. Let cool completely.
  8. Chill in refrigerator for at least 6 hours or overnight for best results.
  9. Cut into bars and drizzle with caramel sauce before serving.

Notes

  • Use Granny Smith apples for a tart contrast or swap for sweeter varieties like Fuji.
  • Substitute apple pie spice with pumpkin pie spice or cinnamon and nutmeg.
  • Drizzle caramel only when serving to maintain crumb texture.
  • Store bars in the fridge for up to 4 days in an airtight container.
  • Do not freeze, as it affects texture.

Nutrition

  • Serving Size: 1 bar
  • Calories: 320
  • Sugar: 24g
  • Sodium: 180mg
  • Fat: 19g
  • Saturated Fat: 11g
  • Unsaturated Fat: 6g
  • Trans Fat: 0g
  • Carbohydrates: 35g
  • Fiber: 1g
  • Protein: 4g
  • Cholesterol: 65mg

Have you made this recipe? I'd love to see it!

Click here to Follow me on Pinterest

Creamy Garlic Shrimp With Parmesan

July 12, 2025 by Sue Leave a Comment

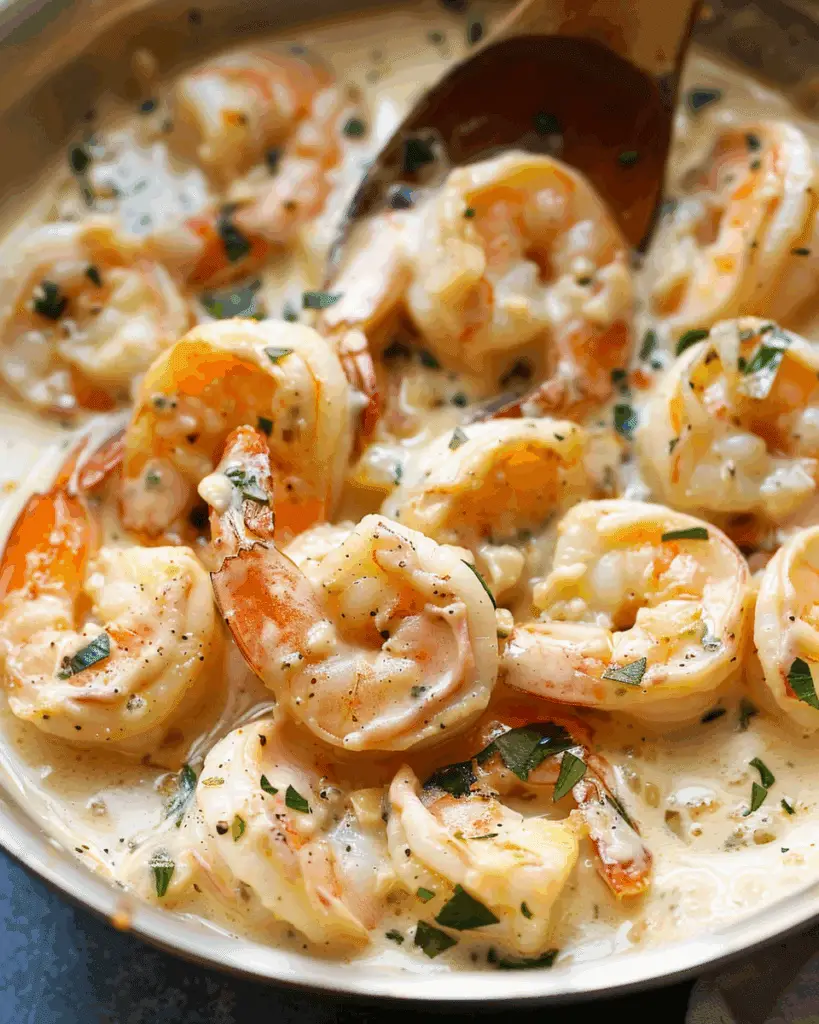
I whipped together this Creamy Garlic Shrimp with Parmesan in under 10 minutes. Tender shrimp bathed in a luscious garlic-parmesan sauce makes for a quick, elegant meal I adore.

Creamy Garlic Shrimp With Parmesan

Why You’ll Love This Recipe

I love how effortlessly gourmet this dish feels—yet it’s super simple. The creamy sauce is rich without being heavy, and the garlic brings just the right depth of flavor. It’s low-carb, versatile, and perfect for busy nights or when I’m craving comfort with flair.

Ingredients

(Here's a tip: Check out the full list of ingredients and measurements in the recipe card below.)

  • 1 tablespoon olive oil

  • 1 pound shrimp (tails on or off)

  • ¼ teaspoon salt, to taste

  • ¼ teaspoon black pepper, to taste

  • 2 tablespoons unsalted butter

  • 6 cloves garlic, minced

  • ½ cup chicken broth

  • 1 ½ cups reduced-fat cream

  • ½ cup freshly grated Parmesan cheese

  • 2 tablespoons fresh parsley, chopped

Directions

  1. I heat olive oil in a large skillet over medium-high heat. I season the shrimp with salt and pepper, then sear for 1–2 minutes on each side until just pink. I remove them and set aside.

  2. In the same skillet, I melt the butter and sauté the garlic until it becomes fragrant, about 30 seconds.

  3. I pour in the chicken broth and let it simmer until reduced by half, scraping up any flavorful bits.

  4. I reduce the heat and stir in the cream, letting it simmer gently. I adjust seasoning if needed.

  5. I add the Parmesan and stir until the sauce slightly thickens.

  6. I return the shrimp to the skillet, gently coat them in the sauce, sprinkle parsley on top, and serve immediately.

Servings and timing

  • Serves: 4

  • Prep time: 10 minutes

  • Cook time: 10 minutes

  • Total time: 20 minutes

Variations

  • I sometimes use heavy cream or half-and-half instead of reduced-fat cream for extra richness.

  • I like to add red pepper flakes for a little kick or a squeeze of lemon juice for a brighter flavor.

  • Occasionally, I stir in spinach or chopped sun-dried tomatoes for a twist.

Storage/reheating

I store leftovers in an airtight container in the refrigerator for up to 2 days. To reheat, I warm the shrimp gently in a skillet over low heat. This keeps the sauce smooth and the shrimp tender.

FAQs

How do I know when the shrimp is cooked?

I look for a pink color and firm texture. It usually takes 1–2 minutes per side. Overcooked shrimp can get rubbery.

Can I make this recipe dairy-free?

Yes. I use olive oil instead of butter and replace cream with coconut cream. The taste changes slightly, but it stays delicious.

What can I serve this dish with?

I often serve it over pasta, rice, or even mashed cauliflower. It also pairs well with steamed vegetables or a crisp salad.

Can I use frozen shrimp?

Absolutely. I just make sure to thaw and pat them dry before cooking. That way, they sear properly and don’t water down the sauce.

Can I prepare this ahead of time?

I usually prepare the sauce ahead and cook the shrimp just before serving. This keeps the shrimp from getting overcooked or tough.

Conclusion

This creamy garlic shrimp is one of those recipes I always come back to when I need something quick, comforting, and impressive. It’s flexible, fast, and packed with flavor. Whether I serve it on a busy weeknight or for a special occasion, it never fails to satisfy.

Print

clock clock iconcutlery cutlery iconflag flag iconfolder folder iconinstagram instagram iconpinterest pinterest iconfacebook facebook iconprint print iconsquares squares iconheart heart iconheart solid heart solid icon
Creamy Garlic Shrimp With Parmesan

Creamy Garlic Shrimp With Parmesan

5 Stars 4 Stars 3 Stars 2 Stars 1 Star No reviews
  • Author: Sue
  • Prep Time: 10 minutes
  • Cook Time: 10 minutes
  • Total Time: 20 minutes
  • Yield: 4 servings
  • Category: Dinner
  • Method: Stovetop
  • Cuisine: American
Print Recipe
Pin Recipe

Description

Creamy Garlic Shrimp with Parmesan is a quick, elegant dish featuring tender shrimp in a rich, garlicky cream sauce, perfect for weeknights or special occasions.


Ingredients

  • 1 tablespoon olive oil
  • 1 pound shrimp (tails on or off)
  • ¼ teaspoon salt, to taste
  • ¼ teaspoon black pepper, to taste
  • 2 tablespoons unsalted butter
  • 6 cloves garlic, minced
  • ½ cup chicken broth
  • 1 ½ cups reduced-fat cream
  • ½ cup freshly grated Parmesan cheese
  • 2 tablespoons fresh parsley, chopped

Instructions

  1. Heat olive oil in a large skillet over medium-high heat. Season shrimp with salt and pepper. Sear for 1–2 minutes on each side until just pink, then remove and set aside.
  2. In the same skillet, melt butter and sauté garlic for about 30 seconds until fragrant.
  3. Pour in chicken broth and let it simmer until reduced by half, scraping up browned bits.
  4. Reduce heat, stir in cream, and let it gently simmer. Adjust seasoning as needed.
  5. Add Parmesan and stir until sauce slightly thickens.
  6. Return shrimp to skillet, coat with sauce, sprinkle parsley on top, and serve immediately.

Notes

  • Heavy cream or half-and-half can be used for extra richness.
  • Add red pepper flakes or lemon juice for extra flavor.
  • Stir in spinach or sun-dried tomatoes for variety.
  • Use thawed and dried frozen shrimp for best results.
  • Reheat gently to maintain sauce consistency and shrimp tenderness.

Nutrition

  • Serving Size: ¼ of recipe
  • Calories: 360
  • Sugar: 1g
  • Sodium: 620mg
  • Fat: 26g
  • Saturated Fat: 13g
  • Unsaturated Fat: 10g
  • Trans Fat: 0g
  • Carbohydrates: 4g
  • Fiber: 0g
  • Protein: 26g
  • Cholesterol: 225mg

Have you made this recipe? I'd love to see it!

Click here to Follow me on Pinterest

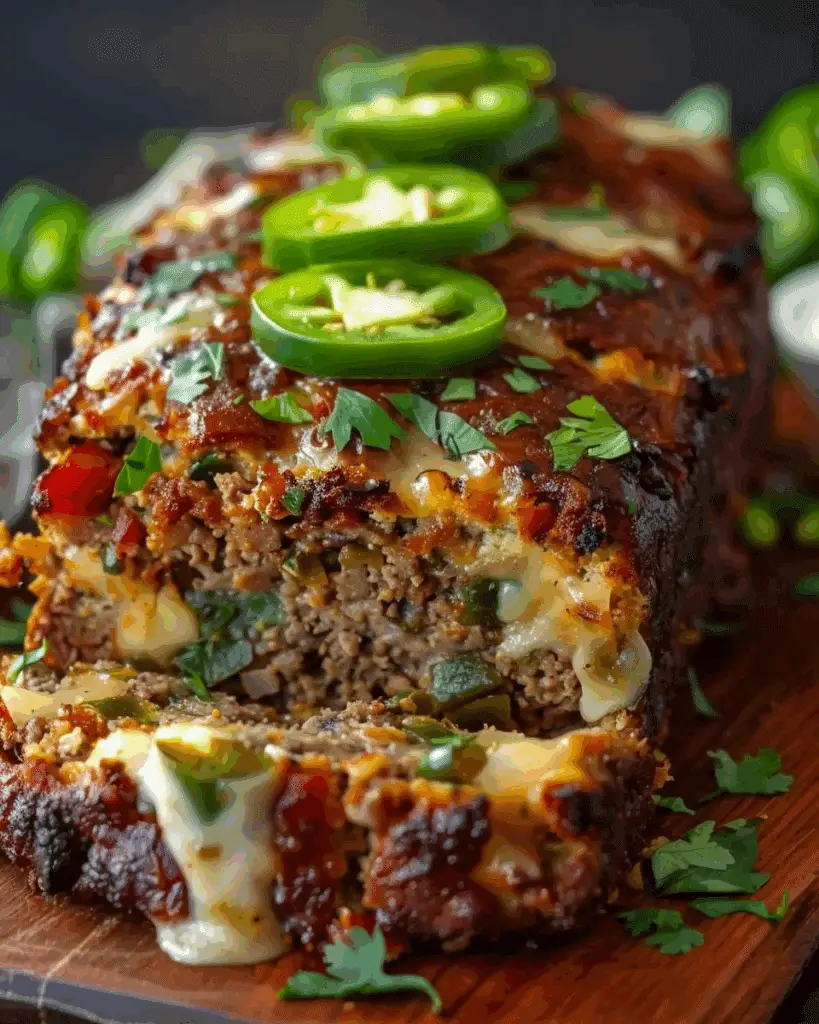
Smoky Jalapeño Popper Meatloaf

July 12, 2025 by Sue Leave a Comment

Smoky Jalapeño Popper Meatloaf is a bold twist on a classic comfort food. It brings together the creamy, cheesy richness of jalapeño poppers and the hearty satisfaction of meatloaf in one irresistible dish. The smoky flavor, combined with the heat of jalapeños and a gooey cheese center, makes this meatloaf unforgettable. Smoky Jalapeño Popper Meatloaf

Why You’ll Love This Recipe

I love this recipe because it balances spice, smokiness, and creaminess all in one satisfying bite. The jalapeños add just the right amount of heat without overpowering the dish, while the cream cheese and cheddar melt into a rich center. It’s perfect for spicing up a weekday dinner or serving as a standout dish at a gathering. Plus, the smoky seasoning adds a depth of flavor that makes it truly unique.

ingredients

(Here's a tip: Check out the full list of ingredients and measurements in the recipe card below.)

ground beef
cream cheese
shredded cheddar cheese
fresh jalapeños, diced
smoked paprika
garlic powder
onion powder
salt
black pepper
eggs
breadcrumbs
barbecue sauce (for topping)

directions

  1. I start by preheating the oven to 375°F (190°C) and lining a loaf pan with parchment or lightly greasing it.

  2. In a large mixing bowl, I combine the ground beef, smoked paprika, garlic powder, onion powder, salt, pepper, eggs, and breadcrumbs. I mix just until everything is incorporated—being careful not to overwork the meat.

  3. In a separate bowl, I mix the cream cheese, shredded cheddar, and diced jalapeños to make the popper filling.

  4. I take half the meat mixture and press it into the bottom of the loaf pan, making a well in the center.

  5. Then, I spoon the cream cheese mixture into the well, spreading it evenly, and cover it with the remaining meat mixture, sealing the edges.

  6. I brush the top with barbecue sauce for a smoky-sweet glaze.

  7. The meatloaf bakes in the preheated oven for 50–60 minutes, until it’s fully cooked and the internal temperature reaches 160°F (71°C).

  8. I let it rest for 10 minutes before slicing so the juices redistribute and the cheese sets slightly.

Servings and timing

This recipe makes about 6 servings.
Prep time: 15 minutes
Cook time: 60 minutes
Rest time: 10 minutes
Total time: 1 hour 25 minutes

Variations

I like to mix things up by using a mix of ground beef and ground pork for extra richness. If I want more heat, I swap in serrano peppers instead of jalapeños. Sometimes, I use pepper jack cheese in place of cheddar for a spicier filling. For a smoky BBQ version, I add a splash of liquid smoke to the meat mixture.

storage/reheating

I store leftover meatloaf in an airtight container in the refrigerator for up to 4 days. To reheat, I slice what I need and warm it in the microwave or oven until heated through. If I'm reheating the whole loaf, I cover it with foil and bake at 325°F (163°C) for about 20 minutes. It also freezes well—just wrap it tightly in plastic wrap and foil before freezing.

FAQs

How spicy is the jalapeño popper meatloaf?

The spice level depends on how many jalapeños I use and whether I remove the seeds. For a milder dish, I take out all the seeds and membranes.

Can I make this meatloaf ahead of time?

Yes, I often assemble it a day in advance and refrigerate it until I’m ready to bake. It makes weeknight dinners much easier.

What can I serve with this meatloaf?

I like to serve it with mashed potatoes, roasted veggies, or a crisp green salad to balance the richness.

Can I use turkey instead of beef?

Yes, ground turkey works well, though I usually add a bit more seasoning or a splash of oil to keep it moist.

Why is my meatloaf falling apart?

That can happen if there’s not enough binder. I make sure to include enough eggs and breadcrumbs, and let the meatloaf rest before slicing.

Conclusion

Smoky Jalapeño Popper Meatloaf brings together the bold flavors of a favorite appetizer and the satisfying comfort of a classic dish. It’s creamy, spicy, and perfectly smoky—everything I want in a modern meatloaf. Whether I’m cooking for a crowd or just want to elevate dinner, this recipe delivers every time.

Print

clock clock iconcutlery cutlery iconflag flag iconfolder folder iconinstagram instagram iconpinterest pinterest iconfacebook facebook iconprint print iconsquares squares iconheart heart iconheart solid heart solid icon
Smoky Jalapeño Popper Meatloaf

Smoky Jalapeño Popper Meatloaf

5 Stars 4 Stars 3 Stars 2 Stars 1 Star No reviews
  • Author: Sue
  • Prep Time: 15 minutes
  • Cook Time: 60 minutes
  • Total Time: 1 hour 25 minutes
  • Yield: 6 servings
  • Category: Main Dish
  • Method: Baking
  • Cuisine: American
Print Recipe
Pin Recipe

Description

Smoky Jalapeño Popper Meatloaf combines the spicy, creamy essence of jalapeño poppers with the hearty, comforting flavor of classic meatloaf. This dish features a gooey cheese center, smoky seasoning, and a barbecue glaze for an unforgettable dinner.


Ingredients

  • 1.5 lbs ground beef
  • 4 oz cream cheese, softened
  • 1 cup shredded cheddar cheese
  • 2-3 fresh jalapeños, diced
  • 1 tsp smoked paprika
  • 1 tsp garlic powder
  • 1 tsp onion powder
  • 1 tsp salt
  • ½ tsp black pepper
  • 2 eggs
  • 1 cup breadcrumbs
  • ¼ cup barbecue sauce (for topping)

Instructions

  1. Preheat oven to 375°F (190°C) and grease or line a loaf pan with parchment paper.
  2. In a large bowl, mix ground beef, smoked paprika, garlic powder, onion powder, salt, pepper, eggs, and breadcrumbs until just combined.
  3. In a separate bowl, mix cream cheese, shredded cheddar cheese, and diced jalapeños to create the filling.
  4. Press half of the meat mixture into the bottom of the loaf pan, creating a well in the center.
  5. Spoon the cheese mixture into the well and spread evenly.
  6. Top with the remaining meat mixture, sealing the edges around the filling.
  7. Brush barbecue sauce over the top of the loaf.
  8. Bake for 50–60 minutes, or until internal temperature reaches 160°F (71°C).
  9. Let rest for 10 minutes before slicing and serving.

Notes

  • Use gloves when handling jalapeños to avoid skin irritation.
  • Mix gently to keep the meatloaf tender.
  • Letting it rest helps the juices redistribute and the filling set.
  • Swap in serrano peppers or pepper jack cheese for extra heat.

Nutrition

  • Serving Size: 1 slice
  • Calories: 420
  • Sugar: 3g
  • Sodium: 680mg
  • Fat: 29g
  • Saturated Fat: 13g
  • Unsaturated Fat: 13g
  • Trans Fat: 0.5g
  • Carbohydrates: 12g
  • Fiber: 1g
  • Protein: 27g
  • Cholesterol: 115mg

Have you made this recipe? I'd love to see it!

Click here to Follow me on Pinterest

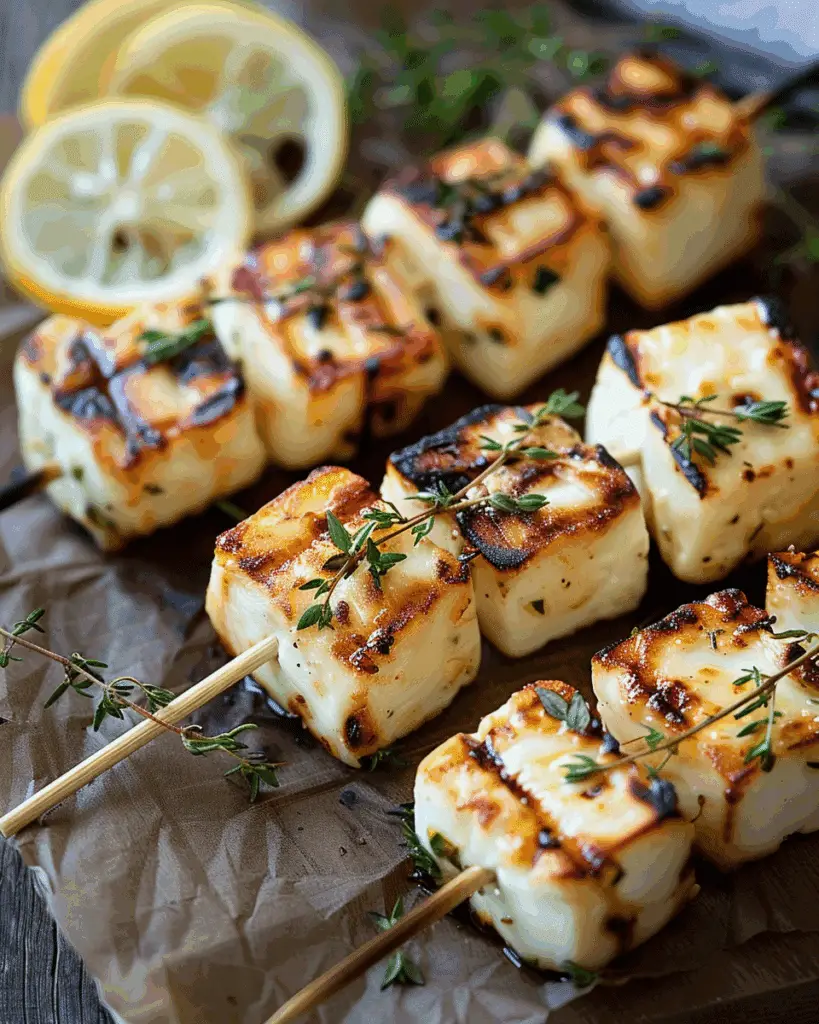
Grilled Halloumi Skewers with Lemon and Thyme

July 12, 2025 by Sue Leave a Comment

These grilled halloumi skewers with lemon and thyme are a quick, flavorful dish I love making when I want something savory, herby, and satisfying. The salty, firm halloumi gets crispy on the grill while soaking up the brightness of lemon juice and the earthy touch of thyme. It’s a Mediterranean-inspired treat that’s always a hit at cookouts or as a light lunch. Grilled Halloumi Skewers with Lemon and Thyme

Why You’ll Love This Recipe

I enjoy how simple and delicious these skewers are. Halloumi holds up wonderfully on the grill, developing a golden, crispy edge without melting. The marinade takes just minutes to whip up, and I can easily mix in vegetables to add color and flavor. Whether I’m serving these as a starter, a meatless main, or a party platter, they come together fast and impress every time.

ingredients

(Here's a tip: Check out the full list of ingredients and measurements in the recipe card below.)

  • Halloumi cheese, cut into 1-inch cubes

  • Lemon (half juiced, half cut into wedges for serving or skewering)

  • Fresh thyme leaves or dried thyme

  • Garlic, minced

  • Olive oil

  • Salt and black pepper

  • Optional vegetables like bell peppers, cherry tomatoes, or red onion

directions

  1. If I’m using wooden skewers, I soak them in water for 20 to 30 minutes to prevent burning.

  2. I mix the olive oil, lemon juice, garlic, thyme, salt, and pepper in a bowl.

  3. I toss in the halloumi cubes (and veggies if using), making sure everything is coated well.

  4. I thread the cheese and vegetables onto the skewers, alternating as I go.

  5. I heat the grill or a grill pan over medium-high heat.

  6. I cook the skewers for 3 to 4 minutes on each side, until the cheese is golden and lightly charred.

  7. I serve the skewers hot with extra lemon squeezed on top.

Servings and timing

  • Servings: 4

  • Prep time: 10 minutes

  • Cook time: 8–10 minutes

  • Total time: 20 minutes

variations

  • I sometimes add chunks of zucchini, mushrooms, or eggplant for a more filling skewer.

  • I swap thyme for oregano, rosemary, or za’atar depending on the mood.

  • For a sweet and spicy twist, I drizzle a bit of honey over the grilled skewers and sprinkle on red chili flakes.

  • If I’m short on time, I skip the marinade and just brush the skewers with seasoned olive oil right before grilling.

  • I’ve even used metal skewers or fresh rosemary sprigs as skewers for extra flavor and flair.

storage/reheating

If I have leftovers, I store them in an airtight container in the fridge for up to 2 days. To reheat, I pop them back on a hot grill or into a skillet for a few minutes until warmed through. The texture holds up pretty well, and they taste just as great the next day.

FAQs

Can I prep these skewers ahead of time?

Yes, I like to assemble them a few hours in advance and refrigerate them until I’m ready to grill.

Can I use a stovetop grill pan instead?

Definitely. I use a grill pan over medium-high heat and they turn out just as tasty.

Do I need to soak the wooden skewers?

I always soak them for about 20–30 minutes so they don’t burn or splinter while grilling.

Can I freeze leftover halloumi skewers?

I don’t recommend freezing them since the texture of halloumi changes in the freezer and becomes rubbery.

How long should I grill the skewers?

I usually grill them for about 3–4 minutes per side until they’re nicely charred and golden.

Conclusion

These grilled halloumi skewers with lemon and thyme are one of those recipes I come back to over and over. They’re quick, flavorful, and adaptable to whatever vegetables or herbs I have on hand. Whether I’m grilling outdoors or indoors on a pan, they always turn out delicious and satisfying.

Print

clock clock iconcutlery cutlery iconflag flag iconfolder folder iconinstagram instagram iconpinterest pinterest iconfacebook facebook iconprint print iconsquares squares iconheart heart iconheart solid heart solid icon
Grilled Halloumi Skewers with Lemon and Thyme

Grilled Halloumi Skewers with Lemon and Thyme

5 Stars 4 Stars 3 Stars 2 Stars 1 Star No reviews
  • Author: Sue
  • Prep Time: 10 minutes
  • Cook Time: 10 minutes
  • Total Time: 20 minutes
  • Yield: 4 servings
  • Category: Appetizer
  • Method: Grill
  • Cuisine: Mediterranean
  • Diet: Vegetarian
Print Recipe
Pin Recipe

Description

These Mediterranean-inspired grilled halloumi skewers are bright, savory, and perfect for a quick appetizer or light meal. Lemon juice adds a tangy zing, while thyme brings aromatic depth to the charred cheese.


Ingredients

  • 8 oz Halloumi cheese, cut into 1-inch cubes
  • 1 lemon (half juiced, half cut into wedges)
  • 1 tsp fresh thyme leaves or 1 tsp dried thyme
  • 2 cloves garlic, minced
  • 2–3 tablespoon olive oil
  • Salt and pepper, to taste
  • Optional: bell peppers, cherry tomatoes, red onion chunks

Instructions

  1. If using wooden skewers, soak them in water for 20–30 minutes.
  2. In a bowl, whisk together olive oil, lemon juice, garlic, thyme, salt, and pepper.
  3. Add halloumi and optional veggies to the bowl and toss gently to coat. Let marinate briefly.
  4. Thread halloumi and veggies onto skewers, alternating as desired.
  5. Preheat grill or grill pan to medium-high heat.
  6. Grill skewers for about 3–4 minutes per side until the halloumi is golden and slightly crisp.
  7. Transfer to a plate and squeeze fresh lemon juice over before serving.

Notes

  • Use metal skewers or rosemary sprigs for added aroma and sustainability.
  • For a twist, try oregano or za’atar instead of thyme.
  • Store leftovers in the fridge for up to 2 days and reheat on grill or under broiler.
  • Don’t freeze grilled halloumi as it alters the texture.

Nutrition

  • Serving Size: 1 skewer
  • Calories: 220
  • Sugar: 1g
  • Sodium: 450mg
  • Fat: 18g
  • Saturated Fat: 9g
  • Unsaturated Fat: 8g
  • Trans Fat: 0g
  • Carbohydrates: 3g
  • Fiber: 0.5g
  • Protein: 12g
  • Cholesterol: 40mg

Have you made this recipe? I'd love to see it!

Click here to Follow me on Pinterest

Homemade Sopapilla Recipe

July 12, 2025 by Sue Leave a Comment

A golden, puffy pocket of fried dough that's crispy on the outside and soft and airy inside—perfect for drizzling with honey or loading with savory toppings. Homemade Sopapilla Recipe

Why You’ll Love This Recipe

I love that these sopapillas are not only easy but also quick—no yeast or rising time needed. In under 30 minutes, I can whip up a batch of golden, perfectly puffed pastries that impress everyone. Whether I go sweet with honey and powdered sugar or savory with taco toppings, they’re always a favorite.

ingredients

(Here's a tip: Check out the full list of ingredients and measurements in the recipe card below.)

  • 1 ½ cups all‑purpose flour (spooned and leveled)

  • 1 ½ teaspoons baking powder

  • ½ teaspoon salt

  • 1 ½ tablespoons shortening

  • ½ cup warm water

  • 3 cups vegetable oil for frying

  • Optional garnish: powdered sugar, honey

directions

  1. Whisk together flour, baking powder, and salt in a large bowl.

  2. Use a pastry blender or a fork to cut in the shortening until crumbly.

  3. Stir in warm water until a dough forms.

  4. Knead for 2–3 minutes until smooth—don’t overwork it.

  5. Cover and rest dough for 15 minutes.

  6. Heat oil in a heavy skillet or Dutch oven to 350–360 °F.

  7. Roll dough into a 9×12‑inch rectangle on a floured surface.

  8. Cut into 12 squares or rectangles (adjust size as preferred).

  9. Fry in batches, 1–2 minutes per side until golden. Drain on paper towels.

  10. Sprinkle with powdered sugar and drizzle with honey if desired. Serve immediately.

Servings and timing

This recipe yields 12 sopapillas.

  • Prep time: 20 minutes

  • Cook time: 1 minute per piece (around 12 minutes total)

  • Total time: 30 minutes

Variations

I like switching it up with:

  • Air-fryer version: I preheat to 350 °F, spray the basket, and cook them for 8 minutes, flipping halfway.

  • Savory topping: I top mine with taco meat, cheese, beans, sour cream, and pico de gallo—turning dessert into dinner.

  • Baked sopapillas: I’ve tried brushing the dough with oil and baking at 400 °F for about 12–15 minutes, flipping halfway, for a lighter option.

storage/reheating

I usually eat them fresh—but if I have leftovers:

  • At room temperature: I store them in an airtight container for 1–2 days.

  • In the refrigerator: I keep them sealed for up to 4 days.

  • In the freezer: I freeze them for up to 3 months in an airtight bag.
    To reheat, I pop them in a 350 °F oven until warm and crispy again.

FAQs

What type of shortening should I use?

I use vegetable shortening, but lard also works well if I want a more traditional flavor.

Can I substitute butter for shortening?

I avoid using butter because it melts too quickly and doesn’t give the same light, puffy texture. The results are denser.

Will sopapillas still puff if I bake instead of fry?

They do puff a little when baked, but I don’t get that same crispy, airy texture I love from frying.

Can I make the dough ahead of time?

Yes, I often prepare the dough ahead, cover it, and store it in the fridge. Then I roll and fry it fresh when I’m ready.

What oil works best for frying?

I usually use vegetable oil for its high smoke point and neutral flavor. Canola oil is also a great choice.

Conclusion

I absolutely adore these sopapillas for how simple they are to make and how versatile they are to serve. With no yeast or long waiting times, and the option to go sweet or savory, they’ve become a go-to treat in my kitchen.

Print

clock clock iconcutlery cutlery iconflag flag iconfolder folder iconinstagram instagram iconpinterest pinterest iconfacebook facebook iconprint print iconsquares squares iconheart heart iconheart solid heart solid icon
Homemade Sopapilla Recipe

Homemade Sopapilla Recipe

5 Stars 4 Stars 3 Stars 2 Stars 1 Star No reviews
  • Author: Sue
  • Prep Time: 20 minutes
  • Cook Time: 12 minutes
  • Total Time: 30 minutes
  • Yield: 12 sopapillas
  • Category: Dessert
  • Method: Frying
  • Cuisine: Mexican
  • Diet: Vegetarian
Print Recipe
Pin Recipe

Description

A golden, puffy pocket of fried dough that's crispy on the outside and soft and airy inside—perfect for drizzling with honey or loading with savory toppings.


Ingredients

  • 1 ½ cups all-purpose flour (spooned and leveled)
  • 1 ½ teaspoons baking powder
  • ½ teaspoon salt
  • 1 ½ tablespoons shortening
  • ½ cup warm water
  • 3 cups vegetable oil for frying
  • Optional garnish: powdered sugar, honey

Instructions

  1. Whisk together flour, baking powder, and salt in a large bowl.
  2. Use a pastry blender or a fork to cut in the shortening until crumbly.
  3. Stir in warm water until a dough forms.
  4. Knead for 2–3 minutes until smooth—don't overwork it.
  5. Cover and rest dough for 15 minutes.
  6. Heat oil in a heavy skillet or Dutch oven to 350–360 °F.
  7. Roll dough into a 9×12‑inch rectangle on a floured surface.
  8. Cut into 12 squares or rectangles (adjust size as preferred).
  9. Fry in batches, 1–2 minutes per side until golden. Drain on paper towels.
  10. Sprinkle with powdered sugar and drizzle with honey if desired. Serve immediately.

Notes

  • Try an air-fryer version at 350 °F for 8 minutes, flipping halfway.
  • Top with savory ingredients like taco meat, cheese, beans, and pico de gallo for a meal.
  • You can bake instead of fry at 400 °F for 12–15 minutes, flipping halfway.
  • Use vegetable, canola, or peanut oil for frying due to high smoke points.
  • Dough can be made ahead and refrigerated until ready to roll and fry.

Nutrition

  • Serving Size: 1 sopapilla
  • Calories: 180
  • Sugar: 1g
  • Sodium: 95mg
  • Fat: 10g
  • Saturated Fat: 2g
  • Unsaturated Fat: 7g
  • Trans Fat: 0g
  • Carbohydrates: 20g
  • Fiber: 1g
  • Protein: 2g
  • Cholesterol: 0mg

Have you made this recipe? I'd love to see it!

Click here to Follow me on Pinterest

Watermelon Fries with Coconut Lime Dip

July 12, 2025 by Sue Leave a Comment

I turn fresh watermelon into crispy "fries" sprinkled with Tajin and serve them with a tangy coconut-lime dip. It's a playful, healthy snack perfect for a hot day and always a hit at summer gatherings. Watermelon Fries with Coconut Lime Dip

Why You’ll Love This Recipe

I love how refreshing and fun this snack feels—it’s basically watermelon transformed into fries! It’s naturally gluten-free, vegan, and comes together in just minutes. It’s the perfect poolside munch or party platter. The vibrant colors, mix of sweet and spicy flavors, and the creamy dip make it a standout without any guilt.

ingredients

(Here's a tip: Check out the full list of ingredients and measurements in the recipe card below.)

  • 1 small watermelon, rind removed and cut into long fry-like sticks

  • 2 teaspoon Tajin Classic Seasoning (chili-lime salt)

For the dip:

  • 1 cup coconut yogurt

  • Zest and juice of 1 lime

  • 1 tablespoon coconut sugar (optional, depending on the sweetness of the watermelon)

directions

  1. In a small bowl, I whisk together the coconut yogurt, lime zest, lime juice, and coconut sugar until smooth.

  2. I arrange the watermelon sticks on a serving platter or plate.

  3. I sprinkle the Tajin evenly over the watermelon fries.

  4. I serve the fries with the coconut-lime dip on the side for dipping.

Servings and timing

  • Servings: 12 (as a snack)

  • Prep time: 5 minutes

  • Total time: 5 minutes

Variations

  • If I don’t have Tajin, I mix sea salt, chili powder, and lime zest to make a quick homemade substitute.

  • I swap coconut yogurt with Greek yogurt or another non-dairy yogurt depending on what I have on hand.

  • Sometimes I add a pinch of cayenne or smoked paprika for an extra flavor boost.

  • For a touch of sweetness, I drizzle a bit of honey into the dip instead of coconut sugar.

storage/reheating

I store any leftover watermelon fries (unseasoned) in an airtight container in the refrigerator for up to 5 days. I add Tajin right before serving to keep the texture crisp. The dip can be refrigerated separately in a sealed container and stirred before serving. No reheating is needed for this dish.

FAQs

How far in advance can I prepare watermelon fries?

I slice the watermelon up to 2–3 days in advance and store it in an airtight container in the fridge. I season just before serving to keep the texture fresh.

Can I use a different yogurt for the dip?

Yes, I use whatever yogurt I have—Greek yogurt, plain dairy-free yogurt, or even flavored yogurt if I want to play with different profiles.

What if I don’t have Tajin?

I make a simple mix with chili powder, salt, and lime zest when I’m out of Tajin. It gives a similar kick and brightness.

Will the watermelon get soggy?

Watermelon holds up well if I season it right before serving. If left too long with seasoning, it can get a bit soft, so I always wait until the last minute.

Is this a good recipe for kids?

Absolutely. Kids love dipping the watermelon, and I just reduce or skip the seasoning for younger palates if needed.

Conclusion

This watermelon fries recipe is one of my favorite summertime treats. It's quick, fun, and packed with bold flavor while staying light and nutritious. Whether I’m entertaining or just craving a cool snack, it’s a recipe I keep coming back to.

Print

clock clock iconcutlery cutlery iconflag flag iconfolder folder iconinstagram instagram iconpinterest pinterest iconfacebook facebook iconprint print iconsquares squares iconheart heart iconheart solid heart solid icon
Watermelon Fries with Coconut Lime Dip

Watermelon Fries with Coconut Lime Dip

5 Stars 4 Stars 3 Stars 2 Stars 1 Star No reviews
  • Author: Sue
  • Prep Time: 5 minutes
  • Cook Time: 0 minutes
  • Total Time: 5 minutes
  • Yield: 12 servings
  • Category: Snack
  • Method: No-Cook
  • Cuisine: Fusion
  • Diet: Vegan
Print Recipe
Pin Recipe

Description

Fresh watermelon cut into fry-like sticks and sprinkled with Tajin seasoning, served with a tangy coconut-lime yogurt dip. A refreshing, healthy snack perfect for summer.


Ingredients

  • 1 small watermelon, rind removed and cut into long fry-like sticks
  • 2 tsp Tajin Classic Seasoning (chili-lime salt)
  • For the dip:
  • 1 cup coconut yogurt
  • Zest and juice of 1 lime
  • 1 tbsp coconut sugar (optional)

Instructions

  1. In a bowl, whisk together coconut yogurt, lime zest and juice, and coconut sugar; set aside.
  2. Arrange watermelon sticks on a plate and sprinkle evenly with Tajin seasoning.
  3. Serve the seasoned watermelon fries alongside the coconut-lime dip.

Notes

  • Swap Tajin with a homemade mix of ½ teaspoon salt, ¼ teaspoon chili powder, and lime zest if unavailable.
  • Any yogurt (dairy or non-dairy) can be used instead of coconut yogurt.
  • Add a dash of cayenne for extra heat.
  • Store unseasoned watermelon sticks in the fridge for up to 5 days; add Tajin just before serving.
  • Dip can be stored in the fridge for up to 5 days; stir before serving.

Nutrition

  • Serving Size: 1 serving
  • Calories: 45
  • Sugar: 7g
  • Sodium: 110mg
  • Fat: 1g
  • Saturated Fat: 0.7g
  • Unsaturated Fat: 0.3g
  • Trans Fat: 0g
  • Carbohydrates: 10g
  • Fiber: 1g
  • Protein: 0.5g
  • Cholesterol: 0mg
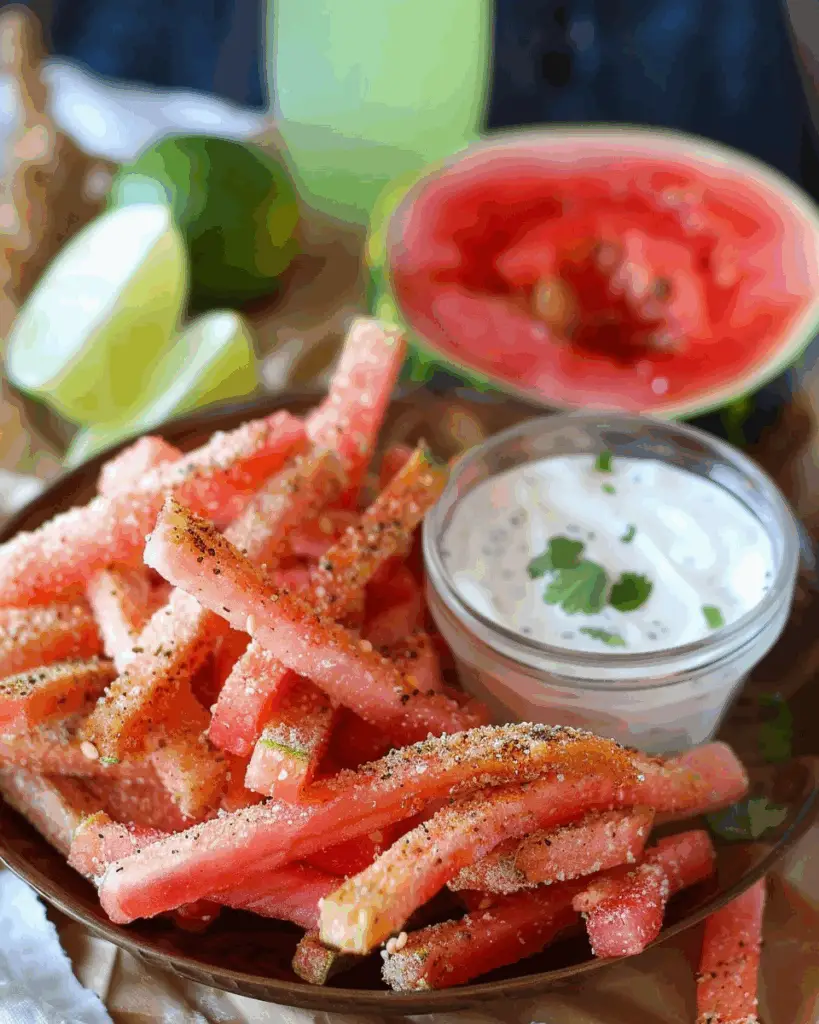
Have you made this recipe? I'd love to see it!

Click here to Follow me on Pinterest

Lemon Sorbet

July 12, 2025 by Sue Leave a Comment

A refreshingly tart and sweet frozen dessert, this lemon sorbet is the perfect treat for hot days or anytime I want a light, citrusy palate cleanser. With just a few ingredients and minimal effort, I can enjoy a scoop of this icy delight whenever the craving hits. Lemon Sorbet

Why You’ll Love This Recipe

I love how bright and zesty this lemon sorbet is. It’s incredibly simple to make and doesn’t require any fancy equipment. The lemon flavor is bold and natural, and the texture turns out beautifully smooth with just a little attention during freezing. It’s the kind of dessert I keep on hand all summer long.

ingredients

(Here's a tip: Check out the full list of ingredients and measurements in the recipe card below.)

  • 1 cup granulated sugar

  • 1 cup water

  • 2 tablespoons lemon zest

  • 1½ cups lemon simple syrup

  • 1 cup water

  • ½ cup freshly squeezed lemon juice

directions

  1. I start by making a simple syrup: combining sugar, water, and lemon zest in a saucepan. I bring it to a simmer, stirring until the sugar is completely dissolved. Then I let it cool. Sometimes I strain out the zest for a clearer sorbet, but leaving it in adds a stronger lemon flavor.

  2. In a mixing bowl, I whisk together the cooled lemon syrup, more water, and fresh lemon juice until fully combined.

  3. I pour the mixture into a shallow, freezer-safe container. I cover it tightly with plastic wrap and a lid, then place it in the freezer.

  4. Every 30 minutes for the next 4 to 6 hours, I stir the mixture thoroughly to break up any ice crystals. This keeps the sorbet nice and smooth.

  5. Once it’s firm and scoopable, I serve it immediately or keep it frozen until I’m ready to enjoy.

Servings and timing

  • Servings: 4

  • Prep time: 5 minutes

  • Chill/freezing time: 4 to 6 hours

  • Total time: about 6 hours

Variations

  • I like infusing the syrup with herbs like mint or basil for an extra layer of flavor.

  • For a fruit twist, I add blended berries or a splash of raspberry juice before freezing.

  • When I want it creamier, I stir in a tablespoon or two of coconut cream.

  • A touch of ginger or a pinch of cayenne adds unexpected but welcome heat.

storage/reheating

I store the sorbet in a tightly sealed container in the freezer. To keep it from getting icy, I press a layer of plastic wrap directly onto the surface before sealing. It keeps well for up to 2 months. When I’m ready to serve, I let it sit at room temperature for 5 to 10 minutes for easier scooping.

FAQs

Can I use an ice cream maker?

Yes, I can absolutely use one. I churn the mixture according to the machine's instructions until it thickens, then freeze it until firm.

Why do I need to stir it during freezing?

Stirring every 30 minutes helps prevent large ice crystals from forming and gives me a smoother texture.

Can I reduce the sugar?

I can, but I do so carefully. Too little sugar affects the texture and might make the sorbet too icy.

What if I want it extra tangy?

I add a bit more lemon juice or some finely grated zest to intensify the citrus flavor.

Can I make it ahead of time?

Definitely. I often make it a day or two ahead and store it in the freezer until I’m ready to serve.

Conclusion

This lemon sorbet is a must for anyone who loves fresh, bright flavors. I enjoy how easy it is to whip up and how impressive it feels when served. Whether as a palate refresher or a stand-alone dessert, it never fails to cool me down and lift my spirits.

Print

clock clock iconcutlery cutlery iconflag flag iconfolder folder iconinstagram instagram iconpinterest pinterest iconfacebook facebook iconprint print iconsquares squares iconheart heart iconheart solid heart solid icon
Lemon Sorbet

Lemon Sorbet

5 Stars 4 Stars 3 Stars 2 Stars 1 Star No reviews
  • Author: Sue
  • Prep Time: 5 minutes
  • Cook Time: 5 minutes
  • Total Time: 6 hours 5 minutes
  • Yield: 4 servings
  • Category: Dessert
  • Method: Freeze
  • Cuisine: American
  • Diet: Vegan
Print Recipe
Pin Recipe

Description

A refreshing and zesty lemon sorbet made with a simple lemon syrup base. It's light, tart, and perfect for warm days or as a palate cleanser.


Ingredients

  • 1 cup granulated sugar
  • 1 cup water
  • 2 tablespoons lemon zest
  • 1½ cups lemon simple syrup
  • 1 cup water
  • ½ cup freshly squeezed lemon juice

Instructions

  1. Combine 1 cup sugar, 1 cup water, and 2 tablespoons lemon zest in a saucepan. Bring to a simmer, stirring until sugar dissolves. Remove from heat and let cool. Optionally strain zest for a clearer sorbet.
  2. In a large bowl, whisk together 1½ cups cooled lemon syrup, 1 cup water, and ½ cup lemon juice.
  3. Pour into a shallow freezer-safe container. Cover with plastic wrap and a lid. Freeze for 4–6 hours, stirring every 30 minutes to prevent ice crystals.
  4. Scoop into bowls, garnish with lemon slices or mint, and serve.

Notes

  • Use an ice cream maker for a smoother texture.
  • Stir every 30 minutes during freezing to keep the sorbet smooth.
  • Adjust sugar to taste, but less sugar may cause icier texture.
  • Store with plastic wrap touching the surface to prevent freezer burn.
  • Let sit at room temperature for a few minutes before scooping.

Nutrition

  • Serving Size: 1 serving
  • Calories: 140
  • Sugar: 28g
  • Sodium: 5mg
  • Fat: 0g
  • Saturated Fat: 0g
  • Unsaturated Fat: 0g
  • Trans Fat: 0g
  • Carbohydrates: 36g
  • Fiber: 0g
  • Protein: 0g
  • Cholesterol: 0mg
Have you made this recipe? I'd love to see it!

Click here to Follow me on Pinterest

Microwave Peanut Butter Fudge

July 12, 2025 by Sue Leave a Comment

I share a rich, creamy fudge made entirely in the microwave with just three simple ingredients. It's nostalgic, melt-in-your-mouth, and perfect for gifting or sweet cravings. Microwave Peanut Butter Fudge

Why You’ll Love This Recipe

I love how this fudge comes together in minutes—no stovetop, no candy thermometer, just a microwave and a little patience. With just butter, creamy peanut butter, and confectioners’ sugar, it’s smooth, sweet, and balanced by that classic peanut buttery flavor. It’s the kind of easy, no‑bake treat that feels like something my grandma would have made.

ingredients

(Here's a tip: Check out the full list of ingredients and measurements in the recipe card below.)

  • 1 cup (2 sticks / 227 g) unsalted butter, room temperature

  • 1 cup (258 g) creamy peanut butter (not natural)

  • 4 cups (500 g) confectioners’ sugar

directions

  1. Line an 8×8-inch baking dish with parchment paper, leaving an overhang on two sides.

  2. In a large microwave-safe bowl, combine butter and peanut butter. Microwave in 30‑second intervals, stirring each time, until melted and smooth.

  3. Add confectioners’ sugar and stir until fully combined—a thick mixture.

  4. Transfer to the prepared pan. Place another parchment sheet on top and gently press to even out. Remove the top parchment and smooth the surface.

  5. Refrigerate for about 2 hours, or until the fudge is set.

Servings and timing

  • Servings: About 25 one-inch squares

  • Prep Time: 5 minutes

  • Chilling Time: 2 hours

  • Total Time: Approximately 2 hours and 5 minutes

I always plan ahead because the chill time is the longest step.

Variations

  • Crunchy peanut butter: I sometimes swap in crunchy PB for added texture, though it won’t be as smooth.

  • Mix-ins: After combining the sugar and peanut butter, I like to fold in chocolate chips, chopped nuts, or sprinkles for extra fun.

  • Chocolate swirl: I melt a few tablespoons of chocolate and swirl it in before chilling for a marbled look and taste.

storage/reheating

I store the fudge in an airtight container in the refrigerator, and it stays fresh for up to 2 weeks. Letting it sit at room temperature for a few minutes before serving makes it soft and creamy again. It also freezes well: I wrap individual squares and freeze them for up to 3 months. When I want some, I just thaw in the fridge.

FAQs

What kind of peanut butter works best?

I always go for regular creamy peanut butter. Natural types can separate and won’t give the right texture.

Can I use crunchy peanut butter?

Yes, I’ve tried it, and while it adds texture, it does make the fudge less smooth.

Can I add extras like chocolate or nuts?

Definitely. I like folding in chocolate chips or chopped nuts after the sugar is mixed in.

Do I need a candy thermometer?

Not at all. That’s what I love about this recipe—no special tools, just a microwave.

How long does it last?

It lasts up to 2 weeks in the fridge and around 3 months in the freezer if properly wrapped.

Conclusion

This microwave peanut butter fudge is one of my favorite quick treats—easy to make, rich in flavor, and totally comforting. Whether I’m whipping up a batch for the holidays or just because, it always hits the spot.

Print

clock clock iconcutlery cutlery iconflag flag iconfolder folder iconinstagram instagram iconpinterest pinterest iconfacebook facebook iconprint print iconsquares squares iconheart heart iconheart solid heart solid icon
Microwave Peanut Butter Fudge

Microwave Peanut Butter Fudge

5 Stars 4 Stars 3 Stars 2 Stars 1 Star No reviews
  • Author: Sue
  • Prep Time: 5 minutes
  • Cook Time: 0 minutes
  • Total Time: 2 hours 5 minutes
  • Yield: About 25 one-inch squares
  • Category: Dessert
  • Method: Microwave
  • Cuisine: American
  • Diet: Vegetarian
Print Recipe
Pin Recipe

Description

A rich, creamy peanut butter fudge made with just three ingredients in the microwave—quick, nostalgic, and perfect for gifting or satisfying a sweet craving.


Ingredients

  • 1 cup (2 sticks / 227 g) unsalted butter, room temperature
  • 1 cup (258 g) creamy peanut butter (not natural)
  • 4 cups (500 g) confectioners’ sugar

Instructions

  1. Line an 8×8-inch baking dish with parchment paper, leaving an overhang on two sides.
  2. In a large microwave-safe bowl, combine butter and peanut butter. Microwave in 30‑second intervals, stirring each time, until melted and smooth.
  3. Add confectioners’ sugar and stir until fully combined—a thick mixture.
  4. Transfer to the prepared pan. Place another parchment sheet on top and gently press to even out. Remove the top parchment and smooth the surface.
  5. Refrigerate for about 2 hours, or until the fudge is set.

Notes

  • Use creamy peanut butter for a smooth texture.
  • Add mix-ins like chocolate chips or chopped nuts for variety.
  • Let the fudge sit at room temperature before serving for the best texture.
  • Store in the fridge for up to 2 weeks or freeze for up to 3 months.

Nutrition

  • Serving Size: 1 piece
  • Calories: 180
  • Sugar: 20g
  • Sodium: 80mg
  • Fat: 10g
  • Saturated Fat: 4g
  • Unsaturated Fat: 5g
  • Trans Fat: 0g
  • Carbohydrates: 22g
  • Fiber: 0g
  • Protein: 2g
  • Cholesterol: 15mg

Have you made this recipe? I'd love to see it!

Click here to Follow me on Pinterest

Marshmallow Buttercream

July 12, 2025 by Sue Leave a Comment

A delightfully airy and sweet frosting made with just four main ingredients—unsalted butter, powdered sugar, almond extract, and marshmallow fluff. It’s fluffy, creamy, and perfect for cakes, cupcakes, or sandwich cookies. Marshmallow Buttercream

Why You’ll Love This Recipe

I love this marshmallow buttercream because it’s incredibly easy to make and the texture is light and smooth. It’s sweet but not overpowering, and the almond extract adds a nice depth of flavor. I find it perfect for piping, spreading, or layering on baked goods. It’s a simple upgrade from traditional buttercream that feels extra special.

Ingredients

(Here's a tip: Check out the full list of ingredients and measurements in the recipe card below.)

  • 1 cup (2 sticks / 227 g) unsalted butter, softened

  • 4 cups (500 g) confectioners’ sugar

  • ½ teaspoon almond extract

  • 2 jars (7 ounces each) marshmallow creme or fluff

Directions

  1. I start by beating the softened butter in a stand mixer fitted with the paddle attachment for about 2 minutes until it's light and fluffy.

  2. I add the almond extract and mix until it’s fully incorporated.

  3. Then, I gradually add the confectioners’ sugar, about ½ cup at a time, starting on low speed to avoid a sugar cloud. Once it’s all added, I increase the speed to high and beat it for 2–3 minutes until smooth.

  4. I gently fold in the marshmallow creme by hand, which keeps the frosting light and airy. It’s ready to use immediately or can be stored for later.

Servings and Timing

  • Servings: Frosts an 8-inch 2-layer cake or about 24 cupcakes

  • Prep Time: 10 minutes

  • Total Time: 10 minutes

Variations

  • I sometimes swap almond extract with vanilla extract for a more traditional flavor.

  • For a nut-free version, I use imitation almond extract.

  • To customize for themed desserts, I add gel food coloring to tint the frosting without thinning it out.

  • A small pinch of salt helps balance the sweetness if I find it too sugary.

Storage/Reheating

I store the buttercream in an airtight container in the fridge for up to one week. Before using, I let it come to room temperature and re-whip it briefly to restore the fluffiness. It also freezes well for up to two months—just thaw it in the fridge overnight, then let it warm up and re-whip it.

FAQs

Can I use vanilla extract instead of almond?

Yes, I’ve used vanilla extract many times and it gives a more classic marshmallow flavor. It’s a great option if I want something a bit more neutral.

Is this frosting overly sweet?

It is on the sweeter side due to the marshmallow and powdered sugar, but I find it balanced by the butter. I’ve added a pinch of salt or reduced the sugar slightly if I want to cut down on the sweetness.

Will this frosting hold up for piping?

Absolutely. It’s sturdy enough for piping rosettes, swirls, or borders. I just make sure it’s not too warm, as that can make it a little softer.

Can I make this ahead of time?

Yes, I often make it a day or two in advance and store it in the fridge. When I’m ready to use it, I bring it to room temperature and whip it again briefly.

Can I toast this like marshmallow fluff?

I can use a kitchen torch to lightly toast the outer layer, especially if I’m going for that toasted marshmallow look and flavor. I just avoid over-torching to keep the buttercream intact.

Conclusion

This marshmallow buttercream is my go-to when I want something sweet, fluffy, and simple. It comes together quickly, spreads and pipes beautifully, and adds a fun twist to my baked treats. Whether I’m decorating cupcakes or layering a celebration cake, this frosting never disappoints.

Print

clock clock iconcutlery cutlery iconflag flag iconfolder folder iconinstagram instagram iconpinterest pinterest iconfacebook facebook iconprint print iconsquares squares iconheart heart iconheart solid heart solid icon
Marshmallow Buttercream

Marshmallow Buttercream

5 Stars 4 Stars 3 Stars 2 Stars 1 Star No reviews
  • Author: Sue
  • Prep Time: 10 minutes
  • Cook Time: 0 minutes
  • Total Time: 10 minutes
  • Yield: Frosts an 8” 2-layer cake or 24 standard cupcakes
  • Category: Frosting
  • Method: No-Cook
  • Cuisine: American
  • Diet: Vegetarian
Print Recipe
Pin Recipe

Description

A light, fluffy, and sweet marshmallow buttercream frosting made with butter, powdered sugar, almond extract, and marshmallow fluff. Perfect for cakes, cupcakes, and cookies.


Ingredients

  • 1 cup (2 sticks / 227 g) unsalted butter, softened
  • 4 cups (500 g) confectioners’ sugar
  • ½ teaspoon almond extract
  • 2 jars (7 ounces each) marshmallow creme or fluff

Instructions

  1. In a stand mixer fitted with the paddle attachment, beat the softened butter on medium speed for about 2 minutes until light and fluffy.
  2. Add the almond extract and mix until combined.
  3. Gradually add the confectioners’ sugar, about ½ cup at a time, starting on low speed. Once all is added, increase to high speed and beat for 2–3 minutes until creamy and smooth.
  4. Gently fold in the marshmallow creme by hand to maintain the fluffy texture. Use immediately or refrigerate for later use.

Notes

  • For a nut-free version, substitute almond extract with vanilla or imitation almond extract.
  • Chill frosting before use if piping intricate designs or for warm climates.
  • Re-whip chilled or thawed buttercream to restore fluffiness.

Nutrition

  • Serving Size: 1/24th of recipe
  • Calories: 220
  • Sugar: 30g
  • Sodium: 30mg
  • Fat: 11g
  • Saturated Fat: 7g
  • Unsaturated Fat: 3g
  • Trans Fat: 0g
  • Carbohydrates: 31g
  • Fiber: 0g
  • Protein: 0g
  • Cholesterol: 30mg

Have you made this recipe? I'd love to see it!

Click here to Follow me on Pinterest

Cajun Garlic Butter Steak Bites

July 12, 2025 by Sue Leave a Comment

I love how this recipe turns simple steak into flavorful bites, perfectly seasoned with homemade Cajun spices and coated in a rich garlic‑butter sauce. It’s quick, indulgent, and just right for a satisfying meal or appetizer. Cajun Garlic Butter Steak Bites

Why You’ll Love This Recipe

I’m all about bold, satisfying flavors—and this delivers. The Cajun seasoning gives a smoky, spicy kick, while the garlic butter ties everything together with richness. Plus, I can have it from start to finish in about 30 minutes. It’s a crowd-pleaser whether served as a main course or shared on a grazing board.

Ingredients

(Here's a tip: Check out the full list of ingredients and measurements in the recipe card below.)

Cajun seasoning blend

  • 1 tablespoon smoked paprika

  • 1½ teaspoon kosher salt

  • 1½ teaspoon garlic powder

  • 1 teaspoon onion powder

  • ½ teaspoon black pepper

  • ½ teaspoon dried oregano

  • ½ teaspoon dried thyme

  • ½ teaspoon cayenne pepper (or less, to taste)

  • ½ teaspoon packed light brown sugar

Steak bites & sauce

  • 1½ lbs steak (strip steak, sirloin, ribeye, etc.)

  • 2 tablespoon vegetable oil, divided

  • 3 tablespoon unsalted butter

  • 5 cloves garlic, finely minced or grated

  • Minced fresh parsley, for garnish

Directions

  1. I start by slicing the steak into roughly 2-inch pieces and placing them in a bowl.

  2. I mix all the Cajun seasoning ingredients in a small bowl, then coat the steak pieces thoroughly.

  3. I heat a large skillet over medium-high heat until it’s very hot.

  4. I add 1 tablespoon of oil, then sear half the steak pieces without moving them for 2 minutes to get a crust, flip, and sear the other side for another 2 minutes. I repeat this with the second batch.

  5. I reduce the heat to medium-low, melt the butter in the skillet, and sauté the garlic for about 30 seconds.

  6. I return the steak bites to the skillet, toss them in the garlic butter, garnish with parsley, and serve immediately.

Servings and timing

  • Servings: 4

  • Prep time: 15 minutes

  • Cook time: 15 minutes

  • Total time: 30 minutes

Variations

  • I sometimes swap the homemade Cajun blend for a pre-made mix when I’m in a rush.

  • If I want more heat, I add extra cayenne or even a pinch of red pepper flakes.

  • When I want a touch of sweetness, I add a bit more brown sugar to the seasoning.

  • I’ve also made this with chicken or shrimp using the same steps and it works great.

  • For a buttery herb version, I skip the Cajun and just use garlic, butter, and fresh rosemary or thyme.

Storage/reheating

I store leftovers in an airtight container in the fridge for up to 4 days. To reheat, I prefer using a skillet over medium heat with a bit of butter to keep them juicy. Microwaving works too, but I do it in short bursts to avoid overcooking.

FAQs

What’s the best steak to use for steak bites?

I prefer using sirloin, strip steak, or ribeye since they’re tender and cook quickly.

Can I make this in advance?

Yes, I often prep the steak and seasoning ahead of time and cook it when ready to eat.

How do I make it less spicy?

I just reduce or skip the cayenne pepper for a milder flavor without losing the Cajun taste.

Can I use frozen steak?

Yes, I thaw it completely and pat it dry before seasoning to make sure it sears well.

What can I serve with this?

I like serving these with mashed potatoes, rice, or a side of roasted vegetables like asparagus or broccoli.

Conclusion

I love how this dish transforms everyday steak into something exciting and flavorful without much effort. The Cajun spices bring the heat, and the garlic butter brings comfort. Whether I’m hosting friends or just making dinner for myself, this recipe always hits the spot.

Print

clock clock iconcutlery cutlery iconflag flag iconfolder folder iconinstagram instagram iconpinterest pinterest iconfacebook facebook iconprint print iconsquares squares iconheart heart iconheart solid heart solid icon
Cajun Garlic Butter Steak Bites

Cajun Garlic Butter Steak Bites

5 Stars 4 Stars 3 Stars 2 Stars 1 Star No reviews
  • Author: Sue
  • Prep Time: 15 minutes
  • Cook Time: 15 minutes
  • Total Time: 30 minutes
  • Yield: 4 servings
  • Category: Main Course
  • Method: Searing
  • Cuisine: American
Print Recipe
Pin Recipe

Description

Cajun Garlic Butter Steak Bites are bold, juicy pieces of steak seasoned with a homemade Cajun spice blend and finished in a rich garlic-butter sauce. Perfect for a quick meal or a flavorful appetizer.


Ingredients

  • 1 Tbsp smoked paprika
  • 1½ tsp kosher salt
  • 1½ tsp garlic powder
  • 1 tsp onion powder
  • ½ tsp black pepper
  • ½ tsp dried oregano
  • ½ tsp dried thyme
  • ½ tsp cayenne pepper (or less, to taste)
  • ½ tsp packed light brown sugar
  • 1½ lbs steak (strip steak, sirloin, ribeye, etc.)
  • 2 Tbsp vegetable oil, divided
  • 3 Tbsp unsalted butter
  • 5 cloves garlic, finely minced or grated
  • Minced fresh parsley, for garnish

Instructions

  1. Slice the steak into roughly 2″ pieces and set aside in a bowl.
  2. Combine Cajun seasoning spices in a small bowl, then toss with the steak until evenly coated.
  3. Heat a large, heavy-bottomed skillet over medium-high until it just begins to smoke.
  4. Add 1 tablespoon oil. Place half the steak bites in the pan, searing 2 minutes on one side without moving, then flip and sear another 2 minutes until browned. Transfer to a plate and repeat with remaining oil and steak.
  5. Lower heat to medium-low. Add butter to the same skillet, letting it melt. Stir in garlic, cooking about 30 seconds while scraping up browned bits.
  6. Turn off heat, return steak bites to the pan, tossing to coat in garlic butter. Garnish with parsley and serve immediately.

Notes

  • Use store-bought Cajun seasoning as a shortcut.
  • Adjust garlic amount to taste—use less for a milder flavor.
  • Fresh parsley is optional but adds a nice brightness.
  • For less heat, reduce or omit cayenne pepper.
  • Leftovers can be refrigerated for up to 4–5 days and reheated gently.

Nutrition

  • Serving Size: ¼ of recipe
  • Calories: 425
  • Sugar: 1g
  • Sodium: 650mg
  • Fat: 32g
  • Saturated Fat: 12g
  • Unsaturated Fat: 18g
  • Trans Fat: 0g
  • Carbohydrates: 3g
  • Fiber: 1g
  • Protein: 32g
  • Cholesterol: 110mg

Have you made this recipe? I'd love to see it!

Click here to Follow me on Pinterest

Homemade Cheesy Breadsticks

July 12, 2025 by Sue Leave a Comment

I make these cheesy breadsticks using pizza dough—brushed with garlic butter, loaded with mozzarella and Parmesan, then baked until golden and bubbly. They're crispy on the outside, soft on the inside, and full of rich, cheesy flavor. Homemade Cheesy Breadsticks

Why You’ll Love This Recipe

I love how quick and versatile this recipe is. It transforms simple pizza dough into a warm, cheesy treat that works as an appetizer, snack, or side dish. I can whip them up in about 20 minutes, and they’re always a crowd-pleaser. I’ve even made them ahead of time, which makes entertaining stress-free.

Ingredients

(Here’s a tip: Check out the full list of ingredients and measurements in the recipe card below.)

  • Pizza dough

  • Olive oil (for coating the baking sheet)

  • Butter, melted

  • Minced garlic

  • Italian seasoning

  • Salt

  • Shredded mozzarella cheese

  • Shredded Parmesan cheese

Directions

  1. Preheat the oven to 500°F and move the oven rack to the lowest level.

  2. Roll the pizza dough into a 14×10 inch rectangle on a floured sheet of parchment paper.

  3. Transfer the dough to a lightly oiled baking sheet and press it to fill the pan.

  4. Mix the melted butter and garlic together, then brush it evenly over the dough.

  5. Sprinkle half of the Italian seasoning and salt over the dough.

  6. Top with mozzarella and Parmesan cheese, then sprinkle the remaining seasoning.

  7. Bake for about 10 minutes, or until the cheese is melted and bubbly with golden edges.

  8. Let the breadsticks cool slightly before slicing into 18 sticks using a pizza cutter.

Servings and timing

  • Servings: 18 breadsticks

  • Prep time: 10 minutes

  • Cook time: 10 minutes

  • Total time: 20 minutes

Variations

  • I sometimes use store-bought dough when I’m short on time, and it still turns out delicious.

  • For extra flavor, I swap in Colby Jack, provolone, or pepper jack instead of mozzarella.

  • I like adding fresh herbs like parsley, basil, or rosemary to the cheese topping.

  • Garlic herb seasoning or crushed red pepper flakes give the breadsticks a fun twist.

Storage/reheating

I store leftover breadsticks in an airtight container in the refrigerator for up to 5 days. To reheat, I use the toaster oven or regular oven at 350°F for a few minutes to bring back the crisp texture. They can also be microwaved, but they’ll be softer.

FAQs

How do I make this ahead of time?

I roll out the dough and prep the toppings in advance. When I’m ready to bake, everything’s ready to go—just pop it in the oven.

Can I use store-bought pizza dough?

Yes, I often use refrigerated pizza dough when I need something quick. It works just as well as homemade.

What kind of cheese is best for these breadsticks?

Mozzarella is my go-to, but I love experimenting with blends like provolone, Parmesan, or cheddar for added flavor.

Can I freeze the breadsticks?

Yes, I wrap baked breadsticks tightly and freeze them for up to 2 months. I reheat them in the oven straight from the freezer.

What dips go well with cheesy breadsticks?

I like serving them with marinara sauce, ranch dressing, garlic butter, or even pesto for a change.

Conclusion

These homemade cheesy breadsticks are one of my favorite go-to recipes. They’re easy to prepare, packed with flavor, and perfect for any occasion. Whether I’m making them for a party, a pasta night, or just a snack, they always get devoured.

Print

clock clock iconcutlery cutlery iconflag flag iconfolder folder iconinstagram instagram iconpinterest pinterest iconfacebook facebook iconprint print iconsquares squares iconheart heart iconheart solid heart solid icon
Homemade Cheesy Breadsticks

Homemade Cheesy Breadsticks

5 Stars 4 Stars 3 Stars 2 Stars 1 Star No reviews
  • Author: Sue
  • Prep Time: 10 minutes
  • Cook Time: 10 minutes
  • Total Time: 20 minutes
  • Yield: 18 breadsticks
  • Category: Appetizer
  • Method: Baking
  • Cuisine: American
  • Diet: Vegetarian
Print Recipe
Pin Recipe

Description

Quick and versatile cheesy breadsticks made with pizza dough, brushed with garlic butter, and topped with mozzarella and Parmesan cheese. Baked until golden and bubbly, they make a perfect appetizer or side.


Ingredients

  • 1 lb pizza dough
  • 1 tbsp olive oil (for coating the baking sheet)
  • 3 tbsp butter, melted
  • 2 cloves garlic, minced
  • 1 tsp Italian seasoning, divided
  • ¼ tsp salt
  • 1 cup shredded mozzarella cheese
  • ¼ cup shredded Parmesan cheese

Instructions

  1. Preheat oven to 500 °F and position oven rack at the lowest level.
  2. Roll pizza dough into a 14×10 inch rectangle on parchment paper with a light dusting of flour. Transfer to an oiled rimmed baking sheet and pat to size.
  3. Combine melted butter and minced garlic; spread evenly over the dough.
  4. Sprinkle half of the Italian seasoning and salt over the dough. Top with mozzarella and Parmesan. Finish with remaining seasoning.
  5. Bake for about 10 minutes, until cheese is melted and golden. Let rest for a minute or two.
  6. Slice into 18 breadsticks using a pizza cutter (6 across by 3 down).

Notes

  • Store-bought dough can be used as a time-saver.
  • Try cheese variations like Colby Jack or Pepper Jack.
  • Fresh herbs or garlic herb seasoning add extra flavor.
  • Leftovers can be stored in the fridge for up to a week.
  • Reheat in toaster oven to retain crispiness.

Nutrition

  • Serving Size: 1 breadstick
  • Calories: 120
  • Sugar: 0.5g
  • Sodium: 190mg
  • Fat: 7g
  • Saturated Fat: 3.5g
  • Unsaturated Fat: 3g
  • Trans Fat: 0g
  • Carbohydrates: 11g
  • Fiber: 0.5g
  • Protein: 4g
  • Cholesterol: 15mg

Have you made this recipe? I'd love to see it!

Click here to Follow me on Pinterest

Three Bean Summer Salad

July 11, 2025 by lina Leave a Comment

This Three Bean Summer Salad is a refreshing, colorful, and nutritious dish perfect for summer gatherings or a quick healthy lunch. Packed with protein, fiber, and a variety of vegetables, it’s a dish that’s as satisfying as it is delicious. The medley of beans and fresh veggies, combined with a tangy vinaigrette dressing, creates a mouthwatering combination that’s sure to be a hit at any table.

Three Bean Summer Salad

Why You’ll Love This Recipe

I love this recipe because it’s incredibly versatile, light, and full of vibrant flavors. The combination of beans provides a satisfying texture while the dressing brings a zesty kick. It’s not only easy to make but also quick to prepare, making it an excellent choice for a last-minute meal or a crowd-pleasing side dish. Plus, this salad is a great source of plant-based protein, which makes it both filling and nutritious.

Ingredients

  • 1 can of kidney beans, drained and rinsed
  • 1 can of chickpeas, drained and rinsed
  • 1 can of black beans, drained and rinsed
  • 1 cup of cherry tomatoes, halved
  • 1 cup of diced cucumber
  • ½ cup red onion, finely chopped
  • ¼ cup fresh parsley, chopped
  • ¼ cup olive oil
  • 2 tablespoons red wine vinegar
  • 1 tablespoon Dijon mustard
  • Salt and pepper to taste
    (Tip: You'll find the full list of ingredients and measurements in the recipe card below.)

Directions

  1. In a large bowl, combine the kidney beans, chickpeas, black beans, cherry tomatoes, cucumber, red onion, and fresh parsley.
  2. In a small bowl or jar, whisk together the olive oil, red wine vinegar, Dijon mustard, salt, and pepper until well combined.
  3. Pour the dressing over the salad and toss gently to coat the ingredients evenly.
  4. Cover and refrigerate the salad for at least 30 minutes to allow the flavors to meld together.
  5. Serve chilled, and enjoy!

Servings and Timing

  • Servings: 4-6
  • Preparation time: 10 minutes
  • Chilling time: 30 minutes

Variations

I like to get creative with this salad by adding different vegetables or herbs based on what’s in season or what I have on hand. Some great variations include:

  • Adding diced bell peppers or zucchini for extra crunch and color.
  • Swapping out the parsley for cilantro for a slightly different flavor.
  • For a bit of sweetness, I add a handful of corn kernels or sliced strawberries.
  • If I want to make the salad heartier, I’ll include some diced avocado.

Storage/Reheating

This Three Bean Summer Salad stores well in the fridge for up to 3 days. I recommend keeping the dressing separate if you plan to store leftovers, as it helps prevent the salad from getting soggy. Just toss everything together again when ready to serve. I wouldn’t recommend reheating this dish since it’s best enjoyed chilled, but it’s delicious cold or at room temperature.

FAQs

Can I use dried beans instead of canned beans?

Yes, you can! If you prefer to use dried beans, make sure to cook them beforehand and allow them to cool before adding them to the salad.

Can I make this salad ahead of time?

Absolutely! In fact, the flavors get better as they sit together. You can make this salad a day or two ahead and store it in the fridge until you’re ready to serve.

Is this recipe gluten-free?

Yes, this Three Bean Summer Salad is naturally gluten-free, making it a great choice for anyone with dietary restrictions.

Can I add cheese to this salad?

If you like cheese, crumbled feta or shredded mozzarella would make a great addition to the salad. Just sprinkle it on top after tossing everything together.

How can I make this salad spicier?

To add a little heat, I sometimes toss in some chopped jalapeños or a pinch of red pepper flakes in the dressing.

Conclusion

This Three Bean Summer Salad is a simple, delicious, and healthy dish that I can enjoy on its own or as a side to complement any meal. It’s quick to make, packed with flavor, and perfect for any summer occasion. Whether you're having a picnic, a barbecue, or just looking for a light lunch, this salad will always hit the spot.

Print

clock clock iconcutlery cutlery iconflag flag iconfolder folder iconinstagram instagram iconpinterest pinterest iconfacebook facebook iconprint print iconsquares squares iconheart heart iconheart solid heart solid icon
Three Bean Summer Salad

Three Bean Summer Salad

5 Stars 4 Stars 3 Stars 2 Stars 1 Star No reviews
  • Author: Sophia
  • Prep Time: 10 minutes
  • Cook Time: 0 minutes
  • Total Time: 40 minutes
  • Yield: 4-6 servings
  • Category: Salad
  • Method: No-cook
  • Cuisine: American
  • Diet: Vegan
Print Recipe
Pin Recipe

Description

A refreshing and nutritious Three Bean Summer Salad with a variety of beans, fresh veggies, and a tangy vinaigrette dressing, perfect for summer gatherings or a quick healthy lunch.


Ingredients

  • 1 can of kidney beans, drained and rinsed
  • 1 can of chickpeas, drained and rinsed
  • 1 can of black beans, drained and rinsed
  • 1 cup of cherry tomatoes, halved
  • 1 cup of diced cucumber
  • ½ cup red onion, finely chopped
  • ¼ cup fresh parsley, chopped
  • ¼ cup olive oil
  • 2 tablespoons red wine vinegar
  • 1 tablespoon Dijon mustard
  • Salt and pepper to taste

Instructions

  1. In a large bowl, combine the kidney beans, chickpeas, black beans, cherry tomatoes, cucumber, red onion, and fresh parsley.
  2. In a small bowl or jar, whisk together the olive oil, red wine vinegar, Dijon mustard, salt, and pepper until well combined.
  3. Pour the dressing over the salad and toss gently to coat the ingredients evenly.
  4. Cover and refrigerate the salad for at least 30 minutes to allow the flavors to meld together.
  5. Serve chilled, and enjoy!

Notes

  • The salad can be made ahead of time; it gets better as it sits in the fridge.
  • Keep the dressing separate when storing leftovers to avoid sogginess.
  • Can be customized with other vegetables or herbs based on preference.

Nutrition

  • Serving Size: 1 serving
  • Calories: 150
  • Sugar: 3g
  • Sodium: 250mg
  • Fat: 7g
  • Saturated Fat: 1g
  • Unsaturated Fat: 6g
  • Trans Fat: 0g
  • Carbohydrates: 20g
  • Fiber: 6g
  • Protein: 7g
  • Cholesterol: 0mg
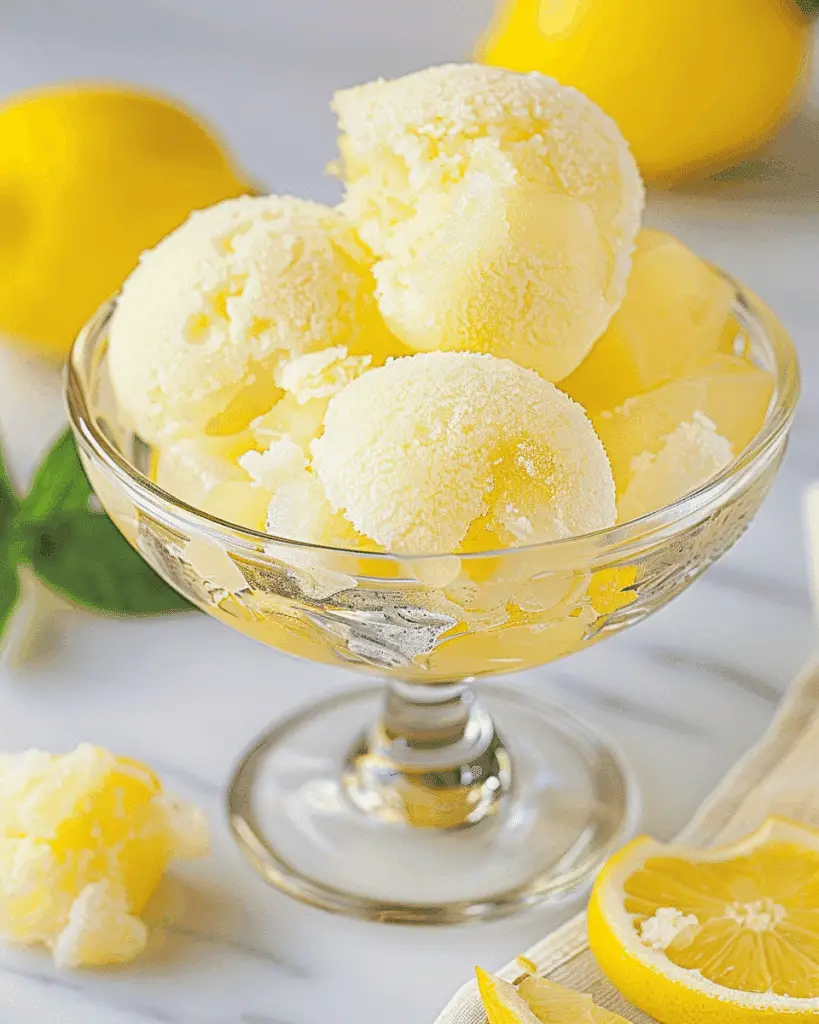
Have you made this recipe? I'd love to see it!

Click here to Follow me on Pinterest

Viral TikTok Cucumber & Bell Pepper Salad

July 11, 2025 by Sue Leave a Comment

I’m excited to share this refreshingly crunchy salad—it’s a viral TikTok sensation featuring crisp cucumbers and colorful bell peppers tossed in a sweet‑spicy sesame dressing. It’s ready in about 10 minutes, and perfect for summer sides or snacking.

Viral TikTok Cucumber & Bell Pepper Salad

Why You’ll Love This Recipe

I love how this salad is vibrant and so easy—it only needs five ingredients and minimal effort. The combination of sweet mini peppers, cool cucumbers, ginger‑sesame dressing, spicy chili oil, and that unforgettable savory “Everything But the Bagel” twist makes it endlessly addictive. I often make it ahead and stash it in the fridge, ready to brighten any meal or gathering.

ingredients

(Here's a tip: Check out the full list of ingredients and measurements in the recipe card below.)

  • 3–4 mini (Persian) cucumbers, thinly sliced

  • 6–7 mini sweet bell peppers (red, orange, yellow), sliced

  • 2 tablespoons chili crisp oil

  • ¼ cup ginger sesame dressing

  • 2½ teaspoons everything but the bagel seasoning

directions

  1. Slice the cucumbers and bell peppers into thin, bite‑sized pieces.

  2. Toss together cucumbers, peppers, chili oil, ginger sesame dressing, and everything bagel seasoning in a bowl until everything is well coated.

  3. Chill the salad in the fridge for about 30 minutes to let flavors meld.

  4. Stir again before serving.

Servings and timing

  • Prep time: ~10 minutes

  • Chill time: 30 minutes

  • Total time: approximately 40 minutes

  • Serves: 4 side‑dish portions

Variations

  • I make it a main dish by adding chopped cooked chicken breast, rotisserie chicken, or cooked pasta like bow ties or fusilli.

  • I add extra texture with green onions, thinly sliced red onion, cherry tomatoes, avocado, or crumbled feta cheese.

  • When I want a milder version, I swap the chili oil with olive oil.

storage/reheating

I store this salad in an airtight container in the fridge, and it stays fresh for up to 4 days. Before serving, I always give it a good stir. There’s no reheating—just serve chilled and crisp.

FAQs

What if I don’t have mini cucumbers?

I sometimes use sliced English cucumbers instead—just peel them if I want to reduce bitterness.

Can I use other dressings if I don’t have ginger‑sesame?

Yes—I’ve replaced it with other Asian-style sesame dressings and it still tastes great.

Is there a vegan or dairy‑free version?

Yes—all the main ingredients are vegan and dairy-free. I just avoid any cheese add-ins if I want to keep it that way.

Can I prep this salad ahead of time?

Definitely. I like to make it the night before. It gets even better as the flavors soak in.

How spicy is it, and can I adjust it?

The chili oil gives moderate heat. I usually start with a small amount and add more if I’m in the mood for a kick. Olive oil works great if I want zero spice.

Conclusion

I keep coming back to this salad because it’s quick, colorful, and refreshingly light—while also full of flavor. I’m always experimenting—sometimes adding chicken, swapping ingredients, or serving it over cottage cheese for an extra‑protein snack. Make it your own, and I promise it’ll become a staple in your summer rotation!

Print

clock clock iconcutlery cutlery iconflag flag iconfolder folder iconinstagram instagram iconpinterest pinterest iconfacebook facebook iconprint print iconsquares squares iconheart heart iconheart solid heart solid icon
Viral TikTok Cucumber & Bell Pepper Salad

Viral TikTok Cucumber & Bell Pepper Salad

5 Stars 4 Stars 3 Stars 2 Stars 1 Star No reviews
  • Author: Sue
  • Prep Time: 10 minutes
  • Cook Time: 0 minutes
  • Total Time: 40 minutes
  • Yield: 4 side-dish portions
  • Category: Salad
  • Method: No-Cook
  • Cuisine: Asian-Inspired
  • Diet: Vegan
Print Recipe
Pin Recipe

Description

A vibrant, refreshing salad made with crisp cucumbers and colorful mini bell peppers, tossed in a sweet-spicy sesame dressing with a savory seasoning twist. It's quick to prepare and perfect for a summer side or healthy snack.


Ingredients

  • 3–4 mini (Persian) cucumbers, thinly sliced
  • 6–7 mini sweet bell peppers (red, orange, yellow), sliced
  • 2 tablespoons chili crisp oil
  • ¼ cup ginger sesame dressing
  • 2½ teaspoons everything but the bagel seasoning

Instructions

  1. Slice the cucumbers and bell peppers into thin, bite‑sized pieces.
  2. Toss together cucumbers, peppers, chili oil, ginger sesame dressing, and everything bagel seasoning in a bowl until well coated.
  3. Chill the salad in the fridge for about 30 minutes to let flavors meld.
  4. Stir again before serving.

Notes

  • Chill the salad for 30 minutes before serving for best flavor.
  • Store in an airtight container in the fridge for up to 4 days.
  • Substitute English cucumbers if mini cucumbers aren't available.
  • Adjust chili oil amount to control spice level.
  • Use any Asian sesame dressing if ginger-sesame is unavailable.

Nutrition

  • Serving Size: 1 side portion
  • Calories: 120
  • Sugar: 4g
  • Sodium: 300mg
  • Fat: 9g
  • Saturated Fat: 1g
  • Unsaturated Fat: 7g
  • Trans Fat: 0g
  • Carbohydrates: 8g
  • Fiber: 2g
  • Protein: 1g
  • Cholesterol: 0mg

Have you made this recipe? I'd love to see it!

Click here to Follow me on Pinterest

Zesty Homemade Slap Ya Mama Seasoning

July 11, 2025 by Sue Leave a Comment

I’ve crafted a version of the beloved Cajun-style “Slap Ya Mama” seasoning that packs a flavorful punch using simple pantry spices. It’s bold, versatile, and perfect for elevating everyday dishes.

Zesty Homemade Slap Ya Mama Seasoning

Why You’ll Love This Recipe

I love how customizable this blend is—whether I want it mild or fiery hot, I just adjust the cayenne or red pepper flakes. It's more affordable than store-bought mixes, and because I make it myself, I skip any unwanted additives. I also enjoy how it brightens up everything from meats to snacks with its zesty Cajun kick.

ingredients

(Here's a tip: Check out the full list of ingredients and measurements in the recipe card below.)

  • 1 tablespoon smoked paprika

  • 1 tablespoon seasoning salt

  • 1½ teaspoons onion powder

  • 1½ teaspoons garlic powder

  • 1 teaspoon cayenne pepper

  • 1 teaspoon coarse black pepper

  • 1 teaspoon dried oregano

  • 1 teaspoon dried thyme

  • 1 teaspoon red pepper flakes

directions

  1. I gather all the spices in a mixing bowl.

  2. I stir thoroughly until the mixture is uniform.

  3. I transfer it to an airtight container and store it in a cool, dry place.

Servings and timing

  • Prep time: 5 minutes

  • Makes about ½ cup, roughly 4 servings (2 tablespoons per serving)

Variations

  • Milder version: I reduce the cayenne and red pepper flakes, and increase the paprika.

  • Extra smoky: I use smoked paprika and add a pinch of ground chipotle.

  • Herb-forward: I add a teaspoon each of dried basil and parsley.

  • Low-sodium: I swap the seasoning salt for kosher salt or leave it out and season as I cook.

storage/reheating

I store my blend in a tightly sealed jar in the pantry. It keeps its flavor for about 4 to 6 weeks, so I usually make small batches to keep it fresh. No reheating is needed—just shake and use.

FAQs

What can I use this seasoning for?

I sprinkle it on chicken, steak, shrimp, or roasted vegetables. It also works great in soups, stews, on popcorn, roasted nuts, or even deviled eggs.

How do I adjust the heat level?

I tweak the amounts of cayenne and red pepper flakes. For less heat, I cut them down; for more, I add an extra pinch.

Can I scale the recipe up?

Absolutely. I just double or triple the ingredients if I want to make a bigger batch.

Will it stay fresh if I double the batch?

Yes, as long as I store it in a cool, dry place. I still try to use it within 4 to 6 weeks for the best flavor.

Can I replace seasoning salt?

Definitely. I often swap it out with kosher salt or leave it out completely and season the dish to taste when I cook.

Conclusion

I’m always excited to have this homemade Slap Ya Mama seasoning on hand. It brings bold Cajun flavor to anything I cook without the additives or price tag of store-bought blends. It’s quick to make, easy to customize, and sure to become a staple in any kitchen.

Print

clock clock iconcutlery cutlery iconflag flag iconfolder folder iconinstagram instagram iconpinterest pinterest iconfacebook facebook iconprint print iconsquares squares iconheart heart iconheart solid heart solid icon
Zesty Homemade Slap Ya Mama Seasoning

Zesty Homemade Slap Ya Mama Seasoning

5 Stars 4 Stars 3 Stars 2 Stars 1 Star No reviews
  • Author: Sue
  • Prep Time: 5 minutes
  • Cook Time: 0 minutes
  • Total Time: 5 minutes
  • Yield: 4 servings (½ cup total)
  • Category: Seasoning
  • Method: Mixing
  • Cuisine: Cajun
  • Diet: Low Salt
Print Recipe
Pin Recipe

Description

A bold and zesty homemade Cajun-style seasoning blend inspired by the popular 'Slap Ya Mama' mix, made with simple pantry spices and customizable heat levels.


Ingredients

  • 1 tablespoon smoked paprika
  • 1 tablespoon seasoning salt
  • 1½ teaspoons onion powder
  • 1½ teaspoons garlic powder
  • 1 teaspoon cayenne pepper
  • 1 teaspoon coarse black pepper
  • 1 teaspoon dried oregano
  • 1 teaspoon dried thyme
  • 1 teaspoon red pepper flakes

Instructions

  1. Gather all the spices in a mixing bowl.
  2. Stir thoroughly until the mixture is uniform.
  3. Transfer to an airtight container and store in a cool, dry place.

Notes

  • For a milder version, reduce cayenne and red pepper flakes.
  • Use smoked paprika and chipotle for an extra smoky flavor.
  • To make it herb-forward, add dried basil and parsley.
  • Store in a tightly sealed jar for up to 6 weeks.

Nutrition

  • Serving Size: 2 tablespoons
  • Calories: 15
  • Sugar: 0g
  • Sodium: 350mg
  • Fat: 0.5g
  • Saturated Fat: 0g
  • Unsaturated Fat: 0.5g
  • Trans Fat: 0g
  • Carbohydrates: 3g
  • Fiber: 1g
  • Protein: 0.5g
  • Cholesterol: 0mg
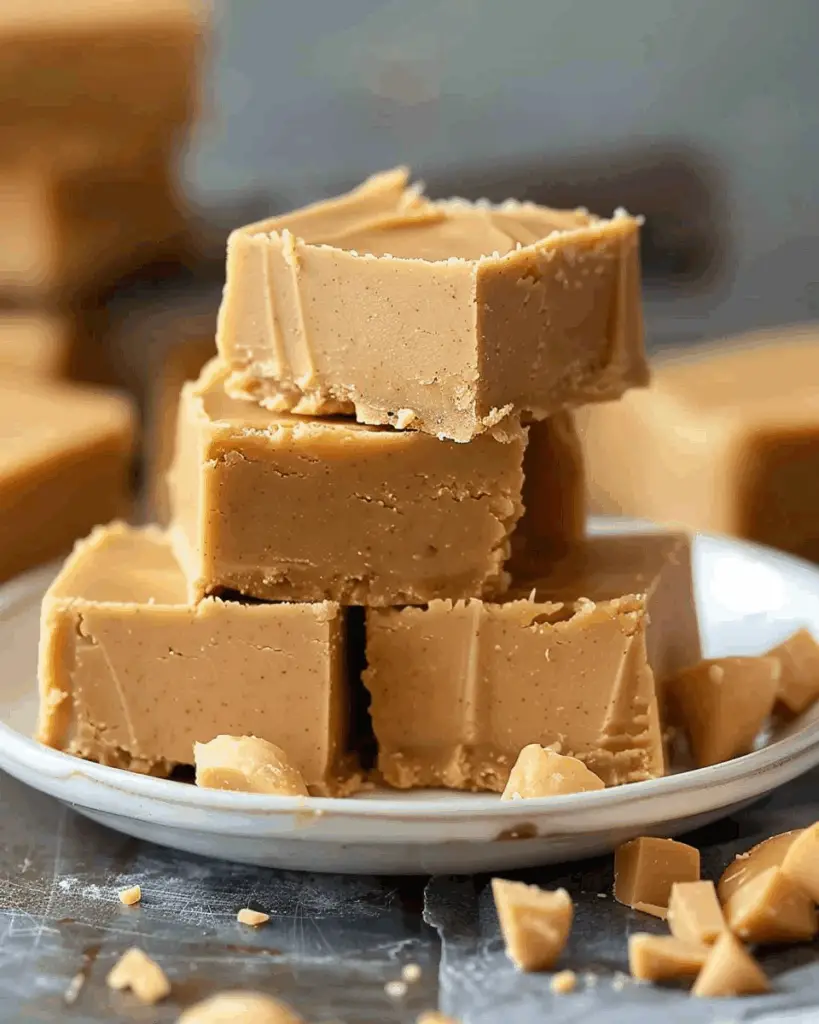
Have you made this recipe? I'd love to see it!

Click here to Follow me on Pinterest

Creamy Caprese Pasta Salad

July 11, 2025 by Sue Leave a Comment

A fresh spin on the classic Caprese salad, this creamy pasta version brings together juicy tomatoes, soft mozzarella, aromatic basil, and tender pasta all coated in a velvety dressing. In about 30 minutes, I’ve got a vibrant, crowd-pleasing dish that holds well for leftovers—perfect for summer meals or casual gatherings.

Creamy Caprese Pasta Salad

Why You’ll Love This Recipe

I love how this pasta salad transforms the simple Caprese trio into a hearty yet light dish. The creamy dressing clings to every noodle, making each bite burst with flavor. It’s easy enough for a quick lunch, yet elegant enough for a potluck or barbecue. Plus, I can prep it ahead and toss in fresh basil just before serving for that perfect pop of color and aroma.

ingredients

(Here's a tip: Check out the full list of ingredients and measurements in the recipe card below.)

  • 1 lb small pasta (like rotini or cavatappi)

  • ⅓ cup extra-virgin olive oil

  • 3 tablespoon white balsamic vinegar

  • 1 clove garlic, minced

  • ½ teaspoon kosher salt

  • 1 teaspoon freshly ground black pepper

  • 16 oz fresh mozzarella (bocconcini or diced)

  • 3 cups cherry tomatoes, halved

  • ½ cup fresh basil, chopped

directions

  1. Cook the pasta in salted boiling water until slightly past al dente. Drain and rinse under cold water to stop the cooking.

  2. In a large bowl, whisk together the olive oil, white balsamic vinegar, garlic, salt, and pepper.

  3. Add the cooled pasta to the dressing and toss to coat.

  4. Gently fold in the mozzarella, cherry tomatoes, and basil until everything is well combined.

  5. Taste and adjust seasoning if needed. I like to chill it for 15–30 minutes before serving to let the flavors meld.

Servings and timing

  • Servings: 4 as a side, 2–3 as a main

  • Prep time: 10 minutes

  • Cook time: 10 minutes

  • Total time: 30 minutes

Variations

  • Add a spoonful of mayo or Greek yogurt for an extra creamy dressing.

  • Use aged balsamic vinegar for a deeper, richer flavor.

  • Mix in veggies like diced bell pepper or cucumber for extra crunch.

  • Add grilled chicken or chickpeas to turn it into a full meal.

  • Swap in gluten-free pasta to suit dietary needs.

storage/reheating

I store leftovers in an airtight container in the fridge, where they stay fresh for up to 2 days. Before serving again, I like to toss the salad with a splash of olive oil or vinegar to revive the flavors. If I’m making it ahead, I wait to add the basil until just before serving to keep it vibrant and green.

FAQs

What type of pasta is best for this salad?

I like to use small, twisty shapes like rotini or cavatappi because they hold onto the dressing and mix-ins really well.

Can I make it ahead of time?

Yes, and I actually prefer it that way. Letting it sit in the fridge for a bit helps the flavors meld together. I just wait to add the basil until serving.

How do I keep the basil from wilting?

I usually add the basil right before serving so it stays fresh and fragrant. If I’m storing leftovers, I add a fresh sprinkle on top later.

Can I make this dairy-free?

Yes, I can leave out the mozzarella or substitute it with a dairy-free cheese alternative. I sometimes add extra veggies or chickpeas for more substance.

Is this good served warm?

It works well at room temperature or slightly chilled, but I’ve also enjoyed it slightly warm right after mixing everything together. It’s really versatile.

Conclusion

This Creamy Caprese Pasta Salad is one of those dishes I keep coming back to—simple, satisfying, and packed with flavor. Whether I’m making it for a picnic, a weeknight dinner, or meal prep, it always delivers. I love how easy it is to customize and how beautifully it brings together fresh summer ingredients in a creamy, comforting bowl.

Print

clock clock iconcutlery cutlery iconflag flag iconfolder folder iconinstagram instagram iconpinterest pinterest iconfacebook facebook iconprint print iconsquares squares iconheart heart iconheart solid heart solid icon
Creamy Caprese Pasta Salad

Creamy Caprese Pasta Salad

5 Stars 4 Stars 3 Stars 2 Stars 1 Star No reviews
  • Author: Sue
  • Prep Time: 10 minutes
  • Cook Time: 10 minutes
  • Total Time: 30 minutes
  • Yield: 4 as a side, 2–3 as a main
  • Category: Salad
  • Method: Boiling
  • Cuisine: Italian
  • Diet: Vegetarian
Print Recipe
Pin Recipe

Description

A creamy and refreshing twist on the traditional Caprese salad, this pasta salad combines juicy cherry tomatoes, mozzarella, and fresh basil with a rich olive oil dressing, making it a perfect dish for summer gatherings or quick lunches.


Ingredients

  • 1 lb small pasta (like rotini or cavatappi)
  • ⅓ cup extra-virgin olive oil
  • 3 tbsp white balsamic vinegar
  • 1 clove garlic, minced
  • ½ tsp kosher salt
  • 1 tsp freshly ground black pepper
  • 16 oz fresh mozzarella (bocconcini or diced)
  • 3 cups cherry tomatoes, halved
  • ½ cup fresh basil, chopped

Instructions

  1. Bring a large pot of salted water to a boil. Cook pasta until slightly past al dente, then drain and rinse under cold water to stop cooking.
  2. In a big bowl, whisk together olive oil, white balsamic vinegar, garlic, salt, and pepper to make the dressing.
  3. Add cooled pasta to the dressing and toss to coat.
  4. Gently fold in mozzarella, tomatoes, and basil until everything is combined.
  5. Adjust salt and pepper to taste. Chill for 15–30 minutes before serving if desired.

Notes

  • For best flavor, add fresh basil just before serving.
  • Can be served slightly chilled or at room temperature.
  • Add a splash of olive oil or vinegar to refresh leftovers.
  • Customize with veggies or protein for variation.

Nutrition

  • Serving Size: 1 cup
  • Calories: 390
  • Sugar: 3g
  • Sodium: 430mg
  • Fat: 21g
  • Saturated Fat: 7g
  • Unsaturated Fat: 13g
  • Trans Fat: 0g
  • Carbohydrates: 37g
  • Fiber: 2g
  • Protein: 14g
  • Cholesterol: 30mg

Have you made this recipe? I'd love to see it!

Click here to Follow me on Pinterest

Lemon Sweet Rolls

July 11, 2025 by Sue Leave a Comment

I’ve fallen head over heels for these Lemon Sweet Rolls—they’re like a bright burst of sunshine wrapped in soft, fluffy dough. Imagine the classic cinnamon roll turned tangy and fresh with lemon flavor—that's exactly what I created here.

Lemon Sweet Rolls

Why You’ll Love This Recipe

I absolutely adore how the lemon zest and juice awaken the taste buds, bringing a refreshing twist to the familiar comfort of sweet rolls. They’re incredibly versatile—perfect for a cozy weekend brunch with friends or a cheerful afternoon treat. Plus, they’re deceptively simple to make, even for someone like me who usually goes for cinnamon rolls—though the process is nearly identical, with just a citrusy upgrade .

Ingredients

(Here’s a tip: Check out the full list of ingredients and measurements in the recipe card below.)

Dough

  • 1 ½ cups whole milk, warmed to about 110°F

  • 2 ¼ teaspoon instant yeast

  • 1 large egg

  • 3 tablespoon granulated sugar

  • 2 teaspoon lemon zest

  • ½ teaspoon salt

  • 3 tablespoon melted unsalted butter

  • 3½–4¼ cups bread flour (or all-purpose flour works too)

  • Olive oil or butter (for greasing)

Filling

  • ¾ cup granulated sugar

  • 1½ tablespoon lemon zest (approx. 2 large lemons)

  • 5 tablespoon softened unsalted butter

  • 1 tablespoon butter (for greasing pan)

Glaze

  • 4 oz full‑fat cream cheese

  • 2 tablespoon softened unsalted butter

  • 1¼ cups powdered sugar

  • A pinch of salt

  • 2 tablespoon lemon juice

Garnish

  • Lemon slices

  • Lemon zest

Directions

  1. In a stand mixer bowl, whisk the warmed milk, yeast, egg, sugar, lemon zest, melted butter, and salt until foamy.

  2. Add flour and knead for 3 minutes (or hand‑knead for 5 minutes) until smooth and slightly tacky.

  3. Coat a bowl with oil, place the dough inside, cover, and let rise until doubled—about 1 hour depending on temperature.

  4. Roll the dough into a roughly 12×16″ rectangle.

  5. Spread softened butter evenly over the dough, then sprinkle the lemon‑sugar mixture (¾ cup sugar + zest).

  6. Roll tightly from the long side into a log, pinch the seam, and cut in half, then into 6 pieces each (12 rolls total).

  7. Grease a 9″×13″ pan with butter, arrange rolls with space between, cover, and let rise again for 45–60 minutes.

  8. Preheat oven to 350°F. Brush rolls with 1 tablespoon melted butter, bake 28–30 minutes (cover with foil if browning too quickly).

  9. While rolls rest, beat cream cheese and butter until smooth. Add powdered sugar, salt, and lemon juice; beat to a pourable consistency.

  10. Drizzle the glaze over warm rolls, top with lemon slices and zest, and serve immediately.

Servings and timing

  • Total time: About 3 hours (30 min prep, 2 hr rising, 28–30 min baking)

  • Yields: 12 rolls

Variations

  • Swap some lemon for orange zest or juice for a citrus blend.

  • Mix in fresh berries like blueberries or strawberries.

  • Add chopped nuts (almonds, pecans, pistachios) in the filling or on top.

  • Opt for a simpler glaze—just powdered sugar and lemon juice.

  • Skip the glaze for a lighter, tangy roll experience.

Storage/reheating

I always enjoy these rolls fresh, but I’ve got backup plans:

  • Refrigerator: Airtight container for 2–3 days.

  • Freezer: Once cooled, wrap tightly and freeze up to 1 month.

  • Reheat: Microwave for ~30 seconds to revive warmth and softness.

  • Make-ahead: After shaping and second rise, refrigerate for up to 48 hours. Bring to room temp before baking.

  • Freeze unbaked: Through step 10, cover well, freeze, thaw overnight in fridge, then bake.

FAQs

What flour should I use?

I prefer bread flour for its higher protein—it makes the dough extra fluffy. But all-purpose flour works beautifully too .

How long does the dough rise?

Plan for about 1 hour a rise, but room temperature matters. The dough should double and feel dome-shaped—just poke it gently and it should spring back slowly .

Can I use active dry yeast instead of instant?

Yes! If using active dry, dissolve it in warm milk with 1 tablespoon sugar and let it sit 5–10 minutes until foamy, then add remaining sugar. You’ll need an extra 2 tablespoon sugar overall .

What temperature should the milk be?

Keep it around 110°F—warm and comfortable to touch. Too hot, and it harms the yeast; too cool, and your dough won’t rise properly .

How do I adjust the glaze consistency?

For a thinner glaze, add extra lemon juice or milk. For thicker, add more powdered sugar until you reach the desired pourability .

Conclusion

I love how these Lemon Sweet Rolls bring a fresh twist to classic cinnamon rolls—they’re bright, soft, and full of flavor. Whether you're making them for brunch, dessert, or just a cozy moment at home, they never disappoint. I can’t wait to hear how much you enjoy them!

Print

clock clock iconcutlery cutlery iconflag flag iconfolder folder iconinstagram instagram iconpinterest pinterest iconfacebook facebook iconprint print iconsquares squares iconheart heart iconheart solid heart solid icon
Lemon Sweet Rolls

Lemon Sweet Rolls

5 Stars 4 Stars 3 Stars 2 Stars 1 Star No reviews
  • Author: Sue
  • Prep Time: 30 minutes
  • Cook Time: 30 minutes
  • Total Time: 3 hours
  • Yield: 12 rolls
  • Category: Breakfast, Dessert
  • Method: Baking
  • Cuisine: American
  • Diet: Vegetarian
Print Recipe
Pin Recipe

Description

These Lemon Sweet Rolls are a bright, citrusy twist on classic cinnamon rolls. Soft, fluffy dough is swirled with a tangy lemon-sugar filling and topped with a zesty cream cheese glaze.


Ingredients

  • 1 ½ cups whole milk, warmed to about 110°F
  • 2 ¼ tsp instant yeast
  • 1 large egg
  • 3 Tbsp granulated sugar
  • 2 tsp lemon zest
  • ½ tsp salt
  • 3 Tbsp melted unsalted butter
  • 3½–4¼ cups bread flour (or all-purpose flour)
  • Olive oil or butter (for greasing)
  • ¾ cup granulated sugar (filling)
  • 1½ Tbsp lemon zest (filling)
  • 5 Tbsp softened unsalted butter (filling)
  • 1 Tbsp butter (for greasing pan)
  • 4 oz full-fat cream cheese (glaze)
  • 2 Tbsp softened unsalted butter (glaze)
  • 1¼ cups powdered sugar (glaze)
  • A pinch of salt (glaze)
  • 2 Tbsp lemon juice (glaze)
  • Lemon slices (garnish)
  • Lemon zest (garnish)

Instructions

  1. In a stand mixer bowl, whisk the warmed milk, yeast, egg, sugar, lemon zest, melted butter, and salt until foamy.
  2. Add flour and knead for 3 minutes (or hand-knead for 5 minutes) until smooth and slightly tacky.
  3. Coat a bowl with oil, place the dough inside, cover, and let rise until doubled, about 1 hour.
  4. Roll the dough into a roughly 12×16″ rectangle.
  5. Spread softened butter over the dough, then sprinkle with the lemon-sugar mixture.
  6. Roll tightly from the long side into a log, pinch the seam, and cut into 12 equal pieces.
  7. Grease a 9×13″ pan with butter, arrange the rolls with space between, cover, and let rise again for 45–60 minutes.
  8. Preheat oven to 350°F. Brush rolls with 1 tablespoon melted butter and bake for 28–30 minutes, covering with foil if browning too quickly.
  9. While rolls rest, beat cream cheese and butter until smooth. Add powdered sugar, salt, and lemon juice; beat to a pourable consistency.
  10. Drizzle glaze over warm rolls, top with lemon slices and zest, and serve immediately.

Notes

  • Bread flour makes the dough extra fluffy, but all-purpose flour works too.
  • You can swap lemon with orange for a citrus blend or add berries/nuts for variation.
  • Store in an airtight container for 2–3 days or freeze for up to a month.
  • To reheat, microwave for about 30 seconds.
  • Dough can be made ahead and refrigerated before baking.

Nutrition

  • Serving Size: 1 roll
  • Calories: 290
  • Sugar: 19g
  • Sodium: 150mg
  • Fat: 11g
  • Saturated Fat: 7g
  • Unsaturated Fat: 3g
  • Trans Fat: 0g
  • Carbohydrates: 43g
  • Fiber: 1g
  • Protein: 5g
  • Cholesterol: 35mg

Have you made this recipe? I'd love to see it!

Click here to Follow me on Pinterest

Rainbow Orzo Salad

July 11, 2025 by Sue Leave a Comment

Rainbow Orzo Salad is a vibrant, fresh pasta salad loaded with crunchy vegetables, creamy feta, and tossed in a zesty homemade dressing—perfect for light lunches, summer gatherings, or meal prep.

Rainbow Orzo Salad

Why You’ll Love This Recipe

I make this salad all summer long because it's bright, flavorful, and so versatile. It comes together in under 30 minutes, and the simple vinaigrette outshines anything store‑bought. I love how I can swap in whatever veggies I have on hand, and it even improves the next day—ideal for meal prep or potlucks.

Ingredients

(Here's a tip: Check out the full list of ingredients and measurements in the recipe card below.)

For the dressing
• Extra virgin olive oil
• Red wine vinegar
• Lemon juice
• Honey
• Garlic, minced
• Italian seasoning
• Salt and black pepper

For the salad
• Orzo pasta
• Cherry or grape tomatoes, quartered
• Orange and yellow bell peppers, diced
• Cucumber, diced
• Red onion (optional), diced
• Crumbled feta cheese
• Fresh basil, sliced
• Salt and black pepper

Directions

  1. I cook the orzo in a large pot of salted boiling water until al dente, about 7–10 minutes. Then I drain and rinse it under cold water until it’s fully cooled.

  2. While the pasta cooks, I whisk together the olive oil, vinegar, lemon juice, honey, garlic, Italian seasoning, salt, and pepper to make the dressing.

  3. In a large bowl, I combine the cooled orzo, tomatoes, bell peppers, cucumber, red onion, feta, and basil.

  4. I pour the dressing over the salad and toss everything gently until well combined.

  5. I serve it immediately or refrigerate it in an airtight container if making ahead.

Servings and timing

This recipe makes about 6 servings.
Prep time: 15 minutes
Cook time: 10 minutes
Total time: 25 minutes

Variations

  • I swap in other vegetables like spinach, shredded carrots, or olives depending on what I have.

  • I add protein like chickpeas, grilled chicken, or shrimp to make it a complete meal.

  • I change the cheese to goat cheese or mozzarella, or leave it out for a dairy-free option.

  • Sometimes I roast the bell peppers or tomatoes for a deeper flavor.

  • I use maple syrup instead of honey and skip the feta for a vegan version.

  • I experiment with different dressings like Greek or lemon vinaigrette.

Storage/reheating

I store any leftovers in an airtight container in the fridge for up to 3 days. The pasta tends to soak up the dressing, so I usually add a drizzle of olive oil or extra dressing and give it a good toss before serving again. It’s best served cold or at room temperature, so no reheating is needed.

FAQs

What is orzo?

Orzo is a small, rice-shaped pasta made from semolina flour. It looks like rice but cooks like traditional pasta, and it’s perfect for salads.

How long does orzo take to cook?

Orzo typically takes about 7 to 10 minutes to cook until al dente. I taste it around the 8-minute mark to be sure.

Can I use a different type of pasta?

Yes, I sometimes use small pasta shapes like ditalini, mini shells, or even couscous when I don’t have orzo on hand.

What if I don’t like feta cheese?

No problem. I’ve made this salad without feta or with alternatives like goat cheese, mozzarella pearls, or just left the cheese out entirely.

Can I make this salad ahead of time?

Definitely. I often make it a day in advance. I just save a little of the dressing to stir in before serving so the salad stays fresh and flavorful.

Conclusion

I love how this Rainbow Orzo Salad brings color, crunch, and bold flavor to my table with minimal effort. It’s a go-to recipe for warm weather, gatherings, or a refreshing meal prep dish. It’s easy to customize, quick to prepare, and always satisfying.

Print

clock clock iconcutlery cutlery iconflag flag iconfolder folder iconinstagram instagram iconpinterest pinterest iconfacebook facebook iconprint print iconsquares squares iconheart heart iconheart solid heart solid icon
Rainbow Orzo Salad

Rainbow Orzo Salad

5 Stars 4 Stars 3 Stars 2 Stars 1 Star No reviews
  • Author: Sue
  • Prep Time: 15 minutes
  • Cook Time: 10 minutes
  • Total Time: 25 minutes
  • Yield: 6 servings
  • Category: Salad
  • Method: Boiling
  • Cuisine: Mediterranean
  • Diet: Vegetarian
Print Recipe
Pin Recipe

Description

Rainbow Orzo Salad is a vibrant, fresh pasta salad featuring crunchy vegetables, creamy feta, and a zesty homemade dressing. It's perfect for light lunches, summer gatherings, or make-ahead meal prep.


Ingredients

  • 1 cup orzo pasta
  • 1 cup cherry or grape tomatoes, quartered
  • ½ orange bell pepper, diced
  • ½ yellow bell pepper, diced
  • ½ cucumber, diced
  • ¼ red onion (optional), diced
  • ½ cup crumbled feta cheese
  • 2 tablespoons fresh basil, sliced
  • Salt and black pepper, to taste
  • ¼ cup extra virgin olive oil
  • 2 tablespoons red wine vinegar
  • 1 tablespoon lemon juice
  • 1 teaspoon honey
  • 1 garlic clove, minced
  • 1 teaspoon Italian seasoning

Instructions

  1. Cook orzo in a large pot of salted boiling water until al dente, about 7–10 minutes. Drain and rinse under cold water until cooled.
  2. In a bowl or jar, whisk together olive oil, red wine vinegar, lemon juice, honey, garlic, Italian seasoning, salt, and black pepper to make the dressing.
  3. In a large bowl, combine the cooled orzo, tomatoes, bell peppers, cucumber, red onion, feta, and basil.
  4. Pour the dressing over the salad and toss well to combine. Season with additional salt and pepper to taste.
  5. Serve immediately, or refrigerate in an airtight container for later.

Notes

  • Add spinach, olives, or artichoke hearts for variety.
  • Include chickpeas, grilled chicken, or shrimp for protein.
  • Use goat cheese or mozzarella, or omit for dairy-free.
  • Roast tomatoes and peppers for added flavor.
  • Swap honey with maple syrup and skip cheese for a vegan version.
  • Use different vinaigrettes like lemon or Greek-style for variation.
  • Store leftovers in the fridge for up to 3 days; refresh with a little extra dressing.

Nutrition

  • Serving Size: 1 serving
  • Calories: 280
  • Sugar: 4g
  • Sodium: 340mg
  • Fat: 15g
  • Saturated Fat: 4g
  • Unsaturated Fat: 10g
  • Trans Fat: 0g
  • Carbohydrates: 30g
  • Fiber: 2g
  • Protein: 7g
  • Cholesterol: 15mg

Have you made this recipe? I'd love to see it!

Click here to Follow me on Pinterest

Crab & Shrimp Stuffed Salmon

July 11, 2025 by Sue Leave a Comment

Crab & Shrimp Stuffed Salmon is a rich, satisfying seafood dish that brings elegance to any dinner table. Flaky salmon fillets are filled with a savory mixture of crab, shrimp, and seasonings, then baked to perfection. It’s a restaurant-worthy meal that’s surprisingly simple to make at home.

Crab & Shrimp Stuffed Salmon

Why You’ll Love This Recipe

I love this recipe because it delivers bold seafood flavor with minimal effort. The creamy, cheesy stuffing contrasts beautifully with the tender, buttery salmon. It’s perfect for special occasions, but easy enough for a weeknight dinner. The stuffing is versatile, the cooking is straightforward, and the results are always impressive.

Ingredients

(Here's a tip: Check out the full list of ingredients and measurements in the recipe card below.)

salmon fillets (skinless, thick cut)
lump crab meat
small cooked shrimp, chopped
cream cheese
mayonnaise
Parmesan cheese, grated
green onions, chopped
garlic, minced
lemon juice
Old Bay seasoning
paprika
salt and black pepper

Directions

  1. I start by preheating the oven to 375°F (190°C).

  2. I slice a pocket into the thickest part of each salmon fillet, being careful not to cut all the way through.

  3. In a mixing bowl, I combine the crab meat, chopped shrimp, cream cheese, mayonnaise, Parmesan cheese, green onions, garlic, lemon juice, and Old Bay seasoning. I mix until fully combined.

  4. I carefully stuff each salmon fillet with the seafood mixture, packing it in generously.

  5. I place the stuffed fillets in a baking dish, sprinkle them with paprika, salt, and pepper, then drizzle a little oil or butter over the top.

  6. I bake the salmon for about 20–25 minutes or until the fish flakes easily with a fork and the stuffing is hot and slightly golden.

  7. I finish with a squeeze of fresh lemon juice before serving.

Servings and timing

This recipe serves 4 and takes about 10 minutes to prep and 25 minutes to cook, making the total time roughly 35 minutes.

Variations

Sometimes I add chopped spinach or bell peppers into the stuffing for extra color and nutrients. For a spicier kick, I like to include a dash of cayenne pepper or a chopped jalapeño. When I want a lighter version, I use Greek yogurt instead of mayonnaise. And if I’m out of shrimp, I simply double the crab meat.

Storage/Reheating

I store leftovers in an airtight container in the fridge for up to 2 days. To reheat, I place the salmon in a baking dish, cover it with foil, and warm it in the oven at 325°F until heated through. I avoid microwaving to prevent the fish from drying out.

FAQs

Can I use canned crab and shrimp?

Yes, I can use canned versions, but I always drain them well and check for shells. Fresh seafood tastes better, but canned works in a pinch.

What can I use instead of cream cheese?

I sometimes substitute cream cheese with ricotta or mascarpone for a similar creamy texture.

Can I grill the stuffed salmon instead of baking?

Yes, I can grill it over medium heat using foil to keep the stuffing intact and avoid sticking.

How do I know when the salmon is done?

I check that the salmon flakes easily with a fork and the internal temperature reaches 145°F. The stuffing should also be hot and slightly golden on top.

Can I make this ahead of time?

Yes, I often prepare the stuffing and stuff the fillets a few hours ahead, keeping them covered in the fridge until I’m ready to bake.

Conclusion

Crab & Shrimp Stuffed Salmon is one of those recipes that never fails to impress. It’s rich, creamy, and full of flavor, yet so simple to make. Whether I’m hosting guests or treating myself to a fancy dinner, this dish always hits the spot.

Print

clock clock iconcutlery cutlery iconflag flag iconfolder folder iconinstagram instagram iconpinterest pinterest iconfacebook facebook iconprint print iconsquares squares iconheart heart iconheart solid heart solid icon
Crab & Shrimp Stuffed Salmon

Crab & Shrimp Stuffed Salmon

5 Stars 4 Stars 3 Stars 2 Stars 1 Star No reviews
  • Author: Sue
  • Prep Time: 10 minutes
  • Cook Time: 25 minutes
  • Total Time: 35 minutes
  • Yield: 4 servings
  • Category: Main Course
  • Method: Baking
  • Cuisine: American
Print Recipe
Pin Recipe

Description

Crab & Shrimp Stuffed Salmon is a rich, satisfying seafood dish featuring flaky salmon fillets filled with a creamy, cheesy mixture of crab, shrimp, and seasonings, baked to perfection for a restaurant-quality meal at home.


Ingredients

  • 4 salmon fillets (skinless, thick cut)
  • 1 cup lump crab meat
  • ½ cup small cooked shrimp, chopped
  • 4 oz cream cheese, softened
  • 2 tbsp mayonnaise
  • ¼ cup Parmesan cheese, grated
  • 2 green onions, chopped
  • 2 cloves garlic, minced
  • 1 tbsp lemon juice
  • 1 tsp Old Bay seasoning
  • ½ tsp paprika
  • Salt and black pepper to taste

Instructions

  1. Preheat the oven to 375°F (190°C).
  2. Slice a pocket into the thickest part of each salmon fillet, being careful not to cut all the way through.
  3. In a mixing bowl, combine crab meat, chopped shrimp, cream cheese, mayonnaise, Parmesan cheese, green onions, garlic, lemon juice, and Old Bay seasoning. Mix until well combined.
  4. Carefully stuff each salmon fillet with the seafood mixture, packing it in generously.
  5. Place the stuffed fillets in a baking dish, sprinkle with paprika, salt, and pepper, then drizzle with a little oil or melted butter.
  6. Bake for 20–25 minutes, or until the fish flakes easily with a fork and the stuffing is hot and slightly golden.
  7. Finish with a squeeze of fresh lemon juice before serving.

Notes

  • Use fresh seafood for best flavor, but canned crab and shrimp can work in a pinch.
  • Add chopped spinach or bell peppers to the stuffing for extra nutrients.
  • Greek yogurt can replace mayonnaise for a lighter version.
  • Prepare and stuff the salmon ahead of time for easy baking later.

Nutrition

  • Serving Size: 1 stuffed fillet
  • Calories: 420
  • Sugar: 1g
  • Sodium: 690mg
  • Fat: 26g
  • Saturated Fat: 10g
  • Unsaturated Fat: 14g
  • Trans Fat: 0g
  • Carbohydrates: 5g
  • Fiber: 0g
  • Protein: 38g
  • Cholesterol: 125mg

Have you made this recipe? I'd love to see it!

Click here to Follow me on Pinterest

Chocolate Peanut Butter Ritz Cookies

July 11, 2025 by Sue Leave a Comment

I love how these no-bake Chocolate Peanut Butter Ritz Cookies come together with just four simple ingredients—Ritz crackers, peanut butter, powdered sugar, and chocolate—for a perfectly sweet-and-salty treat in about an hour.

Chocolate Peanut Butter Ritz Cookies

Why I’ll Love This Recipe

I adore these cookies because they require no baking and involve minimal hands-on time. They blend creamy peanut butter, rich chocolate, and crisp crackers for an irresistible flavor contrast. Plus, they freeze beautifully, making them ideal for satisfy-later snacking or gift giving.

ingredients

(Here's a tip: Check out the full list of ingredients and measurements in the recipe card below.)

  • 60 Ritz crackers

  • 1½ cups creamy peanut butter

  • ½ cup powdered sugar

  • 2½ cups semi-sweet chocolate chips

directions

  1. Line a large baking sheet with wax or parchment paper and arrange 30 Ritz crackers face-down.

  2. In a bowl, stir together peanut butter and powdered sugar until smooth and well combined.

  3. Scoop about 1 tablespoon of the peanut butter mixture onto each cracker.

  4. Top each with another cracker, face-up, pressing gently to form sandwiches.

  5. Chill the tray in the refrigerator for 25 minutes, or place in the freezer for about 5 minutes to firm them up.

  6. In a microwave-safe bowl, melt the chocolate chips in 30-second intervals, stirring between each, until smooth.

  7. Dip each cookie sandwich into the melted chocolate, coating fully. Let any excess chocolate drip off.

  8. Place dipped cookies back on the tray and refrigerate for 30 minutes or until the chocolate is fully set.

  9. Enjoy immediately or store for later.

Servings and timing

  • Yields: 30 sandwich cookies

  • Prep time: 20 minutes

  • Chill and set time: 55 minutes

  • Total time: 1 hour 15 minutes

Variations

  • Swap out the Ritz crackers for Club crackers or saltines for a different crunch.

  • Try dark, milk, or white chocolate chips in place of semi-sweet.

  • Add a teaspoon of vanilla extract or a pinch of sea salt to the filling for extra flavor.

  • Use almond butter, sunflower butter, or cashew butter instead of peanut butter.

  • Add crushed pretzels or mini marshmallows to the peanut butter mixture for texture.

storage/reheating

Fridge: I keep the cookies in an airtight container in the fridge for up to 2 weeks.
Freezer: They freeze well in a sealed container or freezer bag for up to 3 months. I just thaw them in the fridge or at room temperature before serving.
No reheating needed—these cookies are best enjoyed chilled or at room temperature.

FAQs

What if I don’t have Ritz crackers?

I’ve used Club crackers or saltines in a pinch—they work great as long as they’re crisp and buttery.

Can I use natural peanut butter?

Yes, but I find the texture is a bit softer. Stir well to make sure the oils are mixed evenly.

How do I thin the melted chocolate for easier dipping?

I add a teaspoon of coconut oil or vegetable shortening to the chocolate when melting to help it coat more smoothly.

Can I make these ahead of time?

Definitely. I often make a batch a few days early and keep them in the fridge or freezer until I’m ready to serve.

Can I double the recipe?

Absolutely. I just double each ingredient and use two trays to keep the process smooth and efficient.

Conclusion

I’m always amazed at how easily these Chocolate Peanut Butter Ritz Cookies come together—and how fast they disappear. They’re simple, satisfying, and the perfect balance of salty and sweet. Whether I’m making a quick dessert or stocking the freezer for later, this recipe never lets me down.

Print

clock clock iconcutlery cutlery iconflag flag iconfolder folder iconinstagram instagram iconpinterest pinterest iconfacebook facebook iconprint print iconsquares squares iconheart heart iconheart solid heart solid icon
Chocolate Peanut Butter Ritz Cookies

Chocolate Peanut Butter Ritz Cookies

5 Stars 4 Stars 3 Stars 2 Stars 1 Star No reviews
  • Author: Sue
  • Prep Time: 20 minutes
  • Cook Time: 0 minutes
  • Total Time: 1 hour 15 minutes
  • Yield: 30 sandwich cookies
  • Category: Dessert
  • Method: No-Bake
  • Cuisine: American
  • Diet: Vegetarian
Print Recipe
Pin Recipe

Description

These no-bake Chocolate Peanut Butter Ritz Cookies are a quick and easy sweet-and-salty treat made with just four ingredients—Ritz crackers, peanut butter, powdered sugar, and chocolate.


Ingredients

  • 60 Ritz crackers
  • 1½ cups creamy peanut butter
  • ½ cup powdered sugar
  • 2½ cups semi-sweet chocolate chips

Instructions

  1. Line an 18 × 13‑inch baking sheet with wax or parchment paper and place 30 crackers face‑down in even rows.
  2. Stir together peanut butter and powdered sugar until smooth.
  3. Spoon about 1 tablespoon of the peanut butter mixture onto each cracker (do not spread).
  4. Top with another cracker, face‑up, pressing gently until filling nears the cracker edge.
  5. Chill in the fridge for 25 minutes or in the freezer for 5 minutes to firm up.
  6. Melt chocolate chips in 30-second microwave bursts, stirring between, until smooth.
  7. Dip each sandwich cookie into the melted chocolate, flipping to coat, then tap off the excess.
  8. Return the dipped cookies to the tray and refrigerate for 30 minutes or until chocolate sets.
  9. Enjoy immediately or store in the fridge or freezer as desired.

Notes

  • Use creamy no-stir peanut butter like Jif or Skippy for best results.
  • To thin the chocolate for dipping, add a teaspoon of coconut oil while melting.
  • Store in an airtight container in the fridge for up to 2 weeks or freeze for up to 3 months.
  • Try topping with sprinkles or sea salt before chocolate sets for extra flair.

Nutrition

  • Serving Size: 1 cookie
  • Calories: 150
  • Sugar: 10g
  • Sodium: 100mg
  • Fat: 9g
  • Saturated Fat: 3g
  • Unsaturated Fat: 5g
  • Trans Fat: 0g
  • Carbohydrates: 14g
  • Fiber: 1g
  • Protein: 3g
  • Cholesterol: 0mg
Have you made this recipe? I'd love to see it!

Click here to Follow me on Pinterest

Mango Ice Cream

July 11, 2025 by Sue Leave a Comment

Homemade mango ice cream is a tropical treat I can't get enough of. It's creamy, fruity, and the perfect balance of sweet and refreshing. Made with real mangoes and just a few simple ingredients, it’s an easy dessert that tastes like sunshine in every bite. Mango Ice Cream

Why You’ll Love This Recipe

I love how simple and delicious this recipe is. I don’t need an ice cream maker, and it comes together with just a few ingredients I likely already have. The natural sweetness and flavor of ripe mangoes shine through, making it a fruity delight I can whip up in no time. Whether I'm hosting guests or craving something cool and sweet, this mango ice cream never disappoints.

Ingredients

(Here's a tip: Check out the full list of ingredients and measurements in the recipe card below.)

  • Ripe mangoes (fresh or frozen and thawed)

  • Sweetened condensed milk

  • Heavy whipping cream

  • Lemon juice (optional, to balance the sweetness)

Directions

  1. I start by peeling and chopping the mangoes, then blending them into a smooth puree. If I’m using frozen mango, I make sure it’s fully thawed before blending.

  2. In a large bowl, I whip the heavy cream until stiff peaks form.

  3. In a separate bowl, I mix the mango puree with the sweetened condensed milk and a splash of lemon juice.

  4. I gently fold the mango mixture into the whipped cream, being careful not to deflate the cream.

  5. I transfer the mixture into a container, smooth the top, and cover it.

  6. I freeze it for at least 6 hours, or overnight, until it’s firm and scoopable.

Servings and timing

This recipe makes about 6 servings. It takes around 20 minutes to prepare, and I let it freeze for at least 6 hours before serving.

Variations

When I want a twist, I sometimes add chopped mango chunks or swirl in some mango pulp for extra texture. Coconut milk can replace part of the cream for a tropical coconut-mango combo. I’ve also added cardamom for a subtle spice or folded in crushed pistachios for crunch.

Storage/reheating

I store the mango ice cream in an airtight container in the freezer. It keeps well for up to 2 weeks. If it's too firm to scoop, I let it sit at room temperature for 5-10 minutes before serving. No reheating needed, just enjoy straight from the freezer.

FAQs

How do I make mango ice cream without condensed milk?

I can replace sweetened condensed milk with a mix of whole milk and sugar, or use coconut milk and maple syrup for a dairy-free version. The texture might change slightly but it’ll still be delicious.

Can I use canned mango pulp?

Yes, I’ve used canned mango pulp when fresh mangoes aren’t in season. I just make sure it’s unsweetened or adjust the condensed milk to avoid it being too sweet.

What type of mango is best for this ice cream?

I prefer using Alphonso or Ataulfo mangoes for their intense sweetness and rich flavor. Any ripe, juicy mango will work though.

Is it necessary to use an ice cream maker?

Not at all. This recipe is no-churn, which means I don’t need any special equipment—just a blender and a hand mixer or whisk.

Can I make it vegan?

Yes, I use coconut cream and sweetened condensed coconut milk for a dairy-free version. It turns out rich and creamy with a lovely coconut undertone.

Conclusion

Mango ice cream is one of my favorite homemade treats. It’s creamy, fruity, and so easy to make without an ice cream maker. Whether I’m looking for a quick dessert or a summer indulgence, this recipe delivers a burst of tropical flavor in every spoonful.

Print

clock clock iconcutlery cutlery iconflag flag iconfolder folder iconinstagram instagram iconpinterest pinterest iconfacebook facebook iconprint print iconsquares squares iconheart heart iconheart solid heart solid icon
Mango Ice Cream

Mango Ice Cream

5 Stars 4 Stars 3 Stars 2 Stars 1 Star No reviews
  • Author: Sue
  • Prep Time: 20 minutes
  • Cook Time: 0 minutes
  • Total Time: 6 hours 20 minutes
  • Yield: 6 servings
  • Category: Dessert
  • Method: No-Churn
  • Cuisine: Tropical
  • Diet: Vegetarian
Print Recipe
Pin Recipe

Description

This homemade mango ice cream is a creamy, fruity, and refreshing tropical dessert made with ripe mangoes, sweetened condensed milk, and heavy cream. It's a no-churn recipe that's simple to prepare and full of natural mango flavor.


Ingredients

  • 2 cups ripe mangoes, peeled and chopped (fresh or frozen and thawed)
  • 1 can (14 oz) sweetened condensed milk
  • 2 cups heavy whipping cream
  • 1 tablespoon lemon juice (optional)

Instructions

  1. Peel and chop the mangoes, then blend them into a smooth puree. If using frozen mango, thaw completely before blending.
  2. In a large bowl, whip the heavy cream until stiff peaks form.
  3. In a separate bowl, mix the mango puree with the sweetened condensed milk and lemon juice.
  4. Gently fold the mango mixture into the whipped cream, being careful not to deflate the cream.
  5. Transfer the mixture into a container, smooth the top, and cover it.
  6. Freeze for at least 6 hours or overnight until firm and scoopable.

Notes

  • Use Alphonso or Ataulfo mangoes for the best flavor.
  • Add chopped mango or mango pulp for extra texture.
  • For a vegan version, use coconut cream and sweetened condensed coconut milk.
  • If too firm to scoop, let sit at room temperature for 5-10 minutes.

Nutrition

  • Serving Size: 1 serving
  • Calories: 320
  • Sugar: 30g
  • Sodium: 80mg
  • Fat: 20g
  • Saturated Fat: 12g
  • Unsaturated Fat: 7g
  • Trans Fat: 0g
  • Carbohydrates: 35g
  • Fiber: 1g
  • Protein: 4g
  • Cholesterol: 60mg

Have you made this recipe? I'd love to see it!

Click here to Follow me on Pinterest

Cheesy Garlic Butter Rollups

July 11, 2025 by Sue Leave a Comment

I recently tried the Cheesy Garlic Butter Rollups from Lili Cooks, and they’re pure comfort in every bite! Cheesy Garlic Butter Rollups

Why You’ll Love This Recipe

I adore the crispy exterior paired with gooey, melty cheese and rich garlic butter inside. They’re simple to make but look and taste like something served in a cozy restaurant. Perfect as an appetizer, snack, or side dish—these rollups disappear fast at any gathering.

ingredients

(Here's a tip: Check out the full list of ingredients and measurements in the recipe card below.)

  • 1 can refrigerated crescent roll dough (8 rolls)

  • 2 Tbsp unsalted butter, melted

  • 1 tsp garlic powder (or fresh garlic, minced)

  • ½ tsp Italian seasoning

  • 1 cup shredded mozzarella (or string cheese pieces)

  • Optional: chopped parsley for garnish

directions

  1. Preheat oven to 375 °F (190 °C). Line a baking sheet with parchment paper.

  2. In a small bowl, whisk melted butter with garlic powder (or minced garlic) and Italian seasoning.

  3. Unroll crescents and separate into triangles. Brush each triangle with garlic butter, reserving some for later.

  4. Place cheese at the wide end of each triangle and roll up, tucking edges underneath to seal.

  5. Arrange rollups on the sheet, seam side down. Brush tops with remaining garlic butter.

  6. Bake for 10–12 minutes, until golden brown and cheese is melty.

  7. Let cool slightly, then garnish with parsley if desired. Serve warm.

Servings and timing

  • Servings: Makes 8 rollups (2–4 makes a satisfying snack).

  • Prep time: 5 minutes

  • Cook time: 10–12 minutes

  • Total time: About 17 minutes

Variations

  • Protein-packed: Add mini pepperoni or sausage.

  • Cheese blend: Try cheddar, gouda, or pepper jack for a flavor twist.

  • Herb upgrade: Sprinkle fresh basil or parsley inside before rolling.

  • Spicy kick: Add crushed red pepper flakes to the butter mixture.

storage/reheating

Store cooled rollups in an airtight container in the fridge for up to 3 days. To reheat, place them on a baking sheet and warm at 350 °F (175 °C) for 5–7 minutes, or microwave for 20–30 seconds until heated through. They taste best fresh but remain delicious when reheated.

FAQs

What can I use instead of crescent roll dough?

I’ve used pizza dough or puff pastry, too. Just roll it thin, brush with garlic butter, add cheese, and follow the same steps.

Can I use fresh garlic instead of powder?

Absolutely—I like grating a clove into the melted butter for a bolder garlic kick.

Can I make these ahead of time?

Yes! I assemble them, cover with plastic wrap, and refrigerate. I brush on the final butter just before baking.

How do I avoid leaking cheese?

Tuck in the dough edges firmly around the cheese. Brushing the bottoms with butter also helps seal them.

Can I freeze uncooked rollups?

I haven’t tried this yet, but I plan to. I’d suggest freezing the assembled rollups separated on a tray, then transferring them to a bag. Bake directly from the freezer, adding a few minutes to the cook time.

Conclusion

I love serving these Cheesy Garlic Butter Rollups at parties or as a cozy snack. They’re quick, comforting, and customizable—perfect for satisfying cheesy cravings in under 20 minutes. Let me know how yours turn out!

Print

clock clock iconcutlery cutlery iconflag flag iconfolder folder iconinstagram instagram iconpinterest pinterest iconfacebook facebook iconprint print iconsquares squares iconheart heart iconheart solid heart solid icon
Cheesy Garlic Butter Rollups

Cheesy Garlic Butter Rollups

5 Stars 4 Stars 3 Stars 2 Stars 1 Star No reviews
  • Author: Sue
  • Prep Time: 5 minutes
  • Cook Time: 12 minutes
  • Total Time: 17 minutes
  • Yield: 8 rollups
  • Category: Appetizer
  • Method: Baking
  • Cuisine: American
  • Diet: Vegetarian
Print Recipe
Pin Recipe

Description

Cheesy Garlic Butter Rollups are crispy on the outside and filled with melty cheese and rich garlic butter. They're quick to prepare and perfect as an appetizer, snack, or side dish.


Ingredients

  • 1 can refrigerated crescent roll dough (8 rolls)
  • 2 Tbsp unsalted butter, melted
  • 1 tsp garlic powder (or fresh garlic, minced)
  • ½ tsp Italian seasoning
  • 1 cup shredded mozzarella (or string cheese pieces)
  • Optional: chopped parsley for garnish

Instructions

  1. Preheat oven to 375 °F (190 °C). Line a baking sheet with parchment paper.
  2. In a small bowl, whisk melted butter with garlic powder (or minced garlic) and Italian seasoning.
  3. Unroll crescents and separate into triangles. Brush each triangle with garlic butter, reserving some for later.
  4. Place cheese at the wide end of each triangle and roll up, tucking edges underneath to seal.
  5. Arrange rollups on the sheet, seam side down. Brush tops with remaining garlic butter.
  6. Bake for 10–12 minutes, until golden brown and cheese is melty.
  7. Let cool slightly, then garnish with parsley if desired. Serve warm.

Notes

  • Add mini pepperoni or sausage for extra protein.
  • Mix in different cheeses like cheddar or gouda for variation.
  • Include herbs like basil inside for enhanced flavor.
  • To reheat, use an oven or microwave for best results.

Nutrition

  • Serving Size: 1 rollup
  • Calories: 140
  • Sugar: 1g
  • Sodium: 260mg
  • Fat: 9g
  • Saturated Fat: 4g
  • Unsaturated Fat: 4g
  • Trans Fat: 0g
  • Carbohydrates: 12g
  • Fiber: 0g
  • Protein: 4g
  • Cholesterol: 15mg

Have you made this recipe? I'd love to see it!

Click here to Follow me on Pinterest

Chewy Peanut Butter Cookies

July 11, 2025 by Sue Leave a Comment

A timeless delight with a soft, chewy center and a crackled top, these peanut butter cookies bring back the comforting taste of childhood. I love how the subtle honey flavor enhances the rich peanut butter, and the sugar coating adds just the right touch of sparkle.

Chewy Peanut Butter Cookies

Why You’ll Love This Recipe

I adore this recipe because it strikes a perfect balance: chewy interiors, slightly crisp edges, and a flavorful peanut butter core. The added honey gives a natural sweetness that complements the nutty taste beautifully. These cookies are easy to prepare—no chilling required unless the dough seems too soft—and they bake quickly, making them ideal for satisfying sudden cravings.

Ingredients

(Here’s a tip: Check out the full list of ingredients and measurements in the recipe card below.)

  • 3 cups all‑purpose flour

  • 1½ teaspoon baking soda

  • ½ teaspoon salt

  • ¾ cup unsalted butter, softened

  • 1 cup creamy peanut butter (natural works great)

  • ¼ cup honey

  • ¾ cup brown sugar

  • 1 cup granulated sugar

  • 2 eggs

  • 1 teaspoon vanilla extract

  • Additional sugar for rolling

Directions

  1. In a medium bowl, whisk together flour, baking soda, and salt.

  2. In my mixer, I cream the softened butter, peanut butter, and honey until smooth, then add both sugars until combined.

  3. I beat in the eggs one at a time, followed by vanilla, then slowly mix in the dry ingredients.

  4. If the dough feels very soft, I chill it for about 15 minutes.

  5. Preheat the oven to 350 °F (175 °C). Line baking sheets with parchment or silicone mats.

  6. Scoop dough (about 2 Tbsp), roll into balls, coat in sugar, and place on the prepared sheet. Flatten balls to about ½″ using the bottom of a glass.

  7. Bake 8–10 minutes, until the tops crack but centers are slightly underdone. Let cookies cool on the sheet for 1–2 minutes, then transfer to a rack.

  8. Store in an airtight container for 3–5 days.

Servings and Timing

This recipe yields about 24 large cookies. Total time is approximately 55 minutes: 30 minutes prep, 15 minutes chill, and 10 minutes bake.

Variations

  • Crunchy PB swap: I sometimes use crunchy peanut butter for texture.

  • Reduce sweetness: If your peanut butter is sweetened, I reduce the sugar slightly.

  • Salt boost: I up the salt to 1 teaspoon when using unsalted or natural peanut butter.

Storage / Reheating

I keep the cookies in an airtight container at room temperature for up to 5 days. To revive freshness, I zap one in the microwave for 5–7 seconds—it brings back that freshly baked feel.

FAQs

How can I make the cookies more chewy?

I underbake them slightly and let them cool on the baking sheet; the residual heat finishes the bake and keeps them chewy inside.

Can I freeze the dough?

Yes! I freeze dough balls on a sheet, then transfer them to a zip-top bag. When I bake from frozen, I add 1–2 minutes to the bake time.

Is natural peanut butter okay?

Absolutely. I prefer natural PB, but if it's unsalted, I increase salt to a teaspoon to balance sweetness.

Can I omit the honey?

You can, but I love the honey's extra moisture and depth of flavor—it really enhances the chewiness.

Why roll in sugar?

Rolling in sugar gives a sparkling exterior and adds a sweet crunch; I think it makes these cookies feel extra special.

Conclusion

I hope this recipe brings the same joy it does to me—warm, chewy, full of peanut butter goodness, and simple to make. Whether for a cozy afternoon treat or sharing with friends, these cookies are sure to hit the sweet spot. Enjoy every bite!

Print

clock clock iconcutlery cutlery iconflag flag iconfolder folder iconinstagram instagram iconpinterest pinterest iconfacebook facebook iconprint print iconsquares squares iconheart heart iconheart solid heart solid icon
Chewy Peanut Butter Cookies

Chewy Peanut Butter Cookies

5 Stars 4 Stars 3 Stars 2 Stars 1 Star No reviews
  • Author: Sue
  • Prep Time: 30 minutes
  • Cook Time: 10 minutes
  • Total Time: 55 minutes
  • Yield: 24 large cookies
  • Category: Dessert
  • Method: Baking
  • Cuisine: American
  • Diet: Vegetarian
Print Recipe
Pin Recipe

Description

Chewy Peanut Butter Cookies are a nostalgic treat with a soft, chewy center and a crackled top, enhanced by a touch of honey and sugar coating for sparkle.


Ingredients

  • 3 cups all-purpose flour
  • 1½ tsp baking soda
  • ½ tsp salt
  • ¾ cup unsalted butter, softened
  • 1 cup creamy peanut butter (natural works great)
  • ¼ cup honey
  • ¾ cup brown sugar
  • 1 cup granulated sugar
  • 2 eggs
  • 1 tsp vanilla extract
  • Additional sugar for rolling

Instructions

  1. In a medium bowl, whisk together flour, baking soda, and salt.
  2. In a mixer, cream the softened butter, peanut butter, and honey until smooth, then add both sugars and mix until combined.
  3. Beat in the eggs one at a time, then add vanilla extract.
  4. Gradually mix in the dry ingredients until fully incorporated.
  5. If the dough feels very soft, chill it for about 15 minutes.
  6. Preheat oven to 350°F (175°C) and line baking sheets with parchment or silicone mats.
  7. Scoop about 2 tablespoons of dough, roll into balls, coat in sugar, and place on the prepared baking sheet. Flatten to about ½ inch with the bottom of a glass.
  8. Bake for 8–10 minutes until tops crack but centers remain slightly underdone.
  9. Cool on the baking sheet for 1–2 minutes before transferring to a wire rack.
  10. Store in an airtight container for up to 5 days.

Notes

  • Use crunchy peanut butter for added texture.
  • Reduce sugar slightly if using sweetened peanut butter.
  • Increase salt to 1 teaspoon when using unsalted or natural peanut butter.
  • Microwave cookies for 5–7 seconds to restore freshness.
  • Dough balls can be frozen and baked directly with an extra 1–2 minutes of bake time.

Nutrition

  • Serving Size: 1 cookie
  • Calories: 220
  • Sugar: 16g
  • Sodium: 120mg
  • Fat: 12g
  • Saturated Fat: 4g
  • Unsaturated Fat: 7g
  • Trans Fat: 0g
  • Carbohydrates: 24g
  • Fiber: 1g
  • Protein: 4g
  • Cholesterol: 25mg

Have you made this recipe? I'd love to see it!

Click here to Follow me on Pinterest

Easy California Roll Cucumber Salad

July 11, 2025 by Sue Leave a Comment

I love this California roll cucumber salad because it transforms the flavors of a sushi favorite into a quick, no‑cook meal. With crisp cucumber, creamy avocado, sweet crab, and savory dressing, it's ready in minutes yet feels restaurant‑worthy. Easy California Roll Cucumber Salad

Why You’ll Love This Recipe

I adore how this salad blends vibrant sushi‑inspired flavors without the fuss of rolling rice. It takes about 10 minutes to prep, uses simple, affordable ingredients, and requires zero cooking. It's fresh, flavorful, and perfect for hot days or when I'm craving something light yet satisfying.

ingredients

(Here's a tip: Check out the full list of ingredients and measurements in the recipe card below.)

  • 1 large English cucumber (or 2–3 small Persian cucumbers)

  • 4 imitation crab sticks, diced

  • ½ ripe avocado, diced

  • 2 tablespoon Kewpie mayonnaise (sub regular mayo if needed)

  • 2 tablespoon whipped cream cheese

  • 1½ tablespoon soy sauce

  • 2 teaspoon toasted sesame seeds (white, black, or both)

directions

  1. Slice the cucumber into thin ⅛" rounds using a mandolin or sharp knife.

  2. In a large bowl or lidded container, combine sliced cucumber, diced crab, avocado, mayo, whipped cream cheese, soy sauce, and sesame seeds.

  3. Seal the container and shake vigorously until everything is well coated.

  4. Serve immediately—straight from the bowl or transferred to a plate. Sprinkle extra sesame seeds before serving.

Servings and timing

  • Serves: about 4

  • Prep time: 10 minutes

  • Total time: 10 minutes

Variations

  • Spicy twist: I like to add a drizzle of Sriracha or spicy mayo for a little heat.

  • Extra crunch: I sometimes stir in shredded carrot or shelled edamame for added texture.

  • Seafood upgrade: I swap imitation crab for real crab, cooked shrimp, or even smoked salmon when I want a fancier version.

  • Rice option: To make it heartier, I fold in a scoop of cooked sushi rice or sprinkle crispy rice bits on top.

  • Make it gluten-free: I use gluten-free soy sauce or coconut aminos when needed.

storage/reheating

I prefer to eat this salad immediately for the best texture. If I need to store it, I keep it in an airtight container in the fridge for up to 24 hours. The cucumbers will soften and the avocado may brown slightly, but the flavor still holds up. I don’t reheat this—it’s meant to be enjoyed cold and fresh.

FAQs

What type of cucumber works best?

I always reach for English or Persian cucumbers because they have thin skins, small seeds, and stay crisp. Regular cucumbers work too if peeled and seeded.

Can I skip the cream cheese or mayo?

Yes, I can omit one or both for a lighter version. The salad won't be as creamy, but it will still have great flavor from the soy sauce and crab.

How do I keep the avocado from browning?

To keep the avocado looking fresh, I stir it in just before serving. The dressing helps slow down browning as well.

Can I use real crab instead of imitation?

Definitely. I sometimes use fresh cooked crab if I want a more elevated taste. Just adjust the amount based on preference and budget.

Is this recipe gluten-free?

It can be. I make sure to use gluten-free soy sauce or coconut aminos, and check that any toppings I add (like sesame seeds or furikake) are gluten-free too.

Conclusion

This California roll cucumber salad is one of my favorite ways to enjoy sushi flavors at home. It’s fast, fresh, and packed with umami. Whether I’m making it for lunch, a light dinner, or a party dish, it always impresses. I love how easy it is to customize and how satisfying it feels with such minimal effort.

Print

clock clock iconcutlery cutlery iconflag flag iconfolder folder iconinstagram instagram iconpinterest pinterest iconfacebook facebook iconprint print iconsquares squares iconheart heart iconheart solid heart solid icon
Easy California Roll Cucumber Salad

Easy California Roll Cucumber Salad

5 Stars 4 Stars 3 Stars 2 Stars 1 Star No reviews
  • Author: Sue
  • Prep Time: 10 minutes
  • Cook Time: 0 minutes
  • Total Time: 10 minutes
  • Yield: 4 servings
  • Category: Salad
  • Method: No-Cook
  • Cuisine: Japanese-Inspired
  • Diet: Gluten Free
Print Recipe
Pin Recipe

Description

This California Roll Cucumber Salad is a no-cook, sushi-inspired dish that combines fresh cucumber, creamy avocado, imitation crab, and a savory dressing for a quick, refreshing meal that’s ready in just 10 minutes.


Ingredients

  • 1 large English cucumber (or 2–3 small Persian cucumbers)
  • 4 imitation crab sticks, diced
  • ½ ripe avocado, diced
  • 2 tbsp Kewpie mayonnaise (or regular mayo)
  • 2 tbsp whipped cream cheese
  • 1½ tbsp soy sauce
  • 2 tsp toasted sesame seeds (white, black, or both)

Instructions

  1. Slice the cucumber into thin ⅛" rounds using a mandolin or sharp knife.
  2. In a large bowl or lidded container, combine sliced cucumber, diced crab, avocado, mayo, whipped cream cheese, soy sauce, and sesame seeds.
  3. Seal the container and shake vigorously until everything is well coated.
  4. Serve immediately, optionally garnished with extra sesame seeds.

Notes

  • Best served immediately for crispness.
  • Store leftovers in the fridge for up to 24 hours.
  • Avocado may brown slightly over time.
  • Use gluten-free soy sauce or coconut aminos to make it gluten-free.

Nutrition

  • Serving Size: 1 cup
  • Calories: 180
  • Sugar: 2g
  • Sodium: 420mg
  • Fat: 13g
  • Saturated Fat: 3g
  • Unsaturated Fat: 8g
  • Trans Fat: 0g
  • Carbohydrates: 10g
  • Fiber: 2g
  • Protein: 5g
  • Cholesterol: 20mg

Have you made this recipe? I'd love to see it!

Click here to Follow me on Pinterest

French‑Style Potato and Green Bean Salad

July 11, 2025 by Sue Leave a Comment

I’ve always loved the simplicity of a classic French-style potato and green bean salad—tender potatoes paired with crisp haricot verts, tossed in a tangy Dijon vinaigrette. It’s fresh, flavorful, and perfect for warm-weather meals. French‑Style Potato and Green Bean Salad

Why You’ll Love This Recipe

I adore this salad because it balances hearty and light so beautifully. The potatoes bring comfort, the green beans add brightness, and the Dijon dressing adds that signature French tang. I like that I can prep it ahead, and the flavors deepen as it chills.

ingredients

(Here's a tip: Check out the full list of ingredients and measurements in the recipe card below.)

  • 1 lb haricot verts (thin green beans)

  • 1 lb small yellow potatoes

  • 1 bay leaf

  • 1 cup Dijon vinaigrette

  • A handful of fresh herbs (chives, parsley, basil)

  • Salt and pepper to taste

directions

  1. I start by bringing a large pot of salted water to a boil. I blanch the green beans until just tender-crisp, about 3–4 minutes, then plunge them into ice water to preserve their bright color.

  2. In the same pot, I return the water to a boil, add the potatoes and bay leaf, then simmer until the potatoes are easily pierced with a knife but still firm—about 25–30 minutes.

  3. Once the potatoes are cool enough to handle, I slice them into coins and place them in a large bowl.

  4. I pour in the Dijon vinaigrette and toss the potatoes gently, letting them cool completely in the dressing so they absorb all the flavor.

  5. Finally, I add the cooled green beans and chopped fresh herbs, toss everything together carefully, then season with salt and pepper to taste.

Servings and timing

  • Serves: 6

  • Prep time: 5 minutes

  • Cook time: 35 minutes

  • Total time: 40–45 minutes

Variations

  • I sometimes swap haricot verts for regular green beans or even thin asparagus.

  • A drizzle of extra-virgin olive oil and a sprinkle of chopped shallots can add more depth.

  • For a creamier version, I whisk a spoonful of whole-grain mustard into the vinaigrette.

  • I like to add sliced radishes or cherry tomatoes when I want extra crunch and color.

  • Adding hard-boiled eggs or tuna makes it more filling and turns it into a light meal.

storage/reheating

I keep any leftovers in an airtight container in the fridge for up to 3 days. The flavors actually improve as it sits. Before serving again, I give it a gentle stir and sometimes add a little extra vinaigrette or vinegar to refresh it. I don’t recommend reheating—it’s best served cold or at room temperature.

FAQs

Can I prep this salad ahead of time?

Absolutely—I make it a few hours in advance or even the night before. The flavors deepen over time, though I wait to add the fresh herbs until just before serving to preserve their brightness.

What kind of potatoes work best?

I use small yellow potatoes, but baby red potatoes or fingerlings work well too. Just choose firm, uniformly sized ones for even cooking.

Do I need to peel the potatoes?

Since they’re small and have thin skins, I leave them on. I find they add a nice texture and flavor.

Can I substitute the Dijon vinaigrette?

Yes—I’ve used whole-grain mustard vinaigrette or even a classic French mustard-and-vinegar dressing for a different flavor profile.

How long does it last in the fridge?

It keeps up to 3 days when refrigerated. I gently stir before serving and sometimes add a splash of dressing to refresh it.

Conclusion

This French-style potato and green bean salad is a testament to effortless cooking: simple prep, fresh ingredients, and memorable flavor. I love making it for picnics, dinners, or as an easy potluck favorite. Give it a try—you might find, like I did, that it becomes one of your go-to summer salads.

Print

clock clock iconcutlery cutlery iconflag flag iconfolder folder iconinstagram instagram iconpinterest pinterest iconfacebook facebook iconprint print iconsquares squares iconheart heart iconheart solid heart solid icon
French‑Style Potato and Green Bean Salad

French‑Style Potato and Green Bean Salad

5 Stars 4 Stars 3 Stars 2 Stars 1 Star No reviews
  • Author: Sue
  • Prep Time: 5 minutes
  • Cook Time: 30–45 minutes
  • Total Time: 40–50 minutes
  • Yield: 6 servings
  • Category: Salad
  • Method: Boiling
  • Cuisine: French
  • Diet: Vegetarian
Print Recipe
Pin Recipe

Description

A classic French-style potato and green bean salad made with tender yellow potatoes, crisp haricot verts, and tossed in a tangy Dijon vinaigrette with fresh herbs. Perfect for picnics, potlucks, or light meals.


Ingredients

  • 1 lb haricot verts (thin green beans)
  • 1 lb small yellow potatoes
  • 1 bay leaf
  • 1 cup Dijon vinaigrette
  • A handful of fresh herbs (chives, parsley, basil)
  • Salt and pepper to taste

Instructions

  1. Bring a large pot of salted water to a boil. Blanch the green beans until just tender-crisp (about 3–4 minutes), then plunge into ice water to preserve color.
  2. In the same pot, return the water to a boil, add potatoes and bay leaf, then simmer until potatoes are easily pierced but still firm, about 25–30 minutes.
  3. Once the potatoes are cool enough to handle, slice them into coins and place in a large bowl.
  4. Pour in the Dijon vinaigrette and toss, letting the potatoes cool completely in the dressing.
  5. Add the cooled green beans and fresh herbs, toss gently, then season with salt and pepper to taste.

Notes

  • You can prep this salad ahead and let it chill to enhance the flavors.
  • Substitute haricot verts with regular green beans or thin asparagus if desired.
  • For extra depth, add chopped shallots or a drizzle of extra-virgin olive oil.
  • Add a spoonful of whole-grain mustard for a creamier vinaigrette.
  • Store in an airtight container in the fridge for up to 3 days.

Nutrition

  • Serving Size: 1 cup
  • Calories: 180
  • Sugar: 2g
  • Sodium: 240mg
  • Fat: 9g
  • Saturated Fat: 1g
  • Unsaturated Fat: 7g
  • Trans Fat: 0g
  • Carbohydrates: 22g
  • Fiber: 3g
  • Protein: 3g
  • Cholesterol: 0mg

Have you made this recipe? I'd love to see it!

Click here to Follow me on Pinterest

Meatloaf Cupcakes with Whipped Potato Topping

July 10, 2025 by Sue Leave a Comment

These Meatloaf Cupcakes with Whipped Potato Topping are a fun and flavorful twist on traditional meatloaf. Made in a muffin tin for individual portions, each "cupcake" is topped with creamy mashed potatoes piped on like frosting—bringing extra comfort and creativity to the dinner table. They’re family-friendly, satisfying, and perfect for both busy weeknights and casual gatherings. Meatloaf Cupcakes with Whipped Potato Topping

Why You’ll Love This Recipe

I love this recipe because it turns a hearty classic into an easy-to-serve and visually fun dish. The cupcake form makes them perfect for portioning, and the whipped potato topping adds a creamy, buttery finish to the savory meatloaf. They’re also great for prepping ahead of time and reheating when needed. It’s a dish that brings comfort with a twist.

Ingredients

(Here's a tip: Check out the full list of ingredients and measurements in the recipe card below.)

  • Ground beef

  • Onion, finely chopped

  • Garlic, minced

  • Bread crumbs

  • Egg

  • Milk

  • Worcestershire sauce

  • Ketchup

  • Salt and pepper

  • Russet potatoes, peeled and cubed

  • Butter

  • Heavy cream or milk (for whipped potatoes)

  • Optional: shredded cheese or chopped chives for garnish

Directions

  1. I preheat the oven to 375°F and lightly grease a muffin tin.

  2. In a large bowl, I combine the ground beef, onion, garlic, bread crumbs, egg, milk, Worcestershire sauce, ketchup, salt, and pepper.

  3. I divide the meat mixture evenly among the muffin cups, pressing each one in firmly.

  4. I bake them for 20–25 minutes, or until fully cooked and browned on top.

  5. While they bake, I boil the potatoes in salted water until fork-tender.

  6. I drain the potatoes and mash them with butter and cream (or milk) until smooth and fluffy.

  7. Once the meatloaf cupcakes are out of the oven and slightly cooled, I pipe or spoon the mashed potatoes on top.

  8. I finish with a sprinkle of cheese or chives if I want to dress them up a bit more.

Servings and timing

This recipe makes about 12 meatloaf cupcakes, perfect for serving 4 to 6 people depending on appetite. It takes around 15 minutes to prep, 25 minutes to bake, and another 10–15 minutes for the mashed potatoes and assembly. Altogether, the recipe is ready in about 50–55 minutes.

Variations

I like using ground turkey or chicken instead of beef when I want something lighter. For a smoky flavor, I sometimes swap ketchup with BBQ sauce. I’ve also tried mixing shredded cheese into the potato topping for an extra cheesy twist. And for a gluten-free version, I replace bread crumbs with crushed gluten-free crackers or oats.

storage/reheating

I store leftovers in an airtight container in the fridge for up to 4 days. They reheat well in the oven at 350°F for about 10–15 minutes. I also freeze them individually and reheat straight from the freezer, adding a few extra minutes to the cook time.

FAQs

How do I keep the meatloaf from drying out?

I make sure not to overbake them and always include enough liquid ingredients like milk and ketchup to keep them moist.

Can I make these ahead of time?

Yes, I often prepare them a day ahead and refrigerate. I reheat and add the mashed potato topping just before serving for the best texture.

What’s the best way to pipe the potatoes?

I use a piping bag with a large tip, but if I don’t have one, a plastic bag with the corner snipped works just fine. Or I just spoon it on for a more rustic feel.

Can I hide vegetables in the meatloaf?

Definitely. I like finely dicing carrots, zucchini, or bell peppers and mixing them into the meat for extra nutrition and flavor.

Which potatoes are best for mashing?

Russet potatoes are my favorite for fluffy mashed potatoes, but Yukon Golds give a slightly creamier texture if that's what I’m after.

Conclusion

These Meatloaf Cupcakes with Whipped Potato Topping are a clever and comforting way to enjoy a classic favorite. They’re easy to serve, fun to eat, and simple to customize based on what I have on hand. Whether it’s a busy weeknight or a laid-back weekend dinner, this recipe always hits the mark.

Print

clock clock iconcutlery cutlery iconflag flag iconfolder folder iconinstagram instagram iconpinterest pinterest iconfacebook facebook iconprint print iconsquares squares iconheart heart iconheart solid heart solid icon
Meatloaf Cupcakes with Whipped Potato Topping

Meatloaf Cupcakes with Whipped Potato Topping

5 Stars 4 Stars 3 Stars 2 Stars 1 Star No reviews
  • Author: Sue
  • Prep Time: 15 mins
  • Cook Time: 40 mins
  • Total Time: 55 mins
  • Yield: 12 meatloaf cupcakes
  • Category: Dinner
  • Method: Baking
  • Cuisine: American
  • Diet: Low Lactose
Print Recipe
Pin Recipe

Description

Meatloaf cupcakes topped with creamy mashed potatoes for a fun, family-friendly twist on traditional meatloaf.


Ingredients

  • 1 lb ground beef
  • 1 small onion, finely chopped
  • 2 cloves garlic, minced
  • ¾ cup bread crumbs
  • 1 large egg
  • ¼ cup milk
  • 1 tbsp Worcestershire sauce
  • 3 tbsp ketchup
  • Salt and pepper to taste
  • 4 large russet potatoes, peeled and cubed
  • 4 tbsp butter
  • ¼ cup heavy cream or milk (for whipped potatoes)
  • Optional: shredded cheese or chopped chives for garnish

Instructions

  1. Preheat oven to 375°F and lightly grease a muffin tin.
  2. In a large bowl, combine ground beef, onion, garlic, bread crumbs, egg, milk, Worcestershire sauce, ketchup, salt, and pepper.
  3. Divide meat mixture evenly among muffin cups, pressing firmly.
  4. Bake 20–25 minutes or until cooked and browned.
  5. Meanwhile, boil potatoes in salted water until fork-tender.
  6. Drain potatoes, then mash with butter and cream until fluffy.
  7. Pipe or spoon mashed potatoes onto meatloaf cupcakes.
  8. Garnish with cheese or chives if desired.

Notes

  • Substitute ground turkey or chicken for a lighter option.
  • Use BBQ sauce instead of ketchup for a smoky flavor.
  • Mix cheese into potatoes for a cheesy topping.
  • Replace bread crumbs with gluten-free crackers or oats for a gluten-free version.
  • Leftovers refrigerate well up to 4 days, reheating at 350°F for 10–15 minutes.

Nutrition

  • Serving Size: 2 cupcakes
  • Calories: 380 kcal
  • Sugar: 4 g
  • Sodium: 380 mg
  • Fat: 18 g
  • Saturated Fat: 8 g
  • Unsaturated Fat: 8 g
  • Trans Fat: 0.5 g
  • Carbohydrates: 30 g
  • Fiber: 3 g
  • Protein: 24 g
  • Cholesterol: 100 mg

Have you made this recipe? I'd love to see it!

Click here to Follow me on Pinterest

Grilled Chicken Broccoli Bowls with Creamy Garlic Sauce

July 10, 2025 by Sue Leave a Comment

I love how this meal brings together smoky grilled chicken, tender broccoli, fluffy grains, and a tangy‑creamy garlic sauce for a healthy yet satisfying dinner. Grilled Chicken Broccoli Bowls with Creamy Garlic Sauce

Why You’ll Love This Recipe

I find this recipe perfect for meal prep—everything can be made ahead, then simply assembled when I’m ready. The combination of protein-rich chicken, fiber-filled broccoli, and creamy sauce feels balanced and nourishing. It’s flexible too—I can swap grains, veggies, or proteins depending on what I have.

ingredients

(Here's a tip: Check out the full list of ingredients and measurements in the recipe card below.)

For the chicken marinade:

  • 2 lb boneless, skinless chicken breasts or thighs

  • 1 tablespoon olive oil

  • 1 teaspoon paprika

  • ½ teaspoon garlic powder

  • ¼ teaspoon salt

  • ¼ teaspoon black pepper

  • ¼ teaspoon cayenne pepper (optional)

  • Juice of 1 lime

For the creamy garlic sauce:

  • ½ cup mayonnaise

  • ¼ cup sour cream

  • 2 cloves garlic, minced

  • 1 tablespoon lemon juice

  • 1 teaspoon Dijon mustard

  • ¼ teaspoon salt

  • ¼ teaspoon black pepper

For the bowl assembly:

  • 1 lb broccoli florets

  • 2 cups cooked rice or quinoa

  • Olive oil, salt & pepper (for broccoli)

  • Lime wedges and optional parsley or green onions to garnish

directions

  1. Marinate the chicken
    I whisk together olive oil, paprika, garlic powder, cayenne (if using), lime juice, salt, and pepper. Then I coat the chicken and refrigerate it for at least 30 minutes.

  2. Cook the chicken
    I preheat a grill or grill pan to medium‑high, then grill the chicken for 5–7 minutes per side until it reaches an internal temperature of 165 °F. I let it rest before slicing.

  3. Prepare the broccoli
    While the chicken cooks, I toss the broccoli with olive oil, salt, and pepper. Then I roast it at 400 °F for about 15 minutes until it’s tender and slightly crisp, or I steam it if I want a quicker option.

  4. Cook the grains
    I cook the rice or quinoa according to package instructions and fluff it with a fork once done.

  5. Make the garlic sauce
    I mix mayonnaise, sour cream, minced garlic, lemon juice, Dijon mustard, salt, and pepper until smooth. I like to chill it for 10–15 minutes to let the flavors blend.

  6. Assemble the bowls
    I divide the grains into bowls, top with roasted broccoli and sliced grilled chicken, then drizzle with the garlic sauce and garnish with lime wedges and fresh herbs.

Servings and timing

  • Servings: 2–4 bowls

  • Prep time: 15 minutes (plus 30 minutes marinating)

  • Cook time: 20 minutes

  • Total time: 35–40 minutes

Variations

  • Spicy version: I add more cayenne or a dash of hot sauce to the sauce.

  • Vegetarian: I swap the chicken with grilled tofu, tempeh, or roasted chickpeas.

  • Different grains: Sometimes I use farro, couscous, or cauliflower rice.

  • More vegetables: I like adding sliced bell peppers, shredded carrots, or avocado.

  • Mediterranean twist: I add olives, feta, and cucumbers with a drizzle of lemon.

storage/reheating

I store the grilled chicken, rice or quinoa, broccoli, and sauce separately in airtight containers. The chicken and grains keep well for 3–4 days, the broccoli for up to 3 days, and the sauce for about 5 days. To reheat, I microwave the chicken and grains until warm and re-whisk the sauce before serving.

FAQs

How can I make this dairy-free?

I replace the sour cream and mayonnaise with dairy-free or vegan alternatives.

Can I use frozen broccoli?

Yes, I just thaw and pat it dry before roasting or steaming to avoid sogginess.

Can I prep this meal ahead?

Definitely. I often marinate and grill the chicken ahead, cook the grains, and make the sauce so it’s easy to assemble later.

Is this recipe freezer-friendly?

The chicken and cooked grains freeze well. I don’t freeze the sauce because it can separate when thawed.

What if I don’t have a grill?

I use a grill pan, cast iron skillet, or bake the chicken at 400 °F for 20–25 minutes, flipping halfway.

Conclusion

I’ve found that these bowls hit the sweet spot between healthy and comforting. They’re easy to customize, ideal for meal prep, and delicious enough to make again and again. Whether I’m making them for myself or a group, they always turn out fresh, flavorful, and satisfying.

Print

clock clock iconcutlery cutlery iconflag flag iconfolder folder iconinstagram instagram iconpinterest pinterest iconfacebook facebook iconprint print iconsquares squares iconheart heart iconheart solid heart solid icon
Grilled Chicken Broccoli Bowls with Creamy Garlic Sauce

Grilled Chicken Broccoli Bowls with Creamy Garlic Sauce

5 Stars 4 Stars 3 Stars 2 Stars 1 Star No reviews
  • Author: Sue
  • Prep Time: 15 minutes (plus 30 minutes marinating)
  • Cook Time: 20 minutes
  • Total Time: 35 minutes (plus marinating time)
  • Yield: 2–4 bowls
  • Category: Main Course
  • Method: Grilling
  • Cuisine: American
  • Diet: Gluten Free
Print Recipe
Pin Recipe

Description

A wholesome and satisfying meal featuring smoky grilled chicken, tender broccoli, fluffy grains, and a creamy garlic sauce—perfect for meal prep and customizable to your taste.


Ingredients

  • 2 lb boneless, skinless chicken breasts or thighs
  • 1 Tbsp olive oil
  • 1 tsp paprika
  • ½ tsp garlic powder
  • ¼ tsp salt
  • ¼ tsp black pepper
  • ¼ tsp cayenne pepper (optional)
  • Juice of 1 lime
  • ½ cup mayonnaise
  • ¼ cup sour cream
  • 2 cloves garlic, minced
  • 1 Tbsp lemon juice
  • 1 tsp Dijon mustard
  • ¼ tsp salt
  • ¼ tsp black pepper
  • 1 lb broccoli florets
  • 2 cups cooked rice or quinoa
  • Olive oil, salt & pepper (for broccoli)
  • Lime wedges and optional parsley/green onions to garnish

Instructions

  1. Whisk olive oil, paprika, garlic powder, cayenne, lime juice, salt, and pepper. Coat chicken and refrigerate for at least 30 minutes.
  2. Preheat grill or grill pan to medium-high and cook chicken for 5–7 minutes per side until internal temperature reaches 165°F. Let rest and slice.
  3. Toss broccoli with olive oil, salt, and pepper; roast at 400°F for 15 minutes or steam until bright green.
  4. Cook rice or quinoa according to package instructions and fluff.
  5. Whisk together mayonnaise, sour cream, garlic, lemon juice, Dijon mustard, salt, and pepper until smooth. Chill for 10–15 minutes if desired.
  6. Assemble bowls with grains, broccoli, sliced chicken, drizzle with garlic sauce, and garnish with lime wedge and herbs.

Notes

  • Store components separately for freshness and easy reheating.
  • Chicken, grains: 3–4 days in fridge; broccoli: up to 3 days; sauce: up to 5 days.
  • Reheat chicken and grains gently; re-whisk sauce before serving.
  • Swap grains, vegetables, or protein as desired.
  • Use dairy-free mayo and sour cream to make the sauce dairy-free.

Nutrition

  • Serving Size: 1 bowl
  • Calories: 480
  • Sugar: 3g
  • Sodium: 520mg
  • Fat: 22g
  • Saturated Fat: 4g
  • Unsaturated Fat: 16g
  • Trans Fat: 0g
  • Carbohydrates: 32g
  • Fiber: 4g
  • Protein: 40g
  • Cholesterol: 95mg
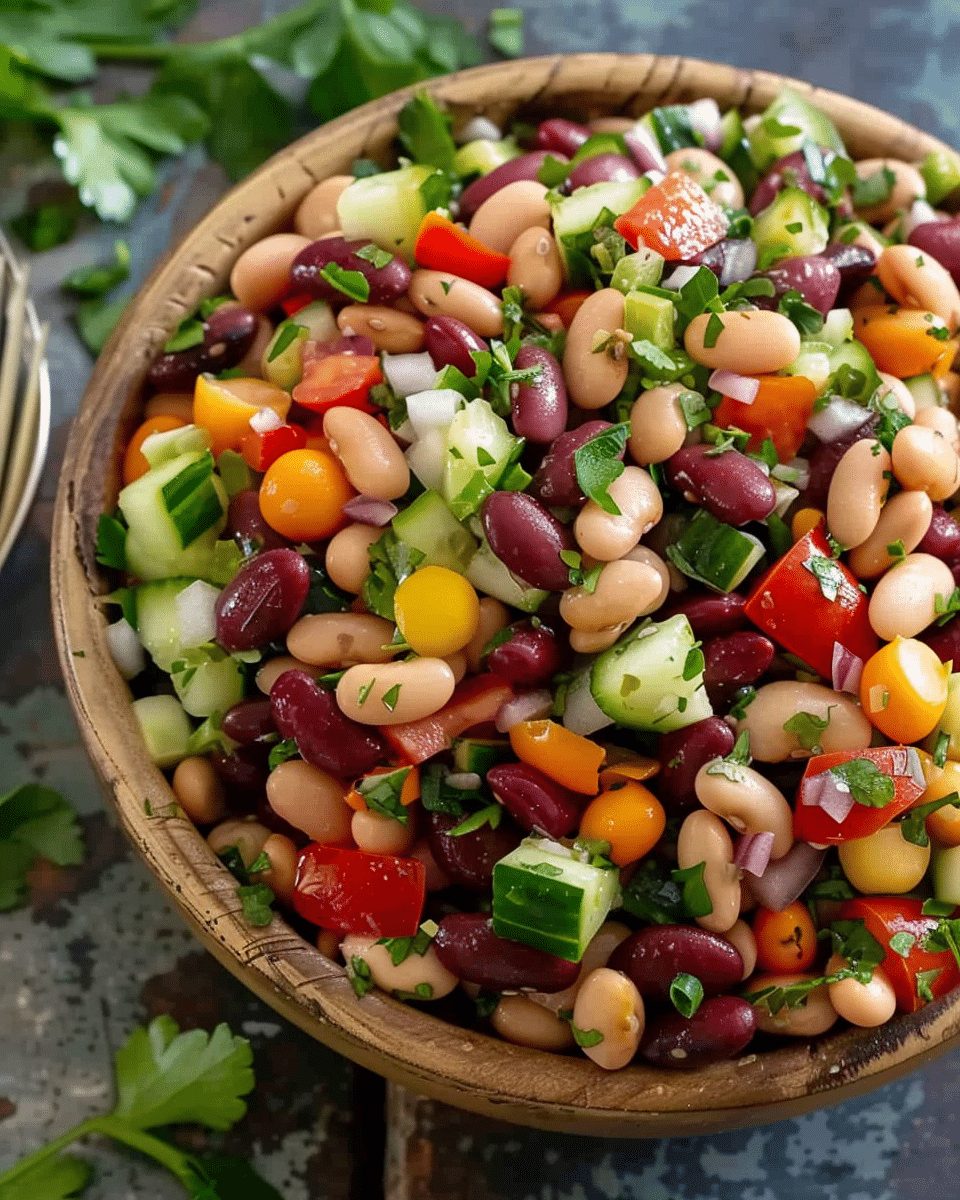
Have you made this recipe? I'd love to see it!

Click here to Follow me on Pinterest

Roasted Red Pepper, Spinach, and Mozzarella Stuffed Chicken

July 10, 2025 by Sue Leave a Comment

This Roasted Red Pepper, Spinach, and Mozzarella Stuffed Chicken is a juicy, flavorful dish that's as stunning on the plate as it is delicious. Each chicken breast is filled with vibrant spinach, smoky roasted red peppers, and melty mozzarella cheese, then seared and baked to perfection. Roasted Red Pepper, Spinach, and Mozzarella Stuffed Chicken
Why You’ll Love This Recipe

I love how elegant this dish looks while being incredibly easy to prepare. It’s perfect for weeknight dinners when I want something hearty and satisfying but still healthy. The roasted red peppers bring a slight sweetness, while the spinach and mozzarella add richness and balance. Plus, it’s a great way to upgrade plain chicken breasts into something truly special.

Ingredients

(Here's a tip: Check out the full list of ingredients and measurements in the recipe card below.)

  • Boneless, skinless chicken breasts

  • Roasted red peppers, sliced

  • Fresh spinach

  • Mozzarella cheese, sliced or shredded

  • Olive oil

  • Garlic powder

  • Onion powder

  • Italian seasoning

  • Salt

  • Black pepper

  • Toothpicks or kitchen twine (to secure the chicken)

Directions

  1. I start by preheating my oven to 375°F (190°C).

  2. Then, I butterfly each chicken breast by slicing them horizontally, being careful not to cut all the way through. I open them like a book and gently pound to an even thickness.

  3. I season the inside with salt, pepper, garlic powder, and onion powder.

  4. Next, I layer a handful of spinach, roasted red pepper slices, and mozzarella cheese on one side of each breast.

  5. I fold the other side over and secure with toothpicks or kitchen twine.

  6. I heat olive oil in an oven-safe skillet over medium-high heat and sear the chicken on both sides until golden brown, about 3-4 minutes per side.

  7. Then, I transfer the skillet to the oven and bake for 15-20 minutes, or until the chicken reaches an internal temperature of 165°F (74°C).

  8. After removing from the oven, I let it rest for a few minutes before slicing and serving.

Servings and timing

This recipe makes 4 servings and takes about 10 minutes to prep and 30 minutes to cook, totaling around 40 minutes from start to finish.

Variations

When I want to mix things up, I sometimes use provolone or goat cheese instead of mozzarella for a different flavor. For a bit of heat, I add crushed red pepper flakes to the filling. If I have sun-dried tomatoes on hand, I’ll swap them in for the roasted red peppers for a tangier taste. And for a lower-fat version, I use part-skim mozzarella or skip the cheese altogether and add more veggies.

storage/reheating

I store leftovers in an airtight container in the fridge for up to 3 days. To reheat, I prefer using the oven at 350°F (175°C) for 10-15 minutes to keep the chicken moist. If I’m in a hurry, the microwave works too, though I cover the chicken with a damp paper towel to prevent it from drying out.

FAQs

How do I keep the filling from falling out while cooking?

I make sure to secure the chicken tightly with toothpicks or kitchen twine. Also, I avoid overstuffing to keep things neat.

Can I use frozen spinach instead of fresh?

Yes, I’ve done it before. I just thaw it and squeeze out all the excess moisture before adding it to the chicken.

What sides go well with this dish?

I often serve it with garlic mashed potatoes, roasted vegetables, or a fresh green salad. It also pairs nicely with rice or quinoa.

Can I prep this ahead of time?

Absolutely. I sometimes stuff and secure the chicken a day ahead, keep it in the fridge, and just sear and bake when I’m ready to cook.

What if I don’t have an oven-safe skillet?

No problem—I sear the chicken in any skillet I have, then transfer it to a baking dish to finish cooking in the oven.

Conclusion

This Roasted Red Pepper, Spinach, and Mozzarella Stuffed Chicken has become a go-to in my kitchen for a reason. It’s simple, full of flavor, and feels a little fancy without much effort. Whether I’m cooking for guests or just myself, it always hits the spot.

Print

clock clock iconcutlery cutlery iconflag flag iconfolder folder iconinstagram instagram iconpinterest pinterest iconfacebook facebook iconprint print iconsquares squares iconheart heart iconheart solid heart solid icon
Roasted Red Pepper, Spinach, and Mozzarella Stuffed Chicken

Roasted Red Pepper, Spinach, and Mozzarella Stuffed Chicken

5 Stars 4 Stars 3 Stars 2 Stars 1 Star No reviews
  • Author: Sue
  • Prep Time: 10 minutes
  • Cook Time: 30 minutes
  • Total Time: 40 minutes
  • Yield: 4 servings
  • Category: Main Course
  • Method: Baked
  • Cuisine: American
  • Diet: Low Fat
Print Recipe
Pin Recipe

Description

Juicy chicken breasts stuffed with smoky roasted red peppers, fresh spinach, and gooey mozzarella cheese, seared to golden perfection and baked until tender and flavorful.


Ingredients

  • 4 boneless, skinless chicken breasts
  • 1 cup roasted red peppers, sliced
  • 2 cups fresh spinach
  • 1 cup mozzarella cheese, sliced or shredded
  • 2 tablespoons olive oil
  • 1 teaspoon garlic powder
  • 1 teaspoon onion powder
  • 1 teaspoon Italian seasoning
  • Salt, to taste
  • Black pepper, to taste
  • Toothpicks or kitchen twine (for securing the chicken)

Instructions

  1. Preheat the oven to 375°F (190°C).
  2. Butterfly each chicken breast by slicing horizontally without cutting all the way through. Open like a book and gently pound to an even thickness.
  3. Season the inside of the chicken with salt, pepper, garlic powder, and onion powder.
  4. Layer spinach, roasted red pepper slices, and mozzarella cheese on one side of each breast.
  5. Fold the other side over and secure with toothpicks or kitchen twine.
  6. Heat olive oil in an oven-safe skillet over medium-high heat. Sear the chicken for 3–4 minutes per side until golden brown.
  7. Transfer the skillet to the oven and bake for 15–20 minutes, or until the internal temperature reaches 165°F (74°C).
  8. Remove from oven and let rest for a few minutes before slicing and serving.

Notes

  • Do not overstuff the chicken to prevent filling from spilling out during cooking.
  • Use part-skim mozzarella or omit cheese for a lower-fat version.
  • Substitute with provolone, goat cheese, or sun-dried tomatoes for variation.
  • Secure well with toothpicks or kitchen twine to keep the stuffing intact.

Nutrition

  • Serving Size: 1 stuffed chicken breast
  • Calories: 310
  • Sugar: 2g
  • Sodium: 450mg
  • Fat: 15g
  • Saturated Fat: 6g
  • Unsaturated Fat: 8g
  • Trans Fat: 0g
  • Carbohydrates: 4g
  • Fiber: 1g
  • Protein: 36g
  • Cholesterol: 95mg

Have you made this recipe? I'd love to see it!

Click here to Follow me on Pinterest

One‑Pot Creamy Spicy Garlic Butter Steak Pasta

July 10, 2025 by Sue Leave a Comment

I love how this dish combines tender steak bites with a luscious, spicy garlic butter cream sauce—all made in one pot. It’s rich, bold, and ready in about 30 minutes, making it perfect for busy weeknights and easy cleanup. One‑Pot Creamy Spicy Garlic Butter Steak Pasta

Why You’ll Love This Recipe

I enjoy how the garlic butter infuses every bite, the creaminess of the sauce, and the heat from the red pepper flakes that keeps things exciting. The fact that I can pull it all together in one pot makes cleanup effortless. It’s a full-flavored, comforting meal that doesn’t feel heavy or overly complicated.

ingredients

(Here's a tip: Check out the full list of ingredients and measurements in the recipe card below.)

Meat

  • 1 lb sirloin or ribeye steak, cut into 1-inch cubes

Pasta

  • 8 oz rotini pasta (penne, rigatoni, or fusilli also work)

Dairy

  • 2 tablespoons butter

  • 1 cup heavy cream

  • ½ cup grated Parmesan cheese

Produce

  • 4 cloves garlic, minced

  • Fresh parsley, chopped (for garnish)

Seasonings

  • ½ teaspoon red pepper flakes

  • Salt and freshly ground black pepper, to taste

Liquids

  • 2½ cups water or broth

directions

  1. I start by seasoning the steak cubes with salt and pepper. In a large pot or deep skillet over medium-high heat, I sear them for about 2–3 minutes per side until browned. Then I remove the steak and set it aside.

  2. In the same pot, I melt the butter, add garlic and red pepper flakes, and cook for about 1 minute until fragrant.

  3. I pour in the water or broth, scraping up the browned bits from the bottom to build flavor.

  4. I add the pasta, cover, and let it cook for 10–12 minutes, stirring occasionally, until al dente and most of the liquid is absorbed.

  5. I return the steak to the pot and stir in the heavy cream and Parmesan, letting it heat through and thicken for another 2–3 minutes.

  6. I taste and adjust the seasoning, then garnish with fresh parsley and serve hot.

Servings and timing

  • Servings: 4

  • Prep time: 10 minutes

  • Cook time: 20 minutes

  • Total time: 30 minutes

Variations

  • I sometimes switch out the steak for grilled chicken or shrimp.

  • Adding veggies like spinach, mushrooms, or bell peppers gives it extra texture and nutrition.

  • If I want more heat, I’ll double the red pepper flakes or drizzle on some chili oil.

  • For a richer sauce, I mix in an extra tablespoon of butter at the end.

storage/reheating

I store leftovers in an airtight container in the fridge for up to 3 days. To reheat, I warm it on the stove over low heat with a splash of broth or cream to loosen the sauce. The microwave works too—just make sure to stir halfway through for even heating.

FAQs

What kind of steak works best for this recipe?

I usually go with sirloin or ribeye for the best balance of tenderness and flavor. Flank steak also works if it’s sliced thin and against the grain.

Can I make this dish less spicy?

Definitely. I just reduce or omit the red pepper flakes if I want a milder version.

Do I have to use heavy cream?

Heavy cream makes the sauce extra rich, but I’ve also used half-and-half or even full-fat coconut milk for a dairy-free twist.

What if I don’t have Parmesan?

I’ve subbed in Pecorino Romano or even shredded mozzarella in a pinch. It changes the flavor a bit but still gives it that creamy texture.

Can I freeze the leftovers?

I don’t recommend freezing it since the cream-based sauce can separate when thawed. It’s best enjoyed fresh or refrigerated for a few days.

Conclusion

This One‑Pot Creamy Spicy Garlic Butter Steak Pasta is everything I want in a quick dinner—flavorful, comforting, and impressively simple. It’s a go-to when I need something hearty without piling up dishes, and every bite delivers big, bold taste.

Print

clock clock iconcutlery cutlery iconflag flag iconfolder folder iconinstagram instagram iconpinterest pinterest iconfacebook facebook iconprint print iconsquares squares iconheart heart iconheart solid heart solid icon
One‑Pot Creamy Spicy Garlic Butter Steak Pasta

One‑Pot Creamy Spicy Garlic Butter Steak Pasta

5 Stars 4 Stars 3 Stars 2 Stars 1 Star No reviews
  • Author: Sue
  • Prep Time: 10 minutes
  • Cook Time: 20 minutes
  • Total Time: 30 minutes
  • Yield: 4 servings
  • Category: Dinner
  • Method: One-Pot
  • Cuisine: American
  • Diet: Halal
Print Recipe
Pin Recipe

Description

This One-Pot Creamy Spicy Garlic Butter Steak Pasta features tender steak bites, rich garlic butter, and a spicy cream sauce, all cooked in a single pot for easy cleanup and bold flavor in just 30 minutes.


Ingredients

  • 1 lb sirloin or ribeye steak, cut into 1‑inch cubes
  • 8 oz rotini pasta (or penne, rigatoni, etc.)
  • 2 Tbsp butter
  • 1 cup heavy cream
  • ½ cup grated Parmesan cheese
  • 4 cloves garlic, minced
  • Fresh parsley, chopped (for garnish)
  • ½ tsp red pepper flakes
  • Salt and freshly ground black pepper, to taste
  • 2½ cups water or broth

Instructions

  1. Season the cubed steak with salt and pepper. Heat a large pot or deep skillet over medium-high and sear the steak in batches for about 2–3 minutes per side until browned. Remove the steak and set it aside.
  2. In the same pot, melt butter. Add minced garlic and red pepper flakes; cook until fragrant, about 1 minute.
  3. Pour in the water or broth, scraping up any browned bits from the bottom. Bring to a simmer.
  4. Stir in the pasta. Cover and cook, stirring occasionally, until pasta is al dente and liquid is mostly absorbed (about 10–12 minutes).
  5. Return the steak to the pot, then stir in heavy cream and Parmesan. Let everything heat through and sauce thicken slightly, about 2–3 minutes.
  6. Taste and adjust seasoning with salt, pepper, or extra red pepper flakes.
  7. Garnish with chopped parsley and serve immediately.

Notes

  • Use any short pasta like penne or rigatoni as substitutes for rotini.
  • For a milder dish, reduce or omit red pepper flakes.
  • Add vegetables like mushrooms, spinach, or bell peppers for extra nutrition.
  • Store leftovers in the fridge for up to 3 days; reheat with a splash of cream or broth.

Nutrition

  • Serving Size: 1 serving
  • Calories: 650
  • Sugar: 2g
  • Sodium: 420mg
  • Fat: 40g
  • Saturated Fat: 20g
  • Unsaturated Fat: 17g
  • Trans Fat: 1g
  • Carbohydrates: 40g
  • Fiber: 2g
  • Protein: 35g
  • Cholesterol: 130mg

Have you made this recipe? I'd love to see it!

Click here to Follow me on Pinterest

Gooey Chocolate Chip Cookies

July 10, 2025 by Sue Leave a Comment

There’s something magical about biting into a warm, gooey chocolate chip cookie—the kind that melts in my mouth with pockets of melted chocolate and a soft, chewy center. These cookies are everything I crave in a classic treat: comforting, rich, and totally irresistible. Whether it’s for a late-night snack or a weekend baking session, these gooey chocolate chip cookies never fail to satisfy. Gooey Chocolate Chip Cookies

Why You’ll Love This Recipe

I love how simple and quick this recipe is, with ingredients I usually already have in my pantry. The result is bakery-style cookies with crispy edges and molten centers. What makes these cookies extra special is the gooey texture that stays soft even after cooling. They’re perfect for dunking in milk, gifting, or enjoying straight from the tray while they’re still warm.

Ingredients

(Here's a tip: Check out the full list of ingredients and measurements in the recipe card below.)

  • All-purpose flour

  • Baking soda

  • Salt

  • Unsalted butter, softened

  • Brown sugar

  • Granulated sugar

  • Eggs

  • Vanilla extract

  • Semi-sweet chocolate chips

  • Optional: flaky sea salt for topping

Directions

  1. I preheat the oven to 350°F (175°C) and line my baking sheets with parchment paper.

  2. In a medium bowl, I whisk together flour, baking soda, and salt.

  3. In a large mixing bowl, I cream the butter, brown sugar, and granulated sugar until light and fluffy.

  4. I beat in the eggs, one at a time, followed by the vanilla extract.

  5. I gradually mix the dry ingredients into the wet ingredients until combined.

  6. I fold in the chocolate chips, making sure they’re evenly distributed.

  7. I scoop generous spoonfuls of dough onto the baking sheets, leaving space between each one.

  8. I bake the cookies for 9–11 minutes, just until the edges are set but the centers look soft and underbaked.

  9. Once out of the oven, I let them cool on the sheet for 5 minutes before transferring them to a wire rack.

Servings and timing

This recipe makes about 24 cookies.
Prep time: 15 minutes
Bake time: 10 minutes
Cooling time: 5 minutes
Total time: Around 30 minutes

Variations

I sometimes mix things up by using dark chocolate chunks or white chocolate chips instead of semi-sweet. For a nutty twist, I add chopped pecans or walnuts. When I’m feeling adventurous, I sprinkle a little espresso powder into the dough for a mocha flavor. A dash of cinnamon also adds a cozy, warm note.

Storage/Reheating

I store leftover cookies in an airtight container at room temperature for up to 4 days. For longer storage, I freeze them in a zip-top bag—either baked or as cookie dough balls. To reheat, I microwave one cookie for about 10–15 seconds to get that gooey texture back.

FAQs

How do I get the gooey center just right?

I make sure not to overbake the cookies. I pull them from the oven when the centers still look slightly underdone—they’ll continue to set as they cool.

Can I chill the dough ahead of time?

Yes, I often chill the dough for at least 30 minutes to enhance the flavor and prevent spreading during baking.

What type of chocolate works best?

I usually go with semi-sweet chips, but high-quality chocolate chunks give an extra decadent texture and flavor.

Can I make these cookies gluten-free?

Absolutely. I use a 1:1 gluten-free flour blend in place of the all-purpose flour and the cookies still come out delicious.

Why did my cookies turn out flat?

Flat cookies usually mean the butter was too soft or melted. I make sure it’s just softened, not runny, before creaming with the sugars.

Conclusion

These gooey chocolate chip cookies are a staple in my kitchen. They’re easy to make, endlessly adaptable, and always hit the spot. Whether I’m baking for a crowd or just treating myself, I can’t go wrong with this sweet, melty classic.

Print

clock clock iconcutlery cutlery iconflag flag iconfolder folder iconinstagram instagram iconpinterest pinterest iconfacebook facebook iconprint print iconsquares squares iconheart heart iconheart solid heart solid icon
Gooey Chocolate Chip Cookies

Gooey Chocolate Chip Cookies

5 Stars 4 Stars 3 Stars 2 Stars 1 Star No reviews
  • Author: Sue
  • Prep Time: 15 minutes
  • Cook Time: 10 minutes
  • Total Time: 30 minutes
  • Yield: 24 cookies
  • Category: Dessert
  • Method: Baking
  • Cuisine: American
  • Diet: Vegetarian
Print Recipe
Pin Recipe

Description

These gooey chocolate chip cookies feature a soft, chewy center with crispy edges and rich pockets of melted chocolate, making them the perfect indulgent treat for any occasion.


Ingredients

  • 2 ¼ cups all-purpose flour
  • 1 tsp baking soda
  • ½ tsp salt
  • 1 cup unsalted butter, softened
  • ¾ cup brown sugar
  • ¾ cup granulated sugar
  • 2 large eggs
  • 2 tsp vanilla extract
  • 2 cups semi-sweet chocolate chips
  • Optional: flaky sea salt for topping

Instructions

  1. Preheat oven to 350°F (175°C) and line baking sheets with parchment paper.
  2. In a medium bowl, whisk together flour, baking soda, and salt.
  3. In a large bowl, cream the butter, brown sugar, and granulated sugar until light and fluffy.
  4. Beat in eggs one at a time, then add vanilla extract.
  5. Gradually mix in the dry ingredients until fully combined.
  6. Fold in chocolate chips evenly throughout the dough.
  7. Scoop generous spoonfuls of dough onto prepared baking sheets, spacing them out.
  8. Bake for 9–11 minutes, until edges are set but centers appear soft and underbaked.
  9. Cool on the baking sheet for 5 minutes before transferring to a wire rack.

Notes

  • Do not overbake to maintain the gooey center.
  • Chill dough for at least 30 minutes for enhanced flavor and better texture.
  • Use high-quality chocolate chunks for a richer cookie.
  • Substitute gluten-free flour blend for a gluten-free version.

Nutrition

  • Serving Size: 1 cookie
  • Calories: 210
  • Sugar: 18g
  • Sodium: 95mg
  • Fat: 11g
  • Saturated Fat: 7g
  • Unsaturated Fat: 3g
  • Trans Fat: 0g
  • Carbohydrates: 28g
  • Fiber: 1g
  • Protein: 2g
  • Cholesterol: 25mg

Have you made this recipe? I'd love to see it!

Click here to Follow me on Pinterest

Cheesy Garlic Chicken Wraps

July 10, 2025 by Sue Leave a Comment

These Cheesy Garlic Chicken Wraps are crispy on the outside and packed with creamy, cheesy chicken goodness on the inside. I love how quick they are to prepare, making them perfect for busy weeknights or a satisfying lunch. Cheesy Garlic Chicken Wraps

Why You’ll Love This Recipe

I always enjoy recipes that strike the balance between delicious and simple—and this one does exactly that. The wraps are crispy and golden on the outside, and the inside is filled with juicy chicken, rich cream cheese, cheddar, and a punch of garlic. They’re incredibly versatile and come together fast using store-bought rotisserie chicken.

ingredients

(Here's a tip: Check out the full list of ingredients and measurements in the recipe card below.)

  • Rotisserie chicken, shredded

  • Cream cheese

  • Cheddar cheese

  • Garlic, minced

  • Garlic powder

  • Onion powder

  • Dried parsley

  • Salt

  • Pepper

  • Flour tortillas

  • Butter or oil for the skillet

directions

  1. I start by combining the shredded rotisserie chicken, cream cheese, cheddar cheese, garlic, garlic powder, onion powder, parsley, salt, and pepper in a large bowl. I mix it all together until creamy and well combined.

  2. I scoop the filling onto the center of each flour tortilla and fold it tightly like a burrito.

  3. In a skillet over medium heat, I melt butter (or use a drizzle of oil) and cook the wraps seam-side down until golden brown and crispy, flipping once to get both sides evenly browned.

  4. I let them rest for a couple minutes, then slice them in half and serve hot.

Servings and timing

  • Servings: Makes about 4 wraps

  • Prep time: 10 minutes

  • Cook time: 10 minutes

  • Total time: 20 minutes

Variations

  • I like to swap in mozzarella or pepper jack for a different cheese flavor.

  • Sometimes I add spinach or chopped jalapeños to the filling for extra color and spice.

  • For a buffalo-style version, I stir in a splash of buffalo sauce with the chicken mixture.

  • I’ve also used whole wheat or low-carb tortillas depending on what I have on hand.

storage/reheating

  • I store leftover wraps in an airtight container in the fridge for up to 3 days.

  • To reheat, I pop them back in the skillet over low heat until warmed through and crisp, or reheat them in the air fryer for a few minutes.

  • I don’t recommend microwaving as it can make the wrap soggy.

FAQs

1. Can I use canned chicken instead of rotisserie?

Yes, I’ve used canned chicken in a pinch. Just be sure to drain it well and fluff it with a fork before mixing.

2. What type of cream cheese should I use?

I prefer regular full-fat cream cheese for the creamiest texture, but reduced fat works too.

3. Can these be made ahead of time?

Absolutely. I assemble the wraps and refrigerate them uncooked, then toast them in the skillet just before serving.

4. Are these wraps freezer-friendly?

Yes! I wrap them in foil and freeze. When I’m ready to eat, I thaw in the fridge overnight and toast in the skillet.

5. What sides go well with these wraps?

I like to pair them with a fresh salad, coleslaw, or even a side of tortilla chips and salsa for a simple meal.

Conclusion

These Cheesy Garlic Chicken Wraps are everything I love in a quick, satisfying meal. Crispy, creamy, and loaded with flavor—they’re a regular in my kitchen and always a hit with friends and family. Whether I’m making them for lunch or an easy dinner, I know I can count on this recipe to deliver.

Print

clock clock iconcutlery cutlery iconflag flag iconfolder folder iconinstagram instagram iconpinterest pinterest iconfacebook facebook iconprint print iconsquares squares iconheart heart iconheart solid heart solid icon
Cheesy Garlic Chicken Wraps

Cheesy Garlic Chicken Wraps

5 Stars 4 Stars 3 Stars 2 Stars 1 Star No reviews
  • Author: Sue
  • Prep Time: 15 minutes
  • Cook Time: 7 minutes
  • Total Time: 22 minutes
  • Yield: 2 wraps (≈2 servings)
  • Category: Lunch, Dinner
  • Method: Pan-Fried
  • Cuisine: American
  • Diet: Low Fat
Print Recipe
Pin Recipe

Description

These Cheesy Garlic Chicken Wraps combine tender chicken, creamy garlic sauce, and melty cheese in a crispy tortilla—perfect for a quick, satisfying meal.


Ingredients

  • 2 large tortillas (regular or low‑carb/high‑protein)
  • 7 oz (≈200 g) cooked chicken, chopped
  • 2 garlic cloves, minced or grated
  • 2 tbsp light mayonnaise
  • 1 tbsp light Greek yogurt
  • 2 tsp hot sauce (e.g., Frank’s)
  • ¼ tsp salt
  • 3 oz (≈90 g) shredded cheddar blend
  • 1 green onion, chopped
  • Olive oil spray

Instructions

  1. In a bowl, mix the chicken, garlic, mayo, yogurt, hot sauce, and salt until well combined.
  2. Lay out each tortilla, sprinkle some cheese on the lower third, top with ≈⅔ cup chicken mixture, add more cheese and green onion.
  3. Fold in the sides and roll up the wrap tightly.
  4. Heat a non-stick pan over medium‑high, spritz with olive oil spray, and place wraps seam-side down.
  5. Cook for 3–4 minutes per side until golden and crispy, covering the pan to melt the cheese.
  6. Slice in half and serve immediately.

Notes

  • Swap cheddar for pepper jack or gouda for different flavors.
  • Add veggies like bell peppers or spinach for extra texture.
  • Halve the cheese for a lighter version.
  • Air fry at 375 °F (190 °C) for 6–8 minutes for a crispy finish.
  • Store cooked wraps in the fridge for up to 2 days; reheat in skillet or air fryer.
  • Freeze filling (not assembled wraps) up to 1 month.

Nutrition

  • Serving Size: 1 wrap
  • Calories: 410
  • Sugar: 2g
  • Sodium: 720mg
  • Fat: 22g
  • Saturated Fat: 7g
  • Unsaturated Fat: 13g
  • Trans Fat: 0g
  • Carbohydrates: 24g
  • Fiber: 2g
  • Protein: 30g
  • Cholesterol: 80mg

Have you made this recipe? I'd love to see it!

Click here to Follow me on Pinterest

Million Dollar Italian Lasagna

July 10, 2025 by Sue Leave a Comment

This Million Dollar Italian Lasagna is the ultimate comfort food layered with rich meat sauce, creamy cheese, and tender pasta. It’s the kind of hearty, indulgent dish I turn to when I want something filling, warm, and guaranteed to impress everyone at the table.

Million Dollar Italian Lasagna

Why You’ll Love This Recipe

I love this recipe because it delivers all the classic flavors of traditional lasagna but with a rich, creamy twist that truly makes it feel like a million bucks. It combines savory ground beef and sausage, zesty tomato sauce, creamy layers of ricotta and cream cheese, and gooey melted mozzarella. Every bite is layered with flavor, texture, and that irresistible Italian comfort food magic. Plus, I can make it ahead and pop it in the oven when I need it.

Ingredients

(Here's a tip: Check out the full list of ingredients and measurements in the recipe card below.)

  • Ground beef

  • Italian sausage

  • Onion

  • Garlic

  • Marinara or pasta sauce

  • Tomato paste

  • Sugar

  • Ricotta cheese

  • Cream cheese

  • Sour cream

  • Egg

  • Mozzarella cheese

  • Parmesan cheese

  • Italian seasoning

  • Salt and pepper

  • Lasagna noodles (cooked or oven-ready)

Directions

  1. I start by browning the ground beef and sausage together in a large skillet. I add in chopped onions and garlic, letting everything cook until fragrant and golden.

  2. Then I stir in the pasta sauce, tomato paste, a little sugar, and seasonings. I let this simmer so the flavors really deepen.

  3. For the creamy layer, I mix ricotta cheese, softened cream cheese, sour cream, an egg, and some Italian seasoning until smooth.

  4. In a greased baking dish, I layer meat sauce, noodles, the creamy cheese mixture, and shredded mozzarella. I repeat the layers, finishing with a generous sprinkle of Parmesan and mozzarella on top.

  5. I bake it at 375°F (190°C) for about 45 minutes covered with foil, then uncover it for another 10-15 minutes until bubbly and golden on top.

  6. I always let it rest for at least 15 minutes before cutting into it so everything sets perfectly.

Servings and timing

This lasagna serves 10 to 12 people and takes about 25 minutes to prep and 1 hour to bake, plus resting time. It's ideal for feeding a crowd or enjoying leftovers throughout the week.

Variations

When I want to change things up, I sometimes swap the beef for ground turkey or chicken. I’ve also made it with spinach added to the cheese layer for extra greens. For a spicy twist, I use hot Italian sausage or add a pinch of crushed red pepper. And when I need a gluten-free version, I opt for gluten-free lasagna noodles—just as satisfying.

Storage/Reheating

Leftover lasagna keeps beautifully. I store it in an airtight container in the fridge for up to 4 days. To reheat, I use the oven at 350°F (175°C) for about 20 minutes or microwave individual portions until heated through. It also freezes well—perfect for make-ahead meals. I wrap slices tightly in foil or a freezer-safe container and reheat from frozen or thaw overnight before warming.

FAQs

What makes this lasagna "million dollar"?

It’s the creamy cheese layer that takes it over the top—mixing ricotta, cream cheese, and sour cream gives it a velvety richness that feels truly luxurious.

Can I make this ahead of time?

Yes, I often assemble it a day in advance and refrigerate it. I just let it come to room temperature before baking or add a bit of extra time if baking straight from the fridge.

Do I have to cook the lasagna noodles first?

If I’m using oven-ready noodles, I skip boiling. But for regular noodles, I cook them until al dente before layering.

Can I freeze this lasagna?

Absolutely. I freeze it either before baking or after. If freezing before baking, I thaw it overnight before cooking. If already baked, I reheat it straight from frozen or thaw first.

What side dishes go well with this lasagna?

I like to serve it with garlic bread, a fresh Caesar salad, or roasted vegetables. Something light and crisp balances the richness of the dish perfectly.

Conclusion

Million Dollar Italian Lasagna is one of those crowd-pleasing recipes I turn to again and again. It’s rich, hearty, and packed with comforting flavor in every layer. Whether I’m making it for Sunday dinner, a holiday, or a potluck, it always brings people together and never disappoints.

Print

clock clock iconcutlery cutlery iconflag flag iconfolder folder iconinstagram instagram iconpinterest pinterest iconfacebook facebook iconprint print iconsquares squares iconheart heart iconheart solid heart solid icon
Million Dollar Italian Lasagna

Million Dollar Italian Lasagna

5 Stars 4 Stars 3 Stars 2 Stars 1 Star No reviews
  • Author: Sue
  • Prep Time: 25 minutes
  • Cook Time: 1 hour
  • Total Time: 1 hour 40 minutes (includes resting)
  • Yield: 10-12 servings
  • Category: Main Course
  • Method: Baking
  • Cuisine: Italian
  • Diet: Halal
Print Recipe
Pin Recipe

Description

Million Dollar Italian Lasagna is a rich, indulgent dish featuring layers of seasoned meat sauce, creamy cheeses, and tender noodles—perfect for family dinners or special occasions.


Ingredients

  • 1 lb ground beef
  • 1 lb Italian sausage
  • 1 onion, chopped
  • 3 cloves garlic, minced
  • 3 cups marinara or pasta sauce
  • 2 tbsp tomato paste
  • 1 tsp sugar
  • 1 ½ cups ricotta cheese
  • 8 oz cream cheese, softened
  • ½ cup sour cream
  • 1 egg
  • 3 cups shredded mozzarella cheese
  • ½ cup grated Parmesan cheese
  • 2 tsp Italian seasoning
  • Salt and pepper to taste
  • 12 lasagna noodles (cooked or oven-ready)

Instructions

  1. Preheat oven to 375°F (190°C). Grease a 9x13-inch baking dish.
  2. In a large skillet over medium heat, brown the ground beef and sausage. Add chopped onion and minced garlic; cook until softened.
  3. Stir in marinara sauce, tomato paste, sugar, Italian seasoning, salt, and pepper. Simmer for 10-15 minutes.
  4. In a bowl, mix ricotta, cream cheese, sour cream, egg, and a pinch of Italian seasoning until smooth.
  5. Spread a layer of meat sauce in the bottom of the baking dish. Add a layer of noodles, then spread the cheese mixture, followed by mozzarella. Repeat layers, ending with meat sauce and a final topping of mozzarella and Parmesan.
  6. Cover with foil and bake for 45 minutes. Remove foil and bake an additional 10-15 minutes until golden and bubbly.
  7. Let lasagna rest for at least 15 minutes before slicing and serving.

Notes

  • You can substitute beef with ground turkey or chicken.
  • Add spinach to the cheese layer for extra veggies.
  • Use oven-ready noodles to save time.
  • Lasagna freezes well either before or after baking.

Nutrition

  • Serving Size: 1 slice
  • Calories: 480
  • Sugar: 6g
  • Sodium: 780mg
  • Fat: 29g
  • Saturated Fat: 14g
  • Unsaturated Fat: 12g
  • Trans Fat: 1g
  • Carbohydrates: 30g
  • Fiber: 2g
  • Protein: 28g
  • Cholesterol: 90mg

Have you made this recipe? I'd love to see it!

Click here to Follow me on Pinterest

Crispy Fried Cheese Balls – Golden Crunch Meets Gooey Delight!

July 10, 2025 by Sue Leave a Comment

These crispy fried cheese balls are the ultimate snack for cheese lovers. Each bite delivers a satisfying crunch followed by a burst of gooey, melted cheese. Whether I’m serving them at parties or enjoying them as a late-night treat, these golden bites never disappoint. Crispy Fried Cheese Balls – Golden Crunch Meets Gooey Delight!

Why You’ll Love This Recipe

I love how quick and easy these cheese balls are to make with basic pantry ingredients. They’re crowd-pleasers—perfect for game nights, gatherings, or even as a comforting snack. The contrast of the crispy exterior with the soft, cheesy interior always gets rave reviews. Plus, I can tweak the flavors to fit my mood or the occasion.

ingredients

(Here's a tip: Check out the full list of ingredients and measurements in the recipe card below.)

flour
cornstarch
baking powder
salt
pepper
cheese (cheddar or mozzarella works great)
water
breadcrumbs
oil for frying

directions

  1. I start by mixing the flour, cornstarch, baking powder, salt, and pepper in a bowl.

  2. I add water slowly to create a smooth, thick batter.

  3. Then, I shape the cheese into small balls.

  4. I dip each cheese ball into the batter, making sure it’s fully coated.

  5. After that, I roll them in breadcrumbs for that extra crunch.

  6. I heat the oil in a deep frying pan or pot and fry the balls until they’re golden brown.

  7. Once they’re done, I remove them and let them drain on paper towels before serving.

Servings and timing

This recipe makes about 16 cheese balls, enough to serve 4 people as a snack or appetizer. It takes around 10 minutes to prepare and 10 minutes to fry, so I can have these ready in just 20 minutes.

Variations

Sometimes I like to mix in herbs like parsley or oregano into the batter for added flavor. If I’m feeling spicy, I add a pinch of chili flakes or paprika. I’ve also tried different cheeses like pepper jack or gouda, and they melt beautifully.

storage/reheating

If I have leftovers, I store them in an airtight container in the fridge for up to 3 days. To reheat, I pop them in the oven at 375°F (190°C) for about 10 minutes until they’re crispy again. I avoid microwaving them because it makes them soggy.

FAQs

How do I prevent the cheese from leaking out while frying?

I make sure the cheese balls are fully coated in batter and breadcrumbs, and that the oil is hot enough before frying. A good seal keeps the cheese inside.

Can I make these ahead of time?

Yes, I often prepare the cheese balls and freeze them before frying. When I’m ready, I fry them straight from the freezer—just a minute or two longer.

What’s the best cheese to use?

I prefer cheddar for its sharp flavor, but mozzarella gives that classic stretchy melt. Mixing both also works great.

Can I bake these instead of frying?

Yes, I can bake them at 400°F (200°C) for about 15–18 minutes. They don’t get quite as crispy, but they’re still delicious.

What dipping sauces go well with cheese balls?

I love serving them with marinara sauce, garlic aioli, or even a spicy sriracha mayo. They pair well with almost anything.

Conclusion

These crispy fried cheese balls are everything I want in a snack—cheesy, crunchy, and completely satisfying. They’re quick to make, easy to customize, and always a hit. Whether I’m treating myself or feeding a crowd, this recipe never fails to bring smiles.

Print

clock clock iconcutlery cutlery iconflag flag iconfolder folder iconinstagram instagram iconpinterest pinterest iconfacebook facebook iconprint print iconsquares squares iconheart heart iconheart solid heart solid icon
Crispy Fried Cheese Balls – Golden Crunch Meets Gooey Delight!

Crispy Fried Cheese Balls – Golden Crunch Meets Gooey Delight!

5 Stars 4 Stars 3 Stars 2 Stars 1 Star No reviews
  • Author: Sue
  • Prep Time: 10 minutes
  • Cook Time: 10 minutes
  • Total Time: 20 minutes
  • Yield: 4 servings (about 16 cheese balls)
  • Category: Snack
  • Method: Frying
  • Cuisine: American
  • Diet: Vegetarian
Print Recipe
Pin Recipe

Description

These crispy fried cheese balls feature a golden crunchy exterior with a gooey melted cheese center. Perfect as a snack or appetizer, they are quick to make and customizable with various cheeses and seasonings.


Ingredients

  • ½ cup all-purpose flour
  • 2 tbsp cornstarch
  • ½ tsp baking powder
  • ½ tsp salt
  • ¼ tsp black pepper
  • 1 cup cheese (cheddar or mozzarella), cubed
  • ½ cup water (adjust as needed for batter consistency)
  • 1 cup breadcrumbs
  • Oil for frying

Instructions

  1. In a mixing bowl, combine flour, cornstarch, baking powder, salt, and pepper.
  2. Gradually add water to form a smooth, thick batter.
  3. Shape the cheese into small bite-sized balls.
  4. Dip each cheese ball into the batter, ensuring complete coverage.
  5. Roll the coated cheese balls in breadcrumbs.
  6. Heat oil in a deep pan or pot over medium-high heat.
  7. Fry the cheese balls in hot oil until golden brown and crispy.
  8. Remove the cheese balls and drain on paper towels before serving.

Notes

  • Add herbs like parsley or oregano for extra flavor.
  • Include chili flakes or paprika for a spicy twist.
  • Experiment with cheeses like gouda or pepper jack.
  • Reheat in oven to retain crispiness.
  • Prepare ahead and freeze before frying.

Nutrition

  • Serving Size: 4 cheese balls
  • Calories: 250
  • Sugar: 1g
  • Sodium: 300mg
  • Fat: 18g
  • Saturated Fat: 8g
  • Unsaturated Fat: 9g
  • Trans Fat: 0g
  • Carbohydrates: 15g
  • Fiber: 1g
  • Protein: 7g
  • Cholesterol: 30mg

Have you made this recipe? I'd love to see it!

Click here to Follow me on Pinterest

  • « Previous Page
  • 1
  • …
  • 6
  • 7
  • 8
  • 9
  • 10
  • …
  • 39
  • Next Page »
Modern Sidebar

Hey there! I'm Sue, a mom, a wife, and someone who’s always in the kitchen trying out new recipes or revisiting old ones that remind me of family gatherings and special moments.

Learn more

Popular

  • Cracker Barrel Meatloaf Copycat Recipe
    Cracker Barrel Meatloaf Copycat Recipe
  • Hillbilly Pie (Poor Man’s Pie)
    Hillbilly Pie (Poor Man’s Pie)
  • Perfect Chocolate Cupcakes
    Perfect Chocolate Cupcakes
  • Slow Cooker Salisbury Steaks
    Slow Cooker Salisbury Steaks

Footer

↑ back to top

About

  • About
  • Contact
  • Disclosure Policy
  • DMCA
  • Privacy Policy
  • Terms and Conditions

Newsletter

  • Sign Up! for emails and updates

Recipes

  • Appetizers & Snacks
  • Beef
  • Breakfast
  • Chicken
  • Desserts
  • Dinner
  • Drinks
  • Side-Dish
  • Soups

As an Amazon Associate I earn from qualifying purchases.

Copyright © 2025 Sue Recipe