
I absolutely love sharing my favorite comfort foods, and this Butter Dip Buttermilk Biscuits (Butter Swim Biscuits) Recipe has a special place in my heart. These biscuits are not only incredibly fluffy and buttery but also wonderfully easy to make—no fancy tools needed. I remember the first time I tried these, I couldn’t believe how perfectly golden and tender they turned out with so little fuss. Whether it’s a cozy weekend breakfast or a heartwarming side for dinner, these biscuits are my go-to when I want something that tastes like it was made with love, but without hours of effort.
Why You'll Love This Butter Dip Buttermilk Biscuits (Butter Swim Biscuits) Recipe
What really sets this Butter Dip Buttermilk Biscuits (Butter Swim Biscuits) Recipe apart for me is the incredible buttery flavor that literally swims around the tender biscuit dough as it bakes. The way the butter pools beneath and seeps into every bite creates a richness that’s hard to match. The top crisps up just enough to give a slight crunch while the inside stays so fluffy and soft that it almost melts in your mouth. I find this balance dreamy and truly special.
I also love how straightforward the process is. No need to fuss over rolling dough or hunting for a biscuit cutter. Pouring the dough right into a baking dish filled with melted butter makes baking these biscuits feel like such a relaxing, stress-free experience. It’s perfect for days when I want something homemade but don’t want my kitchen to look like a mess afterward.
These biscuits are perfect for so many occasions! I often make them for family brunches or as the ideal accompaniment to hearty soups and stews on chilly nights. Plus, the visual appeal of butter swimming around the biscuits right in the pan never fails to impress guests. It’s a simple recipe that feels like a little celebration every time I bake it.
Ingredients You'll Need
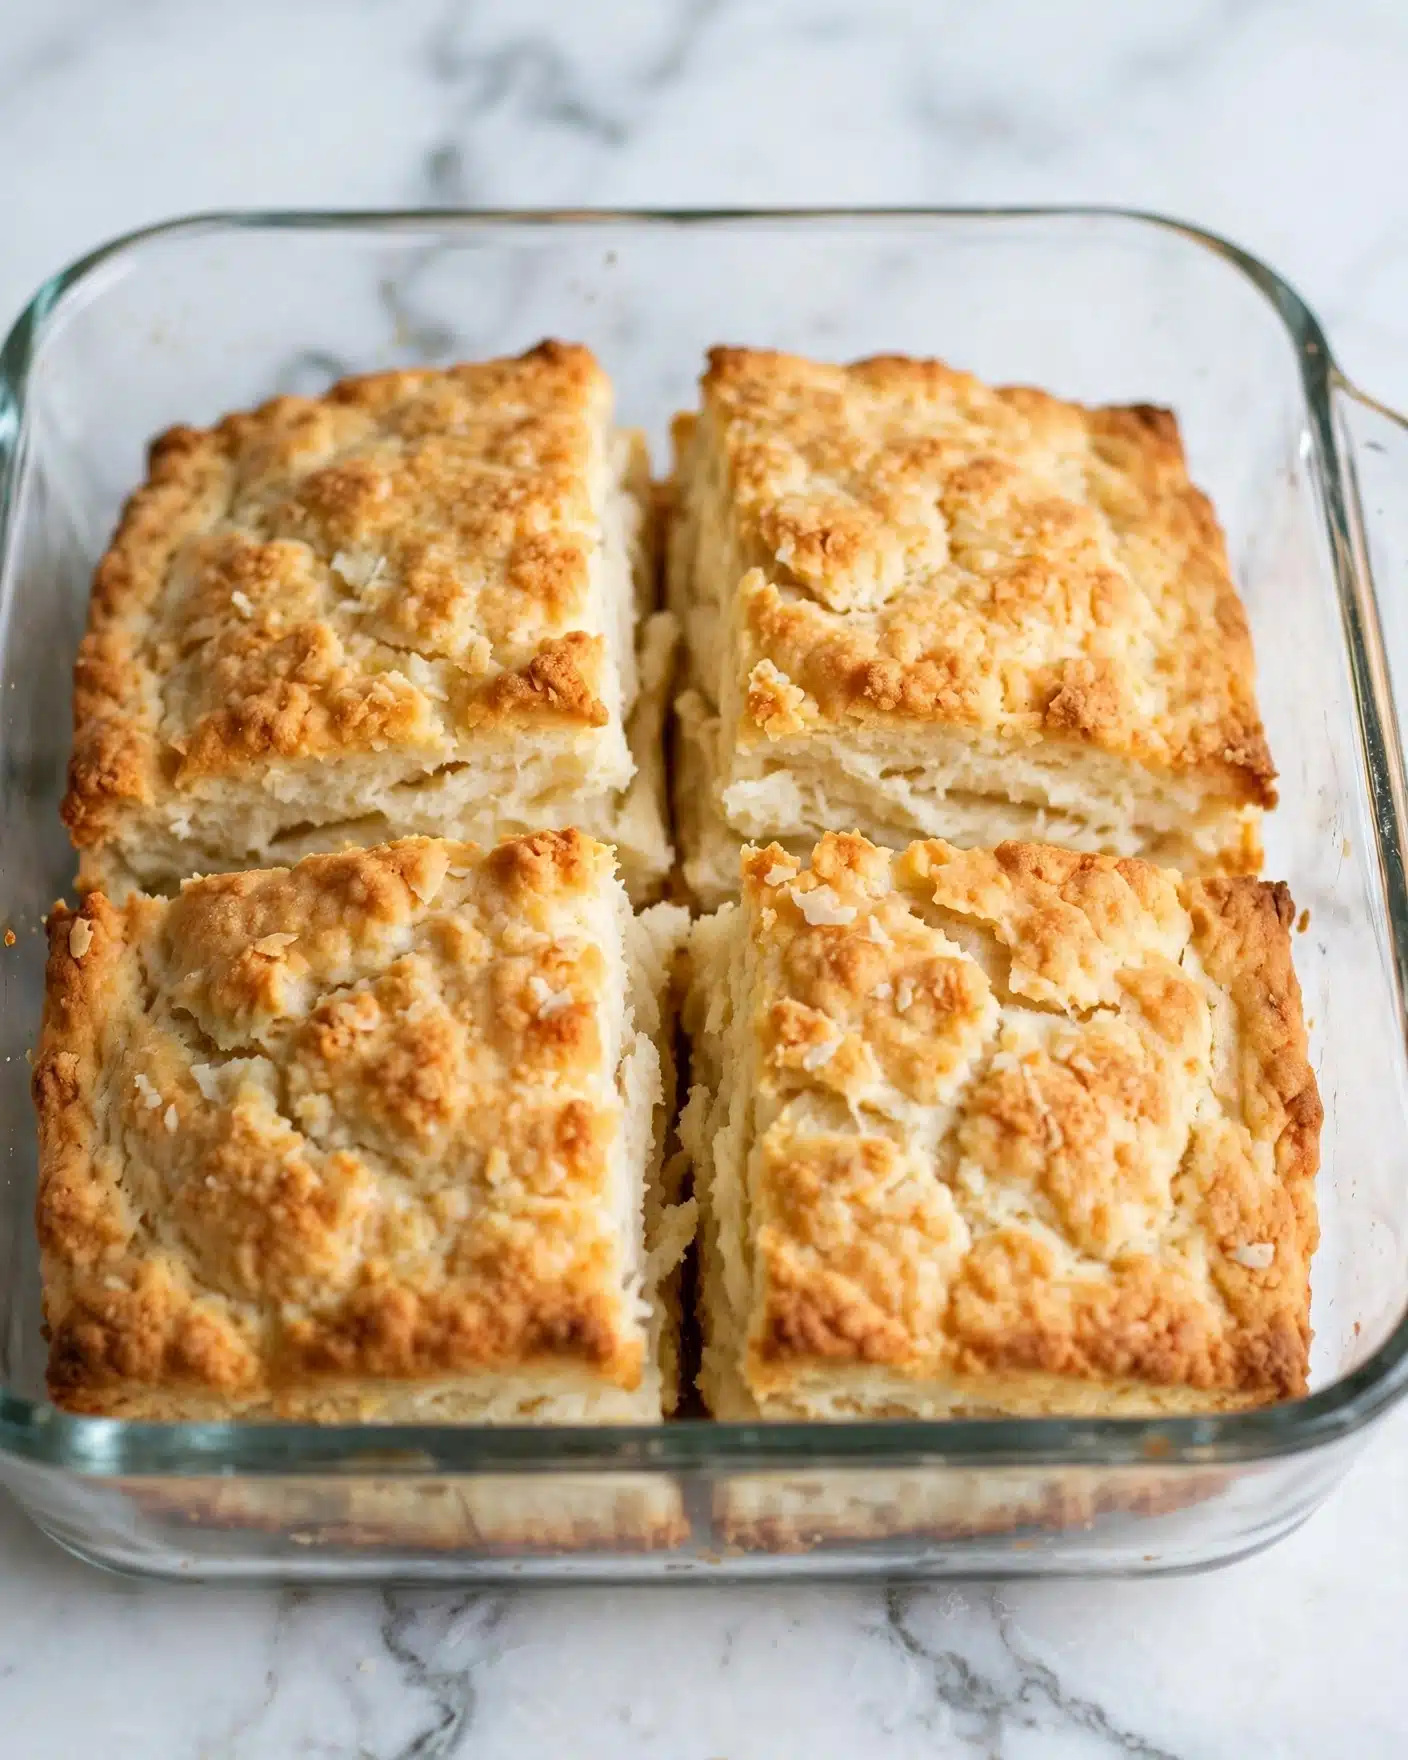
The ingredients for this recipe are straightforward and simple, but each one plays an essential role in creating the perfect biscuit texture and flavor. From the richness of the salted butter to the tang of the buttermilk, every element enhances the final result beautifully.
TIP : You'll find the full list of ingredients and measurements in the recipe card below
- Salted butter: Provides deep richness and moisture, and the salt enhances the other flavors.
- All-purpose flour: The base for the biscuits, offering structure and tenderness.
- Granulated sugar: Adds a subtle sweetness that balances the saltiness and tang.
- Aluminum-free baking powder: Essential for that perfect rise without any metallic aftertaste.
- Salt: Enhances all the flavors and balances the sweetness.
- Buttermilk: The star for tender, flavorful biscuits with a slight tang and perfect crumb.
Directions
Step 1: Preheat your oven to 450°F. It’s important to get the oven really hot because that heat jump-starts the rise and browning. Grab a 9x9-inch glass or ceramic baking dish and give it a light spray with nonstick cooking spray. I prefer the kind with flour added, but any nonstick spray works fine. Since you’re using a lot of butter, spraying is optional but I like to be cautious.
Step 2: Melt ½ cup (one stick) of salted butter in the microwave until fully liquid. Pour this butter straight into your prepared baking dish. This is where the magic happens — the butter will “swim” around your dough as it bakes.
Step 3: In a medium mixing bowl, whisk together the flour, sugar, baking powder, and salt. Make sure everything is well combined so your biscuits rise evenly and taste balanced.
Step 4: Pour in 1¾ cups of buttermilk and stir gently until a sticky batter forms. It may seem thick, but that’s exactly what you want. If it feels too dry to spread in the pan, add a splash more buttermilk, one tablespoon at a time, until it’s thick but spreadable.
Step 5: Pour the dough over the melted butter in your baking dish. Some butter will pool on top as you spread it out. To make spreading easier and less sticky, I spray my hands with nonstick spray. Spread the dough evenly, then use a knife to score it into 9 squares. This step helps you break the biscuits apart cleanly after baking.
Step 6: Place the pan in the oven on the middle rack and bake for 25 to 30 minutes. Halfway through baking, rotate the baking dish to ensure even browning. You want the biscuits nicely golden on top and springy when lightly touched.
Step 7: To check doneness, insert a toothpick into the center of a biscuit. It should come out clean, with no raw batter clinging. Once done, remove from the oven and let the biscuits rest a few minutes before serving to let the butter settle.
Servings and Timing
This Butter Dip Buttermilk Biscuits (Butter Swim Biscuits) Recipe yields about 9 generous servings—perfect for sharing with friends or family. Prep time is just 10 minutes, which is amazingly quick for homemade biscuits. You’ll bake them for 25 to 30 minutes, totaling around 35 to 40 minutes from start to finish. No additional resting or cooling time is necessary beyond a few minutes to let them set once out of the oven. I love how efficient this recipe is without sacrificing flavor or texture.
How to Serve This Butter Dip Buttermilk Biscuits (Butter Swim Biscuits) Recipe
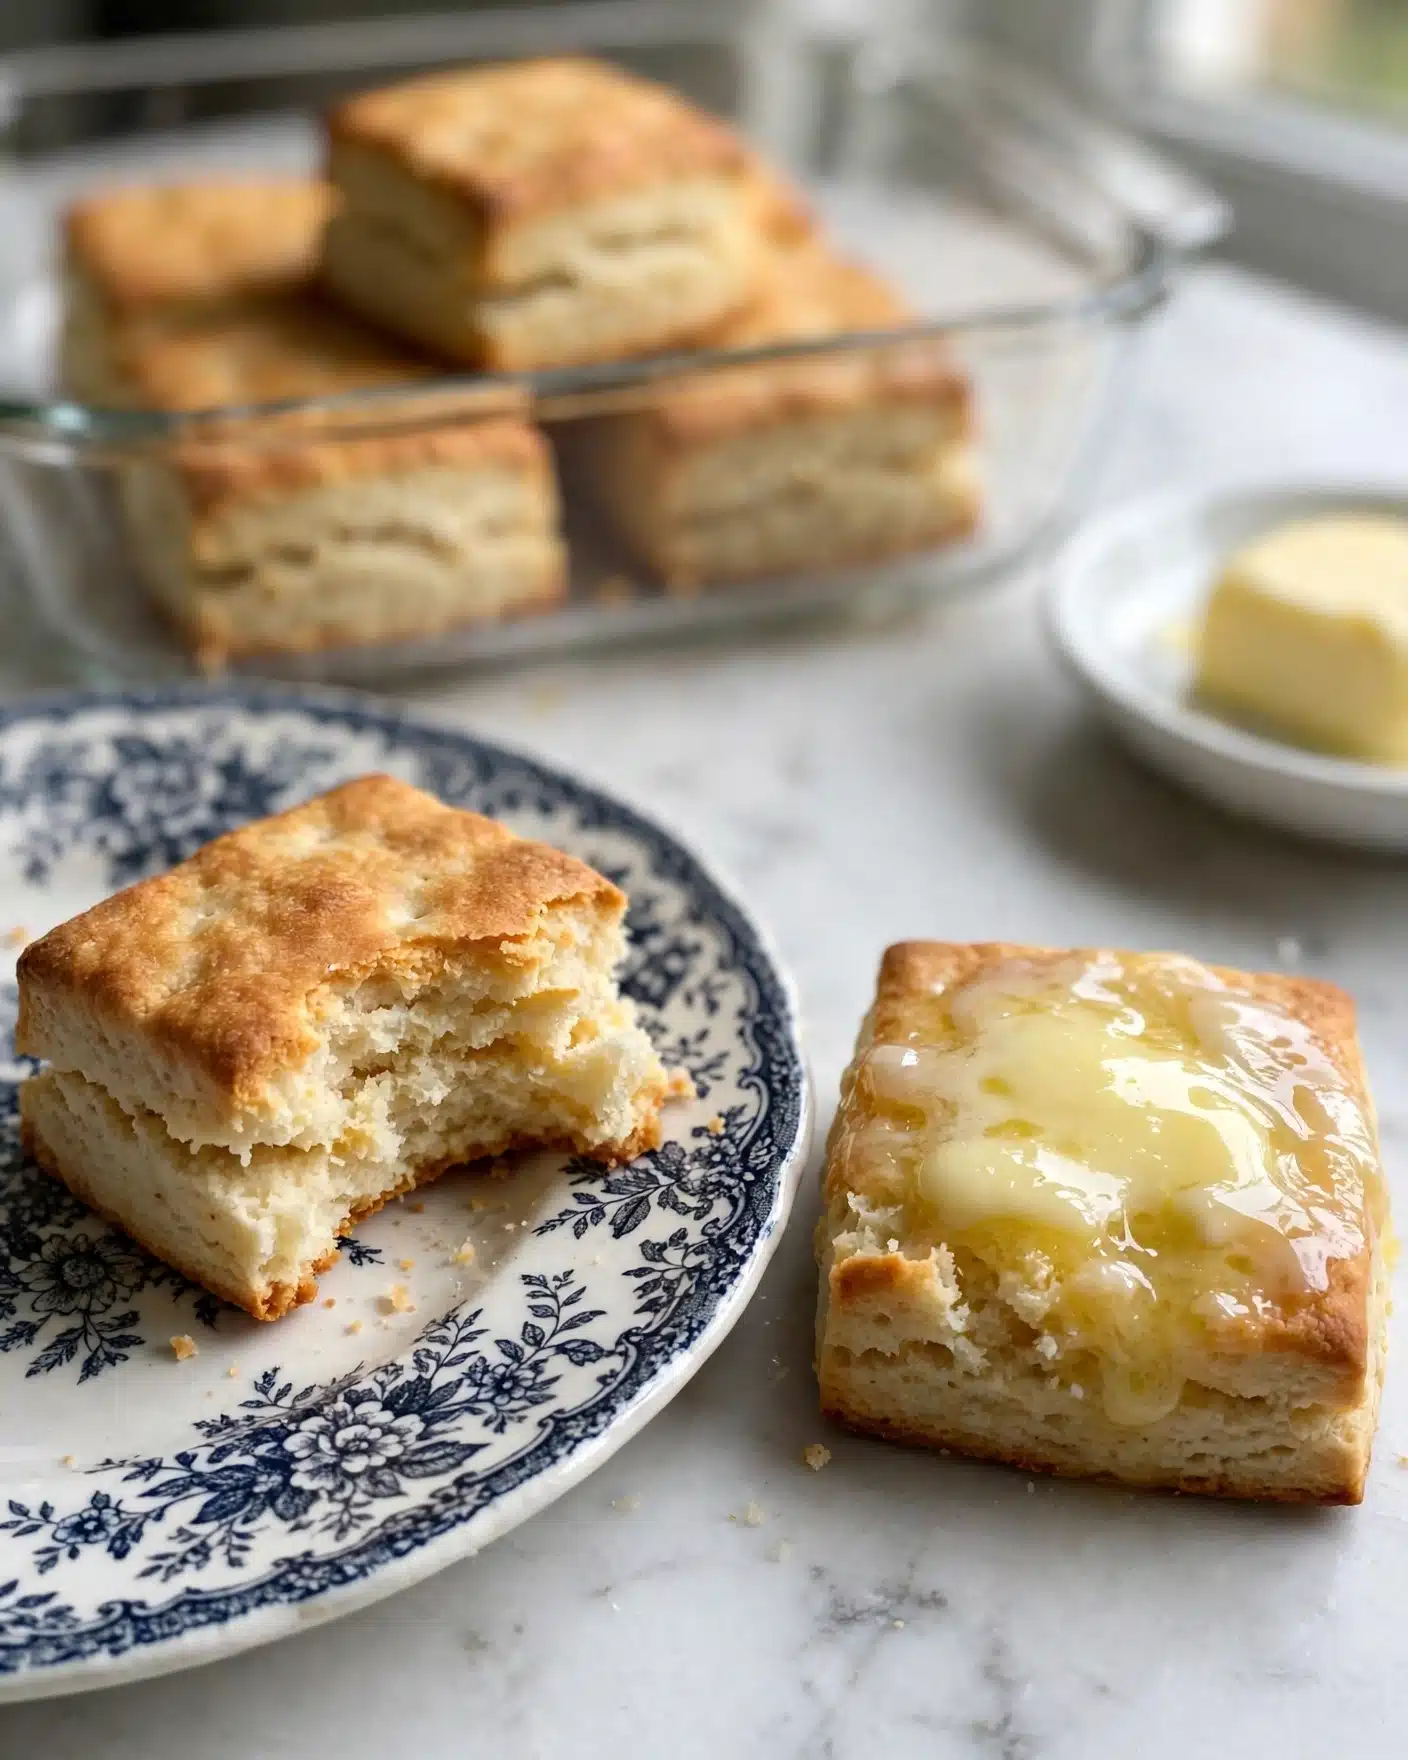
I find these biscuits to be so versatile when serving. My favorite way is to keep them warm and serve right from the pan, placed on a rustic wooden board to catch any buttery drips that might escape. They pair beautifully alongside a bowl of creamy chicken soup or a hearty sausage gravy. If I’m serving them at breakfast, I love spreading a bit of homemade strawberry jam or honey for a lovely sweet and savory touch.
For an elegant touch, you can garnish them with a sprinkle of fresh thyme or rosemary right before serving, which adds a lovely aroma and makes the plate pop visually. I also recommend pairing with a chilled glass of freshly squeezed lemonade or a rich cup of coffee to balance the richness. These biscuits really shine at family dinners, brunches, and even holiday gatherings where you want something simple yet show-stopping.
When it comes to temperature, I serve them warm. Fresh from the oven is ideal, but if you need to reheat leftovers, a quick few minutes in the oven brings back that perfect buttery crispness. For portion sizes, one large biscuit per person works nicely as a side, or pair two for a filling breakfast or snack.
Variations
I love experimenting with variations on this classic recipe to keep it fresh and exciting. For example, swapping out half the all-purpose flour for whole wheat flour adds a lovely nutty flavor and boosts the fiber content without sacrificing too much tenderness. If you prefer a dairy-free or vegan-friendly version, you can easily substitute the butter with a plant-based alternative and use almond or oat milk mixed with a tablespoon of vinegar instead of buttermilk. The texture might slightly differ but stays delicious!
To mix up the flavor, I sometimes stir in fresh herbs like chives or dill for a savory twist, or sprinkle shredded cheddar cheese on top before baking for an ooey-gooey cheesy biscuit. Another fun cooking method is to bake these in individual ramekins for a personal touch and beautiful presentation, especially for brunch gatherings.
Each variation lets you tailor this Butter Dip Buttermilk Biscuits (Butter Swim Biscuits) Recipe to suit your tastes and dietary needs while keeping that signature buttery, fluffy magic intact. I encourage you to get creative and find your favorite twist!
Storage and Reheating
Storing Leftovers
When I have leftover biscuits, I like to store them in an airtight container at room temperature if I plan to eat them within a day or two. If your kitchen is warm, the fridge is a safer bet to keep them fresh. Using a container that seals well helps maintain the moisture and prevents them from drying out. Leftovers stored properly usually stay good for up to 3 days, but I always say best enjoyed sooner than later!
Freezing
This Butter Dip Buttermilk Biscuits (Butter Swim Biscuits) Recipe freezes very well, which is perfect if you want to make a batch in advance. I wrap each biscuit tightly in plastic wrap and place them all in a resealable freezer bag or airtight container. They can be frozen for up to 2 months without losing quality. When you want to enjoy them, thaw biscuits overnight in the refrigerator before reheating or thaw at room temperature for about 30 minutes if you’re in a hurry.
Reheating
Reheating is best done in the oven to restore that wonderful crisp edge and fluffy interior. I preheat the oven to 350°F, place the biscuits on a baking sheet, and heat for about 10 minutes or until warmed through. Microwaving is faster but can make them a little rubbery or soggy, so I avoid that if I’m after perfect texture. Adding a small pad of butter on top before reheating helps refresh the buttery flavor and moisture.
FAQs
Can I use biscuit cutters instead of just cutting the dough in the pan?
Absolutely! While the beauty of this recipe is no biscuit cutter needed, you can use one if you want round biscuits instead of squares. Just scoop the sticky dough onto a buttered baking sheet and cut with your biscuit cutter, making sure not to twist it to preserve the biscuit’s rise.
Why do I need to preheat the oven to such a high temperature (450°F)?
The high temperature is key to creating those lovely golden tops and causing the biscuits to rise quickly, which results in a light and fluffy texture. If you bake at a lower temperature, the biscuits might turn out denser and less evenly browned.
Can I substitute the buttermilk if I don’t have any on hand?
Yes, you can make a quick buttermilk substitute by adding 1 tablespoon of white vinegar or lemon juice to a measuring cup, then filling it with milk to the 1¾ cup line. Let it sit for 5 minutes to curdle before using—it won’t be exactly the same but creates similar acidity that tenderizes the biscuits.
How do I know when the biscuits are fully baked?
Look for golden brown tops that spring back lightly when touched. To be sure, insert a toothpick or skewer into the center—it should come out clean without any sticky batter. If it’s wet, the biscuits need a few more minutes.
Is it okay to use unsalted butter instead of salted?
You can, but I recommend adjusting the salt in the recipe slightly to compensate—add a pinch more salt to the dough. Salted butter adds flavor depth and helps with browning, so using it gives the best results, but unsalted works in a pinch.
Conclusion
I truly hope you give this Butter Dip Buttermilk Biscuits (Butter Swim Biscuits) Recipe a try—it’s one of those heartwarming, easy recipes that always brings a smile to my face. The simplicity combined with that indulgent buttery flavor makes it a trusted classic in my kitchen. Once you try it, I’m sure these biscuits will become a beloved staple in your home, just like they are in mine!
Print
Butter Dip Buttermilk Biscuits (Butter Swim Biscuits) Recipe
- Prep Time: 10 minutes
- Cook Time: 25 minutes
- Total Time: 35 minutes
- Yield: 9 biscuits
- Category: Side Dish
- Method: Baking
- Cuisine: American
Description
Butter Dip Buttermilk Biscuits, also known as Butter Swim Biscuits, are an exceptionally easy homemade biscuit recipe requiring no biscuit cutter. These thick, fluffy, and buttery biscuits are baked directly in melted butter, resulting in rich, moist layers and a golden brown crust. Perfect as a comforting side or breakfast treat, they combine simplicity with delicious traditional American flavors.
Ingredients
Butter
- ½ cup salted butter (1 stick)
Dry Ingredients
- 2 ½ cups all-purpose flour
- 1 ½ Tablespoons granulated sugar
- 1 Tablespoon aluminum-free baking powder
- 1 ½ teaspoons salt
Wet Ingredients
- 1 ¾ cups buttermilk (may need up to 2 cups)
Instructions
- Preheat Oven and Prepare Pan: Preheat the oven to 450°F. Spray a 9x9-inch glass or ceramic baking dish with nonstick cooking spray that contains flour to prevent sticking, although this step is optional due to the butter used.
- Melt Butter in Baking Dish: Melt ½ cup salted butter in the microwave using a microwave-safe bowl, then pour the melted butter into the prepared baking dish, ensuring it covers the bottom evenly.
- Mix Dry Ingredients: In a medium bowl, combine 2 ½ cups all-purpose flour, 1 ½ tablespoons granulated sugar, 1 tablespoon aluminum-free baking powder, and 1 ½ teaspoons salt. Stir to blend all dry components uniformly.
- Add Buttermilk and Form Dough: Pour in 1 ¾ cups of buttermilk and stir the mixture until a thick, sticky batter forms. If the dough appears too dry, add a little more buttermilk until it reaches the desired sticky consistency.
- Transfer Dough to Baking Dish: Pour the biscuit dough directly into the melted butter in the baking dish. Use sprayed hands or a spatula to spread the dough evenly. The butter may run over the dough's edges.
- Score Dough into Squares: Using a knife, gently cut the dough into 9 equal squares. This pre-cutting will make it easier to separate the biscuits after baking.
- Bake Biscuits: Place the baking dish on the middle rack of the oven and bake for 25-30 minutes, rotating the dish once halfway through baking. The biscuits are done when the tops are golden brown and spring back to the touch; a toothpick inserted in the center should come out clean.
Notes
- The butter not only adds flavor but acts as a non-stick and moisture barrier, ensuring fluffy biscuits.
- Using aluminum-free baking powder prevents any metallic aftertaste in the biscuits.
- Pre-cutting the dough helps to separate biscuits more easily after baking, especially since the dough is sticky.
- Oven temperatures vary; keep an eye on the biscuits during the last 5 minutes to avoid overbrowning.
- You can use up to 2 cups of buttermilk if necessary to get the right dough consistency.




Leave a Reply