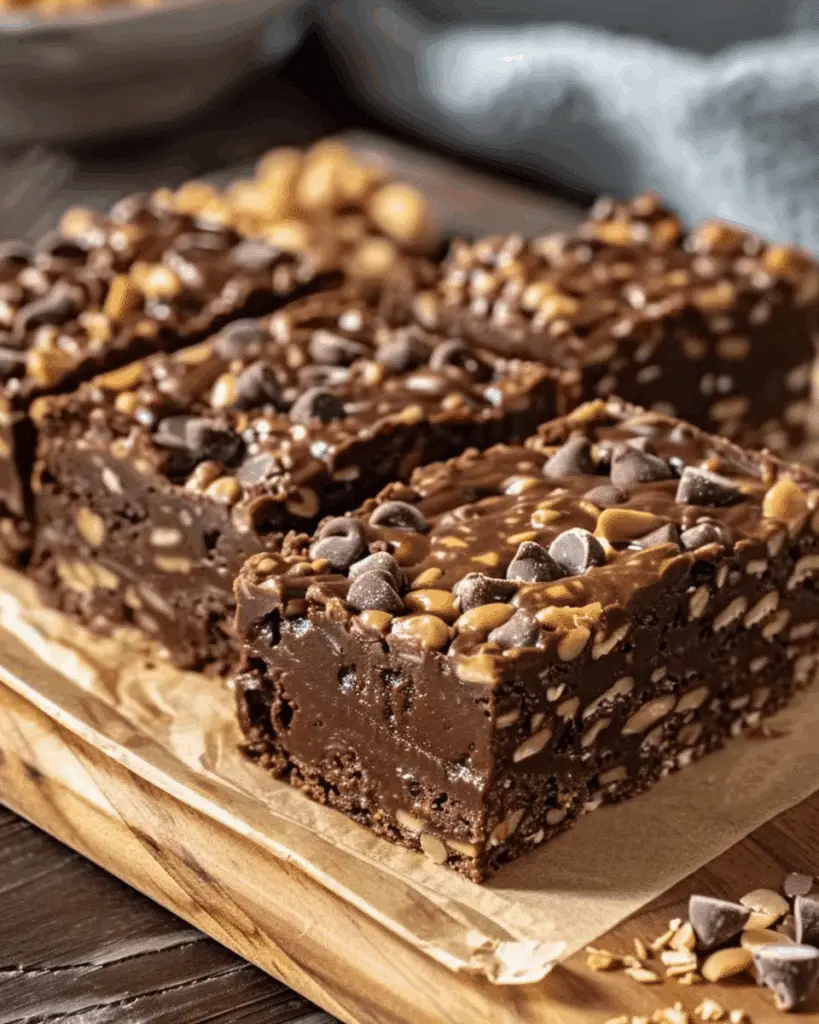
Healthy no-bake chocolate peanut butter crunch bars are a dreamy combination of creamy peanut butter, rich dark chocolate, and crispy, crunchy texture—all with no oven required. They’re naturally sweetened, made with simple pantry ingredients, and perfect when I want a guilt-free treat that still feels indulgent.
Why You’ll Love This Recipe
I love this recipe because it comes together in minutes, keeps in the fridge for days, and satisfies both my sweet tooth and my craving for something a little crunchy. It’s great for meal prep, doesn’t require any fancy equipment, and is easy to customize with what I have on hand. Plus, they’re gluten-free and can easily be made vegan.
Ingredients
(Here's a tip: Check out the full list of ingredients and measurements in the recipe card below.)
- Natural peanut butter (or almond butter)
- Maple syrup or honey
- Coconut oil
- Vanilla extract
- Crispy rice cereal
- Rolled oats (optional for added texture)
- Dark chocolate chips or chopped chocolate
- Sea salt (optional, for sprinkling)
Directions
- I line an 8x8-inch pan with parchment paper and set it aside.
- In a saucepan over low heat, I melt the peanut butter, maple syrup (or honey), and coconut oil until smooth and combined.
- I remove it from the heat and stir in vanilla extract.
- I gently fold in the crispy rice cereal (and oats, if using) until evenly coated.
- I press the mixture into the prepared pan, smoothing it out into an even layer.
- In a separate bowl, I melt the dark chocolate chips (either in the microwave or over a double boiler), then pour it over the base and spread evenly.
- I sprinkle a little sea salt on top if I want that sweet-salty finish.
- I refrigerate the bars for at least 1–2 hours, or until set, before slicing into squares or bars.
Servings and Timing
This recipe makes about 12–16 bars depending on how I slice them. It takes 10 minutes to prep and about 1–2 hours to chill. I usually make them the night before for an easy grab-and-go snack the next day.
Variations
- I sometimes add chia seeds or flaxseed for a fiber and omega-3 boost.
- Swapping in almond or cashew butter works great for a different nutty flavor.
- For a dessert twist, I mix mini chocolate chips, shredded coconut, or chopped nuts into the base.
- I use vegan chocolate and maple syrup to keep the bars fully plant-based.
Storage/Reheating
I store the bars in an airtight container in the fridge for up to 1 week. They also freeze well—I layer them with parchment paper and freeze for up to 2 months. No reheating needed—just thaw at room temp or enjoy straight from the fridge for the best texture.
FAQs
Can I use regular peanut butter?
Yes, but natural peanut butter works best since it has fewer additives and blends smoothly with the other ingredients. I just stir it well before using.
What cereal should I use?
I usually go with plain crispy rice cereal. Brown rice cereal or puffed quinoa also works for a slightly different crunch and flavor.
Can I make these nut-free?
Yes, I use sunflower seed butter or a nut-free spread instead of peanut butter, and they still turn out great.
How do I keep the bars from crumbling?
I press the mixture firmly into the pan and make sure everything is well coated. Chilling for the full time also helps them hold together when sliced.
Can I use the microwave to melt everything?
Definitely. I melt the peanut butter, syrup, and coconut oil together in 20-second intervals, stirring between each round. Same goes for the chocolate topping.
Conclusion
Healthy no-bake chocolate peanut butter crunch bars are one of my favorite treats to keep in the fridge. They’re easy, crave-worthy, and packed with wholesome ingredients that give me a boost of energy without weighing me down. Whether I’m grabbing one after a workout or serving them as a better-for-you dessert, these bars are always a hit.
Print
Healthy No-Bake Chocolate Peanut Butter Crunch Bars
- Prep Time: 10 minutes
- Cook Time: 1–2 hours
- Total Time: ~1 hour 10 minutes
- Yield: 12–16 bars
- Category: Snack, Dessert
- Method: No-Bake
- Cuisine: American
- Diet: Gluten Free
Description
These healthy no-bake chocolate peanut butter crunch bars are the perfect blend of creamy, crunchy, and chocolatey—all made with wholesome ingredients and no oven required. Naturally sweetened, gluten-free, and easily vegan, they're the ultimate feel-good treat.
Ingredients
- 1 cup natural peanut butter (or almond butter)
- ⅓ cup maple syrup or honey
- 2 tablespoons coconut oil
- 1 teaspoon vanilla extract
- 2 ½ cups crispy rice cereal
- ½ cup rolled oats (optional)
- 1 cup dark chocolate chips or chopped chocolate
- Sea salt (optional, for topping)
Instructions
- Line an 8x8-inch pan with parchment paper.
- In a saucepan over low heat, melt together the peanut butter, maple syrup (or honey), and coconut oil until smooth.
- Remove from heat and stir in vanilla extract.
- Gently mix in crispy rice cereal and rolled oats (if using) until fully coated.
- Press mixture into the prepared pan in an even layer.
- Melt dark chocolate chips and spread over the top.
- Sprinkle with sea salt (optional), then refrigerate for 1–2 hours until firm.
- Slice into bars and enjoy!
Notes
- For vegan bars, use maple syrup and dairy-free chocolate.
- To keep bars crisp, store them chilled.
- Add chia or flaxseeds to the base for extra nutrition.




Leave a Reply