A simple and creamy no-bake cherry cheesecake that sits on a buttery graham cracker crust and is topped with luscious cherry pie filling. It’s the perfect fuss-free dessert when I want something sweet, refreshing, and crowd-pleasing—without turning on the oven.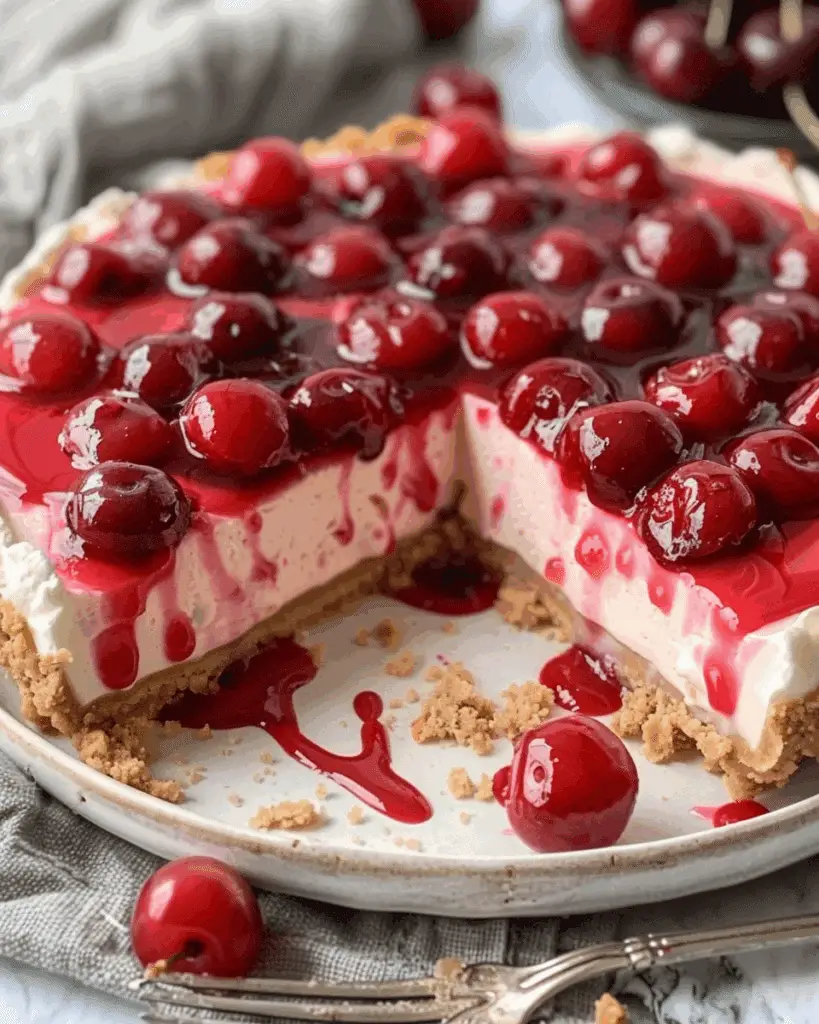
Why I Love This Recipe
I love how effortlessly this dessert comes together. There’s no baking involved, so I don’t have to heat up the kitchen. It’s creamy, smooth, and light, with a sweet-tart cherry topping that balances the richness of the filling. The graham cracker crust adds just the right crunch. This is one of those reliable desserts I can make ahead of time, and it’s always a hit at gatherings, holidays, or weeknight treats.
Ingredients
(Here's a tip: Check out the full list of ingredients and measurements in the recipe card below.)
-
1⅓ cups graham cracker crumbs
-
¼ cup sugar (granulated)
-
6 tablespoons butter, melted
-
8 oz (225 g) cream cheese, softened
-
⅓ cup powdered sugar
-
1 teaspoon vanilla extract
-
8 oz (≈225 g) whipped topping (Cool Whip or equivalent)
-
1 can (≈12‑21 oz) cherry pie filling
Directions
-
Make the crust: I mix the graham cracker crumbs, granulated sugar, and melted butter in a bowl until they’re fully combined. Then, I press the mixture into the bottom of a 9-inch pie plate, going slightly up the sides if I want extra crust. I chill it in the fridge while preparing the filling.
-
Make the filling: I beat the softened cream cheese with powdered sugar and vanilla until smooth. Then, I gently fold in the whipped topping until it’s just combined—this makes the filling airy and light.
-
Assemble: I spread the cream cheese mixture over the chilled crust, smoothing it out with a spatula.
-
Chill: I let the whole thing chill in the refrigerator for at least 2 to 3 hours. This helps it firm up so I can get clean slices.
-
Add topping: Once the cheesecake is set, I spoon the cherry pie filling evenly over the top.
-
Serve: I slice and serve the cheesecake chilled—it holds up beautifully.
Servings and timing
-
Yield: 8 slices
-
Prep Time: 15 minutes
-
Cook Time: 0 minutes
-
Chill Time: 2 hours (minimum)
-
Total Time: About 2 hours 15 minutes
Variations
I sometimes change things up depending on the occasion or what's in the pantry:
-
I swap the cherry topping for blueberry, raspberry, or even lemon curd.
-
For a chocolate twist, I add mini chocolate chips to the filling or use chocolate graham crackers for the crust.
-
When I want individual servings, I build these in small mason jars or cups for a fun presentation.
-
I’ve also used mascarpone in place of cream cheese for a slightly different texture and flavor.
Storage/Reheating
I store leftovers tightly covered in the refrigerator, where they keep well for up to 4 days. The crust might soften slightly over time, but the flavor stays delicious.
This dessert isn’t great for freezing because the texture of the whipped topping and cream cheese can change when thawed. I always serve it cold straight from the fridge, and there’s no reheating necessary.
FAQs
How do I prevent the filling from being runny?
I make sure the cream cheese is fully softened and whipped smooth, and I chill the assembled cheesecake for at least a few hours—overnight is even better. That gives it time to set properly.
Can I use homemade whipped cream instead of Cool Whip?
Yes, I’ve used homemade whipped cream before. I whip about 1 cup of heavy cream with a little sugar until stiff peaks form. It works beautifully, though I keep in mind it’s not quite as stable as Cool Whip, so I try to serve it sooner.
What if I don’t have a pie plate?
I’ve made this in an 8x8-inch square pan and it works just as well. I just line it with parchment paper for easy removal and slicing.
Can I make this cheesecake ahead of time?
Definitely. I often make it the day before serving so it has plenty of time to chill. It actually tastes better after sitting overnight.
How do I keep the crust from crumbling?
I press the crust mixture down firmly and evenly with the bottom of a measuring cup. Chilling it before adding the filling also helps it stay compact.
Conclusion
This no-bake cherry cheesecake is one of my go-to desserts when I want something creamy, fruity, and effortless. It’s simple enough for a weekday but elegant enough for a celebration. I love how customizable it is, and it never fails to impress. Whether I’m making it for family, guests, or just myself, it’s always a win.
Print
No-Bake Cherry Cheesecake
- Prep Time: 15 minutes
- Cook Time: 0 minutes (no baking)
- Total Time: 2 hours 15 minutes (including chill time)
- Yield: 8 slices
- Category: Dessert
- Method: No‑Bake
- Cuisine: American
- Diet: Vegetarian
Description
A simple, creamy no‑bake cherry cheesecake over a buttery graham cracker crust, topped with sweet cherry pie filling.
Ingredients
- 1⅓ cups graham cracker crumbs
- ¼ cup sugar (granulated)
- 6 tablespoons butter, melted
- 8 oz (225 g) cream cheese, softened
- ⅓ cup powdered sugar
- 1 teaspoon vanilla extract
- 8 oz (≈225 g) whipped topping (Cool Whip or equivalent)
- 1 can (≈12‑21 oz) cherry pie filling
Instructions
- Make the crust: In a bowl, mix graham cracker crumbs, granulated sugar, and melted butter until well combined. Press into bottom of a 9‑inch pie plate (and slightly up the sides if desired). Chill in refrigerator while you make the filling.
- Make the filling: Beat the softened cream cheese with powdered sugar and vanilla until smooth. Gently fold in the whipped topping until just combined.
- Assemble: Spread the cream cheese filling over the chilled crust, smoothing top with a spatula.
- Chill: Refrigerate for at least 2‑3 hours (until set and firm enough to slice).
- Add topping: Once set, spoon the cherry pie filling over the cheesecake layer.
- Serve: Slice and serve chilled.
Notes
- For a homemade crust: use about 9 full graham crackers (crushed) instead of store‑bought crust.
- Be sure cream cheese is softened at room temperature to avoid lumps.
- Chilling longer (overnight) improves firmness.
- You can swap cherry topping for other fruit pie fillings (strawberry, blueberry, etc.)
- If using canned cherries, drain a little syrup if it's very runny to avoid soggy top layer.
Nutrition
- Serving Size: 1 slice (⅛ of pie)
- Calories: ≈ 380 kcal
- Sugar: ≈ 30 g
- Sodium: ≈ 200 mg
- Fat: ≈ 21 g
- Saturated Fat: ≈ 11 g
- Unsaturated Fat: ≈ 9 g
- Trans Fat: ≈ 0.3 g
- Carbohydrates: ≈ 45 g
- Fiber: ≈ 1 g
- Protein: ≈ 4 g
- Cholesterol: ≈ 50 mg




Leave a Reply