Sue Recipe

  • Recipe Index
  • Chicken
  • Desserts
  • About
  • Contact
menu icon
go to homepage
  • Recipe Index
  • Chicken
  • Desserts
  • About
  • Contact

search icon
Homepage link
  • Recipe Index
  • Chicken
  • Desserts
  • About
  • Contact

×

Vegan Cabbage Rolls (Asian-Inspired Wraps)

April 4, 2025 by Sue Leave a Comment

These vegan cabbage rolls are fresh, flavorful, and packed with an Asian-inspired filling that’s both nourishing and satisfying. I wrap tender cabbage leaves around a savory mix of vegetables, rice, and tofu or mushrooms, then steam or bake them until everything is warm and perfectly melded. Finished with a soy-based sauce or peanut drizzle, these wraps are a wholesome twist on classic cabbage rolls with bold, comforting flavor.
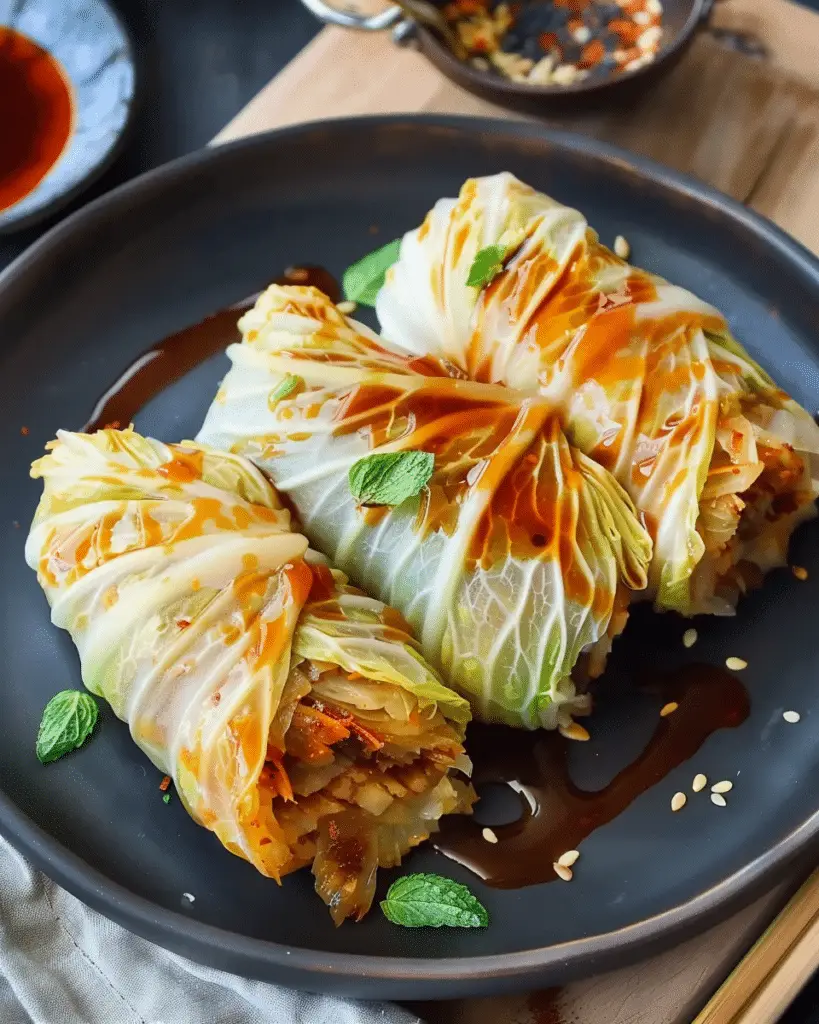
Vegan Cabbage Rolls (Asian-Inspired Wraps)

Why You’ll Love This Recipe

I love how these cabbage rolls are light but still incredibly filling. They’re completely plant-based, gluten-free if needed, and packed with colorful veggies and protein. The Asian-inspired flavors—ginger, garlic, sesame, soy—give them a unique twist that makes every bite exciting. They’re perfect for meal prep, and I often enjoy them for lunch or a light dinner. Plus, they look beautiful on a plate and are fun to make once I get the hang of rolling them.

Ingredients

(Here's a tip: Check out the full list of ingredients and measurements in the recipe card below.)

  • Green cabbage (whole leaves, blanched)

  • Cooked rice (white or brown)

  • Firm tofu or finely chopped mushrooms

  • Carrot (shredded)

  • Green onions (chopped)

  • Garlic (minced)

  • Ginger (grated)

  • Soy sauce or tamari

  • Sesame oil

  • Rice vinegar

  • Optional: chili flakes or sriracha for heat

  • Sesame seeds and chopped cilantro (for garnish)

Directions

  1. I bring a large pot of water to a boil and blanch the cabbage leaves for 1–2 minutes, until flexible. I set them aside to cool.

  2. In a skillet, I sauté garlic and ginger in sesame oil until fragrant, then add the tofu or mushrooms and cook until lightly browned.

  3. I stir in shredded carrots, green onions, cooked rice, soy sauce, rice vinegar, and any additional seasonings. I cook everything for a few minutes until combined and heated through.

  4. I lay out each cabbage leaf and place a scoop of filling near the center. I fold in the sides and roll it up tightly like a burrito.

  5. I place the rolls seam-side down in a steamer or baking dish. If steaming, I let them steam for about 10–12 minutes. If baking, I cover the dish and bake at 375°F (190°C) for 20 minutes.

  6. I drizzle with extra sauce or a peanut dressing before serving and garnish with sesame seeds and cilantro.

Servings and timing

This recipe makes about 6–8 cabbage rolls and takes approximately 45 minutes total—20 minutes to prep, 10 minutes to cook the filling, and 10–15 minutes to steam or bake.

Variations

I like switching up the filling by adding cooked quinoa, edamame, or glass noodles. For more heat, I mix chili garlic sauce into the filling or use a spicy dipping sauce. I’ve also made these with napa cabbage or collard greens when regular green cabbage isn’t available. If I want a richer flavor, I serve them with hoisin or a tangy peanut-lime sauce on the side.

storage/reheating

I store leftover cabbage rolls in an airtight container in the fridge for up to 4 days. They reheat well in the microwave or steamed again gently. I don’t recommend freezing them, as the cabbage can get watery when thawed, but the filling itself can be made ahead and frozen separately.

FAQs

Can I make these rolls ahead of time?

Yes, I often prep and roll them a day ahead, then steam or bake them when ready to serve. They hold up well in the fridge.

What’s the best type of cabbage to use?

I usually use green cabbage because it’s sturdy and holds its shape after blanching. Napa cabbage works too, but it’s more delicate.

Can I make this gluten-free?

Absolutely. I use tamari instead of soy sauce to keep it gluten-free, and double-check that my other ingredients are certified gluten-free.

What protein works best in the filling?

I usually use crumbled tofu or chopped mushrooms, but tempeh, lentils, or edamame also make great plant-based protein sources.

Do I have to cook the rolls again after filling?

I recommend it. Steaming or baking helps soften the cabbage further and melds the flavors of the filling, making them taste even better.

Conclusion

These vegan cabbage rolls are one of my favorite ways to enjoy a light yet deeply satisfying meal. The Asian-inspired flavors bring a fresh twist to a classic dish, and I love how versatile and wholesome they are. Whether I’m making a batch for lunch, a dinner party, or just because I want something nourishing and flavorful, they always hit the spot.

Print

clock clock iconcutlery cutlery iconflag flag iconfolder folder iconinstagram instagram iconpinterest pinterest iconfacebook facebook iconprint print iconsquares squares iconheart heart iconheart solid heart solid icon
Vegan Cabbage Rolls (Asian-Inspired Wraps)

Vegan Cabbage Rolls (Asian-Inspired Wraps)

5 Stars 4 Stars 3 Stars 2 Stars 1 Star No reviews
  • Author: Sue
  • Prep Time: 20 minutes
  • Cook Time: 20 minutes
  • Total Time: 45 minutes
  • Yield: 6–8 cabbage rolls
  • Category: Dinner, Main Course
  • Method: Steaming, Baking
  • Cuisine: Asian-Inspired
  • Diet: Vegan
Print Recipe
Pin Recipe

Description

These Vegan Cabbage Rolls (Asian-Inspired Wraps) are light, nourishing, and bursting with bold flavor. Filled with tofu or mushrooms, rice, vegetables, and savory seasonings, then wrapped in tender cabbage leaves and steamed or baked to perfection. A wholesome, plant-based, gluten-free meal that’s perfect for lunch, dinner, or meal prep.


Ingredients

  • 8–10 large green cabbage leaves, blanched
  • 1½ cups cooked rice (white or brown)
  • 1 cup firm tofu (crumbled) or chopped mushrooms
  • 1 medium carrot, shredded
  • 2 green onions, chopped
  • 2 cloves garlic, minced
  • 1 tsp fresh grated ginger
  • 1 tbsp soy sauce or tamari
  • 1 tsp sesame oil
  • 1 tsp rice vinegar
  • Optional: chili flakes or sriracha, to taste
  • Garnish: sesame seeds, chopped cilantro
  • Optional: peanut sauce, hoisin, or soy drizzle for serving

Instructions

  • Bring a large pot of water to a boil. Blanch cabbage leaves for 1–2 minutes until flexible. Drain and set aside.
  • Heat sesame oil in a skillet. Sauté garlic and ginger until fragrant.
  • Add tofu or mushrooms and cook until lightly browned. Stir in carrots, green onions, rice, soy sauce, rice vinegar, and optional heat. Cook for 2–3 minutes until combined.
  • Lay each cabbage leaf flat. Place filling in the center, fold in sides, and roll up tightly.
  • Steam rolls for 10–12 minutes, or place in a baking dish, cover, and bake at 375°F (190°C) for 20 minutes.
  • Drizzle with sauce of choice and garnish with sesame seeds and cilantro before serving.

Notes

  • Substitute rice with quinoa or glass noodles for variety.
  • Use tamari for a gluten-free version.
  • Add edamame, lentils, or tempeh for extra protein.
  • Napa cabbage or collard greens can be used in place of green cabbage.
  • Rolls can be made ahead and steamed or baked just before serving.
  • Peanut-lime sauce or hoisin drizzle adds rich flavor when serving.

Have you made this recipe? I'd love to see it!

Click here to Follow me on Pinterest

Taco Casserole

April 4, 2025 by Sue Leave a Comment

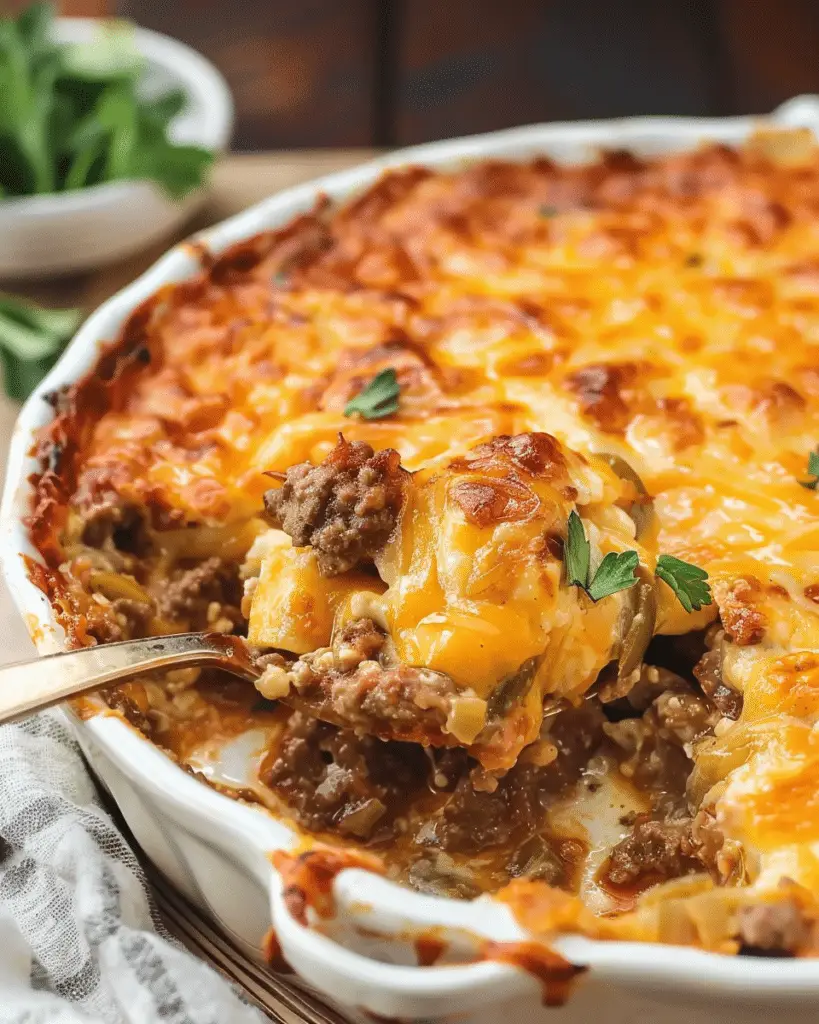
Taco Casserole is everything I love about taco night—just baked into one warm, cheesy, comforting dish. It’s packed with seasoned meat, beans, salsa, gooey cheese, and crunchy chips or tortillas, all layered together for maximum flavor and minimal effort. Whether it’s a weeknight dinner or a weekend crowd-pleaser, this casserole never disappoints.

Taco Casserole

Why You’ll Love This Recipe

I love this recipe because it’s fast, filling, and so versatile. It uses pantry staples, comes together in one dish, and lets me customize based on what I have on hand. It’s a perfect way to feed a family or prep meals for the week. Every bite is loaded with flavor, and the melty cheese on top seals the deal.

ingredients

(Here's a tip: Check out the full list of ingredients and measurements in the recipe card below.)

  • Ground beef or ground turkey

  • Taco seasoning

  • Onion, diced

  • Black beans, drained and rinsed

  • Corn (fresh, canned, or frozen)

  • Salsa or enchilada sauce

  • Tortilla chips or soft flour tortillas

  • Shredded cheddar or Mexican blend cheese

  • Olive oil (for cooking)

  • Optional toppings: sour cream, chopped green onions, diced tomatoes, jalapeños, avocado, cilantro

directions

  1. I preheat the oven to 375°F and grease a 9x13 inch baking dish.

  2. In a large skillet, I heat olive oil over medium heat, then cook the diced onion until soft. I add the ground beef and taco seasoning, cooking until browned and fully cooked.

  3. I stir in the black beans, corn, and salsa or enchilada sauce, letting everything simmer for 5–7 minutes so the flavors come together.

  4. I spread a layer of crushed tortilla chips (or torn tortillas) at the bottom of the baking dish.

  5. I spoon half the meat mixture over the chips, then sprinkle with a layer of cheese.

  6. I repeat the layers: more chips, the rest of the meat mixture, and more cheese on top.

  7. I bake uncovered for 20 minutes, until the cheese is melted and bubbly.

  8. I let it cool for a few minutes, then top with sour cream, avocado, or whatever toppings I’m craving before serving.

Servings and timing

This recipe serves 6 to 8 people. It takes about 15 minutes to prep and 20 minutes to bake. From start to finish, I can have it ready in under 40 minutes.

Variations

  • I switch up the meat with shredded chicken or ground turkey.

  • I add cooked rice for a burrito-style casserole.

  • For more heat, I use hot salsa or toss in some jalapeños.

  • I sometimes add chopped bell peppers or zucchini to boost the veggies.

  • For a crunchier top, I scatter more crushed chips just before serving.

storage/reheating

I store leftovers in an airtight container in the fridge for up to 4 days. To reheat, I cover the dish with foil and warm it in a 350°F oven, or microwave single portions. If I’m freezing it, I assemble the casserole without chips on top, wrap tightly, and freeze for up to 2 months. I thaw in the fridge overnight before baking.

FAQs

Can I make Taco Casserole ahead of time?

Yes, I often assemble it a day ahead, cover it, and keep it in the fridge. When I’m ready, I just pop it in the oven and bake as directed.

Can I make this vegetarian?

Absolutely. I skip the meat and double up on beans, or add cooked lentils or veggie crumbles.

What’s the best cheese to use?

I like a shredded Mexican blend or cheddar. Pepper jack is great if I want a little kick.

Do tortilla chips get soggy?

They soften slightly as they absorb the sauce, which I actually enjoy. For crunch, I add more chips on top just before serving.

Can I use taco shells instead of chips?

Yes, I just crush them up or break them into pieces to use as layers in the casserole.

Conclusion

Taco Casserole is one of those meals that feels like a party in a pan. It’s bold, cheesy, comforting, and completely customizable. I love how easy it is to throw together and how satisfying it is to eat. Whether I’m feeding my family or just craving something hearty and fun, this dish hits the spot every time.

Print

clock clock iconcutlery cutlery iconflag flag iconfolder folder iconinstagram instagram iconpinterest pinterest iconfacebook facebook iconprint print iconsquares squares iconheart heart iconheart solid heart solid icon
Taco Casserole

Taco Casserole

5 Stars 4 Stars 3 Stars 2 Stars 1 Star No reviews
  • Author: Sue
  • Prep Time: 15 minutes
  • Cook Time: 20 minutes
  • Total Time: 35–40 minutes
  • Yield: 6–8 servings
  • Category: Dinner, Casserole
  • Method: Bakied
  • Cuisine: Mexican-Inspired
Print Recipe
Pin Recipe

Description

This easy Taco Casserole recipe is a cheesy, hearty dish layered with seasoned ground beef, beans, salsa, and tortilla chips or tortillas. Baked to perfection and topped with your favorite taco fixings, it's a crowd-pleasing, one-pan meal that’s perfect for weeknights or potlucks.


Ingredients

  • 1 lb ground beef or ground turkey
  • 1 packet taco seasoning (or 2 tbsp homemade)
  • 1 small onion, diced
  • 1 can black beans, drained and rinsed
  • 1 cup corn (canned, frozen, or fresh)
  • 1 cup salsa or enchilada sauce
  • 3–4 cups tortilla chips (crushed) or torn soft tortillas
  • 2 cups shredded cheddar or Mexican blend cheese
  • 1 tbsp olive oil
  • Optional toppings:
  • Sour cream
  • Diced tomatoes
  • Jalapeños
  • Chopped green onions
  • Avocado
  • Fresh cilantro

Instructions

  1. Preheat oven to 375°F (190°C) and grease a 9x13 inch baking dish.
  2. In a large skillet, heat olive oil over medium heat. Sauté diced onion until softened.
  3. Add ground beef and taco seasoning. Cook until browned and cooked through.
  4. Stir in black beans, corn, and salsa. Simmer for 5–7 minutes to blend flavors.
  5. Layer half the crushed tortilla chips or torn tortillas in the bottom of the baking dish.
  6. Spoon half the meat mixture over the chips. Sprinkle with 1 cup of cheese.
  7. Repeat layers: remaining chips, meat mixture, and the rest of the cheese.
  8. Bake uncovered for 20 minutes, or until cheese is melted and bubbly.
  9. Let cool for 5 minutes. Top with desired toppings and serve.

Notes

  • Add rice for a burrito-style casserole.
  • Use spicy salsa or hot taco seasoning for more heat.
  • Vegetarian version: omit meat and add extra beans or lentils.
  • Add veggies like bell peppers or zucchini for extra nutrition.
  • For crunchier texture, add fresh crushed chips just before serving.
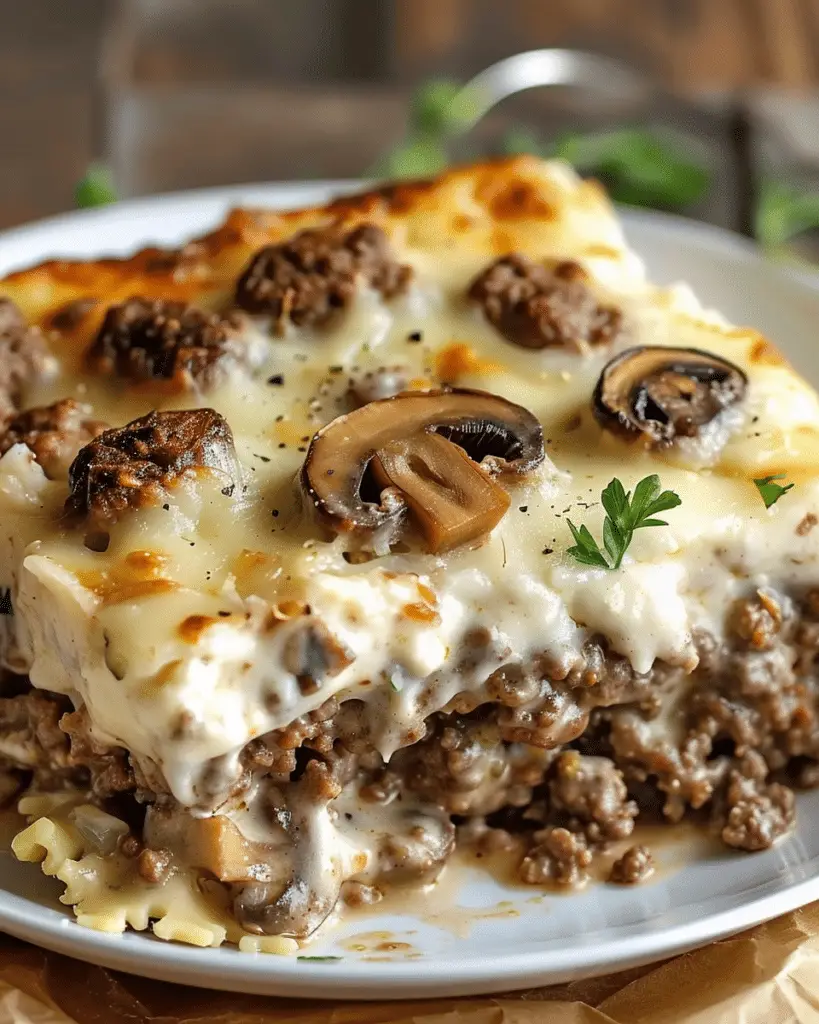
Have you made this recipe? I'd love to see it!

Click here to Follow me on Pinterest

Best Pancake Recipe

April 4, 2025 by Sue Leave a Comment

This is the best pancake recipe I’ve ever made—light, fluffy, golden, and perfectly soft on the inside. These pancakes come together with simple ingredients and give me that classic diner-style stack I crave on weekend mornings. Whether I serve them plain with butter and syrup or loaded with fruit, they always turn out just right.

Best Pancake Recipe

Why You’ll Love This Recipe

I love how easy this recipe is and how consistent the results are. The pancakes are fluffy without being dry, and the edges cook up with a little crisp while the centers stay tender. There’s no need for a mix or special equipment—just a few pantry staples and a good skillet. Plus, I can customize them endlessly with add-ins or toppings depending on my mood.

Ingredients

(Here's a tip: Check out the full list of ingredients and measurements in the recipe card below.)

  • All-purpose flour
  • Granulated sugar
  • Baking powder
  • Salt
  • Milk (I use whole milk, but any milk works)
  • Egg
  • Unsalted butter, melted (plus more for greasing the pan)
  • Vanilla extract (optional but adds great flavor)

Directions

  1. I start by whisking the flour, sugar, baking powder, and salt together in a bowl.
  2. In another bowl, I whisk together the milk, egg, melted butter, and vanilla.
  3. I pour the wet ingredients into the dry and stir until just combined. I don’t overmix—it’s fine if there are a few lumps.
  4. I let the batter rest for about 5 minutes while I preheat the skillet or griddle over medium heat.
  5. I grease the pan lightly with butter and pour about ¼ cup of batter for each pancake.
  6. When bubbles form on the surface and the edges look set (about 2–3 minutes), I flip and cook the other side until golden, about 1–2 more minutes.
  7. I keep the pancakes warm in a low oven until I’m ready to serve the whole stack.

Servings and Timing

This recipe makes about 8 pancakes (4 servings). It takes 10 minutes to prep and 15 minutes to cook all the pancakes, so total time is around 25 minutes.

Variations

Sometimes I mix in blueberries, chocolate chips, or sliced bananas right into the batter. For a more wholesome version, I swap half the flour with whole wheat or oat flour. I’ve also added a pinch of cinnamon or nutmeg for a warm, spiced flavor. And when I want to go all out, I top them with whipped cream, nuts, or fresh fruit.

Storage/Reheating

I store leftover pancakes in an airtight container in the fridge for up to 3 days. They also freeze well—I place them in a single layer on a baking sheet to freeze, then transfer to a bag. To reheat, I microwave them for 30 seconds or warm them in the toaster or oven at 300°F until hot.

FAQs

Why are my pancakes flat?

If my pancakes turn out flat, it’s usually because the batter was overmixed or the baking powder is old. I mix gently and check that my leavening is still active.

Can I use buttermilk instead of regular milk?

Yes, and I often do. It makes the pancakes extra tender and adds a slight tang. I just reduce the baking powder a bit and add a pinch of baking soda.

How do I keep pancakes warm while I cook the rest?

I place cooked pancakes on a baking sheet in a 200°F (90°C) oven while I finish the rest. It keeps them warm without drying them out.

Can I make the batter ahead of time?

I don’t usually let pancake batter sit for more than an hour since the baking powder starts to lose its lift. But I have mixed the dry ingredients in advance to save time in the morning.

What kind of pan works best?

I like using a nonstick skillet or a cast iron griddle. I keep the heat at medium and make sure the pan is evenly heated before pouring the batter.

Conclusion

These pancakes are my go-to recipe for a fluffy, delicious breakfast that feels like a treat every time. They’re easy to make, endlessly adaptable, and always a hit at the table. Whether it’s a lazy Sunday morning or a weekday craving, this recipe never fails me.

Print

clock clock iconcutlery cutlery iconflag flag iconfolder folder iconinstagram instagram iconpinterest pinterest iconfacebook facebook iconprint print iconsquares squares iconheart heart iconheart solid heart solid icon
Best Pancake Recipe

Best Pancake Recipe

5 Stars 4 Stars 3 Stars 2 Stars 1 Star No reviews
  • Author: Sue
  • Prep Time: 10 minutes
  • Cook Time: 15 minutes
  • Total Time: 25 minutes
  • Yield: 8 pancakes (4 servings)
  • Category: Breakfast
  • Method: Griddle / Skillet
  • Cuisine: American
  • Diet: Vegetarian
Print Recipe
Pin Recipe

Description

This easy and fluffy pancake recipe delivers golden, diner-style pancakes that are soft inside with perfectly crisp edges. Made with simple ingredients, these pancakes are ready in under 30 minutes and are perfect for any breakfast or brunch spread.


Ingredients

  1. 1 cup all-purpose flour
  2. 2 tbsp granulated sugar
  3. 2 tsp baking powder
  4. ¼ tsp salt
  5. ¾ cup milk (whole milk or your choice)
  6. 1 large egg
  7. 2 tbsp unsalted butter, melted (plus more for greasing)
  8. 1 tsp vanilla extract (optional)

Instructions

  • In a large bowl, whisk together flour, sugar, baking powder, and salt.
  • In another bowl, whisk milk, egg, melted butter, and vanilla (if using).
  • Pour the wet ingredients into the dry and stir until just combined—do not overmix.
  • Let the batter rest for 5 minutes.
  • Heat a nonstick skillet or griddle over medium heat and lightly grease with butter.
  • Pour ¼ cup of batter per pancake onto the hot pan.
  • Cook until bubbles form and edges look set (about 2–3 minutes), then flip and cook the other side until golden (1–2 minutes).
  • Keep pancakes warm in a 200°F (90°C) oven until ready to serve.

Notes

  • Overmixing will result in flat pancakes—mix gently.
  • Add mix-ins like chocolate chips, blueberries, or sliced bananas for variation.
  • Buttermilk can be used for extra tenderness—adjust leavening as needed.
  • Store cooked pancakes in the fridge (up to 3 days) or freeze for up to 2 months.
  • Reheat in the toaster, oven, or microwave for a quick breakfast.

Have you made this recipe? I'd love to see it!

Click here to Follow me on Pinterest

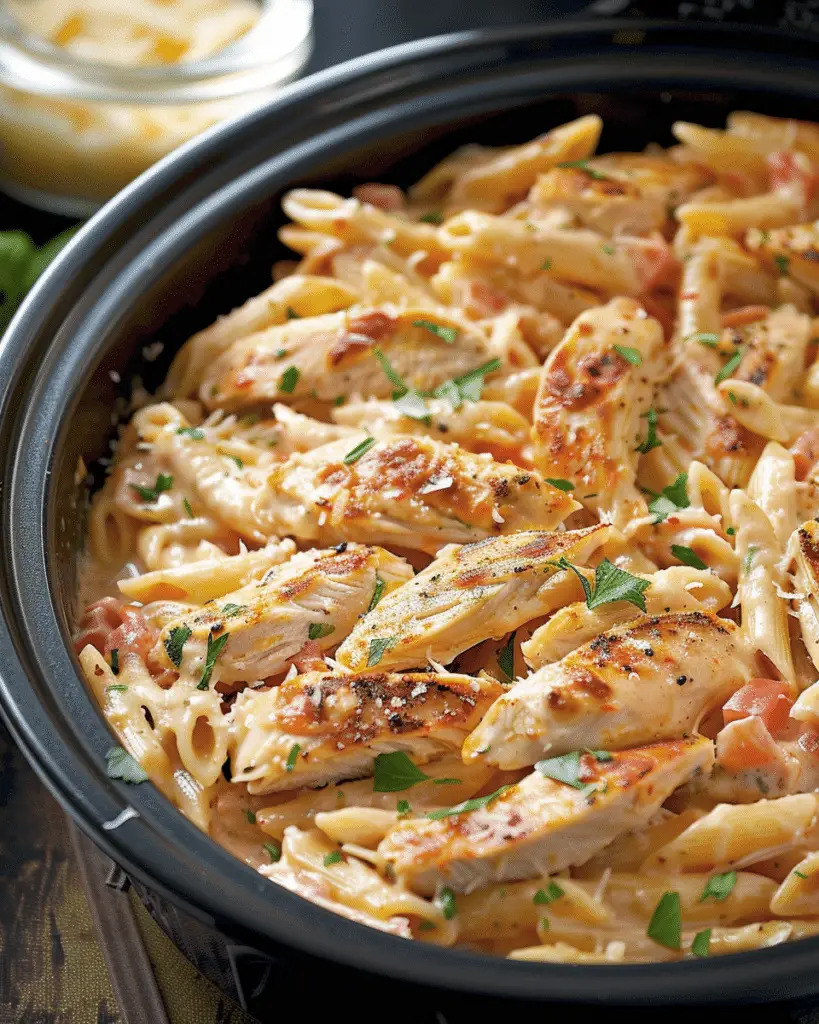
Bruschetta Chicken Pasta

April 4, 2025 by Sue Leave a Comment

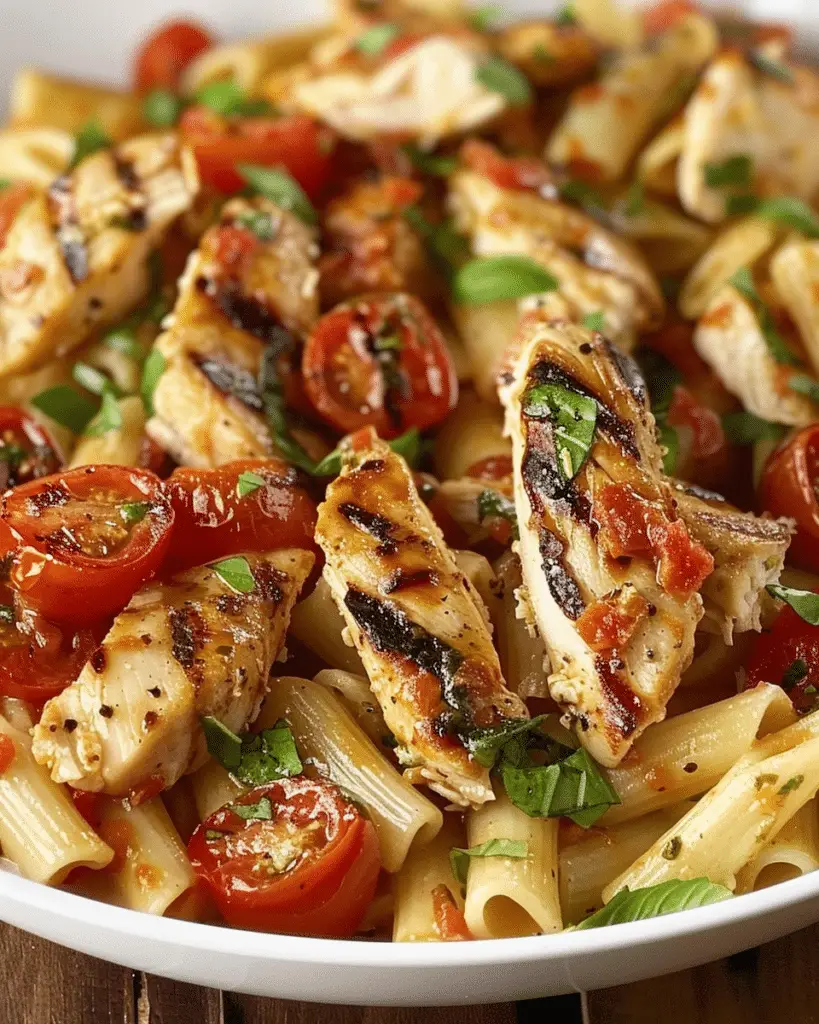
Bruschetta Chicken Pasta combines the fresh, vibrant flavors of classic bruschetta with tender chicken and al dente pasta. It's a delightful dish that brings together juicy tomatoes, fragrant basil, and garlic, all tossed with pasta and topped with seasoned chicken. This meal is perfect for a weeknight dinner or when I want to impress guests with minimal effort.

Bruschetta Chicken Pasta

Why I Love This Recipe

I find this recipe appealing for several reasons:

  • Fresh Ingredients: The use of ripe tomatoes and fresh basil adds a burst of flavor and color.

  • Quick and Easy: I can have this dish ready in under 30 minutes, making it ideal for busy evenings.

  • Versatile: It's easy to customize with different types of pasta or additional vegetables.

Ingredients

(Here's a tip: Check out the full list of ingredients and measurements in the recipe card below.)

  • Boneless, skinless chicken breasts

  • Italian seasoning

  • Garlic powder

  • Salt and black pepper

  • Olive oil

  • Angel hair pasta (or pasta of choice)

  • Roma tomatoes, diced

  • Fresh basil leaves, chopped

  • Garlic cloves, minced

  • Balsamic vinegar

  • Parmesan cheese, grated (optional)

  • Balsamic glaze (optional, for drizzling)

Directions

  1. Prepare the Chicken: I season the chicken breasts with Italian seasoning, garlic powder, salt, and pepper on both sides.

  2. Cook the Chicken: In a large skillet over medium-high heat, I heat olive oil and cook the chicken for about 6-7 minutes per side, or until fully cooked. Once done, I remove the chicken from the skillet and let it rest before slicing it into thin strips.

  3. Cook the Pasta: While the chicken is cooking, I bring a large pot of salted water to a boil and cook the pasta according to package instructions until al dente. After draining, I return the pasta to the pot and toss it with a bit of olive oil to prevent sticking.

  4. Prepare the Bruschetta Topping: In a bowl, I combine diced tomatoes, minced garlic, chopped basil, balsamic vinegar, and a drizzle of olive oil. I season the mixture with salt and pepper to taste.

  5. Assemble the Dish: I add the bruschetta mixture to the pasta, tossing everything together until well combined.

  6. Serve: I plate the pasta and top it with sliced chicken. For added flavor, I sprinkle grated Parmesan cheese on top and drizzle with balsamic glaze if desired.

Servings and Timing

This recipe yields approximately 4 servings. The preparation time is about 10 minutes, and the cooking time is around 20 minutes, totaling approximately 30 minutes from start to finish.

Variations

I enjoy experimenting with this recipe by:

  • Using Different Proteins: Sometimes, I substitute the chicken with grilled shrimp or keep it vegetarian by omitting the meat altogether.

  • Adding Vegetables: Incorporating sautéed spinach or zucchini adds more nutrients and flavor.

  • Choosing Whole Wheat Pasta: For a healthier option, I opt for whole wheat pasta, which provides more fiber.

Storage and Reheating

Leftovers can be stored in an airtight container in the refrigerator for up to 3 days. To reheat, I warm the pasta gently in a skillet over medium heat, adding a splash of olive oil or water to prevent it from drying out. I avoid using the microwave, as it can make the chicken rubbery.

FAQs

Can I use canned tomatoes instead of fresh?

While fresh tomatoes provide the best flavor, I can use canned diced tomatoes in a pinch. I make sure to drain them well before using.

How can I make this dish gluten-free?

To make this recipe gluten-free, I use gluten-free pasta and ensure that all other ingredients, including seasonings, are certified gluten-free.

Is there a dairy-free option?

Yes, by omitting the Parmesan cheese or using a dairy-free alternative, I can make this dish dairy-free.

Can I prepare the bruschetta topping ahead of time?

Absolutely. Preparing the bruschetta topping a few hours in advance allows the flavors to meld together beautifully. I store it in the refrigerator until ready to use.

What can I serve alongside this pasta?

A light green salad and crusty garlic bread complement this dish well, making for a complete and satisfying meal.

Conclusion

Bruschetta Chicken Pasta is a delightful fusion of classic Italian flavors and hearty pasta. Its simplicity, combined with fresh ingredients, makes it a go-to recipe in my kitchen. Whether I'm cooking for family or entertaining friends, this dish always impresses and satisfies.

Print

clock clock iconcutlery cutlery iconflag flag iconfolder folder iconinstagram instagram iconpinterest pinterest iconfacebook facebook iconprint print iconsquares squares iconheart heart iconheart solid heart solid icon
Bruschetta Chicken Pasta

Bruschetta Chicken Pasta

5 Stars 4 Stars 3 Stars 2 Stars 1 Star No reviews
  • Author: Sue
  • Prep Time: 10 minutes
  • Cook Time: 20 minutes
  • Total Time: 30 minutes
  • Yield: 4 servings
  • Category: Main Course
  • Method: Stovetop
  • Cuisine: Italian-Inspired
  • Diet: Gluten Free
Print Recipe
Pin Recipe

Description

Bruschetta Chicken Pasta blends the fresh, vibrant flavors of classic Italian bruschetta with juicy chicken and al dente pasta. Featuring ripe tomatoes, fresh basil, garlic, and a touch of balsamic vinegar, this easy 30-minute meal is perfect for weeknight dinners or entertaining guests with minimal effort and maximum flavor.


Ingredients

  • 2 boneless, skinless chicken breasts
  • 1 tsp Italian seasoning
  • ½ tsp garlic powder
  • Salt and black pepper, to taste
  • 2 tbsp olive oil, divided
  • 8 oz angel hair pasta (or pasta of choice)
  • 4 Roma tomatoes, diced
  • ¼ cup fresh basil leaves, chopped
  • 2 garlic cloves, minced
  • 1 tbsp balsamic vinegar
  • ¼ cup grated Parmesan cheese (optional)
  • Balsamic glaze (optional, for drizzling)

Instructions

  1. Season Chicken: Sprinkle chicken breasts with Italian seasoning, garlic powder, salt, and pepper on both sides.
  2. Cook Chicken: In a skillet over medium-high heat, heat 1 tablespoon olive oil. Sear chicken 6–7 minutes per side or until fully cooked. Remove from heat and let rest before slicing.
  3. Cook Pasta: Meanwhile, cook pasta in salted water until al dente. Drain and toss with a little olive oil to prevent sticking.
  4. Make Bruschetta Topping: In a bowl, mix diced tomatoes, garlic, chopped basil, balsamic vinegar, and 1 tablespoon olive oil. Season with salt and pepper.
  5. Combine Pasta & Topping: Toss the bruschetta mixture with the cooked pasta until evenly coated.
  6. Assemble Dish: Plate the pasta, top with sliced chicken, sprinkle with Parmesan cheese, and drizzle with balsamic glaze if desired.
  7. Serve Warm.

Notes

  • Swap chicken with shrimp or keep it vegetarian by omitting meat.
  • Add sautéed spinach, zucchini, or mushrooms for more veggies.
  • Use gluten-free or whole wheat pasta as needed.
  • Bruschetta topping can be made in advance and chilled.
  • Best served fresh, but leftovers can be stored and gently reheated.

Have you made this recipe? I'd love to see it!

Click here to Follow me on Pinterest

Marry Me Chickpeas

April 4, 2025 by Sue Leave a Comment

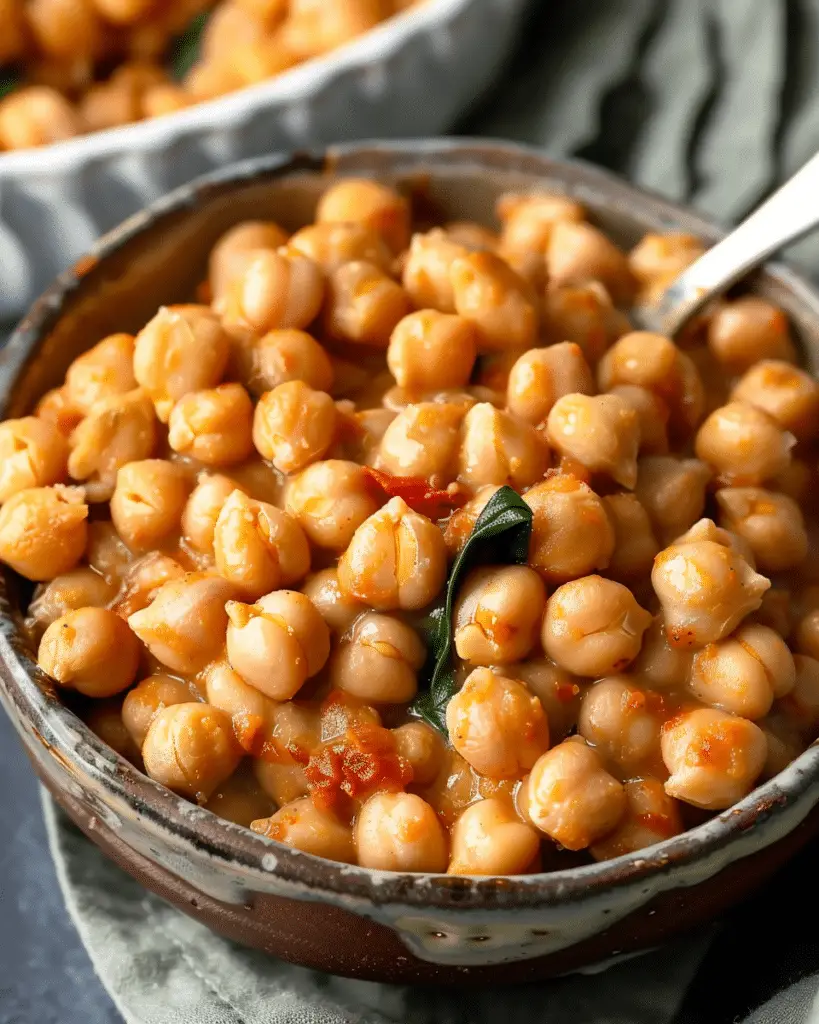
Marry Me Chickpeas is a creamy, flavor-packed plant-based dish inspired by the popular "Marry Me Chicken." This recipe swaps meat for hearty chickpeas, blending them with a savory sun-dried tomato cream sauce for a one-pan meal that’s quick, cozy, and satisfying. It’s perfect for weeknights, date nights, or whenever I want something comforting without a lot of fuss.

Marry Me Chickpeas

Why You’ll Love This Recipe

I love this dish because it comes together in 15 minutes, uses simple pantry ingredients, and tastes absolutely indulgent. The creamy sauce gets depth from garlic, sun-dried tomatoes, and Italian-inspired seasonings, while the chickpeas provide a filling, protein-rich base. It’s great over pasta, rice, or with crusty bread to soak up every last drop.

ingredients

(Here's a tip: Check out the full list of ingredients and measurements in the recipe card below.)

  • Olive oil
  • Garlic
  • Sun-dried tomatoes
  • Dried oregano
  • Red pepper flakes
  • Salt and pepper
  • Canned chickpeas (drained and rinsed)
  • Tomato paste
  • Vegetable broth
  • Vegan cream (cashew cream, coconut milk, or oat cream)
  • Baby spinach
  • Fresh basil (optional)
  • Vegan parmesan (optional, for topping)

directions

  1. I warm olive oil in a large skillet over medium heat and sauté the garlic until fragrant.
  2. I add the sun-dried tomatoes, oregano, red pepper flakes, salt, and pepper, stirring to combine.
  3. I stir in the chickpeas, tomato paste, and vegetable broth, then bring everything to a simmer.
  4. I pour in the vegan cream and add baby spinach, letting it wilt as the sauce thickens slightly.
  5. I adjust seasoning to taste and garnish with fresh basil and vegan parmesan if using.
  6. I serve hot over pasta, rice, baked potatoes, or with crusty bread.

Servings and timing

This recipe serves 4 to 6. It takes about 5 minutes to prep and 10 minutes to cook, making it a perfect 15-minute meal.

Variations

  • I swap chickpeas for white beans or lentils for a different twist.
  • I add mushrooms or zucchini to bulk up the veggies.
  • I use different greens like kale or chard instead of spinach.
  • I stir in a splash of white wine or lemon juice for brightness.

storage/reheating

I store leftovers in an airtight container in the fridge for up to 5 days. To reheat, I warm it gently on the stove or in the microwave, adding a splash of broth or water if the sauce thickens too much.

FAQs

Can I make this ahead of time?

Yes, I make it a day or two in advance and just reheat before serving. The flavors deepen beautifully overnight.

Can I freeze it?

Yes, it freezes well. I let it cool completely, store in freezer-safe containers, and thaw overnight before reheating.
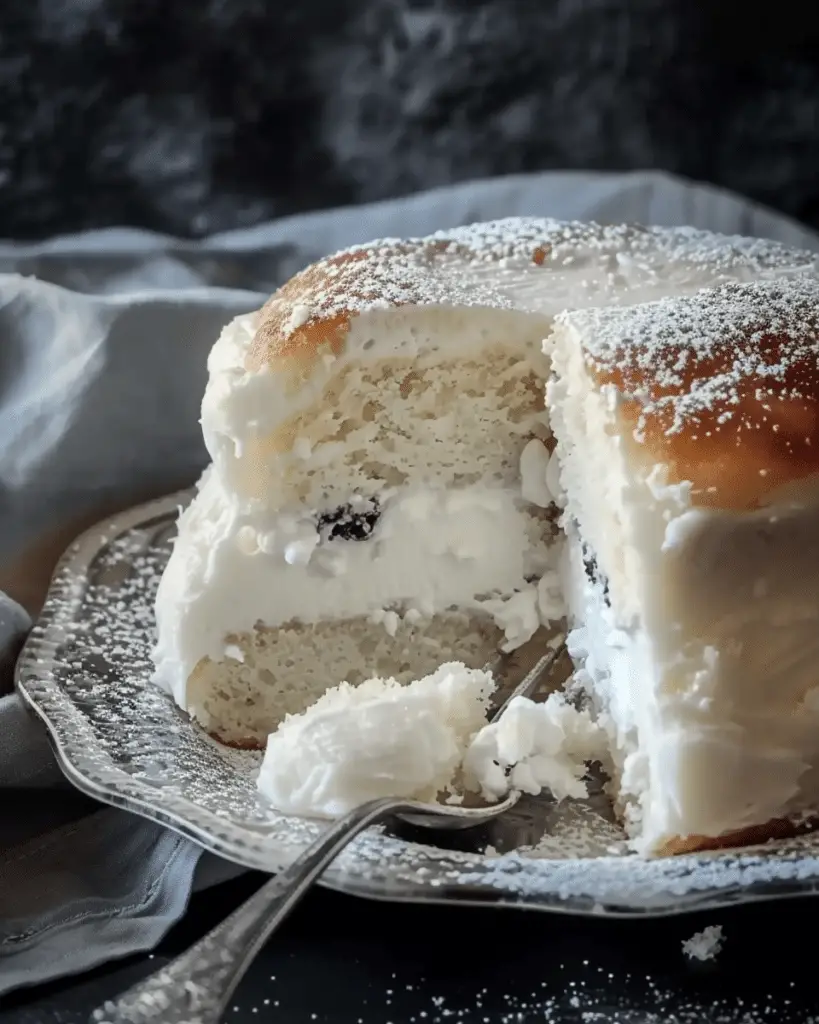
What kind of vegan cream works best?

Cashew cream gives a rich texture, but I also love using coconut milk or oat cream for a neutral flavor.

Is this recipe gluten-free?

Yes, it is naturally gluten-free. I just make sure any broth or toppings I use are certified gluten-free.

Can I make it spicy?

Definitely. I add extra red pepper flakes or even a dash of hot sauce to kick it up a notch.

Conclusion

Marry Me Chickpeas is one of those quick and easy meals I keep coming back to. It’s creamy, comforting, and full of bold flavors, all made in a single pan. Whether I’m cooking for guests or just myself, this recipe always leaves me impressed—and a little more in love with chickpeas.

Print

clock clock iconcutlery cutlery iconflag flag iconfolder folder iconinstagram instagram iconpinterest pinterest iconfacebook facebook iconprint print iconsquares squares iconheart heart iconheart solid heart solid icon
Marry Me Chickpeas

Marry Me Chickpeas

5 Stars 4 Stars 3 Stars 2 Stars 1 Star No reviews
  • Author: Sue
  • Prep Time: 5 minutes
  • Cook Time: 10 minutes
  • Total Time: 15 minutes
  • Yield: 4–6 servings
  • Category: Main Dish
  • Method: Stovetop
  • Cuisine: Mediterranean-Inspired
  • Diet: Vegan
Print Recipe
Pin Recipe

Description

This Marry Me Chickpeas recipe is a creamy, one-pan plant-based dish bursting with bold, comforting flavor. Inspired by the viral Marry Me Chicken, this vegan version swaps in protein-packed chickpeas and a luscious sun-dried tomato cream sauce for a cozy, 15-minute meal that’s perfect over pasta, rice, or crusty bread. It’s dairy-free, gluten-free, and guaranteed to impress.


Ingredients

  • 1 tbsp olive oil
  • 3–4 garlic cloves, minced
  • ⅓ cup sun-dried tomatoes (in oil), chopped
  • 1 tsp dried oregano
  • ¼–½ teaspoon red pepper flakes (to taste)
  • Salt and black pepper, to taste
  • 2 cans (15 oz each) chickpeas, drained and rinsed
  • 1 tbsp tomato paste
  • ¾ cup vegetable broth
  • ¾ cup vegan cream (cashew cream, coconut milk, or oat cream)
  • 2 cups baby spinach
  • Fresh basil, for garnish (optional)
  • Vegan parmesan, for topping (optional)

Instructions

  1. Heat olive oil in a large skillet over medium heat. Sauté garlic for about 1 minute until fragrant.
  2. Stir in sun-dried tomatoes, oregano, red pepper flakes, salt, and pepper.
  3. Add chickpeas, tomato paste, and vegetable broth. Stir well and bring to a simmer.
  4. Pour in vegan cream and stir in baby spinach until wilted and sauce is creamy.
  5. Adjust seasoning to taste. Garnish with fresh basil and vegan parmesan if desired.
  6. Serve hot over pasta, rice, baked potatoes, or with crusty bread

Notes

  • Use white beans or lentils in place of chickpeas for a twist.
  • Swap in kale, chard, or arugula instead of spinach.
  • Add a splash of lemon juice or white wine for brightness.
  • Great with a side of roasted veggies or a crisp salad.
  • Naturally gluten-free—just check your broth and toppings.

Have you made this recipe? I'd love to see it!

Click here to Follow me on Pinterest


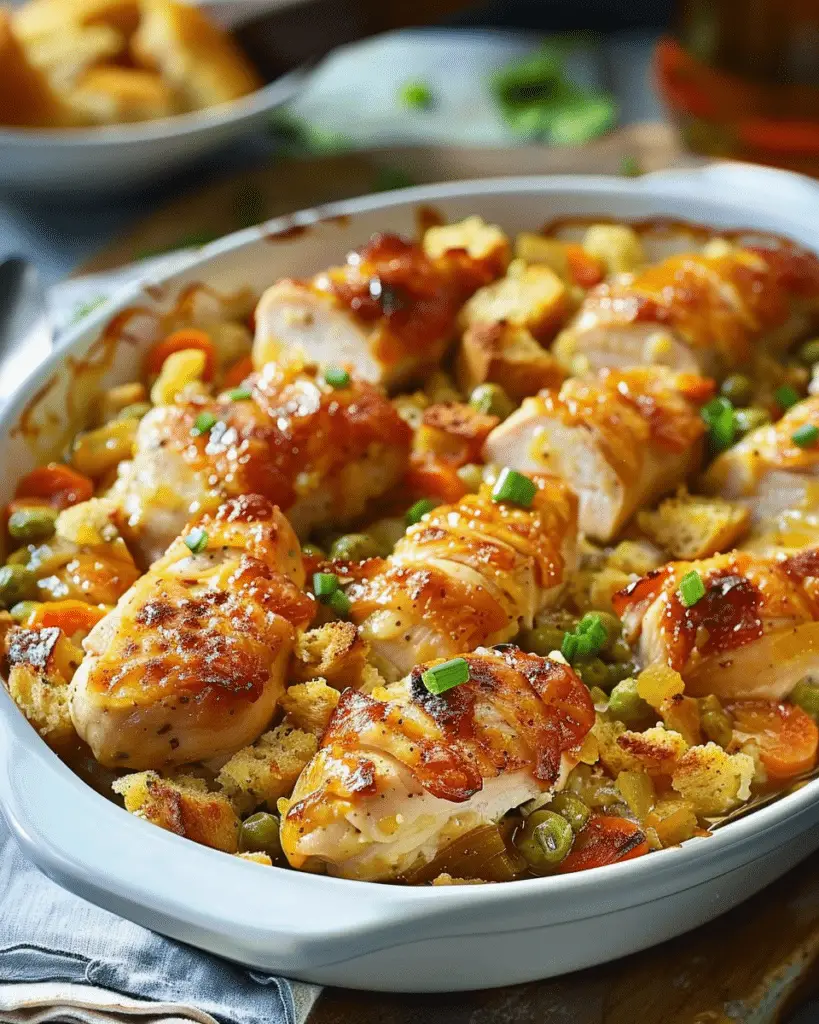
Biscuit & Vegetable Pot Pie (Casserole)

April 4, 2025 by Sue Leave a Comment

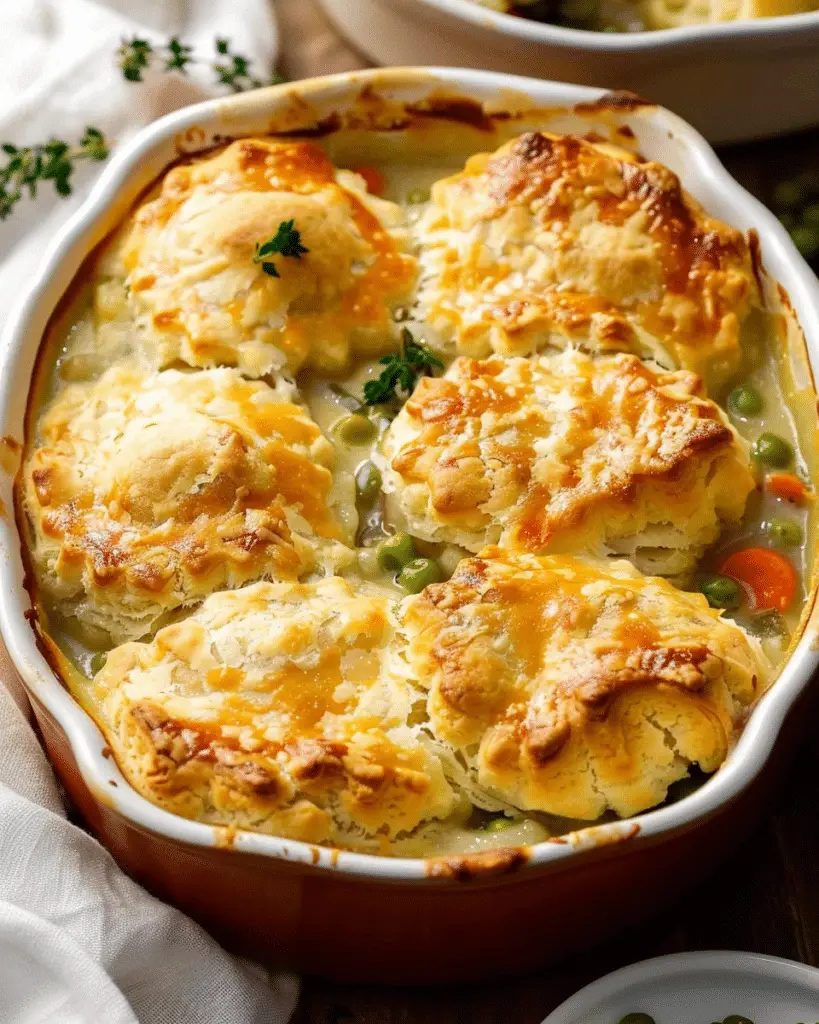
Biscuit & Vegetable Pot Pie Casserole is the kind of comfort food that makes me feel instantly at home. It’s creamy, hearty, and packed with tender vegetables in a rich sauce, all topped with golden, fluffy biscuits. This casserole brings together the flavors of a classic pot pie with the ease of a one-dish bake.

Biscuit & Vegetable Pot Pie (Casserole)

Why You’ll Love This Recipe

I love this recipe because it’s warm, filling, and incredibly easy to pull together. The biscuit topping makes it feel extra cozy and satisfying, and the creamy veggie filling is just as comforting as any traditional pot pie. It’s perfect for meatless nights, but I can also add leftover chicken or turkey when I have it. This dish always hits the spot and works great for family dinners, meal prep, or sharing with friends.

Ingredients

(Here's a tip: Check out the full list of ingredients and measurements in the recipe card below.)

  • Mixed vegetables (frozen or fresh like peas, carrots, corn, green beans)

  • Onion

  • Garlic

  • Butter

  • All-purpose flour

  • Vegetable broth

  • Milk or cream

  • Salt and pepper

  • Dried thyme or poultry seasoning

  • Canned or homemade biscuit dough

  • Optional: shredded cheese or chopped fresh herbs for topping

Directions

  1. I preheat the oven to 375°F (190°C) and lightly grease a 9x13-inch baking dish.

  2. In a large skillet, I melt butter and sauté chopped onion and garlic until softened.

  3. I stir in the flour to make a roux and cook for a minute before gradually whisking in the broth and milk.

  4. I let the mixture simmer until thickened, then season with salt, pepper, and thyme.

  5. I stir in the mixed vegetables and cook for a few more minutes until heated through.

  6. I pour the creamy vegetable mixture into the prepared baking dish.

  7. I top it with biscuit dough pieces—either whole biscuits or cut into quarters for easier serving.
  8. I bake for 20–25 minutes, until the biscuits are golden and cooked through and the filling is bubbling.
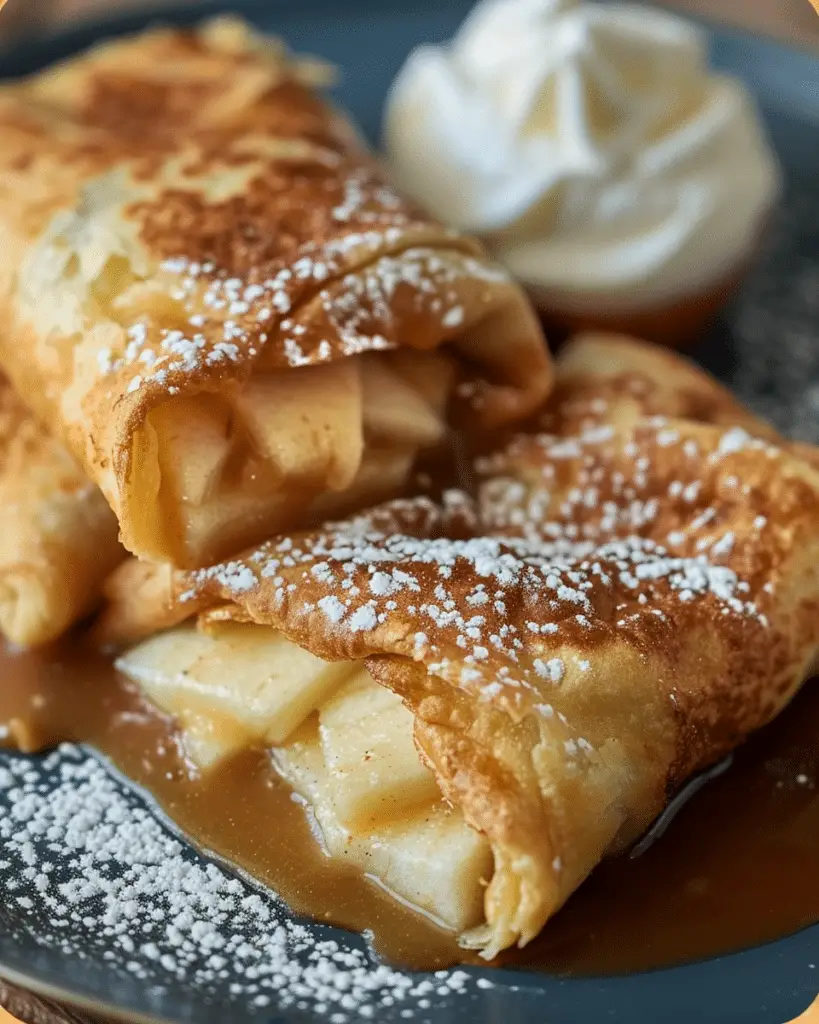
  9. I let it cool slightly before serving.

Servings and timing

This recipe makes about 6 servings. It takes me 15–20 minutes to prepare and another 25 minutes to bake, so it’s ready in around 45 minutes total.

Variations

  • I sometimes add cooked shredded chicken or turkey for extra protein.

  • When I want more flavor, I stir in fresh herbs like rosemary or parsley.

  • I’ve used puff pastry on top instead of biscuits for a different texture.

  • For a dairy-free version, I use plant-based milk and butter.

storage/reheating

I store leftovers in the fridge, covered, for up to 4 days. To reheat, I use the microwave for single portions or warm the whole dish in a 350°F oven until heated through. If the biscuits start to dry out, I cover the dish with foil while reheating.

FAQs

Can I use canned vegetables?

Yes, I drain them well before adding. I prefer frozen or fresh for better texture, but canned works in a pinch.

Can I make this casserole ahead?

Yes, I prep the filling and refrigerate it. I add the biscuit topping just before baking so it doesn’t get soggy.

How do I know the biscuits are fully cooked?

I check the center of the biscuits—they should be firm and not doughy. I sometimes use a toothpick to test them.

Can I freeze this dish?

Yes. I freeze the baked casserole after it cools completely. When reheating, I cover it with foil and bake at 350°F until hot all the way through.

What can I serve with this?

It’s a full meal on its own, but I sometimes serve it with a light green salad or roasted veggies for a little extra freshness.

Conclusion

Biscuit & Vegetable Pot Pie Casserole is one of those recipes I turn to when I want a satisfying, no-fuss dinner that tastes like home. It’s rich, creamy, and loaded with comforting flavors. Once I’ve made it, I always look forward to the leftovers—if there are any.

Print

clock clock iconcutlery cutlery iconflag flag iconfolder folder iconinstagram instagram iconpinterest pinterest iconfacebook facebook iconprint print iconsquares squares iconheart heart iconheart solid heart solid icon
Biscuit & Vegetable Pot Pie (Casserole)

Biscuit & Vegetable Pot Pie (Casserole)

5 Stars 4 Stars 3 Stars 2 Stars 1 Star No reviews
  • Author: Sue
  • Prep Time: 20 minutes
  • Cook Time: 25 minutes
  • Total Time: 45 minutes
  • Yield: 6 servings
  • Category: Main Dish
  • Method: Baking
  • Cuisine: American
  • Diet: Vegetarian
Print Recipe
Pin Recipe

Description

Biscuit & Vegetable Pot Pie Casserole is a creamy, comforting one-dish meal packed with tender mixed vegetables in a savory sauce, all topped with fluffy, golden biscuits. This easy vegetarian dinner is perfect for cozy weeknights, potlucks, or using up pantry staples—no meat needed!


Ingredients

  • 4 cups mixed vegetables (frozen or fresh: peas, carrots, corn, green beans)
  • 1 small onion, diced
  • 2 cloves garlic, minced
  • 3 tbsp butter
  • ¼ cup all-purpose flour
  • 2 cups vegetable broth
  • 1 cup milk or cream
  • ½ tsp salt
  • ¼ tsp black pepper
  • ½ tsp dried thyme or poultry seasoning
  • 1 can refrigerated biscuit dough (or homemade biscuit dough)
  • Optional: shredded cheese or chopped herbs for topping

Instructions

  1. Preheat oven to 375°F (190°C). Lightly grease a 9x13-inch baking dish.
  2. In a large skillet, melt butter over medium heat. Add onion and garlic; sauté until softened.
  3. Stir in flour to form a roux; cook for 1 minute. Gradually whisk in broth and milk until smooth.
  4. Simmer until thickened. Add salt, pepper, and thyme.
  5. Stir in mixed vegetables and cook until heated through, about 2–3 minutes.
  6. Pour mixture into the baking dish.
  7. Top with biscuit dough—either whole or cut into smaller pieces.
  8. Bake uncovered for 20–25 minutes, until biscuits are golden and cooked through.
  9. Let cool for 5–10 minutes before serving.

Notes

  • Add cooked shredded chicken or turkey for a heartier option.
  • Swap biscuit topping for puff pastry or mashed potatoes for a different twist.
  • Use plant-based milk and butter to make it dairy-free.
  • For best biscuit texture, don’t overbake—just until golden and set inside.

Have you made this recipe? I'd love to see it!

Click here to Follow me on Pinterest

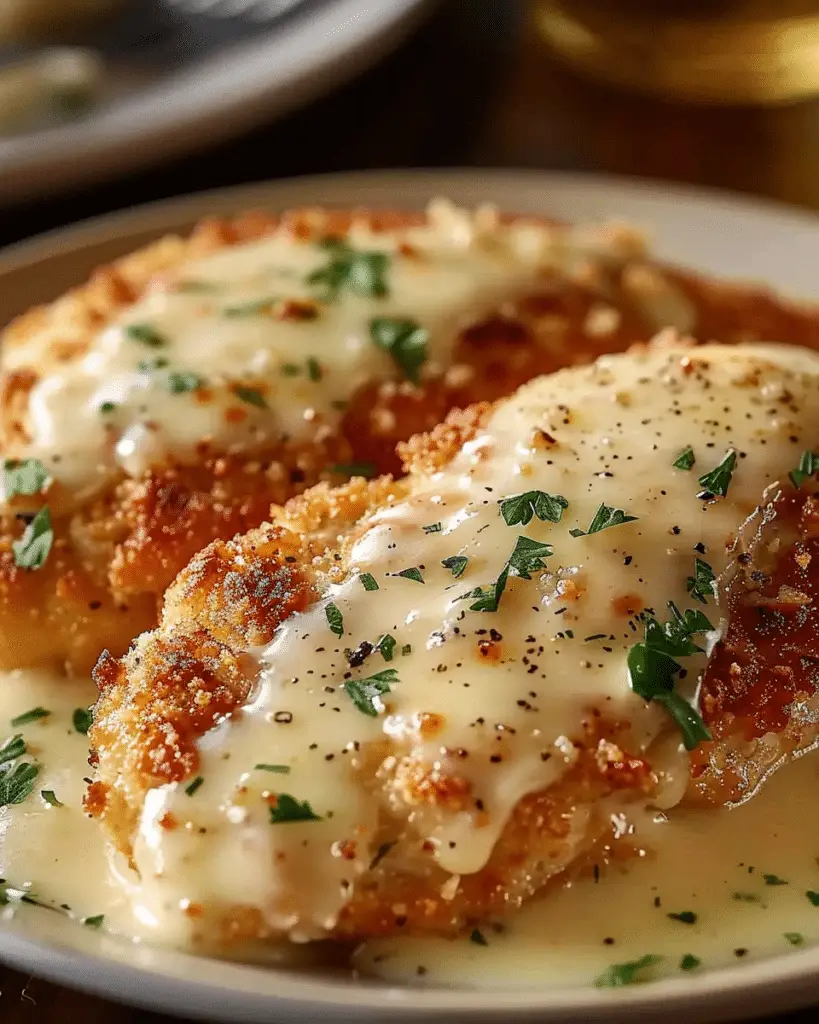
Longhorn Steakhouse Parmesan Chicken

April 4, 2025 by Sue Leave a Comment

Longhorn Steakhouse Parmesan Chicken is a crave-worthy dish that combines juicy grilled chicken with a rich, creamy ranch-Parmesan sauce and a golden layer of melted cheese. It’s packed with bold, comforting flavor and tastes just like the restaurant favorite—but even better when I make it fresh at home.

Longhorn Steakhouse Parmesan Chicken

Why You’ll Love This Recipe

I love how this dish brings together grilled flavor and cheesy indulgence in one bite. The chicken stays moist and flavorful, the sauce is creamy and savory, and the cheese topping adds that irresistible gooey finish. It’s a perfect choice when I want something satisfying and restaurant-quality without leaving the house.

Ingredients

(Here's a tip: Check out the full list of ingredients and measurements in the recipe card below.)

  • Boneless, skinless chicken breasts
  • Olive oil
  • Salt
  • Black pepper
  • Garlic powder
  • Ranch dressing
  • Grated Parmesan cheese
  • Shredded provolone or mozzarella cheese
  • Optional garnish: chopped parsley or green onions

Directions

  1. I start by flattening the chicken breasts slightly so they cook evenly.
  2. I season both sides with salt, pepper, and garlic powder.
  3. I heat olive oil in a skillet or grill pan over medium heat and cook the chicken until golden on both sides and cooked through (about 6–8 minutes per side).
  4. In a small bowl, I mix the ranch dressing and Parmesan cheese together to make a thick, creamy sauce.
  5. I spread the ranch-Parmesan mixture over each piece of cooked chicken.
  6. I sprinkle shredded provolone or mozzarella over the top.
  7. I transfer the chicken to a baking dish or oven-safe skillet and broil for a few minutes, just until the cheese is melted and bubbly.
  8. I garnish with parsley or green onions before serving if I want a fresh pop of color.

Servings and timing

  • Servings: 4
  • Prep Time: 10 minutes
  • Cook Time: 20 minutes
  • Total Time: 30 minutes

Variations

  • I’ve used grilled chicken or pan-seared thighs when I want something a bit heartier.
  • If I’m out of ranch, I mix sour cream with a bit of garlic powder and herbs for a quick alternative.
  • For a spicy twist, I add a dash of hot sauce or crushed red pepper flakes to the ranch mixture.

storage/reheating

I store leftovers in an airtight container in the fridge for up to 4 days.
To reheat, I warm the chicken in a covered skillet over low heat or in the oven at 300°F until heated through. The cheese melts beautifully again without drying out the chicken.

FAQs

Can I bake the chicken instead of pan-searing?

Yes, I bake it at 400°F for about 20–25 minutes or until the internal temperature reaches 165°F, then add the sauce and cheese and broil to finish.

What’s the best cheese to use on top?

I like provolone or mozzarella for melting, but cheddar or Monterey Jack also work well if I want a sharper flavor.

Can I prep this dish ahead of time?

Absolutely. I cook the chicken and make the sauce ahead, then assemble and broil just before serving.

How do I keep the chicken from drying out?

I don’t overcook it during the initial sear—just until it’s golden—and I let the broiler finish the job gently with the cheese.

What sides go best with this chicken?

I usually serve it with mashed potatoes, steamed veggies, or a side salad to balance out the richness.

Conclusion

Longhorn Steakhouse Parmesan Chicken is one of those dishes that feels indulgent and comforting all at once. I love making it at home because it’s quick, packed with flavor, and every bite brings that cheesy, creamy goodness I’m craving. It’s the perfect go-to for a hearty family dinner or a special weeknight treat.


Print

clock clock iconcutlery cutlery iconflag flag iconfolder folder iconinstagram instagram iconpinterest pinterest iconfacebook facebook iconprint print iconsquares squares iconheart heart iconheart solid heart solid icon
Longhorn Steakhouse Parmesan Chicken

Longhorn Steakhouse Parmesan Chicken

5 Stars 4 Stars 3 Stars 2 Stars 1 Star No reviews
  • Author: Sue
  • Prep Time: 10 minutes
  • Cook Time: 20 minutes
  • Total Time: 30 minutes
  • Yield: Serves 4
  • Category: Dinner, Main Course
  • Method: Pan-Searing, Broiling
  • Cuisine: American
Print Recipe
Pin Recipe

Description

Longhorn Steakhouse Parmesan Chicken is a rich and flavorful dish made with juicy grilled chicken breasts, a creamy ranch-Parmesan sauce, and a gooey layer of melted cheese. This easy copycat recipe brings all the indulgence of the restaurant favorite right to your dinner table in just 30 minutes.


Ingredients

  • 4 boneless, skinless chicken breasts
  • 2 tbsp olive oil
  • 1 tsp salt
  • ½ tsp black pepper
  • ½ tsp garlic powder
  • ½ cup ranch dressing
  • ⅓ cup grated Parmesan cheese
  • 1 cup shredded provolone or mozzarella cheese
  • Optional: chopped parsley or green onions for garnish

Instructions

  1. Flatten chicken breasts to even thickness.
  2. Season both sides with salt, pepper, and garlic powder.
  3. Heat olive oil in a skillet over medium heat. Sear chicken 6–8 minutes per side, until golden and cooked through.
  4. In a bowl, mix ranch dressing with Parmesan cheese.
  5. Spread ranch-Parmesan mixture over each chicken breast.
  6. Top with shredded cheese.
  7. Transfer to an oven-safe dish and broil for 2–4 minutes, until cheese is melted and bubbly.
  8. Garnish with parsley or green onions if desired.

Notes

  • Baking option: Bake chicken at 400°F for 20–25 minutes, then broil with sauce and cheese.
  • Swap ranch with sour cream + herbs in a pinch.
  • Add hot sauce for extra flavor variations.
  • Store leftovers in the fridge for up to 4 days. Reheat gently to preserve moisture.

Have you made this recipe? I'd love to see it!

Click here to Follow me on Pinterest


Garlic Parmesan Chicken and Potatoes

April 4, 2025 by Sue Leave a Comment

This Garlic Parmesan Chicken and Potatoes is a one-pan wonder that brings crispy, juicy chicken and golden roasted potatoes together in a buttery garlic parmesan coating. It’s the kind of meal I turn to when I want something hearty, flavorful, and easy enough to throw together on a weeknight without sacrificing taste.

Garlic Parmesan Chicken and Potatoes

Why You’ll Love This Recipe

I love this recipe because everything cooks together on a single pan, which means fewer dishes and more flavor. The garlic and parmesan mixture creates a savory crust on the chicken and a golden, cheesy coating on the potatoes. It’s comforting, satisfying, and made with ingredients I usually have in my kitchen. Plus, it’s super adaptable, so I can throw in extra veggies or swap out the protein if I want to change things up.

ingredients

(Here's a tip: Check out the full list of ingredients and measurements in the recipe card below.)

  • Boneless, skinless chicken thighs or breasts
  • Baby potatoes or Yukon gold potatoes
  • Olive oil
  • Butter (melted)
  • Garlic (minced)
  • Grated parmesan cheese
  • Italian seasoning
  • Paprika
  • Salt and black pepper
  • Fresh parsley (for garnish, optional)

directions

  1. I preheat the oven to 400°F and line a baking sheet with parchment paper or lightly grease it.
  2. I cut the potatoes into halves or quarters, depending on their size.
  3. In a bowl, I mix olive oil, melted butter, minced garlic, parmesan, Italian seasoning, paprika, salt, and pepper.
  4. I toss the potatoes in half of the garlic parmesan mixture, then spread them out on one side of the baking sheet.
  5. I coat the chicken with the remaining mixture and place it on the other side of the baking sheet.
  6. I roast everything in the oven for 35–40 minutes, flipping the potatoes halfway through and checking the chicken for doneness (internal temp should reach 165°F).
  7. I broil for the last 2–3 minutes if I want extra crispiness on top.
  8. I garnish with fresh parsley and serve hot.

Servings and timing

This recipe serves about 4 people.
Prep time: 10 minutes
Cook time: 40 minutes
Total time: 50 minutes

Variations

Sometimes I swap the potatoes for sweet potatoes or add vegetables like broccoli, green beans, or zucchini to the pan for a full meal. I’ve also used bone-in chicken thighs for even more flavor—just increase the cook time slightly. When I want a little heat, I sprinkle in red pepper flakes or add a dash of hot sauce to the garlic butter mixture.

storage/reheating

I store leftovers in an airtight container in the fridge for up to 4 days. To reheat, I place everything on a baking sheet and warm it in the oven at 350°F for about 10–15 minutes to keep the texture crisp. The microwave works in a pinch, but it can make the potatoes a bit soft.

FAQs

Can I use bone-in chicken for this recipe?

Yes, I often use bone-in thighs or drumsticks for more flavor. I just make sure to extend the cooking time and check for doneness with a meat thermometer.

What kind of potatoes work best?

I usually go with baby potatoes or Yukon golds—they roast well and get a nice crispy edge. Russet potatoes can work too, but I cut them into smaller chunks.

Can I prep this meal ahead?

Absolutely. I sometimes toss the chicken and potatoes in the garlic parmesan mixture the night before and keep them covered in the fridge until I’m ready to bake.

How do I get everything crispy?

I make sure not to overcrowd the pan and use parchment paper or a light oil spray to help with browning. A quick broil at the end also helps everything crisp up beautifully.

Is it possible to make this dairy-free?

Yes, I’ve made it without parmesan and butter—just using olive oil, garlic, and spices—and it’s still tasty, though not quite as rich.

Conclusion

Garlic Parmesan Chicken and Potatoes is the kind of one-pan dinner I rely on when I want something quick, flavorful, and comforting with minimal cleanup. The juicy chicken, crispy potatoes, and buttery garlic parmesan flavor make it feel like a meal that took much more effort than it actually did. It’s a weeknight win every time I make it.

Print

clock clock iconcutlery cutlery iconflag flag iconfolder folder iconinstagram instagram iconpinterest pinterest iconfacebook facebook iconprint print iconsquares squares iconheart heart iconheart solid heart solid icon
Garlic Parmesan Chicken and Potatoes

Garlic Parmesan Chicken and Potatoes (One-Pan Dinner)

5 Stars 4 Stars 3 Stars 2 Stars 1 Star No reviews
  • Author: Sue
  • Prep Time: 10 minutes
  • Cook Time: 40 minutes
  • Total Time: 50 minutes
  • Yield: 4 servings
  • Category: Dinner, One-Pan Meals, Chicken Recipes
  • Method: Oven Roasting, Sheet Pan
  • Cuisine: American
Print Recipe
Pin Recipe

Description

This Garlic Parmesan Chicken and Potatoes is a flavorful, crispy, one-pan dinner made with juicy chicken thighs or breasts, golden roasted potatoes, and a buttery garlic parmesan coating. It’s the ultimate easy weeknight meal that delivers comfort, flavor, and minimal cleanup in under an hour.


Ingredients

  • Boneless, skinless chicken thighs or breasts
  • Baby potatoes or Yukon gold potatoes
  • Olive oil
  • Butter (melted)
  • Garlic (minced)
  • Grated parmesan cheese
  • Italian seasoning
  • Paprika
  • Salt
  • Black pepper
  • Fresh parsley (optional, for garnish)

Instructions

  1. Preheat oven to 400°F. Line a baking sheet with parchment or lightly grease it.
  2. Cut potatoes into halves or quarters, depending on size.
  3. In a bowl, mix olive oil, melted butter, garlic, parmesan, Italian seasoning, paprika, salt, and pepper.
  4. Toss potatoes with half the garlic parmesan mixture. Spread them on one side of the baking sheet.
  5. Coat chicken with the remaining mixture. Place on the other side of the sheet.
  6. Roast for 35–40 minutes, flipping potatoes halfway through. Ensure chicken reaches 165°F internal temp.
  7. Broil for the last 2–3 minutes for extra crispiness.
  8. Garnish with fresh parsley and serve hot.

Notes

  • Swap in sweet potatoes or add broccoli, green beans, or zucchini to the pan.
  • Bone-in chicken thighs can be used—just adjust cook time.
  • Add red pepper flakes or hot sauce for a spicy version.
  • Broil at the end to enhance crispiness on both chicken and potatoes.

Have you made this recipe? I'd love to see it!

Click here to Follow me on Pinterest

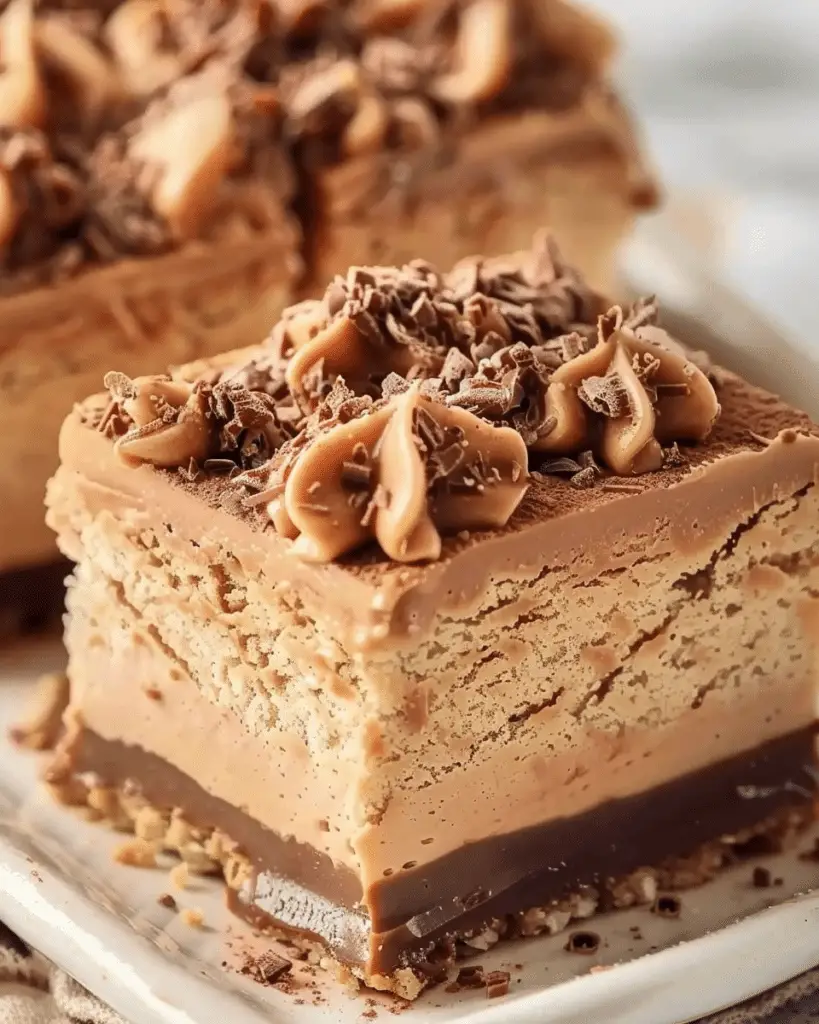
Disneyland Peanut Butter Squares

April 4, 2025 by Sue Leave a Comment

Disneyland Peanut Butter Squares are a dreamy blend of creamy peanut butter and rich chocolate that bring a bit of Disney magic right into my kitchen. Inspired by the beloved treat served at Disneyland’s bakeries, these no-bake dessert bars are thick, indulgent, and absolutely unforgettable.

Disneyland Peanut Butter Squares

Why You’ll Love This Recipe

I love how these bars perfectly balance salty-sweet peanut butter with smooth chocolate on top. They’re simple to make, don’t require baking, and taste just like the ones I remember from Main Street, U.S.A. I can whip up a batch with pantry staples and they always disappear fast—whether I’m sharing with friends or treating myself.

Ingredients

(Here's a tip: Check out the full list of ingredients and measurements in the recipe card below.)

  • Creamy peanut butter
  • Unsalted butter, softened
  • Powdered sugar
  • Graham cracker crumbs
  • Semi-sweet or milk chocolate chips
  • Optional: vanilla extract, sea salt for topping

Directions

  1. I line an 8x8-inch or 9x9-inch baking dish with parchment paper, leaving a bit of overhang for easy removal.
  2. In a large bowl, I mix the softened butter and peanut butter until smooth and creamy.
  3. I stir in the powdered sugar and graham cracker crumbs until the mixture is fully combined and forms a thick dough.
  4. I press the peanut butter mixture evenly into the prepared dish, smoothing the surface.
  5. In a microwave-safe bowl, I melt the chocolate chips in 30-second intervals, stirring in between until smooth.
  6. I pour the melted chocolate over the peanut butter layer and spread it evenly with a spatula.
  7. I chill the bars in the refrigerator for at least 2 hours, or until the chocolate is set and the bars are firm.
  8. Once set, I lift them out using the parchment and cut into squares.

Servings and timing

This recipe makes about 16 squares and takes around 15 minutes to prepare, plus at least 2 hours of chill time. I like to make them ahead so they’re ready to slice and serve when the craving hits.

Variations

  • I sometimes swirl in a bit of marshmallow fluff for a fluffernutter-inspired twist.
  • For crunch, I use chunky peanut butter or stir in crushed pretzels.
  • I’ve topped the chocolate layer with a sprinkle of flaky sea salt, chopped peanuts, or mini Reese’s pieces for extra flair.
  • For a gluten-free version, I swap the graham cracker crumbs with gluten-free cookie crumbs or oat flour.

Storage/Reheating

I store these bars in an airtight container in the fridge for up to 1 week. They also freeze well—just wrap them tightly and store in a freezer-safe bag for up to 2 months. When I want to serve them, I let them thaw at room temperature for about 15–20 minutes.

FAQs

Can I use natural peanut butter?

I’ve tried it, but natural peanut butter can be too runny and may not set as firmly. I stick with a no-stir, creamy version for the best results.

Why are they called Disneyland Peanut Butter Squares?

They’re inspired by the famous peanut butter-chocolate treats sold at Disneyland’s bakeries—especially the ones from Pooh Corner and Candy Palace. This homemade version tastes just like the original.

Can I use almond or sunflower seed butter instead?

Yes, I’ve used both as substitutions for peanut butter, especially for allergy-friendly versions. The texture stays close, and the flavor is still rich and delicious.

How do I keep the chocolate layer from cracking when cutting?

I let the bars sit at room temperature for about 10 minutes before slicing, and I use a sharp knife warmed under hot water, wiped dry between cuts.

Do I need to bake the crust?

No baking needed—this recipe is fully no-bake, which makes it even easier and faster to prepare.

Conclusion

Disneyland Peanut Butter Squares are a nostalgic treat that bring back sweet memories with every bite. They’re rich, creamy, and ridiculously easy to make. Whether I’m recreating some Disney magic at home or just looking for a no-bake dessert that never fails, these bars are always a winner in my kitchen.

Print

clock clock iconcutlery cutlery iconflag flag iconfolder folder iconinstagram instagram iconpinterest pinterest iconfacebook facebook iconprint print iconsquares squares iconheart heart iconheart solid heart solid icon
Disneyland Peanut Butter Squares

Disneyland Peanut Butter Squares

5 Stars 4 Stars 3 Stars 2 Stars 1 Star No reviews
  • Author: Sue
  • Prep Time: 15 minutes
  • Cook Time: 0 minutes (no-bake)
  • Total Time: 2 hours 15 minutes (includes chilling)
  • Yield: 16 squares
  • Category: Dessert, Snack
  • Method: No-Bake
  • Cuisine: American
  • Diet: Vegetarian
Print Recipe
Pin Recipe

Description

Disneyland Peanut Butter Squares are rich, no-bake dessert bars inspired by the classic Disney treat. Made with creamy peanut butter, graham cracker crumbs, and a luscious chocolate topping, these nostalgic bars are easy to prepare and perfect for recreating Disney magic at home.


Ingredients

  • 1 cup creamy peanut butter
  • ½ cup unsalted butter, softened
  • 1½ cups powdered sugar
  • 1½ cups graham cracker crumbs
  • 1½ cups semi-sweet or milk chocolate chips
  • Optional: 1 teaspoon vanilla extract, flaky sea salt for topping

Instructions

  1. Line an 8x8-inch or 9x9-inch baking pan with parchment paper, leaving overhang on the sides.
  2. In a large bowl, mix peanut butter and softened butter until smooth.
  3. Stir in powdered sugar and graham cracker crumbs until fully combined and dough-like.
  4. Press the mixture evenly into the prepared pan, smoothing the surface.
  5. Melt chocolate chips in a microwave-safe bowl in 30-second intervals, stirring until smooth.
  6. Pour melted chocolate over the peanut butter layer and spread evenly.
  7. Chill in the refrigerator for at least 2 hours, until chocolate is set.
  8. Lift out of the pan and cut into 16 squares before serving.

Notes

  • For texture, use chunky peanut butter or mix in crushed pretzels.
  • Add marshmallow fluff for a fluffernutter-style bar.
  • Top with flaky sea salt, chopped nuts, or Reese’s pieces for extra flavor and crunch.
  • Use gluten-free graham crackers for a GF version.
  • Let bars sit at room temperature for 10 minutes before slicing to prevent cracking.

Have you made this recipe? I'd love to see it!

Click here to Follow me on Pinterest

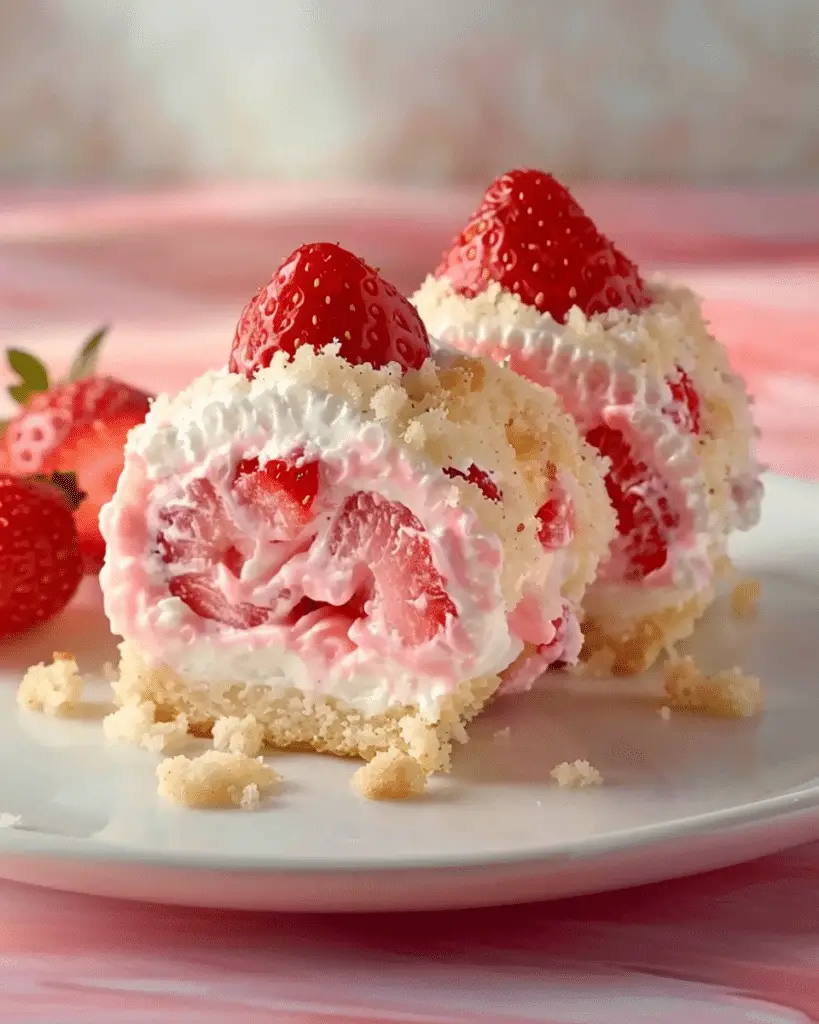
Strawberry Shortcake Cheesecake Rolls

April 4, 2025 by Sue Leave a Comment

Strawberry shortcake cheesecake rolls are a dreamy dessert mashup that brings together soft, pillowy rolls, sweet strawberries, and creamy cheesecake filling—all topped with a buttery shortcake crumble. It’s like having strawberry shortcake, cheesecake, and cinnamon rolls all in one bite, and I honestly can’t get enough of them.

Strawberry Shortcake Cheesecake Rolls

Why You’ll Love This Recipe

I love this recipe because it turns a classic flavor combo into a decadent, bakery-style treat right from my own kitchen. The rolls are soft and rich, the strawberry filling adds fruity freshness, and the cheesecake swirl makes each bite feel extra special. Plus, the shortcake crumble on top adds that perfect finishing crunch.

Ingredients

(Here's a tip: Check out the full list of ingredients and measurements in the recipe card below.)

For the Dough:

  • All-purpose flour
  • Active dry yeast
  • Warm milk
  • Granulated sugar
  • Salt
  • Unsalted butter
  • Eggs

For the Cheesecake Filling:

  • Cream cheese (softened)
  • Powdered sugar
  • Vanilla extract

For the Strawberry Filling:

  • Fresh or frozen strawberries (chopped)
  • Granulated sugar
  • Cornstarch
  • Lemon juice

For the Shortcake Crumble Topping:

  • All-purpose flour
  • Granulated sugar
  • Cold butter
  • Crushed shortbread cookies or golden Oreos (optional for extra crunch)

For the Glaze (optional):

  • Powdered sugar
  • Milk or cream
  • Vanilla extract

Directions

  1. I start by activating the yeast in warm milk with a bit of sugar, then mix in the remaining dough ingredients and knead until smooth. I let it rise until doubled in size.
  2. While the dough rises, I make the cheesecake filling by beating cream cheese, powdered sugar, and vanilla until smooth.
  3. For the strawberry filling, I cook the berries with sugar, cornstarch, and lemon juice until thickened, then let it cool.
  4. Once the dough is ready, I roll it out into a rectangle, spread on the cheesecake filling, then layer the strawberry mixture over that.
  5. I roll it up tightly, slice into rolls, and place them in a greased baking dish.
  6. I let them rise again for about 30 minutes, then sprinkle the crumble topping over each roll.
  7. I bake at 350°F (175°C) for 25–30 minutes, until golden and set.
  8. After cooling slightly, I drizzle with glaze if I’m feeling extra indulgent.

Servings and Timing

This recipe makes about 12 rolls. It takes around 30 minutes to prep (plus 1–2 hours of rising time), and 25–30 minutes to bake. I usually set aside a couple of hours total if I’m making these from scratch.

Variations

  • I’ve used raspberry or blueberry filling for a different fruit twist.
  • A premade crescent dough works if I’m short on time—just adjust the bake time slightly.
  • I’ve also made mini rolls in a muffin tin for a grab-and-go version.
  • A bit of lemon zest in the cheesecake filling adds a lovely brightness.

Storage/Reheating

I store leftovers in an airtight container in the fridge for up to 4 days. To reheat, I warm individual rolls in the microwave for about 20–30 seconds or pop the tray into a 300°F oven for 10 minutes to refresh them. They also freeze well—just wrap tightly and thaw before reheating.

FAQs

Can I use frozen strawberries?

Yes, I’ve used frozen strawberries many times. I just make sure to thaw and drain them before cooking the filling so it’s not too watery.

Can I prep these rolls the night before?

Definitely. I assemble them and place them in the baking dish, cover tightly, and refrigerate overnight. In the morning, I let them come to room temperature and rise a bit before baking.

What’s the best way to slice the rolls cleanly?

I use unflavored dental floss or a sharp serrated knife—it keeps the filling from squishing out and gives me neat spirals.

Do I have to make the crumble topping?

No, but I highly recommend it. It adds texture and brings in that signature shortcake vibe. Even a quick streusel works if I’m in a rush.

Can I make these gluten-free?

Yes, I’ve had success using a 1:1 gluten-free flour blend and making sure my other ingredients are gluten-free too. The texture is slightly different but still delicious.

Conclusion

Strawberry shortcake cheesecake rolls are the kind of treat that feels fancy but comes together with simple, familiar ingredients. They’re rich, fruity, creamy, and comforting all at once. Whether I’m baking for brunch, dessert, or just to treat myself, these rolls always steal the show—and I never mind going back for seconds.

Print

clock clock iconcutlery cutlery iconflag flag iconfolder folder iconinstagram instagram iconpinterest pinterest iconfacebook facebook iconprint print iconsquares squares iconheart heart iconheart solid heart solid icon
Strawberry Shortcake Cheesecake Rolls

Strawberry Shortcake Cheesecake Rolls

5 Stars 4 Stars 3 Stars 2 Stars 1 Star No reviews
  • Author: Sue
  • Prep Time: 30 minutes
  • Cook Time: 30 minutes
  • Total Time: About 3 hours
  • Yield: 12 rolls
  • Category: Breakfast, Dessert, Brunch
  • Method: Baking
  • Cuisine: American
  • Diet: Vegetarian
Print Recipe
Pin Recipe

Description

These strawberry shortcake cheesecake rolls combine soft, fluffy dough with a swirl of creamy cheesecake filling and sweet strawberry compote, all topped with a buttery shortcake crumble. Perfect for brunch or dessert, this bakery-style treat is bursting with classic strawberry shortcake flavor in every indulgent bite.


Ingredients

  • For the Dough:
  • 3½ cups all-purpose flour
  • 1 packet (2¼ tsp) active dry yeast
  • 1 cup warm milk (about 110°F)
  • ¼ cup granulated sugar
  • ½ tsp salt
  • ¼ cup unsalted butter, melted
  • 2 large eggs
  • For the Cheesecake Filling:
  • 8 oz cream cheese, softened
  • ⅓ cup powdered sugar
  • 1 tsp vanilla extract
  • For the Strawberry Filling:
  • 1½ cups fresh or frozen strawberries, chopped
  • ¼ cup granulated sugar
  • 1 tbsp cornstarch
  • 1 tsp lemon juice
  • For the Shortcake Crumble Topping:
  • ½ cup all-purpose flour
  • ¼ cup granulated sugar
  • ¼ cup cold butter, cubed
  • ¼ cup crushed shortbread cookies or golden Oreos (optional)
  • For the Glaze (optional):
  • ½ cup powdered sugar
  • 1–2 tablespoon milk or cream
  • ½ tsp vanilla extract

Instructions

  1. In a bowl, dissolve yeast and 1 tablespoon sugar in warm milk. Let sit until foamy (about 5–10 minutes).
  2. Mix in remaining sugar, butter, eggs, salt, and flour. Knead until a soft dough forms (about 5–7 minutes). Cover and let rise until doubled, 1–1½ hours.
  3. Make the cheesecake filling by beating cream cheese, powdered sugar, and vanilla until smooth.
  4. Cook strawberries, sugar, lemon juice, and cornstarch in a saucepan over medium heat until thickened. Let cool.
  5. Roll dough into a 10x15-inch rectangle. Spread with cheesecake filling, then strawberry filling. Roll tightly and slice into 12 rolls.
  6. Place rolls in a greased 9x13-inch pan. Cover and let rise for 30–45 minutes.
  7. For the crumble topping, mix flour and sugar, then cut in cold butter until crumbly. Stir in crushed cookies if using.
  8. Sprinkle crumble over rolls and bake at 350°F (175°C) for 25–30 minutes, until golden.
  9. Drizzle with optional glaze after cooling slightly.

Notes

  • Use unflavored dental floss to slice rolls cleanly.
  • Substitute raspberry or blueberry for a fruity twist.
  • For convenience, use crescent roll dough and reduce baking time.
  • Add lemon zest to cheesecake filling for a citrusy lift.

Have you made this recipe? I'd love to see it!

Click here to Follow me on Pinterest

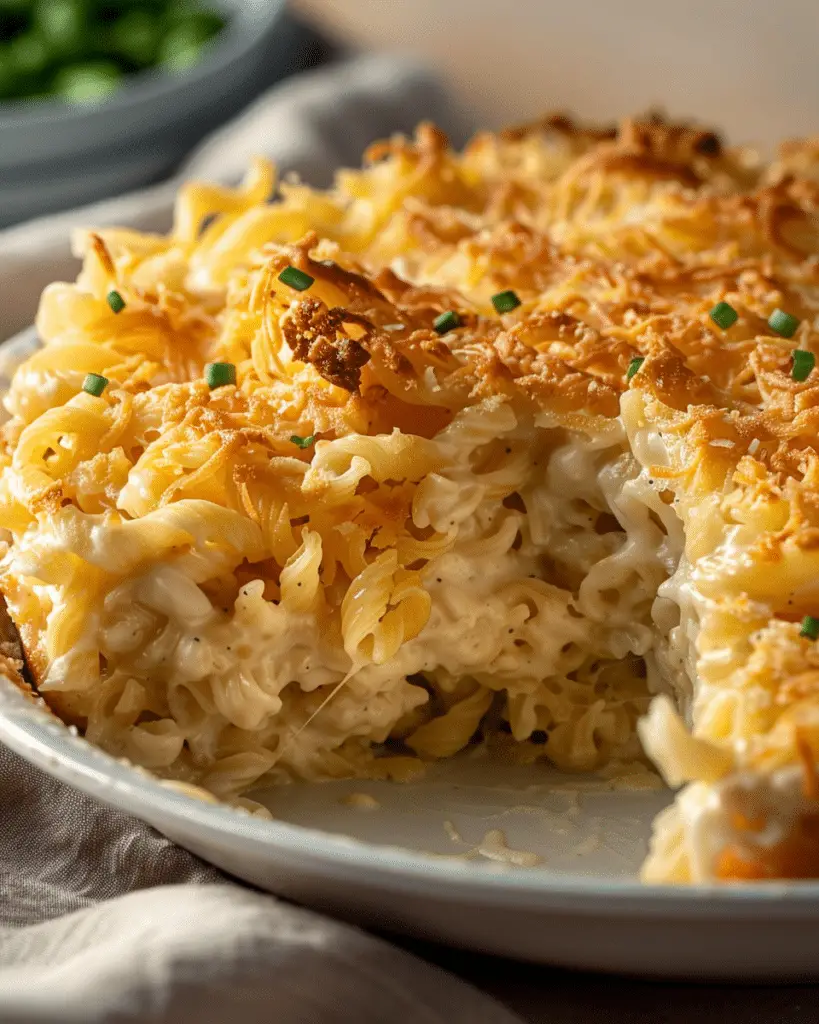
Creamy Tuna Noodle Bake

April 2, 2025 by Sue Leave a Comment

Creamy Tuna Noodle Bake is the ultimate comfort food—warm, hearty, and full of nostalgic flavor. This cozy casserole combines tender egg noodles, creamy sauce, flaky tuna, and sweet peas, all topped with a golden, buttery breadcrumb crust. It’s an easy, satisfying dinner that I can throw together on a busy weeknight or prep ahead for a cozy weekend meal.

Creamy Tuna Noodle Bake

Why You’ll Love This Recipe

  • I can make it with pantry staples—no special trip to the store needed.

  • It’s creamy, cheesy, and filling—the kind of meal that makes me feel instantly at home.

  • I can easily customize it with whatever vegetables or cheeses I have on hand.

  • It’s a great make-ahead meal for busy days or meal prep.

  • Leftovers reheat well and taste just as good the next day.

Ingredients

(Here's a tip: Check out the full list of ingredients and measurements in the recipe card below.)

  • egg noodles

  • unsalted butter

  • all-purpose flour

  • milk

  • cream of mushroom soup

  • canned tuna, drained

  • frozen peas

  • shredded cheddar cheese

  • salt and black pepper

  • breadcrumbs

Directions

  1. I bring a pot of salted water to a boil and cook the egg noodles until just tender. Then I drain and set them aside.

  2. In a saucepan over medium heat, I melt butter and whisk in flour to make a roux. After cooking for about a minute, I gradually whisk in the milk until smooth and slightly thickened.

  3. I stir in the cream of mushroom soup, then add tuna, peas, and shredded cheese. I stir everything together until it’s melted and creamy. I season it with salt and pepper to taste.

  4. I preheat the oven to 375°F (190°C) and grease a 9x13-inch baking dish.

  5. I combine the cooked noodles with the sauce and pour the mixture into the baking dish.

  6. In a small bowl, I toss breadcrumbs with melted butter and sprinkle them evenly over the top.

  7. I bake the casserole uncovered for 20–25 minutes, until the topping is golden and the sauce is bubbly.

  8. I let it rest for a few minutes before serving.

Servings and Timing

  • Servings: 6

  • Prep Time: 15 minutes

  • Cook Time: 25 minutes

  • Total Time: 40 minutes

Variations

  • I like to add sautéed mushrooms, diced carrots, or spinach to boost the veggie content.

  • Sometimes I swap cheddar for mozzarella, Monterey Jack, or a sharp white cheese.

  • I use crushed potato chips or French fried onions for a different crunchy topping.

  • I’ve even used rotisserie chicken instead of tuna for a fun twist.

Storage/Reheating

  • Refrigerator: I store leftovers in an airtight container in the fridge for up to 3 days.

  • Reheating: I reheat portions in the microwave or warm the whole dish in a 350°F oven, covered with foil until heated through.

  • Freezer: I freeze the unbaked casserole (without the topping) for up to 2 months. When ready to eat, I thaw it overnight, add the topping, and bake as directed.

FAQs

Can I make this ahead of time?

Yes, I often assemble it earlier in the day, cover it, and refrigerate it until dinnertime. I add the topping just before baking.

Can I freeze this dish?

Absolutely. I prepare the casserole, freeze it without the breadcrumbs, then bake from frozen or after thawing in the fridge.

What’s a good substitute for cream of mushroom soup?

I sometimes use cream of celery or cream of chicken soup. I’ve also made a homemade white sauce with sautéed mushrooms when I want to go from scratch.

Can I use other pasta shapes?

Yes, I’ve made this with rotini, penne, and even shells. I just make sure not to overcook them before baking.

How can I make it lighter?

I use reduced-fat cheese, low-fat milk, and a lighter soup base. I also add extra veggies to make it more balanced.

Conclusion

Creamy Tuna Noodle Bake is one of those timeless, feel-good meals that always hits the spot. It’s easy to make, full of comforting flavors, and endlessly adaptable. Whether I’m feeding a hungry family or just craving something classic and cozy, this casserole never disappoints.

Print

clock clock iconcutlery cutlery iconflag flag iconfolder folder iconinstagram instagram iconpinterest pinterest iconfacebook facebook iconprint print iconsquares squares iconheart heart iconheart solid heart solid icon
Creamy Tuna Noodle Bake

5 Stars 4 Stars 3 Stars 2 Stars 1 Star No reviews
  • Author: Sue
  • Prep Time: 15 minutes
  • Cook Time: 25 minutes
  • Total Time: 40 minutes
  • Yield: 6 servings
  • Category: Main Course
  • Method: Baking
  • Cuisine: American
Print Recipe
Pin Recipe

Description

This Creamy Tuna Noodle Bake is the ultimate comfort food classic—tender egg noodles, flaky tuna, and sweet peas baked in a rich, cheesy cream sauce, all topped with a golden, buttery breadcrumb crust. A cozy, crowd-pleasing casserole perfect for family dinners, potlucks, or meal prep.


Ingredients

  • 12 oz egg noodles
  • 4 tbsp unsalted butter
  • ¼ cup all-purpose flour
  • 2 cups milk
  • 1 (10.5 oz) can cream of mushroom soup
  • 2 cans (5 oz each) tuna, drained
  • 1 cup frozen peas
  • 1½ cups shredded cheddar cheese
  • Salt and pepper, to taste
  • ¾ cup breadcrumbs
  • 2 tbsp melted butter (for topping)

Instructions

  1. Cook the Noodles:
    Bring a large pot of salted water to a boil. Cook egg noodles until just al dente. Drain and set aside.
  2. Make the Sauce:
    In a large saucepan over medium heat, melt butter. Whisk in flour and cook for 1–2 minutes. Gradually whisk in milk until smooth and thickened. Stir in the cream of mushroom soup.
  3. Add the Filling:
    Stir in drained tuna, frozen peas, and shredded cheddar cheese. Mix until cheese melts and mixture is heated through. Season with salt and pepper.
  4. Assemble:
    Preheat oven to 375°F (190°C). Grease a 9x13-inch baking dish. Combine the sauce mixture with cooked noodles and spread evenly in the baking dish.
  5. Add Topping:
    Mix breadcrumbs with melted butter. Sprinkle over the casserole evenly.
  6. Bake:
    Bake uncovered for 20–25 minutes, until topping is golden and sauce is bubbling.
  7. Serve:
    Let cool for a few minutes before serving.

Notes

  • Add extra veggies like mushrooms, spinach, or bell peppers.
  • Try other cheeses such as Gruyère or Monterey Jack.
  • Swap breadcrumbs with crushed chips or crispy onions for a twist.
  • Make-ahead friendly and freezer-friendly.

Have you made this recipe? I'd love to see it!

Click here to Follow me on Pinterest

Dill Pickle Grilled Cheese

April 2, 2025 by Sue Leave a Comment

Dill Pickle Grilled Cheese is a bold and tangy twist on a classic comfort food. This crispy, buttery sandwich melts sharp cheese around layers of crunchy dill pickles, bringing a salty punch that pairs perfectly with the creamy richness of melted cheese. It’s quick to make, packed with flavor, and perfect when I want something familiar yet exciting.

Dill Pickle Grilled Cheese

Why You’ll Love This Recipe

I love how the sharp, briny flavor of dill pickles cuts through the richness of the cheese, giving the sandwich a punch of brightness. It’s everything I enjoy about grilled cheese—crispy edges, melty centers—with a tangy twist that keeps each bite interesting. It’s fast, simple, and surprisingly addictive.

Ingredients

(Here's a tip: Check out the full list of ingredients and measurements in the recipe card below.)

  • Sourdough or sandwich bread
  • Sharp cheddar cheese (or a mix of cheeses like mozzarella, Havarti, or provolone)
  • Dill pickle slices (pat them dry)
  • Butter (softened)
  • Optional: cream cheese or ranch spread, fresh dill, a pinch of garlic powder

Directions

  1. I butter one side of each slice of bread generously.
  2. On the unbuttered side of one slice, I layer half of the cheese.
  3. I add a layer of dill pickle slices, then top with the remaining cheese.
  4. I place the second slice of bread on top, buttered side facing out.
  5. I heat a skillet over medium-low and cook the sandwich until the bottom is golden brown, about 3–4 minutes.
  6. I flip it carefully and cook the other side until golden and the cheese is fully melted.
  7. I remove it from the skillet, let it sit for a minute, then slice and serve.

Servings and Timing

This makes 1 sandwich.
Prep time: 5 minutes
Cook time: 8 minutes
Total time: 13 minutes

Variations

  • I like to spread a thin layer of ranch or cream cheese on the inside of the bread for extra creaminess.
  • Adding a pinch of red pepper flakes or using pepper jack cheese gives it a nice heat.
  • For more crunch, I use bread and butter pickles or add a few crushed chips inside.
  • Sometimes I toss in a little chopped fresh dill or a swipe of mustard for more tang.

Storage/Reheating

I store leftover sandwiches wrapped in foil or an airtight container in the fridge for up to 1 day.
To reheat, I warm it in a skillet or toaster oven to crisp the bread again—about 5 minutes on medium heat. I avoid the microwave since it softens the crust and ruins that perfect crunch.

FAQs

Can I use sweet pickles instead?

Yes, but I prefer dill pickles because their salty, vinegary bite balances the richness of the cheese better.

How do I keep the sandwich from getting soggy?

I always pat the pickles dry with paper towels before adding them. That helps keep the bread crispy.

What type of bread works best?

I use sourdough or any sturdy sandwich bread that crisps up well in the pan without falling apart.

Can I make this sandwich vegan?

Yes, I use vegan butter, dairy-free cheese, and plant-based bread. Just make sure the pickles don’t have any added animal-based flavorings.

What cheese melts best for this?

Cheddar gives great flavor, mozzarella melts smoothly, and Havarti adds creaminess. I like mixing two for the best texture and taste.

Conclusion

Dill Pickle Grilled Cheese is a quick, satisfying twist on the classic grilled cheese I already love. The mix of crunchy, tangy pickles and melted cheese between golden, buttery bread is pure comfort with a little extra zing. Whether for lunch, a snack, or a late-night craving, it always hits the spot.

Print

clock clock iconcutlery cutlery iconflag flag iconfolder folder iconinstagram instagram iconpinterest pinterest iconfacebook facebook iconprint print iconsquares squares iconheart heart iconheart solid heart solid icon
Dill Pickle Grilled Cheese

Dill Pickle Grilled Cheese

5 Stars 4 Stars 3 Stars 2 Stars 1 Star No reviews
  • Author: Sue
  • Prep Time: 5 minutes
  • Cook Time: 8 minutes
  • Total Time: 13 minutes
  • Yield: 1 sandwich
  • Category: Lunch, Sandwich
  • Method: Stovetop
  • Cuisine: American
  • Diet: Vegetarian
Print Recipe
Pin Recipe

Description

This Dill Pickle Grilled Cheese takes classic comfort food to the next level with tangy dill pickles, gooey melted cheese, and crispy golden bread. It's an easy, flavor-packed sandwich that's perfect for pickle lovers and grilled cheese fans alike!


Ingredients

  • 2 slices sourdough or sandwich bread
  • ½ cup shredded cheddar and mozzarella cheese (or cheese of choice)
  • 6–8 thin dill pickle slices, patted dry
  • 1 tablespoon butter, softened
  • Optional Additions:
  • 1 tablespoon cream cheese mixed with ranch dressing
  • Fresh dill or chopped chives
  • A dash of hot sauce

Instructions

  1. Prep Ingredients: Pat pickle slices dry to remove moisture. If using, mix softened cream cheese with ranch dressing.
  2. Assemble Sandwich:
  3. Spread butter on one side of each slice of bread.
  4. On the unbuttered side, layer half the cheese, then add pickles, any optional add-ins, and top with remaining cheese.
  5. Close the sandwich with the other bread slice, buttered side facing out.
  6. Cook:
  7. Heat a skillet over medium-low heat.
  8. Cook sandwich for 3–4 minutes per side, until bread is golden brown and cheese is fully melted.
  9. Serve:
  10. Let cool for 1 minute before slicing.
  11. Serve warm with tomato soup or a dipping sauce, if desired.

Notes

  • Use sourdough or another sturdy bread to avoid sogginess.
  • Pat pickles dry to prevent excess moisture.
  • Try different cheeses like Havarti, Swiss, or pepper jack.
  • Great served with chips, soup, or salad.

Have you made this recipe? I'd love to see it!

Click here to Follow me on Pinterest

Crockpot Steak Bites

April 2, 2025 by Sue Leave a Comment

These crockpot steak bites are tender, juicy, and full of rich, savory flavor. I toss chunks of steak into the slow cooker with a flavorful mix of seasonings, butter, and broth, and after a few hours, they’re melt-in-your-mouth delicious. Whether I serve them over mashed potatoes, rice, or with roasted veggies, they always come out comforting and satisfying with minimal effort.

Crockpot Steak Bites

Why You’ll Love This Recipe

I love this recipe because it turns simple cuts of beef into something incredibly tender and flavorful without needing to stand over the stove. The slow cooker does all the work, and the result is a hearty, protein-packed dish that feels fancy but couldn’t be easier. It’s also a great option for busy days when I want a filling meal that cooks while I go about my day. I can keep it classic or switch up the flavors depending on what I’m craving.

Ingredients

(Here's a tip: Check out the full list of ingredients and measurements in the recipe card below.)

  • Sirloin steak (or stew meat, cut into bite-sized cubes)

  • Olive oil

  • Salt

  • Black pepper

  • Garlic powder

  • Onion powder

  • Paprika

  • Worcestershire sauce

  • Beef broth

  • Butter

  • Fresh garlic (minced)

  • Optional: chopped parsley for garnish

Directions

  1. I start by seasoning the steak bites with salt, pepper, garlic powder, onion powder, and paprika.

  2. In a skillet, I heat a little olive oil and sear the steak bites just until browned on the outside—it helps lock in flavor.

  3. I transfer the steak to the crockpot and pour in the beef broth and Worcestershire sauce.

  4. I add the minced garlic and place the butter on top.

  5. I cover and cook on low for 6–7 hours or on high for about 3–4 hours, until the steak is tender and flavorful.

  6. Before serving, I give everything a gentle stir and garnish with chopped parsley if I have it on hand.

Servings and timing

This recipe serves about 4–6 people and takes roughly 6–7 hours on low or 3–4 hours on high, plus a few minutes to sear the steak.

Variations

I sometimes add sliced mushrooms or onions for extra flavor and texture. For a spicier version, I throw in a pinch of crushed red pepper flakes. If I want it creamier, I stir in a bit of sour cream or heavy cream at the end. And when I want to make it into a full meal, I add diced potatoes or carrots straight into the crockpot with the steak.

storage/reheating

I store leftovers in an airtight container in the fridge for up to 4 days. They reheat well on the stove or in the microwave—just add a splash of broth to keep them juicy. I’ve also frozen portions of the cooked steak for up to 2 months and thawed them overnight in the fridge before reheating.

FAQs

Can I skip searing the steak?

Yes, but I’ve found that searing adds a richer flavor and better texture. It only takes a few extra minutes and makes a big difference.

What’s the best cut of meat to use?

I usually go with sirloin—it’s tender and flavorful. But stew meat, chuck roast, or even ribeye can work if I cut them into cubes.

Can I add vegetables to the crockpot?

Definitely. I’ve added mushrooms, onions, carrots, or baby potatoes. I just make sure to cut them into uniform pieces so they cook evenly.

Is it okay to cook this on high instead of low?

Yes, cooking on high for 3–4 hours still results in tender steak. But if I have the time, low and slow gives the best results.

Can I use frozen steak?

I recommend thawing the steak first for the best texture and even cooking. Frozen steak won’t sear properly and may release too much liquid.

Conclusion

These crockpot steak bites are one of my favorite lazy-day meals. They’re rich, savory, and incredibly versatile. Whether I serve them over creamy mashed potatoes or alongside some roasted veggies, they always deliver bold flavor and tender bites with hardly any work. It’s the kind of meal that feels like comfort food but fits easily into any weeknight routine.

Print

clock clock iconcutlery cutlery iconflag flag iconfolder folder iconinstagram instagram iconpinterest pinterest iconfacebook facebook iconprint print iconsquares squares iconheart heart iconheart solid heart solid icon
Crockpot Steak Bites

Crockpot Steak Bites

5 Stars 4 Stars 3 Stars 2 Stars 1 Star No reviews
  • Author: Sue
  • Prep Time: 10 minutes
  • Cook Time: 6–7 hours (low) or 3–4 hours (high)
  • Total Time: 6–7 hours (or 3–4 hours on high)
  • Yield: 4–6 servings
  • Category: Dinner, Main Course
  • Method: Slow Cooker, Crockpot
  • Cuisine: American
Print Recipe
Pin Recipe

Description

These Crockpot Steak Bites are melt-in-your-mouth tender, full of rich savory flavor, and incredibly easy to make. Seared steak cubes simmer in a buttery garlic broth, making this slow cooker steak recipe perfect for busy weeknights or cozy comfort food dinners. Serve over mashed potatoes, rice, or roasted veggies for a hearty, satisfying meal.


Ingredients

  • 2 lbs sirloin steak or stew meat, cut into bite-sized cubes
  • 1 tbsp olive oil
  • 1 tsp salt
  • ½ tsp black pepper
  • 1 tsp garlic powder
  • 1 tsp onion powder
  • ½ tsp paprika
  • 1 tbsp Worcestershire sauce
  • ¾ cup beef broth
  • 3 tbsp butter
  • 2–3 cloves garlic, minced
  • Optional: chopped parsley, for garnish

Instructions

  1. Season steak cubes with salt, pepper, garlic powder, onion powder, and paprika.
  2. Heat olive oil in a skillet over medium-high heat. Sear steak bites for 1–2 minutes per side until browned.
  3. Transfer steak to the crockpot. Add beef broth and Worcestershire sauce.
  4. Top with minced garlic and butter.
  5. Cover and cook on low for 6–7 hours or high for 3–4 hours, until steak is tender.
  6. Stir gently before serving and garnish with chopped parsley if desired.

Notes

  • Searing adds depth of flavor but can be skipped if you’re short on time.
  • Add mushrooms, onions, potatoes, or carrots for a one-pot meal.
  • Stir in a splash of cream or sour cream at the end for a creamy variation.
  • Adjust seasoning to taste—add red pepper flakes for a spicy kick.
  • Leftovers freeze well and reheat easily with a splash of broth.

Have you made this recipe? I'd love to see it!

Click here to Follow me on Pinterest

Lazy Day Lemon Cream Pie Bars

April 2, 2025 by Sue Leave a Comment

Lazy Day Lemon Cream Pie Bars are the perfect dessert when I want something sweet, tangy, and refreshing without spending hours in the kitchen. With a buttery cookie crust and a creamy lemon filling, these bars are light, zesty, and easy to make using simple ingredients. They’re a slice of sunshine in dessert form—perfect for spring, summer, or any day I want a burst of citrus.

Lazy Day Lemon Cream Pie Bars

Why You’ll Love This Recipe

I love this recipe because it’s fuss-free but delivers big flavor. The lemon filling is rich and silky with the perfect balance of sweetness and tartness, while the crust adds just the right amount of crunch. It feels like a cross between lemon pie and cheesecake, but with way less work. No complicated steps, no fancy tools—just pure lemony goodness in every bite. It’s my go-to when I want to whip up something that tastes like I spent hours on it.

ingredients

(Here's a tip: Check out the full list of ingredients and measurements in the recipe card below.)

  • Lemon cake mix

  • Eggs

  • Butter (melted)

  • Sweetened condensed milk

  • Lemon juice (fresh is best)

  • Lemon zest

  • Cream cheese (softened)

  • Powdered sugar (optional, for dusting)

directions

  1. I preheat the oven to 350°F and lightly grease a 9x13 inch baking dish.

  2. In a mixing bowl, I combine the lemon cake mix, one egg, and melted butter. I mix until crumbly and press the mixture firmly into the bottom of the pan to form the crust.

  3. In another bowl, I beat together softened cream cheese and sweetened condensed milk until smooth.

  4. I add in lemon juice, lemon zest, and one egg, then mix until the filling is creamy and well combined.

  5. I pour the lemon mixture over the crust and spread it out evenly.

  6. I bake for 25–30 minutes, or until the edges are set and the center is just slightly jiggly.

  7. I let the bars cool to room temperature, then refrigerate for at least 2 hours before slicing. Sometimes, I dust the top with powdered sugar before serving.

Servings and timing

This recipe makes about 12 to 16 bars, depending on how big I slice them. Prep takes just 10 minutes, baking around 25–30 minutes, plus chill time. Altogether, I usually plan for about 2.5 to 3 hours from start to serve (including cooling and chilling).

Variations

  • I add a little vanilla extract to the filling for extra depth.

  • For a crunchier crust, I mix in crushed graham crackers or shortbread crumbs with the cake mix.

  • I sometimes swirl a little raspberry or blueberry jam into the lemon filling for a fruity twist.

  • To lighten it up, I use low-fat cream cheese and light condensed milk—it’s still delicious.

storage/reheating

I store these bars covered in the refrigerator for up to 4 days. They’re best served cold or slightly chilled, and I never need to reheat them. For longer storage, I freeze individual bars wrapped tightly in plastic wrap and foil for up to a month. I just thaw them overnight in the fridge before enjoying.

FAQs

Can I use bottled lemon juice?

I prefer fresh lemon juice for the best flavor, but bottled works in a pinch if I’m short on time or lemons.

Can I make these bars ahead of time?

Yes, I often make them a day before. They hold their shape better when fully chilled, and the flavor gets even better overnight.

Can I use a different cake mix flavor?

I’ve used white or vanilla cake mix when I didn’t have lemon, and they still turned out great with a slightly milder citrus flavor.

Why does the center look slightly jiggly after baking?

That’s normal—it firms up as it cools. I make sure not to overbake it or the texture might turn dry and crumbly.

Can I make this gluten-free?

Yes, I just use a gluten-free cake mix and double-check all my other ingredients. The result is just as tasty.

Conclusion

Lazy Day Lemon Cream Pie Bars are the ultimate dessert when I want something quick, easy, and bursting with lemon flavor. They’re smooth, creamy, and perfectly tangy without being overpowering. Whether I’m bringing dessert to a party or just craving something citrusy at home, these bars never disappoint.

Print

clock clock iconcutlery cutlery iconflag flag iconfolder folder iconinstagram instagram iconpinterest pinterest iconfacebook facebook iconprint print iconsquares squares iconheart heart iconheart solid heart solid icon
Lazy Day Lemon Cream Pie Bars

Lazy Day Lemon Cream Pie Bars

5 Stars 4 Stars 3 Stars 2 Stars 1 Star No reviews
  • Author: Sue
  • Prep Time: 10 minutes
  • Cook Time: 25–30 minutes
  • Total Time: 2 hours
  • Yield: 2.5–3 hours
  • Category: Dessert, Bars
  • Method: Baked
  • Cuisine: American
  • Diet: Vegetarian
Print Recipe
Pin Recipe

Description

These Lazy Day Lemon Cream Pie Bars are a no-fuss dessert made with lemon cake mix, sweetened condensed milk, and cream cheese for a rich, tangy filling over a buttery crust. This easy lemon dessert is perfect for spring, summer, potlucks, or when you need a citrusy treat with minimal effort.


Ingredients

  • 1 box lemon cake mix
  • 2 eggs (divided)
  • ½ cup butter, melted
  • 1 (14 oz) can sweetened condensed milk
  • ¼ cup fresh lemon juice
  • 1 tbsp lemon zest
  • 8 oz cream cheese, softened
  • Powdered sugar (optional, for dusting)

Instructions

  1. Preheat oven to 350°F (175°C) and grease a 9x13 inch baking dish.
  2. In a bowl, mix lemon cake mix, 1 egg, and melted butter until crumbly. Press mixture into the bottom of the dish to form the crust.
  3. In another bowl, beat cream cheese until smooth. Add sweetened condensed milk, lemon juice, lemon zest, and remaining egg. Mix until creamy.
  4. Pour lemon filling over the crust and spread evenly.
  5. Bake for 25–30 minutes, until the edges are set and center is slightly jiggly.
  6. Cool to room temperature, then refrigerate for at least 2 hours before slicing.
  7. Optional: Dust with powdered sugar before serving.

Notes

  • For more flavor, add ½ teaspoon vanilla extract to the filling.
  • Swap in a white or vanilla cake mix if lemon isn’t available.
  • Add raspberry jam swirls before baking for a fruity touch.
  • Lighten it up with reduced-fat cream cheese and light condensed milk.
  • Use gluten-free cake mix for a GF version.

Have you made this recipe? I'd love to see it!

Click here to Follow me on Pinterest

Pineapple Upside Sugar Cookies

April 2, 2025 by Sue Leave a Comment

Pineapple upside sugar cookies are a fun, tropical twist on the classic pineapple upside-down cake. With buttery sugar cookie dough as the base and a caramelized pineapple-cherry topping baked right in, these cookies are like little bites of sunshine. I love making them when I want something unique, fruity, and nostalgic—all in one bite-sized treat.

Pineapple Upside Sugar Cookies

Why You’ll Love This Recipe

I love how these cookies combine the soft, chewy texture of sugar cookies with the gooey, caramelized top of a pineapple upside-down cake. They’re adorable, super flavorful, and easier to make than a full cake. Plus, they bring a pop of color and sweetness to any dessert spread or party tray. They’re a guaranteed conversation starter—and crowd-pleaser.

Ingredients

(Here's a tip: Check out the full list of ingredients and measurements in the recipe card below.)

  • Unsalted butter, softened
  • Granulated sugar
  • Egg
  • Vanilla extract
  • All-purpose flour
  • Baking powder
  • Salt
  • Pineapple rings (cut into small pieces)
  • Maraschino cherries (halved)
  • Brown sugar
  • Optional: a little pineapple juice for added flavor in the dough

Directions

  1. I start by preheating the oven to 350°F (175°C) and lightly greasing a muffin tin.
  2. I place a bit of brown sugar in the bottom of each muffin cup, then add a small piece of pineapple and half a maraschino cherry, cut-side down.
  3. In a bowl, I cream the butter and sugar until light and fluffy, then beat in the egg and vanilla.
  4. I mix in the flour, baking powder, and salt until a soft dough forms. If I want extra pineapple flavor, I add a teaspoon or two of pineapple juice.
  5. I scoop a ball of dough and press it gently over the fruit in each muffin cup. I try to cover the fruit evenly without packing it in too tightly.
  6. I bake the cookies for 12–15 minutes, until the edges are lightly golden and the centers are set.
  7. After baking, I let them cool in the pan for 5 minutes, then carefully invert the pan onto a tray to release the cookies—just like turning out an upside-down cake.
  8. I let them cool completely before serving.

Servings and Timing

This recipe makes about 12 cookies. It takes around 15 minutes to prep and 12–15 minutes to bake, so the total time is just about 30 minutes.

Variations

I like to add a touch of coconut extract to the dough for extra island flavor. Sometimes I sprinkle shredded coconut into the muffin cups for a toasty base. For a shortcut, I’ve also made these using store-bought sugar cookie dough—just mix in a little vanilla or pineapple juice to give it a homemade taste.

Storage/Reheating

I keep these cookies in an airtight container at room temperature for up to 3 days or in the fridge for up to a week. To reheat, I pop them in the microwave for 10–15 seconds to soften them up and bring out the caramelized flavor again. They’re also great straight from the fridge.

FAQs

Can I use canned pineapple?

Yes, I always use canned pineapple rings for convenience. I just pat them dry before using so the cookies don’t get soggy.

What if I don’t have a muffin tin?

I’ve used mini tart pans or ramekins before, but muffin tins work best to shape the cookies and keep the topping in place.

Can I make the dough ahead of time?

Absolutely. I often make the dough a day ahead and keep it in the fridge. It actually makes shaping easier when the dough is slightly chilled.

Do these cookies need to be refrigerated?

Not necessarily, but I find they last longer and stay moist if I keep them in the fridge, especially if I’m storing them more than a couple of days.

Can I freeze these cookies?

Yes, once they’re cooled, I freeze them in a single layer first, then stack them with parchment between layers in a container. They thaw quickly and taste just as good.

Conclusion

Pineapple upside sugar cookies are the perfect mash-up of two dessert favorites—sweet, chewy sugar cookies and fruity, caramelized upside-down cake. They’re eye-catching, easy to make, and packed with tropical flavor. Whether I’m baking for a summer party or just want to brighten up my week, these cookies always bring the sunshine.

Print

clock clock iconcutlery cutlery iconflag flag iconfolder folder iconinstagram instagram iconpinterest pinterest iconfacebook facebook iconprint print iconsquares squares iconheart heart iconheart solid heart solid icon
Pineapple Upside Sugar Cookies

Pineapple Upside Sugar Cookies

5 Stars 4 Stars 3 Stars 2 Stars 1 Star No reviews
  • Author: Sue
  • Prep Time: 15 minutes
  • Cook Time: 15 minutes
  • Total Time: 30 minutes
  • Yield: 12 cookies
  • Category: Dessert
  • Method: Baking
  • Cuisine: American
  • Diet: Vegetarian
Print Recipe
Pin Recipe

Description

These pineapple upside sugar cookies combine the fruity, caramelized magic of pineapple upside-down cake with the soft, chewy goodness of a sugar cookie. With bright pineapple, maraschino cherries, and a buttery base, these bite-sized treats are tropical, nostalgic, and guaranteed to impress.


Ingredients

  • ½ cup unsalted butter, softened
  • ¾ cup granulated sugar
  • 1 egg
  • 1 tsp vanilla extract
  • 1 ¼ cups all-purpose flour
  • ½ tsp baking powder
  • ¼ tsp salt
  • 6 canned pineapple rings, cut into small chunks
  • 6 maraschino cherries, halved
  • ¼ cup brown sugar
  • Optional: 1–2 teaspoon pineapple juice (for extra flavor)

Instructions

  1. Preheat oven to 350°F (175°C). Lightly grease a standard muffin tin.
  2. Place 1 teaspoon brown sugar into the bottom of each muffin cup. Add a pineapple chunk and a cherry half, cut-side down.
  3. In a bowl, cream the butter and granulated sugar until light and fluffy.
  4. Beat in the egg and vanilla extract. Add pineapple juice if using.
  5. In a separate bowl, whisk together flour, baking powder, and salt. Gradually add to the wet ingredients to form a soft dough.
  6. Scoop and gently press dough over the fruit in each muffin cup, covering evenly.
  7. Bake for 12–15 minutes, until edges are golden and centers are set.
  8. Let cool in the pan for 5 minutes, then invert onto a tray to release the cookies.
  9. Cool completely before serving.

Notes

  • Pat pineapple chunks dry before using to avoid soggy cookies.
  • Add coconut extract or shredded coconut for a tropical twist.
  • Store-bought sugar cookie dough works in a pinch—just enhance it with vanilla or pineapple juice.
  • Dough can be made ahead and refrigerated for easier shaping.

Have you made this recipe? I'd love to see it!

Click here to Follow me on Pinterest

Old Fashioned Beef Stew

April 2, 2025 by Sue Leave a Comment

Old Fashioned Beef Stew is a cozy, nourishing meal that I love to make when I want something hearty and satisfying. It’s packed with tender chunks of beef, soft vegetables, and a savory broth that warms me from the inside out. It’s the kind of recipe that brings comfort with every bite.

Old Fashioned Beef Stew

Why I Love This Recipe

There’s so much I enjoy about this classic stew:

  • The slow-simmered beef becomes fall-apart tender and full of flavor.
  • It’s a one-pot meal with everything I need—protein, veggies, and a rich broth.
  • It’s great for leftovers and even tastes better the next day.
  • I can make it ahead of time and reheat it easily.

Ingredients

(Here's a tip: Check out the full list of ingredients and measurements in the recipe card below.)

  • Beef stew meat (like chuck roast), cut into cubes
  • All-purpose flour
  • Salt and black pepper
  • Paprika
  • Vegetable oil
  • Yellow onions, chopped
  • Garlic cloves, minced
  • Tomato paste
  • Worcestershire sauce
  • Beef broth
  • Bay leaves
  • Carrots, peeled and chopped
  • Potatoes, peeled and cubed
  • Celery, chopped
  • Frozen peas
  • Fresh parsley, for garnish

Directions

  1. Coat and Brown the Beef: I toss the beef cubes with flour, salt, pepper, and paprika. In a large pot or Dutch oven, I heat oil and brown the beef in batches to get a deep, flavorful crust.
  2. Cook the Aromatics: Once the beef is browned, I set it aside and sauté chopped onions in the same pot until soft. Then I stir in minced garlic and tomato paste, cooking for about a minute.
  3. Build the Base: I return the beef to the pot, add Worcestershire sauce, and pour in the beef broth. I also toss in bay leaves and bring everything to a boil.
  4. Simmer the Stew: I reduce the heat, cover the pot, and let it simmer for about 1.5 hours until the beef starts to get tender.
  5. Add the Vegetables: I stir in the carrots, potatoes, and celery, then continue simmering for another 30 minutes until the veggies are cooked through.
  6. Finish It Off: I add the peas during the last 5 minutes of cooking, then remove the bay leaves and adjust the seasoning if needed.
  7. Serve: I ladle the stew into bowls and top it with a sprinkle of chopped fresh parsley.

Servings and Timing

This recipe makes about 6 to 8 servings. Prep time is around 20 minutes, and the total cook time is about 2 hours and 15 minutes, so I can have it ready in roughly 2 hours and 35 minutes.

Variations

  • I sometimes swap the potatoes for sweet potatoes for a different twist.
  • A splash of red wine added with the broth deepens the flavor beautifully.
  • I like adding mushrooms or parsnips when I want a bit more earthy flavor.
  • If I want a thicker stew, I mash a few potatoes into the broth near the end of cooking.

Storage and Reheating

I store leftovers in an airtight container in the fridge for up to 4 days. This stew reheats really well on the stove or in the microwave. I just add a splash of broth or water if it thickens too much. It also freezes well—I let it cool completely before storing in freezer-safe containers for up to 3 months.

FAQs

Can I make this in a slow cooker?

Yes. After browning the beef and sautéing the onions and garlic, I transfer everything to the slow cooker. I cook it on low for 7-8 hours or high for 4-5 hours, adding the peas at the end.

How can I thicken the stew?

If I want it thicker, I mix a tablespoon of cornstarch with a tablespoon of cold water and stir it into the simmering stew at the end, cooking for a few extra minutes.

Do I have to brown the beef first?

I highly recommend it. Browning the beef gives it a deep, rich flavor that really makes a difference in the final dish.

Can I use a different cut of beef?

Yes, but I prefer chuck roast because it gets super tender when simmered. Stew meat is convenient, but any well-marbled cut that can handle long cooking works.

What should I serve with beef stew?

I love serving it with crusty bread or over mashed potatoes. A side salad or roasted green beans also makes a nice pairing.

Conclusion

Old Fashioned Beef Stew is a timeless, comforting recipe that always hits the spot. Whether I’m cooking for family or prepping meals ahead of time, this stew brings rich flavor, warmth, and satisfaction. It’s the kind of meal I turn to again and again when I want something nourishing and homemade.

Print

clock clock iconcutlery cutlery iconflag flag iconfolder folder iconinstagram instagram iconpinterest pinterest iconfacebook facebook iconprint print iconsquares squares iconheart heart iconheart solid heart solid icon
Old Fashioned Beef Stew

Old Fashioned Beef Stew

5 Stars 4 Stars 3 Stars 2 Stars 1 Star No reviews
  • Author: Sue
  • Prep Time: 20 minutes
  • Cook Time: 2 hours 15 minutes
  • Total Time: ~2 hours 35 minutes
  • Yield: 6–8 servings
  • Category: Main Course
  • Method: Stovetop
  • Cuisine: American
  • Diet: Gluten Free
Print Recipe
Pin Recipe

Description

Old Fashioned Beef Stew is a classic, hearty one-pot meal packed with tender beef, vegetables, and a rich, savory broth. This comforting stew is slow-simmered for maximum flavor, making it perfect for cozy dinners, meal prep, and satisfying leftovers. Ideal for cold weather or any time you’re craving a traditional, nourishing dish.


Ingredients

  • 2 lbs beef stew meat (such as chuck roast), cut into cubes
  • ¼ cup all-purpose flour
  • 1 tsp salt
  • ½ tsp black pepper
  • ½ tsp paprika
  • 2 tbsp vegetable oil
  • 1 large yellow onion, chopped
  • 3 garlic cloves, minced
  • 2 tbsp tomato paste
  • 1 tbsp Worcestershire sauce
  • 4 cups beef broth
  • 2 bay leaves
  • 4 carrots, peeled and chopped
  • 3–4 potatoes, peeled and cubed
  • 3 celery stalks, chopped
  • 1 cup frozen peas
  • Fresh parsley, chopped (for garnish)

Instructions

  • Coat and Brown Beef: Toss beef cubes with flour, salt, pepper, and paprika. In a large Dutch oven, heat oil and brown the beef in batches. Set aside.
  • Sauté Aromatics: In the same pot, cook onions until soft. Stir in garlic and tomato paste, cooking for 1 minute.
  • Build the Broth: Return beef to the pot. Add Worcestershire sauce, beef broth, and bay leaves. Bring to a boil.
  • Simmer: Reduce heat, cover, and simmer for 1.5 hours until beef is tender.
  • Add Vegetables: Stir in carrots, potatoes, and celery. Simmer for another 30 minutes until vegetables are soft.
  • Finish: Add peas during the last 5 minutes of cooking. Remove bay leaves, adjust seasoning, and garnish with fresh parsley.
  • Serve: Ladle into bowls and enjoy with crusty bread or over mashed potatoes.

Notes

  • Swap potatoes for sweet potatoes for a sweeter twist.
  • Add red wine with the broth for deeper flavor.
  • For extra heartiness, stir in mushrooms or parsnips.
  • Thicken by mashing a few potatoes or adding a cornstarch slurry at the end.
  • Store in fridge up to 4 days, or freeze for up to 3 months.

Have you made this recipe? I'd love to see it!

Click here to Follow me on Pinterest

Tater Tot Pizza Casserole

April 2, 2025 by Sue Leave a Comment

Tater Tot Pizza Casserole is the ultimate comfort food mashup. It combines the crispy, golden crunch of tater tots with the cheesy, saucy flavors of classic pizza. This dish is fun to make, packed with flavor, and perfect for feeding a hungry crowd on a weeknight or game day.

Tater Tot Pizza Casserole

Why You’ll Love This Recipe

I love how this casserole brings together two favorites in one easy dish. It’s hearty, satisfying, and loaded with gooey cheese, savory meat, and customizable toppings. It feels indulgent but is also a great way to use ingredients I already have in the fridge. Plus, it’s a guaranteed hit with both kids and adults.

ingredients

(Here's a tip: Check out the full list of ingredients and measurements in the recipe card below.)

  • Frozen tater tots
  • Ground Italian sausage or ground beef
  • Pizza sauce
  • Shredded mozzarella cheese
  • Shredded cheddar cheese
  • Sliced pepperoni
  • Diced bell peppers (optional)
  • Sliced black olives (optional)
  • Italian seasoning
  • Garlic powder
  • Fresh basil or parsley (for garnish)

directions

  1. I preheat the oven to 375°F (190°C) and lightly grease a 9x13-inch baking dish.
  2. I spread the frozen tater tots in a single layer in the dish and bake them for 15 minutes to crisp up a bit.
  3. While the tots bake, I brown the sausage or beef in a skillet, then drain the fat. I stir in pizza sauce, garlic powder, and Italian seasoning.
  4. I remove the tots from the oven, spread the meat mixture evenly on top, then sprinkle mozzarella and cheddar cheese over everything.
  5. I layer on the pepperoni and any other toppings I like.
  6. I return the dish to the oven and bake for 20-25 minutes until the cheese is melted and bubbly.
  7. For a crispier top, I broil the casserole for 2 minutes at the end.
  8. I garnish with fresh herbs and serve hot.

Servings and timing

This recipe makes about 6 to 8 servings. Prep time is around 15 minutes, and bake time is 35 to 40 minutes total.

Variations

  • I use ground turkey or plant-based crumbles for a lighter or vegetarian version.
  • I add sautéed mushrooms, onions, or spinach for extra veggies.
  • I try different cheeses like provolone or gouda for new flavor combos.
  • I drizzle hot honey or ranch over the top for a finishing touch.

storage/reheating

I store leftovers in an airtight container in the fridge for up to 3 days. To reheat, I warm individual portions in the microwave or reheat the whole dish in the oven at 350°F until hot. If needed, I cover it with foil to prevent over-browning.

FAQs

Can I make this casserole ahead of time?

Yes, I assemble it up to a day ahead, refrigerate it, and bake when ready. I just add a few extra minutes of baking time.

Can I freeze it?

I freeze the fully baked casserole, then thaw overnight and reheat in the oven. It holds up surprisingly well.

Can I use different meat or make it meatless?

Absolutely. I switch up the protein or skip it entirely and load up on veggies for a meatless version.

What can I use instead of pizza sauce?

Marinara sauce, spaghetti sauce, or even a homemade tomato sauce works just fine.

Will the tater tots get soggy?

If I bake them a bit before adding the toppings, they stay crispier. A quick broil at the end also helps.

Conclusion

Tater Tot Pizza Casserole is my go-to when I want something fun, filling, and ridiculously satisfying. With endless topping options and simple prep, it’s the kind of recipe I come back to over and over for family dinners, potlucks, or any cozy night in.

Print

clock clock iconcutlery cutlery iconflag flag iconfolder folder iconinstagram instagram iconpinterest pinterest iconfacebook facebook iconprint print iconsquares squares iconheart heart iconheart solid heart solid icon
Tater Tot Pizza Casserole

5 Stars 4 Stars 3 Stars 2 Stars 1 Star No reviews
  • Author: Sue
  • Prep Time: 15 minutes
  • Cook Time: 25–30 minutes
  • Total Time: 40–45 minutes
  • Yield: 6–8 servings
  • Category: Dinner, Casserole
  • Method: Baking
  • Cuisine: American
Print Recipe
Pin Recipe

Description

This Tater Tot Pizza Casserole combines crispy golden tater tots with savory pizza toppings in one irresistible, cheesy bake. With seasoned meat, melty mozzarella, and a rich pizza sauce base, this family-friendly dish is perfect for weeknight dinners, game day gatherings, or anytime you’re craving a hearty, customizable comfort food classic.


Ingredients

  • 1 (32 oz) bag frozen tater tots
  • 1 lb ground Italian sausage or ground beef
  • 1½ cups pizza sauce
  • 1½ cups shredded mozzarella cheese
  • 1 cup shredded cheddar cheese
  • 20–30 slices pepperoni
  • ½ cup diced bell peppers (optional)
  • ¼ cup sliced black olives (optional)
  • 1 tsp Italian seasoning
  • ½ tsp garlic powder
  • Fresh basil or parsley, for garnish

Instructions

  1. Preheat oven to 375°F (190°C). Lightly grease a 9×13-inch baking dish.
  2. Spread frozen tater tots in an even layer in the dish. Bake for 15 minutes to crisp slightly.
  3. While tots are baking, brown sausage or ground beef in a skillet over medium heat. Drain grease. Stir in pizza sauce, Italian seasoning, and garlic powder.
  4. Remove dish from oven. Spread meat mixture over the tater tots. Top with mozzarella and cheddar cheeses.
  5. Add pepperoni and any additional toppings (bell peppers, olives, etc.).
  6. Return to oven and bake for 20–25 minutes, or until cheese is melted and bubbly.
  7. (Optional) Broil for 1–2 minutes for extra golden cheese.
  8. Garnish with chopped fresh basil or parsley before serving.

Notes

  • Swap sausage for ground turkey for a leaner option.
  • Use any favorite pizza toppings like mushrooms, onions, or jalapeños.
  • Try different cheeses like gouda, provolone, or a Mexican blend.
  • For a vegetarian version, skip the meat and load up on veggies.

Have you made this recipe? I'd love to see it!

Click here to Follow me on Pinterest

Creamy Mushroom & Ground Beef Bake

April 2, 2025 by Sue Leave a Comment

Creamy Mushroom & Ground Beef Bake is a comforting, hearty dish that’s perfect for weeknight dinners or feeding a hungry crowd. It’s made with seasoned ground beef, tender mushrooms, and a rich, creamy sauce, all baked together with pasta or rice and topped with a golden layer of cheese. It’s the kind of meal that fills the kitchen with cozy aromas and always gets second helpings.

Creamy Mushroom & Ground Beef Bake

Why You’ll Love This Recipe

I love this recipe because it’s satisfying, flavorful, and simple to put together. It uses everyday ingredients and turns them into a filling casserole that tastes like I spent all day cooking. The creamy mushroom sauce coats every bite, and the combination of beef, herbs, and melty cheese is pure comfort food. It’s also great for making ahead, freezing, and reheating—so I always have dinner ready when I need it.

Ingredients

(Here's a tip: Check out the full list of ingredients and measurements in the recipe card below.)

  • Ground beef

  • Onion

  • Garlic

  • Mushrooms (fresh or canned)

  • Cream of mushroom soup (or homemade sauce)

  • Sour cream or heavy cream

  • Worcestershire sauce

  • Italian seasoning or dried thyme

  • Salt and pepper

  • Cooked pasta or rice

  • Shredded cheese (cheddar, mozzarella, or a mix)

  • Fresh parsley (optional for garnish)

Directions

  1. I preheat the oven to 375°F (190°C) and lightly grease a 9x13-inch baking dish.

  2. In a skillet, I cook the ground beef over medium heat until browned, then drain excess grease.

  3. I add chopped onions and cook until softened, then stir in garlic and mushrooms, cooking for a few minutes until tender.

  4. I stir in cream of mushroom soup, sour cream, Worcestershire sauce, and seasonings, letting it all simmer for a couple of minutes.

  5. I combine the beef mixture with cooked pasta or rice, then pour everything into the prepared baking dish.

  6. I sprinkle shredded cheese on top and bake uncovered for 20–25 minutes, until bubbly and golden.

  7. I let it rest for a few minutes before serving, and top with fresh parsley if I have it on hand.

Servings and timing

This recipe makes about 6 servings. I spend around 15 minutes prepping and 25 minutes baking, so the whole dish is ready in about 40 minutes.

Variations

  • I sometimes swap ground beef for ground turkey or chicken for a lighter version.

  • When I want extra veggies, I add spinach, peas, or bell peppers to the mix.

  • For a deeper mushroom flavor, I use a splash of white wine or beef broth in the sauce.

  • I’ve used egg noodles, penne, or even brown rice depending on what I have in the pantry.

storage/reheating

I store leftovers in an airtight container in the fridge for up to 4 days. To reheat, I microwave individual portions or warm it in the oven at 350°F until heated through. If it seems dry, I stir in a little extra cream or broth before reheating.

FAQs

Can I make this ahead of time?

Yes, I often assemble it ahead and refrigerate it unbaked. When I’m ready, I bake it straight from the fridge—just adding 5–10 extra minutes to the cook time.

What can I use instead of cream of mushroom soup?

I make a quick homemade version by combining butter, flour, milk, and sautéed mushrooms, seasoned with garlic and onion powder.

Can I freeze this bake?

Yes. I let it cool completely, cover tightly, and freeze for up to 2 months. I thaw overnight in the fridge and reheat in the oven.

What cheese works best?

I usually go for sharp cheddar or mozzarella, but I’ve also used Monterey Jack or a blend for more flavor.

Is this recipe kid-friendly?

Absolutely. The creamy texture and cheesy topping usually win everyone over—even picky eaters.

Conclusion

Creamy Mushroom & Ground Beef Bake is one of those go-to recipes I always keep in my back pocket. It’s warm, filling, and full of flavor, making it perfect for family dinners, meal prep, or potlucks. Once I’ve made it, I’m already thinking about when I’ll make it again.

Print

clock clock iconcutlery cutlery iconflag flag iconfolder folder iconinstagram instagram iconpinterest pinterest iconfacebook facebook iconprint print iconsquares squares iconheart heart iconheart solid heart solid icon
Creamy Mushroom & Ground Beef Bake

Creamy Mushroom & Ground Beef Bake

5 Stars 4 Stars 3 Stars 2 Stars 1 Star No reviews
  • Author: Sue
  • Prep Time: 15 minutes
  • Cook Time: 25 minutes
  • Total Time: 40 minutes
  • Yield: 6 servings
  • Category: Main Dish
  • Method: Baking
  • Cuisine: American
  • Diet: Gluten Free
Print Recipe
Pin Recipe

Description

Creamy Mushroom & Ground Beef Bake is a rich, cheesy, and comforting casserole made with savory ground beef, mushrooms, and a creamy sauce. This easy dinner recipe is baked with pasta or rice and topped with melted cheese, making it a satisfying meal perfect for weeknights or meal prepping.


Ingredients

  • 1 lb ground beef
  • 1 small onion, chopped
  • 2 cloves garlic, minced
  • 8 oz mushrooms (sliced, fresh or canned)
  • 1 can (10.5 oz) cream of mushroom soup (or homemade substitute)
  • ½ cup sour cream or heavy cream
  • 1 tbsp Worcestershire sauce
  • 1 tsp Italian seasoning or dried thyme
  • Salt and pepper, to taste
  • 3 cups cooked pasta or rice
  • 1 to 1 ½ cups shredded cheese (cheddar, mozzarella, or blend)
  • Chopped parsley (optional for garnish)

Instructions

  1. Preheat oven to 375°F (190°C). Grease a 9x13-inch baking dish.
  2. In a skillet, brown the ground beef over medium heat. Drain excess grease.
  3. Add onion; cook until soft. Stir in garlic and mushrooms; cook until tender.
  4. Stir in cream of mushroom soup, sour cream, Worcestershire sauce, herbs, salt, and pepper. Simmer 2–3 minutes.
  5. Mix in the cooked pasta or rice. Pour mixture into the baking dish.
  6. Sprinkle cheese evenly over the top.
  7. Bake uncovered for 20–25 minutes, until bubbly and golden.
  8. Let rest a few minutes before serving. Garnish with parsley if desired.

Notes

  • Swap in ground turkey or chicken for a leaner version.
  • Add spinach, peas, or bell peppers for extra nutrition.
  • Use homemade mushroom sauce if avoiding canned soups.
  • Great for make-ahead meals and freezer-friendly!

Have you made this recipe? I'd love to see it!

Click here to Follow me on Pinterest

Simple Greek Yogurt Cake

April 2, 2025 by Sue Leave a Comment

This Simple Greek Yogurt Cake is light, moist, and perfectly balanced with a subtle tang from the yogurt. It's an easy one-bowl recipe that delivers a soft, tender crumb and a slightly sweet flavor that works just as well for breakfast as it does for dessert. Whether I serve it plain, dusted with powdered sugar, or topped with fruit and whipped cream, it always disappears fast.

Simple Greek Yogurt Cake

Why You’ll Love This Recipe

I love how incredibly simple this cake is to make—no mixer needed, just a bowl and a whisk. The Greek yogurt keeps the cake moist without making it dense, and it adds a lovely depth of flavor that’s not too sweet. It’s the kind of cake I can bake last minute for guests, or keep on hand as a snack throughout the week.

Ingredients

(Here's a tip: Check out the full list of ingredients and measurements in the recipe card below.)

  • Eggs

  • Greek yogurt

  • All-purpose flour

  • Sugar

  • Baking powder

  • Vanilla extract (optional)

  • A pinch of salt

Directions

  1. I preheat the oven to 350°F (175°C) and grease a small loaf pan or round cake pan.

  2. In a mixing bowl, I whisk together the eggs and sugar until light and slightly frothy.

  3. I stir in the Greek yogurt and vanilla extract (if using) until smooth.

  4. I sift in the flour, baking powder, and salt, and mix just until combined—being careful not to overmix.

  5. I pour the batter into the prepared pan and smooth out the top.

  6. I bake the cake for 30–40 minutes, or until a toothpick inserted in the center comes out clean.

  7. I let the cake cool in the pan for a few minutes before transferring it to a wire rack to cool completely.

Servings and timing

  • Servings: About 8 slices

  • Prep Time: 10 minutes

  • Cook Time: 35 minutes

  • Total Time: 45 minutes

Variations

  • I sometimes add lemon zest or orange zest for a citrusy twist.

  • A handful of fresh berries or chocolate chips stirred into the batter adds fun flavor.

  • I like to top it with a glaze made from powdered sugar and lemon juice for a tangy finish.

  • For a more indulgent version, I layer the cake with jam or whipped cream.

storage/reheating

I store leftovers in an airtight container at room temperature for up to 3 days.
To keep it longer, I refrigerate it for up to a week, or freeze individual slices for up to 2 months.
I warm it slightly in the microwave or let it come to room temperature before serving if it's been chilled.

FAQs

Can I use plain yogurt instead of Greek yogurt?

Yes, I can substitute plain yogurt, but the cake may be slightly less rich and moist due to the thinner consistency.

Can I make this cake gluten-free?

I use a 1:1 gluten-free flour blend in place of regular flour, and it turns out great.

Is this cake sweet enough for dessert?

It’s lightly sweet, so I often serve it with fruit, a glaze, or a dollop of whipped cream if I want more sweetness.

Can I make muffins with this batter?

Yes, I just divide the batter into a greased or lined muffin tin and bake for about 18–22 minutes.

How do I keep the cake from drying out?

I make sure not to overbake it, and I store it in an airtight container once it’s cooled to keep it moist.

Conclusion

This Simple Greek Yogurt Cake is a quick, reliable go-to recipe I can whip up any time. It’s tender, lightly sweet, and incredibly versatile—perfect for dressing up or enjoying as-is with a cup of coffee or tea. It’s proof that a few basic ingredients can come together to make something truly delicious.

Print

clock clock iconcutlery cutlery iconflag flag iconfolder folder iconinstagram instagram iconpinterest pinterest iconfacebook facebook iconprint print iconsquares squares iconheart heart iconheart solid heart solid icon
Simple Greek Yogurt Cake

5 Stars 4 Stars 3 Stars 2 Stars 1 Star No reviews
  • Author: Sue
  • Prep Time: 10 minutes
  • Cook Time: 35 minutes
  • Total Time: 45 minutes
  • Yield: About 8 slices
  • Category: Dessert, Breakfast
  • Method: Baked
  • Cuisine: American, Mediterranean-inspired
  • Diet: Vegetarian
Print Recipe
Pin Recipe

Description

This Simple Greek Yogurt Cake is light, moist, and full of subtle flavor with a creamy tang from the yogurt. It’s an easy, one-bowl recipe made with basic pantry staples—perfect as a not-too-sweet dessert, a tea-time treat, or even a breakfast cake. No mixer required!


Ingredients

  • 3 large eggs
  • 1 cup Greek yogurt
  • 1 cup all-purpose flour
  • ¾ cup sugar
  • 1 ½ tsp baking powder
  • 1 tsp vanilla extract (optional)
  • ¼ tsp salt

Instructions

  1. Preheat oven to 350°F (175°C). Grease a loaf pan or round cake pan.
  2. In a mixing bowl, whisk eggs and sugar until light and slightly frothy.
  3. Stir in Greek yogurt and vanilla extract (if using) until smooth.
  4. Sift in flour, baking powder, and salt. Mix until just combined—do not overmix.
  5. Pour batter into prepared pan and smooth the top.
  6. Bake for 30–40 minutes, or until a toothpick inserted in the center comes out clean.
  7. Let the cake cool in the pan for a few minutes, then transfer to a wire rack to cool completely.

Notes

  • Add lemon or orange zest for a fresh citrus twist.
  • Mix in berries or chocolate chips for added flavor.
  • Top with a simple powdered sugar glaze for extra sweetness.
  • Store at room temp in an airtight container for up to 3 days. Refrigerate or freeze for longer storage.

Have you made this recipe? I'd love to see it!

Click here to Follow me on Pinterest

Apple Pie Chimichangas

April 2, 2025 by Sue Leave a Comment

These Apple Pie Chimichangas are a sweet, crispy, and golden twist on the classic apple pie I love—wrapped in a flour tortilla, fried to perfection, and dusted in cinnamon sugar. Each bite delivers warm apple filling with hints of cinnamon and buttery crust, making this the ultimate handheld dessert for fall or any time I’m craving something cozy and indulgent.

Apple Pie Chimichangas

Why You’ll Love This Recipe

I love this recipe because it takes all the flavors of a traditional apple pie and transforms them into a fun, easy-to-make dessert. It’s quicker than baking a full pie, and I can make them with store-bought or homemade apple filling. The crispy fried tortilla contrasts perfectly with the warm apple center, and the cinnamon sugar coating gives it that irresistible churro-like finish. It’s like apple pie meets dessert taco—and I’m here for it.

ingredients

(Here's a tip: Check out the full list of ingredients and measurements in the recipe card below.)

  • Flour tortillas (soft taco size)
  • Apple pie filling (homemade or canned)
  • Ground cinnamon
  • Granulated sugar
  • Butter (melted)
  • Vegetable oil (for frying)
  • Optional: whipped cream, vanilla ice cream, or caramel sauce for serving

directions

  1. I spoon a few tablespoons of apple pie filling into the center of each tortilla, keeping it about an inch away from the edges.
  2. I fold the sides in and roll up the tortillas tightly like a burrito, securing the seams with a toothpick if needed.
  3. In a large skillet or deep saucepan, I heat vegetable oil over medium heat until it reaches about 350°F.
  4. I carefully place the chimichangas seam-side down in the oil and fry them until golden brown and crispy, turning as needed. This usually takes about 2–3 minutes per side.
  5. Once fried, I transfer them to a paper towel-lined plate to drain excess oil.
  6. While still warm, I brush them with melted butter and roll them in a cinnamon sugar mixture until fully coated.
  7. I serve them warm, optionally with whipped cream, vanilla ice cream, or a drizzle of caramel sauce.

Servings and timing

This recipe makes about 6 chimichangas.
Prep time: 10 minutes
Cook time: 15 minutes
Total time: 25 minutes

Variations

I sometimes mix a handful of chopped nuts (like pecans or walnuts) into the apple filling for added crunch. Swapping the apple filling for cherry, blueberry, or peach makes a whole new flavor of dessert chimichanga. For a baked version, I brush the wrapped chimichangas with butter and bake at 400°F for about 15–18 minutes until golden, then coat in cinnamon sugar.

storage/reheating

If I have leftovers, I store them in the fridge in an airtight container for up to 2 days. To reheat and keep them crisp, I warm them in the oven or air fryer at 350°F for about 5–7 minutes. Microwaving works too, but they won’t stay crispy.

FAQs

Can I use homemade apple pie filling?

Yes, and I often do when I have extra apples. I just cook peeled, chopped apples with butter, sugar, and cinnamon until soft and syrupy before using it as filling.

Can I air fry these instead of deep frying?

Absolutely. I brush them with oil or butter and air fry at 375°F for about 8–10 minutes, flipping halfway through. They still get crispy and delicious.

What type of tortillas should I use?

I go with soft, 8-inch flour tortillas—they’re the perfect size for wrapping and hold up well during frying.

How do I prevent them from unrolling while frying?

I make sure to roll them tightly and place them seam-side down in the oil first. Using toothpicks to secure the seam also helps, just remember to remove them before serving.

Can I make these ahead of time?

I can assemble them in advance and store them in the fridge (uncooked) for a few hours. Then I just fry them fresh when I’m ready to serve.

Conclusion

Apple Pie Chimichangas are a fun, delicious way to enjoy the classic flavors of apple pie without all the effort of making a traditional one. They’re quick to prepare, delightfully crispy, and totally indulgent—perfect for when I want a crowd-pleasing dessert that’s just a little different. Once I tried them, they became a regular treat in my dessert lineup.

Print

clock clock iconcutlery cutlery iconflag flag iconfolder folder iconinstagram instagram iconpinterest pinterest iconfacebook facebook iconprint print iconsquares squares iconheart heart iconheart solid heart solid icon
Apple Pie Chimichangas

Apple Pie Chimichangas

5 Stars 4 Stars 3 Stars 2 Stars 1 Star No reviews
  • Author: Sue
  • Prep Time: 10 minutes
  • Cook Time: 15 minutes
  • Total Time: 25 minutes
  • Yield: 6 chimichangas
  • Category: Dessert, Fall Recipes, Fried Treats
  • Method: Frying, Stovetop
  • Cuisine: American, Tex-Mex Inspired
  • Diet: Vegetarian
Print Recipe
Pin Recipe

Description

These Apple Pie Chimichangas are a crispy, golden twist on traditional apple pie—wrapped in a flour tortilla, fried to perfection, and coated in cinnamon sugar. This handheld dessert is the perfect fall treat, combining warm apple filling with a crunchy, churro-like finish.


Ingredients

  • Flour tortillas (soft taco size)
  • Apple pie filling (homemade or canned)
  • Ground cinnamon
  • Granulated sugar
  • Butter (melted)
  • Vegetable oil (for frying)
  • Optional toppings: whipped cream, vanilla ice cream, caramel sauce

Instructions

  1. Spoon a few tablespoons of apple pie filling into the center of each tortilla, leaving space around the edges.
  2. Fold the sides in and roll tightly like a burrito; use toothpicks to secure if needed.
  3. Heat vegetable oil in a skillet to 350°F.
  4. Fry chimichangas seam-side down until golden brown, about 2–3 minutes per side.
  5. Transfer to a paper towel-lined plate to drain.
  6. While still warm, brush with melted butter and roll in a cinnamon-sugar mixture.
  7. Serve warm with whipped cream, ice cream, or caramel sauce if desired.

Notes

  • Add chopped pecans or walnuts to the filling for crunch.
  • Use cherry, peach, or blueberry pie filling for a twist.
  • For a baked version, brush with butter and bake at 400°F for 15–18 minutes, then roll in cinnamon sugar.
  • Air fryer option: Brush with oil and air fry at 375°F for 8–10 minutes, flipping halfway.

Have you made this recipe? I'd love to see it!

Click here to Follow me on Pinterest

Creamy Lemon Fudge: A Sweet and Tangy Treat

April 2, 2025 by Sue Leave a Comment

Creamy Lemon Fudge is a bright, smooth, and melt-in-your-mouth treat that’s perfect when I want something a little different from the usual chocolate. With its vibrant citrus flavor and silky texture, this fudge brings a sunny twist to classic candy-making and is just as easy to enjoy as it is to prepare.

Creamy Lemon Fudge: A Sweet and Tangy Treat

Why You’ll Love This Recipe

I love this recipe because it’s sweet, zesty, and refreshing—a perfect dessert for spring and summer gatherings. The lemon flavor cuts through the richness, making each bite balanced and satisfying. Plus, it’s a no-fuss, no-bake recipe that only takes a few ingredients and comes together quickly. I often make it as a gift or to serve with tea or coffee when I want to impress without spending hours in the kitchen.

Ingredients

(Here's a tip: Check out the full list of ingredients and measurements in the recipe card below.)

  • White chocolate chips
  • Sweetened condensed milk
  • Unsalted butter
  • Lemon zest
  • Lemon extract (or fresh lemon juice for a milder version)
  • Yellow food coloring (optional, for a sunny look)
  • Pinch of salt

Directions

  1. I line an 8x8-inch baking dish with parchment paper, leaving some overhang for easy removal.
  2. In a medium saucepan, I combine the white chocolate chips, sweetened condensed milk, and butter over low heat.
  3. I stir constantly until everything is melted and smooth, making sure not to overheat or burn the chocolate.
  4. I remove the pan from heat and stir in the lemon zest, lemon extract, a pinch of salt, and a few drops of food coloring if I’m using it.
  5. I pour the mixture into the prepared dish and smooth the top with a spatula.
  6. I refrigerate it for at least 2 hours, or until the fudge is firm.
  7. Once set, I lift it out using the parchment paper, cut it into small squares, and serve.

Servings and timing

This recipe yields about 36 small squares and takes around 10 minutes to prepare, plus 2 hours of chill time. It’s a quick make-ahead dessert that I can pop into the fridge and forget about until I’m ready to serve.

Variations

  • I sometimes swirl in raspberry puree before chilling for a fruity twist.
  • For a holiday vibe, I top the fudge with crushed freeze-dried strawberries or lemon sugar.
  • I’ve used orange zest and extract instead for a Creamsicle-style version.
  • For extra creaminess, I’ve added a spoonful of marshmallow fluff to the mixture.

Storage/Reheating

I store the fudge in an airtight container in the refrigerator for up to 2 weeks. It holds its shape best when chilled. If I want it softer, I let it sit at room temperature for 10–15 minutes before serving. This fudge also freezes well—I wrap it in wax paper and store it in a freezer-safe bag for up to 2 months.

FAQs

Can I use fresh lemon juice instead of extract?

Yes, I’ve used fresh lemon juice before—it gives a lighter lemon flavor, while extract gives a stronger, more concentrated citrus taste. I sometimes use both for a balanced kick.

Why is my fudge grainy?

Graininess usually happens if the mixture is overheated or not stirred enough. I make sure to use low heat and stir constantly until smooth.

Can I use almond milk or non-dairy alternatives?

I haven’t tried it with condensed non-dairy milk, but if I use a plant-based version, I make sure it’s sweetened and thick to match the texture of regular condensed milk.

Do I need a candy thermometer?

Nope! That’s one thing I love about this fudge—it’s a simple melt-and-chill recipe with no candy thermometer needed.

Can I make this ahead of time for a party?

Absolutely. I often make it the night before, refrigerate overnight, and cut it into pieces right before serving.

Conclusion

Creamy Lemon Fudge is one of those desserts that surprises everyone—in the best way. It’s sweet, tangy, silky smooth, and incredibly easy to make. Whether I’m sharing it at a spring brunch, wrapping it up as a gift, or just keeping a stash in the fridge for cravings, this citrusy treat always brings a little brightness to the day.

Print

clock clock iconcutlery cutlery iconflag flag iconfolder folder iconinstagram instagram iconpinterest pinterest iconfacebook facebook iconprint print iconsquares squares iconheart heart iconheart solid heart solid icon
Creamy Lemon Fudge: A Sweet and Tangy Treat

Creamy Lemon Fudge: A Sweet and Tangy Treat

5 Stars 4 Stars 3 Stars 2 Stars 1 Star No reviews
  • Author: Sue
  • Prep Time: 10 minutes
  • Cook Time: 0 minutes
  • Total Time: 2 hours 10 minutes (includes chilling)
  • Yield: 36 squares
  • Category: Dessert, Candy
  • Method: No-Bake
  • Cuisine: American
  • Diet: Vegetarian
Print Recipe
Pin Recipe

Description

Creamy Lemon Fudge is a sweet and tangy no-bake treat that melts in your mouth with every bite. This bright, citrusy dessert is made with white chocolate, lemon zest, and condensed milk, and it’s perfect for spring, summer, or gifting year-round.


Ingredients

  • 3 cups white chocolate chips
  • 1 can (14 oz) sweetened condensed milk
  • 2 tbsp unsalted butter
  • 1 tbsp lemon zest
  • 1½ tsp lemon extract (or 1 tbsp fresh lemon juice for milder flavor)
  • 2–3 drops yellow food coloring (optional)
  • Pinch of salt

Instructions

  1. Line an 8x8-inch baking dish with parchment paper, leaving overhang on the sides.
  2. In a saucepan over low heat, combine white chocolate chips, sweetened condensed milk, and butter.
  3. Stir constantly until melted and smooth—do not overheat.
  4. Remove from heat and stir in lemon zest, lemon extract, salt, and food coloring if using.
  5. Pour mixture into the prepared pan and smooth the top.
  6. Refrigerate for at least 2 hours, or until firm.
  7. Lift fudge out of the pan using parchment paper and cut into 36 small squares.

Notes

  • For a fruity twist, swirl in raspberry puree before chilling.
  • Garnish with lemon sugar or freeze-dried strawberries for a festive touch.
  • Substitute orange zest/extract for a Creamsicle-style version.
  • Add marshmallow fluff for extra creaminess if desired.
  • Store chilled for best texture and easy slicing.

Have you made this recipe? I'd love to see it!

Click here to Follow me on Pinterest

Jello Creamsicle Pie

April 2, 2025 by Sue Leave a Comment

Jello creamsicle pie is a light, refreshing dessert that tastes just like a childhood orange creamsicle in sliceable pie form. With a silky, citrusy filling and a sweet graham cracker crust, it’s perfect for warm days, potlucks, or when I’m craving something bright and nostalgic without turning on the oven.

Jello Creamsicle Pie

Why You’ll Love This Recipe

I love this pie because it’s no-bake, foolproof, and comes together with just a handful of ingredients. The orange Jello gives it that classic creamsicle flavor, while whipped topping and cream cheese create a dreamy, mousse-like texture. It’s a beautiful, chilled dessert that’s always a hit—and I never mind how easy it is to make ahead.

Ingredients

(Here's a tip: Check out the full list of ingredients and measurements in the recipe card below.)

  • Orange Jello
  • Boiling water
  • Cold water
  • Cream cheese (softened)
  • Whipped topping (like Cool Whip)
  • Graham cracker crust (store-bought or homemade)
  • Optional: orange zest or mandarin slices for garnish

Directions

  1. I start by dissolving the orange Jello in boiling water, stirring until fully dissolved. Then I add cold water and let it cool to room temperature.
  2. In a mixing bowl, I beat the softened cream cheese until smooth.
  3. Slowly, I whisk the cooled Jello into the cream cheese until fully combined and creamy.
  4. I gently fold in the whipped topping until the mixture is fluffy and smooth.
  5. I pour the filling into the graham cracker crust and smooth the top.
  6. I refrigerate the pie for at least 4 hours, or until firm and set.
  7. Just before serving, I garnish with extra whipped topping, orange zest, or mandarin orange slices if I want to dress it up.

Servings and Timing

This pie serves 8 slices. It takes about 15 minutes to prepare, plus at least 4 hours of chilling time. I usually make it the day before to let it set overnight.

Variations

  • I’ve tried different Jello flavors like lemon, strawberry, or raspberry for fun twists.
  • A vanilla wafer or Oreo crust works great if I want something other than graham cracker.
  • Adding a few drops of orange extract boosts the creamsicle flavor even more.
  • I like using Greek yogurt in place of some cream cheese for a tangier filling.

Storage/Reheating

I store leftovers covered in the fridge for up to 5 days. Since this is a chilled pie, no reheating is needed—just slice and serve straight from the fridge. It also freezes well; I wrap it tightly and thaw in the fridge before serving.

FAQs

Can I use homemade whipped cream instead of Cool Whip?

Yes, I’ve used freshly whipped cream and it works great. I just make sure it’s stabilized with a little powdered sugar so the pie holds up well.

Do I have to use cream cheese?

Cream cheese adds richness and stability, but I’ve also tried using Greek yogurt or mascarpone for a lighter texture.

Can I make this pie ahead of time?

Absolutely. I often make it the night before—it holds up perfectly and is even better the next day.

Can I use sugar-free Jello?

Yes, I’ve made this with sugar-free Jello and it tastes just as good. It’s a great way to cut down on sugar if needed.

How do I prevent the pie from becoming runny?

I always make sure the Jello is fully cooled before mixing it with cream cheese, and I chill the pie for the full 4 hours or more to ensure it sets properly.

Conclusion

Jello creamsicle pie is the kind of easy, crowd-pleasing dessert I turn to when I want something cool, creamy, and a little nostalgic. It’s simple to prepare, beautifully bright, and brings a bit of sunshine to any table. Whether for a summer party or just to treat myself, this pie never lets me down.

Print

clock clock iconcutlery cutlery iconflag flag iconfolder folder iconinstagram instagram iconpinterest pinterest iconfacebook facebook iconprint print iconsquares squares iconheart heart iconheart solid heart solid icon
Jello Creamsicle Pie

Jello Creamsicle Pie

5 Stars 4 Stars 3 Stars 2 Stars 1 Star No reviews
  • Author: Sue
  • Prep Time: 15 minutes
  • Cook Time: 4 hours
  • Total Time: 4 hours 15 minutes
  • Yield: 8 servings
  • Category: Dessert, No-Bake
  • Method: No-Bake
  • Cuisine: American
  • Diet: Vegetarian
Print Recipe
Pin Recipe

Description

This Jello creamsicle pie is a nostalgic no-bake dessert bursting with orange creamsicle flavor. Made with creamy whipped topping, tangy cream cheese, and bright orange Jello in a sweet graham cracker crust, it’s a refreshing, make-ahead treat perfect for summer gatherings or anytime you crave a chilled citrusy slice.


Ingredients

  • 1 package (3 oz) orange Jello
  • ½ cup boiling water
  • ½ cup cold water
  • 8 oz cream cheese, softened
  • 8 oz whipped topping (e.g., Cool Whip), thawed
  • 1 graham cracker crust (9-inch, store-bought or homemade)
  • Optional: orange zest or mandarin orange slices for garnish

Instructions

  1. In a bowl, dissolve orange Jello in boiling water. Stir well until fully dissolved. Add cold water and let cool to room temperature.
  2. In a separate bowl, beat softened cream cheese until smooth.
  3. Gradually whisk cooled Jello into the cream cheese until fully blended.
  4. Gently fold in the whipped topping until the mixture is light, creamy, and uniform in texture.
  5. Pour the filling into the graham cracker crust and smooth the top.
  6. Refrigerate for at least 4 hours, or until fully set.
  7. Garnish with orange zest, whipped topping, or mandarin orange slices before serving if desired.

Notes

  • Use other Jello flavors like lemon, strawberry, or raspberry for fun variations.
  • Add a few drops of orange extract for extra citrus punch.
  • Substitute Greek yogurt or mascarpone for cream cheese for a lighter or tangier filling.
  • A vanilla wafer or Oreo crust adds a unique twist to the classic graham base.

Have you made this recipe? I'd love to see it!

Click here to Follow me on Pinterest

Caramel Apple Empanadas

April 1, 2025 by Sue Leave a Comment

These caramel apple empanadas are golden, flaky hand pies filled with warm, spiced apples and gooey caramel. I love making them when I want an easy, portable dessert that tastes just like fall. They come out of the oven with perfectly crisp edges and a soft, sweet filling that’s cozy and nostalgic—just like a slice of caramel apple pie in every bite.

Caramel Apple Empanadas

Why You’ll Love This Recipe

I love how these empanadas bring together the best parts of apple pie and a sweet pastry treat. They’re easy to make, especially when I use store-bought pie dough or empanada discs. The combination of tender apples, cinnamon, and rich caramel is comforting, and the handheld size makes them fun to eat and perfect for sharing. Whether I serve them warm with a scoop of vanilla ice cream or pack them up for a fall picnic, they’re always a hit.

Ingredients

(Here's a tip: Check out the full list of ingredients and measurements in the recipe card below.)

  • Apples (peeled and diced – I usually go with Granny Smith or Honeycrisp)
  • Brown sugar
  • Ground cinnamon
  • Nutmeg (optional)
  • Butter
  • Caramel sauce or soft caramel candies
  • Refrigerated pie crust or empanada dough discs
  • Egg (for egg wash)
  • Sugar (for sprinkling on top)

Directions

  1. I preheat the oven to 375°F (190°C) and line a baking sheet with parchment paper.
  2. In a skillet, I melt butter over medium heat and cook the diced apples with brown sugar, cinnamon, and a pinch of nutmeg until they’re soft and slightly caramelized—about 5–7 minutes.
  3. I remove the pan from heat and stir in the caramel sauce or chopped soft caramels, letting it melt into the apple mixture.
  4. I roll out the dough and cut circles (about 4–5 inches wide if using pie crust). I place a spoonful of filling in the center of each round.
  5. I fold the dough over to form a half-moon, pressing the edges with a fork to seal.
  6. I brush each empanada with egg wash and sprinkle with a little sugar for extra crunch.
  7. I bake for 20–25 minutes or until golden brown and crisp.
  8. I let them cool slightly before serving—but they’re best warm with the caramel still gooey inside.

Servings and timing

This recipe makes about 10–12 empanadas and takes around 45 minutes total—15 minutes for prep, 10 minutes to cook the filling, and 20–25 minutes for baking.

Variations

Sometimes I add a handful of chopped pecans or walnuts to the filling for a little crunch. For a salted caramel twist, I sprinkle a bit of flaky sea salt inside or on top before baking. If I’m in a hurry, I use canned apple pie filling and just stir in some caramel. And when I want something extra indulgent, I drizzle them with more caramel after baking.

storage/reheating

I store leftover empanadas in an airtight container at room temperature for up to 2 days or in the fridge for up to 5 days. To reheat, I pop them in a 300°F oven for about 10 minutes or until warm and crisp again. They also reheat nicely in an air fryer. I don’t recommend microwaving since they lose their flakiness.

FAQs

Can I make these empanadas ahead of time?

Yes, I often prepare the filling and dough in advance and assemble the empanadas right before baking. They can also be frozen unbaked—just add a couple extra minutes to the bake time.

What kind of apples work best?

I usually use tart apples like Granny Smith for contrast, but Honeycrisp or Fuji work well if I want something sweeter. A mix of apples also adds great flavor.

Can I use puff pastry instead of pie dough?

Absolutely. Puff pastry gives them a more buttery, flaky texture. I just make sure to seal the edges well and adjust the bake time slightly if needed.

Do I have to cook the apple filling first?

I highly recommend it. Cooking the apples ensures they’re soft and caramelized, and it helps prevent sogginess by reducing excess moisture.

Can I air fry these instead of baking?

Yes! I’ve had success air frying at 350°F for about 10–12 minutes. They turn out golden and crispy, just like from the oven.

Conclusion

These caramel apple empanadas are one of my favorite fall desserts, but honestly, I make them all year round. They’re easy, customizable, and packed with flavor in every bite. Whether I’m making a batch for a get-together or just craving something warm and sweet, these always satisfy. I love how something so simple can taste so special.

Print

clock clock iconcutlery cutlery iconflag flag iconfolder folder iconinstagram instagram iconpinterest pinterest iconfacebook facebook iconprint print iconsquares squares iconheart heart iconheart solid heart solid icon
Caramel Apple Empanadas

Caramel Apple Empanadas

5 Stars 4 Stars 3 Stars 2 Stars 1 Star No reviews
  • Author: Sue
  • Prep Time: 15 minutes
  • Cook Time: 10 minutes (filling)
  • Total Time: 45 minutes
  • Yield: 10–12 empanadas
  • Category: Dessert, Hand Pies
  • Method: Baking
  • Cuisine: American, Latin-Inspired
  • Diet: Vegetarian
Print Recipe
Pin Recipe

Description

These Caramel Apple Empanadas are flaky, golden hand pies filled with cinnamon-spiced apples and gooey caramel. An easy fall dessert that tastes like individual caramel apple pies—perfect for parties, holiday gatherings, or a cozy treat served warm with ice cream. Made with simple ingredients and ready in under an hour!


Ingredients

  • 2 cups peeled and diced apples (Granny Smith, Honeycrisp, or a mix)
  • 2 tbsp brown sugar
  • 1 tsp ground cinnamon
  • ¼ tsp nutmeg (optional)
  • 1 tbsp butter
  • ⅓ cup caramel sauce or 6–8 soft caramel candies, chopped
  • 1 box refrigerated pie crusts or 10–12 empanada dough discs
  • 1 egg (beaten, for egg wash)
  • 1 tbsp granulated sugar (for sprinkling)

Instructions

  1. Preheat oven to 375°F (190°C). Line a baking sheet with parchment paper.
  2. In a skillet, melt butter over medium heat. Add apples, brown sugar, cinnamon, and nutmeg. Cook for 5–7 minutes until apples are tender.
  3. Remove from heat and stir in caramel sauce or chopped caramels until melted and combined.
  4. Roll out dough and cut into 4–5 inch circles. Add a spoonful of filling to the center of each round.
  5. Fold over into a half-moon shape. Press edges with a fork to seal.
  6. Brush tops with egg wash and sprinkle with sugar.
  7. Bake for 20–25 minutes, until golden brown.
  8. Let cool slightly before serving. Best enjoyed warm.

Notes

  • Add chopped pecans or walnuts for crunch.
  • For a salted caramel version, sprinkle flaky sea salt before baking.
  • Use puff pastry for a flakier variation—adjust bake time as needed.
  • Canned apple pie filling + caramel is a quick shortcut.
  • Drizzle extra caramel on top after baking for more indulgence.

Have you made this recipe? I'd love to see it!

Click here to Follow me on Pinterest

Chicken Divan

April 1, 2025 by Sue Leave a Comment

Chicken Divan is a comforting, creamy casserole made with tender chicken, broccoli, and a rich, cheesy sauce, all baked together until bubbly and golden. This classic dish has been around for decades, and every time I make it, I understand why—it’s warm, filling, and packed with flavor. It’s one of those timeless dinners that feels both nostalgic and satisfying.

Chicken Divan

Why You’ll Love This Recipe

I love Chicken Divan because it’s simple, versatile, and family-friendly. It’s the kind of dish I turn to when I need a cozy, all-in-one meal that doesn’t require a lot of fuss. The creamy sauce binds everything together perfectly, the cheese adds richness, and the broccoli gives it a pop of color and freshness. It’s easy to prep ahead of time, freezes well, and makes great leftovers—what’s not to love?

ingredients

(Here's a tip: Check out the full list of ingredients and measurements in the recipe card below.)

  • Cooked chicken breast (shredded or cubed)

  • Fresh or frozen broccoli florets

  • Cream of chicken soup

  • Mayonnaise or sour cream

  • Shredded cheddar cheese

  • Lemon juice

  • Garlic powder

  • Onion powder

  • Salt and pepper

  • Bread crumbs or crushed Ritz crackers (for topping)

  • Butter (melted, for topping)

directions

  1. I preheat the oven to 375°F and lightly grease a 9x13 inch baking dish.

  2. I steam or microwave the broccoli until just tender, then drain and set it aside.

  3. In a large bowl, I mix together the cream of chicken soup, mayonnaise (or sour cream), lemon juice, garlic powder, onion powder, salt, pepper, and half of the shredded cheese.

  4. I add the cooked chicken and broccoli to the bowl and stir everything until well combined.

  5. I pour the mixture into the prepared baking dish and smooth out the top.

  6. I sprinkle the remaining cheese over the casserole, then mix the bread crumbs or crushed crackers with melted butter and sprinkle that on top too.

  7. I bake uncovered for 25–30 minutes, or until the top is golden and the casserole is bubbly around the edges.

Servings and timing

This recipe serves 6 to 8 people and takes about 15 minutes to prep and 25–30 minutes to bake. In total, I can have it ready in under 45 minutes.

Variations

  • I swap in cooked turkey when I have leftovers from the holidays.

  • I use cream of mushroom or cream of celery soup for a different base flavor.

  • For a healthier version, I use Greek yogurt instead of mayo and reduce the cheese.

  • Sometimes I stir in cooked rice or egg noodles to make it a full one-dish meal.

storage/reheating

I store leftovers in an airtight container in the fridge for up to 4 days. To reheat, I cover and warm it in the oven at 350°F until heated through, or microwave individual portions. If I’m freezing it, I assemble everything (except the topping), wrap it tightly, and freeze for up to 3 months. I add the topping just before baking.

FAQs

Can I use rotisserie chicken?

Yes, rotisserie chicken works great here. I just shred it and mix it in—it saves time and adds extra flavor.

Can I make Chicken Divan ahead of time?

Absolutely. I assemble it a day in advance, cover, and refrigerate. Then I just bake it when I’m ready to serve.

What can I use instead of mayo?

Sour cream or plain Greek yogurt both work as a great substitute, depending on whether I want a tangy or lighter flavor.

Can I use frozen broccoli?

Yes, I just thaw and drain it well before using so the casserole doesn’t get watery.

How do I make it gluten-free?

I use a gluten-free cream soup and substitute the topping with gluten-free bread crumbs or crushed gluten-free crackers.

Conclusion

Chicken Divan is one of those hearty, comforting meals that I can always count on. It’s creamy, cheesy, and packed with wholesome ingredients like chicken and broccoli. Whether I’m feeding my family, prepping for the week, or making something to bring to a friend, this casserole never fails to hit the mark.

Print

clock clock iconcutlery cutlery iconflag flag iconfolder folder iconinstagram instagram iconpinterest pinterest iconfacebook facebook iconprint print iconsquares squares iconheart heart iconheart solid heart solid icon
Chicken Divan

Chicken Divan

5 Stars 4 Stars 3 Stars 2 Stars 1 Star No reviews
  • Author: Sue
  • Prep Time: 15 minutes
  • Cook Time: 25–30 minutes
  • Total Time: 40–45 minutes
  • Yield: 6–8 servings
  • Category: Dinner, Casserole
  • Method: Baked
  • Cuisine: American
Print Recipe
Pin Recipe

Description

This Chicken Divan recipe is a creamy, cheesy, and comforting casserole made with tender chicken, broccoli, and a rich sauce, then topped with golden breadcrumbs or crackers. It's the ultimate easy weeknight dinner or make-ahead meal that delivers nostalgic, family-friendly flavor in every bite.


Ingredients

  • 3 cups cooked chicken breast (shredded or cubed)
  • 4 cups fresh or frozen broccoli florets (steamed)
  • 1 can (10.5 oz) cream of chicken soup
  • ½ cup mayonnaise or sour cream
  • 1 ½ cups shredded cheddar cheese (divided)
  • 1 tbsp lemon juice
  • ½ tsp garlic powder
  • ½ tsp onion powder
  • Salt and pepper, to taste
  • ½ cup bread crumbs or crushed Ritz crackers
  • 2 tbsp melted butter

Instructions

  1. Preheat oven to 375°F (190°C). Lightly grease a 9x13 inch baking dish.
  2. Steam or microwave broccoli until just tender. Drain and set aside.
  3. In a large bowl, combine cream of chicken soup, mayonnaise (or sour cream), lemon juice, garlic powder, onion powder, salt, pepper, and half of the shredded cheese.
  4. Fold in cooked chicken and broccoli until well combined.
  5. Pour mixture into the prepared baking dish and spread evenly.
  6. Top with remaining cheese.
  7. Mix bread crumbs or crushed crackers with melted butter and sprinkle over the top.
  8. Bake uncovered for 25–30 minutes, or until golden and bubbly.

Notes

  • Swap mayo for Greek yogurt for a lighter version.
  • Cream of mushroom or celery soup can be used for flavor variations.
  • Add cooked rice or noodles to make it a full one-dish meal.
  • Assemble ahead and refrigerate until ready to bake.
  • For gluten-free, use GF soup and topping alternatives.

Have you made this recipe? I'd love to see it!

Click here to Follow me on Pinterest

Raspberry-Rhubarb Slab Pie

April 1, 2025 by Sue Leave a Comment

Raspberry-Rhubarb Slab Pie brings together tart rhubarb and sweet raspberries in a buttery, golden crust. I love how it captures the essence of summer fruit pies, but in a format that’s perfect for sharing. It’s easy to slice, easy to serve, and always a hit at gatherings.

Raspberry-Rhubarb Slab Pie

Why I Love This Recipe

There’s so much to love about this pie:

  • The raspberry and rhubarb combination offers the perfect sweet-tart balance.
  • It's great for serving a crowd—more pie with less fuss.
  • The flaky homemade crust pairs perfectly with the juicy filling.
  • I can easily customize it with different fruits or toppings.

Ingredients

(Here's a tip: Check out the full list of ingredients and measurements in the recipe card below.)

  • All-purpose flour
  • Salt
  • Unsalted butter, cold and cubed
  • Egg yolk
  • Milk
  • Granulated sugar
  • Cornstarch
  • Fresh or frozen raspberries
  • Fresh or frozen rhubarb
  • Confectioners’ sugar
  • Vanilla extract

Directions

  1. Make the Dough: I mix the flour and salt in a large bowl, then cut in the cold butter until the mixture resembles coarse crumbs. I whisk together the egg yolk and milk, then slowly add it to the flour mix to form a dough. I divide the dough into two portions (one slightly larger), wrap them in plastic, and refrigerate for at least an hour.
  2. Roll Out and Line the Pan: I roll out the larger portion of dough to fit a 15x10x1-inch baking pan, pressing it into the bottom and up the sides.
  3. Prepare the Filling: I mix sugar and cornstarch in a bowl, then gently toss in the raspberries and sliced rhubarb until coated.
  4. Assemble: I spread the filling evenly over the crust. Then I roll out the remaining dough and lay it on top. I fold and seal the edges and prick the top with a fork.
  5. Bake: I bake the slab pie at 375°F (190°C) for 45 to 55 minutes, until the crust is golden and the filling is bubbling.
  6. Cool and Glaze: After letting the pie cool, I whisk together confectioners’ sugar, vanilla, and a little milk to make a glaze. I drizzle it over the top before cutting the pie into squares.

Servings and Timing

This slab pie makes about 20 to 24 squares. Prep time is around 30 minutes (plus chilling time for the dough), and baking takes 45–55 minutes. It’s usually ready to serve in about 1 hour and 30 minutes.

Variations

  • Switch the Berries: I like swapping raspberries with strawberries or blackberries for a slightly different flavor.
  • Add Citrus Zest: A bit of lemon or orange zest in the filling brightens the pie beautifully.
  • Crumb Topping Option: Sometimes I skip the top crust and use a crumb topping instead for extra texture.

Storage and Reheating

I store leftovers in an airtight container at room temperature for up to 2 days, or in the fridge for up to 4 days. To reheat, I warm slices in the oven at 350°F for about 10 minutes. It helps keep the crust crisp. I don’t recommend freezing it once baked, but the unbaked dough and fruit filling can be frozen separately.

FAQs

Can I use frozen fruit?

Yes, I can use frozen raspberries and rhubarb. I make sure to thaw and drain them well to avoid excess moisture in the filling.

How do I prevent a soggy crust?

To keep the bottom crisp, I make sure the fruit is well-drained and avoid overfilling. A light dusting of cornstarch on the crust before adding the filling helps absorb moisture too.

Can I make this pie ahead of time?

Absolutely. I often bake it a day ahead and let it cool completely. I wait to add the glaze until just before serving for the freshest look and taste.

Can I use store-bought pie crust?

Yes, if I’m short on time, two standard pie crusts (rolled to fit the slab) will work. Homemade gives the best flavor, but store-bought is a good shortcut.

How do I know the pie is done baking?

I look for a golden brown crust and bubbling fruit filling peeking through the slits in the top. That’s how I know it’s cooked through and ready.

Conclusion

Raspberry-Rhubarb Slab Pie is one of my favorite desserts to make when I need something beautiful, easy to serve, and packed with flavor. The mix of sweet and tart fruit in a flaky crust, topped with a drizzle of icing, always hits the spot. Whether for a picnic, party, or just a weekend treat, this pie delivers every time.

Print

clock clock iconcutlery cutlery iconflag flag iconfolder folder iconinstagram instagram iconpinterest pinterest iconfacebook facebook iconprint print iconsquares squares iconheart heart iconheart solid heart solid icon
Raspberry-Rhubarb Slab Pie

Raspberry-Rhubarb Slab Pie

5 Stars 4 Stars 3 Stars 2 Stars 1 Star No reviews
  • Author: Sue
  • Prep Time: 30 minutes (plus 1 hour chill time)
  • Cook Time: 45–55 minutes
  • Total Time: ~1 hour 30 minutes
  • Yield: 20–24 squares
  • Category: Dessert
  • Method: Baking
  • Cuisine: American
  • Diet: Vegetarian
Print Recipe
Pin Recipe

Description

Raspberry-Rhubarb Slab Pie is a sweet-tart dessert made for sharing, featuring a flaky homemade crust filled with juicy raspberries and rhubarb. Baked in a sheet pan and finished with a vanilla glaze, this easy-to-slice pie is perfect for parties, potlucks, or anytime you want a crowd-pleasing treat with fresh summer flavor.


Ingredients

  • For the Crust:
  • 3 cups all-purpose flour
  • ½ tsp salt
  • 1 cup (2 sticks) unsalted butter, cold and cubed
  • 1 egg yolk
  • ½ cup milk
  • For the Filling:
  • 1 cup granulated sugar
  • ¼ cup cornstarch
  • 3 cups raspberries (fresh or thawed if frozen)
  • 3 cups rhubarb, sliced (fresh or thawed if frozen)
  • For the Glaze:
  • 1 cup confectioners’ sugar
  • 1 tsp vanilla extract
  • 1–2 tablespoon milk

Instructions

  1. Make the Dough: In a large bowl, mix flour and salt. Cut in the cold butter until the mixture resembles coarse crumbs. In a separate bowl, whisk egg yolk and milk together, then stir into the flour mixture to form a dough. Divide into two portions (one slightly larger), wrap in plastic, and refrigerate for at least 1 hour.
  2. Line the Pan: Roll out the larger dough portion and fit it into a 15x10x1-inch baking sheet, pressing it into the corners and up the sides.
  3. Prepare Filling: In a bowl, mix sugar and cornstarch. Gently toss in the raspberries and rhubarb until evenly coated.
  4. Assemble Pie: Spread fruit filling over the crust. Roll out the remaining dough and place over the top. Seal edges and prick the top crust with a fork.
  5. Bake: Bake at 375°F (190°C) for 45–55 minutes or until the crust is golden and filling is bubbling.
  6. Cool & Glaze: Let the pie cool completely. Whisk together glaze ingredients and drizzle over the cooled pie before slicing into squares.

Notes

  • Swap raspberries for strawberries or blackberries for variation.
  • Add lemon or orange zest to the filling for extra brightness.
  • A crumb topping can be used instead of a top crust.
  • Use store-bought pie dough if pressed for time.
  • Store covered at room temp for 2 days or refrigerated for up to 4 days.

Have you made this recipe? I'd love to see it!

Click here to Follow me on Pinterest

Creamy Chicken & Rice Casserole Delight!

April 1, 2025 by Sue Leave a Comment

Creamy Chicken & Rice Casserole Delight is the kind of comfort food I turn to when I want something cozy, filling, and easy to throw together. With tender chicken, creamy sauce, and perfectly cooked rice baked into one delicious dish, it’s a complete meal that’s always a hit at the dinner table.

Creamy Chicken & Rice Casserole Delight!

Why You’ll Love This Recipe

I love how simple and satisfying this casserole is. It uses everyday ingredients, comes together in one baking dish, and doesn’t require any fancy prep. The creamy texture and rich flavor make it feel indulgent, but it’s also a great way to feed a crowd or have leftovers for the next day. It’s family-friendly, freezer-friendly, and endlessly adaptable.

ingredients

(Here's a tip: Check out the full list of ingredients and measurements in the recipe card below.)

  • Chicken breasts or thighs (boneless and skinless)
  • Long grain white rice (uncooked)
  • Cream of chicken soup (or a mix of cream of mushroom and chicken)
  • Chicken broth or water
  • Sour cream or cream cheese (for extra creaminess)
  • Onion (diced)
  • Garlic (minced)
  • Salt and pepper
  • Paprika or Italian seasoning (optional)
  • Shredded cheddar cheese (optional topping)
  • Chopped parsley (for garnish)

directions

  1. I preheat the oven to 350°F (175°C) and lightly grease a 9x13-inch baking dish.
  2. In a bowl, I mix the rice, cream soup, chicken broth, sour cream, onion, garlic, salt, pepper, and seasoning.
  3. I spread this mixture evenly in the baking dish.
  4. I place the chicken pieces on top and season them lightly with salt, pepper, and paprika.
  5. I cover the dish tightly with foil and bake for 50 to 60 minutes, or until the rice is tender and the chicken is fully cooked.
  6. If using cheese, I uncover the dish, sprinkle cheese on top, and bake uncovered for another 5-10 minutes until melted.
  7. I let it sit for a few minutes before garnishing with parsley and serving.

Servings and timing

This recipe makes about 6 servings. Prep time is around 10 to 15 minutes, and total baking time is about 55 to 70 minutes.

Variations

  • I swap the chicken for leftover rotisserie chicken to save time.
  • I use brown rice but extend the baking time and add extra broth.
  • I stir in veggies like peas, carrots, or broccoli for added nutrition.
  • I top it with crushed Ritz crackers or breadcrumbs for a crispy finish.

storage/reheating

I store leftovers in an airtight container in the fridge for up to 4 days. To reheat, I microwave individual portions or cover and warm the dish in the oven at 325°F until heated through. If it gets a little dry, I add a splash of broth before reheating.

FAQs

Can I make this casserole ahead of time?

Yes, I assemble everything and refrigerate it overnight. I let it sit at room temperature for 20-30 minutes before baking.

Can I use cooked rice instead?

Yes, I reduce the liquid slightly and bake for less time since the rice doesn’t need to cook through.

What can I substitute for cream of chicken soup?

I make a homemade white sauce or use cream of mushroom or cream of celery for a different flavor.

Can I freeze this casserole?

Absolutely. I freeze it before baking, tightly wrapped. When ready, I thaw overnight in the fridge and bake as directed.

Is this recipe gluten-free?

It can be if I use gluten-free cream soups and check that all ingredients are certified gluten-free.

Conclusion

Creamy Chicken & Rice Casserole Delight is one of those timeless meals I keep coming back to. It’s easy to prepare, comforting to eat, and flexible enough to fit whatever I have in the fridge. Whether it’s a busy weeknight or a weekend family dinner, this dish always hits the spot.

Print

clock clock iconcutlery cutlery iconflag flag iconfolder folder iconinstagram instagram iconpinterest pinterest iconfacebook facebook iconprint print iconsquares squares iconheart heart iconheart solid heart solid icon
Creamy Chicken & Rice Casserole Delight!

Creamy Chicken & Rice Casserole Delight!

5 Stars 4 Stars 3 Stars 2 Stars 1 Star No reviews
  • Author: Sue
  • Prep Time: 10–15 minutes
  • Cook Time: 50–70 minutes
  • Total Time: 60–85 minutes
  • Yield: 6 servings
  • Category: Dinner, Casserole
  • Method: Baking
  • Cuisine: American
  • Diet: Gluten Free
Print Recipe
Pin Recipe

Description

This Creamy Chicken & Rice Casserole Delight is the ultimate cozy dinner—made with tender chicken, creamy sauce, and fluffy rice baked in one dish. It’s the perfect comfort food for busy weeknights, potlucks, or make-ahead meals. Family-friendly, freezer-friendly, and endlessly adaptable, this easy casserole will quickly become a go-to favorite.


Ingredients

  • 1 ½ to 2 lbs boneless, skinless chicken breasts or thighs
  • 1 cup long grain white rice (uncooked)
  • 1 (10.5 oz) can cream of chicken soup (or cream of mushroom/chicken combo)
  • 1 cup chicken broth or water
  • ½ cup sour cream or softened cream cheese
  • ½ cup onion, diced
  • 2 cloves garlic, minced
  • Salt and pepper, to taste
  • ½ tsp paprika or Italian seasoning (optional)
  • 1 cup shredded cheddar cheese (optional, for topping)
  • Fresh chopped parsley (for garnish)

Instructions

  1. Preheat oven to 350°F (175°C) and lightly grease a 9x13-inch baking dish.
  2. In a bowl, mix together rice, cream soup, broth, sour cream, onion, garlic, salt, pepper, and seasoning.
  3. Spread the mixture evenly in the prepared dish.
  4. Place chicken pieces on top and season lightly with salt, pepper, and paprika.
  5. Cover tightly with foil and bake for 50–60 minutes, or until chicken is fully cooked and rice is tender.
  6. (Optional) Uncover, sprinkle with cheddar cheese, and return to oven for 5–10 minutes until melted.
  7. Let rest for a few minutes before garnishing with parsley and serving.

Notes

  • Use rotisserie chicken for a quicker version—just reduce bake time and liquid.
  • Brown rice works too—add extra broth and extend cooking time.
  • Stir in frozen peas, carrots, or broccoli before baking for added veggies.
  • Top with crushed crackers or breadcrumbs for a crispy crust.
  • Easily made gluten-free with certified GF soup and ingredients.

Have you made this recipe? I'd love to see it!

Click here to Follow me on Pinterest

Pineapple Ice Cream

April 1, 2025 by Sue Leave a Comment

Pineapple Ice Cream is creamy, fruity, and full of tropical flavor. It’s the kind of dessert I turn to when I want something light, refreshing, and sweet. Whether I’m serving it in cones or scooping it into bowls, this homemade treat always brings bright, sunny vibes to the table.

Pineapple Ice Cream

Why You’ll Love This Recipe

I love this recipe because it’s easy to make, doesn’t require an ice cream maker, and uses simple ingredients. The fresh pineapple flavor really shines through, and the creamy texture makes every bite smooth and satisfying. It’s perfect for hot days, quick desserts, or whenever I want something a little different than chocolate or vanilla.

Ingredients

(Here's a tip: Check out the full list of ingredients and measurements in the recipe card below.)

  • Pineapple (fresh or canned, chopped)

  • Heavy cream

  • Sweetened condensed milk

  • Vanilla extract

  • Lemon juice (optional)

Directions

  1. I blend the chopped pineapple until smooth, leaving a few chunks if I want extra texture.

  2. I whip the heavy cream until stiff peaks form.

  3. I fold in the sweetened condensed milk, pineapple purée, vanilla, and lemon juice.

  4. I pour the mixture into a loaf pan or container, cover it, and freeze for at least 4–6 hours until firm.

  5. When serving, I let it sit at room temperature for a few minutes to soften for easier scooping.

Servings and timing

This recipe makes about 6 servings. I spend around 15 minutes prepping and let it freeze for at least 4 hours, though overnight works best.

Variations

  • I sometimes stir in shredded coconut or swirl in mango purée for more tropical flavor.

  • When I want a lighter version, I use coconut milk instead of cream.

  • I’ve also poured the mixture into popsicle molds for a frozen handheld version.

storage/reheating

I store the ice cream in an airtight container in the freezer for up to 2 weeks. Before serving, I let it sit out for 5–10 minutes to soften slightly and make scooping easier.

FAQs

Can I use frozen pineapple?

Yes, I thaw it slightly and then blend it just like fresh. It works great and still gives strong flavor.

Do I need an ice cream maker?

No. This is a no-churn recipe, so I don’t need any special tools—just a mixer and a freezer-safe container.

Can I make this dairy-free?

Yes, I replace the cream with coconut cream and use dairy-free sweetened condensed milk.

Why is my ice cream icy?

I make sure to blend everything well and keep it tightly covered in the freezer to avoid ice crystals forming.

What can I serve it with?

I like it on its own, but it’s also great with grilled fruit, cookies, or even as a base for tropical sundaes.

Conclusion

Pineapple Ice Cream is an easy and delicious way to enjoy fresh, fruity flavor in a creamy frozen treat. It’s a go-to recipe I keep in my rotation all summer long, and once I’ve made it, I always look forward to that first cold, tangy spoonful.

Print

clock clock iconcutlery cutlery iconflag flag iconfolder folder iconinstagram instagram iconpinterest pinterest iconfacebook facebook iconprint print iconsquares squares iconheart heart iconheart solid heart solid icon
Pineapple Ice Cream

Pineapple Ice Cream

5 Stars 4 Stars 3 Stars 2 Stars 1 Star No reviews
  • Author: Sue
  • Prep Time: 15 minutes
  • Cook Time: 4–6 hours
  • Total Time: 6+ hours (with freezing)
  • Yield: 6 servings
  • Category: Dessert
  • Method: No-Churn / Freezing
  • Cuisine: American / Tropical-Inspired
  • Diet: Vegetarian
Print Recipe
Pin Recipe

Description

Pineapple Ice Cream is a no-churn, creamy tropical dessert bursting with fruity flavor. Made with simple ingredients like sweetened condensed milk, whipped cream, and pineapple, it’s an easy, refreshing treat that’s perfect for warm weather or anytime you crave a light, sunny scoop.


Ingredients

  • 2 cups chopped pineapple (fresh, canned, or thawed frozen)
  • 2 cups heavy cream
  • 1 (14 oz) can sweetened condensed milk
  • 1 tsp vanilla extract
  • 1 tsp lemon juice (optional, to brighten flavor)

Instructions

  1. Blend chopped pineapple into a purée, leaving a few small chunks if desired.
  2. In a large bowl, whip heavy cream until stiff peaks form.
  3. Fold in sweetened condensed milk, pineapple purée, vanilla, and lemon juice until combined.
  4. Pour mixture into a loaf pan or freezer-safe container.
  5. Cover and freeze for at least 4–6 hours or overnight, until firm.
  6. Let sit at room temperature for 5–10 minutes before scooping.

Notes

  • For added texture and flavor, stir in shredded coconut or mango purée.
  • Use coconut cream and dairy-free condensed milk for a dairy-free version.
  • Keep tightly sealed to prevent freezer burn or ice crystals.
  • Great as popsicles or in cones!

Have you made this recipe? I'd love to see it!

Click here to Follow me on Pinterest

Creamy Honey BBQ Chicken & Cheddar Pasta

April 1, 2025 by Sue Leave a Comment

This Creamy Honey BBQ Chicken & Cheddar Pasta is a bold, comforting twist on classic pasta night. With tender bites of chicken coated in a smoky-sweet honey BBQ sauce, tossed in a rich cheddar cheese cream sauce, this dish brings together the best of tangy, creamy, and cheesy in one irresistible skillet.

Creamy Honey BBQ Chicken & Cheddar Pasta

Why You’ll Love This Recipe

I love this recipe because it’s packed with flavor and comes together fast, making it perfect for weeknights when I want something easy and satisfying. The combo of honey BBQ sauce with melted cheddar gives it a sweet and savory kick that keeps me coming back for more. It’s family-friendly, totally customizable, and tastes like something from a BBQ joint—with way less effort.

ingredients

(Here's a tip: Check out the full list of ingredients and measurements in the recipe card below.)

  • Boneless, skinless chicken breasts or thighs
  • Salt and pepper
  • Garlic powder
  • Olive oil or butter
  • Pasta (penne, rotini, or elbow macaroni)
  • Honey BBQ sauce
  • Heavy cream or half-and-half
  • Shredded cheddar cheese
  • Cream cheese (optional, for extra creaminess)
  • Onion (optional, for more depth)
  • Fresh parsley or green onions (for garnish)

directions

  1. I season the chicken with salt, pepper, and garlic powder.
  2. In a large skillet, I heat olive oil over medium heat and cook the chicken until golden and cooked through. I remove it from the pan and set it aside.
  3. If using, I sauté some finely chopped onion in the same skillet until softened.
  4. I reduce the heat, then stir in the BBQ sauce and cream. I let it simmer for a few minutes so it thickens slightly.
  5. While that simmers, I cook the pasta according to the package directions and drain it.
  6. I stir shredded cheddar (and cream cheese, if using) into the sauce until it melts into a creamy mixture.
  7. I return the chicken to the pan and toss in the cooked pasta, stirring until everything is well coated.
  8. I garnish with chopped parsley or green onions and serve it warm.

Servings and timing

This recipe makes about 4–6 servings.
Prep time: 10 minutes
Cook time: 20 minutes
Total time: 30 minutes

Variations

I sometimes swap the chicken for shredded rotisserie or leftover grilled chicken to save time. If I want to add veggies, sautéed bell peppers or corn go great in this dish. For a smokier twist, I use smoked cheddar or a mix of cheddar and gouda. When I’m in the mood for spice, I add a dash of chipotle powder or hot sauce to the sauce.

storage/reheating

I store leftovers in an airtight container in the fridge for up to 4 days. To reheat, I use the microwave or a skillet with a splash of milk or cream to bring back that silky texture. The sauce can thicken in the fridge, but it loosens up nicely when warmed gently.

FAQs

Can I use a different kind of BBQ sauce?

Yes, I like using honey BBQ for that sweet-savory balance, but spicy or smoky versions work great too—it just changes the flavor profile a bit.

What type of pasta is best?

I go with short pastas like penne, rotini, or shells because they hold the sauce well, but any pasta I have on hand will do the job.

Can I make this ahead of time?

Yes, I’ve made it earlier in the day and reheated it for dinner. I just add a splash of milk when reheating to keep it creamy.

Is there a dairy-free version?

To make it dairy-free, I use a plant-based cream and cheese alternative. The flavor changes a bit, but it still tastes great with the BBQ sauce as the main highlight.

Can I bake it into a casserole?

Absolutely. I mix everything, pour it into a baking dish, top with extra cheese, and bake at 375°F for about 15–20 minutes until bubbly and golden on top.

Conclusion

Creamy Honey BBQ Chicken & Cheddar Pasta is my go-to when I want bold flavor and creamy comfort in one dish. It’s quick, cheesy, and full of BBQ goodness, making it perfect for busy nights or anytime I want something a little indulgent. Every bite hits that sweet, smoky, and cheesy note just right.

Print

clock clock iconcutlery cutlery iconflag flag iconfolder folder iconinstagram instagram iconpinterest pinterest iconfacebook facebook iconprint print iconsquares squares iconheart heart iconheart solid heart solid icon
Creamy Honey BBQ Chicken & Cheddar Pasta

Creamy Honey BBQ Chicken & Cheddar Pasta

5 Stars 4 Stars 3 Stars 2 Stars 1 Star No reviews
  • Author: Sue
  • Prep Time: 10 minutes
  • Cook Time: 20 minutes
  • Total Time: 30 minutes
  • Yield: 4–6 servings
  • Category: Dinner, Pasta, Skillet Meals
  • Method: Stovetop, Skillet
  • Cuisine: American
Print Recipe
Pin Recipe

Description

This Creamy Honey BBQ Chicken & Cheddar Pasta is a bold, cheesy, and comforting dinner recipe featuring juicy chicken, smoky-sweet honey BBQ sauce, and a rich cheddar cheese cream sauce. Perfect for busy weeknights, this one-skillet pasta dish delivers BBQ flavor in under 30 minutes.


Ingredients

  • Boneless, skinless chicken breasts or thighs
  • Salt and pepper
  • Garlic powder
  • Olive oil or butter
  • Pasta (penne, rotini, or elbow macaroni)
  • Honey BBQ sauce
  • Heavy cream or half-and-half
  • Shredded cheddar cheese
  • Cream cheese (optional, for extra creaminess)
  • Onion (optional)
  • Fresh parsley or green onions (for garnish)

Instructions

  1. Season chicken with salt, pepper, and garlic powder.
  2. In a large skillet, heat olive oil over medium heat. Cook chicken until golden and cooked through. Remove and set aside.
  3. (Optional) Sauté chopped onion in the same skillet until softened.
  4. Reduce heat and stir in honey BBQ sauce and cream. Simmer to thicken slightly.
  5. Cook pasta according to package instructions; drain.
  6. Stir shredded cheddar (and optional cream cheese) into the sauce until smooth and creamy.
  7. Return chicken and pasta to the skillet, stirring to coat.
  8. Garnish with parsley or green onions. Serve warm.

Notes

  • Swap chicken for shredded rotisserie or leftover grilled chicken.
  • Add sautéed bell peppers or corn for extra texture and flavor.
  • Use smoked cheddar or a blend of cheddar and gouda for a deeper taste.
  • Add hot sauce or chipotle powder for a spicy kick.
  • To bake as a casserole, top with cheese and bake at 375°F for 15–20 minutes.

Have you made this recipe? I'd love to see it!

Click here to Follow me on Pinterest

High Protein Broccoli Cheddar Soup

April 1, 2025 by Sue Leave a Comment

High Protein Broccoli Cheddar Soup is my go-to when I want something warm, comforting, and satisfying—but still packed with nutrients. This version keeps all the cheesy goodness of the classic while adding a protein boost that makes it a filling meal on its own.

High Protein Broccoli Cheddar Soup

Why You’ll Love This Recipe

I love how this soup combines comfort food flavor with a health-conscious twist. The velvety texture, cheesy richness, and tender broccoli make it feel indulgent, but with added protein, I know I’m fueling up in a smart way. Whether I use Greek yogurt, protein powder, or a high-protein milk base, this soup keeps me full and energized.

Ingredients

(Here's a tip: Check out the full list of ingredients and measurements in the recipe card below.)

  • Fresh broccoli florets
  • Shredded sharp cheddar cheese
  • Onion, chopped
  • Garlic, minced
  • Carrots, diced or shredded
  • Olive oil or butter
  • Low-sodium chicken or vegetable broth
  • Unsweetened high-protein milk (like Fairlife or a pea protein-based milk)
  • Unflavored protein powder (optional, for extra boost)
  • Plain Greek yogurt or cottage cheese (for creaminess and added protein)
  • Salt and black pepper
  • Optional: pinch of nutmeg or crushed red pepper for flavor depth

Directions

  1. I heat olive oil or butter in a large pot over medium heat, then sauté the chopped onion and garlic until fragrant and soft.
  2. I stir in the carrots and broccoli and cook for 5 minutes, just to start softening them.
  3. I pour in the broth and bring everything to a gentle simmer for 10–15 minutes, until the veggies are tender.
  4. I reduce the heat and stir in the high-protein milk and Greek yogurt (or cottage cheese), mixing until smooth. If I’m using protein powder, I whisk it in now.
  5. I gradually add the shredded cheddar, stirring constantly until melted and fully incorporated.
  6. I season with salt, pepper, and any optional spices to taste.
  7. For a smoother texture, I use an immersion blender to partially blend the soup while keeping some chunks for a hearty bite.

Servings and timing

This recipe makes about 4–6 servings and takes roughly 30 minutes from start to finish. It’s quick enough for a weeknight dinner but cozy enough for a weekend meal.

Variations

  • I sometimes stir in cooked shredded chicken or turkey for even more protein.
  • For a lower-fat version, I use reduced-fat cheese and non-fat Greek yogurt without losing much flavor.
  • I’ve made it with cauliflower instead of broccoli, or a mix of both, for a different veggie profile.
  • For a vegan twist, I use plant-based protein milk, vegan cheese, and silken tofu blended in for creaminess.

Storage/Reheating

I store leftovers in the fridge for up to 4 days in an airtight container. To reheat, I warm it gently on the stove or microwave in short intervals, stirring in between. If the soup thickens, I add a splash of broth or milk to loosen it. It also freezes well for up to 2 months—just thaw overnight and reheat gently.

FAQs

How do I add protein without affecting flavor?

I use unflavored protein powder or blend in cottage cheese or Greek yogurt. These options don’t overpower the cheese and broccoli but still boost the protein content.

Can I make this dairy-free?

Yes, I’ve made it using unsweetened almond milk and vegan cheese. I also blend in white beans or silken tofu for creaminess and protein.

What cheese works best?

Sharp cheddar adds the most flavor, but I’ve used a mix of cheddar and mozzarella for extra meltiness. A little Parmesan also deepens the flavor.

Is it okay to blend the whole soup?

Definitely. I’ve blended it completely for a smooth, creamy texture, or just partially for some chunkiness. It’s totally up to the texture I prefer.

Can I use frozen broccoli?

Yes, frozen broccoli works great. I just thaw it slightly before adding to the pot so it cooks evenly with the other veggies.

Conclusion

High Protein Broccoli Cheddar Soup is the perfect mix of hearty comfort and nutritional balance. I get the cheesy, creamy soup I crave, but with ingredients that keep me fueled and full. It’s a recipe I turn to when I want something warm and nourishing without sacrificing taste or texture.

Print

clock clock iconcutlery cutlery iconflag flag iconfolder folder iconinstagram instagram iconpinterest pinterest iconfacebook facebook iconprint print iconsquares squares iconheart heart iconheart solid heart solid icon
High Protein Broccoli Cheddar Soup

High Protein Broccoli Cheddar Soup

5 Stars 4 Stars 3 Stars 2 Stars 1 Star No reviews
  • Author: Sue
  • Prep Time: 10 minutes
  • Cook Time: 20 minutes
  • Total Time: 30 minutes
  • Yield: 4–6 servings
  • Category: Soup, Main Course
  • Method: Stovetop
  • Cuisine: American
Print Recipe
Pin Recipe

Description

This high protein broccoli cheddar soup delivers all the creamy, cheesy comfort you love—plus a nutritional boost. Packed with tender broccoli, rich sharp cheddar, and optional Greek yogurt or protein powder, this easy 30-minute soup is perfect for a healthy, satisfying meal.


Ingredients

  • 1 tbsp olive oil or butter
  • 1 small onion, chopped
  • 2 cloves garlic, minced
  • 2 medium carrots, diced or shredded
  • 4 cups fresh broccoli florets (or thawed frozen)
  • 3 cups low-sodium chicken or vegetable broth
  • 1½ cups unsweetened high-protein milk (like Fairlife or pea protein milk)
  • ½ cup plain Greek yogurt or blended cottage cheese
  • 1 scoop unflavored protein powder (optional)
  • 1½ cups shredded sharp cheddar cheese
  • Salt and black pepper to taste
  • Optional: pinch of nutmeg or crushed red pepper flakes for flavor

Instructions

  1. In a large pot, heat olive oil or butter over medium heat. Add chopped onion and garlic; sauté until softened and fragrant.
  2. Stir in carrots and broccoli. Cook for 5 minutes to begin softening.
  3. Add broth and bring to a simmer. Cook for 10–15 minutes, until vegetables are tender.
  4. Reduce heat. Stir in high-protein milk and Greek yogurt (or cottage cheese) until smooth.
  5. If using, whisk in unflavored protein powder.
  6. Gradually add shredded cheddar cheese, stirring constantly until fully melted.
  7. Season with salt, pepper, and any optional spices.
  8. For a smoother soup, use an immersion blender to partially or fully blend to desired consistency.
  9. Serve warm and enjoy!

Notes

  • Add cooked shredded chicken for extra protein and heartiness.
  • For a vegetarian version, use vegetable broth and omit meat add-ins.
  • Vegan? Swap dairy with plant-based milk, vegan cheese, and silken tofu for creaminess.
  • Blending white beans into the soup is another protein-boosting, dairy-free option.

Have you made this recipe? I'd love to see it!

Click here to Follow me on Pinterest

Sheet Pan Blueberry Shortcake

April 1, 2025 by Sue Leave a Comment

Sheet pan blueberry shortcake is a fun, easy twist on the classic dessert that’s perfect for sharing. It features tender white cake baked in a sheet pan, layered with sweet blueberry filling and a fluffy whipped topping. I love how it comes together in a simple, slice-and-serve format that’s just right for parties, picnics, or a weekend treat.

Sheet Pan Blueberry Shortcake

Why I Love This Recipe

I love how effortless this dessert is to make for a crowd. The sheet pan format makes it easy to assemble and serve, without sacrificing the buttery, moist texture I expect from a great shortcake. The homemade blueberry sauce is vibrant and fresh, and the whipped cream cheese topping adds just enough tang to balance the sweetness. It’s beautiful, delicious, and doesn’t require any fancy decorating skills.

Ingredients

For the Cake:

  • 2¾ cups cake flour
  • 2 teaspoons baking powder
  • 1 cup salted butter, room temperature
  • 2½ cups granulated sugar
  • 2 teaspoons vanilla extract
  • 5 large egg whites, room temperature
  • 1 cup whole milk, room temperature

For the Blueberry Topping:

  • 4½ cups fresh blueberries, divided
  • ¼ cup granulated sugar
  • ¼ cup lemon juice
  • 2 tablespoons cornstarch

For the Whipped Topping:

  • 2 ounces cream cheese, room temperature
  • ½ cup granulated sugar
  • 2 cups heavy cream
  • ½ teaspoon vanilla extract
  • Pinch of kosher salt

(Here's a tip: Check out the full list of ingredients and measurements in the recipe card below.)

Directions

  1. I preheat the oven to 350°F and line a 10x15-inch sheet pan with parchment paper. I let the parchment hang over the sides so I can lift the cake out later. I lightly spray it with nonstick spray.
  2. In a large bowl, I whisk together the cake flour and baking powder. In another bowl, I cream the butter, sugar, and vanilla until light and fluffy. I beat in the egg whites one at a time. Then I alternate adding the flour mixture and milk until everything is combined.
  3. I pour the batter into the pan and spread it evenly. I bake it for 28–30 minutes, or until a toothpick inserted in the center comes out clean. I let it cool completely in the pan on a wire rack.
  4. While the cake cools, I make the blueberry topping. I cook 4 cups of blueberries in a saucepan with sugar, lemon juice, and cornstarch over medium heat until the mixture thickens and becomes glossy. Then I remove it from heat and stir in the remaining ½ cup of blueberries.
  5. For the whipped topping, I beat the cream cheese and sugar until smooth. Then I slowly add the heavy cream while whipping until soft peaks form. I add the vanilla and salt, and continue whipping until stiff peaks form.
  6. Once the cake is cooled, I lift it from the pan and cut it in half crosswise to create two layers. I place one layer on a serving tray, spread half the blueberry topping and whipped topping over it, then repeat with the second layer.

Servings and Timing

This recipe serves 12.
Prep Time: 20 minutes
Cook Time: 30 minutes
Cooling and Chill Time: 30–60 minutes
Total Time: About 1 hour 30 minutes

Variations

  • I sometimes swap in raspberries or strawberries for a berry twist.
  • For a citrus pop, I add lemon zest to the cake batter or the whipped topping.
  • I’ve used almond extract in place of vanilla for a nutty undertone.
  • When I want more crunch, I sprinkle crushed graham crackers or toasted almonds between the layers.

Storage/Reheating

I store any leftover shortcake in the fridge, covered, for up to 3 days. The whipped topping holds up surprisingly well. I don’t reheat it—it tastes best cold or at room temperature. If I’m making it ahead, I store the cake, topping, and blueberry mixture separately and assemble right before serving.

FAQs

Can I use frozen blueberries?

Yes, I can use frozen blueberries in the sauce. I just thaw and drain them first to avoid too much liquid in the topping.

Can I make this dessert ahead?

Definitely. I like to bake the cake and prep the toppings a day in advance. I store everything separately in the fridge and assemble just before serving.

What if I don’t have cake flour?

No problem. I take 2¾ cups all-purpose flour, remove 5½ tablespoons, and replace it with 5½ tablespoons of cornstarch. Then I sift it well.

How do I prevent the whipped topping from deflating?

I make sure to whip it until stiff peaks form, and keep it chilled until I’m ready to use it. I also avoid overmixing after adding the cream to the cream cheese.

Can I bake this in a different pan?

Yes, I can use a 9x13 pan for a thicker cake or even divide it into two round pans for a traditional layered cake look. I just adjust the baking time accordingly.

Conclusion

Sheet pan blueberry shortcake is one of my favorite ways to enjoy a classic dessert with minimal fuss. It’s soft, fruity, and creamy in every bite—and so easy to slice and serve for a group. Whether it’s for a summer cookout or a casual get-together, I always come back to this sweet, simple, crowd-pleasing dessert.

Print

clock clock iconcutlery cutlery iconflag flag iconfolder folder iconinstagram instagram iconpinterest pinterest iconfacebook facebook iconprint print iconsquares squares iconheart heart iconheart solid heart solid icon
Sheet Pan Blueberry Shortcake

5 Stars 4 Stars 3 Stars 2 Stars 1 Star No reviews
  • Author: Sue
  • Prep Time: 20 minutes
  • Cook Time: 30 minutes
  • Total Time: 1 hour 30 minutes
  • Yield: 12 servings
  • Category: Dessert
  • Method: Baking
  • Cuisine: American
  • Diet: Vegetarian
Print Recipe
Pin Recipe

Description

This Sheet Pan Blueberry Shortcake is a simple, shareable twist on the classic dessert. With a fluffy white cake base, fresh homemade blueberry sauce, and a tangy whipped cream cheese topping, it’s the perfect make-ahead treat for parties, picnics, or holidays. Easy to slice, serve, and enjoy!


Ingredients

  • For the Cake:
  • 2¾ cups cake flour

  • 2 teaspoon baking powder

  • 1 cup salted butter, room temperature

  • 2½ cups granulated sugar

  • 2 teaspoon vanilla extract

  • 5 large egg whites, room temperature

  • 1 cup whole milk, room temperature

  • For the Blueberry Topping:
  • 4½ cups fresh blueberries, divided

  • ¼ cup granulated sugar

  • ¼ cup lemon juice

  • 2 tablespoon cornstarch

  • For the Whipped Topping:
  • 2 oz cream cheese, room temperature

  • ½ cup granulated sugar

  • 2 cups heavy cream

  • ½ teaspoon vanilla extract

  • Pinch of kosher salt


Instructions

  1. Preheat and Prep:
    Preheat oven to 350°F. Line a 10x15-inch sheet pan with parchment paper, leaving overhang for easy lifting. Lightly spray with nonstick spray.
  2. Make the Cake Batter:
    In one bowl, whisk flour and baking powder. In a separate bowl, cream butter, sugar, and vanilla until fluffy. Beat in egg whites one at a time. Alternate adding flour mixture and milk until fully combined.
  3. Bake the Cake:
    Pour batter into prepared pan and smooth out the top. Bake for 28–30 minutes, or until a toothpick comes out clean. Cool completely in the pan.
  4. Make the Blueberry Topping:
    In a saucepan, combine 4 cups blueberries, sugar, lemon juice, and cornstarch. Cook over medium heat, stirring until thick and glossy. Remove from heat and stir in remaining ½ cup blueberries. Let cool.
  5. Make the Whipped Topping:
    Beat cream cheese and sugar until smooth. Slowly add heavy cream while whipping to soft peaks. Add vanilla and salt. Continue whipping to stiff peaks. Chill if not using immediately.
  6. Assemble:
    Once cooled, lift the cake from the pan and cut it in half crosswise. Place one layer on a serving tray. Spread half the blueberry topping and half the whipped toppin

Notes

  • Use frozen blueberries if needed—just thaw and drain first.
  • Make cake and toppings in advance and assemble before serving.
  • Substitute almond extract for vanilla for a nuttier flavor.
  • Add lemon zest to cake or topping for brightness.
  • Store leftovers covered in the fridge for up to 3 days.

Have you made this recipe? I'd love to see it!

Click here to Follow me on Pinterest

Mediterranean Salmon Patties

April 1, 2025 by Sue Leave a Comment

Mediterranean Salmon Patties are a light, flavorful twist on a classic fish cake, made with tender salmon, fresh herbs, and zesty lemon. These patties are pan-fried to golden perfection, delivering a crispy exterior and a moist, herby interior. Perfect for a quick weeknight dinner or a healthy lunch, they’re both satisfying and full of Mediterranean character.

Mediterranean Salmon Patties

Why I Love This Recipe

I love how these salmon patties come together in just a few simple steps, yet taste like something special. The bright flavors of lemon, parsley, and dill balance beautifully with the richness of salmon. They're also a great way to use leftover cooked salmon or canned salmon I already have in the pantry. Whether I serve them with a side salad, tucked into pita bread, or topped with yogurt sauce, they always feel fresh and filling.

Ingredients

(Here's a tip: Check out the full list of ingredients and measurements in the recipe card below.)

  • Cooked or canned salmon
  • Eggs
  • Breadcrumbs or panko
  • Fresh parsley, chopped
  • Fresh dill, chopped
  • Onion, finely chopped (red or green)
  • Garlic, minced
  • Lemon zest and juice
  • Ground paprika
  • Olive oil (for frying)
  • Salt and black pepper

Directions

  1. Prepare the mixture
    I start by flaking the salmon into a large mixing bowl. I add the eggs, breadcrumbs, chopped herbs, onion, garlic, lemon zest and juice, paprika, salt, and pepper. I mix everything together until it holds its shape. If it’s too wet, I sprinkle in a bit more breadcrumbs.
  2. Shape the patties
    I form the mixture into round, flat patties about 1 inch thick. Depending on the size, I usually get 4 to 6 patties.
  3. Cook the patties
    I heat olive oil in a skillet over medium heat. Once it’s hot, I add the patties and cook them for about 3-4 minutes per side, until golden brown and cooked through.
  4. Serve
    I transfer them to a plate lined with paper towels and serve them warm with lemon wedges or a dollop of yogurt sauce.

Servings and Timing

This recipe makes about 4 servings. Prep time is 15 minutes, and cooking time is 10 minutes, so everything comes together in roughly 25 minutes.

Variations

  • I sometimes add a spoonful of Dijon mustard for a tangy kick.
  • If I want a creamier inside, I mix in a little feta cheese.
  • For a gluten-free version, I use almond flour or gluten-free breadcrumbs instead of regular ones.

Storage/Reheating

I store leftover patties in an airtight container in the fridge for up to 3 days. When I’m ready to reheat, I use a skillet over medium heat to bring back the crispiness. If I’m in a hurry, I use the microwave, but I know they’ll be softer that way. They can also be frozen—just shape, freeze on a tray, then store in a freezer bag for up to 2 months. I thaw them in the fridge before cooking.

FAQs

Can I use canned salmon?

Yes, I often use canned salmon when I want a quick meal. I make sure to drain it well and remove any large bones.

Do I need to cook the salmon first?

If I’m not using canned salmon, I use pre-cooked fillets. Leftover grilled or baked salmon works great.

Can I bake these instead of frying?

Yes, I bake them at 400°F (200°C) for about 15-18 minutes, flipping halfway. They don’t get quite as crispy, but it’s a great option if I want to avoid frying.

What can I serve with salmon patties?

I like them with a Greek salad, roasted vegetables, or inside pita bread with lettuce and yogurt sauce. They’re super versatile.

How do I keep the patties from falling apart?

I make sure the mixture isn't too wet, and I don’t flip them too early. Letting them get a nice crust on one side helps hold them together.

Conclusion

These Mediterranean Salmon Patties are an easy, healthy meal that’s packed with flavor and perfect for any time of day. I love how adaptable they are and how they bring fresh, vibrant ingredients into one tasty patty. Whether I’m using canned or fresh salmon, I always end up with a dish that feels nourishing and satisfying.

Print

clock clock iconcutlery cutlery iconflag flag iconfolder folder iconinstagram instagram iconpinterest pinterest iconfacebook facebook iconprint print iconsquares squares iconheart heart iconheart solid heart solid icon
Mediterranean Salmon Patties

Mediterranean Salmon Patties

5 Stars 4 Stars 3 Stars 2 Stars 1 Star No reviews
  • Author: Sue
  • Prep Time: 15 minutes
  • Cook Time: 10 minutes
  • Total Time: 25 minutes
  • Yield: 4 servings
  • Category: Main Dish, Lunch
  • Method: Pan-frying
  • Cuisine: Mediterranean
Print Recipe
Pin Recipe

Description

These Mediterranean Salmon Patties are a healthy and flavorful twist on classic fish cakes—packed with fresh herbs, lemon, and tender salmon. Quick to make and perfect for lunch or dinner, these salmon patties are crispy on the outside and moist inside, ideal for a light Mediterranean-inspired meal.


Ingredients

  • Cooked or canned salmon
  • Eggs
  • Breadcrumbs or panko
  • Fresh parsley, chopped
  • Fresh dill, chopped
  • Onion (red or green), finely chopped
  • Garlic, minced
  • Lemon zest and juice
  • Ground paprika
  • Olive oil (for frying)
  • Salt and black pepper

Instructions

  1. Prepare the Mixture
  2. Flake the salmon into a mixing bowl.
  3. Add eggs, breadcrumbs, parsley, dill, onion, garlic, lemon zest, lemon juice, paprika, salt, and pepper.
  4. Mix until combined. If the mixture feels too wet, add a bit more breadcrumbs.
  5. Shape the Patties
  6. Form into round, flat patties about 1 inch thick (makes 4–6 patties).
  7. Cook the Patties
  8. Heat olive oil in a skillet over medium heat.
  9. Cook patties 3–4 minutes per side until golden and heated through.
  10. Serve
  11. Remove and place on paper towels.
  12. Serve warm with lemon wedges or yogurt sauce.

Notes

  • Add Dijon mustard for tanginess or feta for a creamier texture.
  • Use gluten-free breadcrumbs or almond flour to make it gluten-free.
  • Patties can be baked at 400°F (200°C) for 15–18 minutes if preferred over frying.
  • Freeze shaped patties raw for up to 2 months—thaw before cooking.

Have you made this recipe? I'd love to see it!

Click here to Follow me on Pinterest

Meatball & Mashed Potato Bake

March 31, 2025 by Sue Leave a Comment

The Meatball & Mashed Potato Bake is a comforting and hearty casserole that combines tender meatballs nestled in creamy mashed potatoes, all topped with rich marinara sauce and melted cheese. This dish is perfect for family dinners, offering a satisfying blend of flavors and textures that everyone will enjoy.

Meatball & Mashed Potato Bake

Why I Love This Recipe

I appreciate this recipe for its simplicity and versatility. It brings together classic comfort foods—meatballs and mashed potatoes—into a single, easy-to-prepare casserole that's both filling and flavorful. The addition of marinara sauce and melted cheese adds a delightful Italian twist, making it a go-to meal for cozy evenings.

Ingredients

(Here's a tip: Check out the full list of ingredients and measurements in the recipe card below.)

  • For the Mashed Potatoes:

    • Potatoes (gold or russet)

    • Unsalted butter

    • Milk (whole preferred)

    • Salt and pepper to taste

  • For the Meatballs:

    • Ground beef

    • Large egg

    • Finely chopped onion

    • Fresh parsley, chopped

    • Dried oregano

    • Salt and ground black pepper

  • Additional Ingredients:

    • Marinara sauce (store-bought or homemade)

    • Smoked mozzarella cheese, grated

Directions

  1. Prepare the Mashed Potatoes:

    • Wash, peel, and cut the potatoes into uniform pieces for even cooking.

    • Place the potatoes in a pot, cover with cold water, and add a generous amount of salt.

    • Bring to a boil, then reduce heat and simmer until the potatoes are fork-tender.

    • Drain the water, add butter and warm milk to the potatoes, and mash until smooth and creamy. Season with salt and pepper to taste.

  2. Make the Meatballs:

    • Preheat the oven to 400°F (200°C).

    • In a mixing bowl, combine the ground meat, egg, chopped onion, parsley, oregano, salt, and pepper.

    • Mix until all ingredients are well incorporated.

    • Form the mixture into small meatballs, about 1 to 1.5 inches in diameter.

    • Place the meatballs on a baking sheet lined with parchment paper and bake for about 15-20 minutes, or until cooked through.

  3. Assemble the Casserole:

    • Spread the prepared mashed potatoes evenly in the bottom of a casserole dish.

    • Arrange the baked meatballs on top of the mashed potatoes.

    • Pour marinara sauce over the meatballs, ensuring they are well-covered.

    • Sprinkle grated smoked mozzarella cheese generously over the top.

  4. Bake:

    • Place the assembled casserole in the preheated oven and bake for 20-25 minutes, or until the cheese is melted and bubbly with a slight golden hue.

  5. Serve:

    • Remove from the oven and let it cool slightly before serving.

    • Garnish with additional chopped parsley if desired.

Servings and Timing

This recipe serves approximately 4-6 people. The preparation time is about 30 minutes, and the cooking time is around 45 minutes, making the total time approximately 1 hour and 15 minutes.

Variations

  • Cheese Options: If smoked mozzarella isn't available, I use regular mozzarella or even a blend of Italian cheeses for a different flavor profile.

  • Sauce Alternatives: Sometimes, I substitute marinara sauce with a creamy Alfredo or a spicy arrabbiata to change things up.

  • Vegetable Additions: I like to incorporate sautéed spinach or mushrooms into the mashed potatoes for added nutrition and flavor.

Storage/Reheating

I store any leftovers in an airtight container in the refrigerator for up to 3 days. To reheat, I place a portion in the microwave until heated through or warm the entire casserole in the oven at 350°F (175°C) for about 15-20 minutes.

FAQs

Can I use store-bought meatballs for this recipe?

Yes, I often use pre-cooked store-bought meatballs to save time. I just ensure they are fully thawed before assembling the casserole.

Is it possible to make this dish ahead of time?

Absolutely! I assemble the casserole up to the baking step, cover it tightly, and refrigerate it for up to 24 hours. When ready to serve, I bake it as directed, adding a few extra minutes to the baking time.

Can I freeze the Meatball & Mashed Potato Bake?

Yes, I freeze the assembled but unbaked casserole. I wrap it tightly with plastic wrap and aluminum foil and store it in the freezer for up to 2 months. When ready to bake, I thaw it in the refrigerator overnight and bake as directed.

What can I serve alongside this casserole?

I find that a simple green salad or steamed vegetables complement this hearty dish well, adding freshness and balance to the meal.

How can I make this recipe gluten-free?

To make this dish gluten-free, I ensure that all ingredients, including the marinara sauce and any seasonings, are certified gluten-free. I also use gluten-free breadcrumbs if adding them to the meatballs.

Conclusion

The Meatball & Mashed Potato Bake is a delightful fusion of comforting flavors that brings warmth to any dining table. Its creamy, cheesy, and savory layers make it a family favorite, perfect for both weeknight dinners and special gatherings. Enjoy crafting this hearty casserole and sharing it with loved ones.

Print

clock clock iconcutlery cutlery iconflag flag iconfolder folder iconinstagram instagram iconpinterest pinterest iconfacebook facebook iconprint print iconsquares squares iconheart heart iconheart solid heart solid icon
Meatball & Mashed Potato Bake

Meatball & Mashed Potato Bake

5 Stars 4 Stars 3 Stars 2 Stars 1 Star No reviews
  • Author: Sue
  • Prep Time: 30 minutes
  • Cook Time: 45 minutes
  • Total Time: 1 hour 15 minutes
  • Yield: Serves 4–6
  • Category: Dinner, Casserole
  • Method: Baking
  • Cuisine: American, Italian-inspired
Print Recipe
Pin Recipe

Description

This Meatball & Mashed Potato Bake is a cozy, family-friendly casserole that combines tender meatballs, creamy mashed potatoes, marinara sauce, and melted cheese for the ultimate comfort food. Perfect for busy weeknights or weekend dinners, this hearty dish is a guaranteed crowd-pleaser.


Ingredients

  • For the Mashed Potatoes:
  • Potatoes (gold or russet)
  • Unsalted butter
  • Whole milk
  • Salt and pepper to taste
  • For the Meatballs:
  • Ground beef
  • 1 large egg
  • Finely chopped onion
  • Fresh parsley, chopped
  • Dried oregano
  • Salt and black pepper
  • Additional Ingredients:
  • Marinara sauce (store-bought or homemade)
  • Smoked mozzarella cheese, grated

Instructions

  • Prepare the Mashed Potatoes:
  • Wash, peel, and dice potatoes evenly.
  • Boil in salted water until fork-tender, then drain.
  • Add butter and warm milk, mash until creamy. Season with salt and pepper.
  • Make the Meatballs:
  • Preheat oven to 400°F (200°C).
  • Mix ground meat, egg, onion, parsley, oregano, salt, and pepper in a bowl.
  • Form into 1–1.5 inch balls and bake on parchment-lined sheet for 15–20 minutes.
  • Assemble the Casserole:
  • Spread mashed potatoes in a casserole dish.
  • Top with baked meatballs.
  • Pour marinara sauce evenly over meatballs.
  • Sprinkle grated smoked mozzarella on top.
  • Bake:
  • Bake in preheated oven for 20–25 minutes, until cheese is bubbly and slightly golden.
  • Serve:
  • Cool slightly before serving. Garnish with extra chopped parsley if desired.

Notes

  • You can use store-bought meatballs for a time-saving shortcut.
  • Substitute smoked mozzarella with regular mozzarella or a cheese blend.
  • Add sautéed spinach or mushrooms to the mashed potatoes for a nutrition boost.
  • To make ahead: assemble, cover, and refrigerate up to 24 hours before baking.
  • Freeze unbaked casserole up to 2 months; thaw before baking.

Have you made this recipe? I'd love to see it!

Click here to Follow me on Pinterest

Banana Bread Cookies

March 31, 2025 by Sue Leave a Comment

Banana Bread Cookies offer the delightful taste of traditional banana bread in a convenient, handheld form. These soft, chewy treats are perfect for using up overripe bananas and make for a comforting snack or dessert.

Banana Bread Cookies

Why I Love This Recipe

I appreciate this recipe for several reasons:

  • Resourceful: It's an excellent way to utilize overripe bananas that might otherwise go to waste.

  • Quick and Easy: The preparation is straightforward, and the cookies bake faster than a traditional loaf of banana bread.

  • Versatile: These cookies can be customized with various add-ins like nuts, chocolate chips, or spices to suit different tastes.

Ingredients

(Here's a tip: Check out the full list of ingredients and measurements in the recipe card below.)

  • Ripe bananas

  • Unsalted butter

  • Granulated sugar

  • Brown sugar

  • Egg

  • Vanilla extract

  • All-purpose flour

  • Baking soda

  • Salt

  • Ground cinnamon (optional)

  • Chocolate chips or chopped nuts (optional)

Directions

  1. Preheat the Oven: I set my oven to 350°F (175°C) and line a baking sheet with parchment paper.

  2. Prepare the Wet Ingredients: In a large bowl, I cream together softened butter, granulated sugar, and brown sugar until light and fluffy. Then, I mix in a mashed ripe banana, egg, and vanilla extract until well combined.

  3. Combine Dry Ingredients: In a separate bowl, I whisk together all-purpose flour, baking soda, salt, and ground cinnamon if using.

  4. Mix the Dough: I gradually add the dry ingredients to the wet mixture, stirring until just combined. If desired, I fold in chocolate chips or chopped nuts at this stage.

  5. Portion the Dough: Using a spoon or cookie scoop, I drop spoonfuls of the dough onto the prepared baking sheet, spacing them about 2 inches apart.

  6. Bake: I bake the cookies for 10-12 minutes, or until the edges are golden brown and the centers are set.

  7. Cool: After removing them from the oven, I let the cookies cool on the baking sheet for a few minutes before transferring them to a wire rack to cool completely.

Servings and Timing

This recipe yields approximately 24 cookies. The preparation time is about 15 minutes, and the baking time is 10-12 minutes, totaling around 30 minutes from start to finish.

Variations

I enjoy experimenting with this recipe by:

  • Adding Mix-Ins: Incorporating 1 cup of chocolate chips, chopped nuts, or dried fruit for added texture and flavor.

  • Spicing It Up: Adding a pinch of nutmeg or allspice along with the cinnamon for a more complex spice profile.

  • Gluten-Free Option: Substituting the all-purpose flour with a gluten-free flour blend to accommodate dietary preferences.

Storage and Reheating

To keep the cookies fresh, I store them in an airtight container at room temperature for up to 3 days. For longer storage, I freeze the cookies in a sealed container for up to 2 months. When ready to enjoy, I let them thaw at room temperature or warm them briefly in the microwave.

FAQs

Can I use frozen bananas for this recipe?

Yes, I can use frozen bananas. I thaw them completely and drain any excess liquid before mashing and adding them to the batter.

How do I prevent the cookies from becoming too cakey?

To achieve a chewier texture, I ensure not to overmix the batter and avoid adding too much flour. Measuring the flour accurately helps maintain the desired consistency.

Can I make these cookies vegan?

Yes, I can make vegan banana bread cookies by using plant-based butter and replacing the egg with a flax egg (1 tablespoon ground flaxseed mixed with 3 tablespoons water, left to sit for 5 minutes).

Is it necessary to chill the dough before baking?

Chilling the dough is not required for this recipe. However, if I prefer a thicker cookie, refrigerating the dough for 30 minutes before baking can help prevent spreading.

Can I double the recipe?

Absolutely. I can double the ingredients to make a larger batch. I ensure to bake the cookies in batches to avoid overcrowding the baking sheet.

Conclusion

Banana Bread Cookies are a delightful twist on a classic favorite, offering the comforting flavors of banana bread in a portable form. With their soft texture and customizable options, they have become a cherished treat in my household. Whether enjoyed as a snack, dessert, or shared with friends, these cookies are sure to please.

Print

clock clock iconcutlery cutlery iconflag flag iconfolder folder iconinstagram instagram iconpinterest pinterest iconfacebook facebook iconprint print iconsquares squares iconheart heart iconheart solid heart solid icon
Banana Bread Cookies

Banana Bread Cookies

5 Stars 4 Stars 3 Stars 2 Stars 1 Star No reviews
  • Author: Sue
  • Prep Time: 15 minutes
  • Cook Time: 10–12 minutes
  • Total Time: 30 minutes
  • Yield: About 24 cookies
  • Category: Dessert, Snack
  • Method: Baking
  • Cuisine: American
  • Diet: Vegetarian
Print Recipe
Pin Recipe

Description

Banana Bread Cookies bring the comforting flavor of classic banana bread into a soft, chewy cookie form. Perfect for using up ripe bananas, these quick and easy cookies are ideal for snacking, sharing, or satisfying a sweet craving. Customize them with your favorite mix-ins like chocolate chips or nuts for a treat that’s both nostalgic and delicious.


Ingredients

  • 1 ripe banana, mashed
  • ½ cup unsalted butter, softened
  • ½ cup granulated sugar
  • ½ cup brown sugar, packed
  • 1 large egg
  • 1 tsp vanilla extract
  • 1 ½ cups all-purpose flour
  • ½ tsp baking soda
  • ¼ tsp salt
  • ½ tsp ground cinnamon (optional)
  • 1 cup chocolate chips or chopped nuts (optional)

Instructions

  1. Preheat Oven: Set oven to 350°F (175°C) and line a baking sheet with parchment paper.
  2. Cream Butter & Sugars: In a large bowl, cream together softened butter, granulated sugar, and brown sugar until light and fluffy.
  3. Add Wet Ingredients: Mix in mashed banana, egg, and vanilla extract until well combined.
  4. Combine Dry Ingredients: In a separate bowl, whisk together flour, baking soda, salt, and cinnamon (if using).
  5. Mix Dough: Gradually add dry ingredients to the wet mixture, stirring until just combined. Fold in chocolate chips or nuts if desired.
  6. Scoop & Space: Drop spoonfuls of dough onto prepared baking sheet, spacing about 2 inches apart.
  7. Bake: Bake for 10–12 minutes, until edges are golden and centers are set.
  8. Cool: Let cookies cool on the baking sheet for a few minutes before transferring to a wire rack to cool completely.

Notes

  • For chewier cookies, avoid overmixing the dough.
  • Use a gluten-free flour blend for a gluten-free option.
  • Add nutmeg or allspice for extra spice depth.
  • Dough doesn't need chilling, but refrigerating helps if you prefer thicker cookies.
  • Store in an airtight container at room temperature for up to 3 days or freeze for 2 months.

Have you made this recipe? I'd love to see it!

Click here to Follow me on Pinterest

Healthy Cookies – No Sugar! No Flour!

March 31, 2025 by Sue Leave a Comment

These healthy cookies are my go-to when I want something sweet without the guilt. They’re soft, naturally sweetened, and packed with wholesome ingredients—no refined sugar, no flour, and no artificial stuff. Just real, feel-good food that satisfies my cookie cravings in the healthiest way possible.

Healthy Cookies – No Sugar! No Flour!

Why You’ll Love This Recipe

I love how these cookies come together in minutes with just a few simple ingredients. There’s no mixing bowls full of flour or sugar to deal with—just mashed bananas, oats, and whatever mix-ins I’m in the mood for. They’re perfect for breakfast, snacks, or a clean-eating dessert. Plus, they’re naturally gluten-free and vegan-friendly depending on what I add.

Ingredients

(Here's a tip: Check out the full list of ingredients and measurements in the recipe card below.)

  • Ripe bananas (the more ripe, the sweeter)

  • Rolled oats

  • Optional add-ins:

    • Dark chocolate chips or cacao nibs

    • Chopped nuts (like almonds or walnuts)

    • Raisins or dried cranberries

    • Peanut butter or almond butter

    • Cinnamon or vanilla extract

Directions

  1. I start by preheating the oven to 350°F (175°C) and lining a baking sheet with parchment paper.

  2. In a bowl, I mash the bananas until smooth.

  3. I stir in the oats and mix until combined. This is the base dough.

  4. Then I fold in any extras I want—usually some dark chocolate chips, a spoonful of peanut butter, and a sprinkle of cinnamon.

  5. I scoop out spoonfuls of dough and place them on the prepared baking sheet, gently flattening them with my fingers.

  6. I bake the cookies for 12–15 minutes, until they’re set and lightly golden.

  7. I let them cool on the baking sheet for a few minutes before transferring to a rack.

Servings and Timing

This recipe makes about 10–12 small cookies. It takes around 5 minutes to prep and 12–15 minutes to bake, so they’re ready in under 20 minutes.

Variations

I love playing around with the mix-ins. Chopped dates, shredded coconut, chia seeds, or a spoonful of cocoa powder are great options. If I want extra protein, I mix in a scoop of plant-based protein powder. For fall vibes, I add pumpkin puree and pumpkin spice.

Storage/Reheating

I keep these cookies in an airtight container at room temperature for up to 2 days, or in the fridge for up to a week. They also freeze well—I just pop them in a freezer bag and grab one when I need a healthy snack. To reheat, I microwave them for 10–15 seconds to bring back that fresh-from-the-oven softness.

FAQs

Are these cookies really sweet without sugar?

Yes, the ripe bananas add natural sweetness. The riper they are, the sweeter the cookies turn out. If I want more sweetness, I sometimes add a few chopped dates or raisins.

Can I use instant oats instead of rolled oats?

I prefer rolled oats for texture, but instant oats work too. The cookies will just be a bit softer and less chewy.

Are these cookies gluten-free?

Yes, as long as I use certified gluten-free oats, these cookies are naturally gluten-free.

Can I add eggs or baking powder?

Sure, I’ve added an egg before for a slightly more cake-like texture. A pinch of baking powder can help them puff up a bit, but they’re great as-is too.

Can I make these nut-free?

Absolutely. I skip the nut butters and nuts, and just go with plain banana-oat dough or mix in seeds like sunflower or pumpkin instead.

Conclusion

These no sugar, no flour cookies are the easiest way I satisfy my sweet tooth while sticking to healthy habits. They’re quick, endlessly customizable, and made with clean ingredients I feel good about. Whether it’s breakfast on the go, a post-workout snack, or a wholesome dessert, these cookies always come through.

Print

clock clock iconcutlery cutlery iconflag flag iconfolder folder iconinstagram instagram iconpinterest pinterest iconfacebook facebook iconprint print iconsquares squares iconheart heart iconheart solid heart solid icon
Healthy Cookies – No Sugar! No Flour!

Healthy Cookies – No Sugar! No Flour!

5 Stars 4 Stars 3 Stars 2 Stars 1 Star No reviews
  • Author: Sue
  • Prep Time: 5 minutes
  • Cook Time: 15 minutes
  • Total Time: 20 minutes
  • Yield: 10–12 cookies
  • Category: Snack, Breakfast, Dessert
  • Method: Baking
  • Cuisine: American
  • Diet: Vegan
Print Recipe
Pin Recipe

Description

These soft and chewy healthy cookies with no sugar and no flour are naturally sweetened with ripe bananas and made with wholesome oats. They’re quick to make, totally customizable, and perfect for a clean-eating snack, breakfast, or dessert—no guilt, just feel-good goodness!


Ingredients

  • 2 ripe bananas, mashed
  • 1 cup rolled oats
  • Optional add-ins:
  • ¼ cup dark chocolate chips or cacao nibs
  • 2 tbsp chopped nuts (almonds, walnuts, etc.)
  • 2 tbsp raisins or dried cranberries
  • 1 tbsp peanut butter or almond butter
  • ½ tsp cinnamon or 1 tsp vanilla extract

Instructions

  1. Preheat oven to 350°F (175°C) and line a baking sheet with parchment paper.
  2. In a medium bowl, mash bananas until smooth.
  3. Stir in rolled oats to form a sticky dough.
  4. Fold in desired mix-ins like chocolate chips, nut butter, or dried fruit.
  5. Scoop heaping spoonfuls of dough onto prepared baking sheet and flatten slightly.
  6. Bake for 12–15 minutes, until lightly golden and set.
  7. Let cool on the baking sheet for a few minutes before transferring to a rack.

Notes

  • The riper the bananas, the sweeter the cookies.
  • Use certified gluten-free oats to make this recipe gluten-free.
  • For added protein, stir in a scoop of your favorite plant-based protein powder.
  • Cookies can be frozen and reheated for quick snacks.
  • Add pumpkin puree and pumpkin spice for a seasonal twist!

Have you made this recipe? I'd love to see it!

Click here to Follow me on Pinterest

Caramel Frosting Recipe

March 31, 2025 by Sue Leave a Comment

This Caramel Frosting Recipe is rich, buttery, and velvety smooth with deep caramel flavor. It’s the perfect topping for cakes, cupcakes, or even cookies when I want to add a luxurious, sweet finish. Whether I’m baking in fall or craving something decadent year-round, this frosting always delivers that warm, toasty sweetness I love.

Caramel Frosting Recipe

Why You’ll Love This Recipe

I love how this frosting turns any dessert into a showstopper. The homemade caramel base gives it a depth of flavor that store-bought frostings just can’t match. It’s not overly complicated, but it tastes like something truly special. Plus, I can adjust the consistency to make it perfect for spreading, piping, or drizzling.

ingredients

(Here's a tip: Check out the full list of ingredients and measurements in the recipe card below.)

  • Unsalted butter
  • Brown sugar
  • Heavy cream or milk
  • Powdered sugar
  • Vanilla extract
  • Salt (optional, for a salted caramel twist)

directions

  1. In a saucepan over medium heat, I melt the butter and stir in the brown sugar. I cook, stirring constantly, until the sugar is dissolved and the mixture starts to bubble.
  2. I add the heavy cream and continue stirring until everything is smooth and well combined.
  3. I remove the pan from heat and let it cool for about 10–15 minutes.
  4. Once slightly cooled, I transfer the mixture to a mixing bowl and gradually beat in the powdered sugar until I get a fluffy, smooth consistency.
  5. I stir in the vanilla extract and a pinch of salt if I want a salted caramel flavor.
  6. If the frosting is too thick, I add a little more cream. If it’s too thin, I beat in more powdered sugar.

Servings and timing

This recipe makes enough to frost one 9-inch layer cake or about 12 cupcakes. It takes around 10 minutes to prep and 15 minutes to cook and cool.

Variations

  • I add a pinch of cinnamon or nutmeg for a spiced caramel version.
  • For a darker caramel flavor, I use dark brown sugar.
  • I stir in a spoonful of cream cheese for a tangy twist.
  • I use salted butter and skip the added salt for a more savory-sweet flavor.

storage/reheating

I store leftover frosting in an airtight container in the refrigerator for up to 1 week. Before using, I let it come to room temperature and re-whip it to restore the texture. If it’s still too firm, I stir in a small amount of cream until it softens.

FAQs

Can I make this frosting ahead of time?

Yes, I make it up to a week in advance and store it in the fridge. I just re-whip before using.

Can I use this frosting for piping?

Yes, once cooled and whipped, it holds its shape well for simple piping designs.

Is it too sweet for layer cakes?

It is sweet, but the rich caramel balances it out. I pair it with less-sweet cakes like spice or chocolate for the best combo.

Can I double the recipe?

Absolutely. I double all the ingredients as listed and just take care not to burn the sugar while cooking.

What desserts pair best with caramel frosting?

I love it on chocolate cake, spice cake, banana bread, and apple cupcakes. It also works great on sugar cookies or as a filling in sandwich cookies.

Conclusion

This Caramel Frosting Recipe brings deep, buttery flavor and smooth texture to any dessert. It’s easy to make and endlessly versatile, whether I’m spreading it on a cake or adding a swirl to cupcakes. Once I make it from scratch, there’s no going back.

Print

clock clock iconcutlery cutlery iconflag flag iconfolder folder iconinstagram instagram iconpinterest pinterest iconfacebook facebook iconprint print iconsquares squares iconheart heart iconheart solid heart solid icon
Caramel Frosting Recipe

Caramel Frosting Recipe

5 Stars 4 Stars 3 Stars 2 Stars 1 Star No reviews
  • Author: Sue
  • Prep Time: 10 minutes
  • Cook Time: 15 minutes
  • Total Time: 25 minutes
  • Yield: Frosts 1 (9-inch) cake or 12 cupcakes
  • Category: Frosting, Dessert
  • Method: Stovetop + Mixing
  • Cuisine: American
  • Diet: Vegetarian
Print Recipe
Pin Recipe

Description

This Caramel Frosting Recipe is rich, buttery, and velvety smooth with deep caramel flavor. Perfect for cakes, cupcakes, cookies, or even as a filling, this easy homemade frosting adds a luxurious touch to any dessert. Whether you're baking for fall or just love the sweet, toasted notes of caramel, this frosting delivers bold flavor and silky texture every time.


Ingredients

  • ½ cup (1 stick) unsalted butter
  • 1 cup packed brown sugar (light or dark)
  • ¼ cup heavy cream (or milk)
  • 2–2½ cups powdered sugar, sifted
  • 1 tsp vanilla extract
  • Pinch of salt (optional, for salted caramel flavor)

Instructions

  1. In a medium saucepan over medium heat, melt the butter.
  2. Stir in the brown sugar and cook, stirring constantly, until sugar is dissolved and the mixture begins to bubble (about 2–3 minutes).
  3. Slowly add the heavy cream, stirring until smooth. Remove from heat and let cool for 10–15 minutes.
  4. Transfer the mixture to a mixing bowl. Beat in powdered sugar gradually until the frosting reaches a smooth, fluffy consistency.
  5. Stir in vanilla extract and a pinch of salt if desired.
  6. Adjust consistency as needed: add more cream if too thick or more powdered sugar if too thin.

Notes

  • Use dark brown sugar for a deeper, richer caramel flavor.
  • Add a dash of cinnamon or nutmeg for a spiced version.
  • Mix in a spoonful of cream cheese for tangy depth.
  • Use salted butter for a balanced salty-sweet version.
  • Makes enough to frost one 9-inch layer cake or about 12 cupcakes.

Have you made this recipe? I'd love to see it!

Click here to Follow me on Pinterest

Garlic Herb Sourdough Bread Stuffed with Brie and Cranberry Sauce

March 31, 2025 by Sue Leave a Comment

Garlic Herb Sourdough Bread Stuffed with Brie and Cranberry Sauce is one of those irresistible recipes that instantly upgrades any gathering or cozy night in. The crusty sourdough loaf is sliced and filled with creamy brie, sweet-tart cranberry sauce, and a rich garlic herb butter that melts into every crevice. Once baked, it becomes gooey, golden, and full of flavor—a perfect pull-apart appetizer or side dish that’s always a hit.

Garlic Herb Sourdough Bread Stuffed with Brie and Cranberry Sauce

Why You’ll Love This Recipe

I love how simple ingredients can come together to make something so impressive and indulgent. The sourdough loaf holds everything beautifully and develops a crispy crust while the brie melts into luxurious pools of cheese. The cranberry sauce adds a sweet contrast that cuts through the richness, and the garlic herb butter brings everything to life. Whether I serve it for a holiday, dinner party, or casual movie night, it disappears in minutes.

Ingredients

(Here's a tip: Check out the full list of ingredients and measurements in the recipe card below.)

  • Round sourdough bread loaf

  • Brie cheese (rind on or off, based on preference)

  • Cranberry sauce (whole berry or jellied)

  • Unsalted butter

  • Garlic, minced

  • Fresh herbs (such as rosemary, thyme, and parsley)

  • Olive oil (optional for brushing)

  • Salt and pepper

Directions

  1. I preheat the oven to 350°F (175°C) and line a baking sheet with foil or parchment paper.

  2. I cut the sourdough loaf into a crosshatch pattern—making deep slices both vertically and horizontally, but not all the way through the bottom.

  3. I gently stuff slices of brie and small spoonfuls of cranberry sauce into the spaces between the bread cubes.

  4. In a small saucepan, I melt butter and stir in the garlic and chopped herbs. I season it with a pinch of salt and pepper.

  5. I spoon or brush the garlic herb butter generously into the cuts, letting it soak into the bread.

  6. I wrap the bread loosely in foil and bake for 15–20 minutes, then uncover and bake for another 5–10 minutes until the top is golden and the cheese is melted.

  7. I let it cool slightly before serving so it's easier to pull apart.

Servings and timing

This recipe serves about 6–8 people as an appetizer. It takes around 15 minutes to prep and 25–30 minutes to bake, so it’s ready in about 45 minutes.

Variations

  • I sometimes add chopped pecans or walnuts for a bit of crunch.

  • For a more savory twist, I use caramelized onions or fig jam instead of cranberry sauce.

  • When I want a stronger herb flavor, I mix in a little dried Italian seasoning with the butter.

  • I’ve also tried it with camembert or goat cheese as an alternative to brie—both work beautifully.

storage/reheating

If I have leftovers, I wrap the bread in foil and store it in the fridge for up to 2 days. To reheat, I warm it in the oven at 350°F for 10–15 minutes. I avoid microwaving since it makes the bread chewy instead of crisp.

FAQs

Can I make this ahead of time?

Yes, I assemble everything ahead and store it wrapped in the fridge. I bake it just before serving so it’s hot and gooey.

Do I have to use sourdough bread?

No, but sourdough gives it great flavor and holds up well to the fillings. I’ve used rustic Italian or French bread with good results.

Can I use store-bought cranberry sauce?

Absolutely. I’ve used both homemade and canned versions. As long as it’s thick enough to spoon into the bread, it works.

What herbs go best in the garlic butter?

I usually use fresh rosemary, thyme, and parsley, but sage or chives also add great flavor.

How do I keep the bread from drying out?

I cover it with foil for the first part of baking so the cheese melts and the bread stays soft, then uncover it at the end to crisp the top.

Conclusion

Garlic Herb Sourdough Bread Stuffed with Brie and Cranberry Sauce is everything I want in a shareable appetizer—easy, flavorful, and totally addictive. The combination of warm bread, melty cheese, tangy cranberries, and herby butter makes every bite something special. It’s the kind of dish I keep coming back to, and once I’ve served it, I always get asked for the recipe.

Print

clock clock iconcutlery cutlery iconflag flag iconfolder folder iconinstagram instagram iconpinterest pinterest iconfacebook facebook iconprint print iconsquares squares iconheart heart iconheart solid heart solid icon
Garlic Herb Sourdough Bread Stuffed with Brie and Cranberry Sauce

Garlic Herb Sourdough Bread Stuffed with Brie and Cranberry Sauce

5 Stars 4 Stars 3 Stars 2 Stars 1 Star No reviews
  • Author: Sue
  • Prep Time: 15 minutes
  • Cook Time: 30 minutes
  • Total Time: 45 minutes
  • Yield: Serves 6–8 as an appetizer
  • Category: Appetizer, Side Dish
  • Method: Baking
  • Cuisine: American
  • Diet: Vegetarian
Print Recipe
Pin Recipe

Description

Garlic Herb Sourdough Bread Stuffed with Brie and Cranberry Sauce is a crowd-pleasing, pull-apart appetizer featuring crusty sourdough filled with melty brie, tangy cranberry sauce, and rich garlic herb butter. Baked until golden and gooey, it’s the perfect holiday or party dish that’s easy to make and irresistibly delicious.


Ingredients

  • 1 round sourdough bread loaf
  • 8 oz brie cheese, sliced (rind on or off)
  • ½ cup cranberry sauce (whole berry or jellied)
  • 4 tbsp unsalted butter
  • 2 garlic cloves, minced
  • 2 tbsp fresh herbs (rosemary, thyme, parsley), chopped
  • 1 tbsp olive oil (optional, for brushing)
  • Salt and pepper, to taste

Instructions

  1. Preheat oven to 350°F (175°C). Line a baking sheet with foil or parchment paper.
  2. Slice the sourdough loaf in a crosshatch pattern, making deep cuts but not slicing all the way through.
  3. Tuck slices of brie and spoonfuls of cranberry sauce into the spaces between the bread pieces.
  4. Melt butter in a saucepan; stir in garlic, chopped herbs, salt, and pepper.
  5. Drizzle or brush the garlic herb butter into the bread cuts evenly.
  6. Wrap the loaf loosely in foil and bake for 15–20 minutes.
  7. Uncover and bake for an additional 5–10 minutes, until the top is golden and cheese is melted.
  8. Let cool slightly before serving.

Notes

  • Use a thick cranberry sauce to prevent sogginess.
  • Keep the bread wrapped in foil at first to help the cheese melt without drying out.
  • Try adding nuts, caramelized onions, or fig jam for extra flavor.
  • Great with rustic Italian or French bread if sourdough isn’t available.

Have you made this recipe? I'd love to see it!

Click here to Follow me on Pinterest

Slow Cooker Olive Garden Chicken Pasta

March 31, 2025 by Sue Leave a Comment

This Slow Cooker Olive Garden Chicken Pasta is a creamy, cheesy, and incredibly easy dish that brings restaurant flavor straight into my kitchen. Made with tender shredded chicken, Olive Garden Italian dressing, parmesan cheese, and a luscious cream cheese sauce tossed with pasta, it’s the kind of no-fuss comfort food I keep on repeat.

Slow Cooker Olive Garden Chicken Pasta

Why You’ll Love This Recipe

I love this recipe because it’s practically effortless. I just toss everything into the slow cooker, walk away, and come back to a creamy, flavor-packed chicken dish that feels like it came from a restaurant. It’s perfect for busy weekdays, family dinners, or even meal prep. The sauce is rich, tangy, and cheesy, and the slow cooker does all the work for me.

ingredients

(Here's a tip: Check out the full list of ingredients and measurements in the recipe card below.)

  • Boneless, skinless chicken breasts
  • Olive Garden Italian dressing
  • Cream cheese
  • Grated parmesan cheese
  • Garlic powder
  • Black pepper
  • Pasta (penne, rotini, or rigatoni)
  • Optional: fresh parsley or extra parmesan for garnish

directions

  1. I place the chicken breasts in the bottom of the slow cooker.
  2. I pour the Olive Garden Italian dressing over the chicken, then add the cream cheese, grated parmesan, garlic powder, and pepper on top.
  3. I cover and cook on low for 4–5 hours or on high for 3–4 hours, until the chicken is cooked through and tender.
  4. I shred the chicken directly in the slow cooker using two forks and stir everything until it’s smooth and creamy.
  5. While the chicken finishes, I cook the pasta according to package instructions and drain it.
  6. I stir the cooked pasta into the slow cooker and mix everything together until fully coated.
  7. I serve it warm with a sprinkle of fresh parsley or extra parmesan if I want a little something extra.

Servings and timing

This recipe makes about 6 servings.
Prep time: 5 minutes
Cook time: 4–5 hours (low) or 3–4 hours (high)
Total time: 4–5 hours

Variations

Swapping the pasta for cooked rice or serving the chicken over mashed potatoes gives me a different spin. I also like using rotini or bow tie pasta because they hold the sauce really well. For a veggie boost, I stir in spinach, peas, or broccoli just before serving.

storage/reheating

I store leftovers in an airtight container in the fridge for up to 4 days. To reheat, I warm individual portions in the microwave for about 1–2 minutes, stirring halfway through. If the sauce thickens too much, I add a splash of milk to loosen it. It’s best eaten fresh, but I’ve also frozen it (without the pasta) and reheated with freshly cooked noodles.

FAQs

Can I use a different Italian dressing?

Yes, but I find that the Olive Garden brand gives the best flavor—it’s creamy and tangy with just the right balance. Other brands work, but the result may taste slightly different.

Can I make this with frozen chicken?

I prefer using thawed chicken for food safety, but if I’m using frozen, I make sure to cook it on high and extend the cooking time until the chicken reaches a safe internal temperature.

What kind of pasta is best?

I usually go with penne or rotini, but honestly, any short pasta shape works great. I’ve even used spaghetti when that’s all I had, and it was still delicious.

Can I make this dish ahead of time?

Yes, I’ve cooked everything except the pasta ahead of time, then added freshly cooked pasta just before serving. It helps keep the pasta from getting too soft.

Is this dish spicy?

Not at all, but if I want a little heat, I’ll sprinkle in some red pepper flakes or add a dash of hot sauce.

Conclusion

This Slow Cooker Olive Garden Chicken Pasta is the ultimate easy comfort food. It’s rich, creamy, and packed with flavor, and I love how the slow cooker does all the heavy lifting. Whether I’m feeding a crowd or just want an easy weeknight dinner, this recipe always hits the mark—and the leftovers are just as good the next day.

Print

clock clock iconcutlery cutlery iconflag flag iconfolder folder iconinstagram instagram iconpinterest pinterest iconfacebook facebook iconprint print iconsquares squares iconheart heart iconheart solid heart solid icon
Slow Cooker Olive Garden Chicken Pasta

Slow Cooker Olive Garden Chicken Pasta

5 Stars 4 Stars 3 Stars 2 Stars 1 Star No reviews
  • Author: Sue
  • Prep Time: 5 minutes
  • Cook Time: 4–5 hours (low) or 3–4 hours (high)
  • Total Time: 4–5 hours
  • Yield: 6 servings
  • Category: Dinner, Slow Cooker, Pasta
  • Method: Slow Cooker, Crockpot
  • Cuisine: American, Italian-American
Print Recipe
Pin Recipe

Description

This Slow Cooker Olive Garden Chicken Pasta is a creamy, cheesy, and flavor-packed comfort food dish made effortlessly in the crockpot. With tender shredded chicken, Olive Garden Italian dressing, parmesan, cream cheese, and pasta, it’s the perfect weeknight dinner that's always a crowd-pleaser.


Ingredients

  • Boneless, skinless chicken breasts
  • Olive Garden Italian dressing
  • Cream cheese
  • Grated parmesan cheese
  • Garlic powder
  • Black pepper
  • Pasta (penne, rotini, or rigatoni)
  • Optional: fresh parsley or extra parmesan for garnish

Instructions

  1. Place chicken breasts in the bottom of the slow cooker.
  2. Pour Olive Garden Italian dressing over the chicken.
  3. Add cream cheese, parmesan cheese, garlic powder, and black pepper on top.
  4. Cover and cook on low for 4–5 hours or high for 3–4 hours, until chicken is tender.
  5. Shred the chicken directly in the slow cooker and stir to combine into a creamy sauce.
  6. While chicken finishes, cook pasta according to package instructions and drain.
  7. Stir cooked pasta into the slow cooker until fully coated in sauce.
  8. Serve warm with fresh parsley or extra parmesan, if desired.

Notes

  • Serve over mashed potatoes or rice instead of pasta.
  • Stir in vegetables like spinach, broccoli, or peas near the end for added nutrition.
  • Freeze sauce without pasta for best texture upon reheating.

Have you made this recipe? I'd love to see it!

Click here to Follow me on Pinterest

Dolly’s Chicken and Stuffing Casserole

March 31, 2025 by Sue Leave a Comment

Dolly’s Chicken and Stuffing Casserole is the kind of cozy, comforting dish that feels like it came straight from a Southern kitchen. It’s creamy, flavorful, and layered with tender chicken and herbed stuffing, making it a hearty family favorite I reach for when I want a warm, home-cooked meal with minimal effort.

Dolly’s Chicken and Stuffing Casserole

Why You’ll Love This Recipe

I love how this casserole comes together quickly using simple pantry staples. It’s got that nostalgic, comforting flavor that reminds me of holiday dinners—but it’s easy enough to make on a weeknight. The juicy chicken, savory stuffing, and creamy sauce bake up into a golden, satisfying dish that’s always a hit around the table.

Ingredients

(Here's a tip: Check out the full list of ingredients and measurements in the recipe card below.)

  • Cooked, shredded chicken (I usually use rotisserie chicken for convenience)
  • Boxed stuffing mix (like Stove Top, chicken-flavored)
  • Cream of chicken soup
  • Sour cream
  • Chicken broth
  • Butter
  • Salt and pepper to taste
  • Optional: onion powder, garlic powder, dried thyme for extra flavor

Directions

  1. I preheat the oven to 350°F (175°C) and lightly grease a 9x13-inch baking dish.
  2. In a large bowl, I mix the stuffing mix with melted butter and hot chicken broth until well combined and slightly moistened.
  3. In another bowl, I stir together the cream of chicken soup and sour cream. I season with a bit of salt, pepper, and any optional spices I’m using.
  4. I layer the shredded chicken in the bottom of the prepared baking dish.
  5. I spread the soup mixture evenly over the chicken.
  6. I spoon the stuffing mixture on top, gently spreading it out to cover the surface.
  7. I bake uncovered for 35–40 minutes, until the top is golden and the filling is bubbling around the edges.
  8. I let it sit for a few minutes before serving to allow the casserole to set up a bit.

Servings and timing

This recipe serves about 6–8 people and takes 15 minutes to prep, plus 35–40 minutes to bake. I usually have it on the table in under an hour.

Variations

  • I sometimes mix a handful of frozen peas or green beans into the chicken layer for added veggies.
  • When I want a cheesy version, I sprinkle shredded cheddar or Monterey Jack on top before baking.
  • For more depth of flavor, I sauté diced onions and celery and mix them into the stuffing.
  • I’ve made it with leftover turkey after the holidays, and it works beautifully.

Storage/Reheating

I store leftovers in an airtight container in the fridge for up to 4 days. To reheat, I microwave individual servings or bake the whole dish, covered with foil, at 325°F until warmed through—usually about 15–20 minutes. It also freezes well; I wrap it tightly and freeze for up to 2 months, then thaw in the fridge before reheating.

FAQs

Can I make this ahead of time?

Yes, I often assemble the casserole up to a day in advance, cover it, and refrigerate. I just add a few extra minutes to the baking time if it’s going in cold.

What kind of chicken works best?

I like using rotisserie chicken for convenience, but any cooked and shredded chicken breast or thighs will work well.

Can I use homemade stuffing?

Absolutely. If I have leftover homemade stuffing, I swap it in for the boxed mix—it makes the dish even more flavorful.

Can I use Greek yogurt instead of sour cream?

Yes, I’ve used plain Greek yogurt when I wanted a lighter option, and it still came out creamy and delicious.

How do I keep the stuffing from drying out?

I make sure the stuffing mixture is moist before baking and don’t overbake the casserole. Covering it with foil for the first 20 minutes helps too.

Conclusion

Dolly’s Chicken and Stuffing Casserole is the kind of dish that brings warmth and comfort with every bite. It’s easy to prepare, full of homey flavors, and perfect for feeding a hungry family or enjoying as leftovers throughout the week. Whether it’s a busy night or a lazy Sunday, I know this casserole will always hit the spot.

Print

clock clock iconcutlery cutlery iconflag flag iconfolder folder iconinstagram instagram iconpinterest pinterest iconfacebook facebook iconprint print iconsquares squares iconheart heart iconheart solid heart solid icon
Dolly’s Chicken and Stuffing Casserole

Dolly’s Chicken and Stuffing Casserole

5 Stars 4 Stars 3 Stars 2 Stars 1 Star No reviews
  • Author: Sue
  • Prep Time: 15 minutes
  • Cook Time: 40 minutes
  • Total Time: 55 minutes
  • Yield: 6–8 servings
  • Category: Main Course, Casserole
  • Method: Baking
  • Cuisine: Southern-American
Print Recipe
Pin Recipe

Description

This creamy, comforting chicken and stuffing casserole brings Southern charm to your dinner table with minimal prep and maximum flavor. Made with tender chicken, savory stuffing, and a rich, creamy sauce, it’s a cozy one-dish meal perfect for weeknights, holidays, or anytime you crave a hearty, home-cooked classic.


Ingredients

  • 3 cups cooked, shredded chicken (rotisserie works great)
  • 1 box (6 oz) chicken-flavored stuffing mix (e.g., Stove Top)
  • 1 can (10.5 oz) cream of chicken soup
  • ¾ cup sour cream
  • 1 cup chicken broth (hot)
  • 4 tbsp unsalted butter, melted
  • Salt and pepper to taste
  • Optional: ½ teaspoon onion powder, ½ teaspoon garlic powder, ¼ teaspoon dried thyme

Instructions

  1. Preheat oven to 350°F (175°C) and grease a 9x13-inch baking dish.
  2. In a bowl, combine stuffing mix with melted butter and hot chicken broth. Stir until just moistened.
  3. In a separate bowl, mix cream of chicken soup and sour cream. Season with salt, pepper, and optional spices.
  4. Spread shredded chicken evenly in the bottom of the baking dish.
  5. Layer the soup mixture over the chicken.
  6. Spoon the stuffing mixture on top, spreading gently to cover.
  7. Bake uncovered for 35–40 minutes, until bubbly and golden on top.
  8. Let sit for 5–10 minutes before serving.

Notes

  • Add frozen peas or green beans to the chicken layer for extra veggies.
  • Top with shredded cheese before baking for a cheesy twist.
  • Sautéed onions and celery can be mixed into the stuffing for added flavor.
  • Great way to use up leftover turkey or homemade stuffing!

Have you made this recipe? I'd love to see it!

Click here to Follow me on Pinterest

Air Fryer Beef Jerky

March 31, 2025 by Sue Leave a Comment

Making beef jerky in the air fryer is a quick and satisfying way to create a protein-rich snack without the hassle of a dehydrator. The result is a chewy, savory, and totally customizable treat that I can enjoy anytime—perfect for road trips, hiking, or just snacking at home.

Air Fryer Beef Jerky

Why I Love This Recipe

I love how easy it is to make this jerky from scratch using simple ingredients. The air fryer handles the dehydrating process with ease, and I don’t have to keep an eye on it constantly. It also lets me control the flavors and cut out all the preservatives and additives. Every bite is full of bold, smoky, and slightly sweet flavor, and I can tailor the spice level exactly how I like it.

Ingredients

  • 1 pound flank steak or sirloin steak
  • 4 ½ teaspoons steak seasoning
  • 4 ½ teaspoons brown sugar
  • 1 tablespoon water
  • 1 ½ teaspoons soy sauce
  • 1 teaspoon smoked paprika

(Here's a tip: Check out the full list of ingredients and measurements in the recipe card below.)

Directions

  1. I start by slicing the steak against the grain into ¼-inch thick strips. If the meat is too soft, I freeze it for 20–30 minutes to make slicing easier.
  2. In a large bowl, I mix together the steak seasoning, brown sugar, water, soy sauce, and smoked paprika until combined.
  3. I add the sliced meat to the marinade, stir to coat evenly, cover the bowl, and refrigerate for at least 4 hours or overnight for maximum flavor.
  4. When it’s time to cook, I arrange the marinated beef strips in a single layer in the air fryer basket, making sure they don’t overlap.
  5. I set the air fryer to 180°F and cook the jerky for about 2.5 hours, flipping halfway through. The jerky should be firm but bendable when done.

Servings and Timing

This recipe makes about 16 servings.
Prep time: 15 minutes
Marinating time: 4–12 hours
Cook time: 2.5 hours
Total time: about 6–8 hours including marinating

Variations

  • Spicy jerky: I add chili flakes or cayenne pepper to the marinade for a nice heat.
  • Sweeter version: A drizzle of honey or maple syrup gives it a sweeter flavor profile.
  • Garlic lover’s twist: I toss in some garlic powder or minced garlic for extra punch.
  • Teriyaki-style: I swap the steak seasoning for teriyaki sauce and reduce the sugar slightly.

Storage/Reheating

Once the jerky cools completely, I store it in an airtight container at room temperature for up to 2 weeks. For longer storage, I keep it in the fridge for up to a month. If I want it warm, I pop a few pieces in the microwave for 10–15 seconds. But honestly, it tastes great straight from the container.

FAQs

How thin should I slice the beef for jerky?

I slice the beef about ⅛ to ¼ inch thick. The thinner the slices, the faster and more evenly they dry.

Can I skip marinating the meat?

I wouldn’t. Marinating is what gives the jerky all its flavor and helps tenderize the beef. I always let it sit for at least 4 hours.

What cut of meat is best for air fryer beef jerky?

I prefer flank steak or top round because they’re lean and easy to slice thin. Avoid cuts with a lot of fat since fat doesn’t dehydrate well.

How do I know when the jerky is done?

It should be dry to the touch, firm, but still bendy. If it snaps, it’s overdone. If it’s soft or sticky, it needs more time.

Can I double the recipe?

Yes, but I make sure not to overcrowd the air fryer. I cook in batches to make sure every strip dries out evenly.

Conclusion

Air fryer beef jerky is one of those snacks I keep coming back to. It’s simple to make, full of flavor, and way better than anything I could buy pre-packaged. Whether I like it spicy, sweet, or smoky, it’s easy to adjust to whatever I’m craving—and I always have a satisfying, protein-rich snack ready to go.

Print

clock clock iconcutlery cutlery iconflag flag iconfolder folder iconinstagram instagram iconpinterest pinterest iconfacebook facebook iconprint print iconsquares squares iconheart heart iconheart solid heart solid icon
Air Fryer Beef Jerky

Air Fryer Beef Jerky

5 Stars 4 Stars 3 Stars 2 Stars 1 Star No reviews
  • Author: Sue
  • Prep Time: 15 minutes
  • Cook Time: 4–12 hours
  • Total Time: 6–8 hours (with marinating)
  • Yield: 16 servings
  • Category: Snack
  • Method: Air Fryer
  • Cuisine: American
Print Recipe
Pin Recipe

Description

This Air Fryer Beef Jerky is an easy, flavorful, and protein-packed snack made right at home—no dehydrator needed! Using simple ingredients like flank steak, soy sauce, and seasonings, this homemade jerky is chewy, smoky, and completely customizable. Great for on-the-go snacking, meal prep, or low-carb diets.


Ingredients

  • 1 lb flank steak or sirloin steak, sliced ¼-inch thick against the grain
  • 4½ tsp steak seasoning
  • 4½ tsp brown sugar
  • 1 tbsp water
  • 1½ tsp soy sauce
  • 1 tsp smoked paprika

Instructions

  1. Freeze steak for 20–30 minutes to firm up, then slice into thin strips against the grain.
  2. In a large bowl, whisk together steak seasoning, brown sugar, water, soy sauce, and smoked paprika.
  3. Add beef strips to the marinade. Toss to coat, cover, and refrigerate for 4–12 hours.
  4. Arrange marinated beef in a single layer in the air fryer basket, with space between each piece.
  5. Air fry at 180°F (82°C) for 2.5 hours, flipping halfway through. Jerky should be dry, firm, and bendable when done.
  6. Let cool completely before storing.

Notes

  • Use lean cuts of meat like flank steak or top round. Trim excess fat for better texture and shelf life.
  • Jerky is done when it bends without breaking and feels dry to the touch.
  • Don’t skip marinating—it’s essential for flavor and tenderness.
  • Adjust seasoning to taste with garlic, chili flakes, teriyaki sauce, or honey.
  • Store airtight at room temperature (up to 2 weeks) or refrigerate for longer shelf life.

Have you made this recipe? I'd love to see it!

Click here to Follow me on Pinterest

Chocolate Cupcake

March 30, 2025 by Sue Leave a Comment

Chocolate Cupcakes are the ultimate classic treat—rich, moist, and deeply chocolatey. Whether I’m baking for a birthday, a celebration, or just a sweet craving, these cupcakes never disappoint. They’re soft and fluffy with a tender crumb, and they pair perfectly with a smooth, creamy frosting of my choice.

Chocolate Cupcake

Why You’ll Love This Recipe

I love this recipe because it’s easy, dependable, and produces bakery-worthy cupcakes every time. The batter comes together in one bowl, and the ingredients are probably already in my pantry. These cupcakes rise beautifully, stay moist for days, and have that perfect balance of sweetness and deep chocolate flavor. Whether I top them with buttercream, ganache, or leave them plain, they always taste amazing.

Ingredients

(Here's a tip: Check out the full list of ingredients and measurements in the recipe card below.)

  • All-purpose flour

  • Granulated sugar

  • Unsweetened cocoa powder

  • Baking soda

  • Baking powder

  • Salt

  • Eggs

  • Milk

  • Vegetable oil

  • Vanilla extract

  • Boiling water or hot coffee (for enhanced chocolate flavor)

Directions

  1. I preheat the oven to 350°F (175°C) and line a muffin tin with paper cupcake liners.

  2. In a large bowl, I whisk together the flour, sugar, cocoa powder, baking soda, baking powder, and salt.

  3. I add in the eggs, milk, oil, and vanilla, mixing until smooth.

  4. I carefully stir in the boiling water or hot coffee—this makes the batter thin, but it’s what gives the cupcakes their rich texture.

  5. I divide the batter evenly among the cupcake liners, filling each about ⅔ full.

  6. I bake for 18–22 minutes, or until a toothpick inserted into the center comes out clean.

  7. I let the cupcakes cool in the pan for a few minutes before transferring them to a wire rack to cool completely.

Servings and timing

This recipe makes about 12 standard cupcakes. It takes me 10–15 minutes to prepare the batter and about 20 minutes to bake, so the total time is around 35 minutes.

Variations

  • For extra richness, I sometimes add mini chocolate chips to the batter.

  • I love topping them with cream cheese frosting, peanut butter frosting, or whipped ganache.

  • I’ve made them gluten-free by using a 1:1 gluten-free flour blend.

  • To make them dairy-free, I use almond or oat milk and dairy-free chocolate.

storage/reheating

I store the cupcakes in an airtight container at room temperature for up to 3 days. If I’ve frosted them with something perishable, like cream cheese frosting, I refrigerate them and let them come to room temp before serving. I’ve also frozen them (unfrosted) for up to 2 months, and they thaw beautifully.

FAQs

Why are my cupcakes dry?

I make sure not to overbake them—checking at the 18-minute mark usually keeps them soft and moist. Also, using oil instead of butter helps retain moisture.

Can I double the recipe?

Yes, I’ve doubled this recipe with great results. I just make sure not to overmix and bake in batches if needed.

What frosting goes best with chocolate cupcakes?

I personally love chocolate buttercream or vanilla buttercream. Cream cheese frosting or salted caramel buttercream also work really well.

Can I make these cupcakes ahead of time?

Absolutely. I often bake them a day in advance and store them unfrosted until I’m ready to decorate and serve.

Can I use this recipe for a cake instead?

Yes, I’ve poured the batter into a cake pan and baked it as a single-layer cake. I adjust the baking time to around 30–35 minutes.

Conclusion

Chocolate Cupcakes are a timeless dessert that I never get tired of making—or eating. They’re rich, fluffy, and full of deep chocolate flavor, making them a guaranteed crowd-pleaser. Whether I dress them up or keep them simple, they always bring smiles with every bite.

Print

clock clock iconcutlery cutlery iconflag flag iconfolder folder iconinstagram instagram iconpinterest pinterest iconfacebook facebook iconprint print iconsquares squares iconheart heart iconheart solid heart solid icon
Chocolate Cupcake

Chocolate Cupcake

5 Stars 4 Stars 3 Stars 2 Stars 1 Star No reviews
  • Author: Sue
  • Prep Time: 15 minutes
  • Cook Time: 20 minutes
  • Total Time: 35 minutes
  • Yield: 12 cupcakes
  • Category: Dessert
  • Method: Baking
  • Cuisine: American
  • Diet: Vegetarian
Print Recipe
Pin Recipe

Description

Chocolate Cupcakes are rich, moist, and full of deep cocoa flavor—the perfect go-to dessert for birthdays, parties, or chocolate cravings. Made in one bowl with pantry staples, these cupcakes are easy to prepare, beautifully soft, and delicious with any frosting you choose.


Ingredients

  • 1 cup all-purpose flour
  • 1 cup granulated sugar
  • ⅓ cup unsweetened cocoa powder
  • ½ tsp baking soda
  • ½ tsp baking powder
  • ¼ tsp salt
  • 2 large eggs
  • ½ cup milk
  • ½ cup vegetable oil
  • 1 tsp vanilla extract
  • ½ cup boiling water or hot coffee

Instructions

  1. Preheat oven to 350°F (175°C). Line a muffin tin with cupcake liners.
  2. In a large bowl, whisk together flour, sugar, cocoa powder, baking soda, baking powder, and salt.
  3. Add eggs, milk, oil, and vanilla. Mix until smooth.
  4. Carefully stir in boiling water or hot coffee—the batter will be thin.
  5. Divide batter evenly into prepared liners, filling each about ⅔ full.
  6. Bake for 18–22 minutes, or until a toothpick inserted in the center comes out clean.
  7. Cool in the pan for 5 minutes, then transfer to a wire rack to cool completely.

Notes

  • Don’t skip the hot water/coffee—it enhances the cocoa flavor and keeps the texture moist.
  • Avoid overmixing once wet and dry ingredients are combined.
  • Add-ins like mini chocolate chips or a surprise filling work well with this batter.
  • Store unfrosted cupcakes in the freezer for up to 2 months.

Have you made this recipe? I'd love to see it!

Click here to Follow me on Pinterest

  • « Previous Page
  • 1
  • …
  • 34
  • 35
  • 36
  • 37
  • 38
  • 39
  • Next Page »
Modern Sidebar

Hey there! I'm Sue, a mom, a wife, and someone who’s always in the kitchen trying out new recipes or revisiting old ones that remind me of family gatherings and special moments.

Learn more

Popular

  • Cheesecake Fruit Salad
    Cheesecake Fruit Salad
  • Creamy Tuscan Ravioli Soup: A Comfort Dish
    Creamy Tuscan Ravioli Soup: A Comfort Dish
  • Garlic Herb Chicken with Mashed Potatoes and Glazed Carrots
    Garlic Herb Chicken with Mashed Potatoes and Glazed Carrots
  • Bobby Flay Salisbury Steak
    Bobby Flay Salisbury Steak

Footer

↑ back to top

About

  • About
  • Contact
  • Disclosure Policy
  • DMCA
  • Privacy Policy
  • Terms and Conditions

Newsletter

  • Sign Up! for emails and updates

Recipes

  • Appetizers & Snacks
  • Beef
  • Breakfast
  • Chicken
  • Desserts
  • Dinner
  • Drinks
  • Side-Dish
  • Soups

As an Amazon Associate I earn from qualifying purchases.

Copyright © 2025 Sue Recipe