
I absolutely adore this Easy Apple Galette Recipe because it’s the kind of dessert that feels effortlessly rustic yet impresses everyone who tries it. Flaky, buttery crust cradles sweet, spiced apples that burst with flavor, and the simplicity of making it always makes me smile. It’s one of those recipes I love to pull together on a whim, especially when I want to treat myself or guests without fussing over complicated baking techniques. This galette is a warm hug in dessert form and has quickly become one of my favorite fall and winter indulgences.
Why You'll Love This Easy Apple Galette Recipe
What really makes this galette stand out to me is the perfect balance of textures and flavors. The crust is wonderfully flaky and rich thanks to the cold butter, yet it remains tender enough to let the juicy, cinnamon-spiced apples shine. I love how the tartness of the fresh apples is mellowed out by just the right amount of brown sugar and a whisper of nutmeg. Each bite feels cozy and comforting, like a little celebration of autumn’s best flavors.
Another thing I cherish about this Easy Apple Galette Recipe is how wonderfully approachable it is. I find that making a galette feels so much less intimidating than a classic pie, especially because you don’t have to worry about fitting the dough into a pie pan or creating a perfect lattice top. Rolling out the dough, piling the apples, and folding the edges is practically foolproof, even for someone like me who doesn't always have time to wait around in the kitchen for hours.
This recipe is perfect for a variety of occasions too. I’ve whipped it up for cozy family dinners, holiday gatherings, or just weekend treats when I crave something sweet but not overly complicated. And if you want to make it extra special, adding a drizzle of salted caramel or serving it with vanilla ice cream turns it into a dessert that feels totally indulgent without extra work. It’s truly a crowd-pleaser that I find myself making again and again.
Ingredients You'll Need

These ingredients are deceptively simple but absolutely essential to getting the perfect blend of flaky crust and tasty apple filling. Each component plays a role in creating that irresistible texture, sweetness, and aroma that I always look forward to.
TIP : You'll find the full list of ingredients and measurements in the recipe card below
- All-purpose flour: The base for the crust that provides structure and tenderness once baked.
- Granulated sugar: Adds just a touch of sweetness to the dough without overpowering the apples.
- Salt: Enhances the flavor by balancing the sweetness perfectly.
- Cold unsalted butter: Key to that flaky, buttery crust I look forward to with every bite.
- Ice-cold water: Keeps the dough just moist enough to come together while preserving flakiness.
- Egg wash: Gives the crust a shiny, golden finish that's so inviting.
- Apples (peeled and sliced): The star of the show, bringing juicy sweetness and body to the filling.
- Brown sugar: Infuses the filling with a deep caramel-like sweetness that complements the tart apples.
- Ground cinnamon and nutmeg: Warm spices that instantly transport me to cozy fall afternoons.
- Lemon juice: Brightens the apple filling and prevents browning while adding a subtle tang.
- Optional coarse sugar: Adds a delightful crunch and sparkle to the crust edges.
- Optional salted caramel sauce: Elevates the galette with a luscious, rich topping that's pure indulgence.
Directions
Step 1: Start by making your crust. Whisk together the flour, sugar, and salt in a medium bowl. Then, use a pastry cutter or two forks to cut in the cold butter until the mixture looks like coarse, pea-sized crumbs. This texture is crucial for creating that flaky crust I love.
Step 2: Slowly add the ice-cold water and stir until the mixture just comes together. If it feels too dry, add a little more water, but be careful not to overwork the dough. Turn it out onto a floured surface and gently pat it into a ball, then flatten into a thick disc. Wrap it tightly and pop it in the fridge for at least an hour, which helps the butter chill and the dough firm up.
Step 3: While the dough chills, prepare the apple filling. Combine the peeled, sliced apples with the brown sugar, flour, lemon juice, cinnamon, and nutmeg in a large bowl. Mix everything well, then cover and refrigerate until your dough is ready. This step lets the apples absorb those warm spices and develop their delicious flavor.
Step 4: When you’re ready, preheat your oven to 400°F (204°C) and line a baking sheet with parchment paper or a silicone baking mat. On a lightly floured surface, roll your chilled dough into a 12-inch circle. Don’t stress about making it perfectly round – the rustic shape adds to the charm!
Step 5: Transfer the dough circle onto your prepared baking sheet. Arrange the apple filling in the center, leaving about a 2 to 3-inch border around the edges. I love creating concentric circles with the apple slices, but a simple heap works just as well.
Step 6: Carefully fold the edges of the dough up and over the apples, overlapping the crust as needed to encase the filling. Press gently where the dough overlaps to seal it. Then brush the crust generously with your egg wash and sprinkle with coarse sugar if you like an extra crunch on the edges.
Step 7: For an extra-special touch, drizzle a few tablespoons of salted caramel sauce over the apples but not on the crust edges. This little indulgence adds a perfect salty-sweet contrast that I never get tired of.
Step 8: Chill your assembled galette for at least 15 to 20 minutes before baking. This helps it firm up and hold its shape in the oven. If you plan to refrigerate longer, just cover it lightly to keep it fresh.
Step 9: Bake your galette in the preheated oven for about 35 to 36 minutes, or until the crust is beautifully golden and the apple filling is bubbling with juicy goodness.
Step 10: Remove from the oven and let it cool on the baking sheet for about 10 minutes – this resting time helps the filling set slightly for easier slicing.
Step 11: Serve warm or at room temperature, ideally with a scoop of vanilla ice cream or a drizzle more of that luscious salted caramel. If you have leftovers, just cover and store them in the fridge for up to 4 days.
Servings and Timing
This Easy Apple Galette Recipe yields about 1 generous galette, perfect for 4 to 6 servings depending on how hungry everyone is. Here’s a quick breakdown of the timing to help you plan:
- Prep time: 25 minutes (plus at least 1-hour chilling for the dough)
- Cook time: 35 to 36 minutes
- Total time: Approximately 2 hours and 10 minutes (including chilling and cooling)
- Resting/cooling time: 10 minutes after baking for the best texture
How to Serve This Easy Apple Galette Recipe
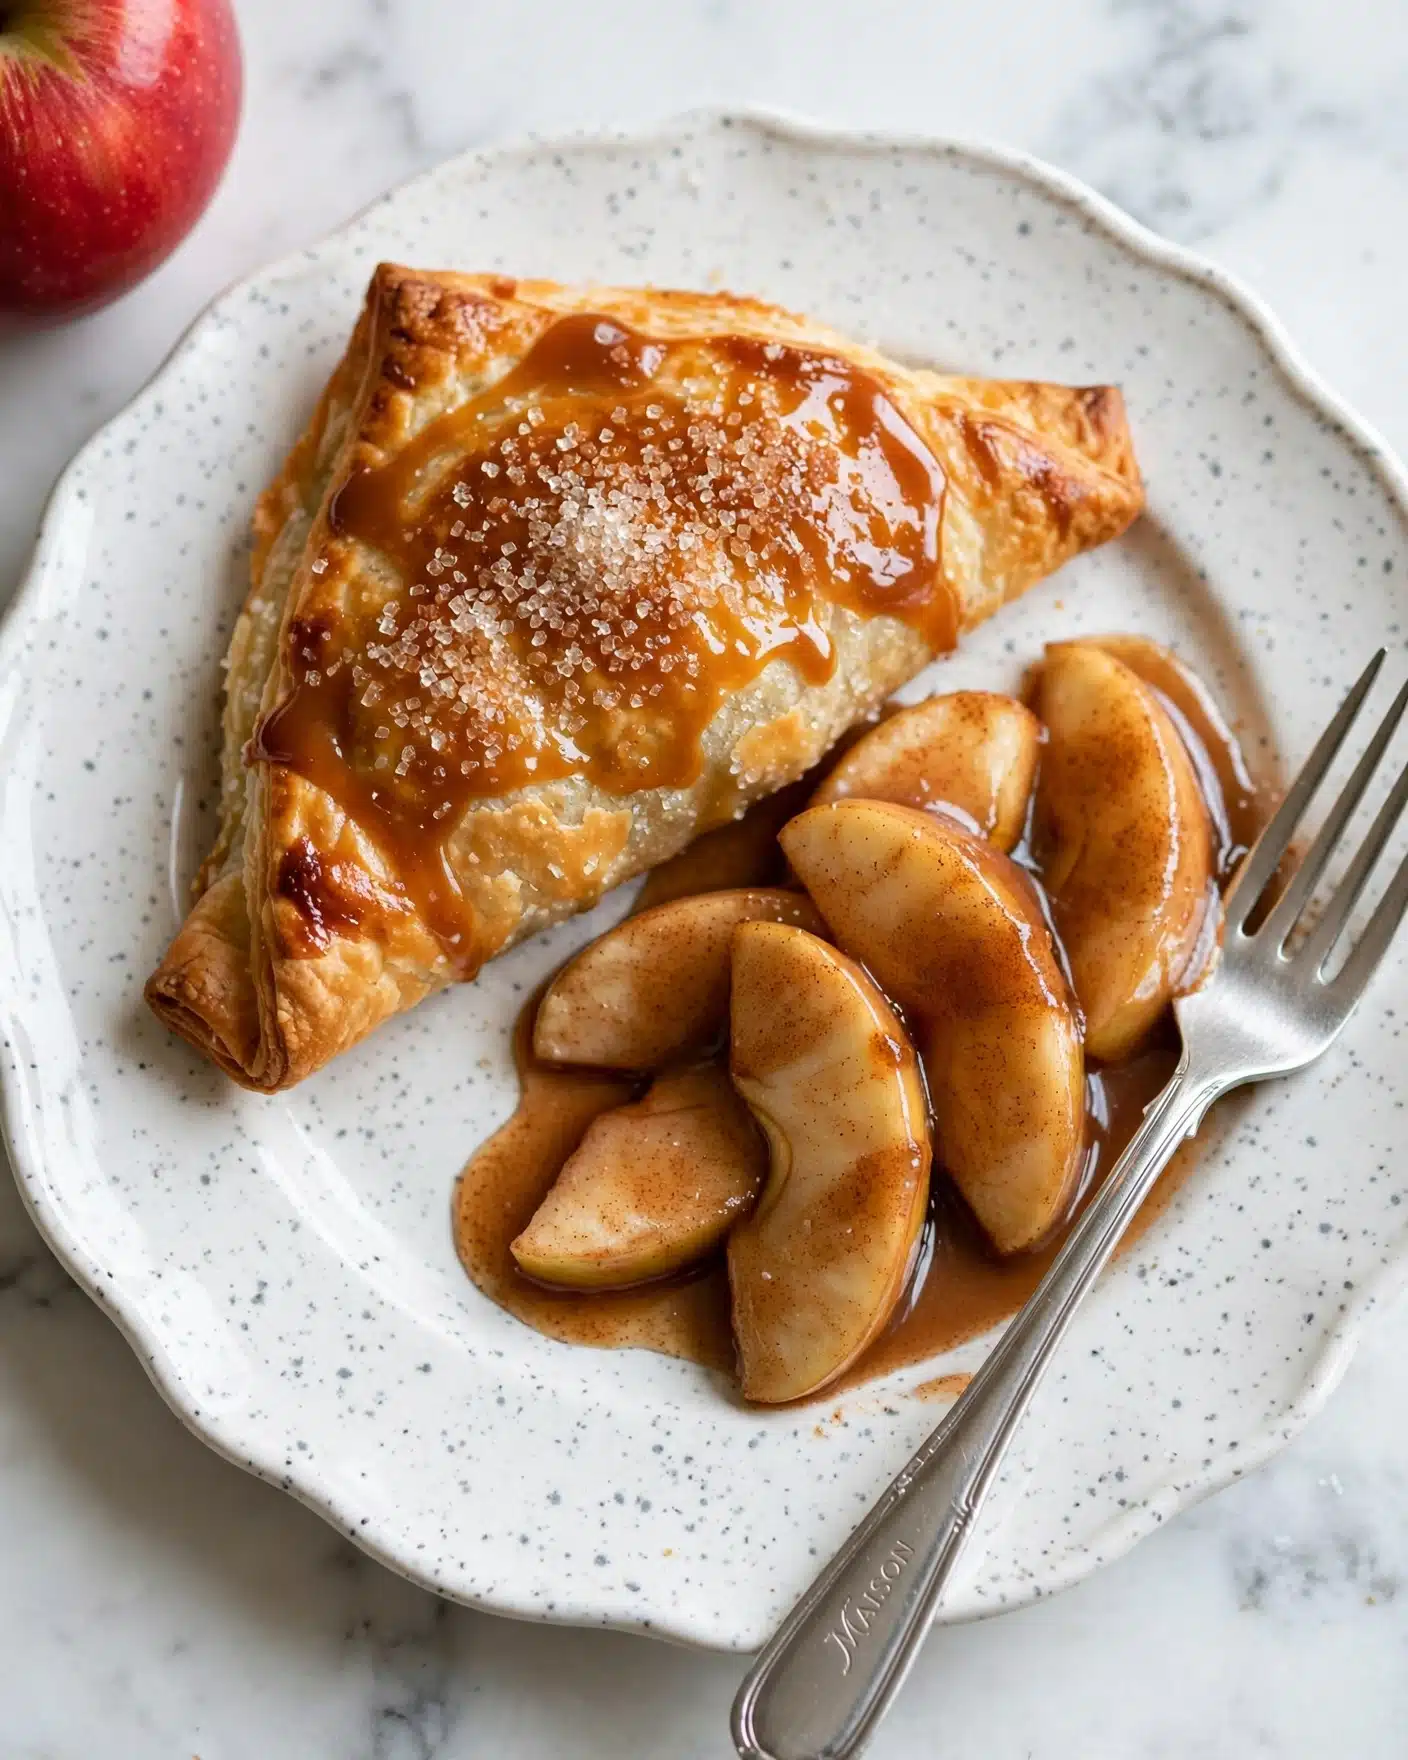
When it comes to enjoying this galette, I like to keep things cozy and inviting. Serving it warm brings out the best in the spiced apples and flaky crust, and that gentle heat pairs beautifully with a scoop of vanilla ice cream or dollop of whipped cream. If you want to impress, drizzle some salted caramel sauce over the top just before serving for an extra layer of decadence.
This galette shines as a comforting dessert after a family dinner or as a sweet treat during holiday celebrations. For casual occasions, I sometimes slice it into smaller pieces and serve alongside a cup of hot cider or freshly brewed coffee. If you’re looking for an elegant touch, a glass of crisp white wine, like a lightly oaked Chardonnay, complements the apples’ sweetness beautifully.
Presentation-wise, I love placing the galette on a rustic wooden board to highlight its handmade charm. When portioning, slicing the galette into wedges about 2 to 3 inches wide lets everyone enjoy a balanced serving without overwhelming their plates. You can even garnish each slice with a few fresh apple slices or a sprig of mint for a pop of color.
Variations
One of the things I enjoy most about this Easy Apple Galette Recipe is how easy it is to customize based on what I have on hand or my mood. For example, if you want to play with the fruit, swapping out apples for pears or mixing in some berries adds delightful new flavors and textures.
For those with dietary restrictions, I’ve had good success making this galette gluten-free by substituting the all-purpose flour with a high-quality gluten-free blend, which still yields a great crust. Vegan versions are also possible by replacing the butter with chilled coconut oil or vegan butter and using a plant-based milk for the egg wash. It may change the texture slightly but still tastes wonderful.
Flavor-wise, I sometimes like to experiment by adding a touch of ginger or cardamom to the apple filling for an unexpected spicy twist. Another fun idea is to bake mini galettes instead of one large one – they’re perfect for parties or gifting to friends. No matter how you tweak it, this recipe remains simple and absolutely delicious.
Storage and Reheating
Storing Leftovers
When I have leftovers, I store the galette in an airtight container or cover it tightly with plastic wrap, then place it in the fridge. It keeps really well for up to four days without losing much of that fresh-baked flavor or texture, making it a great make-ahead treat for busy days.
Freezing
Freezing this galette is definitely possible and works well if you want to save it for later. I recommend wrapping it tightly in plastic wrap followed by aluminum foil to protect it from freezer burn. Stored this way, it can last up to 2 months in the freezer. To enjoy, I thaw it overnight in the fridge before reheating.
Reheating
The best way I’ve found to reheat leftover galette is in the oven at 350°F (175°C) for about 10 to 15 minutes until warmed through and the crust regains its lovely crispness. Avoid microwaving if you can, as it tends to make the crust soggy and less appetizing. If you want to recapture a freshly baked feel, a quick oven reheat does wonders.
FAQs
Can I use other types of apples for this galette?
Absolutely! While tart apples like Granny Smith work wonderfully for balancing sweetness, I love mixing in sweeter varieties like Honeycrisp or Fuji for a more nuanced flavor and softer texture. Just be sure to peel and slice them evenly for the best results.
Do I have to peel the apples?
Peeling the apples helps create a tender filling, but if you enjoy a bit more texture and rustic feel, you can leave the skins on. Just make sure to wash the apples well and slice them thinly so they cook evenly.
Can I make the dough ahead of time?
Yes! The dough can be refrigerated for up to three days before you roll it out, which makes this recipe very convenient if you want to prep in advance. Just keep it well wrapped to prevent it from drying out.
What if I don’t have coarse sugar for sprinkling?
Coarse sugar is optional and mainly adds a nice crunch and sparkle to the crust edges. If you don’t have it, you can skip it or use turbinado sugar as a substitute. Regular granulated sugar won’t provide the same texture but won’t ruin the galette either.
Can I add nuts or other toppings?
Definitely! Toasted pecans, walnuts, or sliced almonds sprinkled on top before baking add a wonderful crunch and extra depth of flavor. You could also try adding a light glaze after baking by brushing with warmed apricot jam for a shiny finish.
Conclusion
I cannot recommend this Easy Apple Galette Recipe enough if you want a charming, delicious dessert that feels special without requiring hours in the kitchen. It’s a recipe that always brings me joy to make and even more joy to share. Whether it’s a cozy night in or a festive get-together, this galette never fails to delight, and I’m certain it will become one of your favorites too. Give it a try—you’ll be so glad you did!
Print
Easy Apple Galette Recipe
- Prep Time: 40 minutes
- Cook Time: 36 minutes
- Total Time: 2 hours 16 minutes
- Yield: 1 galette (serves 6)
- Category: Dessert
- Method: Baking
- Cuisine: American
- Diet: Vegetarian
Description
This Easy Apple Galette recipe features a buttery, flaky crust filled with a spiced apple mixture, creating a rustic and charming dessert that's perfect for any occasion. The galette is simple to prepare, requiring no special equipment beyond common baking tools, and can be served warm with optional salted caramel sauce and vanilla ice cream for an extra indulgent touch.
Ingredients
For the Crust
- 1 and ½ cups (188g) all-purpose flour (spooned & leveled), plus more for work surface
- 1 Tablespoon (12g) granulated sugar
- ¼ teaspoon salt
- ½ cup (8 Tbsp; 113g) cold unsalted butter, cubed
- ¼ cup (60ml) ice-cold water, plus more as needed
- Egg wash: 1 large egg beaten with 1 Tablespoon (15ml) milk
- Optional: coarse sugar for sprinkling
For the Filling
- 3–4 apples, peeled and sliced into ¼-inch slices (about 4–5 cups / 500–600g slices)
- ¼ cup (50g) packed light or dark brown sugar
- 1 and ½ Tablespoons (12g) all-purpose flour
- 2 teaspoons fresh lemon juice
- 1 teaspoon ground cinnamon
- ¼ teaspoon ground nutmeg
- Optional: salted caramel sauce for drizzling
Instructions
- Make the crust: In a medium bowl, whisk together the flour, sugar, and salt. Using a pastry cutter or two forks, cut in the cold, cubed butter until the mixture resembles coarse pea-sized crumbs. Gradually add the ice-cold water and stir just until the flour is moistened, adding 1–2 more tablespoons if the dough seems dry. Turn the dough out onto a lightly floured surface and gather it into a ball. Flatten into a thick disc and wrap tightly with plastic wrap or parchment paper. Refrigerate for at least 1 hour and up to 3 days.
- Prepare the filling: While the dough chills, mix peeled and thinly sliced apples with brown sugar, flour, lemon juice, cinnamon, and nutmeg in a large bowl. Cover tightly and keep chilled until ready to assemble.
- Prepare the baking sheet: Line a large baking sheet with parchment paper or a silicone baking mat. Ensure your refrigerator has enough space for chilling the assembled galette before baking.
- Roll out the dough: On a lightly floured surface, roll the chilled dough into a 12-inch circle. Transfer it carefully to the prepared baking sheet, either by rolling directly on the parchment/silicone mat or transferring after rolling on the surface.
- Assemble the galette: Spoon the apple filling onto the center of the dough, leaving a 2–3 inch border around. You can arrange the slices in concentric circles for visual appeal or simply pile the filling. Fold the edges of the dough over the filling, overlapping as needed, and gently press to seal.
- Apply egg wash and optional sugar: Generously brush the dough edges with the beaten egg wash and sprinkle coarse sugar over the crust if desired. Optionally drizzle 3 tablespoons of salted caramel sauce over the apple filling (avoid the crust).
- Chill the galette: Refrigerate the shaped galette for at least 15–20 minutes to firm up before baking, or up to 8 hours. If chilled for longer than 1–2 hours, cover it lightly. The cold helps maintain its shape during baking.
- Preheat oven: Heat your oven to 400°F (204°C) while chilling the galette.
- Bake the galette: Bake on the prepared baking sheet until the filling is bubbly and crust is golden brown, about 35–36 minutes. Remove from oven and let cool on the baking sheet for 10 minutes before slicing.
- Serve: Enjoy the galette warm, optionally topped with vanilla ice cream and additional salted caramel sauce.
- Store leftovers: Cover and refrigerate any leftover galette for up to 4 days.
Notes
- Use cold butter and ice-cold water to ensure a flaky crust.
- The dough can be prepared up to 3 days in advance and stored refrigerated or frozen for longer storage.
- Chilling the assembled galette before baking helps retain its shape and prevents spreading.
- Apples like Granny Smith or Honeycrisp work well for balanced tartness and sweetness.
- Optional coarse sugar adds a pleasant crunch and sparkle to the crust.
- Drizzling salted caramel sauce complements the spiced apples but avoid putting it on the crust to prevent sogginess.


Leave a Reply