Sue Recipe

  • Recipe Index
  • Chicken
  • Desserts
  • About
  • Contact
menu icon
go to homepage
  • Recipe Index
  • Chicken
  • Desserts
  • About
  • Contact

search icon
Homepage link
  • Recipe Index
  • Chicken
  • Desserts
  • About
  • Contact

×

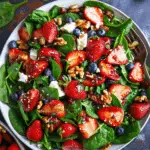
15-Minute Strawberry Spinach Salad

July 24, 2025 by Sue Leave a Comment

A vibrant and refreshing salad that combines the sweetness of fresh strawberries with the peppery bite of baby spinach, aromatic pecans, and creamy feta. Dressed in a simple balsamic glaze, this recipe comes together in just 15 minutes and makes a perfect side dish or light lunch.
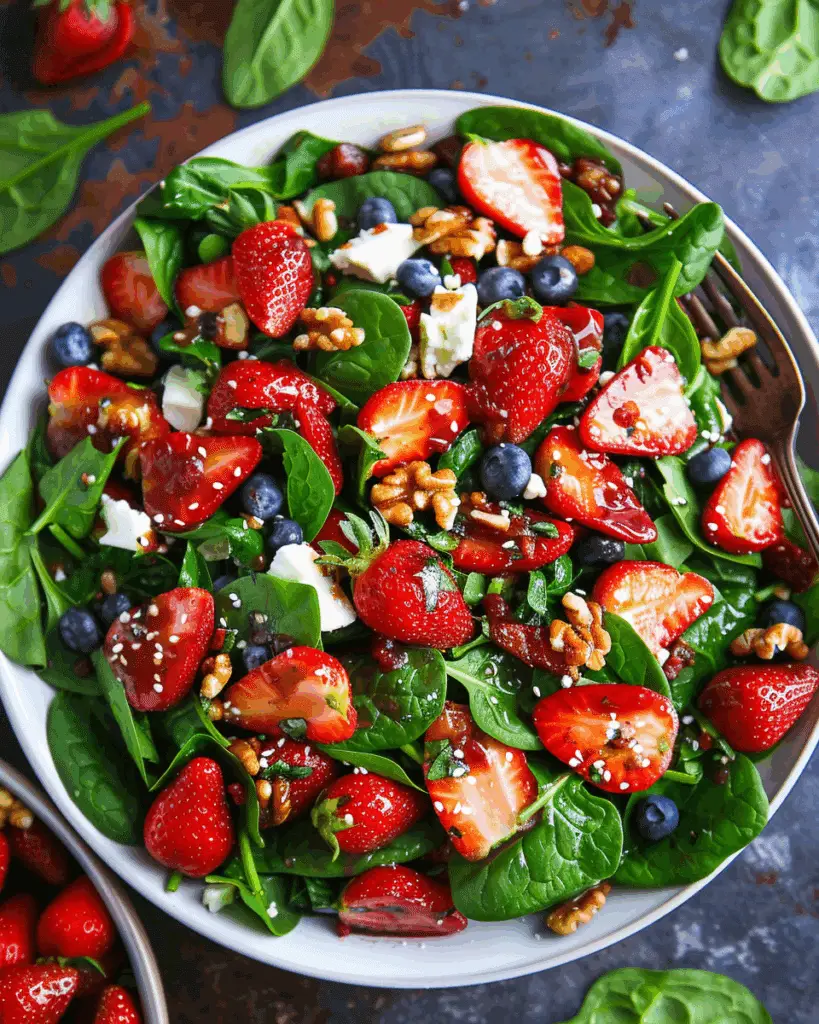
15-Minute Strawberry Spinach Salad

Why You’ll Love This Recipe

I love this salad for its simplicity and quick prep—it uses just a handful of ingredients and takes only 15 minutes to assemble. It offers a delightful balance of textures and flavors: juicy strawberries, crunchy pecans, creamy feta, and tender spinach. It’s perfect for everyday meals or special gatherings, and I often turn to it during picnics, BBQs, or holiday spreads.

ingredients

(Here's a tip: Check out the full list of ingredients and measurements in the recipe card below.)

  • 10 oz baby spinach

  • 3 cups strawberries, cleaned, hulled, and sliced

  • 1 cup pecans, toasted (some chopped)

  • ⅓ cup crumbled feta cheese

Balsamic Dressing:

  • 1 cup balsamic vinegar

  • ¼ cup honey or brown sugar

directions

  1. Make the balsamic glaze

    • In a small saucepan, I combine the balsamic vinegar and honey (or brown sugar). I bring it to a gentle boil over medium heat, then let it simmer for about 10 minutes until reduced by half. Once thickened, I remove it from heat and let it cool.

  2. Assemble the salad

    • In a large mixing bowl, I toss together the baby spinach, sliced strawberries, and crumbled feta. I keep the toasted pecans aside until ready to serve.

  3. Serve

    • I divide the salad into individual bowls or serve it family-style. I sprinkle the toasted pecans on top and drizzle with the balsamic glaze right before serving.

Servings and timing

  • Servings: 6

  • Prep time: 15 minutes

  • Cook time: 10 minutes (for the glaze)

  • Total time: 15 minutes (if glaze is pre-made)

Variations

  • I sometimes replace pecans with toasted almonds or walnuts for a different crunch.

  • Goat cheese or blue cheese makes a delicious swap for feta.

  • When I want more color and sweetness, I add blueberries or mandarin oranges.

  • Mixing spinach with arugula gives it a more peppery kick.

storage/reheating

I store leftover undressed salad in an airtight container in the fridge for up to 3 days. I always keep the balsamic glaze separate to avoid soggy leaves and nuts. The pecans stay crisp if I add them only at the last moment. I never recommend reheating this salad since it’s meant to be enjoyed cold or at room temperature.

FAQs

What type of strawberries work best for this salad?

I prefer using fresh, ripe strawberries that are firm and slightly sweet. Overripe berries can get mushy and water down the salad.

Can I prepare this salad ahead of time?

Yes, I usually prep all the ingredients ahead and store them separately. I assemble everything just before serving to keep it fresh and crunchy.

Is this salad gluten-free?

Yes, all the ingredients in this recipe are naturally gluten-free. I just make sure the balsamic vinegar I use is certified gluten-free if needed.

Can I use store-bought balsamic glaze?

Definitely. When I’m short on time, I grab a good-quality store-bought balsamic glaze and drizzle it over the salad right before serving.

How do I toast pecans?

I toast them in a dry skillet over medium heat for about 3–5 minutes, stirring often until they’re golden and fragrant. It really brings out their flavor.

Conclusion

This 15-minute Strawberry Spinach Salad is one of my favorites because it’s simple, colorful, and packed with flavor. Whether I serve it as a side dish or a light meal, it’s always a hit. The combination of sweet strawberries, nutty pecans, creamy feta, and tangy balsamic glaze makes every bite satisfying. I hope you enjoy it as much as I do!
Print

clock clock iconcutlery cutlery iconflag flag iconfolder folder iconinstagram instagram iconpinterest pinterest iconfacebook facebook iconprint print iconsquares squares iconheart heart iconheart solid heart solid icon
15-Minute Strawberry Spinach Salad

15-Minute Strawberry Spinach Salad

5 Stars 4 Stars 3 Stars 2 Stars 1 Star No reviews
  • Author: Sue
  • Prep Time: 15 minutes
  • Cook Time: 10 minutes
  • Total Time: 15 minutes
  • Yield: 6 servings
  • Category: Salad
  • Method: No-Cook, Simmer (for glaze)
  • Cuisine: American
  • Diet: Vegetarian
Print Recipe
Pin Recipe

Description

A vibrant and refreshing salad combining sweet strawberries, tender baby spinach, crunchy toasted pecans, and creamy feta cheese, topped with a tangy balsamic glaze. Ready in just 15 minutes, it's perfect as a side or light main dish.


Ingredients

  • 10 oz baby spinach
  • 3 cups strawberries, cleaned, hulled, and sliced
  • 1 cup pecans, toasted (some chopped)
  • ⅓ cup crumbled feta cheese
  • 1 cup balsamic vinegar
  • ¼ cup honey or brown sugar

Instructions

  1. In a small saucepan, combine balsamic vinegar and honey (or brown sugar). Heat over medium, bring to a gentle boil, then simmer for about 10 minutes until reduced by half. Remove from heat and let cool—it'll thicken further.
  2. In a large bowl, toss spinach, sliced strawberries, and feta together, saving the pecans until serving.
  3. Divide salad into bowls, top with toasted pecans, then drizzle with balsamic glaze just before serving.

Notes

  • Use fresh strawberries for the best texture and flavor.
  • Store salad ingredients and dressing separately to maintain freshness.
  • Try substituting feta with goat cheese or blue cheese for a flavor variation.
  • Combine spinach with arugula for an extra peppery taste.

Nutrition

  • Serving Size: 1 serving
  • Calories: 230
  • Sugar: 14g
  • Sodium: 180mg
  • Fat: 15g
  • Saturated Fat: 3g
  • Unsaturated Fat: 11g
  • Trans Fat: 0g
  • Carbohydrates: 18g
  • Fiber: 3g
  • Protein: 4g
  • Cholesterol: 10mg
Have you made this recipe? I'd love to see it!

Click here to Follow me on Pinterest

Big Mac Salad

July 23, 2025 by Sue Leave a Comment

I love turning fast-food cravings into something lighter, and this Big Mac Salad does just that—crisp iceberg lettuce, juicy tomatoes, onions, pickles, shredded cheese, and savory ground beef, all brought together by a tangy Thousand Island-style dressing. Big Mac Salad

Why You’ll Love This Recipe

I adore this salad because it captures the iconic Big Mac flavors without the bun. It’s hearty enough for a satisfying meal but fresh and healthy with all that crunchy lettuce and veggies.

ingredients

(Here's a tip: Check out the full list of ingredients and measurements in the recipe card below.)

  • 6 cups chopped iceberg lettuce

  • 1½ pounds very lean ground beef, browned and drained

  • 1½ cups shredded Colby Jack cheese

  • 1 cup diced Roma tomatoes

  • 1 cup sliced red onion

  • ½ cup diced dill pickles

  • Thousand Island dressing

directions

  1. I start by browning the ground beef in a skillet over medium-high heat until fully cooked, then drain off the excess fat.

  2. In a large serving bowl, I layer the chopped iceberg lettuce.

  3. I sprinkle the warm ground beef over the lettuce.

  4. Then I add the shredded Colby Jack, diced Roma tomatoes, sliced red onion, and diced dill pickles.

  5. Finally, I drizzle as much Thousand Island dressing as I like, toss everything lightly, and serve immediately.

Servings and timing

This recipe makes 8 servings.

  • Prep time: 10 minutes

  • Cook time: 10 minutes

  • Total time: 20 minutes

Variations

  • I sometimes substitute sweet pickles for dill pickles.

  • I switch to yellow onions if I don’t have red.

  • Occasionally I swap Colby Jack for Cheddar or add a sprinkle of sesame seeds to mimic the sesame bun topping.

  • I’ve even mixed in grape or cherry tomatoes when Roma tomatoes weren't available.

storage/reheating

I keep the components separate if I'm meal prepping. I store the cooked beef in one container and all the veggies and cheese in another, then combine and dress right before serving.

  • Fridge: Up to 2 days in airtight containers.

  • Freezer: Not recommended—the lettuce wilts and veggies become soggy.
    When reheating, I gently warm the beef and toss it with the chilled ingredients for a contrast of warm meat and crisp veggies.

FAQs

Can I make this salad ahead of time?

Yes—I prep the beef and veggies separately ahead of time, then assemble and dress it just before eating to keep things crisp.

What dressing works best?

I prefer Thousand Island-style, but I’ve also used a classic Big Mac-style sauce or even a zesty Russian dressing.

Can I use different protein?

Absolutely. I’ve used ground turkey, chicken, or even plant-based crumbles with great results.

Can I add extra toppings?

Sure! I’ve tried adding sesame seeds, avocado slices, or even crumbled bacon for added texture and flavor.

Does it keep well for meal prep?

I store dressings and components separately; combining just before eating keeps everything fresh and the crunch intact.

Conclusion

I love how this Big Mac Salad transforms a drive-thru favorite into a healthier, crunchier, and just-as-delicious meal. Whether I’m recreating it on a busy weeknight or prepping lunches for the week ahead, it delivers that classic flavor without the bun—and with so much more freshness.

Print

clock clock iconcutlery cutlery iconflag flag iconfolder folder iconinstagram instagram iconpinterest pinterest iconfacebook facebook iconprint print iconsquares squares iconheart heart iconheart solid heart solid icon
Big Mac Salad

Big Mac Salad

5 Stars 4 Stars 3 Stars 2 Stars 1 Star No reviews
  • Author: Sue
  • Prep Time: 10 minutes
  • Cook Time: 10 minutes
  • Total Time: 20 minutes
  • Yield: 8 servings
  • Category: Salad
  • Method: No-Cook (assembly), Stovetop (beef)
  • Cuisine: American
Print Recipe
Pin Recipe

Description

This Big Mac Salad transforms a fast-food classic into a lighter, healthier option, combining ground beef, lettuce, tomatoes, onions, pickles, and cheese with a tangy Thousand Island-style dressing.


Ingredients

  • 6 cups chopped iceberg lettuce
  • 1½ pounds very lean ground beef, browned and drained
  • 1½ cups shredded Colby Jack cheese
  • 1 cup diced Roma tomatoes
  • 1 cup sliced red onion
  • ½ cup diced dill pickles
  • Thousand Island dressing, to taste

Instructions

  1. Brown the ground beef in a skillet over medium-high heat until fully cooked. Drain the excess fat.
  2. Layer the chopped iceberg lettuce in a large serving bowl.
  3. Sprinkle the warm ground beef over the lettuce.
  4. Add shredded Colby Jack cheese, diced Roma tomatoes, sliced red onion, and diced dill pickles.
  5. Drizzle with Thousand Island dressing to taste, toss lightly, and serve immediately.

Notes

  • Keep components separate if prepping in advance to maintain freshness.
  • Use yellow onions or sweet pickles as substitutions if needed.
  • Try cheddar cheese or cherry tomatoes for variation.
  • Top with sesame seeds, avocado slices, or crumbled bacon for added flavor.

Nutrition

  • Serving Size: 1 serving
  • Calories: 350
  • Sugar: 4g
  • Sodium: 650mg
  • Fat: 26g
  • Saturated Fat: 10g
  • Unsaturated Fat: 14g
  • Trans Fat: 0.5g
  • Carbohydrates: 7g
  • Fiber: 2g
  • Protein: 22g
  • Cholesterol: 70mg

Have you made this recipe? I'd love to see it!

Click here to Follow me on Pinterest

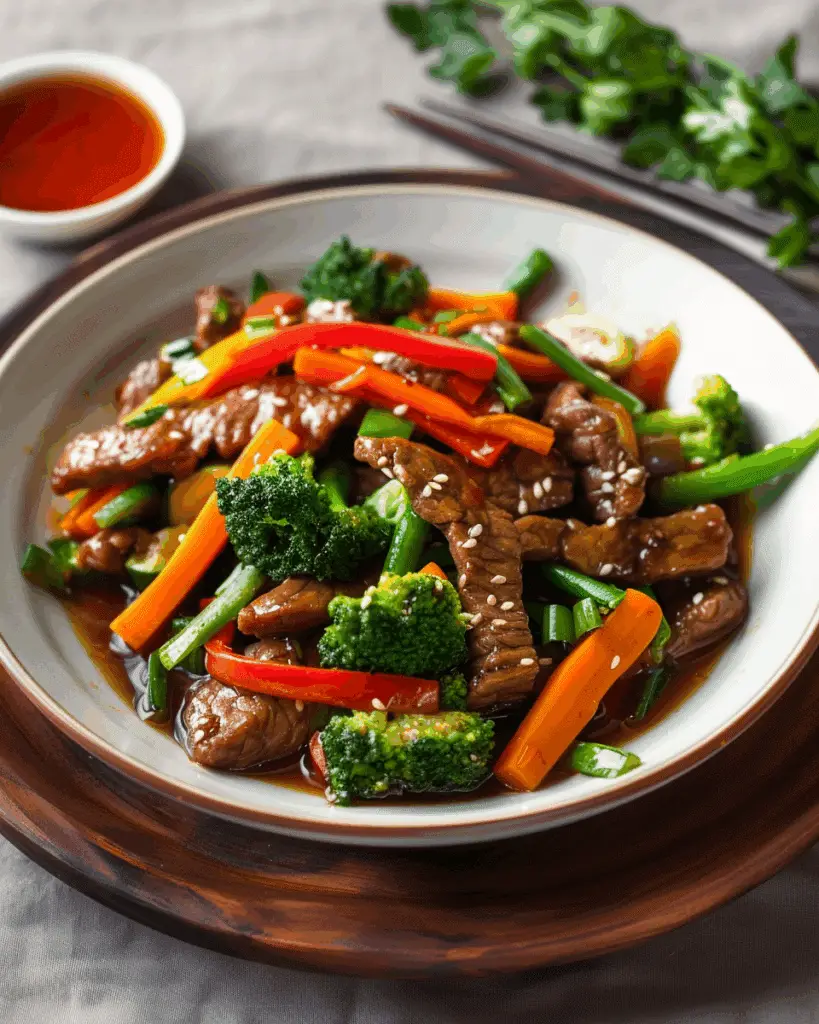
Beef and Vegetable Stir-Fry

July 23, 2025 by Sue Leave a Comment

This beef and vegetable stir-fry is a quick, delicious dish packed with colorful vegetables and tender strips of beef, all tossed in a savory sauce. It’s my go-to when I want something fast, hearty, and full of flavor that doesn’t sacrifice nutrition. Beef and Vegetable Stir-Fry

Why You’ll Love This Recipe

I love how this stir-fry comes together in under 30 minutes, making it ideal for busy weeknights. It’s flexible—I can use whatever vegetables I have on hand—and the flavors are always satisfying. The beef stays tender, and the sauce clings to every bite for a bold, savory finish.

Ingredients

(Here's a tip: Check out the full list of ingredients and measurements in the recipe card below.)

  • Flank steak or sirloin, thinly sliced

  • Soy sauce

  • Garlic, minced

  • Fresh ginger, grated

  • Cornstarch

  • Sesame oil

  • Vegetable oil

  • Broccoli florets

  • Carrot, sliced

  • Bell pepper, sliced

  • Onion, sliced

  • Green beans or snap peas

  • Oyster sauce or hoisin sauce

  • Optional: red pepper flakes or chili garlic sauce for heat

Directions

  1. I start by marinating the thinly sliced beef in a mixture of soy sauce, garlic, ginger, and a bit of cornstarch. This tenderizes the beef and infuses it with flavor.

  2. While the beef marinates, I prep all my vegetables, cutting them into bite-sized pieces so they cook quickly and evenly.

  3. In a large skillet or wok, I heat vegetable oil over medium-high heat and quickly sear the beef until browned but not fully cooked. I remove it from the pan and set it aside.

  4. I then stir-fry the vegetables in the same pan, starting with the ones that take longer like carrots and broccoli, followed by peppers and onions.

  5. Once the veggies are just tender but still crisp, I return the beef to the pan, add oyster sauce (or hoisin sauce), and toss everything together until coated and heated through.

  6. I drizzle a little sesame oil at the end for extra depth and serve it hot.

Servings and timing

This recipe makes 4 servings. It takes about 10 minutes to prep and 15 minutes to cook, so it’s on the table in around 25 minutes.

Variations

I sometimes swap out the beef for chicken, shrimp, or tofu if I’m looking for something different. I also like adding baby corn, mushrooms, or zucchini depending on the season or what I have in the fridge. For a low-carb option, I serve it over cauliflower rice instead of regular rice or noodles.

storage/reheating

I store leftovers in an airtight container in the fridge for up to 3 days. When reheating, I use a skillet over medium heat to keep everything crisp, but the microwave works fine too—just don’t overcook or the vegetables might turn mushy. I avoid freezing this dish because the vegetables can lose their texture.

FAQs

What kind of beef is best for stir-fry?

I prefer flank steak or sirloin because they’re tender and cook quickly. I always slice the beef thinly against the grain for the best texture.

Can I use frozen vegetables?

Yes, I can use frozen stir-fry veggie mixes if I’m in a rush. I just make sure to thaw and drain them first to avoid excess moisture in the pan.

How do I keep the beef tender?

Marinating the beef with cornstarch and slicing it thin against the grain helps a lot. I also make sure not to overcook it—just a quick sear is enough.

What can I serve with this stir-fry?

I usually serve it over steamed rice, jasmine rice, or noodles. For a healthier option, I use brown rice or cauliflower rice.

Is this stir-fry spicy?

Not by default, but I like to add red pepper flakes or a spoonful of chili garlic sauce if I want some heat.

Conclusion

This beef and vegetable stir-fry is a staple in my kitchen because it’s fast, flavorful, and endlessly adaptable. Whether I’m cleaning out the fridge or planning a meal ahead, it always delivers a satisfying, balanced dinner in no time.

Print
clock clock iconcutlery cutlery iconflag flag iconfolder folder iconinstagram instagram iconpinterest pinterest iconfacebook facebook iconprint print iconsquares squares iconheart heart iconheart solid heart solid icon
Beef and Vegetable Stir-Fry

Beef and Vegetable Stir-Fry

5 Stars 4 Stars 3 Stars 2 Stars 1 Star No reviews
  • Author: Sue
  • Prep Time: 10 minutes
  • Cook Time: 15 minutes
  • Total Time: 25 minutes
  • Yield: 4 servings
  • Category: Main Course
  • Method: Stir-Fry
  • Cuisine: Asian
  • Diet: Low Fat
Print Recipe
Pin Recipe

Description

A quick and flavorful beef and vegetable stir-fry packed with colorful veggies and tender beef in a savory sauce, perfect for a healthy weeknight dinner.


Ingredients

  • 1 lb flank steak or sirloin, thinly sliced
  • 3 tbsp soy sauce
  • 2 cloves garlic, minced
  • 1 tsp fresh ginger, grated
  • 1 tbsp cornstarch
  • 1 tsp sesame oil
  • 2 tbsp vegetable oil
  • 2 cups broccoli florets
  • 1 carrot, sliced
  • 1 bell pepper, sliced
  • 1 onion, sliced
  • 1 cup green beans or snap peas
  • 2 tbsp oyster sauce or hoisin sauce
  • Optional: ½ teaspoon red pepper flakes or 1 teaspoon chili garlic sauce

Instructions

  1. Marinate the sliced beef with soy sauce, garlic, ginger, and cornstarch. Let sit for at least 10 minutes.
  2. Prepare all vegetables, cutting them into bite-sized pieces.
  3. Heat vegetable oil in a large skillet or wok over medium-high heat. Sear the beef until browned but not fully cooked, then remove and set aside.
  4. Stir-fry the vegetables in the same pan, starting with harder ones like carrots and broccoli, followed by peppers and onions.
  5. Return the beef to the pan, add oyster or hoisin sauce, and toss everything to coat evenly.
  6. Drizzle sesame oil, stir well, and serve hot over rice or noodles.

Notes

  • Use flank or sirloin steak sliced thinly against the grain for tenderness.
  • Swap beef for chicken, shrimp, or tofu for variation.
  • Frozen vegetables can be used if thawed and drained properly.
  • Do not overcook vegetables to maintain their crispness.
  • Store leftovers in an airtight container for up to 3 days in the fridge.

Nutrition

  • Serving Size: 1 serving
  • Calories: 320
  • Sugar: 6g
  • Sodium: 780mg
  • Fat: 16g
  • Saturated Fat: 3g
  • Unsaturated Fat: 12g
  • Trans Fat: 0g
  • Carbohydrates: 18g
  • Fiber: 4g
  • Protein: 28g
  • Cholesterol: 70mg

Have you made this recipe? I'd love to see it!

Click here to Follow me on Pinterest

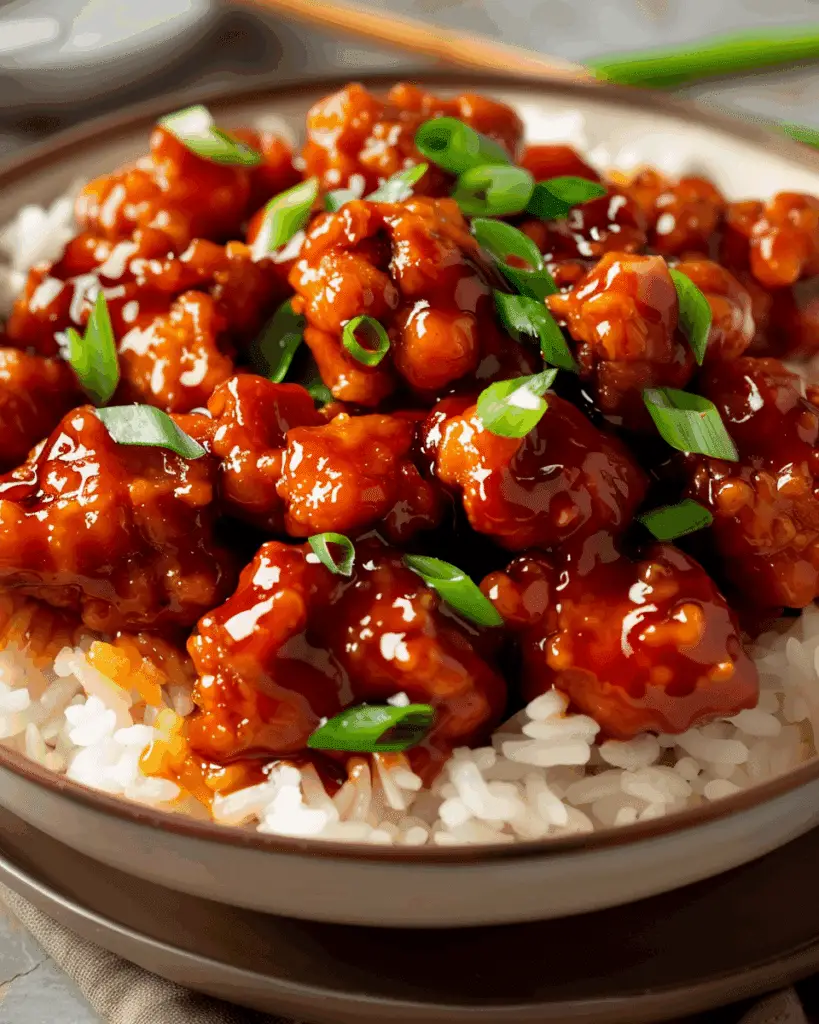
General Tso’s Chicken

July 23, 2025 by Sue Leave a Comment

General Tso’s Chicken is a beloved Chinese-American dish known for its crispy fried chicken pieces coated in a sticky, sweet, tangy, and slightly spicy sauce. It’s the perfect blend of savory and bold flavors that hits all the right notes, making it a popular choice at takeout spots—and even better when made at home. General Tso’s Chicken

Why You’ll Love This Recipe

I love this recipe because it brings that restaurant-quality flavor to my own kitchen. The chicken stays perfectly crispy under a thick, glossy sauce that balances sweetness, tang, and heat. It’s easy to prep ahead, and I can tweak the spice level depending on who I’m feeding. Plus, it pairs beautifully with steamed rice or stir-fried vegetables for a full meal.

ingredients

(Here's a tip: Check out the full list of ingredients and measurements in the recipe card below.)

  • Boneless, skinless chicken thighs

  • Cornstarch

  • All-purpose flour

  • Eggs

  • Soy sauce

  • Rice vinegar

  • Hoisin sauce

  • Sugar

  • Garlic

  • Ginger

  • Dried red chilies

  • Sesame oil

  • Green onions (for garnish)

  • Vegetable oil (for frying)

directions

  1. I start by cutting the chicken thighs into bite-sized pieces, then coat them in a mixture of cornstarch, flour, and beaten eggs.

  2. I deep-fry the coated chicken pieces until golden and crispy, then drain them on paper towels.

  3. While the chicken rests, I make the sauce by combining soy sauce, rice vinegar, hoisin sauce, sugar, minced garlic, grated ginger, and sesame oil in a pan. I add the dried chilies and simmer the mixture until slightly thickened.

  4. I toss the crispy chicken into the sauce and stir until each piece is fully coated and sticky.

  5. I serve it hot, garnished with sliced green onions over steamed rice.

Servings and timing

This recipe serves about 4 people. The total time is approximately 40 minutes: 15 minutes for prep and 25 minutes for cooking.

Variations

Sometimes I swap chicken thighs for chicken breast if I want a leaner version. I’ve also added steamed broccoli or bell peppers for a vegetable boost. If I want it spicier, I throw in some crushed red pepper flakes or use fresh chili slices. To make it gluten-free, I use tamari instead of soy sauce and make sure the hoisin sauce is certified gluten-free.

storage/reheating

I store any leftovers in an airtight container in the fridge for up to 3 days. To reheat, I prefer using the oven or air fryer so the chicken gets crispy again. Microwaving works too, though it softens the coating a bit. I avoid freezing it, as the sauce can turn watery and the chicken loses its crunch.

FAQs

What makes General Tso’s Chicken different from other Chinese chicken dishes?

General Tso’s Chicken is known for its deep-fried texture and sweet-spicy sauce, whereas other dishes might be stir-fried or have lighter, more savory sauces.

Can I bake the chicken instead of frying?

Yes, I’ve baked the chicken at 425°F for 20–25 minutes for a healthier option. While it’s not as crispy as frying, it still tastes delicious once coated in sauce.

How do I keep the chicken crispy after adding the sauce?

I make sure the sauce is thickened before adding the chicken and only toss everything together right before serving. That helps maintain a good texture.

Can I make this ahead of time?

I usually prep the sauce and chicken coating ahead of time, but I fry the chicken and toss it in the sauce just before serving for the best results.

What can I serve with General Tso’s Chicken?

I like serving it with white or brown rice, fried rice, or stir-fried vegetables like broccoli, snow peas, or bok choy.

Conclusion

General Tso’s Chicken is a flavorful, satisfying dish that brings takeout comfort food straight to my kitchen. With crispy chicken and that signature sticky-sweet sauce, it’s a go-to meal when I want something both fun and familiar. Whether I keep it classic or mix in some vegetables, it never disappoints.

Print

clock clock iconcutlery cutlery iconflag flag iconfolder folder iconinstagram instagram iconpinterest pinterest iconfacebook facebook iconprint print iconsquares squares iconheart heart iconheart solid heart solid icon
General Tso’s Chicken

General Tso’s Chicken

5 Stars 4 Stars 3 Stars 2 Stars 1 Star No reviews
  • Author: Sue
  • Prep Time: 15 minutes
  • Cook Time: 25 minutes
  • Total Time: 40 minutes
  • Yield: 4 servings
  • Category: Main Dish
  • Method: Deep-Fry
  • Cuisine: Chinese-American
  • Diet: Halal
Print Recipe
Pin Recipe

Description

General Tso’s Chicken is a crispy, deep-fried chicken dish tossed in a sticky, sweet, tangy, and slightly spicy sauce—a Chinese-American favorite that's easy to recreate at home.


Ingredients

  • 1.5 lbs boneless, skinless chicken thighs, cut into bite-sized pieces
  • ½ cup cornstarch
  • ½ cup all-purpose flour
  • 2 eggs, beaten
  • ¼ cup soy sauce
  • 2 tbsp rice vinegar
  • 2 tbsp hoisin sauce
  • 2 tbsp sugar
  • 2 cloves garlic, minced
  • 1 tbsp fresh ginger, grated
  • 6-8 dried red chilies
  • 1 tsp sesame oil
  • 2 green onions, sliced (for garnish)
  • Vegetable oil, for frying

Instructions

  1. Cut the chicken thighs into bite-sized pieces.
  2. Coat the chicken in a mixture of cornstarch, flour, and beaten eggs.
  3. Deep-fry the coated chicken pieces in hot vegetable oil until golden and crispy. Drain on paper towels.
  4. In a pan, combine soy sauce, rice vinegar, hoisin sauce, sugar, garlic, ginger, and sesame oil. Add dried chilies and simmer until slightly thickened.
  5. Add the crispy chicken to the sauce and toss to coat evenly.
  6. Serve hot, garnished with sliced green onions over steamed rice.

Notes

  • Use chicken breast for a leaner version.
  • Add vegetables like broccoli or bell peppers for more nutrition.
  • Adjust spice level by adding crushed red pepper flakes or fresh chilies.
  • Use tamari and certified gluten-free hoisin sauce for a gluten-free version.
  • Best served immediately to retain crispiness.

Nutrition

  • Serving Size: 1 serving
  • Calories: 450
  • Sugar: 10g
  • Sodium: 850mg
  • Fat: 22g
  • Saturated Fat: 4g
  • Unsaturated Fat: 16g
  • Trans Fat: 0g
  • Carbohydrates: 35g
  • Fiber: 1g
  • Protein: 28g
  • Cholesterol: 145mg

Have you made this recipe? I'd love to see it!

Click here to Follow me on Pinterest

Baked Sweet Potatoes

July 23, 2025 by Sue Leave a Comment

I love how effortlessly this recipe turns basic sweet potatoes into a comforting, flavorful side dish with just a few simple steps. Baked Sweet Potatoes

Why You’ll Love This Recipe

I adore how it delivers sweet, tender interiors with perfectly crisp skins—all from minimal ingredients and fuss. It’s versatile enough for weeknight dinners or holiday spreads, and I can dress mine sweet or savory based on my cravings.

ingredients

(Here's a tip: Check out the full list of ingredients and measurements in the recipe card below.)

  • sweet potatoes (4 medium, long and thin)

  • 1 tablespoon olive oil

  • 1 teaspoon sea salt or kosher salt

directions

  1. I preheat the oven to 400 °F.

  2. I line a baking sheet with parchment paper or foil for easy cleanup.

  3. I wash and thoroughly dry each sweet potato—dry skin crisps better.

  4. I poke about 8 fork holes evenly around each potato to let steam escape.

  5. I drizzle on olive oil, sprinkle salt, and rub it all over the skins.

  6. I bake them on the sheet for about 45 minutes, or until a fork slides in easily and juices begin to caramelize.

  7. After a 5-minute rest, I split them open and add my favorite toppings.

Servings and timing

  • Servings: 4

  • Prep time: 5 minutes

  • Cook time: ~45 minutes

  • Total time: 50 minutes

Variations

  • I wrap them in foil for softer skin when I want a more steamed texture.

  • I microwave them when I need a faster option—5 to 10 minutes, flipping halfway.

  • I mix up toppings with savory (butter, sour cream, herbs) or sweet (cinnamon, brown sugar, maple syrup) styles.

storage/reheating

I store leftovers (without toppings) in an airtight container in the fridge for up to 4 days. To reheat, I bake at 400 °F for 15 minutes to regain crispiness, or microwave them with a damp paper towel for quick results—though the skin won’t stay crispy.

FAQs

What temperature is best for baking sweet potatoes?

I find that 400 °F strikes the perfect balance—high enough for crisp skins and a fluffy inside without burning.

How do I know when they’re done?

They’re ready when the skin starts to wrinkle, juices bubble out slightly, and a fork slides in with no resistance.

Is it okay to eat the skins?

Yes, and I actually enjoy them most when they’re rubbed in oil and salt and roasted until crisp—they add texture and nutrition.

Can I wrap them in foil?

I do that when I want soft skin. It steams them more than roasts, so I skip the foil when I want that crispy bite.

How can I make fluffy versus caramelized sweet potatoes?

To get fluffier potatoes, I don’t overcrowd the pan and I leave them unwrapped. For caramelization, I bake them a little longer to let the natural sugars bubble out.

Conclusion

This baked sweet potato recipe is one of my go-to comfort dishes. It’s hands-off, healthy, and endlessly customizable. Whether I keep it simple or load it with toppings, I always end up with something warm, satisfying, and delicious.

Print

clock clock iconcutlery cutlery iconflag flag iconfolder folder iconinstagram instagram iconpinterest pinterest iconfacebook facebook iconprint print iconsquares squares iconheart heart iconheart solid heart solid icon
Baked Sweet Potatoes

Baked Sweet Potatoes

5 Stars 4 Stars 3 Stars 2 Stars 1 Star No reviews
  • Author: Sue
  • Prep Time: 5 minutes
  • Cook Time: 45 minutes
  • Total Time: 50 minutes
  • Yield: 4 servings
  • Category: Side Dish
  • Method: Baking
  • Cuisine: American
  • Diet: Vegan
Print Recipe
Pin Recipe

Description

This baked sweet potato recipe transforms simple ingredients into a comforting, flavorful side dish with tender interiors and crisp skins, perfect for any occasion.


Ingredients

  • 4 medium sweet potatoes (long and thin)
  • 1 tablespoon olive oil
  • 1 teaspoon sea salt or kosher salt

Instructions

  1. Preheat the oven to 400 °F (200 °C).
  2. Line a baking sheet with parchment paper or foil for easy cleanup.
  3. Wash and thoroughly dry each sweet potato.
  4. Poke about 8 fork holes evenly around each potato to let steam escape.
  5. Drizzle olive oil over the potatoes, sprinkle with salt, and rub it all over the skins.
  6. Place on the baking sheet and bake for about 45 minutes, or until a fork slides in easily and juices begin to caramelize.
  7. Let rest for 5 minutes, then split open and add desired toppings.

Notes

  • Wrap in foil for softer skin, though crispiness will be lost.
  • Microwave for a faster version by wrapping in a damp towel and cooking 5–10 minutes, flipping halfway.
  • Try savory toppings like butter, salt, sour cream, or sweet options like brown sugar and cinnamon.
  • Store leftovers without toppings in an airtight container for up to 4 days.
  • Reheat in the oven at 400 °F for 15 minutes for crisp skin or microwave wrapped in a damp paper towel.

Nutrition

  • Serving Size: 1 medium sweet potato
  • Calories: 180
  • Sugar: 7g
  • Sodium: 300mg
  • Fat: 4g
  • Saturated Fat: 0.5g
  • Unsaturated Fat: 3.5g
  • Trans Fat: 0g
  • Carbohydrates: 36g
  • Fiber: 5g
  • Protein: 2g
  • Cholesterol: 0mg

Have you made this recipe? I'd love to see it!

Click here to Follow me on Pinterest

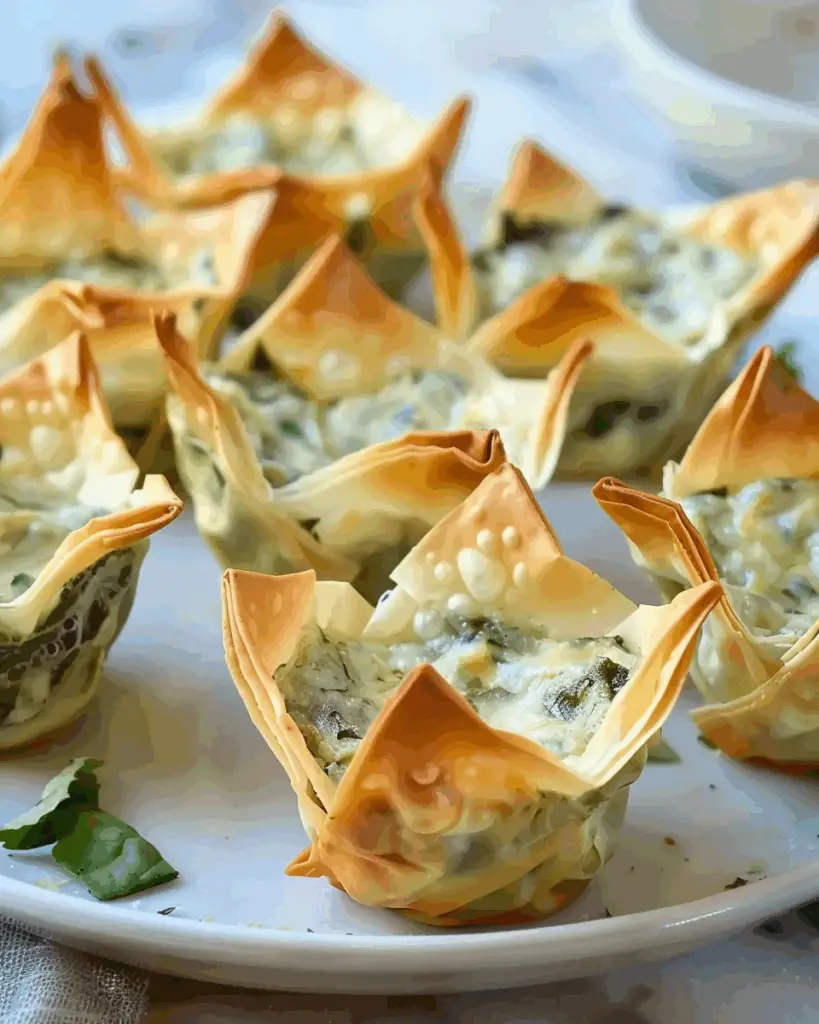
Spinach-Artichoke Dip Wonton Cups

July 23, 2025 by Sue Leave a Comment

I love these crispy, golden wonton cups filled with creamy spinach and artichoke dip. They're the perfect bite-sized appetizer—easy to make, fun to eat, and always a crowd-pleaser. Spinach-Artichoke Dip Wonton Cups

Why You’ll Love This Recipe

I like how these wonton cups give the traditional spinach-artichoke dip a portable, no-mess twist. They bake up crunchy in the oven, and the warm, cheesy filling is rich and comforting. These are perfect for parties, holidays, or even just a fun snack.

Ingredients

(Here's a tip: Check out the full list of ingredients and measurements in the recipe card below.)

  • 12 wonton wrappers

  • Cooking spray

  • ½ of a 10‑oz package frozen spinach, thawed and very well‑strained

  • 1 (8‑oz) can artichoke hearts, drained and finely chopped

  • ⅓ cup mayonnaise

  • ¼ cup sour cream

  • 2 oz cream cheese, at room temperature

  • ½ cup grated Parmesan cheese

  • 2 cloves garlic, minced

Directions

  1. I preheat the oven to 350°F.

  2. I press a wonton wrapper into each muffin tin cup, spray them lightly with cooking spray, and bake for 5 minutes to firm them up.

  3. In a bowl, I mix together the spinach, artichokes, mayonnaise, sour cream, cream cheese, Parmesan, and garlic until everything is well blended.

  4. I spoon the mixture evenly into the pre-baked wonton cups.

  5. Then I bake them for another 10–12 minutes, until the filling is hot and the edges of the wontons are golden and crisp.

Servings and Timing

  • Servings: 12 wonton cups

  • Prep time: 10 minutes

  • Cook time: 20 minutes

  • Total time: 30 minutes

Variations

  • I sometimes add a pinch of crushed red pepper flakes for a spicy kick.

  • Shredded mozzarella or cheddar can go in for extra cheesy goodness.

  • I like to stir in chopped cooked chicken if I want something more filling.

  • Mini phyllo shells work great if I’m out of wonton wrappers.

Storage/Reheating

I store leftovers in an airtight container in the fridge for up to 2 days. To reheat, I place them in a 300°F oven for about 5–10 minutes until the cups are warm and crispy again. I don’t recommend microwaving because they lose their crunch.

FAQs

Can I use fresh spinach instead of frozen?

Yes, I cook it down, drain it thoroughly, and chop it before mixing. It works just as well.

Can I make these ahead of time?

I usually prep the filling and bake the wonton cups ahead, then fill and finish baking right before serving.

Can I freeze them?

I don’t freeze them because the wonton cups tend to lose their crispiness once thawed.

What kind of artichokes should I use?

I go for canned or jarred artichoke hearts packed in water. I make sure to drain and chop them well.

How do I make them in a mini muffin tin?

I either trim the wonton wrappers to fit or double them up. Then I reduce the bake time slightly so they don’t overbrown.

Conclusion

These spinach-artichoke dip wonton cups are one of my go-to appetizers. They’re crunchy, cheesy, and super easy to put together. Whether it’s game day, a holiday, or just a fun night in, I know they’ll disappear fast.

Print

clock clock iconcutlery cutlery iconflag flag iconfolder folder iconinstagram instagram iconpinterest pinterest iconfacebook facebook iconprint print iconsquares squares iconheart heart iconheart solid heart solid icon
Spinach-Artichoke Dip Wonton Cups

Spinach-Artichoke Dip Wonton Cups

5 Stars 4 Stars 3 Stars 2 Stars 1 Star No reviews
  • Author: Sue
  • Prep Time: 10 minutes
  • Cook Time: 20 minutes
  • Total Time: 30 minutes
  • Yield: 12 wonton cups
  • Category: Appetizer
  • Method: Baking
  • Cuisine: American
  • Diet: Vegetarian
Print Recipe
Pin Recipe

Description

Crispy baked wonton cups filled with a creamy, cheesy spinach and artichoke dip—perfect for parties and easy to make in just 30 minutes.


Ingredients

  • 12 wonton wrappers
  • Cooking spray
  • ½ of a 10‑oz package frozen spinach, thawed and very well‑strained
  • 1 (8‑oz) can artichoke hearts, drained and finely chopped
  • ⅓ cup mayonnaise
  • ¼ cup sour cream
  • 2 oz cream cheese, at room temperature
  • ½ cup grated Parmesan cheese
  • 2 cloves garlic, minced

Instructions

  1. Preheat oven to 350 °F.
  2. Arrange wonton wrappers into the cups of a standard 12‑cup muffin pan, lightly spray with cooking spray, and bake for 5 minutes.
  3. In a bowl, stir together spinach, chopped artichoke hearts, mayonnaise, sour cream, cream cheese, Parmesan, and garlic until well combined.
  4. Divide the mixture evenly among the pre‑baked wonton cups.
  5. Return them to the oven and bake for another 10–12 minutes, until the filling is warmed and cups are golden brown.

Notes

  • Refrigerate leftovers in an airtight container for up to 2 days.
  • Reheat in a 300 °F oven for 5–10 minutes for optimal crispiness.
  • Can be made ahead by prepping cups and filling separately.
  • Use fresh spinach by cooking and draining thoroughly.
  • Do not freeze as texture may suffer.

Nutrition

  • Serving Size: 1 wonton cup
  • Calories: 120
  • Sugar: 1g
  • Sodium: 230mg
  • Fat: 9g
  • Saturated Fat: 3g
  • Unsaturated Fat: 5g
  • Trans Fat: 0g
  • Carbohydrates: 6g
  • Fiber: 1g
  • Protein: 3g
  • Cholesterol: 10mg
Have you made this recipe? I'd love to see it!

Click here to Follow me on Pinterest

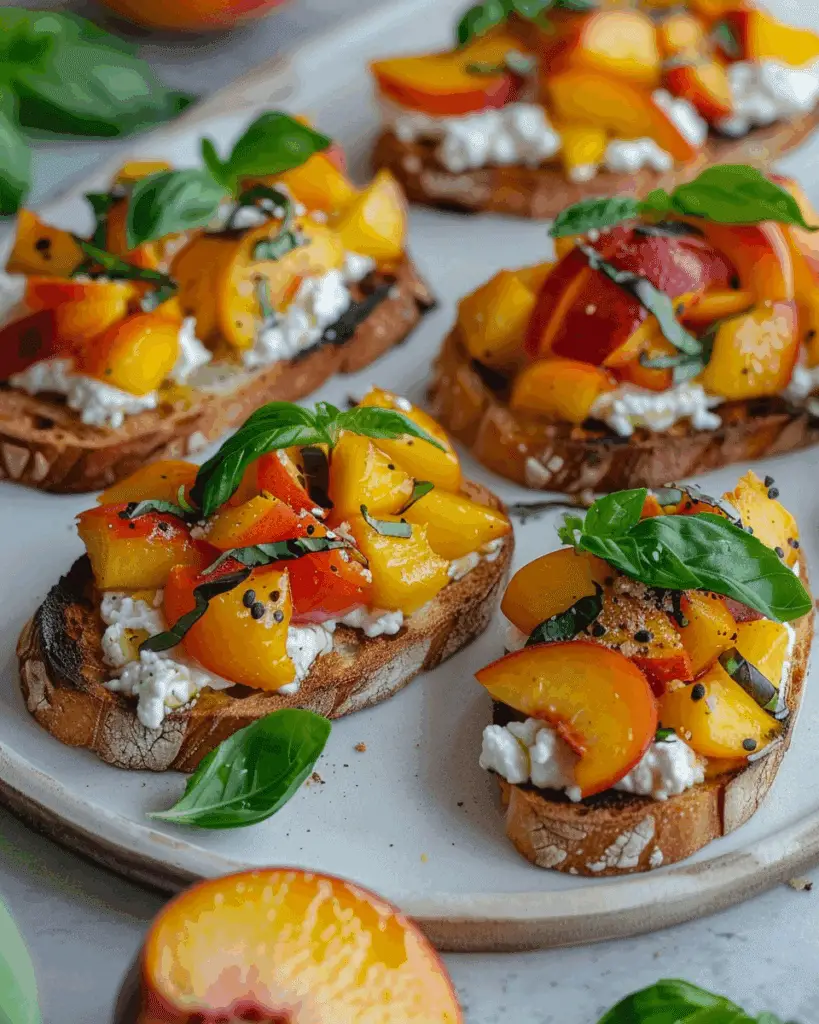
Quick Peach Bruschetta with Whipped Ricotta

July 23, 2025 by Sue Leave a Comment

I love how this bruschetta combines juicy seasonal peaches, creamy whipped ricotta, fresh basil, and toasty baguette for a sweet‑savory summer appetizer that I can prepare in about 20 minutes. Quick Peach Bruschetta with Whipped Ricotta

Why You’ll Love This Recipe

I adore how easy this is to pull together—just whip, top, and toast. Every bite balances creamy, juicy, herby, and crunchy, making it feel a little indulgent yet refreshingly light. I always feel like I'm treating myself with minimal effort.

ingredients

(Here's a tip: Check out the full list of ingredients and measurements in the recipe card below.)

  • 1 baguette, thinly sliced

  • 1 cup whole‑milk ricotta cheese

  • 2 tablespoon extra‑virgin olive oil

  • 3 medium ripe peaches, diced

  • 1 pint cherry or grape tomatoes, chopped

  • 2–4 garlic cloves, minced (or rubbed on bread)

  • Juice of ½ lemon

  • A generous handful of fresh basil, thinly sliced

  • Salt and pepper, to taste

  • Balsamic glaze, for drizzling

directions

  1. Preheat the oven to 375°F (190°C).

  2. Lightly brush or rub baguette slices with olive oil or garlic, then place them on a baking sheet. Toast until golden and crisp, about 10–12 minutes.

  3. While the bread toasts, whip the ricotta in a food processor or whisk until smooth, airy, and slightly glossy. Season lightly with salt and pepper.

  4. In a bowl, gently mix peaches, tomatoes, garlic, olive oil, lemon juice, salt, pepper, and basil. Let the flavors sit for a few minutes.

  5. To assemble, spread whipped ricotta on each toasted slice, top with the peach mixture, and drizzle with balsamic glaze. Serve immediately.

Servings and timing

This recipe makes about 6–8 servings, depending on the size of your baguette slices. Prep takes around 10 minutes, and toasting takes another 10–12 minutes. Total time is approximately 20–22 minutes.

Variations

  • I sometimes swap goat cheese or whipped feta for ricotta when I want a tangier bite.

  • Adding  chopped pistachios gives the bruschetta more texture and flavor.

  • I skip the tomatoes if I want a more fruit-forward topping.

  • Occasionally, I stir in herbs like thyme or parsley into the ricotta for something different.

storage/reheating

I store leftover whipped ricotta and peach topping separately in airtight containers in the fridge for up to 2 days. Toasted baguette slices are best kept at room temperature for a day in a sealed bag. I always assemble just before serving to keep the bread crisp and the toppings fresh.

FAQs

Can I prepare parts in advance?

Yes—I usually whip the ricotta and mix the topping earlier in the day. I wait until just before serving to toast the bread and assemble everything.

What if I don’t have fresh peaches?

I’ve used nectarines in place of peaches and it works wonderfully. I avoid canned peaches as they tend to be too soft and syrupy for this dish.

Can I grill instead of baking the bread?

Definitely. I love grilling the bread for 1–2 minutes per side. It adds a smoky, charred flavor that pairs beautifully with the toppings.

How sweet or savory is this appetizer?

It strikes a nice balance. The ricotta brings mild creaminess, the peaches and tomatoes add juicy sweetness, and the garlic and basil bring that savory depth.

Is it suitable for a party crowd?

Absolutely. I often make a large batch and let guests assemble their own crostini. It’s fun, interactive, and looks gorgeous on a platter.

Conclusion

This quick peach bruschetta with whipped ricotta is one of my favorite summer recipes. It’s light yet satisfying, sweet and savory, elegant but simple. I love serving it for gatherings or enjoying a few slices on my own as a treat.

Print

clock clock iconcutlery cutlery iconflag flag iconfolder folder iconinstagram instagram iconpinterest pinterest iconfacebook facebook iconprint print iconsquares squares iconheart heart iconheart solid heart solid icon
Quick Peach Bruschetta with Whipped Ricotta

Quick Peach Bruschetta with Whipped Ricotta

5 Stars 4 Stars 3 Stars 2 Stars 1 Star No reviews
  • Author: Sue
  • Prep Time: 10 minutes
  • Cook Time: 10–12 minutes
  • Total Time: 20–22 minutes
  • Yield: 6–8 crostini
  • Category: Appetizer
  • Method: Toasting
  • Cuisine: American
  • Diet: Vegetarian
Print Recipe
Pin Recipe

Description

A sweet-savory summer appetizer featuring juicy peaches, creamy whipped ricotta, fresh basil, and toasted baguette slices, ready in about 20 minutes.


Ingredients

  • 1 baguette, thinly sliced
  • 1 cup whole‑milk ricotta cheese
  • 2 tbsp extra‑virgin olive oil
  • 3 medium ripe peaches, diced
  • 1 pint cherry or grape tomatoes, chopped
  • 2–4 garlic cloves, minced or rubbed on bread
  • Juice of ½ lemon
  • A generous handful of fresh basil, thinly sliced
  • Salt and pepper, to taste
  • Balsamic glaze, for drizzling

Instructions

  1. Preheat the oven to 350–400 °F (175–200 °C).
  2. Lightly brush or rub baguette slices with olive oil or a garlic‑butter mixture, then arrange them on a baking sheet. Toast until golden and crisp, about 10–12 minutes.
  3. While the bread toasts, whip the ricotta in a food processor or whisk until smooth, airy, and slightly glossy. Season lightly with salt and pepper.
  4. To assemble, spread whipped ricotta on each toasted slice, spoon over the peach‑tomato mixture, and finish with a drizzle of balsamic glaze. Serve immediately.

Notes

  • Swap goat cheese or whipped feta for ricotta for a different flavor.
  • Add chopped pistachios for extra texture.
  • Skip tomatoes for a pure peach version.
  • Mix herbs like parsley or thyme into the ricotta for added flavor.

Nutrition

  • Serving Size: 1 crostini
  • Calories: 120
  • Sugar: 4g
  • Sodium: 140mg
  • Fat: 6g
  • Saturated Fat: 2.5g
  • Unsaturated Fat: 3g
  • Trans Fat: 0g
  • Carbohydrates: 12g
  • Fiber: 1g
  • Protein: 4g
  • Cholesterol: 10mg
Have you made this recipe? I'd love to see it!

Click here to Follow me on Pinterest

KFC-Style Gravy (Copycat Recipe)

July 22, 2025 by Sue Leave a Comment

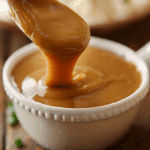
I make this rich and flavorful brown gravy at home with just a few pantry staples. It’s smooth, savory, and tastes just like the iconic KFC version. Whether I pour it over mashed potatoes or serve it with fried chicken, it always hits the spot. KFC-Style Gravy (Copycat Recipe)

Why You’ll Love This Recipe

I love how quick and simple this recipe is, coming together in under 15 minutes. The blend of chicken broth and beef bouillon gives it deep, complex flavor without needing meat drippings. It’s also budget-friendly and works perfectly for weeknight meals or comforting Sunday dinners.

ingredients

(Here's a tip: Check out the full list of ingredients and measurements in the recipe card below.)

  • unsalted butter

  • all-purpose flour

  • onion powder

  • white pepper

  • sea salt

  • chicken broth

  • water

  • beef bouillon granules

directions

  1. I start by melting butter in a medium saucepan over medium heat.

  2. I whisk in the flour, onion powder, white pepper, and salt to form a roux. I cook it for 1–2 minutes until it turns a light golden color.

  3. I gradually whisk in the chicken broth until smooth.

  4. I add the water and beef bouillon, then bring it to a simmer.

  5. I continue whisking and simmering for 2–3 minutes, or until the gravy thickens.

  6. I taste and adjust seasoning if needed, then serve it warm.

Servings and timing

This recipe yields about 3 cups of gravy, which serves approximately 6 people.
Prep time: 5 minutes
Cook time: 10 minutes
Total time: 15 minutes

Variations

  • I sometimes add a pinch of garlic powder for extra depth.

  • If I want a more intense flavor, I increase the beef bouillon slightly.

  • For a vegetarian version, I use vegetable broth and omit the beef bouillon.

  • To mimic authentic KFC flavor even more, I add a splash of Worcestershire sauce.

storage/reheating

I store leftover gravy in an airtight container in the refrigerator for up to 5–7 days. To reheat, I warm it gently on the stove over low heat, stirring frequently until hot and smooth. If it thickens too much, I add a splash of water or broth.

FAQs

What gives this gravy the KFC-style flavor?

It’s the combination of a browned roux, chicken broth, and a touch of beef bouillon that gives the gravy its signature savory depth.

Can I make this gravy without beef bouillon?

Yes, I can use just chicken broth, though the beef bouillon adds richness. If I skip it, I sometimes add a little soy sauce or Worcestershire sauce for extra umami.

How do I fix lumpy gravy?

If my gravy gets lumpy, I strain it through a fine-mesh sieve or blend it until smooth. To avoid lumps in the first place, I always whisk continuously while adding the broth.

Can I freeze this gravy?

Yes, I let it cool completely, then freeze it in a sealed container for up to 3 months. I thaw it in the fridge overnight and reheat slowly on the stove, whisking well.

What should I serve this gravy with?

I love it poured over mashed potatoes, fried chicken, turkey, biscuits, or even meatloaf. It’s a versatile sauce that brings comfort to many dishes.

Conclusion

This KFC-style gravy recipe is one of my favorite go-to comfort foods. It’s quick, satisfying, and made with ingredients I usually already have on hand. Once I tried it, I stopped buying gravy packets—this version is just too good and too easy not to make from scratch.

Print

clock clock iconcutlery cutlery iconflag flag iconfolder folder iconinstagram instagram iconpinterest pinterest iconfacebook facebook iconprint print iconsquares squares iconheart heart iconheart solid heart solid icon
KFC-Style Gravy (Copycat Recipe)

KFC-Style Gravy (Copycat Recipe)

5 Stars 4 Stars 3 Stars 2 Stars 1 Star No reviews
  • Author: Sue
  • Prep Time: 5 minutes
  • Cook Time: 10 minutes
  • Total Time: 15 minutes
  • Yield: 6 servings (about 3 cups)
  • Category: Sauce
  • Method: Stovetop
  • Cuisine: American
  • Diet: Gluten Free
Print Recipe
Pin Recipe

Description

This KFC-style gravy copycat recipe creates a rich, velvety brown gravy in just 15 minutes. Perfect over mashed potatoes, fried chicken, or meatloaf, it delivers that unmistakable fast-food flavor at home.


Ingredients

  • 4 Tbsp unsalted butter
  • 4 Tbsp all-purpose flour
  • ¼ tsp onion powder
  • ⅛ tsp white pepper
  • ¼ tsp sea salt, plus more to taste
  • 2 cups chicken broth
  • 1 cup water
  • ½ tsp beef bouillon granules

Instructions

  1. Melt butter in a saucepan over medium heat.
  2. Add flour, onion powder, white pepper, and salt, stirring continuously to form a roux. Cook until it turns a light golden color, about 1–2 minutes.
  3. Whisk in chicken broth slowly until smooth.
  4. Stir in water and beef bouillon, bring to a simmer, and whisk until thickened, about 1–2 minutes.
  5. Taste and adjust seasoning with more salt and pepper if needed.
  6. Remove from heat and serve hot.

Notes

  • Use leftover chicken drippings for added flavor.
  • Vegetable oil can be substituted for butter.
  • Use extra chicken broth if beef bouillon is unavailable.
  • Swap in gluten-free flour for a gluten-free version.
  • Store in the fridge for up to 7 days and reheat gently over low heat.

Nutrition

  • Serving Size: ½ cup
  • Calories: 90
  • Sugar: 0g
  • Sodium: 410mg
  • Fat: 6g
  • Saturated Fat: 3.5g
  • Unsaturated Fat: 2g
  • Trans Fat: 0g
  • Carbohydrates: 6g
  • Fiber: 0g
  • Protein: 1g
  • Cholesterol: 15mg

Have you made this recipe? I'd love to see it!

Click here to Follow me on Pinterest

Easy Homemade Taco Seasoning

July 22, 2025 by Sue Leave a Comment

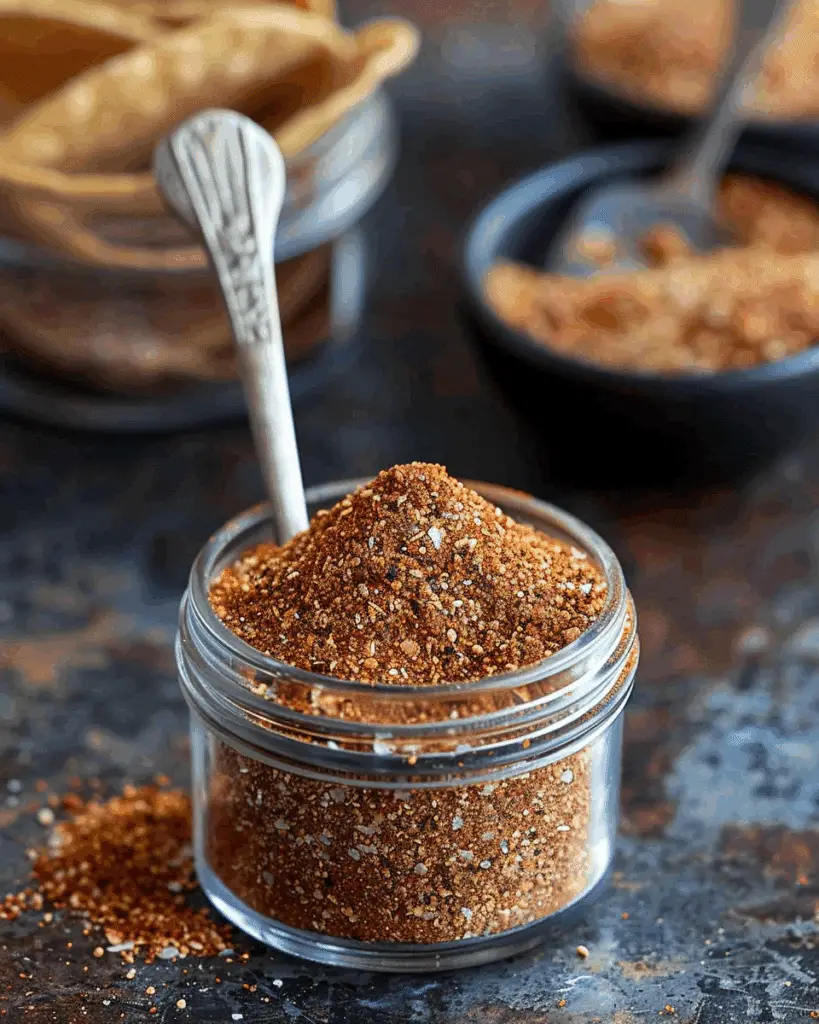
I’m thrilled to share this easy homemade taco seasoning recipe. It’s a simple spice blend I whipped up in about 5 minutes using pantry staples—no cooking required, yet full of bold flavor for beef, chicken, veggies, and more. Easy Homemade Taco Seasoning

Why You’ll Love This Recipe

I love how this mix is tastier and more affordable than store-bought packets. I can adjust the spice levels to my liking, avoid fillers and preservatives, and always have ingredients on hand. Plus, it makes a lovely gift when I put it in small jars with cute labels.

Ingredients

(Here's a tip: Check out the full list of ingredients and measurements in the recipe card below.)

  • 2 tablespoon chili powder

  • 5 teaspoon paprika

  • 4 teaspoon cumin

  • 3 teaspoon onion powder

  • 2 teaspoon garlic powder

  • ¼ teaspoon cayenne pepper

  • ¼ teaspoon oregano

  • 1 teaspoon crushed red pepper flakes (optional)

Directions

  1. I combine all the spices in a small bowl.

  2. I mix well until everything is fully incorporated.

  3. I transfer the mixture into an airtight jar or spice container.

  4. I store it in a cool, dark place, where it stays fresh and flavorful for months.

Servings and Timing

  • Prep Time: 5 minutes

  • Total Time: 5 minutes

  • Yield: About ¼ cup of seasoning (roughly 12 teaspoons)

  • I typically use 2 tablespoons of this seasoning per pound of meat.

Variations

  • I like to use smoked paprika instead of regular paprika for a richer, smoky flavor.

  • When I want it spicier, I add extra cayenne or red pepper flakes.

  • For a mild version, I skip the cayenne and flakes altogether.

  • Sometimes I add a small pinch of sugar or cornstarch if I want the seasoning to stick better when cooking with ground meat.

Storage/Reheating

  • I store the seasoning in an airtight jar or container at room temperature.

  • It stays fresh for up to 6 months when kept in a cool, dry place.

  • Since it’s a dry mix, there’s no reheating required.

  • When cooking, I brown the meat first, then add about 2 tablespoons of seasoning and ¾ cup of water. I simmer until the mixture thickens into a light sauce.

FAQs

How much taco seasoning should I use per pound of meat?

I use about 2 tablespoons of seasoning per pound of meat for great flavor.

Can I use this on more than just ground beef?

Yes, I use it for ground turkey, chicken, shrimp, roasted vegetables, and even soups or stews.

Is this recipe gluten-free?

Yes, the recipe is naturally gluten-free as long as I make sure my individual spices are labeled gluten-free.

Can I double or triple this recipe?

Absolutely. I often make a big batch and store it in a mason jar so I always have some ready.

What can I do if I don’t like spicy food?

I reduce or skip the cayenne pepper and red pepper flakes to make a milder version that still tastes delicious.

Conclusion

This homemade taco seasoning is a total game-changer in my kitchen. I love that it’s easy, customizable, and packed with flavor. It’s my go-to mix for taco night and beyond—and once I started making it, I never went back to store-bought packets.

Print

clock clock iconcutlery cutlery iconflag flag iconfolder folder iconinstagram instagram iconpinterest pinterest iconfacebook facebook iconprint print iconsquares squares iconheart heart iconheart solid heart solid icon
Easy Homemade Taco Seasoning

Easy Homemade Taco Seasoning

5 Stars 4 Stars 3 Stars 2 Stars 1 Star No reviews
  • Author: Sue
  • Prep Time: 5 minutes
  • Cook Time: 0 minutes
  • Total Time: 5 minutes
  • Yield: ¼ cup (about 12 servings)
  • Category: Seasoning
  • Method: No-cook
  • Cuisine: Mexican
  • Diet: Gluten Free
Print Recipe
Pin Recipe

Description

This easy homemade taco seasoning is a bold, customizable blend of pantry spices. Made in just 5 minutes, it's perfect for beef, chicken, or veggies, offering a flavorful and healthier alternative to store-bought packets.


Ingredients

  • 2 tbsp chili powder
  • 5 tsp paprika
  • 4 tsp cumin
  • 3 tsp onion powder
  • 2 tsp garlic powder
  • ¼ tsp cayenne pepper
  • ¼ tsp oregano
  • 1 tsp crushed red pepper flakes (optional)

Instructions

  1. Combine all spices in a small bowl.
  2. Transfer the mixture into an airtight jar or spice container.
  3. Store in a cool, dark place for up to six months.

Notes

  • Use about 2 tablespoons of seasoning per pound of ground meat.
  • Add ¾ cup water after seasoning meat and simmer until a light sauce forms.
  • Customize the spiciness by adjusting cayenne and red pepper flakes.
  • Store in an airtight container at room temperature for optimal freshness.

Nutrition

  • Serving Size: 1 tsp
  • Calories: 8
  • Sugar: 0g
  • Sodium: 1mg
  • Fat: 0.4g
  • Saturated Fat: 0.1g
  • Unsaturated Fat: 0.3g
  • Trans Fat: 0g
  • Carbohydrates: 1.4g
  • Fiber: 0.6g
  • Protein: 0.3g
  • Cholesterol: 0mg
Have you made this recipe? I'd love to see it!

Click here to Follow me on Pinterest

Bewitching Black Lemonade

July 22, 2025 by Sue Leave a Comment

This Bewitching Black Lemonade is a stunning, jet-black drink that's perfect for Halloween parties or when I want to serve something with a spooky flair. It's made with fresh lemon juice and activated charcoal, creating a mysterious, slightly tangy refreshment that’s both eye-catching and delicious. Bewitching Black Lemonade

Why You’ll Love This Recipe

I love this recipe because it’s simple yet incredibly dramatic. The activated charcoal gives the lemonade a gothic twist while still keeping that crisp citrus flavor. It’s also a fun conversation starter, and I can sweeten it exactly the way I like. Plus, it’s a refreshing alternative to sugary sodas and makes for a memorable addition to any themed gathering.

ingredients

(Here's a tip: Check out the full list of ingredients and measurements in the recipe card below.)

  • Water

  • Fresh lemon juice

  • Activated charcoal powder (food grade)

  • Maple syrup or honey (or sweetener of choice)

  • Ice

  • Optional: lemon slices for garnish

directions

  1. I start by adding the lemon juice, sweetener, and water into a large pitcher or shaker bottle.

  2. Then I stir or shake it well until the sweetener dissolves completely.

  3. Next, I add the activated charcoal powder and stir until it's fully mixed in.

  4. I pour the mixture over ice in serving glasses.

  5. Finally, I garnish with lemon slices if I want to make it look extra fancy.

Servings and timing

This recipe makes about 4 servings. It takes approximately 5 minutes to prepare, making it a quick and easy drink to whip up on short notice.

Variations

  • I sometimes add sparkling water instead of still water for a fizzy twist.

  • A few muddled blackberries give it an extra layer of flavor and a deeper black-purple hue.

  • If I prefer it sweeter or more tart, I simply adjust the sweetener or lemon juice to taste.

storage/reheating

I store any leftover lemonade in an airtight pitcher in the fridge for up to 2 days. Before serving again, I give it a good stir as the charcoal can settle at the bottom. I don’t reheat this drink since it’s meant to be served cold.

FAQs

What does activated charcoal taste like?

Activated charcoal itself is flavorless, so it doesn’t alter the taste of the lemonade. I still get that fresh, tart lemon flavor with a touch of sweetness.

Is activated charcoal safe to drink?

Yes, in small amounts and when it’s food-grade, activated charcoal is generally safe. I always make sure to consult a healthcare professional if I have health concerns or take medication, as charcoal can interfere with absorption.

Can I use bottled lemon juice?

Freshly squeezed lemon juice gives the best flavor, but I use bottled lemon juice in a pinch if I don’t have fresh lemons on hand.

Can I make this lemonade in advance?

Absolutely. I often make it a few hours ahead and store it in the fridge. I just stir it well before serving.

Can I leave out the activated charcoal?

Yes. If I skip the charcoal, I’ll just have a regular lemonade—but still delicious. The charcoal is mainly for the dramatic color and spooky effect.

Conclusion

This Bewitching Black Lemonade is more than just a pretty drink—it’s a fun, festive treat that’s quick to make and easy to customize. Whether I’m planning a Halloween bash or just want something unique to sip, this dark and delightful lemonade is always a hit

Print

clock clock iconcutlery cutlery iconflag flag iconfolder folder iconinstagram instagram iconpinterest pinterest iconfacebook facebook iconprint print iconsquares squares iconheart heart iconheart solid heart solid icon
Bewitching Black Lemonade

5 Stars 4 Stars 3 Stars 2 Stars 1 Star No reviews
  • Author: Sue
  • Prep Time: 5 minutes
  • Cook Time: 0 minutes
  • Total Time: 5 minutes
  • Yield: 4 servings
  • Category: Drinks
  • Method: No-Cook
  • Cuisine: American
  • Diet: Vegan
Print Recipe
Pin Recipe

Description

Bewitching Black Lemonade is a visually striking, jet-black drink perfect for Halloween parties or themed gatherings. Made with fresh lemon juice and food-grade activated charcoal, it's tangy, refreshing, and a fun conversation starter.


Ingredients

  • 4 cups water
  • 1 cup fresh lemon juice (about 4–6 lemons)
  • 1-2 teaspoons activated charcoal powder (food grade)
  • ¼ cup maple syrup or honey (or sweetener of choice, to taste)
  • Ice, for serving
  • Optional: lemon slices for garnish

Instructions

  1. Add lemon juice, sweetener, and water into a large pitcher or shaker bottle.
  2. Stir or shake well until the sweetener dissolves completely.
  3. Add activated charcoal powder and stir until fully mixed in.
  4. Pour the mixture over ice in serving glasses.
  5. Garnish with lemon slices if desired.

Notes

  • Use food-grade activated charcoal only.
  • Adjust sweetness and tartness to your taste.
  • Charcoal may settle; stir well before serving.
  • Store leftovers in an airtight container in the fridge for up to 2 days.
  • Charcoal may interfere with medication absorption—consult your doctor if unsure.

Nutrition

  • Serving Size: 1 glass
  • Calories: 60
  • Sugar: 12g
  • Sodium: 5mg
  • Fat: 0g
  • Saturated Fat: 0g
  • Unsaturated Fat: 0g
  • Trans Fat: 0g
  • Carbohydrates: 15g
  • Fiber: 0g
  • Protein: 0g
  • Cholesterol: 0mg

Have you made this recipe? I'd love to see it!

Click here to Follow me on Pinterest

Brownie Bread

July 22, 2025 by Sue Leave a Comment

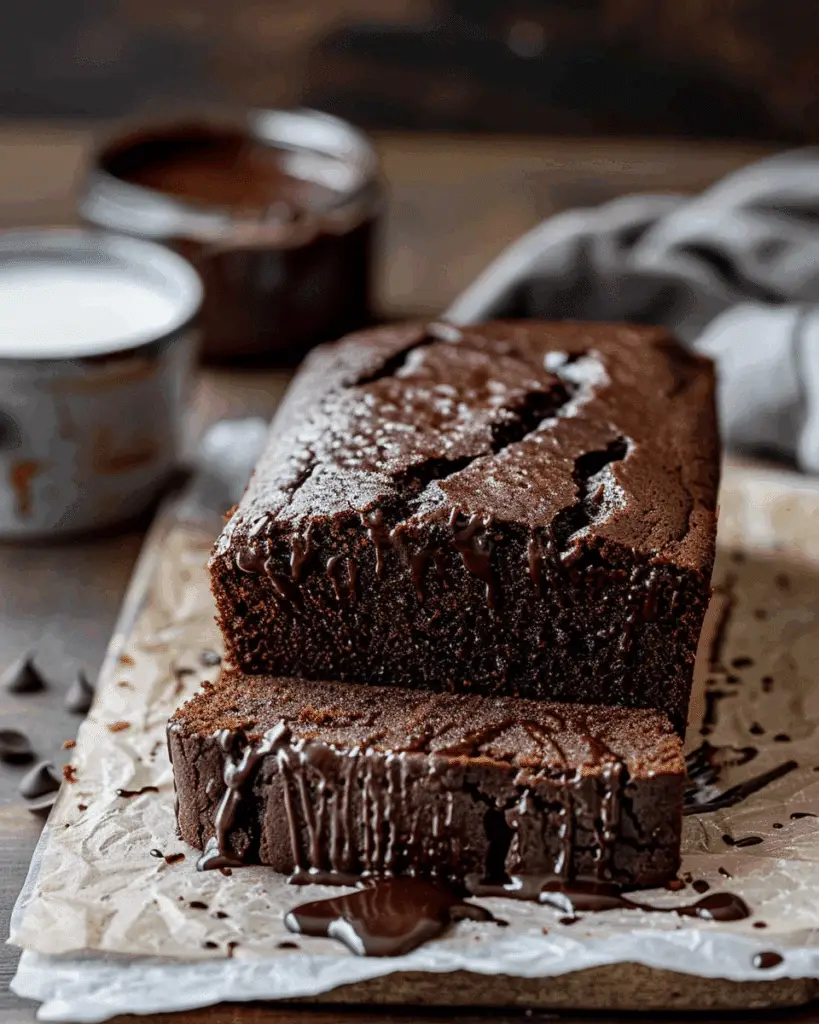
I created a fudgy, brownie-like quick bread that’s baked in a loaf pan and finished with a silky milk chocolate ganache—perfectly sliced like bread, yet rich like a brownie. It’s a nostalgic treat with easy prep and impressive results. Brownie Bread

Why You’ll Love This Recipe

I love that this combines the best of both worlds: the gooey satisfaction of a brownie with the cozy loaf presentation of quick bread. It’s simple to make, hugely satisfying, and that ganache glaze takes it over the top—truly the ultimate comfort dessert.

ingredients

(Here's a tip: Check out the full list of ingredients and measurements in the recipe card below.)

  • 1 cup (168 g) milk chocolate chips

  • 1¼ cups (156 g) all-purpose flour

  • ½ cup (59 g) Dutch-processed cocoa powder

  • ¼ tsp baking soda

  • 1 tsp kosher salt

  • 3 large eggs, room temperature

  • 1¼ cups (250 g) granulated sugar

  • ½ cup (109 g) vegetable oil

  • ¾ cup water

Milk Chocolate Ganache

  • ½ cup (84 g) milk chocolate chips

  • ¼ cup (59.5 g) heavy cream

directions

  1. Preheat oven to 325 °F. Spray a 9×5″ metal loaf pan with nonstick cooking spray.

  2. In a microwave-safe bowl, melt the 1 cup of milk chocolate chips in 30‑second bursts, stirring until smooth. Let cool slightly.

  3. In a medium bowl, whisk together flour, cocoa powder, baking soda, and salt.

  4. In a stand mixer fitted with paddle attachment, beat eggs and sugar until pale and fluffy, about 5 minutes.

  5. With mixer on low, add melted chocolate, oil, and water until the batter is smooth.

  6. Gradually add dry ingredients, mixing until no lumps remain.

  7. Pour batter into prepared pan and bake 85–90 minutes, or until toothpick inserted in center comes out with a few moist crumbs (not wet batter). Begin checking at 75 minutes to avoid overbaking.

  8. Cool completely in pan before adding ganache.

For the ganache

  1. Place the remaining ½ cup chocolate chips in a heat-safe bowl. Simmer heavy cream in a saucepan, then pour it over the chips.

  2. Let sit briefly, then stir until smooth. Cool slightly before drizzling over the cooled loaf.

  3. Allow ganache to set 10–15 minutes before slicing and serving.

Servings and timing

This recipe yields 12 generous slices.

  • Prep time: ~15 minutes

  • Bake time: ~85–90 minutes

  • Total time: ~1 hour 40 minutes

Variations

  • I sometimes swap milk chocolate for semi-sweet chips for a richer flavor.

  • Regular unsweetened cocoa can replace Dutch-processed, though the loaf may be less dark.

  • I’ve used canola oil instead of vegetable with no flavor loss.

  • To add texture, try folding in nuts or swirling in caramel before baking.

storage/reheating

I store leftover slices in an airtight container at room temperature for up to two days. For longer freshness, I refrigerate them up to a week, though that can slightly dry the crumb. To reheat, I pop individual slices in the microwave for 10–15 seconds. Ganache firms up when chilled, so I let cold slices sit at room temperature before warming.

FAQs

What’s the best way to know the bread is done?

I use a toothpick in the center—it’s done when a few moist crumbs cling, but no wet batter. Around 85 minutes is typical, but ovens vary.

Can I use unsweetened cocoa powder?

Yes—but the loaf will look lighter and have a thinner chocolate flavor compared to Dutch-processed. I’ve done both with good results.

What if I don’t have a loaf pan?

I’ve baked this in an 8 or 9‑inch square pan or a deep-dish pie plate; times may vary slightly.

How do I store and freeze it?

At room temp in an airtight container for 2 days, refrigerated up to a week, or frozen for 3 months after wrapping tightly. Thaw overnight.

Can I skip the ganache?

Absolutely. The bread is deliciously fudgy on its own, though the ganache adds extra richness and gloss.

Conclusion

I love how this brownie bread feels both nostalgic and special—easy enough for a weeknight treat, elegant enough for guests. The ganache is optional, but always a hit. I can’t wait to see how you make it your own!

Print

clock clock iconcutlery cutlery iconflag flag iconfolder folder iconinstagram instagram iconpinterest pinterest iconfacebook facebook iconprint print iconsquares squares iconheart heart iconheart solid heart solid icon
Brownie Bread

Brownie Bread

5 Stars 4 Stars 3 Stars 2 Stars 1 Star No reviews
  • Author: Sue
  • Prep Time: 15 minutes
  • Cook Time: 85–90 minutes
  • Total Time: 1 hour 40 minutes
  • Yield: 12 slices
  • Category: Dessert
  • Method: Baking
  • Cuisine: American
  • Diet: Vegetarian
Print Recipe
Pin Recipe

Description

A fudgy, brownie-inspired quick bread baked in a loaf pan and topped with a smooth milk chocolate ganache. It's easy to make, rich, and perfectly sliceable like bread.


Ingredients

  • 1 cup (168 g) milk chocolate chips
  • 1¼ cups (156 g) all-purpose flour
  • ½ cup (59 g) Dutch-processed cocoa powder
  • ¼ tsp baking soda
  • 1 tsp kosher salt
  • 3 large eggs, room temperature
  • 1¼ cups (250 g) granulated sugar
  • ½ cup (109 g) vegetable oil
  • ¾ cup water
  • ½ cup (84 g) milk chocolate chips (for ganache)
  • ¼ cup (59.5 g) heavy cream (for ganache)

Instructions

  1. Preheat oven to 325 °F. Spray a 9×5″ metal loaf pan with nonstick cooking spray.
  2. Melt 1 cup milk chocolate chips in a microwave-safe bowl in 30-second intervals, stirring until smooth. Let cool slightly.
  3. In a medium bowl, whisk together flour, cocoa powder, baking soda, and salt.
  4. In a stand mixer, beat eggs and sugar until pale and fluffy, about 5 minutes.
  5. On low speed, add melted chocolate, vegetable oil, and water. Mix until smooth.
  6. Gradually add dry ingredients to the wet mixture and mix until no lumps remain.
  7. Pour batter into prepared pan and bake for 85–90 minutes, or until a toothpick comes out with a few moist crumbs. Begin checking at 75 minutes.
  8. Cool the loaf completely in the pan.
  9. For the ganache, place ½ cup chocolate chips in a bowl. Simmer heavy cream and pour over chips. Let sit, then stir until smooth.
  10. Cool slightly and drizzle over cooled loaf. Let ganache set for 10–15 minutes before slicing.

Notes

  • Begin checking doneness at 75 minutes to prevent overbaking.
  • Can use semi-sweet chocolate chips for a richer taste.
  • Unsweetened cocoa powder is a workable substitute for Dutch-processed.
  • Canola oil works as a substitute for vegetable oil.
  • Optional add-ins: nuts or caramel swirls.

Nutrition

  • Serving Size: 1 slice
  • Calories: 310
  • Sugar: 28g
  • Sodium: 220mg
  • Fat: 16g
  • Saturated Fat: 7g
  • Unsaturated Fat: 8g
  • Trans Fat: 0g
  • Carbohydrates: 39g
  • Fiber: 2g
  • Protein: 4g
  • Cholesterol: 35mg

Have you made this recipe? I'd love to see it!

Click here to Follow me on Pinterest

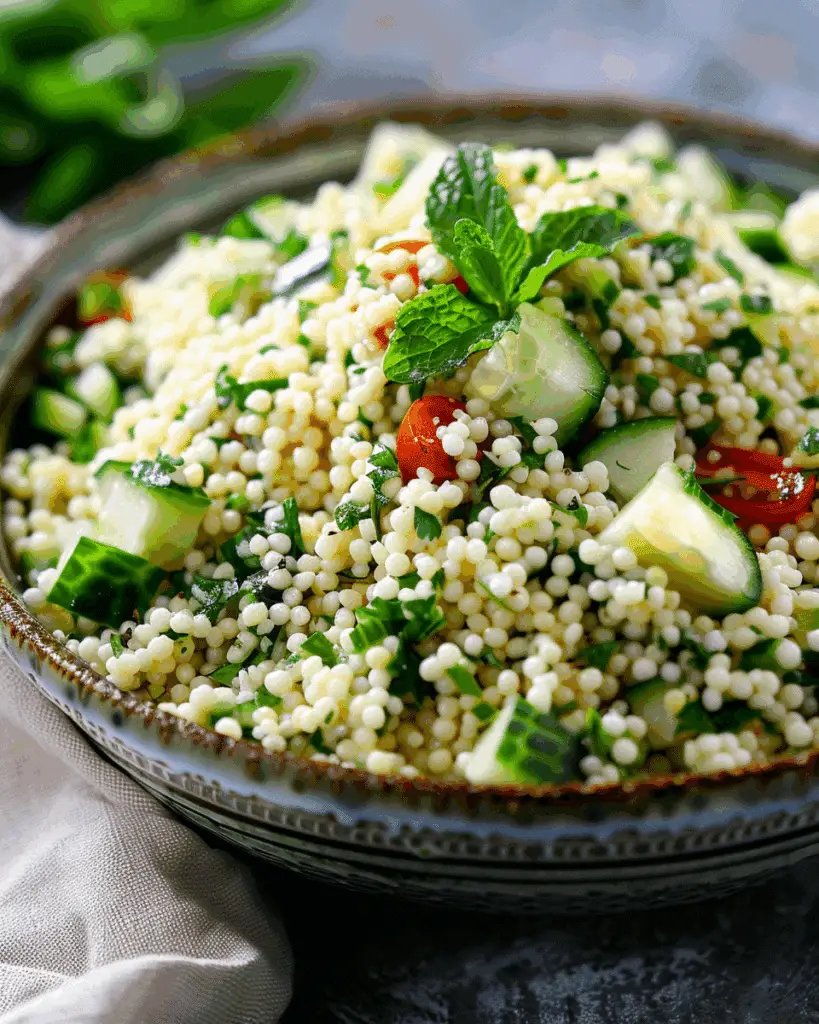
Mint Herb Couscous Salad

July 22, 2025 by Sue Leave a Comment

This mint herb couscous salad is light, refreshing, and packed with vibrant flavors. Fluffy couscous blends with fresh herbs, crunchy vegetables, a citrusy dressing, and sweet dried fruit for a satisfying dish that’s perfect as a side or a light meal on its own. Mint Herb Couscous Salad

Why You’ll Love This Recipe

I love how quick and versatile this salad is. The fresh mint and parsley give it a clean, bright taste, while the citrus dressing adds just the right amount of tang. It’s great served cold or at room temperature, and I often prepare it ahead of time to enjoy throughout the week. Whether I’m heading to a picnic or just want something light and nourishing, this dish always delivers.

ingredients

(Here's a tip: Check out the full list of ingredients and measurements in the recipe card below.)

  • 2 cups water

  • 2 cups regular couscous

  • 2 tablespoons olive oil or butter

  • 2 cups finely diced hard vegetables (carrots, bell peppers, cucumbers)

  • ½ cup finely chopped fresh parsley

  • ½ cup finely chopped fresh mint

  • ½ cup currants or raisins

  • ¼ cup orange juice

  • ½ cup chopped nuts (pistachios, pine nuts, or walnuts)

  • ½ cup chopped scallions

  • ¼ cup fresh lemon juice

  • ¼ cup olive oil

  • 1 teaspoon ground cardamom

  • 1 teaspoon ground coriander

  • 1 teaspoon kosher salt

  • Freshly ground black pepper, to taste

directions

  1. I bring 2 cups of water to a boil, then stir in the olive oil or butter along with the couscous. I remove it from the heat, cover it, and let it sit for 5 minutes.

  2. After resting, I fluff the couscous with a fork to break up any clumps and transfer it to a large bowl.

  3. I add the diced vegetables, parsley, mint, and scallions, mixing gently to combine.

  4. I warm the orange juice slightly, soak the currants or raisins in it for a few minutes, then add both the juice and fruit to the couscous.

  5. I whisk together the lemon juice, olive oil, cardamom, coriander, salt, and pepper to create the dressing.

  6. I pour the dressing over the couscous mixture and toss everything to coat evenly.

  7. I top the salad with chopped nuts and let it rest at room temperature for about 30 minutes to let the flavors come together.

Servings and timing

  • Servings: 6

  • Prep time: 10 minutes

  • Cook time: 5 minutes

  • Rest time: 30 minutes

  • Total time: 45 minutes

Variations

  • Protein boost: I sometimes mix in chickpeas or grilled chicken to make it more filling.

  • Fruit swaps: Instead of currants, I like using chopped dried apricots or cranberries.

  • Leafy greens: I stir in baby spinach or arugula just before serving for added freshness.

  • Spice change-up: A pinch of cumin or a splash of pomegranate molasses gives it a deeper flavor.

  • Gluten-free option: I swap couscous for quinoa for a gluten-free version.

storage/reheating

I store leftovers in an airtight container in the refrigerator for up to 4 days. Before serving again, I give it a good stir and add a drizzle of olive oil or lemon juice if needed to freshen it up. I serve it cold or at room temperature, and I don’t reheat it, since it’s meant to be enjoyed chilled.

FAQs

### Can I use pearl couscous instead?

Yes, I’ve used pearl couscous and it works great. It gives the salad a heartier bite and a slightly different texture.

### Can I make this salad ahead of time?

Definitely. I usually make it a day in advance and let the flavors develop. I wait to add the nuts and scallions until just before serving to keep them crisp.

### What if I don’t have orange juice?

I’ve used all lemon juice before and it still tastes amazing. If I want a little sweetness, I add a small drizzle of honey or maple syrup to balance it.

### Is this salad good for meal prep?

Absolutely. I pack it into containers for easy lunches and find that it holds up well for several days in the fridge.

### Can I leave out the nuts?

Yes, I sometimes skip the nuts when I want a softer texture or need a nut-free dish. Toasted seeds like pumpkin or sunflower are a nice alternative.

Conclusion

This mint herb couscous salad is one of my favorite go-to recipes when I want something fresh, flavorful, and easy to put together. I love how the herbs, citrus, and texture all come together in each bite. It’s perfect for summer gatherings, weekday lunches, or whenever I’m craving something light and satisfying.

Print

clock clock iconcutlery cutlery iconflag flag iconfolder folder iconinstagram instagram iconpinterest pinterest iconfacebook facebook iconprint print iconsquares squares iconheart heart iconheart solid heart solid icon
Mint Herb Couscous Salad

Mint Herb Couscous Salad

5 Stars 4 Stars 3 Stars 2 Stars 1 Star No reviews
  • Author: Sue
  • Prep Time: 10 minutes
  • Cook Time: 6 minutes
  • Total Time: 46 minutes
  • Yield: 6 servings
  • Category: Salad
  • Method: No-Cook
  • Cuisine: Mediterranean
  • Diet: Vegan
Print Recipe
Pin Recipe

Description

A bright, refreshing couscous salad with fresh mint, parsley, crunchy vegetables, nuts, and dried fruit tossed in a zesty citrus-spice dressing. Perfect for warm days, potlucks, or make-ahead lunches.


Ingredients

  • 2 cups water
  • 2 cups regular couscous
  • 2 tablespoons olive oil or butter
  • 2 cups finely diced hard vegetables (carrots, bell peppers, cucumbers)
  • ½ cup finely chopped parsley
  • ½ cup finely chopped fresh mint
  • ½ cup currants or raisins
  • ¼ cup orange juice
  • ½ cup chopped nuts (pistachios, pine nuts, or walnuts)
  • ½ cup chopped scallions
  • ¼ cup fresh lemon juice
  • ¼ cup olive oil (for dressing)
  • 1 teaspoon ground cardamom
  • 1 teaspoon ground coriander
  • 1 teaspoon kosher salt
  • Freshly ground black pepper, to taste

Instructions

  1. Bring 2 cups of water to a boil in a medium pot, stir in the olive oil (or butter) and couscous. Stir briefly, cover, remove from heat, and let stand for 5 minutes.
  2. Fluff the couscous with a fork and transfer to a large bowl.
  3. Gently fold in the diced vegetables, parsley, mint, and scallions.
  4. Warm the orange juice slightly and pour over currants or raisins; let soak, then add both fruit and juice to the couscous.
  5. In a small bowl, whisk together lemon juice, olive oil, cardamom, coriander, salt, and pepper.
  6. Drizzle the dressing over the salad and mix gently to combine.
  7. Top with chopped nuts and let the salad rest at room temperature for at least 30 minutes or chill before serving.

Notes

  • Use olive oil instead of butter for a vegan version.
  • Substitute dried cranberries or chopped apricots for the currants.
  • Add chickpeas or grilled chicken for extra protein.
  • For a nut-free option, use seeds like sunflower or pumpkin.
  • Best served cold or at room temperature; do not reheat.

Nutrition

  • Serving Size: 1 serving
  • Calories: 320
  • Sugar: 9g
  • Sodium: 290mg
  • Fat: 15g
  • Saturated Fat: 2g
  • Unsaturated Fat: 12g
  • Trans Fat: 0g
  • Carbohydrates: 40g
  • Fiber: 4g
  • Protein: 6g
  • Cholesterol: 0mg

Have you made this recipe? I'd love to see it!

Click here to Follow me on Pinterest

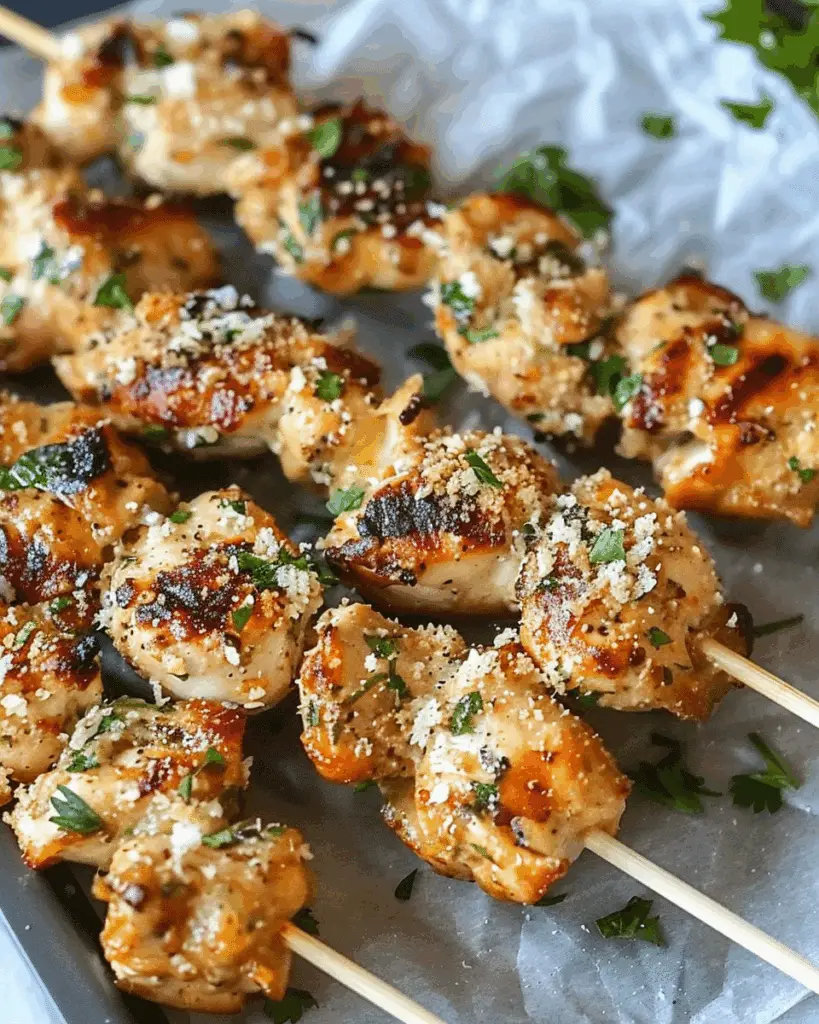
Ranch Garlic Parmesan Chicken Skewers

July 22, 2025 by Sue Leave a Comment

I love how these skewers bring together the comforting flavors of ranch dressing, garlic, and Parmesan in one juicy, delicious chicken skewer that falls right off the stick. Ranch Garlic Parmesan Chicken Skewers

Why You’ll Love This Recipe

I adore this recipe because it combines a savory garlic-parmesan butter sauce with ranch seasoning for a bold, herby flavor that's still easy and fun to make. Whether I cook them in my air fryer, grill, or oven, they always turn out tender, juicy, and crowd-pleasing.

Ingredients

(Here's a tip: Check out the full list of ingredients and measurements in the recipe card below.)

  • 2 lbs chicken tenders (or boneless thighs/breast), cut into 3″ pieces

  • 2 tbsp olive oil

Garlic Parmesan Butter Sauce

  • 1 stick butter

  • 8–10 cloves garlic, minced

  • ½ cup grated Parmesan

  • 1 tbsp hot sauce

  • 2 tsp red pepper flakes

  • ⅓ cup fresh parsley, minced

  • 1 tbsp dry ranch seasoning

  • 1 tsp dried dill

  • ½ tsp onion powder

Chicken Seasonings

  • 1½ tbsp dry ranch seasoning

  • 1 tsp dried dill

  • 2 tsp paprika

  • 1 tsp garlic powder

  • 1 tsp onion powder

  • ½ tsp salt

  • ½ tsp pepper

Directions

  1. I start by soaking wooden skewers in water for at least 30 minutes.

  2. I combine the chicken seasonings in a bowl, toss the chicken in olive oil and this spice mix, then thread pieces tightly onto skewers.

  3. I melt butter and garlic, then whisk in Parmesan, hot sauce, red pepper flakes, parsley, ranch seasoning, dill, and onion powder. I spoon out about ⅓ of this sauce to baste during cooking, and reserve the rest to keep things safe.

  4. In my air fryer set to 400 °F, I cook 2–3 skewers for 5 minutes, flip and baste, cook 2 more minutes, baste again, then finish cooking for 5–6 minutes until internal temperature hits 165 °F.

  5. Once out, I give them a final baste with the reserved sauce, sprinkle extra Parmesan, and serve.

Alternative methods:

  • Oven: Bake at 450 °F for 14 minutes, flip and baste halfway, then broil for 2 minutes and baste again.

  • Grill: Cook over medium-high heat, about 5–6 minutes per side, basting throughout, then finish with a final baste.

Servings and timing

  • Servings: Makes about 6 skewers (serves 4–6)

  • Prep time: ~20 minutes + 30 minutes soaking

  • Cook time: 12–14 minutes (air fryer), 16–18 minutes (oven or grill)

  • Total time: ~35–40 minutes

Variations

  • I sometimes swap chicken tenders for thighs or breasts depending on what I have.

  • To switch up the heat, I adjust the hot sauce and red pepper flakes—less for mild, more for spicy.

  • Occasionally I add a squeeze of lemon juice into the sauce for a bright, fresh finish.

  • For a lower-fat version, I use half butter and half olive oil in the sauce.

storage/reheating

I store leftovers in an airtight container in the fridge for up to 3–4 days. To reheat, I microwave in 30-second intervals until warm, then broil or air fry briefly to re-crisp edges.

FAQs

What if I don’t have wooden skewers?

I just use metal skewers instead—no soaking required. They conduct heat too, giving a bit more cooking inside the chicken.

Can I prep ahead of time?

Yes—I often toss the chicken in seasoning and make the sauce earlier in the day. I store them separately in the fridge and skewer just before cooking.

How do I know when the chicken is done?

I always use an instant‑read thermometer and pull them at 165 °F. Chicken can dry out quickly if overcooked.

Can I bake these instead of grilling or air frying?

Absolutely. Baking at 450 °F for about 14 minutes, flipping and basting halfway, then broiling 2 minutes at the end gives a nicely browned finish.

What sides pair well with these skewers?

I like serving them over rice, alongside roasted veggies, or even with a crisp green salad—especially if I drizzle leftover garlic‑Parm sauce over everything.

Conclusion

I’m always thrilled when these skewers come out tender, flavorful, and ready to impress—even on a regular weeknight. This ranch‑garlic‑Parmesan combo has quickly earned a spot in my dinner rotation. I can’t wait for you to give them a try!

Print

clock clock iconcutlery cutlery iconflag flag iconfolder folder iconinstagram instagram iconpinterest pinterest iconfacebook facebook iconprint print iconsquares squares iconheart heart iconheart solid heart solid icon
Ranch Garlic Parmesan Chicken Skewers

Ranch Garlic Parmesan Chicken Skewers

5 Stars 4 Stars 3 Stars 2 Stars 1 Star No reviews
  • Author: Sue
  • Prep Time: 20 minutes + 30 minutes soaking
  • Cook Time: 12–14 minutes (air fryer), 16–18 minutes (oven or grill)
  • Total Time: 35–40 minutes
  • Yield: 6 skewers (serves 4–6)
  • Category: Main Course
  • Method: Air Fryer, Oven, Grill
  • Cuisine: American
Print Recipe
Pin Recipe

Description

These Ranch Garlic Parmesan Chicken Skewers are packed with bold, herby flavors from ranch seasoning, garlic, and Parmesan, cooked to juicy perfection using an air fryer, oven, or grill.


Ingredients

  • 2 lbs chicken tenders (or boneless thighs/breast), cut into 3″ pieces
  • 2 tbsp olive oil
  • 1 stick butter
  • 8–10 cloves garlic, minced
  • ½ cup grated Parmesan
  • 1 tbsp hot sauce
  • 2 tsp red pepper flakes
  • ⅓ cup fresh parsley, minced
  • 1 tbsp dry ranch seasoning
  • 1 tsp dried dill
  • ½ tsp onion powder
  • 1½ tbsp dry ranch seasoning
  • 1 tsp dried dill
  • 2 tsp paprika
  • 1 tsp garlic powder
  • 1 tsp onion powder
  • ½ tsp salt
  • ½ tsp pepper

Instructions

  1. Soak wooden skewers in water for at least 30 minutes.
  2. Combine chicken seasonings in a bowl. Toss chicken pieces in olive oil and seasoning mix, then thread onto skewers.
  3. Melt butter and garlic in a pan. Whisk in Parmesan, hot sauce, red pepper flakes, parsley, ranch seasoning, dill, and onion powder. Reserve ⅓ of the sauce for basting.
  4. Cook in air fryer at 400 °F for 5 minutes, flip and baste, cook for 2 more minutes, baste again, then finish cooking for 5–6 minutes until internal temperature reaches 165 °F.
  5. After cooking, baste with reserved sauce and sprinkle extra Parmesan before serving.
  6. For oven: Bake at 450 °F for 14 minutes, flip and baste halfway, then broil for 2 minutes and baste again.
  7. For grill: Cook over medium-high heat for 5–6 minutes per side, basting throughout, and baste once more at the end.

Notes

  • Use metal skewers if you don’t have wooden ones.
  • Prep chicken and sauce ahead and refrigerate until ready to cook.
  • Ensure chicken reaches 165 °F internal temperature for doneness.
  • Adjust spice levels by modifying hot sauce and red pepper flakes.
  • Store leftovers in the fridge for 3–4 days and reheat to re-crisp edges.

Nutrition

  • Serving Size: 1 skewer
  • Calories: 310
  • Sugar: 1g
  • Sodium: 420mg
  • Fat: 21g
  • Saturated Fat: 9g
  • Unsaturated Fat: 10g
  • Trans Fat: 0g
  • Carbohydrates: 3g
  • Fiber: 0.5g
  • Protein: 26g
  • Cholesterol: 85mg

Have you made this recipe? I'd love to see it!

Click here to Follow me on Pinterest

Pretzel-Crusted Chicken with Creamy Mustard Cheddar Sauce

July 21, 2025 by Sue Leave a Comment

This Pretzel-Crusted Chicken with Creamy Mustard Cheddar Sauce is the ultimate combination of crispy, savory, and creamy. I coat tender chicken breasts in crushed pretzels, then bake or pan-fry them until golden brown. The real magic happens with the sauce—a smooth, velvety cheddar base spiked with tangy mustard. It’s comfort food with a flavorful twist that feels gourmet but is surprisingly easy to prepare. Pretzel-Crusted Chicken with Creamy Mustard Cheddar Sauce

Why You’ll Love This Recipe

I love how this dish brings together different textures and flavors in one bite. The salty crunch of the pretzel crust perfectly complements the rich and tangy cheddar-mustard sauce. It's a great way to elevate everyday chicken into something that feels special. I often make this when I want something comforting but don’t want to spend hours in the kitchen. Plus, it’s kid-friendly and adult-approved.

ingredients

(Here's a tip: Check out the full list of ingredients and measurements in the recipe card below.)

  • Boneless, skinless chicken breasts

  • Salt and black pepper

  • Flour

  • Eggs

  • Crushed pretzels

  • Olive oil or butter (for frying or baking)

  • Cheddar cheese, shredded

  • Dijon mustard

  • Whole grain mustard

  • Milk or half-and-half

  • Garlic powder (optional)

directions

  1. I start by preheating the oven to 400°F (if baking).

  2. I season the chicken breasts with salt and pepper.

  3. I dredge each chicken piece in flour, dip it in beaten eggs, then coat it in crushed pretzels.

  4. If baking, I place the coated chicken on a greased baking sheet and bake for 20-25 minutes, flipping halfway. If pan-frying, I heat oil in a skillet and cook each piece until golden brown and cooked through, about 4-5 minutes per side.

  5. While the chicken cooks, I make the sauce by warming milk in a saucepan, then whisking in shredded cheddar, Dijon mustard, whole grain mustard, and garlic powder until smooth and creamy.

  6. I serve the pretzel-crusted chicken hot with a generous drizzle of mustard cheddar sauce over the top.

Servings and timing

This recipe makes 4 servings. The total prep and cook time is about 35 minutes: 10 minutes of prep and 25 minutes of cooking time.

Variations

Sometimes I add a little cayenne pepper or smoked paprika to the pretzel coating for extra flavor. For a lighter sauce, I swap in Greek yogurt for some of the cheese. I’ve also tried this recipe with chicken tenders for bite-sized portions, perfect for appetizers or parties.

storage/reheating

To store leftovers, I keep the chicken and sauce separate in airtight containers in the fridge for up to 3 days. When reheating, I warm the chicken in the oven at 350°F for about 10 minutes to retain crispiness. I reheat the sauce gently on the stove or in the microwave, stirring occasionally to bring back the creamy texture.

FAQs

How do I keep the pretzel crust from falling off?

I make sure to press the crushed pretzels firmly onto the chicken and let the coated pieces rest for a few minutes before cooking to help the crust stick better.

Can I use other types of mustard in the sauce?

Yes, I’ve used spicy brown mustard and honey mustard with great results—it just depends on the flavor I’m going for.

What kind of pretzels work best for the crust?

I usually go with traditional salted pretzels, either twists or sticks, crushed finely. Hard pretzels hold up better than soft ones.

Is the sauce very spicy?

Not really. The mustards give it a tangy kick, but it’s balanced out by the richness of the cheddar. I adjust the amount of mustard to taste.

Can I make the sauce ahead of time?

Yes, I often prepare the sauce a day in advance and store it in the fridge. I just reheat it gently and stir well before serving.

Conclusion

This Pretzel-Crusted Chicken with Creamy Mustard Cheddar Sauce is one of my favorite ways to make chicken feel special without too much effort. I love the bold flavor and satisfying crunch, and the sauce takes it over the top. It’s a reliable, tasty dish I come back to again and again.

Print

clock clock iconcutlery cutlery iconflag flag iconfolder folder iconinstagram instagram iconpinterest pinterest iconfacebook facebook iconprint print iconsquares squares iconheart heart iconheart solid heart solid icon
Pretzel-Crusted Chicken with Creamy Mustard Cheddar Sauce

Pretzel-Crusted Chicken with Creamy Mustard Cheddar Sauce

5 Stars 4 Stars 3 Stars 2 Stars 1 Star No reviews
  • Author: Sue
  • Prep Time: 10 minutes
  • Cook Time: 25 minutes
  • Total Time: 35 minutes
  • Yield: 4 servings
  • Category: Dinner
  • Method: Baking or Pan-Frying
  • Cuisine: American
  • Diet: Halal
Print Recipe
Pin Recipe

Description

This Pretzel-Crusted Chicken with Creamy Mustard Cheddar Sauce combines crispy pretzel-coated chicken with a rich and tangy mustard cheddar sauce, offering a gourmet twist on classic comfort food.


Ingredients

  • 4 boneless, skinless chicken breasts
  • Salt and black pepper, to taste
  • ½ cup all-purpose flour
  • 2 large eggs, beaten
  • 2 cups crushed pretzels
  • 2 tablespoons olive oil or butter (for frying or greasing)
  • 1 ½ cups shredded cheddar cheese
  • 1 tablespoon Dijon mustard
  • 1 tablespoon whole grain mustard
  • 1 cup milk or half-and-half
  • ½ teaspoon garlic powder (optional)

Instructions

  1. Preheat the oven to 400°F if baking the chicken.
  2. Season the chicken breasts with salt and black pepper.
  3. Dredge each chicken breast in flour, then dip in beaten eggs, and coat with crushed pretzels, pressing gently to adhere.
  4. To bake: Place the coated chicken on a greased baking sheet and bake for 20-25 minutes, flipping halfway through. To pan-fry: Heat olive oil or butter in a skillet over medium heat and cook each chicken piece for 4-5 minutes per side until golden and cooked through.
  5. For the sauce, heat milk in a saucepan over medium heat until warm.
  6. Whisk in shredded cheddar, Dijon mustard, whole grain mustard, and garlic powder (if using) until the sauce is smooth and creamy.
  7. Serve the pretzel-crusted chicken hot, drizzled with the mustard cheddar sauce.

Notes

  • Add cayenne pepper or smoked paprika to the pretzel coating for extra flavor.
  • Swap in Greek yogurt for part of the cheese to lighten the sauce.
  • Use chicken tenders for appetizer-sized portions.
  • Store chicken and sauce separately to maintain crispiness.

Nutrition

  • Serving Size: 1 chicken breast with sauce
  • Calories: 520
  • Sugar: 3g
  • Sodium: 860mg
  • Fat: 28g
  • Saturated Fat: 12g
  • Unsaturated Fat: 13g
  • Trans Fat: 0g
  • Carbohydrates: 32g
  • Fiber: 1g
  • Protein: 40g
  • Cholesterol: 150mg

Have you made this recipe? I'd love to see it!

Click here to Follow me on Pinterest

Crinkly Crackly Butter Toffee Sugar Cookies

July 21, 2025 by Sue Leave a Comment

These Crinkly Crackly Butter Toffee Sugar Cookies are a delightful twist on the classic sugar cookie. They combine a buttery, chewy base with rich toffee bits, and a crinkled, crackly top that adds texture and charm. Each bite melts in my mouth, balanced with the sweetness of sugar and the caramel undertones of toffee. Crinkly Crackly Butter Toffee Sugar Cookies

Why You’ll Love This Recipe

I love how these cookies bring together simplicity and decadence. The buttery base gives a soft and tender crumb, while the toffee adds pops of rich, nutty flavor throughout. I enjoy the contrast of the crackly top against the chewy center. They’re easy to make and perfect for sharing—or not sharing at all. Whether it’s for a holiday treat or an everyday indulgence, these cookies always disappear quickly.

Ingredients

(Here's a tip: Check out the full list of ingredients and measurements in the recipe card below.)

all-purpose flour
baking soda
baking powder
salt
unsalted butter, softened
granulated sugar
egg
vanilla extract
toffee bits (like Heath bits or homemade)

Directions

  1. I preheat my oven to 350°F (175°C) and line baking sheets with parchment paper.

  2. In a medium bowl, I whisk together the flour, baking soda, baking powder, and salt.

  3. In a large mixing bowl, I cream the softened butter and sugar together until light and fluffy.

  4. I add the egg and vanilla extract, mixing until fully combined.

  5. I gradually add the dry ingredients into the wet ingredients, stirring until a dough forms.

  6. Then I fold in the toffee bits evenly.

  7. Using a cookie scoop or spoon, I drop the dough onto the prepared baking sheets, spacing them a couple of inches apart.

  8. I bake them for about 10–12 minutes, or until the edges are just golden and the tops are crackled.

  9. I let the cookies cool on the baking sheet for 5 minutes before transferring them to a wire rack to cool completely.

Servings and timing

This recipe makes about 24 cookies.
Prep time: 15 minutes
Cook time: 10–12 minutes
Cooling time: 10 minutes
Total time: About 35 minutes

Variations

Sometimes I like to switch things up by adding a pinch of cinnamon for a warm twist. For a nutty crunch, I mix in chopped pecans or walnuts along with the toffee bits. If I’m going for extra decadence, a drizzle of melted chocolate over the cooled cookies does the trick. Around the holidays, I might use red and green toffee bits or roll the dough in colored sugar for a festive touch.

storage/reheating

I store these cookies in an airtight container at room temperature for up to 5 days. To keep them extra soft, I like to toss in a slice of bread with the cookies. If I want to reheat them, a quick 5–10 seconds in the microwave brings back that freshly-baked warmth. They also freeze well—just make sure they’re fully cooled before freezing in a zip-top bag or container for up to 3 months.

FAQs

How do I get that crinkly crackly top?

The crackly texture comes from the sugar in the dough and how it bakes. I make sure not to overmix once I add the flour, and I don’t flatten the cookies before baking—they naturally crinkle on top.

Can I use salted butter instead?

Yes, I can. I just reduce the added salt slightly if I’m using salted butter to avoid overpowering the sweetness.

Can I make the dough ahead of time?

Absolutely. I often chill the dough for a few hours or overnight. It helps intensify the flavor and makes the cookies even chewier.

What type of toffee should I use?

I usually use store-bought toffee bits, like Heath brand. If I’m feeling ambitious, I make homemade toffee and chop it into small chunks.

Can I freeze the cookie dough?

Yes, I scoop the dough onto a tray and freeze until solid, then transfer to a freezer bag. I bake them straight from frozen, just adding an extra minute or two to the bake time.

Conclusion

These Crinkly Crackly Butter Toffee Sugar Cookies are a joy to make and even more fun to eat. With their buttery chew, sweet toffee bits, and irresistible texture, they’ve become one of my go-to cookie recipes. Whether I’m baking for a crowd or just craving something special, these cookies always hit the spot.

Print

clock clock iconcutlery cutlery iconflag flag iconfolder folder iconinstagram instagram iconpinterest pinterest iconfacebook facebook iconprint print iconsquares squares iconheart heart iconheart solid heart solid icon
Crinkly Crackly Butter Toffee Sugar Cookies

Crinkly Crackly Butter Toffee Sugar Cookies

5 Stars 4 Stars 3 Stars 2 Stars 1 Star No reviews
  • Author: Sue
  • Prep Time: 15 minutes
  • Cook Time: 12 minutes
  • Total Time: 35 minutes
  • Yield: 24 cookies
  • Category: Dessert
  • Method: Baking
  • Cuisine: American
  • Diet: Vegetarian
Print Recipe
Pin Recipe

Description

Crinkly Crackly Butter Toffee Sugar Cookies are a chewy, buttery treat with rich toffee bits and a crackled sugar top, offering a delightful texture and sweet caramel flavor in every bite.


Ingredients

  • 2 ¼ cups all-purpose flour
  • ½ tsp baking soda
  • ½ tsp baking powder
  • ½ tsp salt
  • 1 cup unsalted butter, softened
  • 1 cup granulated sugar
  • 1 large egg
  • 2 tsp vanilla extract
  • 1 cup toffee bits (like Heath bits or homemade)

Instructions

  1. Preheat the oven to 350°F (175°C) and line baking sheets with parchment paper.
  2. In a medium bowl, whisk together flour, baking soda, baking powder, and salt.
  3. In a large bowl, cream together the softened butter and sugar until light and fluffy.
  4. Add the egg and vanilla extract to the creamed mixture and mix until fully combined.
  5. Gradually add the dry ingredients to the wet ingredients and stir until a dough forms.
  6. Fold in the toffee bits evenly throughout the dough.
  7. Drop the dough by spoonfuls onto the prepared baking sheets, spacing them a couple of inches apart.
  8. Bake for 10–12 minutes, or until the edges are golden and the tops are crackled.
  9. Let the cookies cool on the baking sheet for 5 minutes before transferring to a wire rack to cool completely.

Notes

  • Add a pinch of cinnamon or chopped nuts for a flavor twist.
  • Drizzle with melted chocolate for extra indulgence.
  • Store with a slice of bread to maintain softness.
  • Dough can be chilled or frozen for later use.

Nutrition

  • Serving Size: 1 cookie
  • Calories: 160
  • Sugar: 12g
  • Sodium: 90mg
  • Fat: 9g
  • Saturated Fat: 5g
  • Unsaturated Fat: 3g
  • Trans Fat: 0g
  • Carbohydrates: 18g
  • Fiber: 0g
  • Protein: 1g
  • Cholesterol: 25mg

Have you made this recipe? I'd love to see it!

Click here to Follow me on Pinterest

The Best Chicken Salad

July 21, 2025 by Sue Leave a Comment

This is my go‑to creamy, sweet, crunchy chicken salad that brings together tender chicken, crisp apples and celery, juicy grapes, and nuts—all tossed in a bright, zesty dressing. The Best Chicken Salad

Why You’ll Love This Recipe

I love how it’s easy yet impressive: just a few fresh ingredients create a perfect balance of textures and flavors. It can be made ahead, which makes it ideal for sandwiches, wraps, or even lettuce cups. And the combination of apples, grapes, pecans, and creamy dressing gives it that delightful sweet crunch that always delights guests.

ingredients

(Here's a tip: Check out the full list of ingredients and measurements in the recipe card below.)

Dressing

  • 1 cup mayonnaise

  • 2 tablespoons fresh lemon juice

  • 1 tablespoon fresh parsley, chopped

  • 1 teaspoon kosher salt (or to taste)

  • ½ teaspoon freshly ground pepper (or to taste)

Chicken Salad

  • 4 cups cooked, diced chicken

  • 1 cup seedless red grapes, halved or quartered

  • 1 cup red apple, chopped

  • 1 cup celery ribs, chopped (about 2 stalks)

  • 1 cup pecans (or walnuts/almonds), chopped or sliced

For Serving

  • Bread, croissants, lettuce cups, pita or crackers

directions

  1. In a medium bowl I whisk together mayonnaise, lemon juice, parsley, salt, and pepper until smooth and creamy.

  2. In another bowl I toss the diced chicken, grapes, apple, celery, and pecans.

  3. I drizzle the dressing over the salad ingredients and stir until everything is evenly coated.

  4. I cover the bowl and chill it for at least 1 hour before serving to let the flavors meld.

  5. I serve it on bread, croissants, wraps, puff in lettuce cups—or just scoop it with crackers.

Servings and timing

This recipe makes about 6 servings with an approximate total time of:

  • Prep: 10 minutes

  • Chill: 1 hour

  • Total: ~1 hour 10 minutes

Variations

  • I sometimes substitute Greek yogurt for half the mayo for a tangier twist.

  • If grapes aren’t available, I swap them with raisins or craisins.

  • Celery seeds work as a substitute when I’m out of fresh celery.

  • I vary the apple type—Fuji, Gala, or Honeycrisp—depending on what’s in season.

storage/reheating

I store leftovers in an airtight container in the fridge for up to 3 days. I usually enjoy it cold; if I want it slightly warmer, I let it sit at room temperature for 10–15 minutes before serving. I don’t reheat it in the microwave since that softens the fruit and changes the texture.

FAQs

How long does this chicken salad last in the fridge?

It stays fresh for up to 3 days when stored in a sealed container.

Can I make this salad ahead of time?

Absolutely. I make it the night before to let flavors develop overnight—makes serving the next day effortless.

Can I freeze this chicken salad?

I don’t recommend freezing it. The fruits and celery become mushy once thawed, affecting overall texture.

What can I use instead of grapes?

Raisins or craisins are great substitutes that still add sweetness and chewiness.

Can I use rotisserie chicken?

Definitely! I often use unseasoned rotisserie chicken—it’s convenient and gives me perfect chicken flavor without extra fuss.

Conclusion

I’ve made this chicken salad countless times for quick lunches, tea sandwiches, and easy entertaining. It’s always a hit because it’s creamy yet fresh, sweet yet tangy, and delightfully crunchy. I can’t wait for you to try it—I know you'll love how versatile and delicious it is!

Print

clock clock iconcutlery cutlery iconflag flag iconfolder folder iconinstagram instagram iconpinterest pinterest iconfacebook facebook iconprint print iconsquares squares iconheart heart iconheart solid heart solid icon
The Best Chicken Salad

The Best Chicken Salad

5 Stars 4 Stars 3 Stars 2 Stars 1 Star No reviews
  • Author: Sue
  • Prep Time: 10 minutes
  • Cook Time: 0 minutes
  • Total Time: 1 hour 10 minutes
  • Yield: 6 servings
  • Category: Salad
  • Method: Mixing
  • Cuisine: American
  • Diet: Gluten Free
Print Recipe
Pin Recipe

Description

A creamy, sweet, and crunchy chicken salad featuring tender chicken, crisp apples and celery, juicy grapes, and pecans, all tossed in a zesty lemon mayo dressing.


Ingredients

  • 1 cup mayonnaise
  • 2 tablespoons fresh lemon juice
  • 1 tablespoon fresh parsley, chopped
  • 1 teaspoon kosher salt (or to taste)
  • ½ teaspoon freshly ground pepper (or to taste)
  • 4 cups cooked, diced chicken
  • 1 cup seedless red grapes, halved or quartered
  • 1 cup red apple, chopped
  • 1 cup celery ribs, chopped (about 2 stalks)
  • 1 cup pecans (or walnuts/almonds), chopped or sliced
  • Bread, croissants, lettuce cups, pita or crackers (for serving)

Instructions

  1. In a medium bowl, whisk together mayonnaise, lemon juice, parsley, salt, and pepper until smooth and creamy.
  2. In another bowl, toss the diced chicken, grapes, apple, celery, and pecans.
  3. Drizzle the dressing over the salad ingredients and stir until everything is evenly coated.
  4. Cover the bowl and chill for at least 1 hour before serving to let the flavors meld.
  5. Serve on bread, croissants, wraps, in lettuce cups, or with crackers.

Notes

  • Can substitute Greek yogurt for half the mayo for a tangier twist.
  • Raisins or craisins can be used instead of grapes.
  • Celery seeds are a good substitute for fresh celery.
  • Try different apples like Fuji, Gala, or Honeycrisp.

Nutrition

  • Serving Size: 1 cup
  • Calories: 420
  • Sugar: 6g
  • Sodium: 520mg
  • Fat: 31g
  • Saturated Fat: 5g
  • Unsaturated Fat: 23g
  • Trans Fat: 0g
  • Carbohydrates: 14g
  • Fiber: 2g
  • Protein: 25g
  • Cholesterol: 75mg

Have you made this recipe? I'd love to see it!

Click here to Follow me on Pinterest

Strawberry Sorbet

July 21, 2025 by Sue Leave a Comment

I fell in love with this vibrant, four-ingredient strawberry sorbet. It’s quick to whip up, captures the pure flavor of strawberries, and is wonderfully refreshing—a perfect cool-down treat for hot days. Strawberry Sorbet

Why You’ll Love This Recipe

I like how this recipe uses just four simple ingredients—water, sugar, strawberries (fresh or frozen), and lemon or lime juice. The simple syrup brings out the natural sweetness of the berries, and the blending process creates a smooth, icy texture that’s incredibly satisfying on a warm day. It’s light, bright, and easy to prepare.

ingredients

(Here's a tip: Check out the full list of ingredients and measurements in the recipe card below.)

  • 1 cup granulated sugar

  • 3 cups water

  • 5 cups fresh or frozen strawberries, cleaned and quartered (about 2 lb)

  • 2 tablespoons lemon juice or lime juice

directions

  1. Rinse and quarter the strawberries; set them aside.

  2. In a saucepan, bring the water and sugar to a boil over medium-high heat, stirring until the sugar fully dissolves. Remove from heat and let the syrup cool.

  3. Combine the cooled syrup, lemon (or lime) juice, and strawberries in a large bowl.

  4. Transfer the mixture to a blender or food processor and blend until completely smooth.

  5. Pour into a freezer-safe container and freeze for at least 6 hours or overnight until firm.

Servings and timing

This recipe yields about 8 servings.

  • Prep time: 10 minutes

  • Cook time: 10 minutes

  • Freeze time: At least 6 hours, preferably overnight

Variations

I like to switch things up now and then:

  • Lime juice gives it a bolder citrus tang, which I really enjoy.

  • Using a mix of strawberries and raspberries adds a richer berry flavor.

  • A few fresh mint leaves blended in give it a cool, herbal twist.

  • For a chunkier texture, I sometimes reserve a small portion of chopped strawberries to stir in before freezing.

storage/reheating

I store the sorbet in an airtight freezer-safe container, where it keeps well for up to 2 weeks. When I’m ready to serve, I leave it on the counter for 5 to 10 minutes so it softens slightly and scoops more easily.

FAQs

What’s the best kind of strawberries to use?

I find that fresh, ripe strawberries give the best flavor. If strawberries aren't in season, I use frozen ones—just make sure to thaw them before blending.

Do I need to remove the seeds?

I usually leave them in, since they don’t bother me and add a little texture. But if I want a super smooth sorbet, I strain the blended mixture through a fine mesh sieve before freezing.

Can I use a different sweetener instead of sugar?

Yes, I’ve used honey or maple syrup as a substitute for sugar. It slightly changes the flavor, but still works well.

What can I do if my sorbet is too icy?

I make sure the sugar is fully dissolved in the syrup, and I let the sorbet sit out for a few minutes before scooping so it softens. A smooth blend also helps reduce iciness.

Can I make this without a blender?

If I don’t have a blender or food processor, I mash the strawberries as finely as possible and mix them with the syrup and juice until the texture is consistent. It’s not quite as smooth, but still delicious.

Conclusion

This strawberry sorbet is one of my favorite ways to enjoy fresh berries in the summer. It’s simple, refreshing, and easy to make with ingredients I usually have on hand. I like how customizable it is, and how it always turns out bright, sweet, and satisfying.

Print

clock clock iconcutlery cutlery iconflag flag iconfolder folder iconinstagram instagram iconpinterest pinterest iconfacebook facebook iconprint print iconsquares squares iconheart heart iconheart solid heart solid icon
Strawberry Sorbet

Strawberry Sorbet

5 Stars 4 Stars 3 Stars 2 Stars 1 Star No reviews
  • Author: Sue
  • Prep Time: 10 minutes
  • Cook Time: 10 minutes
  • Total Time: 6 hours 20 minutes
  • Yield: 8 servings
  • Category: Dessert
  • Method: Freezing
  • Cuisine: American
  • Diet: Vegan
Print Recipe
Pin Recipe

Description

This vibrant strawberry sorbet is made with just four ingredients—strawberries, sugar, water, and lemon or lime juice. It’s quick to prepare, wonderfully refreshing, and captures the pure flavor of summer berries.


Ingredients

  • 1 cup granulated sugar
  • 3 cups water
  • 5 cups fresh or frozen strawberries, cleaned and quartered (about 2 lb)
  • 2 tablespoons lemon juice or lime juice

Instructions

  1. Rinse and quarter the strawberries; set them aside.
  2. In a saucepan, bring the water and sugar to a boil over medium-high heat, stirring until the sugar fully dissolves. Remove from heat and let the syrup cool.
  3. Combine the cooled syrup, lemon (or lime) juice, and strawberries in a large bowl.
  4. Transfer the mixture to a blender or food processor and blend until completely smooth.
  5. Pour into a freezer-safe container and freeze for at least 6 hours or overnight until firm.

Notes

  • Lime juice adds a tangier citrus flavor.
  • Mix in raspberries for a deeper berry taste.
  • Add fresh mint leaves for a herbal note.
  • Reserve some chopped strawberries for texture.
  • Let sorbet sit out for 5–10 minutes before scooping.

Nutrition

  • Serving Size: 1 serving
  • Calories: 110
  • Sugar: 22g
  • Sodium: 2mg
  • Fat: 0g
  • Saturated Fat: 0g
  • Unsaturated Fat: 0g
  • Trans Fat: 0g
  • Carbohydrates: 28g
  • Fiber: 2g
  • Protein: 1g
  • Cholesterol: 0mg

Have you made this recipe? I'd love to see it!

Click here to Follow me on Pinterest

Sheet Pan Chicken Pitas with Herby Ranch Slaw

July 21, 2025 by Sue Leave a Comment

A simple, flavorful meal that I love for its ease and minimal cleanup. Bite-sized spiced chicken roasted on a sheet pan becomes sweet and caramelized, paired with a crisp herby slaw and creamy avocado tucked into warm pita pockets. It’s fresh, satisfying, and perfect for a light summer dinner. Sheet Pan Chicken Pitas with Herby Ranch Slaw

Why I’ll Love This Recipe

I love how quick and fuss-free this dish is—everything bakes together, meaning fewer dishes and zero stress. The brown sugar-spiced chicken caramelizes beautifully, while the vibrant slaw made with yogurt, fresh herbs, and cabbage brings a refreshing bite. Tucking it all into pita makes it feel fun and casual—perfect for family meals or easy entertaining.

ingredients

(Here's a tip: Check out the full list of ingredients and measurements in the recipe card below.)

Chicken

  • 1 lb boneless, skinless chicken breasts, cut into 1‑inch pieces

  • 2 tablespoon brown sugar

  • 1½ teaspoon smoked paprika

  • ½ teaspoon garlic powder

  • ½ teaspoon onion powder

  • ½ teaspoon cayenne

  • ½ teaspoon kosher salt

  • 1 tablespoon olive oil

  • Juice and slices from ½ lemon

Herby Ranch Slaw

  • ½ cup plain yogurt (can use non-dairy)

  • ¼ cup dill, finely chopped

  • ¼ cup parsley, finely chopped

  • 2 tablespoon chives, minced

  • Juice from ½ lemon

  • 2 tablespoon olive oil

  • Kosher salt, to taste

  • ½ small head green cabbage, finely shredded

Additional

  • 2–3 pita pockets

  • 1 ripe avocado, cubed

directions

  1. Preheat oven to 425°F (use convection mode if available).

  2. In a large bowl, toss chicken with brown sugar, smoked paprika, garlic powder, onion powder, cayenne, salt, olive oil, lemon juice, and lemon slices.

  3. Spread chicken evenly on a sheet pan in a single layer.

  4. Bake for 15 minutes, then toss the chicken pieces and roast for another 4–7 minutes until browned and caramelized.

  5. While the chicken roasts, make the slaw: whisk together yogurt, herbs, lemon juice, olive oil, and salt in a large bowl. Add shredded cabbage and toss until well coated. Let it sit for 10–15 minutes to soften.

  6. Warm pita pockets in the microwave or oven.

  7. Stuff each pita with slaw, roasted chicken, and cubed avocado. Serve immediately.

Servings and timing

  • Serves 2–3

  • Prep time: 15 minutes

  • Cook time: 20–22 minutes

  • Total time: approximately 45 minutes

Variations

  • Vegetarian: Swap the chicken for tofu or roasted chickpeas.

  • Gluten-free: Use gluten-free pita or serve over rice or in lettuce wraps.

  • Extra heat: Add more cayenne or a few dashes of hot sauce.

  • Add crunch: Top with crushed pita chips or roasted seeds.

  • Dairy-free: Use a dairy-free yogurt alternative in the slaw.

storage/reheating

I store the cooked chicken and slaw separately in airtight containers in the refrigerator. The chicken keeps well for up to 4 days, and the slaw stays crisp for about 3 days. I reheat the chicken in the oven or microwave and keep the slaw chilled. I always assemble the pitas fresh for the best texture.

FAQs

What kind of yogurt works best for the slaw?

I prefer plain whole milk yogurt for creaminess, but Greek yogurt or non-dairy alternatives like almond or coconut yogurt work great too.

Can I make the slaw ahead of time?

Yes, I like to make the slaw a few hours ahead or even the day before. The flavors blend better over time, and the cabbage softens nicely.

How do I get the chicken extra crispy?

Make sure the chicken is spaced out on the sheet pan, use convection if available, and broil for the last 2–3 minutes for a crispier texture.

Can I freeze this meal?

I don’t recommend freezing the slaw, but the cooked chicken freezes well. I let it cool, then freeze in a sealed container for up to 2 months. Thaw and reheat before serving.

What can I use instead of pita?

I sometimes use naan, flatbread, or even tortillas. This chicken and slaw combo is also great over rice or in a salad bowl.

Conclusion

This sheet pan chicken pita recipe is a total win for my weeknight dinner lineup. With bold flavors, crisp textures, and easy cleanup, it checks all the boxes for a satisfying and stress-free meal. Whether I’m serving it in warm pitas or over rice, the combo of spiced chicken and herby ranch slaw never disappoints.

Print

clock clock iconcutlery cutlery iconflag flag iconfolder folder iconinstagram instagram iconpinterest pinterest iconfacebook facebook iconprint print iconsquares squares iconheart heart iconheart solid heart solid icon
Sheet Pan Chicken Pitas with Herby Ranch Slaw

Sheet Pan Chicken Pitas with Herby Ranch Slaw

5 Stars 4 Stars 3 Stars 2 Stars 1 Star No reviews
  • Author: Sue
  • Prep Time: 15 minutes
  • Cook Time: 22 minutes
  • Total Time: 45–50 minutes
  • Yield: 2–3 servings
  • Category: Main Course
  • Method: Sheet Pan
  • Cuisine: American
  • Diet: Halal
Print Recipe
Pin Recipe

Description

A quick and flavorful sheet-pan meal with spiced caramelized chicken, fresh herby slaw, and creamy avocado served in warm pita pockets—perfect for a light, low-effort summer dinner.


Ingredients

  • 1 lb boneless, skinless chicken breasts, cut into 1‑inch pieces
  • 2 tbsp brown sugar
  • 1½ tsp smoked paprika
  • ½ tsp garlic powder
  • ½ tsp onion powder
  • ½ tsp cayenne
  • ½ tsp kosher salt
  • 1 tbsp olive oil
  • Juice and slices from ½ lemon
  • ½ cup plain yogurt (can use non‑dairy)
  • ¼ cup dill, finely chopped
  • ¼ cup parsley, finely chopped
  • 2 tbsp chives, minced
  • Juice from ½ lemon
  • 2 tbsp olive oil
  • Kosher salt, to taste
  • ½ small head green cabbage, finely shredded
  • 2–3 pita pockets
  • 1 ripe avocado, cubed

Instructions

  1. Preheat oven to 425 °F (use convection mode if available).
  2. In a large bowl, toss chicken with brown sugar, smoked paprika, garlic powder, onion powder, cayenne, salt, olive oil, lemon juice, and slices until evenly coated.
  3. Spread the chicken on a sheet pan in a single layer.
  4. Bake for 15 minutes, then toss and roast for another 4–7 minutes until browned and caramelized.
  5. While chicken bakes, make the slaw: whisk yogurt, dill, parsley, chives, lemon juice, olive oil, and salt in a bowl. Add shredded cabbage and toss. Let sit for 10–15 minutes to soften.
  6. Warm pitas in the microwave or oven.
  7. Stuff each pita with slaw, roasted chicken, and cubed avocado.
  8. Serve immediately or use chicken and slaw in wraps or over rice.

Notes

  • To make vegetarian, use tofu or tempeh instead of chicken.
  • For gluten-free, serve in GF pita or lettuce wraps.
  • Adjust spice by altering the amount of cayenne or using mild paprika.
  • Add toasted nuts for extra crunch.
  • Store chicken and slaw separately in airtight containers in the fridge.
  • Reheat chicken before serving; slaw should remain cold for crunch.

Nutrition

  • Serving Size: 1 stuffed pita
  • Calories: 420
  • Sugar: 6g
  • Sodium: 520mg
  • Fat: 22g
  • Saturated Fat: 4g
  • Unsaturated Fat: 16g
  • Trans Fat: 0g
  • Carbohydrates: 28g
  • Fiber: 5g
  • Protein: 28g
  • Cholesterol: 75mg

Have you made this recipe? I'd love to see it!

Click here to Follow me on Pinterest

Easy Low-Carb Keto Lettuce Wraps with Chicken (PF Chang’s Copycat)

July 21, 2025 by Sue Leave a Comment

I make these low-carb chicken lettuce wraps when I want something flavorful, quick, and light. They’re packed with ground chicken, crunchy vegetables, and a savory sauce—all tucked into fresh, crisp lettuce leaves for the perfect handheld meal. Easy Low-Carb Keto Lettuce Wraps with Chicken (PF Chang’s Copycat)

Why You’ll Love This Recipe

I love how these wraps satisfy cravings for takeout without the guilt. They’re fast to make, great for meal prep, and easy to customize. The flavor is bold and tangy with the right balance of heat and crunch—plus, it all comes together in one pan. Whether for lunch, dinner, or appetizers, these wraps never disappoint.

ingredients

(Here's a tip: Check out the full list of ingredients and measurements in the recipe card below.)
• 1 lb ground chicken
• 1 tablespoon vegetable or peanut oil
• ½ cup yellow or white onion, minced
• 2 large garlic cloves, minced
• 1 teaspoon fresh ginger, grated
• pinch of crushed red pepper flakes (optional)
• 8–10 cremini mushrooms, diced (optional)
• ½ cup diced water chestnuts
• 2 tablespoon sesame oil
• 5 tablespoon low-sodium soy sauce or coconut aminos
• 2 tablespoon rice wine vinegar
• 2 tablespoon hoisin sauce (choose a low-sugar version if keto)
• 1½ teaspoon lime juice
• salt and pepper, to taste
• chopped green onions, sesame seeds, or peanuts for garnish
• 1 head butter, bibb, or baby romaine lettuce, leaves separated

directions

  1. I start by whisking soy sauce, rice vinegar, hoisin, sesame oil, garlic, ginger, and lime juice in a bowl.

  2. I heat oil in a large skillet over medium-high heat, add the ground chicken, season it, and cook for about 3–5 minutes, breaking it up as it browns.

  3. I push the chicken to one side and sauté the onions (and mushrooms if I’m using them) until soft.

  4. I stir in garlic, ginger, and red pepper flakes, cooking for another minute.

  5. Then I add the water chestnuts and pour in the sauce, letting it simmer on low heat for a couple minutes until slightly thickened.

  6. I remove the pan from heat and serve the filling inside lettuce leaves, topped with green onions, sesame seeds, or peanuts.

Servings and timing

This recipe serves about 4 people as a main dish or 6 as an appetizer. I get around 12–16 lettuce wraps from one batch. Prep time is about 10 minutes, cook time is around 20 minutes, making it a quick 30-minute meal from start to finish.

Variations

  • Different proteins: I sometimes use ground turkey for a slightly leaner option.

  • Add crunch: Bell peppers or shredded carrots can replace mushrooms or water chestnuts.

  • Spicy twist: A little Sriracha or extra red pepper flakes give it a kick.

  • Sauce swap: Coconut aminos make it soy-free and lower in sodium.

storage/reheating

I store leftover filling in an airtight container in the fridge for up to 4 days. It reheats well in a skillet or microwave. I always keep the lettuce separate and assemble the wraps just before eating so the leaves stay fresh and crisp. If I freeze the filling, it lasts up to 3 months—just thaw it in the fridge before reheating.

Easy Low-Carb Keto Lettuce Wraps with Chicken (PF Chang’s Copycat)

FAQs

Can I make this completely keto-friendly?

Yes. I use a keto-friendly hoisin sauce and coconut aminos instead of regular soy sauce to cut down carbs and sugar.

What’s the best lettuce to use?

I like butter lettuce the most because of its soft, cup-shaped leaves. Romaine or iceberg also work if I want something with more crunch.

Can I meal prep this recipe?

Definitely. I often make the filling ahead of time and store it in the fridge. When I’m ready to eat, I just reheat the filling and serve with fresh lettuce.

What’s a good substitute for water chestnuts?

If I don’t have water chestnuts, I sometimes use finely chopped celery or diced bell peppers for that crunch factor.

How do I keep lettuce wraps from getting soggy?

I make sure the filling cools slightly before assembling and I never fill the wraps until just before serving. This keeps the lettuce nice and crisp.

Conclusion

These chicken lettuce wraps have become one of my favorite low-carb meals. They’re fast, tasty, and easy to make with pantry staples. Whether I’m watching carbs or just want something light but flavorful, this dish always delivers.

Print

clock clock iconcutlery cutlery iconflag flag iconfolder folder iconinstagram instagram iconpinterest pinterest iconfacebook facebook iconprint print iconsquares squares iconheart heart iconheart solid heart solid icon
Easy Low-Carb Keto Lettuce Wraps with Chicken (PF Chang’s Copycat)

Easy Low-Carb Keto Lettuce Wraps with Chicken (PF Chang’s Copycat)

5 Stars 4 Stars 3 Stars 2 Stars 1 Star No reviews
  • Author: Sue
  • Prep Time: 10 minutes
  • Cook Time: 20 minutes
  • Total Time: 30 minutes
  • Yield: Serves 4 (12–16 wraps)
  • Category: Main Dish
  • Method: Stovetop
  • Cuisine: Asian-Inspired
Print Recipe
Pin Recipe

Description

These low-carb chicken lettuce wraps are a quick, flavorful, and light meal inspired by PF Chang’s. Made with ground chicken, crunchy veggies, and a savory sauce, they’re perfect for lunch, dinner, or appetizers.


Ingredients

  • 1 lb ground chicken
  • 1 tbsp vegetable or peanut oil
  • ½ cup yellow or white onion, minced
  • 2 large garlic cloves, minced
  • 1 tsp fresh ginger, grated
  • Pinch of crushed red pepper flakes (optional)
  • 8–10 cremini mushrooms, diced (optional)
  • ½ cup diced water chestnuts
  • 2 tbsp sesame oil
  • 5 tbsp low-sodium soy sauce or coconut aminos
  • 2 tbsp rice wine vinegar
  • 2 tbsp hoisin sauce (low-sugar version if keto)
  • 1½ tsp lime juice
  • Salt and pepper, to taste
  • Chopped green onions, sesame seeds, or peanuts for garnish
  • 1 head butter, bibb, or baby romaine lettuce, leaves separated

Instructions

  1. Whisk together soy sauce, rice vinegar, hoisin sauce, sesame oil, garlic, ginger, and lime juice in a bowl.
  2. Heat oil in a large skillet over medium-high heat, add the ground chicken, season with salt and pepper, and cook for 3–5 minutes, breaking it up as it browns.
  3. Push the chicken to one side of the skillet and sauté the onions (and mushrooms if using) until soft.
  4. Stir in garlic, ginger, and red pepper flakes, and cook for another minute.
  5. Add water chestnuts and pour in the sauce, allowing it to simmer on low heat for a few minutes until slightly thickened.
  6. Remove from heat and serve the chicken mixture inside lettuce leaves, topped with green onions, sesame seeds, or peanuts.

Notes

  • Use coconut aminos and low-sugar hoisin for a keto-friendly version.
  • Store leftover filling separately from lettuce to maintain crispness.
  • Add bell peppers or carrots for extra crunch.
  • Can be made ahead and stored in fridge or freezer.

Nutrition

  • Serving Size: 3–4 wraps
  • Calories: 280
  • Sugar: 3g
  • Sodium: 620mg
  • Fat: 18g
  • Saturated Fat: 3g
  • Unsaturated Fat: 14g
  • Trans Fat: 0g
  • Carbohydrates: 7g
  • Fiber: 2g
  • Protein: 22g
  • Cholesterol: 65mg

Have you made this recipe? I'd love to see it!

Click here to Follow me on Pinterest

Shrimp-Crab Fajita Roll-Up Bombs

July 20, 2025 by Sue Leave a Comment

Shrimp-Crab Fajita Roll-Up Bombs are a bold, flavor-packed fusion of Tex-Mex flair and seafood indulgence. With a creamy, cheesy filling wrapped in tortillas and baked until golden, these handheld bites are ideal for parties, appetizers, or even a fun dinner idea. They bring together the richness of crab, the tenderness of shrimp, and the smoky sizzle of fajitas in one irresistible bite. Shrimp-Crab Fajita Roll-Up Bombs

Why You’ll Love This Recipe

I love this recipe because it turns everyday ingredients into a restaurant-style appetizer that's packed with flavor. The mix of shrimp and crab offers a unique twist to the usual fajita routine, and the cream cheese base keeps it rich and satisfying. It's also versatile—I can serve it hot from the oven or at room temperature, and it’s always a hit. Best of all, it’s easy to prep ahead and makes a great finger food option for gatherings.

ingredients

(Here's a tip: Check out the full list of ingredients and measurements in the recipe card below.)

  • Cooked shrimp, chopped

  • Lump crab meat

  • Bell peppers (red and green), diced

  • Onion, finely chopped

  • Cream cheese, softened

  • Shredded Mexican cheese blend

  • Fajita seasoning

  • Flour tortillas

  • Butter or oil for brushing

  • Fresh cilantro or green onion for garnish (optional)

directions

  1. I start by preheating the oven to 375°F (190°C) and lightly greasing a baking sheet.

  2. In a bowl, I mix together the chopped shrimp, crab meat, diced bell peppers, onion, softened cream cheese, shredded cheese, and fajita seasoning until it’s well combined.

  3. I lay out the tortillas and spread a generous amount of the seafood mixture over each one, then roll them up tightly like a burrito.

  4. I slice each roll into 2-inch segments and place them seam-side down on the baking sheet.

  5. I brush the tops with melted butter or oil to help them brown nicely in the oven.

  6. I bake them for about 15–18 minutes, or until the tops are golden and the filling is bubbly.

  7. I let them cool slightly before serving, garnished with cilantro or green onions if desired.

Servings and timing

This recipe makes about 16–20 roll-up bombs depending on the size of your tortillas and how thickly you slice them. Prep time takes around 15 minutes, and bake time is approximately 15–18 minutes, so I have a snack ready in just over 30 minutes.

Variations

I like switching it up by using imitation crab or canned crab if I’m in a pinch. Sometimes I throw in jalapeños or hot sauce for extra heat. I’ve also tried it with pepper jack cheese for a more intense flavor. If I want to go low-carb, I swap out tortillas for low-carb wraps or even large lettuce leaves for a fresh twist.

storage/reheating

I store any leftovers in an airtight container in the refrigerator for up to 3 days. To reheat, I pop them in the oven at 350°F for about 10 minutes or until warmed through. If I’m in a hurry, a quick zap in the microwave works too, though the oven keeps them crispier. These also freeze well—I wrap them individually in foil, then reheat straight from frozen at 375°F for about 20 minutes.

FAQs

What kind of shrimp should I use for this recipe?

I like using cooked, peeled, and deveined shrimp to save time. Medium or small shrimp work best because they mix well with the crab and cheese.

Can I make these ahead of time?

Yes, I often prep the filling and roll them up earlier in the day, then store them in the fridge until I'm ready to bake. They hold up great and save me time when entertaining.

Are these spicy?

They have a mild kick from the fajita seasoning, but I can easily make them spicier by adding jalapeños, cayenne pepper, or hot sauce.

Can I use canned crab meat?

Absolutely. While fresh or lump crab meat tastes richer, canned crab is a convenient and budget-friendly option. I just make sure to drain it well.

How do I keep the tortillas from getting soggy?

Brushing the tops with oil and baking them uncovered helps keep them crisp. I also avoid overfilling them with the creamy mixture to maintain the right texture.

Conclusion

Shrimp-Crab Fajita Roll-Up Bombs are my go-to when I want something fun, flavorful, and a little indulgent. Whether I’m entertaining or just craving a savory snack, these roll-ups hit the spot every time. The fusion of seafood and fajita spices wrapped in a crispy tortilla makes them unforgettable—and I always find myself reaching for seconds.

Print

clock clock iconcutlery cutlery iconflag flag iconfolder folder iconinstagram instagram iconpinterest pinterest iconfacebook facebook iconprint print iconsquares squares iconheart heart iconheart solid heart solid icon
Shrimp-Crab Fajita Roll-Up Bombs

Shrimp-Crab Fajita Roll-Up Bombs

5 Stars 4 Stars 3 Stars 2 Stars 1 Star No reviews
  • Author: Sue
  • Prep Time: 15 minutes
  • Cook Time: 15–18 minutes
  • Total Time: 30–33 minutes
  • Yield: 16–20 roll-up bombs
  • Category: Appetizer
  • Method: Baking
  • Cuisine: Tex-Mex
Print Recipe
Pin Recipe

Description

Shrimp-Crab Fajita Roll-Up Bombs are a fusion of Tex-Mex and seafood, combining creamy cheese, shrimp, and crab in crispy tortilla wraps—perfect as appetizers or party snacks.


Ingredients

  • 1 cup cooked shrimp, chopped
  • 1 cup lump crab meat
  • ½ cup red bell pepper, diced
  • ½ cup green bell pepper, diced
  • ¼ cup onion, finely chopped
  • 8 oz cream cheese, softened
  • 1 cup shredded Mexican cheese blend
  • 1 tbsp fajita seasoning
  • 4–5 flour tortillas
  • 2 tbsp butter or oil, for brushing
  • Fresh cilantro or green onion, for garnish (optional)

Instructions

  1. Preheat oven to 375°F (190°C) and lightly grease a baking sheet.
  2. In a large bowl, mix chopped shrimp, crab meat, bell peppers, onion, cream cheese, shredded cheese, and fajita seasoning until well combined.
  3. Spread the seafood mixture evenly over each tortilla and roll them up tightly.
  4. Slice each roll into 2-inch segments and place seam-side down on the baking sheet.
  5. Brush tops with melted butter or oil.
  6. Bake for 15–18 minutes, until tops are golden and filling is bubbly.
  7. Cool slightly before serving. Garnish with cilantro or green onion if desired.

Notes

  • Use cooked, peeled, and deveined shrimp for convenience.
  • Canned or imitation crab can be used as alternatives.
  • Add jalapeños or hot sauce for extra spice.
  • Low-carb tortillas or lettuce wraps can be used for a lighter version.
  • Store leftovers in an airtight container for up to 3 days or freeze individually wrapped portions.

Nutrition

  • Serving Size: 1 roll-up
  • Calories: 110
  • Sugar: 1g
  • Sodium: 180mg
  • Fat: 7g
  • Saturated Fat: 3g
  • Unsaturated Fat: 3g
  • Trans Fat: 0g
  • Carbohydrates: 6g
  • Fiber: 0.5g
  • Protein: 6g
  • Cholesterol: 35mg

Have you made this recipe? I'd love to see it!

Click here to Follow me on Pinterest

The Best Caramel Sauce

July 20, 2025 by Sue Leave a Comment

I’m excited to share a rich, buttery caramel sauce that I make often—it’s simple to prepare, packs intense flavor, and beats any store-bought version hands down. The Best Caramel Sauce

Why You’ll Love This Recipe

I add this sauce to everything: homemade ice cream, desserts, even coffee treats. It balances sweetness and creaminess beautifully. Plus, it’s customizable—just add sea salt for salted caramel or vanilla for extra depth. I also love that it doesn’t require a candy thermometer; visual cues help me nail the consistency every time.

Ingredients

(Here’s a tip: Check out the full list of ingredients and measurements in the recipe card below.)

  • 1 cup sugar

  • 4 tablespoons water

  • ½ cup heavy cream

  • 5 tablespoons unsalted butter

  • ½ teaspoon kosher salt (optional for salted caramel)

  • 1 teaspoon vanilla extract (optional)

Directions

  1. In a heavy-bottomed saucepan over medium heat, I combine the sugar and water. I stir gently until the sugar dissolves, which takes about 3–5 minutes.

  2. Then I increase the heat to medium-high and let the mixture boil. I stop stirring at this point, gently swirling the pan occasionally to avoid crystallization.

  3. I keep an eye on the color—once it turns a deep amber (usually within 6–9 minutes), I remove the pan from heat.

  4. I carefully whisk in the heavy cream and butter. The mixture bubbles up vigorously, so I stir slowly until it smooths out.

  5. If I’m using salt and vanilla, I stir those in last.

  6. I let the sauce cool in the pan for about 15 minutes before pouring it into a glass jar.

Servings and timing

  • Servings: About 32 servings (yields 1 cup of sauce)

  • Prep time: 5 minutes

  • Cook time: 15 minutes

  • Cooling time: 15 minutes

  • Total time: 35 minutes

Variations

  • For salted caramel, I add ½ teaspoon of kosher or sea salt.

  • For extra depth, I stir in a teaspoon of vanilla extract at the end.

  • I sometimes add 1 tablespoon of corn syrup with the sugar and water to help prevent crystallization, but I usually skip it.

Storage/reheating

I store the caramel sauce in an airtight glass jar in the fridge for up to 3 weeks.
To reheat, I microwave it on 50% power in 30-second intervals, stirring between each round until it’s smooth and pourable.

FAQs

What makes this caramel so creamy?

The combination of butter and heavy cream gives it a luxurious, smooth texture that I find irresistible.

How do I know when the sugar is ready to add cream and butter?

I watch for a deep amber color, similar to a new penny. If it goes too dark, it might taste burnt.

Can I double the batch?

Yes, I often do! I just make sure to use a larger pan and pay close attention to prevent crystallization.

Why don’t I need a candy thermometer?

This recipe is based on visual cues. I can tell it’s ready by watching the sugar change color.

How long does homemade caramel sauce last?

When stored properly in the fridge, it lasts up to three weeks. I always finish mine long before that!

Conclusion

I keep this homemade caramel sauce on hand for everything from ice cream to cakes to coffee. It’s simple, reliable, and absolutely delicious. Once I made it the first time, I never went back to store-bought again.

Print

clock clock iconcutlery cutlery iconflag flag iconfolder folder iconinstagram instagram iconpinterest pinterest iconfacebook facebook iconprint print iconsquares squares iconheart heart iconheart solid heart solid icon
The Best Caramel Sauce

The BEST Caramel Sauce

5 Stars 4 Stars 3 Stars 2 Stars 1 Star No reviews
  • Author: Sue
  • Prep Time: 5 minutes
  • Cook Time: 15 minutes
  • Total Time: 35 minutes
  • Yield: 32 servings (1 cup)
  • Category: Dessert
  • Method: Stovetop
  • Cuisine: American
  • Diet: Vegetarian
Print Recipe
Pin Recipe

Description

A rich, buttery homemade caramel sauce that’s easy to make and far superior to store-bought. Perfect for desserts, coffee, and more.


Ingredients

  • 1 cup sugar
  • 4 tablespoons water
  • ½ cup heavy cream
  • 5 tablespoons unsalted butter
  • ½ teaspoon kosher salt (optional, for salted caramel)
  • 1 teaspoon vanilla extract (optional)

Instructions

  1. In a heavy-bottomed saucepan over medium heat, combine sugar and water. Stir until sugar dissolves (about 3–5 minutes).
  2. Increase heat to medium-high and bring to a boil. Stop stirring; gently swirl the pan occasionally and brush down sides with water to prevent crystallization.
  3. Watch closely and continue swirling until the mixture turns a deep amber color (6–9 minutes).
  4. Remove from heat and carefully add heavy cream, butter, and salt (if using). Stir until smooth as it bubbles up.
  5. Stir in vanilla extract, if using.
  6. Let the sauce cool in the pan for about 15 minutes, then transfer to a glass jar.

Notes

  • Add sea salt for a salted caramel version.
  • Vanilla enhances the depth of flavor.
  • No candy thermometer needed—visual cues guide you.
  • Store in fridge up to 3 weeks.
  • Microwave to reheat in 30-second intervals at 50% power.

Nutrition

  • Serving Size: 1 tablespoon
  • Calories: 82
  • Sugar: 9g
  • Sodium: 12mg
  • Fat: 5g
  • Saturated Fat: 3g
  • Unsaturated Fat: 2g
  • Trans Fat: 0g
  • Carbohydrates: 10g
  • Fiber: 0g
  • Protein: 0g
  • Cholesterol: 15mg

Have you made this recipe? I'd love to see it!

Click here to Follow me on Pinterest

Butterscotch Toffee Cookie Bars

July 20, 2025 by Sue Leave a Comment

Butterscotch Toffee Cookie Bars are a rich and chewy dessert layered with sweet butterscotch chips, crunchy toffee bits, and a soft cookie base. Every bite delivers that perfect balance of buttery sweetness and texture. These bars are easy to make and perfect for parties, bake sales, or anytime I want to satisfy a serious sweet tooth. Butterscotch Toffee Cookie Bars

Why You’ll Love This Recipe

I love how this recipe combines the deep caramel flavor of butterscotch with the crunch of toffee in one soft and chewy cookie bar. It’s incredibly simple to whip up and doesn’t require any complicated steps or special equipment. These bars are ideal for making ahead and travel well for any gathering. Whether I’m baking for a holiday, a family gathering, or just for fun, these bars are always a hit.

ingredients

(Here's a tip: Check out the full list of ingredients and measurements in the recipe card below.)

  • All-purpose flour

  • Baking soda

  • Salt

  • Unsalted butter, softened

  • Brown sugar

  • Granulated sugar

  • Eggs

  • Vanilla extract

  • Butterscotch chips

  • Toffee bits (like Heath bits)

directions

  1. I preheat the oven to 350°F (175°C) and grease a 9x13-inch baking pan or line it with parchment paper.

  2. In a bowl, I whisk together the flour, baking soda, and salt.

  3. In another large bowl, I beat the softened butter with brown sugar and granulated sugar until light and fluffy.

  4. I add the eggs one at a time, beating well after each, then mix in the vanilla extract.

  5. Gradually, I add the dry ingredients into the wet mixture and stir until combined.

  6. I fold in the butterscotch chips and toffee bits evenly.

  7. I spread the dough into the prepared pan and smooth the top.

  8. I bake for about 25–30 minutes, or until the top is golden and a toothpick inserted in the center comes out clean.

  9. I let the bars cool completely before slicing into squares.

Servings and timing

This recipe makes approximately 24 bars. It takes about 15 minutes to prepare and 25–30 minutes to bake. I usually let them cool for at least 30 minutes before slicing and serving.

Variations

I sometimes swap out the butterscotch chips for white chocolate chips if I want a creamier sweetness. For a nuttier flavor, I mix in chopped pecans or walnuts. If I’m in the mood for more chocolate, mini chocolate chips work great in combination with the toffee bits.

storage/reheating

I store these bars in an airtight container at room temperature for up to 5 days. If I want to keep them longer, I freeze them in a single layer wrapped in plastic wrap and then in foil or a freezer bag. To reheat, I just pop one into the microwave for 10–15 seconds for that fresh-baked texture.

FAQs

How do I keep the cookie bars from getting too dry?

I make sure not to overbake them. As soon as the top is golden and a toothpick comes out clean, I take them out of the oven.

Can I make these bars gluten-free?

Yes, I use a 1:1 gluten-free flour blend in place of the all-purpose flour, and it works just fine.

What kind of toffee bits should I use?

I prefer using pre-packaged toffee bits like Heath bits, either plain or with chocolate, depending on the flavor I want.

Can I make these bars ahead of time?

Absolutely. I often bake them a day in advance and keep them covered at room temperature. The flavors develop even more overnight.

Do I need to chill the dough before baking?

No need. I spread the dough straight into the pan and bake immediately, which keeps this recipe quick and easy.

Conclusion

Butterscotch Toffee Cookie Bars are a sweet, chewy treat that never fails to impress. I love the rich flavor combination and the ease of preparing them. Whether I’m baking for a crowd or indulging in a cozy dessert at home, these bars always bring joy.

Print

clock clock iconcutlery cutlery iconflag flag iconfolder folder iconinstagram instagram iconpinterest pinterest iconfacebook facebook iconprint print iconsquares squares iconheart heart iconheart solid heart solid icon
Butterscotch Toffee Cookie Bars

Butterscotch Toffee Cookie Bars

5 Stars 4 Stars 3 Stars 2 Stars 1 Star No reviews
  • Author: Sue
  • Prep Time: 15 minutes
  • Cook Time: 25–30 minutes
  • Total Time: 55–60 minutes
  • Yield: 24 bars
  • Category: Dessert
  • Method: Baking
  • Cuisine: American
  • Diet: Vegetarian
Print Recipe
Pin Recipe

Description

Butterscotch Toffee Cookie Bars are chewy dessert bars with a soft cookie base, sweet butterscotch chips, and crunchy toffee bits, perfect for parties or satisfying a sweet craving.


Ingredients

  • 2 ¼ cups all-purpose flour
  • ½ teaspoon baking soda
  • ½ teaspoon salt
  • 1 cup unsalted butter, softened
  • 1 cup brown sugar
  • ½ cup granulated sugar
  • 2 large eggs
  • 2 teaspoons vanilla extract
  • 1 cup butterscotch chips
  • 1 cup toffee bits (e.g., Heath bits)

Instructions

  1. Preheat the oven to 350°F (175°C) and grease a 9x13-inch baking pan or line it with parchment paper.
  2. In a bowl, whisk together the flour, baking soda, and salt.
  3. In a large bowl, beat the softened butter with brown sugar and granulated sugar until light and fluffy.
  4. Add the eggs one at a time, beating well after each addition, then mix in the vanilla extract.
  5. Gradually stir the dry ingredients into the wet mixture until combined.
  6. Fold in the butterscotch chips and toffee bits evenly.
  7. Spread the dough into the prepared pan and smooth the top.
  8. Bake for 25–30 minutes, or until the top is golden and a toothpick inserted into the center comes out clean.
  9. Let the bars cool completely before slicing into squares.

Notes

  • Do not overbake to keep the bars moist and chewy.
  • You can swap butterscotch chips for white chocolate chips or add nuts for variation.
  • Bars can be made ahead and stored for up to 5 days or frozen for longer storage.

Nutrition

  • Serving Size: 1 bar
  • Calories: 210
  • Sugar: 18g
  • Sodium: 120mg
  • Fat: 11g
  • Saturated Fat: 7g
  • Unsaturated Fat: 3g
  • Trans Fat: 0g
  • Carbohydrates: 27g
  • Fiber: 0.5g
  • Protein: 2g
  • Cholesterol: 30mg

Have you made this recipe? I'd love to see it!

Click here to Follow me on Pinterest

Creamy Garlic Butter Shrimp Bowl with Herb Rice

July 20, 2025 by Sue Leave a Comment

This Creamy Garlic Butter Shrimp Bowl with Herb Rice is a comforting, flavorful dish that feels gourmet but is incredibly simple to prepare. Juicy shrimp are pan-seared in a rich garlic butter sauce and served over fluffy herb-infused rice, making this meal satisfying, quick, and delicious. Creamy Garlic Butter Shrimp Bowl with Herb Rice

Why You’ll Love This Recipe

I love how this dish delivers bold, creamy flavor in such a short amount of time. The shrimp cook quickly, soaking up the garlicky butter sauce, while the herb rice adds a fresh and aromatic base that ties the entire bowl together. Whether I need a quick weeknight dinner or something impressive for guests, this recipe always delivers. Plus, it’s easy to customize with my favorite herbs or extra vegetables.

Ingredients

(Here's a tip: Check out the full list of ingredients and measurements in the recipe card below.)

  • Shrimp, peeled and deveined

  • Butter

  • Garlic, minced

  • Heavy cream

  • Parmesan cheese, grated

  • Fresh parsley, chopped

  • Cooked rice (preferably jasmine or basmati)

  • Fresh herbs (like dill, basil, or cilantro)

  • Salt and black pepper

  • Olive oil

  • Lemon juice (optional)

Directions

  1. I start by seasoning the shrimp with salt and pepper.

  2. In a skillet, I heat olive oil and cook the shrimp for 2-3 minutes per side until they turn pink and slightly golden. I then remove them from the pan.

  3. In the same skillet, I add butter and garlic, sautéing until fragrant.

  4. I stir in the heavy cream and let it simmer for a couple of minutes before adding grated Parmesan.

  5. Once the sauce thickens, I return the shrimp to the pan and coat them in the creamy mixture.

  6. For the herb rice, I mix cooked rice with chopped herbs, a drizzle of olive oil, salt, and a squeeze of lemon juice if I want extra brightness.

  7. I serve the creamy shrimp over the warm herb rice and garnish with more parsley.

Servings and timing

This recipe makes about 4 servings and takes around 25 minutes total — 10 minutes of prep and 15 minutes of cook time.

Variations

  • I sometimes add spinach or baby kale to the skillet for extra greens.

  • For a spicy kick, I sprinkle in red pepper flakes or a dash of cayenne.

  • If I want a lighter sauce, I substitute half the cream with chicken broth.

  • I also enjoy swapping the rice with cauliflower rice for a low-carb version.

  • Sometimes, I add a soft-boiled egg on top for extra richness.

Storage/Reheating

I store leftovers in an airtight container in the refrigerator for up to 2 days. When reheating, I prefer doing it on the stovetop over low heat, adding a splash of cream or water to bring the sauce back to life. The shrimp should be heated just until warm to avoid overcooking.

FAQs

How do I know when the shrimp are fully cooked?

Shrimp are done when they turn pink and opaque with a slight curl. I avoid overcooking them, as they can become rubbery quickly.

Can I use frozen shrimp for this recipe?

Yes, I use frozen shrimp often. I just make sure to thaw and pat them dry before cooking to avoid extra moisture in the pan.

What herbs work best for the rice?

I love using parsley, dill, basil, or cilantro, either solo or combined. Fresh herbs really elevate the rice and balance the richness of the sauce.

Can I make this dairy-free?

I can make it dairy-free by using a plant-based butter and coconut cream or a dairy-free alternative for the heavy cream and cheese.

Is this dish good for meal prep?

Yes, it works well for meal prep, though I recommend storing the shrimp and rice separately and reheating gently to maintain texture.

Conclusion

This Creamy Garlic Butter Shrimp Bowl with Herb Rice has become one of my favorite go-to meals. It’s rich, savory, and comforting while still being fresh and quick to make. The flavors are restaurant-worthy, and it’s endlessly adaptable depending on what I have on hand. Whether I need a cozy solo dinner or a dish to share, this one always hits the spot.

Print

clock clock iconcutlery cutlery iconflag flag iconfolder folder iconinstagram instagram iconpinterest pinterest iconfacebook facebook iconprint print iconsquares squares iconheart heart iconheart solid heart solid icon
Creamy Garlic Butter Shrimp Bowl with Herb Rice

Creamy Garlic Butter Shrimp Bowl with Herb Rice

5 Stars 4 Stars 3 Stars 2 Stars 1 Star No reviews
  • Author: Sue
  • Prep Time: 10 minutes
  • Cook Time: 15 minutes
  • Total Time: 25 minutes
  • Yield: 4 servings
  • Category: Main Dish
  • Method: Stovetop
  • Cuisine: American
Print Recipe
Pin Recipe

Description

A rich and flavorful dish featuring juicy shrimp in a creamy garlic butter sauce served over herb-infused rice, perfect for a quick and impressive meal.


Ingredients

  • 1 lb shrimp, peeled and deveined
  • 2 tbsp butter
  • 3 cloves garlic, minced
  • ½ cup heavy cream
  • ¼ cup Parmesan cheese, grated
  • 2 tbsp fresh parsley, chopped (plus more for garnish)
  • 2 cups cooked jasmine or basmati rice
  • 2 tbsp mixed fresh herbs (dill, basil, or cilantro), chopped
  • Salt and black pepper, to taste
  • 1 tbsp olive oil
  • 1 tbsp lemon juice (optional)

Instructions

  1. Season shrimp with salt and pepper.
  2. Heat olive oil in a skillet and cook shrimp for 2-3 minutes per side until pink and slightly golden. Remove from pan.
  3. In the same skillet, add butter and garlic, sauté until fragrant.
  4. Stir in heavy cream, let simmer for 2 minutes, then add Parmesan cheese.
  5. Return shrimp to the skillet and coat in the creamy sauce.
  6. In a bowl, mix cooked rice with fresh herbs, olive oil, salt, and lemon juice if desired.
  7. Serve creamy shrimp over herb rice and garnish with chopped parsley.

Notes

  • Add spinach or kale for extra greens.
  • Use red pepper flakes or cayenne for a spicy kick.
  • Substitute half the cream with chicken broth for a lighter sauce.
  • Cauliflower rice works as a low-carb alternative.
  • Add a soft-boiled egg on top for extra richness.

Nutrition

  • Serving Size: 1 bowl
  • Calories: 420
  • Sugar: 1g
  • Sodium: 720mg
  • Fat: 26g
  • Saturated Fat: 12g
  • Unsaturated Fat: 12g
  • Trans Fat: 0g
  • Carbohydrates: 22g
  • Fiber: 1g
  • Protein: 30g
  • Cholesterol: 210mg

Have you made this recipe? I'd love to see it!

Click here to Follow me on Pinterest

Tortellini with Summer Veggies

July 20, 2025 by Sue Leave a Comment

I bring summer to the table with tender cheese tortellini tossed in a vibrant mix of zucchini, bell peppers, cherry tomatoes, and spinach, finished with a lemony-herb kiss and a sprinkling of Parmesan. Tortellini with Summer Veggies

Why You’ll Love This Recipe

I love this recipe because it highlights the best of summer produce, bursting with color and flavor. It’s ready in about 30 minutes—perfect for busy evenings. I can serve it warm as a cozy dinner or chill it for a refreshing pasta salad. Plus, it's easy to adapt—just add chicken, chickpeas, or any seasonal veggie.

ingredients

(Here's a tip: Check out the full list of ingredients and measurements in the recipe card below.)

  • 1 (20 oz/500 g) package cheese tortellini (fresh or refrigerated)

  • 2 tablespoons olive oil

  • 3 cloves garlic, minced

  • 1 medium zucchini, chopped

  • 1 red bell pepper, diced

  • 1 yellow bell pepper, diced

  • 1 cup cherry tomatoes, halved

  • 2 cups baby spinach

  • ½ teaspoon dried oregano

  • ¼ teaspoon red pepper flakes (optional)

  • Salt and black pepper, to taste

  • ¼ cup freshly grated Parmesan cheese (optional)

  • 2 tablespoons fresh basil, chopped

  • Juice of half a lemon

directions

  1. Cook the tortellini. I bring a large pot of salted water to a boil and cook the tortellini according to the package directions (usually 3–5 minutes). I drain it and reserve about ¼ cup of pasta water.

  2. Sauté the garlic and veggies. In a wide skillet over medium heat, I warm the olive oil, then add the garlic and stir for about 30 seconds. I add zucchini and bell peppers and sauté them for 5–7 minutes until they're tender but still vibrant.

  3. Add tomatoes and spinach. I toss in the cherry tomatoes and spinach and cook until the tomatoes start to burst and the spinach wilts, around 3 minutes.

  4. Combine with tortellini. I add the cooked tortellini to the skillet and season with oregano, red pepper flakes, salt, and pepper. I pour in the reserved pasta water to help create a light sauce.

  5. Finish and serve. Off the heat, I squeeze in lemon juice, sprinkle fresh basil, and add Parmesan if I’m using it.

Servings and timing

  • Servings: 4–6

  • Prep time: 10 minutes

  • Cook time: 20 minutes

  • Total time: 30 minutes

Variations

  • I chill it and serve it as a pasta salad with a splash of extra olive oil and lemon.

  • I add grilled chicken, chickpeas, or shrimp when I want more protein.

  • I swap in other veggies like corn, green beans, or mushrooms based on what’s in season.

  • I skip the cheese or use a plant-based Parmesan for a dairy-free option.

storage/reheating

I store leftovers in an airtight container in the fridge for up to 3 days. When I reheat it, I add a splash of water or broth and warm it gently on the stovetop or in the microwave to keep everything moist and flavorful.

FAQs

What kind of tortellini works best?

I like using fresh or refrigerated cheese tortellini because it cooks quickly and has a soft, delicate texture.

Can I use frozen tortellini?

Yes, I often use frozen tortellini. I just add a few more minutes to the cooking time according to the package instructions.

Can this dish be made ahead of time?

Definitely. I sometimes make it in the morning and either reheat it for dinner or serve it chilled for lunch.

What herbs go well with this?

Fresh basil is my favorite, but I’ve also used parsley or thyme when that’s what I have on hand.

How do I prevent it from drying out when reheating?

I always add a splash of water or broth before reheating and stir gently to revive the sauce and texture.

Conclusion

This Tortellini with Summer Veggies is a beautiful, flavorful way to celebrate the season. It’s colorful, quick, and versatile—perfect for any night of the week. Whether I’m craving something warm and cozy or a light, refreshing pasta salad, this dish delivers every time.

Print

clock clock iconcutlery cutlery iconflag flag iconfolder folder iconinstagram instagram iconpinterest pinterest iconfacebook facebook iconprint print iconsquares squares iconheart heart iconheart solid heart solid icon
Tortellini with Summer Veggies

Tortellini with Summer Veggies

5 Stars 4 Stars 3 Stars 2 Stars 1 Star No reviews
  • Author: Sue
  • Prep Time: 10 minutes
  • Cook Time: 20 minutes
  • Total Time: 30 minutes
  • Yield: 4–6 servings
  • Category: Main Course
  • Method: Sauté
  • Cuisine: Italian
  • Diet: Vegetarian
Print Recipe
Pin Recipe

Description

Cheese tortellini tossed with a colorful mix of summer vegetables like zucchini, bell peppers, cherry tomatoes, and spinach, finished with lemon juice, fresh herbs, and Parmesan cheese.


Ingredients

  • 1 (20 oz/500 g) package cheese tortellini (fresh or refrigerated)
  • 2 tablespoons olive oil
  • 3 cloves garlic, minced
  • 1 medium zucchini, chopped
  • 1 red bell pepper, diced
  • 1 yellow bell pepper, diced
  • 1 cup cherry tomatoes, halved
  • 2 cups baby spinach
  • ½ teaspoon dried oregano
  • ¼ teaspoon red pepper flakes (optional)
  • Salt and black pepper, to taste
  • ¼ cup freshly grated Parmesan cheese (optional)
  • 2 tablespoons fresh basil, chopped
  • Juice of half a lemon

Instructions

  1. Bring a large pot of salted water to a boil and cook the tortellini according to the package directions (usually 3–5 minutes). Drain and reserve about ¼ cup of pasta water.
  2. In a wide skillet over medium heat, warm the olive oil, then add the garlic and cook for about 30 seconds.
  3. Add zucchini and bell peppers and sauté for 5–7 minutes until tender but still vibrant.
  4. Add cherry tomatoes and spinach and cook until the tomatoes start to burst and the spinach wilts, around 3 minutes.
  5. Add the cooked tortellini to the skillet and season with oregano, red pepper flakes, salt, and pepper. Pour in reserved pasta water to create a light sauce.
  6. Remove from heat, squeeze in lemon juice, sprinkle fresh basil, and top with Parmesan if using.

Notes

  • Use plant-based Parmesan for a dairy-free version.
  • Great served warm or chilled as a pasta salad.
  • Can be made ahead and stored for up to 3 days in the fridge.
  • Reheat with a splash of water or broth to prevent drying out.

Nutrition

  • Serving Size: 1 serving
  • Calories: 380
  • Sugar: 4g
  • Sodium: 480mg
  • Fat: 16g
  • Saturated Fat: 5g
  • Unsaturated Fat: 10g
  • Trans Fat: 0g
  • Carbohydrates: 45g
  • Fiber: 4g
  • Protein: 14g
  • Cholesterol: 35mg

Have you made this recipe? I'd love to see it!

Click here to Follow me on Pinterest

=

Hawaiian Chicken Sheet Pan

July 20, 2025 by Sue Leave a Comment

I create a vibrant, one-pan Hawaiian-inspired dish packed with juicy chicken, caramelized pineapple, and colorful veggies—all roasted together for a fuss-free, flavor-packed meal. Hawaiian Chicken Sheet Pan

Why You’ll Love This Recipe

I love how this sheet-pan meal practically cooks itself, letting me relax or focus on other things while the oven does all the work. The sweet-savory balance of pineapple and soy-based marinade always hits the spot, and clean-up is a breeze—just one pan needed.

ingredients

(Here’s a tip: Check out the full list of ingredients and measurements in the recipe card below.)

  • Boneless, skinless chicken breasts or thighs, cut into cubes

  • Red and green bell peppers, chopped

  • Red onion, cut into chunks

  • Pineapple chunks (fresh or drained canned)

  • Soy sauce

  • Honey or brown sugar

  • Pineapple juice

  • Garlic (minced or powder)

  • Ginger (fresh or ground)

  • Optional: ketchup, rice vinegar or Worcestershire sauce, cornstarch or arrowroot, red pepper flakes

directions

  1. I preheat the oven to 400 °F (200 °C) and line a large baking sheet with parchment or foil.

  2. I combine the chicken, bell peppers, and onion in a large bowl.

  3. I whisk together soy sauce, honey, pineapple juice, garlic, ginger, and any optional ingredients until smooth.

  4. I toss the chicken and veggies with the marinade, setting aside a little extra sauce if I want to drizzle some on after baking.

  5. I spread everything evenly on the sheet pan and bake for 20–25 minutes.

  6. I remove the pan, add the pineapple chunks, gently toss, and bake for another 10–15 minutes until the chicken is cooked through.

  7. For added caramelization, I broil the sheet pan for 2–4 minutes at the end.

  8. I serve it hot, topped with any garnishes I like such as green onions or sesame seeds.

Servings and timing

This recipe serves about 4 to 6 people. It takes around 10 minutes to prep and 30 to 35 minutes to cook, so total time is approximately 40 to 45 minutes.

Variations

  • Protein swap: I sometimes use chicken thighs for extra juiciness.

  • Low‑carb option: I skip the rice and enjoy it as-is or with cauliflower rice.

  • Add heat: I toss in red pepper flakes or a splash of sriracha for a spicy version.

  • Extra tang: I stir in a little ketchup or rice vinegar for added depth.

  • Thicker sauce: I add cornstarch or arrowroot to the marinade to give it a glossy finish.

storage/reheating

I let leftovers cool before storing them in an airtight container in the fridge for up to 4 days. To reheat, I use the microwave for about 2 minutes or warm them in a skillet. It also freezes well for up to 2 months—I thaw it overnight in the fridge before reheating.

FAQs

What if I don't have fresh pineapple?

I use canned pineapple chunks when fresh isn’t available—just make sure to drain them well.

Can I prepare this ahead of time?

Yes, I often marinate the chicken and veggies the night before and keep them in the fridge. Then I just bake everything when I’m ready.

How do I make the sauce thicker?

I whisk in a little cornstarch or arrowroot powder into the marinade to help it thicken as it bakes.

Is this dish gluten-free?

It can be—if I use gluten-free soy sauce or tamari, it works perfectly for a gluten-free version.

What toppings go well with it?

I like to garnish it with fresh cilantro, sesame seeds, chopped green onions, or even a few lime wedges for brightness.

Conclusion

This Hawaiian Chicken Sheet Pan recipe is one I keep coming back to. It’s flavorful, colorful, and so simple to put together. I love how it brings tropical flair to my dinner table without the mess or stress of complicated cooking.

Print

clock clock iconcutlery cutlery iconflag flag iconfolder folder iconinstagram instagram iconpinterest pinterest iconfacebook facebook iconprint print iconsquares squares iconheart heart iconheart solid heart solid icon
Hawaiian Chicken Sheet Pan

Hawaiian Chicken Sheet Pan

5 Stars 4 Stars 3 Stars 2 Stars 1 Star No reviews
  • Author: Sue
  • Prep Time: 10 minutes
  • Cook Time: 30–35 minutes
  • Total Time: 40–45 minutes
  • Yield: 4–6 servings
  • Category: Main Course
  • Method: Baking
  • Cuisine: Hawaiian
  • Diet: Gluten Free
Print Recipe
Pin Recipe

Description

A vibrant, one-pan Hawaiian-inspired dish packed with juicy chicken, caramelized pineapple, and colorful veggies—all roasted together for a fuss-free, flavor-packed meal.


Ingredients

  • 1.5 lbs boneless, skinless chicken breasts or thighs, cut into cubes
  • 1 red bell pepper, chopped
  • 1 green bell pepper, chopped
  • 1 red onion, cut into chunks
  • 1.5 cups pineapple chunks (fresh or drained canned)
  • ¼ cup soy sauce
  • 2 tbsp honey or brown sugar
  • ¼ cup pineapple juice
  • 2 cloves garlic, minced or 1 tsp garlic powder
  • 1 tsp fresh grated ginger or ½ tsp ground ginger
  • Optional: 1 tablespoon ketchup
  • Optional: 1 tablespoon rice vinegar or Worcestershire sauce
  • Optional: 1 teaspoon cornstarch or arrowroot powder
  • Optional: ½ teaspoon red pepper flakes

Instructions

  1. Preheat oven to 400 °F (200 °C) and line a large baking sheet with parchment or foil.
  2. Combine chicken, bell peppers, and onion in a large bowl.
  3. Whisk together soy sauce, honey, pineapple juice, garlic, ginger, and any optional ingredients until smooth.
  4. Toss chicken and veggies with the marinade, reserving some sauce if desired for serving.
  5. Spread mixture evenly on the sheet pan and bake for 20–25 minutes.
  6. Remove from oven, add pineapple chunks, gently toss, and bake for another 10–15 minutes until chicken is cooked through.
  7. For extra caramelization, broil for 2–4 minutes at the end.
  8. Serve hot, garnished with green onions or sesame seeds if desired.

Notes

  • Use canned pineapple if fresh is not available—just drain well.
  • Marinate ingredients overnight for easier prep.
  • To thicken sauce, add cornstarch or arrowroot to marinade.
  • Use gluten-free soy sauce or tamari for a gluten-free version.
  • Top with cilantro, sesame seeds, or lime wedges for extra flavor.

Nutrition

  • Serving Size: ⅙ of recipe
  • Calories: 280
  • Sugar: 14g
  • Sodium: 620mg
  • Fat: 7g
  • Saturated Fat: 1.5g
  • Unsaturated Fat: 5g
  • Trans Fat: 0g
  • Carbohydrates: 22g
  • Fiber: 2g
  • Protein: 28g
  • Cholesterol: 75mg

Have you made this recipe? I'd love to see it!

Click here to Follow me on Pinterest

Dill Pickle Fries

July 19, 2025 by Sue Leave a Comment

I absolutely love crunchy, feel-good snacks, and these dill pickle fries hit that spot perfectly. They’re crisp on the outside, tangy and juicy on the inside—even though they’re crisped up like classic fries, the pickle flavor shines through. Dill Pickle Fries

Why You’ll Love This Recipe

I adore how quick and easy this recipe is—just a handful of ingredients, minimal prep, and full-on flavor. You’ll appreciate how the briny tang of pickles transforms into crispy, golden fries that feel indulgent but are surprisingly simple to make.

ingredients

(Here's a tip: Check out the full list of ingredients and measurements in the recipe card below.)

  • Dill pickle spears (cut into fry‑sized strips)

  • All‑purpose flour

  • Paprika

  • Milk

  • Egg (beaten)

  • Panko breadcrumbs

  • Cooking oil or spray

directions

  1. I drain and very thoroughly pat dry the pickle spears.

  2. I whisk together flour and paprika in one bowl, milk and beaten egg in another, and place panko in a third.

  3. I dredge each pickle strip in the flour mixture, shake off excess, dip it in the egg, then press into the breadcrumbs until well coated.

  4. I arrange coated pickles in a single layer on a baking sheet and lightly spritz or drizzle with oil.

  5. I bake at 425 °F (220 °C) for around 20 minutes or until crisp and golden, turning halfway for even browning.

Servings and timing

  • Servings: About 6 appetizer servings (depending on jar size).

  • Prep time: ~10 minutes

  • Cook time: ~20–25 minutes
    If you’d like an air‑fried version, I’d heat the fryer to 400 °F and cook for about 8 minutes, flip, then another 3–5 minutes until golden.

Variations

  • Add cheese: Mix grated Parmesan into crumbs for a richer taste.

  • Spicy kick: Include a pinch of cayenne or smoked paprika in the breading.

  • Gluten‑free option: Swap regular flour and breadcrumbs for gluten‑free versions.

  • Oven vs air fryer vs deep‑fry: I usually bake, but air‑frying gives extra crispness and deep‑frying gives that true crunchy bite.

storage/reheating

I let leftovers cool fully, then store in an airtight container in the fridge for up to 5 days. To reheat, I pop them in a 375 °F oven or 350 °F air fryer for 7–10 minutes—crispy and fresh again.

FAQs

### Can I use bread and butter pickles for a sweet‑and‑salty twist?

Absolutely—I once tried that combo, and the sweet pickle with savory breading gave fun kettle‑corn vibes.

### How critical is it to dry the pickles?

It’s key—I always pat them thoroughly dry. Excess moisture prevents the breading from sticking properly.

### Can I prep breaded pickles ahead of time?

Yes—I bread them and chill on a tray for up to 30 minutes before baking. They hold their shape nicely in the oven.

### What sauces pair well with these fries?

I like creamy dips—ranch, dill‑yogurt sauce, or spicy mayo all enhance the flavor brilliantly.

### Are they okay for a crowd or party snack?

Definitely! I’ve made them for movie nights and casual parties—they’re always a hit and fun to eat.

Conclusion

I genuinely enjoy making these dill pickle fries—they’re fast, easy, and crave‑worthy. Whether I’m craving a snack, appetizer, or something to go with burgers, these fries never disappoint. They bring that perfect crunch with pickle zing, and I know they’ll become a favorite in my kitchen.

Print

clock clock iconcutlery cutlery iconflag flag iconfolder folder iconinstagram instagram iconpinterest pinterest iconfacebook facebook iconprint print iconsquares squares iconheart heart iconheart solid heart solid icon
Dill Pickle Fries

Dill Pickle Fries

5 Stars 4 Stars 3 Stars 2 Stars 1 Star No reviews
  • Author: Sue
  • Prep Time: 10 minutes
  • Cook Time: 25 minutes
  • Total Time: 35 minutes
  • Yield: 6 appetizer servings
  • Category: Appetizer
  • Method: Baking
  • Cuisine: American
  • Diet: Vegetarian
Print Recipe
Pin Recipe

Description

Crispy and tangy dill pickle fries make for a feel-good snack or appetizer, with a golden breadcrumb coating and a juicy pickle center.


Ingredients

  • Dill pickle spears (cut into fry-sized strips)
  • ½ cup all-purpose flour
  • 1 tsp paprika
  • ¼ cup milk
  • 1 egg (beaten)
  • 1 cup panko breadcrumbs
  • Cooking oil or spray

Instructions

  1. Preheat oven to 425°F (220°C).
  2. Drain and thoroughly pat dry the pickle spears to remove excess moisture.
  3. In one bowl, whisk together flour and paprika. In another bowl, combine milk and beaten egg. Place panko breadcrumbs in a third bowl.
  4. Dredge each pickle strip in the flour mixture, shake off the excess, dip into the egg mixture, and then press into the breadcrumbs until fully coated.
  5. Arrange the coated pickles in a single layer on a baking sheet and lightly spritz or drizzle with cooking oil.
  6. Bake for 20–25 minutes, turning halfway through, until crisp and golden.

Notes

  • Patting the pickles dry is crucial for crispiness and breading adhesion.
  • Air fryer option: Cook at 400°F for 8 minutes, flip, and cook for another 3–5 minutes.
  • Try adding Parmesan cheese or spices to the breading for variation.
  • Store leftovers in an airtight container in the fridge for up to 5 days.
  • Reheat in oven at 375°F or air fryer at 350°F for 7–10 minutes.

Nutrition

  • Serving Size: ⅙ of recipe
  • Calories: 180
  • Sugar: 1g
  • Sodium: 720mg
  • Fat: 8g
  • Saturated Fat: 1.5g
  • Unsaturated Fat: 6g
  • Trans Fat: 0g
  • Carbohydrates: 22g
  • Fiber: 1g
  • Protein: 4g
  • Cholesterol: 35mg

Have you made this recipe? I'd love to see it!

Click here to Follow me on Pinterest

Lemon Zucchini Cake

July 19, 2025 by Sue Leave a Comment

This Lemon Zucchini Cake is a light, moist loaf bursting with citrus flavor and the hidden goodness of zucchini. It’s topped with a bright lemon glaze that ties everything together beautifully—perfect for summer baking or whenever I want something a little refreshing and sweet. Lemon Zucchini Cake

Why You’ll Love This Recipe

I love how incredibly soft and tender this cake turns out, thanks to the zucchini and olive oil. It’s a great way to sneak vegetables into dessert without compromising flavor. The lemon zest and juice give it a vibrant, sunny personality, while the glaze adds a tangy sweetness that keeps me coming back for another slice.

Ingredients

(Here’s a tip: Check out the full list of ingredients and measurements in the recipe card below.)

  • 1 ¼ cups granulated sugar

  • 6 tablespoons extra virgin olive oil (or vegetable/canola oil)

  • 2 eggs, room temperature

  • ⅓ cup vanilla almond milk (or whole milk)

  • 2 tablespoons lemon juice

  • 1 teaspoon vanilla or almond extract

  • 2 cups cake flour (or all-purpose flour)

  • 1 ⅓ teaspoons baking powder

  • ½ teaspoon kosher salt

  • 1 ½ cups shredded zucchini, drained

  • 2 tablespoons lemon zest

For the glaze

  • 1 cup powdered sugar

  • 1–2 tablespoons lemon juice

Directions

  1. I preheat the oven to 350°F and line a loaf pan with parchment paper, spraying it lightly with nonstick spray.

  2. In a bowl, I whisk together the flour, baking powder, and salt.

  3. In a larger bowl, I whisk the sugar and oil until smooth.

  4. Then I add in the eggs and almond milk, whisking to combine.

  5. I stir in the lemon juice and vanilla (or almond) extract.

  6. I gently stir the dry ingredients into the wet mixture until just combined.

  7. I fold in the shredded zucchini and lemon zest.

  8. The batter goes into the prepared pan, and I bake it for 45 to 55 minutes, until a toothpick comes out with moist crumbs and the top looks set.

  9. I let the loaf cool in the pan for about 15 minutes before lifting it out and letting it cool completely on a wire rack.

  10. To make the glaze, I whisk powdered sugar with lemon juice until smooth, then drizzle it over the cooled cake.

Servings and Timing

This recipe makes about 10 servings. Prep time is around 10 minutes, bake time is 45 to 55 minutes, and the total time is just over an hour including cooling.

Variations

  • I sometimes use all-purpose flour if I’m out of cake flour—works just fine.

  • Swapping in whole milk instead of almond milk makes it a bit richer.

  • I like to use almond extract for a deeper, nuttier flavor, but vanilla is great too.

  • If I want a little more zing, I double the lemon zest in the batter.

  • I’ve also added a handful of blueberries before baking for an extra fruity twist.

Storage/Reheating

I keep the cake in an airtight container at room temperature for up to 3 days. For longer storage, I refrigerate it for up to 5 days. If I want a warm slice, I pop it in the microwave for about 10 seconds. This cake also freezes well—I wrap individual slices and thaw them when I need a quick treat.

FAQs

What’s the best way to shred zucchini for this cake?

I use a fine grater for the best texture and always drain it well to avoid excess moisture in the batter.

Can I skip the glaze?

Yes, but I love how the lemon glaze adds a tangy-sweet finish. If I skip it, I might dust the top with a little powdered sugar instead.

Do I need to peel the zucchini?

Nope, I leave the skin on—it’s tender and adds little green flecks to the cake without affecting the texture.

Can I make this in a bundt pan or muffin tin?

Yes, I’ve tried it in both. Just adjust the baking time—about 20–25 minutes for muffins and around 40–50 minutes for a bundt pan.

Can I double the recipe?

Absolutely. I double the ingredients and use two loaf pans or a larger baking dish, adding more time as needed.

Conclusion

This Lemon Zucchini Cake is a go-to recipe for me when I want something fresh, moist, and easy to make. The balance of lemon and zucchini is just right, and it’s one of those bakes that always gets rave reviews. I love how simple it is, yet it tastes like something truly special.

Print

clock clock iconcutlery cutlery iconflag flag iconfolder folder iconinstagram instagram iconpinterest pinterest iconfacebook facebook iconprint print iconsquares squares iconheart heart iconheart solid heart solid icon
Lemon Zucchini Cake

Lemon Zucchini Cake

5 Stars 4 Stars 3 Stars 2 Stars 1 Star No reviews
  • Author: Sue
  • Prep Time: 10 minutes
  • Cook Time: 45–55 minutes
  • Total Time: 1 hour 10 minutes
  • Yield: 10 servings
  • Category: Dessert
  • Method: Baking
  • Cuisine: American
  • Diet: Vegetarian
Print Recipe
Pin Recipe

Description

A light, moist lemon zucchini cake with a refreshing citrus flavor and a tangy lemon glaze. Perfect for summer baking and a delicious way to enjoy zucchini in dessert.


Ingredients

  • 1 ¼ cups granulated sugar
  • 6 tablespoons extra virgin olive oil (or vegetable/canola oil)
  • 2 eggs, room temperature
  • ⅓ cup vanilla almond milk (or whole milk)
  • 2 tablespoons lemon juice
  • 1 teaspoon vanilla or almond extract
  • 2 cups cake flour (or all-purpose flour)
  • 1 ⅓ teaspoons baking powder
  • ½ teaspoon kosher salt
  • 1 ½ cups shredded zucchini, drained
  • 2 tablespoons lemon zest
  • 1 cup powdered sugar
  • 1–2 tablespoons lemon juice (for glaze)

Instructions

  1. Preheat the oven to 350°F and line a loaf pan with parchment paper, spraying it lightly with nonstick spray.
  2. Whisk together the flour, baking powder, and salt in a bowl.
  3. In a larger bowl, whisk the sugar and oil until smooth.
  4. Add the eggs and almond milk, whisking to combine.
  5. Stir in the lemon juice and vanilla (or almond) extract.
  6. Gently stir the dry ingredients into the wet mixture until just combined.
  7. Fold in the shredded zucchini and lemon zest.
  8. Pour the batter into the prepared pan and bake for 45 to 55 minutes, until a toothpick comes out with moist crumbs.
  9. Let the loaf cool in the pan for about 15 minutes before removing and cooling completely on a wire rack.
  10. For the glaze, whisk powdered sugar with lemon juice until smooth, then drizzle over the cooled cake.

Notes

  • Use all-purpose flour if cake flour is unavailable.
  • Whole milk can replace almond milk for a richer texture.
  • Double the lemon zest for a more intense lemon flavor.
  • Optional: add blueberries for a fruity twist.
  • Store in an airtight container at room temperature for up to 3 days or refrigerate for up to 5 days.
  • Freezes well—wrap individual slices for convenience.

Nutrition

  • Serving Size: 1 slice
  • Calories: 280
  • Sugar: 22g
  • Sodium: 160mg
  • Fat: 10g
  • Saturated Fat: 1.5g
  • Unsaturated Fat: 8g
  • Trans Fat: 0g
  • Carbohydrates: 40g
  • Fiber: 1g
  • Protein: 3g
  • Cholesterol: 35mg

Have you made this recipe? I'd love to see it!

Click here to Follow me on Pinterest

Butter Toffee Pretzels

July 19, 2025 by Sue Leave a Comment

I love sharing this sweet and salty snack—mini pretzels coated in a rich butter-toffee mixture and topped with crunchy toffee bits. It’s addictive, festive, and easy to make. Butter Toffee Pretzels

Why You’ll Love This Recipe

I’m obsessed with the perfect sweet-and-salty combo. These toffee pretzels satisfy that craving with buttery toffee, salty crunch, and a sweet topping, all in bite-size pieces. Plus, the easy stovetop-to-oven method means I’m enjoying them in just under two hours.

ingredients

(Here's a tip: Check out the full list of ingredients and measurements in the recipe card below.)

  • 16 oz mini pretzel twists

  • 1 cup light brown sugar (packed)

  • ½ cup (1 stick) salted butter, sliced

  • 5 tablespoon light corn syrup

  • 1 teaspoon pure vanilla extract

  • ½ teaspoon baking soda

  • 8 oz Heath English toffee bits (divided)

directions

  1. I preheat the oven to 200°F and line a baking sheet with foil or parchment, then spray it.

  2. I place the pretzels in a large heatproof bowl.

  3. In a saucepan over medium heat, I combine brown sugar, butter, and corn syrup. I stir constantly and bring it to a low boil, letting it boil for about 5 minutes.

  4. I remove the pan from heat and stir in vanilla and baking soda. The mixture will foam up, and that’s exactly what I want.

  5. I immediately pour the hot toffee mixture over the pretzels and toss quickly to coat them.

  6. I spread the coated pretzels onto the prepared baking sheet and sprinkle half the toffee bits evenly on top.

  7. I bake them for 1 hour, stirring every 15 minutes to keep them evenly coated.

  8. After baking, I sprinkle the remaining toffee bits over the warm pretzels. I let them cool completely, then break them apart to serve or store.

Servings and timing

  • Serves: 12

  • Prep time: 10 minutes

  • Cook time: 1 hour 15 minutes

  • Cooling time: 30 minutes

  • Total time: about 1 hour 55 minutes

Variations

  • I like to swap in square pretzels or gluten-free pretzels when I need an alternative.

  • I’ve added chopped pecans or almonds for an extra crunch and nutty flavor.

  • A drizzle of melted dark or white chocolate after baking makes these even more decadent.

storage/reheating

I store these butter toffee pretzels in an airtight container at room temperature. They stay fresh and crispy for up to 7 days. No reheating is needed—just grab a handful and enjoy.

FAQs

What if I don’t have corn syrup?

I don’t recommend skipping it—it helps the toffee set up smoothly. Without it, the mixture could become grainy.

Can I use unsalted butter instead of salted?

Yes, I’ve used unsalted butter and simply added a small pinch of salt to balance the sweetness.

How do I coat the pretzels evenly with toffee?

I make sure to work quickly when pouring and tossing the toffee mixture. Stirring efficiently helps every piece get a good coating.

Can I use chopped toffee bars instead of toffee bits?

Absolutely. I’ve chopped up candy bars like Skor or Heath when I didn’t have bits on hand, and they work just as well.

Why do I bake them at 200°F for so long?

The low temperature allows the toffee to set and bake into the pretzels without burning. The slow baking gives them that perfect crunchy finish.

Conclusion

I make these butter toffee pretzels whenever I need a crowd-pleasing treat or just a sweet-and-salty snack for myself. They’re simple, crunchy, and seriously addictive. I hope you enjoy them as much as I do.

Print

clock clock iconcutlery cutlery iconflag flag iconfolder folder iconinstagram instagram iconpinterest pinterest iconfacebook facebook iconprint print iconsquares squares iconheart heart iconheart solid heart solid icon
Butter Toffee Pretzels

Butter Toffee Pretzels

5 Stars 4 Stars 3 Stars 2 Stars 1 Star No reviews
  • Author: Sue
  • Prep Time: 10 minutes
  • Cook Time: 1 hour 15 minutes
  • Total Time: 1 hour 55 minutes
  • Yield: 12 servings
  • Category: Snacks
  • Method: Baking
  • Cuisine: American
  • Diet: Vegetarian
Print Recipe
Pin Recipe

Description

Mini pretzel twists coated in a rich butter-toffee mixture and topped with crunchy toffee bits, making a perfect sweet and salty snack that's easy to prepare and highly addictive.


Ingredients

  • 16 oz mini pretzel twists
  • 1 cup light brown sugar (packed)
  • ½ cup (1 stick) salted butter, sliced
  • 5 Tbsp light corn syrup
  • 1 tsp pure vanilla extract
  • ½ tsp baking soda
  • 8 oz Heath English toffee bits (divided)

Instructions

  1. Preheat the oven to 200°F and line a baking sheet with foil or parchment paper, then spray it with nonstick spray.
  2. Place the mini pretzels in a large heatproof bowl.
  3. In a saucepan over medium heat, combine brown sugar, butter, and corn syrup. Stir constantly and bring to a low boil, continuing to boil for about 5 minutes.
  4. Remove the saucepan from heat and stir in the vanilla extract and baking soda until the mixture foams up.
  5. Immediately pour the hot toffee mixture over the pretzels and toss quickly to coat them evenly.
  6. Spread the coated pretzels onto the prepared baking sheet and sprinkle half of the toffee bits evenly over the top.
  7. Bake for 1 hour, stirring every 15 minutes to keep the pretzels evenly coated.
  8. After baking, sprinkle the remaining toffee bits over the warm pretzels. Let cool completely, then break apart for serving or storage.

Notes

  • Work quickly when tossing the pretzels to ensure even coating.
  • Chopped Heath or Skor bars can replace toffee bits.
  • Optional: Add chopped nuts or a drizzle of chocolate for extra flavor.
  • Store in an airtight container at room temperature for up to 7 days.

Nutrition

  • Serving Size: 1/12 batch
  • Calories: 240
  • Sugar: 18g
  • Sodium: 280mg
  • Fat: 10g
  • Saturated Fat: 5g
  • Unsaturated Fat: 4g
  • Trans Fat: 0g
  • Carbohydrates: 34g
  • Fiber: 1g
  • Protein: 2g
  • Cholesterol: 20mg

Have you made this recipe? I'd love to see it!

Click here to Follow me on Pinterest

Taco Salad

July 19, 2025 by Sue Leave a Comment

Taco Salad is a hearty, flavorful dish that brings together all the best parts of a taco in a convenient and customizable bowl. With layers of seasoned ground beef, crisp lettuce, fresh toppings, and crunchy tortilla chips or shells, it's a perfect mix of texture and taste. I like to prepare this when I want something fast, filling, and flexible enough to match whatever I have on hand. Taco Salad

Why You’ll Love This Recipe

I enjoy how quick and easy this taco salad is to prepare, especially on busy weeknights. It’s a one-bowl meal that’s both satisfying and packed with flavor. I can also easily adjust the ingredients to make it healthier, vegetarian, or spicier, depending on what I’m craving. Plus, cleanup is minimal, which is always a win.

ingredients

(Here's a tip: Check out the full list of ingredients and measurements in the recipe card below.)

  • Ground beef

  • Taco seasoning

  • Romaine lettuce or iceberg lettuce

  • Cherry tomatoes

  • Shredded cheddar cheese

  • Black beans (optional)

  • Corn (optional)

  • Sliced black olives

  • Tortilla chips or taco shells

  • Sour cream

  • Salsa or taco sauce

  • Diced avocado or guacamole

  • Green onions or red onions

directions

  1. I start by browning the ground beef in a skillet over medium heat. Once it’s fully cooked, I drain any excess fat and stir in the taco seasoning with a bit of water. I let it simmer for a few minutes to blend the flavors.

  2. While the meat is cooking, I chop the lettuce, slice the tomatoes, and prep the other toppings.

  3. In a large bowl or individual serving bowls, I layer the lettuce first, followed by the seasoned meat, then the rest of the toppings—cheese, tomatoes, beans, corn, olives, avocado, onions.

  4. I top everything with crushed tortilla chips and drizzle sour cream and salsa on top.

  5. I mix everything lightly before serving or let each person toss their own bowl.

Servings and timing

This recipe makes about 4 generous servings. It usually takes around 25 minutes from start to finish, with 10 minutes for prep and 15 minutes for cooking.

Variations

I sometimes swap out ground beef for ground turkey or shredded chicken to lighten it up. For a vegetarian version, I skip the meat and add more beans or a plant-based crumbled substitute. If I’m in the mood for spice, I add jalapeños or hot sauce. I’ve also tried using ranch dressing or a lime vinaigrette for a different twist.

storage/reheating

I store the components separately if I plan to keep leftovers. The meat goes into an airtight container in the fridge for up to 3 days, and I keep the lettuce and toppings fresh in separate containers. I reheat the meat in the microwave for about 1 minute before assembling another salad. I avoid mixing everything ahead of time, especially with the chips, since they can get soggy.

FAQs

How can I make taco salad healthier?

I usually use lean ground turkey, skip the cheese or use less of it, and load up on veggies. A squeeze of lime or a dollop of Greek yogurt makes a great low-fat dressing substitute.

Can I make taco salad in advance?

I prep the ingredients ahead of time and store them separately. When I’m ready to eat, I just assemble the salad so the chips stay crunchy and the lettuce stays fresh.

What dressing goes well with taco salad?

I often use salsa or taco sauce as dressing, but creamy avocado, ranch, or a cilantro-lime dressing are great options too.

Is this salad gluten-free?

If I use gluten-free tortilla chips and double-check the taco seasoning ingredients, it can be entirely gluten-free.

Can I serve this salad cold?

Yes, I often serve it cold, especially in the summer. I just make sure the cooked meat has cooled down a bit before adding it in.

Conclusion

Taco Salad is my go-to when I want something tasty, fast, and versatile. It packs in all the flavors of a classic taco but skips the fuss. With just a bit of prep, I can serve up a fresh, colorful meal that everyone loves and customize it to suit any dietary need.

Print

clock clock iconcutlery cutlery iconflag flag iconfolder folder iconinstagram instagram iconpinterest pinterest iconfacebook facebook iconprint print iconsquares squares iconheart heart iconheart solid heart solid icon
Taco Salad

Taco Salad

5 Stars 4 Stars 3 Stars 2 Stars 1 Star No reviews
  • Author: Sue
  • Prep Time: 10 minutes
  • Cook Time: 15 minutes
  • Total Time: 25 minutes
  • Yield: 4 servings
  • Category: Salad
  • Method: Stovetop
  • Cuisine: Mexican
  • Diet: Gluten Free
Print Recipe
Pin Recipe

Description

Taco Salad is a quick and customizable dish that combines all your favorite taco ingredients in one bowl. With seasoned ground beef, crisp lettuce, fresh toppings, and crunchy tortilla chips, it’s perfect for busy weeknights or casual gatherings.


Ingredients

  • 1 lb ground beef
  • 1 packet taco seasoning
  • 1 head romaine or iceberg lettuce, chopped
  • 1 cup cherry tomatoes, halved
  • 1 cup shredded cheddar cheese
  • ½ cup black beans (optional)
  • ½ cup corn (optional)
  • ¼ cup sliced black olives
  • 1 cup crushed tortilla chips or broken taco shells
  • ½ cup sour cream
  • ½ cup salsa or taco sauce
  • 1 diced avocado or ½ cup guacamole
  • ¼ cup chopped green or red onions

Instructions

  1. Brown the ground beef in a skillet over medium heat. Drain excess fat.
  2. Add taco seasoning and a bit of water to the beef. Simmer for a few minutes.
  3. Chop lettuce, slice tomatoes, and prepare all other toppings.
  4. Layer lettuce in a bowl, add beef, and then toppings: cheese, tomatoes, beans, corn, olives, avocado, and onions.
  5. Top with crushed tortilla chips, drizzle with sour cream and salsa.
  6. Mix lightly before serving or allow individuals to mix their own.

Notes

  • Use lean ground turkey or chicken as a lighter meat alternative.
  • For a vegetarian version, skip the meat and add more beans or plant-based protein.
  • Prep ingredients in advance and store separately to keep everything fresh.
  • Serve with your choice of dressing, such as salsa, ranch, or cilantro-lime vinaigrette.
  • Ensure chips and meat are added just before serving to avoid sogginess.

Nutrition

  • Serving Size: 1 bowl
  • Calories: 450
  • Sugar: 4g
  • Sodium: 850mg
  • Fat: 28g
  • Saturated Fat: 10g
  • Unsaturated Fat: 14g
  • Trans Fat: 0.5g
  • Carbohydrates: 28g
  • Fiber: 6g
  • Protein: 25g
  • Cholesterol: 75mg

Have you made this recipe? I'd love to see it!

Click here to Follow me on Pinterest

Hamburger Steaks in Creamy Dill Sauce

July 19, 2025 by Sue Leave a Comment

This hamburger steak in creamy dill sauce is the kind of comfort food I turn to when I want something hearty, fast, and full of flavor. Juicy ground beef patties get seared until golden, then simmered in a rich, garlicky dill sauce that’s creamy, aromatic, and just right over mashed potatoes or with crusty bread. Hamburger Steaks in Creamy Dill Sauce

Why You’ll Love This Recipe

I love that this recipe brings big flavor with very little effort. The patties are simple to mix up with just a few ingredients, and the creamy dill sauce is a breeze to pull together while they sear. It’s a cozy dish that works for a weeknight dinner but still feels special enough to serve guests. Plus, it’s all made in one pan, which makes cleanup quick and easy.

ingredients

(Here's a tip: Check out the full list of ingredients and measurements in the recipe card below.)

  • Ground beef

  • Breadcrumbs

  • Yellow onion, grated and chopped

  • Salt

  • Black pepper

  • Heavy cream

  • Egg

For the Creamy Dill Sauce

  • Olive oil

  • Unsalted butter

  • Onion, finely chopped

  • Garlic cloves, minced

  • Salt

  • Black pepper

  • All-purpose flour

  • Low-sodium chicken broth

  • Heavy cream

  • Fresh dill, chopped

directions

  1. I start by mixing the ground beef with breadcrumbs, grated onion, salt, pepper, heavy cream, and egg in a large bowl. I mix just until combined—overmixing makes the patties dense.

  2. I divide the mixture into four even portions and shape them into thick patties.

  3. In a large skillet, I heat olive oil and butter over medium heat. I sear the patties for about 4–5 minutes per side, until golden brown. Then I transfer them to a plate.

  4. In the same skillet, I sauté the chopped onion and garlic over low heat for about 2 minutes until fragrant.

  5. I stir in the salt, pepper, and flour, letting it cook briefly to form a roux.

  6. I pour in the chicken broth, scraping up any browned bits from the bottom of the skillet, and simmer for 2 minutes.

  7. Then I add the heavy cream and chopped dill, and bring the sauce to a gentle boil until it thickens slightly.

  8. I return the patties to the skillet and let them simmer in the sauce for another 5–6 minutes, or until they’re fully cooked through.

  9. I garnish with more fresh dill and some cracked black pepper before serving.

Servings and timing

This recipe makes 4 servings. It takes about 10 minutes to prep and 20 minutes to cook, so I can have it ready in 30 minutes.

Variations

  • I sometimes swap ground beef with ground turkey or chicken for a lighter version.

  • For extra flavor, I add a splash of white wine to the sauce before the cream.

  • If I want a tangy kick, I mix a spoonful of Dijon mustard into the cream sauce.

  • I’ve also added sautéed mushrooms to the sauce for more texture.

storage/reheating

I store leftovers in an airtight container in the fridge for up to 3 days. When reheating, I warm the patties gently on the stove over low heat, adding a splash of broth or cream to loosen the sauce. I can also microwave it in short intervals, stirring in between. This dish also freezes well—just store the patties and sauce separately and thaw overnight in the fridge.

FAQs

How do I keep the patties from falling apart?

I make sure to include the egg and breadcrumbs to bind everything together. Also, I let them rest a few minutes before searing to help them hold their shape.

What should I serve with this dish?

I love serving it with mashed potatoes, rice, or even egg noodles. A simple green salad or steamed veggies makes it a full meal.

Can I make this dairy-free?

Yes, I use dairy-free cream alternatives like oat or soy cream, and plant-based butter. The flavor changes slightly but still tastes great.

Can I use dried dill instead of fresh?

Fresh dill gives the sauce its bright, fresh taste. But in a pinch, I use 1 teaspoon of dried dill—it works, though I prefer fresh when I can get it.

Is this recipe kid-friendly?

Absolutely. The creamy sauce and mild seasoning make it very approachable for kids. I sometimes reduce the garlic and dill for a more neutral flavor.

Conclusion

Hamburger steaks in creamy dill sauce are a delicious, cozy meal I keep coming back to. It’s quick to make, incredibly flavorful, and perfect for both weeknights and special occasions. I love how the creamy sauce elevates the humble beef patty into something truly satisfying. Give it a try—I think it’ll become one of your go-to recipes too.

Print

clock clock iconcutlery cutlery iconflag flag iconfolder folder iconinstagram instagram iconpinterest pinterest iconfacebook facebook iconprint print iconsquares squares iconheart heart iconheart solid heart solid icon
Hamburger Steaks in Creamy Dill Sauce

Hamburger Steaks in Creamy Dill Sauce

5 Stars 4 Stars 3 Stars 2 Stars 1 Star No reviews
  • Author: Sue
  • Prep Time: 10 minutes
  • Cook Time: 20 minutes
  • Total Time: 30 minutes
  • Yield: 4 servings
  • Category: Main Dish
  • Method: Stovetop
  • Cuisine: American
  • Diet: Halal
Print Recipe
Pin Recipe

Description

Juicy hamburger steaks simmered in a creamy, garlicky dill sauce. A hearty, flavorful dish perfect for weeknights or special dinners, served best with mashed potatoes or crusty bread.


Ingredients

  • 1 lb ground beef
  • ⅓ cup breadcrumbs
  • ½ yellow onion, grated and chopped
  • ½ tsp salt
  • ½ tsp black pepper
  • 2 tbsp heavy cream
  • 1 egg
  • 1 tbsp olive oil
  • 1 tbsp unsalted butter
  • ½ onion, finely chopped
  • 2 garlic cloves, minced
  • ¼ tsp salt
  • ¼ tsp black pepper
  • 1 tbsp all-purpose flour
  • 1 cup low-sodium chicken broth
  • ½ cup heavy cream
  • 2 tbsp fresh dill, chopped

Instructions

  1. In a large bowl, mix ground beef with breadcrumbs, grated onion, salt, pepper, heavy cream, and egg just until combined.
  2. Divide the mixture into four equal portions and shape into thick patties.
  3. Heat olive oil and butter in a large skillet over medium heat. Sear patties for 4–5 minutes per side until golden brown. Transfer to a plate.
  4. In the same skillet, sauté chopped onion and garlic over low heat for 2 minutes until fragrant.
  5. Add salt, pepper, and flour, stirring to form a roux. Cook briefly.
  6. Pour in chicken broth, scraping up browned bits, and simmer for 2 minutes.
  7. Add heavy cream and chopped dill, then bring to a gentle boil until sauce thickens slightly.
  8. Return patties to skillet and simmer in sauce for 5–6 minutes until fully cooked through.
  9. Garnish with fresh dill and cracked black pepper before serving.

Notes

  • Don’t overmix the beef mixture to keep patties tender.
  • Let patties rest a few minutes before cooking to help them hold shape.
  • Use fresh dill for the best flavor; substitute with 1 teaspoon dried dill if needed.
  • Add a splash of white wine or Dijon mustard for a flavor twist.

Nutrition

  • Serving Size: 1 steak with sauce
  • Calories: 420
  • Sugar: 2g
  • Sodium: 480mg
  • Fat: 32g
  • Saturated Fat: 14g
  • Unsaturated Fat: 16g
  • Trans Fat: 0.5g
  • Carbohydrates: 9g
  • Fiber: 0.5g
  • Protein: 23g
  • Cholesterol: 115mg

Have you made this recipe? I'd love to see it!

Click here to Follow me on Pinterest

Quick & Easy Homemade Butter Chicken

July 19, 2025 by Sue Leave a Comment

I created a creamy, flavorful butter chicken that's surprisingly simple to make at home. Featuring juicy marinated chicken thighs in a rich tomato-cream sauce, it's a cozy comfort food that pairs beautifully with naan or steamed rice. Quick & Easy Homemade Butter Chicken

Why I’ll Love This Recipe

I love that this butter chicken blends warm spices, tangy tomato sauce, and velvety cream into a dish that feels luxurious yet comes together in under an hour. Marinating the chicken in Greek yogurt boosts tenderness, and finishing with cold butter gives the sauce that silky, restaurant-quality texture.

Ingredients

(Here's a tip: Check out the full list of ingredients and measurements in the recipe card below.)

For the Chicken & Marinade

  • skinless boneless chicken thighs, cut into bite-sized chunks

  • salt

  • garlic powder

  • sweet paprika

  • curry powder

  • Greek yogurt

For the Butter Chicken Sauce

  • vegetable oil

  • butter (divided use)

  • garlic cloves, minced

  • onion, diced

  • tomato sauce

  • sugar

  • salt (to taste)

  • black pepper

  • heavy cream

  • cayenne pepper (optional)

  • garam masala

  • curry powder

  • fresh parsley, chopped (for garnish)

To Serve

  • naan bread

  • steamed rice

Directions

  1. I mix chicken, salt, garlic powder, paprika, curry powder, and Greek yogurt until well coated. I let it marinate for at least 15 minutes.

  2. I heat oil in a large skillet over medium-high, add the chicken, and cook for about 8–10 minutes until golden and cooked through. I remove the chicken and leave the oil in the pan.

  3. I reduce the heat to medium and melt a tablespoon of butter in the skillet. I sauté the minced garlic and diced onion with a pinch of salt until translucent.

  4. I stir in the tomato sauce and sugar and let it simmer briefly. I return the chicken to the pan and pour in the heavy cream, stirring until the sauce turns a rich orange.

  5. I add cayenne (if using), garam masala, curry powder, and black pepper. I simmer everything on low heat for about 10 minutes.

  6. I stir in the remaining cold butter for a silky finish, then sprinkle with chopped parsley.

  7. I serve hot with naan and steamed rice.

Servings and timing

  • Servings: 4

  • Prep time: 5 minutes

  • Marinate time: at least 15 minutes

  • Cook time: 25 minutes

  • Total time: around 45 minutes

Variations

  • I sometimes use chicken breasts, tofu, or even paneer instead of chicken thighs.

  • I replace Greek yogurt with coconut yogurt or sour cream if needed.

  • For a dairy-free version, I use plant-based butter and coconut cream.

  • I occasionally swap the tomato sauce for pureed canned tomatoes or diluted tomato paste.

  • I use honey or maple syrup instead of sugar for a natural sweetener.

  • I swap heavy cream for coconut cream or cashew cream for a different twist.

Storage/Reheating

  • I store leftovers in an airtight container in the fridge for up to 3 days.

  • To reheat, I warm it on the stovetop over low heat, adding a splash of water or cream if needed.

  • For longer storage, I freeze it for up to 2 months, then thaw in the fridge and reheat gently.

FAQs

How long should I marinate the chicken?

I recommend at least 15 minutes, but letting it sit for a few hours makes the chicken even more flavorful and tender.

Can I make this dairy-free?

Yes, I use coconut yogurt, coconut cream, and plant-based butter to make it completely dairy-free.

Is this butter chicken spicy?

It’s mild by default. I adjust the spice level by changing the amount of cayenne pepper I add—or leave it out for a very mild version.

Can I substitute chicken thighs with chicken breast?

Absolutely. I just make sure not to overcook the breast meat since it can dry out faster than thighs.

Can I freeze this butter chicken?

Yes, it freezes very well. I cool it completely, store it in a freezer-safe container, and reheat on the stove with a bit of cream or water to freshen the sauce.

Conclusion

I love this butter chicken recipe because it brings bold flavor and creamy texture without complicated steps. With a short marinate time and a quick simmer, I can enjoy a rich, comforting Indian-inspired meal on a weeknight. Whether served with naan or rice, it's always a hit at the table.

Print

clock clock iconcutlery cutlery iconflag flag iconfolder folder iconinstagram instagram iconpinterest pinterest iconfacebook facebook iconprint print iconsquares squares iconheart heart iconheart solid heart solid icon
Quick & Easy Homemade Butter Chicken

Quick & Easy Homemade Butter Chicken

5 Stars 4 Stars 3 Stars 2 Stars 1 Star No reviews
  • Author: Sue
  • Prep Time: 5 minutes
  • Cook Time: 25 minutes
  • Total Time: 45 minutes
  • Yield: 4 servings
  • Category: Main Course
  • Method: Stovetop
  • Cuisine: Indian
  • Diet: Halal
Print Recipe
Pin Recipe

Description

A quick and easy homemade butter chicken recipe featuring marinated chicken thighs simmered in a creamy, spiced tomato sauce. Perfect with naan or steamed rice, this comforting dish delivers rich, restaurant-quality flavor in under an hour.


Ingredients

  • 1.5 lbs skinless boneless chicken thighs, cut into bite-sized chunks
  • 1 tsp salt
  • 1 tsp garlic powder
  • 1 tsp sweet paprika
  • 1 tsp curry powder
  • ½ cup Greek yogurt
  • 1 tbsp vegetable oil
  • 3 tbsp butter (divided use)
  • 3 garlic cloves, minced
  • 1 medium onion, diced
  • 1 cup tomato sauce
  • 1 tsp sugar
  • Salt (to taste)
  • ½ tsp black pepper
  • ½ cup heavy cream
  • ¼ tsp cayenne pepper (optional)
  • 1 tsp garam masala
  • 1 tsp curry powder
  • Fresh parsley, chopped (for garnish)
  • Naan bread (to serve)
  • Steamed rice (to serve)

Instructions

  1. In a bowl, mix chicken thighs with salt, garlic powder, paprika, curry powder, and Greek yogurt until well coated. Let marinate for at least 15 minutes.
  2. Heat vegetable oil in a large skillet over medium-high heat. Add marinated chicken and cook for 8–10 minutes until golden and cooked through. Remove chicken from skillet and set aside.
  3. Reduce heat to medium and add 1 tablespoon butter to the skillet. Sauté minced garlic and diced onion with a pinch of salt until translucent.
  4. Stir in tomato sauce and sugar. Simmer briefly, then return chicken to the pan. Pour in heavy cream and stir until the sauce turns orange and creamy.
  5. Add cayenne pepper (if using), garam masala, curry powder, and black pepper. Simmer over low heat for 10 minutes.
  6. Stir in the remaining cold butter to finish the sauce, allowing it to melt and create a silky texture. Garnish with chopped parsley.
  7. Serve hot with naan bread and steamed rice.

Notes

  • Marinate longer (up to 4 hours) for deeper flavor.
  • Substitute chicken thighs with breast, turkey, or tofu for variations.
  • For dairy-free, use coconut yogurt and cream, and plant-based butter.
  • Adjust cayenne pepper for preferred spice level.
  • Freeze leftovers up to 2 months; reheat with a splash of cream or water.

Nutrition

  • Serving Size: ¼ of recipe
  • Calories: 450
  • Sugar: 5g
  • Sodium: 750mg
  • Fat: 28g
  • Saturated Fat: 12g
  • Unsaturated Fat: 14g
  • Trans Fat: 0.5g
  • Carbohydrates: 12g
  • Fiber: 2g
  • Protein: 35g
  • Cholesterol: 130mg

Have you made this recipe? I'd love to see it!

Click here to Follow me on Pinterest

Jalapeño Popper Soup

July 18, 2025 by Sue Leave a Comment

This Jalapeño Popper Soup is a creamy, cheesy, and slightly spicy bowl of comfort that turns a favorite appetizer into a full, satisfying meal. It brings together the flavors of jalapeños, tender chicken, vegetables, and melty cheese in a rich broth that I can’t stop craving. Jalapeño Popper Soup

Why You’ll Love This Recipe

I love how this soup takes the bold flavor of jalapeño poppers and transforms it into a hearty meal that’s quick and easy to make. The combination of creaminess, mild heat, and rich cheese makes each spoonful addictive. It’s perfect for chilly nights or whenever I want something filling but not too heavy.

Ingredients

(Here's a tip: Check out the full list of ingredients and measurements in the recipe card below.)

  • Jalapeños

  • Carrots

  • Celery

  • Onion

  • Garlic

  • Cooked chicken

  • Chicken broth

  • Heavy cream

  • Cream cheese

  • Cheddar cheese

  • Salt & pepper

Directions

  1. In a large pot, sauté diced onion, celery, carrots, garlic, and jalapeños in a bit of oil until softened.

  2. Stir in cooked chicken and pour in the chicken broth and heavy cream.

  3. Add cream cheese and stir until completely melted and smooth.

  4. Mix in shredded cheddar cheese until fully melted and incorporated.

  5. Season with salt and pepper to taste.

  6. Serve hot, optionally topped with extra shredded cheese or chopped jalapeños.

Servings and timing

This recipe makes about 6 servings.

  • Prep time: 15 minutes

  • Cook time: 20–25 minutes

  • Total time: 35–40 minutes

Variations

  • Spicier version: I leave in the jalapeño seeds or add a pinch of crushed red pepper.

  • Vegetarian option: I skip the chicken and use vegetable broth, adding diced potatoes or black beans for texture.

  • Low-carb version: I replace carrots with chopped zucchini or cauliflower for a lower-carb option.

  • Cheese swap: I’ve tried using pepper jack or Monterey Jack instead of cheddar for a different flavor kick.

Storage/Reheating

  • I store leftovers in an airtight container in the refrigerator for up to 4 days.

  • For longer storage, I freeze portions for up to 3 months and thaw them overnight in the fridge before reheating.

  • When reheating, I use a pot over medium heat, stirring often. I sometimes add a splash of broth or cream to thin it back out if needed.

FAQs

Can I make this soup without cream cheese?

Yes, but I’ve found that cream cheese gives it that rich, signature texture. A substitute like sour cream or a dairy-free spread can work, but the result won’t be as creamy.

Is it possible to make this soup dairy-free?

I’ve made a version with plant-based cream cheese, coconut cream, and vegan cheddar—still delicious, though with a slightly different taste.

How can I adjust the heat level?

I remove all the seeds from the jalapeños for mild heat or add more if I want it spicier. I’ve also used a milder chili like poblano for less spice.

Can I use rotisserie chicken?

Definitely—I often use shredded rotisserie chicken to save time, and it blends right into the soup with great flavor.

What should I serve this with?

I usually enjoy it with crusty bread, tortilla chips, or a simple green salad to balance the richness of the soup.

Conclusion

This Jalapeño Popper Soup is everything I love in one pot—creamy, cheesy, comforting, and full of bold flavor. It’s simple to prepare, easy to customize, and perfect for any time I want a cozy, satisfying meal with a little kick.

Print

clock clock iconcutlery cutlery iconflag flag iconfolder folder iconinstagram instagram iconpinterest pinterest iconfacebook facebook iconprint print iconsquares squares iconheart heart iconheart solid heart solid icon
Jalapeño Popper Soup

Jalapeño Popper Soup

5 Stars 4 Stars 3 Stars 2 Stars 1 Star No reviews
  • Author: Sue
  • Prep Time: 15 minutes
  • Cook Time: 25 minutes
  • Total Time: 40 minutes
  • Yield: 6 servings
  • Category: Soup
  • Method: Stovetop
  • Cuisine: American
Print Recipe
Pin Recipe

Description

A creamy, cheesy, and slightly spicy soup inspired by jalapeño poppers, made with tender chicken, fresh vegetables, and rich cheeses for a comforting meal.


Ingredients

  • 2–3 jalapeños, diced
  • 2 carrots, diced
  • 2 celery stalks, diced
  • 1 onion, diced
  • 3 cloves garlic, minced
  • 2 cups cooked chicken, shredded or diced
  • 4 cups chicken broth
  • 1 cup heavy cream
  • 8 oz cream cheese
  • 1½ cups shredded cheddar cheese, plus extra for topping
  • Salt & pepper, to taste

Instructions

  1. In a large pot, sauté diced onion, celery, carrots, garlic, and jalapeños in a bit of oil until softened.
  2. Stir in cooked chicken, then add chicken broth and heavy cream.
  3. Add cream cheese, stirring until completely melted and smooth.
  4. Stir in shredded cheddar cheese until fully melted.
  5. Season with salt and pepper to taste.
  6. Serve hot, garnished with extra shredded cheese or chopped jalapeños if desired.

Notes

  • Adjust spice by including or removing jalapeño seeds.
  • Use vegetable broth and skip chicken for a vegetarian version, adding potatoes or black beans for texture.
  • For lower carbs, replace carrots with zucchini or cauliflower.
  • Pepper Jack or Monterey Jack cheese can substitute cheddar for a different flavor.
  • Leftovers can be refrigerated up to 4 days or frozen up to 3 months.

Nutrition

  • Serving Size: 1 bowl (approximately 1½ cups)
  • Calories: 450
  • Sugar: 5g
  • Sodium: 800mg
  • Fat: 34g
  • Saturated Fat: 18g
  • Unsaturated Fat: 14g
  • Trans Fat: 0.5g
  • Carbohydrates: 10g
  • Fiber: 1.5g
  • Protein: 25g
  • Cholesterol: 120mg

Have you made this recipe? I'd love to see it!

Click here to Follow me on Pinterest

Easy Chicken Caesar Salad Wraps

July 18, 2025 by Sue Leave a Comment

A fresh twist on the classic Caesar salad, these wraps combine creamy dressing, tender chicken, crisp lettuce, and crunchy croutons—all rolled into a soft tortilla for a portable, satisfying meal. Easy Chicken Caesar Salad Wraps

Why You’ll Love This Recipe

I like how quick and easy this recipe is—it comes together in about 10 minutes if I’ve already cooked my chicken. It’s hearty and loaded with lean protein, yet still feels light thanks to the crisp romaine and bright dressing. Plus, it’s perfect for lunches on the go, whether for work, a picnic, or a road trip. I can even customize it with extras like avocado or lemon juice for a fresh kick.

Ingredients

(Here's a tip: Check out the full list of ingredients and measurements in the recipe card below.)

  • 3 cups chopped romaine lettuce

  • 3 boneless, skinless chicken breasts, cooked and cubed

  • 1 cup Italian croutons

  • ¾ cup Caesar dressing

  • ½ cup shredded Parmesan cheese

  • 3 burrito-sized flour tortillas

Directions

  1. In a large bowl, I toss together the chopped romaine, cooked chicken, croutons, Caesar dressing, and Parmesan cheese until well combined.

  2. I lay the tortillas flat and evenly divide the chicken Caesar mixture among them.

  3. I fold the sides of the tortilla in, then roll them up tightly from the bottom.

  4. I serve them immediately or slice them in half for easier handling.

Servings and timing

This recipe makes 3 wraps and takes about 10 minutes to prepare.

Variations

  • I like swapping in grilled chicken strips or shredded chicken for a different texture.

  • A little squeeze of fresh lemon juice adds a bright note.

  • Sometimes I use a spinach or tomato wrap for a colorful twist.

  • Adding sliced avocado brings a creamy texture that complements the Caesar flavor.

storage/reheating

  • I store any leftover wraps in an airtight container in the fridge for up to 2 days.

  • To avoid sogginess, I keep the filling and tortilla separate until I’m ready to eat.

  • These wraps are best served cold or at room temperature—no reheating needed.

FAQs

1. Can I make these wraps ahead of time?

Yes, I often prep the filling in advance and assemble the wraps when I’m ready to eat.

2. What kind of chicken works best?

I usually use grilled or rotisserie-style chicken, but any cooked, cubed chicken breast works great.

3. Can I use a different type of lettuce?

Definitely. I’ve used iceberg or mixed greens when I didn’t have romaine on hand.

4. Are these good for meal prep?

Yes, I prepare the salad mixture ahead of time and store it separately from the tortillas until serving.

5. How do I keep the wrap from falling apart?

Rolling tightly and warming the tortilla slightly helps hold everything together better.

Conclusion

I love how these Chicken Caesar Salad Wraps deliver bold flavor and satisfying texture in a convenient, handheld form. Whether I’m packing lunch or looking for a quick dinner fix, this recipe always comes through.

Print

clock clock iconcutlery cutlery iconflag flag iconfolder folder iconinstagram instagram iconpinterest pinterest iconfacebook facebook iconprint print iconsquares squares iconheart heart iconheart solid heart solid icon
Easy Chicken Caesar Salad Wraps

Easy Chicken Caesar Salad Wraps

5 Stars 4 Stars 3 Stars 2 Stars 1 Star No reviews
  • Author: Sue
  • Prep Time: 10 mins
  • Cook Time: 0 mins
  • Total Time: 10 mins
  • Yield: 3 wraps
  • Category: Lunch
  • Method: No-Cook
  • Cuisine: American
  • Diet: Low Calorie
Print Recipe
Pin Recipe

Description

Easy Chicken Caesar Salad Wraps combine creamy Caesar dressing, tender chicken, crunchy croutons, and fresh romaine lettuce wrapped in a soft tortilla for a quick, portable meal.


Ingredients

  • 3 cups chopped romaine lettuce
  • 3 boneless, skinless chicken breasts, cooked and cubed
  • 1 cup Italian croutons
  • ¾ cup Caesar dressing
  • ½ cup shredded Parmesan cheese
  • 3 burrito-sized flour tortillas

Instructions

  1. In a large bowl, toss together the chopped romaine, cooked chicken, croutons, Caesar dressing, and Parmesan cheese until well combined.
  2. Lay tortillas flat and evenly divide the chicken Caesar mixture among them.
  3. Fold the sides of the tortilla in, then roll them up tightly from the bottom.
  4. Serve immediately or slice in half for easier handling.

Notes

  • Swap grilled or shredded chicken for variety.
  • Add avocado or a squeeze of lemon for extra freshness.
  • Use spinach or tomato wraps for a colorful variation.
  • Store filling separately from tortillas to avoid sogginess.
  • Best served cold or at room temperature.

Nutrition

  • Serving Size: 1 wrap
  • Calories: 520
  • Sugar: 3g
  • Sodium: 900mg
  • Fat: 25g
  • Saturated Fat: 5g
  • Unsaturated Fat: 18g
  • Trans Fat: 0g
  • Carbohydrates: 41g
  • Fiber: 3g
  • Protein: 34g
  • Cholesterol: 75mg

Have you made this recipe? I'd love to see it!

Click here to Follow me on Pinterest

French Onion Chicken Soup

July 18, 2025 by Sue Leave a Comment

I made this cozy French Onion Chicken Soup—a delicious fusion of classic French onion soup and comforting chicken soup. It starts with deeply caramelized onions, then simmers with chicken, vegetables, and herbs, topped with cheesy Gruyère toasts. It’s rich, warming, and perfect for satisfying big cravings. French Onion Chicken Soup

Why You’ll Love This Recipe

I love this soup because the sweet-savory caramelized onions build deep flavor over time. The tender chicken and veggies soak up that richness, and finishing with melty cheese on toast makes each bowl feel indulgent and complete. It's one of the most comforting soups I’ve made—I already cooked it twice in a week.

ingredients

(Here's a tip: Check out the full list of ingredients and measurements in the recipe card below.)

  • 3 lb yellow onions (about 4 large or 6 medium)

  • 6 tablespoon unsalted butter, divided

  • 1 teaspoon dried thyme

  • 2 dried bay leaves

  • 2½ teaspoon kosher salt, divided

  • ½ teaspoon freshly ground black pepper

  • 3 medium carrots, sliced (about 1¼ cups)

  • 3 celery stalks, sliced (about 1 cup)

  • 3 garlic cloves, minced

  • 2 lb boneless skinless chicken breasts or thighs

  • ¾ cup dry white wine

  • 1 tablespoon dry sherry

  • ¼ cup all-purpose flour

  • 6 cups low-sodium chicken broth

  • Optional for cheesy toasts:

    • ½ baguette, sliced

    • 2 oz Gruyère cheese (about heaping ½ cup)

directions

  1. Peel, halve, and thinly slice the onions (about 10 cups).

  2. In a large Dutch oven over medium heat, melt 4 tablespoons of butter. Add the onions, thyme, bay leaves, 1½ teaspoons salt, and pepper. Stir often, scraping the pot, until the onions are soft and deeply golden brown, about 35–45 minutes.

  3. While the onions cook, slice the carrots and celery, and mince the garlic.

  4. Add the remaining 2 tablespoons of butter to the pot, then add the carrots, celery, and garlic. Cook for about 5 minutes until the vegetables are slightly tender.

  5. Season the chicken with 1 teaspoon salt. If the chicken breasts are thick, I like to butterfly them so they cook more evenly.

  6. Pour in the white wine and sherry. Let it cook for 2–3 minutes until most of the liquid evaporates. Stir in the flour and cook for 1 minute.

  7. Slowly pour in the chicken broth while stirring. Lay the chicken pieces in the pot in a single layer. Increase the heat to medium-high and bring to a lively simmer.

  8. Reduce the heat to maintain a gentle simmer and cook, stirring occasionally, until the chicken is cooked through. Thighs usually take about 10 minutes; breasts may take 12–20 minutes depending on thickness.

  9. While the chicken simmers, make the cheesy toasts. Preheat the broiler. Place baguette slices on a baking sheet, top with shredded Gruyère, and broil for 30 seconds to 1 minute until the cheese is melted and bubbling.

  10. Transfer the cooked chicken to a cutting board. Shred it with two forks and return it to the pot. Discard the bay leaves, taste, and adjust the seasoning if needed.

  11. Ladle the soup into bowls and top each with a cheesy toast.

Servings and timing

  • Servings: About 8

  • Prep time: 15 minutes

  • Cook time: 1 hour 10 minutes

  • Total time: 1 hour 25 minutes

Variations

  • I like using chicken thighs for extra flavor, but chicken breasts work great if I want a leaner soup.

  • For deeper richness, I sometimes swap chicken broth with beef broth.

  • I’ve replaced white wine with more sherry or even a splash of apple cider vinegar in a pinch.

  • I love switching up the cheese—Fontina, Swiss, or Parmesan are all delicious on the toast.

  • For a low-carb version, I simply skip the bread or use roasted cauliflower slices instead.

storage/reheating

I store leftovers in the fridge for up to 4 days in an airtight container. I reheat it gently on the stove over medium-low heat so the flavors stay intact. When freezing, I portion the soup into freezer-safe containers and freeze for up to 3 months. I thaw it overnight in the fridge and always make the cheesy toasts fresh when serving.

FAQs

How can I make this gluten-free?

I swap the flour for a cornstarch slurry (1 tablespoon cornstarch mixed with 1 tablespoon water) and stir it in at the end to thicken the soup.

Can I use chicken thighs instead of breasts?

Yes, I often do that. Thighs stay more tender and juicy, and they add a rich flavor that I really enjoy.

What can I use instead of white wine?

When I don’t have wine, I use extra chicken broth with a splash of vinegar or lemon juice to mimic the acidity.

Do I have to make the cheesy toasts?

Not at all. I love the crunch and richness they add, but the soup is still hearty and flavorful on its own.

Can I make this ahead of time?

Absolutely. I often make it a day in advance—the flavors deepen overnight. I just wait to add the cheesy toasts until serving.

Conclusion

This French Onion Chicken Soup is comfort in a bowl. The caramelized onions build incredible depth, the chicken makes it hearty, and the cheesy toast on top gives it that special touch. It’s a recipe I keep coming back to when I want something that feels classic but extra satisfying.

Print

clock clock iconcutlery cutlery iconflag flag iconfolder folder iconinstagram instagram iconpinterest pinterest iconfacebook facebook iconprint print iconsquares squares iconheart heart iconheart solid heart solid icon
French Onion Chicken Soup

French Onion Chicken Soup

5 Stars 4 Stars 3 Stars 2 Stars 1 Star No reviews
  • Author: Sue
  • Prep Time: 15 minutes
  • Cook Time: 1 hour 10 minutes
  • Total Time: 1 hour 25 minutes
  • Yield: 8 servings
  • Category: Soup
  • Method: Stovetop
  • Cuisine: French-American
  • Diet: Low Lactose
Print Recipe
Pin Recipe

Description

A comforting fusion of French onion soup and chicken soup featuring caramelized onions, tender chicken, and vegetables, topped with cheesy Gruyère toasts.


Ingredients

  • 3 lb yellow onions (about 4 large or 6 medium)
  • 6 Tbsp unsalted butter, divided
  • 1 tsp dried thyme
  • 2 dried bay leaves
  • 2½ tsp kosher salt, divided
  • ½ tsp freshly ground black pepper
  • 3 medium carrots, sliced (~1¼ cups)
  • 3 celery stalks, sliced (~1 cup)
  • 3 garlic cloves, minced
  • 2 lb boneless skinless chicken breasts or thighs
  • ¾ cup dry white wine
  • 1 Tbsp dry sherry
  • ¼ cup all‑purpose flour
  • 6 cups low‑sodium chicken broth
  • Optional: ½ baguette, sliced
  • Optional: 2 oz Gruyère cheese (about heaping ½ cup)

Instructions

  1. Peel, halve, and thinly slice the onions (~10 cups).
  2. In a Dutch oven over medium heat, melt 4 Tbsp butter. Add onions, thyme, bay leaves, 1½ tsp salt, and pepper. Stir often, scraping the pot, until onions are soft and amber brown, about 35–45 min.
  3. While onions caramelize, slice carrots and celery, and mince garlic.
  4. Add remaining 2 Tbsp butter, then carrots, celery, and garlic. Cook ~5 min until veggies are crisp‑tender.
  5. Season chicken with 1 tsp salt (butterfly breasts if thick).
  6. Pour in wine and sherry; cook 2–3 min until mostly evaporated. Stir in flour; cook 1 min.
  7. Slowly add chicken broth while stirring. Lay chicken in one layer. Increase heat to medium‑high and bring to lively simmer.
  8. Reduce to gentle simmer; stir occasionally and scrape bottom. Cook until chicken reaches 165 °F—about 10 min for thighs or 12–20 min for breasts.
  9. Meanwhile, make cheesy toasts: Preheat broiler, slice baguette, top with Gruyère. Broil ~30 sec–1 min until bubbling.
  10. Transfer chicken to cutting board, shred, and return to pot. Discard bay leaves, taste, and adjust seasoning.
  11. Ladle soup and top each bowl with a cheesy toast.

Notes

  • Use chicken thighs for richer flavor or breasts for leaner meat.
  • Swap chicken broth with beef broth for deeper taste.
  • Wine can be replaced with extra sherry or Worcestershire sauce.
  • Gruyère cheese can be substituted with Swiss, Fontina, or Parmesan.
  • Gluten-free: replace flour with cornstarch slurry.
  • Soup can be frozen for up to 3 months; reheat and add fresh cheesy toasts.

Nutrition

  • Serving Size: 1.5 cups
  • Calories: 320
  • Sugar: 6g
  • Sodium: 740mg
  • Fat: 14g
  • Saturated Fat: 7g
  • Unsaturated Fat: 6g
  • Trans Fat: 0g
  • Carbohydrates: 20g
  • Fiber: 3g
  • Protein: 28g
  • Cholesterol: 85mg

Have you made this recipe? I'd love to see it!

Click here to Follow me on Pinterest

Pina Colada Smoothie

July 18, 2025 by Sue Leave a Comment

This Pina Colada Smoothie is a tropical delight that brings the beach to my kitchen. It’s creamy, refreshing, and packed with the sweet flavors of pineapple and coconut. Whether I’m looking for a quick breakfast or a mid-day refresher, this smoothie always hits the spot. Pina Colada Smoothie

Why You’ll Love This Recipe

I love how this smoothie gives me a vacation-in-a-glass kind of feel without needing alcohol. It’s naturally sweet, dairy-free, and perfect for both kids and adults. I can whip it up in just a few minutes with minimal ingredients, and it always turns out deliciously smooth and satisfying. It also works great as a post-workout pick-me-up or a sunny brunch treat.

ingredients

(Here's a tip: Check out the full list of ingredients and measurements in the recipe card below.)

  • Frozen pineapple chunks

  • Coconut milk (I use full-fat for extra creaminess)

  • Banana (adds natural sweetness and texture)

  • Ice cubes

  • Honey or maple syrup (optional, depending on how sweet I want it)

  • Optional toppings: shredded coconut, fresh pineapple slices, or a cherry on top

directions

  1. I add the frozen pineapple, coconut milk, banana, and ice to a blender.

  2. If I want it a little sweeter, I drizzle in some honey or maple syrup.

  3. I blend everything until smooth and creamy, scraping down the sides if needed.

  4. I pour the smoothie into a chilled glass and garnish with any toppings I like.

Servings and timing

This recipe makes about 2 servings and takes just 5 minutes to prepare. It’s best enjoyed immediately for the freshest flavor and texture.

Variations

  • I sometimes add a splash of orange juice for a citrusy twist.

  • For a protein boost, I toss in a scoop of vanilla protein powder.

  • If I want a thicker smoothie bowl, I reduce the coconut milk and use more frozen fruit.

  • I’ve also added spinach for a green version that still tastes tropical.

storage/reheating

I prefer to enjoy this smoothie fresh, but if I have leftovers, I store them in an airtight container in the fridge for up to 24 hours. Before drinking, I give it a good shake or a quick blend to restore its creamy consistency. I don’t recommend reheating since it’s meant to be enjoyed cold.

FAQs

Can I use fresh pineapple instead of frozen?

Yes, I can use fresh pineapple, but I usually add more ice to keep the smoothie cold and thick.

Is there a way to make it creamier?

I use full-fat coconut milk or even add a bit of coconut cream to make it extra creamy and rich.

Can I make this smoothie ahead of time?

I can prep the ingredients in a freezer bag and store them in the freezer. Then I just add coconut milk and blend when ready.

What can I substitute for banana?

If I don’t want to use banana, I swap it with frozen mango or avocado for creaminess without the banana flavor.

Is this smoothie vegan?

Yes, as long as I use a plant-based sweetener like maple syrup and dairy-free coconut milk, it’s fully vegan.

Conclusion

This Pina Colada Smoothie is a tropical, creamy, and refreshing treat I always come back to. It’s easy, quick, and packed with fruity goodness that fits into any part of my day. Whether I’m dreaming of island vibes or just want a nutritious drink, this smoothie brings the sunshine to my glass every time.

Print

clock clock iconcutlery cutlery iconflag flag iconfolder folder iconinstagram instagram iconpinterest pinterest iconfacebook facebook iconprint print iconsquares squares iconheart heart iconheart solid heart solid icon
Pina Colada Smoothie

Pina Colada Smoothie

5 Stars 4 Stars 3 Stars 2 Stars 1 Star No reviews
  • Author: Sue
  • Prep Time: 5 minutes
  • Cook Time: 0 minutes
  • Total Time: 5 minutes
  • Yield: 2 servings
  • Category: Beverage
  • Method: Blending
  • Cuisine: Tropical
  • Diet: Vegan
Print Recipe
Pin Recipe

Description

This Pina Colada Smoothie is a creamy, tropical, and dairy-free drink made with pineapple, coconut milk, and banana. Perfect for a quick breakfast or a refreshing snack.


Ingredients

  • 2 cups frozen pineapple chunks
  • 1 cup full-fat coconut milk
  • 1 ripe banana
  • ½ to 1 cup ice cubes
  • 1-2 teaspoon honey or maple syrup (optional)
  • Optional toppings: shredded coconut, fresh pineapple slices, cherry

Instructions

  1. Add frozen pineapple, coconut milk, banana, and ice to a blender.
  2. Drizzle in honey or maple syrup if desired for added sweetness.
  3. Blend until smooth and creamy, scraping down the sides if needed.
  4. Pour into chilled glasses and garnish with toppings if using.

Notes

  • Use fresh pineapple with extra ice if frozen is unavailable.
  • Add coconut cream for a richer texture.
  • Prep ingredients in a freezer bag for quick blending later.
  • Swap banana with mango or avocado for a different flavor.
  • Ensure sweetener is plant-based for a fully vegan version.

Nutrition

  • Serving Size: 1 glass
  • Calories: 180
  • Sugar: 15g
  • Sodium: 20mg
  • Fat: 8g
  • Saturated Fat: 7g
  • Unsaturated Fat: 1g
  • Trans Fat: 0g
  • Carbohydrates: 26g
  • Fiber: 3g
  • Protein: 2g
  • Cholesterol: 0mg

Have you made this recipe? I'd love to see it!

Click here to Follow me on Pinterest

Potsticker Soup

July 18, 2025 by Sue Leave a Comment

I love a comforting soup that’s both quick and flexible—and this potsticker soup fits the bill perfectly, coming together in about 25 minutes with minimal effort. Potsticker Soup

Why You’ll Love This Recipe

I adore this potsticker soup because it’s cozy, customizable, and fast. I usually lean on frozen dumplings and a few fresh veggies, and before I know it, a flavorful, warming bowl of soup is ready. If I want, I can switch up the broth, dumplings, or toppings—so it never gets boring.

ingredients

(Here's a tip: Check out the full list of ingredients and measurements in the recipe card below.)

  • 2 tablespoons olive oil, divided

  • 8 ounces shiitake mushrooms, thinly sliced

  • 2 tablespoons grated or minced fresh ginger

  • 4 cloves garlic, pressed or minced

  • 6 cups vegetable broth

  • 2 tablespoons soy sauce

  • 16–20 ounces frozen potstickers

  • 5 scallions, thinly sliced and divided

  • 3 baby bok choy, ends trimmed off and leaves separated

  • 2 teaspoons toasted sesame oil

  • freshly ground black pepper

  • optional toppings: chili crisp, toasted sesame seeds, furikake, fried garlic

directions

  1. I heat 1 tablespoon olive oil in a stockpot over medium-high heat. I add the mushrooms and sauté until browned.

  2. I stir in the remaining tablespoon of oil, along with the ginger and garlic, and cook for 1 to 2 minutes until fragrant.

  3. I pour in the vegetable broth and soy sauce, bring it to a boil, then stir in the frozen potstickers, half of the scallions, and the bok choy. I let everything simmer for 3 to 4 minutes until the dumplings are tender.

  4. I drizzle in the sesame oil, add freshly ground black pepper, and taste to adjust with more soy sauce if needed.

  5. I serve the soup hot, garnished with the remaining scallions and any optional toppings I have on hand.

Servings and timing

  • Servings: 4 to 6

  • Prep time: 5 minutes

  • Cook time: 20 minutes

  • Total time: 25 minutes

Variations

  • Add protein: I sometimes brown chicken before starting for extra heartiness.

  • Extra veggies: Bell peppers, broccoli, carrots, peas, or zucchini are all welcome additions.

  • Umami boosters: A spoonful of miso (stirred in off-heat) or a splash of Shaoxing wine adds depth.

  • Spicy twist: Enhancing with chili crisp, hot oil, or fresh chiles kicks it up a notch.

  • Greens swap: If I don’t have bok choy, baby spinach, kale, or Swiss chard work beautifully.

storage/reheating

I refrigerate leftovers in an airtight container for up to 3 days. When reheating, I warm it on the stove and stir in a splash of broth if it’s too thick. Potstickers may soften slightly but still taste great—if I want texture, I add fresh ones when reheating.

FAQs

How can I prevent the dumplings from falling apart?

I like to add frozen potstickers just a few minutes before serving—about 3 to 4 minutes—so they stay intact. Browning them first in oil also helps keep them firm.

Can I use chicken broth instead of vegetable broth?

Absolutely. I often switch to chicken broth for a richer taste—it works just as well.

Is there a gluten-free version?

Yes. I look for gluten-free dumplings and use tamari instead of soy sauce. Spinach or bok choy remains gluten-free and delicious.

Can I make this soup vegan?

Definitely! As long as the broth and potstickers are vegan, I keep the recipe entirely plant-based. I love the coconut or miso additions in vegan versions.

Can I freeze leftovers?

I don’t recommend freezing the dumplings—they can get mushy. But I’ll freeze the broth and veggies separately, then add fresh potstickers when reheating later.

Conclusion

This potsticker soup has become one of my go-to weeknight meals—it’s fast, flexible, and always satisfying. I enjoy changing up the veggies, proteins, and toppings based on what’s in my fridge, so it feels new every time. I hope this recipe warms and nourishes you just like it does for me.

Print

clock clock iconcutlery cutlery iconflag flag iconfolder folder iconinstagram instagram iconpinterest pinterest iconfacebook facebook iconprint print iconsquares squares iconheart heart iconheart solid heart solid icon
Potsticker Soup

Potsticker Soup

5 Stars 4 Stars 3 Stars 2 Stars 1 Star No reviews
  • Author: Sue
  • Prep Time: 5 minutes
  • Cook Time: 20 minutes
  • Total Time: 25 minutes
  • Yield: 4–6 servings
  • Category: Soup
  • Method: Stovetop
  • Cuisine: Asian-Inspired
  • Diet: Vegan
Print Recipe
Pin Recipe

Description

This cozy, quick potsticker soup comes together in just 25 minutes using frozen dumplings, fresh veggies, and a savory broth—perfect for busy weeknights and endlessly customizable.


Ingredients

  • 2 tablespoons olive oil, divided
  • 8 ounces shiitake mushrooms, thinly sliced
  • 2 tablespoons grated or minced fresh ginger
  • 4 cloves garlic, pressed or minced
  • 6 cups vegetable broth
  • 2 tablespoons soy sauce
  • 16–20 ounces frozen potstickers
  • 5 scallions, thinly sliced and divided
  • 3 baby bok choy, ends trimmed and leaves separated
  • 2 teaspoons toasted sesame oil
  • Freshly ground black pepper, to taste
  • Optional toppings: chili crisp, toasted sesame seeds, furikake, fried garlic

Instructions

  1. Heat 1 tablespoon olive oil in a stockpot over medium-high heat. Add the mushrooms and sauté until browned.
  2. Add the remaining tablespoon of olive oil, followed by the garlic and ginger. Sauté for 1–2 minutes until fragrant.
  3. Pour in the vegetable broth and soy sauce. Bring to a boil, then add the frozen potstickers, half of the scallions, and bok choy. Simmer for 3–4 minutes until the potstickers are tender.
  4. Stir in the toasted sesame oil and freshly ground black pepper. Adjust seasoning with more soy sauce if needed.
  5. Ladle the soup into bowls and garnish with the remaining scallions and any optional toppings desired.

Notes

  • Browning the potstickers in oil beforehand can help them hold their shape better.
  • Customize with extra veggies, proteins, or spicy toppings.
  • Use gluten-free dumplings and tamari for a gluten-free version.
  • Use vegan broth and dumplings to keep the soup plant-based.
  • Reheat gently with a splash of broth to maintain consistency.

Nutrition

  • Serving Size: 1 bowl (approx. 2 cups)
  • Calories: 280
  • Sugar: 4g
  • Sodium: 900mg
  • Fat: 12g
  • Saturated Fat: 2g
  • Unsaturated Fat: 9g
  • Trans Fat: 0g
  • Carbohydrates: 35g
  • Fiber: 3g
  • Protein: 8g
  • Cholesterol: 0mg

Have you made this recipe? I'd love to see it!

Click here to Follow me on Pinterest

Grape Jelly Meatballs (Crockpot)

July 18, 2025 by Sue Leave a Comment

A beloved and effortlessly delicious appetizer, these Grape Jelly Meatballs are the perfect dish to bring to any gathering. Just three simple ingredients, a hands-off cooking method, and a crowd-pleasing flavor combo make this recipe a go-to for busy hosts and casual weeknight cooks alike. Grape Jelly Meatballs (Crockpot)

Why You’ll Love This Recipe

I absolutely love how easy these meatballs are—just toss everything into the crockpot and let it work its magic. The sweet grape jelly paired with tangy BBQ sauce creates a luscious glaze that coats each meatball beautifully. I can prep in under ten minutes, then go about my day while the slow cooker does all the work. They’re always a hit at potlucks, game nights, or spontaneous get-togethers.

ingredients

(Here's a tip: Check out the full list of ingredients and measurements in the recipe card below.)

  • 18 oz BBQ sauce

  • 18 oz grape jelly

  • 32 oz frozen meatballs

directions

  1. Mix the BBQ sauce and grape jelly in the slow cooker until well combined.

  2. Add the frozen meatballs and stir to coat them evenly.

  3. Cover and cook on low for 4–5 hours, or on high for 2 hours.

  4. Stir halfway through cooking to ensure consistent coating.

  5. When done, switch to the "warm" setting and serve with toothpicks or over rice/noodles.

Servings and timing

  • Servings: Makes about 10 meatballs per pound, so I get roughly 30–40 pieces total—perfect for 10 guests as appetizers.

  • Prep time: 10 minutes

  • Cook time: 2 hours on high or 4–5 hours on low

  • Total time: Approximately 2 hours 10 minutes (high) or 5 hours 10 minutes (low)

Variations

  • I sometimes swap grape jelly for cranberry jelly to add a tangy twist.

  • I like using turkey or Italian-style meatballs instead of classic beef ones.

  • For extra depth of flavor, I add 1–2 teaspoons of Worcestershire sauce or a splash of chili sauce.

storage/reheating

  • Fridge: I store leftovers in an airtight container for up to 4 days.

  • Freezer: I freeze cooled meatballs in an airtight container or freezer bag for up to 2 months.

  • Reheating: I microwave in 30-second increments until hot. For best results, I reheat on the stovetop or in the crockpot with a splash of extra sauce until warmed through.

FAQs

How do I thicken the sauce if it’s too runny?

The sauce is meant to be a bit loose, but if I want it thicker, I simmer it uncovered on the stovetop for 5–10 minutes before serving.

Can I double the recipe?

Yes, I double it all the time. I just make sure to stir occasionally so everything heats evenly.

Do I have to thaw meatballs before cooking?

No, I use them straight from frozen every time. Cooking time remains the same.

How do I know when the meatballs are done?

They’re ready when heated through and coated nicely in sauce. If I want to be precise, I check that the internal temperature hits 160°F.

Can I make these on the stovetop instead?

Yes, I combine all the ingredients in a large skillet, bring to a simmer, and cook on medium-low for 10–15 minutes, stirring occasionally until the meatballs are hot and the sauce thickens slightly.

Conclusion

These Grape Jelly Meatballs are my secret weapon for stress-free entertaining—they require minimal prep, deliver big flavor, and are beloved by everyone. Whether I’m hosting a party or cooking for two, I know this recipe never disappoints. Give it a try—I bet it'll be a new favorite in no time.

Print

clock clock iconcutlery cutlery iconflag flag iconfolder folder iconinstagram instagram iconpinterest pinterest iconfacebook facebook iconprint print iconsquares squares iconheart heart iconheart solid heart solid icon
Grape Jelly Meatballs (Crockpot)

Grape Jelly Meatballs (Crockpot)

5 Stars 4 Stars 3 Stars 2 Stars 1 Star No reviews
  • Author: Sue
  • Prep Time: 10 minutes
  • Cook Time: 2 hours on high or 4–5 hours on low
  • Total Time: 2 hours 10 minutes (high) or 5 hours 10 minutes (low)
  • Yield: 30–40 meatballs (serves about 10 as appetizers)
  • Category: Appetizer
  • Method: Slow Cooker
  • Cuisine: American
  • Diet: Halal
Print Recipe
Pin Recipe

Description

These Grape Jelly Meatballs are a simple, crowd-pleasing appetizer made with just three ingredients and cooked in the crockpot for minimal effort and maximum flavor.


Ingredients

  • 18 oz BBQ sauce
  • 18 oz grape jelly
  • 32 oz frozen meatballs

Instructions

  1. Mix the BBQ sauce and grape jelly in the slow cooker until well combined.
  2. Add the frozen meatballs and stir to coat them evenly.
  3. Cover and cook on low for 4–5 hours, or on high for 2 hours.
  4. Stir halfway through cooking to ensure consistent coating.
  5. When done, switch to the "warm" setting and serve with toothpicks or over rice/noodles.

Notes

  • Use different meatball types like turkey  for variety.
  • Swap grape jelly for cranberry jelly for a tangy twist.
  • Add Worcestershire or chili sauce for deeper flavor.
  • No need to thaw meatballs before cooking.
  • To thicken sauce, simmer uncovered on stovetop for 5–10 minutes.

Nutrition

  • Serving Size: 3-4 meatballs
  • Calories: 280
  • Sugar: 18g
  • Sodium: 580mg
  • Fat: 14g
  • Saturated Fat: 5g
  • Unsaturated Fat: 7g
  • Trans Fat: 0g
  • Carbohydrates: 28g
  • Fiber: 1g
  • Protein: 10g
  • Cholesterol: 35mg

Have you made this recipe? I'd love to see it!

Click here to Follow me on Pinterest

Detox Cleanse Juice

July 18, 2025 by Sue Leave a Comment

This refreshing detox cleanse juice is one of my favorite go-to drinks when I want to feel recharged, lighter, and more energized. With just a few fresh, simple ingredients, I can whip up a vibrant green juice that’s naturally hydrating, full of nutrients, and gentle on the digestive system. Detox Cleanse Juice

Why You’ll Love This Recipe

I love this recipe because it's quick to make and packed with goodness. It’s naturally sweet from the apple, zesty from the lemon, and perfectly refreshing thanks to cucumber and celery. I don’t need any fancy ingredients—everything is fresh, real, and easy to find. Plus, it’s a fantastic way to kick-start the day or reset after a heavy meal.

Ingredients

(Here's a tip: Check out the full list of ingredients and measurements in the recipe card below.)

  • ½ cucumber

  • 1 cup celery (about 2–3 stalks)

  • 1 apple (I like using red apples for extra sweetness)

  • 1 lemon (peeled and deseeded)

Directions

  1. I start by washing all the fruits and veggies thoroughly.

  2. I cut the cucumber, celery, and apple into chunks that are easy for my blender to handle.

  3. I peel and deseed the lemon to avoid any bitterness.

  4. I blend everything together with a splash of water if needed, until smooth.

  5. If I prefer a juice-like texture, I strain the mixture through a fine mesh sieve or cheesecloth. Otherwise, I drink it as-is for extra fiber.

Servings and timing

This recipe makes 1 serving. It takes me about 5 minutes to prepare and 2 minutes to blend. The total time is around 7 minutes—perfect for a quick morning boost.

Variations

  • I sometimes add a small piece of fresh ginger for an extra detox kick.

  • For added greens, I toss in a handful of spinach or kale.

  • If I want it colder, I blend it with a few ice cubes or chill the ingredients beforehand.

  • A green pear works beautifully in place of an apple for a slightly different flavor.

  • A pinch of cayenne pepper gives it a metabolism-boosting twist.

Storage/Reheating

I always drink this juice fresh to get the most nutrients, but if I need to store it, I keep it in an airtight container in the fridge for up to 24 hours. I give it a good shake before drinking. Since it's a juice, there’s no reheating needed.

FAQs

What are the benefits of this detox cleanse juice?

This juice is hydrating, supports digestion, and provides a natural source of vitamins and antioxidants. It helps me feel refreshed and rebalanced.

Can I make this ahead of time?

Yes, but I try to drink it within 24 hours to keep the nutrients and flavor fresh.

Do I need a juicer to make this?

Not at all. I use a blender and strain it if I want a smoother juice, but I often just drink it as a smoothie with all the fiber.

Can I use bottled lemon juice instead of fresh?

I prefer fresh lemon juice for its bright, clean taste and maximum benefits, but bottled works in a pinch.

Is this safe to drink every day?

Yes, in moderation. I include it as part of a balanced diet—it’s a great way to boost my veggie and fruit intake.

Conclusion

This detox cleanse juice is a simple, nourishing way I love to reset my body and refresh my routine. With just a few ingredients and minimal effort, I can enjoy a clean, green burst of natural goodness anytime.

Print

clock clock iconcutlery cutlery iconflag flag iconfolder folder iconinstagram instagram iconpinterest pinterest iconfacebook facebook iconprint print iconsquares squares iconheart heart iconheart solid heart solid icon
Detox Cleanse Juice

Detox Cleanse Juice

5 Stars 4 Stars 3 Stars 2 Stars 1 Star No reviews
  • Author: Sue
  • Prep Time: 5 minutes
  • Cook Time: 2 minutes
  • Total Time: 7 minutes
  • Yield: 1 serving
  • Category: Beverage
  • Method: Blending
  • Cuisine: Health
  • Diet: Vegan
Print Recipe
Pin Recipe

Description

This detox cleanse juice is a refreshing, nutrient-packed green drink made with cucumber, celery, apple, and lemon. It's quick to prepare, hydrating, and gentle on the digestive system—perfect for a morning boost or post-meal reset.


Ingredients

  • ½ cucumber
  • 1 cup celery (about 2–3 stalks)
  • 1 apple (preferably red for sweetness)
  • 1 lemon (peeled and deseeded)

Instructions

  1. Wash all fruits and vegetables thoroughly.
  2. Cut the cucumber, celery, and apple into blender-friendly chunks.
  3. Peel and deseed the lemon to prevent bitterness.
  4. Blend all ingredients with a splash of water until smooth.
  5. Strain through a fine mesh sieve or cheesecloth for a juice-like texture, or drink as-is for added fiber.

Notes

  • Add a small piece of fresh ginger for an extra detox kick.
  • Add a handful of spinach or kale for more greens.
  • Blend with ice cubes or chill ingredients for a colder drink.
  • Substitute green pear for a different flavor profile.
  • Add a pinch of cayenne pepper for a metabolism boost.

Nutrition

  • Serving Size: 1 glass
  • Calories: 90
  • Sugar: 15g
  • Sodium: 50mg
  • Fat: 0.5g
  • Saturated Fat: 0g
  • Unsaturated Fat: 0.5g
  • Trans Fat: 0g
  • Carbohydrates: 22g
  • Fiber: 4g
  • Protein: 1g
  • Cholesterol: 0mg

Have you made this recipe? I'd love to see it!

Click here to Follow me on Pinterest

Creamy Cajun Chicken Spaghetti with Garlic Mozzarella Sauce

July 18, 2025 by Sue Leave a Comment

This Creamy Cajun Chicken Spaghetti with Garlic Mozzarella Sauce is the perfect blend of bold spices and indulgent comfort food. I cook tender chicken breasts with Cajun seasoning, then coat everything in a luscious garlic mozzarella cream sauce that clings beautifully to strands of spaghetti. It's rich, spicy, cheesy, and incredibly satisfying. Creamy Cajun Chicken Spaghetti with Garlic Mozzarella Sauce

Why You’ll Love This Recipe

I love how this dish brings together the smoky heat of Cajun spices with the soothing creaminess of garlic and mozzarella. It's a quick and hearty meal that feels restaurant-worthy but is incredibly easy to make at home. The balance of heat and cream makes every bite comforting with just the right kick. Plus, it’s a one-pan wonder that’s perfect for busy weeknights or a cozy weekend dinner.

Ingredients

(Here's a tip: Check out the full list of ingredients and measurements in the recipe card below.)

  • Chicken breasts

  • Cajun seasoning

  • Olive oil

  • Spaghetti

  • Butter

  • Garlic cloves, minced

  • All-purpose flour

  • Chicken broth

  • Heavy cream

  • Mozzarella cheese, shredded

  • Parmesan cheese

  • Salt and black pepper

  • Fresh parsley (optional, for garnish)

Directions

  1. I start by seasoning the chicken breasts generously with Cajun seasoning.

  2. In a large skillet, I heat olive oil and sear the chicken until it’s cooked through and golden on the outside. Then I remove it from the pan and set it aside.

  3. While the chicken rests, I cook spaghetti according to the package instructions until al dente.

  4. In the same skillet, I melt butter and sauté garlic until fragrant. I whisk in the flour to create a roux, cooking it briefly.

  5. Gradually, I whisk in the chicken broth and heavy cream until the sauce is smooth and thickened.

  6. I stir in mozzarella and Parmesan cheese until melted and creamy.

  7. Then I slice the cooked chicken and return it to the skillet along with the drained spaghetti, tossing everything together to coat it in the sauce.

  8. I finish with a sprinkle of parsley for a fresh touch.

Servings and timing

This recipe serves 4 people. It takes about 30 minutes to make from start to finish, making it an ideal quick dinner option.

Variations

  • I sometimes use shrimp instead of chicken for a seafood twist.

  • For a smokier flavor, I add a bit of smoked paprika to the Cajun spice mix.

  • If I want a spicier version, I toss in a pinch of red pepper flakes with the garlic.

  • I’ve also tried it with penne or fettuccine instead of spaghetti for a different texture.

  • To lighten it up a bit, I’ve substituted half-and-half for the heavy cream.

Storage/Reheating

I store leftovers in an airtight container in the refrigerator for up to 3 days. When reheating, I add a splash of milk or cream to loosen the sauce and warm it over low heat on the stovetop or in the microwave in 30-second intervals, stirring in between.

FAQs

How spicy is Cajun chicken spaghetti?

It has a mild to moderate heat level depending on the Cajun seasoning I use. I can always adjust the spice by reducing or increasing the seasoning.

Can I make this dish ahead of time?

Yes, I often cook the chicken and sauce ahead and store them separately. When I'm ready to eat, I just reheat everything and toss in freshly cooked pasta.

What type of mozzarella works best?

I prefer using low-moisture, part-skim shredded mozzarella because it melts smoothly and gives the sauce a great texture.

Can I freeze this dish?

I don’t recommend freezing it, as the cream sauce can separate and become grainy when thawed. It’s best enjoyed fresh or stored in the fridge for a few days.

What can I serve with Cajun chicken spaghetti?

I like serving it with a simple green salad or some roasted vegetables to balance out the richness.

Conclusion

Creamy Cajun Chicken Spaghetti with Garlic Mozzarella Sauce is one of those dishes that brings warmth and bold flavor to the table with very little effort. I love how the Cajun spice plays off the creamy garlic cheese sauce and how it all comes together in one satisfying meal. Whether it’s for a casual family dinner or something a bit more indulgent, this recipe never disappoints.

Print

clock clock iconcutlery cutlery iconflag flag iconfolder folder iconinstagram instagram iconpinterest pinterest iconfacebook facebook iconprint print iconsquares squares iconheart heart iconheart solid heart solid icon
Creamy Cajun Chicken Spaghetti with Garlic Mozzarella Sauce

Creamy Cajun Chicken Spaghetti with Garlic Mozzarella Sauce

5 Stars 4 Stars 3 Stars 2 Stars 1 Star No reviews
  • Author: Sue
  • Prep Time: 10 minutes
  • Cook Time: 20 minutes
  • Total Time: 30 minutes
  • Yield: 4 servings
  • Category: Dinner
  • Method: Stovetop
  • Cuisine: American
  • Diet: Halal
Print Recipe
Pin Recipe

Description

A rich and spicy pasta dish featuring Cajun-seasoned chicken in a creamy garlic mozzarella sauce, perfect for a quick and indulgent dinner.


Ingredients

  • 2 chicken breasts
  • 2 tbsp Cajun seasoning
  • 2 tbsp olive oil
  • 8 oz spaghetti
  • 2 tbsp butter
  • 3 garlic cloves, minced
  • 2 tbsp all-purpose flour
  • 1 ½ cups chicken broth
  • 1 cup heavy cream
  • 1 ½ cups shredded mozzarella cheese
  • ¼ cup grated Parmesan cheese
  • Salt and black pepper to taste
  • Fresh parsley, chopped (optional, for garnish)

Instructions

  1. Season chicken breasts generously with Cajun seasoning.
  2. Heat olive oil in a large skillet over medium-high heat. Sear the chicken until golden and cooked through. Remove from skillet and set aside.
  3. Cook spaghetti according to package instructions until al dente. Drain and set aside.
  4. In the same skillet, melt butter and sauté garlic until fragrant.
  5. Whisk in flour and cook for about 1 minute to form a roux.
  6. Gradually whisk in chicken broth and heavy cream. Cook until the sauce is smooth and thickened.
  7. Stir in mozzarella and Parmesan cheese until melted and creamy.
  8. Slice cooked chicken and return to the skillet. Add the cooked spaghetti and toss to coat in the sauce.
  9. Garnish with chopped parsley if desired and serve warm.

Notes

  • Use shrimp instead of chicken for a seafood variation.
  • Add smoked paprika to intensify the flavor.
  • Include red pepper flakes for extra heat.
  • Try different pasta shapes like penne or fettuccine.
  • Half-and-half can be used to reduce the richness of the sauce.

Nutrition

  • Serving Size: 1 serving
  • Calories: 620
  • Sugar: 3g
  • Sodium: 780mg
  • Fat: 34g
  • Saturated Fat: 18g
  • Unsaturated Fat: 14g
  • Trans Fat: 0.5g
  • Carbohydrates: 45g
  • Fiber: 2g
  • Protein: 38g
  • Cholesterol: 135mg

Have you made this recipe? I'd love to see it!

Click here to Follow me on Pinterest

Sautéed Zucchini, Mushrooms, and Cherry Tomatoes

July 18, 2025 by Sue Leave a Comment

This sautéed zucchini, mushrooms, and cherry tomatoes recipe is a quick and flavorful vegetable side dish that brings together fresh ingredients with minimal effort. It's light, colorful, and full of natural sweetness and umami from the vegetables. Perfect for pairing with almost any main dish or enjoying on its own. Sautéed Zucchini, Mushrooms, and Cherry Tomatoes

Why You’ll Love This Recipe

I love how fast and simple this dish is to prepare, yet it never fails to impress. The vegetables retain a tender-crisp texture, and the natural juices blend beautifully when sautéed. It’s low-carb, gluten-free, and vegan-friendly, making it versatile for all kinds of eaters. Whether I’m making it for a quick weeknight dinner or a healthy lunch, it always hits the spot.

Ingredients

(Here's a tip: Check out the full list of ingredients and measurements in the recipe card below.)

zucchini, sliced
mushrooms, sliced
cherry tomatoes, whole
onion, sliced
olive oil
garlic, minced
salt and pepper to taste
optional: Italian herbs or crushed red pepper for extra flavor

Directions

  1. I heat olive oil in a large skillet over medium heat.

  2. I start by adding the sliced onions and sauté them for about 2–3 minutes until they begin to soften.

  3. I toss in the garlic and let it cook for about 30 seconds, just until fragrant.

  4. Next, I add the mushrooms and cook them for 4–5 minutes until they release their moisture and start to brown.

  5. I stir in the zucchini slices and cook for another 4 minutes, letting them get slightly tender but still firm.

  6. Lastly, I add the cherry tomatoes and season everything with salt, pepper, and optional herbs. I sauté for another 2–3 minutes until the tomatoes start to blister.

  7. I serve it hot right off the skillet or let it cool slightly to enjoy warm.

Servings and timing

This recipe makes about 4 servings.
Prep time: 10 minutes
Cook time: 15 minutes
Total time: 25 minutes

Variations

  • I sometimes use yellow squash in place of or along with the zucchini for added color.

  • For extra richness, I like to toss in a bit of balsamic glaze at the end.

  • When I want a heartier dish, I add cooked chickpeas or white beans.

  • To switch up the herbs, I’ll use fresh basil or thyme instead of dried Italian seasoning.

Storage/Reheating

I store leftovers in an airtight container in the refrigerator for up to 3 days. To reheat, I use a skillet over medium heat or microwave in 30-second intervals until warmed through. The texture stays better when reheated on the stove.

FAQs

How do I keep the vegetables from becoming soggy?

I make sure not to overcrowd the pan and sauté in batches if needed. That helps the vegetables cook evenly and caramelize rather than steam.

Can I roast these vegetables instead of sautéing?

Yes, I often roast them at 425°F for 20–25 minutes for a more hands-off approach and a deeper roasted flavor.

What type of mushrooms work best?

I usually use cremini or white button mushrooms, but portobello or shiitake work great too for a more robust taste.

Can I make this ahead of time?

Yes, I prep the veggies in advance and cook them just before serving. If fully cooked ahead, I reheat gently in a skillet to maintain texture.

Is this dish freezer-friendly?

I don’t recommend freezing since the vegetables tend to become mushy when thawed. It’s best enjoyed fresh or within a few days.

Conclusion

This sautéed zucchini, mushrooms, and cherry tomatoes recipe is one of my go-to veggie sides because it’s so easy and satisfying. It’s fresh, vibrant, and quick to whip up, making it ideal for busy days or simple dinners. I love how adaptable it is, and it always brings a colorful, healthy touch to my meals

Print

clock clock iconcutlery cutlery iconflag flag iconfolder folder iconinstagram instagram iconpinterest pinterest iconfacebook facebook iconprint print iconsquares squares iconheart heart iconheart solid heart solid icon
Sautéed Zucchini, Mushrooms, and Cherry Tomatoes

Sautéed Zucchini, Mushrooms, and Cherry Tomatoes

5 Stars 4 Stars 3 Stars 2 Stars 1 Star No reviews
  • Author: Sue
  • Prep Time: 10 minutes
  • Cook Time: 15 minutes
  • Total Time: 25 minutes
  • Yield: 4 servings
  • Category: Side Dish
  • Method: Sautéed
  • Cuisine: American
  • Diet: Vegan
Print Recipe
Pin Recipe

Description

A quick and flavorful vegetable side dish featuring sautéed zucchini, mushrooms, and cherry tomatoes. Light, colorful, and full of natural sweetness and umami, it's perfect with any main dish or on its own.


Ingredients

  • 2 medium zucchini, sliced
  • 1 cup mushrooms, sliced
  • 1 cup cherry tomatoes, whole
  • 1 small onion, sliced
  • 2 tablespoons olive oil
  • 2 cloves garlic, minced
  • Salt and pepper to taste
  • Optional: 1 teaspoon Italian herbs or crushed red pepper

Instructions

  1. Heat olive oil in a large skillet over medium heat.
  2. Add the sliced onions and sauté for 2–3 minutes until they begin to soften.
  3. Add the minced garlic and cook for about 30 seconds until fragrant.
  4. Add the mushrooms and cook for 4–5 minutes until they release moisture and start to brown.
  5. Stir in the zucchini slices and cook for another 4 minutes until slightly tender but still firm.
  6. Add the cherry tomatoes, salt, pepper, and optional herbs. Sauté for 2–3 minutes until tomatoes start to blister.
  7. Serve hot off the skillet or slightly cooled.

Notes

  • Don’t overcrowd the pan to prevent soggy vegetables.
  • Try roasting at 425°F for 20–25 minutes for a deeper flavor.
  • Use cremini, white button, portobello, or shiitake mushrooms.
  • Prep veggies in advance and cook just before serving for best texture.
  • Not recommended for freezing.

Nutrition

  • Serving Size: 1 serving
  • Calories: 110
  • Sugar: 5g
  • Sodium: 90mg
  • Fat: 7g
  • Saturated Fat: 1g
  • Unsaturated Fat: 6g
  • Trans Fat: 0g
  • Carbohydrates: 10g
  • Fiber: 3g
  • Protein: 2g
  • Cholesterol: 0mg

Have you made this recipe? I'd love to see it!

Click here to Follow me on Pinterest

  • « Previous Page
  • 1
  • …
  • 3
  • 4
  • 5
  • 6
  • 7
  • …
  • 39
  • Next Page »
Modern Sidebar

Hey there! I'm Sue, a mom, a wife, and someone who’s always in the kitchen trying out new recipes or revisiting old ones that remind me of family gatherings and special moments.

Learn more

Popular

  • Cheesecake Fruit Salad
    Cheesecake Fruit Salad
  • Creamy Tuscan Ravioli Soup: A Comfort Dish
    Creamy Tuscan Ravioli Soup: A Comfort Dish
  • Garlic Herb Chicken with Mashed Potatoes and Glazed Carrots
    Garlic Herb Chicken with Mashed Potatoes and Glazed Carrots
  • Bobby Flay Salisbury Steak
    Bobby Flay Salisbury Steak

Footer

↑ back to top

About

  • About
  • Contact
  • Disclosure Policy
  • DMCA
  • Privacy Policy
  • Terms and Conditions

Newsletter

  • Sign Up! for emails and updates

Recipes

  • Appetizers & Snacks
  • Beef
  • Breakfast
  • Chicken
  • Desserts
  • Dinner
  • Drinks
  • Side-Dish
  • Soups

As an Amazon Associate I earn from qualifying purchases.

Copyright © 2025 Sue Recipe