Sue Recipe

  • Recipe Index
  • Chicken
  • Desserts
  • About
  • Contact
menu icon
go to homepage
  • Recipe Index
  • Chicken
  • Desserts
  • About
  • Contact

search icon
Homepage link
  • Recipe Index
  • Chicken
  • Desserts
  • About
  • Contact

×

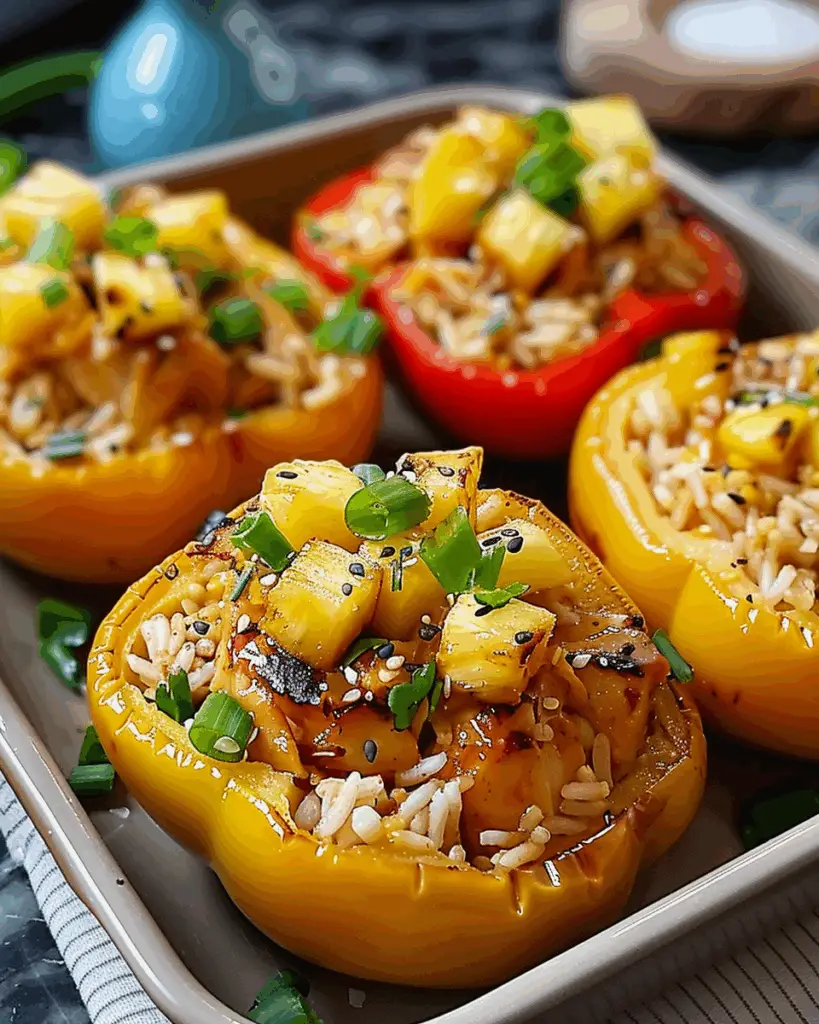
Brown Sugar Pineapple Wings Chicken

June 28, 2025 by Sue Leave a Comment

I present a mouthwatering recipe for Brown Sugar Pineapple Wings Chicken—sweet, tangy, and irresistibly caramelized. These wings are coated in a delicious brown sugar and pineapple glaze that delivers a perfect balance of flavors and a glossy finish sure to impress. Brown Sugar Pineapple Wings Chicken

Why I’ll Love This Recipe

I adore this recipe because it combines the rich sweetness of brown sugar with the tropical tang of pineapple. The glaze not only adds a beautiful sticky coating but also infuses the wings with depth and brightness. Whether for game day, family dinners, or weekend gatherings, these wings elevate the ordinary into something special and crave-worthy.

Ingredients

(Here’s a tip: Check out the full list of ingredients and measurements in the recipe card below.)

  • Chicken wings, split into flats and drumettes

  • Brown sugar

  • Pineapple juice or crushed pineapple

  • Garlic, minced

  • Soy sauce

  • Granulated sugar

  • Ground black pepper

  • Salt

  • Olive oil or vegetable oil

Directions

  1. Prep the wings: Pat chicken wings dry with paper towels and season lightly with salt and pepper.

  2. Make the glaze: In a bowl, whisk together brown sugar, pineapple juice (or crushed pineapple), a touch of soy sauce, minced garlic, and a little oil until smooth.

  3. Marinate: Toss the wings in half of the glaze. Let them marinate at least 30 minutes—or up to 2 hours—for full flavor.

  4. Bake: Preheat oven to 200 °C (400 °F). Arrange wings on a foil‑lined baking sheet, leaving space between them. Bake 20 minutes.

  5. Glaze and turn: Remove from oven, brush with remaining glaze, turn wings over, then return to oven.

  6. Caramelize finish: Bake an additional 15–20 minutes until wings are cooked through and caramelized, brushing again halfway through.

  7. Rest and serve: Let wings rest a few minutes before serving for the juices to settle and the glaze to set.

Servings and timing

  • Servings: Approximately 4–6 servings (about 16–24 wings, depending on portion size)

  • Prep time: 10 minutes

  • Marinating time: 30 minutes (or up to 2 hours for deeper flavor)

  • Cook time: 35–40 minutes

  • Total time: Around 1 hour 15 minutes (including marinating)

Variations

  • Spicy Pineapple Wings: Add 1–2 teaspoons of sriracha or chili flakes to the glaze for a kick.

  • Smoky BBQ Style: Stir in a tablespoon of smoky barbecue sauce or smoked paprika.

  • Teriyaki Twist: Replace soy sauce with teriyaki sauce and toss in some sesame seeds after baking.

  • Grilled Option: Cook the wings on a preheated grill over medium heat, brushing with glaze regularly until charred and sticky.

Storage / Reheating

  • Storage: Keep cooled wings in an airtight container in the refrigerator for up to 3 days.

  • Freezing: Freeze cooked wings in freezer‑safe bags for up to 2 months.

  • Reheating: For best results, reheat in a 175 °C (350 °F) oven for 10–15 minutes until warmed through and glaze is revived. Alternatively, reheat in an air fryer at 160 °C (320 °F) for 5–8 minutes.

FAQs

### How do I know when the wings are fully cooked?

I check that the internal temperature reaches 75 °C (165 °F) using a meat thermometer. The juices should run clear and the meat near the bone should be opaque.

Can I use fresh pineapple instead of juice?

Yes. I often blend fresh pineapple and strain it to get natural juice, or stir in small pineapple chunks for extra texture and flavor.

Can I bake these wings ahead of time for a party?

Absolutely. I bake them through, then reheat and brush with fresh glaze just before serving—right in the oven or air fryer for that sticky, fresh-from-the-oven appeal.

What can I serve alongside these wings?

I serve them with rice, a crisp green salad, coleslaw, or grilled veggies. They pair well with chilled beer or sparkling water with lime.

Can I use boneless chicken pieces instead?

Certainly. I use the same glaze and bake time varies—around 20–25 minutes, turning once, until pieces are cooked through and caramelized.

Conclusion

I hope this Brown Sugar Pineapple Wings Chicken recipe brings bold, sweet, and tangy flavors to your table. It’s a fantastic dish for entertaining or cozy nights in, offering sticky, caramelized wings that disappear fast. I encourage you to try it, make any variation your own, and enjoy every delicious bite!

Print

clock clock iconcutlery cutlery iconflag flag iconfolder folder iconinstagram instagram iconpinterest pinterest iconfacebook facebook iconprint print iconsquares squares iconheart heart iconheart solid heart solid icon
Brown Sugar Pineapple Wings Chicken

Brown Sugar Pineapple Wings Chicken

5 Stars 4 Stars 3 Stars 2 Stars 1 Star No reviews
  • Author: Sue
  • Prep Time: 10 minutes
  • Cook Time: 35–40 minutes
  • Total Time: 1 hour 15 minutes
  • Yield: 4–6 servings
  • Category: Appetizer
  • Method: Baking
  • Cuisine: American
  • Diet: Halal
Print Recipe
Pin Recipe

Description

Sweet, tangy, and sticky Brown Sugar Pineapple Wings coated in a caramelized glaze made with pineapple juice, brown sugar, and soy sauce—perfect for parties, game days, or casual dinners.


Ingredients

  • 2 lbs chicken wings, split into flats and drumettes
  • ½ cup brown sugar
  • ½ cup pineapple juice or crushed pineapple
  • 2 cloves garlic, minced
  • 2 tbsp soy sauce
  • 1 tbsp granulated sugar
  • ½ tsp ground black pepper
  • ½ tsp salt
  • 1 tbsp olive oil or vegetable oil

Instructions

  1. Pat chicken wings dry with paper towels and season lightly with salt and pepper.
  2. In a bowl, whisk together brown sugar, pineapple juice (or crushed pineapple), soy sauce, minced garlic, granulated sugar, oil, and black pepper until smooth.
  3. Toss the wings in half of the glaze and let them marinate for at least 30 minutes, or up to 2 hours for deeper flavor.
  4. Preheat oven to 200 °C (400 °F). Arrange wings on a foil-lined baking sheet, spaced evenly.
  5. Bake for 20 minutes, then remove from oven, brush with remaining glaze, and turn the wings over.
  6. Return to oven and bake for an additional 15–20 minutes, brushing with glaze halfway through, until caramelized and cooked through.
  7. Let the wings rest for a few minutes before serving to allow juices to settle and glaze to set.

Notes

  • Add sriracha or chili flakes to glaze for spicy version.
  • Use teriyaki sauce and sesame seeds for a twist.
  • Grill the wings instead of baking for a smoky flavor.
  • Store leftovers in an airtight container for up to 3 days.
  • Reheat in oven or air fryer for best results.

Nutrition

  • Serving Size: 4 wings
  • Calories: 310
  • Sugar: 14g
  • Sodium: 580mg
  • Fat: 17g
  • Saturated Fat: 4g
  • Unsaturated Fat: 11g
  • Trans Fat: 0g
  • Carbohydrates: 20g
  • Fiber: 0g
  • Protein: 20g
  • Cholesterol: 80mg
Have you made this recipe? I'd love to see it!

Click here to Follow me on Pinterest

Chinese Ground Beef and Cabbage Stir-Fry

June 28, 2025 by Sue Leave a Comment

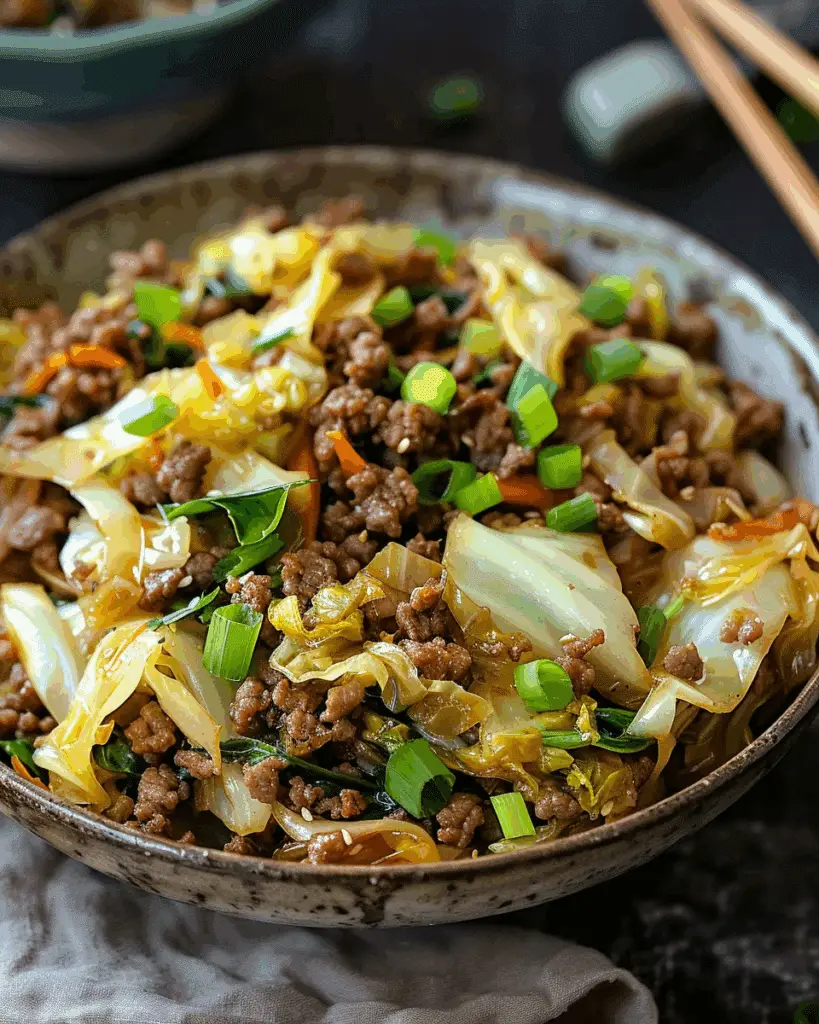
I discovered this Chinese-style ground beef and cabbage stir-fry and absolutely loved how fast, flavorful, and satisfying it is. In under 30 minutes, I get a hearty, umami-rich dish with crisp-tender cabbage and juicy beef. Chinese Ground Beef and Cabbage Stir-Fry

Why You’ll Love This Recipe

I love one-pan meals, and this one delivers big on flavor with minimal effort. I adore how the cumin, garlic, and ginger elevate simple ground beef, while cabbage adds texture without weighing it down. It’s budget-friendly, low-carb, and comes together in around 30 minutes—perfect for weeknight dinners when I don’t want to order takeout.

ingredients

(Here's a tip: Check out the full list of ingredients and measurements in the recipe card below.)

  • 4 large cloves garlic, minced

  • 2 small knobs fresh ginger, grated

  • 1 lb ground beef

  • 1 tablespoon neutral oil (avocado or vegetable)

  • 4 large fresh shiitake mushroom caps, thinly sliced

  • 12 oz green or savoy cabbage, thinly sliced

  • 1 teaspoon coarse sea salt (divided)

  • 1 teaspoon cumin powder (divided), plus extra for serving

  • 1 teaspoon shiitake or chicken bouillon (optional)

  • Splash of Shaoxing wine (or mirin/chicken stock)

  • Drizzle of toasted sesame oil (for finishing)

  • Optional garnish: Korean red pepper flakes (gochugaru)

  • 1 bulb scallion, diced

Sauce:

  • 1 tablespoon light soy sauce

  • ½ tablespoon dark soy sauce

  • ½ tablespoon Chinese black vinegar (or balsamic/rice vinegar)

directions

  1. I prepare the garlic, ginger, and shiitakes. I quarter the cabbage, remove the core, and slice it into thin strips, then separate them by hand.

  2. I heat a large wok or skillet over medium-high. I add oil, then garlic and ginger—sautéing for 5 seconds before adding the beef.

  3. I increase the heat to medium-high. I break the beef into small pieces and brown it for about 5–6 minutes, leaving some moisture for flavor. I season with ½ teaspoon salt and ½ teaspoon cumin. Then I add mushrooms and cook for 1 minute.

  4. I add the cabbage and stir-fry for 2 minutes. I add the remaining salt, cumin, bouillon, and sauce. I stir-fry for 2 more minutes, then splash in the wine and cook for another 30 seconds. I turn off the heat.

  5. I transfer everything to a serving plate. I sprinkle extra cumin and gochugaru, drizzle sesame oil, and garnish with scallions. I like serving it hot over steamed rice or cauliflower rice.

Servings and timing

  • Servings: 6 servings

  • Prep time: ~15 minutes

  • Cook time: ~15 minutes

  • Total time: ~30 minutes

Variations

  • I sometimes swap ground beef for ground chicken or turkey.

  • I like adding extra veggies like shredded carrots, bell peppers, or spinach.

  • I use dried shiitakes when fresh aren't available—just rehydrate them first.

  • To make it spicier, I add chili oil or more gochugaru.

  • For a vegetarian version, I use plant-based crumbles, omit the bouillon, and replace soy sauce with mushroom sauce.

storage/reheating

I store leftovers in an airtight container in the fridge for 3–4 days. For reheating, I use a skillet or microwave and add a splash of water or broth to refresh it. It also freezes well for up to 2 months—I thaw overnight in the fridge and reheat as usual.

FAQs

Can I substitute Napa cabbage?

Yes, I often use Napa cabbage instead. It cooks faster, so I reduce stir-fry time slightly.

Is this dish keto-friendly?

Yes, this stir-fry is low in carbs. I skip any added sugar and sometimes serve it over cauliflower rice.

Can I prep veggies ahead?

Absolutely. I slice the cabbage and mushrooms a day in advance and keep them in the fridge to save time.

How do I make the sauce thicker?

I mix 1 teaspoon of cornstarch with 2 tablespoon of water and add it to the sauce during cooking. It gives the dish a nice glossy finish.

What if I run out of Shaoxing wine?

No problem. I substitute it with mirin, chicken stock, or even water—it still turns out delicious.

Conclusion

I make this stir-fry at least once a week—it’s easy, flexible, and always hits the spot. It’s packed with flavor, quick to prepare, and makes a great go-to dish for busy nights. I hope it becomes one of your favorites too.

Print

clock clock iconcutlery cutlery iconflag flag iconfolder folder iconinstagram instagram iconpinterest pinterest iconfacebook facebook iconprint print iconsquares squares iconheart heart iconheart solid heart solid icon
Chinese Ground Beef and Cabbage Stir-Fry

Chinese Ground Beef and Cabbage Stir-Fry

5 Stars 4 Stars 3 Stars 2 Stars 1 Star No reviews
  • Author: Sue
  • Prep Time: 15 minutes
  • Cook Time: 15 minutes
  • Total Time: 30 minutes
  • Yield: 6 servings
  • Category: Main Course
  • Method: Stir-Fry
  • Cuisine: Chinese
Print Recipe
Pin Recipe

Description

This Chinese-style ground beef and cabbage stir-fry is a quick, flavorful, and satisfying one-pan meal. With bold flavors from garlic, ginger, and cumin, it's a low-carb, budget-friendly option that comes together in under 30 minutes.


Ingredients

  • 4 large cloves garlic, minced
  • 2 small knobs fresh ginger, grated
  • 1 lb ground beef (90/10 preferred)
  • 1 tbsp neutral oil (avocado or vegetable)
  • 4 large fresh shiitake mushroom caps, thinly sliced
  • 12 oz green or savoy cabbage, thinly sliced
  • 1 tsp coarse sea salt (divided)
  • 1 tsp cumin powder (divided), plus extra for serving
  • 1 tsp shiitake or chicken bouillon (optional)
  • Splash of Shaoxing wine (or mirin/chicken stock)
  • Drizzle of toasted sesame oil (for finishing)
  • Optional garnish: Korean red pepper flakes (gochugaru)
  • 1 bulb scallion, diced
  • 1 tbsp light soy sauce
  • ½ tbsp dark soy sauce
  • ½ tbsp Chinese black vinegar (or balsamic/rice vinegar)

Instructions

  1. Prepare the garlic, ginger, and shiitakes. Quarter the cabbage, remove the core, and slice into thin strips. Separate the cabbage by hand.
  2. Heat a large wok or skillet over medium-high heat. Add oil, then garlic and ginger—sauté for 5 seconds before adding the beef.
  3. Increase heat to medium-high. Break beef into small pieces and brown for 5–6 minutes. Leave some moisture for flavor. Season with ½ teaspoon salt and ½ teaspoon cumin. Add mushrooms and cook for 1 minute.
  4. Add cabbage and stir-fry for 2 minutes. Add remaining salt, cumin, bouillon, and sauce. Stir-fry for 2 more minutes, then add a splash of wine and cook for 30 seconds. Turn off heat.
  5. Transfer to a serving plate. Sprinkle cumin and gochugaru, drizzle sesame oil, and garnish with scallions. Serve hot—delicious over steamed rice or cauliflower rice.

Notes

  • Use Napa cabbage for a quicker-cooking alternative.
  • For a vegetarian version, use plant-based crumbles and omit bouillon.
  • Add cornstarch slurry for a thicker sauce.
  • Refrigerates well for 3–4 days; also freezer-friendly up to 2 months.
  • Serve with steamed or cauliflower rice for a complete meal.

Nutrition

  • Serving Size: ⅙ of recipe
  • Calories: 260
  • Sugar: 3g
  • Sodium: 540mg
  • Fat: 18g
  • Saturated Fat: 6g
  • Unsaturated Fat: 10g
  • Trans Fat: 0g
  • Carbohydrates: 9g
  • Fiber: 2g
  • Protein: 17g
  • Cholesterol: 50mg

Have you made this recipe? I'd love to see it!

Click here to Follow me on Pinterest

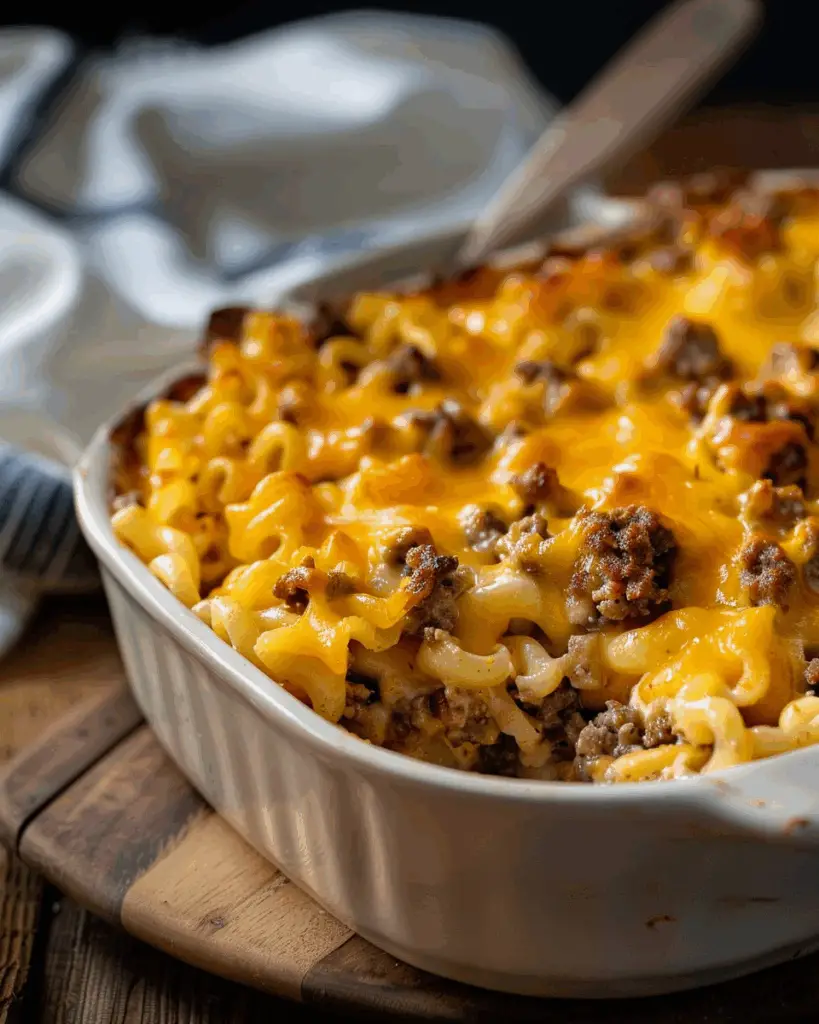
Chili Mac Recipe

June 28, 2025 by Sue Leave a Comment

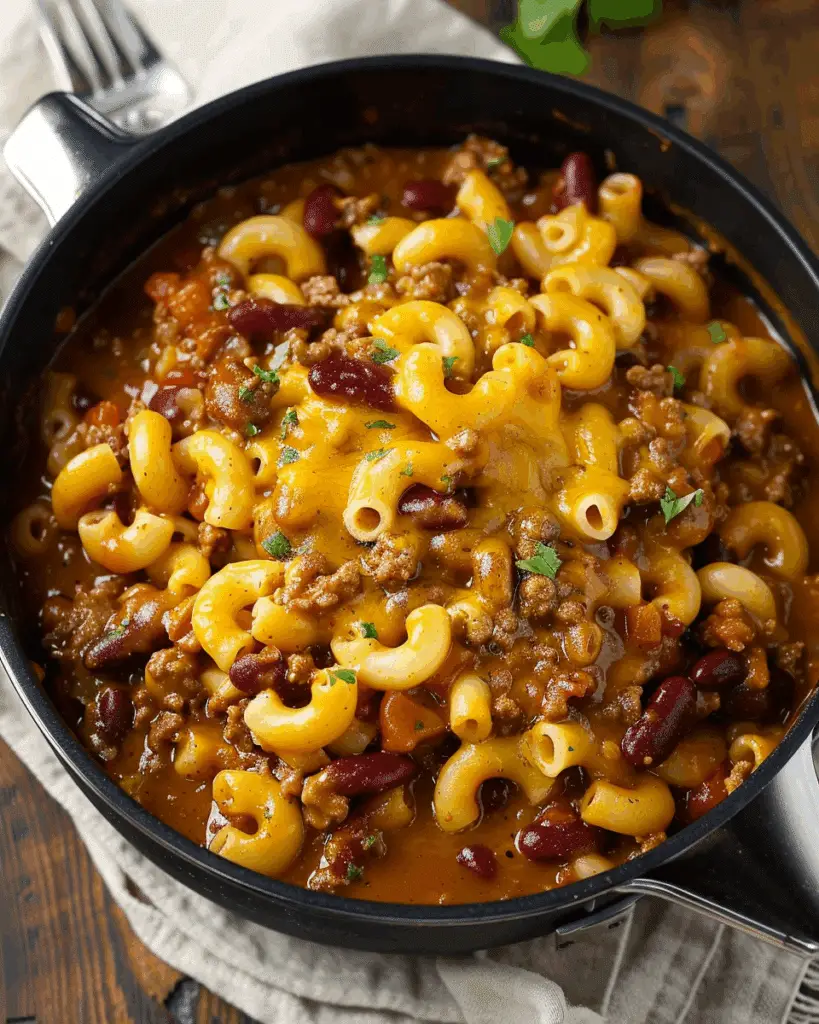
I discovered this creamy Chili Mac and it's one of my favorite takes on a comfort food mash-up—thick, flavorful homemade chili fully combined with creamy macaroni and cheese. Chili Mac Recipe

Why You’ll Love This Recipe

I adore how this dish merges hearty chili and gooey mac and cheese into one satisfying meal. It tastes indulgent without being complicated, and it’s perfect for potlucks, family dinners, or game day. The fact that I can prep components ahead of time just adds to its appeal.

Ingredients

(Here's a tip: Check out the full list of ingredients and measurements in the recipe card below.)

Chili

  • 1 lb ground beef (80% lean)

  • 1 small onion, diced

  • ½ cup bell pepper, diced

  • 3 cloves garlic, diced

  • 1.25 oz packet chili seasoning mix (or homemade blend)

  • 1 tablespoon tomato paste

  • 8 oz tomato sauce

  • 14.5 oz can diced tomatoes, undrained

  • ½ cup chicken broth

  • 1 15‑oz can kidney beans, drained

Mac and Cheese

  • 2 cups uncooked macaroni

  • 2 tablespoons butter

  • 2 tablespoons flour

  • ½ cup heavy cream

  • 1 cup milk

  • ½ teaspoon mustard powder

  • ¼ teaspoon onion powder

  • ¼ teaspoon salt

  • ¼ teaspoon pepper

  • ½ teaspoon hot sauce

  • 1½ cups shredded cheddar cheese

For Baking

  • 1½ cups shredded cheddar cheese

  • Fresh parsley, to garnish

Directions

  1. Make the chili
    I cook and crumble the beef and onions until browned, then drain. I add peppers and garlic, and cook until soft. Next, I stir in the seasoning mix and tomato paste, then add the tomato sauce, diced tomatoes, and broth. I simmer until thickened, adding beans in the last 10 minutes.

  2. Make the mac and cheese
    While pasta water heats, I melt butter, whisk in flour, then slowly whisk in cream and milk until smooth. I add seasonings and hot sauce, reduce heat, then stir in cheese until creamy. Finally, I fold in drained macaroni.

  3. Combine and bake
    I stir the chili into the macaroni and cheese. Then I top it with cheddar and bake at 400°F for 5 minutes until the cheese melts. I finish with a parsley garnish.

Servings and timing

  • Servings: 8–10

  • Prep time: 15 minutes

  • Cook time: 45 minutes

  • Total time: 1 hour

Variations

  • I switch kidney beans with black beans or omit beans entirely.

  • Monterey Jack cheese adds creaminess alongside cheddar.

  • I sometimes add a dash of hot sauce for extra flavor without making it spicy.

  • For a one-pot shortcut, the chili and the mac and cheese can be cooked separately and combined just before baking.

Storage/reheating

I store leftovers in an airtight container in the fridge for up to 3 days. For freezing, I make sure the macaroni isn’t overcooked, then freeze in portions. When ready, I thaw overnight and reheat on the stovetop or in the microwave until warmed through.

FAQs

Can I make this ahead of time?

Yes—I often make the chili 1–2 days in advance. Then when I’m ready, I reheat it, prepare the mac and cheese, combine, and bake.

Can I freeze it?

Absolutely. Just be mindful not to overcook the macaroni so it remains tender after reheating.

How spicy is this dish?

The hot sauce is more of a flavor enhancer than heat—in my experience, it doesn’t make the dish spicy but lifts the overall taste.

Can I make it meatless?

Yes—I’ve replaced the beef with plant-based crumbles or omitted meat entirely, then added extra beans or veggies.

What sides go well with Chili Mac?

I enjoy it with cornbread, Cheddar Bay Biscuits, or a fresh green salad to balance the richness.

Conclusion

I love how this Chili Mac brings together two classics into one unforgettable comfort food meal. It's easy to make, customizable, and perfect whether I’m feeding a crowd or meal-prepping for the week. I hope you enjoy making it as much as I do!

Print

clock clock iconcutlery cutlery iconflag flag iconfolder folder iconinstagram instagram iconpinterest pinterest iconfacebook facebook iconprint print iconsquares squares iconheart heart iconheart solid heart solid icon
Chili Mac Recipe

Chili Mac Recipe

5 Stars 4 Stars 3 Stars 2 Stars 1 Star No reviews
  • Author: Sue
  • Prep Time: 15 minutes
  • Cook Time: 45 minutes
  • Total Time: 1 hour
  • Yield: 8–10 servings
  • Category: Dinner
  • Method: Baking
  • Cuisine: American
  • Diet: Halal
Print Recipe
Pin Recipe

Description

A hearty and creamy mash-up of homemade chili and macaroni and cheese, baked with melted cheddar on top. Perfect for comforting dinners, potlucks, or game day gatherings.


Ingredients

  • 1 lb ground beef (80% lean)
  • 1 small onion, diced
  • ½ cup bell pepper, diced
  • 3 cloves garlic, diced
  • 1.25 oz packet chili seasoning mix (or homemade blend)
  • 1 tablespoon tomato paste
  • 8 oz tomato sauce
  • 14.5 oz can diced tomatoes, undrained
  • ½ cup chicken broth
  • 1 15‑oz can kidney beans, drained
  • 2 cups uncooked macaroni
  • 2 tablespoons butter
  • 2 tablespoons flour
  • ½ cup heavy cream
  • 1 cup milk
  • ½ teaspoon mustard powder
  • ¼ teaspoon onion powder
  • ¼ teaspoon salt
  • ¼ teaspoon pepper
  • ½ teaspoon hot sauce
  • 1½ cups shredded cheddar cheese (for mac and cheese)
  • 1½ cups shredded cheddar cheese (for topping)
  • Fresh parsley, to garnish

Instructions

  1. Cook and crumble the ground beef with diced onion in a large skillet over medium heat until browned. Drain excess grease.
  2. Add bell pepper and garlic to the skillet and cook until softened, about 3–5 minutes.
  3. Stir in chili seasoning and tomato paste. Add tomato sauce, diced tomatoes with juice, and chicken broth. Stir well and simmer uncovered for 25–30 minutes, stirring occasionally. Add kidney beans in the last 10 minutes of simmering.
  4. Meanwhile, cook macaroni in salted water according to package directions. Drain and set aside.
  5. In a saucepan, melt butter over medium heat. Whisk in flour and cook for 1–2 minutes. Slowly whisk in heavy cream and milk until smooth.
  6. Add mustard powder, onion powder, salt, pepper, and hot sauce. Reduce heat to low and stir in shredded cheddar cheese until melted and creamy.
  7. Fold cooked macaroni into the cheese sauce until fully combined.
  8. Preheat oven to 400°F. Stir chili into the macaroni and cheese mixture. Transfer to a greased baking dish.
  9. Top with additional shredded cheddar cheese and bake for 5 minutes or until cheese is melted and bubbly.
  10. Garnish with fresh parsley before serving.

Notes

  • Can substitute kidney beans with black beans or omit them entirely.
  • Use Monterey Jack cheese for added creaminess.
  • Chili can be made 1–2 days in advance for convenience.
  • Refrigerate leftovers for up to 3 days or freeze in portions for later use.

Nutrition

  • Serving Size: 1.8 cups
  • Calories: 540
  • Sugar: 5g
  • Sodium: 880mg
  • Fat: 32g
  • Saturated Fat: 16g
  • Unsaturated Fat: 13g
  • Trans Fat: 1g
  • Carbohydrates: 38g
  • Fiber: 4g
  • Protein: 26g
  • Cholesterol: 95mg

Have you made this recipe? I'd love to see it!

Click here to Follow me on Pinterest

Cheesy Chicken Garlic Wraps

June 28, 2025 by Sue Leave a Comment

I’ve fallen in love with these Cheesy Chicken Garlic Wraps. They’re packed with tender chicken, gooey cheese, and bold garlic flavor—all wrapped up in a crispy tortilla.

Cheesy Chicken Garlic Wraps

Why You’ll Love This Recipe

I adore this recipe because it's low-effort yet high-reward. It’s a super satisfying meal that's also high in protein. The exterior crisps up beautifully while the filling stays warm and cheesy. Plus, I love how versatile it is—I can prep ahead and tweak it to my taste.

Ingredients

(Here's a tip: Check out the full list of ingredients and measurements in the recipe card below.)

  • 2 large flour tortillas

  • 200 g (about 7 oz) cooked chicken, chopped or shredded

  • 2 cloves garlic, minced (or more if I’m feeling bold)

  • 2 tbsp light mayonnaise

  • 1 tbsp light Greek yogurt

  • 2 tsp hot sauce

  • ¼ tsp salt (or to taste)

  • 90 g (about 3 oz) shredded cheese—cheddar or a cheddar blend

  • 1 green onion, chopped

  • Olive oil spray (or a bit of butter)

Directions

  1. In a bowl, I mix the chopped chicken, minced garlic, mayo, Greek yogurt, hot sauce, and salt.

  2. Lay a tortilla flat. Sprinkle about 2 tablespoon of shredded cheese near the bottom third.

  3. Spoon around ⅔ cup of the chicken mixture on top of the cheese.

  4. Add another tablespoon of cheese and scatter some chopped green onion.

  5. Fold in the tortilla sides, then roll tightly from the bottom to form a wrap.

  6. Heat a non-stick skillet over medium-high and spray with olive oil.

  7. Place the wrap seam-side down and cook 3–4 minutes per side until golden and crispy. Covering the pan helps melt the cheese.

  8. Slice in half and serve hot.

Servings and timing

This makes 2 wraps and takes about 15 minutes total—prep 8 min, cook 7 min. Perfect when I’m craving a quick dinner.

Variations

  • Cheese swap: I sometimes use mozzarella, pepper jack, feta, or a blend for different flavor profiles.

  • Protein options: Rotisserie chicken works well, or grilled thigh pieces add more flavor.

  • Add-ins: I like adding spinach, bell peppers, mushrooms, avocado, sundried tomatoes, or olives.

  • Spice it up: A pinch of red pepper flakes or swapping Italian seasoning or paprika can up the heat or depth.

  • Gluten-free: Just swap in gluten-free tortillas.

Storage/reheating

I store leftover wraps in an airtight container in the fridge for up to 2 days. I reheat them in a skillet or air fryer at 190 °C for 3–4 minutes, which restores crispiness. I freeze the filling (not the assembled wrap) in a sealed bag for up to a month—then thaw and reheat before assembling.

FAQs

What if I want to make these ahead of time?

I can prep the chicken filling and store it in the fridge for 2–3 days. Later, I just assemble and toast the wraps before serving.

Can I skip the hot sauce?

Absolutely—I sometimes omit it or substitute with garlic aioli or ranch for a milder taste.

Can I refrigerate before cooking?

Yes—after rolling the wraps, I chill them and cook later. I just make sure to crisp them in a skillet or air fryer to maintain texture.

Is it okay to bake them instead?

Yes! Baking at 200 °C for 10–12 minutes, flipping halfway, works—but pan-frying gives a crispier result.

Can I make a vegetarian version?

Definitely—I swap the chicken for plant-based proteins like tofu, mushrooms, or beans, and adjust seasoning accordingly.

Conclusion

I’m thrilled by how chewy, cheesy, and flavorful these wraps are. They hit all the right notes: easy prep, crispy exterior, creamy and garlic-packed filling, plus customizability. Whether I’m feeding the family or meal-prepping for the week, these wraps never disappoint.

Enjoy making them your own—and savor every chewy, cheesy bite!

Print

clock clock iconcutlery cutlery iconflag flag iconfolder folder iconinstagram instagram iconpinterest pinterest iconfacebook facebook iconprint print iconsquares squares iconheart heart iconheart solid heart solid icon
Cheesy Chicken Garlic Wraps

Cheesy Chicken Garlic Wraps

5 Stars 4 Stars 3 Stars 2 Stars 1 Star No reviews
  • Author: Sue
  • Prep Time: 8 minutes
  • Cook Time: 7 minutes
  • Total Time: 15 minutes
  • Yield: 2 wraps
  • Category: Main
  • Method: Pan-Fried
  • Cuisine: American
Print Recipe
Pin Recipe

Description

These Cheesy Chicken Garlic Wraps are loaded with tender chicken, gooey cheese, and a bold garlic kick, all tucked into a crispy, golden tortilla. Perfect for a quick, satisfying, protein-packed meal.


Ingredients

  • 2 large flour tortillas
  • 200 g (about 7 oz) cooked chicken, chopped or shredded
  • 2 cloves garlic, minced
  • 2 tbsp light mayonnaise
  • 1 tbsp light Greek yogurt
  • 2 tsp hot sauce (e.g., Frank’s)
  • ¼ tsp salt (or to taste)
  • 90 g (about 3 oz) shredded cheese (cheddar or blend)
  • 1 green onion, chopped
  • Olive oil spray (or a bit of butter)

Instructions

  1. In a bowl, mix the chopped chicken, minced garlic, mayonnaise, Greek yogurt, hot sauce, and salt.
  2. Lay a tortilla flat and sprinkle about 2 tablespoons of shredded cheese on the bottom third.
  3. Spoon around ⅔ cup of the chicken mixture over the cheese.
  4. Add another tablespoon of cheese and scatter chopped green onion on top.
  5. Fold in the sides of the tortilla and roll tightly from the bottom to form a wrap.
  6. Heat a non-stick skillet over medium-high heat and spray with olive oil.
  7. Place the wrap seam-side down and cook for 3–4 minutes per side until golden and crispy, covering the pan to help melt the cheese.
  8. Slice in half and serve hot.

Notes

  • Use different cheeses like mozzarella or pepper jack for variation.
  • Swap chicken with tofu or mushrooms for a vegetarian version.
  • Freeze only the filling, not the assembled wrap.
  • Wraps can be baked at 200 °C for 10–12 minutes, flipping halfway.
  • Make ahead by prepping the filling and refrigerating for up to 3 days.

Nutrition

  • Serving Size: 1 wrap
  • Calories: 380
  • Sugar: 2g
  • Sodium: 680mg
  • Fat: 20g
  • Saturated Fat: 7g
  • Unsaturated Fat: 10g
  • Trans Fat: 0g
  • Carbohydrates: 22g
  • Fiber: 2g
  • Protein: 28g
  • Cholesterol: 70mg

Have you made this recipe? I'd love to see it!

Click here to Follow me on Pinterest

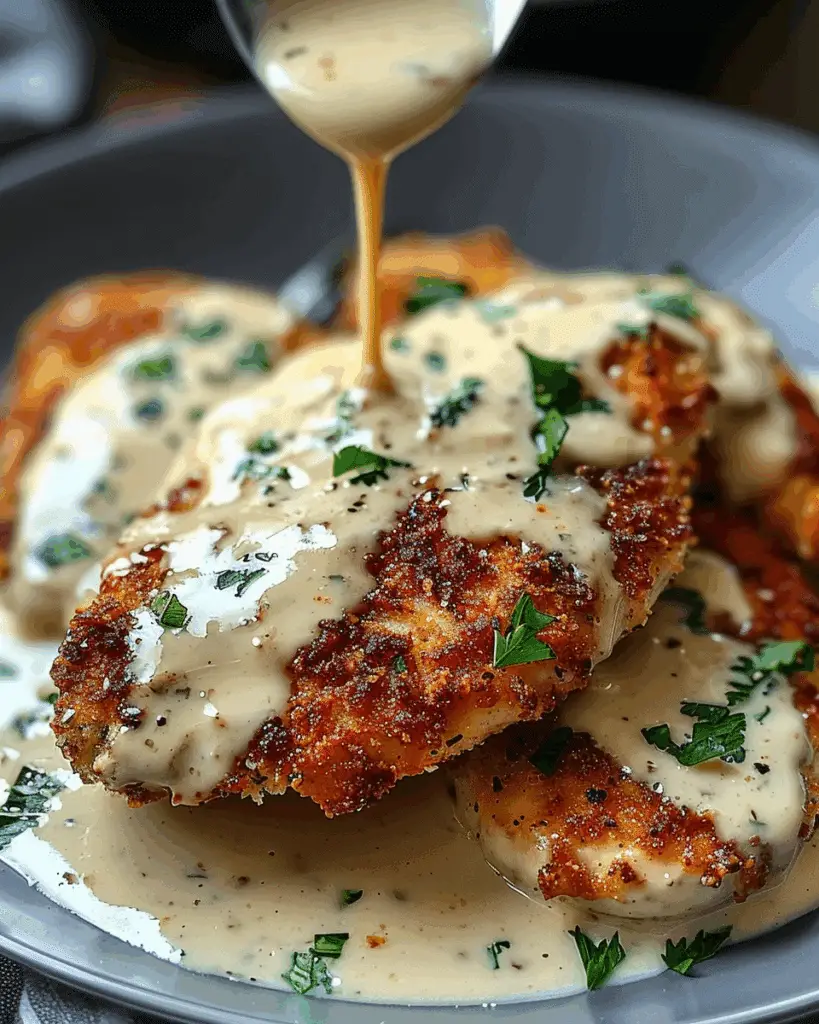
Creamy Smothered Chicken and Rice

June 28, 2025 by Sue Leave a Comment

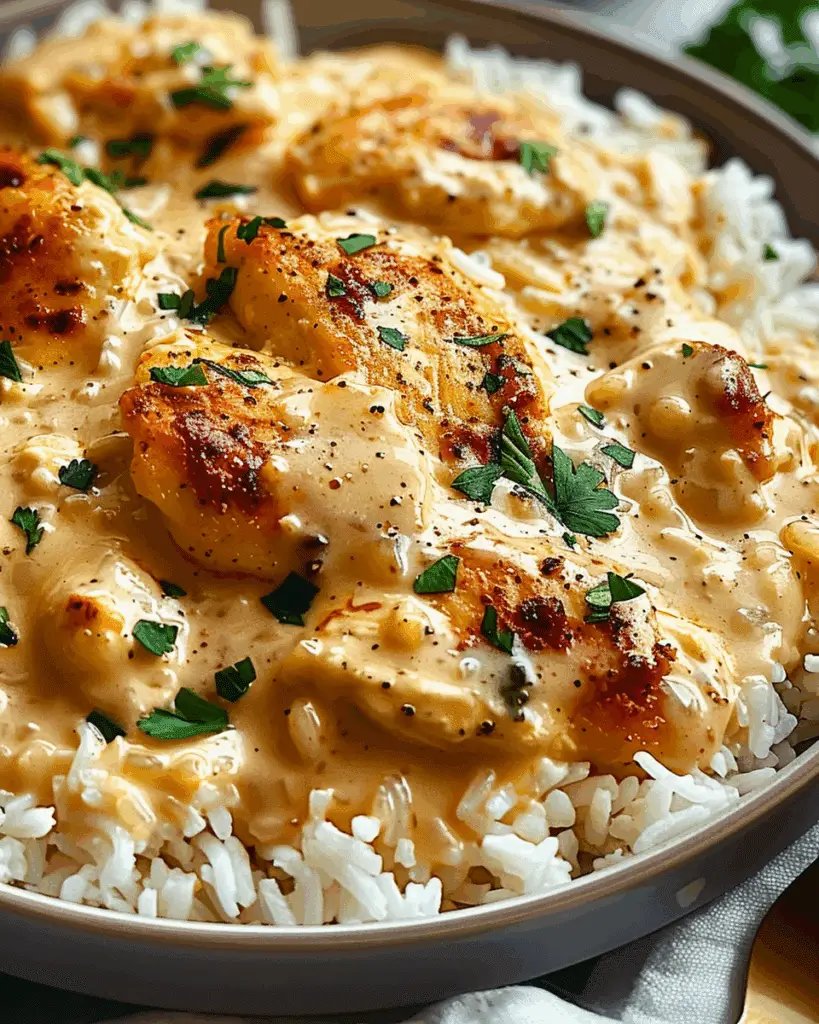
I’ve created a mouthwatering one-skillet meal featuring tender, seared chicken breasts nestled in a creamy, cheesy sauce served over fluffy rice—a perfect comfort dish that’s simple to prepare. Creamy Smothered Chicken and Rice

Why You’ll Love This Recipe

I love this recipe because it’s a one-pan wonder—minimal cleanup with maximum flavor. The creamy sauce is velvety and rich, yet not overwhelming. It’s family-friendly and reheats beautifully, making it ideal for meal prep. Plus, it's easy to tweak depending on what’s in my pantry.

ingredients

(Here's a tip: Check out the full list of ingredients and measurements in the recipe card below.)

For the Chicken:

  • 4 boneless, skinless chicken breasts

  • 1 teaspoon garlic powder

  • 1 teaspoon onion powder

  • 1 teaspoon smoked paprika

  • Salt and black pepper, to taste

  • 2 tablespoon olive oil

For the Rice:

  • 1 cup long-grain white rice

  • 2 cups chicken broth

  • ½ teaspoon salt

For the Creamy Sauce:

  • 2 tablespoon unsalted butter

  • 2 tablespoon all-purpose flour

  • 1½ cups whole milk

  • ½ cup chicken broth

  • ½ teaspoon garlic powder

  • ¼ teaspoon dried thyme

  • ½ cup shredded cheddar cheese

  • ½ cup grated Parmesan cheese

  • Fresh parsley, chopped (for garnish)

directions

  1. I pat the chicken dry and season both sides with garlic powder, onion powder, smoked paprika, salt, and pepper. I heat olive oil in a large skillet over medium-high heat and sear the chicken 4–5 minutes per side until golden. Then I remove it and set it aside.

  2. In a separate saucepan, I bring chicken broth and salt to a boil, add the rice, reduce heat, cover, and simmer for 15–18 minutes until tender. I fluff it with a fork and keep it covered.

  3. In the same skillet, I melt butter, whisk in flour, and cook for 1–2 minutes until pale golden. I slowly whisk in milk and broth, then stir in garlic powder, thyme, cheddar, and Parmesan. I cook it for 3–4 minutes until the sauce thickens.

  4. I nestle the chicken back into the sauce, spooning it over each piece. I cover the skillet and simmer on low for 10 minutes until the chicken is cooked through and tender.

  5. I plate the rice, place a chicken breast on top, spoon over extra creamy sauce, garnish with parsley, and serve immediately.

Servings and timing

This recipe yields 4 generous servings. Prep time is about 10 minutes, cook time is roughly 30–35 minutes, so total time clocks in around 45 minutes.

Variations

  • Protein swap: I can use chicken thighs (bone-in or boneless) for richer flavor; cooking time may need to be extended slightly.

  • Veggie boost: I stir in mushrooms, spinach, or peas in the sauce's final minutes for extra flavor and nutrition.

  • Cheese twist: I sometimes swap cheddar for mozzarella, pepper jack, or a mix with smoked gouda.

  • Lighter option: I substitute cauliflower rice to reduce carbs without sacrificing comfort.

  • Herb swap: I prefer fresh thyme or parsley in place of dried for a brighter taste.

storage/reheating

To store: I cool everything before transferring to airtight containers. In the fridge, it’s good for up to 3 days; in the freezer (sauce and chicken) for up to 2 months. I keep rice separate before freezing.

To reheat:

  • Stovetop: I gently reheat with a splash of milk or broth to restore creaminess.

  • Microwave: I heat in 30-second intervals, stirring between, adding a bit of milk if needed.

  • Oven: I cover and bake at 325 °F (165 °C) for about 15–20 minutes until thoroughly warmed.

FAQs

1. Can I use chicken thighs instead of breasts?

Yes—I’ve done this often. Thighs stay juicier and more flavorful, though they may take a few extra minutes to reach 165 °F internally.

2. Is this recipe gluten-free?

Not as written—the flour in the sauce contains gluten. To make it gluten-free, I use a gluten-free flour blend and make sure all other ingredients are certified gluten-free.

3. How do I know when the chicken is fully cooked?

I always rely on a meat thermometer—165 °F (75 °C) in the thickest part confirms it's safe and juicy.

4. Can I prepare this ahead of time?

Absolutely. I cook the chicken and sauce in advance and store separately from the rice. When I’m ready to serve, I reheat and assemble.

5. What sides pair well with this dish?

I like to balance it with something fresh—like steamed green beans, a crisp salad, or roasted veggies. Cornbread or rolls are perfect for soaking up the extra sauce.

Conclusion

I adore how this creamy smothered chicken and rice delivers hearty comfort with minimal fuss. The golden seared chicken, cheesy sauce, and fluffy rice come together in a homey, satisfying way that’s perfect any night. Whether I’m cooking for family, prepping ahead, or need a go-to cozy meal, this recipe is consistently a hit. I hope it brings warmth and flavor to your table as much as it does to mine.

Print

clock clock iconcutlery cutlery iconflag flag iconfolder folder iconinstagram instagram iconpinterest pinterest iconfacebook facebook iconprint print iconsquares squares iconheart heart iconheart solid heart solid icon
Creamy Smothered Chicken and Rice

Creamy Smothered Chicken and Rice

5 Stars 4 Stars 3 Stars 2 Stars 1 Star No reviews
  • Author: Sue
  • Prep Time: 10 minutes
  • Cook Time: 35 minutes
  • Total Time: 45 minutes
  • Yield: 4 servings
  • Category: Dinner
  • Method: Stovetop
  • Cuisine: American
  • Diet: Halal
Print Recipe
Pin Recipe

Description

A comforting one-skillet dish featuring seared chicken breasts smothered in a rich, creamy cheese sauce served over fluffy rice. Easy to make, family-friendly, and great for meal prep.


Ingredients

  • 4 boneless, skinless chicken breasts
  • 1 tsp garlic powder
  • 1 tsp onion powder
  • 1 tsp smoked paprika
  • Salt and black pepper, to taste
  • 2 tbsp olive oil
  • 1 cup long‑grain white rice
  • 2 cups chicken broth (divided)
  • ½ tsp salt
  • 2 tbsp unsalted butter
  • 2 tbsp all‑purpose flour
  • 1½ cups whole milk
  • ½ tsp garlic powder (for sauce)
  • ¼ tsp dried thyme
  • ½ cup shredded cheddar cheese
  • ½ cup grated Parmesan cheese
  • Fresh parsley, chopped (for garnish)

Instructions

  1. Pat chicken dry and season with garlic powder, onion powder, smoked paprika, salt, and pepper.
  2. Heat olive oil in a large skillet over medium-high heat. Sear chicken for 4–5 minutes per side until golden. Remove and set aside.
  3. In a saucepan, bring 2 cups chicken broth and ½ teaspoon salt to a boil. Add rice, reduce heat, cover, and simmer 15–18 minutes until tender. Fluff and keep covered.
  4. In the same skillet used for chicken, melt butter. Whisk in flour and cook for 1–2 minutes until lightly golden.
  5. Gradually whisk in milk and ½ cup chicken broth. Stir in garlic powder, thyme, cheddar, and Parmesan. Cook for 3–4 minutes until thickened.
  6. Return chicken to skillet, spoon sauce over pieces, cover, and simmer on low for 10 minutes until chicken is cooked through.
  7. To serve, plate rice, top with chicken, spoon extra sauce over, garnish with parsley, and serve immediately.

Notes

  • Use a meat thermometer to ensure chicken reaches 165°F internally.
  • Substitute gluten-free flour for a GF version.
  • To lighten, use cauliflower rice instead of white rice.
  • Add spinach, peas, or mushrooms for extra nutrition.
  • Swap cheeses like mozzarella or smoked gouda for variety.

Nutrition

  • Serving Size: 1 chicken breast with rice and sauce
  • Calories: 540
  • Sugar: 4g
  • Sodium: 720mg
  • Fat: 26g
  • Saturated Fat: 12g
  • Unsaturated Fat: 12g
  • Trans Fat: 0g
  • Carbohydrates: 34g
  • Fiber: 1g
  • Protein: 44g
  • Cholesterol: 130mg

Have you made this recipe? I'd love to see it!

Click here to Follow me on Pinterest

Cheesy Steak & Queso Rice

June 28, 2025 by Sue Leave a Comment

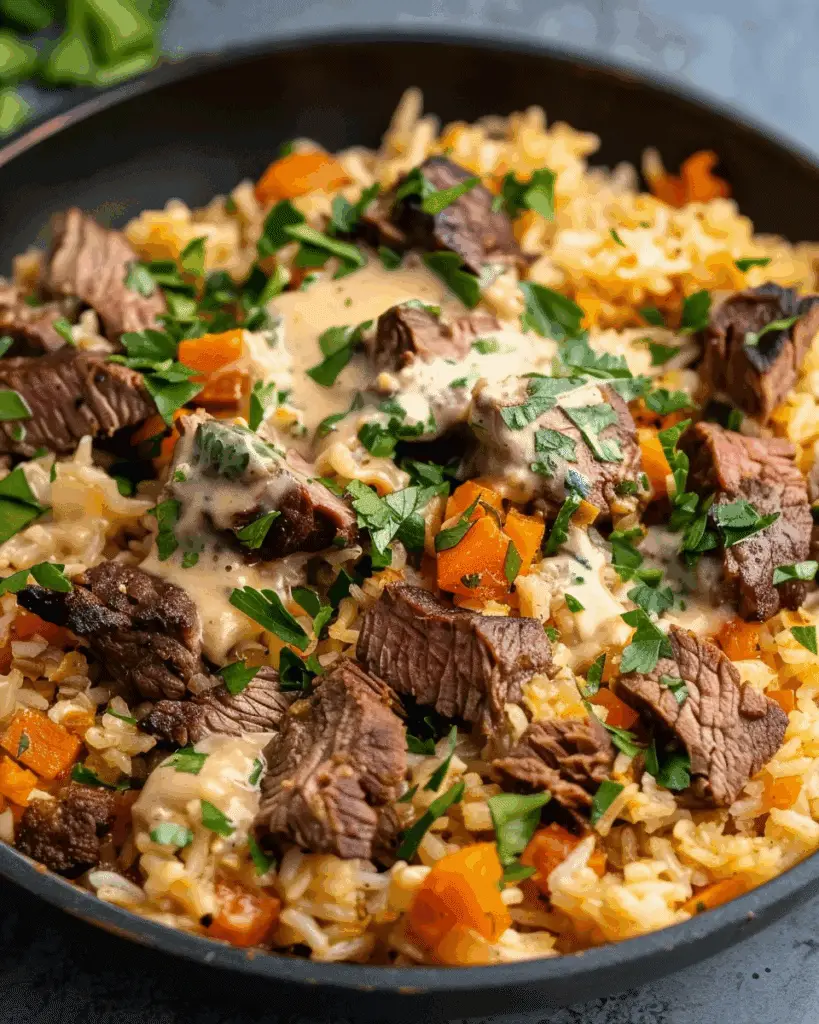
I’ve crafted a comforting dish that layers tender, seasoned steak with creamy queso and fluffy rice—all melting together into a cheesy, flavorful delight. It’s hearty, satisfying, and perfect for weeknight dinners or casual entertaining.

Cheesy Steak & Queso Rice

Why You’ll Love This Recipe

I love how this dish brings together savory steak and rich cheese sauce in every bite. The queso adds creaminess without overpowering the beefy flavor, and the rice soaks up all the goodness. It’s simple to make but delivers big on taste and texture—perfect for those moments I crave something filling that still feels indulgent.

ingredients

(Here's a tip: Check out the full list of ingredients and measurements in the recipe card below.)
– Steak (I use flank or skirt steak, thinly sliced)
– Cooked white or brown rice
– Shredded cheddar or a Mexican cheese blend
– Queso dip or queso sauce (store‑bought or homemade)
– Onion and garlic
– Bell pepper (optional, for color)
– Olive oil or butter
– Salt and pepper
– Cumin, chili powder, or taco seasoning

directions

  1. Prep and cook the steak: I season thinly sliced steak with salt, pepper, and spices. In a hot skillet with oil, I sear it quickly until browned and cooked to my liking. Then I remove it and set it aside.

  2. Sauté veggies: In the same pan, I toss in diced onion, garlic, and bell pepper. I cook until soft and fragrant.

  3. Combine with rice: I stir cooked rice into the skillet with the veggies and toss until it’s heated through.

  4. Add cheese and steak: I stir in shredded cheese until it melts, then fold in the sliced steak.

  5. Pour queso: I drizzle warm queso sauce over the top and gently mix, letting everything meld together in a gooey, cheesy embrace.

  6. Serve: I plate it hot, optionally topping with fresh cilantro, jalapeño slices, or a squeeze of lime.

Servings and timing

  • Servings: Makes about 4 generous portions.

  • Total time: ~30 minutes

    • Prep: 10 minutes

    • Cook: 20 minutes

Variations

  • Switch up the protein: I sometimes swap the steak for shredded chicken, chorizo, or even spiced ground beef.

  • Veggie boost: I’ll add corn, black beans, or sautéed mushrooms for extra texture and nutrition.

  • Cheese change-up: I enjoy using pepper jack for a kick or Monterey Jack for creaminess.

storage/reheating

  • Storage: I let leftovers cool, then store them in an airtight container in the fridge for up to 3–4 days.

  • Reheating: I reheat in a skillet over medium-low heat, adding a splash of milk or broth to revive the creaminess. It also warms well in the microwave—just cover and heat in 1-minute intervals, stirring halfway.

FAQs

What cut of steak works best for this recipe?

I prefer skirt or flank steak for quick cooking and great flavor. But I’ve also used sirloin or ribeye—just slice it thin so it cooks evenly.

Can I make this dish vegetarian?

Absolutely. I’ve swapped the steak for seasoned black beans, jackfruit, or plant-based crumbles, and it still feels indulgent and satisfying.

Is there a gluten‑free version?

Yes—I ensure the queso sauce is gluten-free (check the label if store-bought), and use plain rice. None of the other ingredients contain gluten.

How spicy is this dish?

Mild by default. I control the heat by choosing my queso (plain vs. spicy) and adding jalapeños or chili powder if I want more kick.

Can I freeze leftovers?

I don’t recommend freezing due to the rice and cheese texture—after thawing, it tends to separate. It’s best enjoyed fresh or refrigerated.

Conclusion

I love making this Cheesy Steak & Queso Rice when I want a satisfying, easy meal that feels special. The blend of savory steak, melty cheese, and tender rice always hits the spot. Whether I’m cooking for my family or craving comfort food after a long day, this recipe never disappoints. Want to customize it more? Just tell me what you’re thinking, and I’ll help adjust!

Print

clock clock iconcutlery cutlery iconflag flag iconfolder folder iconinstagram instagram iconpinterest pinterest iconfacebook facebook iconprint print iconsquares squares iconheart heart iconheart solid heart solid icon
Cheesy Steak & Queso Rice

Cheesy Steak & Queso Rice

5 Stars 4 Stars 3 Stars 2 Stars 1 Star No reviews
  • Author: Sue
  • Prep Time: 10 minutes
  • Cook Time: 20 minutes
  • Total Time: 30 minutes
  • Yield: 4 servings
  • Category: Dinner
  • Method: Stovetop
  • Cuisine: Mexican-Inspired
  • Diet: Gluten Free
Print Recipe
Pin Recipe

Description

A comforting, cheesy one-pan dish combining tender, seasoned steak, creamy queso, and fluffy rice—perfect for a satisfying weeknight meal.


Ingredients

  • 1 lb flank or skirt steak, thinly sliced
  • 2 cups cooked white or brown rice
  • 1 cup shredded cheddar or Mexican cheese blend
  • 1 cup queso dip or queso sauce (store-bought or homemade)
  • 1 small onion, diced
  • 2 cloves garlic, minced
  • 1 bell pepper, diced (optional)
  • 2 tbsp olive oil or butter
  • Salt and pepper, to taste
  • 1 tsp cumin
  • 1 tsp chili powder or taco seasoning

Instructions

  1. Season the thinly sliced steak with salt, pepper, cumin, and chili powder. Heat oil in a skillet and sear the steak until browned and cooked to desired doneness. Remove and set aside.
  2. In the same skillet, sauté the diced onion, garlic, and bell pepper until soft and fragrant.
  3. Stir the cooked rice into the skillet with the veggies, mixing well until heated through.
  4. Add shredded cheese and stir until melted.
  5. Fold in the cooked steak slices.
  6. Drizzle warm queso sauce over the mixture and gently stir to combine everything.
  7. Serve hot, optionally garnished with fresh cilantro, jalapeños, or a squeeze of lime.

Notes

  • Use spicy queso or jalapeños for extra heat.
  • Swap steak for chicken, chorizo, or black beans for variation.
  • Store leftovers in the fridge for 3–4 days in an airtight container.
  • Reheat with a splash of milk or broth to revive creaminess.

Nutrition

  • Serving Size: 1 portion
  • Calories: 520
  • Sugar: 3g
  • Sodium: 710mg
  • Fat: 28g
  • Saturated Fat: 13g
  • Unsaturated Fat: 12g
  • Trans Fat: 0.5g
  • Carbohydrates: 36g
  • Fiber: 2g
  • Protein: 34g
  • Cholesterol: 95mg

Have you made this recipe? I'd love to see it!

Click here to Follow me on Pinterest

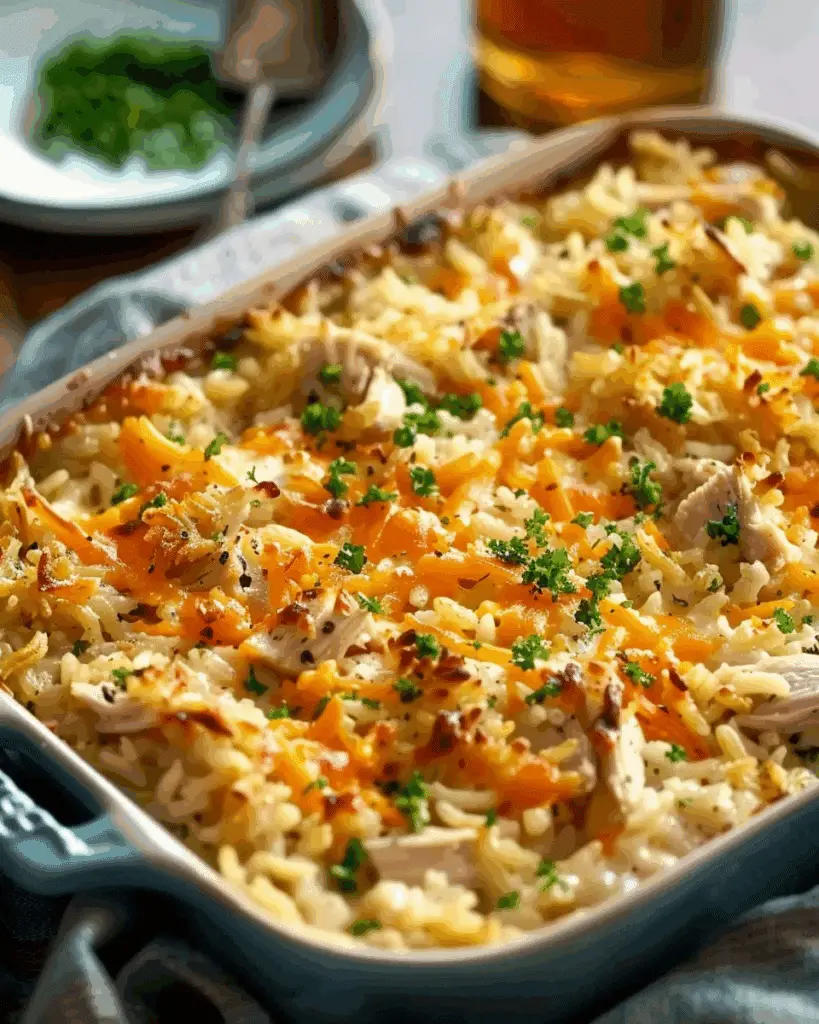
Chicken Rice-a-Roni Casserole

June 28, 2025 by Sue Leave a Comment

This comforting casserole combines tender shredded chicken, creamy soup, and savory Rice-a-Roni into one deliciously easy dish. I love how it comes together quickly with pantry staples, making it a perfect weeknight meal. Chicken Rice-a-Roni Casserole

Why You’ll Love This Recipe

I always turn to this recipe when I want something cozy, filling, and hassle-free. It’s creamy, satisfying, and topped with crispy French-fried onions that give it the perfect crunch. It’s also great for using up leftover chicken or a store-bought rotisserie. I can make it ahead, double it for meal prep, or adjust it to fit what I have in the fridge.

Ingredients

(Here's a tip: Check out the full list of ingredients and measurements in the recipe card below.)

  • 1 box chicken-flavored Rice-a-Roni

  • 1 (10.5 oz) can cream of chicken soup

  • 1 cup sour cream

  • 4 cups cooked, shredded chicken

  • 1 (6 oz) can French-fried onions

Directions

  1. Preheat the oven to 350°F.

  2. Cook the Rice-a-Roni according to package instructions.

  3. In a large bowl, mix the cooked rice, cream of chicken soup, sour cream, and shredded chicken until well combined.

  4. Transfer the mixture to a lightly greased 9x13-inch baking dish.

  5. Top evenly with French-fried onions.

  6. Bake uncovered for 30 minutes, or until bubbly and golden on top.

Servings and timing

  • Servings: 6 to 8

  • Prep time: 15 minutes

  • Cook time: 30 minutes

  • Total time: 45 minutes

Variations

  • I like adding shredded cheddar cheese to the mix for a cheesy version.

  • Chopped vegetables like broccoli, bell peppers, or mushrooms can be stirred in for extra nutrition.

  • For a richer flavor, I sometimes add a few tablespoons of cream cheese or substitute the sour cream with Greek yogurt.

  • To make it spicy, I mix in a few dashes of hot sauce or a pinch of cayenne pepper.

Storage / Reheating

I store leftovers in an airtight container in the fridge for up to 4 days. To reheat, I microwave individual portions for about 2 minutes or warm the whole dish in the oven at 350°F until heated through. This casserole also freezes well—I wrap it tightly and freeze for up to 2 months. I thaw it in the fridge overnight before reheating.

FAQs

Can I use other types of Rice-a-Roni?

Yes, I can use any savory Rice-a-Roni flavor, but the chicken variety gives the best match for this recipe.

What kind of chicken works best?

I usually use rotisserie chicken for convenience, but any cooked and shredded chicken breast or thighs work great.

Can I make this ahead of time?

Absolutely. I often prepare the casserole in the morning, refrigerate it, and bake it in the evening. I just add 5 extra minutes to the bake time if it's coming straight from the fridge.

Is this dish freezer-friendly?

Yes, I can freeze the unbaked or baked casserole. For best results, I thaw overnight in the fridge and bake or reheat as usual.

Can I skip the French-fried onions?

If I want a different topping, crushed crackers or breadcrumbs mixed with a bit of melted butter also add a nice crunch.

Conclusion

This Chicken Rice-a-Roni Casserole is one of my favorite comfort food recipes. It’s hearty, flavorful, and so easy to customize. Whether I’m feeding my family or looking for something simple to prep ahead, this dish always delivers. I know once I try it, it’ll become a regular in my meal rotation.

Print

clock clock iconcutlery cutlery iconflag flag iconfolder folder iconinstagram instagram iconpinterest pinterest iconfacebook facebook iconprint print iconsquares squares iconheart heart iconheart solid heart solid icon
Chicken Rice-a-Roni Casserole

Chicken Rice-a-Roni Casserole

5 Stars 4 Stars 3 Stars 2 Stars 1 Star No reviews
  • Author: Sue
  • Prep Time: 15 minutes
  • Cook Time: 30 minutes
  • Total Time: 45 minutes
  • Yield: 6–8 servings
  • Category: Dinner
  • Method: Baking
  • Cuisine: American
  • Diet: Low Salt
Print Recipe
Pin Recipe

Description

A cozy and comforting casserole made with tender shredded chicken, creamy sauce, and savory Rice‑a‑Roni, topped with crispy French‑fried onions. This easy-to-make dish is perfect for a quick and satisfying family dinner.


Ingredients

  • 1 box chicken‑flavored Rice‑a‑Roni
  • 1 (10.5 oz) can cream of chicken soup (low‑sodium recommended)
  • 1 cup sour cream
  • 4 cups cooked, shredded chicken (rotisserie is easiest)
  • 1 (6 oz) can French‑fried onions

Instructions

  1. Preheat the oven to 350 °F.
  2. Cook Rice‑a‑Roni according to the package instructions, using any included butter or oil.
  3. In a bowl, stir together the cooked rice, cream of chicken soup, sour cream, and shredded chicken.
  4. Spread the mixture in a lightly sprayed 9×13 baking dish.
  5. Sprinkle the French‑fried onions evenly over the top.
  6. Bake uncovered for about 30 minutes, until bubbly and golden.

Notes

  • Use rotisserie chicken for quicker prep.
  • Try adding vegetables or cheese for variation.
  • This dish freezes well—just thaw before reheating.
  • Prepare ahead and refrigerate until ready to bake.

Nutrition

  • Serving Size: 1 portion (approx. ⅛ of casserole)
  • Calories: 410
  • Sugar: 2g
  • Sodium: 720mg
  • Fat: 22g
  • Saturated Fat: 8g
  • Unsaturated Fat: 12g
  • Trans Fat: 0g
  • Carbohydrates: 28g
  • Fiber: 1g
  • Protein: 25g
  • Cholesterol: 85mg

Have you made this recipe? I'd love to see it!

Click here to Follow me on Pinterest

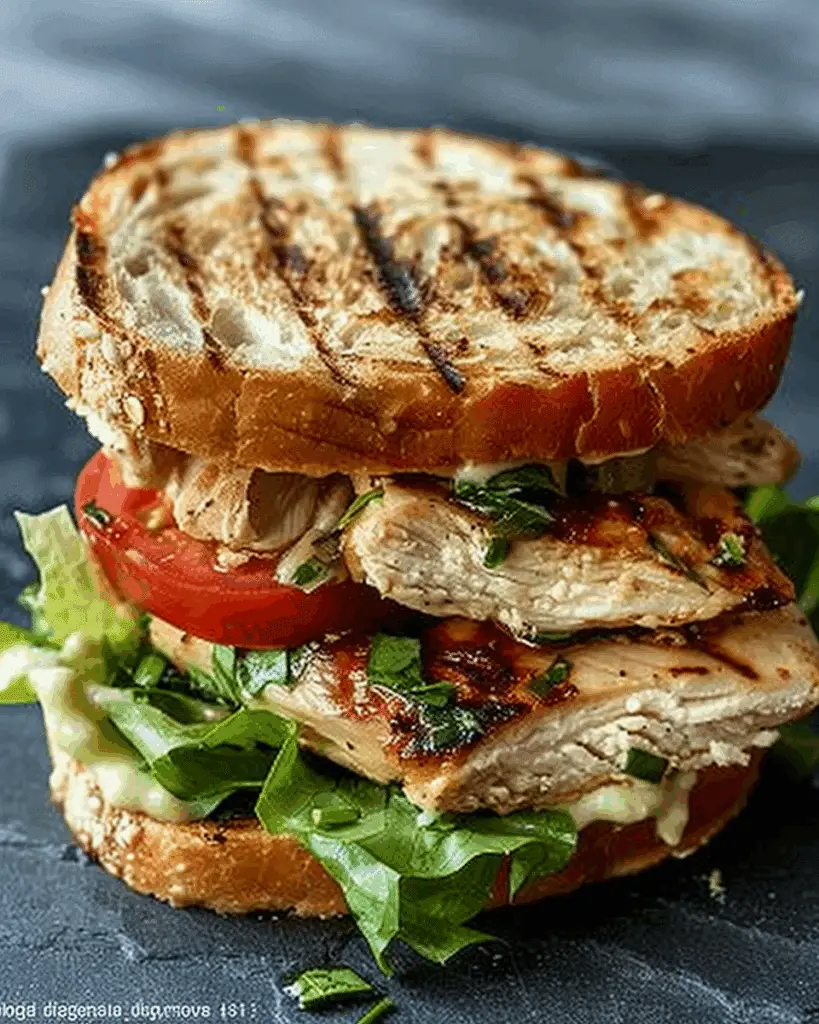
Garlic Butter Lettuce, Tomato & Grilled Chicken Sandwich

June 28, 2025 by Sue Leave a Comment

I share a satisfyingly rich sandwich featuring garlic-buttered bread, juicy grilled chicken, crisp lettuce, and fresh tomato—simple yet indulgent. Garlic Butter Lettuce, Tomato & Grilled Chicken Sandwich

Why You’ll Love This Recipe

I love how this sandwich balances richly flavored garlic-buttered bread with the freshness of lettuce and tomato. The grilled chicken adds heartiness, and the combination feels both comforting and elegant. It’s quick enough for everyday, but tasty enough to feel special.

Ingredients

(Here's a tip: Check out the full list of ingredients and measurements in the recipe card below.)
• Thick-cut bread (Texas toast or favorite)
• Butter
• Garlic (minced or powder)
• Salt (optional)
• Grilled chicken breast
• Lettuce leaves
• Tomato slices

Directions

  1. Mix butter with garlic (minced or powder) until evenly blended

  2. Spread garlic butter on one side of each bread slice

  3. Toast the bread in a skillet over medium heat until golden and fragrant

  4. Grill chicken breast until cooked through (165 °F internal temp), then let rest and slice

  5. Assemble sandwich: place lettuce and tomato on one slice of toast, top with grilled chicken, close with another slice

  6. Serve immediately while everything’s warm and crisp

Servings and timing

Makes 2 to 4 sandwiches, depending on bread and chicken size
Prep time: about 10 minutes
Cook time: about 15 to 20 minutes
Total time: around 25 to 30 minutes

Variations

• Add a slice of provolone or cheddar to the chicken before closing the sandwich
• Mix chopped parsley or basil into the garlic butter
• Stir a dash of chili flakes or hot sauce into the garlic butter for a spicy version
• Layer sliced avocado for added creaminess
• Use different bread types like ciabatta or whole grain for variety

Storage/reheating

I store components separately in airtight containers in the fridge for up to 3 days
To reheat, I warm the chicken and bread together in a skillet or toaster oven for 2 to 3 minutes to keep their crispness
Lettuce and tomato are best added fresh right before serving

FAQs

Can I use chicken thighs instead of breast?

Yes—I sometimes swap in grilled chicken thighs for extra juiciness and flavor. They work well with garlic butter

What kind of bread works best?

I prefer thick-cut bread like Texas toast or sourdough. It holds up to the butter and grilling without getting soggy

How can I make this vegetarian?

I’ve used grilled portobello mushroom caps brushed with garlic butter. They give a satisfying, meaty texture

Can I prepare chicken ahead of time?

Definitely. I grill the chicken in advance, slice it, and keep it in the fridge. When ready, I reheat it in a skillet while toasting the bread

How do I keep the sandwich from getting soggy?

I toast the bread well and layer the lettuce and tomato between the chicken and the top slice of bread to create a moisture barrier

Conclusion

I absolutely enjoy this garlic butter lettuce, tomato, and grilled chicken sandwich because it’s quick, flavorful, and versatile. Whether I’m cooking for myself or sharing it, it always delivers that perfect mix of freshness and richness.

Print

clock clock iconcutlery cutlery iconflag flag iconfolder folder iconinstagram instagram iconpinterest pinterest iconfacebook facebook iconprint print iconsquares squares iconheart heart iconheart solid heart solid icon
Garlic Butter Lettuce, Tomato & Grilled Chicken Sandwich

5 Stars 4 Stars 3 Stars 2 Stars 1 Star No reviews
  • Author: Sue
  • Prep Time: 10 minutes
  • Cook Time: 20 minutes
  • Total Time: 30 minutes
  • Yield: 2–4 sandwiches
  • Category: Sandwich
  • Method: Grilling
  • Cuisine: American
  • Diet: Halal
Print Recipe
Pin Recipe

Description

A satisfyingly rich sandwich with garlic-buttered bread, juicy grilled chicken, crisp lettuce, and fresh tomato—simple yet indulgent.


Ingredients

  • 4 slices thick-cut bread (Texas toast or your favorite)
  • 2 tablespoons butter
  • 1–2 cloves garlic, minced (or ½ teaspoon garlic powder)
  • Pinch of salt (optional)
  • 2 grilled chicken breasts
  • 4 lettuce leaves
  • 4 tomato slices

Instructions

  1. Mix butter with garlic (minced or powder) until evenly blended.
  2. Spread garlic butter on one side of each bread slice.
  3. Toast the bread in a skillet over medium heat until golden and fragrant.
  4. Grill chicken breast until cooked through (165 °F internal temp), then let rest and slice.
  5. Assemble sandwich: place lettuce and tomato on one slice of toast, top with grilled chicken, close with another slice.
  6. Serve immediately while everything’s warm and crisp.

Notes

  • Use chicken thighs for extra juiciness.
  • Choose thick-cut bread like sourdough for better structure.
  • Vegetarian option: swap chicken for garlic-buttered portobello mushroom caps.
  • Grill chicken ahead and reheat as needed.
  • Layer ingredients to avoid sogginess: lettuce and tomato between chicken and top slice.

Nutrition

  • Serving Size: 1 sandwich
  • Calories: 420
  • Sugar: 4g
  • Sodium: 580mg
  • Fat: 20g
  • Saturated Fat: 8g
  • Unsaturated Fat: 10g
  • Trans Fat: 0g
  • Carbohydrates: 28g
  • Fiber: 2g
  • Protein: 32g
  • Cholesterol: 85mg

Have you made this recipe? I'd love to see it!

Click here to Follow me on Pinterest

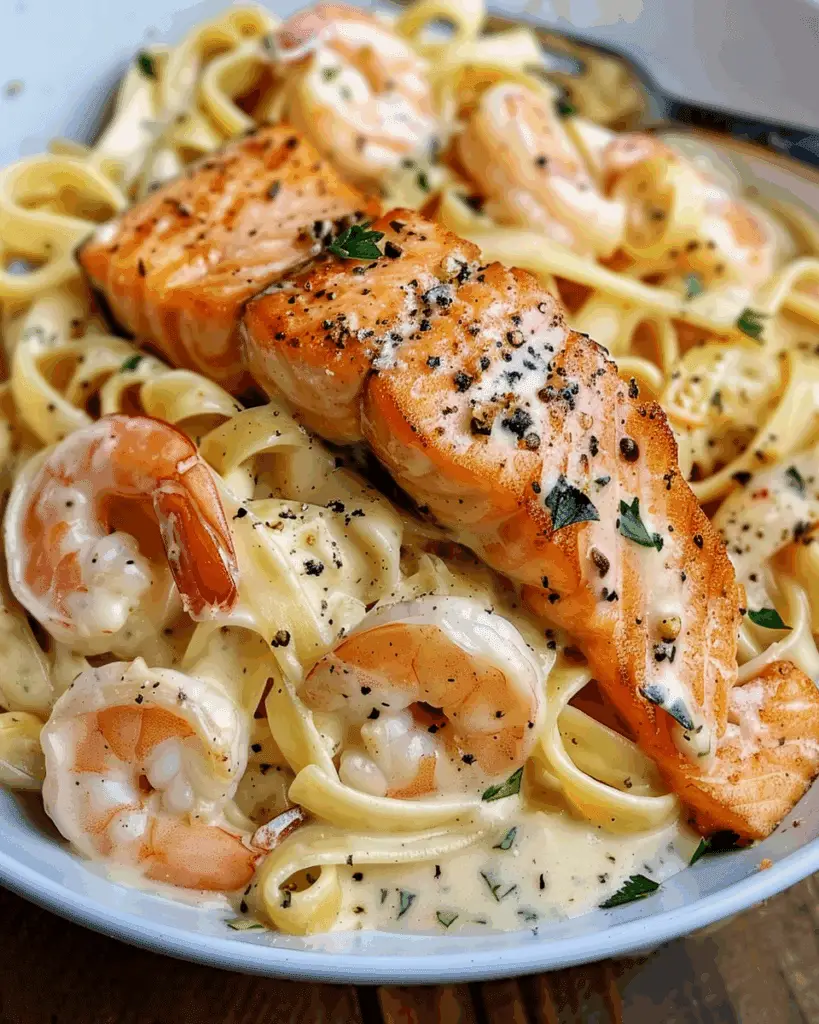
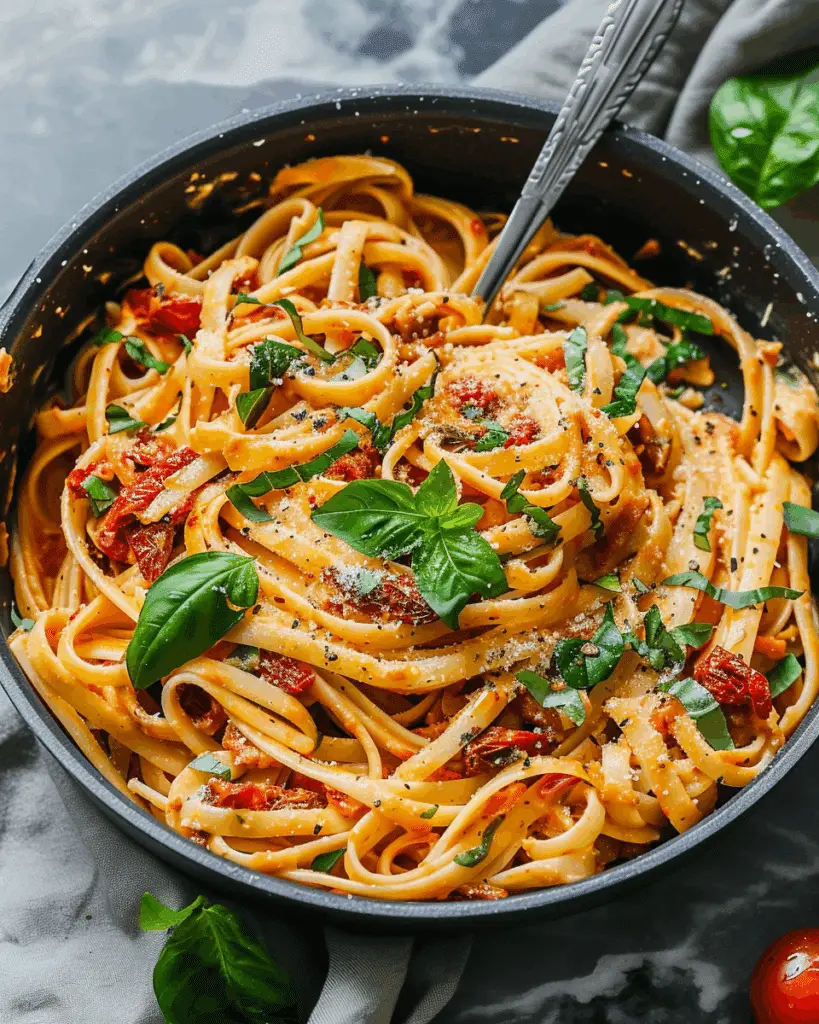
Salmon and Shrimp Alfredo

June 28, 2025 by Sue Leave a Comment

I created a creamy Alfredo pasta featuring both tender shrimp and flaky salmon, all enveloped in a rich, silky sauce served over fettuccine. It’s a seafood lover’s dream with comforting, indulgent flavors.

Salmon and Shrimp Alfredo

Why You’ll Love This Recipe

I love how effortlessly this comes together in about half an hour—perfect for a busy weeknight yet feeling special enough for guests. The combination of salmon and shrimp not only brings a satisfying protein punch but also a pleasant, ocean-fresh taste. I keep the sauce luxurious but streamlined, so it’s approachable without sacrificing flavor.

Ingredients

(Here's a tip: Check out the full list of ingredients and measurements in the recipe card below.)

  • Fettuccine noodles

  • Salmon fillet

  • Peeled, deveined shrimp

  • Butter

  • Greek yogurt (full-fat or low-fat)

  • Garlic powder (or fresh garlic)

  • Freshly grated Parmesan cheese

  • Salt and pepper

  • Chopped dill or parsley (optional garnish)

Directions

  1. I start by cooking the fettuccine in salted boiling water until al dente, saving about a cup of pasta water before draining.

  2. I pat the salmon and shrimp dry, season them with salt and pepper, then cook: either bake the salmon at 400°F for 10 minutes and add shrimp for another 10, or cook both in an air fryer (about 7 minutes for salmon, then shrimp).

  3. In a skillet, I melt the butter over medium heat and whisk in the Greek yogurt and garlic powder until smooth.

  4. I mix in the Parmesan until it melts into the sauce, then loosen it with reserved pasta water until it clings nicely to a spoon.

  5. I toss the pasta in the sauce, then gently fold in the cooked salmon and shrimp.

  6. Finally, I garnish with chopped dill or parsley, extra Parmesan, and a crack of black pepper.

Servings and timing

  • Servings: 4–6

  • Prep time: 5–10 minutes

  • Cook time: 20–25 minutes

  • Total time: Approximately 30 minutes

Variations

  • I sometimes toss in vegetables like spinach, peas, asparagus, or mushrooms for added color and nutrition.

  • When I want a richer version, I swap the Greek yogurt for heavy cream.

  • I often boost flavor with Italian seasoning, a pinch of Cajun spice, or a squeeze of lemon juice.

  • Instead of seafood, I’ve tried scallops, lobster, whitefish, or even chicken for a different protein twist.

Storage/reheating

I store leftovers in an airtight container in the fridge for up to three days. When reheating, I gently warm it on the stovetop or microwave with a splash of water to loosen the sauce. I avoid freezing it because the cream sauce can separate.

FAQs

Can I use other pasta shapes?

Definitely. I’ve used penne, linguine, and tagliatelle, and they all work wonderfully with the creamy sauce.

What if I don’t have Greek yogurt?

I sometimes substitute heavy cream, sour cream, or cream cheese—but it does change the richness and nutrition slightly.

Can I use frozen seafood?

Yes—just thaw it completely and pat it dry before cooking. I’ve also repurposed leftover cooked salmon and shrimp with great results.

Can I prep parts ahead of time?

Absolutely. I often cook the seafood ahead and keep it in the fridge. When I’m ready, I reheat it gently in the sauce before serving.

Is this recipe freezer-friendly?

I’ve found freezing alters the sauce’s texture, so I prefer to enjoy this fresh rather than frozen.

Conclusion

I truly enjoy how this Salmon and Shrimp Alfredo feels indulgent yet is surprisingly simple to whip up. It’s a great way to enjoy seafood in a comforting pasta dish, and I’m always delighted when there are leftovers. I hope you love every creamy, flavorful bite as much as I do.

Print

clock clock iconcutlery cutlery iconflag flag iconfolder folder iconinstagram instagram iconpinterest pinterest iconfacebook facebook iconprint print iconsquares squares iconheart heart iconheart solid heart solid icon
Salmon and Shrimp Alfredo

Salmon and Shrimp Alfredo

5 Stars 4 Stars 3 Stars 2 Stars 1 Star No reviews
  • Author: Sue
  • Prep Time: 10 minutes
  • Cook Time: 25 minutes
  • Total Time: 30 minutes
  • Yield: 4–6 servings
  • Category: Main Course
  • Method: Stovetop, Oven or Air Fryer
  • Cuisine: American
  • Diet: Low Lactose
Print Recipe
Pin Recipe

Description

A creamy and indulgent seafood Alfredo featuring salmon and shrimp, tossed with fettuccine in a Greek yogurt-Parmesan sauce, perfect for a comforting yet nutritious meal.


Ingredients

  • 12 oz fettuccine noodles
  • 10 oz salmon fillet (wild-caught preferred)
  • 1 lb peeled, deveined shrimp
  • 2 Tbsp butter
  • ½ cup Greek yogurt (full-fat or low-fat)
  • 1 tsp garlic powder (or 4–6 cloves minced garlic)
  • ½ cup freshly grated Parmesan cheese
  • Salt and pepper, to taste
  • Optional garnish: chopped dill or parsley

Instructions

  1. Cook fettuccine in salted boiling water until al dente; reserve about 1 cup of pasta water before draining.
  2. Pat salmon and shrimp dry. Season lightly with salt and pepper.
  3. Cook seafood—either bake salmon at 400 °F for 10 minutes then add shrimp for another 10 minutes, or air-fry (7 minutes salmon, add shrimp for 7 minutes).
  4. In the same pan or a skillet, melt butter over medium heat. Whisk in Greek yogurt and garlic powder.
  5. Stir in Parmesan until melted, then add reserved pasta water tablespoon by tablespoon until sauce clings to a spoon.
  6. Add cooked pasta to sauce and gently toss with tongs to coat evenly.
  7. Fold in salmon and shrimp carefully.
  8. Garnish with dill or parsley, a crack of black pepper, and extra Parmesan if desired.

Notes

  • Use wild-caught salmon for better flavor and nutrition.
  • Heavy cream, sour cream, or cream cheese can replace Greek yogurt if preferred.
  • Leftovers are best consumed within 3 days and reheated gently with added moisture.
  • This dish is not freezer-friendly due to the sauce consistency.

Nutrition

  • Serving Size: 1 serving
  • Calories: 520
  • Sugar: 3g
  • Sodium: 580mg
  • Fat: 24g
  • Saturated Fat: 10g
  • Unsaturated Fat: 12g
  • Trans Fat: 0g
  • Carbohydrates: 38g
  • Fiber: 2g
  • Protein: 38g
  • Cholesterol: 160mg

Have you made this recipe? I'd love to see it!

Click here to Follow me on Pinterest

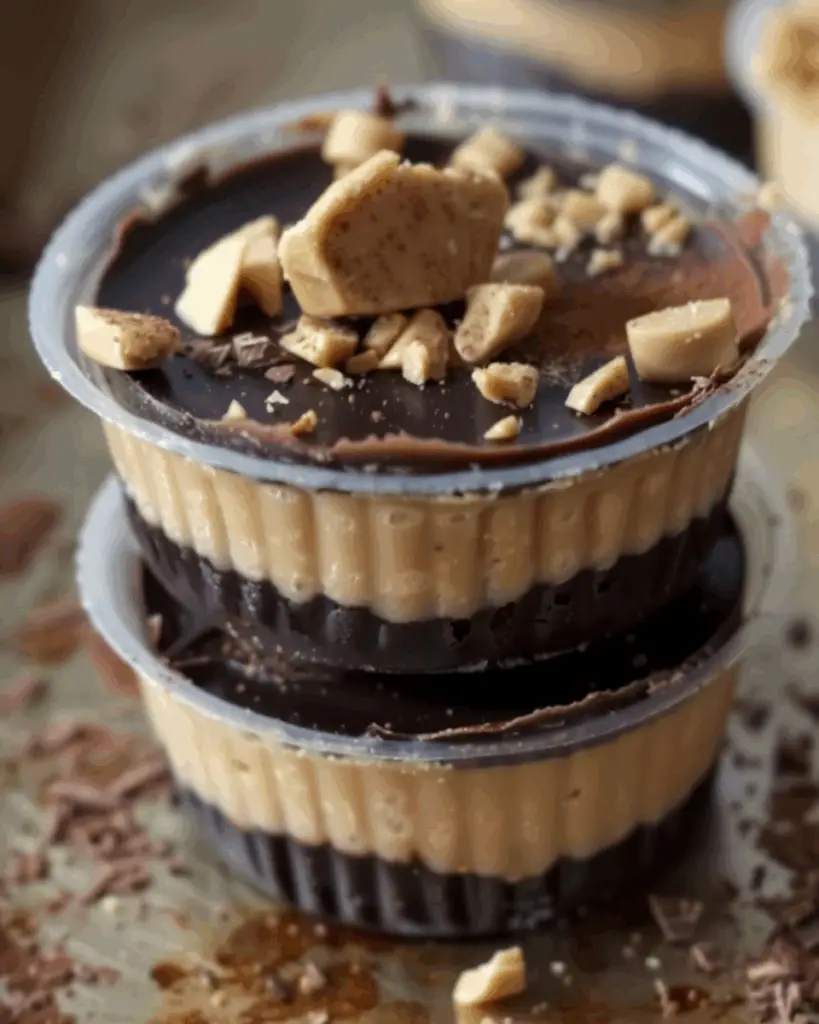
Chocolate Peanut Butter Dessert Cups

June 28, 2025 by Sue Leave a Comment

A decadent, no-bake treat in individual servings—each cup features a buttery Oreo crust, creamy peanut butter filling, a drizzle of chocolate, and a mini Reese’s cup on top. Chocolate Peanut Butter Dessert Cups

Why I’ll Love This Recipe

I love how easy these are—just 25 minutes to prep, and they’re ready to chill. They combine two of my favorite flavors—chocolate and peanut butter—in perfect harmony. Plus, the single-serve cups are ideal for parties or portion control.

ingredients

(Here's a tip: Check out the full list of ingredients and measurements in the recipe card below.)

  • 2 cups crushed Oreo cookie crumbs (with cream filling)

  • ¼ cup salted butter, melted and cooled

  • 8 oz cream cheese, softened

  • 1 cup powdered sugar

  • 1 cup creamy peanut butter

  • 1½ cups cold heavy whipping cream

  • 1 teaspoon pure vanilla extract

  • Chocolate sauce, for drizzling

  • 28 Reese’s peanut butter minis

  • 28 (2-oz) disposable portion cups with lids

directions

  1. Mix Oreo crumbs with melted butter until fully combined.

  2. Divide into the portion cups—about 2 teaspoons each—and press down firmly.

  3. Beat the cream cheese and powdered sugar until smooth.

  4. Mix in peanut butter until well combined.

  5. Add heavy cream and vanilla; beat until the mixture thickens and holds its shape.

  6. Fill piping bag (or zip-top bag) with filling and pipe into cups, filling about ¾ full.

  7. Drizzle chocolate sauce on top, then add a Reese’s mini to each cup.

  8. Cover with lids and chill in the fridge until firm.

Servings and timing

  • Servings: 28 dessert cups

  • Prep time: 25 minutes

  • Total time: 25 minutes

Variations

  • Swap Oreo crumbs for graham cracker crumbs or gluten-free alternatives.

  • Use coconut oil or non-dairy margarine to make them dairy-free.

  • Replace some powdered sugar with a sugar substitute for a less-sweet option.

  • Try almond, cashew, or sunflower seed butter instead of peanut butter.

  • Use half-and-half or milk instead of heavy cream for a lighter filling.

  • Flavor enhancements like cinnamon or espresso powder add a fun twist.

  • Customize the chocolate drizzle with dark, milk, or white chocolate—or add a spoonful of jam for PB&J cups.

storage/reheating

  • Make-ahead: Store in the refrigerator with lids for up to 3 days.

  • Freezer: Freeze for up to 1 month in an airtight container, then thaw in the fridge overnight or at room temperature for about 30 minutes.

FAQs

How can I make these gluten-free?

I can use gluten-free Oreo-style cookies or alternative gluten-free chocolate sandwich cookies to replace the regular Oreo crumbs.

What if I don’t have heavy cream?

I can substitute half-and-half or whole milk, though the filling will be lighter and less stable.

Can I skip the chocolate drizzle?

Yes. I can omit it or swap it for cooled hot fudge or melted chocolate chips.

Will natural peanut butter work?

Yes, but I need to stir well. The filling might be a bit thinner if excess oil isn't well incorporated.

Can I prepare these ahead of time?

Absolutely! I make them ahead—either fridge-chilled for short-term or frozen for longer storage. Just thaw before serving.

Conclusion

These chocolate peanut butter dessert cups are a delightful, effortless treat I turn to when craving something sweet and creamy. They’re perfect for gatherings, easy to customize, and keep well in the fridge or freezer. I can’t wait to whip up another batch!

Print

clock clock iconcutlery cutlery iconflag flag iconfolder folder iconinstagram instagram iconpinterest pinterest iconfacebook facebook iconprint print iconsquares squares iconheart heart iconheart solid heart solid icon
Chocolate Peanut Butter Dessert Cups

Chocolate Peanut Butter Dessert Cups

5 Stars 4 Stars 3 Stars 2 Stars 1 Star No reviews
  • Author: Sue
  • Prep Time: 25 minutes
  • Cook Time: 0 minutes
  • Total Time: 25 minutes
  • Yield: 28 dessert cups
  • Category: Dessert
  • Method: No-Bake
  • Cuisine: American
  • Diet: Vegetarian
Print Recipe
Pin Recipe

Description

Decadent no-bake dessert cups featuring a buttery Oreo crust, creamy peanut butter filling, chocolate drizzle, and a Reese's mini on top—perfect for parties and portion control.


Ingredients

  • 2 cups crushed Oreo cookie crumbs (with cream filling)
  • ¼ cup salted butter, melted and cooled
  • 8 oz cream cheese, softened
  • 1 cup powdered sugar
  • 1 cup creamy peanut butter
  • 1½ cups cold heavy whipping cream
  • 1 tsp pure vanilla extract
  • Chocolate sauce, for drizzling
  • 28 Reese’s peanut butter minis
  • 28 (2-oz) disposable portion cups with lids

Instructions

  1. Mix Oreo crumbs with melted butter until fully combined.
  2. Divide into the portion cups—about 2 teaspoons each—and press down firmly.
  3. Beat the cream cheese and powdered sugar until smooth.
  4. Mix in peanut butter until well combined.
  5. Add heavy cream and vanilla; beat until the mixture thickens and holds its shape.
  6. Fill piping bag (or zip-top bag) with filling and pipe into cups, filling about ¾ full.
  7. Drizzle chocolate sauce on top, then add a Reese’s mini to each cup.
  8. Cover with lids and chill in the fridge until firm.

Notes

  • Use gluten-free cookies for a gluten-free version.
  • Use non-dairy alternatives for a dairy-free version.
  • Substitute sugar with alternatives for a less-sweet option.
  • Customize with different nut butters or flavor add-ins.
  • Can be made ahead and stored in fridge or freezer.

Nutrition

  • Serving Size: 1 dessert cup
  • Calories: 210
  • Sugar: 12g
  • Sodium: 140mg
  • Fat: 14g
  • Saturated Fat: 6g
  • Unsaturated Fat: 6g
  • Trans Fat: 0g
  • Carbohydrates: 17g
  • Fiber: 1g
  • Protein: 4g
  • Cholesterol: 25mg

Have you made this recipe? I'd love to see it!

Click here to Follow me on Pinterest

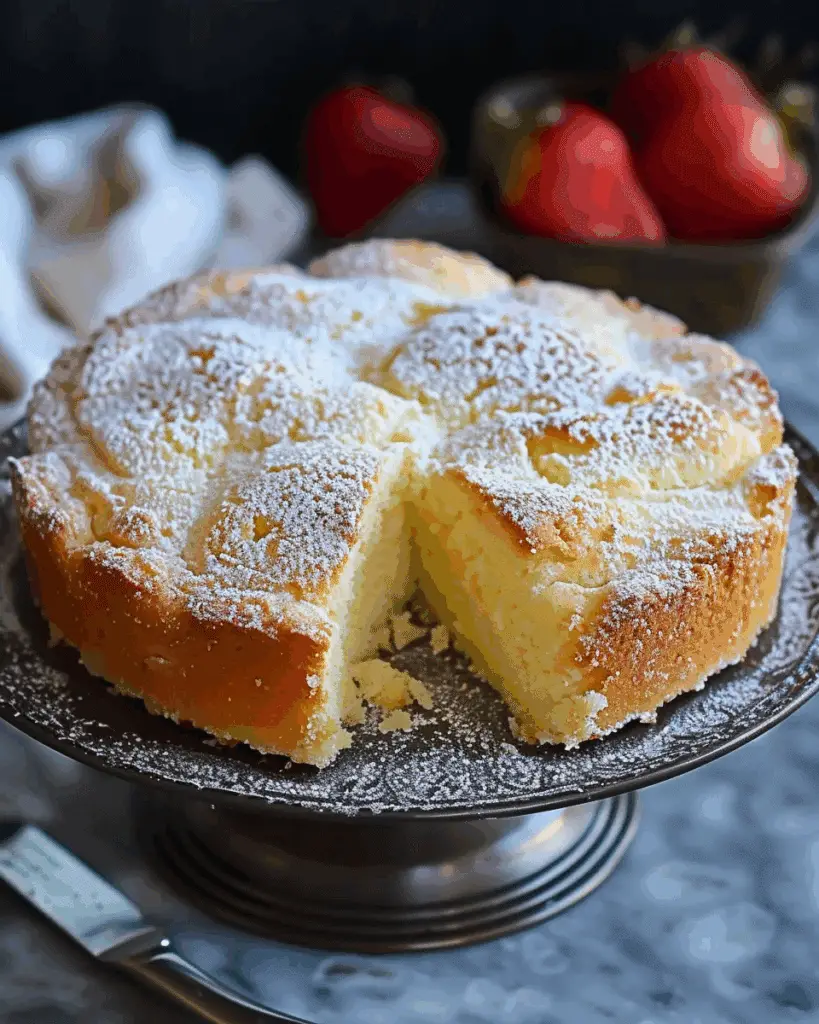
French Butter Cake

June 28, 2025 by Sue Leave a Comment

I’m excited to share this delightful French Butter Cake—a rich, buttery dessert with a tender, melt‑in‑your‑mouth crumb. Easy to whip up with pantry-staples, it’s perfect alongside coffee or as a simple yet indulgent treat. French Butter Cake

Why You’ll Love This Recipe

I love how this cake combines the best of a pound cake and a coffee cake: it’s moist, buttery, and just the right amount of sweet. The tender crumb practically melts when I take a bite. It's fast to prepare and relies on ingredients I always have on hand.

ingredients

(Here's a tip: Check out the full list of ingredients and measurements in the recipe card below.)

  • 3 eggs (room temperature)

  • 1 ⅛ cup granulated sugar

  • 1 cup unsalted butter (2 sticks), melted

  • 2 ½ tsp vanilla extract

  • 2 cups cake flour

  • 2 tsp baking powder

  • 1 tsp salt

  • ⅔ cup sour cream

  • 2 Tbsp granulated sugar (for topping)

directions

  1. Preheat oven to 350 °F (175 °C) and grease a 9×9‑inch baking pan.

  2. In a bowl, beat melted butter and sugar together until light and airy (about 1 minute).

  3. Add eggs one at a time, mixing after each, then stir in vanilla.

  4. Sift together cake flour, baking powder, and salt; gradually mix into wet ingredients until just combined.

  5. Fold in the sour cream gently.

  6. Pour batter into prepared pan, smooth the top, and sprinkle with the remaining 2 Tbsp sugar.

  7. Bake for 30–35 minutes, or until a toothpick comes out clean.

  8. Let the cake cool before slicing.

Servings and timing

  • Makes about 12 servings

  • Prep time: ~10 minutes

  • Bake time: 30–35 minutes

  • Total time: around 45 minutes

Variations

  • Berry-topped: Serve with fresh berries or a compote.

  • Glazed twist: Drizzle a simple powdered sugar glaze (powdered sugar + milk).

  • Citrus hint: Add a teaspoon of lemon or orange zest for a bright flavor.

  • Nut crust: Before baking, sprinkle chopped almonds or pecans on top for crunch.

storage/reheating

I store leftover cake tightly covered at room temperature for up to 3 days. For longer storage, I wrap it well and freeze for up to 2 months—just thaw at room temperature before serving. To reheat, I warm slices in the microwave for 10–15 seconds or pop them in a 300 °F oven for a few minutes until the edges are warm.

FAQs

### Can I use all-purpose flour instead of cake flour?

Yes—I do this often. For every cup of all-purpose flour, I remove 2 tablespoons and replace them with cornstarch, then sift before measuring to mimic cake flour’s lighter texture.

### Can I substitute sour cream with something else?

Absolutely. Greek yogurt works well in the same amount. I’ve also used plain yogurt for a slight tang similar to sour cream.

### How do I know when it’s done baking?

I stick a toothpick in the center—if it comes out with a few moist crumbs, it's done. I also look for the edges to pull slightly from the pan.

### Can I turn this into cupcakes or a bundt cake?

Yes! Bake cupcakes for 18–22 minutes at 350 °F, or pour into a greased 9‑inch bundt pan and bake for about 40–45 minutes, testing doneness with a toothpick.

### Can I add mix-ins like chocolate chips?

Definitely. I love adding about ½ cup of chocolate chips or toasted nuts folded into the batter before baking for added texture and flavor.

Conclusion

This French Butter Cake is my go-to for a quick and comforting dessert. It’s buttery, tender, and easy to customize. Whether I stick to the classic or add a twist, it never disappoints. I hope you enjoy baking and indulging in it as much as I do!

Print

clock clock iconcutlery cutlery iconflag flag iconfolder folder iconinstagram instagram iconpinterest pinterest iconfacebook facebook iconprint print iconsquares squares iconheart heart iconheart solid heart solid icon
French Butter Cake

French Butter Cake

5 Stars 4 Stars 3 Stars 2 Stars 1 Star No reviews
  • Author: Sue
  • Prep Time: 10 minutes
  • Cook Time: 35 minutes
  • Total Time: 45 minutes
  • Yield: 12 servings
  • Category: Dessert
  • Method: Baking
  • Cuisine: French
  • Diet: Vegetarian
Print Recipe
Pin Recipe

Description

A rich and buttery French Butter Cake with a tender, melt-in-your-mouth crumb. Quick to prepare with pantry staples, perfect for coffee time or a simple dessert.


Ingredients

  • 3 eggs (room temperature)
  • 1 ⅛ cup granulated sugar
  • 1 cup unsalted butter (2 sticks), melted
  • 2 ½ tsp vanilla extract
  • 2 cups cake flour
  • 2 tsp baking powder
  • 1 tsp salt
  • ⅔ cup sour cream
  • 2 Tbsp granulated sugar (for topping)

Instructions

  1. Preheat oven to 350 °F (175 °C) and grease a 9×9‑inch baking pan.
  2. In a bowl, beat melted butter and sugar together until light and airy (about 1 minute).
  3. Add eggs one at a time, mixing after each, then stir in vanilla.
  4. Sift together cake flour, baking powder, and salt; gradually mix into wet ingredients until just combined.
  5. Fold in the sour cream gently.
  6. Pour batter into prepared pan, smooth the top, and sprinkle with the remaining 2 Tbsp sugar.
  7. Bake for 30–35 minutes, or until a toothpick comes out clean.
  8. Let the cake cool before slicing.

Notes

  • Store tightly covered at room temperature for up to 3 days.
  • For longer storage, freeze for up to 2 months and thaw at room temperature.
  • Reheat in microwave for 10–15 seconds or in a 300 °F oven until warm.
  • Greek or plain yogurt can substitute for sour cream.
  • Add mix-ins like chocolate chips or nuts for variety.

Nutrition

  • Serving Size: 1 slice
  • Calories: 310
  • Sugar: 18g
  • Sodium: 190mg
  • Fat: 20g
  • Saturated Fat: 12g
  • Unsaturated Fat: 6g
  • Trans Fat: 0.5g
  • Carbohydrates: 30g
  • Fiber: 1g
  • Protein: 4g
  • Cholesterol: 90mg

Have you made this recipe? I'd love to see it!

Click here to Follow me on Pinterest

Crispy Low‑Carb Cottage Cheese Chips Recipe

June 28, 2025 by Sue Leave a Comment

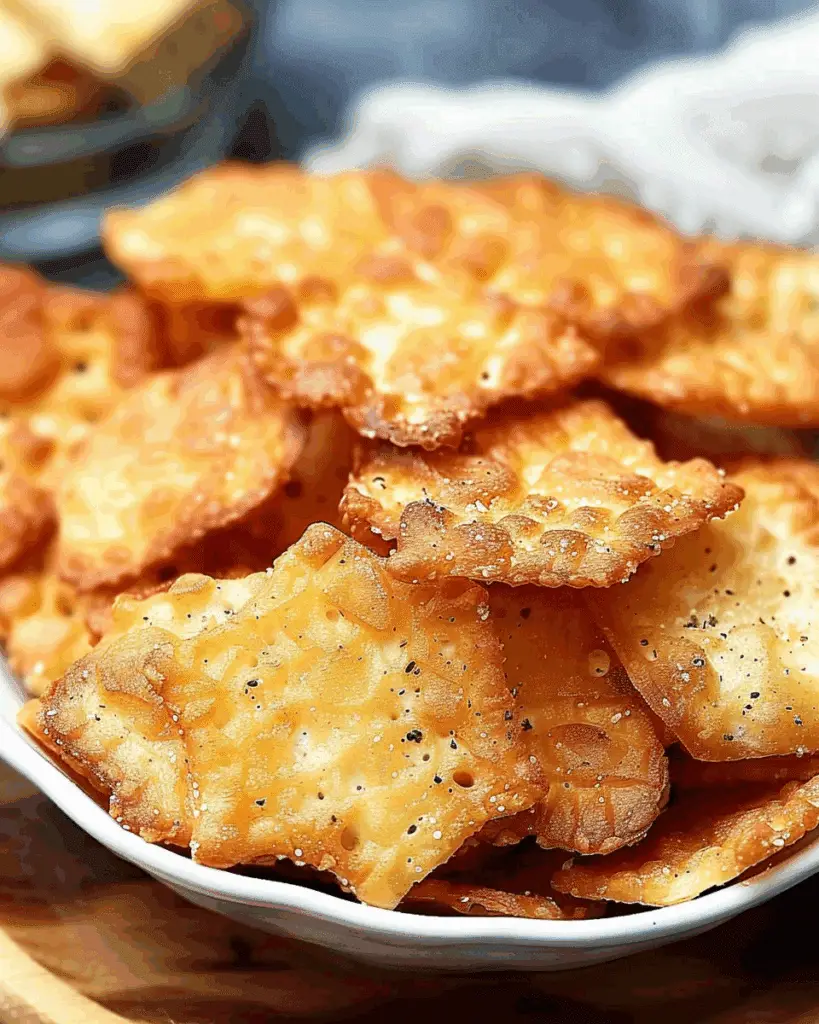
I discovered a high‑protein, keto‑friendly snack that’s surprisingly easy to make: crispy cottage cheese chips. It’s just cottage cheese baked until golden and crunchy—a delicious guilt‑free treat.

Crispy Low‑Carb Cottage Cheese Chips Recipe

Why You’ll Love This Recipe

I love how minimal this snack is—just one main ingredient, and I control the flavor with seasonings. It’s packed with protein, low in carbs, and perfect for dipping or munching on its own. Whether I need a quick bite or a replacement for chips, this always hits the spot.

ingredients

(Here's a tip: Check out the full list of ingredients and measurements in the recipe card below.)

  • 1 cup whole‑milk cottage cheese (small curds, ideally around 4% milk fat)

  • Optional seasonings: garlic powder, onion powder, chili powder, everything‑bagel seasoning, dried herbs, or grated Parmesan

I prefer whole‑milk cottage cheese with at least 14 g protein per ½ cup—it makes the chips much crispier.

directions

  1. Preheat the oven to 350°F (177°C).

  2. Line a baking sheet with high‑quality parchment paper to prevent sticking.

  3. Use a tablespoon scoop (or spoon) to place dollops of cottage cheese on the sheet, spaced about 2 inches apart.

  4. Flatten each scoop to about 3⁄16 to ¼ inch thick using the back of a spoon.

  5. Sprinkle seasonings as desired.

  6. Bake for 40–50 minutes, starting to check around 20 minutes. I look for edges that are dark brown and centers that are golden.

  7. Remove from oven and let cool completely for about 20–30 minutes. The chips will firm up as they cool.

  8. Enjoy once cooled. I store extras in an airtight container at room temperature or in the fridge or freezer. Re‑bake briefly to re‑crisp if softened.

Servings and timing

  • Makes about 16 chips

  • Prep time: 5 minutes

  • Cook time: 40–50 minutes

  • Cooling time: 20–30 minutes

  • Total time: about 1 hour

Variations

  • Everything bagel: I sprinkle no‑salt everything bagel seasoning for a savory twist.

  • Spicy: I like to dust with chili powder for a little kick.

  • Cheesy herb: I mix garlic powder and dried herbs like rosemary or chives.

  • Extra cheesy: I add a bit of Parmesan or cheddar to the mix before baking.

storage/reheating

I store chips in an airtight container. If I eat them the same day, room temperature works. For longer storage, I keep them in the fridge or freezer. To bring back the crunch, I reheat them in a 350°F oven for a few minutes.

FAQs

Can I use low‑fat or large‑curd cottage cheese?

I’ve found whole‑milk, small‑curd cottage cheese gives the best crunch. Low‑fat or large curds have more moisture and make chips softer.

Why do some chips stick to parchment?

Lower‑quality parchment can cause sticking or spreading. I use a sturdy brand to avoid that.

My chips are browned around the edges but still soft in the middle—help?

I bake them longer. I aim for a golden brown across the surface, which can take up to 50 minutes depending on the oven and chip thickness.

Can I microwave these chips?

Yes, I’ve tried microwaving a small scoop of cottage cheese on parchment for about 4 minutes. The texture is slightly different but still satisfying.

Are these really low‑carb and high‑protein?

Yes. Cottage cheese is naturally high in protein and low in carbohydrates, which makes these chips a great snack for a low‑carb or keto lifestyle.

Conclusion

I’m thrilled with how these chips turned out—crispy, flavorful, and nourishing. It’s amazing that cottage cheese transforms into a satisfying snack with no complicated prep. I’ll keep experimenting with seasonings to find my favorite combo. This is a snack I’ll definitely keep coming back to.

Print

clock clock iconcutlery cutlery iconflag flag iconfolder folder iconinstagram instagram iconpinterest pinterest iconfacebook facebook iconprint print iconsquares squares iconheart heart iconheart solid heart solid icon
Crispy Low‑Carb Cottage Cheese Chips Recipe

Crispy Low‑Carb Cottage Cheese Chips Recipe

5 Stars 4 Stars 3 Stars 2 Stars 1 Star No reviews
  • Author: Sue
  • Prep Time: 5 minutes
  • Cook Time: 40–50 minutes
  • Total Time: 1 hour
  • Yield: About 16 chips
  • Category: Snack
  • Method: Baking
  • Cuisine: American
Print Recipe
Pin Recipe

Description

A high-protein, low-carb snack made with just cottage cheese and optional seasonings, baked until crispy. Perfect for keto diets and quick snacking.


Ingredients

  • 1 cup whole‑milk cottage cheese (small curds, ideally around 4% milk fat)
  • Optional seasonings: garlic powder, onion powder, chili powder, everything‑bagel seasoning, dried herbs, or grated Parmesan

Instructions

  1. Preheat the oven to 350°F (177°C).
  2. Line a baking sheet with high‑quality parchment paper to prevent sticking.
  3. Use a 1 Tbsp scoop or spoon to place dollops of cottage cheese on the sheet, spaced about 2 inches apart.
  4. Flatten each scoop to about 3⁄16–¼ inch thick using the back of a metal spoon.
  5. Sprinkle desired seasonings on top.
  6. Bake for 40–50 minutes, starting to check around 20 minutes, until edges are dark brown and centers are medium‑gold.
  7. Remove from oven and let cool completely for 20–30 minutes. Chips will firm up as they cool.
  8. Enjoy once fully cooled. Store in an airtight container at room temperature short-term, or in the fridge/freezer for longer storage. Reheat to re-crisp if needed.

Notes

  • Whole-milk, small-curd cottage cheese yields the crispiest chips.
  • Use high-quality parchment paper to prevent sticking.
  • Thinner chips bake faster and get crunchier.
  • Can be made in the microwave in small batches for a quick snack.

Nutrition

  • Serving Size: 4 chips
  • Calories: 80
  • Sugar: 1g
  • Sodium: 200mg
  • Fat: 5g
  • Saturated Fat: 3g
  • Unsaturated Fat: 2g
  • Trans Fat: 0g
  • Carbohydrates: 1g
  • Fiber: 0g
  • Protein: 8g
  • Cholesterol: 20mg

Have you made this recipe? I'd love to see it!

Click here to Follow me on Pinterest

Cheesecake Factory Italian Lemon Cream Cake Recipe

June 28, 2025 by lina Leave a Comment

This Cheesecake Factory Italian Lemon Cream Cake is a delightful dessert that captures the perfect balance of tangy lemon and creamy texture. With layers of moist lemon cake, luscious lemon cream filling, and a sweet frosting, it’s a showstopper for any occasion. Whether you're hosting a dinner party or simply satisfying a sweet craving, this cake brings an elegant and refreshing touch to your dessert table.

Cheesecake Factory Italian Lemon Cream Cake Recipe

Why You’ll Love This Recipe

I absolutely love this Italian Lemon Cream Cake because it’s not just a cake—it's an experience. The lemon flavor is bright and refreshing, while the cream filling is rich and velvety, creating a perfect harmony of flavors and textures. The cake is soft and fluffy, and the frosting is smooth and sweet, with a delightful tang that complements the lemon perfectly. It’s the kind of dessert that feels special, making it ideal for celebrations or whenever I want to treat myself and others to something extra special.

Ingredients

  • 2 ½ cups all-purpose flour

  • 2 ½ teaspoon baking powder

  • ½ teaspoon salt

  • 1 ½ cups unsalted butter, room temperature

  • 2 cups granulated sugar

  • 5 large eggs

  • 1 teaspoon vanilla extract

  • 1 teaspoon lemon extract

  • 1 tablespoon lemon zest

  • 1 cup whole milk

  • 1 tablespoon fresh lemon juice

  • 1 ½ cups heavy cream

  • 8 oz cream cheese, softened

  • 1 cup powdered sugar

  • 2 tablespoon fresh lemon juice

(Tip: You'll find the full list of ingredients and measurements in the recipe card below.)

Directions

  1. Preheat the oven to 350°F (175°C). Grease and flour two 9-inch round cake pans.

  2. In a bowl, combine the flour, baking powder, and salt. Set aside.

  3. In a large bowl, cream together the butter and sugar until light and fluffy, about 3-4 minutes. Add eggs one at a time, mixing well after each addition. Stir in the vanilla extract, lemon extract, and lemon zest.

  4. Gradually add the dry ingredients to the butter mixture, alternating with milk, beginning and ending with the dry ingredients. Mix until just combined.

  5. Pour the batter evenly into the prepared cake pans. Bake for 25-30 minutes or until a toothpick inserted into the center comes out clean. Let the cakes cool in the pans for 10 minutes before transferring to wire racks to cool completely.

  6. While the cake cools, prepare the lemon cream filling. In a bowl, beat the heavy cream, cream cheese, and powdered sugar until smooth and fluffy. Add the lemon juice and beat until well combined.

  7. Once the cakes are completely cool, spread the lemon cream filling between the layers of cake and on top of the cake.

  8. Garnish with additional lemon zest or whipped cream, if desired.

Servings and Timing

This recipe yields 10-12 servings. The total preparation and baking time will take about 1 hour and 30 minutes, with an additional 30 minutes for cooling.

Variations

  • Lemon Curd Filling: Instead of using the cream cheese and whipped cream filling, you can make a rich lemon curd for an even more intense lemon flavor.

  • Berry Garnish: Add fresh berries such as raspberries or blueberries on top to give the cake a burst of color and flavor.

  • Gluten-Free Version: Substitute the all-purpose flour with a gluten-free flour blend, making sure to use one that is suitable for baking cakes.

Storage/Reheating

This cake can be stored in an airtight container in the refrigerator for up to 3 days. If you want to store it for longer, you can freeze individual slices. Just wrap them tightly in plastic wrap and place them in a freezer-safe container for up to 2 months. To reheat, let the cake thaw in the refrigerator overnight and bring it to room temperature before serving.

FAQs

How can I make the cake more lemony?

To enhance the lemon flavor, I suggest adding more lemon zest or increasing the amount of fresh lemon juice in both the cake and the filling.

Can I use a different type of frosting?

Yes! If you prefer a different flavor, you can replace the lemon frosting with a vanilla or cream cheese frosting.

Can I bake this cake in advance?

Absolutely! You can bake the cakes a day ahead, allowing them to cool completely before storing them in an airtight container at room temperature or in the fridge until you're ready to assemble.

Is this cake suitable for people with nut allergies?

Yes, this cake does not contain any nuts, so it should be safe for people with nut allergies. However, always check the ingredients of your flour and other components to ensure they haven’t been cross-contaminated.

Can I make the cake without the cream cheese filling?

Yes, you can make the cake with just whipped cream or even a simple buttercream frosting if you prefer a lighter filling.

Conclusion

This Cheesecake Factory Italian Lemon Cream Cake is the ultimate dessert for anyone who loves a perfect balance of tangy and creamy flavors. The combination of fluffy lemon cake, luscious cream filling, and a smooth frosting makes every bite an indulgence. Whether you’re preparing for a special occasion or treating yourself to a sweet escape, this cake will undoubtedly impress. Give it a try and enjoy the delightful flavors of Italy in every slice!

Print

clock clock iconcutlery cutlery iconflag flag iconfolder folder iconinstagram instagram iconpinterest pinterest iconfacebook facebook iconprint print iconsquares squares iconheart heart iconheart solid heart solid icon
Cheesecake Factory Italian Lemon Cream Cake Recipe

Cheesecake Factory Italian Lemon Cream Cake Recipe

5 Stars 4 Stars 3 Stars 2 Stars 1 Star No reviews
  • Author: lina
  • Prep Time: 20 minutes
  • Cook Time: 30 minutes
  • Total Time: 1 hour 30 minutes
  • Yield: 10-12 servings
  • Category: Dessert
  • Method: Baking
  • Cuisine: Italian-American
  • Diet: Vegetarian
Print Recipe
Pin Recipe

Description

This Cheesecake Factory-inspired Italian Lemon Cream Cake offers a delicate balance of tangy lemon and rich cream filling. With layers of fluffy lemon cake and smooth lemon cream frosting, it's the perfect dessert for any occasion. Whether you're celebrating or treating yourself, this cake is sure to impress with its fresh, vibrant flavor and creamy texture.


Ingredients

Cake:

2 ½ cups all-purpose flour

2 ½ tsp baking powder

½ tsp salt

1 ½ cups unsalted butter, room temperature

2 cups granulated sugar

5 large eggs

1 tsp vanilla extract

1 tsp lemon extract

1 tbsp lemon zest

1 cup whole milk

1 tbsp fresh lemon juice

Filling & Frosting:

1 ½ cups heavy cream

8 oz cream cheese, softened

1 cup powdered sugar

2 tbsp fresh lemon juice


Instructions

Preheat the oven to 350°F (175°C). Grease and flour two 9-inch round cake pans.

In a bowl, combine the flour, baking powder, and salt. Set aside.

In a large bowl, cream together the butter and sugar until light and fluffy (about 3-4 minutes). Add the eggs one at a time, mixing well after each addition. Stir in the vanilla extract, lemon extract, and lemon zest.

Gradually add the dry ingredients to the butter mixture, alternating with milk. Begin and end with the dry ingredients. Mix until just combined.

Pour the batter evenly into the prepared cake pans. Bake for 25-30 minutes, or until a toothpick inserted into the center comes out clean. Let the cakes cool in the pans for 10 minutes, then transfer to wire racks to cool completely.

While the cake cools, prepare the lemon cream filling. Beat the heavy cream, cream cheese, and powdered sugar until smooth and fluffy. Add the lemon juice and mix until well combined.

Once the cakes have cooled, spread the lemon cream filling between the layers of cake and on top.

Garnish with additional lemon zest or whipped cream if desired.


Notes

To enhance the lemon flavor, feel free to add extra lemon zest or fresh lemon juice to the cake and filling.

You can substitute the lemon frosting with vanilla or cream cheese frosting for a different flavor.

For a gluten-free version, swap the all-purpose flour with a gluten-free baking blend.

Store leftovers in the fridge for up to 3 days or freeze individual slices for up to 2 months.

Have you made this recipe? I'd love to see it!

Click here to Follow me on Pinterest

Cheesy Hamburger Casserole

June 26, 2025 by Sue Leave a Comment

Cheesy Hamburger Casserole is the ultimate comfort food, combining ground beef, creamy cheese, and hearty pasta all in one dish. It’s a family favorite in my house, and I find myself making it more times than I can count. It's simple, filling, and always a crowd-pleaser. Whether it’s a busy weeknight or a relaxed weekend dinner, this casserole has me covered.

Cheesy Hamburger Casserole

Why You’ll Love This Recipe

I absolutely love this casserole because it’s both easy to make and incredibly satisfying. The combination of tender ground beef, gooey cheese, and pasta creates the perfect balance of flavors. Plus, it’s a one-pan meal, which makes cleanup a breeze. This recipe is also highly versatile—you can tweak it with different ingredients to suit your taste.

Ingredients

  • 2 pounds lean ground beef

  • 2 cloves garlic, minced

  • 1 box of macaroni

  • 1 cup each of grated cheddar and mozzarella cheeses

  • 1 can (28 ounces) of whole tomatoes, blended

  • 1 chopped onion

  • 1 tablespoon oil

  • Salt and pepper to taste

(Here's a tip: Check out the full list of ingredients and measurements in the recipe card below.)

Directions

  1. Preheat your oven to 400°F (200°C).

  2. In a large oven-safe skillet, heat the oil over medium-high heat. Add the chopped onion and sauté until translucent.

  3. Add the ground beef to the skillet and cook until browned, breaking it up into crumbles as it cooks.

  4. Season the beef with salt, pepper, and minced garlic. Stir well to combine.

  5. Pour in the blended whole tomatoes and stir the mixture. Let it simmer for a few minutes.

  6. Meanwhile, cook the macaroni according to the package instructions. Drain when al dente.

  7. Add the cooked macaroni to the skillet with the beef and tomato mixture. Mix them together evenly.

  8. Sprinkle the grated cheddar and mozzarella cheeses over the top of the casserole.

  9. Place the skillet in the preheated oven and bake for about 10-20 minutes or until the cheese is melted and bubbly, and the casserole is heated through.

  10. Remove from the oven, let it cool for a few minutes, and then serve warm.

Servings and Timing

  • Servings: Approximately 6 servings

  • Prep Time: 15 minutes

  • Cook Time: 30 minutes

  • Total Time: 45 minutes

Variations

  • Vegetable Add-ins: I love adding chopped bell peppers, mushrooms, or spinach for extra flavor and nutrition.

  • Spicy Kick: For a bit of heat, I sometimes add a diced jalapeño or a sprinkle of red pepper flakes to the beef mixture.

  • Cheese Blend: I’ve also experimented with other cheeses, like pepper jack or gouda, to give it a unique twist.

Storage/Reheating

  • Storage: Store leftovers in an airtight container in the refrigerator for up to 3 days.

  • Reheating: Reheat in the oven at 350°F (175°C) until warmed through, or microwave individual portions until hot.

FAQs

Can I use a different type of pasta?

Yes, I’ve tried using penne, rotini, and fusilli in place of macaroni, and they all work great.

Is it possible to make this dish ahead of time?

Definitely! I often assemble the casserole a day in advance and refrigerate it. When I’m ready to bake, I let it sit at room temperature for about 30 minutes before popping it in the oven.

Can I freeze the casserole?

Yes, you can freeze the casserole before baking it. Just cover it tightly with foil or plastic wrap and freeze for up to 2 months. Thaw overnight in the fridge before baking.

How can I make this recipe healthier?

I’ve swapped out ground beef for lean ground turkey or chicken, and I’ve used whole wheat pasta for added fiber. It’s a great way to lighten up the dish without sacrificing flavor.

Can I add vegetables to the casserole?

Absolutely! I love adding bell peppers, zucchini, or spinach for extra veggies. You can even sneak in some broccoli if you're looking for more greens.

Conclusion

Cheesy Hamburger Casserole is the kind of dish that always hits the spot. It’s simple, comforting, and totally customizable, making it perfect for any occasion. Whether you stick to the classic recipe or play around with different variations, this casserole is sure to become a regular in your dinner rotation.

Print

clock clock iconcutlery cutlery iconflag flag iconfolder folder iconinstagram instagram iconpinterest pinterest iconfacebook facebook iconprint print iconsquares squares iconheart heart iconheart solid heart solid icon
Cheesy Hamburger Casserole

Cheesy Hamburger Casserole

5 Stars 4 Stars 3 Stars 2 Stars 1 Star No reviews
  • Author: Sue
  • Prep Time: 15 minutes
  • Cook Time: 30 minutes
  • Total Time: 45 minutes
  • Yield: 6 servings
  • Category: Casserole
  • Method: Baking
  • Cuisine: American
  • Diet: Gluten Free
Print Recipe
Pin Recipe

Description

Cheesy Hamburger Casserole is a comforting dish made with ground beef, pasta, cheese, and tomatoes. It’s simple, hearty, and a family favorite, perfect for a busy weeknight or relaxed weekend meal.


Ingredients

  • 2 pounds lean ground beef
  • 2 cloves garlic, minced
  • 1 box of macaroni
  • 1 cup each of grated cheddar and mozzarella cheeses
  • 1 can (28 ounces) of whole tomatoes, blended
  • 1 chopped onion
  • 1 tablespoon oil
  • Salt and pepper to taste

Instructions

  1. Preheat your oven to 400°F (200°C).
  2. In a large oven-safe skillet, heat the oil over medium-high heat. Add the chopped onion and sauté until translucent.
  3. Add the ground beef to the skillet and cook until browned, breaking it up into crumbles as it cooks.
  4. Season the beef with salt, pepper, and minced garlic. Stir well to combine.
  5. Pour in the blended whole tomatoes and stir the mixture. Let it simmer for a few minutes.
  6. Meanwhile, cook the macaroni according to the package instructions. Drain when al dente.
  7. Add the cooked macaroni to the skillet with the beef and tomato mixture. Mix them together evenly.
  8. Sprinkle the grated cheddar and mozzarella cheeses over the top of the casserole.
  9. Place the skillet in the preheated oven and bake for about 10-20 minutes or until the cheese is melted and bubbly, and the casserole is heated through.
  10. Remove from the oven, let it cool for a few minutes, and then serve warm.

Notes

  • For a vegetable boost, add bell peppers, mushrooms, or spinach.
  • For a spicy kick, try adding a diced jalapeño or red pepper flakes to the beef mixture.
  • Try swapping in different cheeses like pepper jack or gouda for variety.
  • Store leftovers in an airtight container in the fridge for up to 3 days.
  • Freeze the casserole before baking for up to 2 months and thaw overnight in the fridge before baking.

Nutrition

  • Serving Size: 1 serving
  • Calories: 600
  • Sugar: 6g
  • Sodium: 900mg
  • Fat: 30g
  • Saturated Fat: 12g
  • Unsaturated Fat: 14g
  • Trans Fat: 1g
  • Carbohydrates: 50g
  • Fiber: 3g
  • Protein: 35g
  • Cholesterol: 80mg

Have you made this recipe? I'd love to see it!

Click here to Follow me on Pinterest

Teriyaki Pineapple Chicken & Rice Stuffed Peppers

June 26, 2025 by Sue Leave a Comment

These Teriyaki Pineapple Chicken & Rice Stuffed Peppers are the perfect combination of sweet, savory, and fresh. Packed with tender chicken, tangy teriyaki sauce, juicy pineapple, and a hint of rice, these stuffed peppers are bursting with flavor and texture. They're easy to make, filling, and the kind of dish that brings comfort while still feeling light and fresh. Plus, they make for a great dinner, lunch, or even meal prep idea! Teriyaki Pineapple Chicken & Rice Stuffed Peppers

Why You’ll Love This Recipe

I absolutely love this recipe because it brings together the classic flavors of teriyaki and pineapple in a way that feels both exotic and familiar. The chicken is cooked in a savory-sweet teriyaki sauce, which pairs beautifully with the freshness of the pineapple and the mildness of the rice. The stuffed peppers add an extra layer of crunch and earthiness to the dish, making every bite a satisfying combination of textures. It's also a great way to sneak in some veggies, and it’s an ideal dish for anyone who loves a bit of sweetness and spice in their meals. Plus, it’s a full meal in one, so I don’t need to worry about side dishes.

Ingredients

  • 4 large bell peppers (any color)

  • 2 chicken breasts, diced

  • 1 tablespoon olive oil

  • 1 cup cooked rice (white or brown)

  • ½ cup pineapple, diced (fresh or canned)

  • ¼ cup teriyaki sauce

  • 1 tablespoon soy sauce

  • ½ teaspoon garlic powder

  • ¼ teaspoon ground ginger

  • Salt and pepper to taste

  • 1 tablespoon sesame seeds (optional, for garnish)

  • 1 tablespoon chopped green onions (optional, for garnish)

(Here's a tip: Check out the full list of ingredients and measurements in the recipe card below.)

Directions

  1. Preheat the oven to 375°F (190°C). Slice the tops off the bell peppers and remove the seeds and membranes. Set the peppers aside.

  2. In a large skillet, heat the olive oil over medium heat. Add the diced chicken breasts and cook until browned and cooked through, about 7-8 minutes.

  3. Add the pineapple, garlic powder, ground ginger, soy sauce, and teriyaki sauce to the chicken. Stir everything together and let it simmer for 3-4 minutes until everything is heated through and the flavors are well combined.

  4. Stir in the cooked rice and season with salt and pepper to taste. Remove from heat.

  5. Stuff the prepared bell peppers with the chicken, rice, and pineapple mixture. Place the stuffed peppers in a baking dish.

  6. Cover the baking dish with aluminum foil and bake in the preheated oven for 25-30 minutes, or until the peppers are tender.

  7. If desired, sprinkle sesame seeds and chopped green onions over the stuffed peppers before serving.

Servings and Timing

This recipe makes 4 servings, with each stuffed pepper serving as a complete meal. The total preparation time is about 15 minutes, and the cooking time is around 30 minutes, so you can expect to have the dish ready in about 45 minutes.

Variations

  • Swap the chicken for ground turkey or beef: For a different protein, ground turkey or beef can be used instead of chicken. The flavors will still shine with the teriyaki and pineapple.

  • Use different peppers: While bell peppers are the go-to choice, you can experiment with other types like poblano or Anaheim peppers for a bit of heat and a unique flavor twist.

  • Add more veggies: If you want to add more vegetables to the dish, consider mixing in some diced zucchini, mushrooms, or spinach with the chicken and rice for extra nutrition.

  • Vegetarian version: You could use tofu or tempeh as a substitute for chicken, and skip the teriyaki sauce with a plant-based alternative to keep it vegetarian-friendly.

Storage/Reheating

To store the leftovers, place the stuffed peppers in an airtight container and refrigerate for up to 3 days. When you're ready to reheat them, I find that microwaving for 1-2 minutes works well, or you can heat them in the oven at 350°F (175°C) for about 10-15 minutes until heated through.

If you want to freeze them, simply wrap the stuffed peppers individually in foil and store them in a freezer-safe bag for up to 3 months. To reheat from frozen, bake them at 375°F (190°C) for 30-40 minutes, or until fully heated.

FAQs

How do I know when the bell peppers are done baking?

The bell peppers should be tender when pierced with a fork, but not mushy. You can check after 25 minutes of baking and if they need more time, continue baking for 5-minute intervals until they are done.

Can I use instant rice for this recipe?

Yes, you can use instant rice for convenience, though I personally prefer using regular cooked rice for a better texture and flavor. If you do use instant rice, be sure to cook it according to the package instructions.

Can I use canned pineapple instead of fresh?

Yes, canned pineapple works great for this recipe. Just make sure to drain it well before adding it to the chicken mixture to avoid excess moisture.

How can I make this dish spicier?

If you like heat, try adding a dash of red pepper flakes to the chicken mixture or serve the stuffed peppers with a spicy sriracha sauce or hot sauce on top.

Can I make these stuffed peppers ahead of time?

Absolutely! You can prepare the stuffed peppers up to the point of baking, then cover and refrigerate them for up to 1 day. When you're ready to bake, simply cook them as directed, adding a few extra minutes if needed.

Conclusion

Teriyaki Pineapple Chicken & Rice Stuffed Peppers are a delightful and vibrant dish that's as satisfying as it is flavorful. Whether you're looking for a quick weeknight dinner or a meal prep idea for the week, this recipe has everything you need for a tasty and balanced meal. With its combination of savory chicken, sweet pineapple, and tender bell peppers, it's sure to become a family favorite. The best part? It's easy to customize, so you can make it your own with different proteins or veggies. Give it a try next time you're craving something delicious and fresh!

Print

clock clock iconcutlery cutlery iconflag flag iconfolder folder iconinstagram instagram iconpinterest pinterest iconfacebook facebook iconprint print iconsquares squares iconheart heart iconheart solid heart solid icon
Teriyaki Pineapple Chicken & Rice Stuffed Peppers

Teriyaki Pineapple Chicken & Rice Stuffed Peppers

5 Stars 4 Stars 3 Stars 2 Stars 1 Star No reviews
  • Author: Sue
  • Prep Time: 15 minutes
  • Cook Time: 30 minutes
  • Total Time: 45 minutes
  • Yield: 4 servings
  • Category: Main Course
  • Method: Baking, Skillet Cooking
  • Cuisine: Asian Fusion
  • Diet: Low Fat
Print Recipe
Pin Recipe

Description

Teriyaki Pineapple Chicken & Rice Stuffed Peppers are a flavorful combination of tender chicken, savory teriyaki sauce, juicy pineapple, and a hint of rice, all stuffed into bell peppers. It's a delightful and filling meal with a balance of sweet and savory flavors.


Ingredients

  • 4 large bell peppers (any color)
  • 2 chicken breasts, diced
  • 1 tablespoon olive oil
  • 1 cup cooked rice (white or brown)
  • ½ cup pineapple, diced (fresh or canned)
  • ¼ cup teriyaki sauce
  • 1 tablespoon soy sauce
  • ½ teaspoon garlic powder
  • ¼ teaspoon ground ginger
  • Salt and pepper to taste
  • 1 tablespoon sesame seeds (optional, for garnish)
  • 1 tablespoon chopped green onions (optional, for garnish)

Instructions

  1. Preheat the oven to 375°F (190°C). Slice the tops off the bell peppers and remove the seeds and membranes. Set the peppers aside.
  2. In a large skillet, heat the olive oil over medium heat. Add the diced chicken breasts and cook until browned and cooked through, about 7-8 minutes.
  3. Add the pineapple, garlic powder, ground ginger, soy sauce, and teriyaki sauce to the chicken. Stir everything together and let it simmer for 3-4 minutes until everything is heated through and the flavors are well combined.
  4. Stir in the cooked rice and season with salt and pepper to taste. Remove from heat.
  5. Stuff the prepared bell peppers with the chicken, rice, and pineapple mixture. Place the stuffed peppers in a baking dish.
  6. Cover the baking dish with aluminum foil and bake in the preheated oven for 25-30 minutes, or until the peppers are tender.
  7. If desired, sprinkle sesame seeds and chopped green onions over the stuffed peppers before serving.

Notes

  • If using canned pineapple, be sure to drain it well to avoid excess moisture.
  • For a spicier version, add red pepper flakes to the chicken mixture or top with sriracha sauce.
  • Store leftovers in an airtight container in the refrigerator for up to 3 days, or freeze for up to 3 months.
  • This dish can be made ahead and refrigerated for up to 1 day before baking.

Nutrition

  • Serving Size: 1 stuffed pepper
  • Calories: 350
  • Sugar: 15g
  • Sodium: 700mg
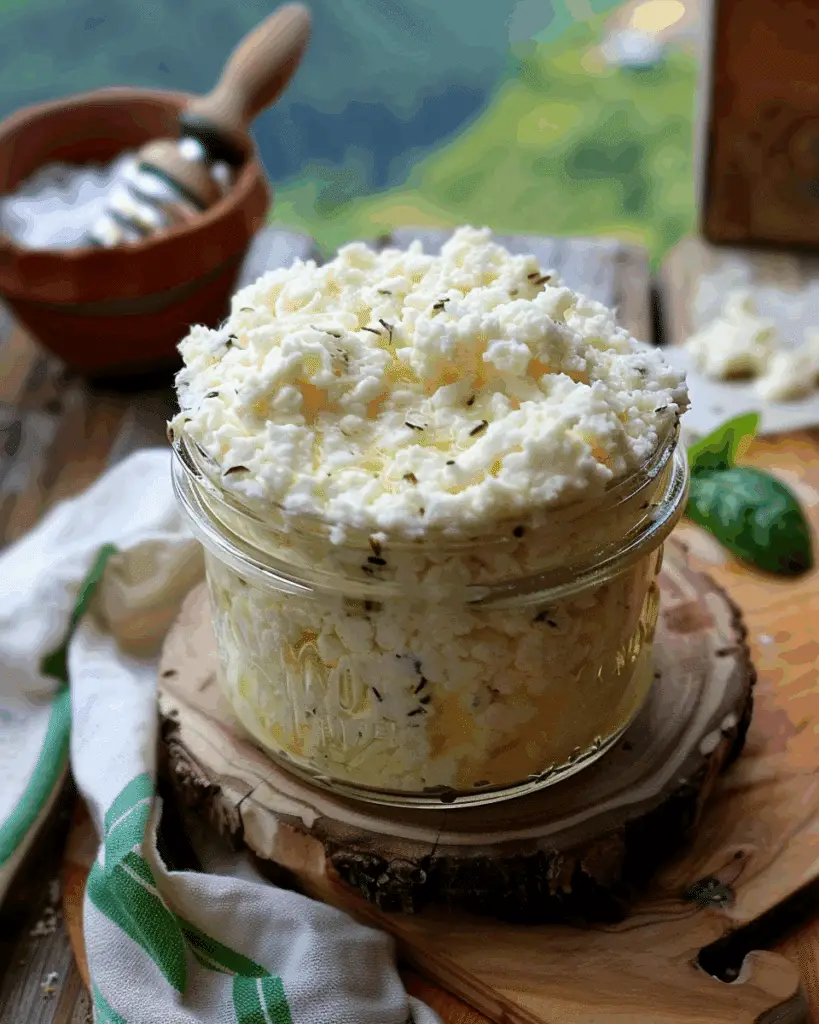
  • Fat: 9g
  • Saturated Fat: 1g
  • Unsaturated Fat: 8g
  • Trans Fat: 0g
  • Carbohydrates: 40g
  • Fiber: 4g
  • Protein: 28g
  • Cholesterol: 50mg
Have you made this recipe? I'd love to see it!

Click here to Follow me on Pinterest

Parmesan Crusted Chicken with Creamy Garlic Sauce

June 26, 2025 by Sue Leave a Comment

This Parmesan Crusted Chicken with Creamy Garlic Sauce is a perfect combination of crispy, golden-brown chicken with a rich, creamy garlic sauce. It's a comforting, indulgent meal that's surprisingly easy to make. Parmesan Crusted Chicken with Creamy Garlic Sauce

Why You’ll Love This Recipe

I absolutely love this recipe because of the way the crispy Parmesan crust on the chicken gives a satisfying crunch, perfectly balanced by the creamy, velvety garlic sauce. The sauce has just the right amount of garlic and creaminess to make the dish feel rich without being overwhelming. Plus, it's quick enough to prepare on a busy weeknight but impressive enough for a dinner party or special occasion. I always find myself going back for seconds!
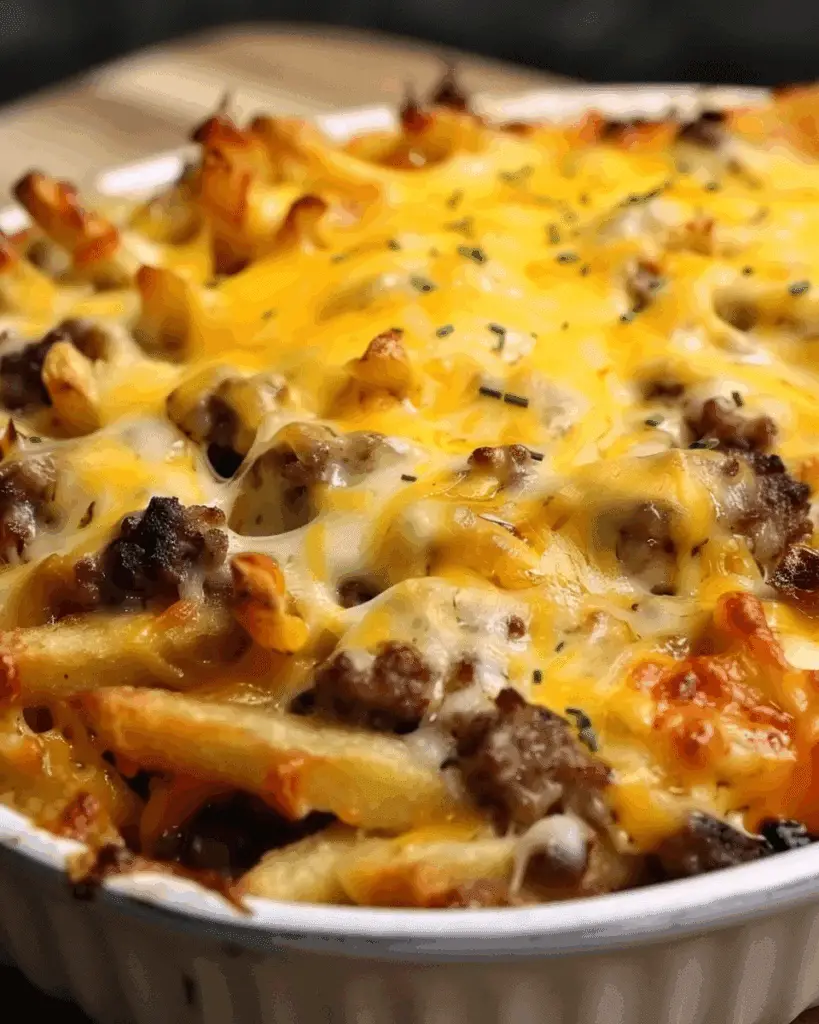
Ingredients

  • 4 boneless, skinless chicken breasts (or 2 large, halved)

  • Salt and pepper, to taste

  • 2 tablespoons olive oil

  • ½ cup grated Parmesan cheese

  • ½ cup panko breadcrumbs

  • 3–4 cloves garlic, minced

  • 1 cup heavy cream or light cream

  • 1 tablespoon Italian seasoning or oregano

  • ½ cup grated Parmesan cheese (for sauce)

  • 1 cup spinach, chopped (optional)

(Hint: Check out the full list of ingredients and measurements in the recipe card below.)

Directions

  1. Prepare the Chicken:
    I start by seasoning the chicken breasts with salt and pepper to make sure they’re nicely flavored from the inside out.

  2. Make the Coating:
    In a shallow dish, I mix together the grated Parmesan cheese and panko breadcrumbs. Then, I lightly press the chicken breasts into this mixture, ensuring both sides are evenly coated.

  3. Sear the Chicken:
    In a large skillet, I heat the olive oil over medium-high heat and add the chicken breasts. I cook them for about 3–4 minutes per side until they develop a nice golden, crispy crust.

  4. Prepare the Sauce:
    Once the chicken is cooked, I lower the heat and add minced garlic to the pan, cooking it for 30 seconds until fragrant. I then pour in the heavy cream, Italian seasoning, and more Parmesan cheese. I stir in chopped spinach if I’m using it, letting everything simmer for a couple of minutes until the sauce thickens slightly.

  5. Combine and Serve:
    I return the chicken to the skillet, spooning the creamy garlic sauce over the top. I let it simmer together for an extra minute to allow the flavors to meld, and then it’s ready to serve!

Servings and Timing

  • Servings: 4

  • Prep Time: 10 minutes

  • Cook Time: 15 minutes

  • Total Time: 25 minutes

Variations

  • Spicy Kick: Add a pinch of red pepper flakes to the garlic sauce for a little heat.

  • Herb Infusion: Try adding fresh thyme or rosemary to the sauce for an aromatic twist.

  • Vegetable Boost: Add sautéed mushrooms or sun-dried tomatoes to the sauce to give it extra depth of flavor.

Storage/Reheating

  • Storage: Leftovers can be stored in an airtight container in the fridge for up to 3 days.

  • Reheating: When reheating, I recommend warming the chicken in a skillet over low heat, adding a splash of cream or milk to help restore the sauce's consistency.

FAQs

Can I use chicken thighs instead of breasts?

Absolutely! Chicken thighs work great in this recipe. They’re more tender and juicy but may require a bit more cooking time.

Can I make this gluten-free?

Yes! You can use gluten-free breadcrumbs instead of the regular panko breadcrumbs to make this recipe gluten-free.

Is there a lighter alternative to heavy cream?

You can substitute the heavy cream with half-and-half, whole milk, or even a non-dairy milk such as almond milk. The sauce will still be creamy, but the richness will be lighter.

Can I prepare the chicken ahead of time?

Yes, you can bread the chicken earlier in the day and refrigerate it until you’re ready to cook. This saves time when you’re ready to get the meal on the table.

What if I don’t have Parmesan cheese?

If you don’t have Parmesan cheese, Pecorino Romano or Grana Padano are good substitutes. They will provide a similar savory, cheesy flavor, though each has a slightly different taste.

Conclusion

This Parmesan Crusted Chicken with Creamy Garlic Sauce is one of my favorite dishes to make. It’s rich, comforting, and full of flavor, yet easy enough for any night of the week. The crispy chicken paired with the creamy, garlicky sauce is simply irresistible. Whether for a quick dinner or a special meal, it’s a dish that’s sure to impress!

Print

clock clock iconcutlery cutlery iconflag flag iconfolder folder iconinstagram instagram iconpinterest pinterest iconfacebook facebook iconprint print iconsquares squares iconheart heart iconheart solid heart solid icon
Parmesan Crusted Chicken with Creamy Garlic Sauce

Parmesan Crusted Chicken with Creamy Garlic Sauce

5 Stars 4 Stars 3 Stars 2 Stars 1 Star No reviews
  • Author: Sue
  • Prep Time: 10 minutes
  • Cook Time: 15 minutes
  • Total Time: 25 minutes
  • Yield: 4 servings
  • Category: Dinner
  • Method: Searing, Simmering
  • Cuisine: American
  • Diet: Low Calorie
Print Recipe
Pin Recipe

Description

Parmesan Crusted Chicken with Creamy Garlic Sauce combines crispy, golden-brown chicken with a rich, velvety garlic sauce, creating a comforting and indulgent dish perfect for both weeknight dinners and special occasions.


Ingredients

  • 4 boneless, skinless chicken breasts (or 2 large, halved)
  • Salt and pepper, to taste
  • 2 tablespoons olive oil
  • ½ cup grated Parmesan cheese
  • ½ cup panko breadcrumbs
  • 3–4 cloves garlic, minced
  • 1 cup heavy cream or light cream
  • 1 tablespoon Italian seasoning or oregano
  • ½ cup grated Parmesan cheese (for sauce)
  • 1 cup spinach, chopped (optional)

Instructions

  1. Prepare the Chicken: Season the chicken breasts generously with salt and pepper.
  2. Make the Coating: In a shallow dish, mix together ½ cup grated Parmesan cheese and ½ cup panko breadcrumbs. Lightly press the mixture onto both sides of each chicken breast, ensuring an even coating.
  3. Sear the Chicken: Heat 2 tablespoons olive oil in a large skillet over medium-high heat. Add the coated chicken breasts and sear for about 3–4 minutes per side until a golden, crispy crust forms.
  4. Prepare the Sauce: Reduce the heat to medium-low. Add the minced garlic to the skillet and sauté for about 30 seconds until fragrant. Pour in the heavy cream, Italian seasoning, and ½ cup grated Parmesan cheese. Stir in the chopped spinach, if using. Simmer the sauce for 2–3 minutes until it thickens slightly.
  5. Combine and Serve: Return the seared chicken breasts to the skillet, spooning the sauce over the top. Let everything simmer together for an additional minute to meld the flavors. Serve hot, garnished with extra Parmesan and fresh parsley if desired.

Notes

  • For a spicy kick, add a pinch of red pepper flakes to the sauce.
  • For added aroma, incorporate fresh herbs like thyme or rosemary into the sauce.
  • For extra flavor, include sautéed mushrooms or sun-dried tomatoes in the sauce.
  • Leftovers can be stored in an airtight container in the refrigerator for up to 3 days.
  • Reheat leftovers gently in a skillet over low heat, adding a splash of cream or milk to restore the sauce's consistency.

Nutrition

  • Serving Size: 1 chicken breast with sauce
  • Calories: 550
  • Sugar: 3g
  • Sodium: 900mg
  • Fat: 34g
  • Saturated Fat: 8g
  • Unsaturated Fat: 21g
  • Trans Fat: 0g
  • Carbohydrates: 10g
  • Fiber: 1g
  • Protein: 46g
  • Cholesterol: 150mg

Have you made this recipe? I'd love to see it!

Click here to Follow me on Pinterest

Teriyaki Shrimp and Pineapple Rice Stack

June 26, 2025 by Sue Leave a Comment

If you're looking for a dish that's packed with flavor and texture, this Teriyaki Shrimp and Pineapple Rice Stack will definitely hit the spot. It’s a vibrant and tropical meal with the perfect balance of savory shrimp, sweet pineapple, and a punch of tangy teriyaki sauce. The rice stack is not just visually appealing, but also bursting with bold and delicious flavors. Whether it's for a casual dinner or a special occasion, this dish will never disappoint. Teriyaki Shrimp and Pineapple Rice Stack

Why You’ll Love This Recipe

I love this recipe because it's incredibly easy to make yet feels so gourmet. The combination of shrimp and pineapple is always a winning flavor profile, and the teriyaki sauce brings everything together beautifully. What’s even better is that it’s a fun presentation! Stacking everything gives a visually stunning dish that can impress any guest. Plus, it's light yet satisfying, making it a perfect meal for warmer weather or whenever you're craving something fresh and flavorful.

Ingredients

  • 1 lb shrimp, peeled and deveined

  • 1 cup cooked jasmine rice

  • 1 cup fresh pineapple, chopped into small chunks

  • 2 tablespoons olive oil

  • ¼ cup teriyaki sauce

  • 1 tablespoon honey

  • 1 tablespoon soy sauce

  • 1 teaspoon garlic, minced

  • ½ teaspoon ginger, minced

  • 1 tablespoon green onions, chopped (for garnish)

  • Salt and pepper, to taste

(Here's a tip: Check out the full list of ingredients and measurements in the recipe card below.)

Directions

  1. Start by cooking the jasmine rice according to the package instructions. Set aside to cool slightly.

  2. In a bowl, combine the teriyaki sauce, honey, soy sauce, garlic, and ginger. Whisk until well blended.

  3. Heat the olive oil in a large skillet over medium heat. Once hot, add the shrimp and cook for 2-3 minutes on each side, or until they turn pink and opaque.

  4. Add the pineapple chunks to the skillet and cook for an additional 1-2 minutes, allowing them to warm through and get a little caramelized.

  5. Pour the teriyaki sauce mixture over the shrimp and pineapple, stirring gently to coat everything evenly. Let it simmer for a couple of minutes to thicken the sauce slightly.

  6. To assemble the stack, place a ring mold or a small bowl onto a plate. Start by layering a spoonful of rice, pressing it down gently to form a compact layer. Add a layer of shrimp and pineapple on top of the rice, and then press down slightly to compact.

  7. Carefully remove the ring mold or bowl and repeat the stacking for any remaining portions.

  8. Garnish each stack with chopped green onions, and season with salt and pepper as needed.

  9. Serve immediately and enjoy your Teriyaki Shrimp and Pineapple Rice Stack!

Servings and Timing

This recipe serves about 4 people and takes approximately 25 minutes to prepare and cook.

Variations

  • Vegetarian Version: Substitute shrimp with tofu or grilled vegetables like bell peppers and zucchini for a plant-based alternative.

  • Add Spice: If you like a bit of heat, add red pepper flakes or sriracha to the teriyaki sauce for a spicy kick.

  • Grilled Pineapple: For extra flavor, you can grill the pineapple before adding it to the dish for a smoky twist.

  • Rice Options: While jasmine rice is great for this dish, feel free to swap it with brown rice, quinoa, or cauliflower rice for a healthier option.

Storage/Reheating

Store any leftovers in an airtight container in the refrigerator for up to 2 days. To reheat, simply microwave for 1-2 minutes or heat it in a skillet over medium heat until warmed through. Keep in mind that the shrimp may lose some of its texture after being reheated, but the flavor will still be fantastic.

FAQs

Can I use frozen shrimp for this recipe?

Yes, frozen shrimp works perfectly fine for this recipe. Just make sure to thaw them thoroughly before cooking.

Can I make this recipe ahead of time?

While it’s best to assemble and serve the rice stack fresh, you can prepare the shrimp, pineapple, and rice in advance and store them separately. When ready to serve, simply reheat and assemble the stacks.

Can I use a different type of rice?

Definitely! While jasmine rice is ideal for its fragrance and texture, you can swap it out for brown rice, basmati rice, or even quinoa if preferred.

Is this recipe gluten-free?

Yes, this recipe can be gluten-free as long as you use a gluten-free soy sauce or tamari sauce instead of regular soy sauce.

Can I use canned pineapple instead of fresh?

Yes, canned pineapple works in a pinch. Just be sure to drain it well and, if you prefer, pat it dry with a paper towel to remove any excess moisture.

Conclusion

I absolutely love this Teriyaki Shrimp and Pineapple Rice Stack because it’s quick, delicious, and visually stunning. The combination of sweet, savory, and tangy flavors creates the perfect balance in every bite. Whether you’re serving it for a weeknight dinner or a special occasion, this dish is sure to impress. With a few simple ingredients and an easy assembly process, you’ll have a crowd-pleaser on your hands in no time!

Print

clock clock iconcutlery cutlery iconflag flag iconfolder folder iconinstagram instagram iconpinterest pinterest iconfacebook facebook iconprint print iconsquares squares iconheart heart iconheart solid heart solid icon
Teriyaki Shrimp and Pineapple Rice Stack

Teriyaki Shrimp and Pineapple Rice Stack

5 Stars 4 Stars 3 Stars 2 Stars 1 Star No reviews
  • Author: Sue
  • Prep Time: 15 minutes
  • Cook Time: 10 minutes
  • Total Time: 25 minutes
  • Yield: 4 servings
  • Category: Main Course
  • Method: Stovetop
  • Cuisine: Asian
  • Diet: Gluten Free
Print Recipe
Pin Recipe

Description

A vibrant and tropical dish featuring shrimp, pineapple, and jasmine rice, all dressed in a tangy teriyaki sauce. The stack presentation makes it both visually stunning and delicious.


Ingredients

  • 1 lb shrimp, peeled and deveined
  • 1 cup cooked jasmine rice
  • 1 cup fresh pineapple, chopped into small chunks
  • 2 tablespoons olive oil
  • ¼ cup teriyaki sauce
  • 1 tablespoon honey
  • 1 tablespoon soy sauce
  • 1 teaspoon garlic, minced
  • ½ teaspoon ginger, minced
  • 1 tablespoon green onions, chopped (for garnish)
  • Salt and pepper, to taste

Instructions

  1. Start by cooking the jasmine rice according to the package instructions. Set aside to cool slightly.
  2. In a bowl, combine the teriyaki sauce, honey, soy sauce, garlic, and ginger. Whisk until well blended.
  3. Heat the olive oil in a large skillet over medium heat. Once hot, add the shrimp and cook for 2-3 minutes on each side, or until they turn pink and opaque.
  4. Add the pineapple chunks to the skillet and cook for an additional 1-2 minutes, allowing them to warm through and get a little caramelized.
  5. Pour the teriyaki sauce mixture over the shrimp and pineapple, stirring gently to coat everything evenly. Let it simmer for a couple of minutes to thicken the sauce slightly.
  6. To assemble the stack, place a ring mold or a small bowl onto a plate. Start by layering a spoonful of rice, pressing it down gently to form a compact layer. Add a layer of shrimp and pineapple on top of the rice, and then press down slightly to compact.
  7. Carefully remove the ring mold or bowl and repeat the stacking for any remaining portions.
  8. Garnish each stack with chopped green onions, and season with salt and pepper as needed.
  9. Serve immediately and enjoy your Teriyaki Shrimp and Pineapple Rice Stack!

Notes

  • For a vegetarian version, substitute shrimp with tofu or grilled vegetables like bell peppers and zucchini.
  • For extra flavor, grill the pineapple before adding it to the dish for a smoky twist.
  • Ensure to use a gluten-free soy sauce or tamari sauce for a gluten-free version.

Nutrition

  • Serving Size: 1 stack
  • Calories: 350
  • Sugar: 16g
  • Sodium: 700mg
  • Fat: 12g
  • Saturated Fat: 1.5g
  • Unsaturated Fat: 9g
  • Trans Fat: 0g
  • Carbohydrates: 42g
  • Fiber: 2g
  • Protein: 25g
  • Cholesterol: 150mg

Have you made this recipe? I'd love to see it!

Click here to Follow me on Pinterest

Vegan Creamy Sun-Dried Tomato Pasta

June 26, 2025 by Sue Leave a Comment

This vegan creamy sun-dried tomato pasta is a delightful, rich, and satisfying dish perfect for any occasion. The combination of sun-dried tomatoes and coconut cream creates a luscious sauce, while the fresh arugula adds a touch of peppery freshness. It's a quick and easy meal that is sure to impress both vegan and non-vegan eaters alike.

Vegan Creamy Sun-Dried Tomato Pasta

Why You’ll Love This Recipe

I love this recipe because it brings together so many wonderful flavors in a simple, straightforward way. The sun-dried tomatoes provide a savory, slightly tangy kick, while the coconut cream creates a rich and smooth sauce that clings to the pasta beautifully. The addition of fresh arugula gives the dish a pop of freshness, and the balsamic vinegar adds a touch of acidity that balances out the creaminess. Best of all, it's ready in just 25 minutes, making it a great choice for busy weeknights or when you want something comforting yet quick.

Ingredients

  • 4 servings gluten-free fettuccine

  • 4 garlic cloves, minced

  • 10 sun-dried tomatoes, chopped

  • 1 tablespoon Italian seasoning

  • 1 tablespoon balsamic vinegar

  • 3 tablespoon tomato paste

  • 2 cups cherry tomatoes

  • 1 cup water or vegetable broth

  • 7 oz full-fat canned coconut milk (use only the thick cream)

  • 3 tablespoon nutritional yeast

  • Salt and pepper to taste

  • 2 cups baby arugula

  • ½ cup flat-leaf parsley, chopped

  • Vegan parmesan (optional)

(Here's a tip: Check out the full list of ingredients and measurements in the recipe card below.)

Directions

  1. Cook the Pasta: Bring water to a boil in a pot and cook the gluten-free fettuccine according to package instructions until al dente. Drain and set aside.

  2. Sauté Aromatics: In a heated skillet, add a splash of water or vegetable broth. Sauté the minced garlic and chopped sun-dried tomatoes for about 2 minutes, adding more liquid as needed to prevent sticking.

  3. Build the Sauce: Stir in the Italian seasoning, balsamic vinegar, and tomato paste. Cook for 2-3 minutes until the mixture becomes aromatic and slightly caramelized.

  4. Simmer the Tomatoes: Add the cherry tomatoes and water (or broth) to the skillet. Cover and cook for 3-4 minutes until the tomatoes soften. Use a spoon to gently smash them, releasing their juices.

  5. Create the Creamy Base: Pour in the coconut milk and stir in the nutritional yeast. Season with salt and pepper. Let the mixture simmer for 5-10 minutes, allowing the sauce to thicken to your desired consistency.

  6. Combine Pasta and Sauce: Add the cooked pasta to the skillet, tossing it in the creamy sauce until well coated.

  7. Finish with Freshness: Stir in the baby arugula and chopped parsley, allowing the arugula to wilt slightly.

  8. Serve: Plate the pasta and, if desired, sprinkle with vegan parmesan for an extra touch of flavor.

Servings and Timing

  • Servings: 4

  • Prep Time: 5 minutes

  • Cook Time: 20 minutes

  • Total Time: 25 minutes

Variations

  • Gluten-Free Option: You can easily swap the pasta for gluten-free options to suit dietary preferences.

  • Spicy Kick: Add a pinch of red pepper flakes or a dash of hot sauce while sautéing the garlic for some extra heat.

  • Herb Infusion: Fresh basil or thyme can be added alongside the parsley for an added burst of herbal aroma.

  • Nut-Free Version: If you need a nut-free dish, you can replace the coconut milk with other plant-based creams, such as soy or oat-based alternatives.

Storage/Reheating

  • Storage: Leftover pasta can be stored in an airtight container in the refrigerator for up to 3 days.

  • Reheating: Reheat the pasta in a skillet over medium heat, adding a splash of water or broth to loosen the sauce as needed. Stir occasionally until heated through.

FAQs

Can I use regular pasta instead of gluten-free?

Absolutely! Feel free to use any pasta you prefer. Just make sure to adjust the cooking time according to the package instructions.

Is there a substitute for coconut milk?

Yes, you can use other plant-based creams, such as cashew cream or soy cream, to replace the coconut milk.

Can I make this dish ahead of time?

While this dish is best enjoyed fresh, you can prepare the sauce in advance and store it in the refrigerator. When ready to serve, cook the pasta and combine it with the reheated sauce.

How can I make this dish spicier?

You can easily make it spicier by adding red pepper flakes or a dash of hot sauce while cooking the garlic or mixing it into the sauce.

Can I freeze the leftovers?

Yes, you can freeze the pasta and sauce in an airtight container for up to 2 months. When ready to eat, thaw overnight in the refrigerator and reheat on the stove.

Conclusion

This vegan creamy sun-dried tomato pasta is a flavorful and satisfying dish that is sure to become a favorite. The sun-dried tomatoes, coconut cream, and fresh arugula create a perfect balance of savory, creamy, and fresh flavors. It’s quick, easy to make, and full of wholesome ingredients. Whether you're a vegan or just looking for a comforting meal, this pasta will hit the spot every time!

Print

clock clock iconcutlery cutlery iconflag flag iconfolder folder iconinstagram instagram iconpinterest pinterest iconfacebook facebook iconprint print iconsquares squares iconheart heart iconheart solid heart solid icon
Vegan Creamy Sun-Dried Tomato Pasta

Vegan Creamy Sun-Dried Tomato Pasta

5 Stars 4 Stars 3 Stars 2 Stars 1 Star No reviews
  • Author: Sue
  • Prep Time: 5 minutes
  • Cook Time: 20 minutes
  • Total Time: 25 minutes
  • Yield: 4 servings
  • Category: Main Dish
  • Method: Sautéing
  • Cuisine: Vegan
  • Diet: Vegan
Print Recipe
Pin Recipe

Description

This vegan creamy sun-dried tomato pasta is a delightful fusion of rich flavors and comforting textures, with a tangy depth from sun-dried tomatoes and a luscious creaminess from coconut milk.


Ingredients

  • 4 servings gluten-free fettuccine
  • 4 garlic cloves, minced
  • 10 sun-dried tomatoes, chopped
  • 1 tbsp Italian seasoning
  • 1 tbsp balsamic vinegar
  • 3 tbsp tomato paste
  • 2 cups cherry tomatoes
  • 1 cup water or vegetable broth
  • 7 oz full-fat canned coconut milk (use only the thick cream)
  • 3 tbsp nutritional yeast
  • Salt and pepper to taste
  • 2 cups baby arugula
  • ½ cup flat-leaf parsley, chopped
  • Vegan parmesan (optional)

Instructions

  1. Cook the Pasta: Boil water in a pot and cook the gluten-free fettuccine according to package instructions until al dente. Drain and set aside.
  2. Sauté Aromatics: In a heated skillet, add a splash of water or vegetable broth. Sauté the minced garlic and chopped sun-dried tomatoes for about 2 minutes, adding more liquid as needed to prevent sticking.
  3. Build the Sauce: Stir in the Italian seasoning, balsamic vinegar, and tomato paste. Cook for 2-3 minutes until the mixture becomes aromatic and slightly caramelized.
  4. Simmer the Tomatoes: Add the cherry tomatoes and water (or broth) to the skillet. Cover and cook for 3-4 minutes until the tomatoes soften. Use a spoon to gently smash them, releasing their juices.
  5. Create the Creamy Base: Pour in the coconut milk and stir in the nutritional yeast. Season with salt and pepper. Let the mixture simmer for 5-10 minutes, allowing the sauce to thicken to your desired consistency.
  6. Combine Pasta and Sauce: Add the cooked pasta to the skillet, tossing it in the creamy sauce until well coated.
  7. Finish with Freshness: Stir in the baby arugula and chopped parsley, allowing the arugula to wilt slightly.
  8. Serve: Plate the pasta and, if desired, sprinkle with vegan parmesan for an extra touch of flavor.

Notes

  • Storage: Store any leftover pasta in an airtight container in the refrigerator for up to 3 days.
  • Reheating: Reheat the pasta in a skillet over medium heat, adding a splash of water or broth to loosen the sauce as needed.
  • Freezing: You can freeze the pasta and sauce for up to 2 months. Thaw overnight in the refrigerator and reheat on the stove.
  • For a spicy kick, add red pepper flakes during the sautéing step.
  • If avoiding nuts, substitute the coconut milk with a nut-free plant-based cream alternative.

Nutrition

  • Serving Size: 1 serving
  • Calories: 350
  • Sugar: 6g
  • Sodium: 250mg
  • Fat: 16g
  • Saturated Fat: 12g
  • Unsaturated Fat: 4g
  • Trans Fat: 0g
  • Carbohydrates: 45g
  • Fiber: 5g
  • Protein: 7g
  • Cholesterol: 0mg

Have you made this recipe? I'd love to see it!

Click here to Follow me on Pinterest

Parmesan Zucchini

June 26, 2025 by Sue Leave a Comment

This Parmesan Zucchini recipe is a delightful way to enjoy a healthy and flavorful side dish. The zucchini is baked to perfection, coated in a crispy Parmesan crust that gives it a satisfying texture while enhancing the fresh, tender zucchini flavor. Whether served alongside a main course or enjoyed on its own, this dish is a perfect addition to any meal. Parmesan Zucchini

Why You’ll Love This Recipe

I love making Parmesan Zucchini because it’s quick, simple, and packed with flavor. The crispy Parmesan coating adds a savory crunch, while the zucchini itself remains soft and juicy. It’s a great way to add more vegetables to my meals, and it’s perfect for those looking for a low-carb option. The best part is that it takes just a few minutes of prep and bakes in no time, making it a go-to when I need a fast and delicious side dish.

Ingredients

  • 4 medium zucchinis, sliced into rounds

  • 1 cup grated Parmesan cheese

  • 1 cup panko breadcrumbs

  • 1 teaspoon garlic powder

  • 1 teaspoon dried oregano

  • Salt and pepper, to taste

  • 2 tablespoons olive oil

(Here's a tip: Check out the full list of ingredients and measurements in the recipe card below.)

Directions

  1. Preheat the oven to 400°F (200°C). Line a baking sheet with parchment paper or lightly grease it with olive oil.

  2. In a shallow bowl, combine the Parmesan cheese, panko breadcrumbs, garlic powder, oregano, salt, and pepper.

  3. Drizzle the zucchini slices with olive oil, making sure they are evenly coated.

  4. Dip each zucchini slice into the Parmesan breadcrumb mixture, pressing gently to ensure a good coating. Place the coated zucchini on the prepared baking sheet.

  5. Bake for 20-25 minutes, or until the zucchini is golden and crispy. If desired, broil for an additional 1-2 minutes to get an extra crispy finish.

  6. Serve immediately and enjoy!

Servings and Timing

This recipe serves 4 people as a side dish. The total time for preparation and cooking is about 35 minutes.

Variations

  • Add herbs: For an extra burst of flavor, I sometimes add fresh thyme or basil to the breadcrumb mixture.

  • Spicy twist: If I want to add a little heat, I sprinkle some red pepper flakes over the zucchini before baking.

  • Cheese options: While Parmesan is my go-to, I can substitute it with other cheeses like Romano or mozzarella for a different taste.

  • Zucchini fries: Instead of rounds, I can slice the zucchini into long strips to create crispy zucchini fries.

Storage/Reheating

To store any leftovers, I place them in an airtight container in the refrigerator for up to 3 days. Reheating is simple; I pop them back into the oven at 375°F for about 5-10 minutes to regain that crispy texture. Avoid microwaving, as it can make them soggy.

FAQs

Can I use regular breadcrumbs instead of panko?

Yes, I can substitute regular breadcrumbs, but panko provides a lighter, crispier texture. If I don't have panko, regular breadcrumbs will still work fine.

How do I prevent the zucchini from becoming soggy?

To keep the zucchini crispy, I make sure to coat it evenly with the Parmesan mixture and bake it at a high temperature. Also, I avoid overcrowding the zucchini slices on the baking sheet to ensure they crisp up properly.

Can I make this recipe ahead of time?

Yes, I can prep the zucchini and coat it with the Parmesan mixture ahead of time. Just store it in the fridge until ready to bake. When ready, I bake it as directed.

Can I freeze Parmesan Zucchini?

While it’s best fresh, I can freeze the cooked zucchini slices for up to 2-3 months. To reheat, I recommend baking them from frozen at 375°F until heated through and crispy.

Is this recipe gluten-free?

If I use gluten-free panko breadcrumbs, this recipe can easily be made gluten-free. I can also check the Parmesan to ensure it doesn’t contain any gluten.

Conclusion

Parmesan Zucchini is one of my favorite ways to enjoy zucchini in a delicious and healthy way. The combination of crispy Parmesan and tender zucchini makes for a perfect side dish that complements any meal. Whether I’m serving it for dinner or preparing it for a gathering, this recipe always delivers on flavor and texture. I love that it’s simple to make and can be easily adapted to suit my taste preferences.

Print

clock clock iconcutlery cutlery iconflag flag iconfolder folder iconinstagram instagram iconpinterest pinterest iconfacebook facebook iconprint print iconsquares squares iconheart heart iconheart solid heart solid icon
Parmesan Zucchini

Parmesan Zucchini

5 Stars 4 Stars 3 Stars 2 Stars 1 Star No reviews
  • Author: Sue
  • Prep Time: 10 minutes
  • Cook Time: 25 minutes
  • Total Time: 35 minutes
  • Yield: 4 servings
  • Category: Side Dish
  • Method: Baking
  • Cuisine: American
  • Diet: Vegetarian
Print Recipe
Pin Recipe

Description

A quick and flavorful side dish featuring zucchini slices coated in a crispy Parmesan and panko crust, baked to golden perfection.


Ingredients

  • 4 medium zucchinis, sliced into rounds
  • 1 cup grated Parmesan cheese
  • 1 cup panko breadcrumbs
  • 1 teaspoon garlic powder
  • 1 teaspoon dried oregano
  • Salt and pepper, to taste
  • 2 tablespoons olive oil

Instructions

  1. Preheat the oven to 400°F (200°C). Line a baking sheet with parchment paper or lightly grease it with olive oil.
  2. In a shallow bowl, combine the Parmesan cheese, panko breadcrumbs, garlic powder, oregano, salt, and pepper.
  3. Drizzle the zucchini slices with olive oil, making sure they are evenly coated.
  4. Dip each zucchini slice into the Parmesan breadcrumb mixture, pressing gently to ensure a good coating. Place the coated zucchini on the prepared baking sheet.
  5. Bake for 20-25 minutes, or until the zucchini is golden and crispy. If desired, broil for an additional 1-2 minutes to get an extra crispy finish.
  6. Serve immediately and enjoy!

Notes

  • Add fresh herbs like thyme or basil for extra flavor.
  • Sprinkle red pepper flakes for a spicy twist.
  • Try substituting Parmesan with Romano or mozzarella.
  • Slice zucchini into strips for zucchini fries.
  • Store leftovers in the refrigerator for up to 3 days.
  • Reheat in the oven at 375°F for 5-10 minutes for best results.

Nutrition

  • Serving Size: 1 serving
  • Calories: 180
  • Sugar: 3g
  • Sodium: 320mg
  • Fat: 10g
  • Saturated Fat: 3g
  • Unsaturated Fat: 6g
  • Trans Fat: 0g
  • Carbohydrates: 15g
  • Fiber: 2g
  • Protein: 8g
  • Cholesterol: 10mg

Have you made this recipe? I'd love to see it!

Click here to Follow me on Pinterest

Carli's Bee Cheese

June 26, 2025 by Sue Leave a Comment

Carli's Bee Cheese is a unique and delicious cheese recipe that blends creamy texture with subtle tang, making it perfect for a variety of dishes. Whether spread on crackers, added to salads, or enjoyed on its own, this homemade cheese brings a flavorful twist to your meals. The combination of fresh ingredients and easy preparation makes it an exciting addition to any kitchen.

Carli's Bee Cheese

Why You’ll Love This Recipe

I absolutely love this recipe because it’s incredibly simple yet yields such a flavorful result. Carli's Bee Cheese has a smooth, creamy texture that’s easy to spread and pairs wonderfully with so many foods. It's also versatile – whether you're looking for a new appetizer or just something different to add to a meal, this cheese is perfect. I find that it adds richness without overwhelming the other flavors in a dish. Plus, the ingredients are wholesome and natural, which makes it feel like a true treat when I make it at home.

Ingredients

  • 2 cups raw cashews, soaked for at least 4 hours

  • 2 tablespoons nutritional yeast

  • 1 tablespoon lemon juice

  • ¼ cup water (or more as needed for consistency)

  • 1 teaspoon apple cider vinegar

  • ½ teaspoon salt (adjust to taste)

  • ¼ teaspoon garlic powder

  • ¼ teaspoon onion powder

  • 1 tablespoon agar agar powder

(Her's a tip: Check out the full list of ingredients and measurements in the recipe card below.)

Directions

  1. Start by soaking the cashews in water for at least 4 hours to soften them. Drain and rinse the cashews after soaking.

  2. In a high-speed blender or food processor, combine the soaked cashews, nutritional yeast, lemon juice, apple cider vinegar, salt, garlic powder, and onion powder. Add about ¼ cup of water and blend until smooth and creamy, adding more water if necessary to achieve the desired consistency.

  3. Meanwhile, dissolve the agar agar powder in ¼ cup of water in a small saucepan. Bring it to a simmer over medium heat, stirring constantly until it thickens and becomes clear. This process usually takes about 5-7 minutes.

  4. Once the agar mixture has thickened, slowly pour it into the blended cashew mixture while continuing to blend, making sure everything is well combined.

  5. Transfer the mixture into a mold or bowl of your choice and let it cool in the fridge for at least 2-3 hours or until it sets.

Servings and timing

This recipe typically makes around 1-2 cups of cheese, depending on how thick you want it. It’s perfect for 4-6 servings, depending on how much cheese you use per person.

  • Prep time: 10 minutes (plus soaking time)

  • Set time: 2-3 hours

  • Total time: 3-4 hours (including soaking and setting)

Variations

If I’m looking to add a bit more flavor to Carli's Bee Cheese, I’ll sometimes experiment with different herbs and spices. Adding fresh herbs like chives, thyme, or basil can really enhance the flavor profile. I’ve also tried adding a bit of smoked paprika for a smoky flavor, or even a touch of miso paste for a deeper, umami richness. If I prefer a sharper taste, I’ll sometimes add a bit more lemon juice or apple cider vinegar. This recipe is highly customizable depending on what flavors I’m craving.

Storage/Reheating

I store any leftover Bee Cheese in an airtight container in the fridge. It typically lasts about 4-5 days when stored properly. I always find that it holds its texture and flavor quite well after chilling, and it’s just as creamy when spread. If the cheese becomes a little firmer than I’d like after refrigeration, I’ll simply let it sit at room temperature for a few minutes before serving. For reheating, I just leave it at room temperature or gently warm it on low heat, though it’s also delicious served cold.

FAQs

Can I make Carli's Bee Cheese without agar agar?

Yes, you can! If you don’t have agar agar, you can try using another thickener like cornstarch or arrowroot powder, although it won’t set as firmly as the agar. You could also skip the setting step and just use the cheese as a creamy spread.

How long should I soak the cashews for?

I soak the cashews for at least 4 hours, but you can soak them overnight if you prefer. Soaking them helps soften the nuts, making the cheese smoother and creamier.

Can I use roasted cashews instead of raw?

I usually prefer raw cashews because they create a more neutral and smooth flavor, but roasted cashews could work as well. Just keep in mind they may introduce a more intense flavor to the cheese.

Is this recipe suitable for vegans?

Yes, Carli's Bee Cheese is completely vegan! It’s made with plant-based ingredients, so it’s perfect for anyone following a dairy-free or vegan diet.

Can I freeze Carli's Bee Cheese?

Yes, you can freeze Carli's Bee Cheese! Just make sure to store it in an airtight container or freezer-safe bag. When ready to use, let it thaw in the fridge overnight and give it a good stir before serving.

Conclusion

Carli's Bee Cheese is an easy, delicious, and versatile homemade cheese alternative that I absolutely love making. Whether I’m enjoying it on crackers, adding it to a salad, or using it as a creamy spread, this cheese always brings something special to the table. With just a few simple ingredients and a little patience while it sets, I can have a fresh batch of this creamy cheese ready to enjoy in no time. It’s a fantastic way to enjoy a healthier, plant-based cheese that doesn’t skimp on flavor or texture.

Print

clock clock iconcutlery cutlery iconflag flag iconfolder folder iconinstagram instagram iconpinterest pinterest iconfacebook facebook iconprint print iconsquares squares iconheart heart iconheart solid heart solid icon
Carli's Bee Cheese

Carli's Bee Cheese

5 Stars 4 Stars 3 Stars 2 Stars 1 Star No reviews
  • Author: Sue
  • Prep Time: 10 minutes (plus soaking time)
  • Cook Time: 5-7 minutes (for agar agar preparation)
  • Total Time: 3-4 hours (including soaking and setting)
  • Yield: 1-2 cups, depending on thickness
  • Category: Appetizer, Spread, Vegan Cheese
  • Method: Blending, Cooking
  • Cuisine: Vegan, Plant-based
  • Diet: Vegan
Print Recipe
Pin Recipe

Description

Carli's Bee Cheese is a creamy, vegan cheese made from soaked cashews, nutritional yeast, lemon juice, and agar agar, offering a smooth texture and subtle tang, perfect as a spread or salad topping.


Ingredients

  • 2 cups raw cashews, soaked for at least 4 hours
  • 2 tablespoons nutritional yeast
  • 1 tablespoon lemon juice
  • ¼ cup water (or more as needed for consistency)
  • 1 teaspoon apple cider vinegar
  • ½ teaspoon salt (adjust to taste)
  • ¼ teaspoon garlic powder
  • ¼ teaspoon onion powder
  • 1 tablespoon agar agar powder

Instructions

  1. Soak the cashews in water for at least 4 hours to soften them. Drain and rinse the cashews after soaking.
  2. In a high-speed blender or food processor, combine the soaked cashews, nutritional yeast, lemon juice, apple cider vinegar, salt, garlic powder, and onion powder. Add about ¼ cup of water and blend until smooth and creamy, adding more water if necessary to achieve the desired consistency.
  3. Meanwhile, dissolve the agar agar powder in ¼ cup of water in a small saucepan. Bring it to a simmer over medium heat, stirring constantly until it thickens and becomes clear. This process usually takes about 5-7 minutes.
  4. Once the agar mixture has thickened, slowly pour it into the blended cashew mixture while continuing to blend, making sure everything is well combined.
  5. Transfer the mixture into a mold or bowl of your choice and let it cool in the fridge for at least 2-3 hours or until it sets.

Notes

  • Soaking cashews helps to soften them, making the cheese creamier.
  • You can adjust the consistency by adding more water if needed.
  • This cheese can be stored in the fridge for 4-5 days in an airtight container.
  • Customize the flavor with herbs like thyme, basil, or smoked paprika for variety.

Nutrition

  • Serving Size: 1 ounce
  • Calories: 80
  • Sugar: 1g
  • Sodium: 150mg
  • Fat: 7g
  • Saturated Fat: 1g
  • Unsaturated Fat: 6g
  • Trans Fat: 0g
  • Carbohydrates: 4g
  • Fiber: 1g
  • Protein: 2g
  • Cholesterol: 0mg

Have you made this recipe? I'd love to see it!

Click here to Follow me on Pinterest

Cheeseburger French Fry Casserole

June 26, 2025 by Sue Leave a Comment

Cheeseburger French Fry Casserole is the ultimate comfort food for anyone craving the delicious combination of cheeseburgers and crispy fries. This dish is perfect for a family dinner or a potluck gathering, where everyone can dig in and enjoy the satisfying layers of seasoned ground beef, gooey cheese, and crispy French fries. It’s quick, hearty, and incredibly easy to prepare. Once I made it, I knew it would become a favorite go-to meal for busy days!

Cheeseburger French Fry Casserole

Why You’ll Love This Recipe

This casserole combines all the flavors of a classic cheeseburger with the added bonus of crispy French fries baked right in. What’s not to love? The creamy cheese blends so perfectly with the savory beef, and the fries offer the best crunch. It’s also super customizable—whether you prefer extra cheese, pickles, or even a bit of mustard, you can add whatever you like to make it your own. Plus, it's a one-pan meal, so cleanup is a breeze!

Ingredients

  • 1 lb ground beef

  • 1 packet of onion soup mix

  • 2 cups shredded cheddar cheese

  • 4 cups frozen French fries

  • ½ cup ketchup

  • ¼ cup mustard

  • Salt and pepper to taste

(Here's a tip: Check out the full list of ingredients and measurements in the recipe card below.)

Directions

  1. Preheat the oven to 375°F (190°C).

  2. In a skillet, brown the ground beef over medium heat until fully cooked, breaking it apart as it cooks. Drain any excess grease.

  3. Stir in the onion soup mix, ketchup, mustard, salt, and pepper. Mix everything until well combined and heated through.

  4. Spread the ground beef mixture evenly in a 9x13-inch casserole dish.

  5. Sprinkle the shredded cheddar cheese over the beef.

  6. Top with the frozen French fries, spreading them evenly over the casserole.

  7. Bake in the preheated oven for about 30 minutes, or until the fries are golden brown and crispy.

  8. Serve hot and enjoy!

Servings and Timing

This recipe makes about 6 servings and takes approximately 45 minutes to prepare, including baking time.

Variations

  • Add veggies: I love adding sautéed onions or bell peppers to the beef mixture for an extra burst of flavor and crunch.

  • Swap the cheese: If cheddar isn't your favorite, you can use mozzarella, Swiss, or even a mix of cheeses for a different twist.

  • Make it spicier: Add some sliced jalapeños or a dash of hot sauce to the beef mixture if you like a bit of heat.

  • Use sweet potato fries: For a slightly healthier option, try using sweet potato fries instead of regular ones. The sweetness pairs wonderfully with the savory beef.

Storage/Reheating

Leftover Cheeseburger French Fry Casserole can be stored in an airtight container in the fridge for up to 3 days. To reheat, simply pop it in the microwave for a quick fix or bake it in the oven at 350°F (175°C) for about 10 minutes until warmed through.

FAQs

Can I use fresh fries instead of frozen?

I prefer frozen fries for their convenience and crispiness, but fresh fries can work too! Just make sure they are pre-cooked before layering them in the casserole.

Can I make this ahead of time?

Yes, you can assemble the casserole in advance and store it in the fridge, covered, for up to 24 hours before baking. Just add a few extra minutes to the baking time if you're baking it straight from the fridge.

Can I use ground turkey or chicken instead of beef?

Absolutely! Ground turkey or chicken can be substituted in place of ground beef for a leaner option.

How can I make this casserole spicier?

To spice it up, I suggest adding chopped jalapeños, a few dashes of hot sauce, or even a sprinkle of cayenne pepper to the beef mixture.

Can I freeze this casserole?

Yes, you can freeze the casserole before baking. Just wrap it tightly in plastic wrap or foil and freeze for up to 3 months. When you're ready to bake, allow it to thaw in the fridge overnight, then bake as usual.

Conclusion

Cheeseburger French Fry Casserole is a fun and easy twist on the classic cheeseburger. It’s hearty, flavorful, and a great way to feed a crowd or satisfy a craving. I love how simple it is to prepare, and the fact that it combines two beloved comfort foods makes it irresistible. Whether I’m serving it for dinner, a game day snack, or a potluck dish, it’s always a hit!

Print

clock clock iconcutlery cutlery iconflag flag iconfolder folder iconinstagram instagram iconpinterest pinterest iconfacebook facebook iconprint print iconsquares squares iconheart heart iconheart solid heart solid icon
Cheeseburger French Fry Casserole

Cheeseburger French Fry Casserole

5 Stars 4 Stars 3 Stars 2 Stars 1 Star No reviews
  • Author: Sue
  • Prep Time: 15 minutes
  • Cook Time: 30 minutes
  • Total Time: 45 minutes
  • Yield: 6 servings
  • Category: Main Course
  • Method: Baking
  • Cuisine: American
  • Diet: Gluten Free
Print Recipe
Pin Recipe

Description

Cheeseburger French Fry Casserole combines seasoned ground beef, gooey cheese, and crispy fries, creating a comforting and easy-to-make dish perfect for busy days or family gatherings.


Ingredients

  • 1 lb ground beef
  • 1 packet of onion soup mix
  • 2 cups shredded cheddar cheese
  • 4 cups frozen French fries
  • ½ cup ketchup
  • ¼ cup mustard
  • Salt and pepper to taste

Instructions

  1. Preheat the oven to 375°F (190°C).
  2. In a skillet, brown the ground beef over medium heat until fully cooked, breaking it apart as it cooks. Drain any excess grease.
  3. Stir in the onion soup mix, ketchup, mustard, salt, and pepper. Mix everything until well combined and heated through.
  4. Spread the ground beef mixture evenly in a 9x13-inch casserole dish.
  5. Sprinkle the shredded cheddar cheese over the beef.
  6. Top with the frozen French fries, spreading them evenly over the casserole.
  7. Bake in the preheated oven for about 30 minutes, or until the fries are golden brown and crispy.
  8. Serve hot and enjoy!

Notes

  • Add sautéed onions or bell peppers for extra flavor.
  • Substitute the cheese with mozzarella, Swiss, or a mix of cheeses for variety.
  • Add jalapeños or hot sauce to spice things up.
  • Sweet potato fries can be used as a healthier alternative.
  • This casserole can be made ahead of time and stored in the fridge for up to 24 hours.

Nutrition

  • Serving Size: 1 serving
  • Calories: 450
  • Sugar: 7g
  • Sodium: 800mg
  • Fat: 20g
  • Saturated Fat: 9g
  • Unsaturated Fat: 8g
  • Trans Fat: 1g
  • Carbohydrates: 45g
  • Fiber: 3g
  • Protein: 25g
  • Cholesterol: 60mg

Have you made this recipe? I'd love to see it!

Click here to Follow me on Pinterest

Soft and Chewy Sugar Cookies

June 26, 2025 by Sue Leave a Comment

These Soft and Chewy Sugar Cookies are the perfect treat to enjoy with a cup of tea or coffee. With a light, buttery flavor and a soft, pillowy texture, they’re bound to become a staple in my baking routine. What makes them stand out is how effortlessly they melt in my mouth, leaving a subtle sweetness behind. Whether for a special occasion or just because, they’re a delightful indulgence. Soft and Chewy Sugar Cookies

Why You’ll Love This Recipe

I absolutely love how soft and chewy these sugar cookies turn out every time. The addition of cream of tartar gives them that classic tangy flavor and tender texture that’s hard to beat. The dough is so easy to work with, and the cookies bake up perfectly golden on the edges while staying soft in the center. Plus, they make the house smell amazing while they bake. It’s a win-win for anyone who loves classic, simple desserts with a bit of a twist.

Ingredients

  • 2 ¾ cups all-purpose flour

  • 1 ½ teaspoons baking soda

  • 1 teaspoon cream of tartar

  • 1 cup unsalted butter, softened

  • 1 ½ cups granulated sugar, divided

  • 2 large eggs

  • 1 teaspoon vanilla extract

  • ½ teaspoon salt

(Here's a tip: Check out the full list of ingredients and measurements in the recipe card below.)

Directions

  1. Preheat the oven to 350°F (175°C). Line baking sheets with parchment paper or lightly grease them.

  2. In a medium bowl, whisk together the flour, baking soda, cream of tartar, and salt. Set aside.

  3. In a large mixing bowl, cream together the softened butter and 1 cup of sugar until light and fluffy. I usually do this for about 3-4 minutes.

  4. Beat in the eggs, one at a time, then add the vanilla extract. Mix until smooth.

  5. Gradually add the dry ingredients to the wet ingredients, stirring until just combined. The dough should be soft but not too sticky.

  6. Roll the dough into 1-inch balls and roll each ball in the remaining ½ cup of sugar until fully coated.

  7. Place the dough balls onto the prepared baking sheets, spacing them about 2 inches apart.

  8. Bake for 8-10 minutes, or until the edges are lightly golden but the centers are still soft.

  9. Let the cookies cool on the baking sheets for a few minutes before transferring them to a wire rack to cool completely.

Servings and Timing

This recipe makes about 24-30 cookies, depending on the size I make them. It typically takes me around 15 minutes to prepare the dough and another 8-10 minutes to bake them.

Variations

  • Cinnamon Sugar Coating: For a spiced version, I sometimes roll the dough balls in a mixture of cinnamon and sugar instead of just plain sugar.

  • Add-ins: I enjoy adding white chocolate chips, mini M&Ms, or sprinkles for a fun twist.

  • Gluten-Free: I’ve tried swapping the all-purpose flour with a gluten-free flour blend, and it works just as well.

  • Frosted Sugar Cookies: For an extra touch, I like to frost these cookies with a simple buttercream frosting for special occasions.

Storage/Reheating

These Soft and Chewy Sugar Cookies can be stored in an airtight container at room temperature for up to a week. If I want them to last a little longer, I keep them in the fridge for up to 10 days. To bring them back to their soft and chewy texture after refrigerating, I pop them in the microwave for 10-15 seconds. If I have extra cookies, I’ll freeze them for up to 3 months. Just make sure to wrap them tightly in plastic wrap or store them in a freezer bag.

FAQs

How do I make sure my sugar cookies stay soft?

I find that not overbaking them is key. I always pull them out of the oven when the edges are golden, but the centers are still soft. The cookies continue to cook on the baking sheet for a minute or two after coming out of the oven, which helps them stay chewy.

Can I use margarine instead of butter?

I prefer using unsalted butter in this recipe for the best flavor and texture, but margarine can be used as a substitute. Keep in mind that the texture may differ slightly.

Why do I need cream of tartar in sugar cookies?

Cream of tartar helps to give these cookies their signature soft and chewy texture. It also reacts with the baking soda to provide a slight tanginess that balances out the sweetness.

Can I make the dough ahead of time?

Yes! I often make the dough ahead of time, roll it into balls, and then refrigerate them for up to 24 hours. This helps the cookies hold their shape better while baking.

Can I freeze sugar cookie dough?

Absolutely! I love freezing sugar cookie dough for future baking. I roll the dough into balls, place them on a baking sheet, freeze them for an hour, then transfer them to a freezer bag. When I’m ready to bake, I just add a couple of extra minutes to the baking time.

Conclusion

These Soft and Chewy Sugar Cookies are an absolute must-try if you’re looking for a classic dessert that’s simple to make and irresistible to eat. Whether you’re baking them for a special occasion or just because you’re craving something sweet, they’ll always hit the spot. I love how soft, buttery, and flavorful they are, and I’m sure you will too!

Print

clock clock iconcutlery cutlery iconflag flag iconfolder folder iconinstagram instagram iconpinterest pinterest iconfacebook facebook iconprint print iconsquares squares iconheart heart iconheart solid heart solid icon
Soft and Chewy Sugar Cookies

Soft and Chewy Sugar Cookies

5 Stars 4 Stars 3 Stars 2 Stars 1 Star No reviews
  • Author: Sue
  • Prep Time: 15 minutes
  • Cook Time: 8-10 minutes
  • Total Time: 25 minutes
  • Yield: 24-30 cookies
  • Category: Dessert
  • Method: Baking
  • Cuisine: American
  • Diet: Vegetarian
Print Recipe
Pin Recipe

Description

These Soft and Chewy Sugar Cookies are a delightful treat with a light, buttery flavor and a soft, pillowy texture. Perfect for any occasion or just because!


Ingredients

  • 2 ¾ cups all-purpose flour
  • 1 ½ teaspoons baking soda
  • 1 teaspoon cream of tartar
  • 1 cup unsalted butter, softened
  • 1 ½ cups granulated sugar, divided
  • 2 large eggs
  • 1 teaspoon vanilla extract
  • ½ teaspoon salt

Instructions

  1. Preheat the oven to 350°F (175°C). Line baking sheets with parchment paper or lightly grease them.
  2. In a medium bowl, whisk together the flour, baking soda, cream of tartar, and salt. Set aside.
  3. In a large mixing bowl, cream together the softened butter and 1 cup of sugar until light and fluffy. This usually takes about 3-4 minutes.
  4. Beat in the eggs, one at a time, then add the vanilla extract. Mix until smooth.
  5. Gradually add the dry ingredients to the wet ingredients, stirring until just combined. The dough should be soft but not too sticky.
  6. Roll the dough into 1-inch balls and roll each ball in the remaining ½ cup of sugar until fully coated.
  7. Place the dough balls onto the prepared baking sheets, spacing them about 2 inches apart.
  8. Bake for 8-10 minutes, or until the edges are lightly golden but the centers are still soft.
  9. Let the cookies cool on the baking sheets for a few minutes before transferring them to a wire rack to cool completely.

Notes

  • To make cinnamon sugar cookies, roll the dough balls in a mixture of cinnamon and sugar instead of plain sugar.
  • For fun variations, add white chocolate chips, mini M&Ms, or sprinkles to the dough.
  • To make gluten-free cookies, swap the all-purpose flour for a gluten-free flour blend.
  • For a special touch, try frosting the cookies with a simple buttercream frosting.
  • Store in an airtight container at room temperature for up to a week, or refrigerate for up to 10 days.
  • Freeze extra cookies for up to 3 months, ensuring they are tightly wrapped or in a freezer bag.

Nutrition

  • Serving Size: 1 cookie
  • Calories: 120
  • Sugar: 10g
  • Sodium: 55mg
  • Fat: 5g
  • Saturated Fat: 3g
  • Unsaturated Fat: 1g
  • Trans Fat: 0g
  • Carbohydrates: 17g
  • Fiber: 0g
  • Protein: 1g
  • Cholesterol: 20mg

Have you made this recipe? I'd love to see it!

Click here to Follow me on Pinterest

Garlic Parmesan Fried Lamb Chops

June 26, 2025 by Sue Leave a Comment

Garlic Parmesan Fried Lamb Chops are a flavorful and succulent dish that combines the richness of lamb with the irresistible taste of garlic and Parmesan. The crispy coating adds a delightful crunch, while the tender lamb offers a juicy bite, making this a dish you’ll want to make again and again. It’s perfect for a special dinner, family gathering, or just a treat to enjoy on a weeknight. Garlic Parmesan Fried Lamb Chops

Why You’ll Love This Recipe

I absolutely love this recipe because it strikes the perfect balance between savory and indulgent. The garlic and Parmesan mix together to form a crispy, golden crust that locks in all the juicy goodness of the lamb. The flavor is bold yet comforting, and the lamb chops themselves are so tender and delicious. Plus, the recipe is simple to follow, making it easy to enjoy this restaurant-quality meal at home. It’s also a great way to impress guests or satisfy my own cravings for something rich and satisfying.

Ingredients

  • 4 lamb chops

  • 2 tablespoons olive oil

  • 3 cloves garlic, minced

  • ½ cup grated Parmesan cheese

  • ¼ cup breadcrumbs

  • 1 tablespoon fresh parsley, chopped

  • Salt and pepper, to taste

  • 1 teaspoon dried oregano

  • 1 teaspoon paprika

(Here's a tip: Check out the full list of ingredients and measurements in the recipe card below.)

Directions

  1. Start by seasoning the lamb chops with salt, pepper, and paprika on both sides.

  2. In a shallow dish, combine the grated Parmesan cheese, breadcrumbs, garlic, dried oregano, and chopped parsley.

  3. Heat the olive oil in a skillet over medium-high heat.

  4. Dredge the seasoned lamb chops in the Parmesan-breadcrumb mixture, pressing gently to coat them evenly.

  5. Once the oil is hot, place the lamb chops in the skillet and cook for about 3-4 minutes per side, or until they reach a golden, crispy crust and the internal temperature reaches 145°F for medium-rare or 160°F for medium.

  6. Remove the lamb chops from the skillet and let them rest for a couple of minutes before serving.

Servings and Timing

This recipe yields 4 lamb chops, serving 2-4 people depending on appetite. It typically takes about 25-30 minutes from start to finish.

Variations

If I want to switch up the flavors, I sometimes add a pinch of red pepper flakes for a little heat. I’ve also tried swapping the breadcrumbs for panko for an extra crispy texture. For a more herby twist, adding thyme or rosemary to the breadcrumb mixture works wonderfully. If lamb isn’t your preferred protein, this coating can work on chicken breasts as well.

Storage/Reheating

I usually store any leftover lamb chops in an airtight container in the refrigerator for up to 2-3 days. When I’m ready to enjoy them again, I prefer reheating them in a skillet over medium heat to keep the crust crispy. You can also reheat them in the oven at 350°F for about 10 minutes, flipping halfway through to ensure even heating.

FAQs

Can I make these lamb chops ahead of time?

Yes, you can prep the lamb chops by seasoning and coating them with the Parmesan mixture, then refrigerating them until you’re ready to cook. Just make sure to cook them fresh for the best texture and flavor.

How do I know when the lamb chops are done?

I always use a meat thermometer to check the internal temperature. For medium-rare lamb chops, the temperature should be 145°F. If I prefer them medium, I cook them to 160°F.

Can I use frozen lamb chops for this recipe?

While fresh lamb chops work best, you can use frozen lamb chops if needed. Be sure to thaw them thoroughly before cooking, as freezing can sometimes affect the texture.

Can I substitute the Parmesan cheese?

If I’m out of Parmesan, I’ve substituted it with Pecorino Romano or Asiago for a slightly different flavor. Both cheeses provide a similar salty, nutty taste.

What should I serve with these lamb chops?

I love serving these garlic Parmesan lamb chops with mashed potatoes, roasted vegetables, or a fresh salad. You can also serve them with a side of garlic bread to complement the savory flavors.

Conclusion

Garlic Parmesan Fried Lamb Chops are a simple yet decadent dish that delivers incredible flavor in every bite. Whether I’m making it for a special occasion or just a cozy dinner at home, it’s always a hit. The crispy coating and tender lamb make for a combination that’s hard to resist, and with a few easy steps, I get a dish that feels both indulgent and comforting.

Print

clock clock iconcutlery cutlery iconflag flag iconfolder folder iconinstagram instagram iconpinterest pinterest iconfacebook facebook iconprint print iconsquares squares iconheart heart iconheart solid heart solid icon
Garlic Parmesan Fried Lamb Chops

Garlic Parmesan Fried Lamb Chops

5 Stars 4 Stars 3 Stars 2 Stars 1 Star No reviews
  • Author: Sue
  • Prep Time: 10 minutes
  • Cook Time: 15 minutes
  • Total Time: 25-30 minutes
  • Yield: 4 lamb chops (serves 2-4 people)
  • Category: Main Dish
  • Method: Pan-Fried
  • Cuisine: American
  • Diet: Gluten Free
Print Recipe
Pin Recipe

Description

Garlic Parmesan Fried Lamb Chops are a flavorful and succulent dish that combines the richness of lamb with the irresistible taste of garlic and Parmesan, offering a crispy golden crust and juicy, tender lamb.


Ingredients

  • 4 lamb chops
  • 2 tablespoons olive oil
  • 3 cloves garlic, minced
  • ½ cup grated Parmesan cheese
  • ¼ cup breadcrumbs
  • 1 tablespoon fresh parsley, chopped
  • Salt and pepper, to taste
  • 1 teaspoon dried oregano
  • 1 teaspoon paprika

Instructions

  1. Season the lamb chops with salt, pepper, and paprika on both sides.
  2. In a shallow dish, combine the grated Parmesan cheese, breadcrumbs, garlic, dried oregano, and chopped parsley.
  3. Heat the olive oil in a skillet over medium-high heat.
  4. Dredge the seasoned lamb chops in the Parmesan-breadcrumb mixture, pressing gently to coat them evenly.
  5. Once the oil is hot, place the lamb chops in the skillet and cook for about 3-4 minutes per side, or until they reach a golden, crispy crust and the internal temperature reaches 145°F for medium-rare or 160°F for medium.
  6. Remove the lamb chops from the skillet and let them rest for a couple of minutes before serving.

Notes

  • If you like heat, add a pinch of red pepper flakes to the breadcrumb mixture.
  • For extra crunch, swap the breadcrumbs for panko.
  • Thyme or rosemary can be added for an herbier flavor.
  • Store leftovers in an airtight container in the fridge for up to 2-3 days. Reheat in a skillet to keep the crust crispy.

Nutrition

  • Serving Size: 1 lamb chop
  • Calories: 300
  • Sugar: 0g
  • Sodium: 420mg
  • Fat: 22g
  • Saturated Fat: 8g
  • Unsaturated Fat: 12g
  • Trans Fat: 0g
  • Carbohydrates: 4g
  • Fiber: 1g
  • Protein: 22g
  • Cholesterol: 75mg

Have you made this recipe? I'd love to see it!

Click here to Follow me on Pinterest

Vegan Creamy Sun-Dried Tomato Pasta

June 26, 2025 by Sue Leave a Comment

This vegan creamy sun-dried tomato pasta is a delightful, satisfying dish that blends bold flavors with a rich, smooth texture. The sun-dried tomatoes provide a deep, savory taste, while the coconut cream adds a silky, indulgent element to the sauce. It's perfect for a cozy night in or an elegant meal for guests. Vegan Creamy Sun-Dried Tomato Pasta

Why You’ll Love This Recipe

I love this recipe because it effortlessly combines the rich, umami flavor of sun-dried tomatoes with the creamy smoothness of coconut cream. The garlic and balsamic vinegar add depth, and the creamy texture coats each pasta strand beautifully. This dish feels luxurious yet is incredibly easy to prepare, making it ideal for both a quick dinner and a more refined meal for special occasions.

Ingredients

  • Fettuccine pasta

  • Sun-dried tomatoes

  • Coconut cream

  • Garlic

  • Balsamic vinegar

  • Olive oil

  • Salt and pepper to taste

(Hint: Check out the full list of ingredients and measurements in the recipe card below.)

Directions

  1. Cook the fettuccine pasta according to the package instructions until al dente. Drain and set aside.

  2. In a large skillet, heat olive oil over medium heat. Add minced garlic and sauté until fragrant.

  3. Add chopped sun-dried tomatoes to the skillet and cook for a few minutes.

  4. Pour in the coconut cream and balsamic vinegar, stirring to combine.

  5. Season with salt and pepper to taste. Let the sauce simmer for a few minutes until it thickens slightly.

  6. Add the cooked pasta to the skillet, tossing to coat the noodles evenly with the sauce.

  7. Serve hot, garnished with fresh herbs if desired.

Servings and Timing

This recipe serves approximately 4 people. The preparation and cooking time is around 30 minutes, making it a quick and satisfying meal option.

Variations

  • Add vegetables: Incorporate sautéed spinach, mushrooms, or zucchini for added nutrition and flavor.

  • Spice it up: Add red pepper flakes or cayenne pepper for a spicy kick.

  • Protein boost: Include grilled tofu or tempeh for a protein-rich addition.

  • Different pasta: Swap fettuccine for penne, spaghetti, or gluten-free pasta to suit your preference.

Storage/Reheating

Store any leftovers in an airtight container in the refrigerator for up to 3 days. To reheat, warm gently on the stovetop over low heat, adding a splash of water or vegetable broth to loosen the sauce if necessary. Alternatively, you can reheat in the microwave, stirring occasionally to ensure even heating.

FAQs

Can I use a different type of pasta?

Absolutely! While fettuccine is traditional, any pasta shape you prefer will work well with this sauce.

Is there a substitute for coconut cream?

Yes, you can use cashew cream or a store-bought vegan heavy cream alternative if you prefer.

Can I make this recipe nut-free?

Yes, using coconut cream keeps it nut-free. Just ensure that any alternative ingredients you choose are also nut-free.

How can I make this recipe spicier?

Add red pepper flakes, chopped fresh chili, or a dash of hot sauce to the sauce while it simmers to increase the heat level.

Can I freeze the leftovers?

While the dish is best enjoyed fresh, you can freeze leftovers in an airtight container for up to 1 month. Reheat thoroughly before serving.

Conclusion

This vegan creamy sun-dried tomato pasta is a delicious, creamy dish that combines bold flavors with a smooth texture. Whether you're a vegan or just exploring plant-based options, this recipe is a great choice for a comforting and satisfying meal. With its simple ingredients and easy preparation, it's a dish that's perfect for any occasion.

Print

clock clock iconcutlery cutlery iconflag flag iconfolder folder iconinstagram instagram iconpinterest pinterest iconfacebook facebook iconprint print iconsquares squares iconheart heart iconheart solid heart solid icon
Vegan Creamy Sun-Dried Tomato Pasta

Vegan Creamy Sun-Dried Tomato Pasta

5 Stars 4 Stars 3 Stars 2 Stars 1 Star No reviews
  • Author: Sue
  • Prep Time: 10 minutes
  • Cook Time: 20 minutes
  • Total Time: 30 minutes
  • Yield: 4 servings
  • Category: Main Course
  • Method: Stovetop
  • Cuisine: Italian
  • Diet: Vegan
Print Recipe
Pin Recipe

Description

A creamy vegan pasta dish featuring sun-dried tomatoes and coconut cream, providing a rich, indulgent, and satisfying flavor. The perfect balance of smoothness and boldness for a cozy dinner or special occasion.


Ingredients

  • Fettuccine pasta
  • Sun-dried tomatoes
  • Coconut cream
  • Garlic
  • Balsamic vinegar
  • Olive oil
  • Salt and pepper to taste

Instructions

  1. Cook the fettuccine pasta according to package instructions until al dente. Drain and set aside.
  2. In a large skillet, heat olive oil over medium heat. Add minced garlic and sauté until fragrant.
  3. Add chopped sun-dried tomatoes to the skillet and cook for a few minutes.
  4. Pour in the coconut cream and balsamic vinegar, stirring to combine.
  5. Season with salt and pepper to taste. Let the sauce simmer for a few minutes until it thickens slightly.
  6. Add the cooked pasta to the skillet, tossing to coat the noodles evenly with the sauce.
  7. Serve hot, garnished with fresh herbs if desired.

Notes

  • For added nutrition, consider adding vegetables like sautéed spinach, mushrooms, or zucchini.
  • Spice it up with red pepper flakes or cayenne pepper for extra heat.
  • To boost protein, try adding grilled tofu or tempeh.
  • Switch up the pasta type, such as penne or spaghetti, to suit your preference.
  • Store leftovers in an airtight container for up to 3 days, or freeze for up to 1 month.

Nutrition

  • Serving Size: 1 serving
  • Calories: 450
  • Sugar: 4g
  • Sodium: 300mg
  • Fat: 24g
  • Saturated Fat: 20g
  • Unsaturated Fat: 4g
  • Trans Fat: 0g
  • Carbohydrates: 55g
  • Fiber: 3g
  • Protein: 6g
  • Cholesterol: 0mg

Have you made this recipe? I'd love to see it!

Click here to Follow me on Pinterest

Best Tomato Soup with Cheddar Bay Dumplings

June 26, 2025 by Sue Leave a Comment

If you're craving a comforting bowl of soup with a little twist, this Best Tomato Soup with Cheddar Bay Dumplings is a dish you won't want to miss. The rich, creamy tomato soup combined with fluffy, cheesy dumplings is the perfect way to warm up on a chilly day. The cheddar bay dumplings bring a delightful savory contrast to the soup, creating an unbeatable flavor combination.

Best Tomato Soup with Cheddar Bay Dumplings

Why You’ll Love This Recipe

I love this recipe because it brings together two of my favorite comfort foods in a unique and satisfying way. The tomato soup is smooth, rich, and packed with flavor, while the Cheddar Bay dumplings add a cheesy, buttery touch that elevates the dish to something truly special. It’s a warm, hearty meal that’s perfect for cozy nights in. Plus, it’s quick and easy to make, which means I can enjoy this delicious bowl of soup without spending hours in the kitchen.

Ingredients

  • 2 tablespoons butter

  • 1 medium onion, diced

  • 3 cloves garlic, minced

  • 1 can (28 ounces) crushed tomatoes

  • 1 can (14 ounces) diced tomatoes

  • 4 cups vegetable broth

  • 1 teaspoon dried basil

  • 1 teaspoon dried oregano

  • 1 teaspoon sugar

  • Salt and pepper to taste

  • ½ cup heavy cream

  • 1 tablespoon fresh parsley, chopped

For the Cheddar Bay Dumplings:

  • 2 cups all-purpose flour

  • 1 tablespoon baking powder

  • ½ teaspoon garlic powder

  • ½ teaspoon onion powder

  • ½ teaspoon dried parsley

  • 1 cup shredded sharp cheddar cheese

  • ½ cup cold butter, cubed

  • ¾ cup whole milk

  • 1 tablespoon melted butter (for brushing)

(Here's a tip: Check out the full list of ingredients and measurements in the recipe card below.)

Directions

  1. Start by melting the butter in a large pot over medium heat. Once it’s melted, add the diced onion and cook until soft and translucent, about 5 minutes. Add the minced garlic and cook for another minute until fragrant.

  2. Pour in the crushed tomatoes, diced tomatoes, and vegetable broth. Stir in the basil, oregano, sugar, and a pinch of salt and pepper. Bring the soup to a simmer and cook for 20-25 minutes, allowing the flavors to meld together.

  3. While the soup is simmering, make the Cheddar Bay dumplings. In a large bowl, combine the flour, baking powder, garlic powder, onion powder, and dried parsley. Add the cubed butter and use a pastry cutter or your fingers to cut it into the dry ingredients until the mixture resembles coarse crumbs.

  4. Stir in the shredded cheddar cheese, then pour in the cold milk. Mix until just combined, being careful not to overmix. The dough should be slightly sticky.

  5. After the soup has simmered, use a spoon to drop heaping tablespoons of the dumpling dough onto the top of the soup. Cover the pot with a lid and let the dumplings cook for 10-12 minutes, or until they are puffed up and cooked through.

  6. Once the dumplings are done, stir in the heavy cream and fresh parsley to the soup, then taste and adjust seasoning if needed. Serve the soup with the Cheddar Bay dumplings on top and enjoy!

Servings and timing

This recipe serves about 6 people, making it perfect for a family meal or a cozy dinner party. From start to finish, it takes around 40-45 minutes to prepare, including the time to make the dumplings and let the soup simmer.

Variations

  • If you prefer a creamier tomato soup, feel free to add more heavy cream or even a bit of cream cheese for extra richness.

  • For a spicier twist, add a pinch of red pepper flakes to the soup or stir in some chopped fresh jalapeños.

  • If you don’t have sharp cheddar cheese, you can substitute it with any cheese you prefer, such as mozzarella or Monterey Jack.

  • For a gluten-free version, use a gluten-free flour blend to make the dumplings.

  • You can also swap out the vegetable broth for chicken broth if you prefer a different flavor base for the soup.

Storage/Reheating

If I have leftovers, I store the soup in an airtight container in the fridge for up to 3 days. The dumplings can lose some of their texture when stored, but the soup will still be delicious. To reheat, simply warm the soup on the stove over medium heat until hot, and if you want to freshen up the dumplings, you can heat them in the oven at 350°F for 5-7 minutes.

FAQs

How can I make this recipe vegetarian?

This recipe is already vegetarian when using vegetable broth, so you don’t need to make any changes for a vegetarian option.

Can I freeze the soup?

Yes, the soup can be frozen for up to 3 months. However, I recommend freezing the soup without the dumplings, as the dumplings might lose their texture when reheated. You can freeze just the soup and add fresh dumplings when reheating.

Can I use store-bought dumplings?

Absolutely! If you're short on time, you can use store-bought biscuit dough or dumplings, but I find that homemade dumplings make a big difference in flavor and texture.

Can I make the soup ahead of time?

Yes, the soup can be made ahead of time and stored in the refrigerator for 2-3 days before serving. If making ahead, I suggest adding the dumplings fresh when you reheat the soup.

How do I make the soup spicier?

If you like a bit of heat, try adding red pepper flakes, hot sauce, or a dash of cayenne pepper to the soup to give it an extra kick.

Conclusion

This Best Tomato Soup with Cheddar Bay Dumplings is the perfect comforting meal for any time of year. With its creamy soup base and cheesy, buttery dumplings, it’s a dish that’ll keep you coming back for more. Whether you’re making it for a cozy dinner at home or sharing it with family and friends, this recipe is sure to be a hit. Enjoy!

Print

clock clock iconcutlery cutlery iconflag flag iconfolder folder iconinstagram instagram iconpinterest pinterest iconfacebook facebook iconprint print iconsquares squares iconheart heart iconheart solid heart solid icon
Best Tomato Soup with Cheddar Bay Dumplings

Best Tomato Soup with Cheddar Bay Dumplings

5 Stars 4 Stars 3 Stars 2 Stars 1 Star No reviews
  • Author: Sue
  • Prep Time: 15 minutes
  • Cook Time: 25 minutes
  • Total Time: 40-45 minutes
  • Yield: 6 servings
  • Category: Soup
  • Method: Stovetop
  • Cuisine: American
  • Diet: Vegetarian
Print Recipe
Pin Recipe

Description

A comforting and flavorful tomato soup with fluffy Cheddar Bay dumplings that add a cheesy, buttery touch. It's the perfect dish for cozy nights in.


Ingredients

  • 2 tablespoons butter
  • 1 medium onion, diced
  • 3 cloves garlic, minced
  • 1 can (28 ounces) crushed tomatoes
  • 1 can (14 ounces) diced tomatoes
  • 4 cups vegetable broth
  • 1 teaspoon dried basil
  • 1 teaspoon dried oregano
  • 1 teaspoon sugar
  • Salt and pepper to taste
  • ½ cup heavy cream
  • 1 tablespoon fresh parsley, chopped
  • For the Cheddar Bay Dumplings:
  • 2 cups all-purpose flour
  • 1 tablespoon baking powder
  • ½ teaspoon garlic powder
  • ½ teaspoon onion powder
  • ½ teaspoon dried parsley
  • 1 cup shredded sharp cheddar cheese
  • ½ cup cold butter, cubed
  • ¾ cup whole milk
  • 1 tablespoon melted butter (for brushing)

Instructions

  1. Start by melting the butter in a large pot over medium heat. Once it’s melted, add the diced onion and cook until soft and translucent, about 5 minutes. Add the minced garlic and cook for another minute until fragrant.
  2. Pour in the crushed tomatoes, diced tomatoes, and vegetable broth. Stir in the basil, oregano, sugar, and a pinch of salt and pepper. Bring the soup to a simmer and cook for 20-25 minutes, allowing the flavors to meld together.
  3. While the soup is simmering, make the Cheddar Bay dumplings. In a large bowl, combine the flour, baking powder, garlic powder, onion powder, and dried parsley. Add the cubed butter and use a pastry cutter or your fingers to cut it into the dry ingredients until the mixture resembles coarse crumbs.
  4. Stir in the shredded cheddar cheese, then pour in the cold milk. Mix until just combined, being careful not to overmix. The dough should be slightly sticky.
  5. After the soup has simmered, use a spoon to drop heaping tablespoons of the dumpling dough onto the top of the soup. Cover the pot with a lid and let the dumplings cook for 10-12 minutes, or until they are puffed up and cooked through.
  6. Once the dumplings are done, stir in the heavy cream and fresh parsley to the soup, then taste and adjust seasoning if needed. Serve the soup with the Cheddar Bay dumplings on top and enjoy!

Notes

  • If you prefer a creamier soup, you can add more heavy cream or cream cheese.
  • For a spicier version, add red pepper flakes or chopped jalapeños to the soup.
  • You can substitute sharp cheddar with any cheese you prefer, like mozzarella or Monterey Jack.
  • For a gluten-free version, use gluten-free flour for the dumplings.
  • Vegetable broth can be replaced with chicken broth if preferred.

Nutrition

  • Serving Size: 1 bowl
  • Calories: 450
  • Sugar: 10g
  • Sodium: 900mg
  • Fat: 28g
  • Saturated Fat: 15g
  • Unsaturated Fat: 8g
  • Trans Fat: 0g
  • Carbohydrates: 41g
  • Fiber: 4g
  • Protein: 10g
  • Cholesterol: 60mg

Have you made this recipe? I'd love to see it!

Click here to Follow me on Pinterest

Sweet Garlic Carrots

June 25, 2025 by Sue Leave a Comment

Sweet garlic carrots are an incredibly simple yet flavorful side dish. The combination of tender carrots with a savory garlic butter glaze and a touch of honey makes for a mouthwatering treat that’s perfect for any meal.

Sweet Garlic Carrots

Why You’ll Love This Recipe

I love making this recipe because it’s quick, easy, and packed with flavor. The sweetness from the honey beautifully complements the earthy carrots, while the garlic adds a savory depth that makes these carrots incredibly addictive. The glaze caramelizes as the carrots roast, giving them a perfect balance of tenderness and a slight crispness. It's a dish that's both family-friendly and elegant enough for dinner parties.

ingredients

(HHere's a tip: Check out the full list of ingredients and measurements in the recipe card below.)

  • 2 lb carrots, peeled (or scrubbed) and cut into 2–3″ pieces

  • 4–5 tablespoon unsalted butter

  • 4 cloves garlic, minced

  • 2–3 tablespoon honey

  • ¼ teaspoon salt (or to taste)

  • ¼ teaspoon freshly ground black pepper

  • 2 tablespoon fresh parsley, chopped (for garnish)

directions

  1. Preheat your oven to 425°F (220°C).

  2. In a skillet, melt the butter over medium heat. Add minced garlic and sauté for about 30 seconds until fragrant.

  3. Remove the skillet from the heat and stir in the honey, salt, and pepper until well combined.

  4. Toss the carrot pieces in the garlic-honey mixture until they are fully coated.

  5. Spread the carrots evenly on a greased rimmed baking sheet.

  6. Roast for 20 minutes, then toss the carrots and return them to the oven for another 5–7 minutes, or until they are tender and slightly caramelized.

  7. If you like a deeper glaze, you can broil the carrots for an additional 1–2 minutes at the end.

  8. Transfer the carrots to a serving dish, sprinkle with fresh parsley, and serve.

Servings and timing

This recipe makes about 4–6 servings.
Total time: 35 minutes (10 minutes prep, 25 minutes roasting).

Variations

  • Spicy kick: Add a pinch of cayenne pepper or smoked paprika for a bit of heat.

  • Maple swap: Replace honey with maple syrup for a different kind of sweetness.

  • Herb tweak: Swap parsley for other fresh herbs like thyme, rosemary, or dill.

  • Mixed root vegetables: Add other root vegetables like parsnips or sweet potatoes for a more colorful dish.

storage/reheating

I store the leftovers in an airtight container in the refrigerator for up to 3 days. To reheat, I recommend warming them in a skillet with a little butter or olive oil over medium heat until heated through. You can also reheat them in the oven at 300°F for about 10–15 minutes.

FAQs

Can I prepare these carrots ahead of time?

Yes, I often roast the carrots ahead of time, store them in the fridge, and then reheat them when needed. They still taste great and the glaze stays delicious!

Do I have to peel the carrots?

I usually peel the carrots for a cleaner look, but you can skip this step if you prefer. Just make sure to scrub them well to remove any dirt.

How do I get the perfect caramelization without burning them?

I find that roasting the carrots at 425°F works well, but be sure to toss them halfway through cooking to avoid uneven browning. If they seem to be browning too quickly, you can lower the temperature to 400°F.

Can I use baby carrots instead?

Definitely! Baby carrots can be used instead of regular carrots. Just be sure to adjust the roasting time, as they cook faster.

Can I skip the honey?

If you’re not a fan of sweetness, you can skip the honey and just stick with the garlic and butter for a more savory flavor. However, the honey helps create that lovely caramelized glaze that enhances the flavor of the carrots.

Conclusion

Sweet Garlic Carrots have become one of my go-to side dishes. They are easy to make, full of flavor, and pair wonderfully with just about any main course. Whether you're serving them for a weeknight dinner or a special occasion, this dish is sure to impress. The perfect balance of sweet, savory, and buttery makes it an irresistible choice!

Print

clock clock iconcutlery cutlery iconflag flag iconfolder folder iconinstagram instagram iconpinterest pinterest iconfacebook facebook iconprint print iconsquares squares iconheart heart iconheart solid heart solid icon
Sweet Garlic Carrots

Sweet Garlic Carrots

5 Stars 4 Stars 3 Stars 2 Stars 1 Star No reviews
  • Author: Sue
  • Prep Time: 10 minutes
  • Cook Time: 25 minutes
  • Total Time: 35 minutes
  • Yield: 4–6 servings
  • Category: Side Dish
  • Method: Roasting
  • Cuisine: American
  • Diet: Vegetarian
Print Recipe
Pin Recipe

Description

A buttery-sweet side dish of tender carrots glazed with garlic and honey, perfect for family dinners or holiday feasts.


Ingredients

  • 2 lb carrots, peeled (or scrubbed) and cut into 2–3" pieces
  • 4–5 tablespoon unsalted butter
  • 4 cloves garlic, minced
  • 2–3 tablespoon honey
  • ¼ tsp salt (or to taste)
  • ¼ tsp freshly ground black pepper
  • 2 Tbsp fresh parsley, chopped (for garnish)

Instructions

  1. Preheat your oven to 425°F (220°C).
  2. In a skillet, melt the butter over medium heat. Add minced garlic and sauté briefly until fragrant—about 30 seconds.
  3. Remove from heat, stir in honey, salt, and pepper until smooth.
  4. Toss the carrot pieces in this honey-garlic butter mixture until evenly coated.
  5. Arrange the carrots in a single layer on a greased rimmed baking sheet.
  6. Roast for 20 minutes, then toss and return to roast until tender and caramelized (an additional 5–7 minutes).
  7. Optional: Broil for 1–2 minutes at the end to deepen the glaze.
  8. Transfer to a serving dish, sprinkle with parsley, and serve warm.

Notes

  • Store leftovers in an airtight container in the fridge for 2–3 days.
  • Reheat in a skillet with a little butter or in a 300°F oven for 10–15 minutes.
  • Baby carrots work fine but reduce cooking time slightly.
  • If carrots brown too fast, lower the oven to 400°F or cover with foil.
  • Skip the honey if you prefer, though it adds a lovely glossy glaze.

Nutrition

  • Serving Size: 1 serving
  • Calories: 160
  • Sugar: 12g
  • Sodium: 200mg
  • Fat: 9g
  • Saturated Fat: 5g
  • Unsaturated Fat: 3g
  • Trans Fat: 0g
  • Carbohydrates: 22g
  • Fiber: 4g
  • Protein: 1g
  • Cholesterol: 20mg

Have you made this recipe? I'd love to see it!

Click here to Follow me on Pinterest

No-Bake Snickers Bar Pie

June 25, 2025 by Sue Leave a Comment

A luscious, no-bake dessert that combines creamy peanut butter cheesecake filling with chunks of Snickers bars, all nestled in a crisp graham cracker crust and drizzled with caramel and chocolate.

No-Bake Snickers Bar Pie

Why You’ll Love This Recipe

I love that this pie is incredibly easy—no oven needed—and perfect for warm days. The flavor combo of peanut butter, caramel, chocolate, and nougat delivers a Snickers bar in pie form! It comes together in about 10–20 minutes and chills to perfection for a crowd-pleasing treat.

Ingredients

(Here's a tip: Check out the full list of ingredients and measurements in the recipe card below.)

  • Graham cracker crumbs

  • Roasted salted peanuts

  • Light brown sugar

  • Unsalted butter, melted

  • Cream cheese, softened

  • Creamy or crunchy peanut butter

  • Powdered sugar

  • Frozen whipped topping (e.g. Cool Whip), thawed

  • Snickers bars, chopped (for filling and topping)

  • Chocolate syrup (for drizzle)

  • Caramel sauce (for drizzle)

directions

  1. Make the crust

    • Combine graham crumbs, peanuts, brown sugar, and melted butter; press evenly into a 9‑inch pie pan.

    • Freeze or refrigerate until firm, about 15 minutes.

  2. Prepare the filling

    • Beat cream cheese, peanut butter, and caramel sauce until smooth (2 minutes).

    • Add powdered sugar and blend until fluffy.

    • Fold in whipped topping and 1½ cups of chopped Snickers bars.

  3. Assemble the pie

    • Spoon filling into chilled crust and smooth the top.

    • Chill the pie for at least 3 hours (or up to overnight).

  4. Add toppings and serve

    • Drizzle with chocolate and caramel syrup.

    • Sprinkle extra chopped Snickers and peanuts on top.

    • Slice and enjoy chilled.

Servings and timing

  • Servings: 8 slices

  • Prep time: ~15–20 minutes

  • Chill time: 2–4 hours (minimum 3 hours recommended)

  • Total time: About 3–4 hours

Variations

  • Use a chocolate graham crackers or Oreo crust instead of a plain graham one.

  • Swap chunky peanut butter for marshmallow fluff for a sweeter nougat-like twist.

  • Add a pretzel crust for extra sweet-salty crunch.

  • Lighten it up with dark chocolate drizzle and less sugary toppings.

  • Make it vegan or sugar-free using alternative crusts, nut butters, and sweeteners.

storage/reheating

  • Refrigerator: Cover and store for up to 5 days.

  • Freezer: Freeze individual slices for 2–3 months; thaw in refrigerator before serving.

  • No reheating needed—it’s best served chilled.

FAQs

What if I don’t have Cool Whip?

You can substitute with homemade whipped cream or marshmallow fluff.

Can I make the crust ahead of time?

Absolutely! Prepare the crust in advance and chill until you're ready to fill it.

Does this pie freeze well?

Yes—freeze slices individually; they keep well for up to 3 months. Thaw in the fridge before serving.

Can kids help with this recipe?

Yes, it’s super kid-friendly—great for mixing and assembling!

How can I reduce the sweetness?

Use less caramel and chocolate drizzle, or opt for dark chocolate toppings.

Conclusion

I adore this No-Bake Snickers Bar Pie for its simplicity and indulgence. It’s perfect for summer gatherings, easy to personalize, and holds up beautifully in the fridge or freezer. Whether I’m craving a decadent treat or looking for a fun dessert to bring to a party, this pie never disappoints!

Print

clock clock iconcutlery cutlery iconflag flag iconfolder folder iconinstagram instagram iconpinterest pinterest iconfacebook facebook iconprint print iconsquares squares iconheart heart iconheart solid heart solid icon
No-Bake Snickers Bar Pie

No-Bake Snickers Bar Pie

5 Stars 4 Stars 3 Stars 2 Stars 1 Star No reviews
  • Author: Sue
  • Prep Time: 15–20 minutes
  • Cook Time: 0 minutes
  • Total Time: 3–4 hours
  • Yield: 8 slices
  • Category: Dessert
  • Method: No-bake
  • Cuisine: American
  • Diet: Vegetarian
Print Recipe
Pin Recipe

Description

A luscious, no-bake dessert combining creamy peanut butter cheesecake filling with chunks of Snickers bars, nestled in a crisp graham cracker crust and drizzled with caramel and chocolate.


Ingredients

  • Graham cracker crumbs
  • Roasted salted peanuts
  • Light brown sugar
  • Unsalted butter, melted
  • Cream cheese, softened
  • Creamy or crunchy peanut butter
  • Powdered sugar
  • Frozen whipped topping (e.g. Cool Whip), thawed
  • Snickers bars, chopped (for filling and topping)
  • Chocolate syrup (for drizzle)
  • Caramel sauce (for drizzle)

Instructions

  1. Make the crust: Combine graham crumbs, peanuts, brown sugar, and melted butter; press evenly into a 9-inch pie pan. Freeze or refrigerate until firm, about 15 minutes.
  2. Prepare the filling: Beat cream cheese, peanut butter, and caramel sauce until smooth (2 minutes). Add powdered sugar and blend until fluffy. Fold in whipped topping and 1½ cups of chopped Snickers bars.
  3. Assemble the pie: Spoon filling into chilled crust and smooth the top. Chill the pie for at least 3 hours (or up to overnight).
  4. Add toppings and serve: Drizzle with chocolate and caramel syrup. Sprinkle extra chopped Snickers and peanuts on top. Slice and enjoy chilled.

Notes

  • Use a chocolate graham cracker or Oreo crust for a different twist.
  • Swap chunky peanut butter for marshmallow fluff for a sweeter nougat-like twist.
  • Try a pretzel crust for extra sweet-salty crunch.
  • Can be made vegan or sugar-free with alternative crusts, nut butters, and sweeteners.

Nutrition

  • Serving Size: 1 slice
  • Calories: 400
  • Sugar: 40g
  • Sodium: 250mg
  • Fat: 24g
  • Saturated Fat: 9g
  • Unsaturated Fat: 13g
  • Trans Fat: 0g
  • Carbohydrates: 42g
  • Fiber: 2g
  • Protein: 6g
  • Cholesterol: 25mg

Have you made this recipe? I'd love to see it!

Click here to Follow me on Pinterest

CHOCOLATE CHIP BANANA BARS

June 25, 2025 by Sue Leave a Comment

I’ve created a tender, moist bar that captures all the comforting flavor of banana bread with the convenience and fun of a bar—and of course, plenty of chocolate chips throughout.

CHOCOLATE CHIP BANANA BARS

Why You’ll Love This Recipe

I love how these bars come together quickly and bake in under 45 minutes, making them perfect whether I’m craving a snack or need to use up a bunch of ripe bananas. They are chewy, banana‑forward, and loaded with sweet chocolate chips—delivering big flavor without fuss.

ingredients

(Here's a tip: Check out the full list of ingredients and measurements in the recipe card below.)

  • ½ cup (113 g) unsalted butter, melted and cooled

  • ¾ cup packed light brown sugar

  • 1 large egg, room temperature

  • 1 teaspoon vanilla extract

  • 1 teaspoon baking powder

  • ½ teaspoon salt

  • 1 cup all‑purpose flour

  • 1 cup mashed overripe bananas (about 2 large bananas)

  • ¾ cup mini (or regular) chocolate chips, plus extra for topping

directions

  1. Preheat the oven to 350°F (175°C). Line an 8×8-inch pan with parchment paper.

  2. In a large bowl, whisk melted butter and brown sugar until smooth.

  3. Add the egg and vanilla, whisking until combined.

  4. Stir in mashed bananas until fully integrated.

  5. In a separate bowl, combine flour, baking powder, and salt.

  6. Gradually fold dry ingredients into the wet mixture until just blended.

  7. Fold in most of the chocolate chips, reserving a few to sprinkle on top.

  8. Spread batter evenly in the pan and top with remaining chips.

  9. Bake for 30–35 minutes, until edges are set and a toothpick comes out with just a few moist crumbs.

  10. Let cool completely in the pan before lifting out and slicing into 16 bars.

Servings and timing

  • Yield: 16 bars

  • Prep time: ~10 minutes

  • Cook time: 30–35 minutes

  • Total time: ~45 minutes

Variations

  • Stir in ½ cup chopped nuts (walnuts, pecans, or hazelnuts) for extra crunch.

  • Double the recipe in a 9×13 pan; add 5 extra minutes to baking time.

  • Replace the chocolate chips entirely with dried fruit, or add a swirl of peanut butter.

  • For a whole‑grain version, substitute whole wheat flour 1:1.

storage/reheating

I store cooled bars in an airtight container. They stay fresh at room temperature for 3–4 days, or I refrigerate them for up to a week. For longer storage, I freeze them (in zip-top bags) for up to a month. When I'm ready to enjoy, I thaw them on the counter or microwave a bar for ~15 seconds to bring back that fresh‑baked warmth.

FAQs

Can I use frozen bananas?

Absolutely—but thaw them completely and drain off any excess liquid first, or else the batter can become too wet.

How do I know when the bars are done?

I use the toothpick method: insert into the center—it should come out clean or with a few moist crumbs. The edges will pull slightly away from the pan.

Can I use a different pan size?

Yes: 9×9 or 9×13 pans both work. Just know a larger pan means thinner bars, so reduce bake time accordingly; a smaller pan yields thicker bars and might need a few extra minutes.

How ripe should the bananas be?

I go for heavily speckled or mostly brown bananas—they’re sweeter and easier to mash, giving the best flavor and texture.

Can I make these nut‑free or vegan?

Yes—just ensure your chocolate chips are dairy‑free. You can also substitute the egg with ¼ cup applesauce or a flax egg (1 tablespoon ground flax + 3 tablespoon water) and use vegan butter.

Conclusion

I hope this chocolate chip banana bar recipe becomes a staple in your kitchen the way it has in mine. They’re an easy, comforting way to use up ripe bananas—perfect for breakfast grab‑and‑gos, afternoon snack breaks, or a casual dessert. Let me know what twist you try next—I’m always looking for new ideas!

Print

clock clock iconcutlery cutlery iconflag flag iconfolder folder iconinstagram instagram iconpinterest pinterest iconfacebook facebook iconprint print iconsquares squares iconheart heart iconheart solid heart solid icon
CHOCOLATE CHIP BANANA BARS

CHOCOLATE CHIP BANANA BARS

5 Stars 4 Stars 3 Stars 2 Stars 1 Star No reviews
  • Author: Sue
  • Prep Time: 10 minutes
  • Cook Time: 30–35 minutes
  • Total Time: 45 minutes
  • Yield: 16 bars
  • Category: Dessert
  • Method: Baking
  • Cuisine: American
  • Diet: Vegetarian
Print Recipe
Pin Recipe

Description

A tender, moist bar capturing the flavor of banana bread with the convenience of a bar, loaded with chocolate chips.


Ingredients

  • ½ cup (113 g) unsalted butter, melted and cooled
  • ¾ cup packed light brown sugar
  • 1 large egg, room temperature
  • 1 tsp vanilla extract
  • 1 tsp baking powder
  • ½ tsp salt
  • 1 cup all‑purpose flour
  • 1 cup mashed overripe bananas (about 2 large bananas)
  • ¾ cup mini (or regular) chocolate chips, plus extra for topping

Instructions

  1. Preheat the oven to 350 °F (175 °C). Line an 8×8‑inch pan with parchment paper.
  2. In a large bowl, whisk melted butter and brown sugar until smooth.
  3. Add the egg and vanilla, whisking until combined.
  4. Stir in mashed bananas until fully integrated.
  5. In a separate bowl, combine flour, baking powder, and salt.
  6. Gradually fold dry ingredients into the wet mixture until just blended.
  7. Fold in most of the chocolate chips, reserving a few to sprinkle on top.
  8. Spread batter evenly in the pan and top with remaining chips.
  9. Bake for 30–35 minutes, until edges are set and a toothpick comes out with just a few moist crumbs.
  10. Let cool completely in the pan before lifting out and slicing into 16 bars.

Notes

  • Stir in ½ cup chopped nuts (walnuts, pecans, or hazelnuts) for extra crunch.
  • Double the recipe in a 9×13 pan; add 5 extra minutes to baking time.
  • Replace the chocolate chips entirely with dried fruit or add a swirl of peanut butter.
  • For a whole-grain version, substitute whole wheat flour 1:1.

Nutrition

  • Serving Size: 1 bar
  • Calories: 200
  • Sugar: 20g
  • Sodium: 150mg
  • Fat: 10g
  • Saturated Fat: 6g
  • Unsaturated Fat: 4g
  • Trans Fat: 0g
  • Carbohydrates: 30g
  • Fiber: 2g
  • Protein: 2g
  • Cholesterol: 35mg

Have you made this recipe? I'd love to see it!

Click here to Follow me on Pinterest

Marshmallow Caramel Corn

June 25, 2025 by Sue Leave a Comment

A gooey, buttery twist on classic caramel corn—crunchy popcorn gets coated in a melted marshmallow‑caramel sauce for a decadent, comforting snack.

Marshmallow Caramel Corn

Why You’ll Love This Recipe

I love how this recipe combines the chewy softness of marshmallow treats with the sweet‑salty crunch of caramel popcorn. It’s no‑bake, comes together in about 15 minutes, and only uses everyday pantry ingredients. It’s ideal for movie nights, parties, or whenever I want a quick, crowd‑pleasing dessert.

ingredients

(Here's a tip: Check out the full list of ingredients and measurements in the recipe card below.)

  • 10 cups popped popcorn

  • ½ cup (1 stick) unsalted butter

  • 1 cup packed light brown sugar

  • 1–2 tablespoon light corn syrup

  • 2–3 cups marshmallows (mini or chopped large)

  • 1 teaspoon vanilla extract

  • Optional pinch of sea salt

directions

  1. Pop the popcorn and remove any unpopped kernels. I usually air‑pop or use plain microwave popcorn.

  2. In a saucepan over medium heat, melt the butter. Add the brown sugar and corn syrup, stirring until it's smooth and starting to bubble.

  3. Lower the heat to medium‑low, then stir in the marshmallows. Continue stirring until fully melted and glossy (about 1–2 minutes). Add the vanilla and stir briefly.

  4. Immediately pour the marshmallow‑caramel mixture over the popcorn. Gently fold to coat evenly. Work quickly before it sets.

  5. Spread the coated popcorn on a baking sheet (lined with parchment or wax paper) and let it cool for 10–15 minutes until set. If I’m impatient, I pop it in the fridge for a few minutes.

Servings and timing

This batch makes about 10–12 cups, which I typically portion into 4–6 servings depending on appetite. Prep and cook take around 15 minutes, plus 10 minutes for cooling.

Variations

  • Add mix‑ins: I sometimes sprinkle mini M&M’s, chocolate chips, or chopped nuts (pecans, peanuts) right after spreading it on the sheet.

  • Salt finish: A light dusting of sea salt enhances the sweet‑salty balance.

  • Vanilla swap: Use maple extract or almond extract instead of vanilla for a twist.

storage/reheating

I store leftovers in an airtight container at room temperature for up to 2 days. It’s best on day one while it’s still soft and chewy—after that it starts to firm up and lose its optimal texture.

FAQs

What popcorn should I use?

I prefer plain, unsalted popcorn—whether air‑popped or microwaved. It gives the caramel‑marshmallow flavor room to shine.

Does corn syrup matter?

Yes—it helps prevent crystallization and keeps the sauce soft and smooth. I use light corn syrup.

Can I bake it for crunchier texture?

This version is meant to be gooey—not crunchy—so I skip baking. If you want crunchy caramel corn, you can bake at 250°F for about an hour, stirring periodically.

Can I use jumbo marshmallows?

Yes—just chop them into smaller pieces so they melt evenly. Three cups of mini equals roughly 20–24 large marshmallows.

Can I freeze it?

I don’t recommend freezing because it can change the texture. It’s best enjoyed fresh or stored at room temperature for a couple of days.

Conclusion

This marshmallow caramel corn is one of my favorite simple, no‑bake treats that delivers on both sweet and comforting textures. It comes together quickly with ingredients I always have on hand. Whether I’m serving it at a gathering or just craving a nostalgic snack, this sticky, gooey delight never disappoints. I hope it becomes a staple in your snack rotation too!

Print

clock clock iconcutlery cutlery iconflag flag iconfolder folder iconinstagram instagram iconpinterest pinterest iconfacebook facebook iconprint print iconsquares squares iconheart heart iconheart solid heart solid icon
Marshmallow Caramel Corn

Marshmallow Caramel Corn

5 Stars 4 Stars 3 Stars 2 Stars 1 Star No reviews
  • Author: Sue
  • Prep Time: 10 minutes
  • Cook Time: 5 minutes
  • Total Time: 15 minutes
  • Yield: 10–12 cups
  • Category: Snack
  • Method: No-bake
  • Cuisine: American
  • Diet: Vegetarian
Print Recipe
Pin Recipe

Description

A gooey, buttery twist on classic caramel corn—crunchy popcorn gets coated in a melted marshmallow‑caramel sauce for a decadent, comforting snack.


Ingredients

  • 10 cups popped popcorn
  • ½ cup (1 stick) unsalted butter
  • 1 cup packed light brown sugar
  • 1–2 tablespoon light corn syrup
  • 2–3 cups marshmallows (mini or chopped large)
  • 1 tsp vanilla extract
  • Optional pinch of sea salt

Instructions

  1. Pop popcorn and remove unpopped kernels.
  2. In a saucepan over medium heat, melt butter. Add brown sugar and corn syrup, stirring until it's smooth and starting to bubble.
  3. Lower heat to medium-low, then stir in marshmallows. Continue stirring until fully melted and glossy (about 1–2 minutes). Add vanilla and stir briefly.
  4. Immediately pour the marshmallow-caramel mixture over the popcorn. Gently fold to coat evenly. Work quickly before it sets.
  5. Spread coated popcorn on a baking sheet (lined with parchment or wax paper) and let cool for 10–15 minutes until set. If impatient, refrigerate for a few minutes.

Notes

  • For extra flavor, add mix-ins like mini M&Ms, chocolate chips, or chopped nuts.
  • A light dusting of sea salt can enhance the sweet-salty balance.
  • Swap vanilla extract with maple or almond extract for a different flavor.

Nutrition

  • Serving Size: ¼ cup
  • Calories: 150
  • Sugar: 15g
  • Sodium: 50mg
  • Fat: 7g
  • Saturated Fat: 4g
  • Unsaturated Fat: 2g
  • Trans Fat: 0g
  • Carbohydrates: 21g
  • Fiber: 1g
  • Protein: 1g
  • Cholesterol: 15mg

Have you made this recipe? I'd love to see it!

Click here to Follow me on Pinterest

IRRESISTIBLE GARLIC PARMESAN CHEESEBURGER BOMBS

June 25, 2025 by Sue Leave a Comment

These Garlic Parmesan Cheeseburger Bombs are the perfect combination of crispy, buttery dough filled with juicy beef, creamy cheese, and a garlic-parmesan topping. They're an irresistible, savory snack or meal that's sure to be a hit at any gathering.

IRRESISTIBLE GARLIC PARMESAN CHEESEBURGER BOMBS

Why You’ll Love This Recipe

I love this recipe because it combines the classic flavors of a cheeseburger in a fun, bite-sized format. The flaky biscuit dough is golden and buttery, while the beef and cheese filling is savory and satisfying. The garlic-parmesan topping adds an extra layer of flavor that makes these bombs absolutely addictive. Plus, they're so quick and easy to make, taking only 35 minutes from start to finish. Perfect for a weeknight dinner or a party appetizer, I find these bombs to be incredibly versatile and always a crowd favorite.

Ingredients

(Here's a tip: Check out the full list of ingredients and measurements in the recipe card below.)

  • 1 lb ground beef

  • 1 cup shredded cheddar cheese

  • ½ cup cream cheese, softened

  • 1 teaspoon garlic powder

  • 1 teaspoon onion powder

  • ½ teaspoon salt

  • ¼ teaspoon black pepper

  • 1 pkg refrigerated biscuit dough (16.3 oz, 8-count)

  • ¼ cup unsalted butter, melted

  • 1 teaspoon garlic powder (for brushing)

  • 2 tablespoon grated Parmesan cheese (for brushing)

  • 1 tablespoon fresh parsley, chopped (optional garnish)

Directions

  1. Preheat the oven to 375°F (190°C) and line a baking sheet with parchment paper.

  2. In a skillet over medium heat, cook the ground beef until browned. Drain any excess fat, then stir in cheddar, cream cheese, garlic powder, onion powder, salt, and pepper until evenly combined.

  3. Flatten each biscuit to about a 4-inch circle with your hands or a rolling pin.

  4. Spoon roughly 2 tablespoon of the beef-cheese mixture into the center of each biscuit circle.

  5. Fold the dough over the filling, pinch the edges to seal completely, and place each bomb seam-side down on the baking sheet.

  6. In a small bowl, whisk melted butter, garlic powder, and Parmesan cheese. Brush this mixture generously over the tops of each bomb.

  7. Bake for 12–15 minutes, until golden brown.

  8. Remove from the oven, allow to cool slightly, then garnish with chopped parsley if desired. Serve warm and enjoy.

Servings and timing

  • Prep time: 20 minutes

  • Cook time: 15 minutes

  • Total time: 35 minutes

  • Servings: 8 bombs

Variations

  • Spicy: Mix diced jalapeños or hot sauce into the beef filling for a spicy kick.

  • Different cheese: Swap the cheddar for pepper jack, mozzarella, or Swiss cheese for different flavors.

  • BBQ style: Use BBQ sauce instead of ketchup and mustard in the filling.

  • Vegetarian: Use plant-based ground meat and dairy-free cheeses for a vegetarian version.

Storage/reheating

  • Refrigerator: Store in an airtight container for up to 3 days.

  • Freezing: Freeze unbaked bombs for up to 3 months. Bake directly from frozen, adding a few minutes to the baking time.

  • Reheating: Reheat in a 350°F oven for about 5–7 minutes or in the microwave for 30 seconds.

FAQs

Can I make these ahead of time?

Yes! I often assemble the bombs ahead of time and refrigerate them for up to 24 hours before baking. They turn out just as delicious.

Can I air‑fry these instead of baking?

Yes, you can! I air-fry them at 350°F for about 10–12 minutes, keeping an eye on them until they turn golden brown.

What dipping sauces pair well?

I love dipping these bombs in ranch, ketchup, mustard, or marinara sauce—each sauce brings out a different, tasty flavor.

Can I use homemade biscuit or pizza dough?

Yes, homemade dough works just as well as refrigerated biscuit dough. I love experimenting with different doughs for a unique twist.

How do I prevent the filling from leaking out?

Be sure to press the edges of the biscuit dough firmly to seal, and avoid overfilling them. Sealing them well keeps all the delicious filling inside.

Conclusion

These Garlic Parmesan Cheeseburger Bombs have quickly become one of my go-to recipes for both casual meals and parties. They're cheesy, savory, and incredibly satisfying with the perfect balance of crispy dough and flavorful filling. Whether for dinner or a fun appetizer, I know these bombs will be a hit every time.

Print

clock clock iconcutlery cutlery iconflag flag iconfolder folder iconinstagram instagram iconpinterest pinterest iconfacebook facebook iconprint print iconsquares squares iconheart heart iconheart solid heart solid icon
IRRESISTIBLE GARLIC PARMESAN CHEESEBURGER BOMBS

IRRESISTIBLE GARLIC PARMESAN CHEESEBURGER BOMBS

5 Stars 4 Stars 3 Stars 2 Stars 1 Star No reviews
  • Author: Sue
  • Prep Time: 20 minutes
  • Cook Time: 15 minutes
  • Total Time: 35 minutes
  • Yield: 8 bombs
  • Category: Appetizer
  • Method: Baking
  • Cuisine: American
  • Diet: Halal
Print Recipe
Pin Recipe

Description

Flaky biscuit dough is stuffed with a savory, cheesy ground beef mixture and brushed with a garlic-Parmesan butter before being baked to golden perfection. These Cheeseburger Bombs are a deliciously fun snack or meal option.


Ingredients

  • 1 lb ground beef
  • 1 cup shredded cheddar cheese
  • ½ cup cream cheese, softened
  • 1 tsp garlic powder
  • 1 tsp onion powder
  • ½ tsp salt
  • ¼ tsp black pepper
  • 1 pkg refrigerated biscuit dough (16.3 oz, 8-count)
  • ¼ cup unsalted butter, melted
  • 1 tsp garlic powder (for brushing)
  • 2 Tbsp grated Parmesan cheese (for brushing)
  • 1 Tbsp fresh parsley, chopped (optional garnish)

Instructions

  1. Preheat the oven to 375 °F (190 °C) and line a baking sheet with parchment paper.
  2. In a skillet over medium heat, cook the ground beef until browned. Drain excess fat, then stir in cheddar, cream cheese, garlic powder, onion powder, salt, and pepper until well combined.
  3. Flatten each biscuit to about a 4-inch circle using your hands or a rolling pin.
  4. Spoon about 2 tablespoons of the beef-cheese mixture into the center of each biscuit circle.
  5. Fold the dough over the filling, pinching edges to seal, and place seam-side down on the baking sheet.
  6. In a small bowl, mix melted butter with garlic powder and Parmesan cheese. Brush over the tops of each bomb.
  7. Bake for 12–15 minutes, until golden brown.
  8. Let cool slightly, garnish with chopped parsley if desired, and serve warm.

Notes

  • Can be made ahead and refrigerated up to 24 hours before baking.
  • Air fryer option: cook at 350 °F for 10–12 minutes.
  • Try different cheeses or add jalapeños for a spicy twist.
  • Seal edges tightly to prevent filling leaks.
  • Serve with dipping sauces like ketchup, mustard, or ranch.

Nutrition

  • Serving Size: 1 bomb
  • Calories: 320
  • Sugar: 2g
  • Sodium: 540mg
  • Fat: 21g
  • Saturated Fat: 10g
  • Unsaturated Fat: 9g
  • Trans Fat: 0.5g
  • Carbohydrates: 18g
  • Fiber: 1g
  • Protein: 14g
  • Cholesterol: 60mg

Have you made this recipe? I'd love to see it!

Click here to Follow me on Pinterest

Shrimp Ceviche

June 25, 2025 by Sue Leave a Comment

A light and refreshing Mexican-inspired seafood dish made with marinated shrimp, fresh lime juice, tomatoes, onions, cilantro, and a hint of chili. It’s the perfect blend of zesty, vibrant flavors in a colorful presentation. Shrimp Ceviche

Why You’ll Love This Recipe

I fell in love with this shrimp ceviche because it’s incredibly easy to make yet tastes like it’s been slow-cooked for hours. The bright lime juice “cooks” the shrimp in minutes, and the freshness of the vegetables and cilantro makes it a hit every time I serve it. It’s ideal for a healthy appetizer, light lunch, or party dip.

ingredients

Here's a tip: Check out the full list of ingredients and measurements in the recipe card below.

  • Raw shrimp (peeled, deveined, and tails removed)

  • Fresh lime juice

  • Ripe tomatoes, finely diced

  • Red onion, finely chopped

  • Jalapeño or serrano chili, seeded and minced

  • Fresh cilantro leaves, chopped

  • Salt and pepper

  • Optional: diced cucumber or avocado for added freshness

directions

  1. Chop the raw shrimp into bite-sized pieces and place in a non-reactive bowl.

  2. Pour enough fresh lime juice over the shrimp to completely cover it.

  3. Refrigerate and let the shrimp “cook” until opaque, about 15–20 minutes. I swirl it gently halfway through to ensure even marination.

  4. Once the shrimp are opaque and firm, drain off some of the excess lime juice, leaving a little for flavor.

  5. Add diced tomatoes, red onion, minced chili, and chopped cilantro.

  6. Season with salt and pepper to taste, and gently toss to combine.

  7. Chill for another 10 minutes to let flavors meld before serving.

Servings and timing

This recipe yields about 4 appetizer servings or 2 light meal portions.
Prep time: 10 minutes
Marinating time: 15–20 minutes in lime juice
Chill time: 10 minutes
Total time: roughly 35–40 minutes

Variations

  • I sometimes swap half the tomatoes for diced cucumber for extra crunch.

  • Adding diced avocado gives a creamy contrast to the tangy ceviche.

  • I adjust the heat level by using more or less jalapeño, or by substituting habanero if I’m seeking a really spicy kick.

  • For a tropical twist, I mix in diced mango or pineapple for a hint of sweetness.

  • I can swap shrimp for scallops or firm white fish like tilapia or halibut if I prefer.

storage/reheating

I store leftover ceviche in an airtight container in the fridge for up to 2 days. I avoid reheating it—ceviche is best enjoyed cold. Before serving leftovers, I give it a gentle stir and add a squeeze of fresh lime to revive the flavors.

FAQs

What type of shrimp is best for ceviche?

I use raw, fresh or thawed shrimp, peeled and deveined. Medium-sized shrimp work well—they’re easy to bite and absorb the lime juice quickly.

Is it safe to eat raw shrimp in ceviche?

Yes, because the acidity of the lime juice “cooks” the shrimp by denaturing proteins. I always use fresh, high-quality shrimp and ensure it remains fully opaque before serving.

Can I make ceviche ahead of time?

I can prepare it a few hours in advance. However, I avoid making it more than 2 hours ahead or refrigerating leftovers beyond two days to maintain freshness and texture.

Can I serve ceviche with something?

I usually serve it with tortilla chips for dipping. It also pairs well with tostadas, saltine crackers, or over a bed of crisp lettuce for a light meal.

What can I use instead of lime juice?

I recommend fresh lime for its bright flavor. However, I’ve used fresh lemon juice with good results—it adds a slightly different tang but works well.

Conclusion

I find shrimp ceviche to be a fantastic, flavorful dish that’s both simple to make and impressive to serve. The zingy lime-marinated shrimp combined with fresh veggies and cilantro always delights. Whether as a starter, snack, or light meal, this ceviche is a go-to recipe for anyone craving fresh, vibrant seafood. I hope it becomes a favorite in your kitchen too.

Print

clock clock iconcutlery cutlery iconflag flag iconfolder folder iconinstagram instagram iconpinterest pinterest iconfacebook facebook iconprint print iconsquares squares iconheart heart iconheart solid heart solid icon
Shrimp Ceviche

Shrimp Ceviche

5 Stars 4 Stars 3 Stars 2 Stars 1 Star No reviews
  • Author: Sue
  • Prep Time: 10 minutes
  • Cook Time: 15-20 minutes (marination time)
  • Total Time: 35-40 minutes
  • Yield: 4 appetizer servings or 2 light meal portions
  • Category: Appetizer, Light Meal
  • Method: No-cook, Marinating
  • Cuisine: Mexican
  • Diet: Low Calorie
Print Recipe
Pin Recipe

Description

A light and refreshing Mexican-inspired seafood dish made with marinated shrimp, fresh lime juice, tomatoes, onions, cilantro, and a hint of chili.


Ingredients

  • Raw shrimp (peeled, deveined, and tails removed)
  • Fresh lime juice
  • Ripe tomatoes, finely diced
  • Red onion, finely chopped
  • Jalapeño or serrano chili, seeded and minced
  • Fresh cilantro leaves, chopped
  • Salt and pepper
  • Optional: diced cucumber or avocado for added freshness

Instructions

  1. Chop the raw shrimp into bite-sized pieces and place in a non-reactive bowl.
  2. Pour enough fresh lime juice over the shrimp to completely cover it.
  3. Refrigerate and let the shrimp “cook” until opaque, about 15–20 minutes. I swirl it gently halfway through to ensure even marination.
  4. Once the shrimp are opaque and firm, drain off some of the excess lime juice, leaving a little for flavor.
  5. Add diced tomatoes, red onion, minced chili, and chopped cilantro.
  6. Season with salt and pepper to taste, and gently toss to combine.
  7. Chill for another 10 minutes to let flavors meld before serving.

Notes

  • For extra crunch, swap half the tomatoes for diced cucumber.
  • Adding diced avocado gives a creamy contrast to the tangy ceviche.
  • Adjust the heat level by using more or less jalapeño, or by substituting habanero for extra spice.
  • For a tropical twist, mix in diced mango or pineapple for a hint of sweetness.
  • Substitute shrimp for scallops or firm white fish like tilapia or halibut for variety.
  • Store leftovers in an airtight container for up to 2 days, and always serve cold.

Nutrition

  • Serving Size: ¼ of the recipe (approx. 1 cup)
  • Calories: 120
  • Sugar: 3g
  • Sodium: 250mg
  • Fat: 1g
  • Saturated Fat: 0g
  • Unsaturated Fat: 0g
  • Trans Fat: 0g
  • Carbohydrates: 8g
  • Fiber: 2g
  • Protein: 18g
  • Cholesterol: 125mg

Have you made this recipe? I'd love to see it!

Click here to Follow me on Pinterest

Homemade Caramel

June 25, 2025 by Sue Leave a Comment

This homemade caramel is rich, buttery, and incredibly easy to make. With just a few simple ingredients, it's perfect for drizzling over desserts, stirring into coffee, or enjoying on its own.

Homemade Caramel

Why You’ll Love This Recipe

I love this caramel recipe because it's quick, versatile, and requires no special equipment like a candy thermometer. The smooth, golden syrup that results is perfect for elevating any dessert. I can easily adjust the flavor with a pinch of sea salt or vanilla extract to suit my mood. Plus, it’s so much better than store-bought versions!

Ingredients

(Here's a tip: Check out the full list of ingredients and measurements in the recipe card below.)

  • Granulated sugar

  • Unsalted butter, room temperature

  • Heavy cream, room temperature

  • A pinch of salt (adjust to taste)

  • Optional: vanilla extract, espresso powder, cinnamon, or bourbon

Directions

  1. Start by heating the sugar in a dry, medium-sized heavy-bottomed saucepan over medium heat. Stir constantly as the sugar clumps together, then melts and turns a deep amber color (this takes about 5–8 minutes).

  2. Once the sugar is fully melted, carefully add the butter. It will bubble up, so be cautious. Stir until the butter is completely incorporated into the caramel.

  3. Slowly pour in the heavy cream while stirring continuously. The mixture will bubble up again, so take care.

  4. Allow the caramel to simmer for 1 minute, then remove the pan from the heat. Stir in the salt, and any optional flavorings like vanilla extract or espresso powder if desired.

  5. If you want a super smooth texture, strain the caramel through a fine mesh sieve.

  6. Pour the caramel into a heatproof jar or container and let it cool before sealing.

Servings and timing

  • Yield: About 1 cup of caramel sauce

  • Prep time: 5 minutes

  • Cook time: 10–15 minutes

  • Total time: 15–20 minutes

Variations

  • Salted caramel: Add ½–1 teaspoon of flaky sea salt at the end for a salty-sweet flavor.

  • Vanilla caramel: Stir in 1 teaspoon of vanilla extract after removing from the heat.

  • Coffee caramel: Add 1 teaspoon of instant espresso powder for a coffee-flavored twist.

  • Spiced caramel: Stir in ½ teaspoon of cinnamon or a pinch of nutmeg for a warm spiced flavor.

  • Chocolate caramel: Melt ¼ cup of dark chocolate chips into the caramel after it’s cooked.

Storage/reheating

I store the cooled caramel in an airtight jar in the fridge for up to 2–3 weeks. It will firm up in the fridge, but I can easily reheat it in the microwave for 10–20 seconds at a time or on the stove over low heat. If the caramel becomes too thick after reheating, I add a splash of cream to loosen it up. For longer storage, I freeze the caramel for 2–3 months and thaw it in the fridge before reheating.

FAQs

1. Can I make caramel without butter or cream?

Yes, it’s possible to make caramel with just sugar and water, though it won’t be as creamy. If I want a dairy-free version, I can substitute coconut cream and dairy-free butter.

2. Why does my caramel taste bitter?

Bitterness occurs when the sugar is cooked too long or at too high a temperature. I make sure to keep an eye on the sugar as it melts, and stop as soon as it reaches a golden amber color to avoid burning.

3. How do I prevent grainy caramel?

Graininess happens when sugar crystals form. I avoid stirring the sugar while it’s melting and use a clean, dry pan to help prevent crystals. If any crystals appear on the sides of the pan, I use a wet pastry brush to wipe them down.

4. Can I use brown sugar instead of white sugar?

Yes, using brown sugar will result in a caramel with a deeper, more toffee-like flavor. The texture will be slightly thicker and the color darker.

5. Do I need a candy thermometer?

No candy thermometer is needed for this recipe! I rely on visual cues to know when the sugar has melted and reached the right color. For a sauce, I find that this method works just as well as using a thermometer.

Conclusion

This homemade caramel is simple, quick, and incredibly delicious. With just a few ingredients and minimal effort, I can create a sweet, buttery sauce that’s perfect for any dessert or treat. Whether I’m adding it to ice cream, coffee, or just enjoying it on its own, this caramel adds a rich, indulgent touch to anything. Enjoy making this easy homemade caramel and customize it to suit your tastes!

Print

clock clock iconcutlery cutlery iconflag flag iconfolder folder iconinstagram instagram iconpinterest pinterest iconfacebook facebook iconprint print iconsquares squares iconheart heart iconheart solid heart solid icon
Homemade Caramel

Homemade Caramel

5 Stars 4 Stars 3 Stars 2 Stars 1 Star No reviews
  • Author: Sue
  • Prep Time: 5 minutes
  • Cook Time: 10–15 minutes
  • Total Time: 15–20 minutes
  • Yield: About 1 cup of caramel sauce
  • Category: Dessert
  • Method: Stovetop
  • Cuisine: American
  • Diet: Vegetarian
Print Recipe
Pin Recipe

Description

This rich, buttery homemade caramel sauce is perfect for drizzling over desserts, stirring into coffee, or enjoying by the spoonful. It’s made with simple ingredients, and no candy thermometer is required.


Ingredients

  • Granulated sugar
  • Unsalted butter, room temperature
  • Heavy cream, room temperature
  • A pinch of salt (adjust to taste)
  • Optional: vanilla extract, espresso powder, cinnamon, or bourbon

Instructions

  1. In a dry, medium heavy-bottomed saucepan, warm the sugar over medium heat. Stir continuously as it clumps, melts, and turns a deep amber color (about 5–8 minutes).
  2. As soon as the sugar fully melts, carefully add the butter—watch for bubbling—and stir until it’s fully incorporated.
  3. Slowly pour in the heavy cream while stirring; the caramel will bubble vigorously.
  4. Allow it to simmer for about 1 minute, then remove from heat. Stir in salt (and vanilla or other flavorings, if using).
  5. If desired, strain through a fine mesh to ensure smooth texture.
  6. Pour into a heatproof jar or container and let cool slightly before sealing.

Notes

  • For salted caramel, add ½–1 teaspoon flaky sea salt right at the end.
  • For vanilla caramel, stir in 1 teaspoon vanilla extract after removing from heat.
  • For coffee caramel, add 1 teaspoon instant espresso powder.
  • For spiced caramel, sprinkle in ½ teaspoon cinnamon or a pinch of nutmeg.
  • For boozy caramel, stir in 1 tablespoon bourbon, rum, or whiskey off the heat.
  • For chocolate caramel, melt in ¼ cup dark chocolate chips after cooking.
  • Caramel can be stored in the fridge for 2–3 weeks. Reheat in the microwave or on the stove, adding a splash of cream if too thick.
  • It can be frozen for up to 2–3 months, then thawed and reheated before use.

Nutrition

  • Serving Size: 2 tbsp
  • Calories: 120
  • Sugar: 18g
  • Sodium: 50mg
  • Fat: 7g
  • Saturated Fat: 4g
  • Unsaturated Fat: 3g
  • Trans Fat: 0g
  • Carbohydrates: 18g
  • Fiber: 0g
  • Protein: 0g
  • Cholesterol: 20mg

Have you made this recipe? I'd love to see it!

Click here to Follow me on Pinterest

Strawberry Cake with Oreo Crumble & Cookies 'n Cream Icing

June 25, 2025 by Sue Leave a Comment

I created this delightful cake by layering tender strawberry-flavored cake with crunchy Oreo crumble and finishing it all off with a rich Cookies ’n Cream icing. The result is a playful fusion that balances fruity sweetness and chocolatey creaminess in every bite.

Strawberry Cake with Oreo Crumble & Cookies 'n Cream Icing

Why You’ll Love This Recipe

I love how the vibrant strawberry cake brings a light, summery flavor, while the Oreo crumble adds a satisfying crunch. The Cookies ’n Cream icing ties it all together with its smooth texture and cookie-filled richness. It’s perfect for celebrations or when I’m craving something both fruity and decadent.

ingredients

(Here’s a tip: Check out the full list of ingredients and measurements in the recipe card below.)

  • Strawberry cake mix or cake base

  • Fresh pureed strawberries or freeze-dried powder

  • Eggs, oil, and water (or as required by the cake base)

  • Crushed Oreo cookies for the crumble

  • Butter, powdered sugar, cream cheese, vanilla extract for the icing

  • Additional crushed Oreos to stir into the icing

directions

  1. Preheat the oven and prepare cake pans according to the cake base instructions.

  2. Whisk together the cake mix or homemade batter with strawberry puree or powder until fully combined.

  3. Fold in half of the crushed Oreos gently.

  4. Pour batter into pans and bake until a toothpick comes out clean. Remove and cool completely.

  5. While the cakes cool, beat butter, powdered sugar, cream cheese, and vanilla to make the icing. Stir in the remaining crushed Oreos.

  6. Level the cooled cake layers if needed. Spread a layer of icing, then sprinkle a generous amount of Oreo crumble. Repeat with the second layer.

  7. Frost the top and sides with the remaining icing, and finish with Oreo crumble on top.

Servings and timing

  • Servings: 10–12 slices

  • Prep time: 20 minutes

  • Bake time: 25–30 minutes per cake layer

  • Cooling time: 1 hour

  • Total time: Approximately 2 hours

Variations

  • I often swap Oreo crumble for crushed graham crackers or cookies if Oreos aren’t available.

  • To amp up the strawberry flavor, I fold freeze-dried strawberry powder into the icing as well.

  • For an extra indulgent twist, I add a layer of strawberry jam between the cake layers before frosting.

storage/reheating

I wrap leftover slices tightly in plastic wrap and refrigerate them; they stay fresh for up to 4 days. I don’t recommend freezing, as the texture softens. I take a slice from the fridge about 20 minutes before enjoying so it softens slightly and the flavors open up.

FAQs

What type of cake base works best for this recipe?

I prefer using a strawberry-flavored boxed mix for simplicity, but a homemade vanilla cake with added strawberry puree works wonderfully too.

Can I make this cake ahead of time?

Yes—I like to bake the cake layers a day ahead and store them wrapped in the refrigerator. I assemble and frost it the next day for the freshest flavor.

How can I make the icing sturdier for warmer days?

I add a touch more cream cheese and refrigerate the frosting bowl before whipping. Chilled frosting holds up better in heat.

Is there a dairy-free version of this icing?

Definitely. I swap dairy butter for vegan margarine and use dairy-free cream cheese and powdered sugar to whip up a creamy vegan version.

Can I use other cookies instead of Oreos?

Absolutely. I’ve used chocolate sandwich cookies, Biscoff cookies, or even mini chocolate chips to great effect—feel free to get creative!

Conclusion

This Strawberry Cake with Oreo Crumble & Cookies ’n Cream Icing is one of my favorites when I crave something fun, fresh, and indulgent. I love how the fruity cake, crunchy crumble, and creamy icing each bring their own texture and flavor. Whether I'm hosting a party or just treating myself, this cake always steals the show. Give it a try—I hope it becomes a go‑to dessert in your kitchen too!

Print

clock clock iconcutlery cutlery iconflag flag iconfolder folder iconinstagram instagram iconpinterest pinterest iconfacebook facebook iconprint print iconsquares squares iconheart heart iconheart solid heart solid icon
Strawberry Cake with Oreo Crumble & Cookies 'n Cream Icing

Strawberry Cake with Oreo Crumble & Cookies 'n Cream Icing

5 Stars 4 Stars 3 Stars 2 Stars 1 Star No reviews
  • Author: Sue
  • Prep Time: 20 minutes
  • Cook Time: 25–30 minutes per cake layer
  • Total Time: Approximately 2 hours
  • Yield: 10–12 slices
  • Category: Dessert
  • Method: Baking
  • Cuisine: American
  • Diet: Vegetarian
Print Recipe
Pin Recipe

Description

A delightful strawberry-flavored cake layered with crunchy Oreo crumble and topped with a rich Cookies ’n Cream icing, offering a balance of fruity sweetness and chocolatey creaminess.


Ingredients

  • Strawberry cake mix or cake base
  • Fresh pureed strawberries or freeze-dried powder
  • Eggs, oil, and water (or as required by the cake base)
  • Crushed Oreo cookies for the crumble
  • Butter
  • Powdered sugar
  • Cream cheese
  • Vanilla extract for the icing
  • Additional crushed Oreos to stir into the icing

Instructions

  1. Preheat the oven and prepare cake pans according to the cake base instructions.
  2. Whisk together the cake mix or homemade batter with strawberry puree or powder until fully combined.
  3. Fold in half of the crushed Oreos gently.
  4. Pour batter into pans and bake until a toothpick comes out clean. Remove and cool completely.
  5. While the cakes cool, beat butter, powdered sugar, cream cheese, and vanilla to make the icing. Stir in the remaining crushed Oreos.
  6. Level the cooled cake layers if needed. Spread a layer of icing, then sprinkle a generous amount of Oreo crumble. Repeat with the second layer.
  7. Frost the top and sides with the remaining icing, and finish with Oreo crumble on top.

Notes

  • Storage: Wrap leftover slices tightly in plastic wrap and refrigerate for up to 4 days. For best flavor, let it sit at room temperature for 20 minutes before serving.
  • Variation: You can substitute the Oreo crumble for other crushed cookies like graham crackers or chocolate sandwich cookies.
  • Variation: Add freeze-dried strawberry powder to the icing for an extra punch of strawberry flavor.
  • Variation: For an extra indulgent twist, add a layer of strawberry jam between the cake layers before frosting.

Nutrition

  • Serving Size: 1 slice
  • Calories: 400
  • Sugar: 45g
  • Sodium: 230mg
  • Fat: 20g
  • Saturated Fat: 8g
  • Unsaturated Fat: 12g
  • Trans Fat: 0g
  • Carbohydrates: 52g
  • Fiber: 2g
  • Protein: 3g
  • Cholesterol: 45mg

Have you made this recipe? I'd love to see it!

Click here to Follow me on Pinterest

Mexican Street Corn White Chicken Chili

June 25, 2025 by Sue Leave a Comment

I created this Mexican Street Corn White Chicken Chili as a creamy, zesty twist on classic white chicken chili—melding the smoky sweetness of street corn (elote) with tender chicken, savory broth, lime, and plenty of rich toppings. It’s one-pot comfort food with vibrant flavor!

Mexican Street Corn White Chicken Chili

Why You’ll Love This Recipe

I love how this chili transforms a basic weeknight dinner into something special. It’s:

  • Versatile – perfect for family meals, game-day gatherings, or meal prep

  • Fast & Easy – prep in about 10 minutes with just 20 minutes of cooking time

  • Comforting with Brightness – creamy richness balanced by lime juice, jalapeño heat, and fresh corn flavor

ingredients

(Here's a tip: Check out the full list of ingredients and measurements in the recipe card below.)

  • 4 boneless, skinless chicken breasts

  • 1 yellow onion, chopped

  • 1 jalapeño, diced

  • 4 cloves garlic, minced

  • 4 cups chicken or bone broth

  • 2 cups frozen or fresh sweet white corn

  • 1½ cups sour cream

  • ½ cup shredded Monterey Jack or Pepper Jack cheese

  • ½ tablespoon dried oregano

  • ½ teaspoon chili powder

  • 3 tablespoon cornstarch

  • 3 tablespoon water

  • ½ cup fresh cilantro, chopped

  • Juice of 1 lime

  • Salt and pepper, to taste

  • 1 tablespoon olive oil

Optional toppings: crumbled cotija cheese, tortilla strips, avocado slices, extra jalapeño

directions

  1. Sauté aromatics: Warm oil in a large pot over medium-high heat. Sauté onion and jalapeño until softened (~2–3 minutes), then add garlic, oregano, and chili powder. Stir until fragrant.

  2. Add broth & chicken: Pour in broth, season with salt and pepper, then add chicken breasts. Bring to a boil, reduce to simmer, cover, and cook 10–15 minutes until chicken is cooked through.

  3. Make slurry: Whisk cornstarch with water in a small bowl.

  4. Shred chicken: Remove chicken and shred with forks, then return to pot.

  5. Mix in dairy & corn: Stir in sour cream, cheese, cilantro, corn, and lime juice.

  6. Thicken: Add slurry, stir, and simmer uncovered ~10 minutes until chili thickens.

  7. Serve: Ladle into bowls and garnish with toppings like cotija cheese, tortilla strips, avocado, jalapeño slices.

Servings and timing

  • Servings: 4–6

  • Prep time: ~10 minutes

  • Cook time: 25 minutes (including thickening step)

  • Total time: ~35 minutes

Variations

  • Spicy: Add more jalapeño, chili powder, or hot sauce to taste.

  • Vegetarian: Use plant-based protein or extra veggies like zucchini and bell peppers.

  • Grilled corn: Roast or grill fresh corn before adding for extra smoky depth.

  • Slow Cooker / Instant Pot:

    • Slow Cooker: Cook ingredients (minus slurry) on low 6–8 hr or high 3–4 hr, then stir in slurry at end.

    • Instant Pot: Pressure cook ~10 min, quick release, shred, then add slurry and finish on sauté setting.

storage/reheating

I store leftovers in an airtight container in the fridge for up to 3–4 days and it reheats well on the stove over low heat—adding a splash of broth if it thickens too much. It also freezes well for up to 3 months; I thaw in the fridge overnight before reheating.

FAQs

Can I use chicken thighs instead of breasts?

Absolutely. I’ve used thighs often—they stay juicy and add richness.

Can I freeze this chili with the dairy?

Yes! It freezes well, though the texture might separate slightly. I just reheat and stir over low heat to bring it back together.

How can I make this thicker?

I sometimes add more cornstarch slurry or simmer it uncovered longer. Mashing a few corn kernels also helps thicken it naturally.

Can I use fresh corn or canned corn?

Fresh corn is my favorite—especially grilled. But frozen or even canned corn works in a pinch.

Is it very spicy?

It has a moderate kick from the jalapeño and chili powder, but I control heat by adjusting those or omitting seeds. Anyone sensitive to spice can ease their amount.

Conclusion

This Mexican Street Corn White Chicken Chili is one of my all-time favorite comfort recipes. It's creamy, bright, and bursting with corn-on-the-cob flavor. I love how easy it is to tweak—from spice level to protein—and how it shines whether I serve it solo or with a spread of toppings. Cozy, flavorful, and always satisfying—this chili is going into my regular rotation!

Print

clock clock iconcutlery cutlery iconflag flag iconfolder folder iconinstagram instagram iconpinterest pinterest iconfacebook facebook iconprint print iconsquares squares iconheart heart iconheart solid heart solid icon
Mexican Street Corn White Chicken Chili

5 Stars 4 Stars 3 Stars 2 Stars 1 Star No reviews
  • Author: Sue
  • Prep Time: 10 minutes
  • Cook Time: 25 minutes
  • Total Time: 35 minutes
  • Yield: 4–6 servings
  • Category: Soup/Chili
  • Method: Stovetop
  • Cuisine: Mexican
  • Diet: Low Fat
Print Recipe
Pin Recipe

Description

A creamy, zesty twist on classic white chicken chili, blending smoky street corn (elote) with tender chicken, savory broth, lime, and rich toppings for a comforting, vibrant meal.


Ingredients

  • 4 boneless, skinless chicken breasts
  • 1 yellow onion, chopped
  • 1 jalapeño, diced
  • 4 cloves garlic, minced
  • 4 cups chicken or bone broth
  • 2 cups frozen or fresh sweet white corn
  • 1½ cups sour cream
  • ½ cup shredded Monterey Jack or Pepper Jack cheese
  • ½ tbsp dried oregano
  • ½ tsp chili powder
  • 3 tbsp cornstarch
  • 3 tbsp water
  • ½ cup fresh cilantro, chopped
  • Juice of 1 lime
  • Salt and pepper, to taste
  • 1 tbsp olive oil
  • Optional toppings: crumbled cotija cheese, tortilla strips, avocado slices, extra jalapeño

Instructions

  1. Warm oil in a large pot over medium-high heat. Sauté onion and jalapeño until softened (~2–3 minutes), then add garlic, oregano, and chili powder. Stir until fragrant.
  2. Pour in broth, season with salt and pepper, then add chicken breasts. Bring to a boil, reduce to simmer, cover, and cook 10–15 minutes until chicken is cooked through.
  3. Whisk cornstarch with water in a small bowl to make a slurry.
  4. Remove chicken and shred with forks, then return to pot.
  5. Stir in sour cream, cheese, cilantro, corn, and lime juice.
  6. Add slurry, stir, and simmer uncovered ~10 minutes until chili thickens.
  7. Ladle into bowls and garnish with toppings like cotija cheese, tortilla strips, avocado, jalapeño slices.

Notes

  • For a spicier chili, add more jalapeño, chili powder, or hot sauce to taste.
  • For a vegetarian version, use plant-based protein or extra veggies like zucchini and bell peppers.
  • Grilling fresh corn adds a smoky depth of flavor to the chili.
  • Slow Cooker: Cook ingredients (minus slurry) on low for 6–8 hours or high for 3–4 hours, then stir in slurry at the end.
  • Instant Pot: Pressure cook for about 10 minutes, quick release, shred the chicken, then add slurry and finish on sauté setting.
  • Leftovers can be stored in an airtight container in the fridge for up to 3–4 days. It also freezes well for up to 3 months.

Nutrition

  • Serving Size: 1 serving
  • Calories: 400
  • Sugar: 6g
  • Sodium: 850mg
  • Fat: 20g
  • Saturated Fat: 6g
  • Unsaturated Fat: 12g
  • Trans Fat: 0g
  • Carbohydrates: 20g
  • Fiber: 3g
  • Protein: 30g
  • Cholesterol: 70mg

Have you made this recipe? I'd love to see it!

Click here to Follow me on Pinterest

Easy Beef Brown Gravy

June 25, 2025 by Sue Leave a Comment

I love how this rich, savory beef gravy comes together in just a few minutes with simple pantry ingredients—perfect drizzled over roast beef, mashed potatoes, or meatloaf.

Easy Beef Brown Gravy

Why You’ll Love This Recipe

I appreciate that this gravy doesn’t rely on drippings—just wholesome ingredients like beef broth, butter, and flour. It’s quick (about 10 minutes) and thickens to a luxurious, glossy finish. Plus, I can tweak it easily to suit my taste.

ingredients

(Here's a tip: Check out the full list of ingredients and measurements in the recipe card below.)

  • 2 tablespoons unsalted butter

  • 2 tablespoons all‑purpose flour

  • 1 cup beef broth

  • ½ cup beef broth (to total 1½ cups)

  • ½ teaspoon Worcestershire sauce

  • ½ teaspoon garlic powder

  • ½ teaspoon onion powder

  • Salt and pepper to taste

directions

  1. In a medium saucepan over medium heat, melt the butter.

  2. Whisk in the flour to form a smooth roux, letting it cook for 1–2 minutes until lightly golden.

  3. Gradually pour in the beef broth, whisking constantly to prevent lumps.

  4. Stir in Worcestershire sauce, garlic powder, and onion powder.

  5. Continue whisking until it simmers and thickens—about 3–5 minutes.

  6. Taste and season with salt and pepper as needed.

  7. For a silkier finish, I sometimes stir in an extra teaspoon of cold butter at the end.

Servings and timing

Makes about 4 servings.
Prep time: 5 minutes — Cook time: 5–7 minutes — Total time: ~10–12 minutes.

Variations

  • No drippings needed: This recipe is great without pan drippings—just broth-based.

  • Extra depth: I sometimes add a splash of soy sauce or red wine for more umami.

  • Onions or mushrooms: Sauté chopped onions or mushrooms before adding flour for a richer base.

  • Gluten‑free option: Swap flour for cornstarch slurry (¼ cup cold water + 3 tablespoons cornstarch).

storage/reheating

  • Refrigerator: I store leftover gravy in an airtight container; it stays good for 3–4 days.

  • Freezer: It freezes well for up to 2–3 months.

  • Reheating: Gently reheat on the stove over low heat, whisking and adding a splash of broth to restore consistency; microwaving in short bursts works too.

FAQs

What can I use instead of beef broth?

If I have it, I use pan drippings from roast beef, or I boost flavor with beef bouillon dissolved in water.

How do I prevent lumps in gravy?

I whisk flour into melted butter to form a smooth roux before adding liquid, and pour broth in slowly while stirring constantly.

Can I make it ahead of time?

Yes—this gravy can be made 1–2 days ahead. I cool it, refrigerate, and re‑warm later; just whisk and thin if needed.

How thick should the gravy be?

I aim for a pourable sauce that coats the back of a spoon. To adjust, I either simmer longer to thicken or whisk in extra broth to thin.

Can I add herbs or wine?

Definitely! Tried-and-true additions include a splash of red wine, fresh herbs (like thyme), Dijon mustard, or soy sauce for flavor depth.

Conclusion

I always turn to this easy beef brown gravy when I want flavorful comfort food fast. It’s adaptable, wholesome, and elevates everything from mashed potatoes to roast beef. Once you master the basics, you can personalize it endlessly—and that’s what makes it a keeper in my kitchen.

Print

clock clock iconcutlery cutlery iconflag flag iconfolder folder iconinstagram instagram iconpinterest pinterest iconfacebook facebook iconprint print iconsquares squares iconheart heart iconheart solid heart solid icon
Easy Beef Brown Gravy

Easy Beef Brown Gravy

5 Stars 4 Stars 3 Stars 2 Stars 1 Star No reviews
  • Author: Sue
  • Prep Time: 5 minutes
  • Cook Time: 5–7 minutes
  • Total Time: ~10–12 minutes
  • Yield: 4 servings
  • Category: Gravy
  • Method: Stovetop
  • Cuisine: American
  • Diet: Low Calorie
Print Recipe
Pin Recipe

Description

A rich and savory beef brown gravy made with simple pantry ingredients like beef broth, butter, and flour. Quick to make and perfect over roast beef, mashed potatoes, or meatloaf.


Ingredients

  • 2 tablespoons unsalted butter
  • 2 tablespoons all-purpose flour
  • 1 cup beef broth
  • ½ cup beef broth (to total 1½ cups)
  • ½ teaspoon Worcestershire sauce
  • ½ teaspoon garlic powder
  • ½ teaspoon onion powder
  • Salt and pepper to taste

Instructions

  1. In a medium saucepan over medium heat, melt the butter.
  2. Whisk in the flour to form a smooth roux, letting it cook for 1–2 minutes until lightly golden.
  3. Gradually pour in the beef broth, whisking constantly to prevent lumps.
  4. Stir in Worcestershire sauce, garlic powder, and onion powder.
  5. Continue whisking until it simmers and thickens—about 3–5 minutes.
  6. Taste and season with salt and pepper as needed.
  7. For a silkier finish, stir in an extra teaspoon of cold butter at the end.

Notes

  • Use beef bouillon dissolved in water as an alternative to beef broth.
  • For a gluten-free option, swap flour for a cornstarch slurry (¼ cup cold water + 3 tablespoon cornstarch).
  • Can add soy sauce or red wine for more umami flavor.
  • For extra flavor, sauté onions or mushrooms before adding flour.
  • Store leftover gravy in an airtight container for 3–4 days in the fridge or freeze for 2–3 months.
  • Reheat gently on the stove or in the microwave, adding a splash of broth to restore consistency.

Nutrition

  • Serving Size: ¼ of the recipe
  • Calories: 100
  • Sugar: 1g
  • Sodium: 600mg
  • Fat: 7g
  • Saturated Fat: 4g
  • Unsaturated Fat: 2g
  • Trans Fat: 0g
  • Carbohydrates: 7g
  • Fiber: 0g
  • Protein: 1g
  • Cholesterol: 25mg

Have you made this recipe? I'd love to see it!

Click here to Follow me on Pinterest

Baklava Muffins

June 25, 2025 by Sue Leave a Comment

A delightful mash-up of traditional baklava flavors—walnuts, honey, cinnamon—baked into tender, sweet muffins.

Baklava Muffins

Why You’ll Love This Recipe

I love how these muffins capture the aromatic warmth and nutty crunch of baklava in a single-serving treat. They’re quick to prepare, bake up beautifully domed, and are perfect for breakfast, dessert, or a snack.

ingredients

(Here’s a tip: Check out the full list of ingredients and measurements in the recipe card below.)

  • For the filling:
    ½ cup chopped walnuts
    ⅓ cup granulated sugar
    1½ tsp ground cinnamon
    3 Tbsp melted butter

  • For the muffins:
    1 cup + 7 Tbsp all-purpose flour
    2 tsp baking powder
    ½ tsp baking soda
    ¼ cup granulated sugar
    1 large egg
    3 Tbsp unsalted butter, melted
    1 cup + 2 Tbsp buttermilk

  • For the topping:
    ½ cup honey

directions

  1. Preheat oven to 400 °F (200 °C). Line a 12‑cup muffin tin with liners or grease it.

  2. In a bowl, combine walnuts, sugar, cinnamon, and melted butter; set aside.

  3. In another bowl, whisk together flour, baking powder, soda, and sugar.

  4. In a measuring cup, whisk egg, melted butter, and buttermilk.

  5. Make a well in the dry ingredients; pour in wet mixture and stir gently—batter should be lumpy.

  6. Spoon batter to about ⅓ capacity in each cup, add a scant tablespoon of walnut filling, then top with more batter until cups are ⅔ full. Sprinkle leftover filling on top.

  7. Bake for ~15 minutes, until golden and a toothpick comes out clean.

  8. Transfer muffins (in liners) to a rack and drizzle honey on top while still warm. Let cool slightly, then serve.

Servings and timing

  • Makes 12 muffins

  • Prep time: ~20 minutes; bake time: ~15 minutes; total: ~35 minutes

Variations

  • Swap walnuts for pecans or add chopped pistachios or almonds.

  • Stir in ½ tsp orange or lemon zest to the batter for a citrus lift.

  • Replace buttermilk with Greek yogurt and milk for a tangy, olive-oil-based twist.

storage/reheating

Store cooled muffins in an airtight container at room temperature—best within 2–3 days. To retain their fresh-baked texture, warm in microwave for ~10 seconds or a few minutes in a 325 °F oven.

FAQs

What’s the best way to prevent overmixing the batter?

I stir the wet into the dry just until I see streaks disappear, leaving the batter slightly lumpy. That keeps the muffins light and tender.

Can I make the muffins dairy‑free?

Yes. You can use dairy-free milk (with 1 Tbsp lemon juice to mimic buttermilk) and a plant-based butter substitute.

How do I reheat these muffins without drying them out?

I cover them with foil and heat at 325 °F for 5–7 minutes. For a quicker option, a 10‑second zap in the microwave softens them nicely.

Can I freeze these muffins?

Absolutely. I let them cool completely and then freeze in a sealed bag. They keep well for up to 3 months. Thaw overnight and warm before serving.

Can I reduce the sugar or honey?

Yes. I sometimes cut the sugar by 1–2 Tbsp or drizzle less honey. The nut filling and spices still deliver plenty of flavor.

Conclusion

I’m always thrilled when a recipe nails both flavor and ease—and these baklava muffins deliver. They’re an inviting treat that brings a touch of indulgence without the fuss of traditional baklava. Plus, they’re flexible enough for tasty tweaks. I hope you enjoy baking and savoring them as much as I do!

Print

clock clock iconcutlery cutlery iconflag flag iconfolder folder iconinstagram instagram iconpinterest pinterest iconfacebook facebook iconprint print iconsquares squares iconheart heart iconheart solid heart solid icon
Baklava Muffins

Baklava Muffins

5 Stars 4 Stars 3 Stars 2 Stars 1 Star No reviews
  • Author: Sue
  • Prep Time: 20 minutes
  • Cook Time: 15 minutes
  • Total Time: 35 minutes
  • Yield: 12 muffins
  • Category: Breakfast, Dessert, Snack
  • Method: Baking
  • Cuisine: Fusion, Mediterranean
  • Diet: Vegetarian
Print Recipe
Pin Recipe

Description

A delightful fusion of baklava and muffins, featuring crunchy walnuts, aromatic cinnamon, and a sweet honey drizzle for a tender, flavorful treat perfect for breakfast, dessert, or snacking.


Ingredients

  • ½ cup chopped walnuts
  • ⅓ cup granulated sugar
  • 1½ tsp ground cinnamon
  • 3 Tbsp melted butter
  • 1 cup + 7 Tbsp all-purpose flour
  • 2 tsp baking powder
  • ½ tsp baking soda
  • ¼ cup granulated sugar
  • 1 large egg
  • 3 Tbsp unsalted butter, melted
  • 1 cup + 2 Tbsp buttermilk
  • ½ cup honey

Instructions

  1. Preheat oven to 400 °F (200 °C). Line a 12‑cup muffin tin with liners or grease it.
  2. In a bowl, combine walnuts, sugar, cinnamon, and melted butter; set aside.
  3. In another bowl, whisk together flour, baking powder, baking soda, and sugar.
  4. In a measuring cup, whisk egg, melted butter, and buttermilk.
  5. Make a well in the dry ingredients; pour in wet mixture and stir gently—batter should be lumpy.
  6. Spoon batter to about ⅓ capacity in each cup, add a scant tablespoon of walnut filling, then top with more batter until cups are ⅔ full. Sprinkle leftover filling on top.
  7. Bake for about 15 minutes, until golden and a toothpick comes out clean.
  8. Transfer muffins (in liners) to a rack and drizzle honey on top while still warm. Let cool slightly, then serve.

Notes

  • Use orange or lemon zest for added citrus flavor.
  • Greek yogurt and milk can replace buttermilk for a tangy variation.
  • Store in an airtight container and reheat gently to maintain texture.
  • Can be frozen for up to 3 months.

Nutrition

  • Serving Size: 1 muffin
  • Calories: 210
  • Sugar: 14g
  • Sodium: 150mg
  • Fat: 10g
  • Saturated Fat: 4g
  • Unsaturated Fat: 5g
  • Trans Fat: 0g
  • Carbohydrates: 28g
  • Fiber: 1g
  • Protein: 3g
  • Cholesterol: 25mg

Have you made this recipe? I'd love to see it!

Click here to Follow me on Pinterest

Shrimp and Avocado Bowls with Mango Salsa & Lime‑Chili Sauce

June 25, 2025 by Sue Leave a Comment

I bring together juicy shrimp, creamy avocado, vibrant mango salsa, and a zesty lime‑chili sauce in a refreshing bowl that bursts with colors and flavors. This dish is bright, satisfying, and perfect for a light yet fulfilling meal.

Shrimp and Avocado Bowls with Mango Salsa & Lime‑Chili Sauce

Why You’ll Love This Recipe

I love how this recipe balances textures and tastes: tender shrimp, creamy avocado, sweet and tangy mango salsa, and a spicy creamy drizzle. It’s easy to assemble, fresh, and ideal for warm days or anytime I want a meal that feels like a treat without being heavy.

ingredients

(Here's a tip: Check out the full list of ingredients and measurements in the recipe card below.)

  • Shrimp (peeled and deveined)

  • Ripe avocados, sliced

  • Ripe mango, diced

  • Red onion, finely chopped

  • Fresh cilantro, roughly chopped

  • Lime juice

  • Olive oil

  • Salt and pepper

  • Chili powder

  • Garlic powder

  • Greek yogurt or sour cream

  • Lime‑chili sauce (lime juice, chili powder, honey, olive oil)

  • Optional: cooked rice or mixed greens as a base

directions

  1. Prepare the shrimp: In a bowl, toss shrimp with olive oil, salt, pepper, garlic powder, and chili powder.

  2. Cook the shrimp: Sauté shrimp in a skillet over medium‑high heat until pink and cooked through, about 2–3 minutes per side. Set aside.

  3. Make the mango salsa: In a separate bowl, combine diced mango, chopped red onion, cilantro, lime juice, salt, and pepper. Stir gently.

  4. Mix the lime‑chili sauce: Whisk together Greek yogurt or sour cream, lime juice, olive oil, honey, chili powder, and a pinch of salt until smooth.

  5. Assemble bowls: Layer rice or greens in bowls. Top with shrimp, avocado slices, mango salsa, and drizzle with lime‑chili sauce. Garnish with extra cilantro or lime wedges as desired.

Servings and timing

Makes 2–3 servings.
Prep time: about 15 minutes
Cook time: about 10 minutes
Total time: approximately 25 minutes

Variations

  • I sometimes swap shrimp for grilled chicken, salmon, or tofu for different flavors and protein options.

  • I experiment with fruit in the salsa—pineapple or papaya also work beautifully.

  • I can turn it into a salad by skipping the rice or base and making extra greens.

  • I can add a kick by mixing sliced jalapeño or hot sauce into the salsa or sauce.

storage/reheating

I store leftover components separately for best freshness. Keep shrimp sealed in an airtight container and salsa chilled. Avocado should be sliced fresh, but I wrap any extras tightly to slow browning. Refrigerated shrimp keeps for up to 2 days. To reheat, I gently warm shrimp in a skillet or microwave for about 30 seconds to 1 minute—just enough to heat without overcooking.

FAQs

1. Can I use frozen shrimp?

Yes. I thaw frozen shrimp completely in the fridge or under cold running water, then pat dry before seasoning and cooking.

2. How can I prevent avocado from browning?

I add a few drops of lime juice over avocado or wrap it tightly in plastic to minimize browning. Fresh use is best.

3. Is there a dairy‑free alternative for the sauce?

Absolutely. I swap Greek yogurt with dairy‑free yogurt, vegan mayo, or even a lighter olive oil‑lime‑chili dressing.

4. How spicy is the lime‑chili sauce?

It’s mildly spicy thanks to the chili powder. I can adjust the heat by adding more chili or a pinch of cayenne, or mellow it out by reducing the spice.

5. Can I make parts of this ahead of time?

Definitely. I make the mango salsa and lime‑chili sauce ahead and refrigerate. Shrimp cooks quickly before serving, and avocado slices are best fresh.

Conclusion

I love these shrimp and avocado bowls for how bright, flavorful, and satisfying they are—yet still light and easy to prepare. With simple ingredients, fresh textures, and a delicious sauce, they’re perfect for a quick weeknight dinner or entertaining friends. I hope this brings a burst of sunshine to your table.

Print

clock clock iconcutlery cutlery iconflag flag iconfolder folder iconinstagram instagram iconpinterest pinterest iconfacebook facebook iconprint print iconsquares squares iconheart heart iconheart solid heart solid icon
Shrimp and Avocado Bowls with Mango Salsa & Lime‑Chili Sauce

Shrimp and Avocado Bowls with Mango Salsa & Lime‑Chili Sauce

5 Stars 4 Stars 3 Stars 2 Stars 1 Star No reviews
  • Author: Sue
  • Prep Time: 10 minutes
  • Cook Time: 10 minutes
  • Total Time: 20 minutes
  • Yield: 2 bowls
  • Category: Main Course
  • Method: Sauté
  • Cuisine: American
  • Diet: Gluten Free
Print Recipe
Pin Recipe

Description

A vibrant and easy-to-make bowl featuring seasoned shrimp, creamy avocado, bright mango salsa, and a tangy lime-chili sauce.


Ingredients

  • 1 lb large shrimp, peeled and deveined
  • 1 tbsp olive oil
  • 1 tsp garlic powder
  • ½ tsp onion powder
  • ¼ tsp salt
  • ⅛ tsp black pepper
  • 1 large ripe mango, diced
  • ¼ cup red onion, finely chopped
  • 1 jalapeño, seeded and minced (optional)
  • ¼ cup cilantro, chopped
  • 1 tbsp lime juice (for salsa)
  • ¼ tsp salt (for salsa)
  • ¼ tsp black pepper (for salsa)
  • ¼ cup mayonnaise
  • 2 tbsp sriracha
  • 1 tbsp lime juice (for sauce)
  • ½ tsp garlic powder (for sauce)
  • ¼ tsp onion powder (for sauce)
  • ⅛ tsp salt (for sauce)
  • ⅛ tsp black pepper (for sauce)
  • 1 cup cooked rice
  • ½ avocado, sliced (per bowl)

Instructions

  1. In a bowl, toss shrimp with olive oil, garlic powder, onion powder, salt, and pepper.
  2. Heat a skillet over medium‑high; cook shrimp 2–3 min per side until pink and opaque. Remove from heat.
  3. In another bowl, mix mango, red onion, jalapeño, cilantro, lime juice, salt, and pepper to make salsa.
  4. Whisk together mayonnaise, sriracha, lime juice, garlic powder, onion powder, salt, and pepper in a small bowl to make lime‑chili sauce.
  5. Assemble bowls: place rice in serving bowls, top with shrimp, sliced avocado, and mango salsa.
  6. Drizzle bowls with lime‑chili sauce and serve immediately.

Notes

  • Optional: use quinoa instead of rice for a gluten‑free alternative.
  • Add jalapeño only if you like heat.
  • For meal prep, make salsa and sauce ahead; add avocado just before serving.
  • Store leftovers (without avocado) up to 2 days in the refrigerator.

Nutrition

  • Serving Size: 1 bowl
  • Calories: approx. 500 kcal
  • Sugar: ~12 g
  • Sodium: ~700 mg
  • Fat: ~29 g
  • Saturated Fat: ~5 g
  • Unsaturated Fat: ~20 g
  • Trans Fat: 0 g
  • Carbohydrates: ~40 g
  • Fiber: ~5 g
  • Protein: ~28 g
  • Cholesterol: ~220 mg

Have you made this recipe? I'd love to see it!

Click here to Follow me on Pinterest

Cherry Earl Grey Milk Tea

June 24, 2025 by lina Leave a Comment

This Cherry Earl Grey Milk Tea is a fragrant and creamy tea drink that combines the floral notes of Earl Grey, the sweet-tart punch of cherries, and the richness of milk. It’s the perfect beverage for a soothing afternoon treat, whether enjoyed warm or iced. This unique twist on traditional milk tea is sure to elevate my tea experience with every sip.

Cherry Earl Grey Milk Tea

Why You’ll Love This Recipe

I absolutely love this Cherry Earl Grey Milk Tea because it offers a beautiful balance of flavors. The floral aroma of Earl Grey tea blends so perfectly with the tart sweetness of cherries, creating a refreshing drink that feels both luxurious and comforting. The rich milk adds a creamy texture that makes the drink incredibly smooth. Whether I’m in the mood for a warm, cozy drink or a refreshing iced version, this recipe adapts beautifully to both. It’s the perfect way to unwind and treat myself to something special.

Ingredients

  • 2 cups water

  • 2 Earl Grey tea bags

  • ½ cup fresh or frozen cherries, pitted and halved

  • 2 tablespoons cherry syrup (optional, for extra sweetness)

  • 1 tablespoon honey or sugar (adjust to taste)

  • 1 cup milk (whole, oat, or almond, per preference)

  • ¼ teaspoon vanilla extract

  • Ice cubes (for iced version)

  • Fresh cherries or a lemon slice, for garnish

(Tip: You'll find the full list of ingredients and measurements in the recipe card below.)

Directions

  1. Bring the water to a gentle boil in a small saucepan. Add the halved cherries and simmer for 3–4 minutes, until the cherries begin to soften and release their juices.

  2. Remove the saucepan from heat and add the Earl Grey tea bags. Cover the pan and let it steep for 4–5 minutes.

  3. Carefully remove the tea bags and strain the liquid to separate the cherries from the tea.

  4. Stir in the cherry syrup (if using) and honey or sugar until fully dissolved. Then, mix in the vanilla extract.

  5. For a warm drink: Return the saucepan to low heat and stir in the milk. Warm gently, making sure not to let it boil.

  6. For an iced version: Let the mixture cool slightly, then pour it over a glass filled with ice and add the cold milk.

  7. Garnish with fresh cherries or a lemon slice. Serve immediately and enjoy!

Servings and Timing

This recipe makes 2 servings and takes about 15 minutes in total, with 5 minutes of prep time and 10 minutes of cooking time.

Cherry Earl Grey Milk Tea

Variations

  • If I want a stronger cherry flavor, I sometimes add a bit more cherry syrup or fresh cherries.

  • To adjust the sweetness, I can swap out the honey or sugar for a different sweetener, such as maple syrup or agave nectar.

  • For a more intense floral note, I’ll steep the tea a little longer or add a dash of lavender alongside the Earl Grey.

  • If I prefer a dairy-free version, oat, almond, or coconut milk work perfectly as substitutes.

Storage/Reheating

  • For the warm version, I recommend serving immediately as the milk can lose its creaminess if reheated.

  • The iced version can be stored in the fridge for up to 24 hours, but it’s best enjoyed fresh for optimal flavor and texture.

  • If I have leftover cherry tea concentrate, I can store it in the fridge for up to 2 days and use it for another batch.

FAQs

Can I make this Cherry Earl Grey Milk Tea without the cherry syrup?

Yes, I can absolutely skip the cherry syrup if I prefer a more natural sweetness. The cherries already provide a lovely amount of sweetness, and I can adjust the honey or sugar to my taste.

Can I use other types of tea instead of Earl Grey?

I love the floral notes of Earl Grey, but I can certainly try this recipe with other teas like black tea or green tea for a different flavor profile.

How can I make this tea more refreshing in hot weather?

If I want an extra refreshing version, I’ll use cold milk and serve the tea over ice. I can even add a slice of lemon for a bright, citrusy twist.

Can I add more fruit to this drink?

Yes, I can experiment with different fruits, such as raspberries or strawberries, to enhance the fruity flavors of the tea. Just be sure to adjust the sweetness based on the fruit's natural taste.

Is it okay to use frozen cherries?

Absolutely! Frozen cherries work just as well as fresh cherries. They’re convenient and often just as flavorful, especially when fresh cherries are out of season.

Conclusion

The Cherry Earl Grey Milk Tea is an elegant and comforting drink that blends the best of both worlds floral Earl Grey tea and sweet, tart cherries with creamy milk. It’s a simple yet sophisticated beverage that I can enjoy any time of day, whether as a cozy warm treat or a refreshing iced delight. Perfect for tea lovers and anyone who enjoys a delicate, flavorful drink. I love how it’s so easy to make and such a treat to sip on!

Print

clock clock iconcutlery cutlery iconflag flag iconfolder folder iconinstagram instagram iconpinterest pinterest iconfacebook facebook iconprint print iconsquares squares iconheart heart iconheart solid heart solid icon
Cherry Earl Grey Milk Tea

Cherry Earl Grey Milk Tea

5 Stars 4 Stars 3 Stars 2 Stars 1 Star No reviews
  • Author: lina
  • Prep Time: 5 minutes
  • Cook Time: 10 minutes
  • Total Time: 15 minutes
  • Yield: 2 servings
  • Category: Beverage
  • Method: teeping, Simmering
  • Cuisine: Fusion (Tea)
  • Diet: Vegetarian
Print Recipe
Pin Recipe

Description

This Cherry Earl Grey Milk Tea blends the floral aroma of Earl Grey tea with the sweet-tart punch of cherries and creamy milk. Perfect for a warm or iced treat, it offers a luxurious yet soothing beverage experience that’s easy to make and ideal for any time of day.


Ingredients

2 cups water

2 Earl Grey tea bags

½ cup fresh or frozen cherries, pitted and halved

2 tablespoons cherry syrup (optional, for extra sweetness)

1 tablespoon honey or sugar (adjust to taste)

1 cup milk (whole, oat, or almond, per preference)

¼ teaspoon vanilla extract

Ice cubes (for iced version)

Fresh cherries or a lemon slice, for garnish


Instructions

Bring 2 cups of water to a gentle boil in a small saucepan. Add halved cherries and simmer for 3–4 minutes until they soften and release their juices.

Remove from heat and add the Earl Grey tea bags. Cover and steep for 4–5 minutes.

Remove the tea bags and strain the liquid to separate the cherries.

Stir in cherry syrup (if using) and honey or sugar until fully dissolved. Add the vanilla extract and mix well.

For a warm drink: Return the saucepan to low heat and stir in milk until warmed. Do not let it boil.

For an iced version: Allow the mixture to cool slightly, then pour over a glass of ice and add cold milk.

Garnish with fresh cherries or a lemon slice. Serve immediately.


Notes

Skip the cherry syrup for a more natural sweetness, adjusting honey or sugar as needed.

Substitute Earl Grey with black or green tea for a different flavor.

Add a dash of lavender to intensify the floral notes.

Dairy-free? Oat, almond, or coconut milk work great.

Store the iced version in the fridge for up to 24 hours, but fresh is best for flavor and texture.

Leftover cherry tea concentrate can be stored for up to 2 days.

Have you made this recipe? I'd love to see it!

Click here to Follow me on Pinterest

Raspberry-Filled Almond Snowball Cookies

June 24, 2025 by lina Leave a Comment

These Raspberry-Filled Almond Snowball Cookies are a delightful combination of buttery, tender almond cookies with a sweet raspberry center. Their melt-in-your-mouth texture and festive appearance make them a perfect treat for holiday gatherings or whenever I’m craving a delicate, flavorful dessert. With a dusting of powdered sugar and a surprise jam filling, these cookies are a true crowd-pleaser.

Raspberry-Filled Almond Snowball Cookies

Why You’ll Love This Recipe

I love these cookies because they are incredibly light and buttery with a subtle almond flavor that pairs perfectly with the tangy raspberry jam. They have a melt-in-your-mouth texture, and the jam in the center adds a burst of sweetness that makes each bite irresistible. Whether it's for a holiday celebration, a casual afternoon tea, or a simple treat for myself, these cookies are always a hit. Plus, they look elegant and festive, making them perfect for gift-giving or cookie exchanges.

Ingredients

  • 1 cup unsalted butter, softened

  • ½ cup powdered sugar (plus extra for dusting)

  • 1 teaspoon vanilla extract

  • 1 teaspoon almond extract

  • 2 cups all-purpose flour

  • 1 cup finely ground almonds (almond meal)

  • ¼ teaspoon salt

  • ½ cup raspberry jam (seedless preferred)

(Tip: You'll find the full list of ingredients and measurements in the recipe card below.)

Directions

  1. Preheat the oven to 350°F (175°C) and line baking sheets with parchment paper.

  2. In a large bowl, cream together the softened butter and powdered sugar until the mixture is light and fluffy. Then, beat in the vanilla and almond extracts until well combined.

  3. In a separate bowl, whisk together the all-purpose flour, almond meal, and salt. Gradually add the dry ingredients to the butter mixture and blend until a soft dough forms.

  4. Scoop tablespoon-sized portions of dough and roll them into balls. Place the balls on the prepared baking sheets, spacing them about 2 inches apart.

  5. Bake the cookies for 12–15 minutes, or until the bottoms are lightly golden. Remove from the oven and let them cool on the tray for 5 minutes.

  6. Once slightly cooled, use a small spoon or knife to flatten the tops of each cookie slightly and make a small indentation in the center. Fill each indentation with about ½ teaspoon of raspberry jam.

  7. Allow the cookies to cool completely on the tray. The jam will set as they cool.

  8. Once cooled, generously roll the cookies in extra powdered sugar for a sweet, snowy finish.

Servings and Timing

Raspberry-Filled Almond Snowball Cookies

This recipe yields about 24 cookies. It has a prep time of 15 minutes and a cooking time of 15 minutes, so the total time for these cookies is just around 30 minutes.

Variations

  • I sometimes swap out the raspberry jam for other fruit jams, such as strawberry, apricot, or blueberry, to experiment with different flavors.

  • If I want a stronger almond flavor, I’ll add a little more almond extract to the dough, or even use a bit of almond paste.

  • For a festive touch, I sometimes add a sprinkle of chopped pistachios or slivered almonds on top of the jam before baking.

  • If I’m looking for a gluten-free option, I can substitute the all-purpose flour with a gluten-free flour blend, though I prefer to keep the almond meal as it adds a wonderful texture.

Storage/Reheating

  • To store, I place the cookies in an airtight container at room temperature, where they will stay fresh for up to 5 days.

  • These cookies can also be frozen! I freeze them in a single layer, then store them in a zip-top bag for up to 3 months. When I’m ready to enjoy them, I let them thaw at room temperature and dust them with powdered sugar again if needed.

FAQs

Can I make the dough ahead of time?

Yes! I can make the dough ahead of time, wrap it tightly in plastic wrap, and refrigerate it for up to 3 days. When I’m ready to bake, I just scoop and shape the cookies as usual.

Can I use a different type of jam for the filling?

Absolutely! I love experimenting with different jam flavors. You can substitute the raspberry jam with strawberry, apricot, or any other jam that I enjoy. Just make sure to use seedless jam for a smoother texture.

Can I skip the powdered sugar dusting?

I could skip the powdered sugar dusting if I prefer a less sweet finish, but I find it adds a lovely touch, making the cookies feel extra special and festive.

Are these cookies suitable for a gluten-free diet?

To make these cookies gluten-free, I can substitute the all-purpose flour with a gluten-free flour blend, but I recommend keeping the almond meal for texture and flavor. Make sure the jam is gluten-free as well.

Can I make these cookies in advance for a party?

Yes, these cookies are perfect for making in advance. After baking and cooling, I store them in an airtight container. They hold up well for several days and freeze well too, so I can prepare them ahead of time for a party or special occasion.

Conclusion

These Raspberry-Filled Almond Snowball Cookies are an absolute delight, offering a perfect balance of buttery richness and sweet raspberry goodness. They’re easy to make, beautifully festive, and perfect for any occasion where a light, melt-in-your-mouth treat is needed. I always look forward to baking and sharing these with friends and family, and they’ve quickly become one of my go-to cookie recipes for the holidays or whenever I’m craving a delicate dessert. Enjoy!

Print

clock clock iconcutlery cutlery iconflag flag iconfolder folder iconinstagram instagram iconpinterest pinterest iconfacebook facebook iconprint print iconsquares squares iconheart heart iconheart solid heart solid icon
Raspberry-Filled Almond Snowball Cookies

Raspberry-Filled Almond Snowball Cookies

5 Stars 4 Stars 3 Stars 2 Stars 1 Star No reviews
  • Author: lina
  • Prep Time: 15 minutes
  • Cook Time: 15 minutes
  • Total Time: 30 minutes
  • Yield: 24 cookies
  • Category: Dessert
  • Method: Baking
  • Cuisine: American
Print Recipe
Pin Recipe

Description

These Raspberry-Filled Almond Snowball Cookies are a festive, melt-in-your-mouth treat with a buttery almond flavor and a sweet raspberry jam center. Perfect for holidays, cookie exchanges, or a simple indulgence, these cookies are easy to make and sure to impress with their elegant appearance.


Ingredients

1 cup unsalted butter, softened

½ cup powdered sugar (plus extra for dusting)

1 teaspoon vanilla extract

1 teaspoon almond extract

2 cups all-purpose flour

1 cup finely ground almonds (almond meal)

¼ teaspoon salt

½ cup raspberry jam (seedless preferred)


Instructions

Preheat the oven to 350°F (175°C) and line baking sheets with parchment paper.

Cream together the softened butter and powdered sugar until light and fluffy. Beat in the vanilla and almond extracts.

In a separate bowl, whisk together the flour, almond meal, and salt. Gradually add this dry mixture to the butter mixture until a soft dough forms.

Scoop tablespoon-sized portions of dough and roll them into balls. Place the dough balls on the baking sheets, spaced about 2 inches apart.

Bake for 12–15 minutes, or until the bottoms are lightly golden. Let the cookies cool on the tray for 5 minutes.

Once slightly cooled, flatten the tops of each cookie and make a small indentation in the center. Fill each indentation with about ½ teaspoon of raspberry jam.

Allow the cookies to cool completely on the tray. Once cool, roll them generously in powdered sugar for a festive finish.


Notes

You can swap raspberry jam for other fruit jams like strawberry, apricot, or blueberry. Ensure the jam is seedless for a smoother filling.

For an extra almond flavor, add more almond extract or use almond paste in the dough.

To make them gluten-free, substitute the all-purpose flour with a gluten-free flour blend, but keep the almond meal.

Store in an airtight container at room temperature for up to 5 days. They can also be frozen for up to 3 months.

Have you made this recipe? I'd love to see it!

Click here to Follow me on Pinterest

Rhubarb and Strawberry Summer Crisp

June 24, 2025 by lina Leave a Comment

This Rhubarb and Strawberry Summer Crisp is a delightful dessert that perfectly captures the essence of summer. It’s a juicy, tart-sweet combination of ripe strawberries and rhubarb, finished off with a golden, crumbly oat topping. It's a nostalgic treat, sure to evoke fond memories of warm summer evenings, and it’s an easy, crowd-pleasing dessert to whip up for any occasion.

Rhubarb and Strawberry Summer Crisp

Why You’ll Love This Recipe

I absolutely love this Rhubarb and Strawberry Summer Crisp for its irresistible balance of sweet and tart flavors. The strawberries and rhubarb meld together perfectly, and the oat crumble topping adds that delightful crunch I crave in a dessert. It's a classic, yet always feels refreshing, especially when served warm with a scoop of vanilla ice cream or a dollop of whipped cream. This recipe is not only delicious but also quick to prepare, making it the perfect summer treat.

Ingredients

For the filling:

  • 3 cups chopped rhubarb

  • 3 cups sliced strawberries

  • ¾ cup granulated sugar

  • 2 tablespoons cornstarch

For the topping:

  • ¾ cup old-fashioned oats

  • ½ cup all-purpose flour

  • ½ cup light brown sugar, packed

  • ½ teaspoon ground cinnamon

  • ¼ teaspoon salt

  • ⅓ cup unsalted butter, melted

(Tip: You'll find the full list of ingredients and measurements in the recipe card below.)

Directions

  1. Preheat the oven to 375°F (190°C) and lightly grease a 9-inch baking dish.

  2. In a large bowl, combine the chopped rhubarb and sliced strawberries with the granulated sugar and cornstarch. Stir until the fruit is evenly coated, then pour the mixture into the prepared baking dish.

  3. In the same bowl, mix together the oats, flour, brown sugar, cinnamon, and salt. Pour in the melted butter and stir until the mixture forms coarse crumbs.

  4. Evenly sprinkle the oat topping over the fruit mixture.

  5. Bake for 35–40 minutes, or until the topping is golden brown and the fruit is bubbling around the edges.

  6. Allow the crisp to cool slightly before serving. It's absolutely delicious served warm with vanilla ice cream or whipped cream.

Servings and Timing

Rhubarb and Strawberry Summer Crisp

This recipe makes about 6 servings. It has a prep time of 15 minutes and a cooking time of 40 minutes, so the total time from start to finish is around 55 minutes.

Variations

  • For a nutty crunch, I sometimes add chopped almonds or walnuts to the topping.

  • If I want to add more depth to the flavor, I’ll throw in a splash of vanilla extract or a pinch of nutmeg with the topping.

  • You can switch out the rhubarb for apples or pears if you prefer a different fruit, though the tartness of rhubarb really complements the strawberries perfectly.

  • For a gluten-free option, I simply swap the all-purpose flour for a gluten-free flour blend.

Storage/Reheating

  • To store leftovers, I place the crisp in an airtight container and refrigerate it for up to 3 days.

  • To reheat, I warm it in the oven at 350°F (175°C) for about 10 minutes until it's heated through.

  • I always love it best when it’s freshly baked, but it still makes a great dessert even when reheated!

FAQs

Can I use frozen rhubarb and strawberries?

Yes, I can use frozen rhubarb and strawberries if fresh ones aren’t available. Just make sure to thaw and drain the frozen fruit to avoid excess moisture in the crisp.

Can I make this ahead of time?

Definitely! I can prepare the filling and topping separately, then store them in the fridge for a day or two. When ready to bake, just assemble the crisp and pop it in the oven. It’s a great make-ahead dessert for dinner parties.

Can I substitute the butter with something else?

If I want to make it dairy-free, I can substitute the butter with coconut oil or a dairy-free margarine. The flavor will vary slightly, but it still tastes great.

Can I reduce the sugar in this recipe?

If I want to cut down on sugar, I can reduce the granulated sugar in the filling or substitute it with a sweetener of my choice, like honey or maple syrup. Keep in mind, it may affect the consistency slightly.

Can I double the recipe for a larger group?

Absolutely! If I want to serve a larger crowd, I can double the ingredients and bake it in a larger dish. Just keep an eye on the baking time, as it might need a few extra minutes to cook through.

Conclusion

This Rhubarb and Strawberry Summer Crisp is the perfect dessert for any summer occasion. It’s light, refreshing, and filled with the sweet-tart combination of fruit, complemented by a crunchy oat topping. I love how easy it is to make, and how it fills the house with a warm, comforting aroma as it bakes. Whether enjoyed on a warm evening with family or shared at a gathering, this crisp is bound to be a hit.

Print

clock clock iconcutlery cutlery iconflag flag iconfolder folder iconinstagram instagram iconpinterest pinterest iconfacebook facebook iconprint print iconsquares squares iconheart heart iconheart solid heart solid icon
Rhubarb and Strawberry Summer Crisp

Rhubarb and Strawberry Summer Crisp

5 Stars 4 Stars 3 Stars 2 Stars 1 Star No reviews
  • Author: lina
  • Prep Time: 15 minutes
  • Cook Time: 40 minutes
  • Total Time: 55 minutes
  • Yield: 6 servings
  • Category: Dessert
  • Method: Baking
  • Cuisine: American
  • Diet: Vegetarian
Print Recipe
Pin Recipe

Description

This Rhubarb and Strawberry Summer Crisp is a perfect summer dessert combining sweet strawberries and tart rhubarb with a crunchy oat topping. Easy to make and packed with flavor, this dessert is a crowd-pleaser that can be served warm with vanilla ice cream or whipped cream.


Ingredients

For the filling:

3 cups chopped rhubarb

3 cups sliced strawberries

¾ cup granulated sugar

2 tablespoons cornstarch

For the topping:

¾ cup old-fashioned oats

½ cup all-purpose flour

½ cup light brown sugar, packed

½ teaspoon ground cinnamon

¼ teaspoon salt

⅓ cup unsalted butter, melted


Instructions

Preheat the oven to 375°F (190°C) and lightly grease a 9-inch baking dish.

In a large bowl, combine the rhubarb, strawberries, sugar, and cornstarch. Stir until the fruit is evenly coated, then pour the mixture into the prepared baking dish.

In the same bowl, mix oats, flour, brown sugar, cinnamon, and salt. Stir in the melted butter until the mixture forms coarse crumbs.

Sprinkle the oat topping evenly over the fruit mixture.

Bake for 35–40 minutes, or until the topping is golden brown and the fruit is bubbling.

Let the crisp cool slightly before serving. Serve warm with vanilla ice cream or whipped cream.


Notes

For extra crunch, add chopped almonds or walnuts to the topping.

Enhance flavor with a splash of vanilla extract or a pinch of nutmeg.

Substitute rhubarb with apples or pears for a different twist.

For gluten-free, swap the all-purpose flour with a gluten-free flour blend.

Refrigerate leftovers in an airtight container for up to 3 days. Reheat at 350°F (175°C) for 10 minutes.

Have you made this recipe? I'd love to see it!

Click here to Follow me on Pinterest

  • « Previous Page
  • 1
  • …
  • 11
  • 12
  • 13
  • 14
  • 15
  • …
  • 40
  • Next Page »
Modern Sidebar

Hey there! I'm Sue, a mom, a wife, and someone who’s always in the kitchen trying out new recipes or revisiting old ones that remind me of family gatherings and special moments.

Learn more

Popular

  • Slow Cooker Hot Honey Chicken Sandwiches
    Slow Cooker Hot Honey Chicken Sandwiches
  • Crockpot French Onion Meatloaf with Melted Swiss Cheese
    Crockpot French Onion Meatloaf with Melted Swiss Cheese
  • Cheddar & Havarti Chicken Bowtie Pasta with Roasted Broccoli & Carrots
    Cheddar & Havarti Chicken Bowtie Pasta with Roasted Broccoli & Carrots
  • Honey Butter Sweet Alabama Pecan Bread
    Honey Butter Sweet Alabama Pecan Bread

Footer

↑ back to top

About

  • About
  • Contact
  • Disclosure Policy
  • DMCA
  • Privacy Policy
  • Terms and Conditions

Newsletter

  • Sign Up! for emails and updates

Recipes

  • Appetizers & Snacks
  • Beef
  • Breakfast
  • Chicken
  • Desserts
  • Dinner
  • Drinks
  • Side-Dish
  • Soups

As an Amazon Associate I earn from qualifying purchases.

Copyright © 2025 Sue Recipe