Sue Recipe

  • Recipe Index
  • Chicken
  • Desserts
  • About
  • Contact
menu icon
go to homepage
  • Recipe Index
  • Chicken
  • Desserts
  • About
  • Contact

search icon
Homepage link
  • Recipe Index
  • Chicken
  • Desserts
  • About
  • Contact

×

Sourdough Sandwich Bread

April 16, 2025 by Sue Leave a Comment

Sourdough sandwich bread is a soft, sliceable loaf with a hint of tang and a tender crumb—perfect for everything from classic PB&J to hearty deli sandwiches. It combines the deep flavor of sourdough with the structure and softness I love in a sandwich loaf. Whether I’m baking for the week or just want a more wholesome, homemade option, this recipe never fails.
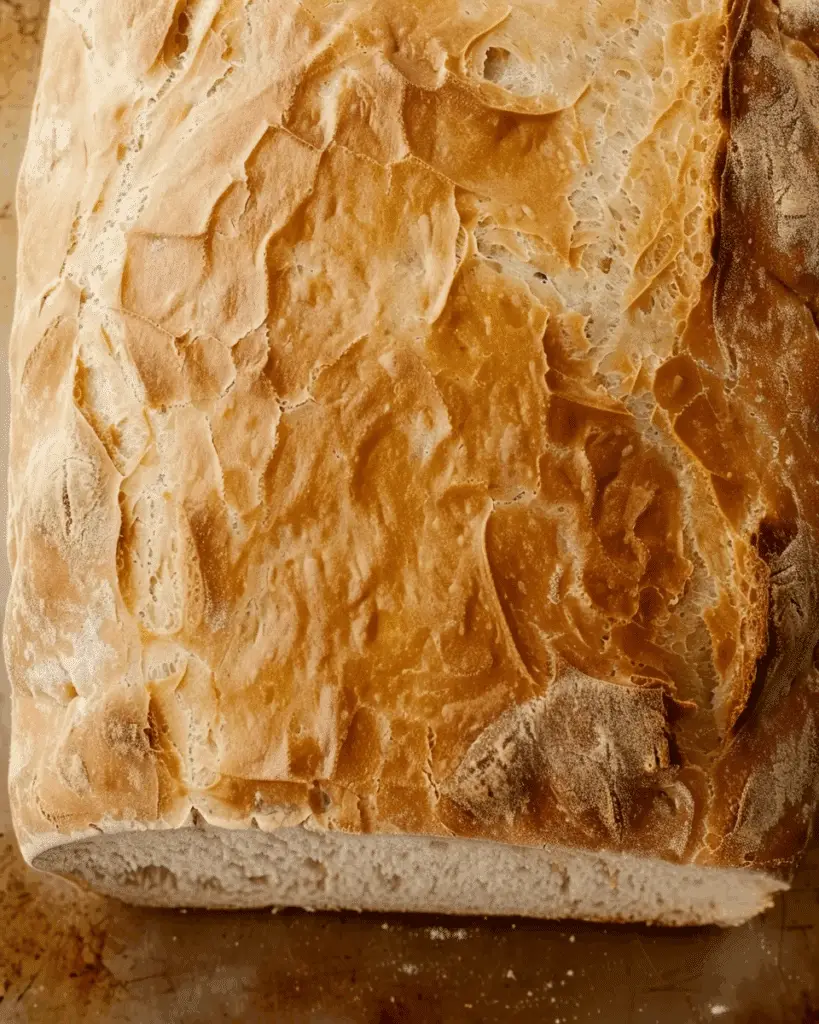
Sourdough Sandwich Bread

Why You’ll Love This Recipe

I love this recipe because it’s the perfect blend of artisan flavor and everyday practicality. The sourdough starter gives it that signature tang and depth, but the texture is soft and fluffy—just like store-bought sandwich bread, only better. It’s great for toast, lunchboxes, and grilled cheese, and it keeps beautifully for days.

Ingredients

(Here's a tip: Check out the full list of ingredients and measurements in the recipe card below.)

  • Active sourdough starter (fed and bubbly)
  • All-purpose or bread flour
  • Warm water or milk
  • Honey or sugar
  • Unsalted butter or oil
  • Salt

Directions

  1. In a large bowl or stand mixer, I mix the sourdough starter, warm water or milk, honey, and melted butter until combined.
  2. I add the flour and salt and knead the dough until it’s smooth and slightly tacky—about 8–10 minutes by hand or 5 minutes in a mixer.
  3. I shape the dough into a ball, place it in a greased bowl, cover, and let it rise at room temperature for 4–6 hours, or until doubled in size.
  4. Once risen, I gently deflate the dough and shape it into a loaf, then place it in a greased 9x5-inch loaf pan.
  5. I cover the pan and let the dough rise again for 1–2 hours, until it crowns about an inch over the rim.
  6. I preheat the oven to 375°F (190°C).
  7. I bake the loaf for 35–40 minutes, or until golden brown and it sounds hollow when tapped.
  8. I remove it from the pan and let it cool completely on a wire rack before slicing.

Servings and Timing

This recipe yields 1 standard loaf (about 12–14 slices). It takes 15 minutes to prep, plus 6–8 hours of rising time (depending on room temp), and 35–40 minutes to bake. I usually start it in the morning and bake it in the evening—or let it bulk ferment overnight in the fridge for a deeper flavor.

Variations

  • I add whole wheat flour for a heartier texture (up to 50%).
  • A handful of rolled oats or seeds on top adds crunch and nutrition.
  • I sometimes swirl in cinnamon and raisins or herbs and cheese for a flavor boost.
  • For extra softness, I use milk instead of water and brush the top with melted butter after baking.

Storage/Reheating

I store the loaf in a bread box or wrapped in a towel for up to 3–4 days at room temperature. For longer storage, I slice and freeze it—then just pop slices into the toaster straight from the freezer.

FAQs

Can I use discard instead of active starter?

For the best rise and texture, I stick with active, bubbly starter. Discard won’t give the same lift, but I use it in crackers or pancakes instead.

Can I cold-proof the dough?

Yes! After shaping, I often place the loaf in the fridge overnight and bake it the next day. It helps develop flavor and makes timing easier.

What’s the best flour to use?

I usually use bread flour for more structure and chew, but all-purpose works great too if that’s what I have on hand.

Why is my bread dense?

This usually happens if the starter isn’t active enough or if the dough is under-proofed. I always give it enough time to rise fully before baking.

Can I double the recipe?

Yes! I’ve doubled it and baked two loaves side by side—just make sure they have room in the oven to bake evenly.

Conclusion

Sourdough sandwich bread is everything I want in a homemade loaf—flavorful, soft, and sturdy enough for everyday use. It’s the perfect balance between rustic and practical, and once I started making it, store-bought bread just didn’t compare. Whether I’m making toast in the morning or packing sandwiches for lunch, this loaf is always my go-to.
Print

clock clock iconcutlery cutlery iconflag flag iconfolder folder iconinstagram instagram iconpinterest pinterest iconfacebook facebook iconprint print iconsquares squares iconheart heart iconheart solid heart solid icon
Sourdough Sandwich Bread

Sourdough Sandwich Bread

5 Stars 4 Stars 3 Stars 2 Stars 1 Star No reviews
  • Author: Sue
  • Prep Time: 15 minutes
  • Cook Time: 40 minutes
  • Total Time: 7–8 hours (including rise time)
  • Yield: 1 loaf (12–14 slices)
  • Category: Bread
  • Method: Baking
  • Cuisine: American
  • Diet: Vegetarian
Print Recipe
Pin Recipe

Description

This soft and fluffy sourdough sandwich bread is the ultimate homemade loaf—perfect for toast, lunchboxes, or stacking with your favorite sandwich fillings. With a tender crumb, golden crust, and that signature tangy flavor, it’s better than store-bought and surprisingly easy to make!


Ingredients

  • ½ cup active sourdough starter (fed and bubbly)
  • 3 ½ cups all-purpose or bread flour
  • 1 cup warm water or milk
  • 1 tablespoon honey or sugar
  • 2 tablespoons unsalted butter (melted) or neutral oil
  • 1 ½ teaspoons salt

Instructions

  1. In a large bowl or stand mixer, combine the sourdough starter, warm water or milk, honey, and melted butter.
  2. Add flour and salt. Knead until smooth and elastic—8–10 minutes by hand or 5 minutes in a mixer with dough hook.
  3. Place dough in a greased bowl, cover, and let it rise at room temperature for 4–6 hours until doubled in size.
  4. Gently deflate and shape the dough into a loaf. Place it in a greased 9x5-inch loaf pan.
  5. Cover and let rise 1–2 hours, or until the dough is about 1 inch above the pan rim.
  6. Preheat oven to 375°F (190°C).
  7. Bake for 35–40 minutes, until golden brown and hollow-sounding when tapped.
  8. Cool completely on a wire rack before slicing.

Notes

  • For a softer loaf, use warm milk instead of water and brush the top with butter after baking.
  • Whole wheat flour can replace up to 50% of the all-purpose flour.
  • To cold-proof: place shaped dough in the fridge overnight, then bake directly the next day.
  • For added flair, sprinkle oats or seeds on top before baking.

Have you made this recipe? I'd love to see it!

Click here to Follow me on Pinterest

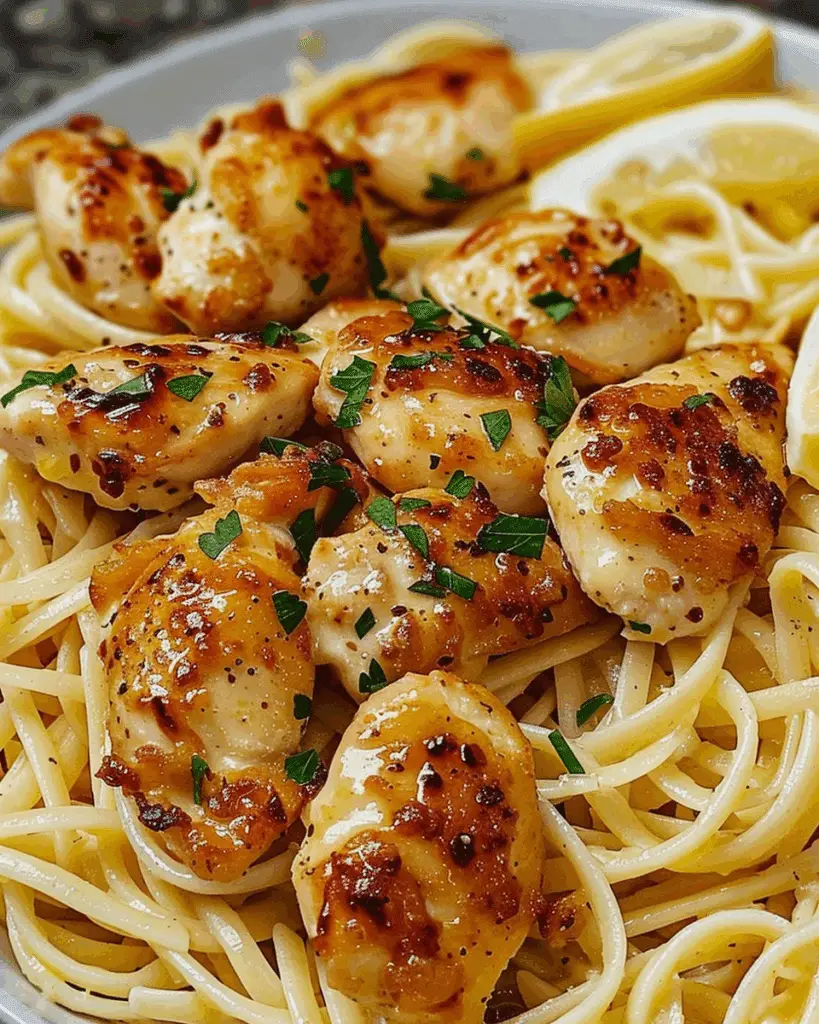
Lemon Garlic Butter Chicken Served with Creamy Parmesan Linguine

April 16, 2025 by Sue Leave a Comment

Lemon garlic butter chicken served with creamy parmesan linguine is the kind of dinner that feels restaurant-worthy but is easy enough for any night of the week. Juicy, golden chicken breasts are cooked in a zesty garlic butter sauce and paired with tender linguine tossed in a silky parmesan cream sauce. It’s rich, bright, and completely satisfying from the first bite to the last.

Lemon Garlic Butter Chicken Served with Creamy Parmesan Linguine

Why You’ll Love This Recipe

I love this recipe because it brings together bold, comforting flavors with very little effort. The lemon and garlic bring freshness, the butter and cream add richness, and the parmesan ties everything together. The chicken is juicy and flavorful, while the pasta is creamy and indulgent—it's the perfect pairing for a cozy dinner or when I want to impress without a lot of fuss.

Ingredients

(Here's a tip: Check out the full list of ingredients and measurements in the recipe card below.)

For the Lemon Garlic Butter Chicken:

  • Boneless skinless chicken breasts (or thighs)
  • Salt and pepper
  • Garlic powder
  • Paprika (optional)
  • Olive oil
  • Butter
  • Garlic (minced)
  • Lemon juice and zest
  • Fresh parsley (for garnish)

For the Creamy Parmesan Linguine:

  • Linguine pasta
  • Heavy cream
  • Butter
  • Garlic (minced)
  • Grated parmesan cheese
  • Salt and pepper
  • Reserved pasta water (as needed for thinning)
  • Optional: extra herbs or crushed red pepper for garnish

Directions

  1. Cook the Pasta:
    I bring a large pot of salted water to a boil and cook the linguine until al dente. I reserve about 1 cup of pasta water before draining.
  2. Prepare the Chicken:
    I season the chicken breasts with salt, pepper, garlic powder, and paprika on both sides.
    In a skillet over medium heat, I heat olive oil and sear the chicken until golden and cooked through (about 5–6 minutes per side).
    I remove the chicken and set it aside.
  3. Make the Lemon Garlic Butter Sauce:
    In the same skillet, I reduce the heat and melt butter. I add minced garlic and cook until fragrant.
    I stir in lemon juice and zest, scraping up any browned bits from the pan.
    I return the chicken to the skillet to coat in the sauce, then turn off the heat and cover to keep warm.
  4. Make the Creamy Parmesan Sauce:
    In a separate saucepan, I melt butter and sauté garlic until fragrant.
    I pour in the cream and simmer gently for 2–3 minutes.
    I stir in grated parmesan and whisk until smooth. I season with salt and pepper and add a splash of pasta water to reach the perfect creamy consistency.
  5. Combine and Serve:
    I toss the cooked linguine in the parmesan sauce until fully coated.
    I plate the creamy pasta and top with lemon garlic butter chicken, spooning any extra sauce over the top.
    I finish with fresh parsley and a little extra parmesan before serving.

Servings and Timing

This recipe serves 4 people. It takes about 15 minutes to prep and 25–30 minutes to cook, so I have a beautiful dinner ready in under 45 minutes.

Variations

  • I sometimes add spinach or cherry tomatoes to the pasta for extra color and freshness.
  • Grilled or baked chicken also works if I want to lighten it up.
  • Shrimp or salmon are great substitutes for the chicken if I’m craving seafood.

Storage/Reheating

Leftovers keep well in the fridge for up to 3 days. I reheat the chicken and pasta gently on the stovetop or in the microwave, adding a splash of cream or milk to loosen the sauce. I avoid overheating so the chicken stays tender and the sauce stays smooth.

FAQs

Can I use half and half instead of heavy cream?

Yes, I’ve used half and half—it still makes a creamy sauce, though slightly less rich.

What’s the best pasta substitute for linguine?

Fettuccine, spaghetti, or even penne all work well. I just adjust the cooking time accordingly.

How do I keep the chicken from drying out?

I don’t overcook it—just 5–6 minutes per side depending on thickness. I let it rest briefly before slicing.

Can I make the sauce ahead of time?

You can, but I prefer making it fresh since it thickens as it sits. Reheating with a splash of pasta water helps revive it if needed.

Can I make this gluten-free?

Absolutely—just use your favorite gluten-free pasta and check that all ingredients are gluten-free.

Conclusion

Lemon garlic butter chicken with creamy parmesan linguine is one of those meals that feels like a treat but is simple enough to whip up on a weeknight. It’s bright, buttery, and satisfying in all the right ways. Whether I’m cooking for guests or treating myself, this dish never fails to impress.

Print

clock clock iconcutlery cutlery iconflag flag iconfolder folder iconinstagram instagram iconpinterest pinterest iconfacebook facebook iconprint print iconsquares squares iconheart heart iconheart solid heart solid icon
Lemon Garlic Butter Chicken Served with Creamy Parmesan Linguine

Lemon Garlic Butter Chicken Served with Creamy Parmesan Linguine

5 Stars 4 Stars 3 Stars 2 Stars 1 Star No reviews
  • Author: Sue
  • Prep Time: 15 minutes
  • Cook Time: 25 minutes
  • Total Time: 40 minutes
  • Yield: 4 servings
  • Category: Dinner
  • Method: Stovetop
  • Cuisine: Italian-American
Print Recipe
Pin Recipe

Description

This lemon garlic butter chicken with creamy parmesan linguine is a restaurant-style dinner made right at home. Juicy, golden chicken is coated in a buttery, citrus-infused sauce and served over rich, cheesy linguine for a comforting and elegant meal that’s ready in under 45 minutes.


Ingredients

  • For the Lemon Garlic Butter Chicken:
  • 2 boneless skinless chicken breasts (or thighs)
  • Salt and pepper, to taste
  • 1 tsp garlic powder
  • ½ tsp paprika (optional)
  • 1 tbsp olive oil
  • 2 tbsp butter
  • 3 cloves garlic, minced
  • 2 tbsp lemon juice + 1 tsp lemon zest
  • Fresh parsley, chopped (for garnish)
  • For the Creamy Parmesan Linguine:
  • 8 oz linguine pasta
  • 1 tbsp butter
  • 2 cloves garlic, minced
  • 1 cup heavy cream
  • ¾ cup grated Parmesan cheese
  • Salt and pepper, to taste
  • Reserved pasta water (as needed for thinning)
  • Optional: chopped herbs or red pepper flakes for garnish

Instructions

  1. Cook the pasta: Boil linguine until al dente, reserving 1 cup pasta water before draining.
  2. Prepare chicken: Season both sides of the chicken with salt, pepper, garlic powder, and paprika.
  3. Heat olive oil in a skillet and cook chicken 5–6 minutes per side until golden and fully cooked. Remove and set aside.
  4. Make the lemon garlic butter sauce: In the same skillet, melt butter, add minced garlic, lemon juice, and zest. Stir and scrape up browned bits. Return chicken to skillet to coat in sauce.
  5. Make the parmesan sauce: In a separate saucepan, melt butter and sauté garlic. Add cream and simmer for 2–3 minutes. Stir in Parmesan and season to taste. Add pasta water to loosen sauce if needed.
  6. Toss pasta in the sauce until fully coated.
  7. Plate pasta and top with sliced chicken, spooning over extra lemon garlic butter sauce. Garnish with parsley and extra cheese if desired.

Notes

  • Add sautéed spinach or cherry tomatoes for color and nutrition.
  • Swap chicken for shrimp or salmon for a seafood twist.
  • Half and half can be used instead of heavy cream for a lighter sauce.

Have you made this recipe? I'd love to see it!

Click here to Follow me on Pinterest

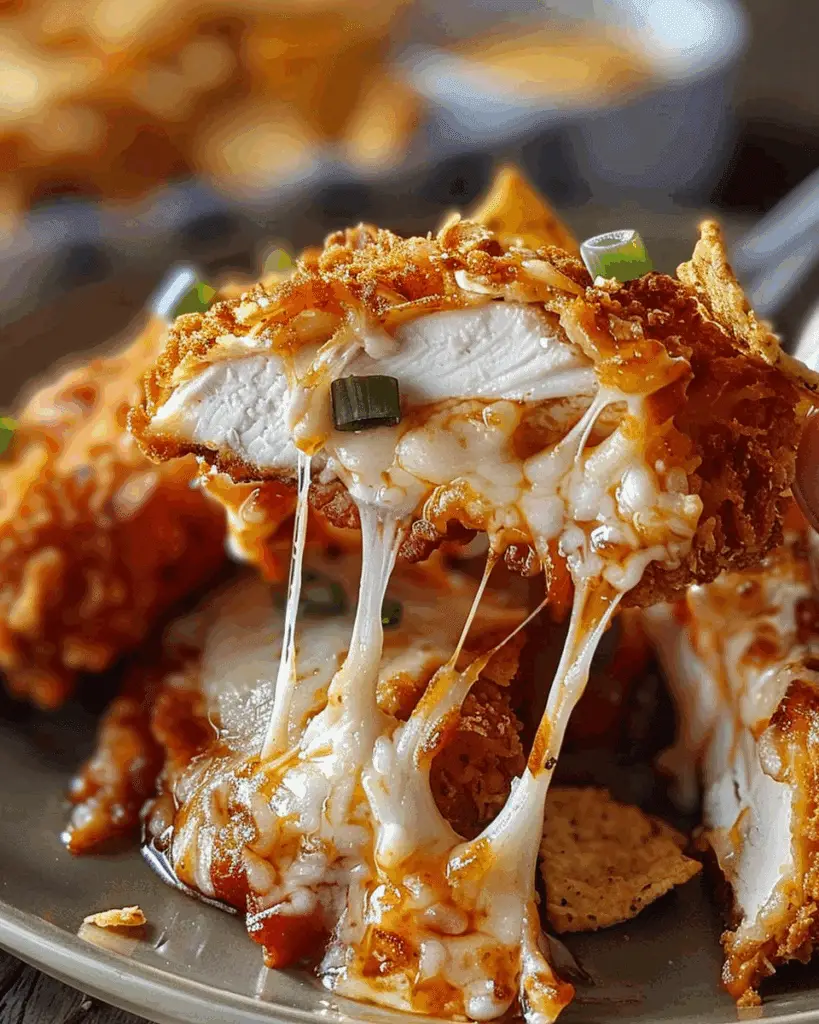
Cream Cheese Stuffed Doritos Chicken

April 16, 2025 by Sue Leave a Comment

Cream cheese stuffed Doritos chicken is a crispy, cheesy, flavor-packed dish that takes comfort food to the next level. Juicy chicken breasts are stuffed with creamy, seasoned cheese and coated in a crunchy Doritos crust for a fun, bold twist on classic baked chicken. It’s the kind of meal I pull out when I want to impress with something totally over-the-top and irresistibly delicious.

Cream Cheese Stuffed Doritos Chicken

Why You’ll Love This Recipe

I love this recipe because it’s fun, flavorful, and surprisingly easy to make. The contrast between the crispy Doritos coating and the creamy, melty cheese center is pure magic. It’s perfect for weeknight dinners, game day, or anytime I want a cheesy, crunchy dish that’s anything but boring. Plus, I can switch up the Doritos flavors and fillings to suit my mood.

Ingredients

(Here's a tip: Check out the full list of ingredients and measurements in the recipe card below.)

  • Boneless, skinless chicken breasts
  • Cream cheese (softened)
  • Shredded cheddar or Mexican blend cheese
  • Garlic powder
  • Onion powder
  • Paprika or taco seasoning
  • Crushed Doritos (any flavor—I love nacho cheese or spicy sweet chili)
  • Eggs (for coating)
  • All-purpose flour
  • Salt and pepper
  • Optional: fresh parsley, hot sauce, or ranch for dipping

Directions

  1. I preheat the oven to 375°F (190°C) and line a baking sheet with parchment paper.
  2. I butterfly each chicken breast and carefully stuff it with a mixture of cream cheese, shredded cheese, and a sprinkle of seasonings.
  3. I press the chicken closed and secure with toothpicks if needed to keep the filling inside.
  4. I set up a breading station with flour (seasoned with salt and pepper), beaten eggs, and crushed Doritos.
  5. I dredge each stuffed chicken breast in the flour, dip it in the egg, then press it into the Doritos crumbs to coat evenly.
  6. I place the chicken on the baking sheet and bake for 25–30 minutes, or until the chicken is cooked through and the outside is golden and crisp.
  7. I let it rest for 5 minutes before slicing and serving with my favorite dipping sauce.

Servings and Timing

This recipe makes about 4 stuffed chicken breasts. It takes 20 minutes to prep and 25–30 minutes to bake, so it’s ready in under an hour.

Variations

  • I sometimes use jalapeño cream cheese for a spicy kick.
  • Switching up the Doritos flavor totally changes the vibe—cool ranch, flaming hot, or even bold BBQ.
  • I add chopped green onions to the filling for more texture and flavor.
  • For a bite-sized version, I use chicken tenders and roll them around the filling like little stuffed nuggets.

Storage/Reheating

Leftovers keep well in the fridge for up to 3 days. To reheat, I use the oven or air fryer at 350°F to bring back the crispiness. The microwave works in a pinch, but the crust won’t stay as crunchy.

FAQs

Can I make this ahead of time?

Yes! I assemble the stuffed and breaded chicken ahead of time and refrigerate it until I’m ready to bake.

How do I keep the filling from leaking out?

I don’t overstuff, and I use toothpicks to help seal the chicken closed. Freezing the filled chicken for 10 minutes before breading can also help.

Can I air fry this?

Absolutely. I cook it in the air fryer at 375°F for about 18–22 minutes, flipping halfway through for even crispiness.

What cheese works best?

Cream cheese mixed with cheddar is my go-to, but mozzarella, pepper jack, or even a bit of feta work well too.

What can I serve with it?

I like it with a side salad, roasted veggies, or something simple like rice or mashed potatoes. A drizzle of ranch or chipotle mayo on top takes it over the top.

Conclusion

Cream cheese stuffed Doritos chicken is one of those meals that feels like a treat—crunchy, cheesy, and full of bold flavor in every bite. It’s a guaranteed crowd-pleaser and a fun way to turn basic chicken into something unforgettable. Once I made it, it instantly earned a spot in my dinner rotation.

Print

clock clock iconcutlery cutlery iconflag flag iconfolder folder iconinstagram instagram iconpinterest pinterest iconfacebook facebook iconprint print iconsquares squares iconheart heart iconheart solid heart solid icon
Cream Cheese Stuffed Doritos Chicken

Cream Cheese Stuffed Doritos Chicken

5 Stars 4 Stars 3 Stars 2 Stars 1 Star No reviews
  • Author: Sue
  • Prep Time: 20 minutes
  • Cook Time: 25–30 minutes
  • Total Time: 45–50 minutes
  • Yield: 4 servings
  • Category: Main Course
  • Method: Baked
  • Cuisine: American
Print Recipe
Pin Recipe

Description

This cream cheese stuffed Doritos chicken is a crunchy, cheesy, and irresistibly bold twist on baked chicken. Filled with creamy cheese and coated in a crispy Doritos crust, it’s an easy, flavor-packed dish that turns dinner into a fun comfort food favorite.


Ingredients

  • 4 boneless, skinless chicken breasts
  • 4 oz cream cheese (softened)
  • ½ cup shredded cheddar or Mexican blend cheese
  • ½ teaspoon garlic powder
  • ½ teaspoon onion powder
  • ½ teaspoon paprika or taco seasoning
  • 1 ½ cups crushed Doritos (any flavor)
  • 2 eggs (beaten)
  • ½ cup all-purpose flour
  • Salt and black pepper, to taste
  • Optional: chopped parsley, hot sauce, ranch dressing for serving

Instructions

  1. Preheat oven to 375°F (190°C) and line a baking sheet with parchment paper.
  2. In a bowl, mix cream cheese, shredded cheese, garlic powder, onion powder, and paprika.
  3. Butterfly each chicken breast and fill with the cheese mixture. Press closed and secure with toothpicks if needed.
  4. Set up a dredging station: flour (seasoned with salt and pepper), beaten eggs, and crushed Doritos.
  5. Dredge each stuffed breast in flour, dip in egg, and coat fully in crushed Doritos.
  6. Place on prepared baking sheet and bake for 25–30 minutes, or until chicken is fully cooked and coating is golden brown.
  7. Let rest 5 minutes before slicing. Serve with dipping sauce if desired.

Notes

  • Use flavored cream cheese or add diced jalapeños for a spicy version.
  • Cool Ranch, Spicy Sweet Chili, or Flaming Hot Doritos offer fun flavor swaps.
  • Great served with ranch, chipotle mayo, or even guacamole on the side.

Have you made this recipe? I'd love to see it!

Click here to Follow me on Pinterest

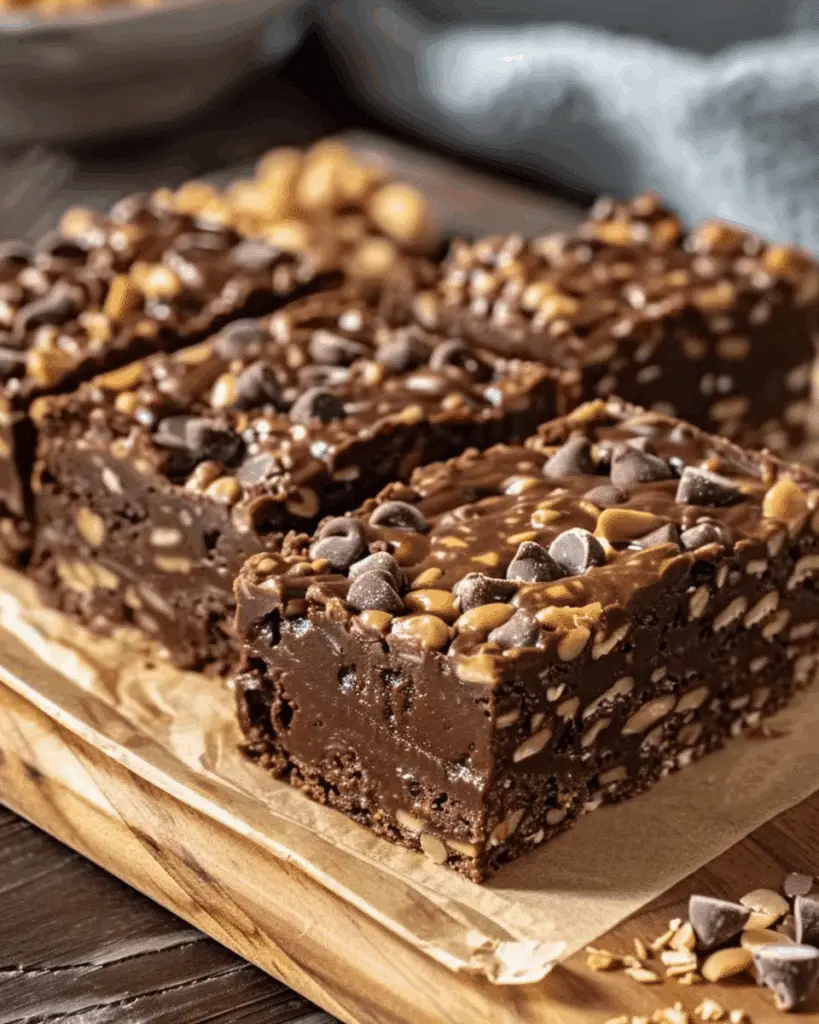
Healthy No-Bake Chocolate Peanut Butter Crunch Bars

April 16, 2025 by Sue Leave a Comment

Healthy no-bake chocolate peanut butter crunch bars are a dreamy combination of creamy peanut butter, rich dark chocolate, and crispy, crunchy texture—all with no oven required. They’re naturally sweetened, made with simple pantry ingredients, and perfect when I want a guilt-free treat that still feels indulgent.

Healthy No-Bake Chocolate Peanut Butter Crunch Bars

Why You’ll Love This Recipe

I love this recipe because it comes together in minutes, keeps in the fridge for days, and satisfies both my sweet tooth and my craving for something a little crunchy. It’s great for meal prep, doesn’t require any fancy equipment, and is easy to customize with what I have on hand. Plus, they’re gluten-free and can easily be made vegan.

Ingredients

(Here's a tip: Check out the full list of ingredients and measurements in the recipe card below.)

  • Natural peanut butter (or almond butter)
  • Maple syrup or honey
  • Coconut oil
  • Vanilla extract
  • Crispy rice cereal
  • Rolled oats (optional for added texture)
  • Dark chocolate chips or chopped chocolate
  • Sea salt (optional, for sprinkling)

Directions

  1. I line an 8x8-inch pan with parchment paper and set it aside.
  2. In a saucepan over low heat, I melt the peanut butter, maple syrup (or honey), and coconut oil until smooth and combined.
  3. I remove it from the heat and stir in vanilla extract.
  4. I gently fold in the crispy rice cereal (and oats, if using) until evenly coated.
  5. I press the mixture into the prepared pan, smoothing it out into an even layer.
  6. In a separate bowl, I melt the dark chocolate chips (either in the microwave or over a double boiler), then pour it over the base and spread evenly.
  7. I sprinkle a little sea salt on top if I want that sweet-salty finish.
  8. I refrigerate the bars for at least 1–2 hours, or until set, before slicing into squares or bars.

Servings and Timing

This recipe makes about 12–16 bars depending on how I slice them. It takes 10 minutes to prep and about 1–2 hours to chill. I usually make them the night before for an easy grab-and-go snack the next day.

Variations

  • I sometimes add chia seeds or flaxseed for a fiber and omega-3 boost.
  • Swapping in almond or cashew butter works great for a different nutty flavor.
  • For a dessert twist, I mix mini chocolate chips, shredded coconut, or chopped nuts into the base.
  • I use vegan chocolate and maple syrup to keep the bars fully plant-based.

Storage/Reheating

I store the bars in an airtight container in the fridge for up to 1 week. They also freeze well—I layer them with parchment paper and freeze for up to 2 months. No reheating needed—just thaw at room temp or enjoy straight from the fridge for the best texture.

FAQs

Can I use regular peanut butter?

Yes, but natural peanut butter works best since it has fewer additives and blends smoothly with the other ingredients. I just stir it well before using.

What cereal should I use?

I usually go with plain crispy rice cereal. Brown rice cereal or puffed quinoa also works for a slightly different crunch and flavor.

Can I make these nut-free?

Yes, I use sunflower seed butter or a nut-free spread instead of peanut butter, and they still turn out great.

How do I keep the bars from crumbling?

I press the mixture firmly into the pan and make sure everything is well coated. Chilling for the full time also helps them hold together when sliced.

Can I use the microwave to melt everything?

Definitely. I melt the peanut butter, syrup, and coconut oil together in 20-second intervals, stirring between each round. Same goes for the chocolate topping.

Conclusion

Healthy no-bake chocolate peanut butter crunch bars are one of my favorite treats to keep in the fridge. They’re easy, crave-worthy, and packed with wholesome ingredients that give me a boost of energy without weighing me down. Whether I’m grabbing one after a workout or serving them as a better-for-you dessert, these bars are always a hit.

Print

clock clock iconcutlery cutlery iconflag flag iconfolder folder iconinstagram instagram iconpinterest pinterest iconfacebook facebook iconprint print iconsquares squares iconheart heart iconheart solid heart solid icon
Healthy No-Bake Chocolate Peanut Butter Crunch Bars

Healthy No-Bake Chocolate Peanut Butter Crunch Bars

5 Stars 4 Stars 3 Stars 2 Stars 1 Star No reviews
  • Author: Sue
  • Prep Time: 10 minutes
  • Cook Time: 1–2 hours
  • Total Time: ~1 hour 10 minutes
  • Yield: 12–16 bars
  • Category: Snack, Dessert
  • Method: No-Bake
  • Cuisine: American
  • Diet: Gluten Free
Print Recipe
Pin Recipe

Description

These healthy no-bake chocolate peanut butter crunch bars are the perfect blend of creamy, crunchy, and chocolatey—all made with wholesome ingredients and no oven required. Naturally sweetened, gluten-free, and easily vegan, they're the ultimate feel-good treat.


Ingredients

  • 1 cup natural peanut butter (or almond butter)
  • ⅓ cup maple syrup or honey
  • 2 tablespoons coconut oil
  • 1 teaspoon vanilla extract
  • 2 ½ cups crispy rice cereal
  • ½ cup rolled oats (optional)
  • 1 cup dark chocolate chips or chopped chocolate
  • Sea salt (optional, for topping)

Instructions

  1. Line an 8x8-inch pan with parchment paper.
  2. In a saucepan over low heat, melt together the peanut butter, maple syrup (or honey), and coconut oil until smooth.
  3. Remove from heat and stir in vanilla extract.
  4. Gently mix in crispy rice cereal and rolled oats (if using) until fully coated.
  5. Press mixture into the prepared pan in an even layer.
  6. Melt dark chocolate chips and spread over the top.
  7. Sprinkle with sea salt (optional), then refrigerate for 1–2 hours until firm.
  8. Slice into bars and enjoy!

Notes

  • For vegan bars, use maple syrup and dairy-free chocolate.
  • To keep bars crisp, store them chilled.
  • Add chia or flaxseeds to the base for extra nutrition.

Have you made this recipe? I'd love to see it!

Click here to Follow me on Pinterest

Sweet Potato Cheesecake Cookies Recipe

April 16, 2025 by Sue Leave a Comment

Sweet Potato Cheesecake Cookies are the perfect mash-up of cozy fall flavors and indulgent texture. With a soft, spiced cookie dough hugging creamy cheesecake and sweet potato filling, these cookies are like little bites of pie and cake all in one. They’re the kind of treat I love to bring out when I want something unique, comforting, and completely irresistible.

Sweet Potato Cheesecake Cookies Recipe

Why You’ll Love This Recipe

I love this recipe because it blends everything I crave in a dessert—warm spices, rich creaminess, and soft-baked cookie goodness. These cookies are impressive enough for holidays, but simple enough to enjoy any time of year. They also freeze beautifully, so I can always have a stash ready for when the sweet tooth strikes.

Ingredients

(Here's a tip: Check out the full list of ingredients and measurements in the recipe card below.)

For the cookie dough:

  • 1 cup unsalted butter, softened
  • 1½ cups granulated sugar
  • 2 large eggs
  • 1 teaspoon vanilla extract
  • 3 cups all-purpose flour
  • 1 teaspoon baking powder
  • ½ teaspoon baking soda
  • ½ teaspoon salt

For the sweet potato filling:

  • 1 cup mashed sweet potato (I like roasting mine for the best flavor)
  • ¼ cup brown sugar
  • ½ teaspoon ground cinnamon
  • ¼ teaspoon ground nutmeg
  • ¼ teaspoon ground ginger
  • 1 teaspoon vanilla extract

For the cheesecake filling:

  • 8 ounces cream cheese, softened
  • ¼ cup powdered sugar
  • 1 teaspoon vanilla extract

Directions

  1. I start by creaming the butter and granulated sugar until light and fluffy. Then I beat in the eggs one at a time, followed by the vanilla.
  2. In another bowl, I whisk together the flour, baking powder, baking soda, and salt. I gradually mix the dry ingredients into the wet ingredients until a soft dough forms. I chill the dough for at least 30 minutes to make it easier to handle.
  3. For the sweet potato filling, I combine mashed sweet potato with brown sugar, spices, and vanilla. I stir it until smooth.
  4. For the cheesecake filling, I beat the cream cheese, powdered sugar, and vanilla until creamy and set it aside.
  5. I preheat the oven to 350°F (175°C) and line baking sheets with parchment paper.
  6. I scoop out about 2 tablespoons of cookie dough and flatten it into a disk. I place a small spoonful of sweet potato filling and cheesecake filling in the center.
  7. I top it with another flattened disk of dough, then pinch and seal the edges so the fillings are enclosed.
  8. I bake the cookies for 12 to 15 minutes until the edges are just turning golden. I let them cool for 5 minutes on the baking sheet before transferring them to a wire rack.

Servings and timing

This recipe makes about 18–20 stuffed cookies.

  • Prep time: 25 minutes
  • Chill time: 30 minutes
  • Bake time: 12–15 minutes
  • Total time: about 1 hour 15 minutes

Variations

I sometimes add chopped pecans or walnuts to the cookie dough for a little crunch. For extra decadence, I drizzle the finished cookies with melted white chocolate. I’ve also swapped the spices to suit the season—adding cloves or using pumpkin spice works great, too.

Storage/Reheating

Once cooled, I store these cookies in an airtight container in the fridge for up to 5 days. They also freeze well—I freeze them in a single layer, then transfer them to a bag once solid. To serve, I let them thaw in the fridge or microwave them for 10–15 seconds to get that just-baked softness back.

FAQs

Can I use canned sweet potato?

Yes, I’ve used canned sweet potato puree in a pinch. Just make sure it’s plain and not sweetened or spiced.

Do I have to chill the dough?

Chilling helps keep the cookies from spreading too much and makes assembling easier. I always chill for at least 30 minutes.

Can I make these cookies ahead of time?

Definitely. I sometimes make the dough and fillings the day before and store them in the fridge. I assemble and bake fresh the next day.

How do I keep the filling from leaking out?

I make sure the top and bottom dough layers are well sealed and pinch the edges tightly before baking.

What can I use instead of cream cheese?

If I want a different filling, I sometimes swap in ricotta or mascarpone. Just know it’ll change the texture slightly.

Conclusion

Sweet Potato Cheesecake Cookies are one of my favorite fall-inspired treats. They bring together rich flavors and textures in a creative and delicious way. Whether I’m baking them for a holiday dessert table or a cozy weekend snack, they always disappear fast. Soft, creamy, spiced, and sweet—these cookies are a little bit of everything I love.

Print

clock clock iconcutlery cutlery iconflag flag iconfolder folder iconinstagram instagram iconpinterest pinterest iconfacebook facebook iconprint print iconsquares squares iconheart heart iconheart solid heart solid icon
Sweet Potato Cheesecake Cookies Recipe

Sweet Potato Cheesecake Cookies Recipe

5 Stars 4 Stars 3 Stars 2 Stars 1 Star No reviews
  • Author: Sue
  • Prep Time: 25 minutes
  • Cook Time: 12–15 minutes
  • Total Time: 1 hour 15 minutes
  • Yield: 18–20 cookies
  • Category: Dessert
  • Method: Baked
  • Cuisine: American
  • Diet: Vegetarian
Print Recipe
Pin Recipe

Description

These sweet potato cheesecake cookies combine spiced cookie dough with creamy cheesecake and sweet potato filling for the ultimate fall dessert. Perfectly soft, rich, and warmly spiced, they’re like a bite of pie and cheesecake all in one irresistible cookie.


Ingredients

  • Cookie Dough:
  • 1 cup unsalted butter, softened
  • 1½ cups granulated sugar
  • 2 large eggs
  • 1 teaspoon vanilla extract
  • 3 cups all-purpose flour
  • 1 teaspoon baking powder
  • ½ teaspoon baking soda
  • ½ teaspoon salt
  • Sweet Potato Filling:
  • 1 cup mashed sweet potato
  • ¼ cup brown sugar
  • ½ teaspoon ground cinnamon
  • ¼ teaspoon ground nutmeg
  • ¼ teaspoon ground ginger
  • 1 teaspoon vanilla extract
  • Cheesecake Filling:
  • 8 ounces cream cheese, softened
  • ¼ cup powdered sugar
  • 1 teaspoon vanilla extract

Instructions

  1. Cream butter and sugar until fluffy. Add eggs one at a time, then vanilla.
  2. In a separate bowl, whisk together flour, baking powder, baking soda, and salt. Gradually mix into the wet ingredients to form dough. Chill for 30 minutes.
  3. Combine sweet potato, brown sugar, spices, and vanilla for the filling. Set aside.
  4. Beat cream cheese, powdered sugar, and vanilla until smooth. Set aside.
  5. Preheat oven to 350°F (175°C). Line baking sheets with parchment.
  6. Scoop 2 tablespoons of dough, flatten into a disk. Add 1 teaspoon of each filling to center. Top with another disk, pinch to seal.
  7. Bake for 12–15 minutes until golden at edges. Cool before serving.

Notes

  • Use roasted sweet potato for richer flavor.
  • Add chopped pecans or drizzle with melted white chocolate for a festive touch.
  • Dough can be made ahead and chilled overnight.
  • Ensure edges are sealed to avoid leaking filling.

Have you made this recipe? I'd love to see it!

Click here to Follow me on Pinterest

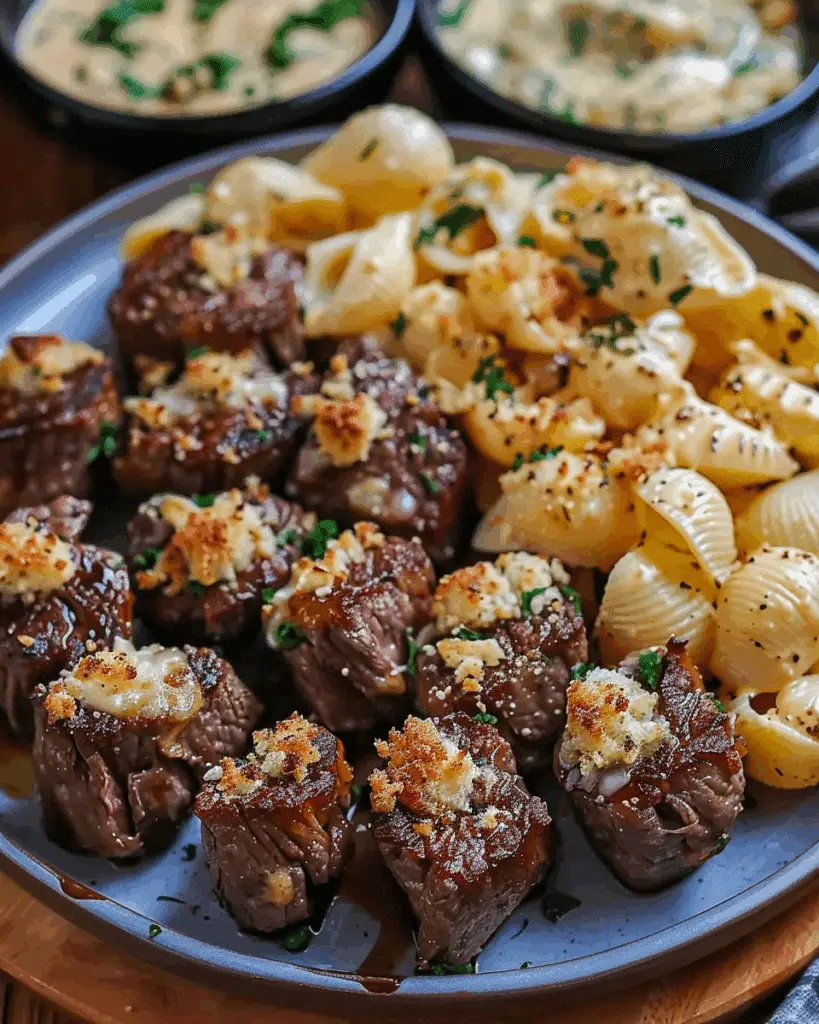
Garlic Butter Steak Bites & Creamy Parmesan Shells

April 16, 2025 by Sue Leave a Comment

Garlic butter steak bites with creamy Parmesan shells is the kind of dinner I turn to when I want something rich, indulgent, and incredibly satisfying. The steak bites are seared to perfection in garlicky butter, and the creamy pasta shells are packed with cheesy, comforting goodness. It’s a restaurant-style meal I can easily whip up at home in under an hour.

Garlic Butter Steak Bites & Creamy Parmesan Shells

Why You’ll Love This Recipe

I love this recipe because it combines two of my favorite things: juicy steak and cheesy pasta. The garlic butter adds a depth of flavor to the steak that’s mouthwatering, and the pasta shells soak up every bit of that luscious Parmesan cream sauce. It’s a cozy dinner that feels special without being complicated. Plus, it's easy to adjust for whatever I have in the fridge.

ingredients

(Here's a tip: Check out the full list of ingredients and measurements in the recipe card below.)

For the steak bites:

  • Sirloin steak, cut into bite-sized cubes
  • Olive oil
  • Unsalted butter
  • Garlic, minced
  • Worcestershire sauce
  • Italian seasoning
  • Smoked paprika
  • Salt and pepper

For the creamy Parmesan shells:

  • Pasta shells
  • Heavy cream
  • Grated Parmesan cheese
  • Shredded mozzarella cheese
  • Unsalted butter
  • Garlic, minced
  • Garlic powder
  • Onion powder
  • Italian seasoning
  • Salt and pepper

directions

  1. I start by seasoning the steak cubes with salt, pepper, Italian seasoning, and smoked paprika.
  2. In a large skillet, I heat olive oil over medium-high heat and sear the steak bites for about 2-3 minutes per side until browned. Then I lower the heat and add butter, minced garlic, and Worcestershire sauce. I cook everything together for another 2 minutes, stirring to coat the steak in the garlic butter. Once done, I remove the steak from the pan and set it aside.
  3. In the same skillet, I melt more butter and sauté garlic until fragrant. Then I pour in the heavy cream and stir in the garlic powder, onion powder, and Italian seasoning.
  4. I simmer the sauce for a few minutes, then add the Parmesan and mozzarella cheeses. Once the sauce is smooth, I stir in the cooked pasta shells and mix until well coated.
  5. I season the pasta with salt and pepper to taste, plate it, and top it with the warm garlic butter steak bites.

Servings and timing

This recipe serves 4 people.
Prep time: 15 minutes
Cook time: 25 minutes
Total time: 40 minutes

Variations

I sometimes swap the sirloin for ribeye, or use chicken breast if I’m in the mood for something lighter. If I want to add a veggie, spinach or sautéed mushrooms go really well with the cream sauce. For a spicy version, I add red pepper flakes to both the steak and the pasta. And when I’m feeling fancy, I finish it with a little truffle oil.

storage/reheating

I store any leftovers in an airtight container in the fridge for up to 3 days. When reheating, I warm the pasta gently on the stovetop with a splash of cream or milk to keep the sauce smooth. The steak can be reheated in a pan or microwave, but I try not to overcook it so it stays tender.

FAQs

Can I use a different cut of steak?

Yes, I can. Ribeye, New York strip, or even tenderloin work well. I just make sure to cut the meat into uniform pieces for even cooking.

Can I make the pasta ahead of time?

I can cook the pasta and even make the sauce ahead. I just reheat the sauce with a splash of cream and toss in the pasta when I’m ready to serve.

What if I don’t have shells?

Any short pasta like penne, rotini, or macaroni works great. I’ve even used fettuccine when I was out of shells.

Can I make this without cream?

Yes, I’ve used whole milk with a bit of cream cheese or added flour and butter to thicken it. It won’t be quite as rich, but it still tastes great.

How do I keep the steak tender?

I make sure not to overcook the steak bites—just a quick sear on high heat is all it takes. Letting them rest briefly before serving helps keep them juicy.

Conclusion

Garlic butter steak bites with creamy Parmesan shells is one of those meals that always satisfies. It’s rich, full of flavor, and so comforting. Whether I’m feeding family, hosting a casual dinner, or just treating myself, this recipe always delivers a delicious experience with minimal fuss.

Print

clock clock iconcutlery cutlery iconflag flag iconfolder folder iconinstagram instagram iconpinterest pinterest iconfacebook facebook iconprint print iconsquares squares iconheart heart iconheart solid heart solid icon
Garlic Butter Steak Bites & Creamy Parmesan Shells

Garlic Butter Steak Bites & Creamy Parmesan Shells

5 Stars 4 Stars 3 Stars 2 Stars 1 Star No reviews
  • Author: Sue
  • Prep Time: 15 minutes
  • Cook Time: 25 minutes
  • Total Time: 40 minutes
  • Yield: 4 servings
  • Category: Main Course
  • Method: Stovetop
  • Cuisine: American
Print Recipe
Pin Recipe

Description

Garlic butter steak bites with creamy Parmesan shells is a rich, indulgent dinner that brings together juicy, seared steak in garlicky butter and cheesy pasta shells smothered in a luscious cream sauce. Perfect for a cozy weeknight meal or a special occasion, this easy steak and pasta recipe is pure comfort food with bold flavor and minimal prep.


Ingredients

  • For the steak bites:
  • Sirloin steak, cut into bite-sized cubes
  • Olive oil
  • Unsalted butter
  • Garlic, minced
  • Worcestershire sauce
  • Italian seasoning
  • Smoked paprika
  • Salt and pepper
  • For the creamy Parmesan shells:
  • Pasta shells
  • Heavy cream
  • Grated Parmesan cheese
  • Shredded mozzarella cheese
  • Unsalted butter
  • Garlic, minced
  • Garlic powder
  • Onion powder
  • Italian seasoning
  • Salt and pepper

Instructions

  1. Season steak cubes with salt, pepper, Italian seasoning, and smoked paprika.
  2. Heat olive oil in a skillet over medium-high heat. Sear steak for 2–3 minutes per side until browned. Reduce heat, add butter, garlic, and Worcestershire sauce. Cook for 2 more minutes, stirring to coat the steak. Remove from pan and set aside.
  3. In the same skillet, melt more butter and sauté garlic until fragrant.
  4. Add heavy cream and season with garlic powder, onion powder, and Italian seasoning. Simmer for a few minutes.
  5. Stir in Parmesan and mozzarella until melted and smooth.
  6. Add cooked pasta shells and mix until well coated. Season with salt and pepper to taste.
  7. Plate the pasta and top with garlic butter steak bites. Serve warm.

Notes

  • Swap sirloin for ribeye, tenderloin, or even chicken.
  • Add spinach or mushrooms for extra flavor and texture.
  • Sprinkle red pepper flakes for a spicy version.
  • Truffle oil makes a fancy finishing touch.
  • Use any short pasta if shells aren’t available.

Have you made this recipe? I'd love to see it!

Click here to Follow me on Pinterest

No-Bake Lemon Dazzling Blueberry Cream Cake

April 16, 2025 by Sue Leave a Comment

This No-Bake Lemon Dazzling Blueberry Cream Cake is one of those desserts I make when I want something bright, creamy, and guaranteed to impr No-Bake Lemon Dazzling Blueberry Cream Cake ess—without turning on the oven. The lemon brings that zesty freshness, while the blueberry adds a burst of sweetness and color. And the best part? It’s incredibly easy to put together.

Why You’ll Love This Recipe

I love how this cake feels light yet decadent. The layers come together beautifully—the buttery graham cracker crust, the creamy lemon filling, the juicy blueberry topping, and the fluffy whipped finish. It’s ideal for warm days, holidays, or when I need a show-stopping dessert with minimal effort.

Ingredients

(Here's a tip: Check out the full list of ingredients and measurements in the recipe card below.)

For the crust:

  • Graham cracker crumbs
  • Unsalted butter, melted

For the lemon cream layer:

  • Cream cheese, softened
  • Granulated sugar
  • Fresh lemon juice
  • Cold milk
  • Instant lemon pudding mix

For the blueberry layer:

  • Blueberry pie filling

For the topping:

  • Whipped topping (thawed)
  • Extra graham cracker crumbs for garnish (optional)

Directions

  1. I start by mixing the graham cracker crumbs and melted butter in a bowl until everything is evenly combined.
  2. I press the mixture firmly into the bottom of a 9x13-inch pan, saving a bit of the crumb mix to sprinkle on top later. Then I pop it in the fridge while I prepare the filling.
  3. In a large bowl, I beat the cream cheese and sugar until it’s smooth. Then I add lemon juice and milk, mixing it until well combined.
  4. I add the instant lemon pudding mix and beat until it thickens slightly. This gives the filling that rich, tangy, velvety texture I love.
  5. I spread the lemon mixture evenly over the chilled crust, smoothing it out with a spatula.
  6. Next, I gently spoon the blueberry pie filling over the lemon layer, being careful not to mix the layers. I spread it out to cover evenly.
  7. I top everything with the whipped topping, creating a smooth, fluffy final layer.
  8. I sprinkle the remaining graham cracker crumbs on top for a bit of crunch and extra charm.
  9. I cover the dish and refrigerate it for at least 2 hours—or even overnight—until it’s fully set and chilled.

Servings and timing

  • Servings: 12
  • Prep time: 30 minutes
  • Chill time: 2 hours
  • Total time: 2 hours 30 minutes

Variations

Sometimes I like to swap the blueberry layer for cherry or raspberry pie filling if I want a different twist. I’ve also added a layer of fresh berries on top of the whipped cream for a more vibrant look. For a slightly lighter version, I use low-fat cream cheese and whipped topping—it still tastes amazing.

Storage/Reheating

I keep this cake refrigerated, tightly covered, for up to 4 days. It actually tastes better the next day after the flavors have had time to come together. Since it’s a no-bake dessert, I never freeze it—the texture doesn’t hold up well when thawed.

FAQs

Can I make this ahead of time?

Yes, I almost always make it the night before. It sets beautifully overnight and is ready to serve straight from the fridge.

Can I use fresh blueberries instead of pie filling?

If I have fresh blueberries, I sometimes cook them down with a bit of sugar and lemon juice to make my own quick filling. But the canned version is super convenient and works great.

Do I need to add food coloring?

Not at all. The pudding and blueberries give it a natural color. If I want a brighter yellow lemon layer, I might add a drop or two of natural food coloring, but it’s totally optional.

Can I use homemade whipped cream instead of whipped topping?

Definitely. I’ve used freshly whipped cream many times—just make sure it’s stabilized a bit with powdered sugar or cream cheese so it holds up in the fridge.

What’s the best way to cut clean slices?

I use a sharp knife dipped in warm water and wipe it clean between each slice. That keeps the layers neat and defined.

Conclusion

This No-Bake Lemon Dazzling Blueberry Cream Cake is one of those feel-good desserts that’s as beautiful as it is delicious. I love how easy it is to assemble, and it always earns compliments at the table. Whether I’m serving it for a party or just treating myself, this dessert always delivers on flavor and freshness.

Print

clock clock iconcutlery cutlery iconflag flag iconfolder folder iconinstagram instagram iconpinterest pinterest iconfacebook facebook iconprint print iconsquares squares iconheart heart iconheart solid heart solid icon
No-Bake Lemon Dazzling Blueberry Cream Cake

No-Bake Lemon Dazzling Blueberry Cream Cake

5 Stars 4 Stars 3 Stars 2 Stars 1 Star No reviews
  • Author: Sue
  • Prep Time: 30 minutes
  • Cook Time: 2 hours
  • Total Time: 2 hours 30 minutes
  • Yield: 12 servings
  • Category: Dessert
  • Method: No-Bake
  • Cuisine: American
  • Diet: Vegetarian
Print Recipe
Pin Recipe

Description

No-Bake Lemon Dazzling Blueberry Cream Cake is a vibrant, layered dessert with a graham cracker crust, creamy lemon filling, sweet blueberry topping, and fluffy whipped finish. This easy, oven-free treat is perfect for warm-weather entertaining, holidays, or when you need a refreshing dessert that wows.


Ingredients

  • For the crust:
  • 2 cups graham cracker crumbs
  • ½ cup unsalted butter, melted
  • For the lemon cream layer:
  • 8 oz cream cheese, softened
  • ½ cup granulated sugar
  • ¼ cup fresh lemon juice
  • 1 cup cold milk
  • 1 (3.4 oz) box instant lemon pudding mix
  • For the blueberry layer:
  • 1 (21 oz) can blueberry pie filling
  • For the topping:
  • 1 container (8 oz) whipped topping, thawed
  • Extra graham cracker crumbs, for garnish (optional)

Instructions

  1. Mix graham cracker crumbs and melted butter until fully combined.
  2. Press mixture into the bottom of a 9x13-inch pan. Reserve a small amount for garnish. Chill while preparing the filling.
  3. In a bowl, beat cream cheese and sugar until smooth. Add lemon juice and milk, mix until combined.
  4. Add pudding mix and beat until thickened.
  5. Spread lemon filling over crust.
  6. Carefully spoon and spread blueberry pie filling over lemon layer.
  7. Top with whipped topping, spreading evenly.
  8. Sprinkle with reserved graham cracker crumbs.
  9. Cover and refrigerate for at least 2 hours or overnight before serving.

Notes

  • Swap blueberry pie filling with cherry or raspberry for variety.
  • Fresh berries can be added on top for a vibrant look.
  • Use low-fat cream cheese and whipped topping for a lighter version.
  • Homemade whipped cream works—just stabilize it with powdered sugar.
  • For clean slices, use a warm knife and wipe between cuts.

Have you made this recipe? I'd love to see it!

Click here to Follow me on Pinterest

Creamy Smothered Chicken and Rice

April 16, 2025 by Sue Leave a Comment

Creamy smothered chicken and rice is the kind of comforting, down-home dinner I turn to when I want something rich, flavorful, and satisfying. Tender chicken is cooked in a velvety, seasoned cream sauce and served over fluffy rice that soaks up all the goodness. It’s a one-pan style meal that tastes like a warm hug on a plate.

Creamy Smothered Chicken and Rice

Why You’ll Love This Recipe

I love this recipe because it’s cozy, easy to put together, and full of simple ingredients that pack serious flavor. The creamy sauce is thick, savory, and coats every bite of chicken perfectly. Paired with rice, it becomes a hearty, soul-soothing meal that’s great for weeknights, meal prep, or feeding a hungry family.

Ingredients

(Here's a tip: Check out the full list of ingredients and measurements in the recipe card below.)

  • Boneless, skinless chicken thighs or breasts
  • Olive oil or butter
  • Onion (chopped)
  • Garlic (minced)
  • Chicken broth
  • Heavy cream or half-and-half
  • Cream of chicken or cream of mushroom soup (optional for extra richness)
  • Cooked white or brown rice
  • Salt and pepper
  • Paprika
  • Garlic powder
  • Optional: parsley for garnish, mushrooms or spinach for extra texture

Directions

  1. I season the chicken with salt, pepper, paprika, and garlic powder.
  2. In a large skillet or sauté pan, I heat oil or butter and sear the chicken on both sides until golden, then set it aside.
  3. In the same pan, I sauté the onions (and mushrooms if using) until soft, then add garlic and cook for another 30 seconds.
  4. I stir in the chicken broth and cream (or soup) and bring the mixture to a gentle simmer.
  5. I return the chicken to the pan, cover, and let it simmer for 20–25 minutes, or until cooked through and tender.
  6. I serve the creamy chicken smothered over a bed of warm, cooked rice, and spoon the sauce generously on top.
  7. I finish with a sprinkle of chopped parsley for a fresh touch.

Servings and Timing

This recipe makes about 4 servings. It takes roughly 10–15 minutes to prep and 30–35 minutes to cook, so dinner is ready in under an hour.

Variations

  • I sometimes stir in fresh spinach or frozen peas at the end for added color and nutrients.
  • A dash of hot sauce or cayenne gives the sauce a subtle kick.
  • Using bone-in chicken adds even more flavor but takes a bit longer to cook.
  • I switch it up with wild rice or garlic butter rice for something a little different.

Storage/Reheating

I store leftovers in an airtight container in the fridge for up to 4 days. The dish reheats well in the microwave or on the stovetop—just add a splash of broth or cream if the sauce thickens too much. It also freezes well, though I prefer freezing the chicken and sauce without the rice.

FAQs

Can I use rotisserie chicken?

Yes, I’ve shredded rotisserie chicken and stirred it into the cream sauce for a super quick version. Just heat through and serve over rice.

Can I make this dairy-free?

I’ve made it with full-fat coconut milk instead of cream, and it still tastes rich and comforting. Just skip the condensed soup if it contains dairy.

What kind of rice works best?

I usually go with long-grain white rice, but brown rice or even cauliflower rice works great too, depending on what I’m in the mood for.

Can I make this in the oven?

Yes! After searing the chicken, I combine everything in a baking dish and bake covered at 375°F for 30–35 minutes, then uncover and bake for 10 more to thicken the sauce.

How do I keep the sauce from curdling?

I simmer gently—never boil—and I add cream after reducing the heat if using heavy cream. Stirring often helps keep the sauce smooth and creamy.

Conclusion

Creamy smothered chicken and rice is the kind of recipe that brings warmth, flavor, and comfort all in one dish. It’s simple enough for a weeknight but satisfying enough for Sunday dinner. With tender chicken, rich sauce, and fluffy rice, it’s a meal I keep coming back to when I want something truly comforting and delicious.

Print

clock clock iconcutlery cutlery iconflag flag iconfolder folder iconinstagram instagram iconpinterest pinterest iconfacebook facebook iconprint print iconsquares squares iconheart heart iconheart solid heart solid icon
Creamy Smothered Chicken and Rice

Creamy Smothered Chicken and Rice

5 Stars 4 Stars 3 Stars 2 Stars 1 Star No reviews
  • Author: Sue
  • Prep Time: 20 minutes
  • Cook Time: 25–30 minutes
  • Total Time: 45–50 minutes
  • Yield: 4 servings
  • Category: Main Course
  • Method: Baked
  • Cuisine: American
Print Recipe
Pin Recipe

Description

This cream cheese stuffed Doritos chicken is a crunchy, cheesy, and irresistibly bold twist on baked chicken. Filled with creamy cheese and coated in a crispy Doritos crust, it’s an easy, flavor-packed dish that turns dinner into a fun comfort food favorite.


Ingredients

  • 4 boneless, skinless chicken breasts
  • 4 oz cream cheese (softened)
  • ½ cup shredded cheddar or Mexican blend cheese
  • ½ teaspoon garlic powder
  • ½ teaspoon onion powder
  • ½ teaspoon paprika or taco seasoning
  • 1 ½ cups crushed Doritos (any flavor)
  • 2 eggs (beaten)
  • ½ cup all-purpose flour
  • Salt and black pepper, to taste
  • Optional: chopped parsley, hot sauce, ranch dressing for serving

Instructions

  1. Preheat oven to 375°F (190°C) and line a baking sheet with parchment paper.
  2. In a bowl, mix cream cheese, shredded cheese, garlic powder, onion powder, and paprika.
  3. Butterfly each chicken breast and fill with the cheese mixture. Press closed and secure with toothpicks if needed.
  4. Set up a dredging station: flour (seasoned with salt and pepper), beaten eggs, and crushed Doritos.
  5. Dredge each stuffed breast in flour, dip in egg, and coat fully in crushed Doritos.
  6. Place on prepared baking sheet and bake for 25–30 minutes, or until chicken is fully cooked and coating is golden brown.
  7. Let rest 5 minutes before slicing. Serve with dipping sauce if desired.

Notes

  • Use flavored cream cheese or add diced jalapeños for a spicy version.
  • Cool Ranch, Spicy Sweet Chili, or Flaming Hot Doritos offer fun flavor swaps.
  • Great served with ranch, chipotle mayo, or even guacamole on the side.

Have you made this recipe? I'd love to see it!

Click here to Follow me on Pinterest

Old Fashioned Chicken & Noodles

April 15, 2025 by Sue Leave a Comment

Old fashioned chicken & noodles is the kind of meal that warms me from the inside out. Made with tender shredded chicken, hearty egg noodles, and a savory homemade broth, this dish is simple, comforting, and straight from the heart. It’s the kind of recipe that’s been passed down through generations and still hits the spot every single time.

Old Fashioned Chicken & Noodles

Why You’ll Love This Recipe

I love this recipe because it’s timeless and deeply satisfying. The slow-simmered chicken makes a rich, flavorful broth, and the thick egg noodles soak up all that goodness. It’s one of those meals that feels like a hug in a bowl—perfect for a cozy dinner or to bring someone a little homemade comfort. Plus, it's budget-friendly and great for feeding a family.

Ingredients

(Here's a tip: Check out the full list of ingredients and measurements in the recipe card below.)

  • Chicken (bone-in thighs, drumsticks, or a whole chicken for more flavor)
  • Water or chicken broth
  • Carrots (sliced)
  • Celery (sliced)
  • Onion (diced)
  • Garlic (minced)
  • Egg noodles (wide, preferably homestyle or frozen)
  • Bay leaf
  • Dried thyme
  • Salt and pepper
  • Optional: chopped fresh parsley, a splash of cream for richness

Directions

  1. I start by placing the chicken, carrots, celery, onion, garlic, bay leaf, thyme, salt, and pepper into a large pot. I pour in enough water or chicken broth to cover.
  2. I bring it to a boil, then reduce the heat and simmer gently for about 45–60 minutes, or until the chicken is fully cooked and tender.
  3. I remove the chicken from the pot and set it aside to cool slightly. I discard the bay leaf and skim off any excess fat from the top of the broth.
  4. Once the chicken is cool enough, I shred it into bite-sized pieces and discard the bones and skin.
  5. I return the shredded chicken to the pot and bring the broth back to a low boil.
  6. I stir in the egg noodles and cook according to the package directions, usually 10–12 minutes, until they’re tender.
  7. I taste and adjust seasoning as needed, then serve it hot with fresh parsley or a splash of cream if I want a richer finish.

Servings and Timing

This recipe makes about 6 generous servings. It takes about 15 minutes to prep and about 1 hour to cook, so I usually have everything ready in just over an hour.

Variations

  • I’ve made it with leftover roasted chicken to save time.
  • For an ultra-rich broth, I use a mix of water and bone broth.
  • I stir in frozen peas or corn during the last few minutes for added texture and sweetness.
  • A few dashes of poultry seasoning or a pinch of sage gives it a more herb-forward flavor.

Storage/Reheating

I store leftovers in an airtight container in the fridge for up to 4 days. The noodles will absorb some of the broth, so I usually add a splash of water or broth when reheating. It warms up beautifully in the microwave or on the stovetop.

FAQs

Can I use store-bought rotisserie chicken?

Yes! I’ve used shredded rotisserie chicken and premade broth for a quick version. I just simmer the veggies and noodles, then stir in the chicken at the end.

What kind of noodles work best?

I prefer thick, homestyle egg noodles or frozen Reames-style noodles for that traditional texture. Regular dried egg noodles work too.

Can I make this in the slow cooker?

Definitely. I add everything but the noodles and cook on low for 6–8 hours. I then shred the chicken and add the noodles for the last 30–40 minutes on high.

How do I keep the noodles from getting mushy?

If I’m planning to store it, I cook the noodles separately and add them to each bowl when serving. This keeps them from over-soaking in the broth.

Can I freeze chicken & noodles?

Yes, though I recommend freezing the broth and chicken separately from the noodles for the best texture. Just reheat and combine when ready to serve.

Conclusion

Old fashioned chicken & noodles is the definition of a classic comfort meal. It’s rich, simple, and made with love—perfect for any night when I want to slow down and enjoy something warm and nourishing. Whether I’m cooking for my family or just making a cozy batch for myself, this recipe never goes out of style.

Print

clock clock iconcutlery cutlery iconflag flag iconfolder folder iconinstagram instagram iconpinterest pinterest iconfacebook facebook iconprint print iconsquares squares iconheart heart iconheart solid heart solid icon
Old Fashioned Chicken & Noodles

Old Fashioned Chicken & Noodles

5 Stars 4 Stars 3 Stars 2 Stars 1 Star No reviews
  • Author: Sue
  • Prep Time: 15 minutes
  • Cook Time: 60 minutes
  • Total Time: 1 hour 15 minutes
  • Yield: 6 servings
  • Category: Dinner
  • Method: Stovetop
  • Cuisine: American
Print Recipe
Pin Recipe

Description

This old fashioned chicken and noodles recipe is the ultimate comfort food, made with tender shredded chicken, hearty egg noodles, and a rich homemade broth. Perfect for cozy family dinners or when you need a warm, satisfying meal that tastes just like grandma used to make.


Ingredients

  • Chicken (bone-in thighs, drumsticks, or a whole chicken)
  • Water or chicken broth
  • 2–3 carrots, sliced
  • 2 celery stalks, sliced
  • 1 onion, diced
  • 2–3 garlic cloves, minced
  • 12 oz egg noodles (homestyle or frozen)
  • 1 bay leaf
  • 1 tsp dried thyme
  • Salt and pepper to taste
  • Optional: chopped fresh parsley, splash of cream for richness

Instructions

  1. In a large pot, combine chicken, carrots, celery, onion, garlic, bay leaf, thyme, salt, and pepper. Pour in water or broth to cover.
  2. Bring to a boil, then reduce heat and simmer gently for 45–60 minutes, or until the chicken is tender and fully cooked.
  3. Remove chicken from the pot and let cool slightly. Skim any excess fat from the broth and discard bay leaf.
  4. Shred the chicken into bite-sized pieces and discard bones and skin. Return shredded chicken to the pot.
  5. Bring broth to a low boil and stir in the egg noodles. Cook according to package directions (10–12 minutes), until noodles are tender.
  6. Taste and adjust seasoning. Garnish with chopped parsley or a splash of cream, if desired.
  7. Serve hot.

Notes

  • Frozen or homestyle egg noodles give the most authentic texture.
  • Make ahead: Cook the noodles separately and store them separately to avoid sogginess.
  • Add frozen peas or corn in the last few minutes of cooking for a veggie boost.
  • For extra depth, use a mix of broth and bone broth.

Have you made this recipe? I'd love to see it!

Click here to Follow me on Pinterest

Golden Cheese Balls

April 15, 2025 by Sue Leave a Comment

Golden cheese balls are crispy, bite-sized snacks with a gooey, cheesy center and a perfectly crunchy, golden exterior. Whether I’m making them for game day, holiday gatherings, or just a fun snack, these cheesy bites are always a hit. They’re simple, crave-worthy, and disappear fast once they hit the table.

Golden Cheese Balls

Why You’ll Love This Recipe

I love this recipe because it delivers everything I want in a savory snack—crunchy on the outside, melty on the inside, and full of bold cheese flavor. They’re super easy to make with a handful of ingredients, and I can bake or fry them depending on my mood. Plus, they’re freezer-friendly, which means I can always keep a batch ready to go.

Ingredients

(Here's a tip: Check out the full list of ingredients and measurements in the recipe card below.)

  • Shredded cheddar cheese (or cheese blend of choice)
  • All-purpose flour
  • Baking powder
  • Salt
  • Eggs
  • Milk
  • Bread crumbs or crushed cornflakes (for coating)
  • Optional: garlic powder, paprika, or chopped chives for added flavor
  • Oil (for frying) or cooking spray (for baking)

Directions

  1. I start by mixing shredded cheese, flour, baking powder, salt, and any seasonings in a large bowl.
  2. In a separate bowl, I whisk together eggs and a splash of milk, then stir it into the dry ingredients to form a soft dough.
  3. I roll the mixture into small balls (about 1 inch wide) and chill them in the fridge for 15–20 minutes to firm up.
  4. I roll each ball in breadcrumbs or crushed cornflakes to coat them fully.
  5. To fry: I heat oil in a deep skillet to 350°F and fry the balls in batches for 2–3 minutes until golden and crispy.
  6. To bake: I preheat the oven to 400°F, place the balls on a lined baking sheet, spray them with oil, and bake for 15–18 minutes, flipping halfway through.
  7. I let them cool slightly before serving warm with my favorite dipping sauce.

Servings and Timing

This recipe makes about 20–24 cheese balls, depending on the size. It takes about 15 minutes to prep, 15–20 minutes to chill and cook, so they’re ready in around 35–40 minutes.

Variations

  • I use different cheeses like mozzarella, pepper jack, or a sharp aged cheddar for unique flavor twists.
  • Adding finely diced jalapeños gives them a bold upgrade.
  • I sometimes stuff the center with a small cube of cheese for an extra melty core.
  • For a spicier version, I mix in a pinch of cayenne or hot sauce.

Storage/Reheating

I store leftover cheese balls in an airtight container in the fridge for up to 4 days. To reheat, I pop them in a 350°F oven or air fryer for 5–7 minutes until crispy again. They freeze well, too—I just freeze them before cooking and fry or bake straight from frozen (adding a few extra minutes).

FAQs

Can I make these ahead of time?

Yes, I often make and chill or freeze the uncooked cheese balls, then fry or bake them just before serving.

What’s the best cheese to use?

Sharp cheddar is my go-to for bold flavor, but any good melting cheese works—mozzarella, gouda, even cream cheese blends.

Can I air fry these?

Absolutely! I air fry them at 375°F for about 10 minutes, shaking the basket halfway through, until golden and crisp.

Can I make them gluten-free?

Yes, I use gluten-free flour and breadcrumbs or crushed gluten-free crackers for coating.

What dips go well with cheese balls?

I love serving them with ranch, marinara, spicy aioli, honey mustard, or even a creamy sriracha dip.

Conclusion

Golden cheese balls are the ultimate cheesy snack—crispy, melty, and totally addictive. Whether I’m frying, baking, or air-frying them, they’re always a hit with both kids and adults. Easy to make, fun to eat, and perfect for any occasion, this is one recipe I always keep in my back pocket.

Print

clock clock iconcutlery cutlery iconflag flag iconfolder folder iconinstagram instagram iconpinterest pinterest iconfacebook facebook iconprint print iconsquares squares iconheart heart iconheart solid heart solid icon
Golden Cheese Balls

Golden Cheese Balls

5 Stars 4 Stars 3 Stars 2 Stars 1 Star No reviews
  • Author: Sue
  • Prep Time: 15 minutes
  • Cook Time: 15–20 minutes
  • Total Time: 35–40 minutes
  • Yield: 20–24 cheese balls
  • Category: Appetizer
  • Method: Baked or Fried
  • Cuisine: American
  • Diet: Vegetarian
Print Recipe
Pin Recipe

Description

These golden cheese balls are the perfect crispy, melty snack with a bold cheesy center and a crunchy, golden crust. Whether baked or fried, they’re always a crowd-pleasing appetizer for parties, holidays, or game day.


Ingredients

  • 2 cups shredded cheddar cheese (or preferred cheese blend)
  • ½ cup all-purpose flour
  • 1 teaspoon baking powder
  • ½ teaspoon salt
  • 2 eggs
  • 2 tablespoons milk
  • 1 cup bread crumbs or crushed cornflakes (for coating)
  • Optional: ½ teaspoon garlic powder, ½ teaspoon paprika, 2 tablespoons chopped chives
  • Oil for frying or cooking spray for baking

Instructions

  1. In a large bowl, mix cheese, flour, baking powder, salt, and any optional seasonings.
  2. In another bowl, whisk eggs and milk. Add to dry ingredients and mix to form a soft dough.
  3. Roll dough into 1-inch balls and chill for 15–20 minutes.
  4. Coat each ball in bread crumbs or crushed cornflakes.
  5. To fry: Heat oil to 350°F and fry in batches for 2–3 minutes until golden.
  6. To bake: Preheat oven to 400°F. Place balls on a lined sheet, spray with oil, and bake 15–18 minutes, flipping halfway through.
  7. Cool slightly and serve warm with your favorite dipping sauce.

Notes

  • Mix and match cheeses for different flavors (cheddar, mozzarella, pepper jack).
  • Add-ins like jalapeños or a cube of cheese in the center make these even better.
  • Freeze uncooked balls and cook from frozen with just a few extra minutes added.

Have you made this recipe? I'd love to see it!

Click here to Follow me on Pinterest

Chinese Ground Beef and Cabbage Stir Fry

April 15, 2025 by Sue Leave a Comment

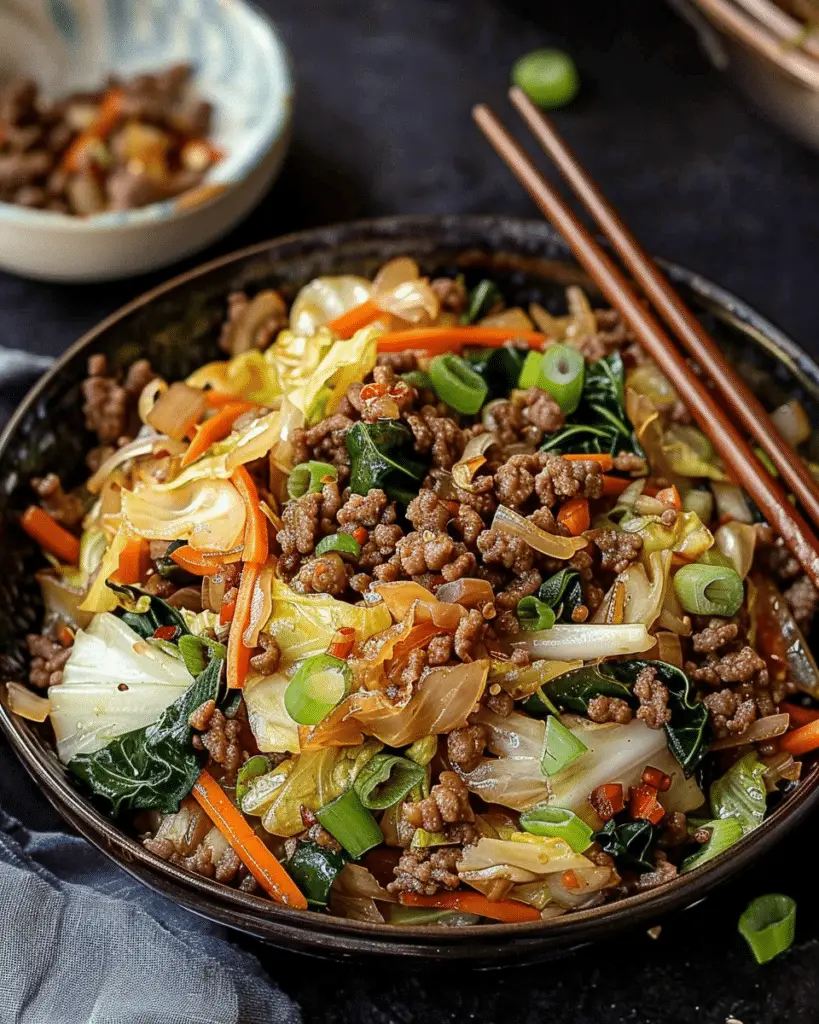
Chinese ground beef and cabbage stir fry is a quick, flavorful, and budget-friendly dish that comes together in just one skillet. With tender ground beef, crisp cabbage, and a savory sauce, it’s the kind of weeknight meal I rely on when I want something easy, filling, and packed with that classic takeout flavor—without the takeout price.

Chinese Ground Beef and Cabbage Stir Fry

Why You’ll Love This Recipe

I love this recipe because it’s fast, versatile, and seriously satisfying. The beef is juicy and full of flavor, the cabbage adds crunch and freshness, and the sauce brings everything together with just the right balance of salty, savory, and slightly sweet. Plus, it uses simple ingredients I usually already have on hand and makes great leftovers.

Ingredients

(Here's a tip: Check out the full list of ingredients and measurements in the recipe card below.)

  • Ground beef
  • Green cabbage (shredded)
  • Garlic (minced)
  • Soy sauce
  • Sesame oil
  • Brown sugar or honey
  • Rice vinegar
  • Ginger (fresh or ground)
  • Green onions (optional, for garnish)
  • Cooked rice (for serving, optional)
  • Optional: red pepper flakes or chili garlic sauce for heat

Directions

  1. I start by heating a little oil in a large skillet or wok over medium-high heat.
  2. I add the ground beef and cook until browned, breaking it up with a spatula as it cooks.
  3. I stir in the garlic and ginger and sauté for another 30 seconds until fragrant.
  4. I add the shredded cabbage to the skillet and toss it with the beef, cooking for 3–5 minutes until slightly softened but still crisp.
  5. I stir in soy sauce, sesame oil, brown sugar (or honey), and a splash of rice vinegar.
  6. I let it cook for another 2–3 minutes, stirring often, until everything is well coated and the cabbage is tender.
  7. I taste and adjust seasonings, then serve it hot over rice and garnish with green onions if I want an extra pop of freshness.

Servings and Timing

This recipe makes about 4 servings. It takes around 10 minutes to prep and 15 minutes to cook, so I can have dinner ready in just 25 minutes.

Variations

  • I swap ground beef for ground chicken or turkey for a different flavor.
  • A handful of shredded carrots or bell peppers adds color and crunch.
  • I sometimes toss in cooked ramen noodles instead of serving it over rice for a different texture.
  • For low-carb, I serve it on its own or over cauliflower rice.

Storage/Reheating

Leftovers keep well in the fridge for up to 4 days. I reheat them in a skillet or microwave until warmed through. The flavors get even better the next day, and it’s perfect for meal prep.

FAQs

Can I use bagged coleslaw mix instead of fresh cabbage?

Yes! I’ve used pre-shredded coleslaw mix plenty of times for convenience. It works perfectly and saves prep time.

What’s the best ground meat to use?

I usually use lean ground beef (85/15 or 90/10), but chicken or turkey makes it a bit lighter.

How do I keep the cabbage from getting soggy?

I cook it just until it starts to soften but still has some bite. High heat and quick cooking help keep the texture right.

Can I make this spicy?

Definitely. I add red pepper flakes, chili garlic sauce, or a splash of sriracha for heat.

What’s a good side dish?

It pairs great with steamed rice, fried rice, or even some simple egg drop soup or dumplings on the side.

Conclusion

Chinese ground beef and cabbage stir fry is one of those fast, flavorful dinners I keep on repeat. It’s easy to make, totally customizable, and full of that takeout-style flavor I crave—without the wait. Whether I’m looking for a quick dinner or prepping lunches for the week, this dish always delivers.

Print

clock clock iconcutlery cutlery iconflag flag iconfolder folder iconinstagram instagram iconpinterest pinterest iconfacebook facebook iconprint print iconsquares squares iconheart heart iconheart solid heart solid icon
Chinese Ground Beef and Cabbage Stir Fry

Chinese Ground Beef and Cabbage Stir Fry

5 Stars 4 Stars 3 Stars 2 Stars 1 Star No reviews
  • Author: Sue
  • Prep Time: 10 minutes
  • Cook Time: 15 minutes
  • Total Time: 25 minutes
  • Yield: 4 servings
  • Category: Main Course
  • Method: Stir Fry
  • Cuisine: Chinese-Inspired
  • Diet: Gluten Free
Print Recipe
Pin Recipe

Description

This Chinese ground beef and cabbage stir fry is a quick, one-skillet meal packed with savory flavor, tender beef, and crisp cabbage. It’s easy, budget-friendly, and ready in under 30 minutes—perfect for busy weeknights or healthy meal prep.


Ingredients

  • 1 lb ground beef
  • 4 cups green cabbage, shredded
  • 2 cloves garlic, minced
  • 1 tablespoon fresh ginger, grated (or ½ tsp ground ginger)
  • 2 tablespoons soy sauce
  • 1 tablespoon sesame oil
  • 1 tablespoon brown sugar or honey
  • 1 tablespoon rice vinegar
  • 1 tablespoon neutral oil (for cooking)
  • 2 green onions, sliced (optional, for garnish)
  • Cooked rice, for serving (optional)
  • Optional: red pepper flakes or chili garlic sauce for heat

Instructions

  1. Heat oil in a large skillet or wok over medium-high heat.
  2. Add ground beef and cook until browned, breaking it apart with a spatula.
  3. Stir in garlic and ginger, and cook for 30 seconds until fragrant.
  4. Add cabbage and sauté 3–5 minutes, until just tender but still crisp.
  5. Stir in soy sauce, sesame oil, brown sugar, and rice vinegar. Mix well.
  6. Cook for another 2–3 minutes, stirring often, until sauce coats everything evenly.
  7. Taste and adjust seasonings. Serve hot over rice and garnish with green onions if desired.

Notes

  • Use coleslaw mix to save prep time.
  • Swap in ground turkey or chicken for variety.
  • Add shredded carrots or bell peppers for more veggies.
  • For a low-carb version, serve over cauliflower rice or skip the rice entirely.

Have you made this recipe? I'd love to see it!

Click here to Follow me on Pinterest

Reese's Peanut Butter Banana Bread

April 15, 2025 by Sue Leave a Comment

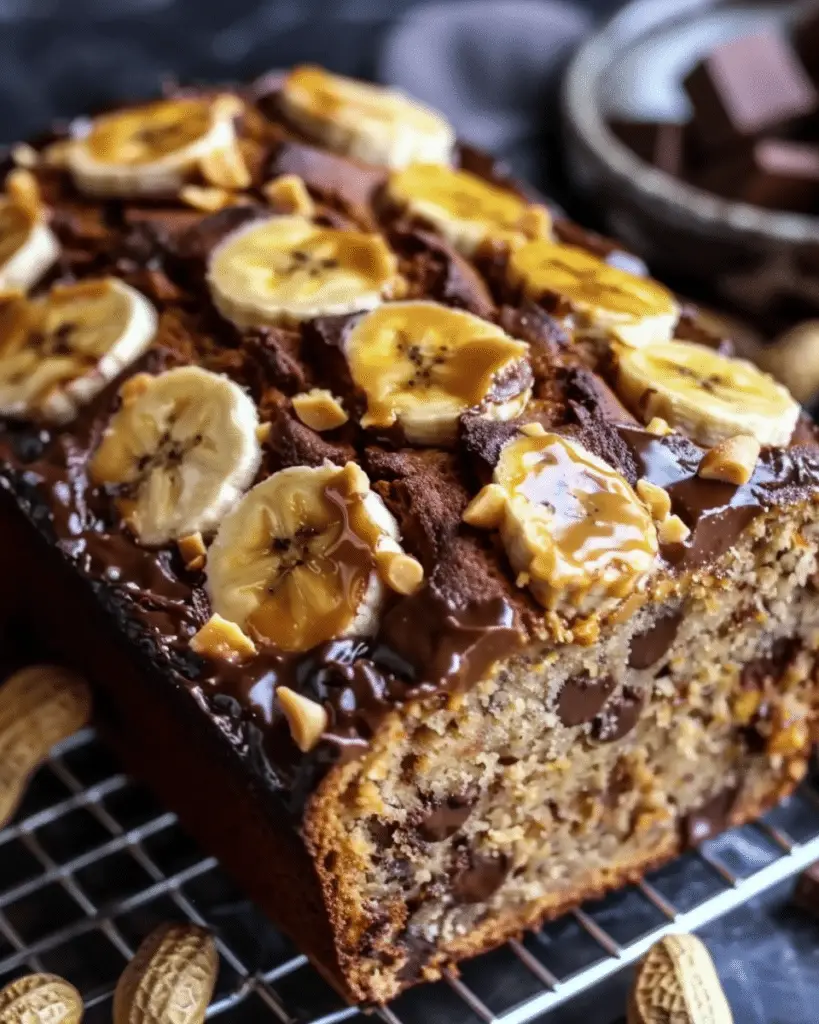
Reese's peanut butter banana bread is a rich, moist twist on classic banana bread that combines sweet ripe bananas, creamy peanut butter, and chunks of Reese’s candy for the ultimate dessert-meets-breakfast treat. Whether I’m baking it for a snack, a brunch table, or just because I’ve got extra bananas to use up, this bread always hits the sweet spot.

Reese's Peanut Butter Banana Bread

Why You’ll Love This Recipe

I love this recipe because it brings together all the flavors I crave—chocolate, peanut butter, and banana—in one soft, gooey, sliceable loaf. It’s easy to make in one bowl, perfect for using up overripe bananas, and the Reese’s candy pieces add an irresistible burst of chocolatey peanut butter in every bite. Plus, it makes the whole kitchen smell amazing while it bakes.

Ingredients

(Here's a tip: Check out the full list of ingredients and measurements in the recipe card below.)

  • Ripe bananas (mashed)
  • Creamy peanut butter
  • Granulated sugar
  • Brown sugar
  • Eggs
  • All-purpose flour
  • Baking soda
  • Salt
  • Vanilla extract
  • Reese's Peanut Butter Cups (chopped)
  • Optional: chocolate chips, chopped peanuts for topping

Directions

  1. I preheat the oven to 350°F (175°C) and grease a standard loaf pan or line it with parchment paper.
  2. In a large bowl, I mash the ripe bananas, then mix in the peanut butter, sugar, brown sugar, eggs, and vanilla extract until smooth.
  3. I stir in the flour, baking soda, and salt just until combined—being careful not to overmix.
  4. I fold in most of the chopped Reese’s, reserving a few pieces for the top.
  5. I pour the batter into the prepared pan and sprinkle the remaining Reese’s and optional chocolate chips or peanuts on top.
  6. I bake for 55–65 minutes, or until a toothpick inserted in the center comes out clean (a few melted chocolate streaks are okay).
  7. I let it cool in the pan for about 10 minutes, then transfer to a wire rack to cool completely before slicing.

Servings and Timing

This recipe makes 1 loaf (about 10 slices). It takes 15 minutes to prep and 55–65 minutes to bake. I usually give it at least 30 minutes to cool before slicing to get clean, neat pieces.

Variations

  • I sometimes swirl extra peanut butter into the top of the batter before baking.
  • For extra crunch, I fold in chopped peanuts or use crunchy peanut butter.
  • Mini Reese’s Pieces make a fun and colorful topping.
  • I’ve also made this into muffins—bake at 350°F for 20–22 minutes.

Storage/Reheating

I store leftovers wrapped tightly at room temperature for up to 3 days, or in the fridge for up to 5. To reheat, I microwave a slice for 15–20 seconds. It also freezes well—I wrap individual slices and thaw them overnight or warm them up in the toaster oven.

FAQs

Can I use natural peanut butter?

Yes, I’ve used natural peanut butter—just make sure it’s well stirred and not too oily or dry.

Can I use Reese’s Pieces instead of cups?

Definitely. They melt a little less, so I usually mix them into the batter or sprinkle them on top.

Can I make this gluten-free?

Yes! I swap the all-purpose flour with a 1:1 gluten-free baking blend and it works beautifully.

Do I need to use both brown and white sugar?

Using both adds moisture and depth, but if I’m short on one, I adjust the total amount with what I have on hand.

How do I keep the bread moist?

I use very ripe bananas, don’t overmix the batter, and store it wrapped tightly to keep it soft.

Conclusion

Reese’s peanut butter banana bread is a dreamy, decadent twist on a classic recipe. It’s easy to make, ultra-moist, and packed with those rich flavors I can never resist. Whether I’m baking for a crowd or keeping it all to myself (no shame), this is one loaf that always disappears fast.

Print

clock clock iconcutlery cutlery iconflag flag iconfolder folder iconinstagram instagram iconpinterest pinterest iconfacebook facebook iconprint print iconsquares squares iconheart heart iconheart solid heart solid icon
Reese's Peanut Butter Banana Bread

Reese's Peanut Butter Banana Bread

5 Stars 4 Stars 3 Stars 2 Stars 1 Star No reviews
  • Author: Sue
  • Prep Time: 15 minutes
  • Cook Time: 55–65 minutes
  • Total Time: 1 hour 15 minutes
  • Yield: 1 loaf (10 slices)
  • Category: Dessert, Breakfast
  • Method: Baking
  • Cuisine: American
  • Diet: Vegetarian
Print Recipe
Pin Recipe

Description

This Reese's peanut butter banana bread is the ultimate treat—rich, moist, and loaded with peanut butter, banana, and chunks of Reese's candy. It’s the perfect mashup of dessert and breakfast, all in one delicious slice.


Ingredients

  • 3 ripe bananas, mashed
  • ½ cup creamy peanut butter
  • ½ cup granulated sugar
  • ¼ cup brown sugar
  • 2 large eggs
  • 1 teaspoon vanilla extract
  • 1 ½ cups all-purpose flour
  • 1 teaspoon baking soda
  • ½ teaspoon salt
  • 1 cup chopped Reese's Peanut Butter Cups (plus extra for topping)
  • Optional: ½ cup chocolate chips or chopped peanuts for topping

Instructions

  1. Preheat oven to 350°F (175°C). Grease a standard 9x5-inch loaf pan or line with parchment.
  2. In a large bowl, mash bananas. Mix in peanut butter, granulated sugar, brown sugar, eggs, and vanilla until smooth.
  3. Stir in flour, baking soda, and salt until just combined. Do not overmix.
  4. Fold in most of the chopped Reese’s.
  5. Pour batter into the prepared loaf pan. Sprinkle with reserved Reese’s and optional chocolate chips or chopped peanuts.
  6. Bake for 55–65 minutes, or until a toothpick inserted in the center comes out clean (a little melted chocolate is okay).
  7. Cool in pan for 10 minutes, then transfer to a wire rack to cool completely before slicing.

Notes

  • For muffins: Bake at 350°F for 20–22 minutes.
  • Use very ripe bananas for the best moisture and sweetness.
  • Swirl in extra peanut butter before baking for a gooey touch.
  • To freeze: Wrap individual slices tightly and freeze for up to 2 months.

Have you made this recipe? I'd love to see it!

Click here to Follow me on Pinterest

Delicious Paula Deen’s Chicken Casserole Recipe for Quick Family Dinners

April 15, 2025 by Sue Leave a Comment

Paula Deen’s chicken casserole is the definition of Southern comfort in a single dish. It’s creamy, hearty, and loaded with tender chicken, a rich sauce, and a buttery, crispy topping. This is one of my go-to recipes when I want a quick, filling dinner that I know the whole family will love.

Delicious Paula Deen’s Chicken Casserole Recipe for Quick Family Dinners

Why You’ll Love This Recipe

I love this recipe because it’s a fuss-free, crowd-pleasing meal that comes together quickly with simple ingredients. It’s perfect for using up leftover chicken or a rotisserie bird, and it bakes into a creamy, golden casserole that feels like a warm hug on a busy night. Plus, it’s easy to prep ahead and freezer-friendly, too.

Ingredients

(Here's a tip: Check out the full list of ingredients and measurements in the recipe card below.)

  • Cooked shredded chicken (rotisserie chicken works great)
  • Cream of chicken soup
  • Sour cream
  • Onion (chopped)
  • Butter (melted)
  • Ritz crackers (crushed for topping)
  • Salt and pepper
  • Optional: shredded cheddar cheese, garlic powder, chopped celery or bell peppers

Directions

  1. I preheat the oven to 350°F (175°C) and grease a 9x13-inch baking dish.
  2. In a large bowl, I mix the shredded chicken, cream of chicken soup, sour cream, and chopped onion. I season with salt, pepper, and a pinch of garlic powder if I’m using it.
  3. I spread the mixture evenly into the prepared dish.
  4. I combine the crushed Ritz crackers with melted butter in a separate bowl, then sprinkle the buttery crumbs over the top of the chicken mixture.
  5. I bake for about 30–35 minutes, until the casserole is bubbly and the topping is golden brown.
  6. I let it rest for a few minutes before serving.

Servings and Timing

This recipe makes about 6 servings. It takes just 10–15 minutes to prep and bakes in 30–35 minutes, making it a perfect weeknight meal I can throw together fast.

Variations

  • I stir in steamed broccoli or green beans for a veggie-packed version.
  • A handful of shredded cheddar or mozzarella adds extra richness and a cheesy finish.
  • I sometimes swap Ritz crackers with panko or crushed cornflakes for a different crunch.
  • For a little heat, I mix in diced green chiles or a few dashes of hot sauce.

Storage/Reheating

Leftovers keep well in the fridge for up to 4 days. I reheat individual portions in the microwave or warm the whole dish in a 300°F oven until heated through. It also freezes beautifully—I just cool it completely, wrap tightly, and freeze for up to 2 months. Thaw overnight in the fridge before reheating.

FAQs

Can I use canned chicken?

Yes, I’ve used canned chicken in a pinch. Just be sure to drain it well and fluff it up with a fork before mixing.

What if I don’t have Ritz crackers?

Panko breadcrumbs, crushed saltines, or even seasoned stuffing mix work well as a topping substitute.

Can I make this casserole ahead of time?

Definitely. I assemble it up to a day ahead, store it covered in the fridge, and bake it fresh when ready.

Can I add vegetables?

Yes! Chopped broccoli, carrots, green beans, or peas all work well. I like to lightly steam or sauté them first so they’re tender in the casserole.

Is this casserole freezer-friendly?

It is. I assemble and freeze before baking or freeze leftovers after cooking. Just make sure it’s tightly sealed to avoid freezer burn.

Conclusion

Paula Deen’s chicken casserole is one of those cozy, classic dishes that always hits the spot. It’s easy to make, rich and creamy, and perfect for a quick family dinner or make-ahead meal. Whether I’m using up leftover chicken or prepping for a busy weeknight, this recipe never lets me down.

Print

clock clock iconcutlery cutlery iconflag flag iconfolder folder iconinstagram instagram iconpinterest pinterest iconfacebook facebook iconprint print iconsquares squares iconheart heart iconheart solid heart solid icon
Delicious Paula Deen’s Chicken Casserole Recipe for Quick Family Dinners

Delicious Paula Deen’s Chicken Casserole Recipe for Quick Family Dinners

5 Stars 4 Stars 3 Stars 2 Stars 1 Star No reviews
  • Author: Sue
  • Prep Time: 10 minutes
  • Cook Time: 35 minutes
  • Total Time: 45 minutes
  • Yield: 6 servings
  • Category: Main Dish
  • Method: Baked
  • Cuisine: American, Southern
Print Recipe
Pin Recipe

Description

This creamy, comforting Paula Deen’s chicken casserole is the ultimate Southern-inspired family dinner. With shredded chicken, rich sauce, and a buttery Ritz cracker topping, this quick and easy recipe delivers cozy flavor with minimal effort—perfect for busy weeknights or meal prep.


Ingredients

  • 3 cups cooked shredded chicken (rotisserie or leftover)
  • 1 can (10.5 oz) cream of chicken soup
  • 1 cup sour cream
  • 1 small onion, finely chopped
  • ½ tsp garlic powder (optional)
  • Salt and black pepper, to taste
  • 1 sleeve Ritz crackers, crushed
  • ¼ cup unsalted butter, melted
  • Optional: 1 cup shredded cheddar cheese
  • Optional: ½ cup chopped steamed broccoli or green beans

Instructions

  1. Preheat oven to 350°F (175°C). Lightly grease a 9x13-inch baking dish.
  2. In a large bowl, mix shredded chicken, cream of chicken soup, sour cream, onion, garlic powder (if using), salt, and pepper. Stir in optional vegetables or cheese if desired.
  3. Spread the mixture evenly into the prepared baking dish.
  4. In a separate bowl, combine crushed Ritz crackers with melted butter. Sprinkle evenly over the casserole.
  5. Bake uncovered for 30–35 minutes, until hot and bubbly with a golden topping.
  6. Let rest 5–10 minutes before serving.

Notes

  • Swap Ritz crackers with panko or cornflakes for a different texture.
  • Add hot sauce or green chiles for a spicy twist.
  • Make ahead and refrigerate unbaked for up to 24 hours.

Have you made this recipe? I'd love to see it!

Click here to Follow me on Pinterest

Biscuits & Gravy Casserole

April 15, 2025 by Sue Leave a Comment

Biscuits & gravy casserole is the ultimate Southern comfort breakfast—warm, hearty, and packed with all the cozy flavors I love. Fluffy biscuit pieces baked in a rich sausage gravy and topped with golden, cheesy goodness make this one of my go-to dishes for weekend brunches or holiday mornings. It’s everything I want in a stick-to-your-ribs breakfast, all baked into one pan.

Biscuits & Gravy Casserole


Why You’ll Love This Recipe

I love this recipe because it takes a classic diner favorite and turns it into an easy, make-ahead-friendly casserole. It feeds a crowd, reheats beautifully, and is the perfect mix of creamy, savory, and fluffy. With just a few ingredients, it delivers big comfort—and it always disappears fast at the breakfast table.

Ingredients

(Here's a tip: Check out the full list of ingredients and measurements in the recipe card below.)

  • Refrigerated biscuit dough (or homemade biscuit dough)
  • Breakfast sausage (like turkey)
  • All-purpose flour
  • Milk
  • Salt and black pepper
  • Garlic powder (optional)
  • Shredded cheddar cheese (optional, for topping)
  • Optional: scrambled eggs for layering, hot sauce for serving

Directions

  1. I preheat the oven to 375°F (190°C) and lightly grease a 9x13-inch baking dish.
  2. I cut each biscuit into quarters and scatter them across the bottom of the dish.
  3. In a skillet, I cook the sausage until browned and crumbled. I sprinkle in the flour and stir to coat the sausage.
  4. I slowly whisk in the milk, stirring constantly until the mixture thickens into a creamy gravy. I season it with salt, pepper, and garlic powder to taste.
  5. I pour the sausage gravy evenly over the biscuit pieces.
  6. If I’m using cheese, I sprinkle it on top before baking.
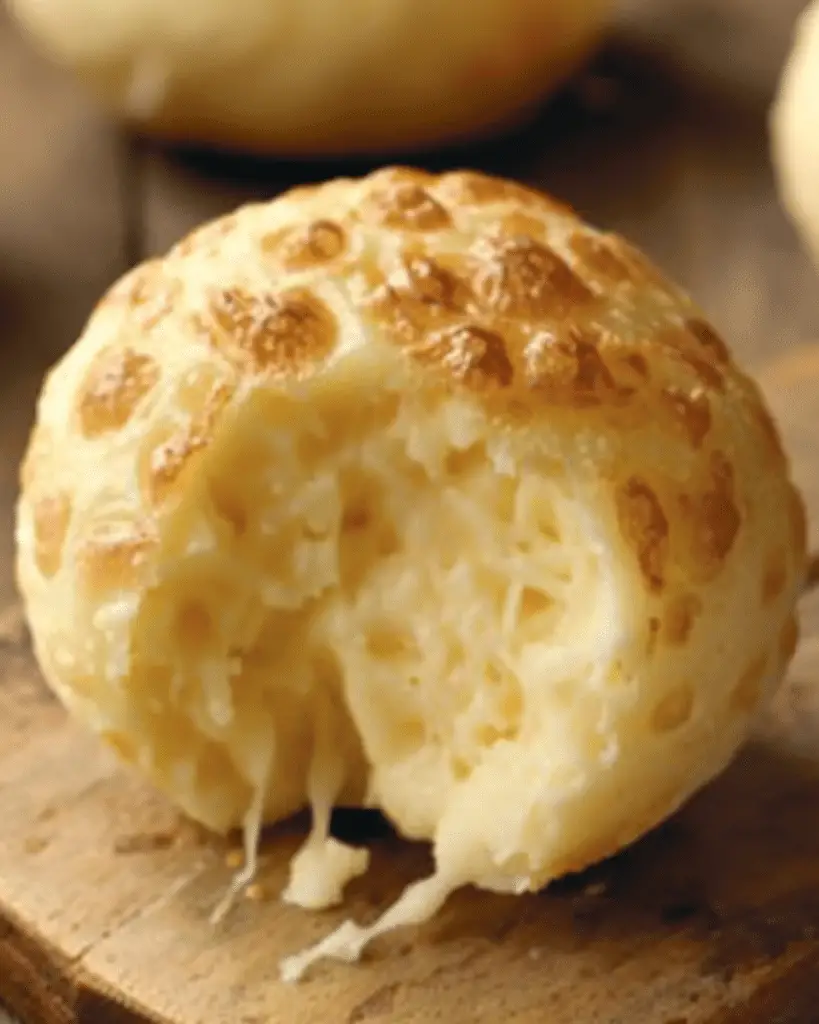
  7. I bake for 30–35 minutes, or until the biscuits are puffed and golden and the casserole is set.
  8. I let it cool for a few minutes before slicing and serving warm.

Servings and Timing

This recipe serves 8–10 people. It takes about 15 minutes to prep and 30–35 minutes to bake, so it’s ready in under an hour.

Variations

  • I sometimes layer in scrambled eggs between the biscuits and gravy for a full breakfast in one dish.
  • Using maple sausage gives it a sweet-savory twist.
  • A layer of sautéed onions and bell peppers adds extra flavor and texture.
  • For a spicy kick, I stir in a pinch of cayenne or top with hot sauce before serving.

Storage/Reheating

Leftovers keep well in the fridge for up to 4 days. I reheat individual servings in the microwave, or the whole casserole in a 300°F oven until warmed through. It also freezes well—just thaw overnight and reheat when ready.

FAQs

Can I make this casserole the night before?

Yes! I assemble everything, cover it, and refrigerate overnight. In the morning, I let it sit at room temp while the oven preheats, then bake as directed.

Can I use homemade biscuits?

Absolutely. I’ve used homemade dough and it turns out great—just make sure the biscuit pieces aren’t too thick so they bake through.

What kind of sausage works best?

Turkey sausage or spicy sausage are great too depending on my mood.

Can I make this without cheese?

Yes, the cheese is optional. The dish is rich and satisfying on its own thanks to the creamy sausage gravy.

How do I keep the biscuits from getting soggy?

I bake uncovered so the biscuits get golden on top. Also, I make sure the gravy isn’t too thin—it should be thick enough to coat a spoon.

Conclusion

Biscuits & gravy casserole is one of those comforting, satisfying recipes I come back to again and again. It’s warm, filling, and full of classic Southern flavor, all baked into one easy dish. Whether I’m hosting brunch or just treating myself to a cozy weekend breakfast, this casserole always hits the spot.

Print

clock clock iconcutlery cutlery iconflag flag iconfolder folder iconinstagram instagram iconpinterest pinterest iconfacebook facebook iconprint print iconsquares squares iconheart heart iconheart solid heart solid icon
Biscuits & Gravy Casserole

Biscuits & Gravy Casserole

5 Stars 4 Stars 3 Stars 2 Stars 1 Star No reviews
  • Author: Sue
  • Prep Time: 15 minutes
  • Cook Time: 35 minutes
  • Total Time: 50 minutes
  • Yield: 8–10 servings
  • Category: Breakfast, Brunch
  • Method: Baked
  • Cuisine: Southern
Print Recipe
Pin Recipe

Description

This biscuits and gravy casserole is the ultimate comfort breakfast—fluffy biscuits baked in creamy sausage gravy and topped with melty cheese. Perfect for brunch, holidays, or feeding a crowd, it’s everything you love about classic Southern biscuits and gravy in easy casserole form.


Ingredients

  • 1 can refrigerated biscuit dough (or homemade biscuit dough)
  • 1 lb breakfast sausage (like turkey)
  • ¼ cup all-purpose flour
  • 2½ cups milk
  • Salt and black pepper (to taste)
  • ½ teaspoon garlic powder (optional)
  • 1 cup shredded cheddar cheese (optional)
  • Optional: scrambled eggs, hot sauce, sautéed onions or peppers

Instructions

  1. Preheat oven to 375°F (190°C) and lightly grease a 9x13-inch baking dish.
  2. Cut biscuit dough into quarters and scatter evenly across the bottom of the dish.
  3. In a skillet, brown the sausage. Once fully cooked, sprinkle flour over sausage and stir to coat.
  4. Gradually whisk in milk and cook until thickened into a creamy gravy. Season with salt, pepper, and garlic powder.
  5. Pour gravy over biscuit pieces. Top with shredded cheese, if using.
  6. Bake uncovered for 30–35 minutes, until golden and set.
  7. Let cool slightly before serving.

Notes

  • Scrambled eggs can be layered between the biscuits and gravy for a fuller breakfast.
  • Make-ahead friendly: assemble and refrigerate overnight, then bake in the morning.
  • Be sure gravy is thick enough to prevent soggy biscuits.

Have you made this recipe? I'd love to see it!

Click here to Follow me on Pinterest

Tater Tot Breakfast Bowl with Sausage Gravy

April 15, 2025 by Sue Leave a Comment

Tater tot breakfast bowl with sausage gravy is a hearty, down-home breakfast that checks every box—crispy tots, rich sausage gravy, gooey cheese, and fluffy eggs all layered into one irresistible dish. Whether I’m making it for a weekend brunch or a breakfast-for-dinner night, it’s guaranteed to hit the spot.

Tater Tot Breakfast Bowl with Sausage Gravy

Why You’ll Love This Recipe

I love this recipe because it combines all my favorite breakfast elements in one bowl. The tater tots add a crispy base, the sausage gravy brings creamy, savory goodness, and the eggs and cheese pull it all together. It’s easy to customize, totally comforting, and seriously satisfying—perfect for feeding a hungry family or indulging in a lazy morning treat.

Ingredients

(Here's a tip: Check out the full list of ingredients and measurements in the recipe card below.)

  • Frozen tater tots
  • Breakfast sausage (like  turkey)
  • All-purpose flour
  • Whole milk
  • Salt and pepper
  • Eggs
  • Shredded cheddar cheese
  • Butter or oil (for cooking eggs)
  • Optional toppings: green onions, hot sauce, crumbled bacon, or fresh herbs

Directions

  1. I bake the tater tots according to the package directions until they’re golden and crispy.
  2. While the tots bake, I brown the sausage in a skillet over medium heat, breaking it into crumbles.
  3. Once the sausage is cooked, I sprinkle the flour over it, stir to coat, and cook for 1–2 minutes.
  4. I slowly whisk in the milk and let it simmer, stirring often, until thickened into a creamy sausage gravy. I season with salt and pepper to taste.
  5. In a separate pan, I scramble the eggs with a little butter or oil until fluffy.
  6. To assemble the bowls, I layer crispy tots on the bottom, then add scrambled eggs, sausage gravy, and a sprinkle of shredded cheese.
  7. I finish with green onions or hot sauce if I want to add a kick.

Servings and Timing

This recipe makes about 4 breakfast bowls. It takes roughly 10 minutes to prep, 25 minutes to cook, and everything can be assembled in under 40 minutes.

Variations

  • I sometimes use hash browns or roasted potatoes instead of tater tots.
  • A fried egg with a runny yolk makes a richer version.
  • I swap the sausage gravy for a vegetarian mushroom gravy to keep it meat-free.
  • Adding sautéed peppers, onions, or spinach gives it a fresh veggie twist.

Storage/Reheating

I store leftovers in separate containers if possible—tots, eggs, and gravy—so they reheat better. The tots stay crispier when baked or air-fried to reheat, and the gravy can be microwaved or gently warmed on the stove. Leftovers keep well for up to 3 days in the fridge.

FAQs

Can I make sausage gravy ahead of time?

Yes, I make the gravy a day or two ahead and reheat it gently when ready to serve. It thickens slightly, so I stir in a splash of milk while reheating.

What kind of cheese works best?

Cheddar is classic, but I’ve used pepper jack, mozzarella, or even a smoky gouda with great results.

Can I use plant-based sausage?

Absolutely. Plant-based sausage crumbles work perfectly and still make a flavorful gravy.

How do I keep the tater tots crispy?

I bake them until golden and only assemble the bowls just before serving. I also avoid adding gravy too early so they don’t soak up too much moisture.

Is this freezer-friendly?

The individual components freeze well, especially the gravy. I reheat them separately and assemble fresh when ready to serve.

Conclusion

Tater tot breakfast bowl with sausage gravy is the ultimate cozy, crave-worthy meal. With crispy, cheesy, creamy layers all in one dish, it’s a guaranteed crowd-pleaser that’s simple to throw together. Whether I’m starting my day or ending it with breakfast-for-dinner, this bowl brings all the flavor and comfort I’m looking for.

Print

clock clock iconcutlery cutlery iconflag flag iconfolder folder iconinstagram instagram iconpinterest pinterest iconfacebook facebook iconprint print iconsquares squares iconheart heart iconheart solid heart solid icon
Tater Tot Breakfast Bowl with Sausage Gravy

Tater Tot Breakfast Bowl with Sausage Gravy

5 Stars 4 Stars 3 Stars 2 Stars 1 Star No reviews
  • Author: Sue
  • Prep Time: 10 minutes
  • Cook Time: 25 minutes
  • Total Time: 35–40 minutes
  • Yield: 4 servings
  • Category: Breakfast, Brunch
  • Method: Bake, Skillet
  • Cuisine: American
Print Recipe
Pin Recipe

Description

This tater tot breakfast bowl with sausage gravy is the ultimate comfort food mashup—crispy tots, creamy sausage gravy, fluffy scrambled eggs, and melty cheese layered into one cozy, satisfying dish. Perfect for weekend brunch or breakfast-for-dinner nights, this hearty bowl is easy to make and endlessly customizable.


Ingredients

  • 1 bag frozen tater tots
  • 1 lb breakfast sausage (like turkey)
  • 2 tablespoons all-purpose flour
  • 2 cups whole milk
  • Salt and pepper, to taste
  • 6 eggs
  • 1 tablespoon butter or oil (for cooking eggs)
  • 1 cup shredded cheddar cheese
  • Optional toppings: sliced green onions, hot sauce, or chopped herbs

Instructions

  1. Bake tater tots according to package instructions until crispy and golden.
  2. In a skillet, cook sausage over medium heat, breaking into crumbles, until fully browned.
  3. Sprinkle flour over sausage, stir to coat, and cook for 1–2 minutes.
  4. Gradually whisk in milk and simmer, stirring often, until thickened. Season with salt and pepper.
  5. In a separate pan, scramble eggs with butter or oil until fluffy.
  6. Assemble each bowl with a base of crispy tots, topped with scrambled eggs, sausage gravy, and shredded cheese.
  7. Garnish with optional toppings and serve hot.

Notes

  • Don’t add gravy until just before serving to keep tots crispy.
  • Gravy can be made ahead and stored for up to 3 days—just reheat with a splash of milk.
  • Great for feeding a crowd or prepping for easy weekday breakfasts.

Have you made this recipe? I'd love to see it!

Click here to Follow me on Pinterest

Cabbage Fat-Burning Soup

April 15, 2025 by Sue Leave a Comment

Cabbage fat-burning soup is a hearty, vegetable-packed dish that’s often used for detoxing or jump-starting a healthy eating routine. Made with cabbage, tomatoes, and a mix of other veggies in a light broth, it’s filling, flavorful, and incredibly low in calories. I love making a big batch when I want to eat clean and feel full without overthinking every meal.

Cabbage Fat-Burning Soup

Why You’ll Love This Recipe

I love this recipe because it’s super simple, budget-friendly, and surprisingly satisfying. It’s loaded with fiber, vitamins, and minerals, and I can eat it anytime I want to feel nourished and lighter. Plus, it’s naturally gluten-free, vegan, and easy to customize depending on what I have on hand.

Ingredients

(Here's a tip: Check out the full list of ingredients and measurements in the recipe card below.)

  • Green cabbage (chopped)
  • Carrots (sliced)
  • Celery (sliced)
  • Onion (chopped)
  • Bell peppers (chopped)
  • Garlic (minced)
  • Diced tomatoes (canned or fresh)
  • Vegetable broth or water
  • Olive oil (for sautéing)
  • Salt and pepper
  • Italian seasoning or dried herbs (optional)
  • Optional: green beans, zucchini, or spinach

Directions

  1. I heat a little olive oil in a large pot and sauté the onions, carrots, celery, bell peppers, and garlic until softened.
  2. I stir in the chopped cabbage and cook for a few minutes until it starts to wilt.
  3. I add the diced tomatoes and pour in enough broth or water to cover all the veggies.
  4. I season with salt, pepper, and any herbs I like, then bring the soup to a boil.
  5. I reduce the heat and let it simmer for 30–40 minutes, or until all the vegetables are tender.
  6. I taste and adjust seasoning if needed, then serve hot.

Servings and Timing

This recipe makes about 8 servings. It takes around 15 minutes to prep and about 35–40 minutes to cook, so I usually have a batch ready in under an hour.

Variations

  • I sometimes add a dash of hot sauce or red pepper flakes for a spicy kick.
  • Adding zucchini or green beans gives the soup more texture and variety.
  • A handful of spinach stirred in at the end adds a fresh green boost.
  • I swap water for bone broth or chicken broth when I want extra richness (if I’m not keeping it vegan).

Storage/Reheating

This soup stores beautifully. I keep it in an airtight container in the fridge for up to 5 days or freeze it for up to 3 months. I reheat on the stove or in the microwave until steaming hot.

FAQs

Is cabbage soup really fat-burning?

While it’s not magic, it’s very low in calories and high in fiber, which can support weight loss when part of a balanced diet.

Can I eat this soup every day?

Yes, I’ve eaten it for lunch or dinner several days in a row. It’s light enough for daily eating but filling enough to keep me satisfied.

Can I add protein to this soup?

Definitely. I sometimes add shredded chicken, lean ground turkey, or white beans to make it more filling.

Can I blend it for a smoother texture?

Yes, if I prefer a blended soup, I let it cool slightly and use an immersion blender until smooth.

Can I use red cabbage?

You can, but it will change the color and taste slightly. Green cabbage is milder and blends better with other flavors.

Conclusion

Cabbage fat-burning soup is a go-to recipe when I want to eat lighter without sacrificing flavor. It’s simple, filling, and made entirely from wholesome ingredients I usually already have. Whether I’m cleansing after the holidays or just want something healthy and cozy, this soup always does the trick.

Print

clock clock iconcutlery cutlery iconflag flag iconfolder folder iconinstagram instagram iconpinterest pinterest iconfacebook facebook iconprint print iconsquares squares iconheart heart iconheart solid heart solid icon
Cabbage Fat-Burning Soup

Cabbage Fat-Burning Soup

5 Stars 4 Stars 3 Stars 2 Stars 1 Star No reviews
  • Author: Sue
  • Prep Time: 15 minutes
  • Cook Time: 40 minutes
  • Total Time: 55 minutes
  • Yield: 8 servings
  • Category: Soup
  • Method: Stovetop
  • Cuisine: American
  • Diet: Vegan
Print Recipe
Pin Recipe

Description

This hearty cabbage fat-burning soup is a nourishing, veggie-packed recipe perfect for healthy eating, weight loss goals, or a simple detox reset. Made with cabbage, tomatoes, and flavorful herbs, it’s low-calorie, fiber-rich, and perfect for meal prep.


Ingredients

  • 1 small head green cabbage, chopped
  • 2 carrots, sliced
  • 2 stalks celery, sliced
  • 1 onion, chopped
  • 1–2 bell peppers, chopped
  • 2–3 cloves garlic, minced
  • 1 (14.5 oz) can diced tomatoes
  • 6–8 cups vegetable broth or water
  • 1 tbsp olive oil
  • 1 tsp salt (adjust to taste)
  • ½ tsp black pepper
  • 1 tsp Italian seasoning or dried herbs
  • Optional: green beans, zucchini, spinach, red pepper flakes, hot sauce

Instructions

  1. Heat olive oil in a large pot over medium heat. Add onion, carrots, celery, bell pepper, and garlic. Sauté for 5–7 minutes, until slightly tender.
  2. Stir in chopped cabbage and cook for another 3–4 minutes.
  3. Add diced tomatoes and enough broth or water to cover the vegetables.
  4. Season with salt, pepper, and Italian seasoning.
  5. Bring to a boil, then reduce heat and simmer for 30–40 minutes, or until all vegetables are soft and flavors are well combined.
  6. Taste and adjust seasoning. Serve hot.

Notes

  • Add cooked lean protein like shredded chicken, turkey, or beans for a more filling version.
  • Stir in fresh spinach or kale at the end for a green boost.
  • Spice it up with red pepper flakes or a dash of hot sauce.
  • This soup freezes well—store in single portions for easy meals later.

Have you made this recipe? I'd love to see it!

Click here to Follow me on Pinterest

Creamy Garlic Butter Salmon Pasta

April 15, 2025 by Sue Leave a Comment

Creamy garlic butter salmon pasta is a rich, elegant, and comforting dish that’s perfect for both a quick weeknight dinner or a cozy weekend meal. Flaky salmon is cooked in a garlicky butter sauce, then tossed with pasta and a creamy parmesan-based sauce that clings to every bite. It’s restaurant-quality but easy enough for me to throw together in under an hour.

Creamy Garlic Butter Salmon Pasta

Why You’ll Love This Recipe

I love this recipe because it balances richness and freshness so perfectly. The tender, seared salmon pairs beautifully with the buttery garlic sauce and creamy pasta. I can make it with fresh or leftover salmon, and it’s endlessly versatile with herbs, lemon, or veggies mixed in. It feels indulgent but is surprisingly simple to pull off.

Ingredients

(Here's a tip: Check out the full list of ingredients and measurements in the recipe card below.)

  • Salmon fillets (skinless or skin-on, deboned)
  • Pasta (fettuccine, linguine, or penne)
  • Butter (unsalted)
  • Garlic (minced)
  • Heavy cream
  • Grated parmesan cheese
  • Fresh parsley or basil (chopped)
  • Lemon juice
  • Olive oil
  • Salt and black pepper
  • Optional: red pepper flakes, spinach, or cherry tomatoes

Directions

  1. I bring a pot of salted water to a boil and cook the pasta until al dente. I reserve ½ cup of pasta water and drain the rest.
  2. I season the salmon with salt and pepper, and sear it in a mix of olive oil and butter over medium heat for 3–4 minutes per side, until golden and cooked through. I set it aside and flake it into chunks once cooled.
  3. In the same pan, I add more butter and sauté the garlic until fragrant (about 1 minute).
  4. I pour in the heavy cream and simmer gently for 3–5 minutes, then stir in the parmesan until melted and the sauce is smooth.
  5. I add the cooked pasta to the sauce and toss, using a bit of reserved pasta water to loosen if needed.
  6. I gently fold in the flaked salmon and a squeeze of lemon juice, then top with chopped herbs and extra cheese.
  7. I serve hot, with a pinch of red pepper flakes if I want a little heat.

Servings and Timing

This recipe makes 4 servings. It takes about 15 minutes to prep and 25 minutes to cook—ready in under 45 minutes.

Variations

  • I’ve added spinach or kale to the sauce for extra greens.
  • Swapping salmon for shrimp or chicken works great too.
  • I sometimes use whole wheat or gluten-free pasta, and it turns out great.

Storage/Reheating

Leftovers keep in the fridge for up to 3 days. I reheat gently on the stove or in the microwave with a splash of cream or milk to loosen the sauce. I avoid freezing due to the creamy texture.

FAQs

Can I use canned salmon?

Yes, I’ve used canned salmon in a pinch. I just drain it well and mix it into the sauce at the end.

What kind of pasta works best?

I prefer fettuccine or linguine for a creamy sauce like this, but penne or shells work well for catching all that flavor too.

Can I make this dairy-free?

Yes, I substitute the butter with olive oil and the cream with coconut cream or unsweetened oat cream. Nutritional yeast can replace the parmesan.

How do I keep the sauce from getting too thick?

I reserve a bit of pasta water to adjust the consistency right before serving. It adds silkiness without thinning the flavor.

Can I make this ahead?

I usually cook the salmon and pasta ahead, then make the sauce fresh when ready to serve—it only takes a few minutes and keeps the dish tasting vibrant.

Conclusion

Creamy garlic butter salmon pasta is one of those dishes that always feels like a treat. The tender salmon, velvety sauce, and comforting pasta make it a go-to for when I want something indulgent yet easy. Whether I’m cooking for guests or just myself, this meal never disappoints.

Print

clock clock iconcutlery cutlery iconflag flag iconfolder folder iconinstagram instagram iconpinterest pinterest iconfacebook facebook iconprint print iconsquares squares iconheart heart iconheart solid heart solid icon
Creamy Garlic Butter Salmon Pasta

Creamy Garlic Butter Salmon Pasta

5 Stars 4 Stars 3 Stars 2 Stars 1 Star No reviews
  • Author: Sue
  • Prep Time: 15 minutes
  • Cook Time: 25 minutes
  • Total Time: 40 minutes
  • Yield: 4 servings
  • Category: Main Course
  • Method: Stovetop
  • Cuisine: Italian-Inspired
  • Diet: Gluten Free
Print Recipe
Pin Recipe

Description

Creamy garlic butter salmon pasta is a comforting, restaurant-quality dish made with flaky salmon, garlic butter, and a rich parmesan cream sauce. Quick to make and packed with flavor, this pasta is perfect for both busy weeknights and cozy dinners.


Ingredients

  • For the Salmon:
  • 2 salmon fillets (skinless or skin-on, deboned)
  • Salt and black pepper (to taste)
  • 1 tablespoon olive oil
  • 1 tablespoon unsalted butter
  • For the Pasta & Sauce:
  • 8 oz fettuccine, linguine, or penne
  • 2 tablespoons unsalted butter
  • 3 cloves garlic, minced
  • 1 cup heavy cream
  • ¾ cup grated parmesan cheese
  • 1 tablespoon lemon juice
  • 2 tablespoons chopped fresh parsley or basil
  • Optional: red pepper flakes, baby spinach, or cherry tomatoes
  • Salt and black pepper to taste

Instructions

  1. Bring a large pot of salted water to a boil. Cook pasta until al dente. Reserve ½ cup of pasta water and drain the rest.
  2. Season salmon with salt and pepper. In a large skillet, heat olive oil and butter over medium heat. Sear salmon 3–4 minutes per side, until cooked through. Remove and let rest, then flake into chunks.
  3. In the same skillet, add 2 tablespoons of butter and sauté garlic for 1 minute until fragrant.
  4. Pour in heavy cream and simmer for 3–5 minutes. Stir in parmesan cheese until melted and smooth.
  5. Toss in the cooked pasta. Use reserved pasta water to loosen the sauce, if needed.
  6. Gently fold in the flaked salmon and lemon juice.
  7. Top with fresh herbs, more parmesan, and red pepper flakes if desired. Serve hot.

Notes

  • Add spinach or kale to the sauce for extra greens.

  • Swap salmon for shrimp or chicken if desired.

  • Use gluten-free pasta or whole wheat pasta to suit your needs.

Have you made this recipe? I'd love to see it!

Click here to Follow me on Pinterest

Baked Potato Topped with Flaked Cooked Salmon

April 15, 2025 by Sue Leave a Comment

Baked potato topped with flaked cooked salmon is a hearty, elegant meal that feels both cozy and gourmet. I love how simple it is to put together, yet it always delivers on flavor and presentation. The crispy skin and fluffy interior of the baked potato pair beautifully with the tender, savory salmon. Add a few fresh toppings and it turns into a complete meal with very little effort.

Baked Potato Topped with Flaked Cooked Salmon

Why You’ll Love This Recipe

I love this dish because it balances comfort and freshness. The baked potato is warm and filling, the salmon adds rich protein, and toppings like sour cream, dill, and capers bring brightness and texture. It’s also easy to customize with whatever I have on hand, and it’s great for using up leftover salmon. Whether I’m making a quick lunch or an easy weeknight dinner, this recipe always hits the spot.

ingredients

(Here's a tip: Check out the full list of ingredients and measurements in the recipe card below.)

  • Large russet potatoes
  • Olive oil
  • Salt and pepper
  • Cooked salmon, flaked (grilled, roasted, or poached)
  • Sour cream or crème fraîche
  • Capers
  • Fresh dill, chopped
  • Lemon wedges (optional)

directions

  1. I start by preheating the oven to 400°F (200°C).
  2. I scrub the potatoes clean, prick them a few times with a fork, rub them with olive oil, and sprinkle with salt.
  3. Then I place them directly on the oven rack or on a baking sheet and bake for about 45-60 minutes, until the skins are crisp and the insides are soft when pierced with a knife.
  4. While the potatoes are baking, I prepare the salmon by gently flaking it into chunks with a fork.
  5. Once the potatoes are ready, I slice them open and fluff the insides with a fork.
  6. I top them with a generous amount of flaked salmon, a spoonful of sour cream or crème fraîche, a sprinkle of capers, fresh dill, and some cracked black pepper.
  7. A drizzle of olive oil or a squeeze of lemon juice over the top adds a perfect finishing touch.

Servings and timing

This recipe serves 2 to 4 people depending on the size of the potatoes and how much salmon is used.
Prep time: 10 minutes
Cook time: 50 minutes
Total time: 1 hour

Variations

I sometimes use sweet potatoes instead of russet for a twist. For extra richness, I mix a little garlic butter into the potato before adding the toppings. If I want to add greens, a handful of arugula or spinach tossed on top works great. Smoked salmon is also a delicious variation, especially when paired with cream cheese or a herbed yogurt sauce.

storage/reheating

If I have leftovers, I store the baked potatoes and salmon separately in airtight containers in the fridge for up to 2 days. To reheat, I warm the potato in the oven or microwave until hot, then add the salmon and toppings fresh. I try not to microwave the salmon to avoid drying it out.

FAQs

Can I use canned salmon?

Yes, I can. I just drain it well and flake it before adding it to the baked potato. It’s a quick and budget-friendly option.

What kind of salmon works best?

I use whatever I have—roasted, grilled, poached, or leftover salmon from a previous meal. Just make sure it's well-seasoned and flaked.

Can I make this dairy-free?

Absolutely. I skip the sour cream or use a dairy-free alternative like coconut yogurt or a cashew-based spread.

How do I make the potato skin extra crispy?

I rub the potatoes with olive oil and bake them directly on the oven rack. This gives me that perfect crispy skin every time.

Can I prep this in advance?

Yes, I often bake the potatoes ahead of time and reheat them when ready to serve. I keep the toppings fresh and assemble everything just before eating.

Conclusion

This baked potato topped with flaked cooked salmon is everything I want in a meal—easy, satisfying, and full of flavor. It’s ideal for a relaxed weeknight dinner or a weekend lunch when I want something comforting but not too heavy. Once I try it, it’s hard not to come back to it again and again.

Print

clock clock iconcutlery cutlery iconflag flag iconfolder folder iconinstagram instagram iconpinterest pinterest iconfacebook facebook iconprint print iconsquares squares iconheart heart iconheart solid heart solid icon
Baked Potato Topped with Flaked Cooked Salmon

Baked Potato Topped with Flaked Cooked Salmon

5 Stars 4 Stars 3 Stars 2 Stars 1 Star No reviews
  • Author: Sue
  • Prep Time: 10 minutes
  • Cook Time: 50 minutes
  • Total Time: 1 hour
  • Yield: 2–4 servings (depending on portion size)
  • Category: Main Course
  • Method: Baked
  • Cuisine: American / European
  • Diet: Gluten Free
Print Recipe
Pin Recipe

Description

Baked potato topped with flaked cooked salmon is a cozy yet elegant meal that's perfect for lunch or dinner. This easy recipe combines crispy-skinned baked potatoes with tender, savory salmon and bright, fresh toppings like sour cream, dill, and capers. It’s a flavorful, protein-packed dish that’s also a great way to use up leftover or canned salmon.


Ingredients

  • Large russet potatoes
  • Olive oil
  • Salt and pepper
  • Cooked salmon, flaked (grilled, roasted, poached, or canned)
  • Sour cream or crème fraîche
  • Capers
  • Fresh dill, chopped
  • Lemon wedges (optional)

Instructions

  1. Preheat the oven to 400°F (200°C).
  2. Scrub potatoes clean, prick with a fork, rub with olive oil, and sprinkle with salt.
  3. Bake directly on the oven rack or a baking sheet for 45–60 minutes, until crisp outside and fluffy inside.
  4. While baking, flake the cooked salmon into bite-sized chunks.
  5. Slice open the baked potatoes and fluff the interior with a fork.
  6. Top with flaked salmon, a spoonful of sour cream or crème fraîche, capers, dill, and cracked black pepper.
  7. Finish with a drizzle of olive oil or a squeeze of lemon juice, if desired.

Notes

  • Sweet potatoes can be used for a sweeter variation.
  • Add garlic butter to the potato for richness.
  • Toss on arugula or spinach for a green boost.
  • Smoked salmon pairs beautifully with cream cheese or herbed yogurt sauce.
  • Use canned salmon for convenience—just drain well before flaking.

Have you made this recipe? I'd love to see it!

Click here to Follow me on Pinterest

Pistachio Cake

April 15, 2025 by Sue Leave a Comment

Pistachio Cake is one of my favorite desserts when I want something a little different but still incredibly satisfying. It’s got a nutty, buttery flavor from the pistachios and a soft, moist texture that makes every bite feel special. Whether I’m making it for a celebration or just because I’m craving something sweet, this cake never fails to impress.

Pistachio Cake

Why You’ll Love This Recipe

I love how this cake blends a delicate nuttiness with a rich, fluffy crumb. The pistachios give it a beautiful flavor and color, and it pairs perfectly with a light cream cheese frosting. It’s also a great make-ahead option since the flavor deepens after a day or two. Whether I’m serving it plain or frosted, it always feels a little luxurious.

Ingredients

(Here's a tip: Check out the full list of ingredients and measurements in the recipe card below.)

For the cake:

  • All-purpose flour
  • Baking powder
  • Baking soda
  • Salt
  • Shelled pistachios, finely ground
  • Unsalted butter, softened
  • Granulated sugar
  • Eggs
  • Vanilla extract
  • Buttermilk

For the frosting:

  • Unsalted butter, softened
  • Cream cheese
  • Powdered sugar
  • Vanilla extract (optional)
  • Chopped pistachios for garnish (optional)

Directions

  1. I start by preheating the oven to 350°F (175°C) and greasing a 9×13-inch baking dish or two 8-inch round pans.
  2. I grind the pistachios in a food processor until they’re fine, almost like almond flour. I’m careful not to over-process them into paste.
  3. In a bowl, I whisk together the flour, baking powder, baking soda, salt, and ground pistachios.
  4. In a separate bowl, I cream the butter and sugar until it’s light and fluffy. Then I beat in the eggs one at a time and add the vanilla.
  5. I add the dry ingredients in batches, alternating with the buttermilk, and mix just until combined.
  6. I pour the batter into the prepared pan and bake for 35–40 minutes, or until a toothpick inserted in the center comes out clean. Then I let it cool completely before frosting.
  7. For the frosting, I beat the butter and cream cheese together until smooth, then gradually add the powdered sugar. If I want a hint of vanilla, I add a splash here.
  8. I frost the cooled cake and garnish with chopped pistachios if I’m feeling fancy.

Servings and timing

  • Servings: 12
  • Prep time: 15 minutes
  • Cook time: 35–40 minutes
  • Total time: 55 minutes

Variations

Sometimes I like to add a touch of almond extract to the batter for extra depth. I’ve also made this as cupcakes—they bake for about 18–20 minutes. When I want to lighten it up, I use a whipped cream topping instead of cream cheese frosting, and it’s still amazing.

Storage/Reheating

I store the cake in the fridge if it’s frosted with cream cheese, usually in an airtight container. It keeps well for up to 4 days. If unfrosted, it can sit at room temperature for a couple of days. I let it come to room temp before serving, especially if it’s been chilled.

FAQs

Can I use roasted pistachios?

I usually go with unsalted, raw pistachios for the best flavor, but lightly roasted ones work too—just make sure they’re not overly salty or seasoned.

Can I make this cake without a food processor?

Yes, I’ve chopped pistachios by hand or used a blender in pulses. The texture isn’t quite as fine, but it still works.

Is there a way to make this dairy-free?

I’ve swapped the butter for vegan margarine and used a dairy-free milk with lemon juice instead of buttermilk. The texture changes slightly but it still tastes great.

Can I freeze this cake?

Absolutely. I wrap it tightly in plastic wrap and foil, either whole or in slices, and freeze it for up to 2 months. I just thaw it in the fridge overnight before serving.

What’s the best frosting for pistachio cake?

I usually go with cream cheese frosting because the tang balances the sweetness nicely. But whipped cream or even a light buttercream works beautifully too.

Conclusion

Pistachio Cake is a unique and elegant dessert that’s surprisingly easy to make. Whether I bake it from scratch or dress it up with a fancy frosting, it’s always a hit. The flavor is subtle but rich, and it’s just the thing when I want something a little out of the ordinary without being complicated.

Print

clock clock iconcutlery cutlery iconflag flag iconfolder folder iconinstagram instagram iconpinterest pinterest iconfacebook facebook iconprint print iconsquares squares iconheart heart iconheart solid heart solid icon
Pistachio Cake

Pistachio Cake

5 Stars 4 Stars 3 Stars 2 Stars 1 Star No reviews
  • Author: Sue
  • Prep Time: 15 minutes
  • Cook Time: 35–40 minutes
  • Total Time: 55 minutes
  • Yield: 12 servings
  • Category: Dessert
  • Method: Baking
  • Cuisine: American
  • Diet: Vegetarian
Print Recipe
Pin Recipe

Description

Pistachio Cake is a soft, moist dessert with a nutty, buttery flavor and beautiful green hue. Made with finely ground pistachios and topped with creamy frosting, this homemade cake is perfect for special occasions or an everyday indulgence.


Ingredients

  • For the cake:
  • 1 ½ cups all-purpose flour
  • 1 ½ tsp baking powder
  • ½ tsp baking soda
  • ¼ tsp salt
  • 1 cup shelled pistachios, finely ground
  • ½ cup unsalted butter, softened
  • 1 cup granulated sugar
  • 3 large eggs
  • 1 tsp vanilla extract
  • ¾ cup buttermilk
  • For the frosting:
  • ½ cup unsalted butter, softened
  • 8 oz cream cheese, softened
  • 2 ½ cups powdered sugar
  • 1 tsp vanilla extract (optional)
  • 2 tbsp chopped pistachios (for garnish, optional)

Instructions

  1. Preheat oven to 350°F (175°C). Grease a 9×13-inch baking dish or two 8-inch round pans.
  2. Finely grind pistachios in a food processor, being careful not to turn them into a paste.
  3. In a medium bowl, whisk together flour, baking powder, baking soda, salt, and ground pistachios.
  4. In a large bowl, cream butter and sugar until light and fluffy. Add eggs one at a time, then mix in vanilla.
  5. Alternate adding the dry ingredients and buttermilk to the wet mixture, stirring just until combined.
  6. Pour batter into prepared pan and bake for 35–40 minutes, or until a toothpick comes out clean. Cool completely.
  7. For the frosting, beat butter and cream cheese until smooth. Gradually add powdered sugar and vanilla (if using).
  8. Frost cooled cake and garnish with chopped pistachios if desired.

Notes

  • Add almond extract for deeper flavor.
  • Can be baked as cupcakes (18–20 min).
  • Whipped cream is a great lighter frosting option.
  • Use dairy-free alternatives for a vegan-friendly version.
  • Cake flavor improves after a day—great for make-ahead.

Have you made this recipe? I'd love to see it!

Click here to Follow me on Pinterest

Spinach and Mushroom White Lasagna

April 14, 2025 by Sue Leave a Comment

Spinach and mushroom white lasagna is a creamy, comforting, and flavor-packed twist on the classic red-sauce lasagna. It layers tender noodles with sautéed mushrooms, wilted spinach, rich béchamel sauce, and gooey cheese for a vegetarian dish that’s both elegant and satisfying. It’s my favorite when I want something hearty yet a little lighter than traditional lasagna.

Spinach and Mushroom White Lasagna

Why You’ll Love This Recipe

I love this recipe because it’s full of deep, savory flavor thanks to the mushrooms and garlic, with a silky white sauce that makes it feel rich without being heavy. It’s a great option for meatless meals or when I want to serve something that feels special but still easy to make. Plus, it reheats beautifully and freezes well, so I often make it ahead.

Ingredients

(Here's a tip: Check out the full list of ingredients and measurements in the recipe card below.)

For the Filling:

  • Olive oil or butter

  • Fresh mushrooms (sliced)

  • Fresh spinach (or frozen, thawed and squeezed dry)

  • Garlic (minced)

  • Salt and pepper

  • Ricotta cheese

  • Egg

  • Shredded mozzarella cheese

  • Grated Parmesan cheese

  • Lasagna noodles (regular or no-boil)

For the White Sauce (Béchamel):

  • Butter

  • All-purpose flour

  • Milk (whole milk preferred)

  • Nutmeg (optional)

  • Salt and pepper

Directions

  1. I preheat the oven to 375°F (190°C).

  2. I start by sautéing the mushrooms in olive oil or butter until browned. I add garlic and spinach, cooking until wilted. I season with salt and pepper and set the mixture aside.

  3. For the béchamel sauce, I melt butter in a saucepan, whisk in flour, and cook for 1–2 minutes. Then I slowly whisk in milk and cook until the sauce thickens. I season with salt, pepper, and a pinch of nutmeg if I want a little warmth.

  4. In a bowl, I mix ricotta with one egg and a bit of Parmesan for a creamy layer.

  5. In a baking dish, I spread a layer of béchamel, then add noodles, ricotta mixture, spinach-mushroom filling, mozzarella, and more sauce. I repeat the layers and finish with a generous layer of sauce and cheese on top.

  6. I cover the lasagna with foil and bake for 30 minutes. Then I uncover it and bake for another 10–15 minutes until golden and bubbly.

  7. I let it rest for 10–15 minutes before slicing so it sets up nicely.

Servings and Timing

This lasagna serves 6–8 people. It takes about 30 minutes to prep, 45 minutes to bake, and 15 minutes to rest before serving—so I usually plan for around 1.5 hours total.

Variations

  • I use kale or Swiss chard instead of spinach when I want to switch things up.

  • For extra flavor, I mix in a handful of sun-dried tomatoes or caramelized onions.

  • A layer of butternut squash purée between the noodles adds a sweet, earthy contrast.

  • I’ve also made it with gluten-free noodles and almond milk béchamel with great results.

Storage/Reheating

Leftover lasagna keeps in the fridge for up to 4 days. I reheat slices in the microwave or oven (covered with foil at 350°F for about 15 minutes). It also freezes well—I wrap individual portions tightly and thaw before reheating.

FAQs

Can I make this lasagna ahead of time?

Yes! I often assemble it a day in advance, refrigerate it, and bake it fresh the next day. I just add 10–15 extra minutes of bake time if it's cold from the fridge.

Can I use frozen spinach?

Absolutely. I thaw and squeeze out as much water as possible before adding it to the filling.

Can I make it vegan?

Yes, I’ve used plant-based butter, milk, and cheeses, and it still turns out delicious. Just be sure to use a thick plant-based béchamel.

What kind of mushrooms work best?

I usually use cremini or baby bella mushrooms, but a mix of shiitake and portobello gives a deeper, meatier flavor.

How do I prevent watery lasagna?

I cook down the spinach and mushrooms until most of the moisture is gone, and I make sure the béchamel is thick before layering.

Conclusion

Spinach and mushroom white lasagna is a creamy, cheesy, and satisfying vegetarian meal that always feels a little elevated. It’s cozy enough for a weeknight but special enough for guests, and I love how versatile it is. Whether I’m craving comfort food or need a meatless main, this lasagna always delivers.

Print

clock clock iconcutlery cutlery iconflag flag iconfolder folder iconinstagram instagram iconpinterest pinterest iconfacebook facebook iconprint print iconsquares squares iconheart heart iconheart solid heart solid icon
Spinach and Mushroom White Lasagna

Spinach and Mushroom White Lasagna

5 Stars 4 Stars 3 Stars 2 Stars 1 Star No reviews
  • Author: Sue
  • Prep Time: 30 minutes
  • Cook Time: 45 minutes
  • Total Time: 1 hour 30 minutes (including resting time)
  • Yield: Serves 6–8
  • Category: Dinner, Main Course
  • Method: Baking
  • Cuisine: Italian-Inspired
  • Diet: Vegetarian
Print Recipe
Pin Recipe

Description

Spinach and Mushroom White Lasagna is a creamy, cheesy vegetarian twist on classic lasagna. Made with tender noodles, garlicky mushrooms, wilted spinach, and a rich white béchamel sauce, this dish is perfect for cozy dinners or elegant gatherings. It’s a hearty meatless main that’s flavorful, easy to make, and perfect for make-ahead meals.


Ingredients

  • For the Filling:
  • Olive oil or butter
  • Fresh mushrooms (sliced)
  • Fresh spinach (or frozen, thawed and squeezed dry)
  • Garlic (minced)
  • Salt and pepper
  • Ricotta cheese
  • Egg
  • Shredded mozzarella cheese
  • Grated Parmesan cheese
  • Lasagna noodles (regular or no-boil)
  • For the White Sauce (Béchamel):
  • Butter
  • All-purpose flour
  • Milk (whole milk preferred)
  • Nutmeg (optional)
  • Salt and pepper

Instructions

  1. Preheat oven to 375°F (190°C).
  2. Sauté mushrooms in olive oil or butter until browned. Add garlic and spinach; cook until wilted. Season and set aside.
  3. Make béchamel: Melt butter, whisk in flour, cook for 1–2 mins. Slowly add milk, cook until thick. Season with salt, pepper, and nutmeg.
  4. Mix ricotta with egg and Parmesan.
  5. In a baking dish, layer béchamel, noodles, ricotta mixture, mushroom-spinach filling, mozzarella, and more béchamel. Repeat layers and finish with sauce and cheese on top.
  6. Cover with foil, bake for 30 mins. Uncover and bake 10–15 mins until golden and bubbly.
  7. Rest for 10–15 mins before serving.

Notes

  • Use cremini, baby bella, shiitake, or portobello mushrooms for different flavor profiles.
  • Frozen spinach works well—just drain it thoroughly.
  • Can be made vegan with dairy-free cheese, milk, and butter.
  • Lasagna freezes and reheats beautifully—perfect for make-ahead meals.
  • Prevent watery lasagna by cooking down spinach and mushrooms and thickening béchamel.

Have you made this recipe? I'd love to see it!

Click here to Follow me on Pinterest

Cabbage Roll Skillet

April 14, 2025 by Sue Leave a Comment

Cabbage roll skillet is a one-pan wonder that brings all the cozy, savory flavors of traditional cabbage rolls—without the rolling or long bake time. With tender cabbage, seasoned ground beef, rice, tomatoes, and just the right amount of spice, it’s a comforting, hearty meal that I can whip up on a busy weeknight.

Cabbage Roll Skillet

Why You’ll Love This Recipe

I love this recipe because it gives me all the flavor of classic cabbage rolls with a fraction of the work. No need to blanch cabbage leaves or roll anything—just chop, stir, and simmer. It’s one of my favorite comfort meals when I want something warm, filling, and homemade without spending all evening in the kitchen.

Ingredients

(Here's a tip: Check out the full list of ingredients and measurements in the recipe card below.)

  • Ground beef (or turkey)
  • Onion (diced)
  • Garlic (minced)
  • Green cabbage (chopped)
  • Cooked white rice
  • Crushed tomatoes or diced tomatoes (with juice)
  • Tomato sauce
  • Worcestershire sauce
  • Paprika
  • Salt and pepper
  • Olive oil

Directions

  1. I start by heating a bit of olive oil in a large skillet over medium heat.
  2. I add the ground beef and cook until browned, breaking it up as it cooks. Then I stir in the onion and garlic and cook until softened.
  3. I add the chopped cabbage and cook for 5–7 minutes, stirring often, until it starts to wilt.
  4. I stir in the crushed tomatoes, tomato sauce, Worcestershire sauce, paprika, salt, and pepper.
  5. I cover the skillet and let everything simmer for about 20 minutes, until the cabbage is tender.
  6. I stir in the cooked rice and let it heat through for a few more minutes.
  7. I taste and adjust seasoning if needed, then serve hot—sometimes with a dollop of sour cream on top.

Servings and Timing

This recipe makes about 4–6 hearty servings. It takes about 10 minutes to prep and 30–35 minutes to cook, so I can have dinner on the table in under 45 minutes.

Variations

  • I sometimes use ground turkey instead of beef.
  • Adding a bit of cayenne or crushed red pepper gives it a spicy kick.
  • I swap in brown rice or cauliflower rice for a lighter version.
  • For extra richness, I stir in a splash of cream or top with shredded cheese before serving.

Storage/Reheating

Leftovers store well in an airtight container in the fridge for up to 4 days. I reheat it on the stovetop or in the microwave until warmed through. It also freezes great—I let it cool, portion it out, and freeze for up to 2 months.

FAQs

Can I use uncooked rice?

I usually use cooked rice to keep the timing simple, but if I use uncooked rice, I add extra liquid and let it simmer longer until the rice is tender.

What kind of cabbage works best?

Green cabbage is my go-to, but Napa or Savoy works too—they’ll cook a little faster.

Can I make this vegetarian?

Yes! I replace the meat with lentils, mushrooms, or a plant-based crumble and it’s just as tasty.

Does it taste like traditional cabbage rolls?

Absolutely—it has the same seasoned meat, rice, and tomato combo, just in an easier form.

Can I prep it ahead?

Definitely. I make the whole skillet and just reheat when ready to serve. The flavors deepen overnight.

Conclusion

Cabbage roll skillet is one of my favorite weeknight meals—comforting, flavorful, and so easy to make. It’s everything I love about old-school cabbage rolls without the hassle, all in one pan. Whether I’m cooking for the family or meal-prepping for the week, this dish always hits the spot.

Print

clock clock iconcutlery cutlery iconflag flag iconfolder folder iconinstagram instagram iconpinterest pinterest iconfacebook facebook iconprint print iconsquares squares iconheart heart iconheart solid heart solid icon
Cabbage Roll Skillet

5 Stars 4 Stars 3 Stars 2 Stars 1 Star No reviews
  • Author: Sue
  • Prep Time: 10 minutes
  • Cook Time: 30–35 minutes
  • Total Time: 40–45 minutes
  • Yield: 4–6 servings
  • Category: Dinner, Main Course
  • Method: Skillet, One-Pan
  • Cuisine: American, Eastern European-inspired
Print Recipe
Pin Recipe

Description

This cabbage roll skillet recipe delivers all the savory flavor of traditional cabbage rolls in a quick, one-pan meal—no rolling required! Perfect for busy weeknights, it's hearty, comforting, and ready in under 45 minutes.


Ingredients

  • 1 lb ground beef (or turkey)
  • 1 medium onion, diced
  • 2 cloves garlic, minced
  • 1 small head green cabbage, chopped
  • 2 cups cooked white rice
  • 1 (14.5 oz) can crushed tomatoes or diced tomatoes (with juice)
  • 1 (8 oz) can tomato sauce
  • 1 tbsp Worcestershire sauce
  • 1 tsp paprika
  • Salt and pepper, to taste
  • 1 tbsp olive oil

Instructions

  1. Heat olive oil in a large skillet over medium heat.
  2. Add ground beef and cook until browned, breaking it up as it cooks.
  3. Stir in diced onion and minced garlic; cook until softened.
  4. Add chopped cabbage; cook 5–7 minutes until it begins to wilt.
  5. Stir in crushed tomatoes, tomato sauce, Worcestershire sauce, paprika, salt, and pepper.
  6. Cover and simmer for 20 minutes, until cabbage is tender.
  7. Stir in cooked rice and heat through for 3–5 more minutes.
  8. Taste and adjust seasoning; serve hot. Optional: top with sour cream.

Notes

  • Swap beef for turkey for variety.
  • Add cayenne or red pepper flakes for heat.
  • Use brown rice or cauliflower rice for a lighter dish.
  • For added richness, stir in cream or top with cheese.
  • Leftovers keep well and taste even better the next day!

Have you made this recipe? I'd love to see it!

Click here to Follow me on Pinterest

Sizzling Chinese Pepper Steak with Onions

April 14, 2025 by Sue Leave a Comment

Sizzling Chinese Pepper Steak with Onions is a deliciously savory stir-fry dish that brings restaurant-style flavor right to my kitchen. With tender slices of beef, crisp bell peppers, and sweet onions tossed in a bold, peppery sauce, this recipe is a total winner for weeknights when I want something fast but full of flavor.

Sizzling Chinese Pepper Steak with Onions

Why You’ll Love This Recipe

I love how quick and easy this pepper steak comes together—perfect for busy evenings. It’s packed with bold, savory flavors, thanks to a rich sauce and perfectly seared beef. The vibrant colors from the peppers make it a beautiful dish to plate, and I can pair it with rice or noodles depending on what I’m craving. Plus, it’s way better (and healthier) than takeout.

Ingredients

(Here's a tip: Check out the full list of ingredients and measurements in the recipe card below.)

For the marinade:

  • 1 lb flank or sirloin steak, thinly sliced against the grain
  • 2 tablespoons soy sauce
  • 1 tablespoon cornstarch
  • 1 tablespoon vegetable oil

For the stir-fry:

  • 2 tablespoons vegetable oil
  • 1 large onion, sliced
  • 1 green bell pepper, sliced
  • 1 red bell pepper, sliced
  • 2 cloves garlic, minced
  • 1 teaspoon fresh ginger, grated

For the sauce:

  • ½ cup beef broth
  • 2 tablespoons soy sauce
  • 1 tablespoon oyster sauce
  • 1 tablespoon hoisin sauce
  • 1 tablespoon rice vinegar
  • 1 teaspoon sugar
  • 1 tablespoon cornstarch
  • 1 teaspoon freshly ground black pepper

Directions

  1. I start by marinating the beef. I mix the soy sauce, cornstarch, and oil, then toss in the sliced steak and let it sit for about 15 minutes.
  2. While that’s marinating, I whisk together the sauce ingredients in a bowl and set it aside.
  3. In a hot wok or large skillet, I add a tablespoon of oil and sear the beef for 2–3 minutes until browned. Then I take it out and set it aside.
  4. I add the rest of the oil to the same skillet and toss in the onions and bell peppers, stir-frying for about 3–4 minutes until they’re just tender.
  5. I add the garlic and ginger, letting them cook for about 30 seconds to release their aroma.
  6. Then I put the beef back into the pan, pour the sauce over everything, and stir it well. I let it simmer for a couple of minutes until the sauce thickens and everything is coated nicely.
  7. I serve it hot over steamed rice, and it's always a hit.

Servings and timing

This recipe serves 4 people and takes about 30 minutes to make from start to finish. That includes prep, marinating, and cooking—perfect for a weeknight dinner.

Variations

When I want to switch it up, I sometimes add mushrooms or snow peas for extra texture. I can also swap the beef for chicken or tofu if I’m in the mood for something lighter. For extra heat, I toss in a few chili flakes or sliced fresh chilies.

Storage/Reheating

I store any leftovers in an airtight container in the fridge for up to 3 days. To reheat, I just warm it up in a skillet over medium heat until hot, or use the microwave in short bursts, stirring in between. It still tastes great the next day.

FAQs

What cut of beef is best for pepper steak?

I usually go for flank steak or sirloin because they’re tender and cook quickly. Just make sure to slice it thinly against the grain for the best texture.

Can I make this dish ahead of time?

Yes, I sometimes marinate the beef and prep the sauce and veggies in advance. When it’s time to cook, it comes together in just minutes.

Is this recipe spicy?

Not really, but it has a nice peppery kick. If I want more heat, I add chili flakes or fresh chili peppers.

Can I freeze Chinese pepper steak?

I wouldn’t recommend freezing it after cooking, as the vegetables can get soggy. But I can freeze the raw, marinated beef and sauce separately to cook fresh later.

What should I serve with pepper steak?

I like it best with white jasmine rice, but brown rice, fried rice, or noodles all work great too.

Conclusion

Sizzling Chinese Pepper Steak with Onions is one of those go-to meals I know will always satisfy. It’s quick, flavorful, and flexible—perfect for busy nights or when I just want that takeout flavor without leaving home. I always keep this recipe in my back pocket, and once I try it, I probably will too.

Print

clock clock iconcutlery cutlery iconflag flag iconfolder folder iconinstagram instagram iconpinterest pinterest iconfacebook facebook iconprint print iconsquares squares iconheart heart iconheart solid heart solid icon
Sizzling Chinese Pepper Steak with Onions

Sizzling Chinese Pepper Steak with Onions

5 Stars 4 Stars 3 Stars 2 Stars 1 Star No reviews
  • Author: Sue
  • Prep Time: 10 minutes
  • Cook Time: 20 minutes
  • Total Time: 30 minutes
  • Yield: 4 servings
  • Category: Dinner, Main Dish
  • Method: Stir-Fry
  • Cuisine: Chinese
Print Recipe
Pin Recipe

Description

This Chinese pepper steak with onions is a sizzling stir-fry packed with tender beef, colorful bell peppers, and a bold, savory sauce. Ready in just 30 minutes, it’s the perfect homemade alternative to takeout that’s loaded with flavor and freshness.


Ingredients

  • For the Marinade:
  • 1 lb flank or sirloin steak, thinly sliced against the grain
  • 2 tablespoons soy sauce
  • 1 tablespoon cornstarch
  • 1 tablespoon vegetable oil
  • For the Stir-Fry:
  • 2 tablespoons vegetable oil, divided
  • 1 large onion, sliced
  • 1 green bell pepper, sliced
  • 1 red bell pepper, sliced
  • 2 cloves garlic, minced
  • 1 teaspoon fresh ginger, grated
  • For the Sauce:
  • ½ cup beef broth
  • 2 tablespoons soy sauce
  • 1 tablespoon oyster sauce
  • 1 tablespoon hoisin sauce
  • 1 tablespoon rice vinegar
  • 1 teaspoon sugar
  • 1 tablespoon cornstarch
  • 1 teaspoon freshly ground black pepper

Instructions

  1. In a medium bowl, mix soy sauce, cornstarch, and vegetable oil. Add sliced steak and marinate for 15 minutes.
  2. In a separate bowl, whisk together all sauce ingredients. Set aside.
  3. Heat 1 tablespoon oil in a wok or large skillet over high heat. Add beef and stir-fry for 2–3 minutes until browned. Remove and set aside.
  4. Add remaining oil to the pan and stir-fry onions and bell peppers for 3–4 minutes until slightly tender.
  5. Add garlic and ginger; stir for 30 seconds until fragrant.
  6. Return beef to the pan, pour in the sauce, and toss everything together. Cook for 2–3 minutes until sauce thickens and coats all ingredients.
  7. Serve hot over steamed rice or noodles.

Notes

  • Slice beef thinly against the grain for best tenderness.
  • Add mushrooms, snow peas, or chili flakes for variety.
  • Prep the marinade and sauce in advance for faster weeknight cooking.
  • For extra heat, toss in Thai chili or sriracha to taste.

Have you made this recipe? I'd love to see it!

Click here to Follow me on Pinterest

One-Pan Sweet & Tangy BBQ Sausage Rice

April 14, 2025 by Sue Leave a Comment

This One-Pan Sweet & Tangy BBQ Sausage Rice is the kind of meal I keep coming back to when I want something quick, flavorful, and comforting. Juicy slices of sausage get tossed with rice, veggies, and a sweet yet tangy BBQ sauce, all simmered together in one pan. The result? A delicious, no-fuss dinner that hits every craving.

One-Pan Sweet & Tangy BBQ Sausage Rice

Why You’ll Love This Recipe

I love how this dish brings big flavor with minimal effort. It’s a true one-pan wonder, so I don’t have to worry about a pile of dishes later. The BBQ sauce gives the rice a bold, sweet-savory tang that pairs perfectly with the smoky sausage. It’s hearty enough to be the main course and versatile enough to switch up based on what I have in the fridge. Plus, it’s kid-friendly, budget-friendly, and always a hit.

Ingredients

(Here's a tip: Check out the full list of ingredients and measurements in the recipe card below.)

  • smoked sausage, sliced into rounds
  • long-grain white rice
  • chicken broth
  • BBQ sauce (my favorite kind, or homemade)
  • onion, diced
  • bell pepper, diced
  • garlic, minced
  • olive oil
  • smoked paprika
  • black pepper
  • salt, to taste
  • fresh parsley, for garnish

Directions

  1. I start by heating olive oil in a large skillet over medium-high heat. Once it’s hot, I add the sliced sausage and cook until it’s browned and a little crispy, about 5 to 7 minutes. Then I remove it and set it aside.
  2. In the same skillet, I toss in the diced onion and bell pepper. I let them soften for about 3 to 4 minutes before adding the garlic. After another minute of stirring, everything smells amazing.
  3. Next, I stir in the rice, smoked paprika, black pepper, and salt. Toasting the rice for a minute or two helps bring out a nuttier flavor.
  4. Then I pour in the chicken broth and BBQ sauce, stirring everything together. Once it starts to simmer, I lower the heat, cover the skillet, and let it cook for 15 to 20 minutes until the rice is tender and the liquid has been absorbed.
  5. I return the sausage to the pan, give everything a good mix, and let it warm through for a few more minutes.
  6. Finally, I garnish with chopped parsley and serve it up hot.

Servings and timing

This recipe makes about 4 servings and takes around 35 minutes from start to finish — 10 minutes of prep and 25 minutes of cook time.

Variations

When I want to mix it up, I add extras like peas, corn, or diced zucchini to the pan along with the onion and pepper. If I’m craving heat, I throw in a pinch of red pepper flakes or a dash of hot sauce. Sometimes I use brown rice, but that takes a bit longer to cook and might need extra liquid. And when I’m feeling indulgent, a sprinkle of shredded cheddar at the end melts right in and makes it extra comforting.

Storage/reheating

I store any leftovers in an airtight container in the fridge for up to 3 days. To reheat, I microwave it with a splash of water to loosen it up, or warm it gently in a skillet over low heat. It even freezes well — I just make sure it’s cooled completely before freezing and reheat it straight from the freezer or thaw overnight in the fridge.

FAQs

What kind of sausage works best for this recipe?

I usually go with smoked sausage or kielbasa for its flavor and ease, but any cooked sausage will work—just make sure it’s flavorful and sliced evenly.

Can I use brown rice instead of white?

Yes, but it takes longer to cook and needs more broth. I usually add about ½ cup extra broth and cook it 10–15 minutes longer.

Is this recipe spicy?

Not by default. The BBQ sauce adds more sweet and tangy notes, but I can always spice it up with chili flakes or hot sauce if I want a kick.

Can I make this vegetarian?

Definitely. I swap the sausage for plant-based sausage or even sautéed mushrooms and use vegetable broth. It’s still packed with flavor.

Can I prep this ahead of time?

Yes. I sometimes chop the veggies and slice the sausage earlier in the day to save time. I can even cook the whole dish in advance and reheat when ready to eat.

Conclusion

This One-Pan Sweet & Tangy BBQ Sausage Rice has become one of my go-to comfort meals. It’s fast, flavorful, and filling, with just the right balance of smoky, sweet, and savory. Whether I’m feeding the family or meal prepping for the week, this recipe checks all the boxes with minimal cleanup and maximum flavor.

Print

clock clock iconcutlery cutlery iconflag flag iconfolder folder iconinstagram instagram iconpinterest pinterest iconfacebook facebook iconprint print iconsquares squares iconheart heart iconheart solid heart solid icon
One-Pan Sweet & Tangy BBQ Sausage Rice

One-Pan Sweet & Tangy BBQ Sausage Rice

5 Stars 4 Stars 3 Stars 2 Stars 1 Star No reviews
  • Author: Sue
  • Prep Time: 10 minutes
  • Cook Time: 25 minutes
  • Total Time: 35 minutes
  • Yield: 4 servings
  • Category: Main Dish
  • Method: One-Pan / Stovetop
  • Cuisine: American
Print Recipe
Pin Recipe

Description

This sweet and tangy BBQ sausage rice is a one-pan wonder packed with smoky sausage, tender rice, sautéed veggies, and a bold BBQ sauce that ties it all together. It’s an easy, family-friendly weeknight meal with minimal cleanup and maximum flavor.


Ingredients

  1. 12 oz smoked sausage, sliced into rounds
  2. 1 cup long-grain white rice
  3. 2 cups chicken broth
  4. ½ cup BBQ sauce (your favorite brand or homemade)
  5. 1 small onion, diced
  6. 1 bell pepper, diced
  7. 2 cloves garlic, minced
  8. 1 tablespoon olive oil
  9. ½ teaspoon smoked paprika
  10. ¼ teaspoon black pepper
  11. Salt, to taste
  12. Fresh parsley, chopped (for garnish)

Instructions

  • Heat olive oil in a large skillet over medium-high heat. Add sliced sausage and cook until browned and crispy, about 5–7 minutes. Remove and set aside.
  • In the same pan, sauté onion and bell pepper for 3–4 minutes until softened. Stir in garlic and cook for another 1 minute.
  • Add rice, paprika, pepper, and salt. Stir and toast for 1–2 minutes.
  • Pour in chicken broth and BBQ sauce. Stir to combine and bring to a simmer.
  • Lower heat, cover, and cook for 15–20 minutes until rice is tender and liquid is absorbed.
  • Return sausage to the pan and stir to combine. Cook 2–3 more minutes until heated through.
  • Garnish with chopped parsley and serve hot.

Notes

  • Add vegetables like peas or corn for extra nutrition.
  • Brown rice can be used but will require more liquid and cooking time.
  • To make it spicier, add red pepper flakes or a splash of hot sauce.
  • Leftovers reheat well with a splash of broth or water to loosen.

Have you made this recipe? I'd love to see it!

Click here to Follow me on Pinterest

Creamy Velveeta Beef Pasta with Bowtie Noodles

April 14, 2025 by Sue Leave a Comment

Creamy Velveeta beef pasta with bowtie noodles is a rich, comforting one-pot meal that’s loaded with cheesy goodness and savory beef. Tender bowtie pasta is coated in a smooth Velveeta cheese sauce and mixed with seasoned ground beef for a quick and hearty dish that feels like the ultimate comfort food.

Creamy Velveeta Beef Pasta with Bowtie Noodles

Why You’ll Love This Recipe

I love this recipe because it’s easy, fast, and ultra-satisfying. It’s perfect for busy weeknights when I want something warm and filling without spending a ton of time in the kitchen. The Velveeta melts into the pasta and beef to create a creamy, silky sauce that clings to every bite. It’s a family favorite and totally customizable based on what I have on hand.

Ingredients

(Here's a tip: Check out the full list of ingredients and measurements in the recipe card below.)

  • Bowtie (farfalle) pasta
  • Ground beef
  • Onion (diced)
  • Garlic (minced)
  • Velveeta cheese (cubed)
  • Milk
  • Beef broth (optional for extra flavor)
  • Salt and pepper
  • Optional: paprika, crushed red pepper flakes, parsley for garnish

Directions

  1. I cook the bowtie pasta in salted boiling water until al dente, then drain and set aside.
  2. In a large skillet or pot, I cook the ground beef over medium heat until browned, breaking it up as it cooks. I drain any excess grease.
  3. I add the diced onion and garlic to the beef and sauté for 2–3 minutes until fragrant and soft.
  4. I stir in the milk (and beef broth if using), then add the Velveeta cubes and stir until melted and smooth.
  5. I season with salt, pepper, and a pinch of paprika or red pepper flakes for extra flavor.
  6. I fold in the cooked bowtie pasta and stir until everything is well coated in the creamy cheese sauce.
  7. I let it simmer for another 2–3 minutes, then garnish with chopped parsley before serving.

Servings and Timing

This recipe makes about 4–6 servings. It takes around 10 minutes to prep and 20 minutes to cook, so dinner is ready in about 30 minutes total.

Variations

  • I swap ground beef for ground turkey or sausage for a different flavor.
  • I mix in cooked broccoli, peas, or spinach for extra veggies.
  • A dash of hot sauce or Cajun seasoning gives it a spicy twist.
  • I’ve even added a little sour cream or cream cheese for an even richer sauce.

Storage/Reheating

I store leftovers in an airtight container in the fridge for up to 4 days. To reheat, I warm it on the stovetop or microwave with a splash of milk to loosen the sauce and bring back the creaminess. It’s just as good the next day—sometimes better.

FAQs

Can I use a different pasta shape?

Yes, I’ve made this with penne, shells, rotini, and elbow macaroni—whatever I have on hand works great.

Does Velveeta make the sauce too thick?

No, it melts smoothly into the milk and makes a perfect creamy texture. I adjust the amount of milk to get the consistency I like.

Can I make this ahead?

Definitely. I make it in advance and reheat when ready. Just add a bit of milk when reheating to keep the sauce silky.

Can I use real cheese instead of Velveeta?

Yes, but it won’t be quite as smooth. I’ve used cheddar or a mix of cheeses and added a splash of cream to help it melt evenly.

What’s the best way to prevent the cheese from clumping?

I cube the Velveeta and stir it in slowly over low heat to keep it smooth. Stirring constantly helps it melt evenly into the sauce.

Conclusion

Creamy Velveeta beef pasta with bowtie noodles is one of those meals that always hits the spot—cheesy, filling, and packed with flavor. It’s a quick and easy dinner that doesn’t skimp on comfort, and I always come back to it when I need a reliable crowd-pleaser. Whether I’m feeding the family or just craving something indulgent, this dish is a guaranteed winner.

Print

clock clock iconcutlery cutlery iconflag flag iconfolder folder iconinstagram instagram iconpinterest pinterest iconfacebook facebook iconprint print iconsquares squares iconheart heart iconheart solid heart solid icon
Creamy Velveeta Beef Pasta with Bowtie Noodles

Creamy Velveeta Beef Pasta with Bowtie Noodles

5 Stars 4 Stars 3 Stars 2 Stars 1 Star No reviews
  • Author: Sue
  • Prep Time: 10 minutes
  • Cook Time: 20 minutes
  • Total Time: 30 minutes
  • Yield: 4–6 servings
  • Category: Dinner, One-Pot
  • Method: Stovetop
  • Cuisine: American
Print Recipe
Pin Recipe

Description

This creamy Velveeta beef pasta with bowtie noodles is a cheesy, comforting one-pot dinner that’s perfect for busy weeknights. Loaded with savory ground beef, tender pasta, and melty Velveeta cheese, it’s a rich, family-friendly meal that’s quick to make and guaranteed to satisfy.


Ingredients

  • 12 oz bowtie (farfalle) pasta
  • 1 lb ground beef
  • 1 small onion, diced
  • 2 cloves garlic, minced
  • 8 oz Velveeta cheese, cubed
  • ½ cup milk
  • ¼ cup beef broth (optional, for flavor and texture)
  • Salt and black pepper, to taste
  • Optional:
  • ½ tsp paprika
  • Pinch of crushed red pepper flakes
  • Chopped fresh parsley (for garnish)

Instructions

  1. Cook pasta in salted boiling water until al dente. Drain and set aside.
  2. In a large skillet, brown the ground beef over medium heat. Drain excess grease.
  3. Add diced onion and garlic to the beef. Cook for 2–3 minutes until softened.
  4. Stir in milk (and broth if using), then add Velveeta cubes. Stir gently until melted and smooth.
  5. Season with salt, pepper, and optional paprika or red pepper flakes.
  6. Fold in cooked pasta. Stir to coat evenly with the creamy cheese sauce.
  7. Let simmer 2–3 minutes, garnish with parsley, and serve warm.

Notes

  • Add steamed broccoli, peas, or spinach for a veggie boost.
  • Swap beef for turkey or sausage for a twist.
  • Stir in sour cream or cream cheese for an extra luscious sauce.
  • Adjust milk/broth to thin the sauce to your preferred consistency.

Have you made this recipe? I'd love to see it!

Click here to Follow me on Pinterest

Spicy Honey-Ginger Chicken Bowls with Yum Yum Sauce

April 14, 2025 by Sue Leave a Comment

Spicy honey-ginger chicken bowls are a vibrant, flavor-packed meal layered with tender chicken, crisp veggies, fluffy rice, and a drizzle of creamy, tangy yum yum sauce. The sweet heat from the honey-ginger glaze pairs perfectly with the cool richness of the sauce, making every bite totally addictive. It’s one of my go-to bowl meals when I want something bold, fresh, and satisfying.

Spicy Honey-Ginger Chicken Bowls with Yum Yum Sauce

Why You’ll Love This Recipe

I love this recipe because it brings together sweet, spicy, and savory in one balanced bowl. The honey-ginger glaze caramelizes beautifully on the chicken, while the yum yum sauce cools it all down with a creamy, garlicky finish. It’s easy to customize with whatever veggies or grains I have on hand, and it’s just as good for a quick dinner as it is for meal prep.

Ingredients

(Here's a tip: Check out the full list of ingredients and measurements in the recipe card below.)

For the Spicy Honey-Ginger Chicken:

  • Chicken thighs or breasts (boneless, skinless, diced)
  • Honey
  • Soy sauce
  • Fresh ginger (grated)
  • Garlic (minced)
  • Sriracha or chili paste
  • Rice vinegar
  • Cornstarch (optional, for thickening)
  • Olive oil or sesame oil (for cooking)

For the Yum Yum Sauce:

  • Mayonnaise
  • Ketchup
  • Rice vinegar
  • Garlic powder
  • Paprika
  • Sugar
  • Water (to thin, if needed)

For the Bowls:

  • Cooked rice (white, brown, or jasmine)
  • Shredded carrots
  • Cucumber slices
  • Avocado
  • Red cabbage or lettuce
  • Green onions or cilantro (for garnish)
  • Sesame seeds (optional)

Directions

  1. I whisk together the honey, soy sauce, ginger, garlic, sriracha, and rice vinegar to make the glaze.
  2. I heat oil in a skillet, add the diced chicken, and cook until browned and fully cooked.
  3. I pour in the glaze and simmer until the sauce thickens and coats the chicken (I add a cornstarch slurry if I want it thicker).
  4. While the chicken cooks, I mix up the yum yum sauce by whisking together all the sauce ingredients until smooth and creamy.
  5. To assemble the bowls, I start with a base of rice, then layer on the chicken, fresh veggies, and avocado.
  6. I drizzle with yum yum sauce, sprinkle on green onions and sesame seeds, and serve warm.

Servings and Timing

This recipe makes about 4 hearty bowls. It takes 15 minutes to prep and 15–20 minutes to cook, so I can have everything ready in about 30–35 minutes.

Variations

  • I sometimes use tofu or shrimp instead of chicken for a different protein.
  • For extra crunch, I toss in chopped peanuts or crispy wonton strips.
  • Adding mango or pineapple gives the bowl a sweet, tropical twist.
  • Quinoa or cauliflower rice works great for a low-carb base.

Storage/Reheating

Leftovers keep well in the fridge for up to 4 days. I store the chicken and rice separately from the veggies and sauce, then reheat in the microwave or on the stovetop. The yum yum sauce stays fresh in the fridge for up to a week.

FAQs

Can I make this ahead of time?

Yes, I often prep the chicken, sauce, and rice ahead and just assemble the bowls when ready to eat. It’s great for meal prep.

How spicy is the chicken?

It has a nice medium kick, but I adjust the sriracha to make it more or less spicy depending on who’s eating.

What’s in yum yum sauce?

It’s a creamy, tangy Japanese steakhouse-style sauce made with mayo, ketchup, garlic powder, and a touch of vinegar and sugar.

Can I grill the chicken?

Absolutely. I marinate the chicken in the glaze, grill it, and then reduce the remaining glaze on the stove to drizzle over the top.

What vegetables work best in the bowl?

I like shredded carrots, sliced cucumbers, red cabbage, avocado, and green onions—but anything crisp and fresh works great.

Conclusion

Spicy honey-ginger chicken bowls with yum yum sauce are one of my favorite meals when I want something bold, healthy, and seriously tasty. The layers of flavor and texture make each bite satisfying, and I love how easy it is to mix and match ingredients based on what I have. Whether for dinner or meal prep, this recipe never disappoints.

Print

clock clock iconcutlery cutlery iconflag flag iconfolder folder iconinstagram instagram iconpinterest pinterest iconfacebook facebook iconprint print iconsquares squares iconheart heart iconheart solid heart solid icon
Spicy Honey-Ginger Chicken Bowls with Yum Yum Sauce

Spicy Honey-Ginger Chicken Bowls with Yum Yum Sauce

5 Stars 4 Stars 3 Stars 2 Stars 1 Star No reviews
  • Author: Sue
  • Prep Time: 15 minutes
  • Cook Time: 15–20 minutes
  • Total Time: 30–35 minutes
  • Yield: 4 bowls
  • Category: Main Course
  • Method: Stovetop
  • Cuisine: Asian-Inspired
Print Recipe
Pin Recipe

Description

Spicy Honey-Ginger Chicken Bowls with Yum Yum Sauce are a bold, flavor-packed meal perfect for weeknight dinners or meal prep. Tender honey-ginger glazed chicken is served over fluffy rice with fresh veggies and drizzled with creamy, tangy yum yum sauce. This sweet, spicy, and savory bowl is healthy, customizable, and totally satisfying. Keywords: spicy honey ginger chicken bowls, yum yum sauce chicken, Asian chicken rice bowl, honey ginger chicken meal prep.


Ingredients

  • For the Spicy Honey-Ginger Chicken:
  • 1 lb boneless, skinless chicken thighs or breasts, diced
  • 3 tbsp honey
  • 2 tbsp soy sauce
  • 1 tbsp grated fresh ginger
  • 2 cloves garlic, minced
  • 1–2 teaspoon sriracha or chili paste (adjust to taste)
  • 1 tbsp rice vinegar
  • 1 tsp cornstarch + 1 tablespoon water (optional, for thickening)
  • 1 tbsp olive oil or sesame oil
  • For the Yum Yum Sauce:
  • ½ cup mayonnaise
  • 1 tbsp ketchup
  • 1 tbsp rice vinegar
  • ½ tsp garlic powder
  • ½ tsp paprika
  • 1 tsp sugar
  • 1–2 teaspoon water (to thin, if needed)
  • For the Bowls:
  • 2 cups cooked white, brown, or jasmine rice
  • 1 cup shredded carrots
  • 1 cucumber, thinly sliced
  • 1 avocado, sliced
  • 1 cup shredded red cabbage or lettuce
  • 2 green onions, chopped or fresh cilantro
  • Sesame seeds (optional, for garnish)aa

Instructions

  1. Whisk together honey, soy sauce, ginger, garlic, sriracha, and rice vinegar to create the glaze.
  2. Heat oil in a skillet over medium-high heat, add diced chicken, and cook until browned and cooked through.
  3. Pour the glaze over the chicken and simmer until thickened, adding cornstarch slurry if needed.
  4. In a bowl, mix all yum yum sauce ingredients until smooth.
  5. To assemble bowls, start with rice, add chicken, veggies, and avocado.
  6. Drizzle with yum yum sauce, top with green onions and sesame seeds, and serve.

Notes

  • Adjust sriracha based on your spice preference.
  • You can substitute tofu or shrimp for the chicken.
  • Store sauce, chicken, and veggies separately for best freshness.
  • Great for meal prep—just assemble fresh when ready to eat.

Have you made this recipe? I'd love to see it!

Click here to Follow me on Pinterest

Crockpot Loaded Steak and Potato Bake

April 14, 2025 by Sue Leave a Comment

Crockpot loaded steak and potato bake is the ultimate cozy, no-fuss dinner that’s packed with flavor and super easy to prepare. With tender chunks of steak, soft and buttery potatoes, and gooey melted cheese, all slow-cooked to perfection, it’s the kind of hearty, one-pot meal I love making on busy days or when I’m craving something comforting.

Crockpot Loaded Steak and Potato Bake

Why You’ll Love This Recipe

I love this recipe because it delivers bold, satisfying flavors with hardly any work. There’s no need to sear the steak or pre-cook anything—I just toss everything in the crockpot and let it do the magic. The steak turns out juicy, the potatoes absorb all that savory seasoning, and the cheese melts over the top like a dream. It’s family-friendly, freezer-friendly, and perfect for leftovers.

Ingredients

(Here's a tip: Check out the full list of ingredients and measurements in the recipe card below.)

  • Steak (sirloin or chuck, cut into bite-sized pieces)
  • Baby potatoes or russet potatoes (cut into chunks)
  • Olive oil
  • Salt
  • Black pepper
  • Garlic powder
  • Onion powder
  • Paprika (optional)
  • Shredded cheddar cheese
  • Green onions (sliced, for topping)
  • Sour cream (optional, for serving)
  • Optional: ranch seasoning mix, bell peppers, or mushrooms for extra flavor and texture

Directions

  1. I start by seasoning the steak with salt, pepper, garlic powder, onion powder, and paprika if I’m using it.
  2. I toss the potatoes in olive oil and a bit more of the same seasonings to coat them evenly.
  3. In the crockpot, I layer the potatoes and steak together, giving everything a light mix.
  4. I cook it on low for 6–7 hours or high for 3–4 hours, until the potatoes are fork-tender and the steak is fully cooked.
  5. About 15 minutes before serving, I sprinkle the shredded cheese on top, cover the crockpot, and let the cheese melt.
  6. I serve it hot, garnished with fresh green onions and a spoonful of sour cream if I’m in the mood.

Servings and Timing

This recipe makes about 6 servings. It takes around 15 minutes to prep and then cooks in the crockpot for 6–7 hours on low or 3–4 hours on high.

Variations

  • I swap the cheddar for mozzarella, pepper jack, or a blend for different flavor profiles.
  • Adding mushrooms or bell peppers gives it a veggie boost and even more flavor.
  • A dash of Worcestershire sauce or a sprinkle of ranch seasoning adds a rich depth to the steak and potatoes.
  • For a lighter option, I sometimes use sweet potatoes instead of regular ones.

Storage/Reheating

I store leftovers in an airtight container in the fridge for up to 4 days. It reheats well in the microwave or in a 350°F oven until warmed through. If it’s a little dry, I add a splash of broth or a bit of sour cream before reheating.

FAQs

Can I skip the cheese?

Yes, I’ve made it without cheese when I want a lighter version. It’s still flavorful thanks to the seasoned steak and potatoes.

What kind of steak works best?

I usually go with sirloin for its tenderness, but chuck steak or stew meat also works well in a slow cooker.

Can I add vegetables?

Absolutely. I often throw in mushrooms, chopped onions, or sliced bell peppers during the last hour of cooking so they don’t get mushy.

Can I prep this the night before?

Yes! I prep and season everything the night before, keep it in the fridge, then dump it into the crockpot in the morning.

Can I make this in the oven instead?

Yes. I layer everything in a baking dish, cover with foil, and bake at 375°F for about 45–55 minutes. I remove the foil in the last 10 minutes, add the cheese, and let it melt.

Conclusion

Crockpot loaded steak and potato bake is one of those meals that feels like a warm hug after a long day. It’s hearty, savory, and packed with flavor—without needing a pile of ingredients or time in the kitchen. Whether I’m serving it for a weeknight dinner or making a batch for leftovers, it’s a guaranteed hit every time.

Print

clock clock iconcutlery cutlery iconflag flag iconfolder folder iconinstagram instagram iconpinterest pinterest iconfacebook facebook iconprint print iconsquares squares iconheart heart iconheart solid heart solid icon
Crockpot Loaded Steak and Potato Bake

Crockpot Loaded Steak and Potato Bake

5 Stars 4 Stars 3 Stars 2 Stars 1 Star No reviews
  • Author: Sue
  • Prep Time: 15 minutes
  • Cook Time: 6–7 hours on low / 3–4 hours on high
  • Total Time: About 6½ hours
  • Yield: 6 servings
  • Category: Dinner, Main Dish
  • Method: Slow Cooker
  • Cuisine: American
Print Recipe
Pin Recipe

Description

This Crockpot Loaded Steak and Potato Bake is a hearty, one-pot dinner made with tender steak, buttery potatoes, and melty cheddar cheese. It’s a set-it-and-forget-it comfort food favorite that’s perfect for weeknights, meal prep, or feeding a hungry family


Ingredients

  • 1½ lbs steak (sirloin or chuck), cut into bite-sized pieces
  • 1½ lbs baby potatoes or russet potatoes, cut into chunks
  • 2 tbsp olive oil
  • 1 tsp salt
  • 1 tsp black pepper
  • 1 tsp garlic powder
  • 1 tsp onion powder
  • 1 tsp paprika (optional)
  • 1½ cups shredded cheddar cheese
  • ¼ cup sliced green onions (for garnish)
  • Sour cream, for serving (optional)
  • Optional add-ins: ranch seasoning mix, sliced mushrooms, chopped bell peppers

Instructions

  1. Season steak with salt, pepper, garlic powder, onion powder, and paprika.
  2. In a separate bowl, toss potatoes with olive oil and a little more of the same seasonings.
  3. In a greased crockpot, layer steak and potatoes evenly and gently mix to combine.
  4. Cook on low for 6–7 hours or high for 3–4 hours, until steak is tender and potatoes are fork-soft.
  5. Sprinkle shredded cheddar over the top, cover, and let melt for 10–15 minutes before serving.
  6. Garnish with green onions and a dollop of sour cream, if desired.

Notes

  • Prepping everything the night before makes this a breeze in the morning.
  • Sirloin gives the best texture, but chuck steak or stew meat works too.
  • Swap cheddar with mozzarella or pepper jack for a twist.
  • Add bell peppers or mushrooms in the last hour of cooking for more veggies.
  • Great for meal prep—leftovers reheat beautifully.

Have you made this recipe? I'd love to see it!

Click here to Follow me on Pinterest

High Protein Breakfast Crumble

April 14, 2025 by Sue Leave a Comment

This High Protein Breakfast Crumble is a delicious, wholesome way to kick off my morning. It blends rolled oats, creamy Greek yogurt, ripe bananas, and a boost of protein powder with the natural sweetness of berries and a crunchy nut topping. I love how it’s both indulgent and nutritious—a real breakfast win.

High Protein Breakfast Crumble

Why You’ll Love This Recipe

I like how this crumble strikes the perfect balance between satisfying and healthy. It's protein-packed, making it ideal for a post-workout meal or a busy morning when I need to stay full for hours. It’s also incredibly flexible—easy to adjust with whatever fruit or nuts I have on hand. Plus, it’s just sweet enough to feel like a treat without going overboard.

ingredients

(Here's a tip: Check out the full list of ingredients and measurements in the recipe card below.)

  • 1½ cups rolled oats
  • ½ cup protein powder (vanilla or unflavored)
  • ½ cup mixed nuts (almonds, walnuts, or pecans), chopped
  • 1 teaspoon cinnamon
  • ¼ teaspoon salt
  • 2 ripe bananas, mashed
  • ½ cup Greek yogurt (or dairy-free alternative)
  • ¼ cup honey or maple syrup
  • 1½ cups mixed berries (strawberries, blueberries, or raspberries)
  • 2 tablespoons coconut oil, melted
  • Optional: ¼ cup chocolate chips for a sweeter twist

directions

  1. I preheat the oven to 350°F (175°C).
  2. In a large bowl, I combine the oats, protein powder, chopped nuts, cinnamon, and salt.
  3. In another bowl, I mix the mashed bananas, Greek yogurt, honey (or maple syrup), and melted coconut oil until smooth.
  4. Then, I stir the wet ingredients into the dry until everything is well coated.
  5. I gently fold in the berries.
  6. I grease a baking dish and pour in the mixture, spreading it evenly.
  7. I bake for 25–30 minutes, until the top is golden and crisp.
  8. Once it’s out of the oven, I let it cool for 10 minutes before serving.
  9. I sometimes top it with extra yogurt or a drizzle of honey if I’m feeling fancy.

Servings and timing

This recipe makes about 6 servings and takes around 10 minutes to prep, plus 25–30 minutes of baking time. Altogether, I have a hot, nourishing breakfast ready in under 45 minutes.

Variations

I like how customizable this recipe is. I often switch the berries based on what’s in season—peaches or apples work great, too. For a vegan version, I use dairy-free yogurt and maple syrup instead of honey. I’ve also tried swapping the nuts for seeds to make it nut-free, and it still turns out delicious.

storage/reheating

I store leftovers in an airtight container in the fridge for up to 4 days. When I’m ready to reheat, I just pop a serving in the microwave for 30–45 seconds or warm it in the oven at 300°F for about 10 minutes. It even tastes good cold if I’m in a rush.

FAQs

What type of protein powder works best?

I prefer using vanilla protein powder for extra flavor, but unflavored also works well. Just make sure it’s one I like the taste of, since it’s a big part of the recipe.

Can I use frozen berries?

Yes, I’ve used frozen berries many times. I don’t thaw them beforehand—they bake beautifully right from frozen.

Is this recipe good for meal prep?

Absolutely. I bake it on Sunday and have breakfast ready through midweek. It reheats nicely and keeps me full for hours.

Can I make this without bananas?

I’ve tried swapping the bananas with unsweetened applesauce or pumpkin puree. The texture changes a bit, but it still tastes great.

How can I make this lower in sugar?

I sometimes skip the honey or syrup altogether and rely on the bananas and berries for natural sweetness. It still turns out satisfying, especially if I add a little extra cinnamon.

Conclusion

This High Protein Breakfast Crumble is now a staple in my breakfast rotation. It's easy to make, customizable, and packed with protein and flavor. Whether I’m prepping it ahead of time or baking it fresh, it’s a go-to when I want something warm, hearty, and healthy in the morning.

Print

clock clock iconcutlery cutlery iconflag flag iconfolder folder iconinstagram instagram iconpinterest pinterest iconfacebook facebook iconprint print iconsquares squares iconheart heart iconheart solid heart solid icon
High Protein Breakfast Crumble

High Protein Breakfast Crumble

5 Stars 4 Stars 3 Stars 2 Stars 1 Star No reviews
  • Author: Sue
  • Prep Time: 10 minutes
  • Cook Time: 30 minutes
  • Total Time: 40 minutes
  • Yield: 6 servings
  • Category: Breakfast
  • Method: Baking
  • Cuisine: American
  • Diet: Vegetarian
Print Recipe
Pin Recipe

Description

This High Protein Breakfast Crumble is a warm, nutritious morning bake packed with rolled oats, Greek yogurt, ripe bananas, and protein powder—naturally sweetened with berries and honey. It’s a hearty, satisfying way to start the day and makes for perfect meal prep!


Ingredients

  • 1½ cups rolled oats
  • ½ cup vanilla or unflavored protein powder
  • ½ cup chopped mixed nuts (almonds, walnuts, or pecans)
  • 1 teaspoon ground cinnamon
  • ¼ teaspoon salt
  • 2 ripe bananas, mashed
  • ½ cup Greek yogurt (or dairy-free yogurt)
  • ¼ cup honey or maple syrup
  • 1½ cups mixed berries (fresh or frozen)
  • 2 tablespoons melted coconut oil
  • Optional: ¼ cup chocolate chips for extra sweetness

Instructions

  1. Preheat oven to 350°F (175°C) and grease a baking dish.
  2. In a large mixing bowl, combine oats, protein powder, chopped nuts, cinnamon, and salt.
  3. In a separate bowl, mix mashed bananas, Greek yogurt, honey/maple syrup, and coconut oil until smooth.
  4. Stir wet ingredients into the dry until fully combined.
  5. Gently fold in the berries (no need to thaw if using frozen).
  6. Spread the mixture evenly into the prepared baking dish.
  7. Bake for 25–30 minutes, or until the top is golden and crisp.
  8. Let cool for 10 minutes before serving.
  9. Optional: top with extra yogurt or a drizzle of honey.

Notes

  • Swap nuts for pumpkin or sunflower seeds for a nut-free version.
  • Use apples, peaches, or chopped pears when berries aren’t in season.
  • Sub applesauce or pumpkin puree for bananas if needed.
  • Great for breakfast meal prep—just portion and store.

Have you made this recipe? I'd love to see it!

Click here to Follow me on Pinterest

Dive into Decadence: Black Forest Cheesecake Bliss!

April 14, 2025 by Sue Leave a Comment

This Black Forest Cheesecake is a luscious twist on two timeless desserts—Black Forest Cake and rich, creamy cheesecake. With layers of chocolate cookie crust, velvety chocolate cheesecake, sweet cherry topping, and a cloud of whipped cream, it’s the ultimate indulgence for any special occasion or when I just want to treat myself.

Dive into Decadence: Black Forest Cheesecake Bliss!

Why You’ll Love This Recipe

I love this dessert because it’s a showstopper in both flavor and presentation. The deep chocolate flavor of the cheesecake perfectly balances the tart-sweet cherry topping, while the creamy texture melts in my mouth. It’s the kind of dessert I bring out when I want to impress guests or celebrate something special. Plus, it keeps well, making it ideal to prep ahead.

Ingredients

(Here's a tip: Check out the full list of ingredients and measurements in the recipe card below.)

  • Chocolate cookie crumbs

  • Unsalted butter, melted

  • Cream cheese, softened

  • Granulated sugar

  • Eggs

  • Sour cream

  • Vanilla extract

  • Semi-sweet chocolate, melted

  • Cherry pie filling

  • Whipped cream

  • Chocolate shavings or curls for garnish (optional)

Directions

  1. I start by preheating the oven to 325°F (163°C).

  2. Then, I mix the chocolate cookie crumbs with melted butter and press the mixture into the bottom of a springform pan to form the crust. I bake it for about 10 minutes and let it cool.

  3. In a large bowl, I beat the cream cheese until smooth, then add sugar and beat until combined. I add eggs one at a time, mixing well after each.

  4. Next, I mix in the sour cream, vanilla, and melted chocolate until smooth.

  5. I pour the filling over the crust and bake for about 55–65 minutes, until the center is set but slightly jiggly.

  6. After turning off the oven, I let the cheesecake sit inside for an hour before chilling it in the refrigerator for at least 4 hours or overnight.

  7. Once it’s fully chilled, I spread cherry pie filling on top, then pipe or spoon whipped cream around the edges.

  8. I garnish with chocolate shavings for that extra wow factor before slicing and serving.

Servings and timing

This cheesecake serves about 12 people. It takes approximately 20 minutes to prep, 1 hour to bake, and at least 4 hours to chill before serving. I usually plan ahead and make it the day before.

Variations

  • I sometimes swap the chocolate cookie crust for a brownie base for an extra rich dessert.

  • For a boozy twist, I add a splash of Kirsch (cherry liqueur) to the cherry topping.

  • If I’m short on time, I use store-bought whipped topping, but homemade whipped cream always tastes better.

  • For a more intense chocolate flavor, I use dark chocolate instead of semi-sweet.

  • When I want a more rustic look, I skip the piping and just dollop whipped cream on top casually.

storage/reheating

I store leftover cheesecake in the fridge, covered with plastic wrap or in an airtight container, for up to 5 days. It also freezes well—I wrap slices in plastic and foil and keep them in the freezer for up to a month. To serve, I let frozen slices thaw in the fridge overnight. I don’t recommend reheating cheesecake, as it’s meant to be served chilled.

FAQs

Can I use fresh cherries instead of cherry pie filling?

Yes, I can make my own topping by cooking fresh cherries with sugar and a bit of cornstarch until thickened.

How do I prevent cracks in my cheesecake?

I always bake it in a water bath or place a pan of hot water in the oven to add moisture and reduce cracking. Cooling it slowly in the oven helps too.

Can I make this cheesecake gluten-free?

Absolutely. I just use gluten-free chocolate cookies for the crust and ensure all other ingredients are labeled gluten-free.

Do I need a springform pan?

Yes, I highly recommend it. A springform pan makes it easier to remove the cheesecake without damaging it.

How far ahead can I make this cheesecake?

I usually make it up to 2 days in advance. It actually tastes better after sitting in the fridge overnight, giving the flavors time to develop.

Conclusion

This Black Forest Cheesecake is pure decadence, combining everything I love about chocolate, cherries, and cheesecake into one unforgettable dessert. Whether I’m celebrating or just craving something sweet and luxurious, this recipe never disappoints. It's rich, beautiful, and worth every bite.

Print

clock clock iconcutlery cutlery iconflag flag iconfolder folder iconinstagram instagram iconpinterest pinterest iconfacebook facebook iconprint print iconsquares squares iconheart heart iconheart solid heart solid icon
Dive into Decadence: Black Forest Cheesecake Bliss!

Dive into Decadence: Black Forest Cheesecake Bliss!

5 Stars 4 Stars 3 Stars 2 Stars 1 Star No reviews
  • Author: Sue
  • Prep Time: 10 minutes
  • Chill Time: 4 hours
  • Cook Time: 1 hour
  • Total Time: 5 hours 20 minutes
  • Yield: 12 servings
  • Category: Dessert
  • Method: Baking
  • Cuisine: American, German-inspired
  • Diet: Vegetarian
Print Recipe
Pin Recipe

Description

This Black Forest Cheesecake combines the bold flavors of rich chocolate cheesecake with sweet cherry topping and fluffy whipped cream for the ultimate decadent dessert. With a chocolate cookie crust and velvety texture, it’s the perfect showstopper for holidays, birthdays, or anytime you crave a luxurious treat.


Ingredients

  • Chocolate cookie crumbs
  • ¼ cup unsalted butter, melted
  • 24 oz cream cheese, softened
  • 1 cup granulated sugar
  • 3 large eggs
  • 1 cup sour cream
  • 1 tsp vanilla extract
  • 8 oz semi-sweet chocolate, melted and cooled slightly
  • 1 can (21 oz) cherry pie filling
  • Whipped cream (homemade or store-bought)
  • Optional: chocolate shavings or curls for garnish

Instructions

  1. Preheat oven to 325°F (163°C). Grease a 9-inch springform pan and wrap the outside with foil to prepare for a water bath if using.
  2. Mix chocolate cookie crumbs with melted butter. Press into the bottom of the pan and bake for 10 minutes. Let cool.
  3. In a large bowl, beat softened cream cheese until smooth. Add sugar and beat until creamy.
  4. Add eggs one at a time, mixing after each addition. Stir in sour cream, vanilla extract, and melted chocolate until fully incorporated.
  5. Pour filling over crust. Place pan in a larger roasting pan and fill halfway with hot water (optional for water bath).
  6. Bake for 55–65 minutes, until edges are set and center jiggles slightly. Turn off oven, crack door, and let cool for 1 hour.
  7. Chill in refrigerator for at least 4 hours, preferably overnight.
  8. Before serving, spread cherry pie filling over top. Pipe or spoon whipped cream around edges. Garnish with chocolate shavings if desired.

Notes

  • For a stronger cherry flavor, stir in a splash of Kirsch liqueur to the pie filling.
  • Swap cookie crust with a brownie base for an extra rich version.
  • Use dark chocolate for a more intense flavor.
  • Homemade cherry topping: simmer 2 cups pitted cherries with ¼ cup sugar + 1 tablespoon cornstarch

Have you made this recipe? I'd love to see it!

Click here to Follow me on Pinterest

High Protein Freezer Breakfast Burrito: An Incredible Ultimate Meal

April 14, 2025 by Sue Leave a Comment

This high-protein freezer breakfast burrito is my ultimate go-to when I need a quick, satisfying, and energizing start to the day. Packed with lean protein, nutrient-rich veggies, and cheesy goodness, it’s a handheld breakfast that keeps me full for hours. The best part? I can make a big batch, freeze them, and reheat in minutes for busy mornings.

High Protein Freezer Breakfast Burrito: An Incredible Ultimate Meal

Why You’ll Love This Recipe

I love how this recipe combines convenience and nutrition. It’s hearty, freezer-friendly, and customizable based on what I have on hand. Whether I’m trying to hit my protein goals or just want something warm and comforting in the morning, these burritos deliver every time. They’re also a smart way to meal prep breakfast for the whole week—or even the whole month.

Ingredients

(Here's a tip: Check out the full list of ingredients and measurements in the recipe card below.)

  • 6 large eggs
  • 6 large egg whites (or about ¾ cup)
  • ½ cup cottage cheese
  • 8 oz ground turkey sausage (or any breakfast sausage)
  • 1 cup frozen hash browns, thawed
  • ½ cup red bell pepper, diced
  • ½ cup yellow onion, diced
  • 2 cups fresh baby spinach, roughly chopped
  • ½ cup shredded cheddar cheese
  • Salt and pepper to taste
  • 1 tablespoon olive oil
  • 6 large burrito-sized tortillas (I usually go with whole wheat)

Directions

  1. I whisk together the eggs, egg whites, cottage cheese, salt, and pepper in a bowl and set it aside.
  2. In a large nonstick skillet, I heat the olive oil over medium-high. I cook the hash browns, red bell pepper, and onion until they start to soften, then stir in the spinach and cook until it wilts.
  3. I pour in the egg mixture and cook it with the veggies over medium heat, stirring often, until everything is set but still moist.
  4. In a separate pan, I brown the ground turkey sausage until fully cooked, then drain any excess fat.
  5. I warm the tortillas slightly so they’re easier to fold, then I layer each one with the egg mix, sausage, and shredded cheese.
  6. I roll each burrito tightly, tucking in the sides, and wrap them individually in foil or plastic wrap. Then I place them in a freezer bag and freeze for later.

Servings and timing

This recipe makes 6 hearty burritos.

  • Prep time: 15 minutes
  • Cook time: 15 minutes
  • Total time: 30 minutes

Variations

Sometimes I mix it up by using ground chicken sausage or even tofu scramble for a vegetarian twist. I’ve added black beans, chopped tomatoes, or a splash of hot sauce when I want extra flavor. I also swap in different cheeses like pepper jack or feta depending on my mood.

Storage/Reheating

I store these burritos in the freezer for up to 3 months. When I’m ready to eat, I remove the foil or plastic wrap and reheat one in the microwave wrapped in a damp paper towel for 1–2 minutes until heated through. For a crispier texture, I bake them in the oven at 350°F for 20–25 minutes while still wrapped in foil.

FAQs

Can I use only whole eggs instead of egg whites?

Absolutely. I sometimes skip the egg whites and just use more whole eggs if I want a richer taste or don’t have egg whites on hand.

What type of tortillas work best for freezing?

I like using large burrito-sized whole wheat tortillas because they hold up well in the freezer and reheat without falling apart.

How do I keep the burritos from getting soggy when reheated?

I always cool the filling completely before assembling. That way, there’s less moisture trapped inside. Reheating in the oven also helps if I want a crispier result.

Are these burritos good for meal prep?

Yes, they’re one of my favorite meal prep breakfasts. I can make a whole batch on the weekend and have a protein-packed breakfast ready for every day of the week.

Can I eat these cold?

Technically, yes—but I prefer to heat them. Reheating brings out the melted cheese and makes everything taste so much better.

Conclusion

These high-protein freezer breakfast burritos have become a staple in my meal prep rotation. They’re easy to make, packed with flavor, and give me the energy I need to take on the day. Whether I’m running out the door or enjoying a slow morning, having one of these burritos in the freezer means breakfast is always just a few minutes away.

Print

clock clock iconcutlery cutlery iconflag flag iconfolder folder iconinstagram instagram iconpinterest pinterest iconfacebook facebook iconprint print iconsquares squares iconheart heart iconheart solid heart solid icon
High Protein Freezer Breakfast Burrito: An Incredible Ultimate Meal

High Protein Freezer Breakfast Burrito: An Incredible Ultimate Meal

5 Stars 4 Stars 3 Stars 2 Stars 1 Star No reviews
  • Author: Sue
  • Prep Time: 15 minutes
  • Cook Time: 15 minutes
  • Total Time: 30 minutes
  • Yield: 6 burritos
  • Category: Breakfast, Meal Prep
  • Method: Stovetop, Freezer
  • Cuisine: American
Print Recipe
Pin Recipe

Description

These high protein freezer breakfast burritos are the ultimate make-ahead breakfast! Loaded with lean turkey sausage, eggs, cottage cheese, and veggies, they’re freezer-friendly, meal prep approved, and reheat beautifully. Perfect for busy mornings when you need a satisfying, protein-packed start to the day.


Ingredients

  • 6 large eggs
  • 6 large egg whites (or about ¾ cup)
  • ½ cup cottage cheese
  • 8 oz ground turkey sausage (or any breakfast sausage)
  • 1 cup frozen hash browns, thawed
  • ½ cup red bell pepper, diced
  • ½ cup yellow onion, diced
  • 2 cups fresh baby spinach, roughly chopped
  • ½ cup shredded cheddar cheese
  • Salt and pepper to taste
  • 1 tablespoon olive oil
  • 6 large burrito-sized tortillas (whole wheat recommended)

Instructions

  1. Whisk together eggs, egg whites, cottage cheese, salt, and pepper in a bowl; set aside.
  2. Heat olive oil in a nonstick skillet over medium-high heat. Cook hash browns, red bell pepper, and onion until softened. Add spinach and cook until wilted.
  3. Pour in egg mixture and cook, stirring often, until eggs are set but still moist.
  4. In another pan, cook the turkey sausage until browned and fully cooked; drain excess fat.
  5. Warm tortillas slightly. Fill each with egg mixture, sausage, and shredded cheese.
  6. Roll tightly, tuck in the sides, and wrap each burrito in foil or plastic wrap. Freeze in a freezer-safe bag.

Notes

  • You can use all whole eggs if preferred.
  • Swap in chicken sausage, tofu scramble, or black beans for variety.
  • Let filling cool before wrapping to avoid soggy burritos.
  • To reheat: Microwave wrapped in a damp paper towel for 1–2 minutes, or bake at 350°F for 20–25 minutes in foil.

Have you made this recipe? I'd love to see it!

Click here to Follow me on Pinterest

Honey Lime Chicken & Avocado Rice Stack

April 14, 2025 by Sue Leave a Comment

The honey lime chicken & avocado rice stack is a colorful, layered dish that brings together sweet, zesty, and creamy flavors in every bite. It’s one of those meals I love making when I want something that looks impressive but is actually really simple to pull together. The combination of juicy chicken, fluffy rice, creamy avocado, and fresh herbs creates a refreshing and hearty plate that's perfect for lunch or dinner.

Honey Lime Chicken & Avocado Rice Stack

Why You’ll Love This Recipe

I love how balanced this dish is. The honey lime marinade gives the chicken a perfect sweet and tangy flavor, while the rice provides a neutral base that lets everything shine. The avocado adds creaminess, and fresh toppings like red onion and cilantro add a pop of flavor. It’s also easy to prep ahead and can be customized with whatever I have on hand. Whether I’m cooking for myself or entertaining guests, this one always hits the mark.

ingredients

(Here's a tip: Check out the full list of ingredients and measurements in the recipe card below.)

For the chicken marinade:

  • Boneless, skinless chicken breasts, cut into bite-sized cubes
  • Honey
  • Fresh lime juice
  • Soy sauce
  • Minced garlic
  • Grated fresh ginger
  • Salt and pepper

For the rice:

  • White rice
  • Water or chicken broth
  • Salt

For the stack and toppings:

  • Ripe avocado, diced
  • Red onion, finely chopped
  • Fresh cilantro, chopped
  • Lime wedges (for garnish)

directions

  1. I start by whisking together honey, lime juice, soy sauce, garlic, ginger, salt, and pepper in a bowl. Then I add the chicken pieces and let them marinate for at least 30 minutes in the fridge.
  2. While the chicken marinates, I cook the rice by bringing water or broth to a boil, adding rice and salt, then simmering it covered until tender—usually about 15 minutes.
  3. Once the rice is done and the chicken is marinated, I heat a skillet over medium-high heat and cook the chicken until it’s browned and cooked through, about 5-7 minutes.
  4. To assemble, I scoop a portion of rice onto a plate, layer on the cooked chicken, then top it with diced avocado, red onion, and cilantro.
  5. I like to serve it with lime wedges for a fresh squeeze just before eating.

Servings and timing

This recipe makes about 4 servings.
Prep time: 15 minutes
Marinating time: 30 minutes
Cook time: 20 minutes
Total time: About 1 hour and 5 minutes

Variations

I sometimes swap the white rice for brown rice or even quinoa when I want something more wholesome. If I want a spicy version, I add a little chopped jalapeño or drizzle on hot sauce. A spoonful of Greek yogurt or a creamy lime dressing also makes a nice topping. I’ve even made this into a wrap or bowl when I want something more casual.

storage/reheating

I store the cooked components separately in airtight containers in the fridge for up to 3 days. To reheat, I warm the rice and chicken in the microwave or on the stovetop. I always add the avocado fresh when I’m ready to serve, since it doesn’t store well once cut.

FAQs

Can I use chicken thighs instead of breasts?

Yes, I’ve used boneless chicken thighs and they work great. They stay extra juicy and take on the marinade beautifully.

Can I make this ahead?

Definitely. I often marinate the chicken the night before and cook the rice in advance. Then I just cook the chicken and assemble the stacks when I’m ready.

Is this dish gluten-free?

As long as I use gluten-free soy sauce or tamari, the recipe is gluten-free.

What can I use instead of avocado?

If I don’t have avocado, I sometimes use a dollop of Greek yogurt or a few slices of cucumber for a bit of coolness and texture.

How do I keep the avocado from browning?

I toss the diced avocado in a little lime juice right after cutting it—it helps keep it fresh and green longer.

Conclusion

This honey lime chicken & avocado rice stack is a simple yet flavorful dish that’s perfect when I want something light, vibrant, and satisfying. It’s easy to customize, great for meal prep, and always makes me feel like I’m eating something special—even on a weeknight.

Print

clock clock iconcutlery cutlery iconflag flag iconfolder folder iconinstagram instagram iconpinterest pinterest iconfacebook facebook iconprint print iconsquares squares iconheart heart iconheart solid heart solid icon
Honey Lime Chicken & Avocado Rice Stack

Honey Lime Chicken & Avocado Rice Stack

5 Stars 4 Stars 3 Stars 2 Stars 1 Star No reviews
  • Author: Sue
  • Prep Time: 15 minutes
  • Marinating Time: 30 minutes
  • Cook Time: 20 minutes
  • Total Time: 1 hour and 5 minutes
  • Yield: 4 servings
  • Category: Main Course
  • Method: Stovetop
  • Cuisine: Fusion / American
Print Recipe
Pin Recipe

Description

This honey lime chicken & avocado rice stack is a vibrant, layered dish packed with sweet, tangy, and creamy flavors. Juicy marinated chicken, fluffy rice, ripe avocado, and fresh herbs come together for a delicious, gluten-free meal that's as beautiful as it is satisfying. Perfect for a weeknight dinner or meal prep, this honey lime chicken stack is easy, healthy, and full of zesty flair.


Ingredients

  • For the chicken marinade:
  • Boneless, skinless chicken breasts, cut into bite-sized cubes
  • Honey
  • Fresh lime juice
  • Soy sauce (or gluten-free tamari)
  • Minced garlic
  • Grated fresh ginger
  • Salt and pepper
  • For the rice:
  • White rice
  • Water or chicken broth
  • Salt
  • For the stack and toppings:
  • Ripe avocado, diced
  • Red onion, finely chopped
  • Fresh cilantro, chopped
  • Lime wedges (for garnish)

Instructions

  1. Whisk together honey, lime juice, soy sauce, garlic, ginger, salt, and pepper. Add chicken and marinate in the fridge for at least 30 minutes.
  2. Cook the rice by bringing water or broth to a boil. Add rice and salt, reduce heat, cover, and simmer until tender (about 15 minutes).
  3. In a hot skillet, cook the marinated chicken over medium-high heat for 5–7 minutes, or until browned and cooked through.
  4. To assemble: layer rice on a plate, top with chicken, then add avocado, red onion, and cilantro.
  5. Garnish with lime wedges and serve immediately.

Notes

  • Swap white rice for brown rice or quinoa for extra fiber.
  • Add jalapeño or hot sauce for a spicy kick.
  • Greek yogurt or creamy lime dressing makes a great topping.
  • Turn it into a bowl or wrap for a fun variation.
  • Toss avocado in lime juice to prevent browning.

Have you made this recipe? I'd love to see it!

Click here to Follow me on Pinterest

Creamy Garlic Shrimp

April 14, 2025 by Sue Leave a Comment

Creamy Garlic Shrimp is a quick and satisfying dish that brings restaurant-quality flavor to the table in just 15 minutes. I love making this recipe on busy weeknights when I want something luxurious without spending too much time in the kitchen. The rich, garlicky cream sauce coats each tender shrimp perfectly, making every bite indulgent and comforting.


Creamy Garlic Shrimp

Why You’ll Love This Recipe

I love this dish because it's fast, flavorful, and incredibly creamy without being heavy. The garlic sauce pairs perfectly with shrimp, and it goes well with pasta, rice, or even a piece of crusty bread. Whether I’m cooking for myself or trying to impress guests, this recipe always delivers.

Ingredients

(Here's a tip: Check out the full list of ingredients and measurements in the recipe card below.)

  • Large shrimp, peeled and deveined
  • Salt and black pepper, to taste
  • Olive oil
  • Unsalted butter
  • Garlic, minced
  • Chicken broth
  • Heavy cream
  • Grated Parmesan cheese
  • Italian seasoning
  • Fresh parsley, chopped (for garnish)
  • Lemon wedges (optional, for serving)

Directions

  1. I start by seasoning the shrimp with salt and black pepper.
  2. In a large skillet over medium-high heat, I heat olive oil and cook the shrimp in a single layer for 2 to 3 minutes per side, just until they’re pink and opaque. Then I remove them from the pan and set them aside.
  3. In the same pan, I reduce the heat to medium and melt the butter. I add the minced garlic and cook it for about 30 seconds until it’s fragrant.
  4. I pour in the chicken broth and let it simmer for a couple of minutes so it reduces a bit.
  5. Then I stir in the heavy cream, Parmesan cheese, and Italian seasoning. I let the sauce simmer for another 2 to 3 minutes, stirring constantly, until it thickens.
  6. I return the cooked shrimp to the skillet, stir everything together to coat the shrimp, and let it all cook for another minute or two.
  7. To finish, I sprinkle on some fresh parsley and serve it right away, sometimes with a wedge of lemon on the side for a bright touch.

Servings and timing

  • Servings: 4
  • Prep time: 5 minutes
  • Cook time: 10 minutes
  • Total time: 15 minutes

Variations

Sometimes I like to add baby spinach or cherry tomatoes to the skillet for extra color and flavor. If I want a bit of heat, I add a pinch of red pepper flakes with the garlic. For a more filling meal, I serve it over pasta or rice, and I’ve even used zucchini noodles when I’m in the mood for something lighter.

Storage/Reheating

I store leftovers in an airtight container in the fridge for up to 2 days. When reheating, I do it gently on the stove over low heat to prevent the sauce from separating. A splash of cream or broth helps bring it back to the right consistency. I try not to reheat it in the microwave, since shrimp can get rubbery.

FAQs

Can I use frozen shrimp?

Yes, I often use frozen shrimp. I just make sure to thaw them completely and pat them dry before cooking so they sear properly.

What can I serve with creamy garlic shrimp?

I usually serve it with pasta, rice, or toasted bread. It also pairs well with a green salad or steamed vegetables.

Can I make this dairy-free?

To make it dairy-free, I use coconut cream instead of heavy cream and skip the Parmesan or use a dairy-free alternative.

Is this recipe spicy?

No, it’s not spicy on its own. But if I want a kick, I add red pepper flakes or a bit of cayenne when cooking the garlic.

Can I use pre-cooked shrimp?

I prefer raw shrimp for the best flavor and texture, but if I only have pre-cooked shrimp, I add them at the very end just to heat through. Cooking them too long can make them tough.

Conclusion

Creamy Garlic Shrimp is one of those meals I keep coming back to—it’s fast, easy, and always feels a little special. Whether I’m making it for a weeknight dinner or a casual get-together, it’s a go-to recipe that never disappoints.

Print

clock clock iconcutlery cutlery iconflag flag iconfolder folder iconinstagram instagram iconpinterest pinterest iconfacebook facebook iconprint print iconsquares squares iconheart heart iconheart solid heart solid icon
Creamy Garlic Shrimp

Creamy Garlic Shrimp

5 Stars 4 Stars 3 Stars 2 Stars 1 Star No reviews
  • Author: Sue
  • Prep Time: 5 minutes
  • Cook Time: 10 minutes
  • Total Time: 15 minutes
  • Yield: 4 servings
  • Category: Main Course
  • Method: Sauté
  • Cuisine: American
  • Diet: Gluten Free
Print Recipe
Pin Recipe

Description

Creamy Garlic Shrimp is a rich, indulgent dish featuring tender shrimp coated in a velvety garlic cream sauce. Ready in just 15 minutes, this quick and flavorful recipe is perfect for weeknights or elegant dinners, and pairs beautifully with pasta, rice, or crusty bread.


Ingredients

  • 1 lb large shrimp, peeled and deveined
  • Salt and black pepper, to taste
  • 1 tbsp olive oil
  • 2 tbsp unsalted butter
  • 4 cloves garlic, minced
  • ⅓ cup chicken broth
  • ¾ cup heavy cream
  • ¼ cup grated Parmesan cheese
  • 1 tsp Italian seasoning
  • 1 tbsp fresh parsley, chopped (for garnish)
  • Lemon wedges (optional, for serving)

Instructions

  1. Season shrimp with salt and pepper.
  2. Heat olive oil in a large skillet over medium-high heat. Add shrimp in a single layer and cook for 2–3 minutes per side until pink and opaque. Remove and set aside.
  3. Lower heat to medium, melt butter in the same pan, and sauté garlic for 30 seconds until fragrant.
  4. Add chicken broth and simmer for 2 minutes to reduce slightly.
  5. Stir in heavy cream, Parmesan, and Italian seasoning. Simmer for 2–3 minutes, stirring until thickened.
  6. Return shrimp to the pan, coat with sauce, and cook for 1–2 more minutes.
  7. Garnish with fresh parsley and serve immediately with lemon wedges if desired.

Notes

  • Add baby spinach or cherry tomatoes for extra flavor and color.
  • Red pepper flakes or cayenne pepper add a spicy kick.
  • Serve with pasta, rice, or crusty bread.
  • Use coconut cream and dairy-free Parmesan for a dairy-free version.
  • Store leftovers in the fridge for up to 2 days. Reheat gently on the stovetop with a splash of broth or cream.

Have you made this recipe? I'd love to see it!

Click here to Follow me on Pinterest

Big Mac Sloppy Joes (with Secret Sauce!)

April 13, 2025 by Sue Leave a Comment

Big Mac Sloppy Joes are the ultimate mash-up of two classic favorites—juicy Sloppy Joes and the iconic Big Mac burger. I brown ground beef with onions and pickles, stir in a tangy, creamy “secret sauce,” and serve it all on sesame seed buns layered with shredded lettuce and melty American cheese. It’s bold, messy, and seriously delicious.

Big Mac Sloppy Joes (with Secret Sauce!)

Why You’ll Love This Recipe

I love this recipe because it takes everything I crave about a Big Mac—savory beef, pickles, cheese, and that tangy sauce—and turns it into a comforting, one-pan dinner. It’s fast, satisfying, and hits all the nostalgic notes. Plus, it’s way easier than making homemade burgers and perfect for a weeknight meal or casual gathering.

ingredients

(Here's a tip: Check out the full list of ingredients and measurements in the recipe card below.)

For the Sloppy Joe Filling:

  • Ground beef
  • Yellow onion, finely chopped
  • Dill pickles, chopped
  • Salt and pepper

For the Secret Sauce:

  • Mayonnaise
  • Yellow mustard
  • Ketchup
  • Sweet pickle relish
  • Vinegar
  • Garlic powder
  • Onion powder
  • Paprika

For Assembling:

  • Sesame seed hamburger buns
  • Shredded lettuce
  • American cheese slices

directions

  1. I brown the ground beef and chopped onions in a skillet over medium heat until the beef is cooked through. I drain the excess grease.
  2. I stir in the chopped pickles and season the mixture with salt and pepper.
  3. While the beef cooks, I whisk together the secret sauce ingredients in a small bowl until smooth.
  4. I pour most of the sauce into the skillet with the beef mixture, saving a bit for drizzling over the finished sandwiches.
  5. I reduce the heat and let the filling simmer for a few minutes so the flavors meld together.
  6. I toast the sesame seed buns, then place a slice of American cheese on the bottom half of each.
  7. I spoon the hot beef mixture over the cheese, top with shredded lettuce, and drizzle on a little extra secret sauce before adding the top bun.

Servings and timing

This recipe serves about 6 and takes around 30 minutes from start to finish—making it a quick and flavorful dinner the whole table loves.

Variations

Sometimes I make it spicy by adding hot sauce or diced jalapeños to the beef. I’ve also used ground turkey or chicken instead of beef for a lighter version. If I’m feeding a crowd, I turn the whole mix into sliders using dinner rolls. For a low-carb version, I serve the filling in lettuce wraps instead of buns.

storage/reheating

I store the meat mixture and sauce separately in airtight containers in the fridge for up to 3 days. To reheat, I warm the beef in a skillet or microwave and assemble the sandwiches fresh. The sauce stays creamy and delicious, even after sitting.

FAQs

Can I make this ahead of time?

Yes, I often prep the beef and sauce in advance. I just reheat and assemble when I’m ready to serve for the best texture and flavor.

What kind of pickles work best?

I use classic dill pickles for that true Big Mac taste. Sweet pickles will make it more tangy-sweet if that’s your preference.

Can I use a different cheese?

Yes, cheddar or provolone work well too, but I stick with American cheese for the most authentic Big Mac flavor.

How do I keep the buns from getting soggy?

I toast them lightly before assembling and place the cheese under the meat to act as a barrier.

Is the secret sauce the same as Big Mac sauce?

It’s a very close copycat version. It’s creamy, tangy, slightly sweet, and gives the Sloppy Joes that signature flavor.

Conclusion

Big Mac Sloppy Joes are a fun, flavorful twist on a fast food favorite that I can make right at home. It’s messy in the best way, packed with all the classic burger fixings, and guaranteed to satisfy those Big Mac cravings—no drive-thru required.

Print

clock clock iconcutlery cutlery iconflag flag iconfolder folder iconinstagram instagram iconpinterest pinterest iconfacebook facebook iconprint print iconsquares squares iconheart heart iconheart solid heart solid icon
Big Mac Sloppy Joes (with Secret Sauce!)

Big Mac Sloppy Joes (with Secret Sauce!)

5 Stars 4 Stars 3 Stars 2 Stars 1 Star No reviews
  • Author: Sue
  • Prep Time: 10 minutes
  • Cook Time: 20 minutes
  • Total Time: 30 minutes
  • Yield: 6 sandwiches
  • Category: Dinner, Sandwiches, Comfort Food
  • Method: Stovetop
  • Cuisine: American
Print Recipe
Pin Recipe

Description

These Big Mac Sloppy Joes with Secret Sauce are the ultimate comfort food mash-up—combining the savory goodness of classic Sloppy Joes with all the flavors of a Big Mac. Juicy ground beef is mixed with chopped pickles, onions, and a tangy, creamy secret sauce, then piled high on sesame seed buns with melty cheese and shredded lettuce. It's fast, fun, and seriously satisfying!


Ingredients

  • For the Sloppy Joe Filling:
  • 1 lb ground beef
  • ½ yellow onion, finely chopped
  • ⅓ cup dill pickles, chopped
  • Salt and pepper, to taste
  • For the Secret Sauce:
  • ½ cup mayonnaise
  • 1 tbsp yellow mustard
  • 1 tbsp ketchup
  • 1 tbsp sweet pickle relish
  • 1 tsp white vinegar
  • ½ tsp garlic powder
  • ½ tsp onion powder
  • ¼ tsp paprika
  • For Assembling:
  • 6 sesame seed hamburger buns
  • 6 slices American cheese
  • 1 cup shredded lettuce

Instructions

  1. In a large skillet over medium heat, cook ground beef and onions until browned and fully cooked. Drain excess fat.
  2. Stir in chopped pickles and season with salt and pepper.
  3. In a small bowl, whisk together all secret sauce ingredients until smooth.
  4. Pour most of the sauce into the skillet with the beef, reserving some for drizzling. Simmer for 3–5 minutes.
  5. Lightly toast the buns. Place a slice of cheese on the bottom half of each.
  6. Spoon hot beef mixture over the cheese, then top with shredded lettuce and a drizzle of reserved sauce.
  7. Add the top bun and serve warm.

Notes

  • Ground turkey or chicken works as a lighter alternative.
  • For sliders, use mini buns or dinner rolls.
  • Lettuce wraps are a great low-carb option.
  • Add jalapeños or hot sauce to the beef for a spicy kick.
  • Sauce can be made ahead and stored for up to 5 days in the fridge.

Have you made this recipe? I'd love to see it!

Click here to Follow me on Pinterest

Orange Cream Cake

April 13, 2025 by Sue Leave a Comment

Orange Cream Cake is a creamy, fruity, and refreshing no-bake cake that I find myself making every single week. It’s the perfect balance of tangy citrus and smooth cream, all set on a buttery cookie crust. Whether I’m preparing it for a family gathering or just to enjoy with coffee, this cake is always a hit—and it's incredibly easy to prepare.

Orange Cream Cake

Why You’ll Love This Recipe

I love this recipe because it doesn’t require any baking and comes together with simple ingredients. The combination of sour cream and whipped cream creates a silky filling that pairs beautifully with the fresh flavor of oranges. It’s light, airy, and just sweet enough to feel indulgent without being heavy. Plus, the cookie base adds a nice crunch that contrasts perfectly with the creamy layers.

Ingredients

(Here's a tip: Check out the full list of ingredients and measurements in the recipe card below.)

  • 200 g butter cookies, crushed
  • 70 g butter, melted
  • 2 packets lemon-flavored gelatin
  • 450 ml orange juice
  • 120 ml water
  • 150 g sugar
  • 450 g sour cream
  • 400 ml heavy cream
  • Zest and juice of 1 fresh orange
  • 1 packet clear cake glaze

Directions

  1. Prepare the Base:
    I start by crushing the butter cookies until they’re fine, then mix them with melted butter. I press the mixture into the bottom of a 26 cm springform pan to create a firm base. I chill it while preparing the filling.
  2. Make the Gelatin Mixture:
    I dissolve the lemon gelatin in 200 ml orange juice, 100 ml water, and 125 g of the sugar (adjusting to package instructions) over low heat, stirring constantly. Once it’s smooth, I remove it from the heat and let it cool slightly.
  3. Mix in the Cream Base:
    I stir the sour cream, orange zest, and fresh orange juice into the cooled gelatin. I let it rest in the fridge for about 30 minutes, just until it begins to thicken slightly.
  4. Add the Whipped Cream:
    I whip the heavy cream until stiff, then fold it gently into the gelatin-sour cream mixture to keep the texture light and airy. I spread this creamy filling evenly over the chilled cookie crust.
  5. Chill the Cake:
    I refrigerate the cake for at least 3 hours so it sets completely.
  6. Finish with Glaze:
    I prepare the clear cake glaze using the remaining 250 ml of orange juice and 25 g of sugar, according to the package directions. Once it’s ready, I pour it gently over the chilled cream layer and allow it to set.

Servings and Timing

This cake makes about 10–12 slices. It takes roughly 20 minutes to prepare and 3 hours to chill, so I usually plan ahead if serving it for guests.

Variations

  • I sometimes use mandarin juice for a slightly sweeter flavor.
  • For extra texture, I mix chopped canned mandarins or orange segments into the cream layer.
  • Instead of butter cookies, I use graham crackers or digestive biscuits for the crust.
  • I occasionally replace half the sour cream with Greek yogurt for a tangier version.

Storage/Reheating

I store leftovers in the fridge for up to 3 days. The cake keeps its structure well and tastes even better the next day once the flavors have melded together. This isn’t a freezer-friendly dessert, as the gelatin and cream don’t freeze well.

FAQs

Can I use different types of juice?

Yes, I sometimes use mandarin or tangerine juice for a sweeter, slightly different citrus profile.

Is it possible to make this cake without gelatin?

Not really, since the gelatin helps the filling set properly. If needed, I use a vegetarian gelatin substitute.

Can I use whipped topping instead of heavy cream?

I prefer real whipped cream for the best flavor and texture, but whipped topping can work in a pinch.

What’s the best way to crush the cookies?

I use a food processor for quick, even crumbs, or I place the cookies in a sealed bag and crush them with a rolling pin.

How do I get clean slices when serving?

I use a sharp knife dipped in hot water, wiping between cuts. Chilling the cake well before slicing also helps.

Conclusion

Orange Cream Cake is one of those effortless, crowd-pleasing desserts that I love coming back to. It’s light, citrusy, creamy, and just rich enough to feel like a treat. Whether I’m celebrating something or just in the mood for a little indulgence, this no-bake cake always delivers.

Print

clock clock iconcutlery cutlery iconflag flag iconfolder folder iconinstagram instagram iconpinterest pinterest iconfacebook facebook iconprint print iconsquares squares iconheart heart iconheart solid heart solid icon
Orange Cream Cake

Orange Cream Cake

5 Stars 4 Stars 3 Stars 2 Stars 1 Star No reviews
  • Author: Sue
  • Prep Time: 20 minutes
  • Cook Time: 3 hours
  • Total Time: 3 hours 20 minutes
  • Yield: 10–12 slices
  • Category: Dessert
  • Method: No-Bake / Chilled
  • Cuisine: German
  • Diet: Vegetarian
Print Recipe
Pin Recipe

Description

This no-bake Orange Cream Cake is a refreshing and creamy German dessert layered with a buttery cookie crust, silky sour cream and whipped cream filling, and a tangy orange glaze. Light, citrusy, and easy to make, this crowd-pleasing cake is perfect for spring, summer, or any time you want a no-fuss, fruity treat.


Ingredients

  • Crust:
  • 200 g butter cookies, crushed
  • 70 g butter, melted
  • Cream Filling:
  • 2 packets lemon-flavored gelatin (Götterspeise Zitrone)
  • 450 ml orange juice (divided: 200 ml for gelatin, 250 ml for glaze)
  • 120 ml water
  • 150 g sugar (125 g for filling, 25 g for glaze)
  • 450 g sour cream
  • 400 ml heavy cream
  • Zest and juice of 1 orange
  • Glaze:
  • 1 packet clear cake glaze

Instructions

  1. Make the Base: Mix crushed cookies with melted butter and press into a 26 cm springform pan. Chill while preparing the filling.

  2. Prepare Gelatin Base: In a saucepan, combine 200 ml orange juice, 100 ml water, and 125 g sugar with lemon gelatin. Heat gently while stirring until dissolved. Let cool slightly.

  3. Mix Cream Layer: Stir in sour cream, orange zest, and orange juice into the gelatin. Chill for 30 minutes, until slightly thickened.

  4. Add Whipped Cream: Whip heavy cream to stiff peaks. Fold gently into the gelatin mixture. Spread evenly over the crust.

  5. Chill: Refrigerate for at least 3 hours, until set.

  6. Top with Glaze: Prepare cake glaze using 250 ml orange juice and 25 g sugar per packet instructions. Pour over the chilled cake and let it set fully before slicing.


Notes

  • Substitute mandarin or tangerine juice for a sweeter twist.

  • Add canned mandarins or orange segments for texture.

  • Digestive biscuits or graham crackers work as alternative crusts.

  • Use Greek yogurt in place of some sour cream for extra tang.

  • Chill thoroughly for cleaner slices and best texture.

Have you made this recipe? I'd love to see it!

Click here to Follow me on Pinterest

5-Minute Chicken Salad

April 13, 2025 by Sue Leave a Comment

This 5-minute chicken salad is quick, creamy, and full of texture and flavor. With juicy chicken, crunchy veggies, sweet fruit, and a tangy dressing, it’s perfect for sandwiches, wraps, or a light meal on its own. I make it often when I need something fast but fresh.

5-Minute Chicken Salad

Why You’ll Love This Recipe

I love how fast and flexible this chicken salad is. I can use leftover chicken, canned chicken, or rotisserie—whatever I have on hand. The mix of crisp apples, juicy grapes, and crunchy celery gives it great texture, while the creamy dressing pulls it all together. It’s one of those simple recipes that always delivers.

ingredients

(Here's a tip: Check out the full list of ingredients and measurements in the recipe card below.)

  • Cooked chicken, diced (canned, rotisserie, or leftover)
  • Apple, diced
  • Grapes, sliced
  • Celery, sliced
  • Mini cucumber, diced
  • Raisins
  • Mayonnaise
  • Plain yogurt or sour cream
  • Salt
  • Pepper
  • Dried parsley
  • Onion powder

directions

  1. I prepare all the fruits and vegetables by dicing and slicing them.
  2. In a mixing bowl, I combine the diced chicken, apple, grapes, celery, cucumber, and raisins.
  3. I add mayonnaise and yogurt or sour cream, then season with salt, pepper, dried parsley, and onion powder.
  4. I mix everything together until well coated and creamy.
  5. I serve it right away or chill it in the fridge for later.

Servings and timing

This recipe makes about 3–4 servings. Prep time is just 5 minutes—no cooking needed if the chicken is already prepared.

Variations

Sometimes I add chopped walnuts or almonds for extra crunch. I’ve swapped raisins for dried cranberries, and used Greek yogurt for a tangier flavor. I also like adding a dash of Dijon mustard or a squeeze of lemon juice for extra zip.

storage/reheating

I store this chicken salad in an airtight container in the fridge for up to 3 days. It tastes great cold, so I don’t reheat it—just give it a quick stir before serving.

FAQs

Can I use canned chicken?

Yes, I use canned chicken when I need to save time. I drain it well and flake it before mixing.

What type of apple works best?

I like using a crisp, sweet apple like Fuji or Honeycrisp, but any kind works.

Is this chicken salad good for meal prep?

Absolutely. I make a batch and portion it into containers for easy lunches during the week.

Can I leave out the yogurt or sour cream?

Yes, I sometimes use just mayo or substitute with all Greek yogurt.

How do I serve this chicken salad?

I like it in sandwiches, lettuce wraps, or on top of crackers. It also works great on a bed of greens for a light salad.

Conclusion

This 5-minute chicken salad is my go-to when I need something quick, delicious, and satisfying. It’s easy to mix and match ingredients based on what I have, and it’s always a hit whether I’m eating solo or serving a group. Simple, fresh, and totally customizable—that’s why it’s a staple in my kitchen.

Print

clock clock iconcutlery cutlery iconflag flag iconfolder folder iconinstagram instagram iconpinterest pinterest iconfacebook facebook iconprint print iconsquares squares iconheart heart iconheart solid heart solid icon
5-Minute Chicken Salad

5-Minute Chicken Salad

5 Stars 4 Stars 3 Stars 2 Stars 1 Star No reviews
  • Author: Sue
  • Prep Time: 5 minutes
  • Cook Time: 0 minutes
  • Total Time: 5 minutes
  • Yield: 3–4 servings
  • Category: Lunch, Salad
  • Method: No-Cook
  • Cuisine: American
  • Diet: Gluten Free
Print Recipe
Pin Recipe

Description

This 5-minute chicken salad is creamy, crunchy, and packed with flavor from juicy chicken, crisp apples, sweet grapes, and a tangy dressing. Perfect for quick lunches, wraps, sandwiches, or a light snack, it’s an easy, no-cook recipe that’s great for meal prep and totally customizable!


Ingredients

  • Cooked chicken, diced (canned, rotisserie, or leftover)
  • Apple, diced
  • Grapes, sliced
  • Celery, sliced
  • Mini cucumber, diced
  • Raisins
  • Mayonnaise
  • Plain yogurt or sour cream
  • Salt
  • Pepper
  • Dried parsley
  • Onion powder

Instructions

  1. Dice and slice the apple, grapes, celery, cucumber, and any other mix-ins.
  2. In a large bowl, combine diced chicken, fruits, and vegetables.
  3. Add mayonnaise and yogurt or sour cream.
  4. Season with salt, pepper, dried parsley, and onion powder.
  5. Mix well until evenly coated.
  6. Serve immediately or chill in the fridge for later.

Notes

  • Add chopped walnuts, almonds, or pecans for crunch.
  • Swap raisins for dried cranberries.
  • Greek yogurt can be used for a tangier flavor or as a mayo substitute.
  • A dash of Dijon mustard or lemon juice adds brightness.
  • Serve in sandwiches, lettuce wraps, or on crackers or greens.

Have you made this recipe? I'd love to see it!

Click here to Follow me on Pinterest

How to Cook Meatballs in the Oven

April 13, 2025 by Sue Leave a Comment

Oven-baked meatballs are a simple, hands-off way to make juicy, flavorful bites without the mess of stovetop cooking. This method delivers evenly cooked meatballs with a golden exterior and tender center, perfect for pairing with sauces, pasta, or enjoying on their own.

How to Cook Meatballs in the Oven

Why I Love This Recipe

I love baking meatballs in the oven because it's clean, easy, and lets me prepare a big batch all at once. There’s no need to babysit a frying pan, and the results are consistently delicious. Whether I’m meal-prepping or whipping up a weeknight dinner, this method never fails.

ingredients

(Here's a tip: Check out the full list of ingredients and measurements in the recipe card below.)

  • Ground beef
  • Bread crumbs
  • Milk
  • Egg
  • Parmesan cheese (optional)
  • Garlic, minced
  • Onion, finely chopped
  • Fresh parsley, chopped
  • Salt and pepper

directions

  1. Preheat the oven to 400°F (200°C) and line a baking sheet with parchment paper or lightly grease it.
  2. In a large mixing bowl, combine bread crumbs and milk. Let it soak for a couple of minutes.
  3. Add ground meat, egg, garlic, onion, parsley, Parmesan (if using), salt, and pepper. Mix until just combined—don’t overmix.
  4. Roll the mixture into equal-sized balls (about 1 to 1.5 inches in diameter).
  5. Arrange meatballs on the prepared baking sheet in a single layer.
  6. Bake for 18-20 minutes, or until the internal temperature reaches 160°F (71°C) and the outside is browned.
  7. For extra browning, I sometimes broil them for 1-2 minutes at the end.

Servings and timing

This recipe makes about 20-24 meatballs, enough to serve 4-6 people depending on appetite and what I serve them with. Total prep time is around 15 minutes, and cooking time is 20 minutes.

Variations

  • I sometimes swap in ground turkey or chicken for a leaner option.
  • Spicing things up with chili flakes or using Italian seasoning adds great flavor.
  • Adding feta and oregano gives a Mediterranean twist.
  • For gluten-free meatballs, I use gluten-free breadcrumbs or rolled oats.

storage/reheating

I store leftover meatballs in an airtight container in the fridge for up to 4 days. To reheat, I pop them in the microwave or warm them in the oven at 350°F (175°C) for 10 minutes. They also freeze beautifully—raw or cooked—for up to 3 months.

FAQs

How do I keep meatballs from falling apart?

I make sure to include a binder like egg and breadcrumbs soaked in milk. These ingredients help the meatballs hold their shape.

Can I use frozen meatballs for this method?

Yes, I bake frozen pre-cooked meatballs straight from the freezer. I just add a few extra minutes to the baking time.

How do I know when the meatballs are done?

I check that they’re browned on the outside and have an internal temp of 160°F (71°C) using a meat thermometer.

Can I make these meatballs ahead of time?

Absolutely. I often shape them in advance and refrigerate or freeze them before baking.

Conclusion

Oven-baked meatballs are one of my go-to recipes for ease, flavor, and versatility. I can prep them quickly, cook a large batch with minimal effort, and enjoy them in countless ways—from pasta nights to subs to party appetizers. Once I tried baking them, I never looked back.

Print

clock clock iconcutlery cutlery iconflag flag iconfolder folder iconinstagram instagram iconpinterest pinterest iconfacebook facebook iconprint print iconsquares squares iconheart heart iconheart solid heart solid icon
How to Cook Meatballs in the Oven

How to Cook Meatballs in the Oven

5 Stars 4 Stars 3 Stars 2 Stars 1 Star No reviews
  • Author: Sue
  • Category: Dinner, Main Course
  • Method: Baked
  • Cuisine: American, Italian
Print Recipe
Pin Recipe

Description

Learn how to cook meatballs in the oven with this easy, no-fuss recipe. Juicy, tender, and golden on the outside, oven-baked meatballs are perfect for pasta, subs, appetizers, and more. Plus, they’re cleaner and easier than pan-frying—ideal for meal prep or quick dinners.


Ingredients

  • 1 lb ground beef
  • ½ cup bread crumbs
  • ⅓ cup milk
  • 1 large egg
  • ¼ cup grated Parmesan cheese (optional)
  • 2 cloves garlic, minced
  • ½ small onion, finely chopped
  • 2 tbsp chopped fresh parsley
  • 1 tsp salt
  • ½ tsp black pepper

Instructions

  1. Preheat oven to 400°F (200°C) and line a baking sheet with parchment paper or lightly grease it.
  2. In a large bowl, combine breadcrumbs and milk. Let it soak for 2–3 minutes.
  3. Add ground meat, egg, garlic, onion, parsley, Parmesan (if using), salt, and pepper. Mix gently until just combined—don’t overmix.
  4. Roll into 1 to 1.5-inch balls and place in a single layer on the baking sheet.
  5. Bake for 18–20 minutes, or until browned and internal temperature reaches 160°F (71°C).
  6. Optional: Broil for 1–2 minutes for a crispier top.
  7. Serve with your favorite sauce or store for later use.

Notes

  • Avoid overmixing to keep the meatballs tender.
  • Use a cookie scoop for evenly sized portions.
  • Freeze raw or baked meatballs for up to 3 months.

Have you made this recipe? I'd love to see it!

Click here to Follow me on Pinterest

No-Bake Coconut Cream Balls

April 13, 2025 by Sue Leave a Comment

No-Bake Coconut Cream Balls are rich, creamy, and irresistibly coconutty. These sweet treats are rolled into bite-sized perfection and dipped in chocolate for an indulgent finish. I love making these when I need a quick dessert that still feels special, and best of all, there's no oven required.

No-Bake Coconut Cream Balls

Why I Love This Recipe

I love this recipe because it's simple, fast, and always a hit. The texture is soft and chewy with a satisfying chocolate shell, and the coconut flavor shines through in every bite. These are great for gifting, parties, or just a personal treat when I want something sweet without baking.

Ingredients

(Here's a tip: Check out the full list of ingredients and measurements in the recipe card below.)

  • Shredded sweetened coconut
  • Sweetened condensed milk
  • Vanilla extract
  • Powdered sugar
  • Chopped nuts (optional)
  • White or semi-sweet chocolate, melted (for coating)

Directions

  1. Mix the filling: In a large bowl, I stir together the shredded coconut, sweetened condensed milk, vanilla extract, powdered sugar, and chopped nuts (if using) until a thick, sticky dough forms.
  2. Shape into balls: I scoop out small amounts of the mixture and roll them into 1-inch balls, then place them on a parchment-lined baking sheet.
  3. Chill: I place the sheet in the freezer for 30 minutes so the balls firm up and are easier to coat.
  4. Dip in chocolate: I melt the chocolate and use a fork or toothpick to dip each chilled ball until fully coated, letting the excess drip off before placing them back on the tray.
  5. Set: I refrigerate the coated balls for 15–20 minutes until the chocolate is set.

Servings and Timing

This recipe makes about 24–30 coconut balls.
Prep time: 15 minutes
Chill time: 30 minutes
Total time: 45 minutes

Variations

  • Different chocolate: I switch between white, milk, or dark chocolate depending on what I’m in the mood for.
  • Flavor twist: A drop of almond or coconut extract gives a unique twist to the filling.
  • Decorate: I like to top them with extra coconut or chopped nuts before the chocolate sets for texture and flair.

Storage and Reheating

These store well in an airtight container in the fridge for up to 2 weeks.
They also freeze beautifully—I place them in a single layer and freeze for up to 2 months. No reheating needed—just thaw and enjoy.

FAQs

Can I use unsweetened coconut?

Yes, but the texture may be slightly different. I usually stick to sweetened for best results and flavor.

Can I skip the chocolate coating?

Absolutely. They're still delicious without the chocolate, just a little less decadent.

How do I keep them from sticking when rolling?

If the mixture is too sticky, I chill it for 15 minutes or lightly grease my hands with a bit of oil or butter before rolling.

Can I make them dairy-free?

Yes. I use dairy-free sweetened condensed coconut milk and dairy-free chocolate for a fully dairy-free version.

Do I need to toast the coconut?

Not for this recipe—I use it as-is for that soft, chewy texture. But toasted coconut can be sprinkled on top for extra flavor.

Conclusion

No-Bake Coconut Cream Balls are an easy, elegant treat that comes together with minimal effort. Whether I’m making them for a party or just to satisfy my own sweet tooth, these creamy, coconut-filled bites are always a win. They're quick, delicious, and absolutely addicting.

Print

clock clock iconcutlery cutlery iconflag flag iconfolder folder iconinstagram instagram iconpinterest pinterest iconfacebook facebook iconprint print iconsquares squares iconheart heart iconheart solid heart solid icon
No-Bake Coconut Cream Balls

No-Bake Coconut Cream Balls

5 Stars 4 Stars 3 Stars 2 Stars 1 Star No reviews
  • Author: Sue
  • Prep Time: 15 minutes
  • Cook Time: 30 minutes
  • Total Time: 45 minutes
  • Yield: 24–30 balls
  • Category: Dessert, Snack
  • Method: No-Bake
  • Cuisine: American
  • Diet: Vegetarian
Print Recipe
Pin Recipe

Description

No-Bake Coconut Cream Balls are creamy, chewy coconut bites dipped in chocolate for a sweet, indulgent treat. Quick to make with just a few ingredients, these bite-sized desserts are perfect for holidays, parties, gifting, or anytime you want a no-bake delight!


Ingredients

  • Shredded sweetened coconut
  • Sweetened condensed milk
  • Vanilla extract
  • Powdered sugar
  • Chopped nuts (optional)
  • White or semi-sweet chocolate, melted (for coating)

Instructions

  1. In a large bowl, combine shredded coconut, sweetened condensed milk, vanilla, powdered sugar, and optional nuts. Mix until a thick dough forms.
  2. Scoop and roll into 1-inch balls. Place on a parchment-lined baking sheet.
  3. Freeze for 30 minutes to firm up.
  4. Melt chocolate. Dip each ball into chocolate using a fork or toothpick. Let excess drip off and place back on the tray.
  5. Refrigerate for 15–20 minutes until the chocolate sets. Serve chilled or at room temp.

Notes

  • Use almond or coconut extract for a flavor twist.
  • Decorate with extra coconut or chopped nuts before chocolate sets.
  • Can be made dairy-free with condensed coconut milk and dairy-free chocolate.
  • If mixture is sticky, chill before rolling or lightly grease hands.
  • Store in fridge or freezer—no reheating required.

Have you made this recipe? I'd love to see it!

Click here to Follow me on Pinterest

Crockpot Steak Bites

April 13, 2025 by Sue Leave a Comment

Crockpot Steak Bites are one of those easy, hands-off meals I love coming back to again and again. With just a few ingredients and minimal prep, I can throw everything into the slow cooker and come back to tender, flavorful steak bites coated in a rich, buttery sauce. It's the perfect dinner after a long day when I still want something hearty and comforting.

Crockpot Steak Bites

Why I Love This Recipe

This recipe checks all the boxes for me:

  • It's set-it-and-forget-it easy—perfect for busy days.
  • The steak comes out melt-in-your-mouth tender.
  • The buttery, savory sauce is packed with flavor and goes great over mashed potatoes, rice, or noodles.
  • It only takes a handful of ingredients to make.
  • Leftovers taste even better the next day.

Ingredients

(Here's a tip: Check out the full list of ingredients and measurements in the recipe card below.)

  • Steak (sirloin or chuck roast), cut into 1-inch cubes
  • Salt and black pepper
  • Sweet onion, thinly sliced
  • Garlic, minced
  • Beef broth
  • Butter
  • Optional: au jus mix or Worcestershire sauce for extra flavor

Directions

  1. I season the steak bites with salt and pepper.
  2. (Optional) I sear the steak pieces in a hot skillet with a little oil until browned on all sides. This adds extra flavor but isn't required if I'm short on time.
  3. I add the sliced onions and garlic to the bottom of the crockpot.
  4. I layer the steak bites on top, then pour in the beef broth. If I’m using au jus or Worcestershire, I add it here.
  5. I dot the top with slices of butter, then cover and cook on low for 6–8 hours or high for 3–4 hours, until the steak is tender.
  6. I stir gently before serving and spoon the sauce over the steak.

Servings and Timing

  • Servings: 4–6
  • Prep Time: 10 minutes
  • Cook Time: 6–8 hours on low or 3–4 hours on high
  • Total Time: About 6–8 hours (mostly hands-off)

Variations

Here are a few ways I like to change things up:

  • Add mushrooms: I throw in sliced mushrooms during the last hour for a richer, earthier flavor.
  • Make it spicy: I sprinkle in a little crushed red pepper or hot sauce.
  • Use different herbs: I add thyme, rosemary, or a bay leaf for a more herby sauce.
  • Thicken the sauce: I stir in a cornstarch slurry (1 tablespoon cornstarch + 1 tablespoon water) at the end if I want a thicker gravy.

Storage and Reheating

  • Refrigerate: I store leftovers in an airtight container in the fridge for up to 3–4 days.
  • Freeze: I freeze portions in freezer-safe containers or bags for up to 2 months.
  • Reheat: I warm the steak bites on the stovetop over low heat or in the microwave in 30-second bursts, stirring occasionally.

FAQs

What kind of steak works best?

I usually use sirloin because it's tender and cooks well in the slow cooker. Chuck roast also works great for a more budget-friendly option.

Do I have to sear the steak first?

Not at all. Searing adds extra flavor, but I skip it when I’m short on time. The steak still turns out tender and delicious.

Can I cook this on high?

Yes! If I need it done faster, I cook it on high for about 3–4 hours. The meat still gets super tender.

How can I thicken the sauce?

At the end of cooking, I mix 1 tablespoon of cornstarch with 1 tablespoon of cold water and stir it into the sauce. I let it cook for 10–15 minutes more until thickened.

What can I serve with steak bites?

I love serving them over mashed potatoes, rice, or egg noodles to soak up all that buttery sauce. A side of roasted vegetables or a fresh salad rounds out the meal.

Conclusion

Crockpot Steak Bites are the kind of cozy, satisfying dinner I crave after a long day. They’re simple to make, packed with flavor, and so versatile. Whether I’m feeding the family or just stocking the fridge with leftovers for the week, this recipe always delivers.

Print

clock clock iconcutlery cutlery iconflag flag iconfolder folder iconinstagram instagram iconpinterest pinterest iconfacebook facebook iconprint print iconsquares squares iconheart heart iconheart solid heart solid icon
Crockpot Steak Bites

Crockpot Steak Bites

5 Stars 4 Stars 3 Stars 2 Stars 1 Star No reviews
  • Author: Sue
  • Prep Time: 10 minutes
  • Cook Time: 6–8 hours on low or 3–4 hours on high
  • Total Time: 6–8 hours (hands-off)
  • Yield: 4–6 servings
  • Category: Main Course, Slow Cooker
  • Method: Crockpot
  • Cuisine: American
Print Recipe
Pin Recipe

Description

These Crockpot Steak Bites are a flavorful, hands-off dinner made with tender steak slow-cooked in a rich, buttery sauce. With just a few ingredients and minimal prep, this melt-in-your-mouth meal is perfect over mashed potatoes, rice, or noodles. A cozy, comforting family favorite ideal for busy weeknights or meal prep.


Ingredients

  • 2 lbs steak (sirloin or chuck roast), cut into 1-inch cubes
  • Salt and black pepper, to taste
  • 1 sweet onion, thinly sliced
  • 3–4 garlic cloves, minced
  • ¾ cup beef broth
  • 4 tablespoons butter, sliced
  • Optional: 1 tablespoon Worcestershire sauce or 1 packet au jus mix

Instructions

  1. Season steak bites with salt and pepper.
  2. (Optional) Sear steak pieces in a hot skillet with oil until browned on all sides for added flavor.
  3. Add sliced onions and garlic to the bottom of the crockpot.
  4. Place the steak on top. Pour in beef broth and optional Worcestershire or au jus mix.
  5. Dot the top with butter slices.
  6. Cover and cook on low for 6–8 hours or high for 3–4 hours, until steak is fork-tender.
  7. Stir gently before serving and spoon buttery sauce over the steak bites.

Notes

  • Add sliced mushrooms during the last hour of cooking for added richness.
  • Sprinkle crushed red pepper or a dash of hot sauce for a spicy kick.
  • Stir in herbs like thyme, rosemary, or bay leaf for aromatic depth.
  • Thicken sauce with a cornstarch slurry at the end for a gravy-like texture.

Have you made this recipe? I'd love to see it!

Click here to Follow me on Pinterest

Crockpot Mac and Cheese with Cream Cheese

April 13, 2025 by Sue Leave a Comment

Crockpot Mac and Cheese with Cream Cheese is the ultimate comfort food made simple. I love how it turns basic pantry staples into a creamy, cheesy dish with barely any effort. Toss everything in the slow cooker, let it work its magic, and by the time I’m ready to eat, I’ve got a rich, gooey mac and cheese that’s perfect for family dinners, potlucks, or lazy weekends.

Crockpot Mac and Cheese with Cream Cheese

Why I Love This Recipe

I love this recipe because it delivers amazing flavor and texture with minimal hands-on cooking. The cream cheese adds a velvety richness that takes traditional mac and cheese to a whole new level. Everything cooks in one pot, and I don’t even have to boil the pasta first. It’s warm, cozy, and always a hit with everyone who tries it.
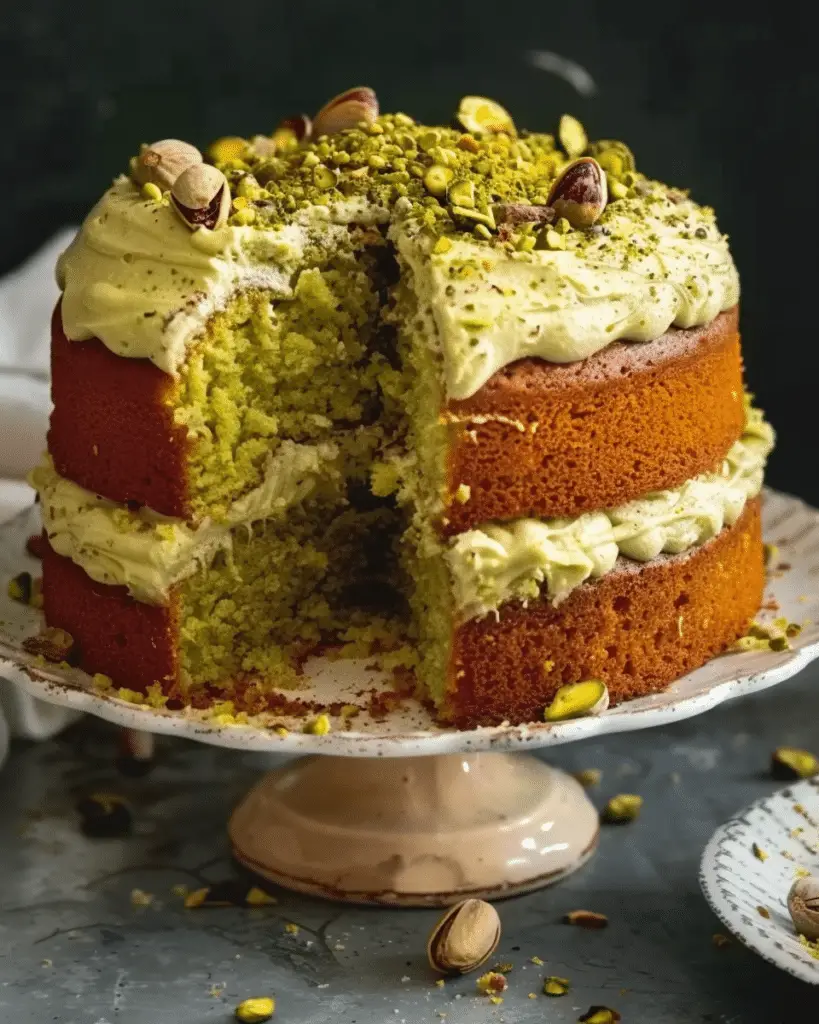
Ingredients

(Here's a tip: Check out the full list of ingredients and measurements in the recipe card below.)

  • Uncooked elbow macaroni
  • Whole milk
  • Heavy cream
  • Unsalted butter, cubed
  • Cream cheese, cubed
  • Sharp cheddar cheese, freshly shredded
  • Monterey Jack or mozzarella, freshly shredded
  • Salt
  • Black pepper
  • Optional: garlic powder, ground mustard, or cayenne for extra flavor

Directions

  1. I spray the inside of the crockpot with cooking spray to prevent sticking.
  2. I add the uncooked macaroni, milk, heavy cream, butter, cream cheese, and seasonings to the crockpot. I give it a good stir.
  3. I cover and cook on low for 1½ to 2 hours, stirring once or twice during cooking to prevent clumps.
  4. Once the pasta is nearly tender, I stir in the shredded cheddar and Monterey Jack cheeses. I cover and cook for another 10–15 minutes until the cheese is melted and everything is creamy.
  5. I give it one last stir before serving. If it’s too thick, I splash in a bit more milk to loosen it up.
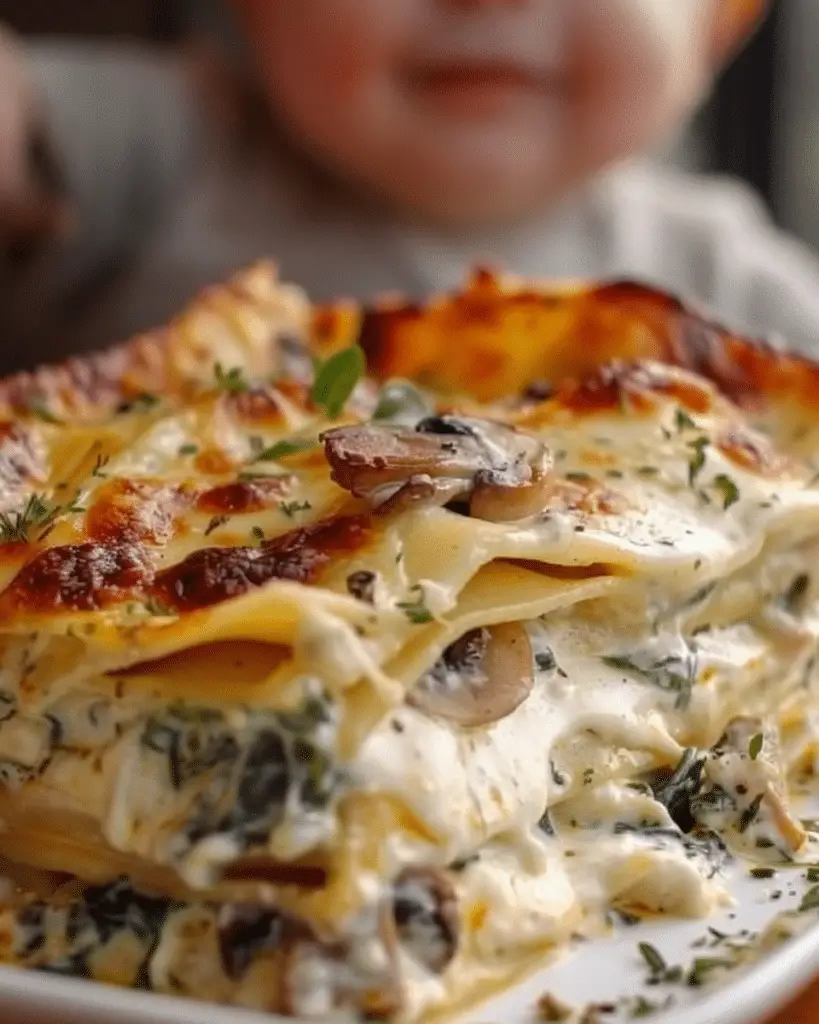
Servings and Timing

  • Servings: 6–8
  • Prep time: 10 minutes
  • Cook time: 2 hours
  • Total time: About 2 hours 10 minutes

Variations

  • I swap the cheese blend for pepper jack or smoked gouda for a deeper flavor.
  • For a spicy version, I stir in some hot sauce or red pepper flakes.
  • I top it with toasted breadcrumbs or crushed crackers before serving for a little crunch.

Storage/Reheating

  • I store leftovers in an airtight container in the fridge for up to 4 days.
  • To reheat, I warm it gently on the stove or in the microwave, adding a splash of milk to bring back the creaminess.
  • I don’t recommend freezing this dish, as the sauce may separate when thawed.

FAQs

Do I need to cook the pasta before adding it to the crockpot?

No, I add the pasta uncooked. It cooks right in the slow cooker, soaking up all the flavor.

Can I use pre-shredded cheese?

I prefer freshly shredded cheese because it melts better. Pre-shredded cheese often has anti-caking agents that affect the sauce texture.

Can I cook this on high?

Yes, I cook it on high for about 1 to 1½ hours, but I stir more often to prevent sticking.
What kind of pasta works best?

Elbow macaroni is classic, but I’ve also used cavatappi or shells with great results.
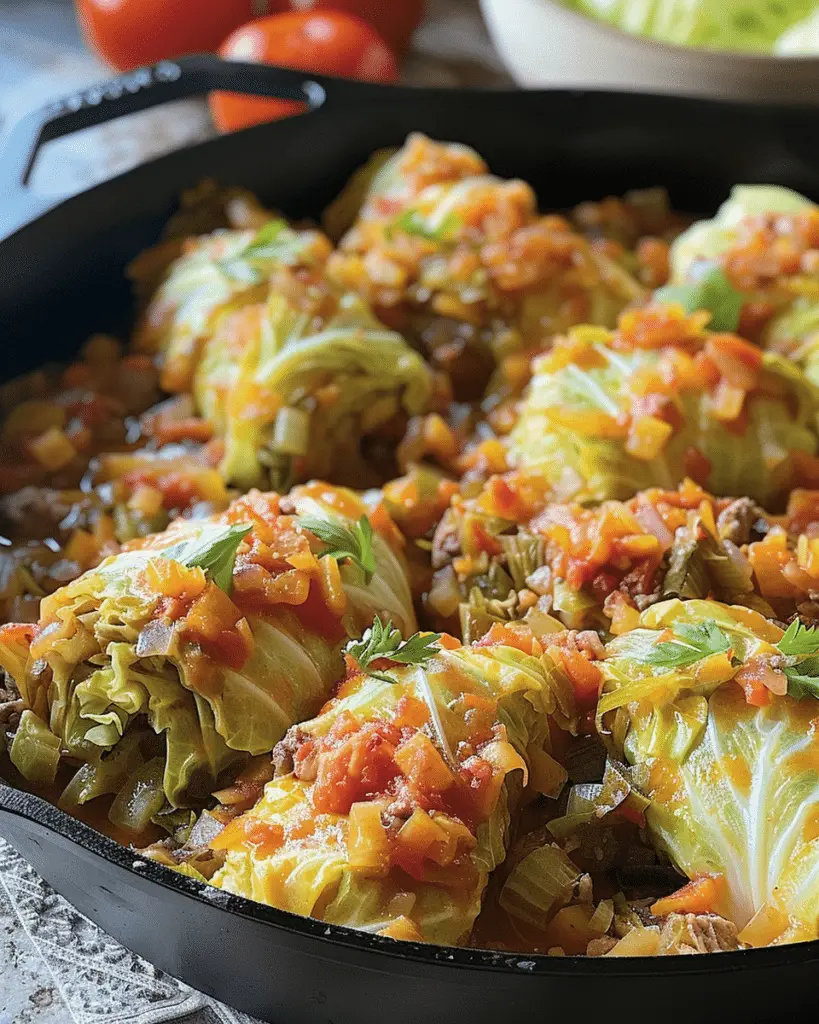
How do I keep it from getting too thick?

If the mac and cheese gets too thick, I just stir in more milk or cream until it loosens up.

Conclusion

Crockpot Mac and Cheese with Cream Cheese is creamy, cozy, and incredibly easy to make. It’s one of those recipes I keep on repeat because it always delivers comfort in a bowl. Whether I serve it as a side or a main dish, it’s always a crowd-pleaser with zero stress.

Print

clock clock iconcutlery cutlery iconflag flag iconfolder folder iconinstagram instagram iconpinterest pinterest iconfacebook facebook iconprint print iconsquares squares iconheart heart iconheart solid heart solid icon
Crockpot Mac and Cheese with Cream Cheese

5 Stars 4 Stars 3 Stars 2 Stars 1 Star No reviews
  • Author: Sue
  • Prep Time: 10 minutes
  • Cook Time: 1–2 hours
  • Total Time: Up to 2 hours 10 minutes
  • Yield: 6–8 servings
  • Category: Main Dish, Side Dish
  • Method: Slow Cooker
  • Cuisine: American Comfort Food
  • Diet: Vegetarian
Print Recipe
Pin Recipe

Description

Crockpot Mac and Cheese with Cream Cheese is a creamy, rich, and easy slow cooker dish perfect for busy weeknights, potlucks, or holiday gatherings. Cream cheese adds a velvety texture and tangy depth to this comforting classic. Keyword: Crockpot Mac and Cheese with Cream Cheese


Ingredients

  • 1 pound uncooked elbow macaroni
  • 4 tablespoons unsalted butter, cut into pieces
  • 4 ounces cream cheese, cubed
  • 1 teaspoon kosher salt
  • ½ teaspoon cayenne pepper (optional)
  • 3 cups whole milk
  • ½ cup heavy cream
  • 2 cups freshly shredded sharp cheddar cheese
  • 1 cup freshly shredded pepper jack cheese (or Monterey Jack for milder flavor)

Instructions

  1. Prepare the Base: Add uncooked pasta to a 6-quart slow cooker. Top with butter, cream cheese, salt, and cayenne pepper. Pour in milk and heavy cream. Stir to combine.
  2. Cook: Cover and cook on low for 1–2 hours until pasta is al dente. Stir once halfway through cooking.
  3. Add Cheese: Stir in shredded cheddar and pepper jack. Cover and cook an additional 10 minutes until cheese is melted and sauce is creamy.
  4. Serve: Stir well before serving. Add a splash of milk if the sauce is too thick.

Notes

  • Cheese Tip: Use freshly shredded cheese for the smoothest melt.
  • Pasta Substitutions: Cavatappi, shells, or penne also work well.
  • Spice Level: Omit cayenne for a milder version.
  • Holding Warm: Keep on “warm” setting if not serving right away; stir occasionally and thin with milk as needed.

Have you made this recipe? I'd love to see it!

Click here to Follow me on Pinterest

Pioneer Woman Cheeseburger Pie

April 13, 2025 by Sue Leave a Comment

This Pioneer Woman–inspired Cheeseburger Pie is a warm, savory, and ultra-comforting dinner that brings all the classic flavors of a cheeseburger into an easy-to-make baked dish. With seasoned ground beef, gooey cheddar cheese, and a simple homemade batter that forms a crust as it bakes, it’s the kind of meal I turn to when I want something hearty, familiar, and family-friendly.

Pioneer Woman Cheeseburger Pie

Why I Love This Recipe

I love how this pie packs all the satisfying flavors of a cheeseburger into a one-dish wonder. It’s easy to prep, uses pantry staples, and bakes up golden and bubbly with minimal cleanup. The juicy beef, melty cheese, and soft, biscuit-like topping make it a favorite for weeknights and leftovers.

Ingredients

(Here's a tip: Check out the full list of ingredients and measurements in the recipe card below.)

  • 1 tablespoon olive oil
  • 1 pound ground beef
  • ½ cup yellow onion, finely chopped
  • ½ teaspoon salt
  • 1 tablespoon Worcestershire sauce
  • 2 large eggs
  • 1 cup buttermilk (or milk with 1 teaspoon vinegar)
  • 1 tablespoon melted butter
  • ½ cup all-purpose flour
  • 1 teaspoon baking powder
  • 1 cup shredded cheddar cheese
  • Optional toppings: pickles, ketchup, mustard, burger sauce

Directions

  1. I preheat the oven to 400°F and lightly grease a 9-inch pie dish.
  2. In a skillet over medium heat, I cook the ground beef and onions in olive oil until the beef is browned and the onions are soft—about 8–10 minutes.
  3. I stir in the salt and Worcestershire sauce, then remove the skillet from the heat.
  4. I spread the beef mixture evenly into the prepared pie dish.
  5. In a separate bowl, I whisk together the eggs, buttermilk, and melted butter. I stir in the flour and baking powder until smooth.
  6. I pour the batter over the beef and top it with shredded cheddar cheese.
  7. I bake for 25 minutes, or until the top is golden and the center is set.
  8. I let it cool for a few minutes before slicing, then serve it warm with burger toppings like pickles or a drizzle of ketchup.

Servings and Timing

  • Servings: 6
  • Prep Time: 15 minutes
  • Cook Time: 25 minutes
  • Total Time: 40 minutes

Variations

  • I swap cheddar with pepper jack for a spicy twist.
  • Sometimes I mix in chopped pickles or cooked bacon with the beef.
  • For extra flavor, I add garlic powder or dry mustard to the batter.
  • I top individual slices with a little ketchup and mustard for that true burger vibe.

Storage/Reheating

I store leftovers in an airtight container in the fridge for up to 3 days. To reheat, I warm slices in the oven at 350°F or in the microwave for about a minute. It still tastes great the next day and makes an easy lunch.

FAQs

Can I use ground turkey instead of beef?

Yes, ground turkey works well if I want a lighter version. I just season it well to keep the flavor rich.

Can I use store-bought biscuit mix?

I can, but I prefer the simple homemade batter—it’s just as quick and tastes fresher.

Is this pie good for meal prep?

Absolutely. I bake it ahead and store it in the fridge. It reheats well and makes great leftovers.

Can I add vegetables?

Yes, I sometimes add chopped bell peppers or mushrooms to the beef mixture for extra nutrition and texture.

Can I freeze Cheeseburger Pie?

Yes, I let it cool completely, then wrap it tightly and freeze it for up to 2 months. I thaw it overnight in the fridge and reheat in the oven.

Conclusion

This Cheeseburger Pie is the kind of cozy, feel-good dinner that always hits the spot. It’s rich, satisfying, and full of those classic burger flavors, baked into a golden, cheesy pie that everyone loves. It’s one of those recipes I keep coming back to when I need something easy and crowd-pleasing.

Print

clock clock iconcutlery cutlery iconflag flag iconfolder folder iconinstagram instagram iconpinterest pinterest iconfacebook facebook iconprint print iconsquares squares iconheart heart iconheart solid heart solid icon
Pioneer Woman Cheeseburger Pie

Pioneer Woman Cheeseburger Pie

5 Stars 4 Stars 3 Stars 2 Stars 1 Star No reviews
  • Author: Sue
  • Prep Time: 15 minutes
  • Cook Time: 25 minutes
  • Total Time: 40 minutes
  • Yield: 6 servings
  • Category: Main Dish
  • Method: Baked
  • Cuisine: American
Print Recipe
Pin Recipe

Description

This Pioneer Woman Cheeseburger Pie is a hearty, family-friendly dinner that transforms the flavors of a classic cheeseburger into a golden, baked casserole. Made with seasoned beef, cheddar cheese, and a simple batter crust, it’s the ultimate comfort food that's easy to make and even easier to love.


Ingredients

  • 1 tablespoon olive oil
  • 1 pound ground beef
  • ½ cup yellow onion, finely chopped
  • ½ teaspoon salt
  • 1 tablespoon Worcestershire sauce
  • 2 large eggs
  • 1 cup buttermilk (or milk + 1 tsp vinegar)
  • 1 tablespoon melted butter
  • ½ cup all-purpose flour
  • 1 teaspoon baking powder
  • 1 cup shredded cheddar cheese
  • Optional toppings: pickles, ketchup, mustard, burger sauce

Instructions

  1. Preheat oven to 400°F and grease a 9-inch pie dish.
  2. In a skillet, heat olive oil over medium. Cook ground beef and onion until beef is browned and onions are soft, about 8–10 minutes.
  3. Stir in salt and Worcestershire sauce. Remove from heat.
  4. Spread the beef mixture evenly in the prepared pie dish.
  5. In a bowl, whisk together eggs, buttermilk, and melted butter. Stir in flour and baking powder until smooth.
  6. Pour the batter over the beef. Top with shredded cheddar cheese.
  7. Bake for 25 minutes, until golden and set in the center.
  8. Cool slightly, then slice and serve with your favorite burger toppings.

Notes

  • Swap cheddar for pepper jack for a spicy twist.
  • Add chopped pickles, or veggies to the beef mixture.
  • Stir garlic powder or dry mustard into the batter for more flavor.
  • Great for meal prep—stores well and reheats beautifully.
  • Serve with a dollop of burger sauce or drizzle of ketchup and mustard.

Have you made this recipe? I'd love to see it!

Click here to Follow me on Pinterest

Peach Butter Swim Biscuits

April 13, 2025 by Sue Leave a Comment

Peach Butter Swim Biscuits are tender, golden biscuits baked in a pool of melted butter and sweetened with juicy peaches. They come out with crisp buttery edges, a soft, fluffy center, and a touch of fruit that makes them perfect for breakfast, dessert, or an anytime treat.

Peach Butter Swim Biscuits


Why I Love This Recipe

I love how easy and indulgent these biscuits are. The butter does all the work, giving them a rich flavor and irresistible texture without any fuss. The addition of peaches brings a summery sweetness that balances perfectly with the rich biscuit base. It’s the kind of recipe I keep on hand for lazy weekends or when I need something simple but special.

Ingredients

(Here's a tip: Check out the full list of ingredients and measurements in the recipe card below.)

  • All-purpose flour
  • Baking powder
  • Granulated sugar
  • Salt
  • Heavy cream
  • Vanilla extract
  • Canned peaches, drained and diced (or fresh peaches when in season)
  • Salted butter

For the Icing (optional):

  • Powdered sugar
  • Milk
  • Vanilla extract

Directions

  1. Preheat the oven:
    I set my oven to 450°F and place a stick of butter in an 8x8 baking dish. I put it in the oven until fully melted, then remove and set aside.
  2. Make the dough:
    In a mixing bowl, I combine flour, baking powder, sugar, and salt. In a separate bowl, I mix cream and vanilla, then stir it into the dry ingredients until just combined. I gently fold in the peaches.
  3. Pour and score:
    I spread the dough evenly into the hot, buttered baking dish. The butter should rise up around the edges. I use a knife to lightly score the dough into 9 squares.
  4. Bake:
    I bake the biscuits for 25–30 minutes, until golden on top and cooked through.
  5. Add icing (optional):
    While they cool slightly, I whisk together powdered sugar, milk, and vanilla for a simple glaze and drizzle it over the warm biscuits.

Servings and Timing

  • Servings: 9
  • Prep Time: 15 minutes
  • Cook Time: 30 minutes
  • Total Time: 45 minutes

Variations

  • Fruit swap: I sometimes use fresh blueberries, cherries, or apples instead of peaches.
  • Spiced version: A little cinnamon or nutmeg in the dough gives it a cozy flavor.
  • Nutty topping: A sprinkle of chopped pecans or walnuts on top adds great texture.
  • Savory twist: I skip the sugar and fruit and turn these into cheese biscuits for savory meals.

Storage/Reheating

  • Storage: I keep any leftovers in an airtight container at room temperature for up to 2 days, or in the fridge for 3–4 days.
  • Reheating: I reheat them in the microwave for about 10 seconds or warm them in the oven at 300°F until soft.
  • Freezing: I freeze the baked biscuits without icing and thaw them overnight before reheating.

FAQs

Can I use fresh peaches?

Yes, I can use peeled and diced fresh peaches. I just make sure they’re not too juicy so the dough stays the right consistency.

Do I have to make the icing?

No, the biscuits are delicious on their own, but the icing adds a sweet finish that makes them extra special.

Why are they called “swim” biscuits?

They bake in melted butter, so the dough essentially “swims” while cooking. This method creates a buttery crust all around the edges.

Can I use milk instead of cream?

Heavy cream gives the best texture, but I’ve used whole milk in a pinch. The dough will be slightly thinner, and the biscuits may not be as rich.

What’s the best way to serve them?

Warm is best. I like serving them with coffee in the morning or as a quick dessert with a scoop of ice cream.

Conclusion

Peach Butter Swim Biscuits are one of those magical recipes that feel fancy but are so easy to make. They’re rich, soft, sweet, and packed with juicy fruit. Whether I’m treating myself on a weekend morning or sharing them with friends and family, these biscuits always bring comfort and joy.

Print

clock clock iconcutlery cutlery iconflag flag iconfolder folder iconinstagram instagram iconpinterest pinterest iconfacebook facebook iconprint print iconsquares squares iconheart heart iconheart solid heart solid icon
Peach Butter Swim Biscuits

Peach Butter Swim Biscuits

5 Stars 4 Stars 3 Stars 2 Stars 1 Star No reviews
  • Author: Sue
  • Prep Time: 15 minutes
  • Cook Time: 30 minutes
  • Total Time: 45 minutes
  • Yield: 9 biscuits
  • Category: Breakfast, Dessert
  • Method: Baked
  • Cuisine: American
  • Diet: Vegetarian
Print Recipe
Pin Recipe

Description

Peach Butter Swim Biscuits are tender, buttery drop biscuits baked in melted butter and sweetened with juicy peaches. With crisp edges, fluffy centers, and a hint of vanilla, these easy, one-bowl biscuits make a delicious breakfast, dessert, or anytime treat. Drizzle with optional glaze for an extra sweet finish.


Ingredients

  • For the Biscuits:
  • 2 cups all-purpose flour
  • 1 tbsp baking powder
  • 2 tbsp granulated sugar
  • ½ tsp salt
  • 1 ½ cups heavy cream
  • 1 tsp vanilla extract
  • 1 cup canned peaches, drained and diced (or fresh peaches, peeled and chopped)
  • ½ cup (1 stick) salted butter
  • For the Optional Icing:
  • ½ cup powdered sugar
  • 1–2 tablespoon milk
  • ¼ tsp vanilla extract

Instructions

  1. Preheat oven: Preheat to 450°F (232°C). Place butter in an 8x8 baking dish and put it in the oven until melted, about 5 minutes. Remove dish and set aside.
  2. Make the dough: In a large bowl, whisk together flour, baking powder, sugar, and salt. In a separate bowl, combine heavy cream and vanilla. Stir the wet ingredients into the dry ingredients just until combined. Gently fold in the diced peaches.
  3. Assemble: Spread the dough evenly into the hot, buttered baking dish. The butter will rise up around the dough. Lightly score the dough into 9 squares with a knife.
  4. Bake: Bake for 25–30 minutes, or until biscuits are golden brown and baked through.
  5. Optional glaze: In a small bowl, whisk powdered sugar, milk, and vanilla until smooth. Drizzle over warm biscuits before serving.

Notes

  • Swap peaches for blueberries, apples, or cherries.
  • Add cinnamon or nutmeg to the dry ingredients for a cozy flavor.
  • For a savory version, skip the sugar and peaches and add shredded cheese.
  • Top with chopped pecans or walnuts before baking for extra texture.

Have you made this recipe? I'd love to see it!

Click here to Follow me on Pinterest

  • « Previous Page
  • 1
  • …
  • 31
  • 32
  • 33
  • 34
  • 35
  • …
  • 39
  • Next Page »
Modern Sidebar

Hey there! I'm Sue, a mom, a wife, and someone who’s always in the kitchen trying out new recipes or revisiting old ones that remind me of family gatherings and special moments.

Learn more

Popular

  • Slow Cooker Boneless Turkey Breast with Cranberry Sauce
    Slow Cooker Boneless Turkey Breast with Cranberry Sauce
  • Pumpkin Chocolate Chip Bread
    Pumpkin Chocolate Chip Bread
  • Honey Butter Sweet Potato Cornbread
    Honey Butter Sweet Potato Cornbread
  • Crock Pot Brisket Recipe with BBQ Sauce
    Crock Pot Brisket Recipe with BBQ Sauce

Footer

↑ back to top

About

  • About
  • Contact
  • Disclosure Policy
  • DMCA
  • Privacy Policy
  • Terms and Conditions

Newsletter

  • Sign Up! for emails and updates

Recipes

  • Appetizers & Snacks
  • Beef
  • Breakfast
  • Chicken
  • Desserts
  • Dinner
  • Drinks
  • Side-Dish
  • Soups

As an Amazon Associate I earn from qualifying purchases.

Copyright © 2025 Sue Recipe